
From Zero to Hero Vol. 2: CYM Edition

Thread Starter


Joined: Apr 2015
Posts: 398
Likes: 169
From: St. Louis, MO
Update 5/5/2019:
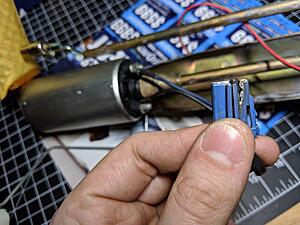
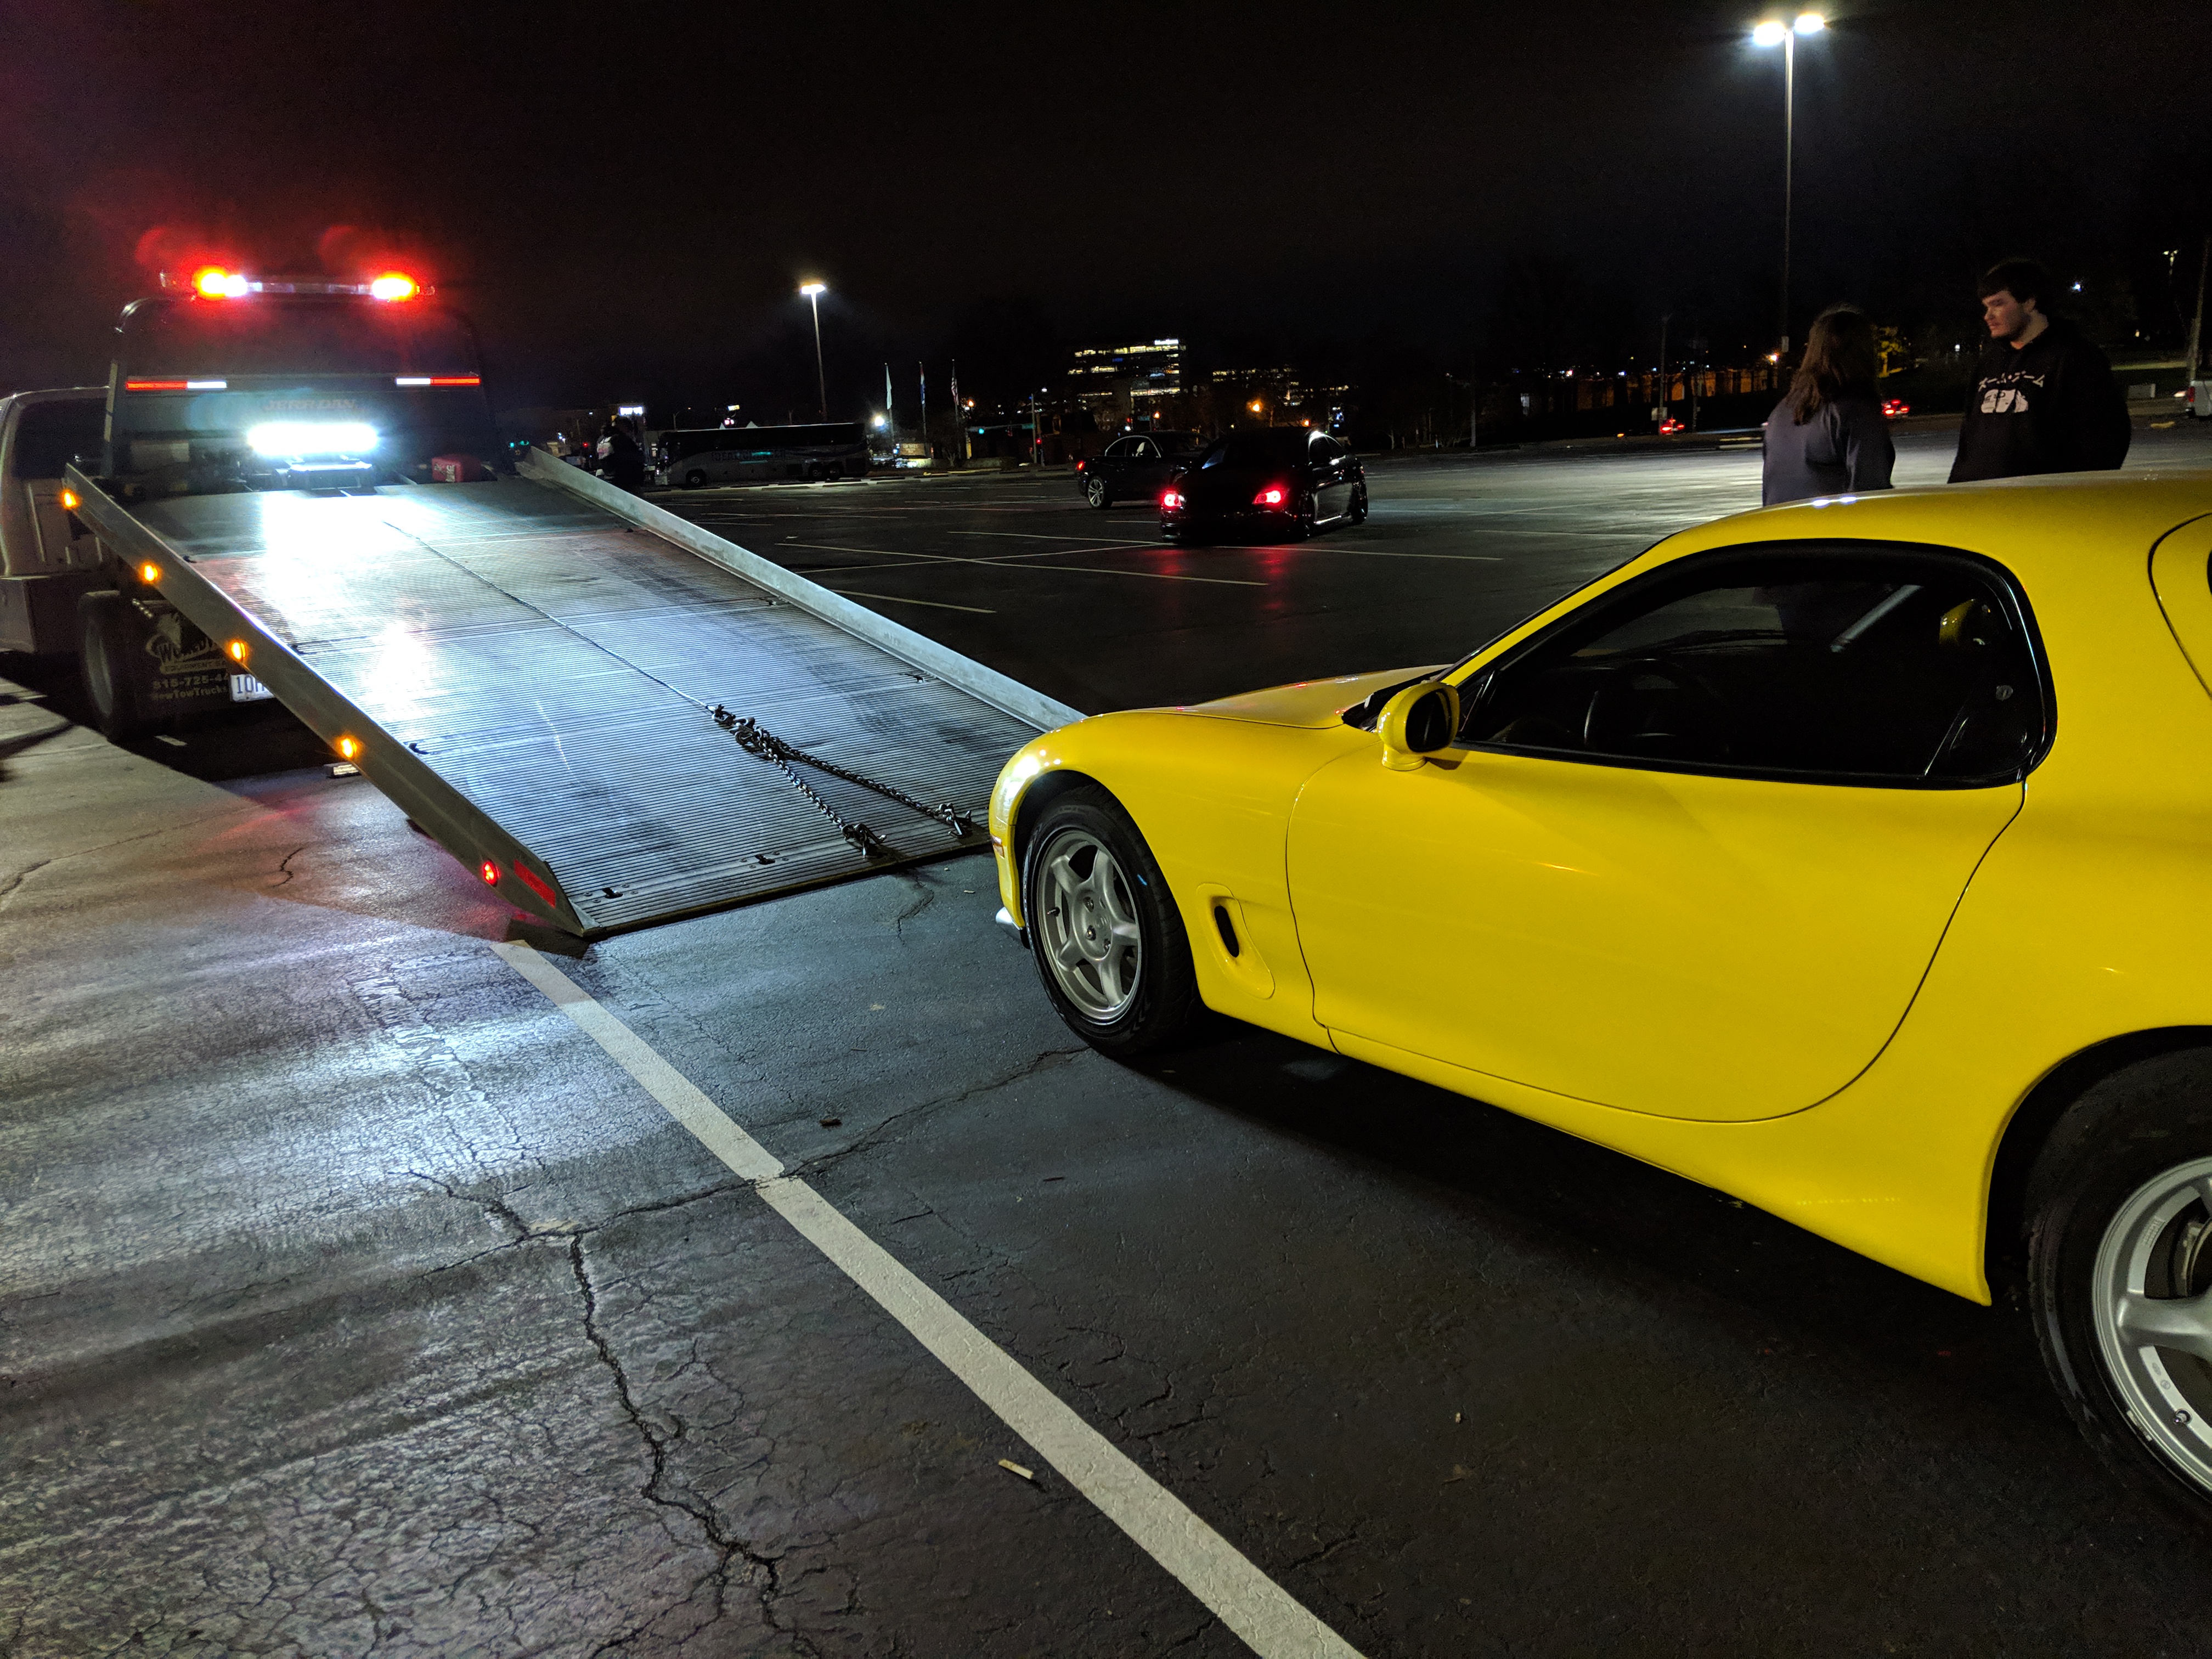
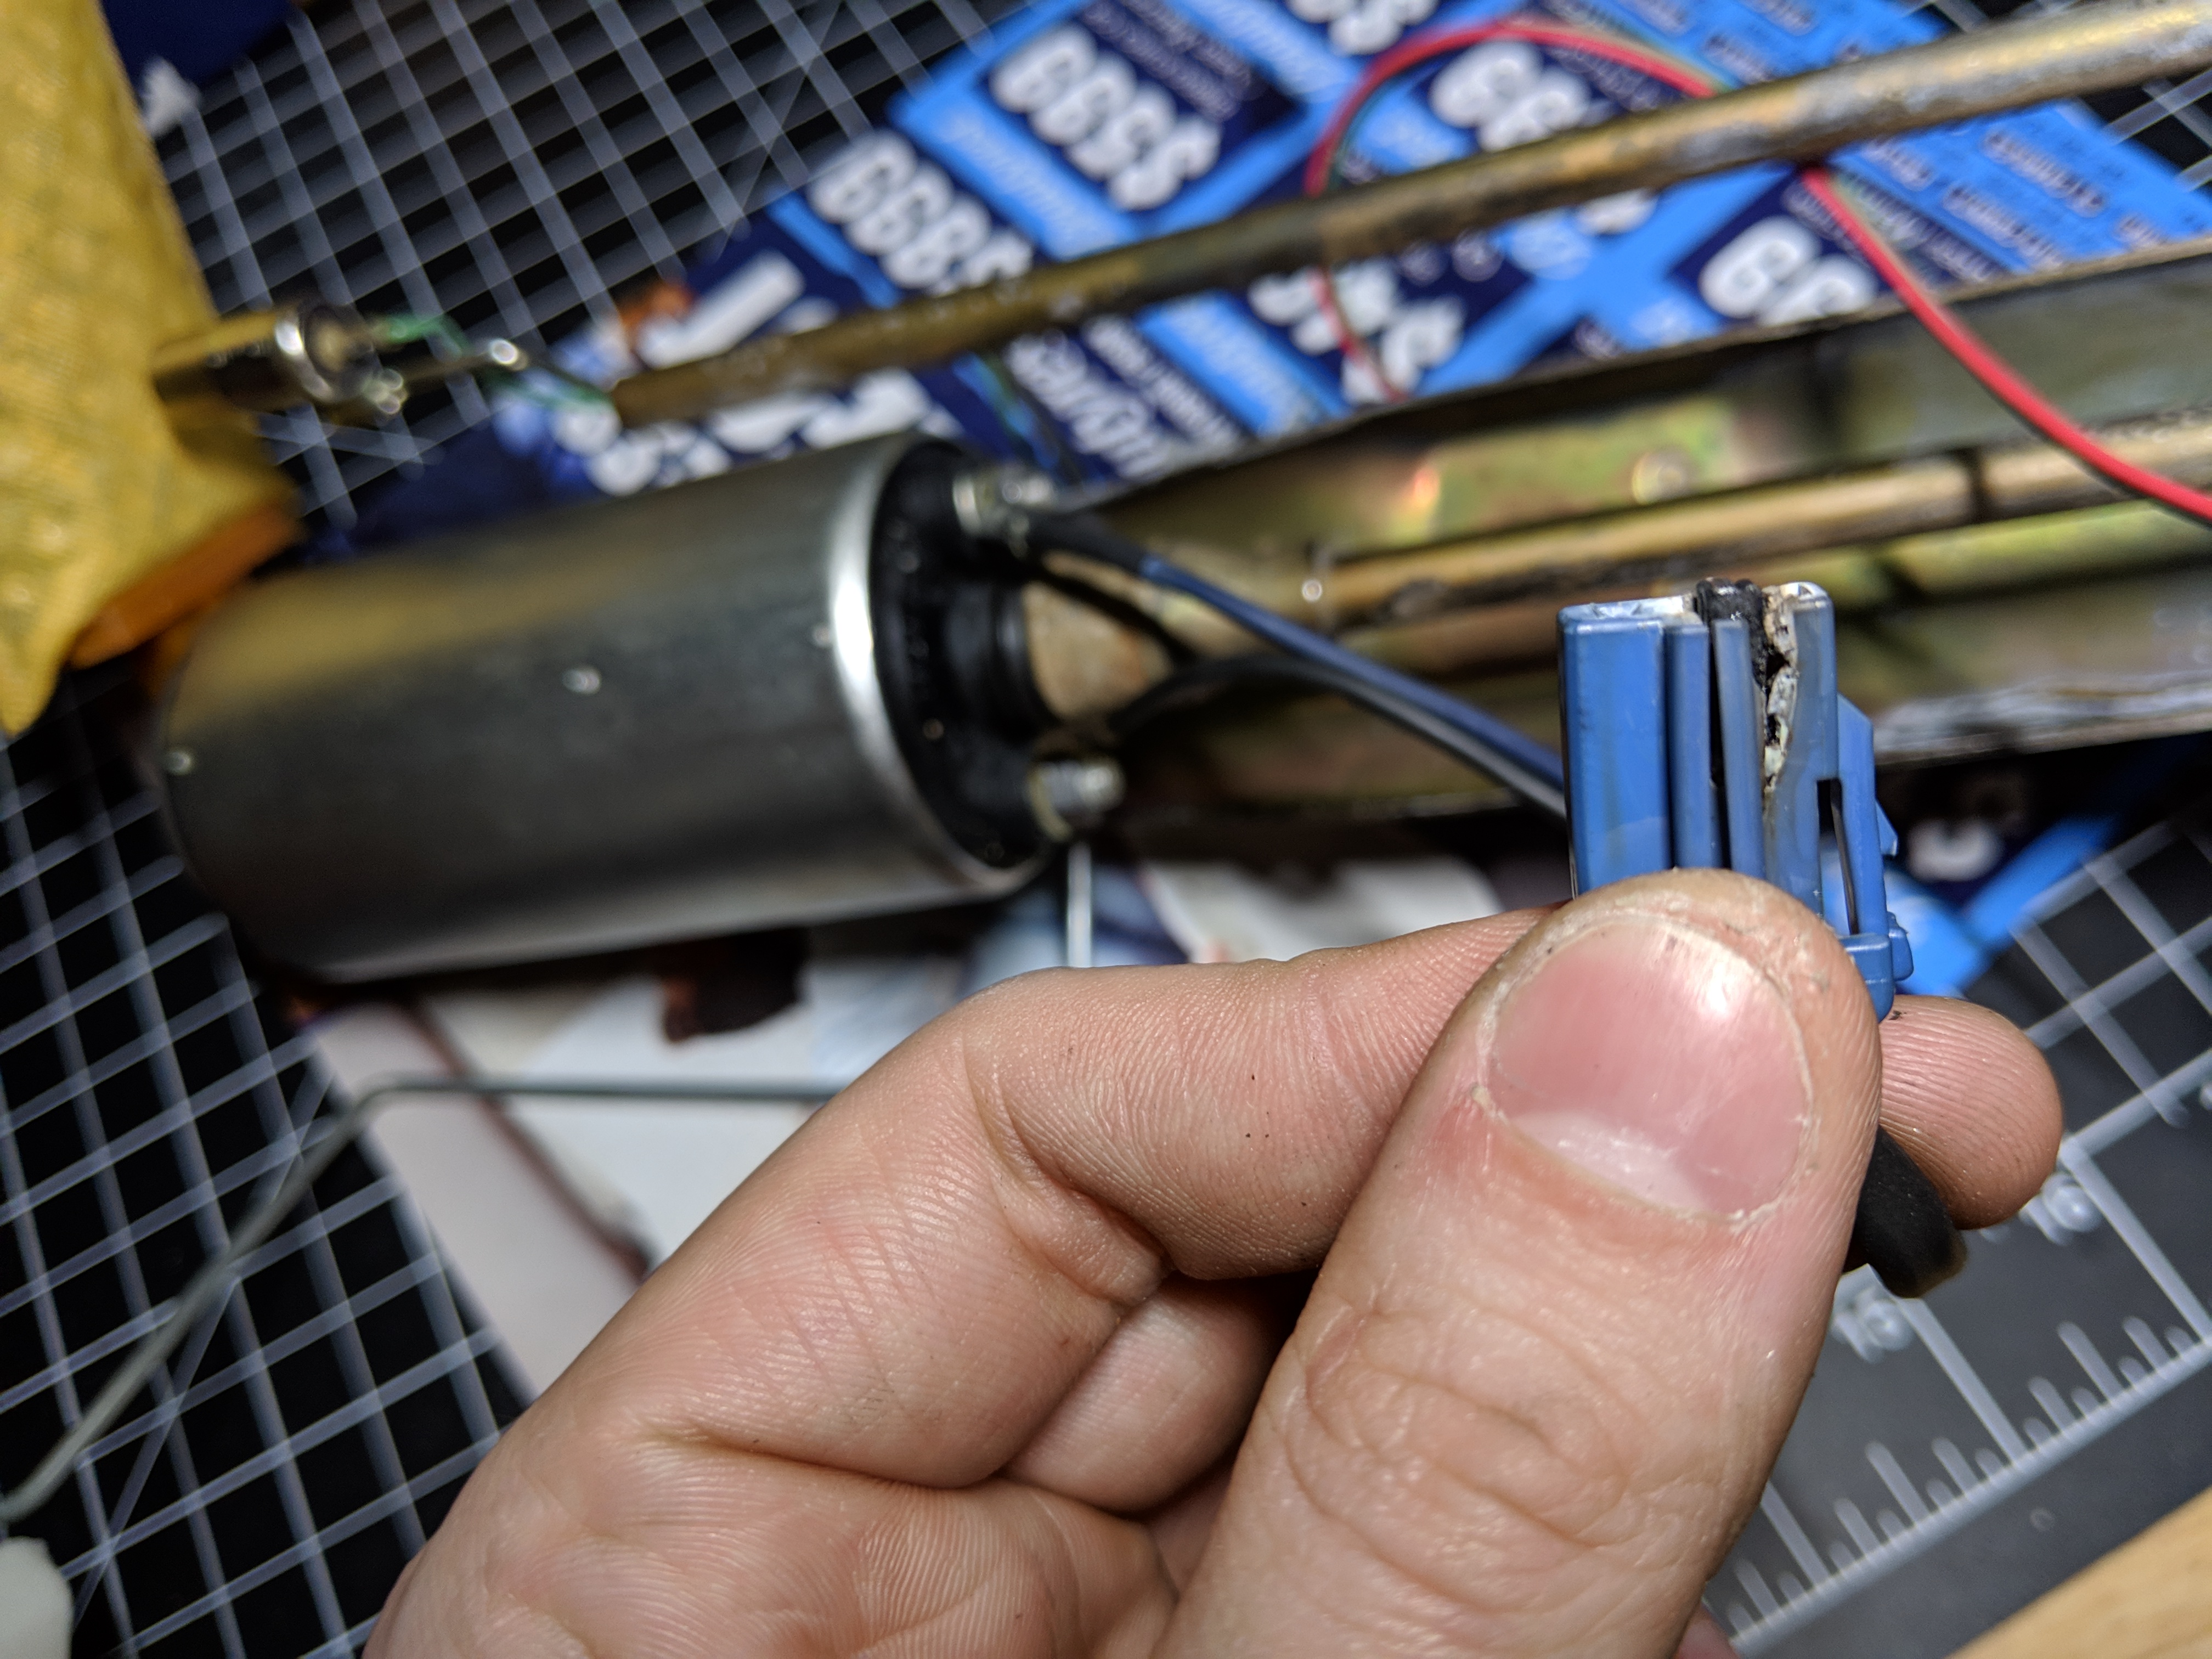
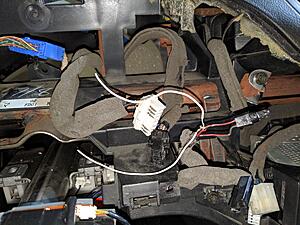
The first part of this update is going to be a lesson in patience and thinking before acting. I tried to start the car the other day and it wouldn't turn over. After a few basic diagnostics I realized the fuel pump wasn't priming. I tested for voltage all the way to the connector on the pump - it was good. Tested ground - good. Figured it was the fuel pump so I ordered an OEM like Walbro. Pulled the fuel pump and ran direct voltage to the pump with my Power Probe - it worked. Threw it back in and it started; wrote it off as a loose connector. Frantically called Walbro to cancel my order - it was cancelled. Got in my car the following day and took it to the first meet, but stopped at McDonald's first. Went back out and car wouldn't start; had to tow it home. Figured it was due to the pump being of old age; ordered another Walbro. Decided not to splice into wiring to run their connector, already shipped couldn't refund. I ordered a Denso Supra TT pump instead since it connects the same way. Went to disconnect old pump and get it ready for the new one and noticed a dimple in the blue connector. I pulled it out; it was melted. So it was the wire that was causing the fuel pump to not work. To add further salt to the wound, in my haste to not miss any car events, I didn't bother checking what fuel pump was in the car (I figured it was OEM). Wouldn't you know - it was a Denso Supra TT pump. Naturally, too late to refund.
TLDR: Fuel pump wire fried due to previous owner upgrading the fuel pump, but not the wiring. Failed to diagnose correctly and spent a lot of unnecessary money.
Now for the happier portion:
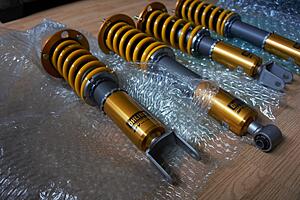
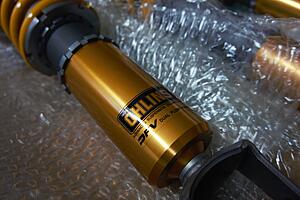
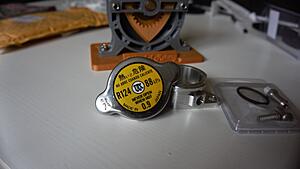
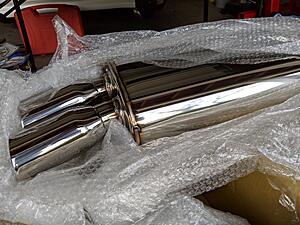
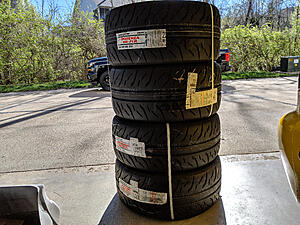
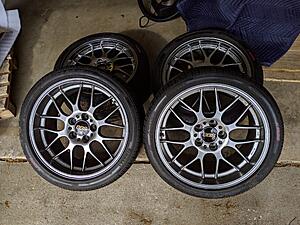
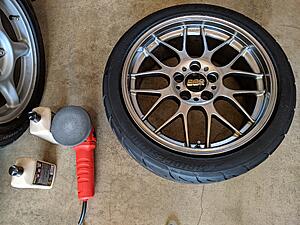
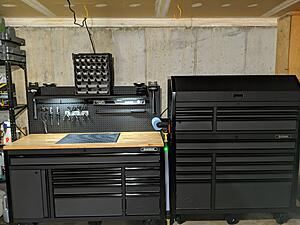
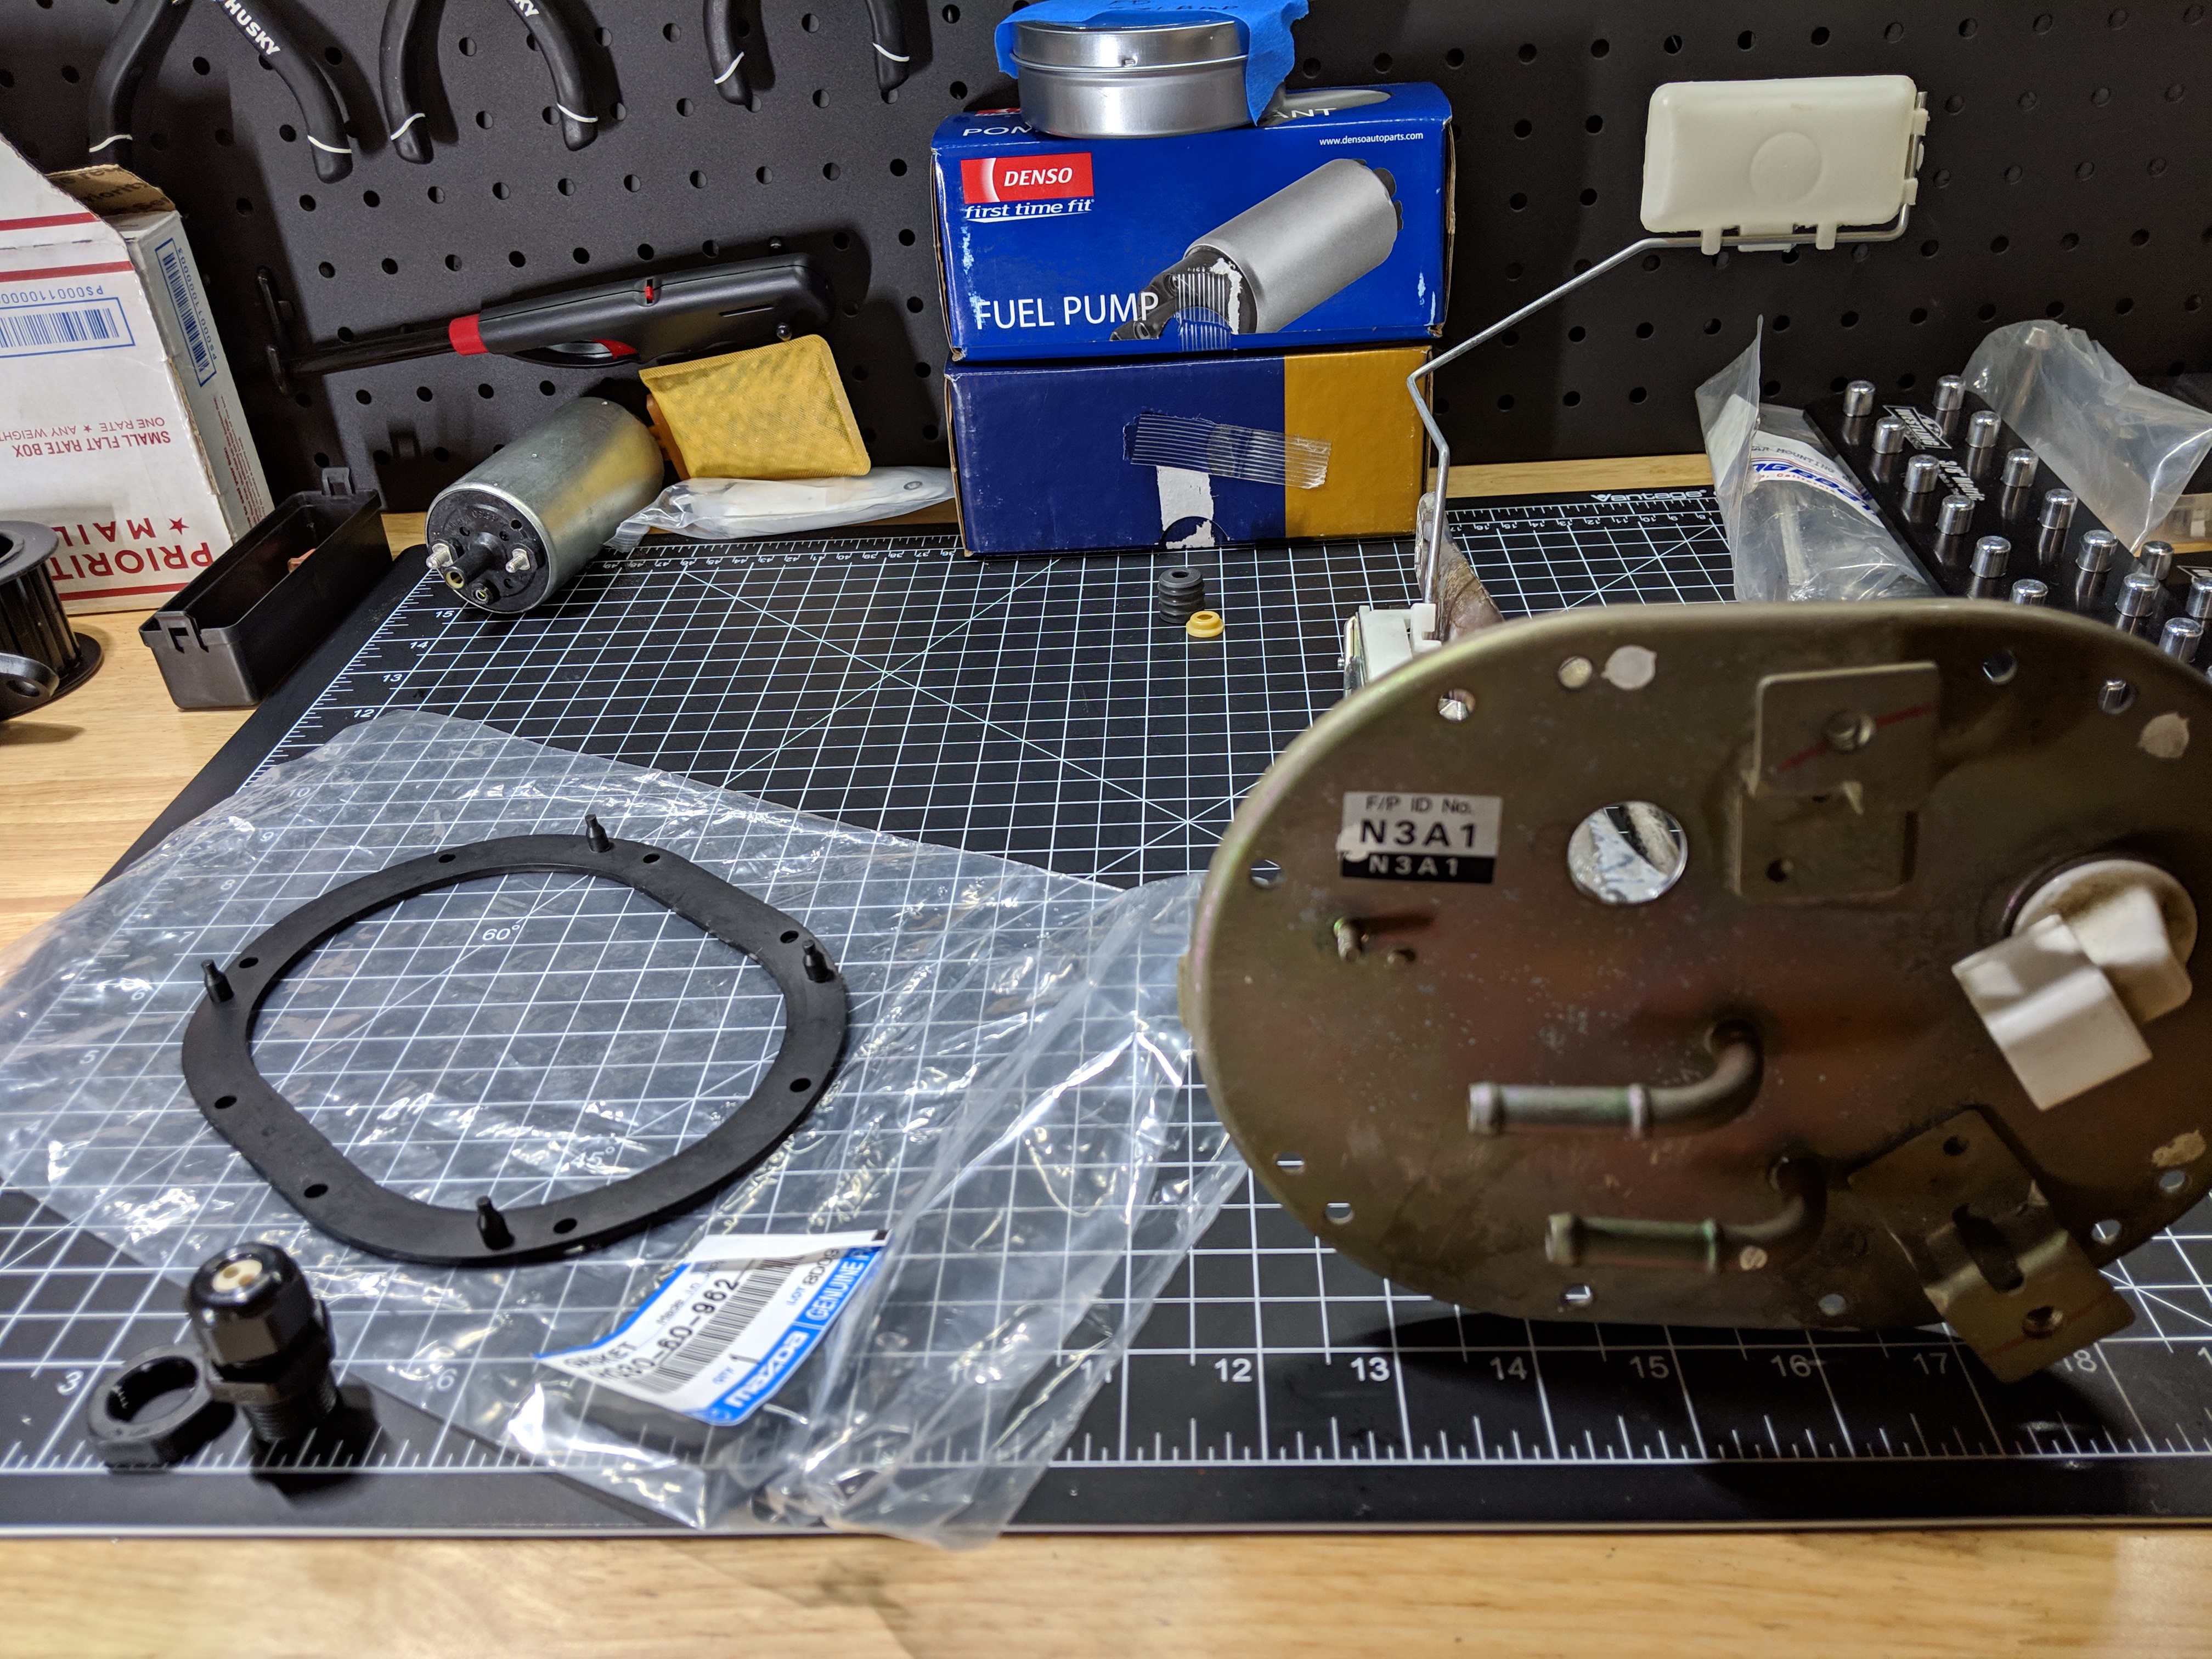
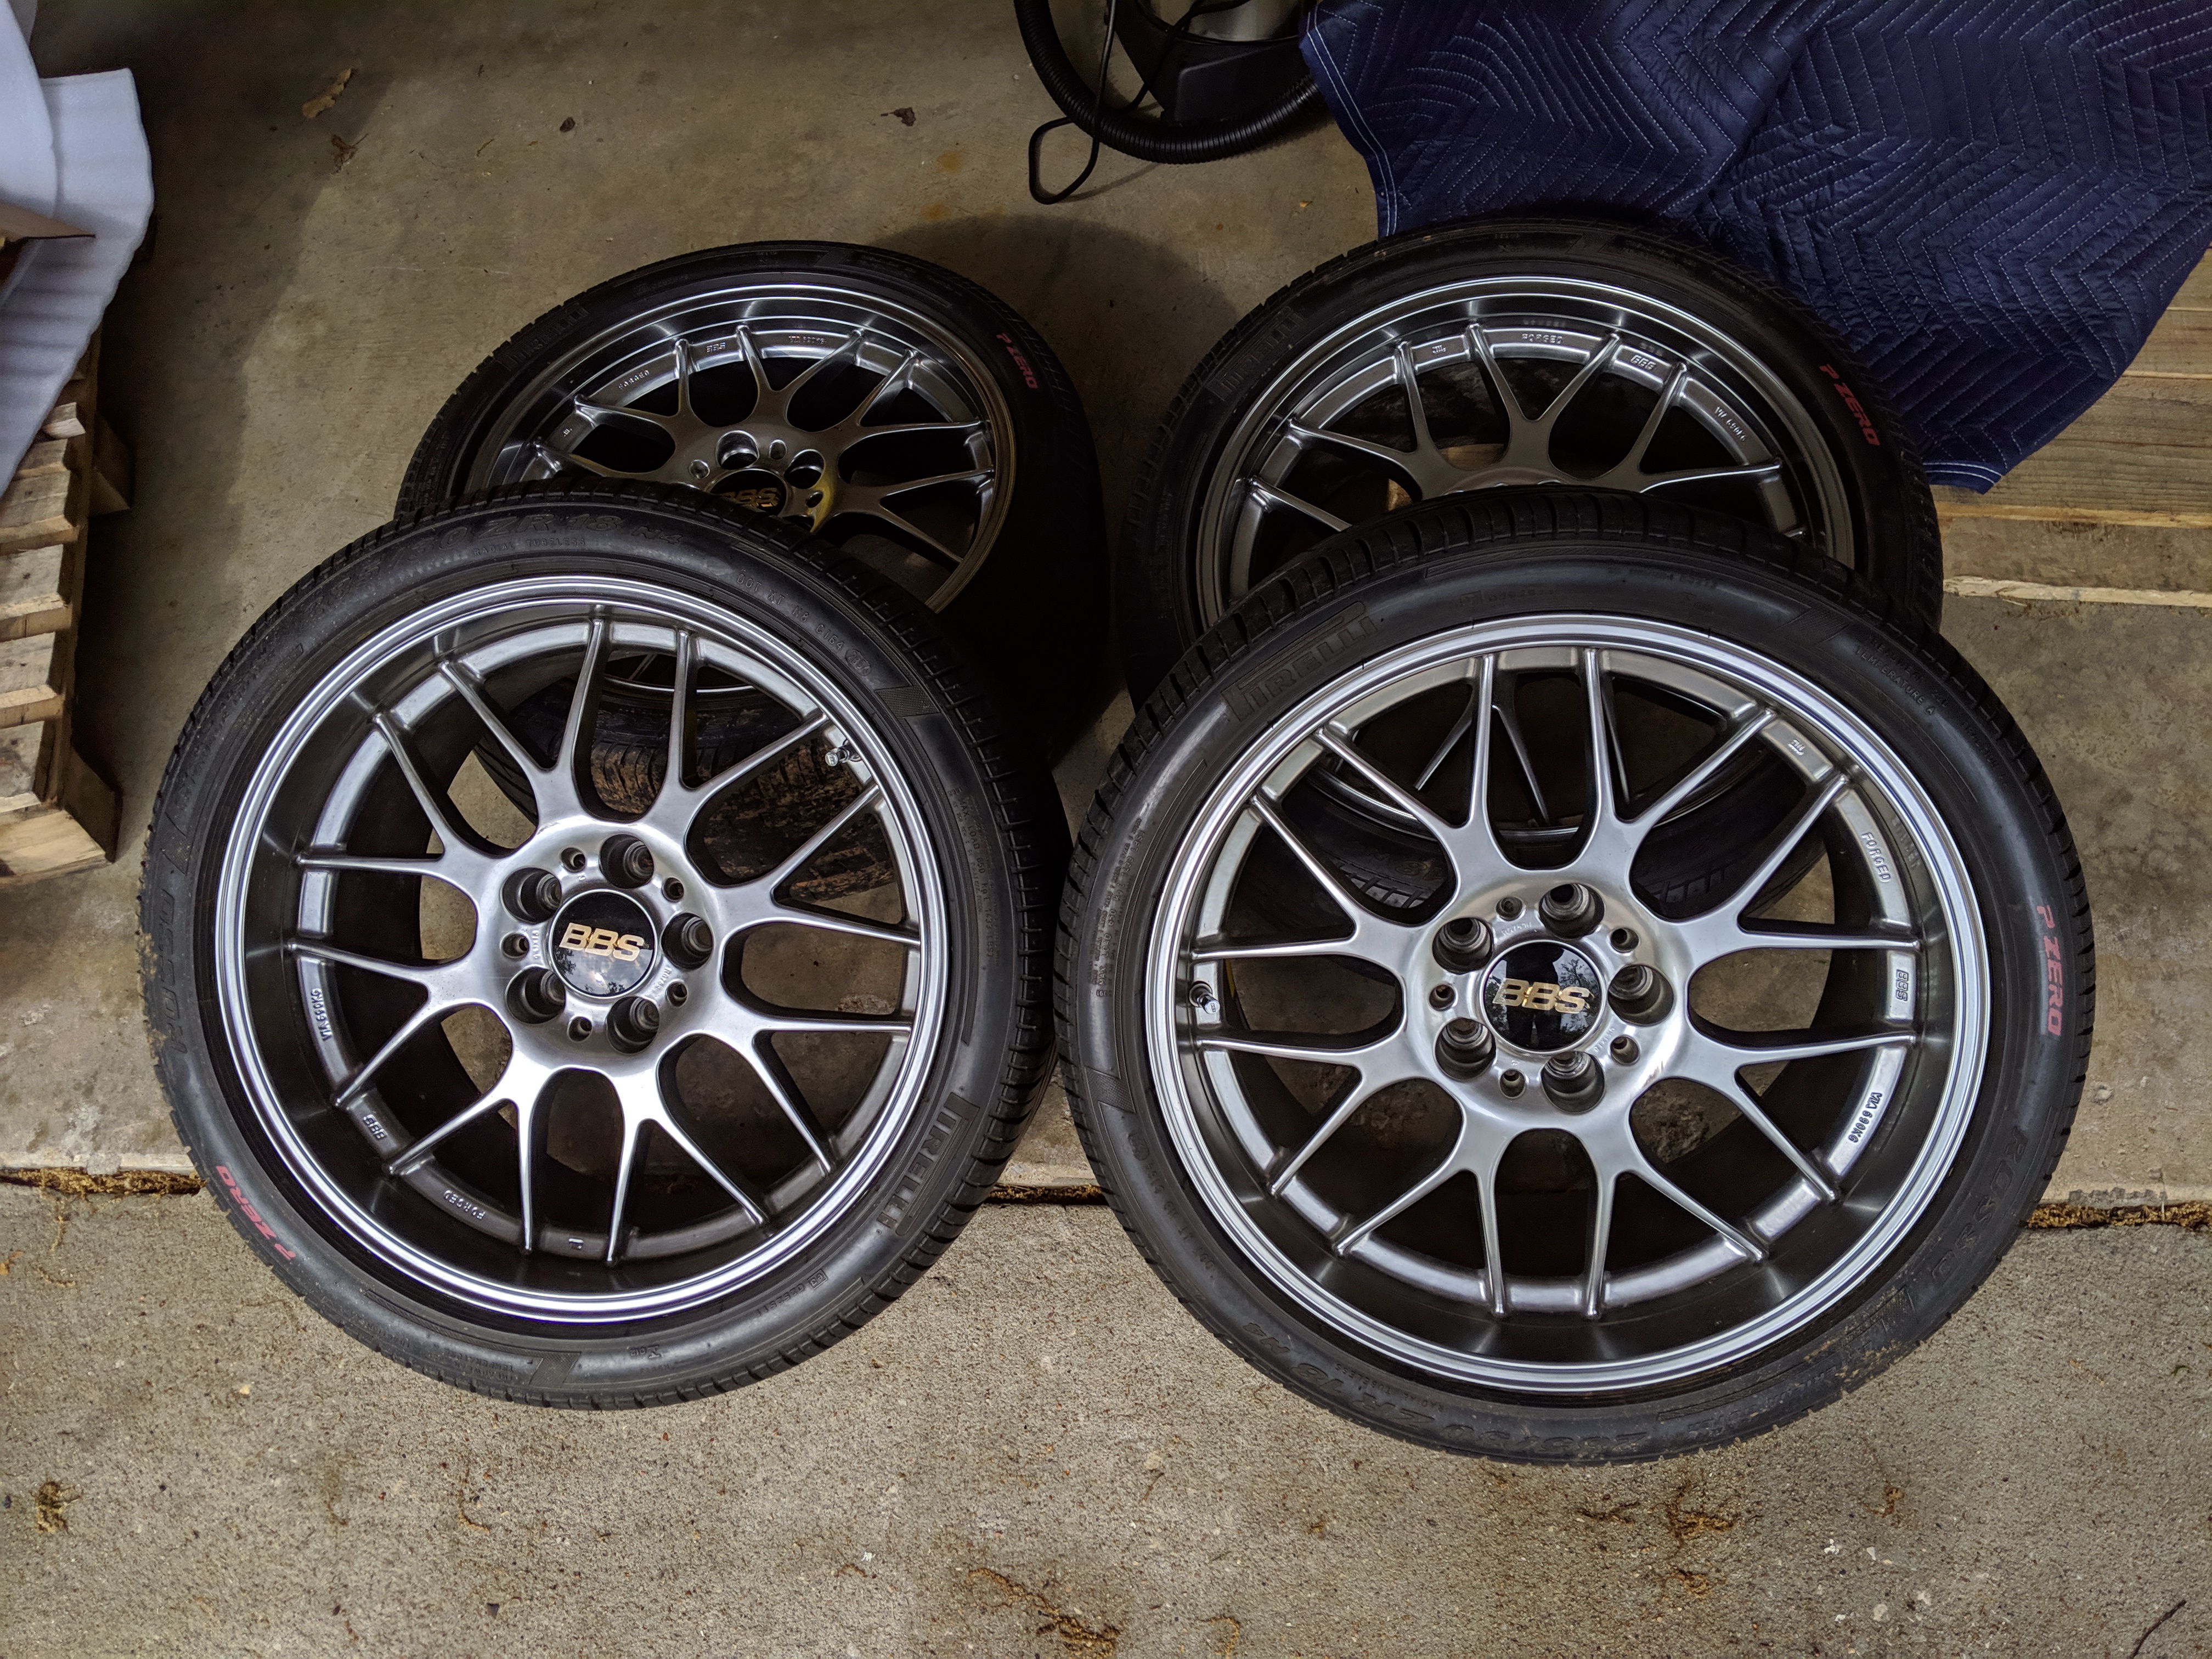
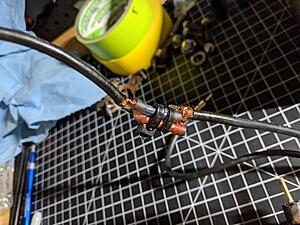
I got the fuel pump issue resolved. Drilled and ran dedicated 12 gauge wires directly to the pump. Eventually, when I start bringing more out of the turbos, I'll run dedicated 12 gauge lines from the battery to ensure I'm not dropping any voltage. For now, I've jumped and bypassed the speed relay and resistor. While I was at it I replaced the assembly gasket and added allen bolts to bolt the assembly to the tank. I have an issue spending money so I purchased some super low mile Ohlin DFVs from a member on the forum. At this point I figured I might as well finish it off with new wheels and an exhaust. I purchased some BBS RGRs in 18x8.5 and 18x9.5. I noticed they had some light scratches so I went ahead and did a quick buff and cut on them - they turned out super nice! I needed some new tires as well so I purchased some Bridgestone Potenza RE-71R in 235/40 for the fronts and 265/35 for the rears. The offset of the wheels is pretty low, so I'm already anticipating rolling every fender and a harsher stiffness on the coilovers. I was struggling to find the exhaust I wanted since Racing Beat was backordered until July, however Ari at RX7.com pulled through and had one last one in stock of the dual tip. I was almost ready to pull the trigger on an S4 plastic coolant filler neck for an AST delete, fortunately Banzai released their aluminum one before I did and I snagged it. I'll get that installed when I do a coolant flush; for now I have an aluminum AST to hold me over. The last thing I purchased was long overdue; in my old build thread you'll see the first workbench I've ever owned. Since then I've collected a ton of tools and was running out of space. I graduate with my masters next semester and decided an early graduation present was in order - a new Husky workbench and tool chest! Safe to say I'm spent out. Still a couple more things to finish on the FC. It's looking like the 99-Spec won't happen until next year, which I planned on anyway. I've definitely learned the important of not rushing; you can ask my three fuel pumps all about it.
Here is the tragic fuel pump story in picture form:

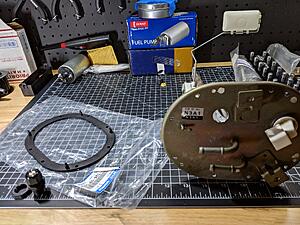
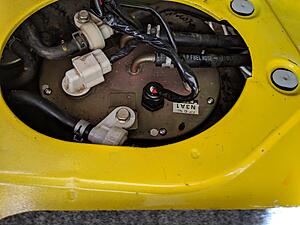
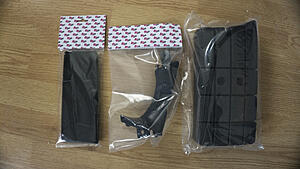
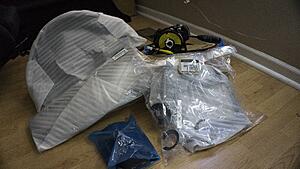
Here is all the new stuff that came in:
Here is the new workbench!:
The first part of this update is going to be a lesson in patience and thinking before acting. I tried to start the car the other day and it wouldn't turn over. After a few basic diagnostics I realized the fuel pump wasn't priming. I tested for voltage all the way to the connector on the pump - it was good. Tested ground - good. Figured it was the fuel pump so I ordered an OEM like Walbro. Pulled the fuel pump and ran direct voltage to the pump with my Power Probe - it worked. Threw it back in and it started; wrote it off as a loose connector. Frantically called Walbro to cancel my order - it was cancelled. Got in my car the following day and took it to the first meet, but stopped at McDonald's first. Went back out and car wouldn't start; had to tow it home. Figured it was due to the pump being of old age; ordered another Walbro. Decided not to splice into wiring to run their connector, already shipped couldn't refund. I ordered a Denso Supra TT pump instead since it connects the same way. Went to disconnect old pump and get it ready for the new one and noticed a dimple in the blue connector. I pulled it out; it was melted. So it was the wire that was causing the fuel pump to not work. To add further salt to the wound, in my haste to not miss any car events, I didn't bother checking what fuel pump was in the car (I figured it was OEM). Wouldn't you know - it was a Denso Supra TT pump. Naturally, too late to refund.
TLDR: Fuel pump wire fried due to previous owner upgrading the fuel pump, but not the wiring. Failed to diagnose correctly and spent a lot of unnecessary money.
Now for the happier portion:
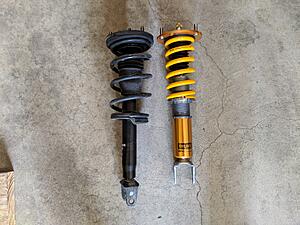
I got the fuel pump issue resolved. Drilled and ran dedicated 12 gauge wires directly to the pump. Eventually, when I start bringing more out of the turbos, I'll run dedicated 12 gauge lines from the battery to ensure I'm not dropping any voltage. For now, I've jumped and bypassed the speed relay and resistor. While I was at it I replaced the assembly gasket and added allen bolts to bolt the assembly to the tank. I have an issue spending money so I purchased some super low mile Ohlin DFVs from a member on the forum. At this point I figured I might as well finish it off with new wheels and an exhaust. I purchased some BBS RGRs in 18x8.5 and 18x9.5. I noticed they had some light scratches so I went ahead and did a quick buff and cut on them - they turned out super nice! I needed some new tires as well so I purchased some Bridgestone Potenza RE-71R in 235/40 for the fronts and 265/35 for the rears. The offset of the wheels is pretty low, so I'm already anticipating rolling every fender and a harsher stiffness on the coilovers. I was struggling to find the exhaust I wanted since Racing Beat was backordered until July, however Ari at RX7.com pulled through and had one last one in stock of the dual tip. I was almost ready to pull the trigger on an S4 plastic coolant filler neck for an AST delete, fortunately Banzai released their aluminum one before I did and I snagged it. I'll get that installed when I do a coolant flush; for now I have an aluminum AST to hold me over. The last thing I purchased was long overdue; in my old build thread you'll see the first workbench I've ever owned. Since then I've collected a ton of tools and was running out of space. I graduate with my masters next semester and decided an early graduation present was in order - a new Husky workbench and tool chest! Safe to say I'm spent out. Still a couple more things to finish on the FC. It's looking like the 99-Spec won't happen until next year, which I planned on anyway. I've definitely learned the important of not rushing; you can ask my three fuel pumps all about it.
Here is the tragic fuel pump story in picture form:

Here is all the new stuff that came in:


Here is the new workbench!:
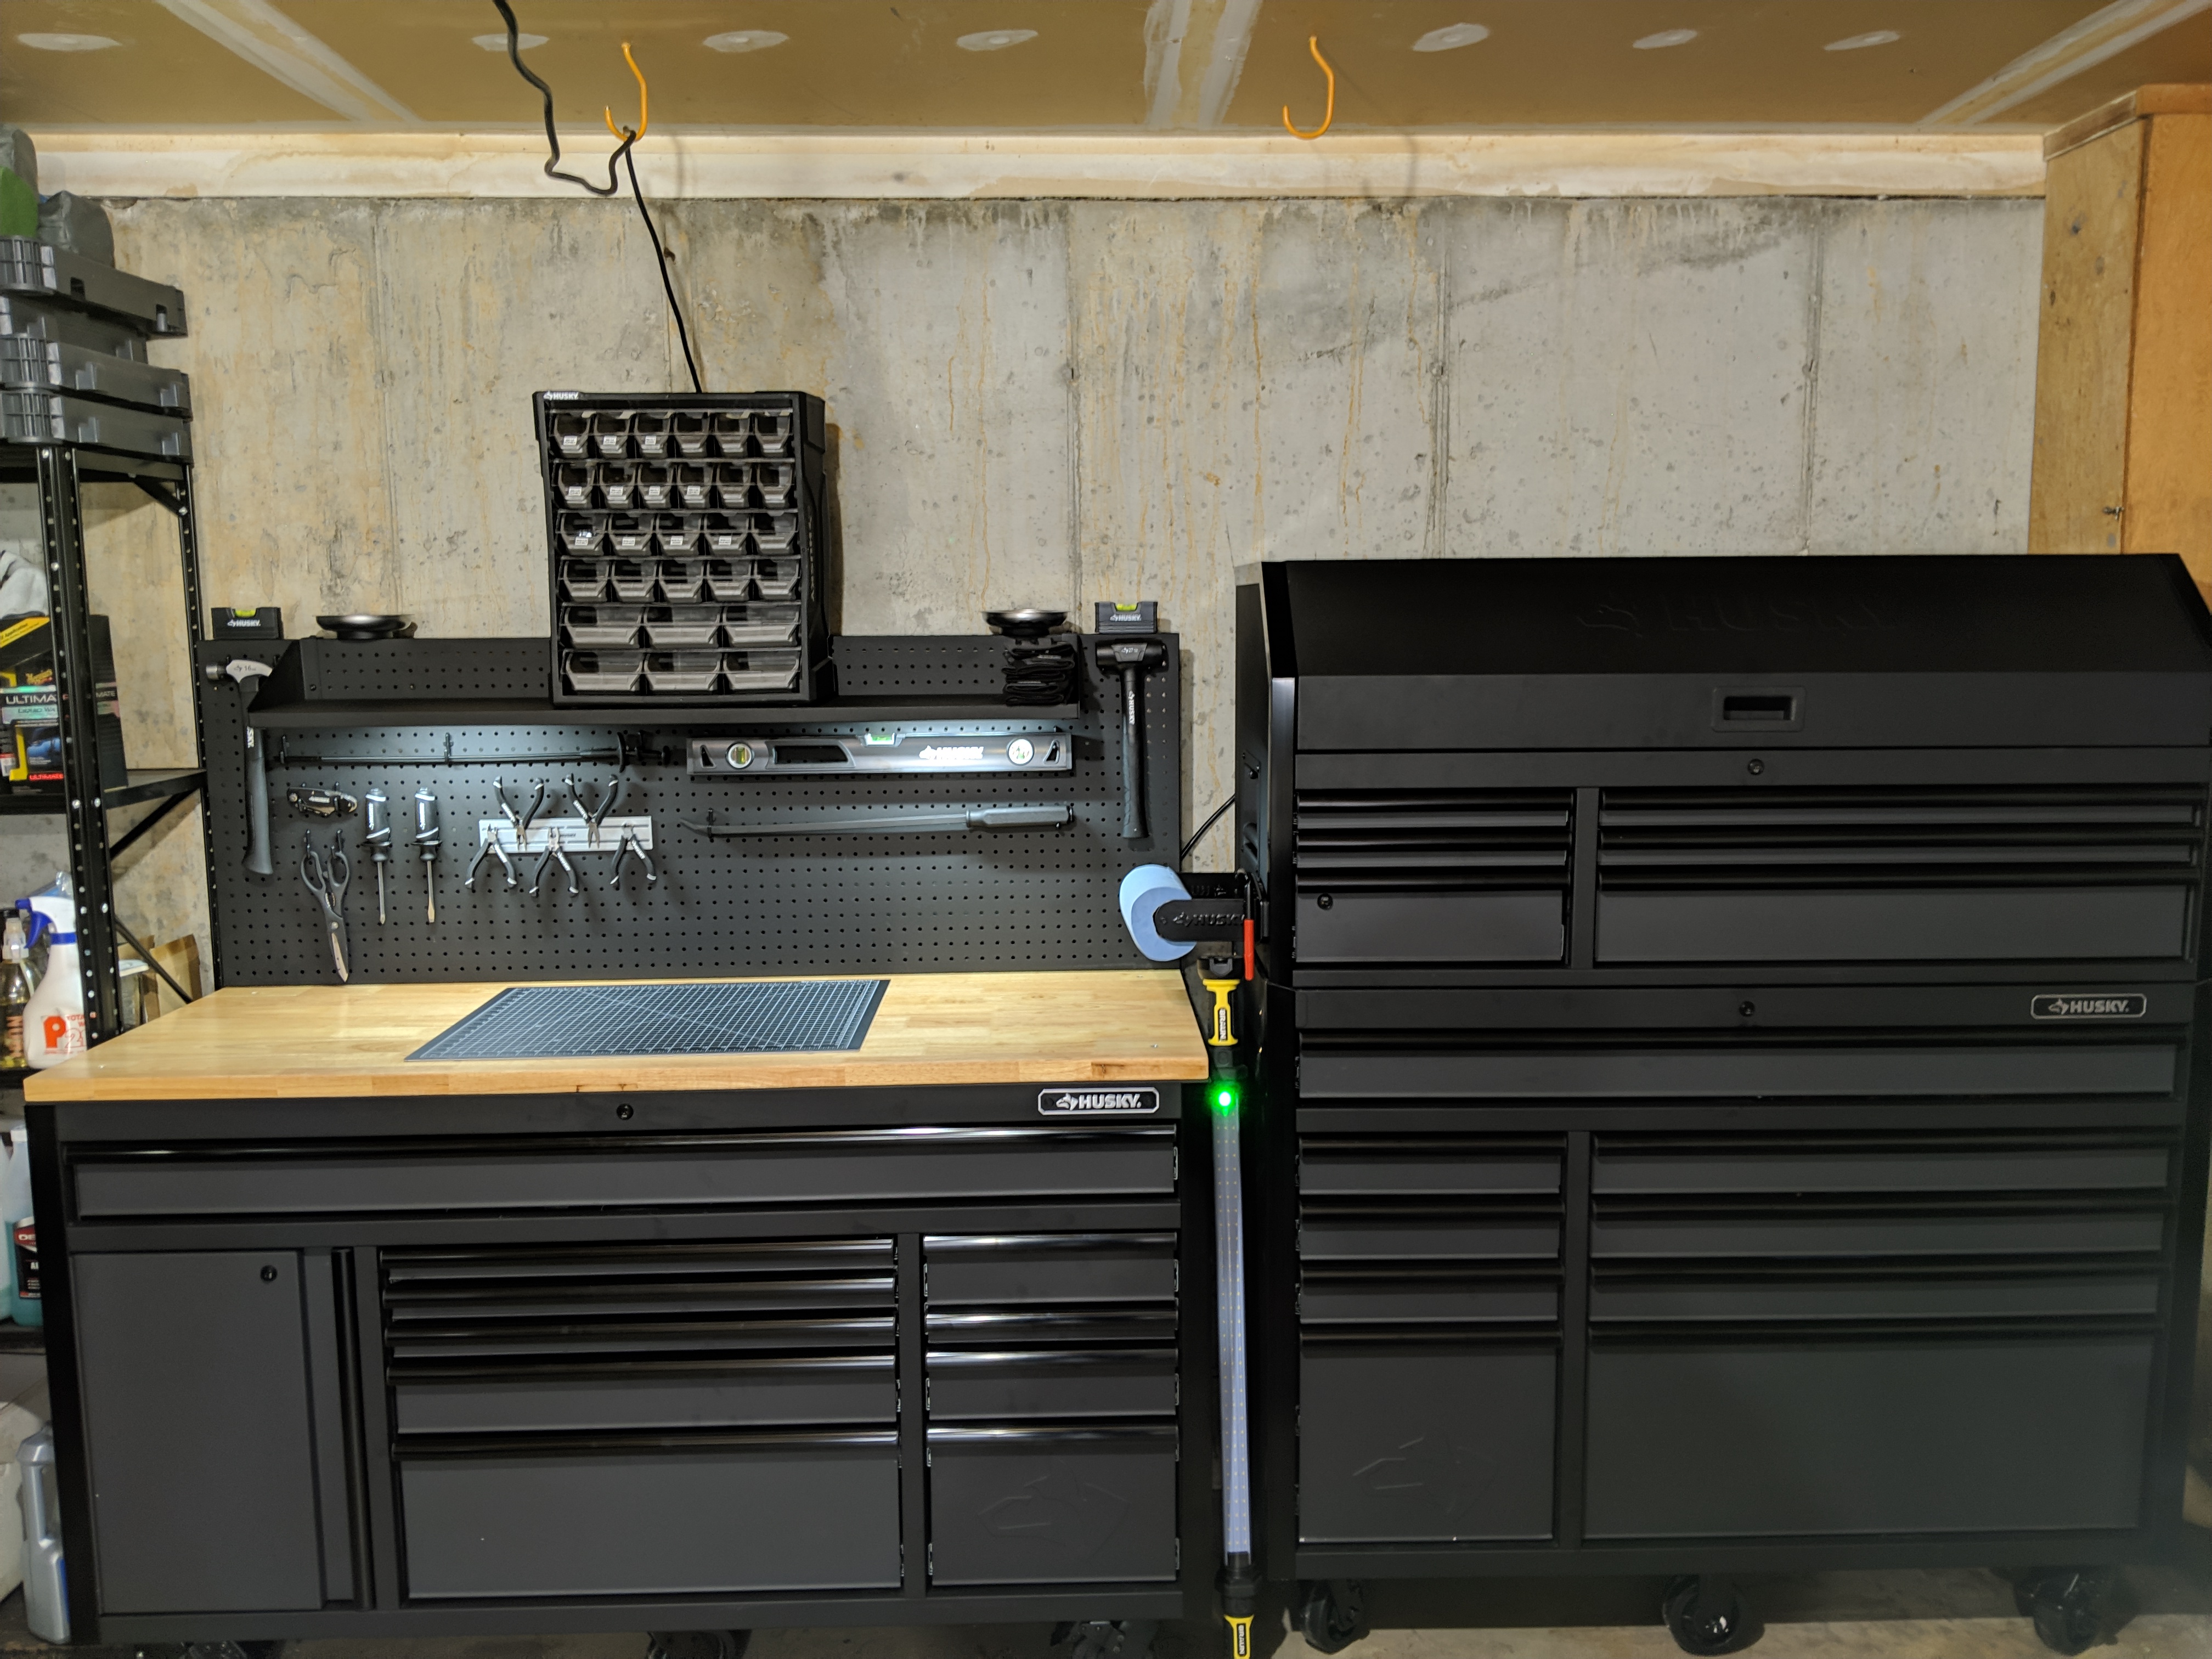
Nice workbench! I've always thought highly of the Husky line of toolboxes from Home Depot. The quality has greatly improved over the last few years and are a really good value.
Thread Starter
Joined: Apr 2015
Posts: 398
Likes: 169
From: St. Louis, MO
I will say I'm incredibly impressed. I think they are nailing, at a bare minimum, the cosmetic side. That was really one of the reasons I wanted these - because they looked so good! However, coming from Harbor Freight and a small Craftsman I think anything would have impressed me haha. I don't think I could ever go back to non-soft close drawers though.
Thread Starter
Joined: Apr 2015
Posts: 398
Likes: 169
From: St. Louis, MO
Update 5/19/2019:
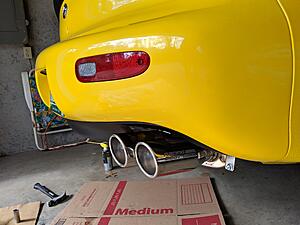
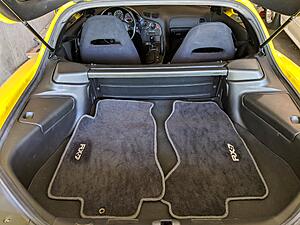
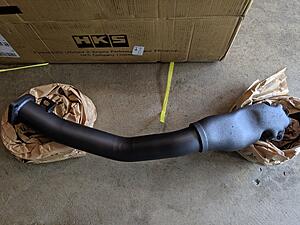
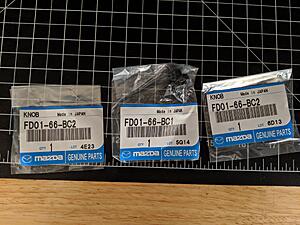
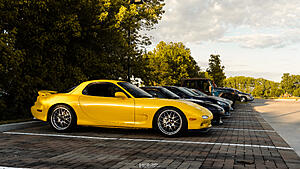
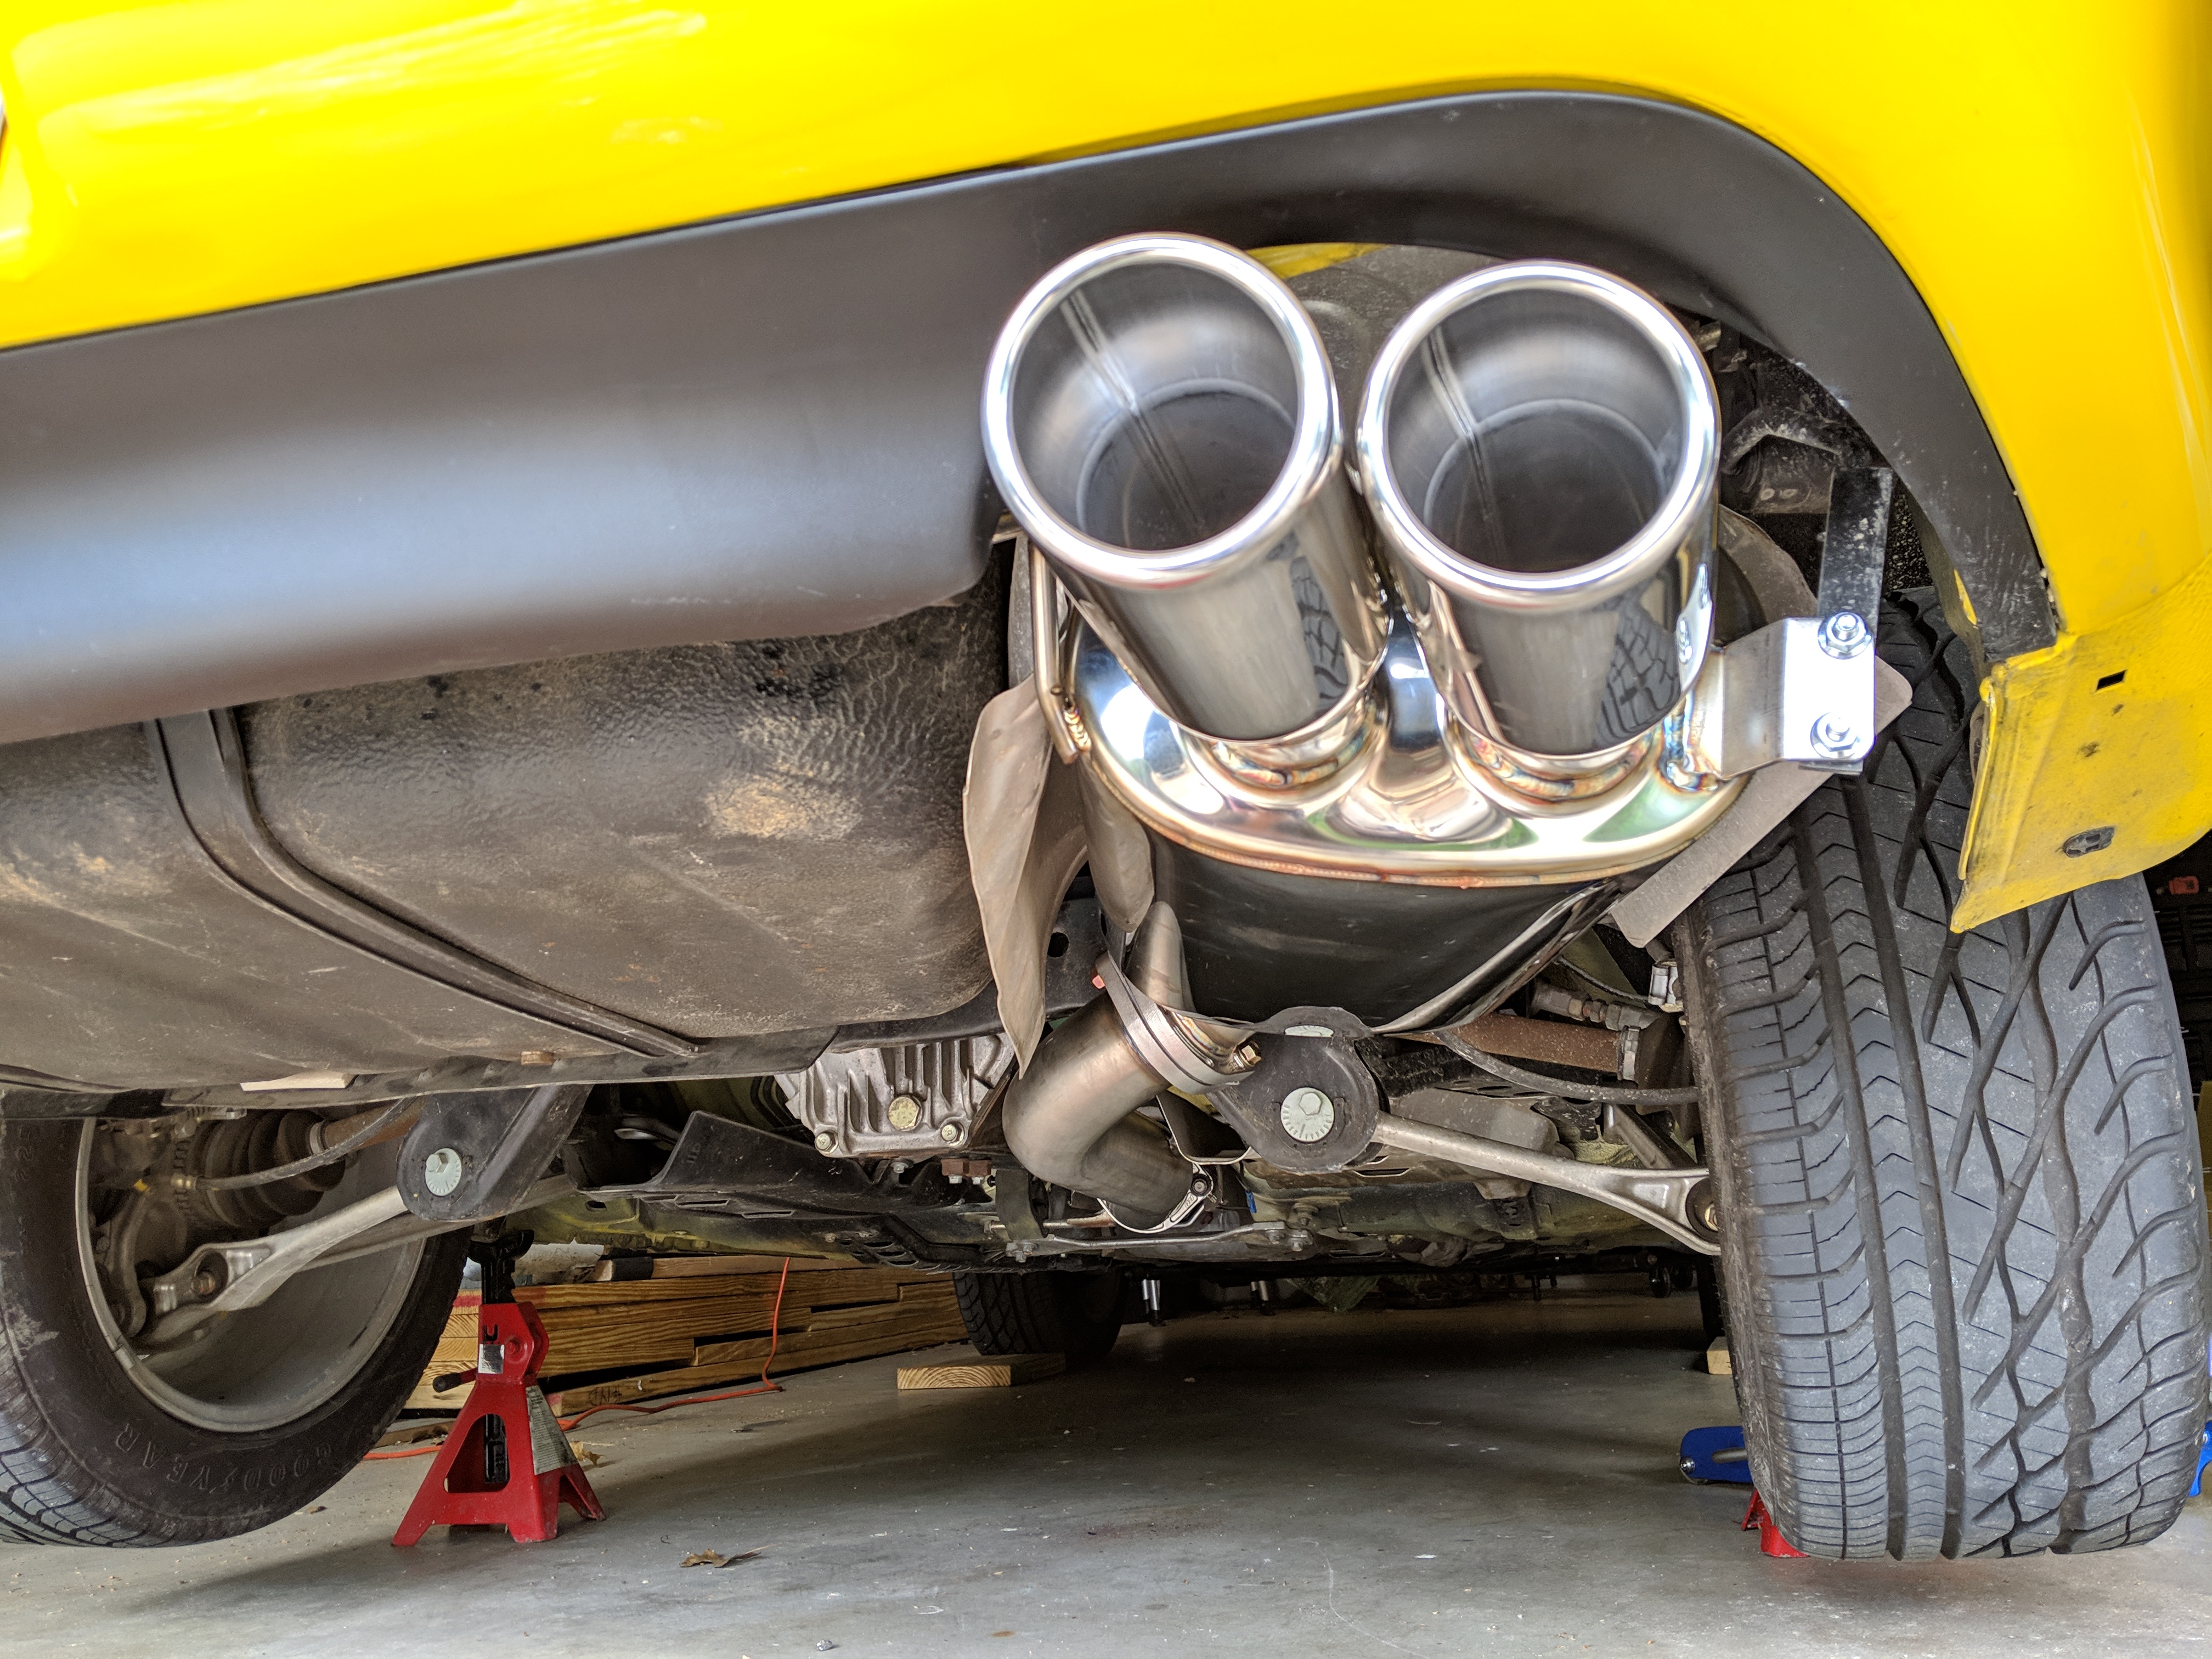
A lot has been going on with both the FC and the FD. I ended up installing a lot of the exterior cosmetic things I purchased. I ended up throwing the cat-back on one random day after work. I can’t really hear any sort of difference, but it certainly looks a lot better than the OEM exhaust. I also ended up having two days off after a business trip I took so I went ahead and got the Ohlins and BBS RGRs on. They look fantastic and I’m super happy with them. I can definitely tell the difference going from stock setup to these. Eventually I’ll pull the wheels off and have them professionally restored, but for now they will work. I noticed that my stock floor mats were getting dirty, so I ordered some new ones from Alpha Garage and threw them in. They look really good and will allow me to keep the OEM ones in great shape. I also purchased Rotary Bum’s newer premix kit. I anticipated I, eventually, wouldn’t want to swap kits between the FC and the FD, so I just went ahead and purchased another one. I also purchased an HKS downpipe to get rid of the pre-cat. I went with the HKS because I wanted one that was bolt-on and go - I didn’t want to mess with taking out studs or converting to bolts or anything. I may have lost a little performance, but I think it was worth the ease of installation. I also purchased some random ***** to repair the OEM cassette player to like new. I think I’d like to keep it in the car. I was originally going to run the bottom fold down pocket and a 3 din gauge pod, but I think keeping this thing looking “OEM” on the inside is a high priority.
My plans for the end of the year is to put on all of the little things that I can without making the jump to getting the 99-spec swap done (there is still a ton left). I’m definitely holding out on that stuff for next year. I have decided that I will source another front bumper to pull it’s mounting hardware off. I want to keep all my stock stuff the way it came and not pull mounting hardware off.
Here’s some shots of the exhaust:

Here’s the floor mats:

Here’s the new stuff I purchased:
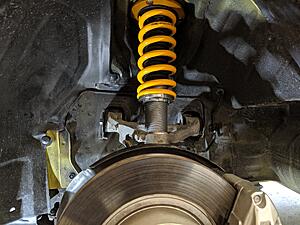
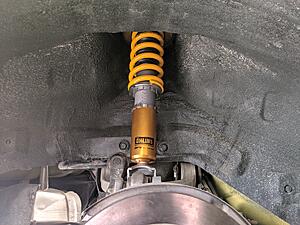
Here’s the Ohlin install:
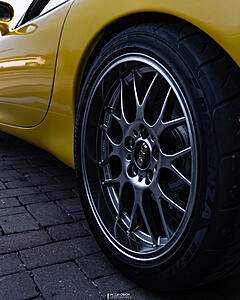
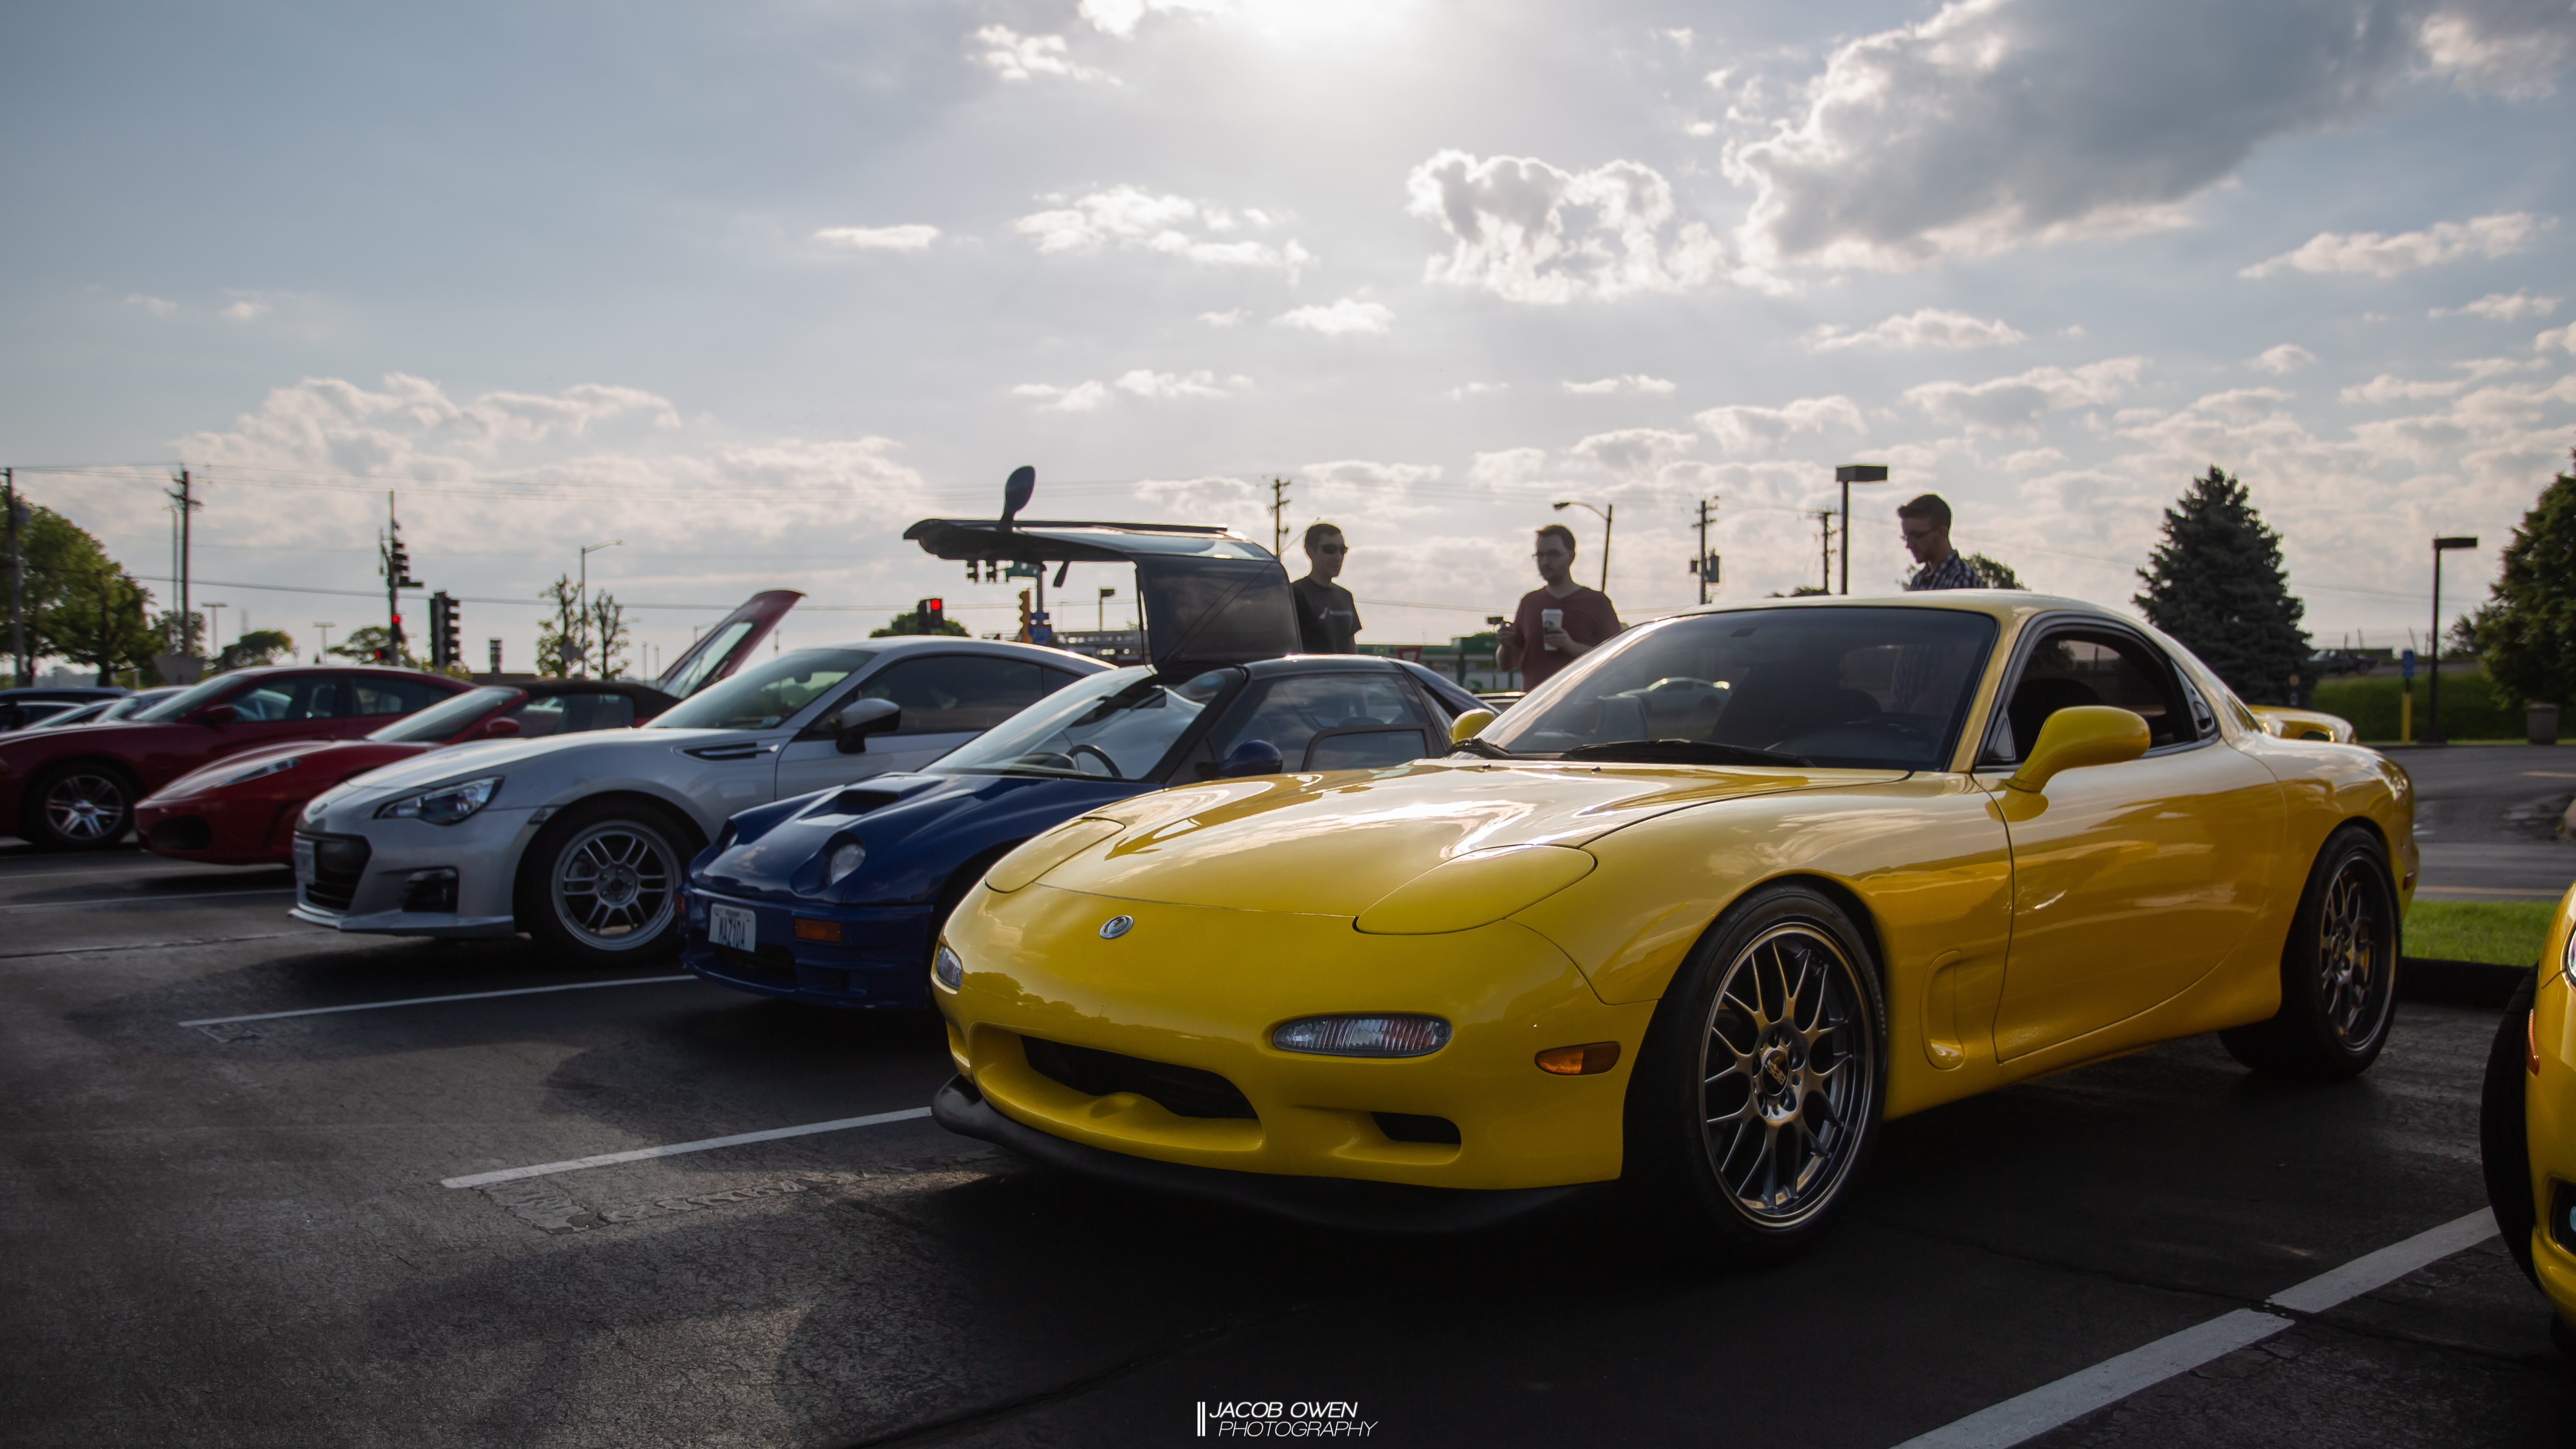
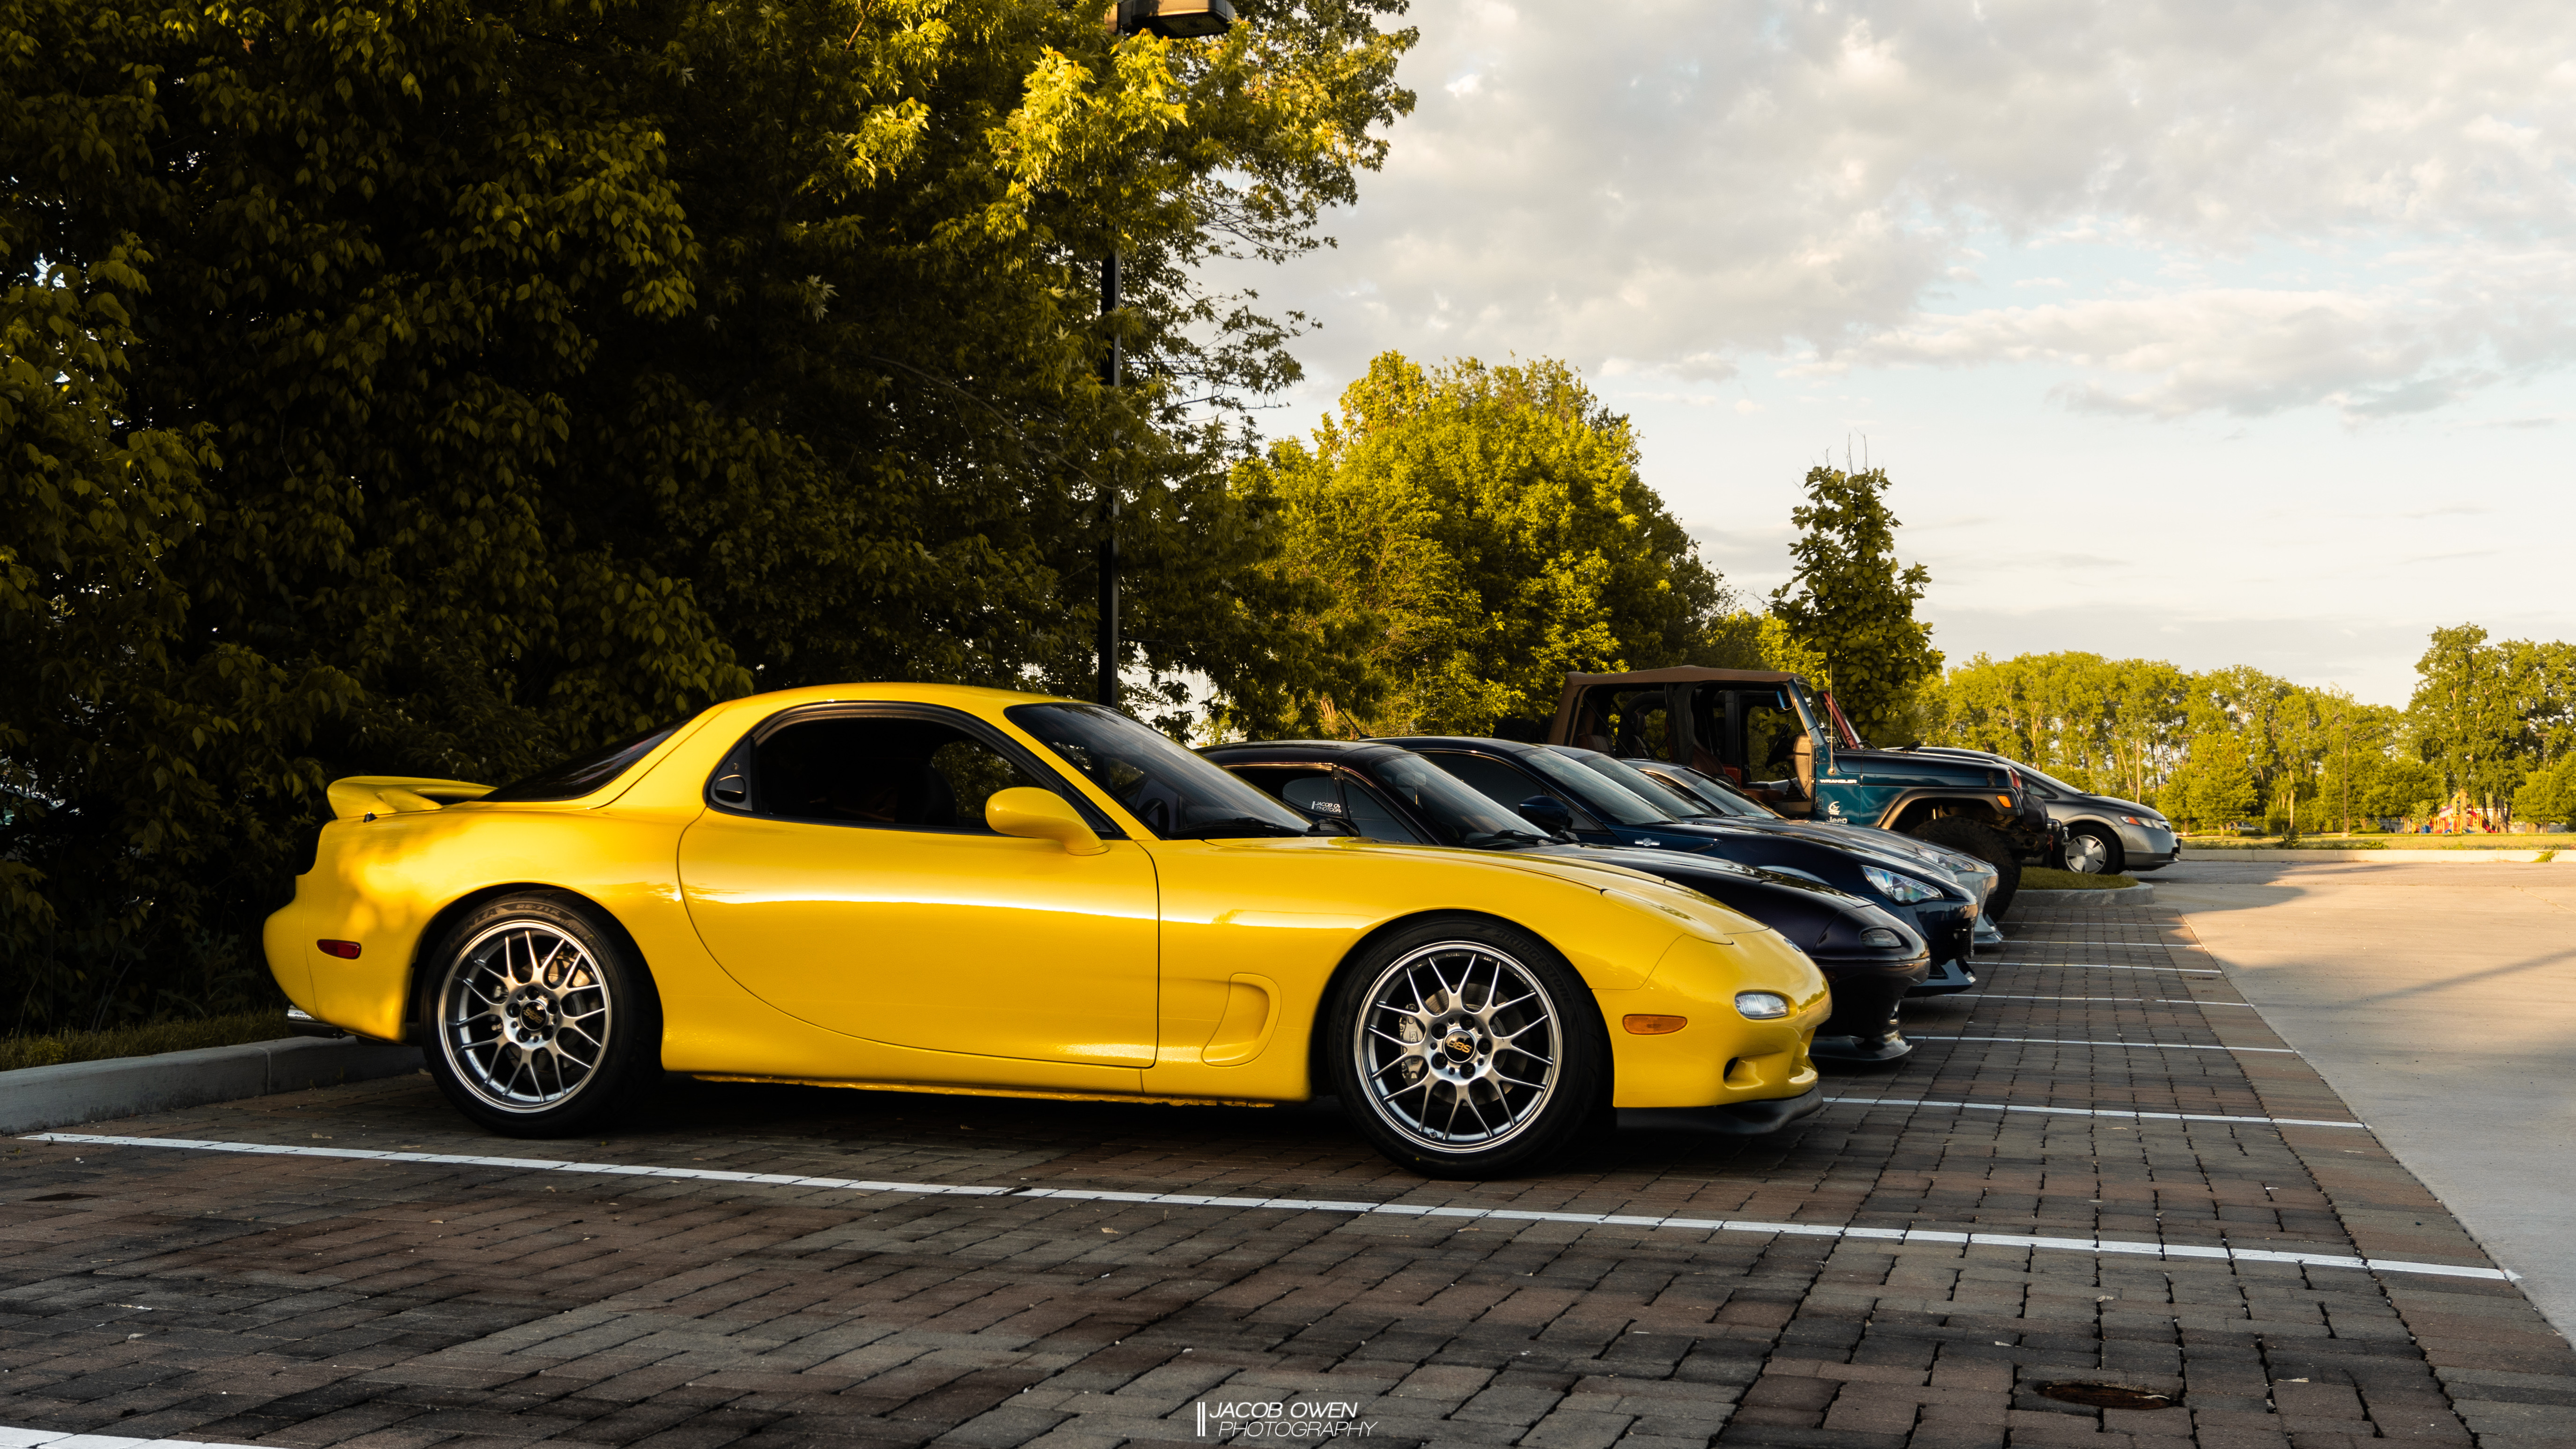
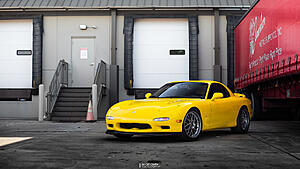
Here is how the car currently sits (I have since raised the car in the front slightly):

A lot has been going on with both the FC and the FD. I ended up installing a lot of the exterior cosmetic things I purchased. I ended up throwing the cat-back on one random day after work. I can’t really hear any sort of difference, but it certainly looks a lot better than the OEM exhaust. I also ended up having two days off after a business trip I took so I went ahead and got the Ohlins and BBS RGRs on. They look fantastic and I’m super happy with them. I can definitely tell the difference going from stock setup to these. Eventually I’ll pull the wheels off and have them professionally restored, but for now they will work. I noticed that my stock floor mats were getting dirty, so I ordered some new ones from Alpha Garage and threw them in. They look really good and will allow me to keep the OEM ones in great shape. I also purchased Rotary Bum’s newer premix kit. I anticipated I, eventually, wouldn’t want to swap kits between the FC and the FD, so I just went ahead and purchased another one. I also purchased an HKS downpipe to get rid of the pre-cat. I went with the HKS because I wanted one that was bolt-on and go - I didn’t want to mess with taking out studs or converting to bolts or anything. I may have lost a little performance, but I think it was worth the ease of installation. I also purchased some random ***** to repair the OEM cassette player to like new. I think I’d like to keep it in the car. I was originally going to run the bottom fold down pocket and a 3 din gauge pod, but I think keeping this thing looking “OEM” on the inside is a high priority.
My plans for the end of the year is to put on all of the little things that I can without making the jump to getting the 99-spec swap done (there is still a ton left). I’m definitely holding out on that stuff for next year. I have decided that I will source another front bumper to pull it’s mounting hardware off. I want to keep all my stock stuff the way it came and not pull mounting hardware off.
Here’s some shots of the exhaust:

Here’s the floor mats:

Here’s the new stuff I purchased:

Here’s the Ohlin install:

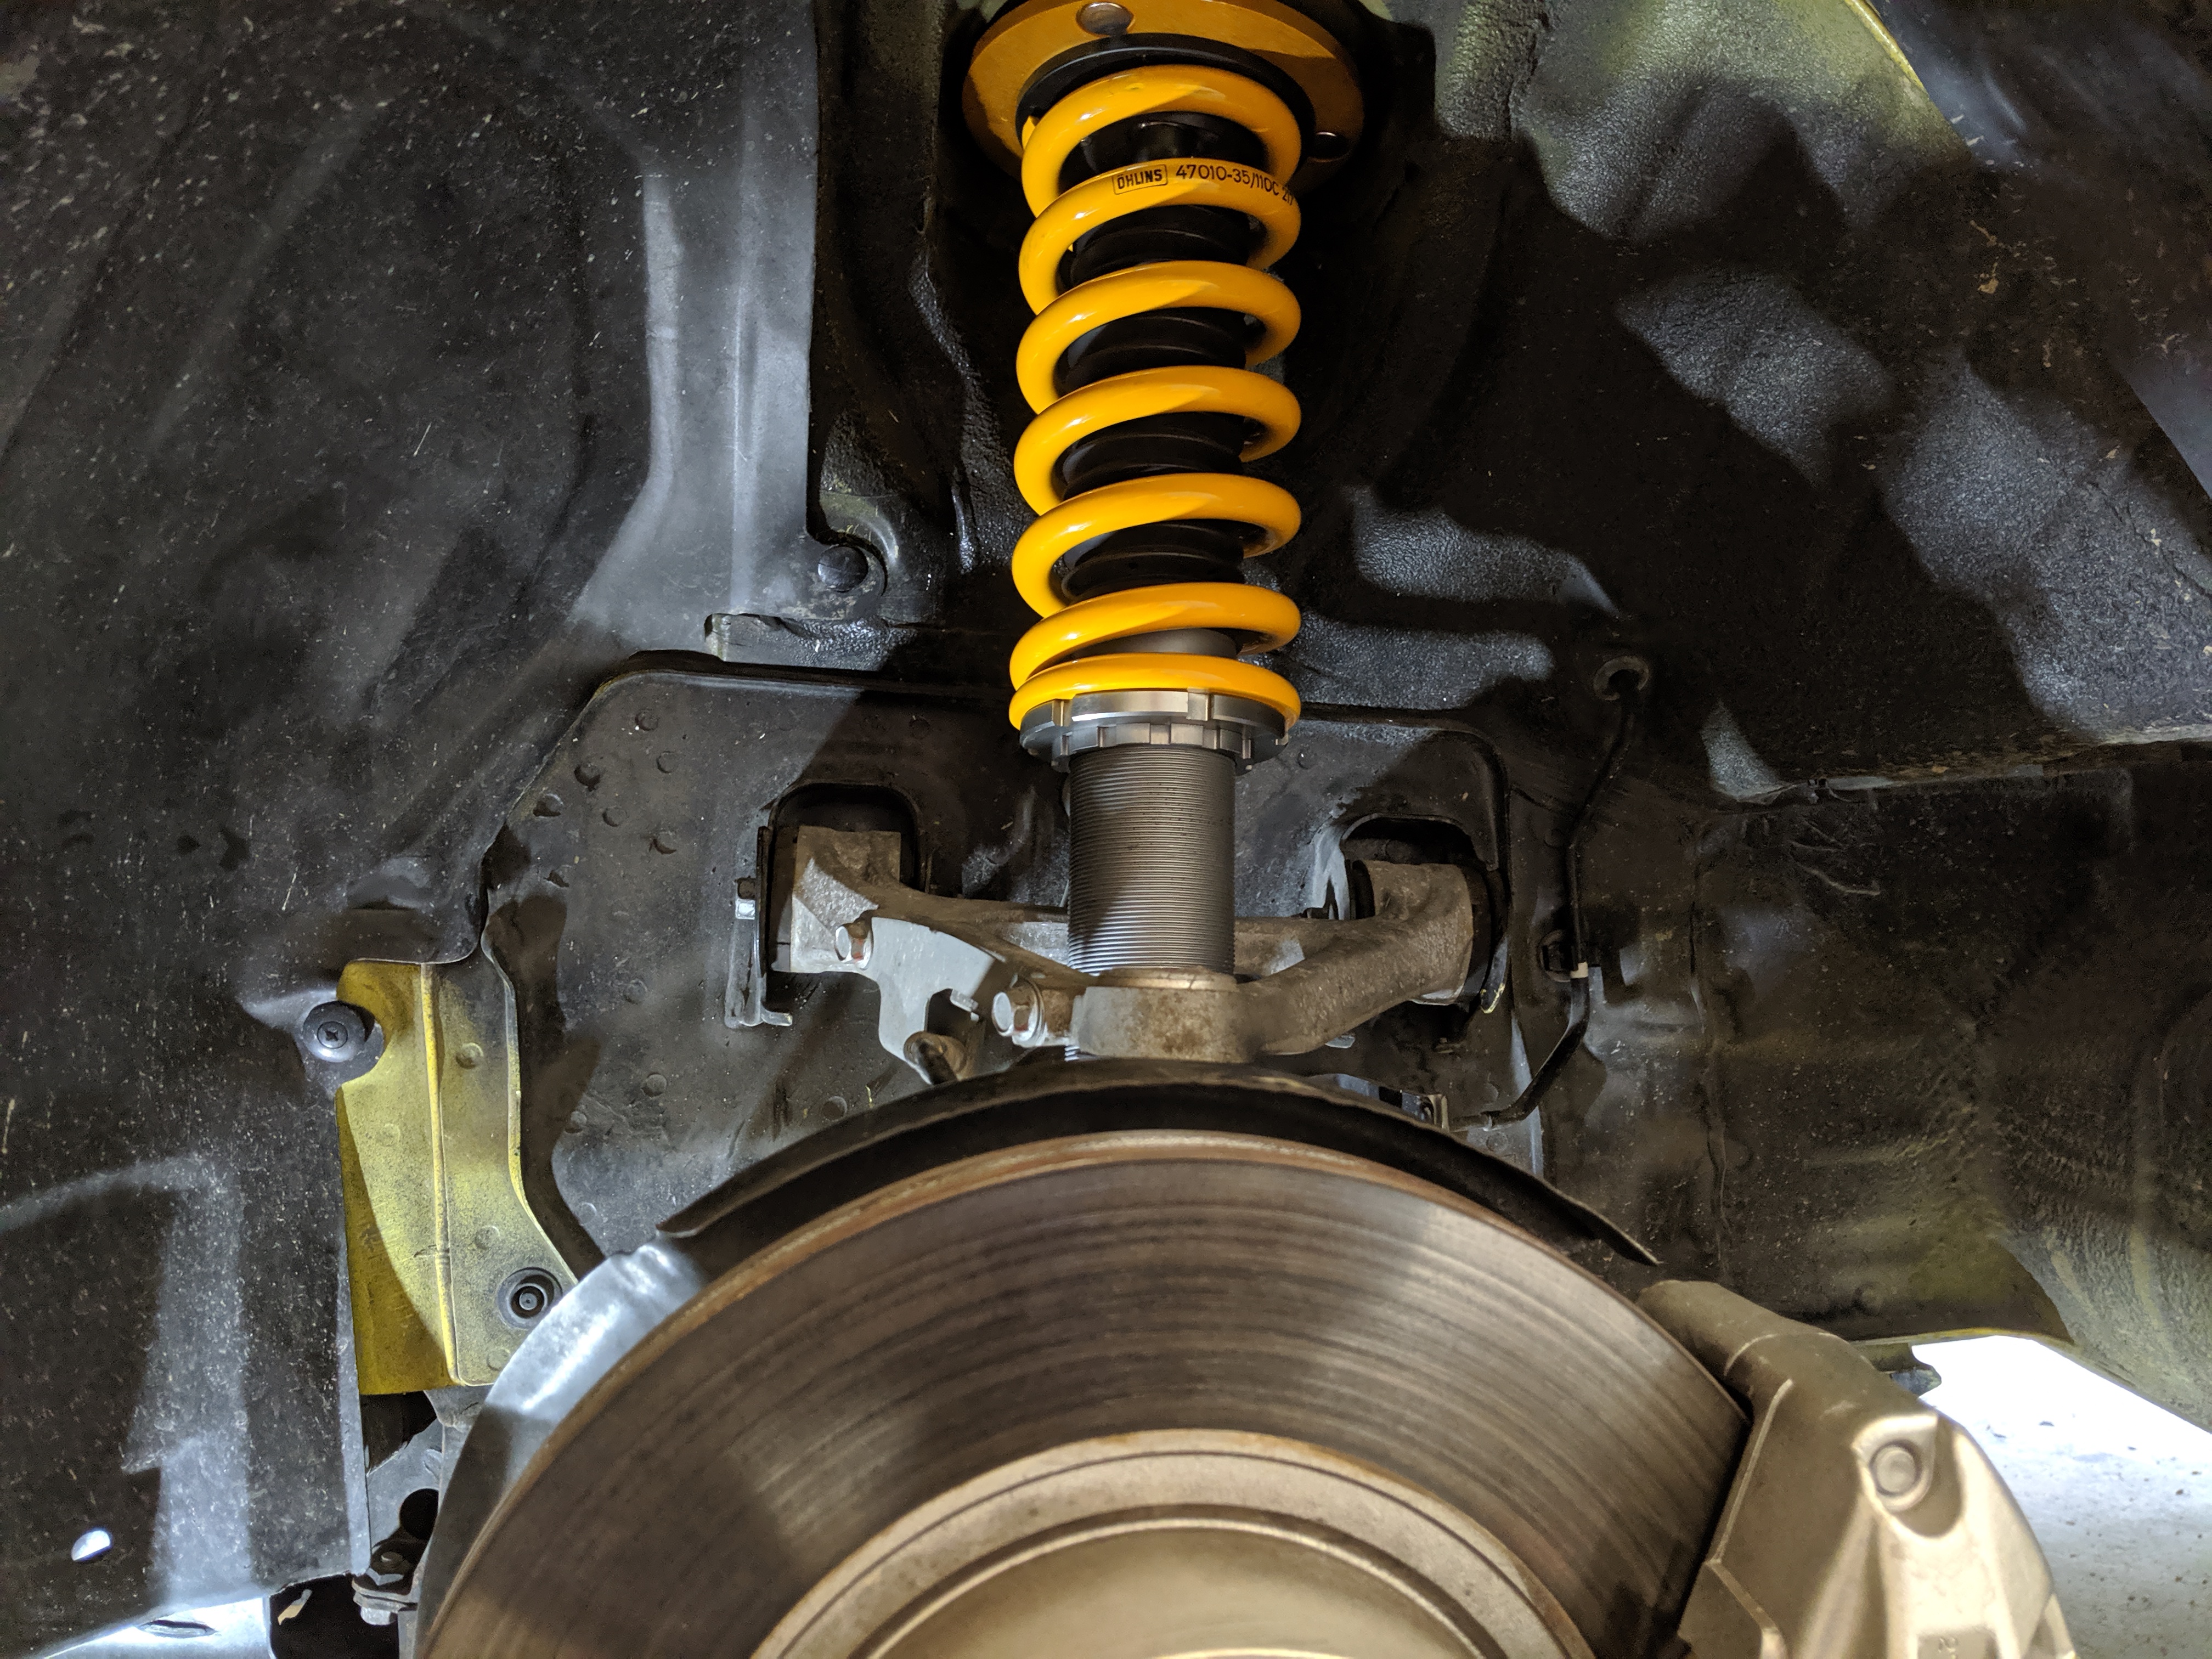

Here is how the car currently sits (I have since raised the car in the front slightly):

Last edited by Akomix; May 19, 2019 at 10:47 AM.


Thread Starter
Joined: Apr 2015
Posts: 398
Likes: 169
From: St. Louis, MO
Thank you!
Thank you! I think they would look good on about any FD color combination.
Absolutely! Here is the model: WB-909-T
Thank you! I think they would look good on about any FD color combination.
Absolutely! Here is the model: WB-909-T
Thread Starter
Joined: Apr 2015
Posts: 398
Likes: 169
From: St. Louis, MO
Update 5/26/2019:
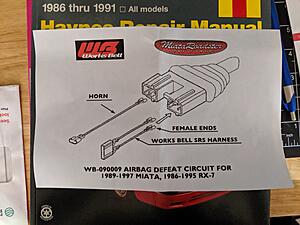
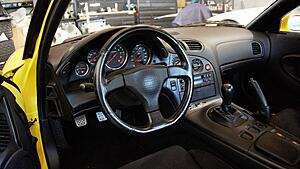
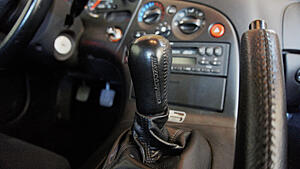
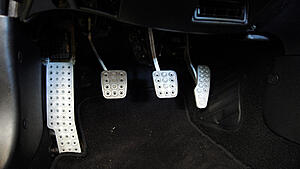
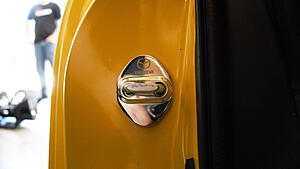
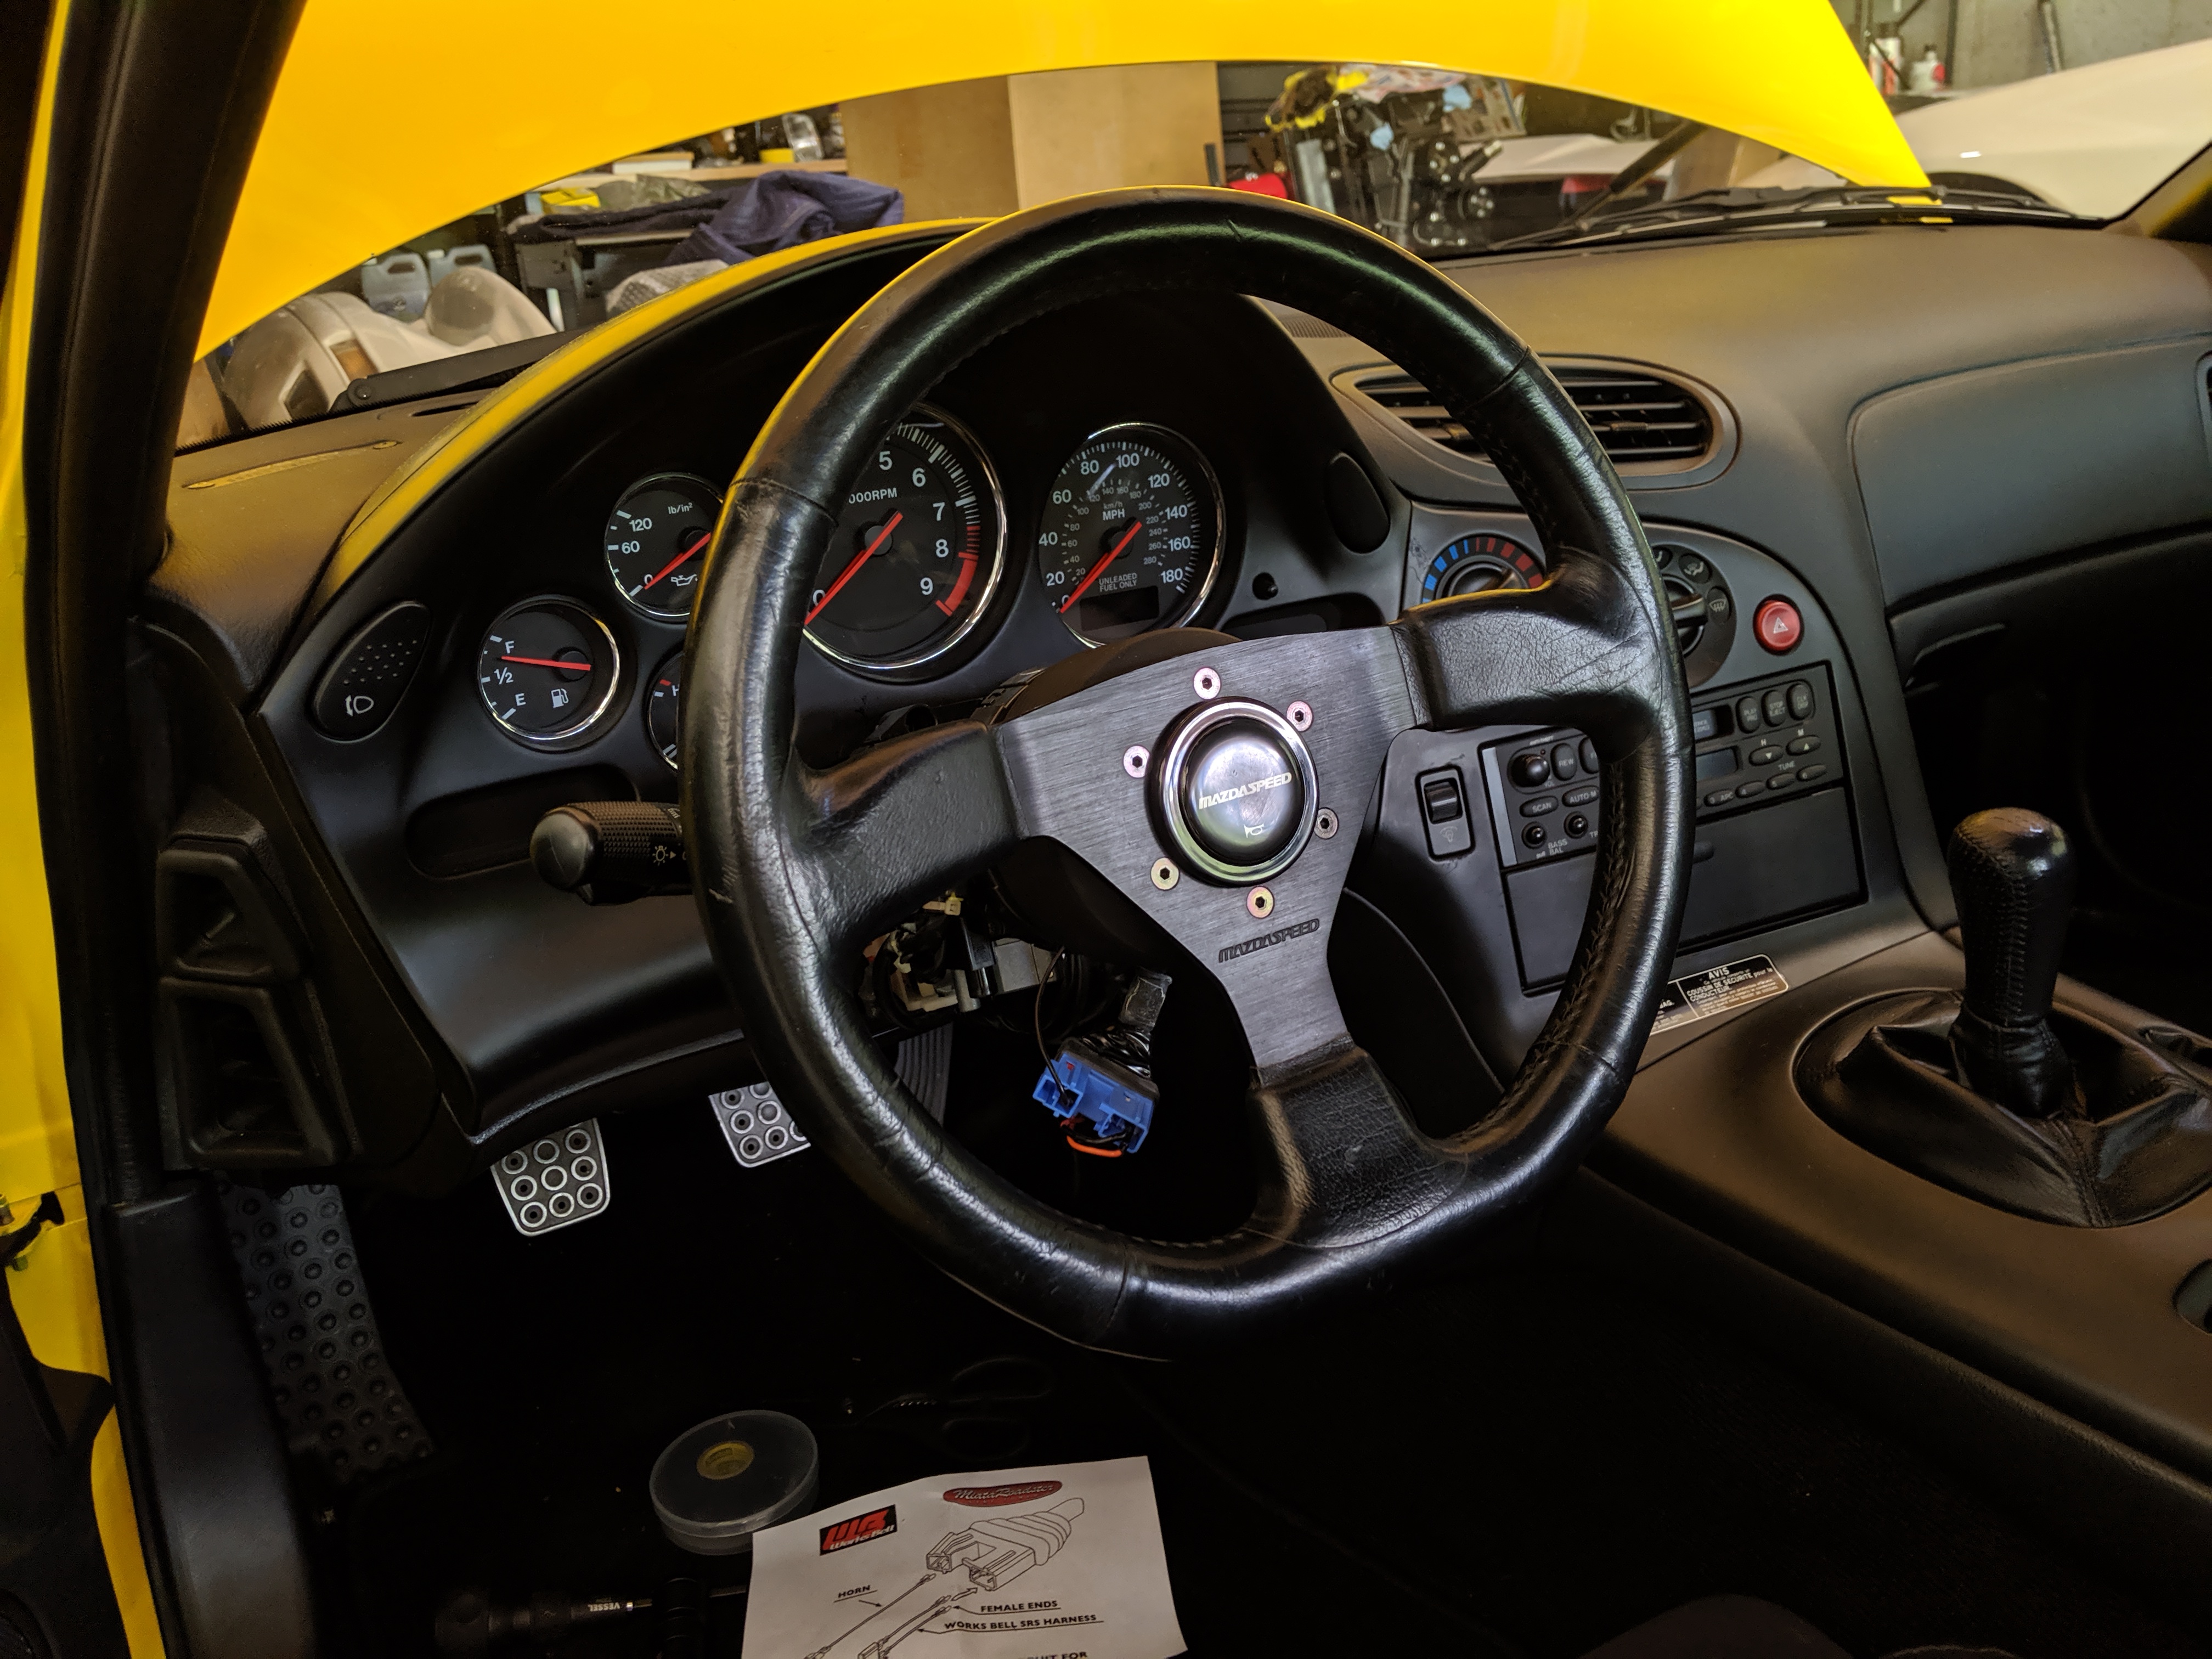
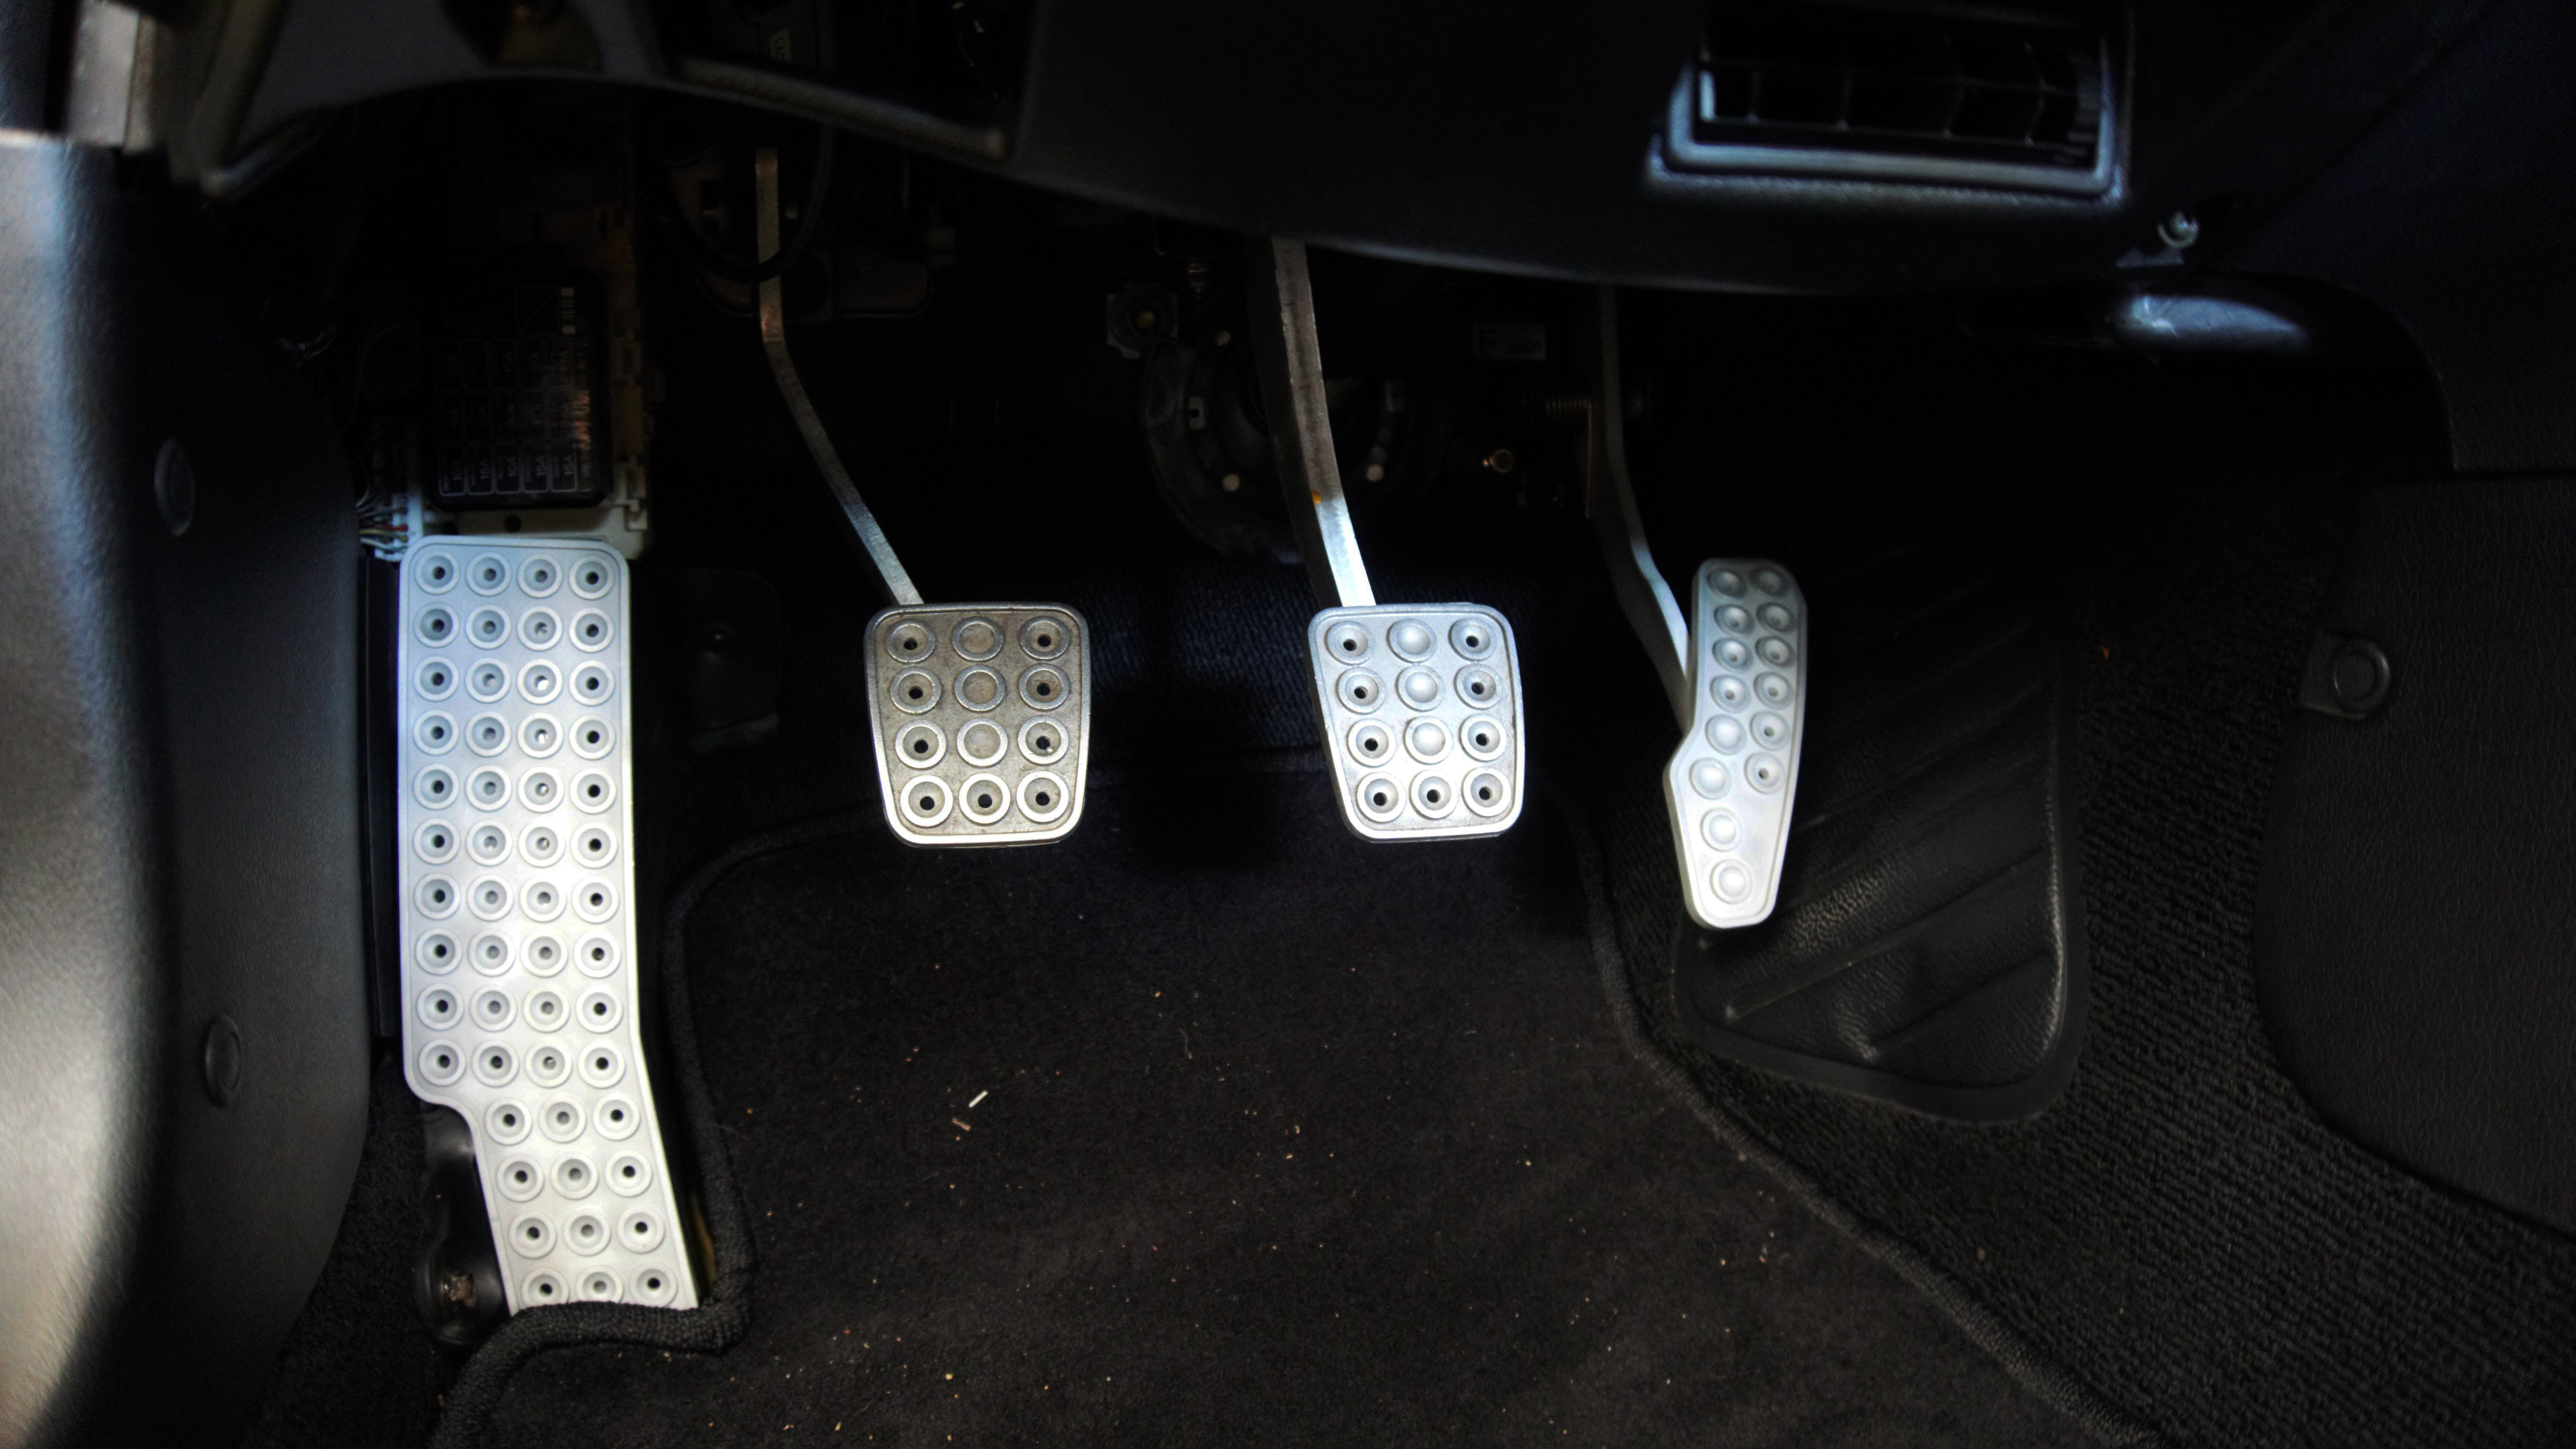
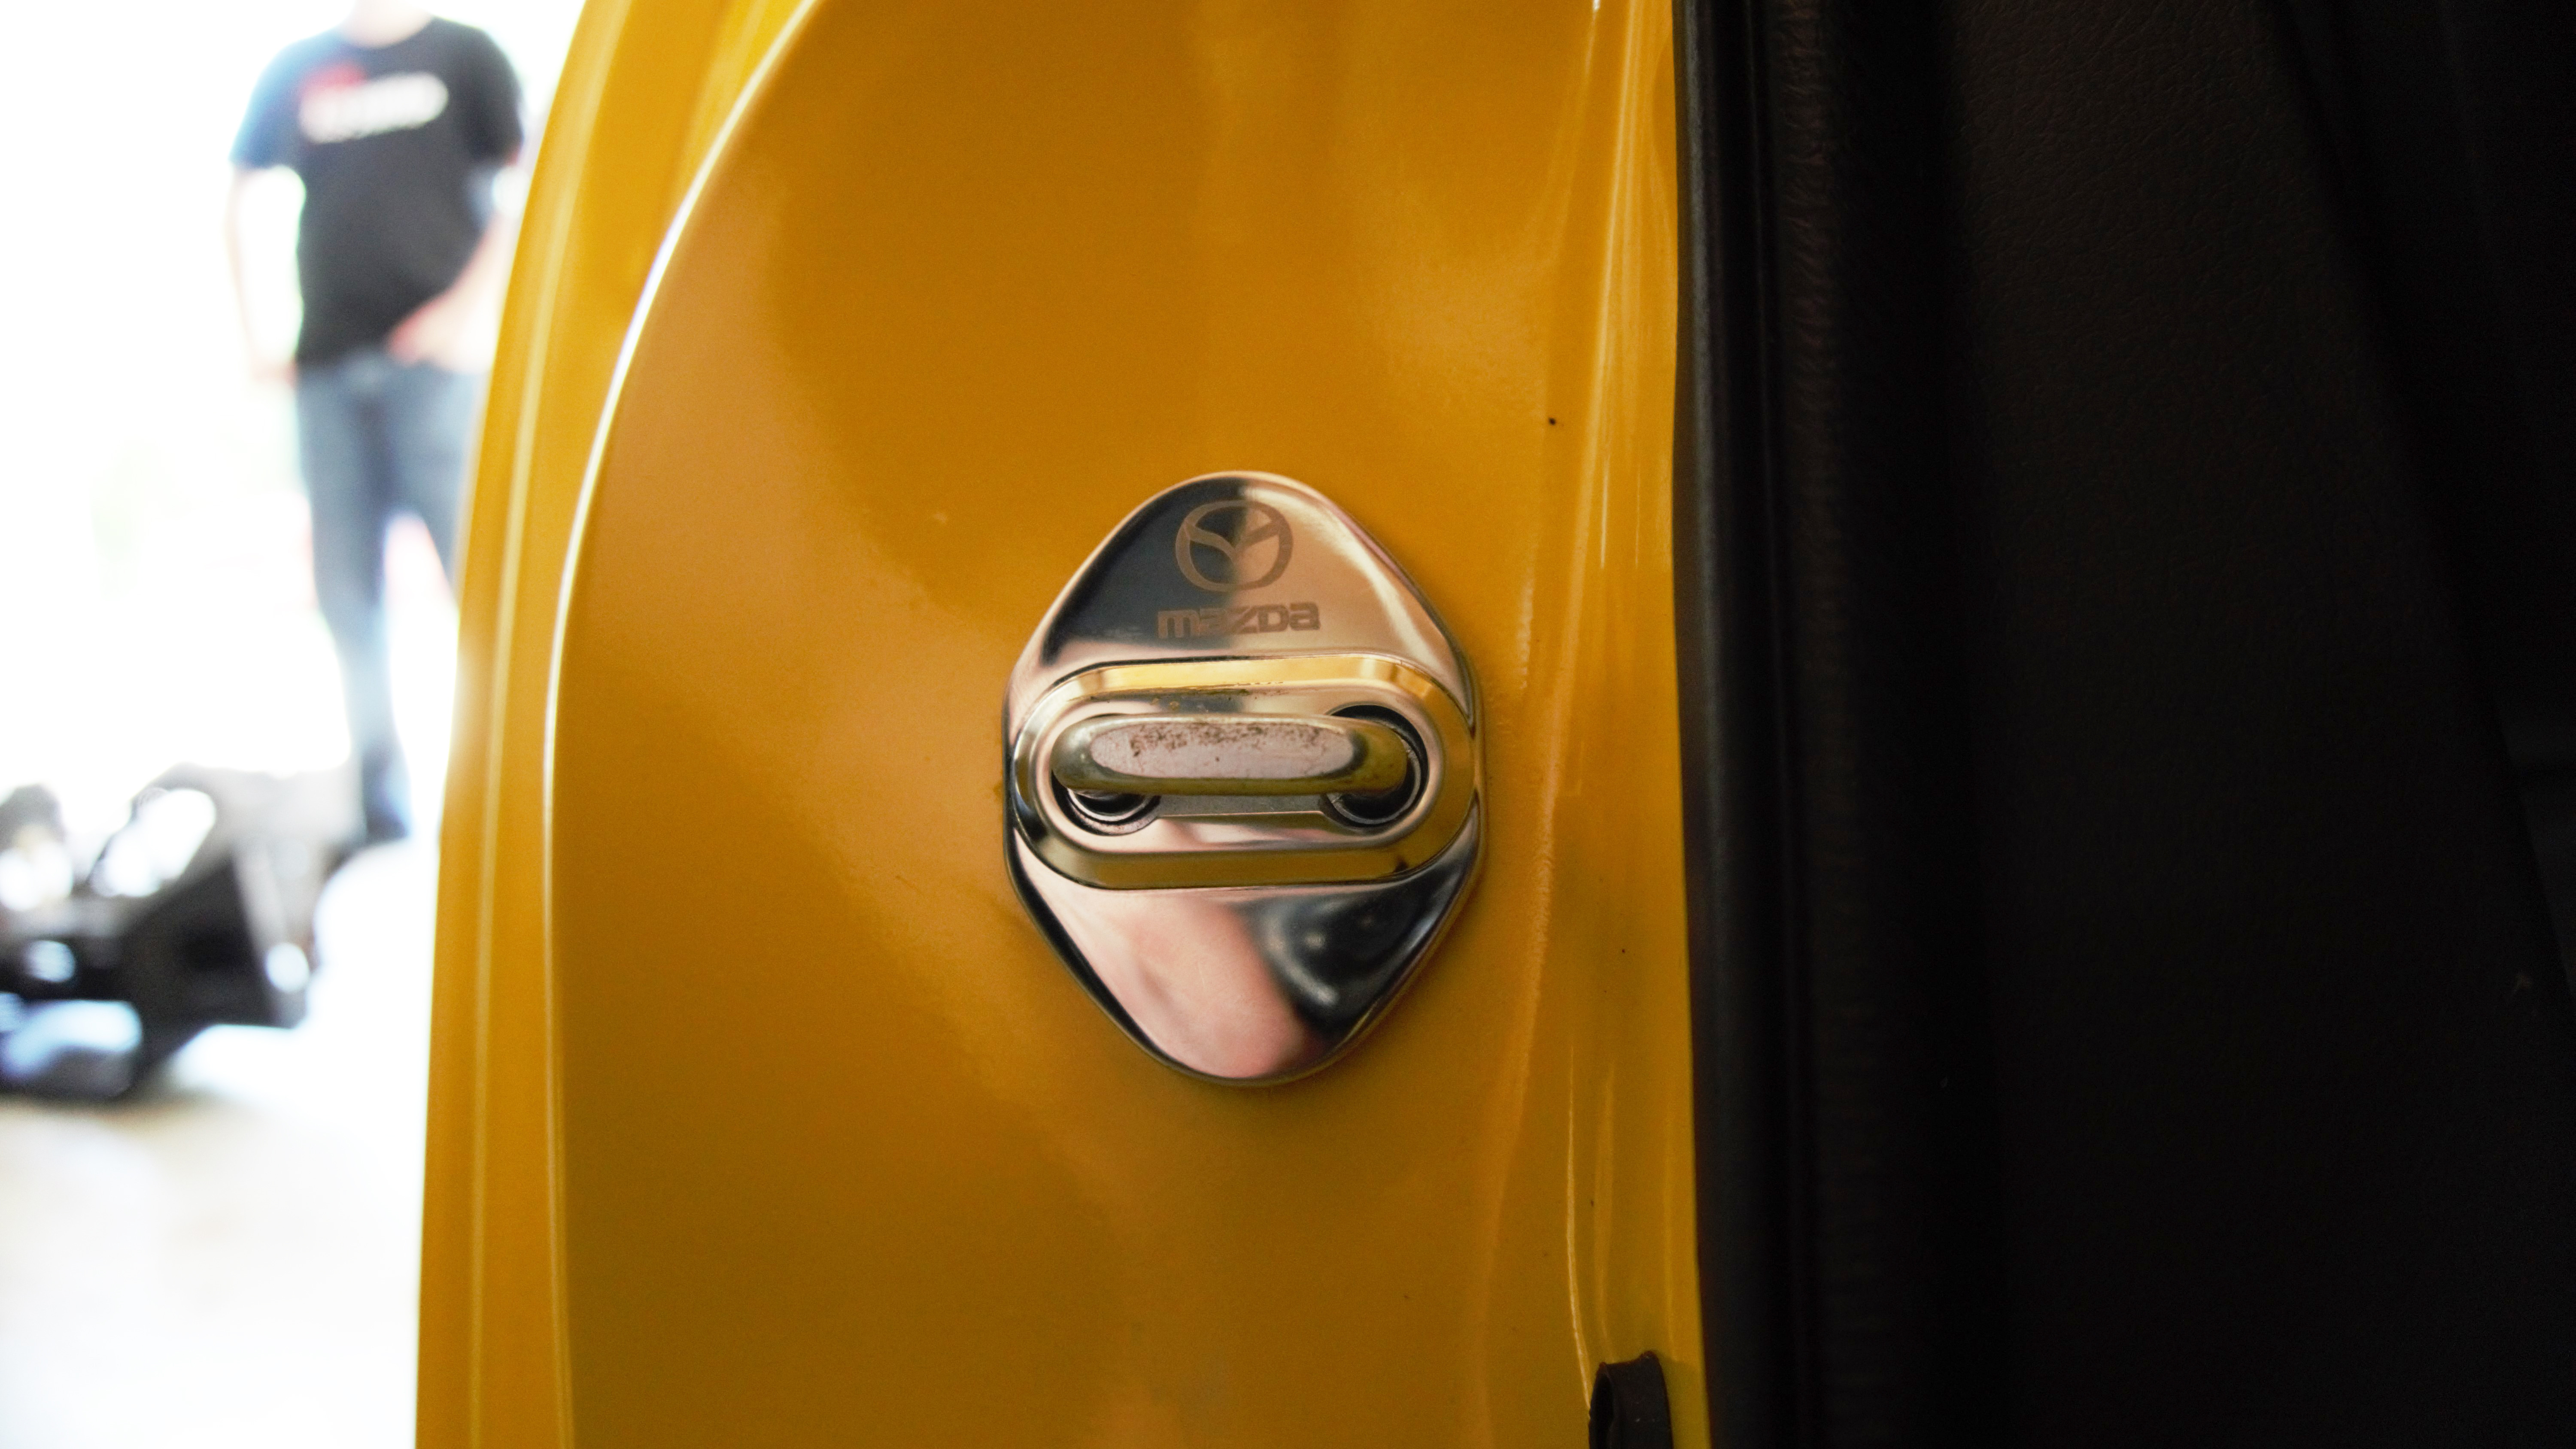
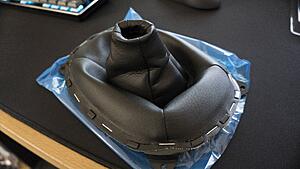
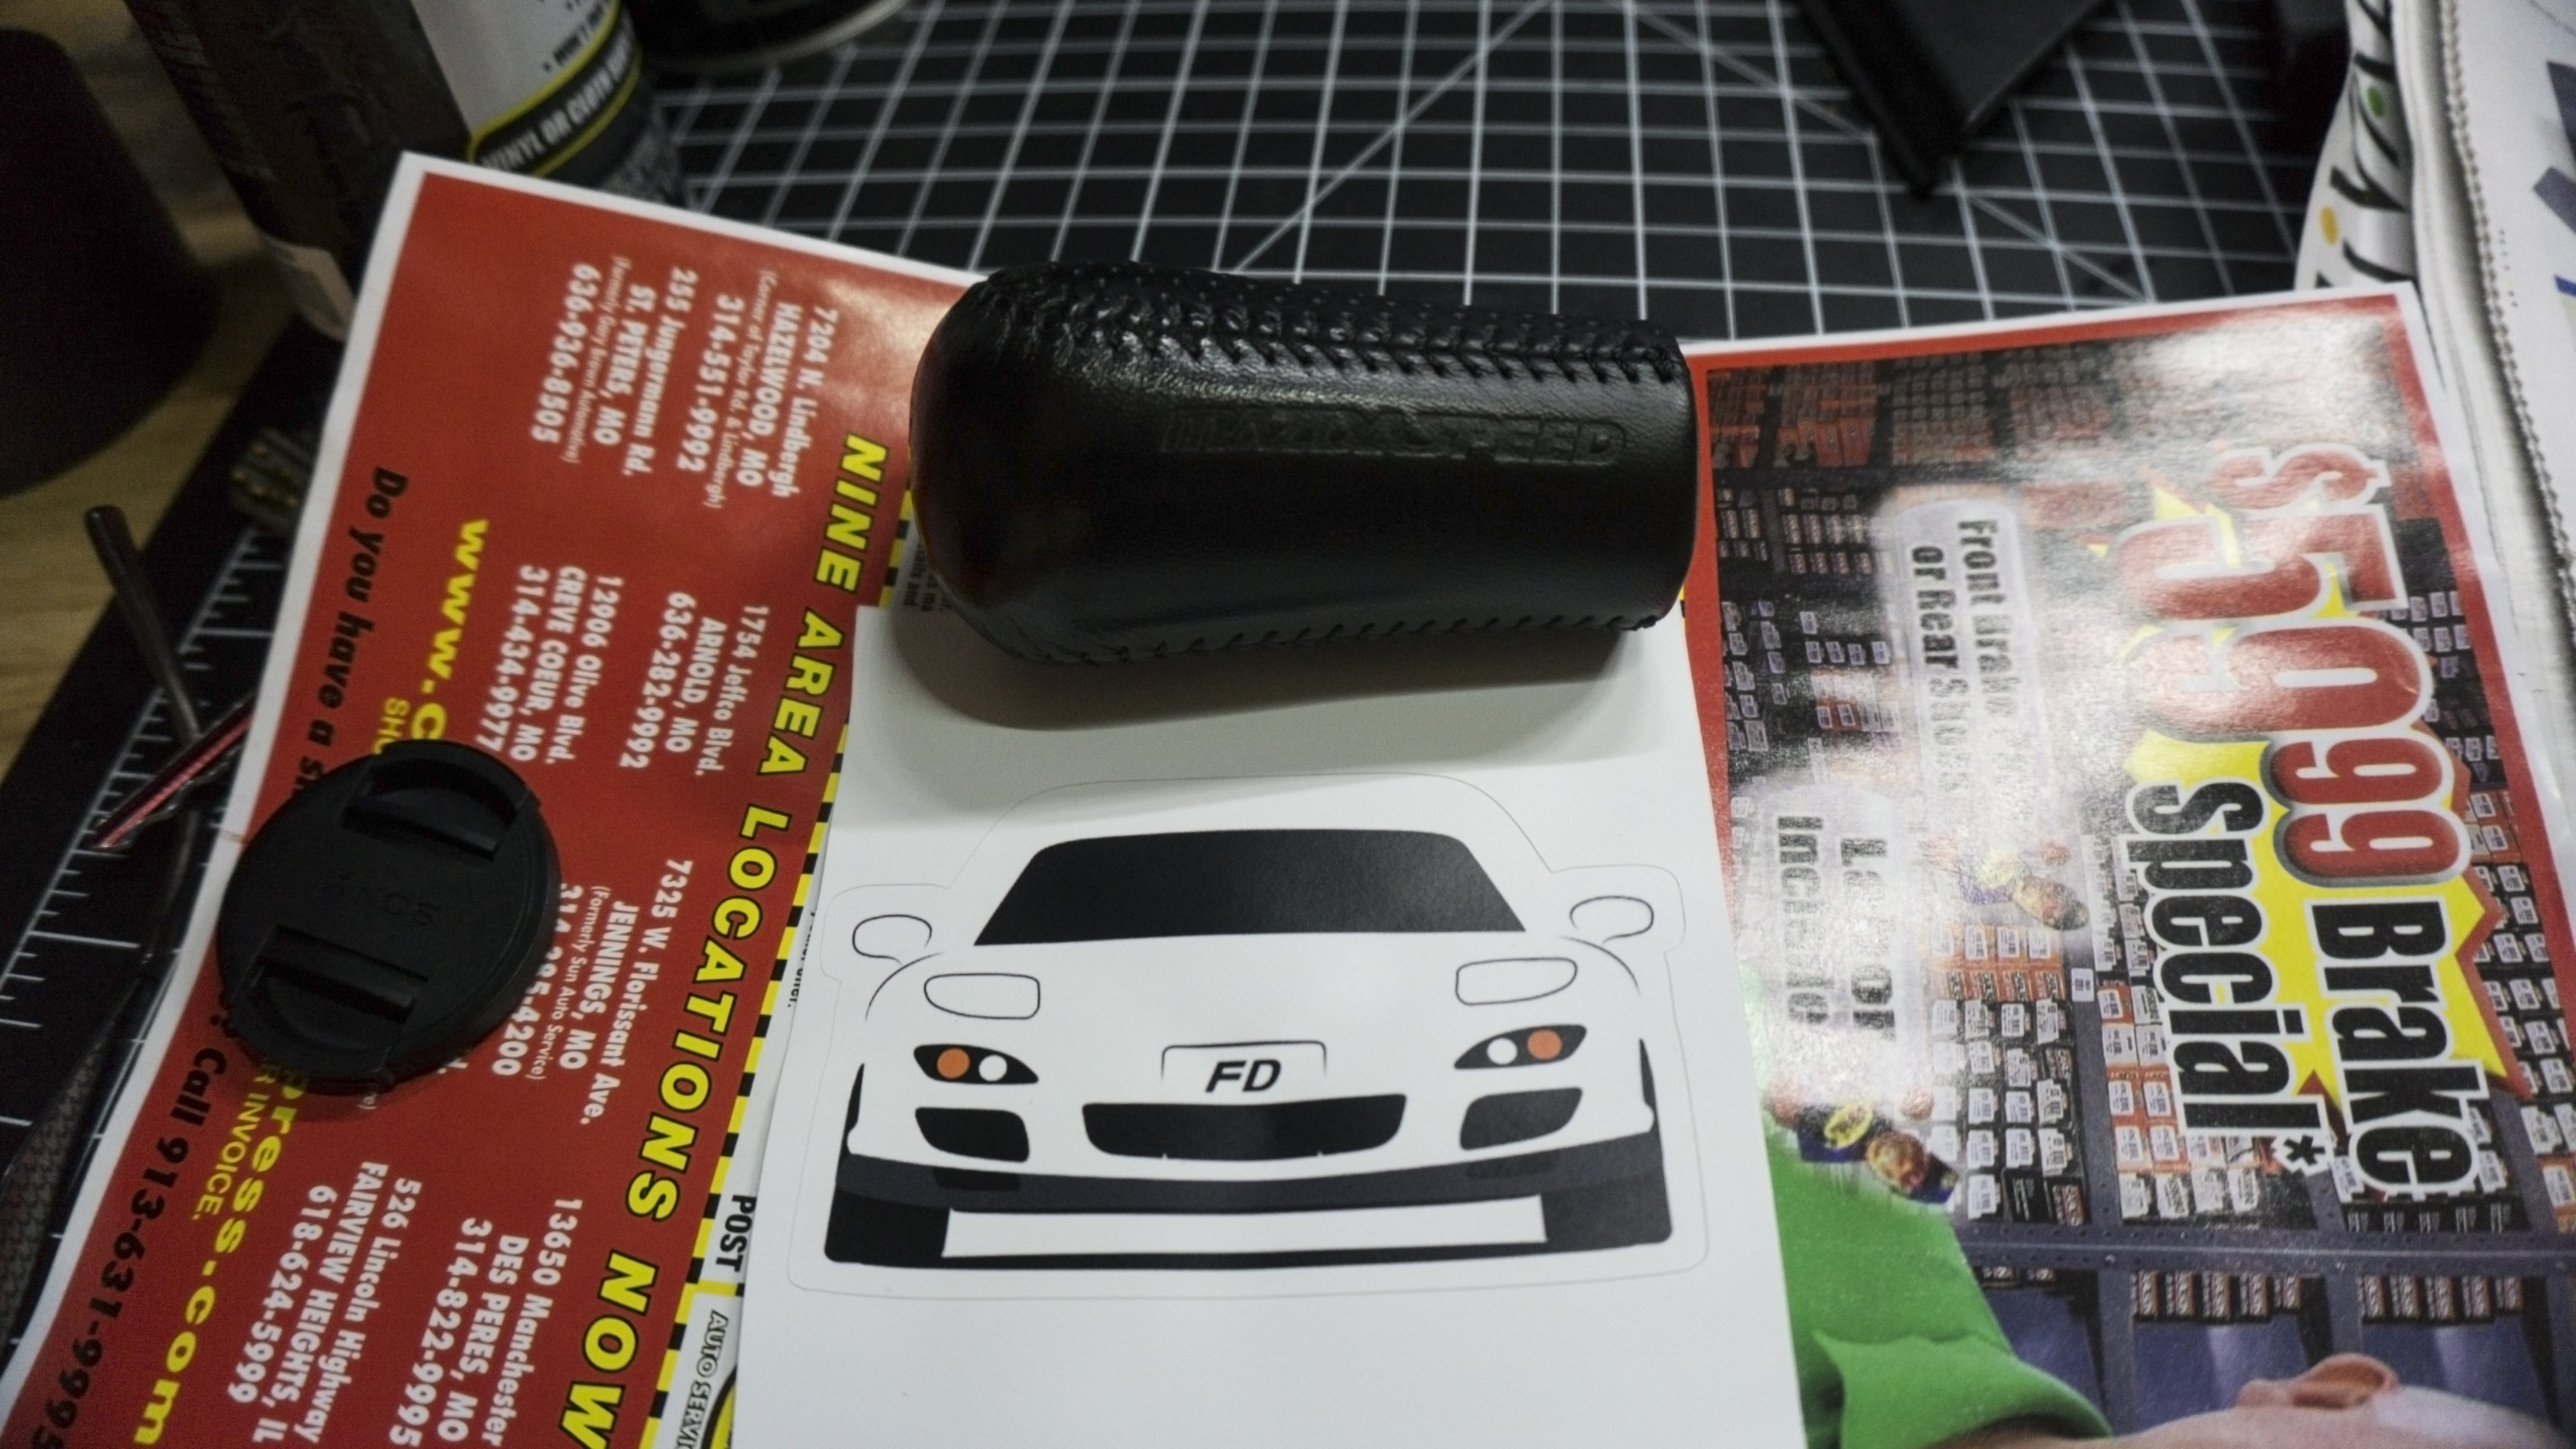
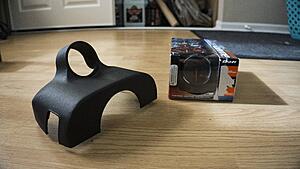
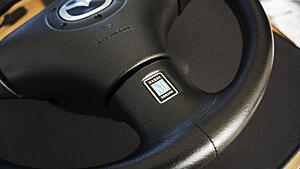
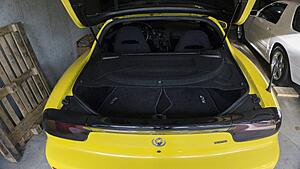
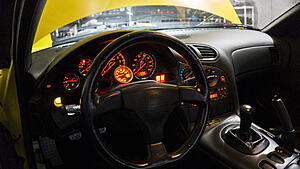
This will probably be my last update for a bit. I went ahead and threw the remainder of the things on I could that does not require me to have bodywork done to the car. The last thing is the AST delete that I intend to do on next coolant flush, but that�s about it. I went out one day with the intention to get the rest of the stuff on the FD and that I did. I went ahead and installed the hub and the Mazdaspeed D-cut steering wheel. I�ve noticed there is a lot of questions regarding which wire goes where, so I�ve included the instructions in picture form below. I also purchased another MazdaSpeed leather shift ****, so I threw the better looking one from the FC in the FD. The Levy Motor Corp aluminum pedals went in and are very nicely made. I did not screw the dead pedal into the plastic, instead I used 3M tape; I wanted it to be reversible. I need to clean up the clutch and brake pedal a bit more so it matches better. I also installed the Half-Spec S2000 antenna adapter. I much prefer it over retractable one, despite it leaving a smaller footprint when down. I plan to eventually go through and get the stereo working (one speaker slightly works if that�s a consolation prize). In my previous build thread you�d eventually come across a post where I bought aluminum door striker covers for the FC. Well, I was smart enough to think way ahead and bought an extra set for if/when I ever bought a FD - I threw those on as well.
Here�s the MazdaSpeed steering wheel installation and the Mazdaspeed Shift ****:

Here�s the S2000 Antenna installed:

Here�s the Levy Motor Corps aluminum pedals:
Here�s the Door Striker Cover:
This will probably be my last update for a bit. I went ahead and threw the remainder of the things on I could that does not require me to have bodywork done to the car. The last thing is the AST delete that I intend to do on next coolant flush, but that�s about it. I went out one day with the intention to get the rest of the stuff on the FD and that I did. I went ahead and installed the hub and the Mazdaspeed D-cut steering wheel. I�ve noticed there is a lot of questions regarding which wire goes where, so I�ve included the instructions in picture form below. I also purchased another MazdaSpeed leather shift ****, so I threw the better looking one from the FC in the FD. The Levy Motor Corp aluminum pedals went in and are very nicely made. I did not screw the dead pedal into the plastic, instead I used 3M tape; I wanted it to be reversible. I need to clean up the clutch and brake pedal a bit more so it matches better. I also installed the Half-Spec S2000 antenna adapter. I much prefer it over retractable one, despite it leaving a smaller footprint when down. I plan to eventually go through and get the stereo working (one speaker slightly works if that�s a consolation prize). In my previous build thread you�d eventually come across a post where I bought aluminum door striker covers for the FC. Well, I was smart enough to think way ahead and bought an extra set for if/when I ever bought a FD - I threw those on as well.
Here�s the MazdaSpeed steering wheel installation and the Mazdaspeed Shift ****:


Here�s the S2000 Antenna installed:

Here�s the Levy Motor Corps aluminum pedals:
Here�s the Door Striker Cover:
Thread Starter
Joined: Apr 2015
Posts: 398
Likes: 169
From: St. Louis, MO
Update 7/14/2019:
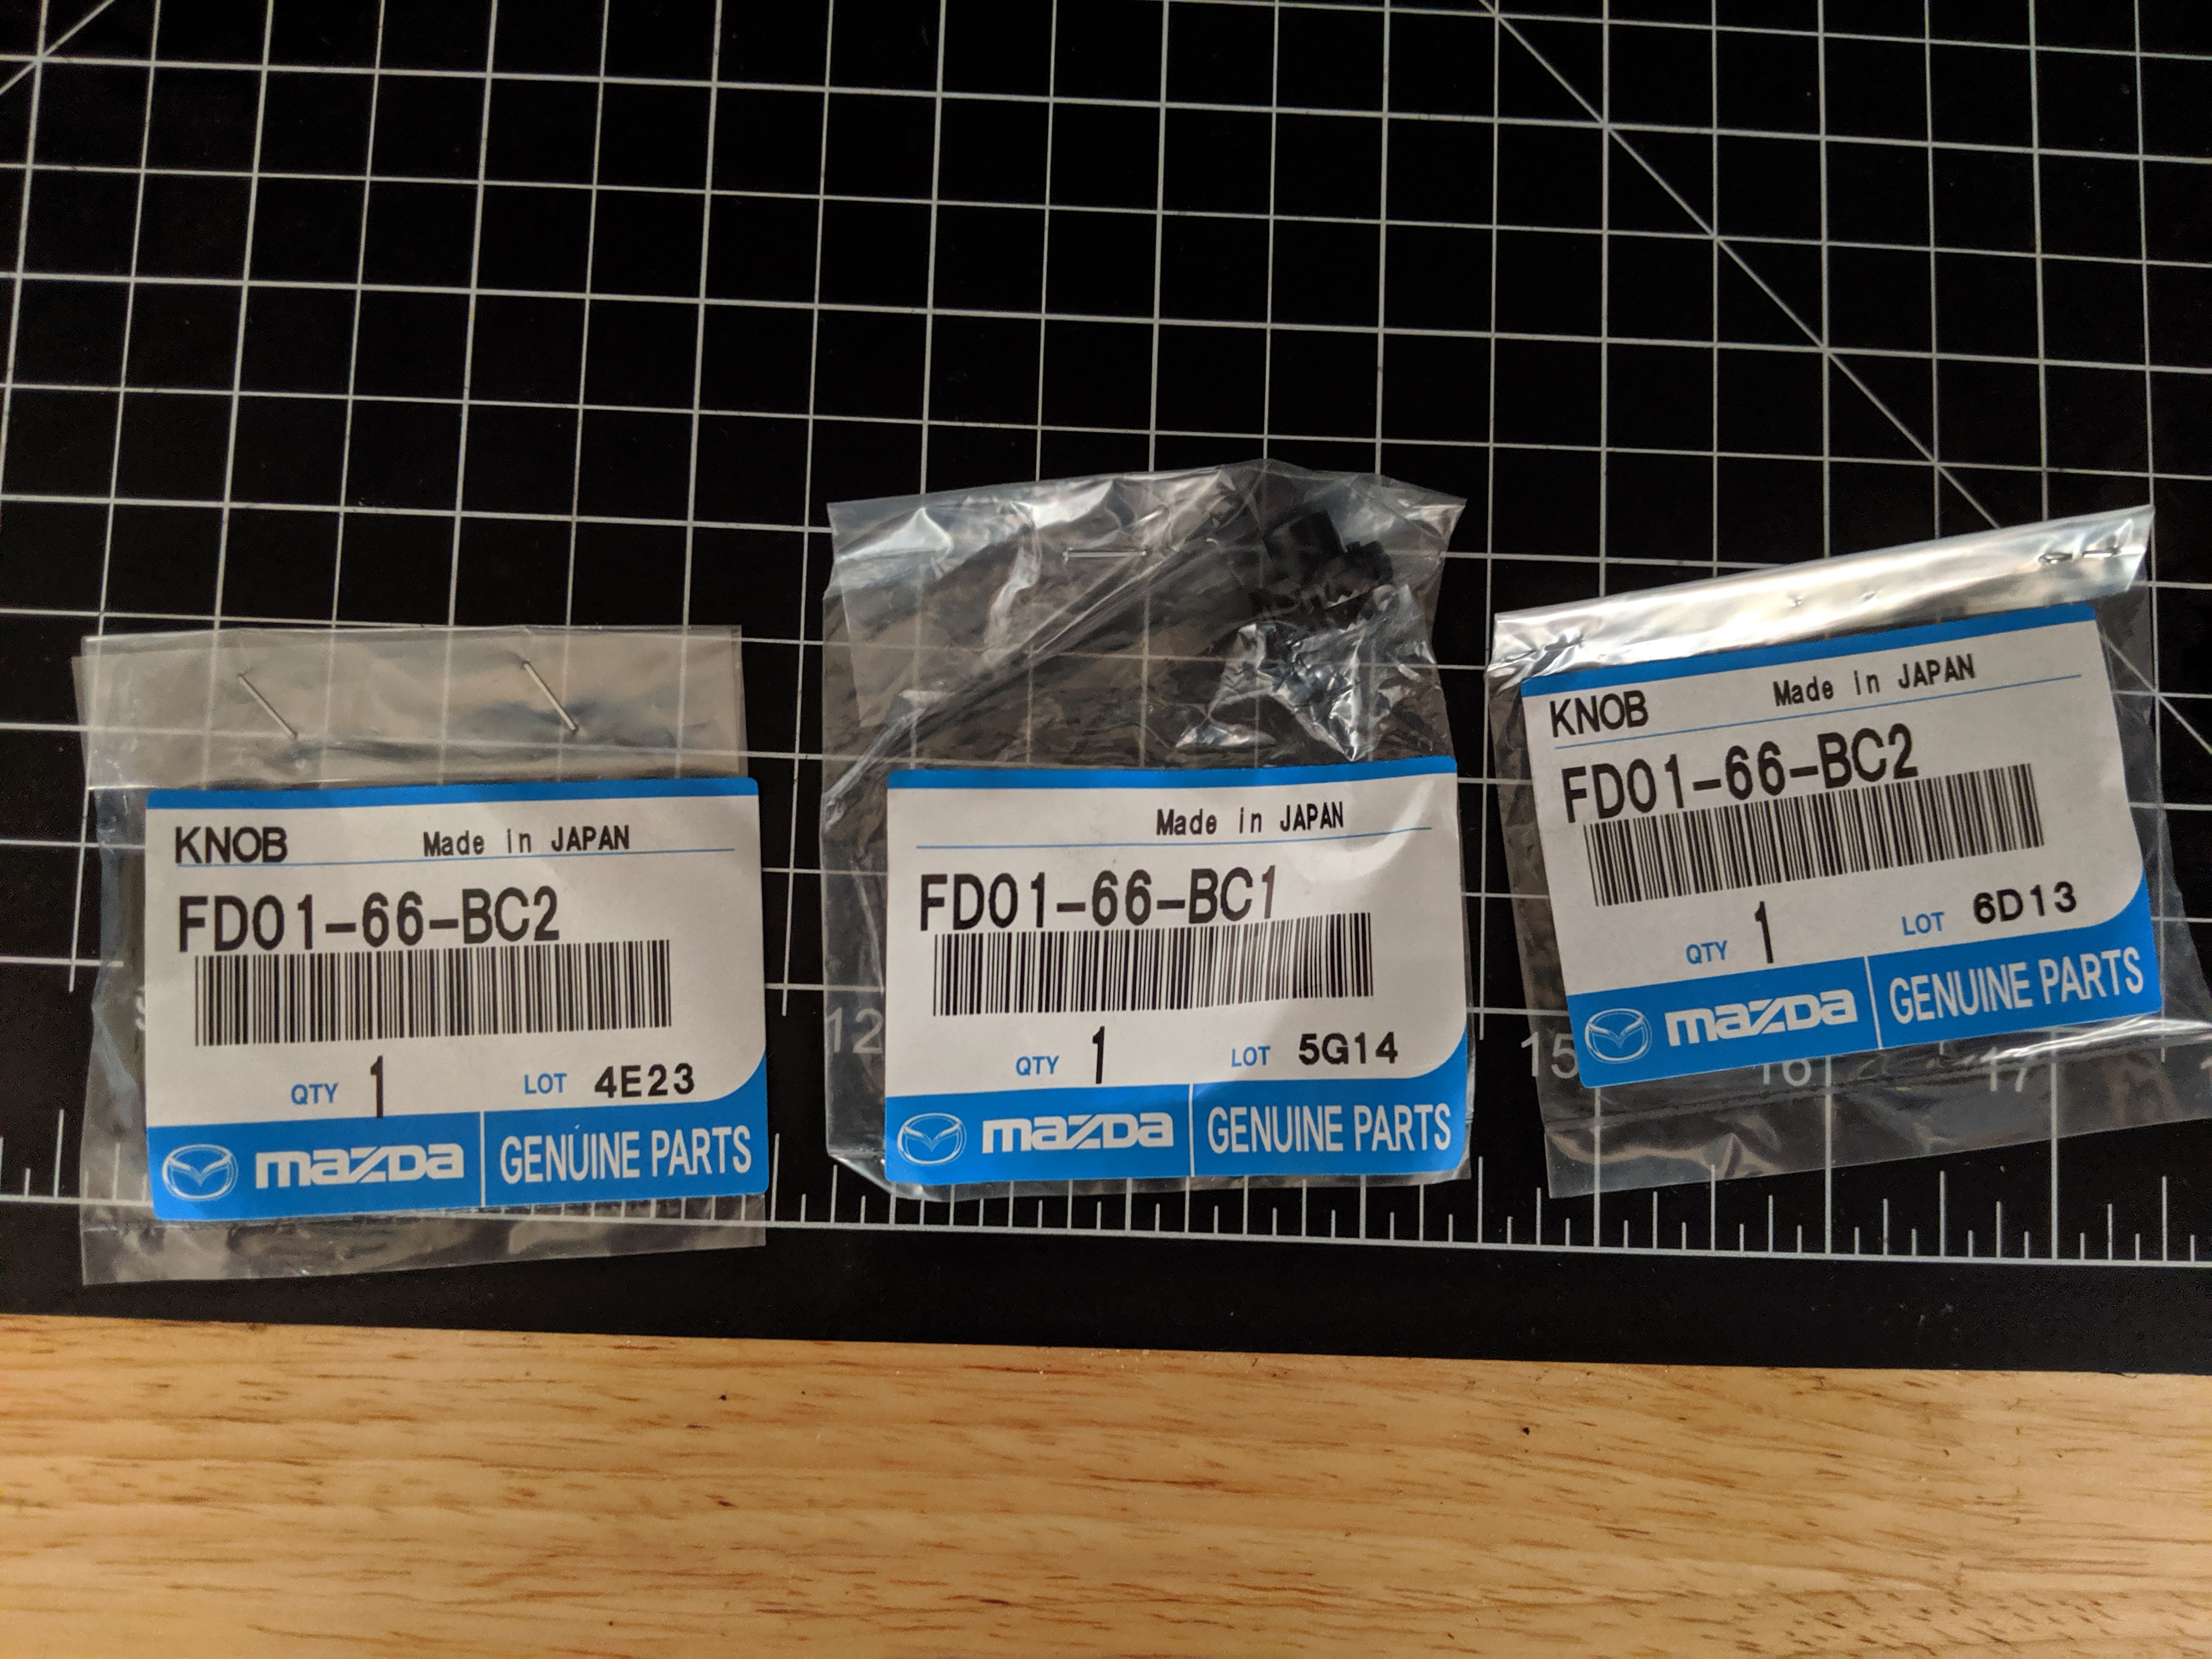
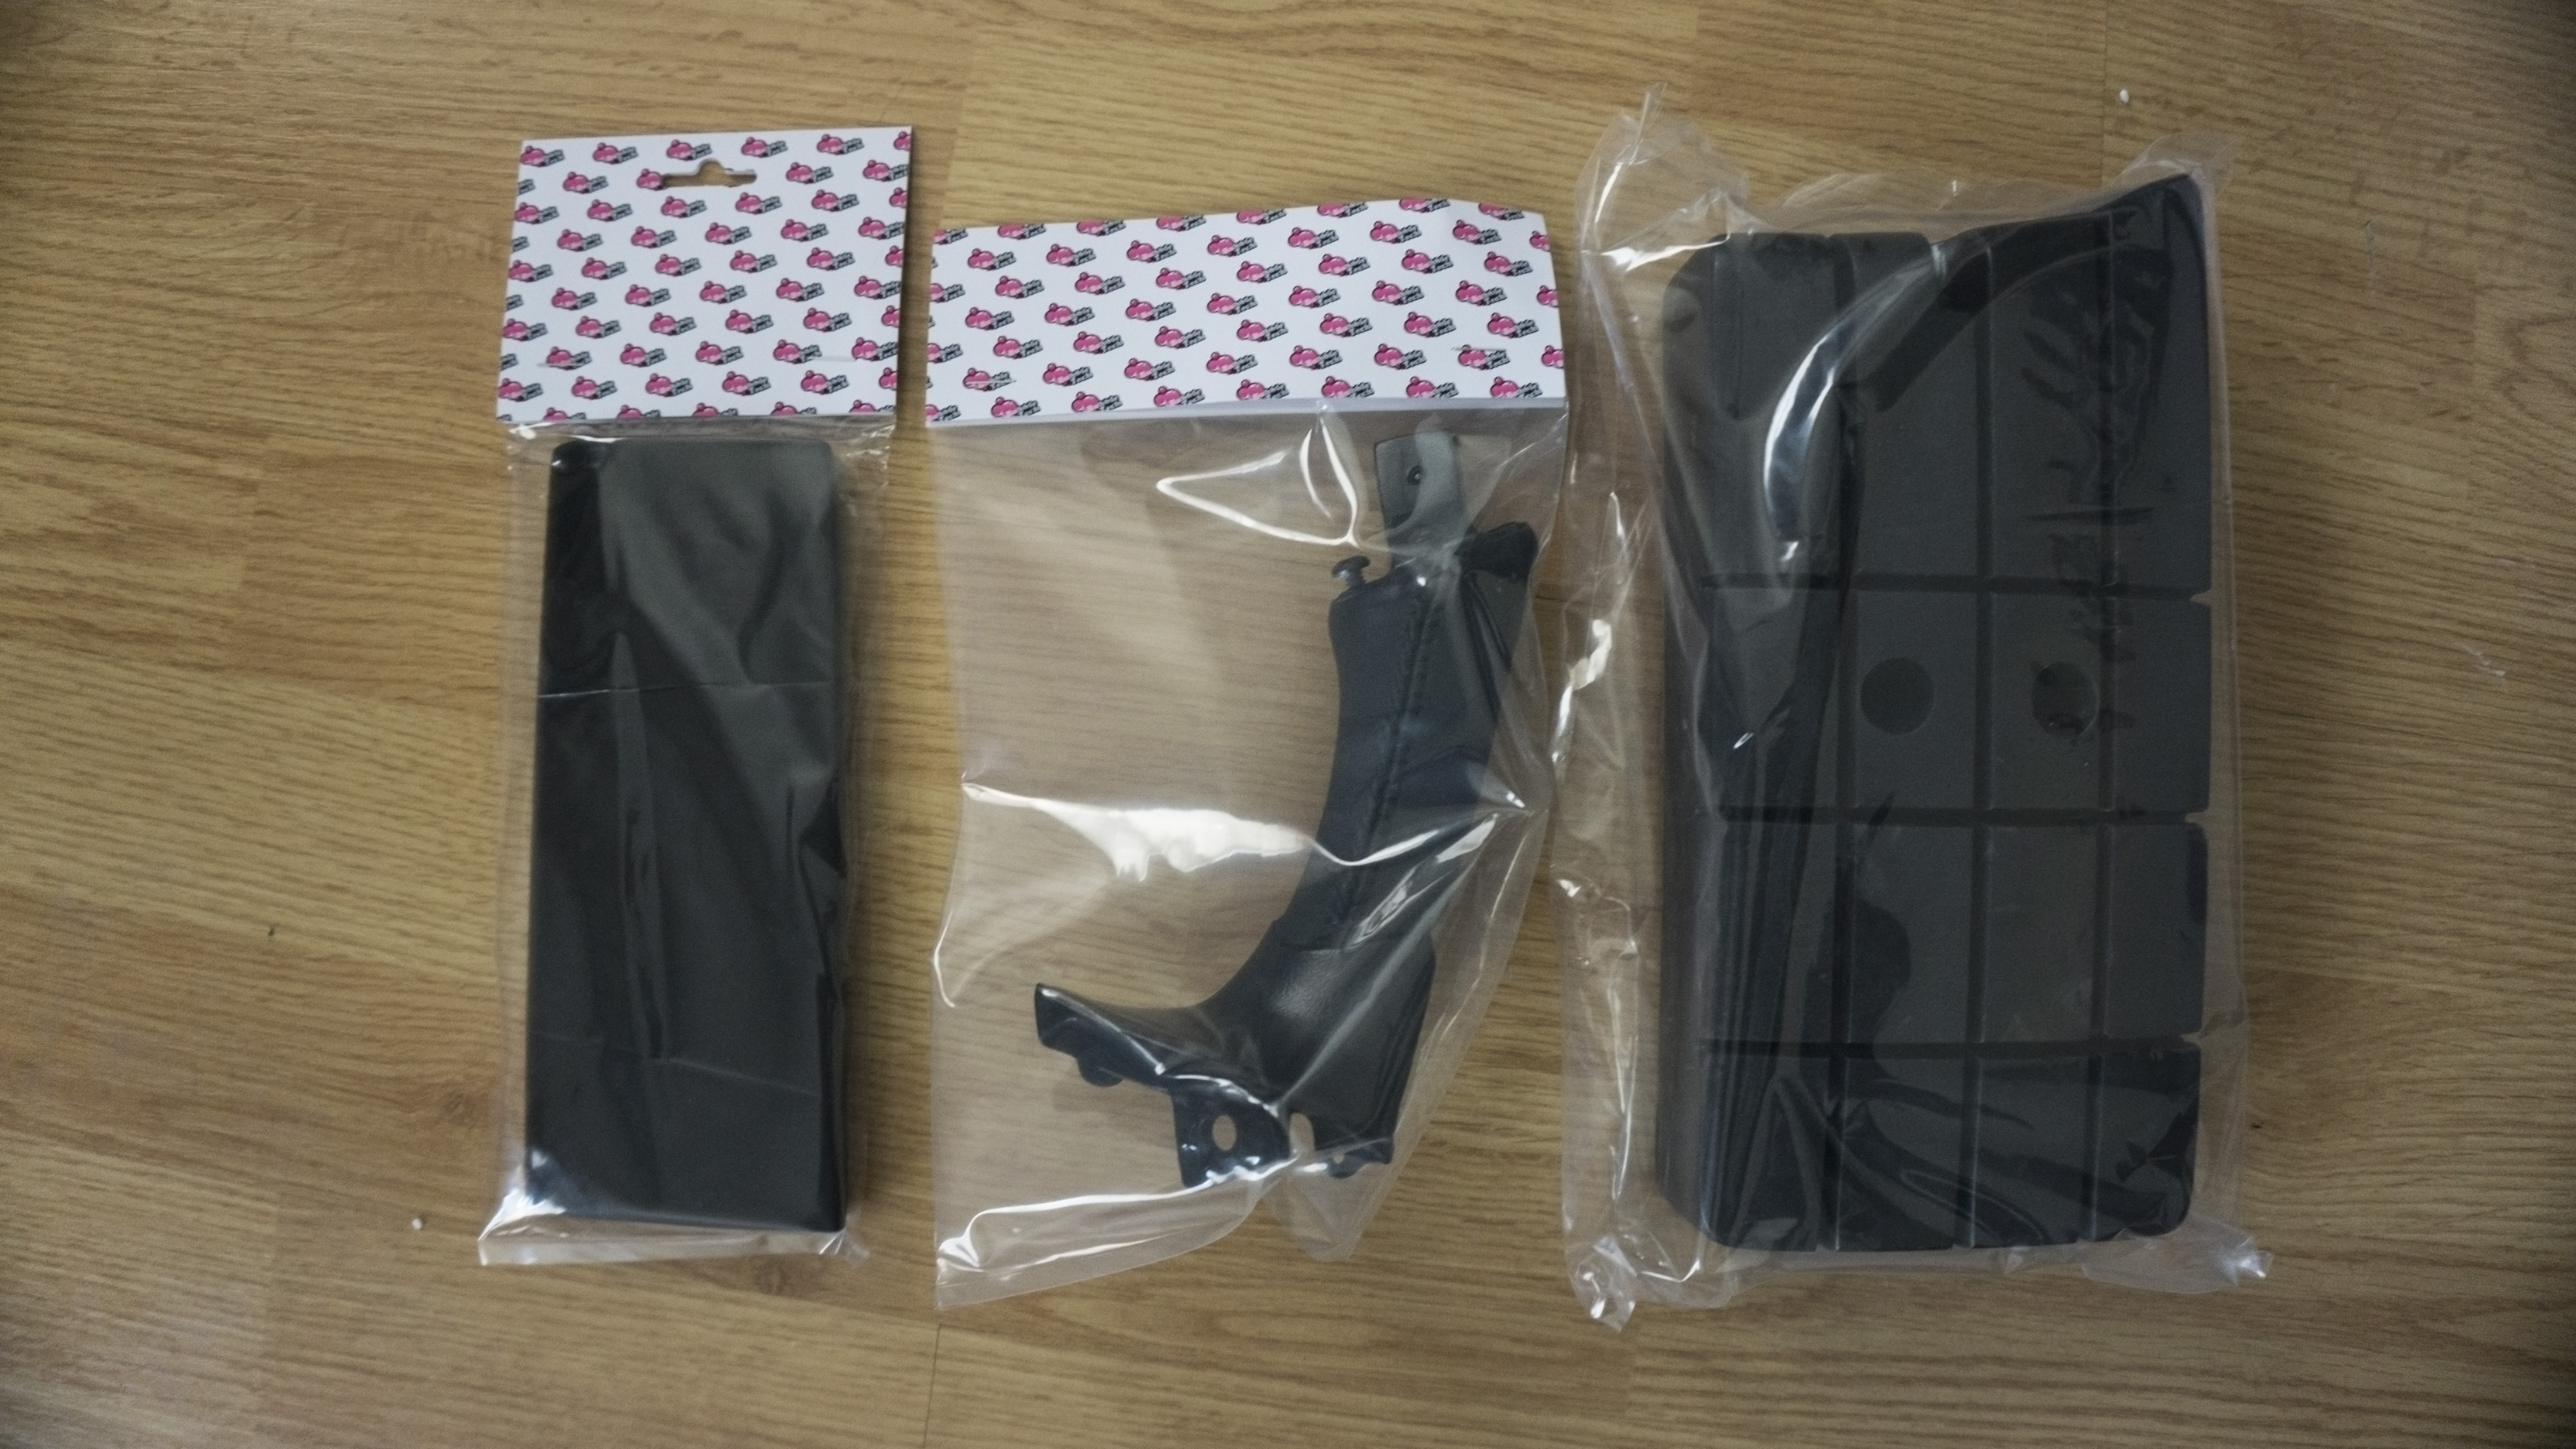
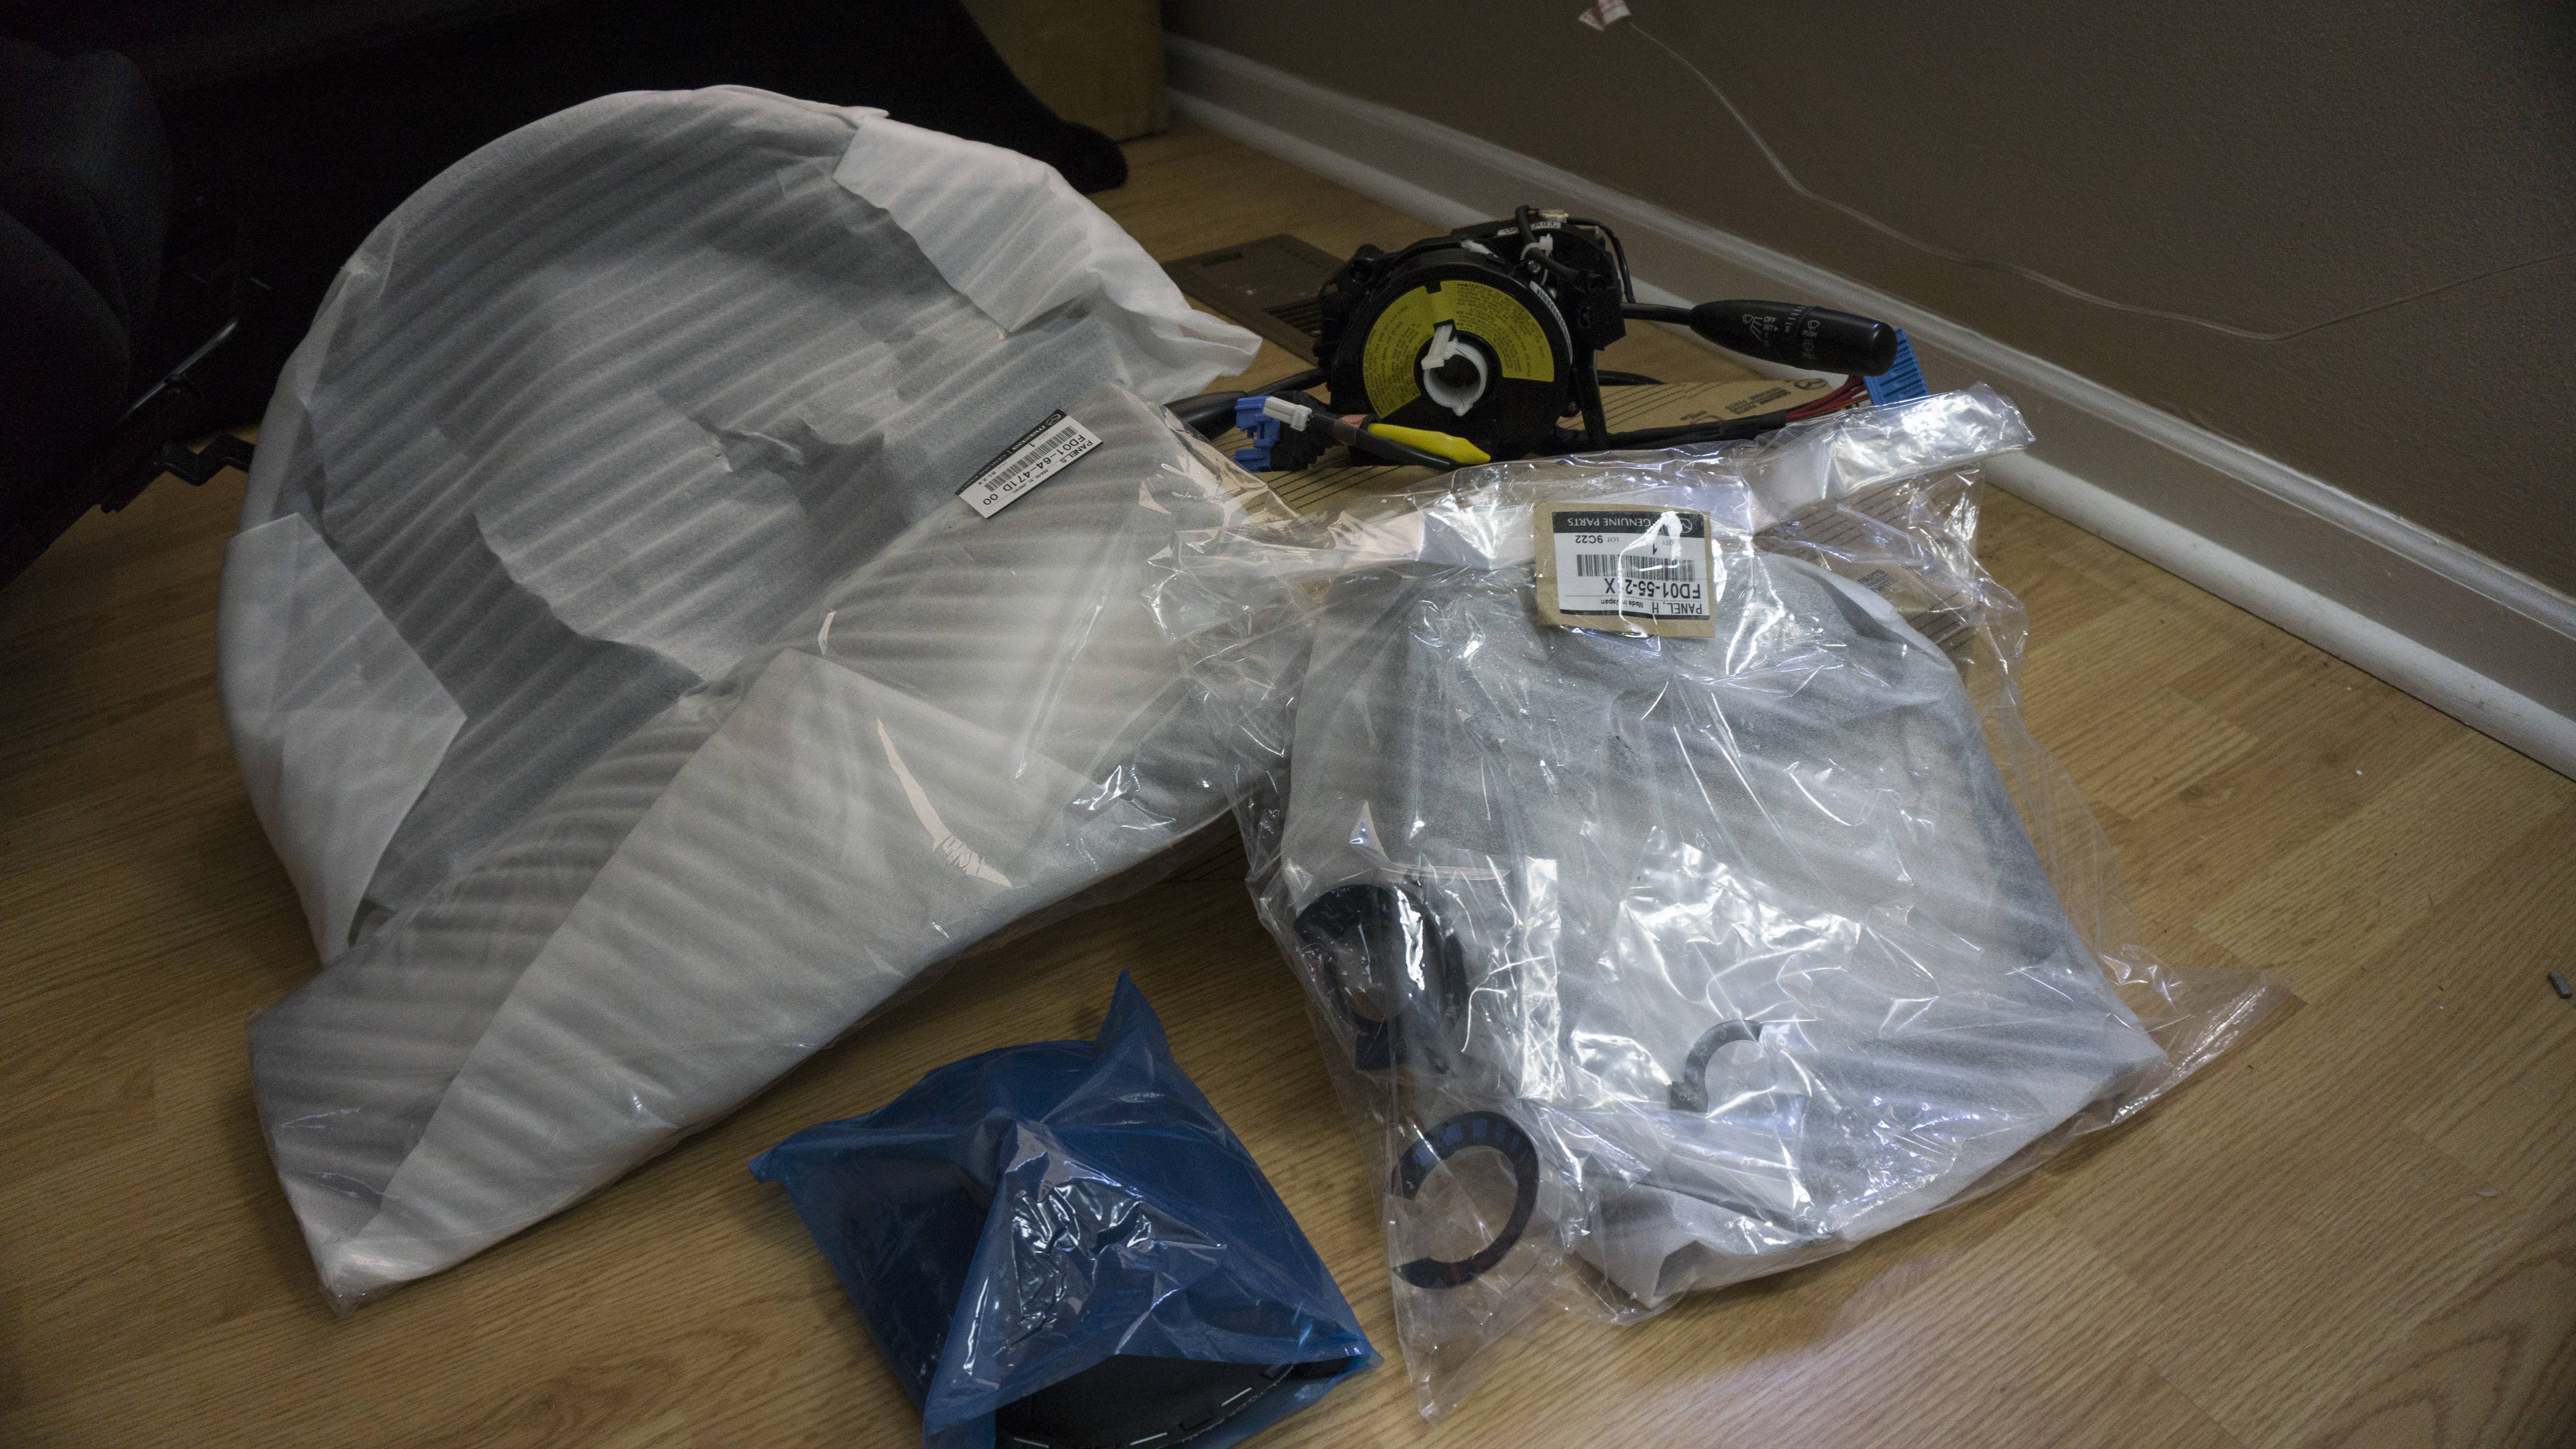
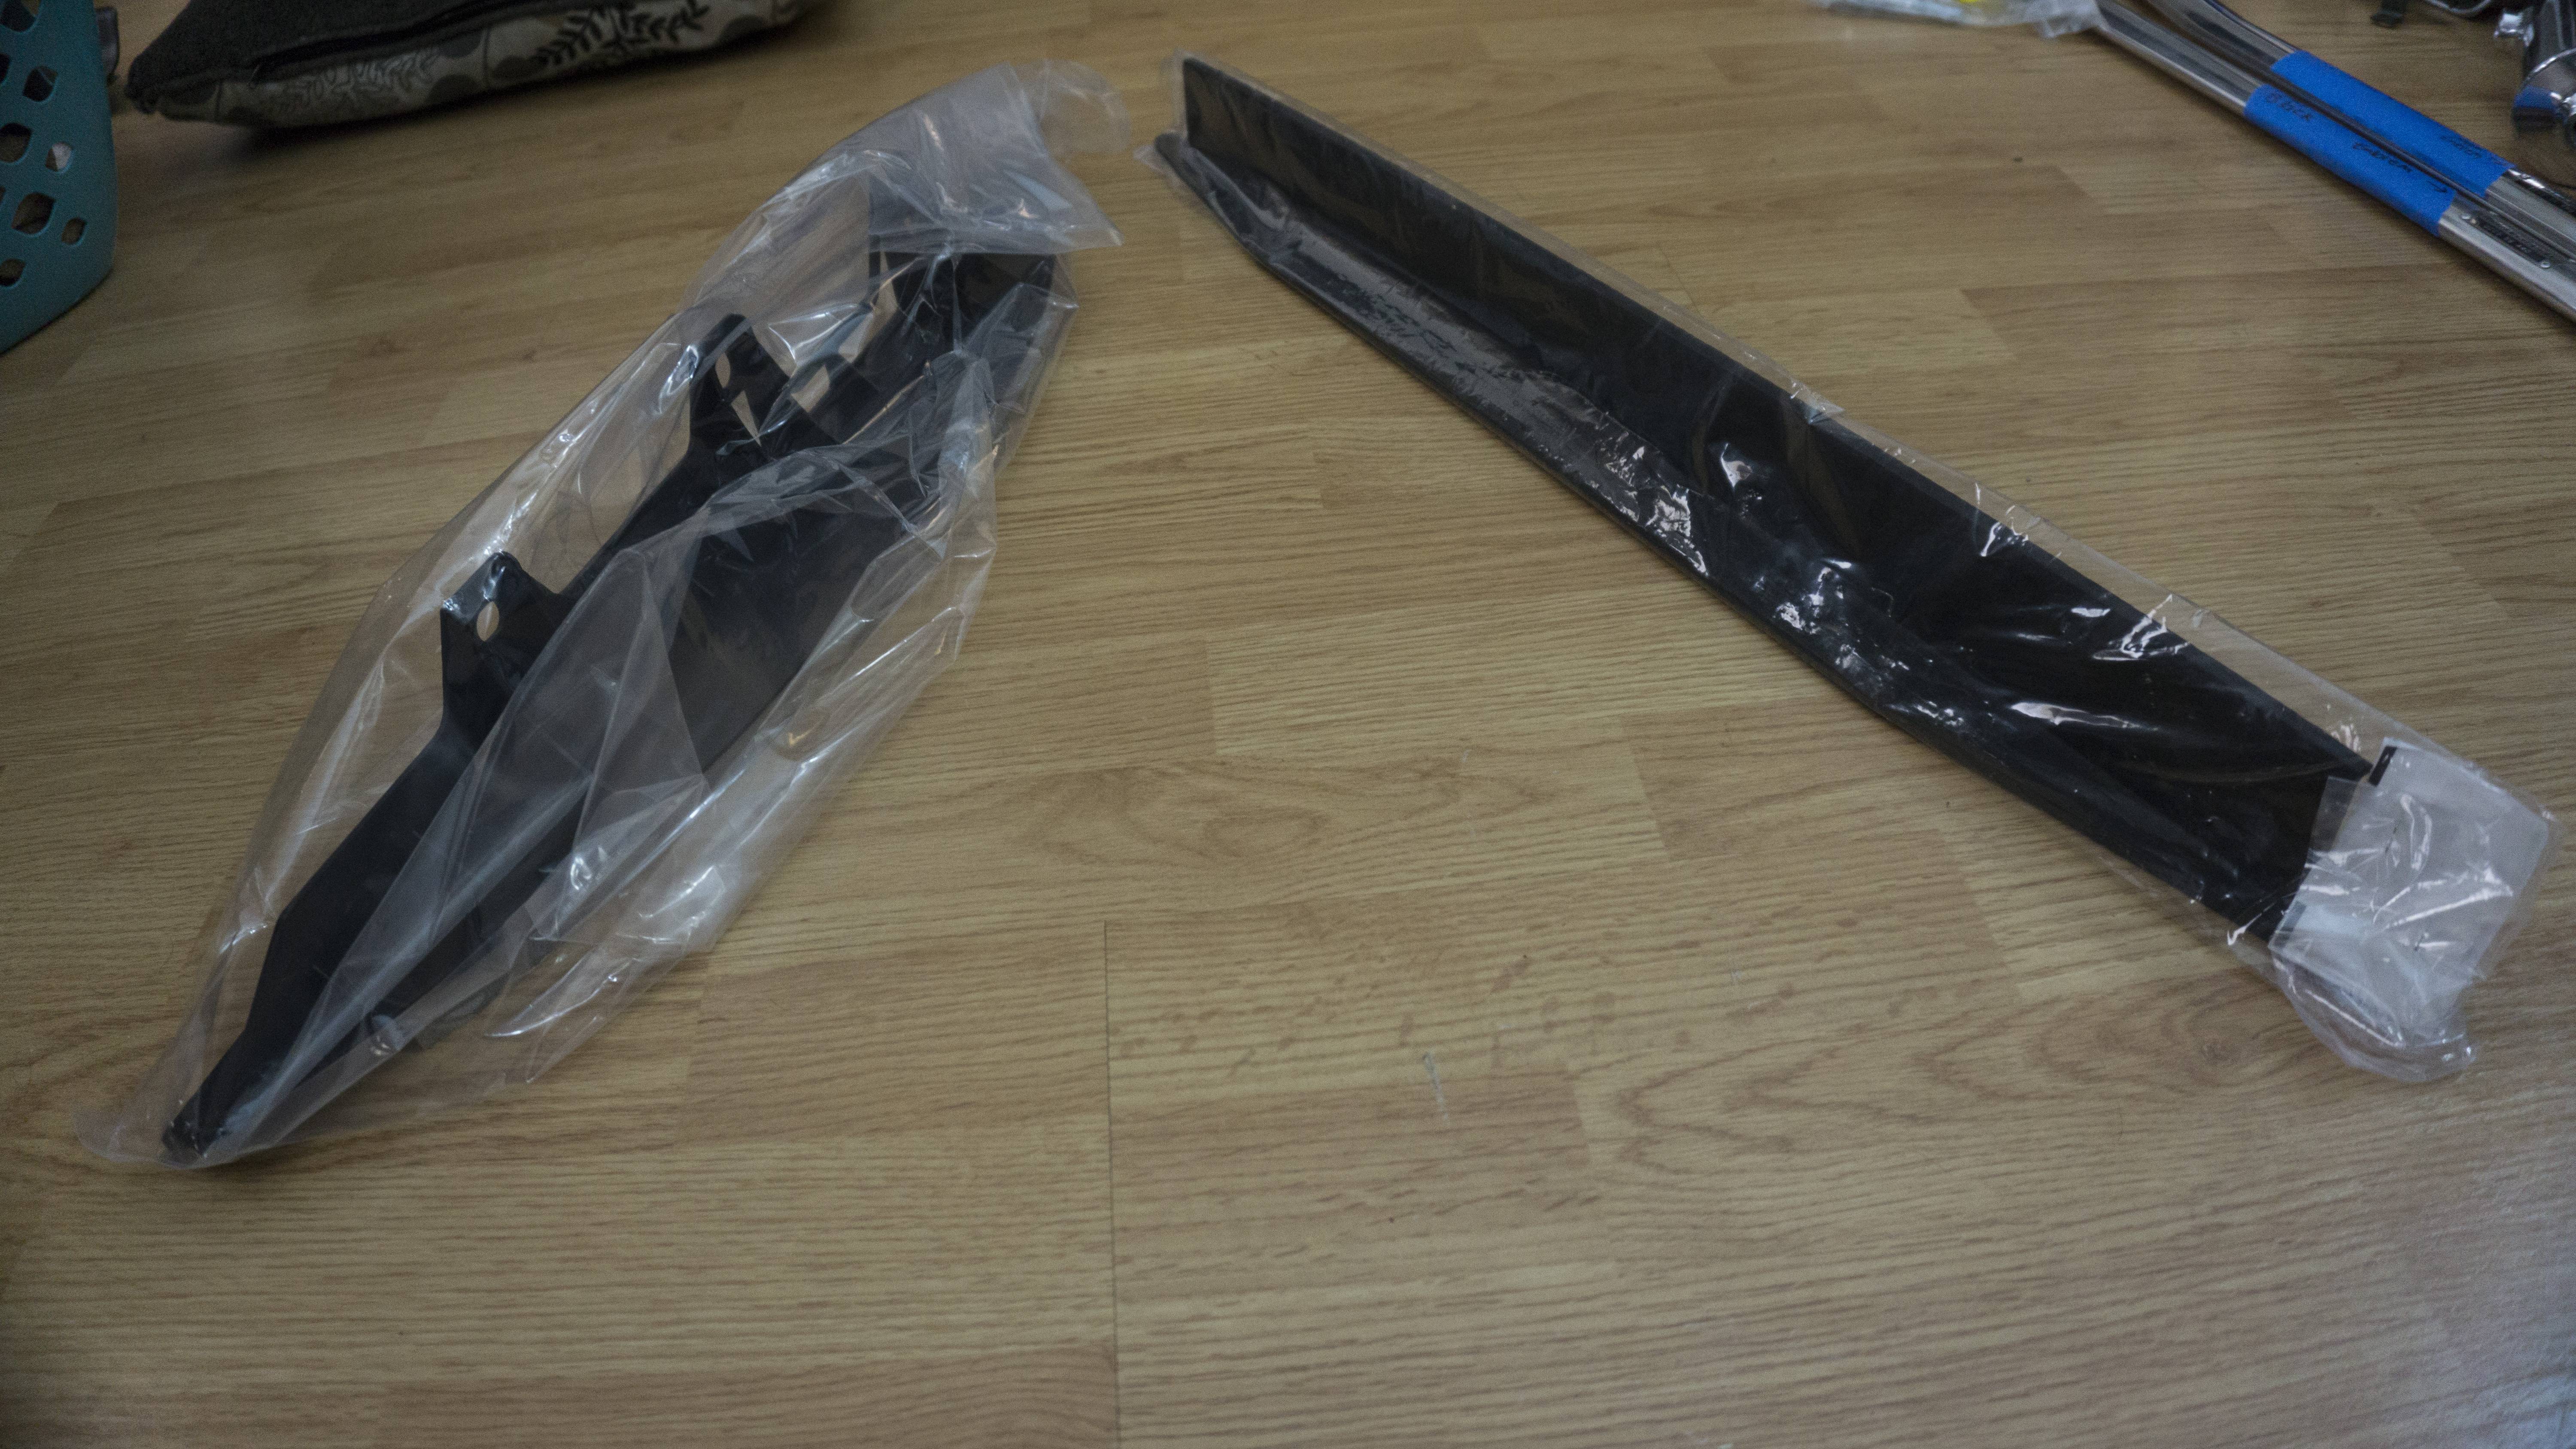
Not a whole lot has been happening with the FD. I went to install the downpipe the other day and a stud started to back out with the nut. Decided to deal with that during winter. I purchased a host of new things for the car though! I got a NOS Mazdaspeed Shift ****, new shift boot, new shifter panel, new hvac panel, and new instrument cluster panel. I also noticed that the previous owner broke the clock spring and the auto cancelling ring. I went ahead and purchased a new one of those as well. I also went ahead and grabbed bubbletechs map lid, passenger handle, and trans tunnel trim brace.
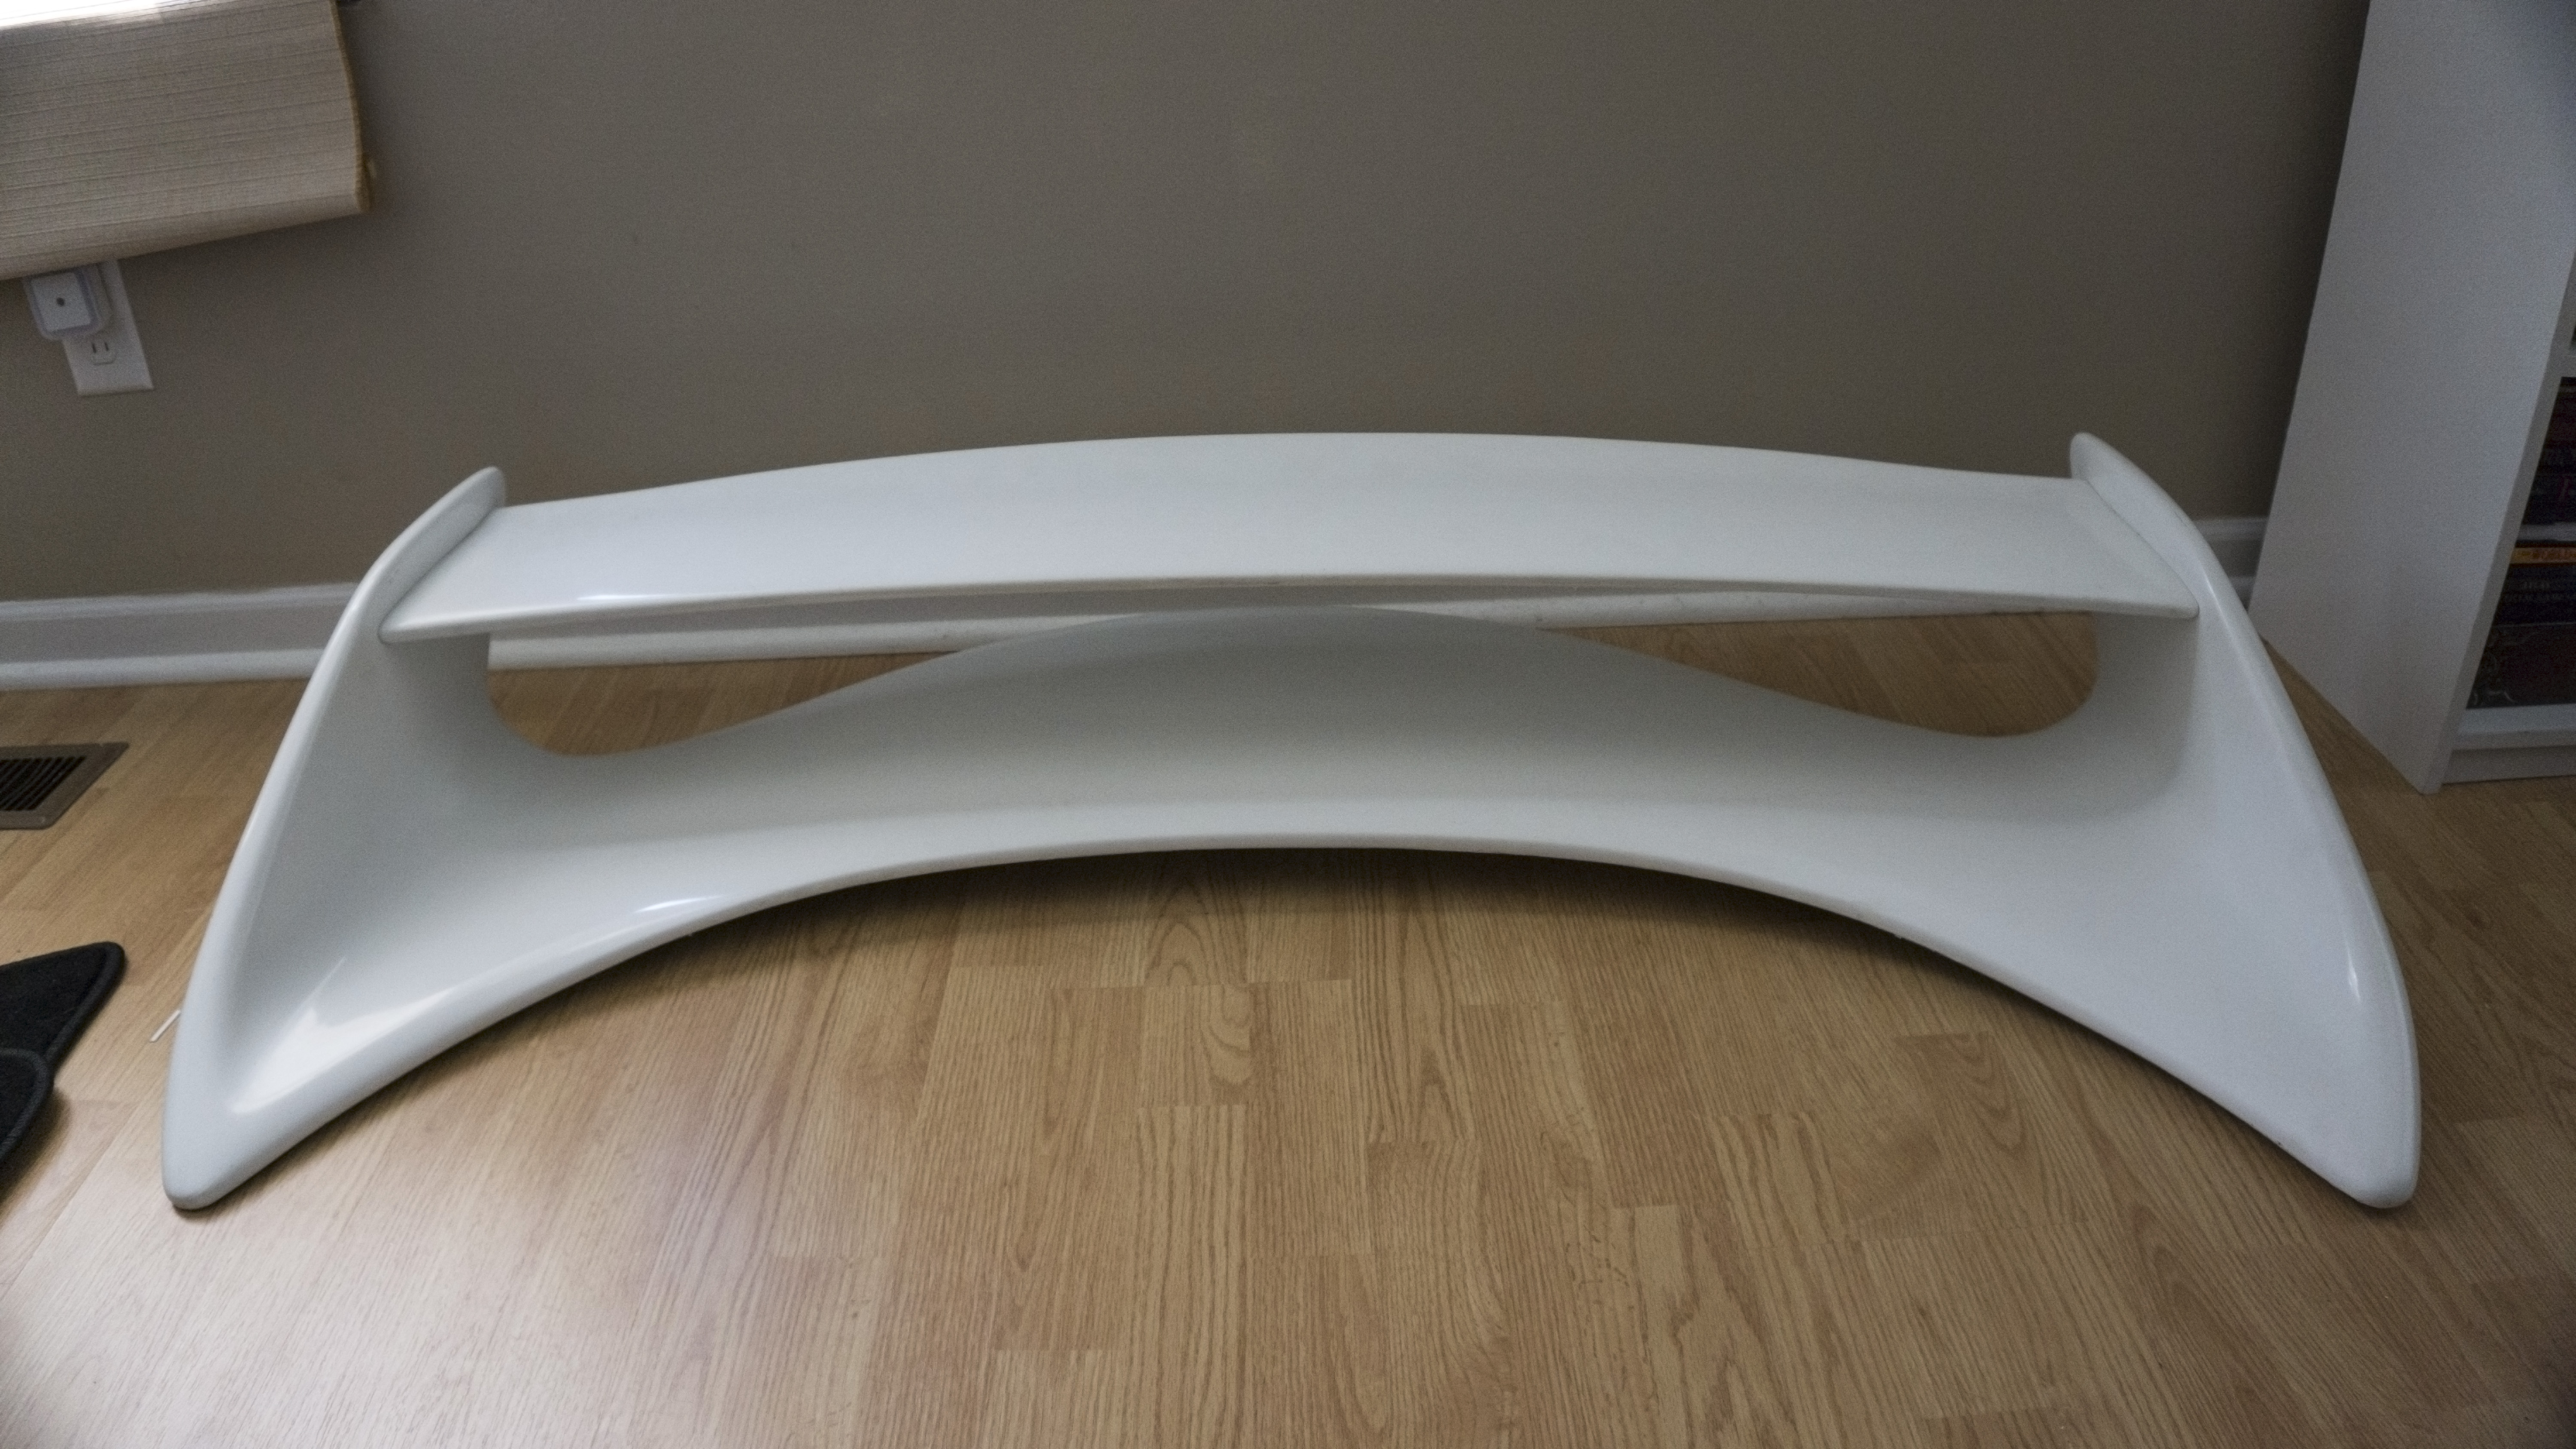
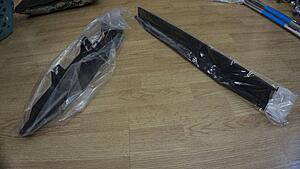
I�ve been contemplating going a different route for the FD and I think I decided on it. I want to go slightly more aggressive. I sold my 99-spec wing - I decided I did not want to drill into the hatch and plug/weld the holes that remain. I instead went with a MazdaSpeed Type II wing. I will not have to perform any drilling and the holes that aren�t used will be hidden. I�m trying to only use parts, at this point, that will allow me to return completely to stock if I want to. I also plan to pick up some Feed side skirt extensions and the Re-Amemiya street diffuser. I think everything will really come together to create a clean, OEM+, aggressive car. I�m excited for the FC to be finished so I can start cranking away on this.
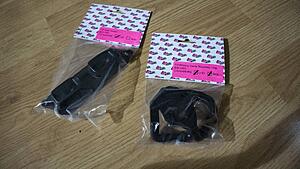
Here are all the new goodies! (In no particular order):


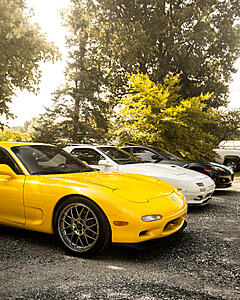
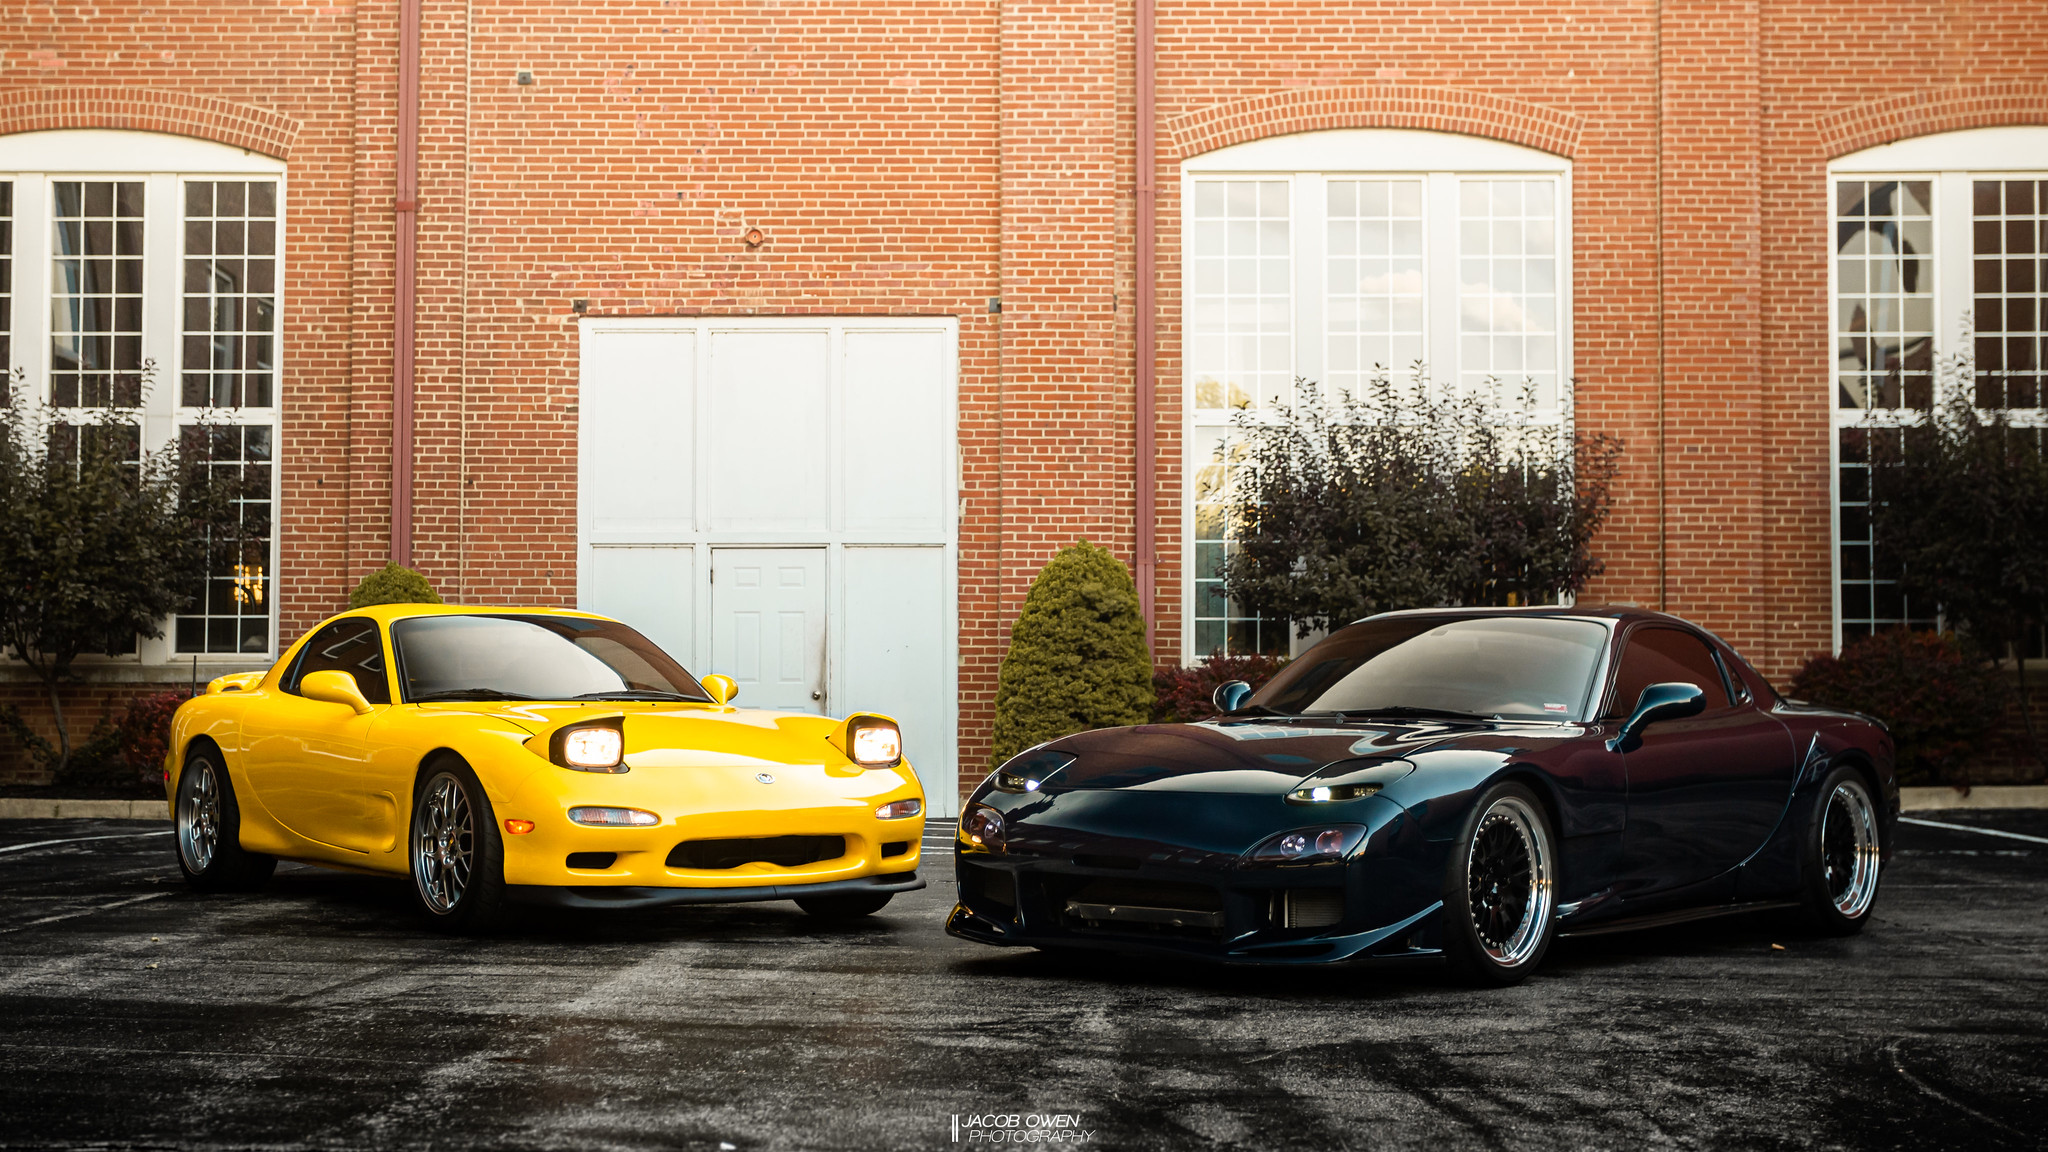
Here are some current shots of the car from a few different events:

Not a whole lot has been happening with the FD. I went to install the downpipe the other day and a stud started to back out with the nut. Decided to deal with that during winter. I purchased a host of new things for the car though! I got a NOS Mazdaspeed Shift ****, new shift boot, new shifter panel, new hvac panel, and new instrument cluster panel. I also noticed that the previous owner broke the clock spring and the auto cancelling ring. I went ahead and purchased a new one of those as well. I also went ahead and grabbed bubbletechs map lid, passenger handle, and trans tunnel trim brace.
I�ve been contemplating going a different route for the FD and I think I decided on it. I want to go slightly more aggressive. I sold my 99-spec wing - I decided I did not want to drill into the hatch and plug/weld the holes that remain. I instead went with a MazdaSpeed Type II wing. I will not have to perform any drilling and the holes that aren�t used will be hidden. I�m trying to only use parts, at this point, that will allow me to return completely to stock if I want to. I also plan to pick up some Feed side skirt extensions and the Re-Amemiya street diffuser. I think everything will really come together to create a clean, OEM+, aggressive car. I�m excited for the FC to be finished so I can start cranking away on this.
Here are all the new goodies! (In no particular order):

Here are some current shots of the car from a few different events:


Thread Starter
Joined: Apr 2015
Posts: 398
Likes: 169
From: St. Louis, MO
Update 10/5/2019:
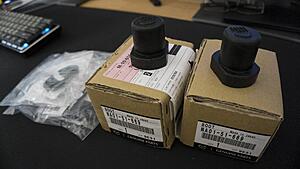
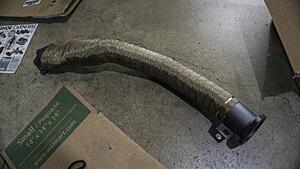
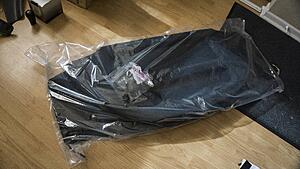
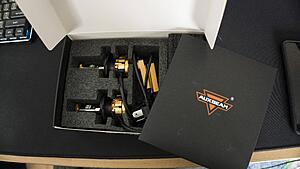
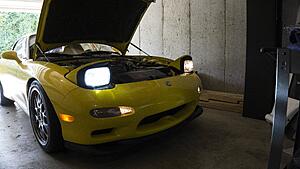
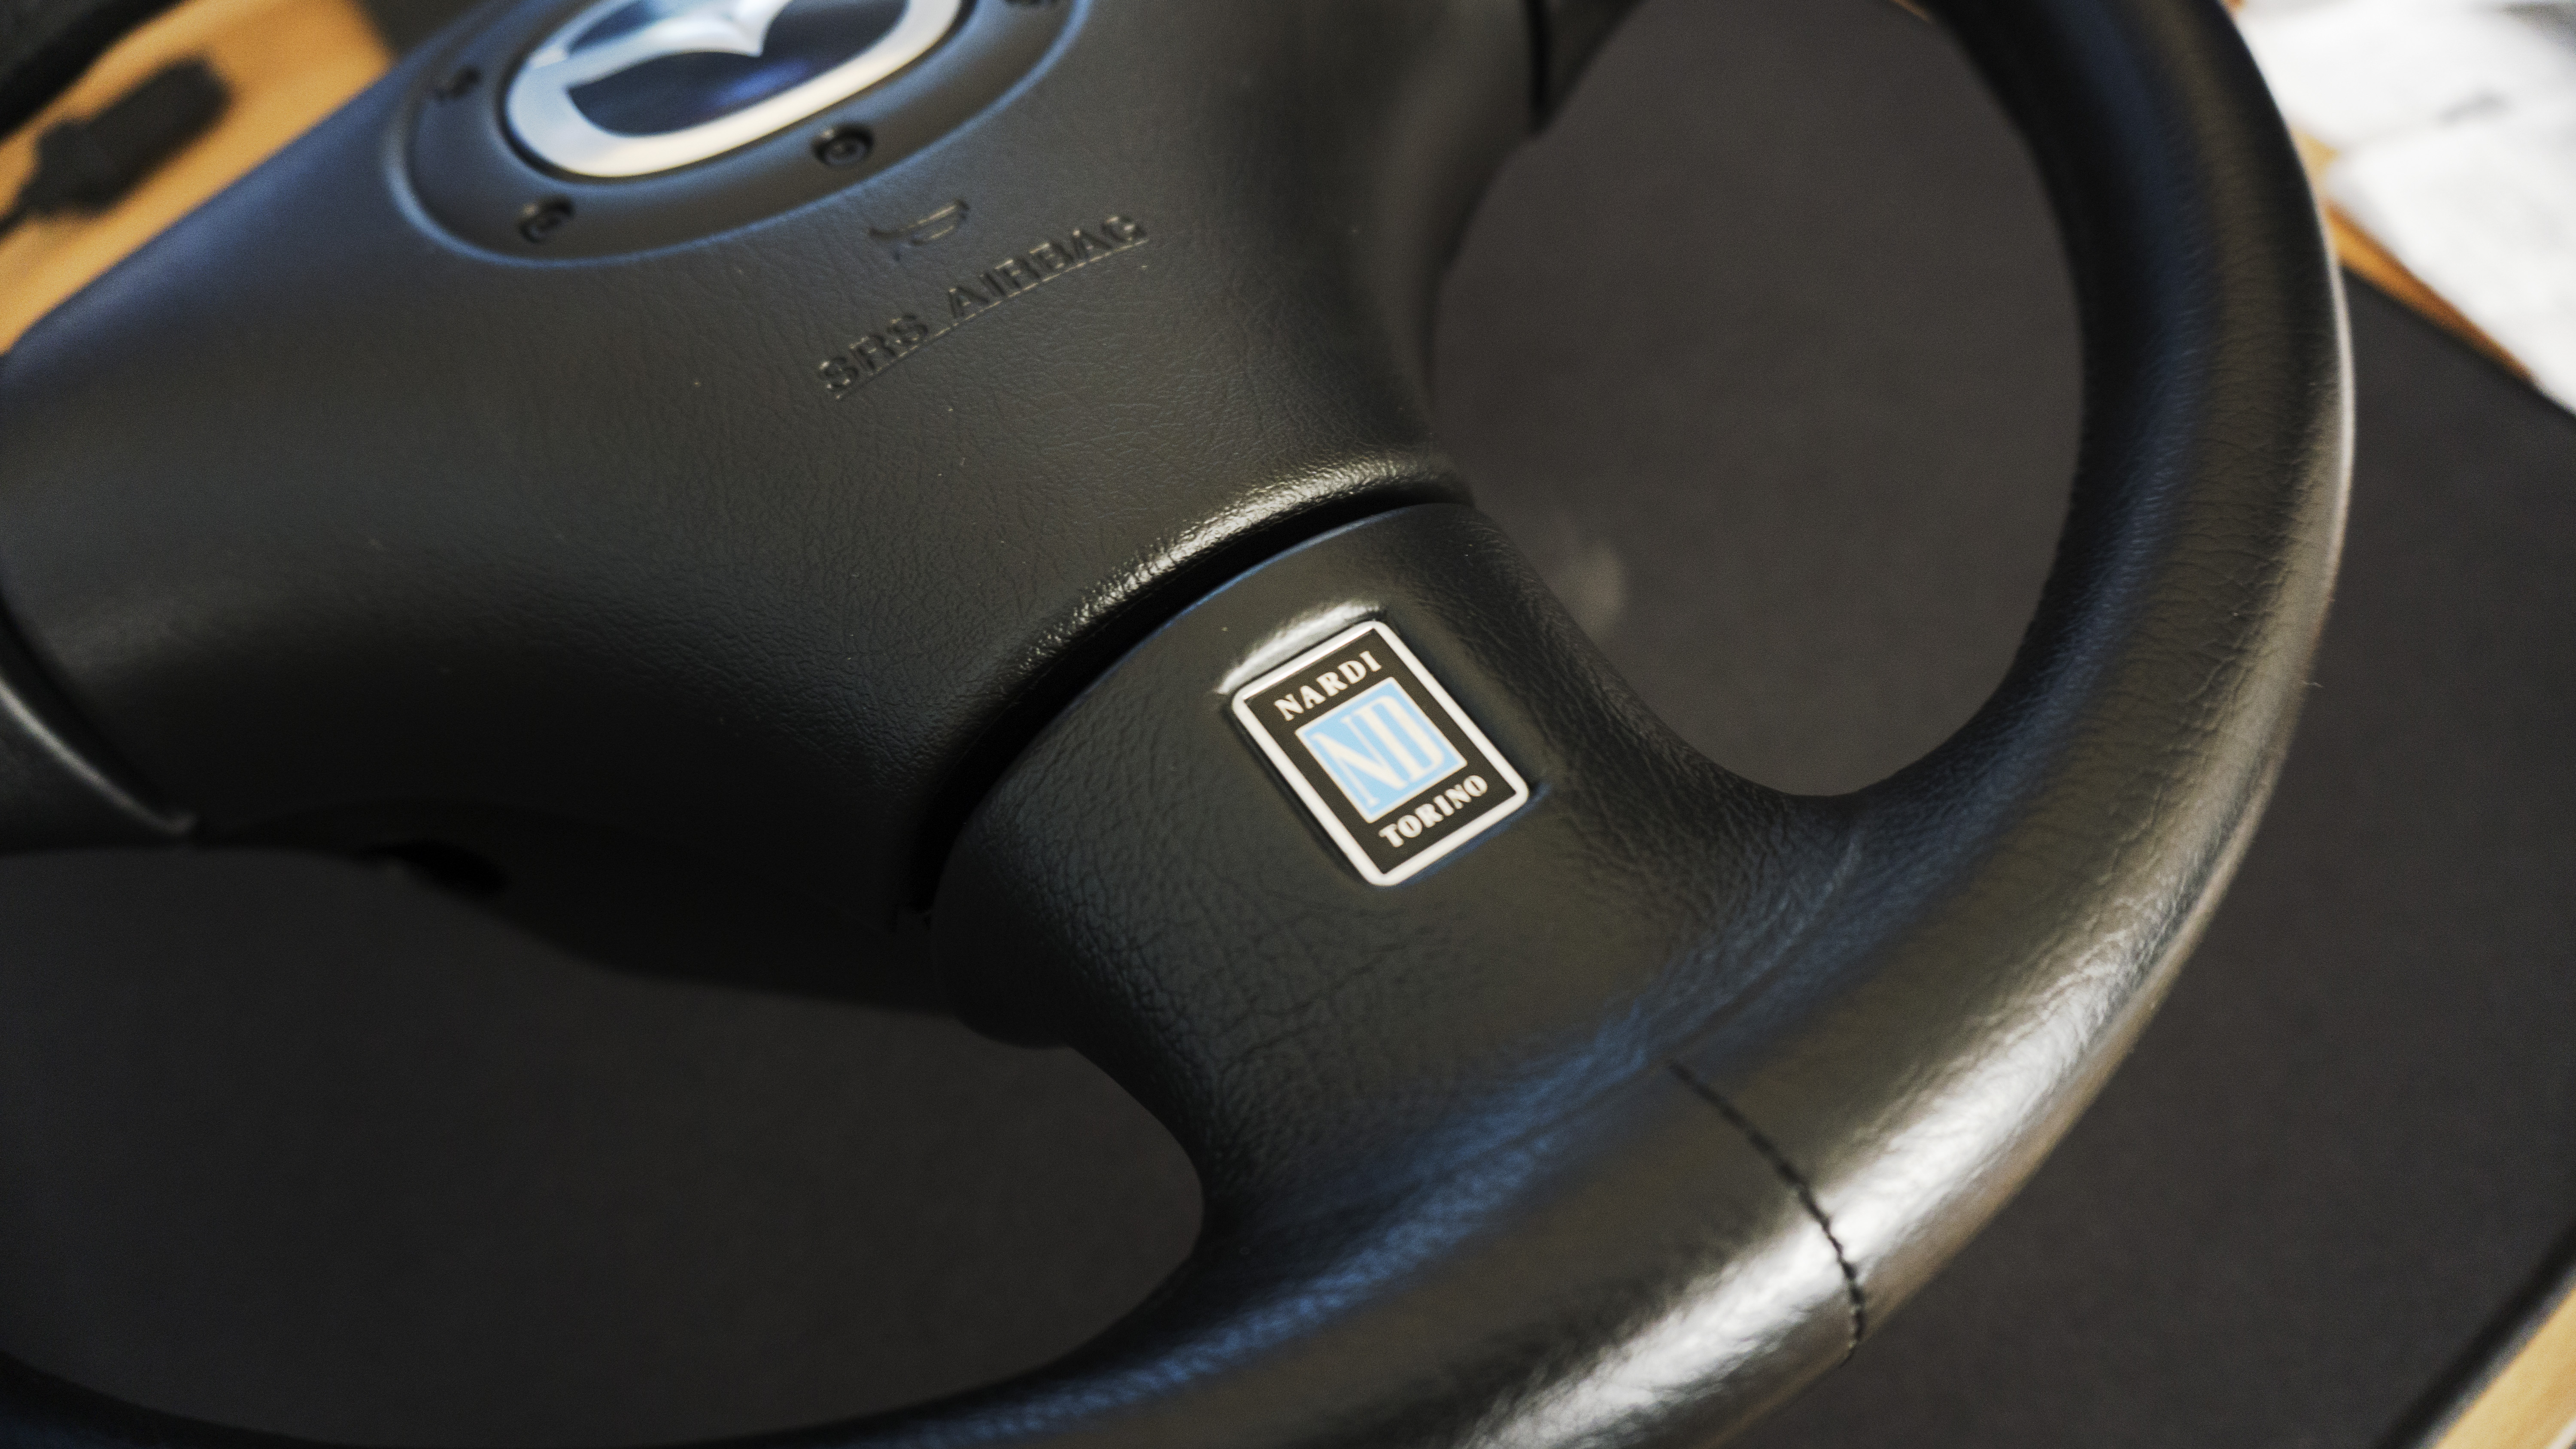
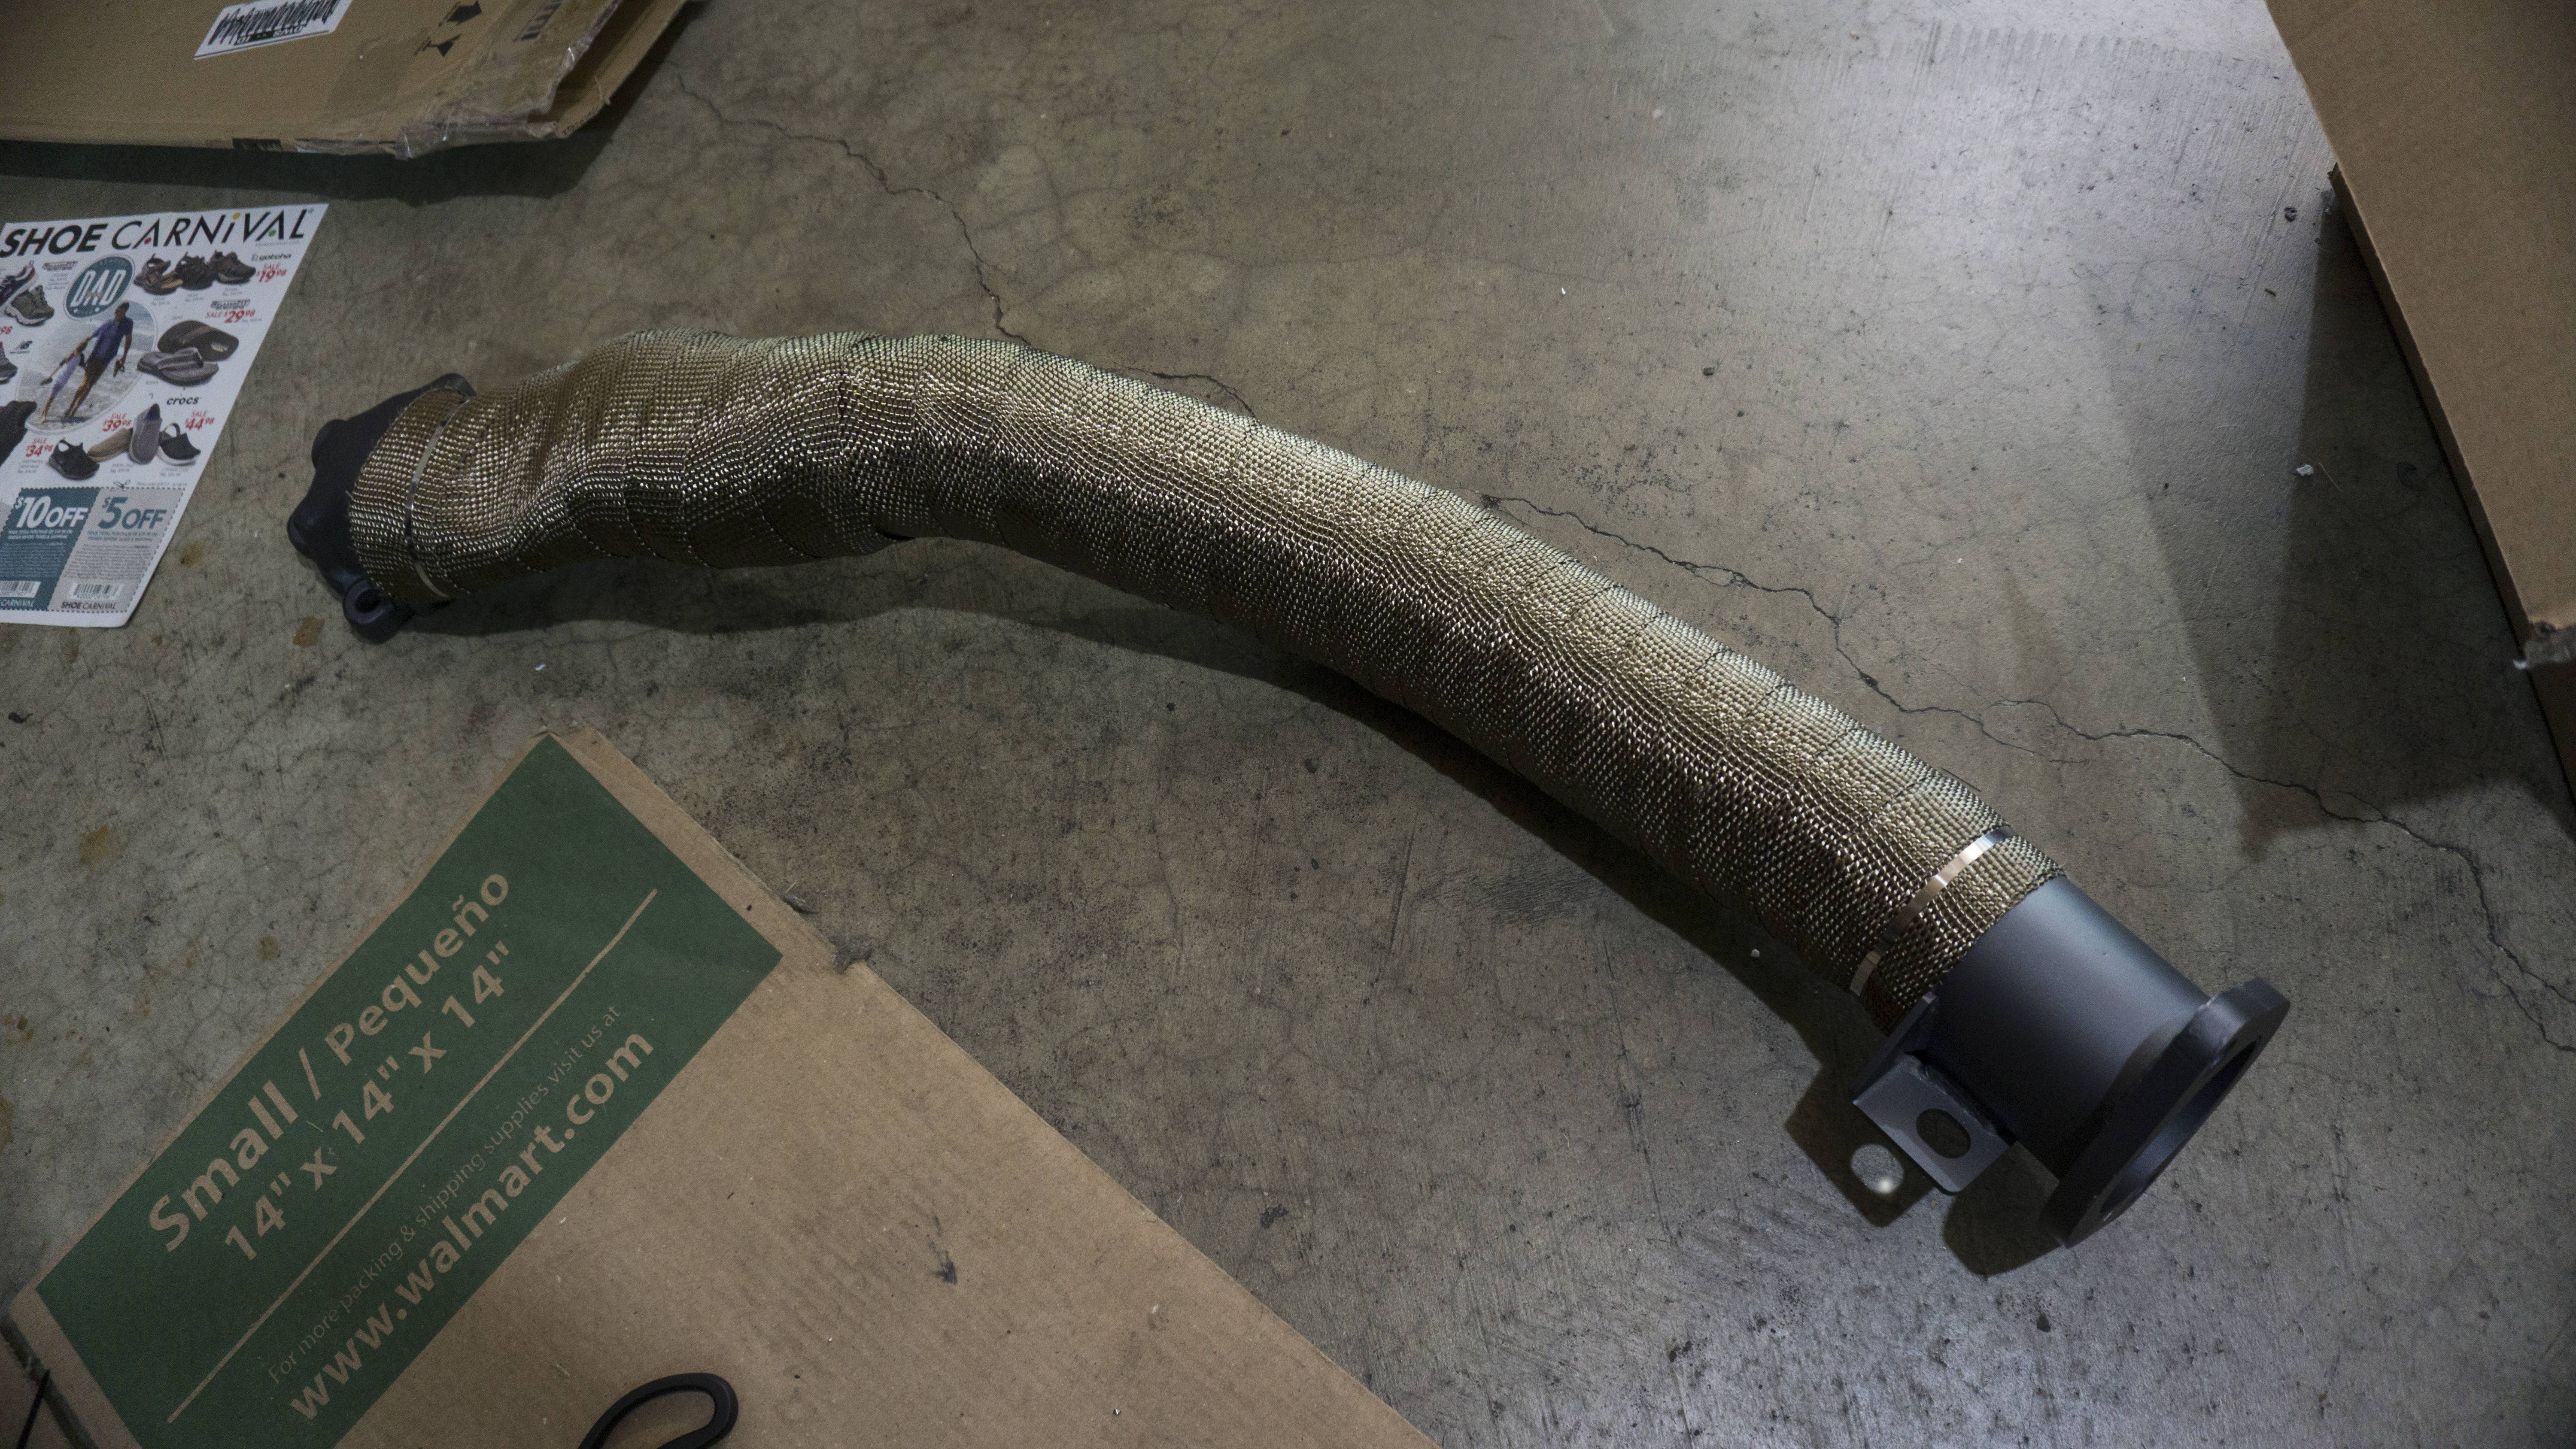
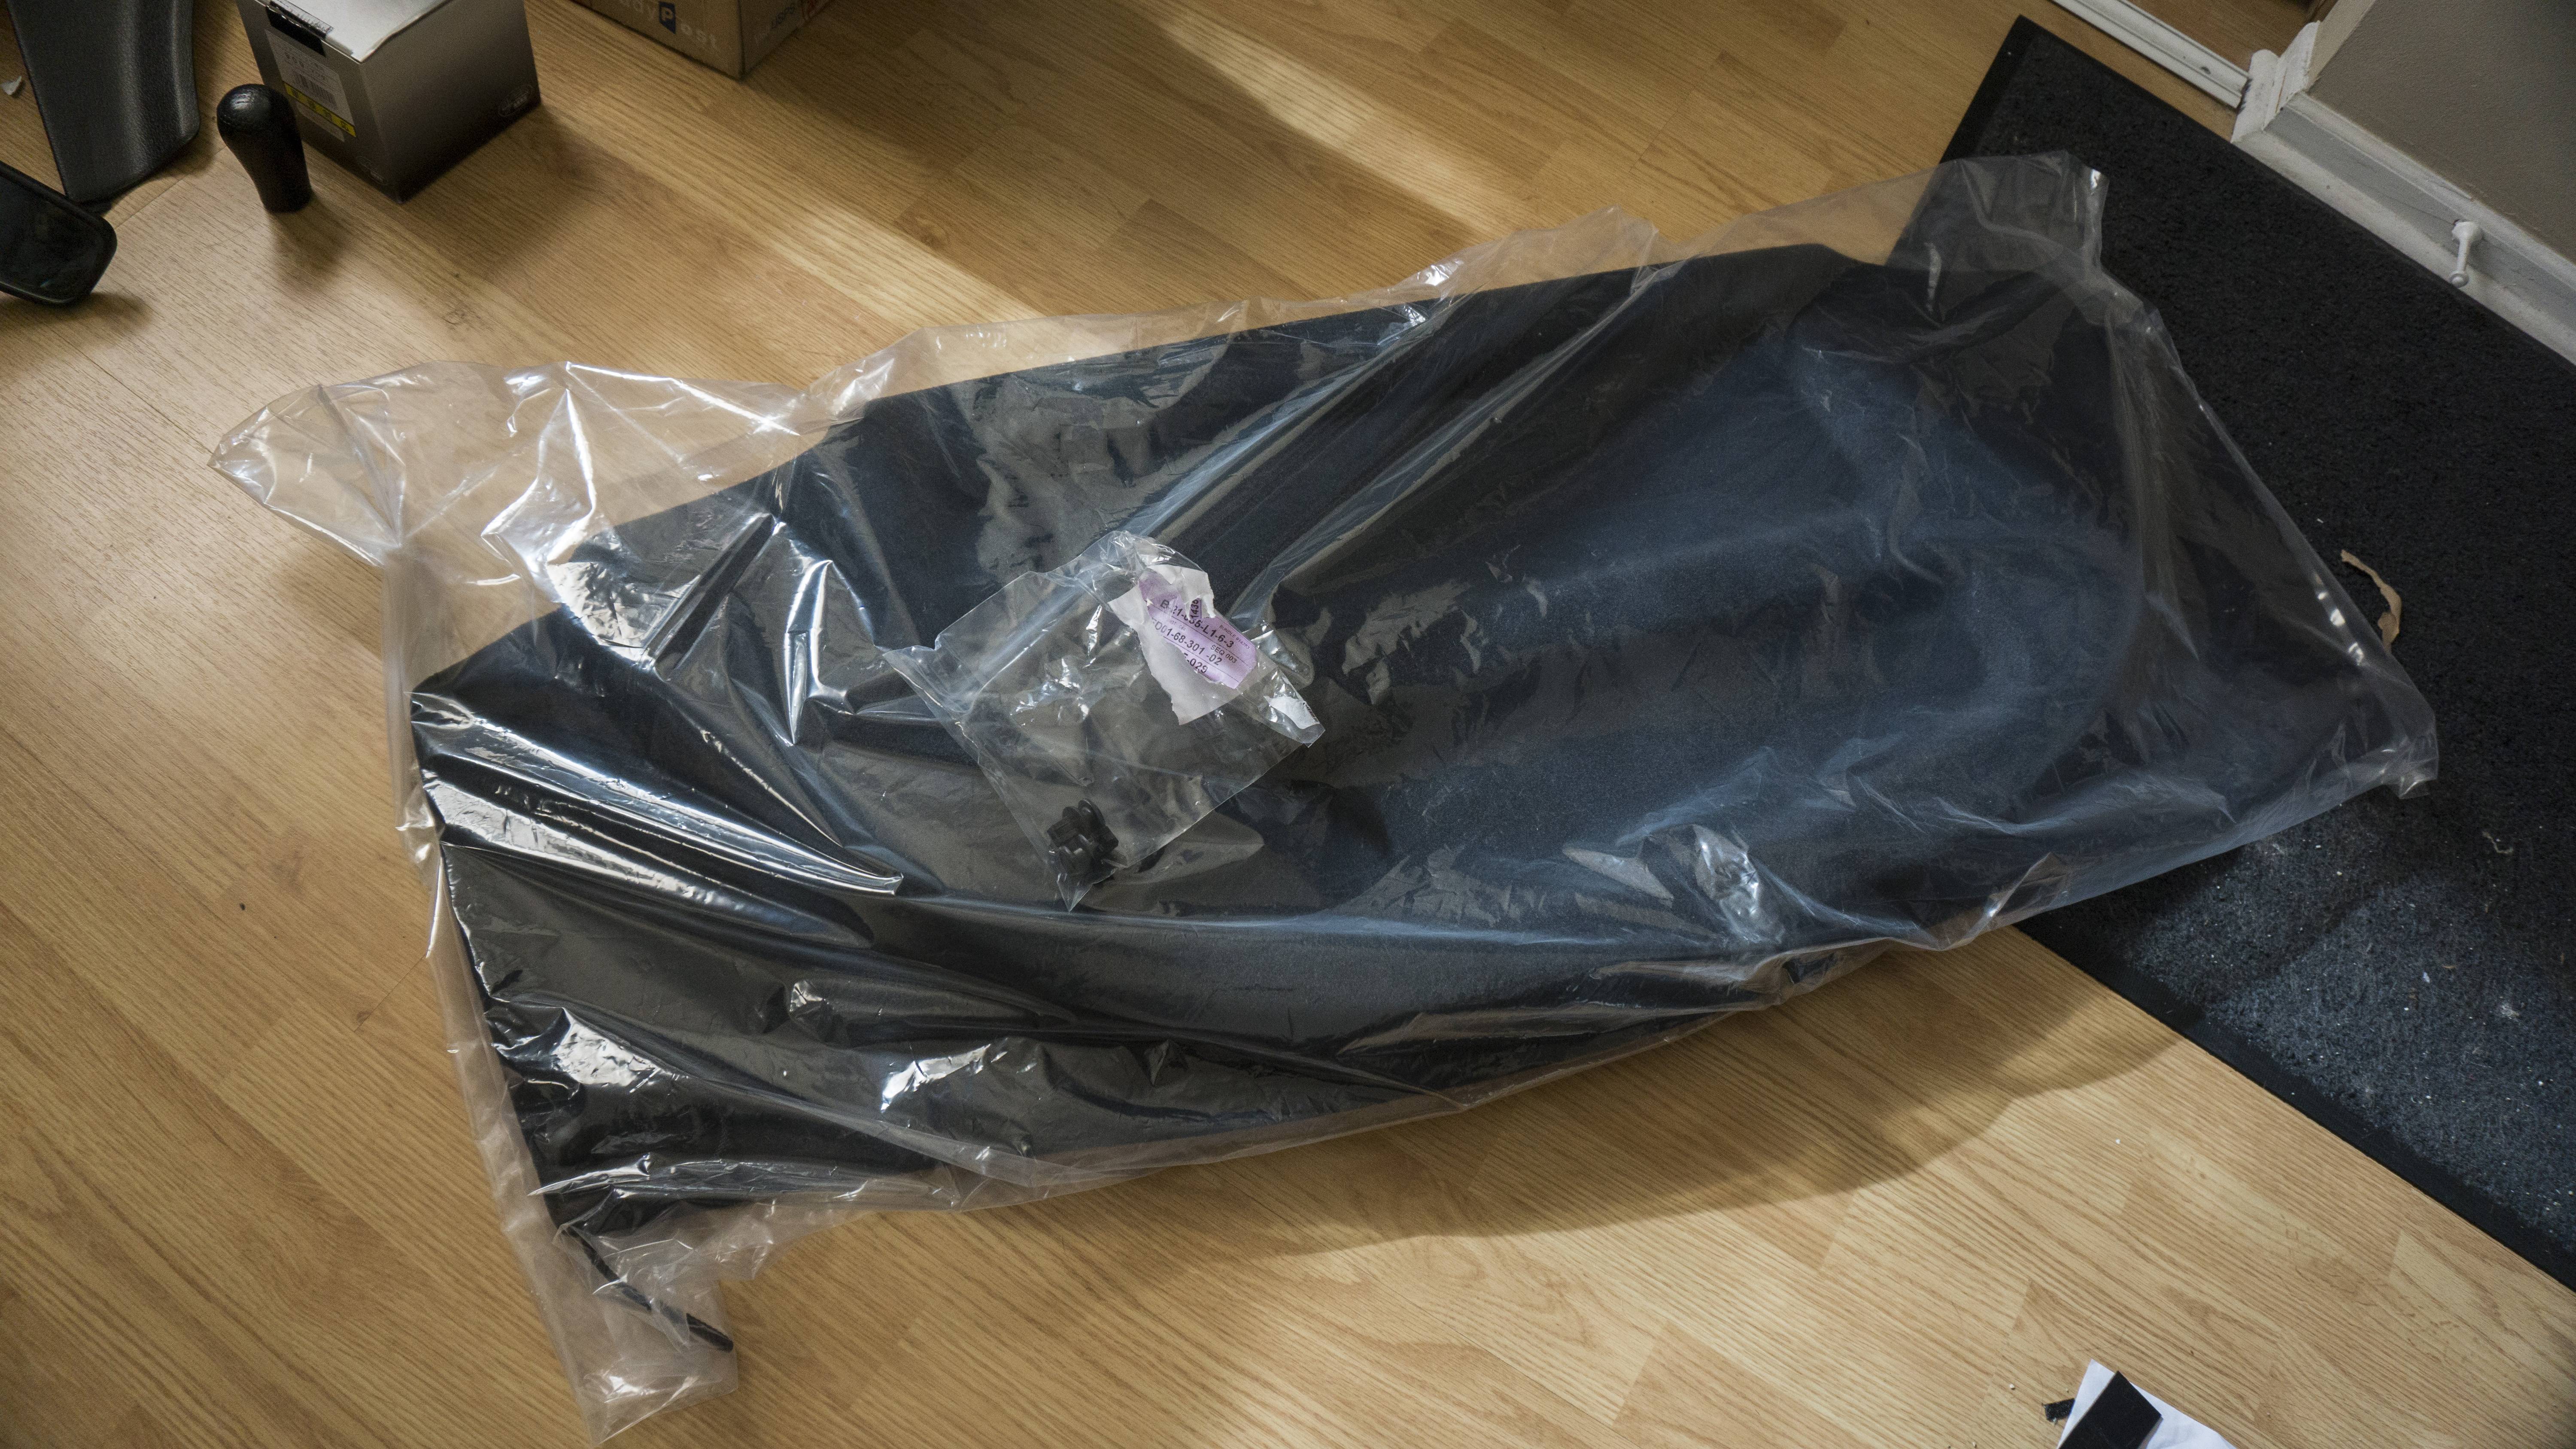
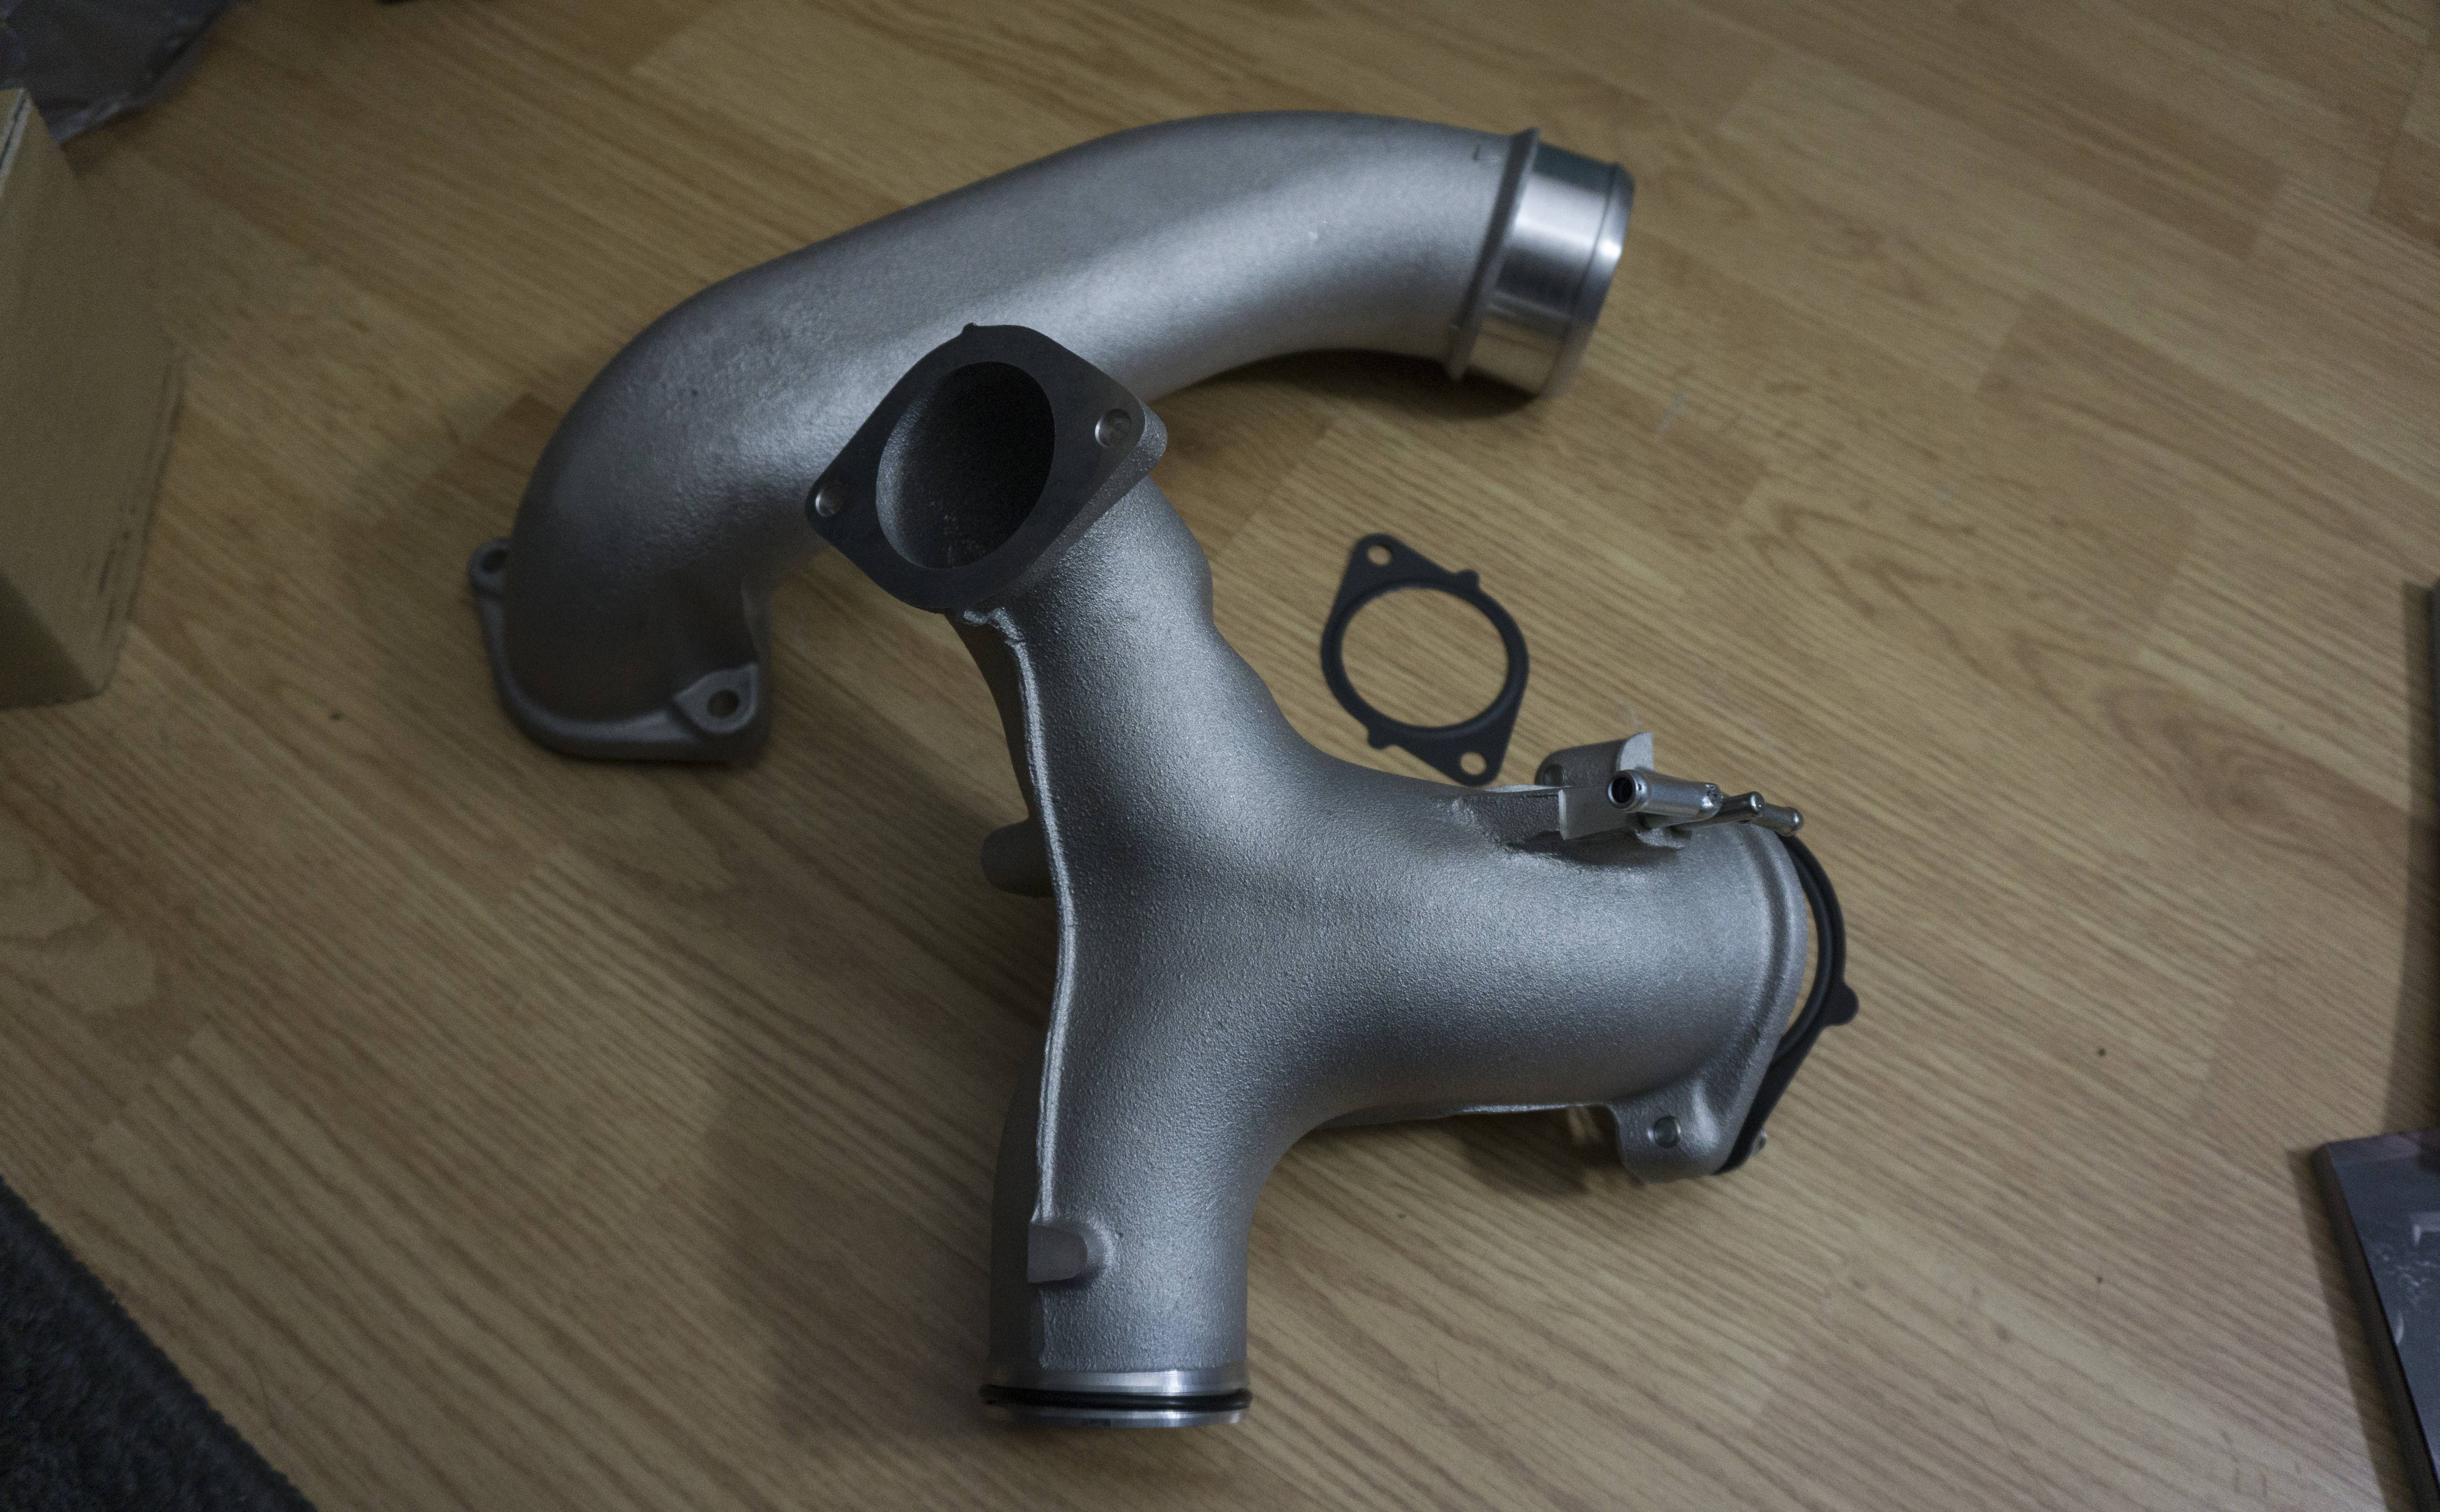
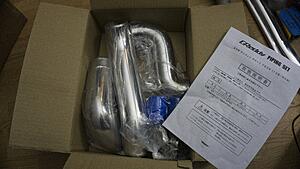
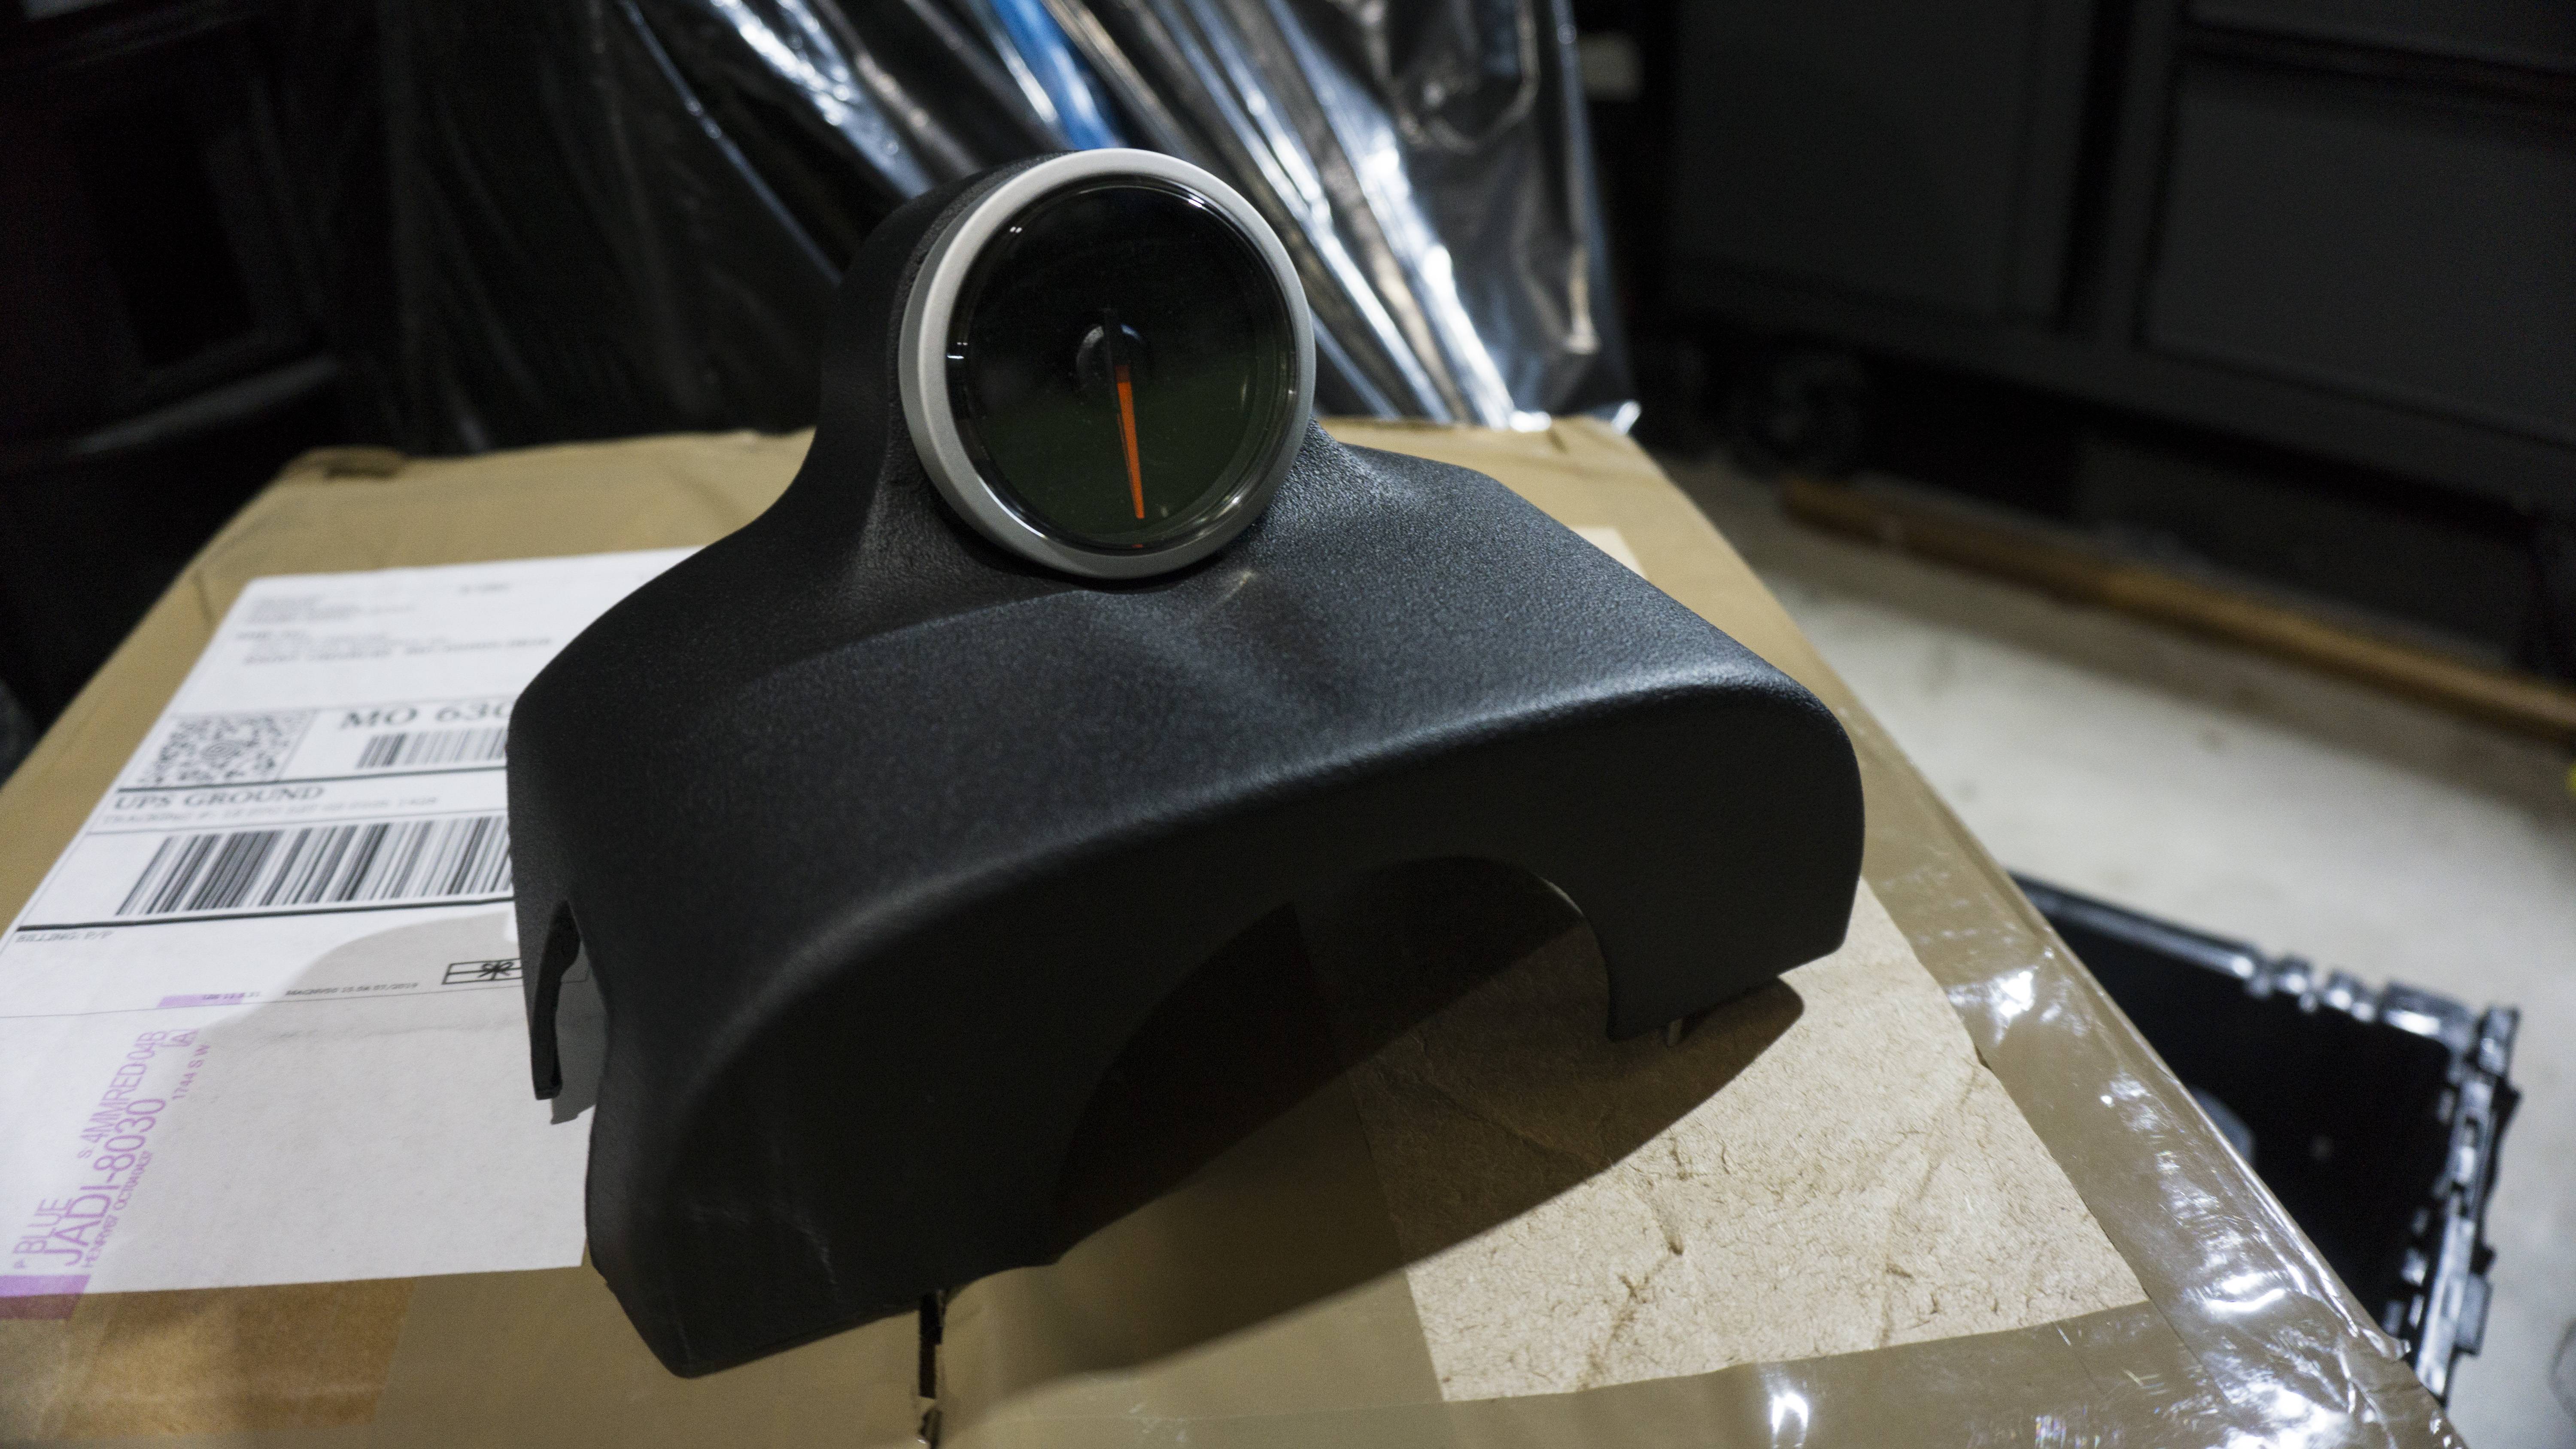
Well, the FC is pretty much done for the moment. I�ve done all that I can to it until I get my V-Mount kit in. I�ve decided to swap focus back to the FD a bit and do some �preventative� modding. I finally got around to wrapping the HKS Downpipe in Titanium heat wrap. I am currently working on getting that installed and have four new studs from Mazda at the ready. I�m not in a rush to get it done, so I�m just working on it when I can (I guess that means my car season is over for this year, but I�m okay with it). While I was removing the Y-Pipes for the ease of access to the Downpipe I decided to go ahead and just replace the entire system. I have the Efini Y-Pipe on the way in addition to the HKS RS intake system. I�d like to eventually change the foam HKS filters to a K&N type filter, but they will work for now. I�ve been a busy bee with ordering stuff for the interior. I picked up Bubbletech�s Coil Holder and Privacy Cover Brackets. I also sourced a brand new privacy cover and the trim pieces that hold it up. I went ahead and threw on the privacy cover. Gearing up for the interior overhaul I sourced one of Drake�s Steering Column Pods and a Defi Boost Gauge. I�m undecided if I�ll run additional gauges. I probably should - if I do I�ll mirror the ones I have in the FC (Water, Oil Press, Oil Temp, AFR). I hate trying to find an AFR gauge that doesn�t look out of place. I was fortunate enough in the FC I could modify the OEM clock and place it there, but I have no such luck in the FD. To finish out the interior buying I also sourced some sun visor caps and a like new Nardi-Flying M Miata wheel. It�s already been pre-drilled for the RX-7. I plan to swap out my MazdaSpeed D-Cut with it. I�m going to send the D-Cut off to be restored...and then may frame it and put it on my wall. For the exterior I purchased some brand new headlight motor caps and some LEDs for the headlights. I bought these as a test really. I use Rize Japan LEDs in the FC and wanted to see if I could get away with the same in the FD. I�m not a fan of HIDs because they utilize an external ballast. These LEDs have the ballast baked right onto the back of the assembly.
Here are all the new goodies that came in:

Here is the downpipe wrapped:
Here is the privacy cover:
Here is the headlights:
Well, the FC is pretty much done for the moment. I�ve done all that I can to it until I get my V-Mount kit in. I�ve decided to swap focus back to the FD a bit and do some �preventative� modding. I finally got around to wrapping the HKS Downpipe in Titanium heat wrap. I am currently working on getting that installed and have four new studs from Mazda at the ready. I�m not in a rush to get it done, so I�m just working on it when I can (I guess that means my car season is over for this year, but I�m okay with it). While I was removing the Y-Pipes for the ease of access to the Downpipe I decided to go ahead and just replace the entire system. I have the Efini Y-Pipe on the way in addition to the HKS RS intake system. I�d like to eventually change the foam HKS filters to a K&N type filter, but they will work for now. I�ve been a busy bee with ordering stuff for the interior. I picked up Bubbletech�s Coil Holder and Privacy Cover Brackets. I also sourced a brand new privacy cover and the trim pieces that hold it up. I went ahead and threw on the privacy cover. Gearing up for the interior overhaul I sourced one of Drake�s Steering Column Pods and a Defi Boost Gauge. I�m undecided if I�ll run additional gauges. I probably should - if I do I�ll mirror the ones I have in the FC (Water, Oil Press, Oil Temp, AFR). I hate trying to find an AFR gauge that doesn�t look out of place. I was fortunate enough in the FC I could modify the OEM clock and place it there, but I have no such luck in the FD. To finish out the interior buying I also sourced some sun visor caps and a like new Nardi-Flying M Miata wheel. It�s already been pre-drilled for the RX-7. I plan to swap out my MazdaSpeed D-Cut with it. I�m going to send the D-Cut off to be restored...and then may frame it and put it on my wall. For the exterior I purchased some brand new headlight motor caps and some LEDs for the headlights. I bought these as a test really. I use Rize Japan LEDs in the FC and wanted to see if I could get away with the same in the FD. I�m not a fan of HIDs because they utilize an external ballast. These LEDs have the ballast baked right onto the back of the assembly.
Here are all the new goodies that came in:


Here is the downpipe wrapped:
Here is the privacy cover:

Here is the headlights:


Thread Starter
Joined: Apr 2015
Posts: 398
Likes: 169
From: St. Louis, MO
I did recently order it, but I was unable to find one through a dealer. There was a seller on eBay selling them for 350 shipped. That was the best I was able to find.
I got them through Tasca Parts. If they can't get them for you they refund you. I don't think it would hurt to give them a try.
I got them through Tasca Parts. If they can't get them for you they refund you. I don't think it would hurt to give them a try.
Thread Starter
Joined: Apr 2015
Posts: 398
Likes: 169
From: St. Louis, MO
Update 10/12/2019:
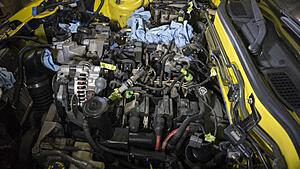
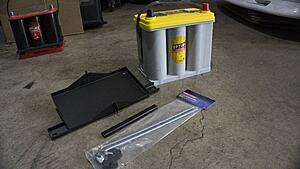
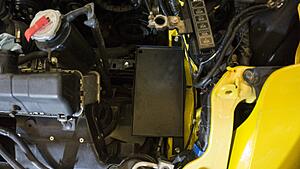
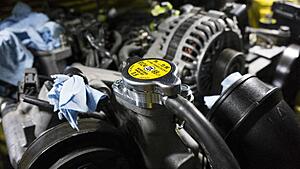
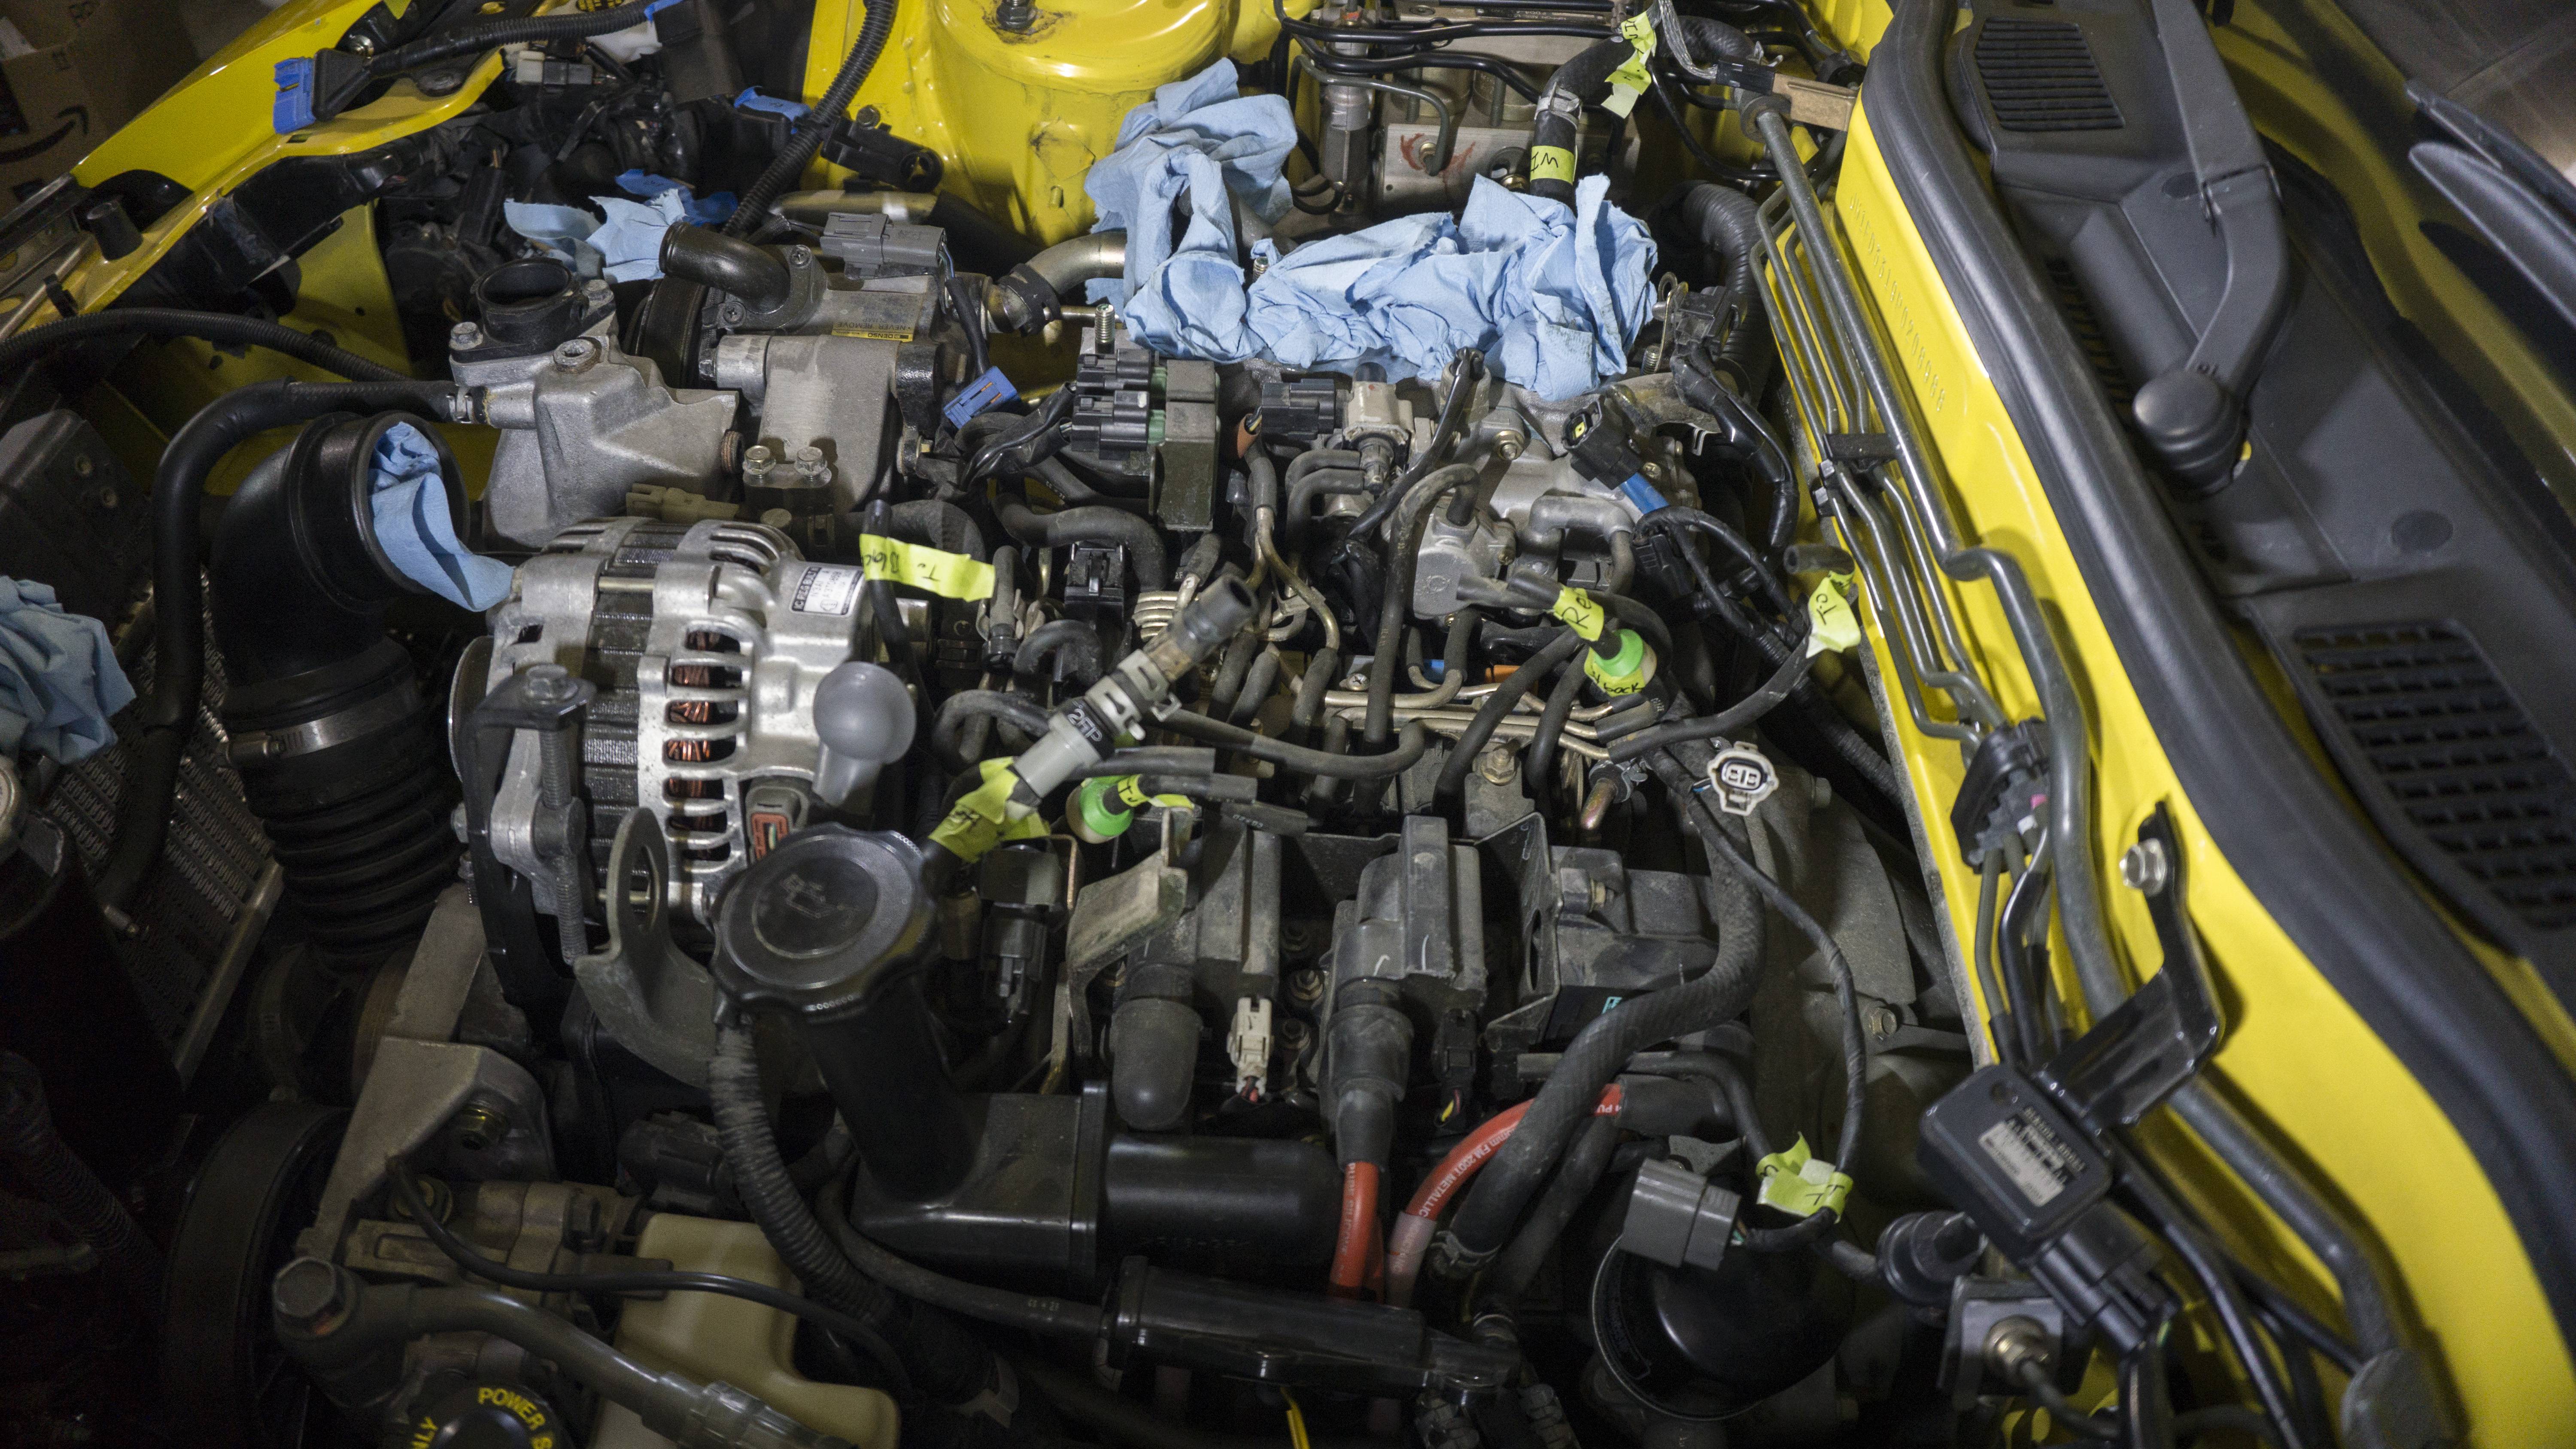
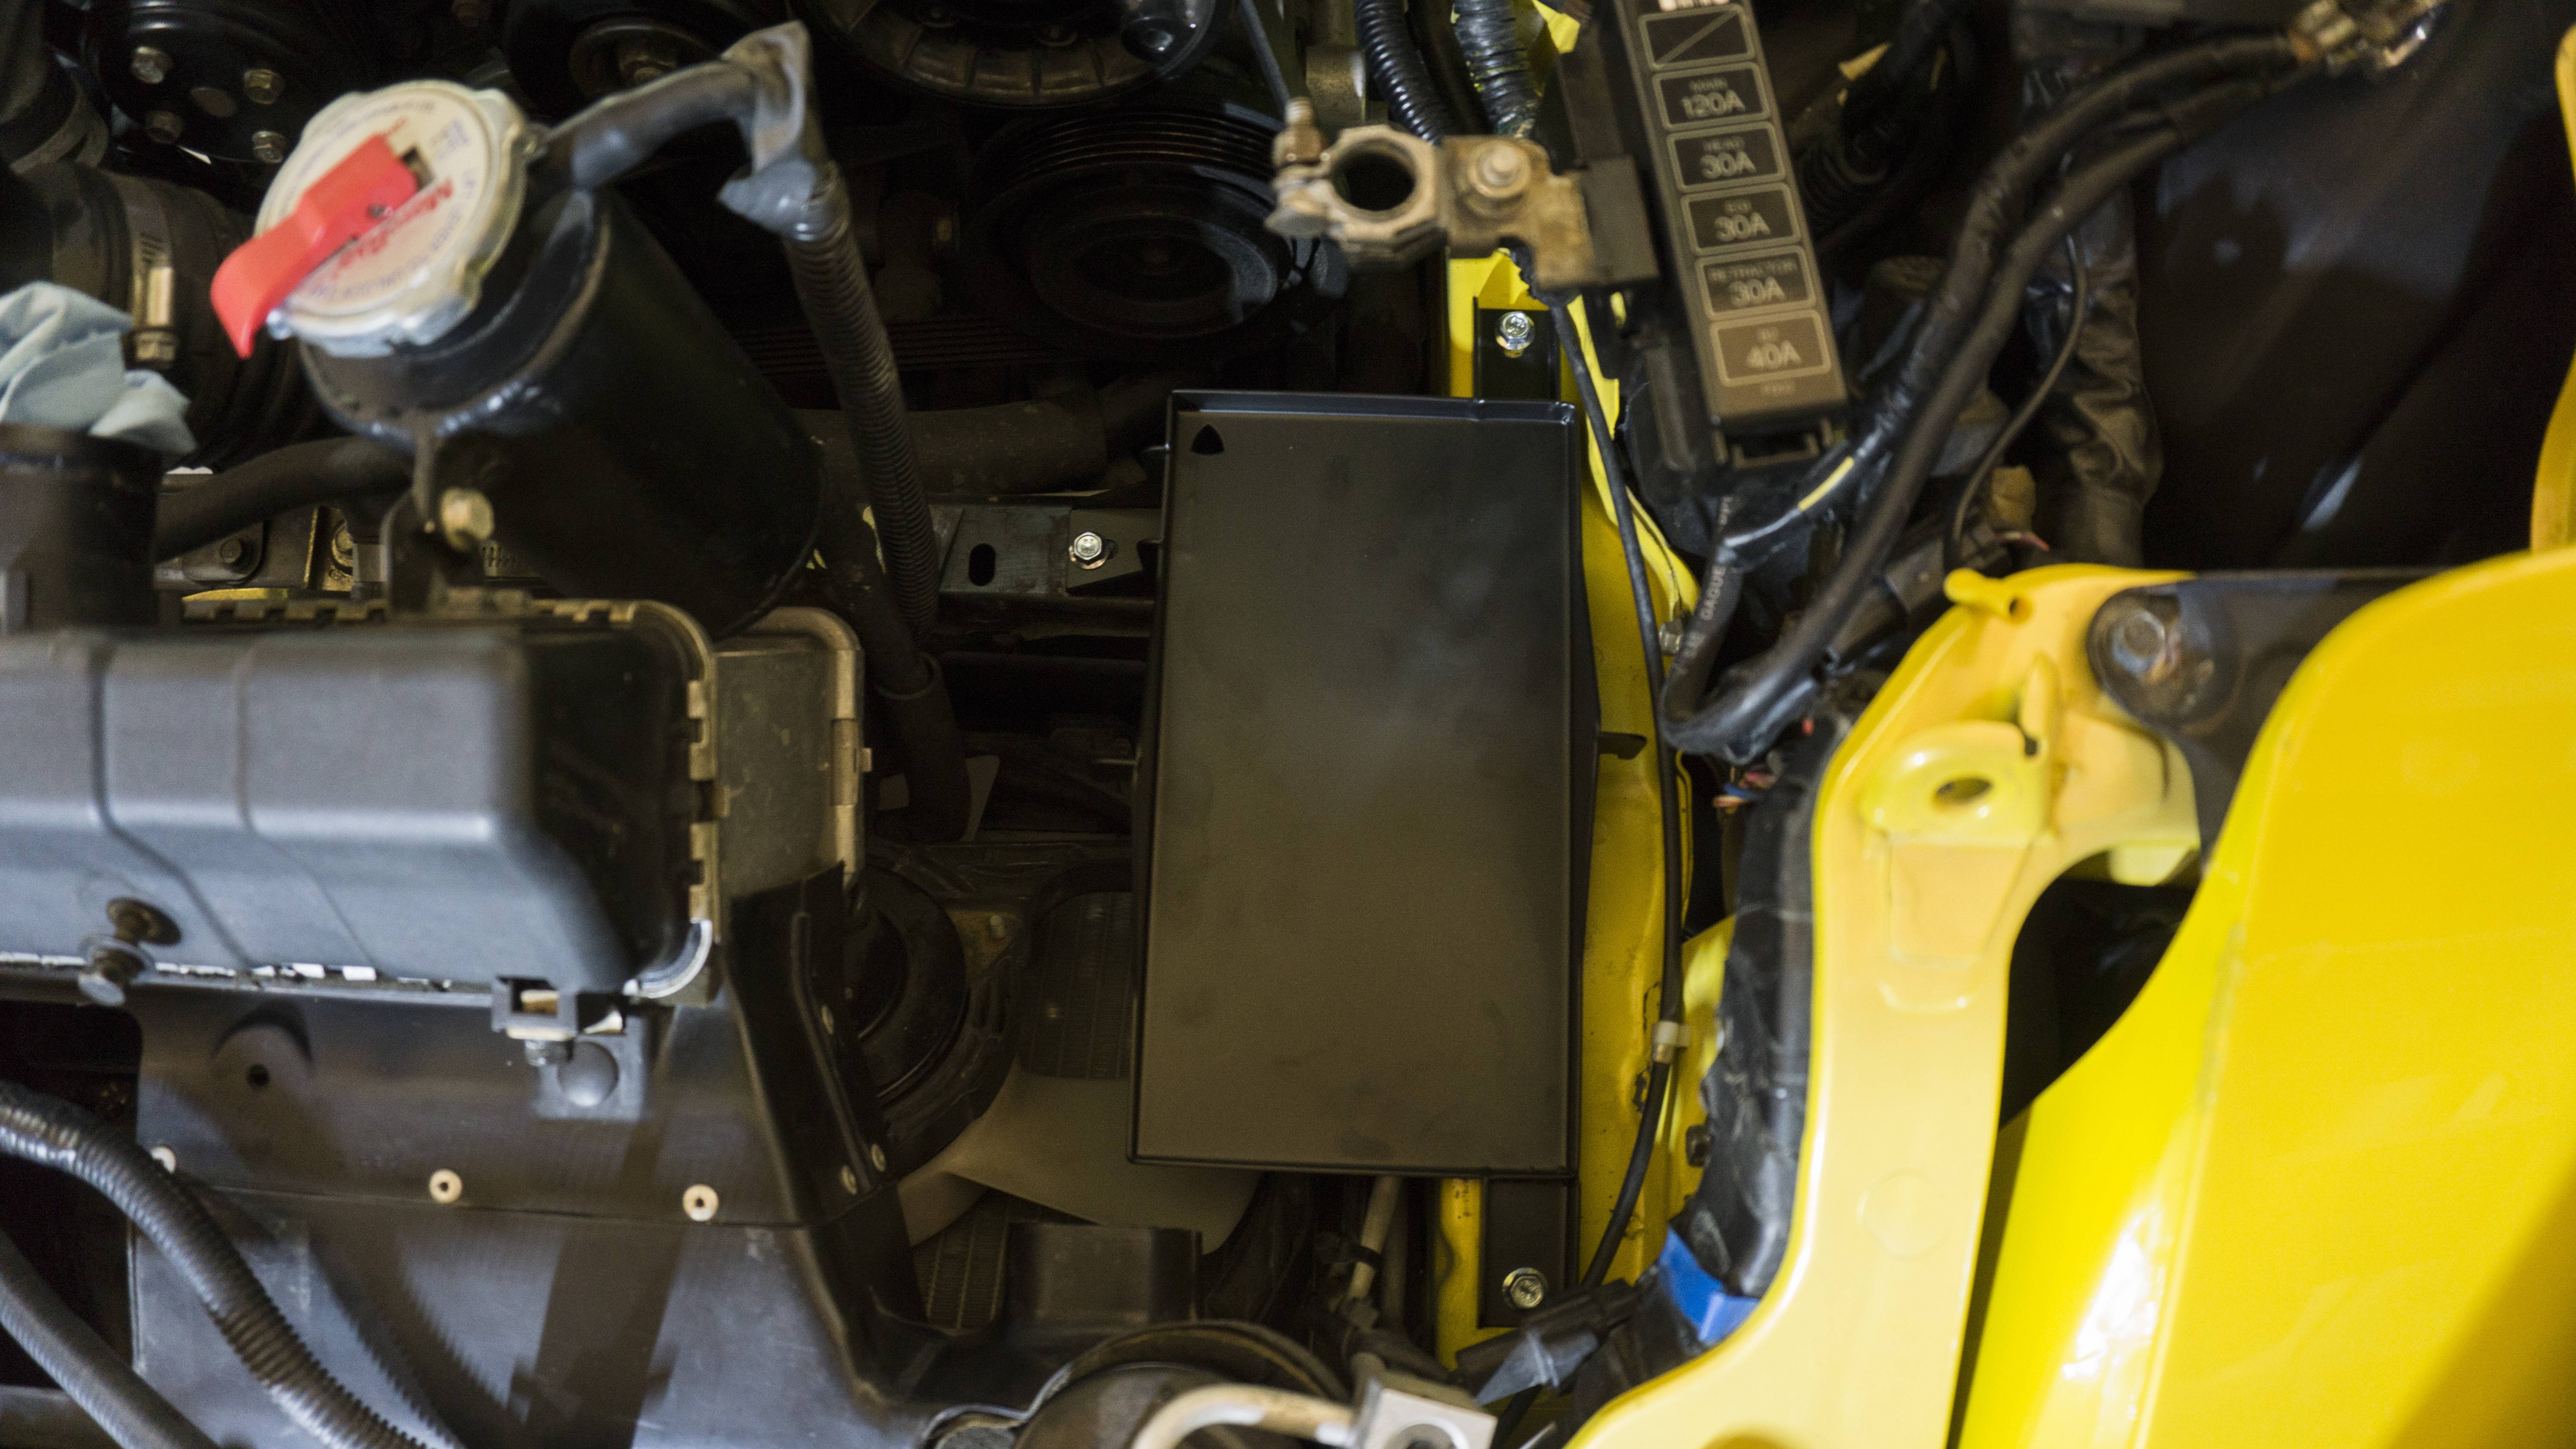
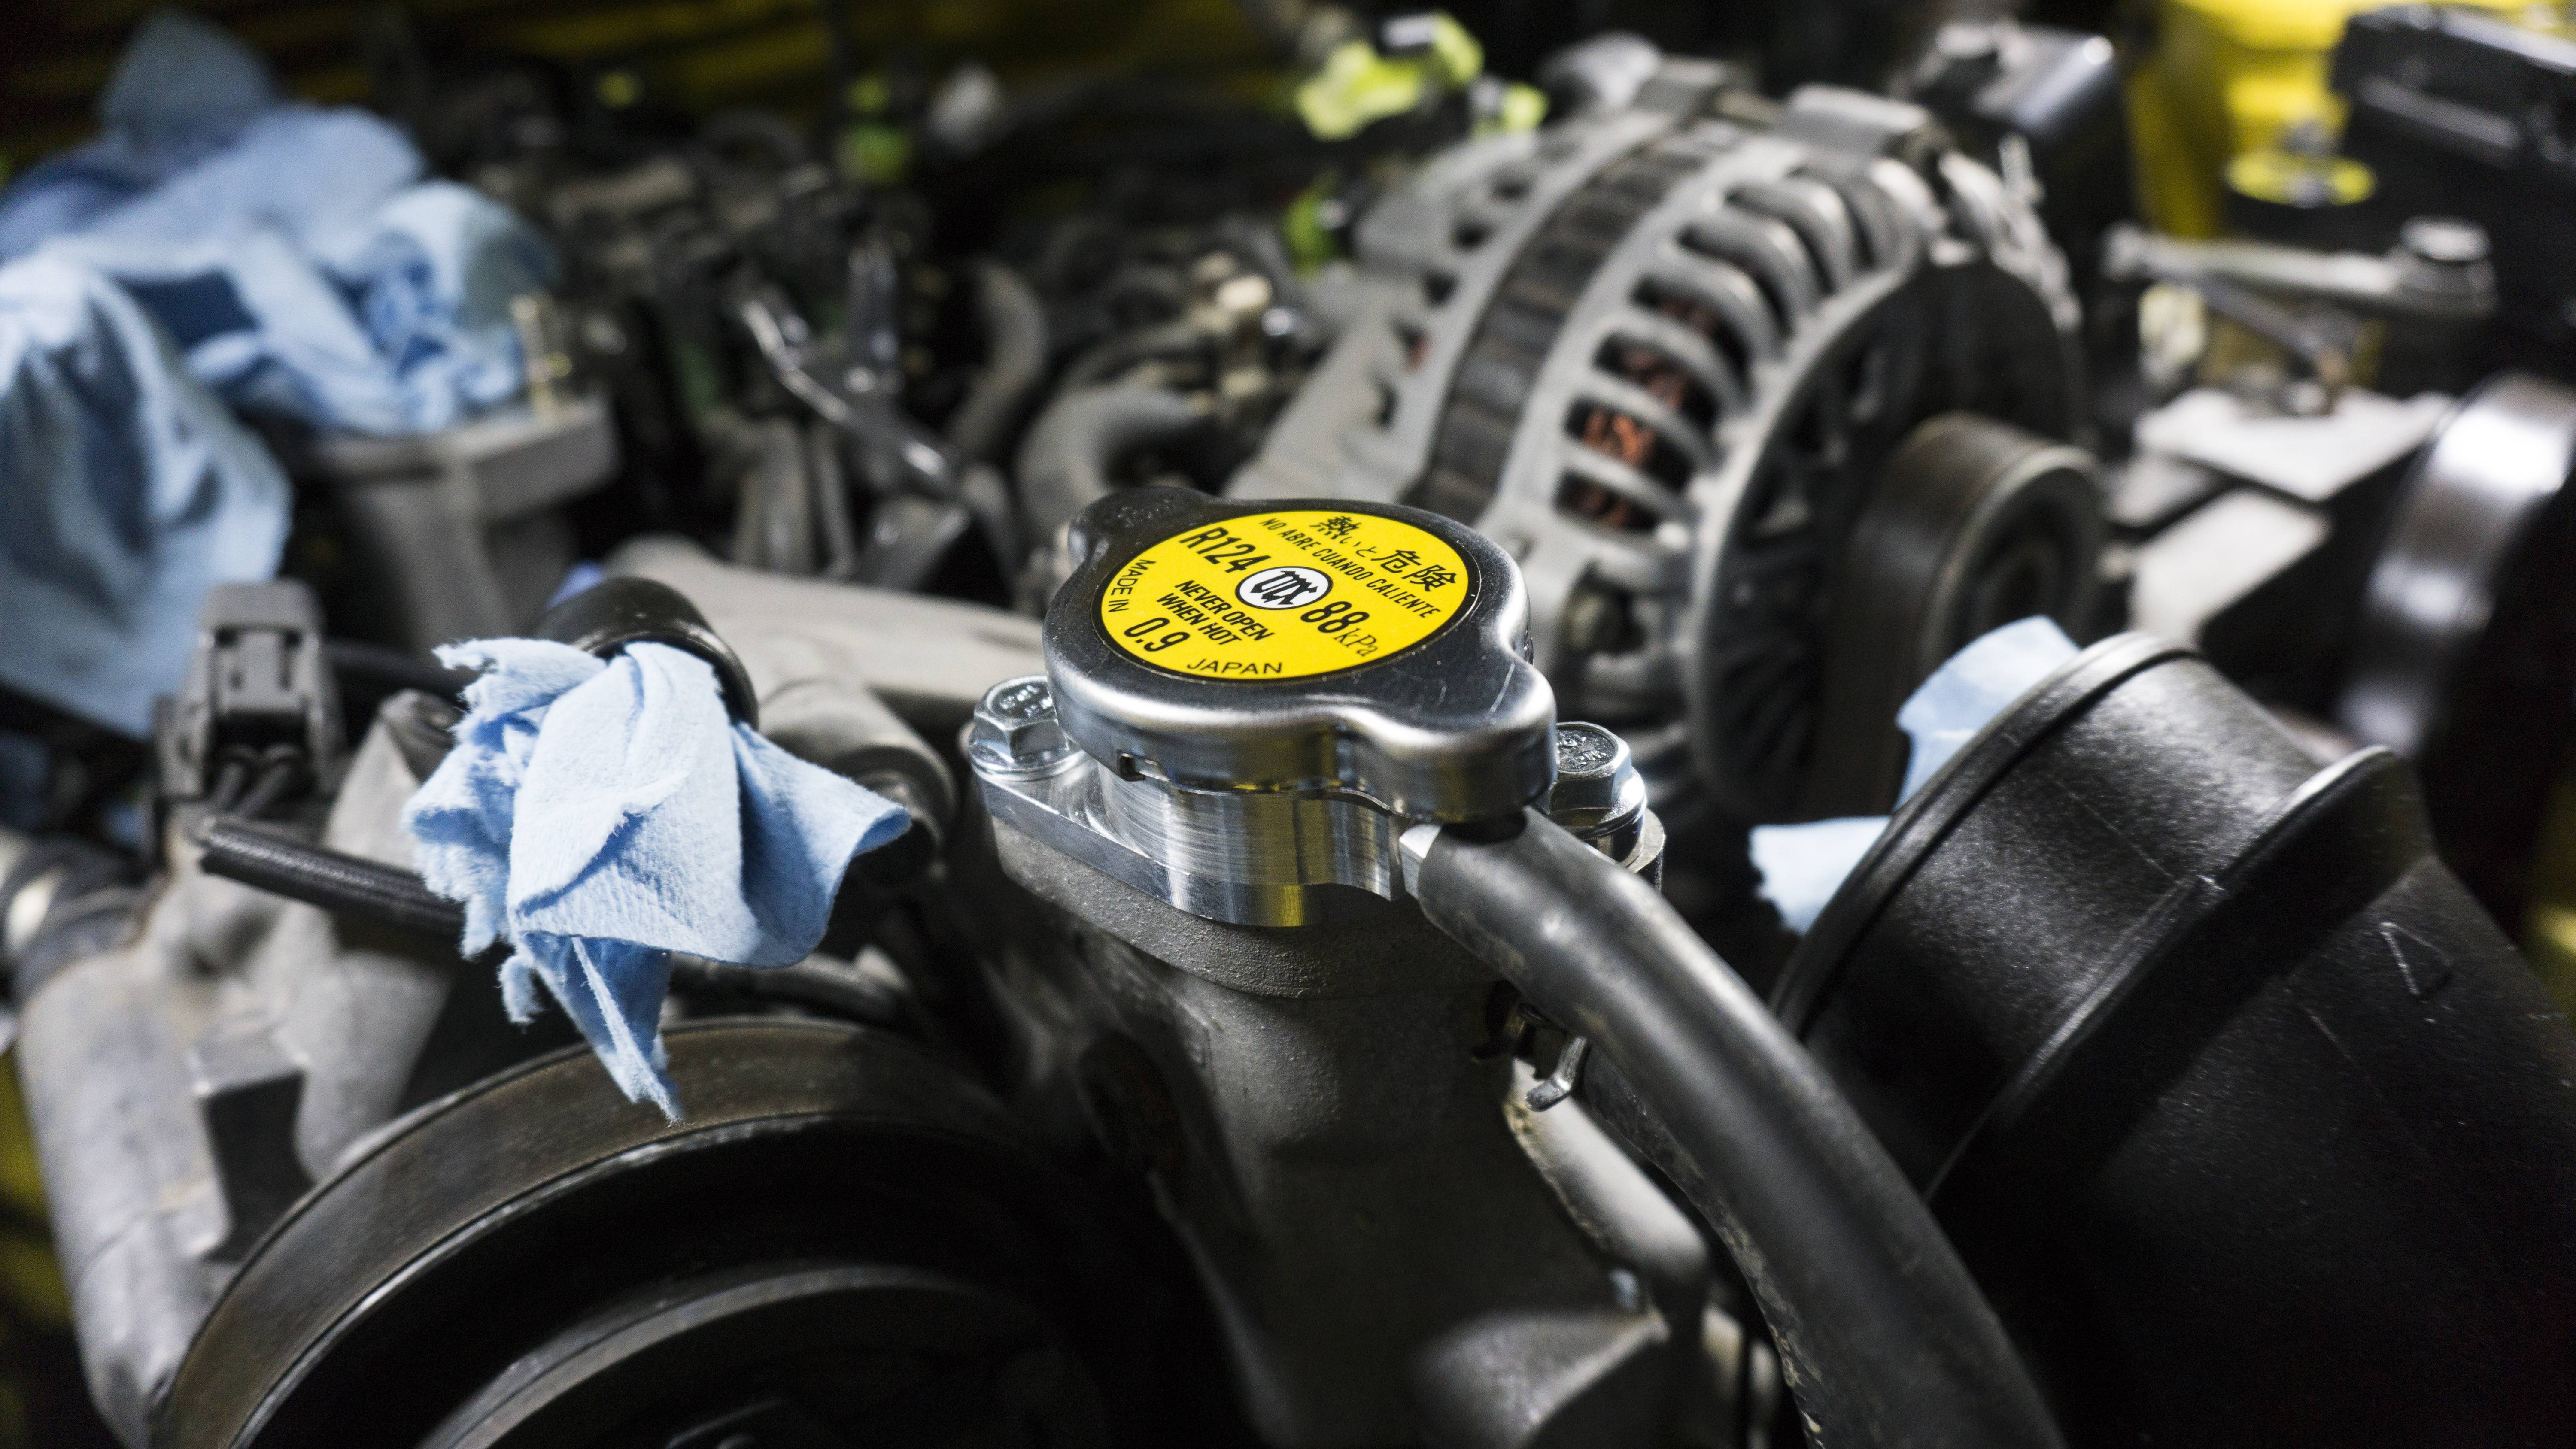
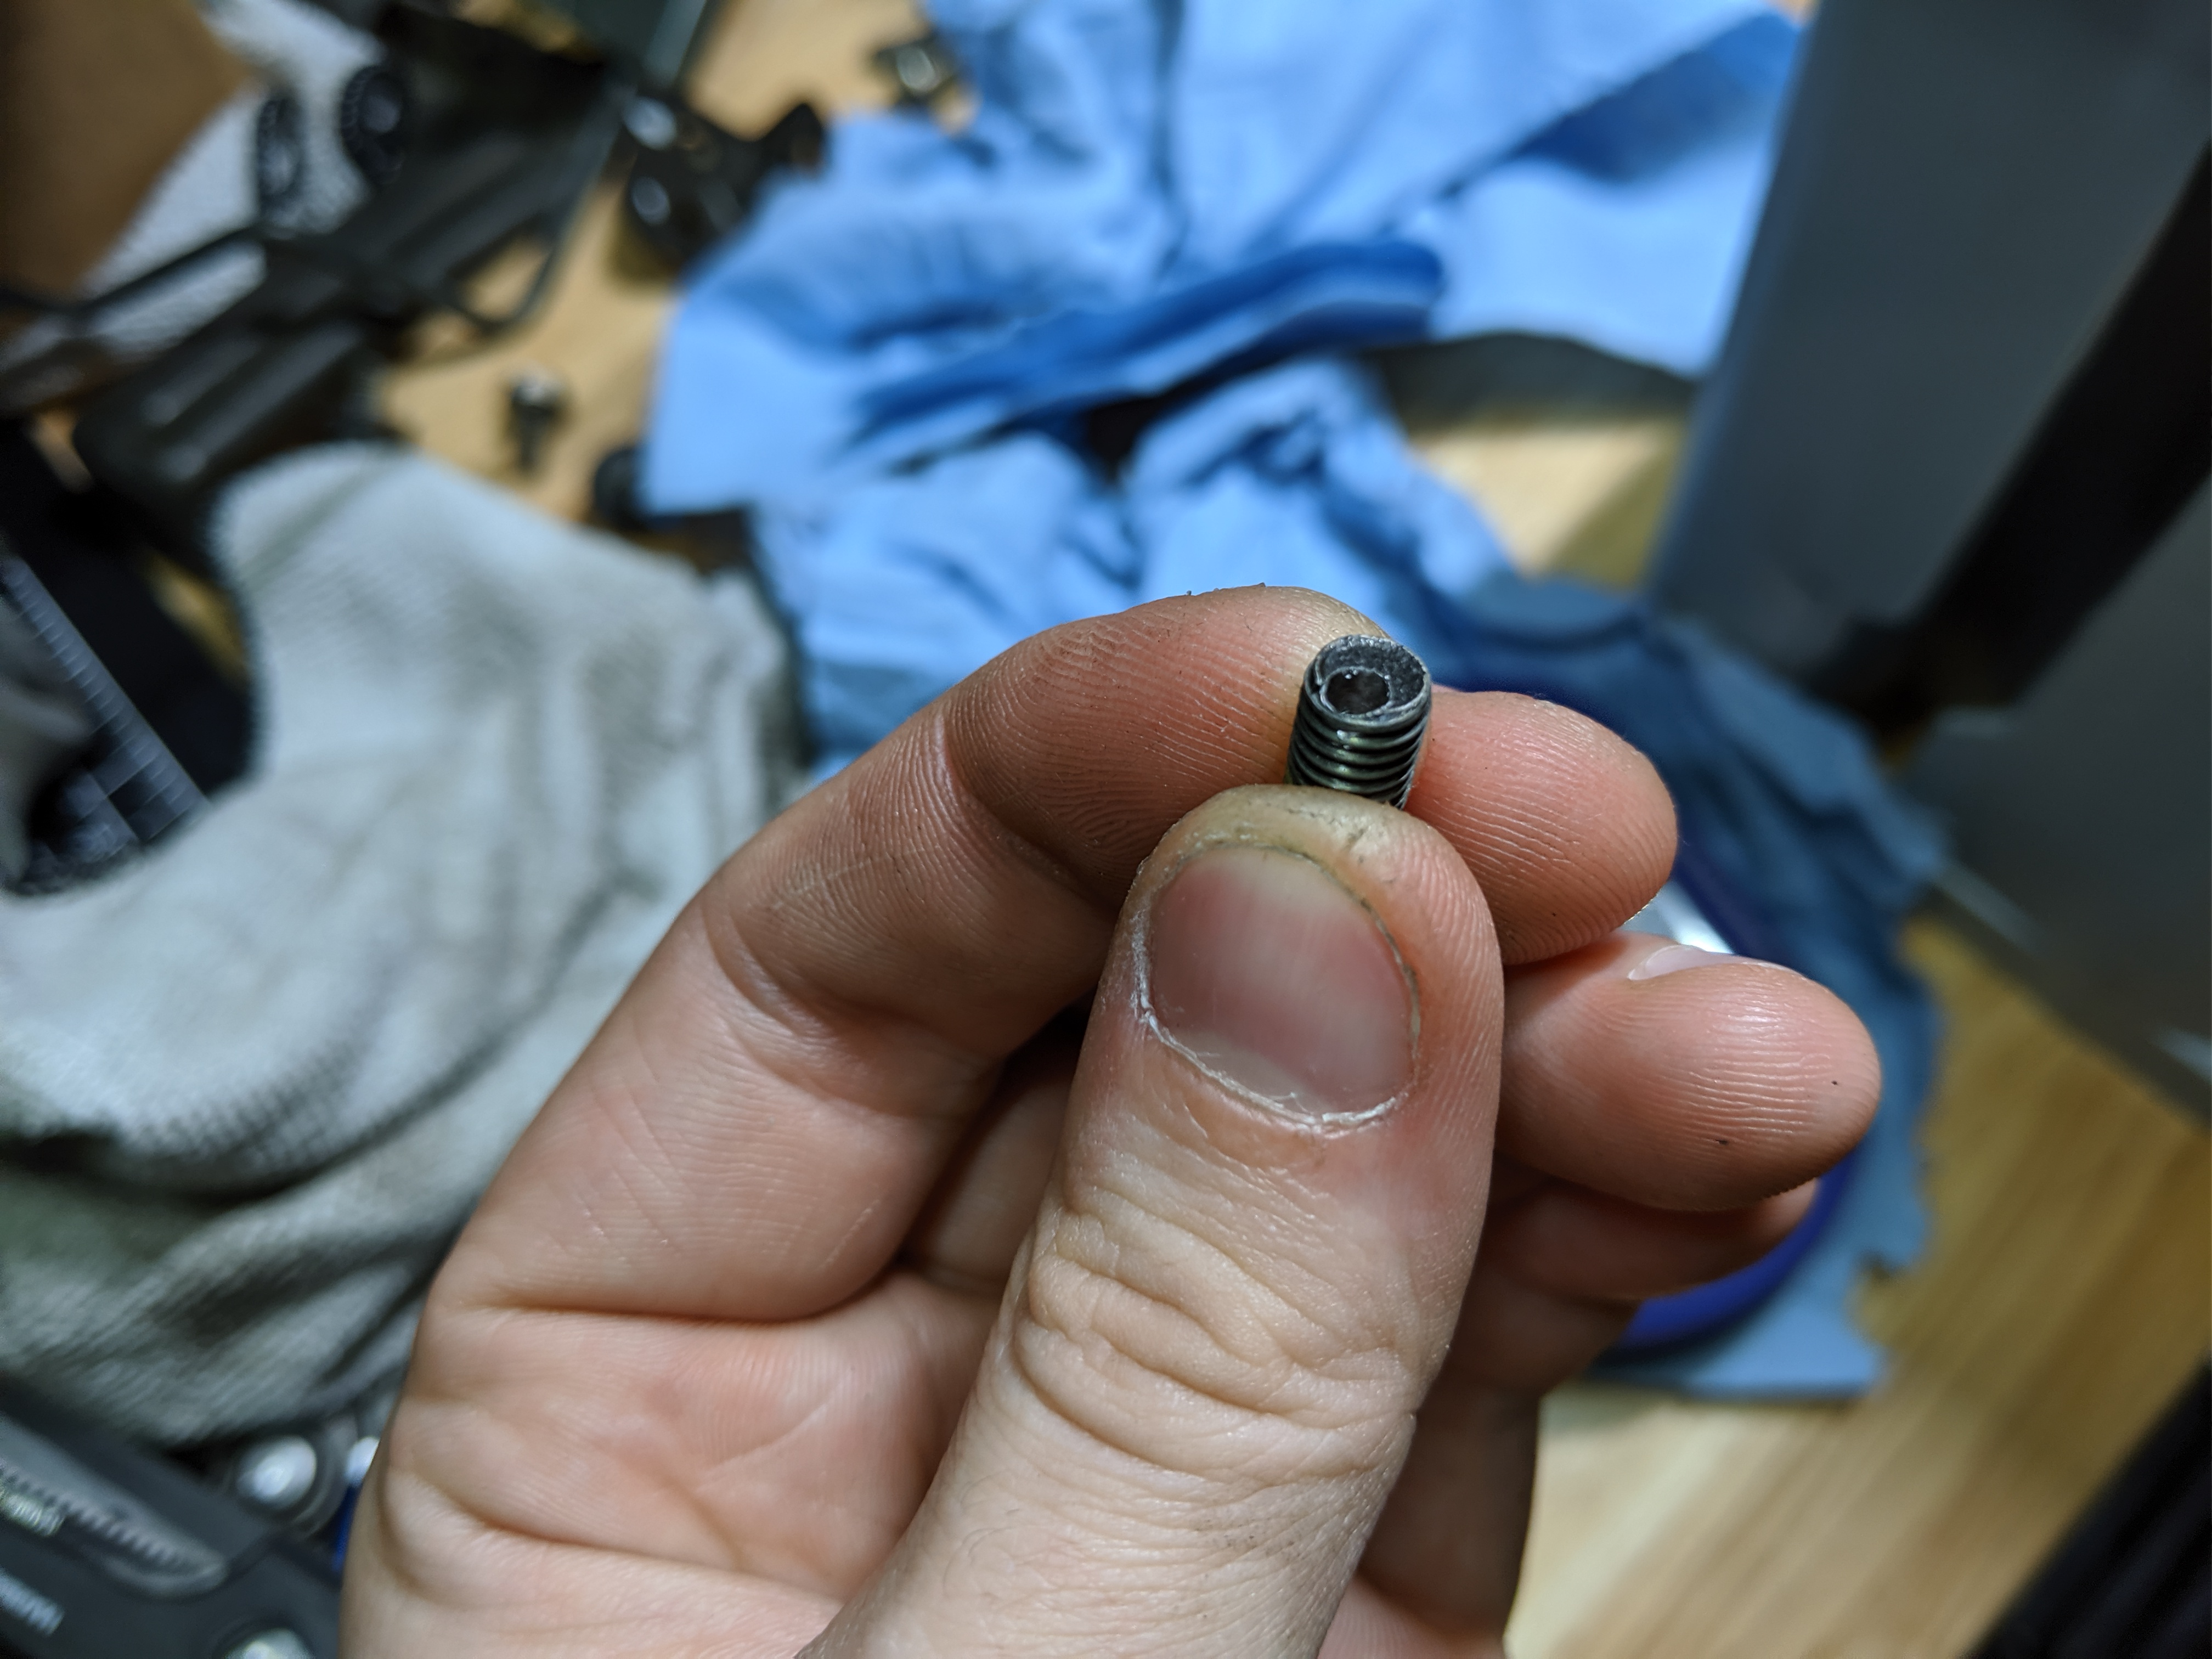
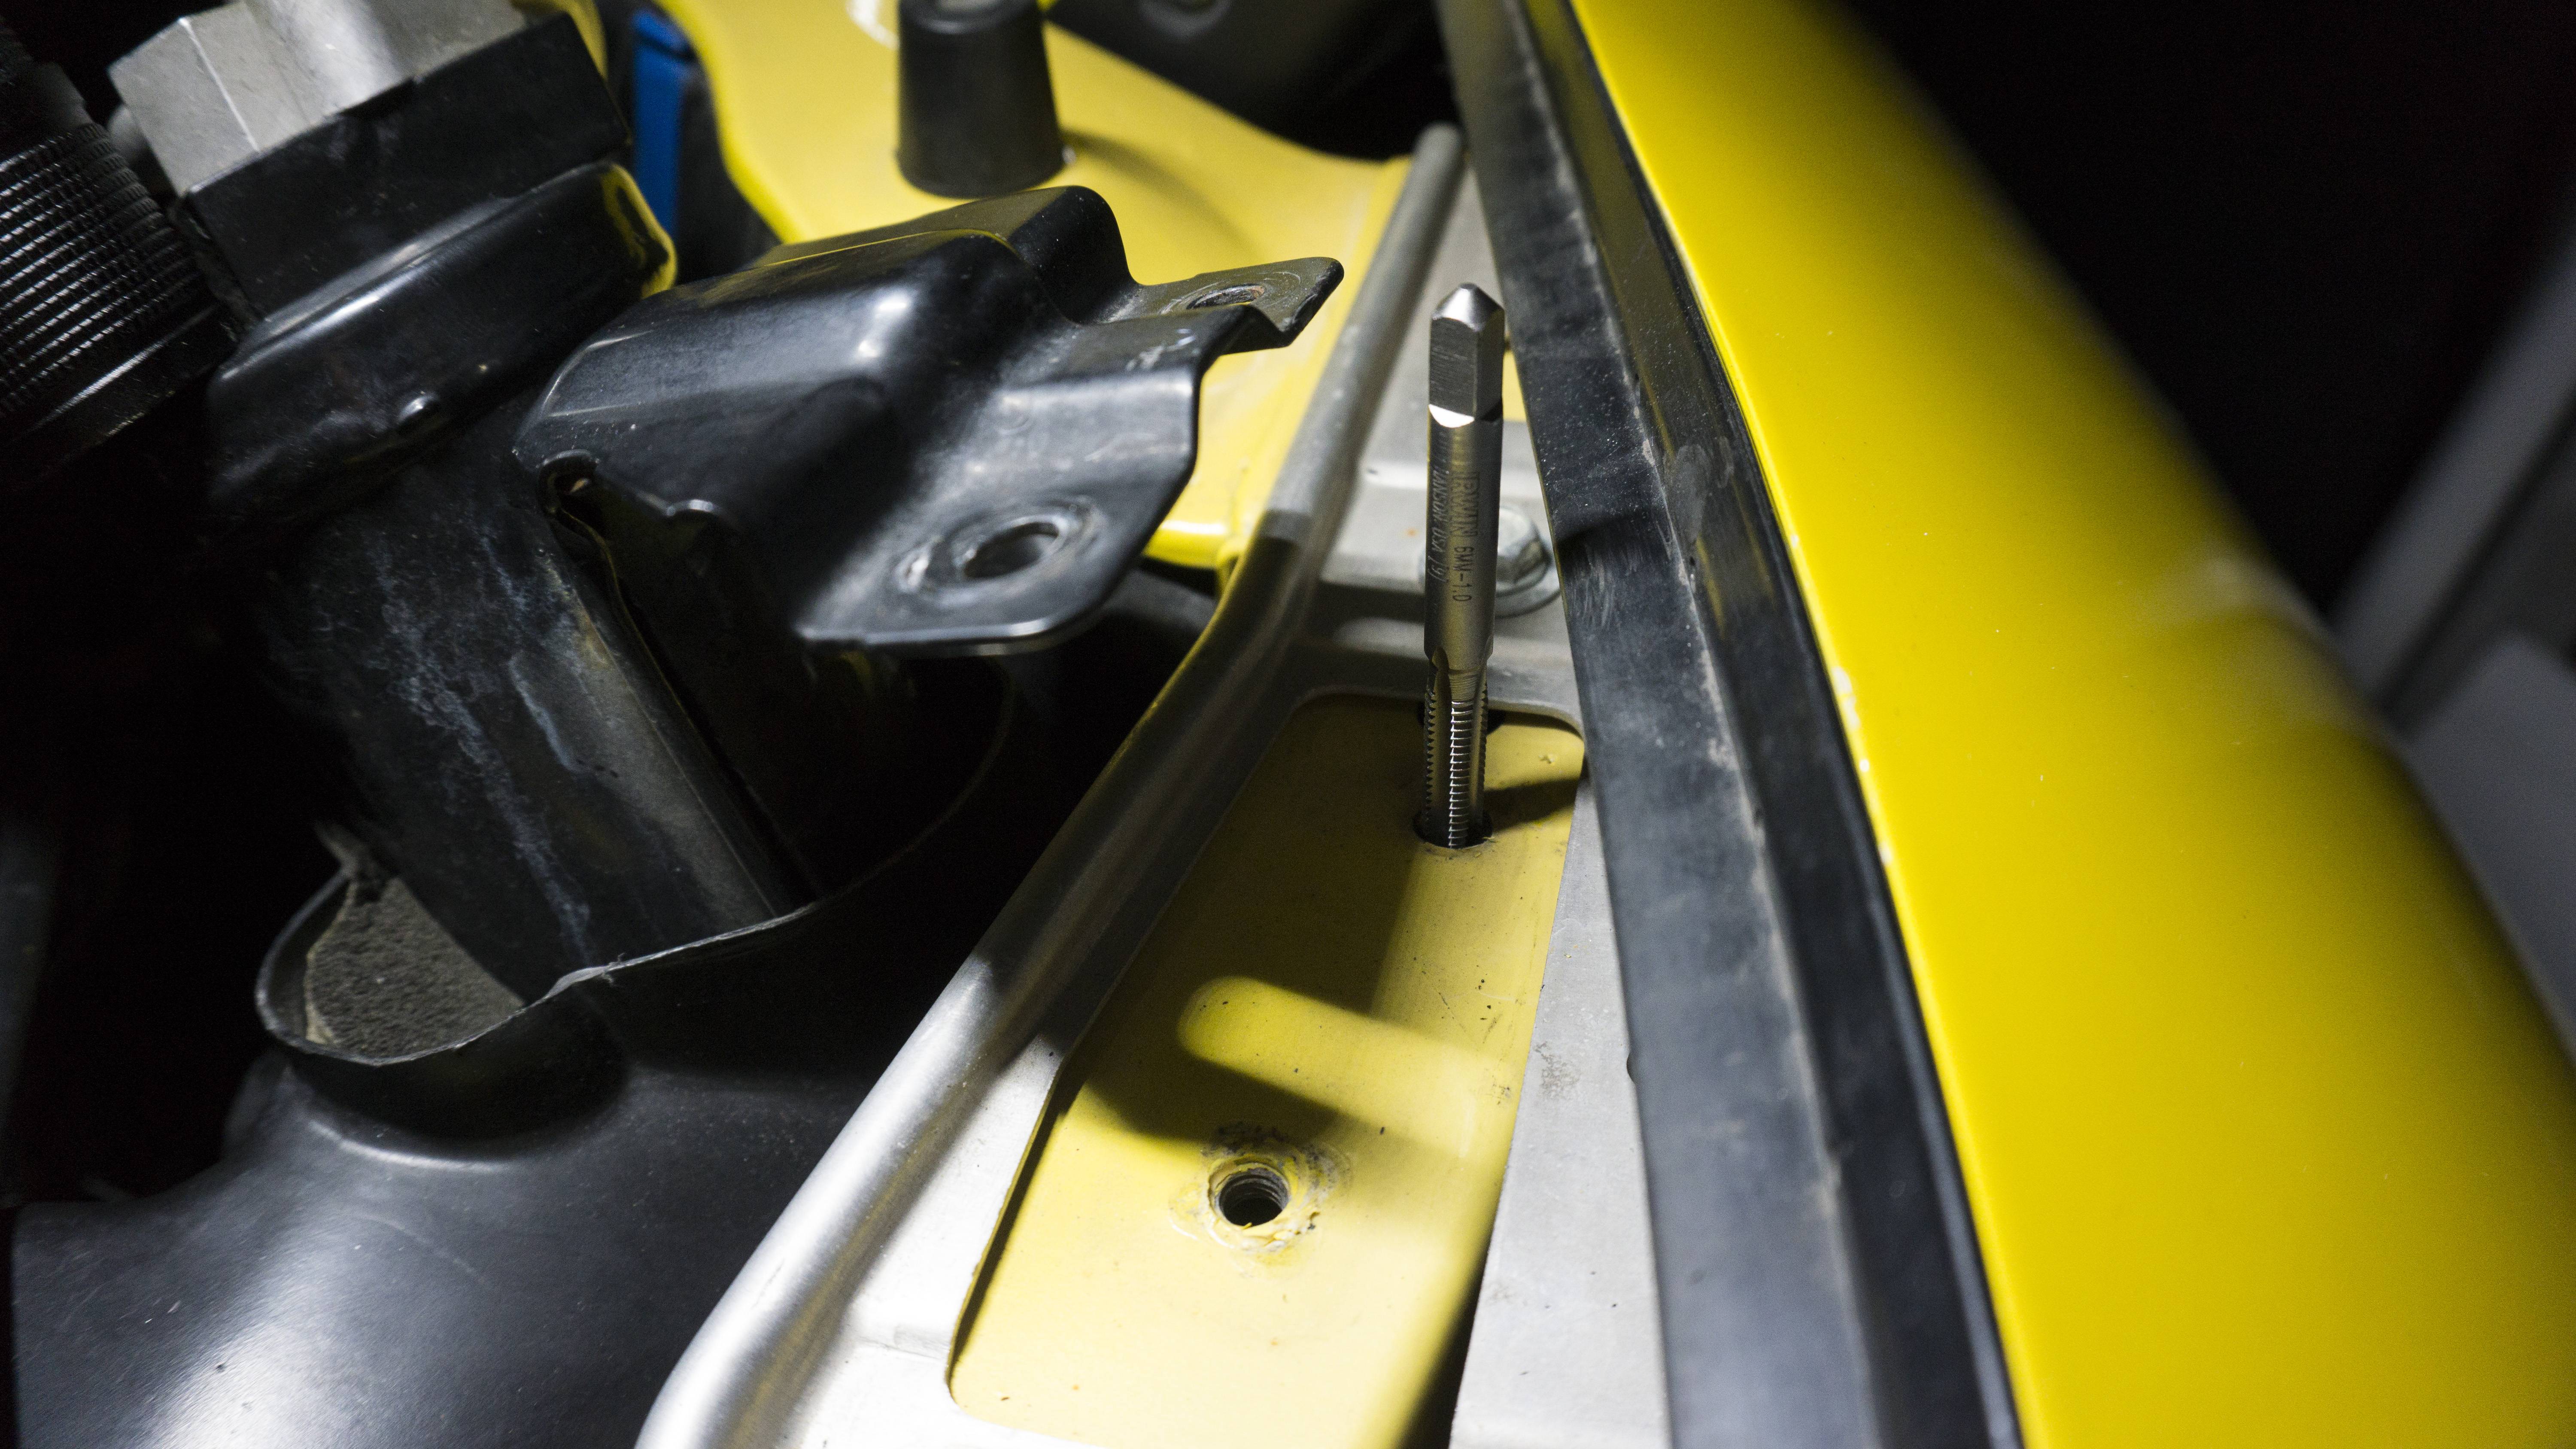
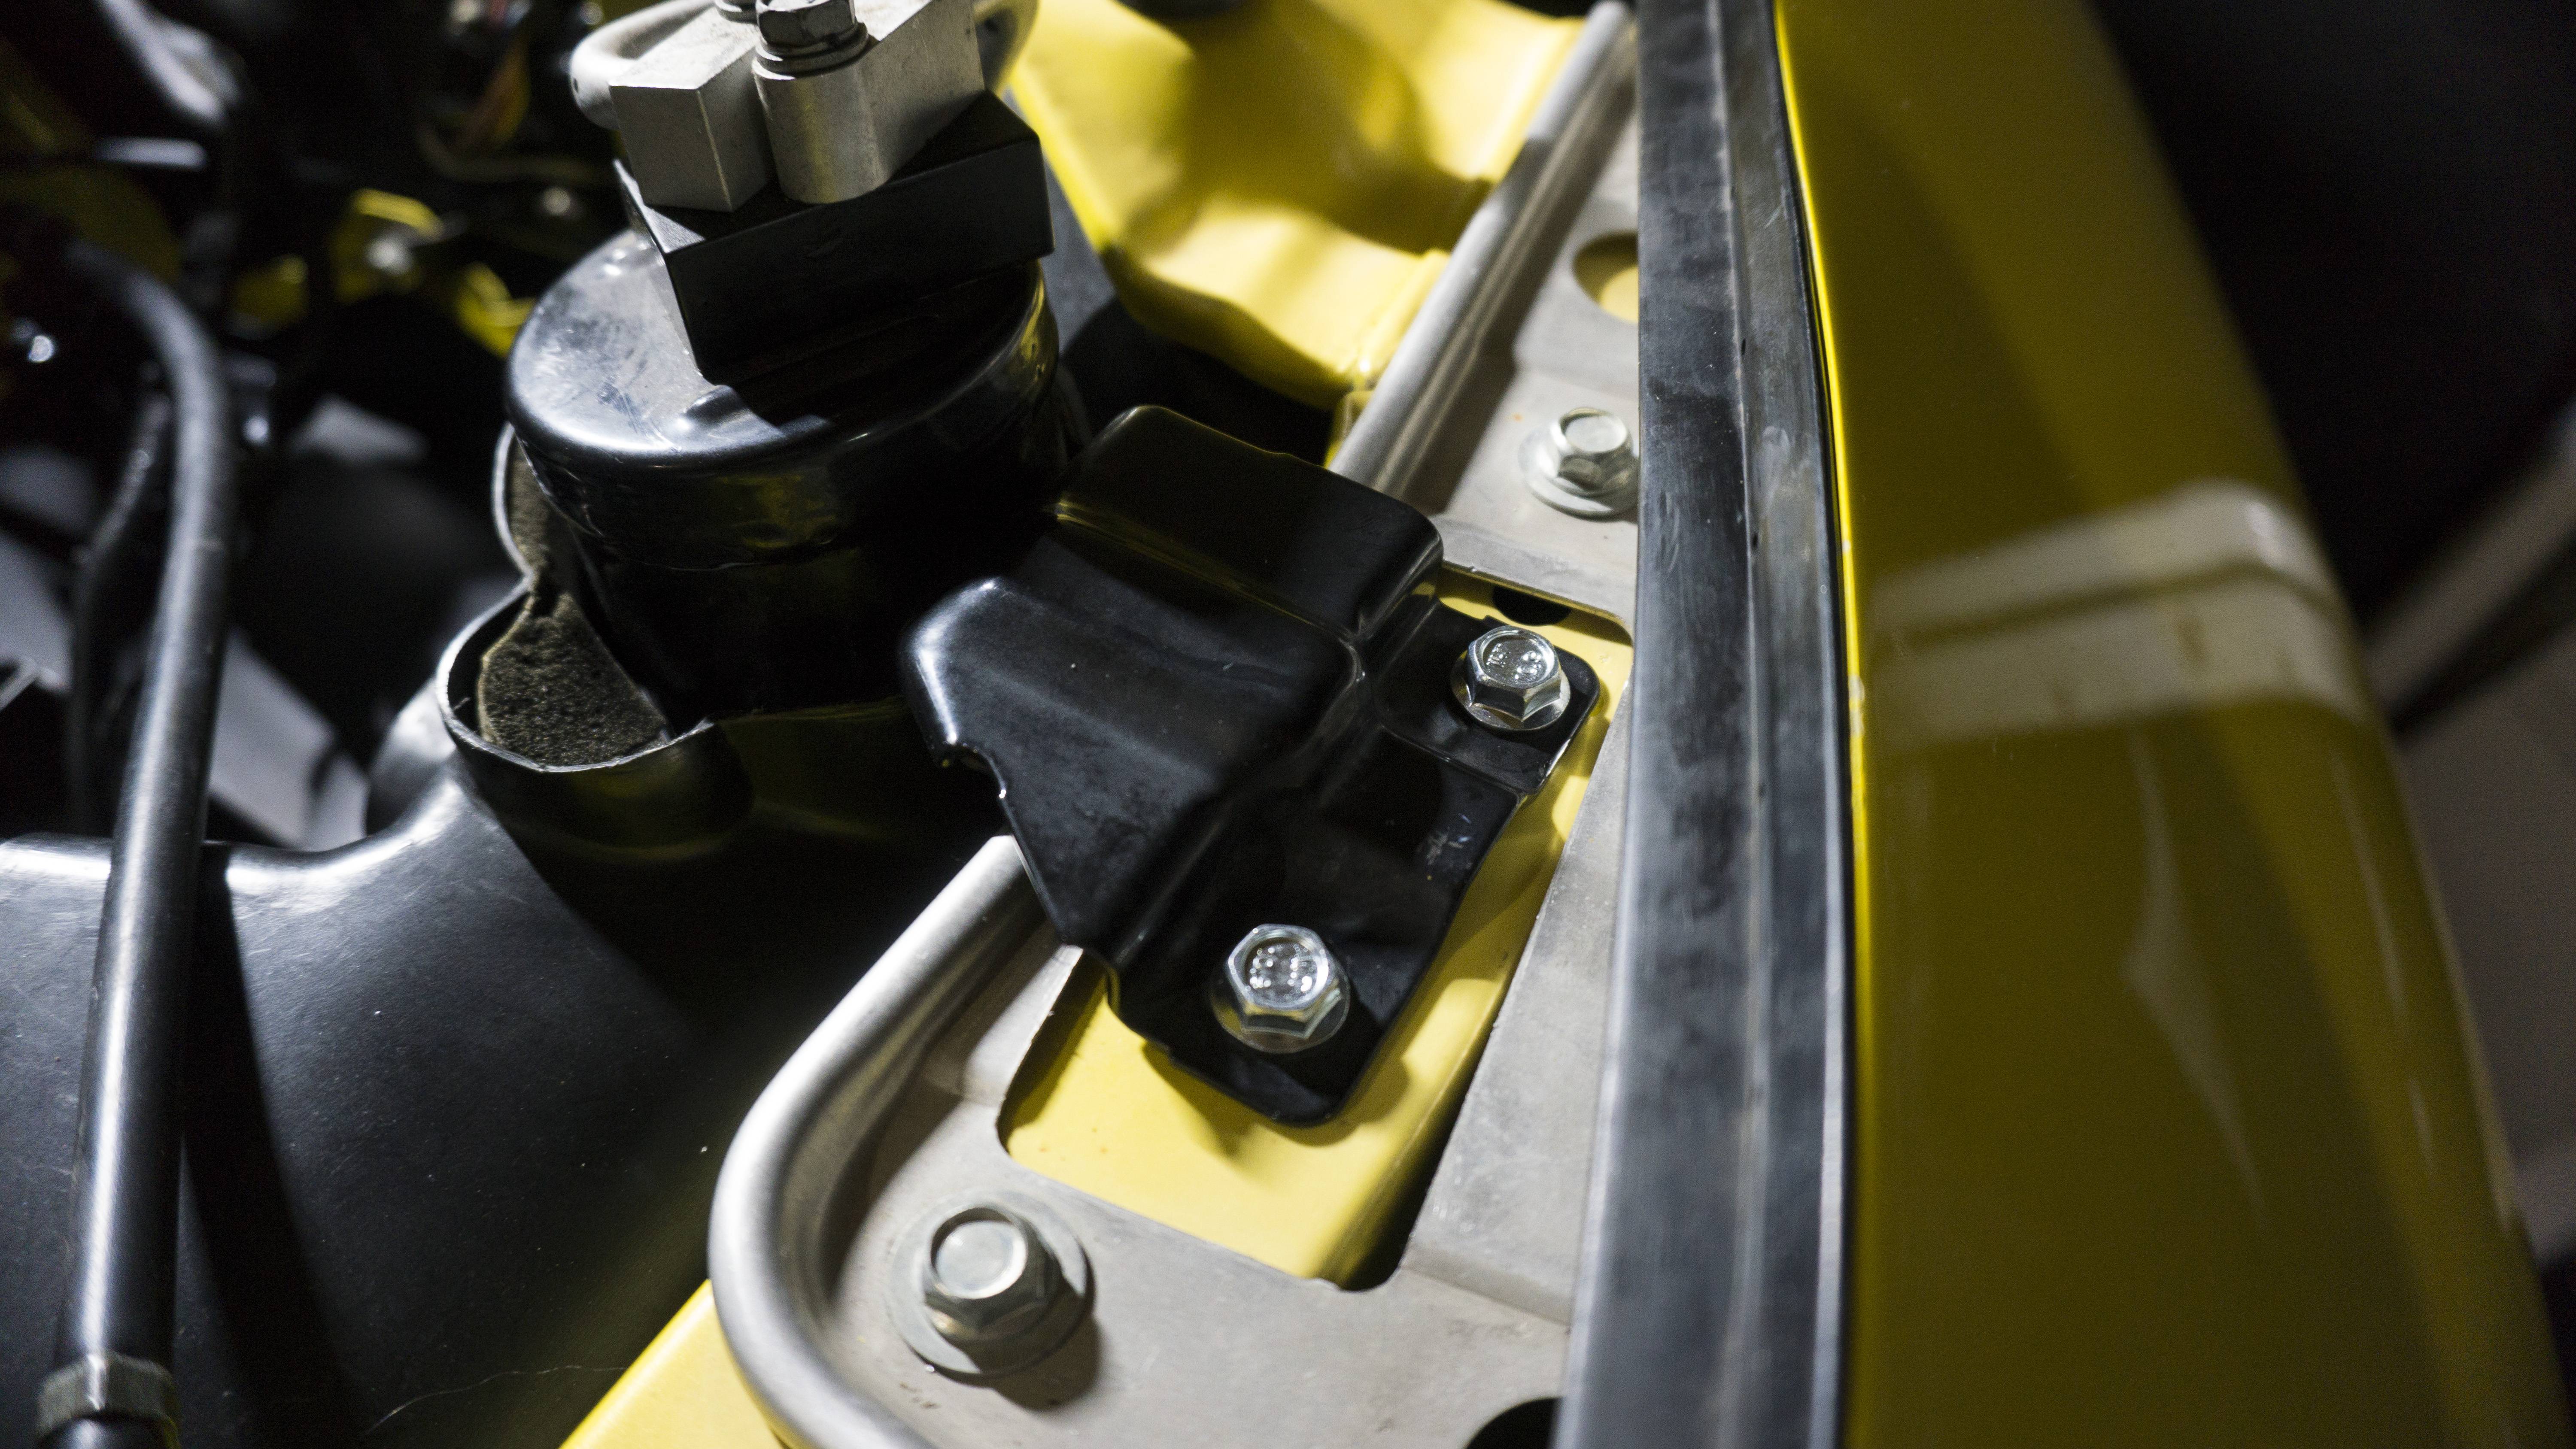
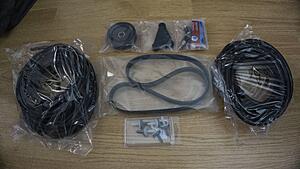
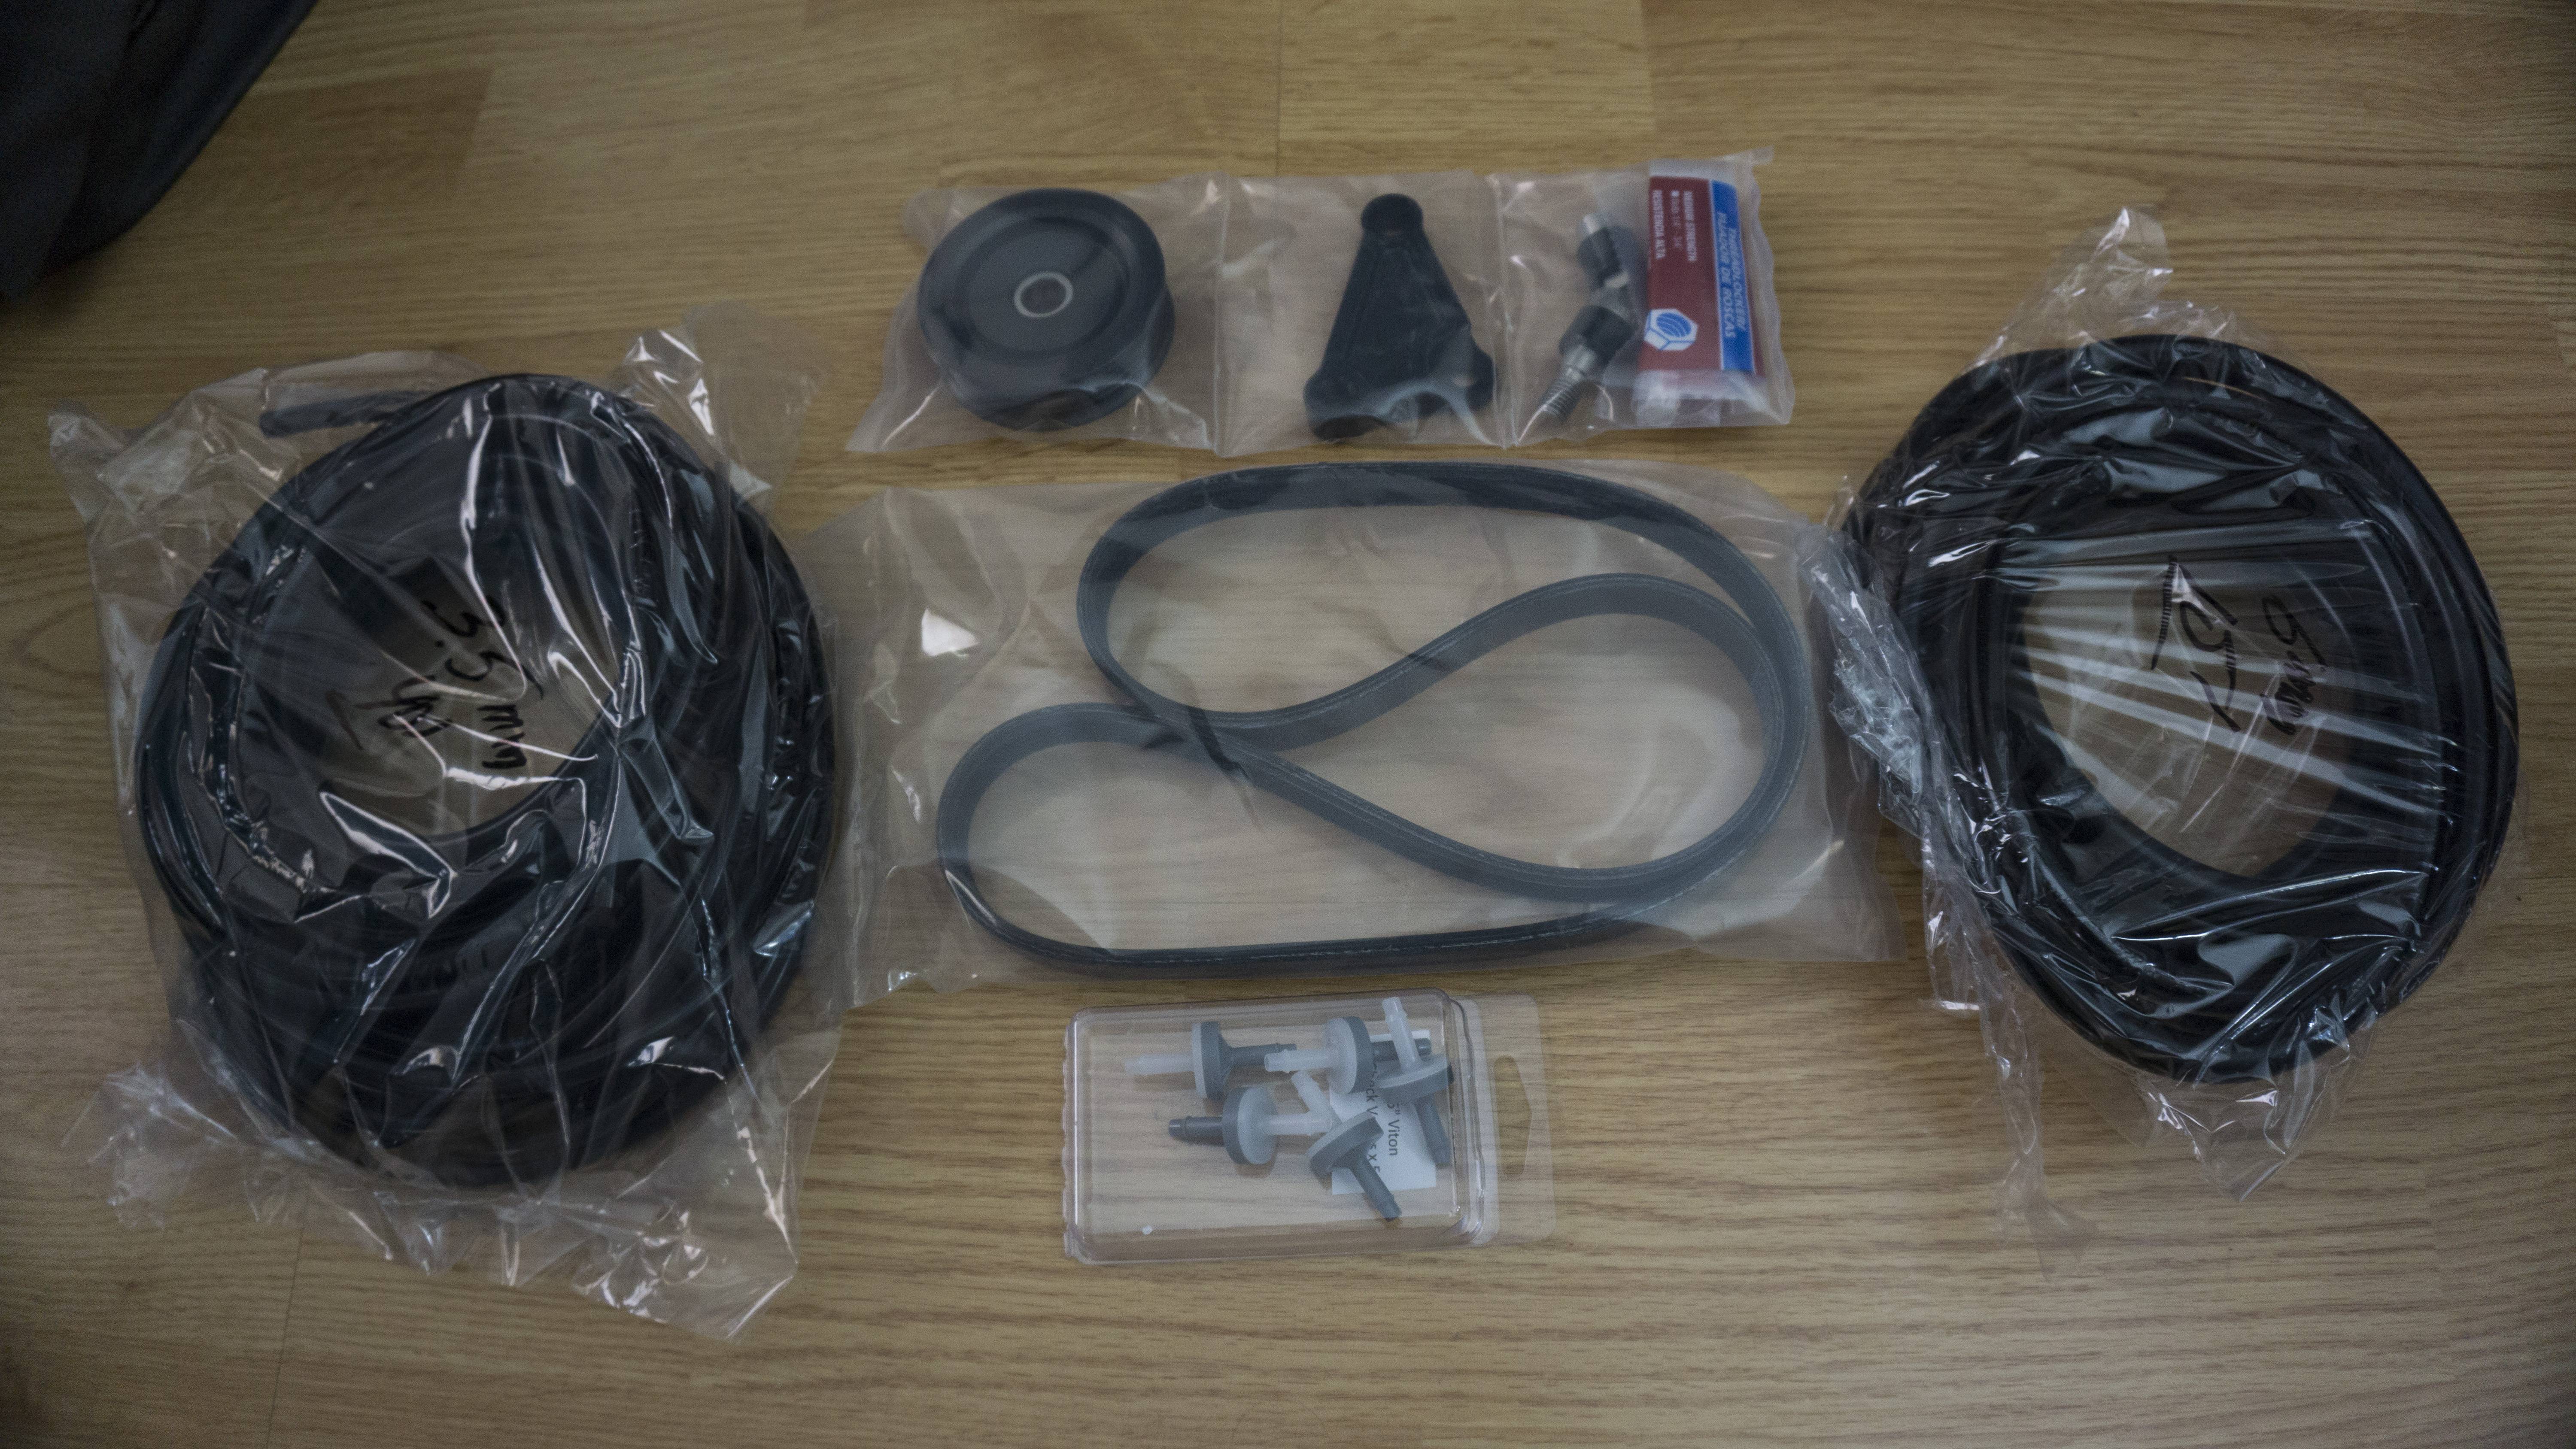
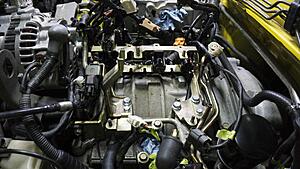
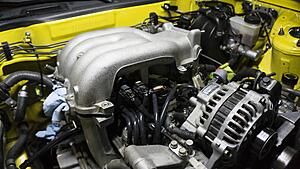
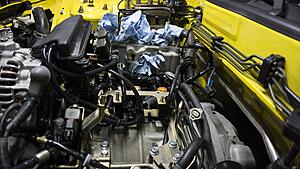
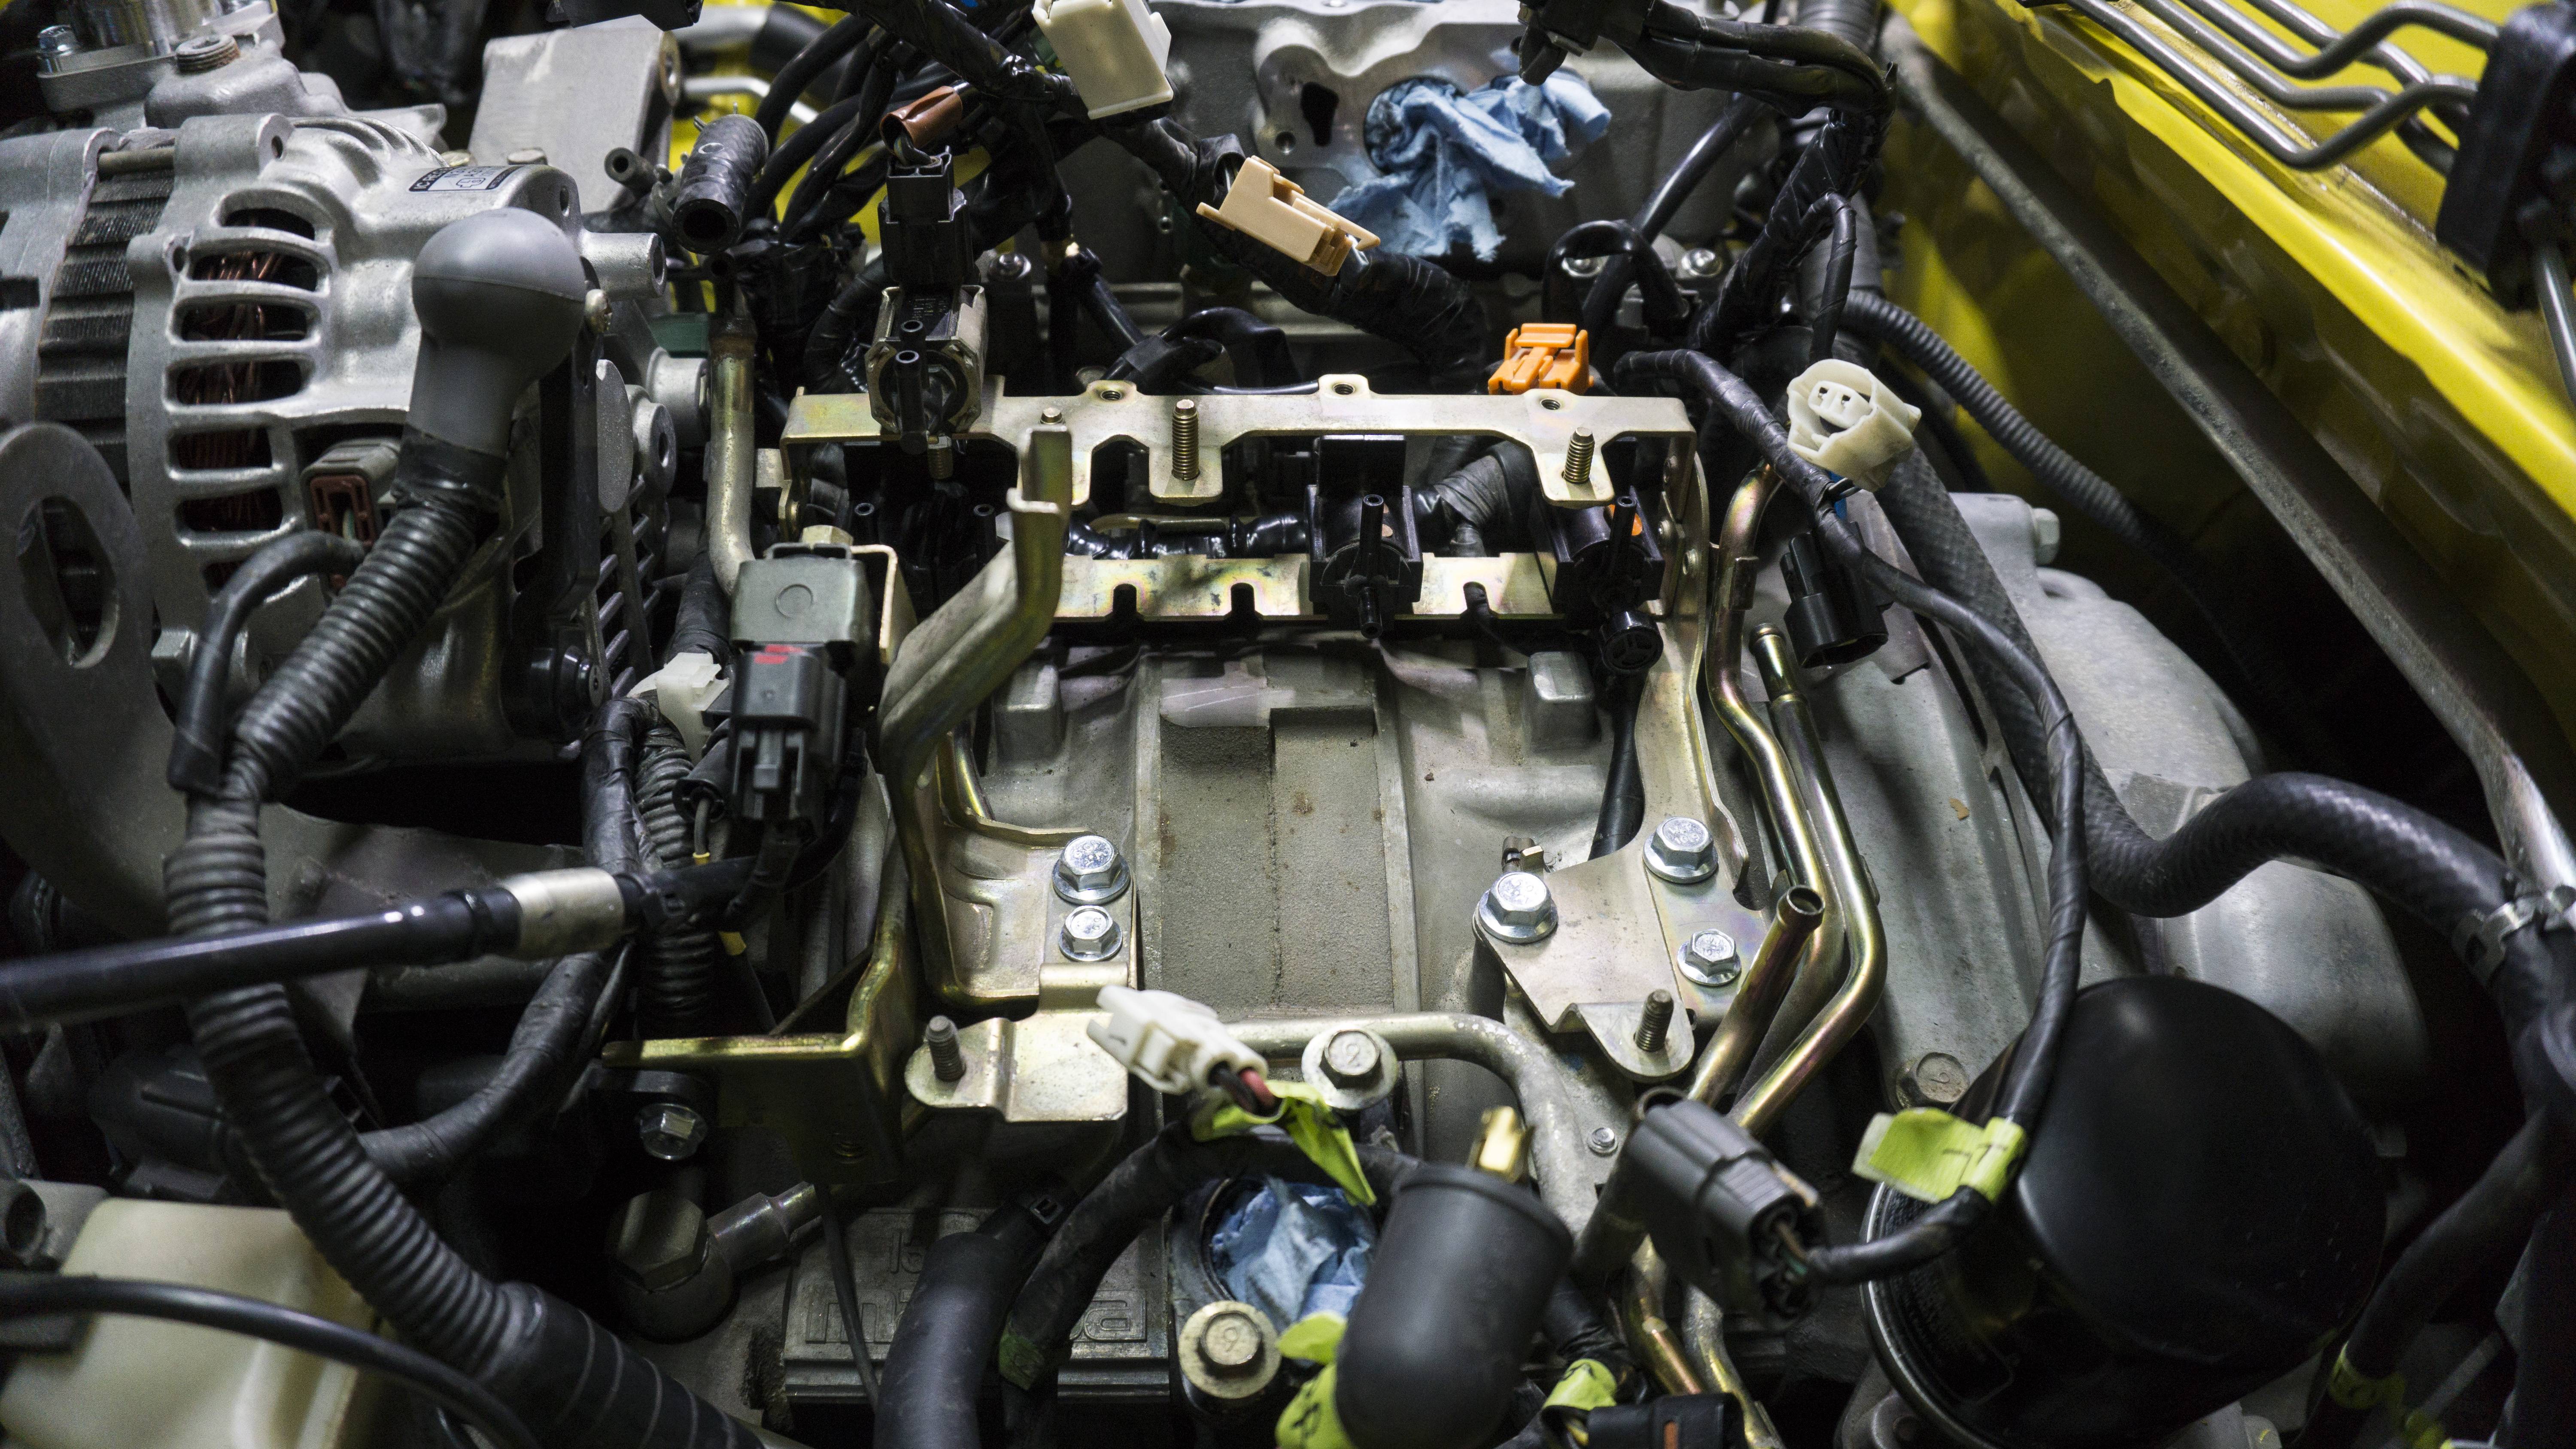
Well...I must say, I didn�t believe a simple downpipe install could progress to become so expensive. I just continue to find things I want to replace (this is partially due to some... �bad� influencers). I�m happy to say that the downpipe came off successfully. All the studs backed out with the bolts, but I think that is the best possible scenario. Since I have the UIM off I�ve decided to overhaul all the hoses. Ironically, none of mine were brittle or bad (I assume due to the low mileage). However, I want to also perform the sequential vacuum simplification - just to make things easier for me later on. Just looking at all the vacuum lines is super intimidating, but I have my diagram so I should, hopefully, be okay. I�m waiting for all the lines to come in...and the motivation...before I start that. I�ve also decided to remove almost everything that�s not needed - AWS, ACV, Air Pump, Dual Butterflys & EGR. This prompted a couple of different purchases - I have on the way a JDM LIM and UIM. Since the JDM variants have the AWS and EGR already deleted they were prime candidates and I didn�t want to use my pristine LIM and UIM for this since I plan on powdercoating them. Since I�m removing the air pump I also purchased a Full Function Engineering Idler Pulley. Some of the stuff that came in this week is the Turbo Jeff Battery Tray (which I already have on), the Efini Y-Pipes, and the final pieces required for my 99-Spec Front bumper swap - two air guides. I was sad to find out that my HKS RS intake system is back ordered until November and December, so that puts a damper on me getting this stuff over to coating. To cheer myself up I went ahead and grabbed the GReddy Compression Tube and Hard Piping kit. Since the last update I was able to get the downpipe pulled off, remove a lot of stuff in the engine bay to get work done, get the TurboJeff mount installed, and I dumped the coolant for a flush and installed Banzai Racing�s AST Delete. I also went ahead and got the air pump off as well. The last thing I did was something that�s been bothering me for awhile. The previous owner snapped a bolt head off that holds the AC drier. I finally took the time to get it out, but had a lot of luck on my side. I was unable to extract it trying a lot of different methods. Went to drill it out and as soon as I went all the way through the bolt it threaded itself down and out automatically. Usually I don�t get this lucky, so I�m hoping it�s a good sign that everything else will go fine too lol.
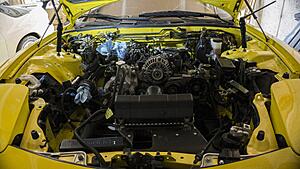
Here are a few shots of the engine bay:
Here is the TurboJeff battery tray and AST delete:
Here is that blasted bolt:

Here is all the new stuff that came in:

Well...I must say, I didn�t believe a simple downpipe install could progress to become so expensive. I just continue to find things I want to replace (this is partially due to some... �bad� influencers). I�m happy to say that the downpipe came off successfully. All the studs backed out with the bolts, but I think that is the best possible scenario. Since I have the UIM off I�ve decided to overhaul all the hoses. Ironically, none of mine were brittle or bad (I assume due to the low mileage). However, I want to also perform the sequential vacuum simplification - just to make things easier for me later on. Just looking at all the vacuum lines is super intimidating, but I have my diagram so I should, hopefully, be okay. I�m waiting for all the lines to come in...and the motivation...before I start that. I�ve also decided to remove almost everything that�s not needed - AWS, ACV, Air Pump, Dual Butterflys & EGR. This prompted a couple of different purchases - I have on the way a JDM LIM and UIM. Since the JDM variants have the AWS and EGR already deleted they were prime candidates and I didn�t want to use my pristine LIM and UIM for this since I plan on powdercoating them. Since I�m removing the air pump I also purchased a Full Function Engineering Idler Pulley. Some of the stuff that came in this week is the Turbo Jeff Battery Tray (which I already have on), the Efini Y-Pipes, and the final pieces required for my 99-Spec Front bumper swap - two air guides. I was sad to find out that my HKS RS intake system is back ordered until November and December, so that puts a damper on me getting this stuff over to coating. To cheer myself up I went ahead and grabbed the GReddy Compression Tube and Hard Piping kit. Since the last update I was able to get the downpipe pulled off, remove a lot of stuff in the engine bay to get work done, get the TurboJeff mount installed, and I dumped the coolant for a flush and installed Banzai Racing�s AST Delete. I also went ahead and got the air pump off as well. The last thing I did was something that�s been bothering me for awhile. The previous owner snapped a bolt head off that holds the AC drier. I finally took the time to get it out, but had a lot of luck on my side. I was unable to extract it trying a lot of different methods. Went to drill it out and as soon as I went all the way through the bolt it threaded itself down and out automatically. Usually I don�t get this lucky, so I�m hoping it�s a good sign that everything else will go fine too lol.
Here are a few shots of the engine bay:

Here is the TurboJeff battery tray and AST delete:

Here is that blasted bolt:
Here is all the new stuff that came in:
Thread Starter
Joined: Apr 2015
Posts: 398
Likes: 169
From: St. Louis, MO
Update 10/19/19:
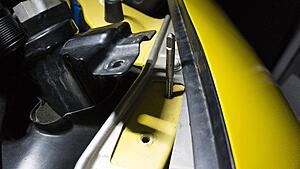
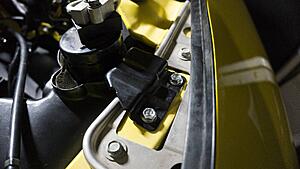
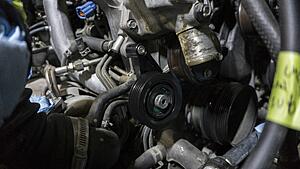
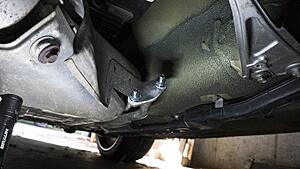
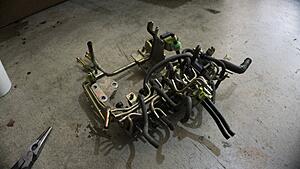
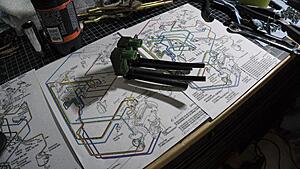
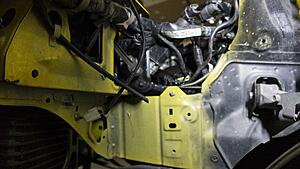
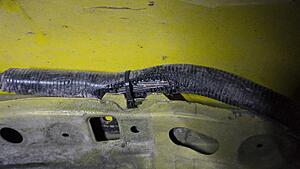
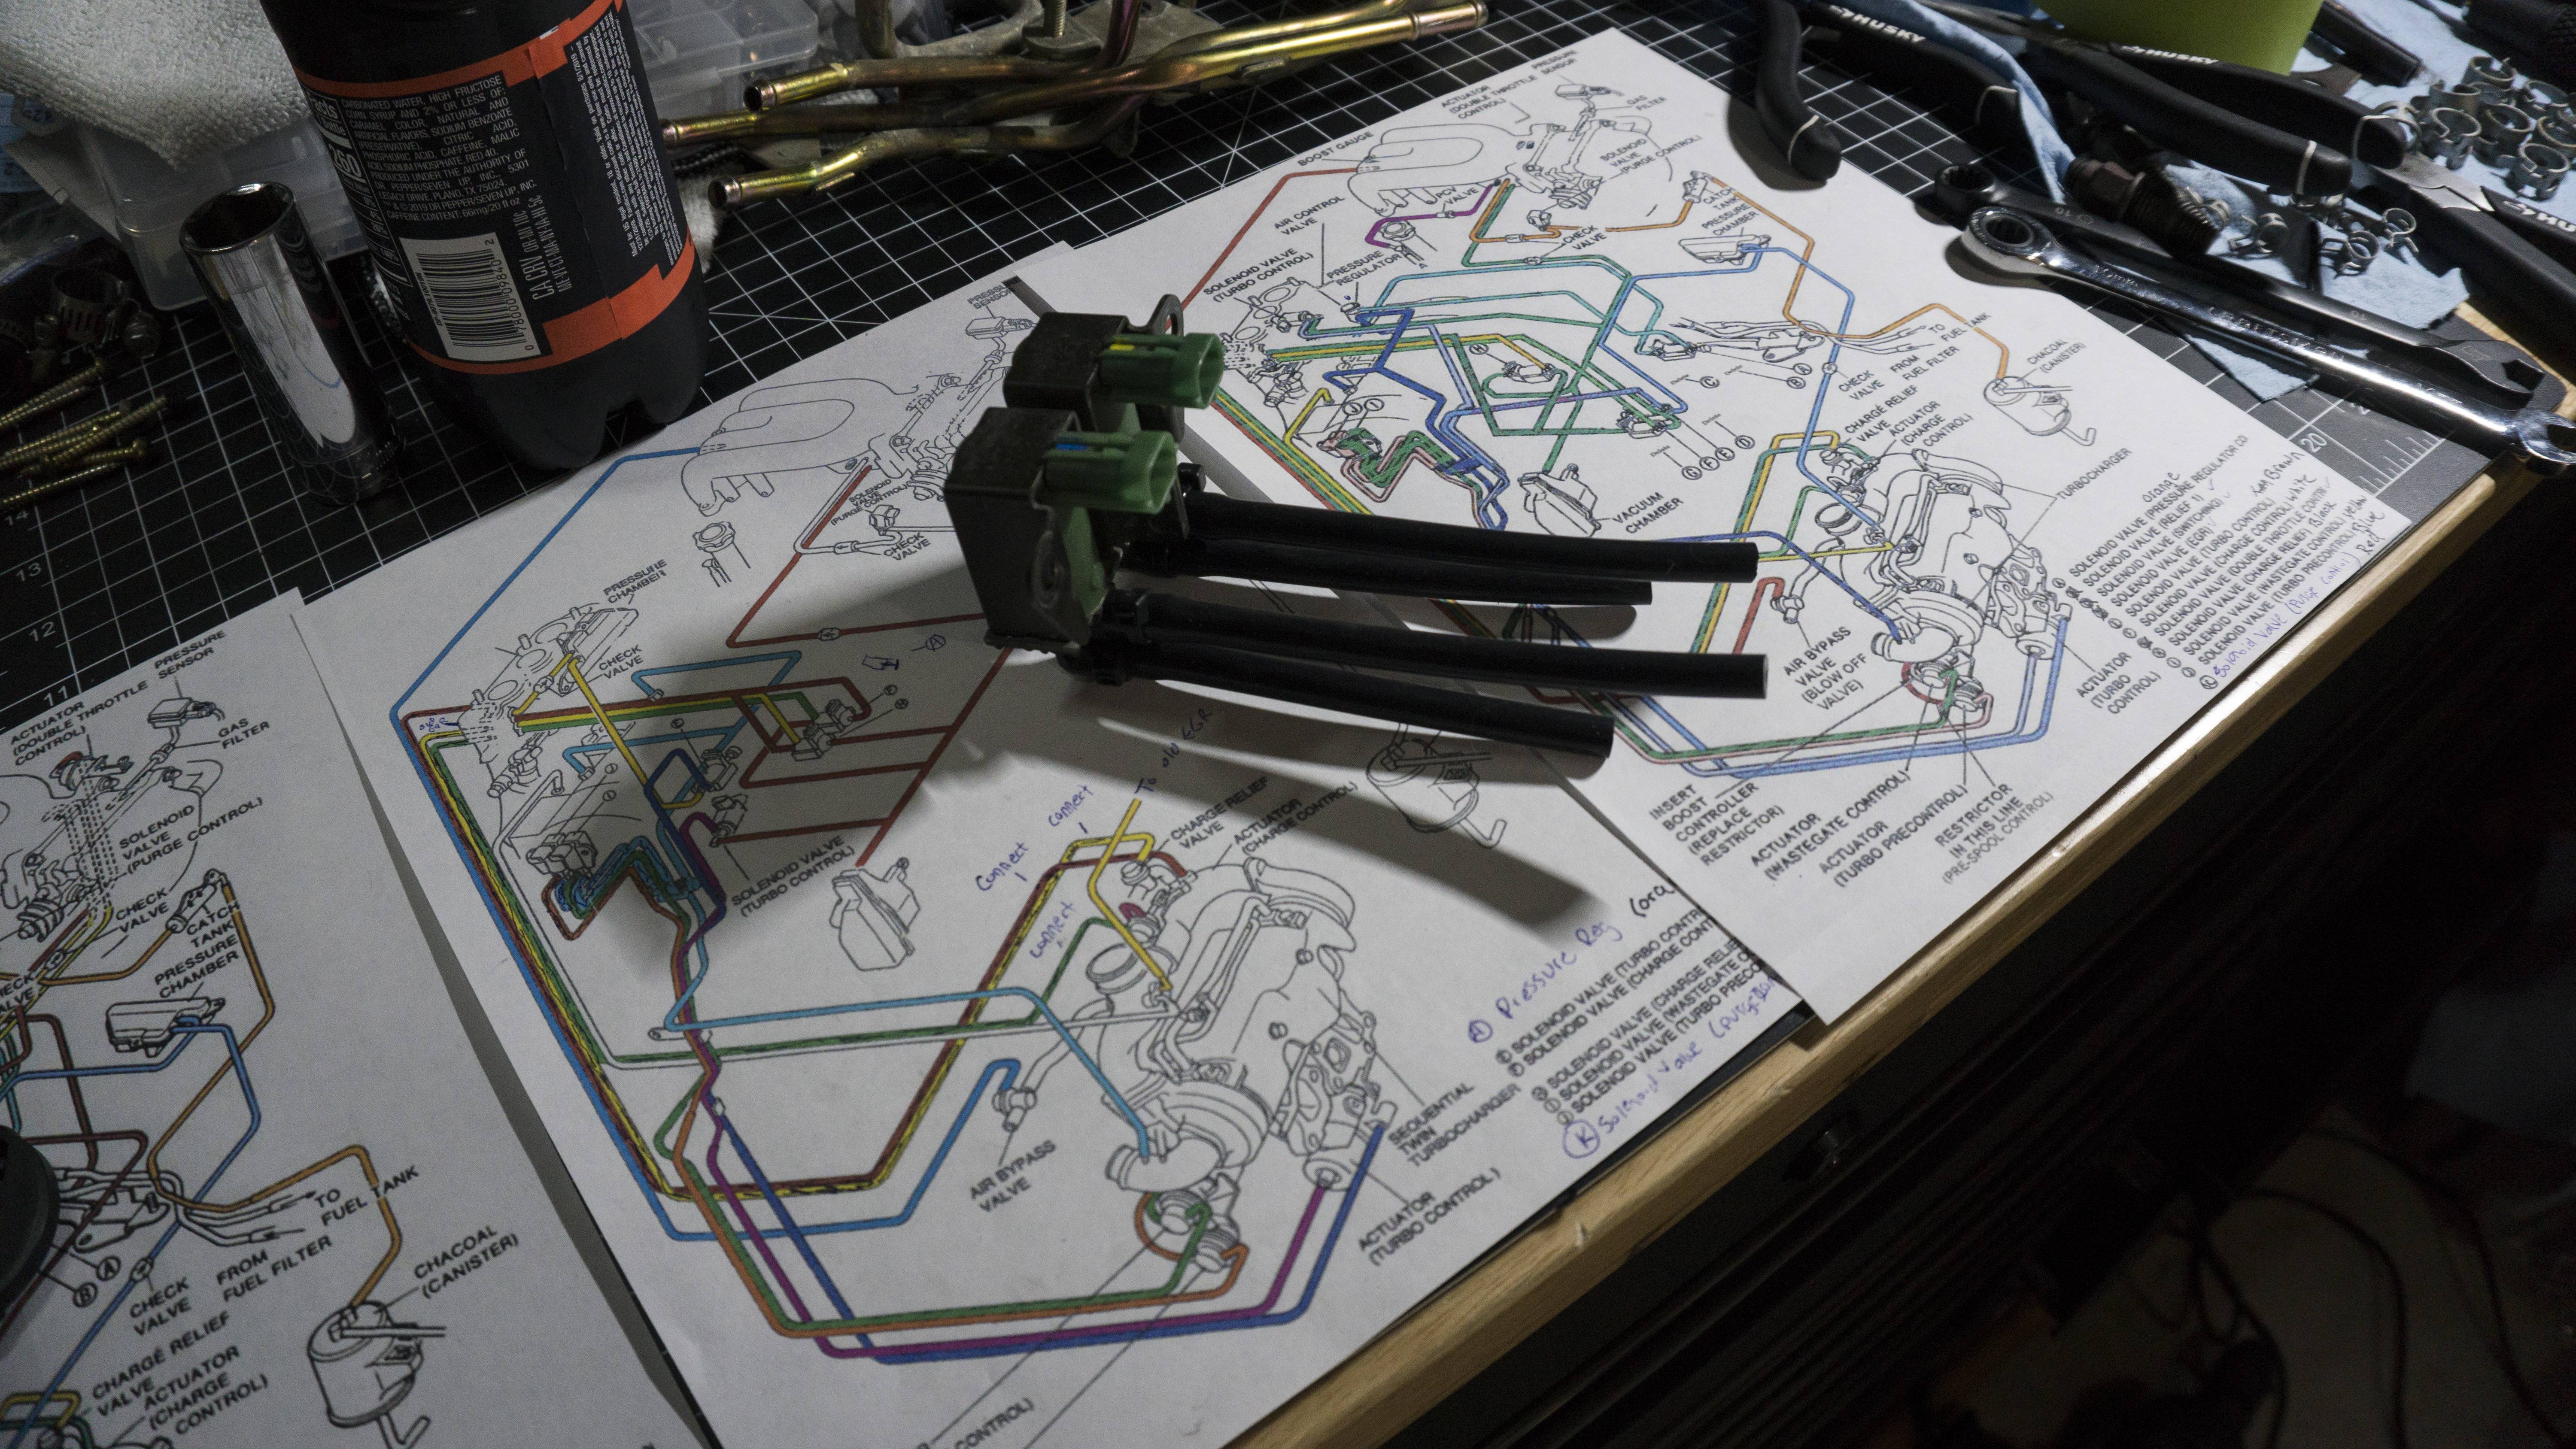
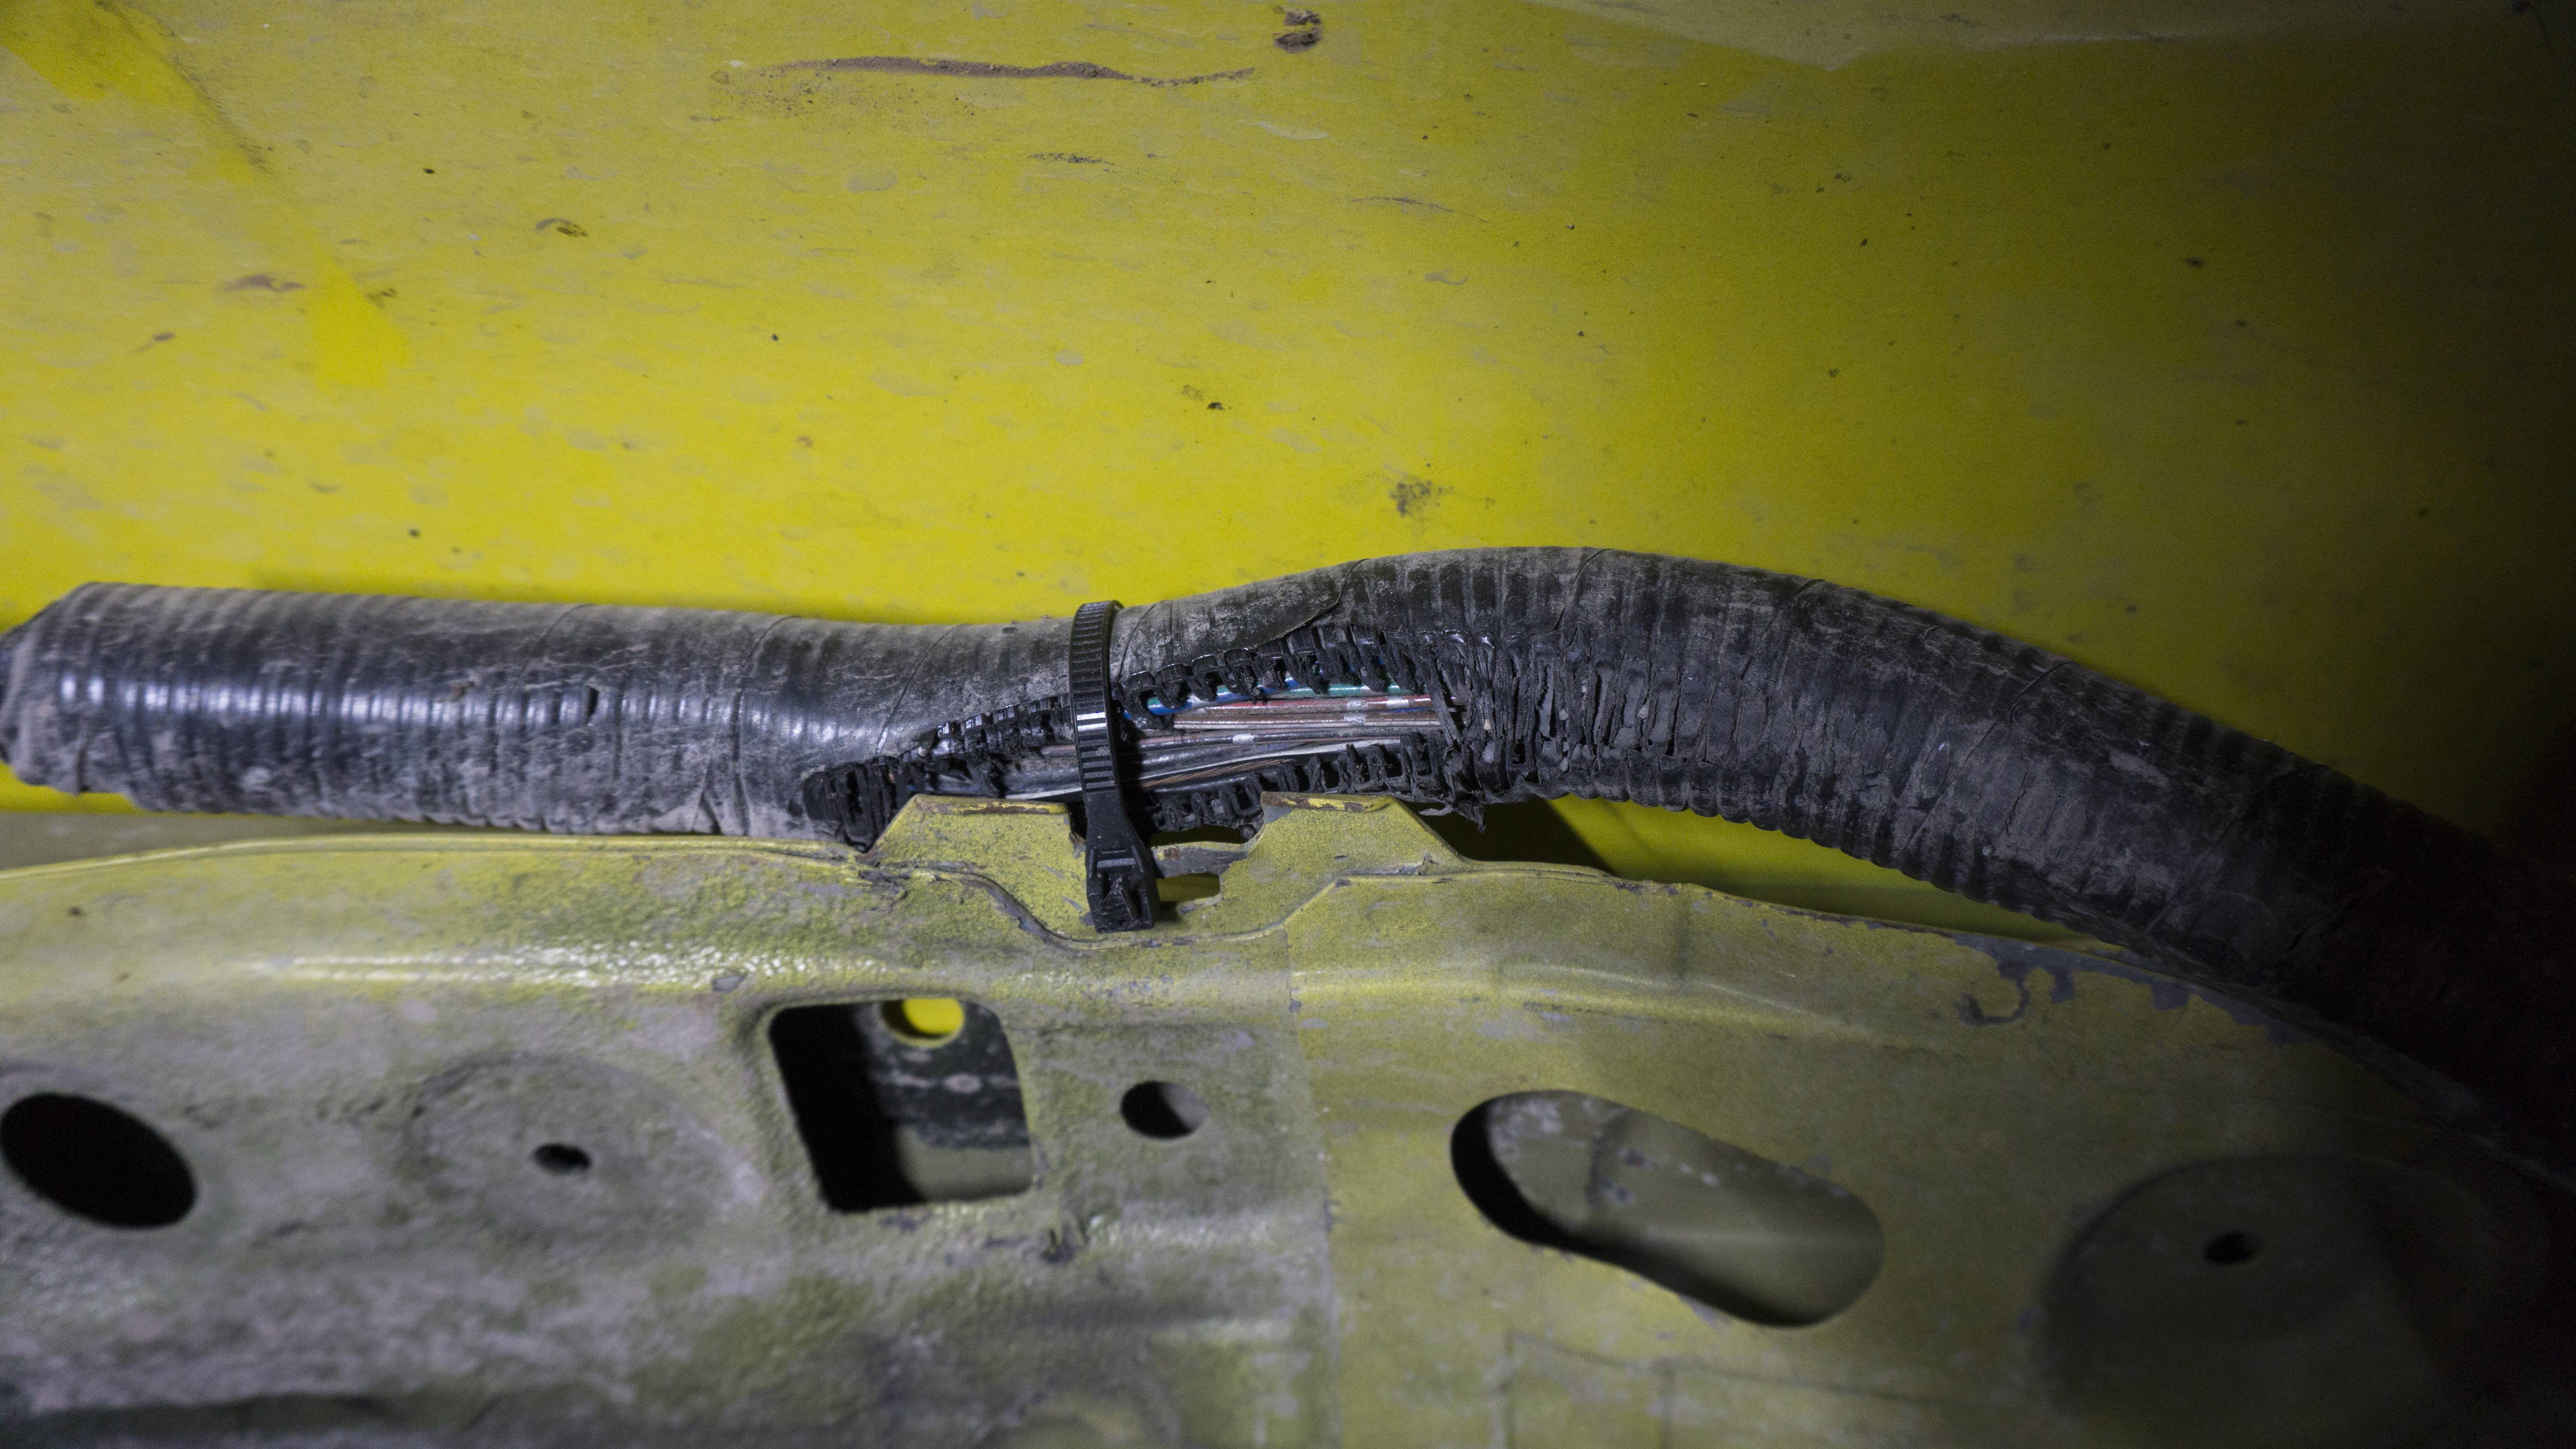
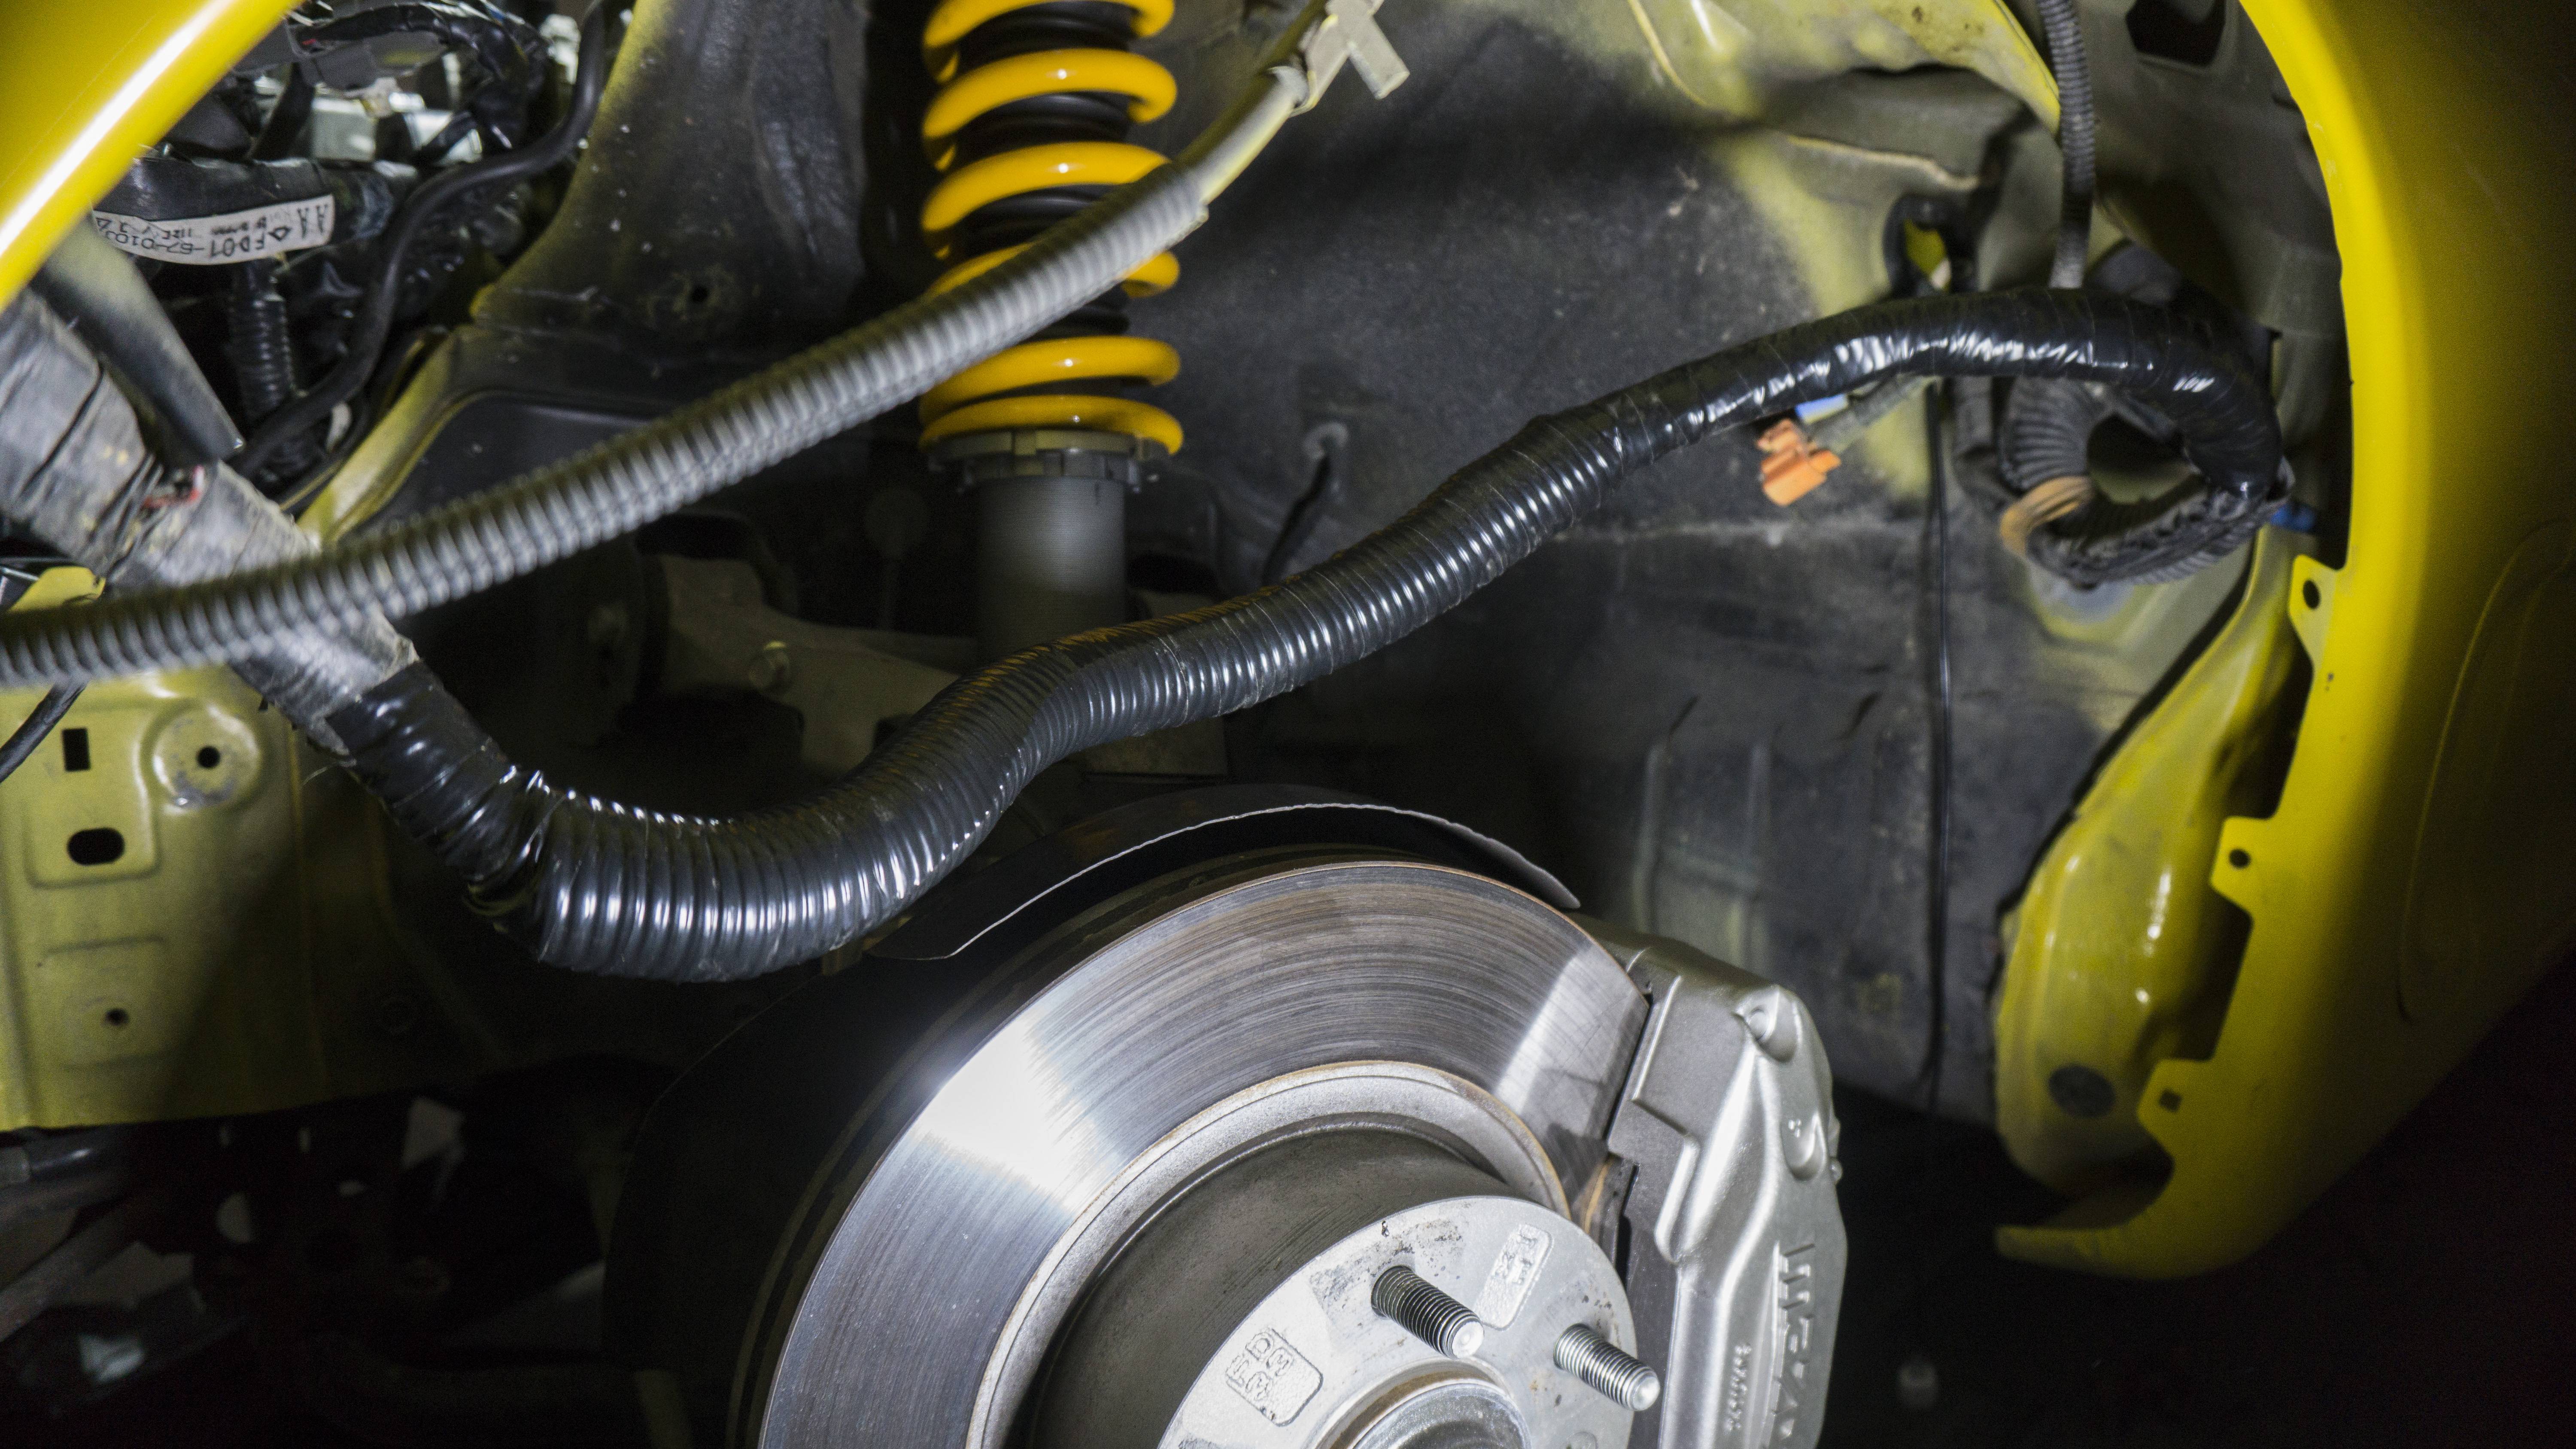
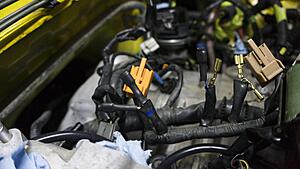
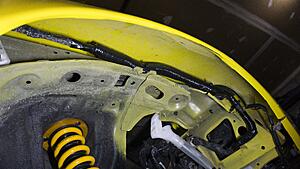
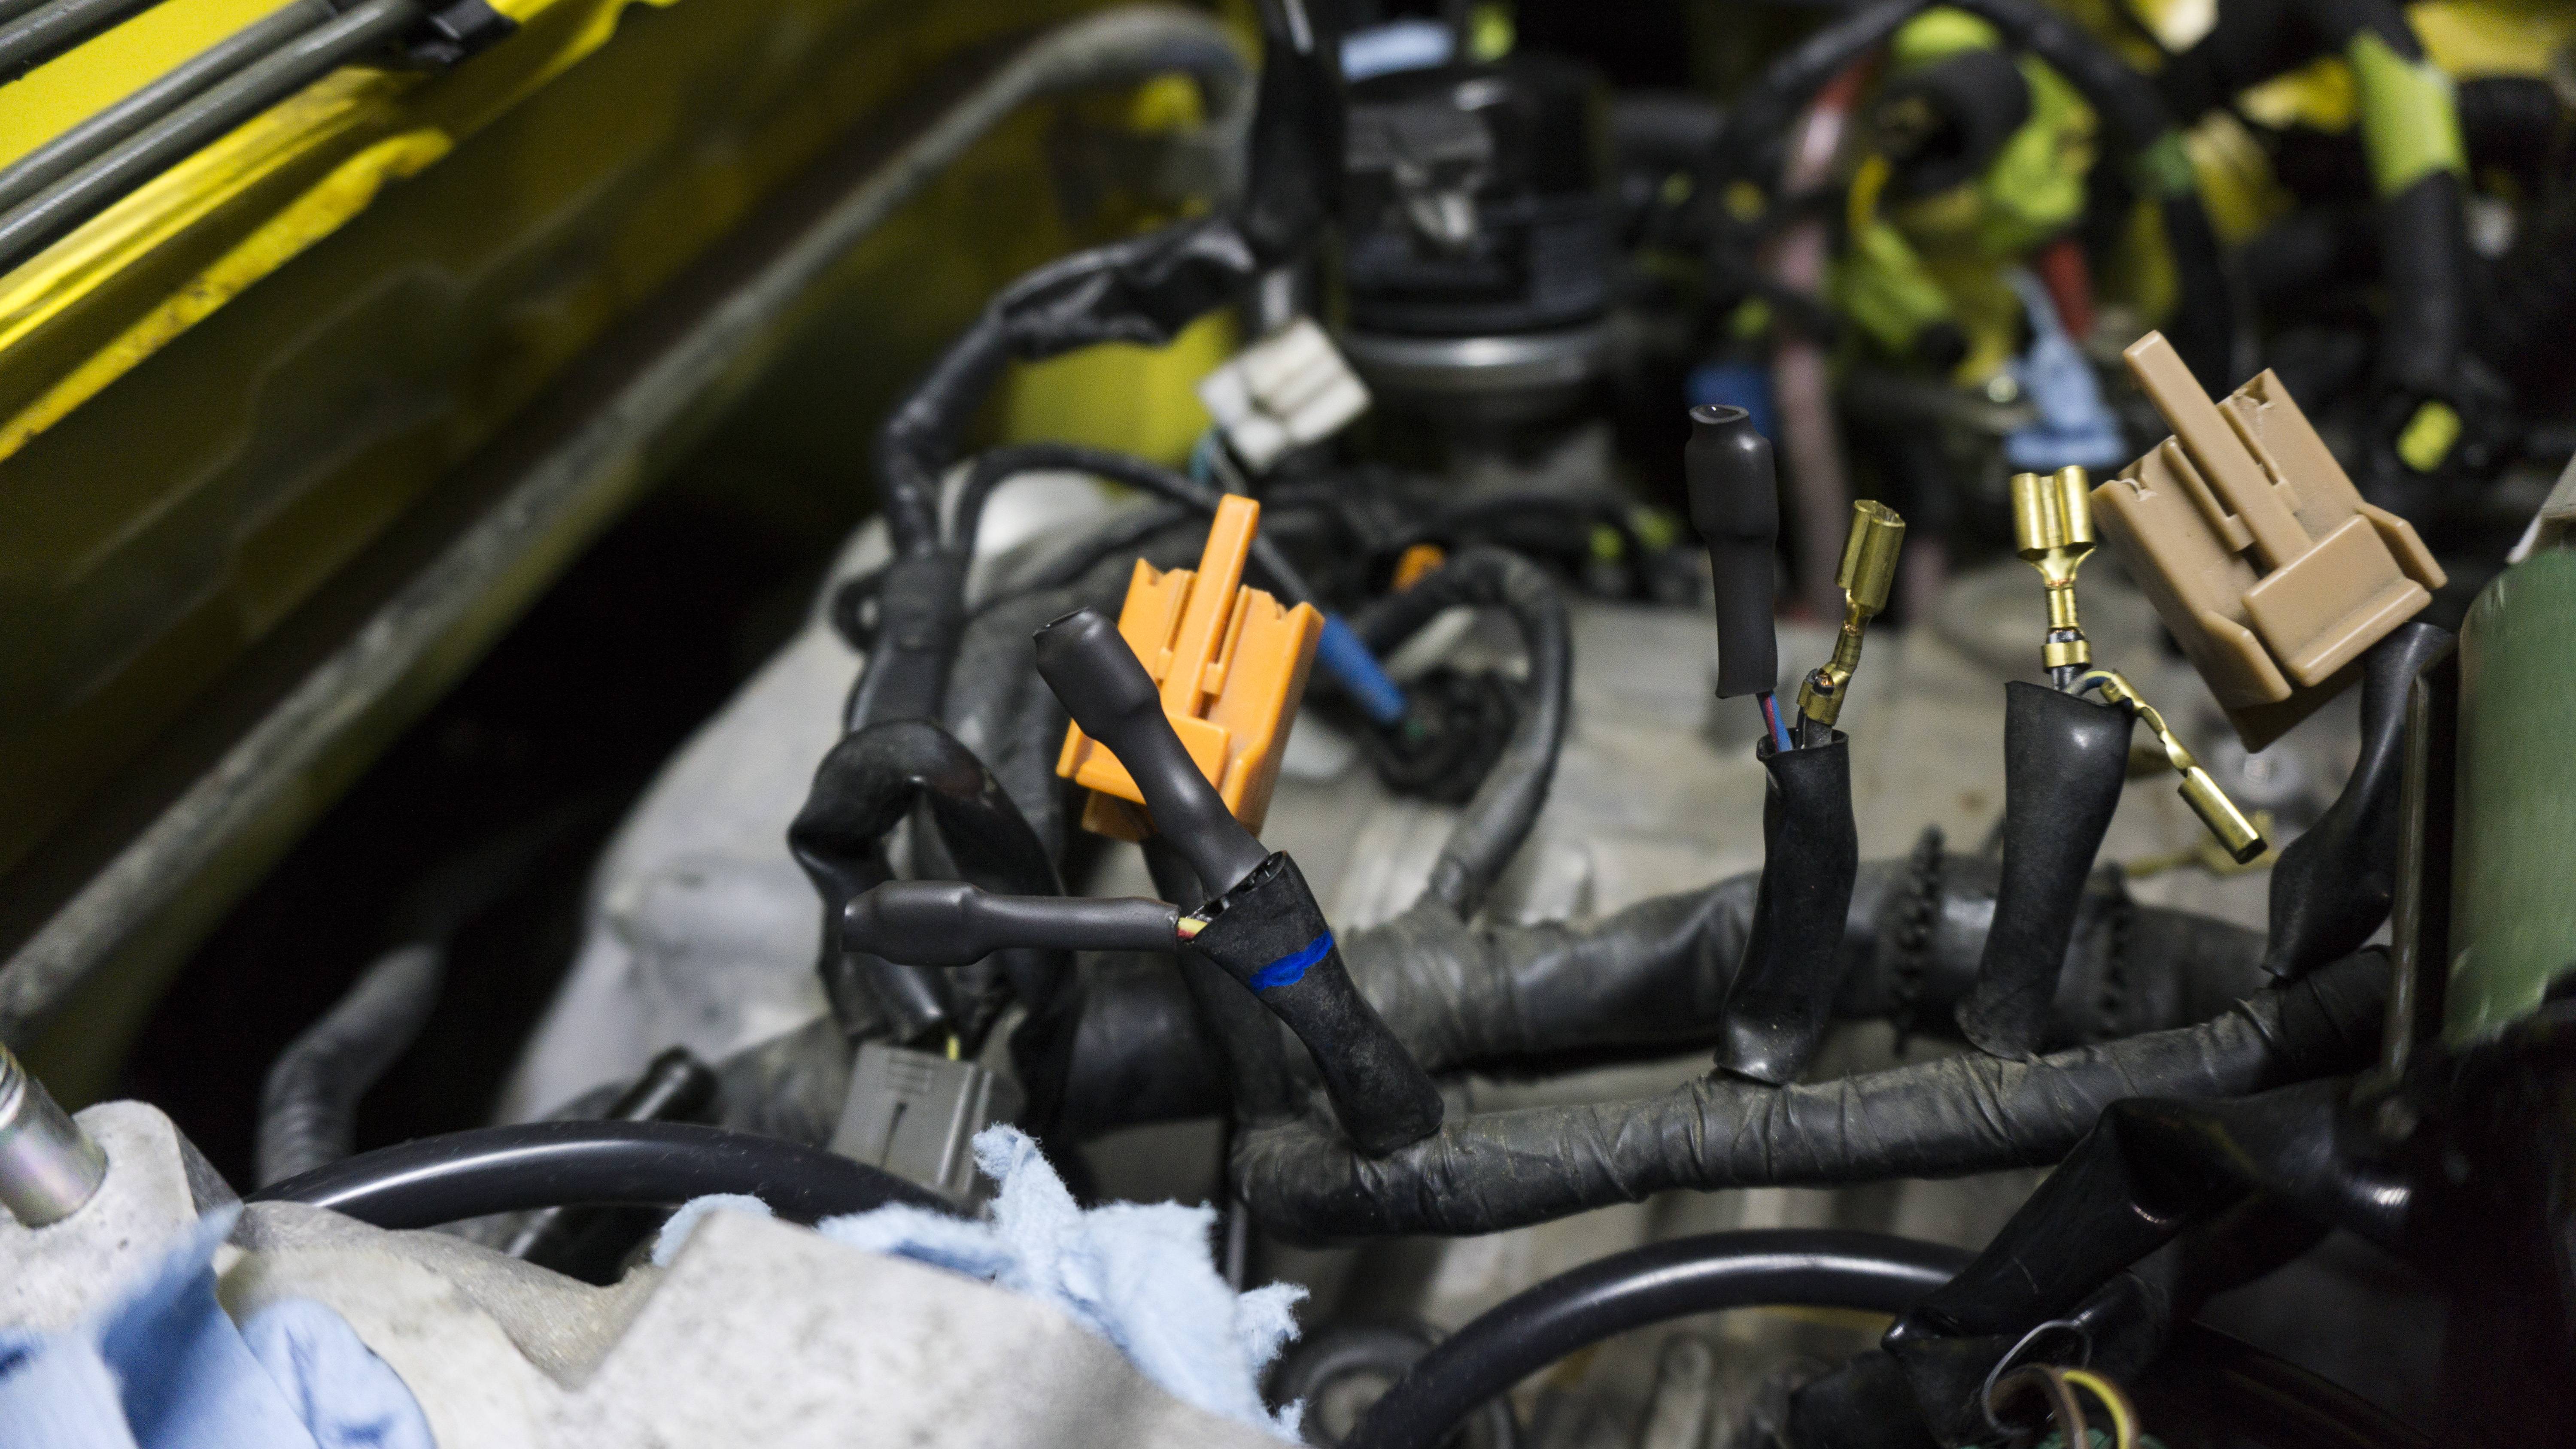
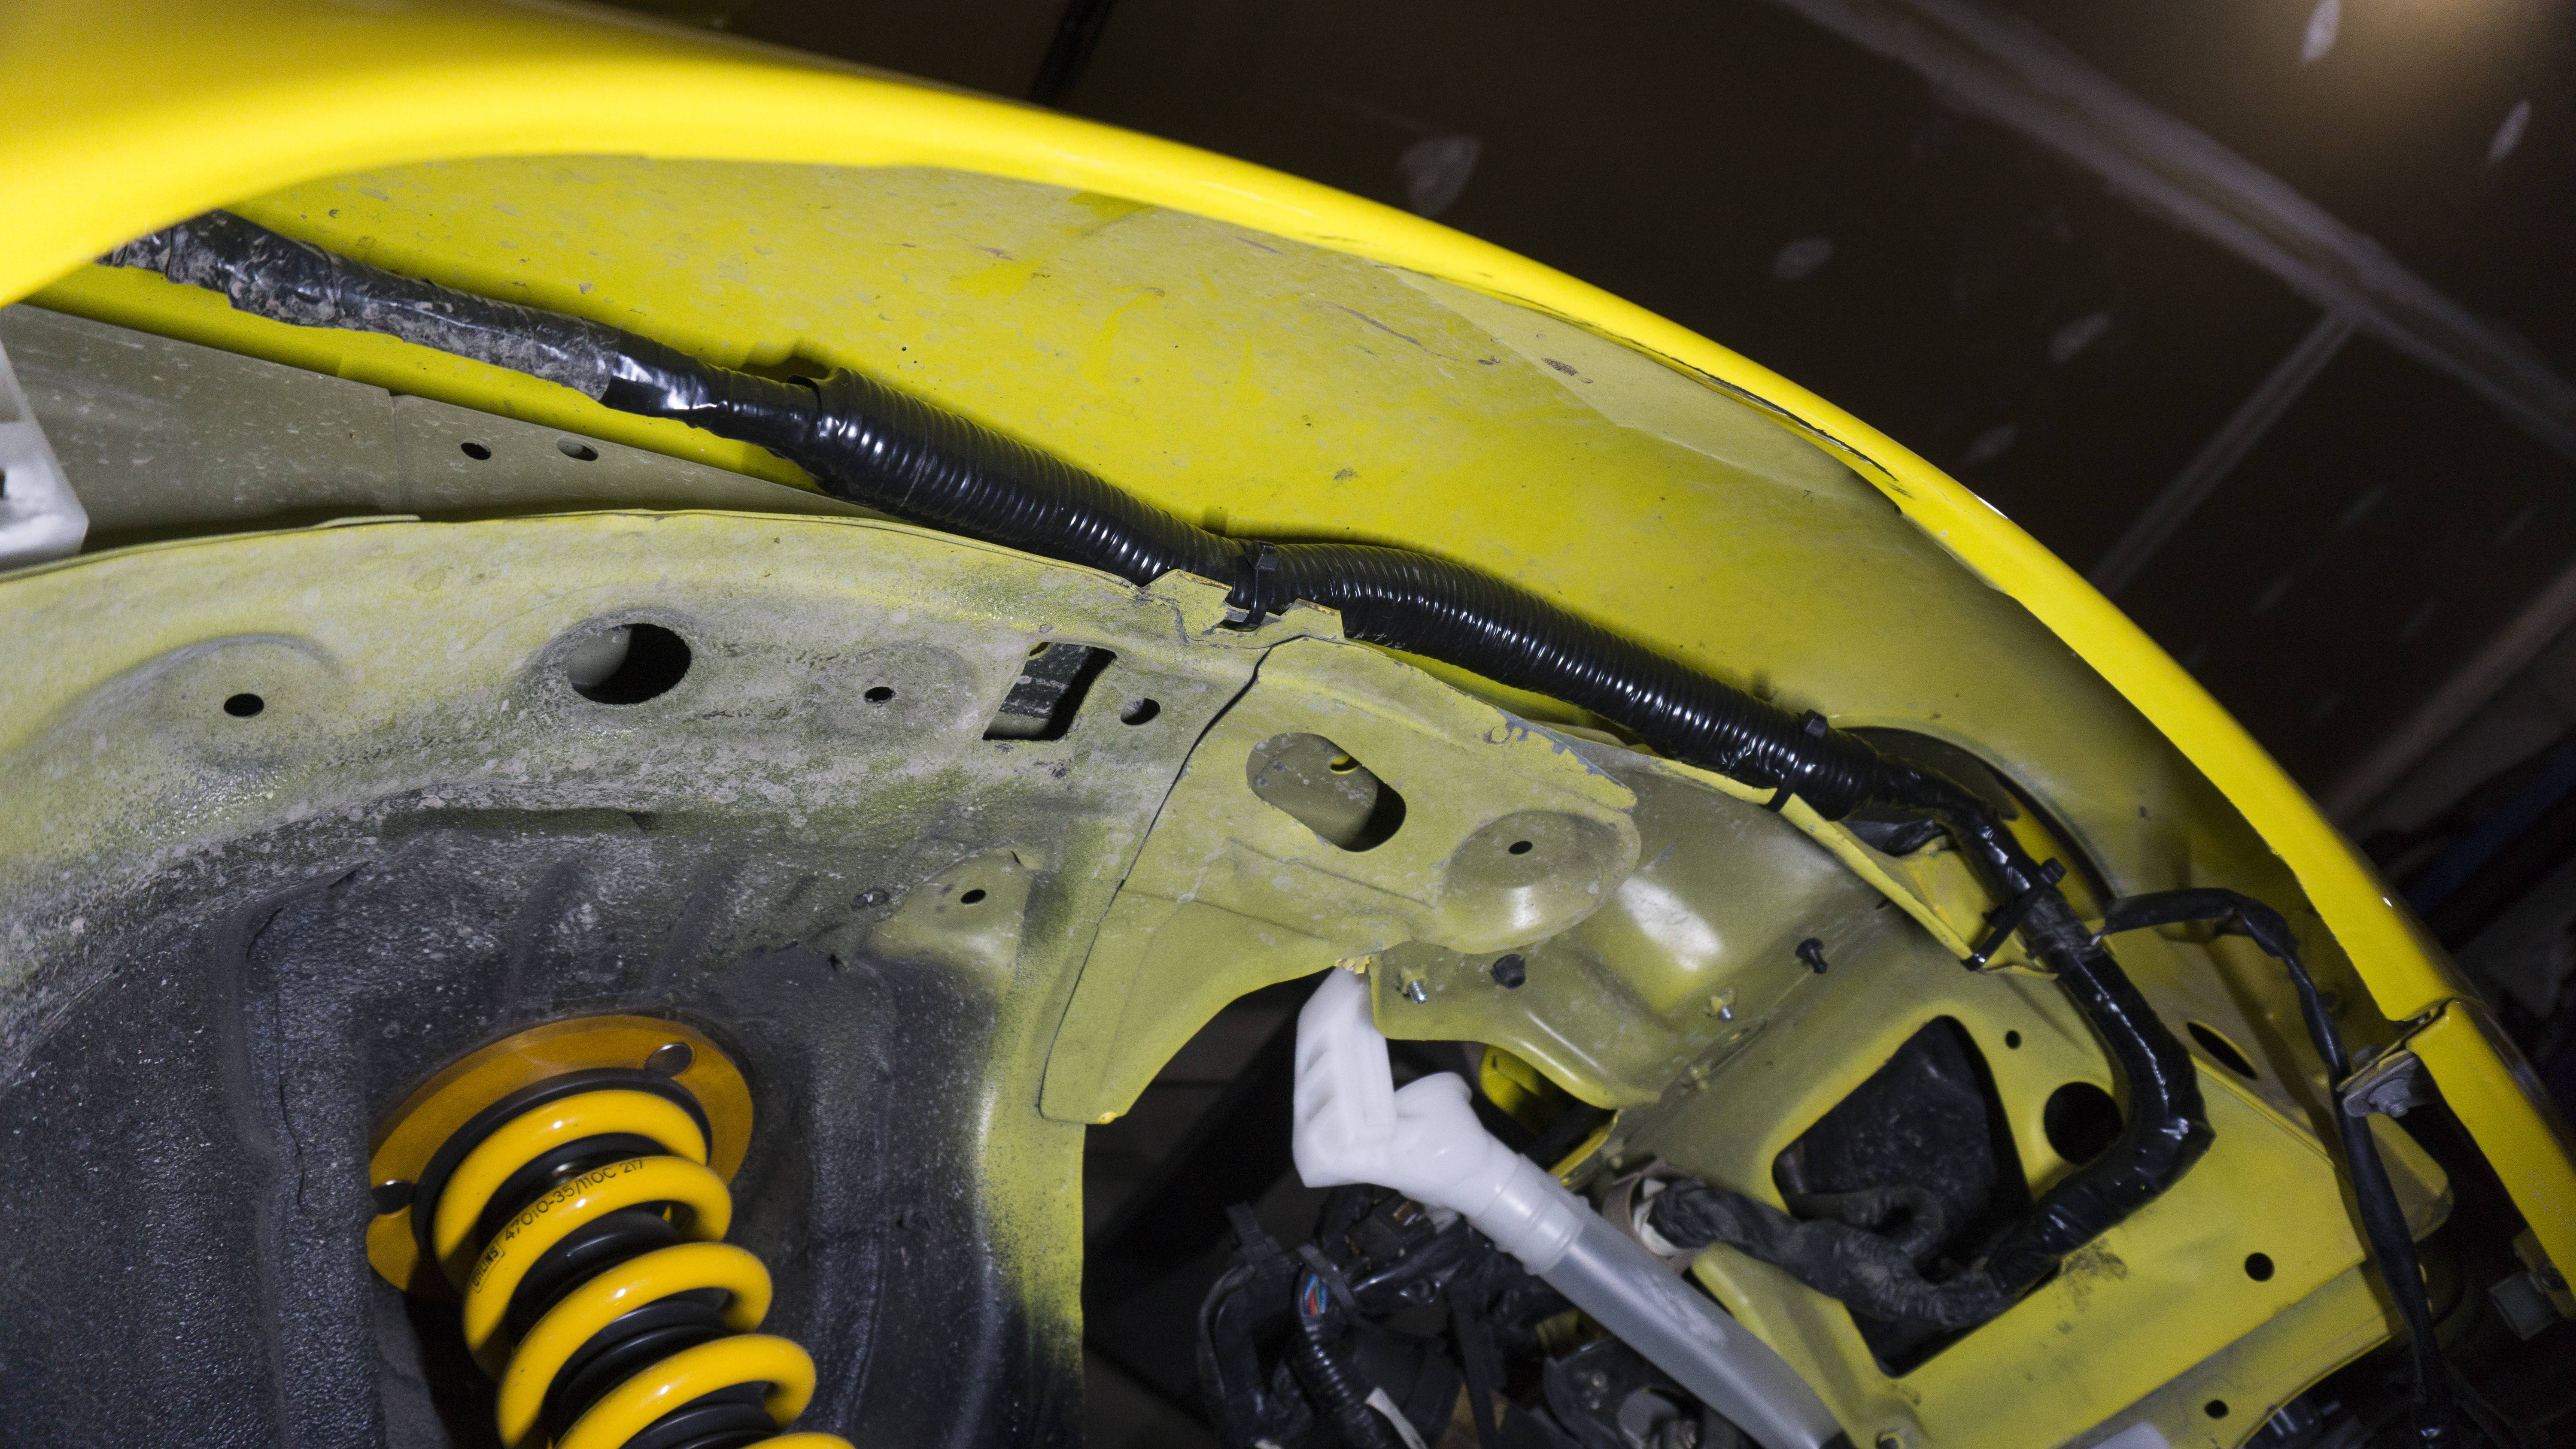
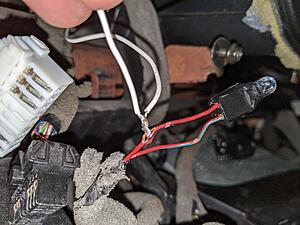
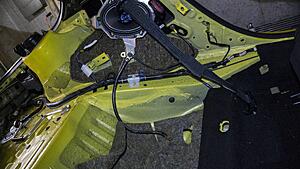
The deeper I dig into this car, the more I find that I�m unhappy with. But first! My GReddy hard pipes came in; as well as my FFE Idler Pulley and vacuum lines required for the overhaul. I�ve successfully pulled the rats nest and mocked up a couple of different variations for the solenoids. It�s nice being able to get rid of all the emissions related solenoids, but now I�m left with the connectors to figure out what to do with. I�ve decided to get rid of the vacuum metal tubes, but keep the coolant connecting tube for now. I�m still undecided on if I�ll keep the fuel connecting tubes or just run straight dedicated fuel lines. I'm not sure why I was so stressed out about this vacuum simplification. It's honestly really easy...feels like I'm just connecting the dots using the diagrams. I also ended up throwing on the FFE Idler Pulley. It�s a really well made kit and super easy to install. Since I�m overhauling stuff I�m replacing almost all the �Phillips� head M5�s Mazda used with M5 hex heads. I have no idea why Mazda would use these. One of them I had to whip out the Knipex pliers on because the grooves melted away. I also ended up making a block off plate for the split-air tube that connects at the cat. I ended up pulling the fender liner on the driver side to see what I�m working with for me putting back in the windshield washer. I�m bound and determined to have everything working on this car (except emissions equipment of course). Good news, the connector and washer line is still there. Bad news - what the heck is going on here? The electrical harness looks like a previous owner used super aggressive wheels without fender liners...or it happened in the accident the car had. Either way, I wrapped it back up and I�ll route it higher up. I also noticed both airbag fender connectors were disconnected with the sensor wire nowhere in sight. They aren�t that expensive to replace, but is it worth it? I�m still debating on replacing them. If not, I might as well remove the front bumper sensor as well. I pulled the passenger fender liner and it is in the exact same condition. I�d wager I�d pull my cluster out and the airbag light has been removed. I plan to pull the front bumper next and see if there is anything else not as it should be.
Here are the goodies that came in:
Here is the FFE Idler pulley and the block-off plate installed:
Here is Rats Nest and Engine Bay progress:
Here is the fender shenanigans:

The deeper I dig into this car, the more I find that I�m unhappy with. But first! My GReddy hard pipes came in; as well as my FFE Idler Pulley and vacuum lines required for the overhaul. I�ve successfully pulled the rats nest and mocked up a couple of different variations for the solenoids. It�s nice being able to get rid of all the emissions related solenoids, but now I�m left with the connectors to figure out what to do with. I�ve decided to get rid of the vacuum metal tubes, but keep the coolant connecting tube for now. I�m still undecided on if I�ll keep the fuel connecting tubes or just run straight dedicated fuel lines. I'm not sure why I was so stressed out about this vacuum simplification. It's honestly really easy...feels like I'm just connecting the dots using the diagrams. I also ended up throwing on the FFE Idler Pulley. It�s a really well made kit and super easy to install. Since I�m overhauling stuff I�m replacing almost all the �Phillips� head M5�s Mazda used with M5 hex heads. I have no idea why Mazda would use these. One of them I had to whip out the Knipex pliers on because the grooves melted away. I also ended up making a block off plate for the split-air tube that connects at the cat. I ended up pulling the fender liner on the driver side to see what I�m working with for me putting back in the windshield washer. I�m bound and determined to have everything working on this car (except emissions equipment of course). Good news, the connector and washer line is still there. Bad news - what the heck is going on here? The electrical harness looks like a previous owner used super aggressive wheels without fender liners...or it happened in the accident the car had. Either way, I wrapped it back up and I�ll route it higher up. I also noticed both airbag fender connectors were disconnected with the sensor wire nowhere in sight. They aren�t that expensive to replace, but is it worth it? I�m still debating on replacing them. If not, I might as well remove the front bumper sensor as well. I pulled the passenger fender liner and it is in the exact same condition. I�d wager I�d pull my cluster out and the airbag light has been removed. I plan to pull the front bumper next and see if there is anything else not as it should be.
Here are the goodies that came in:

Here is the FFE Idler pulley and the block-off plate installed:


Here is Rats Nest and Engine Bay progress:


Here is the fender shenanigans:

Thread Starter
Joined: Apr 2015
Posts: 398
Likes: 169
From: St. Louis, MO
Update 10/27/19:
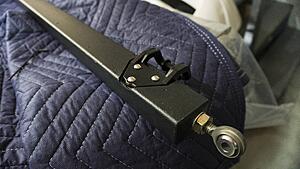
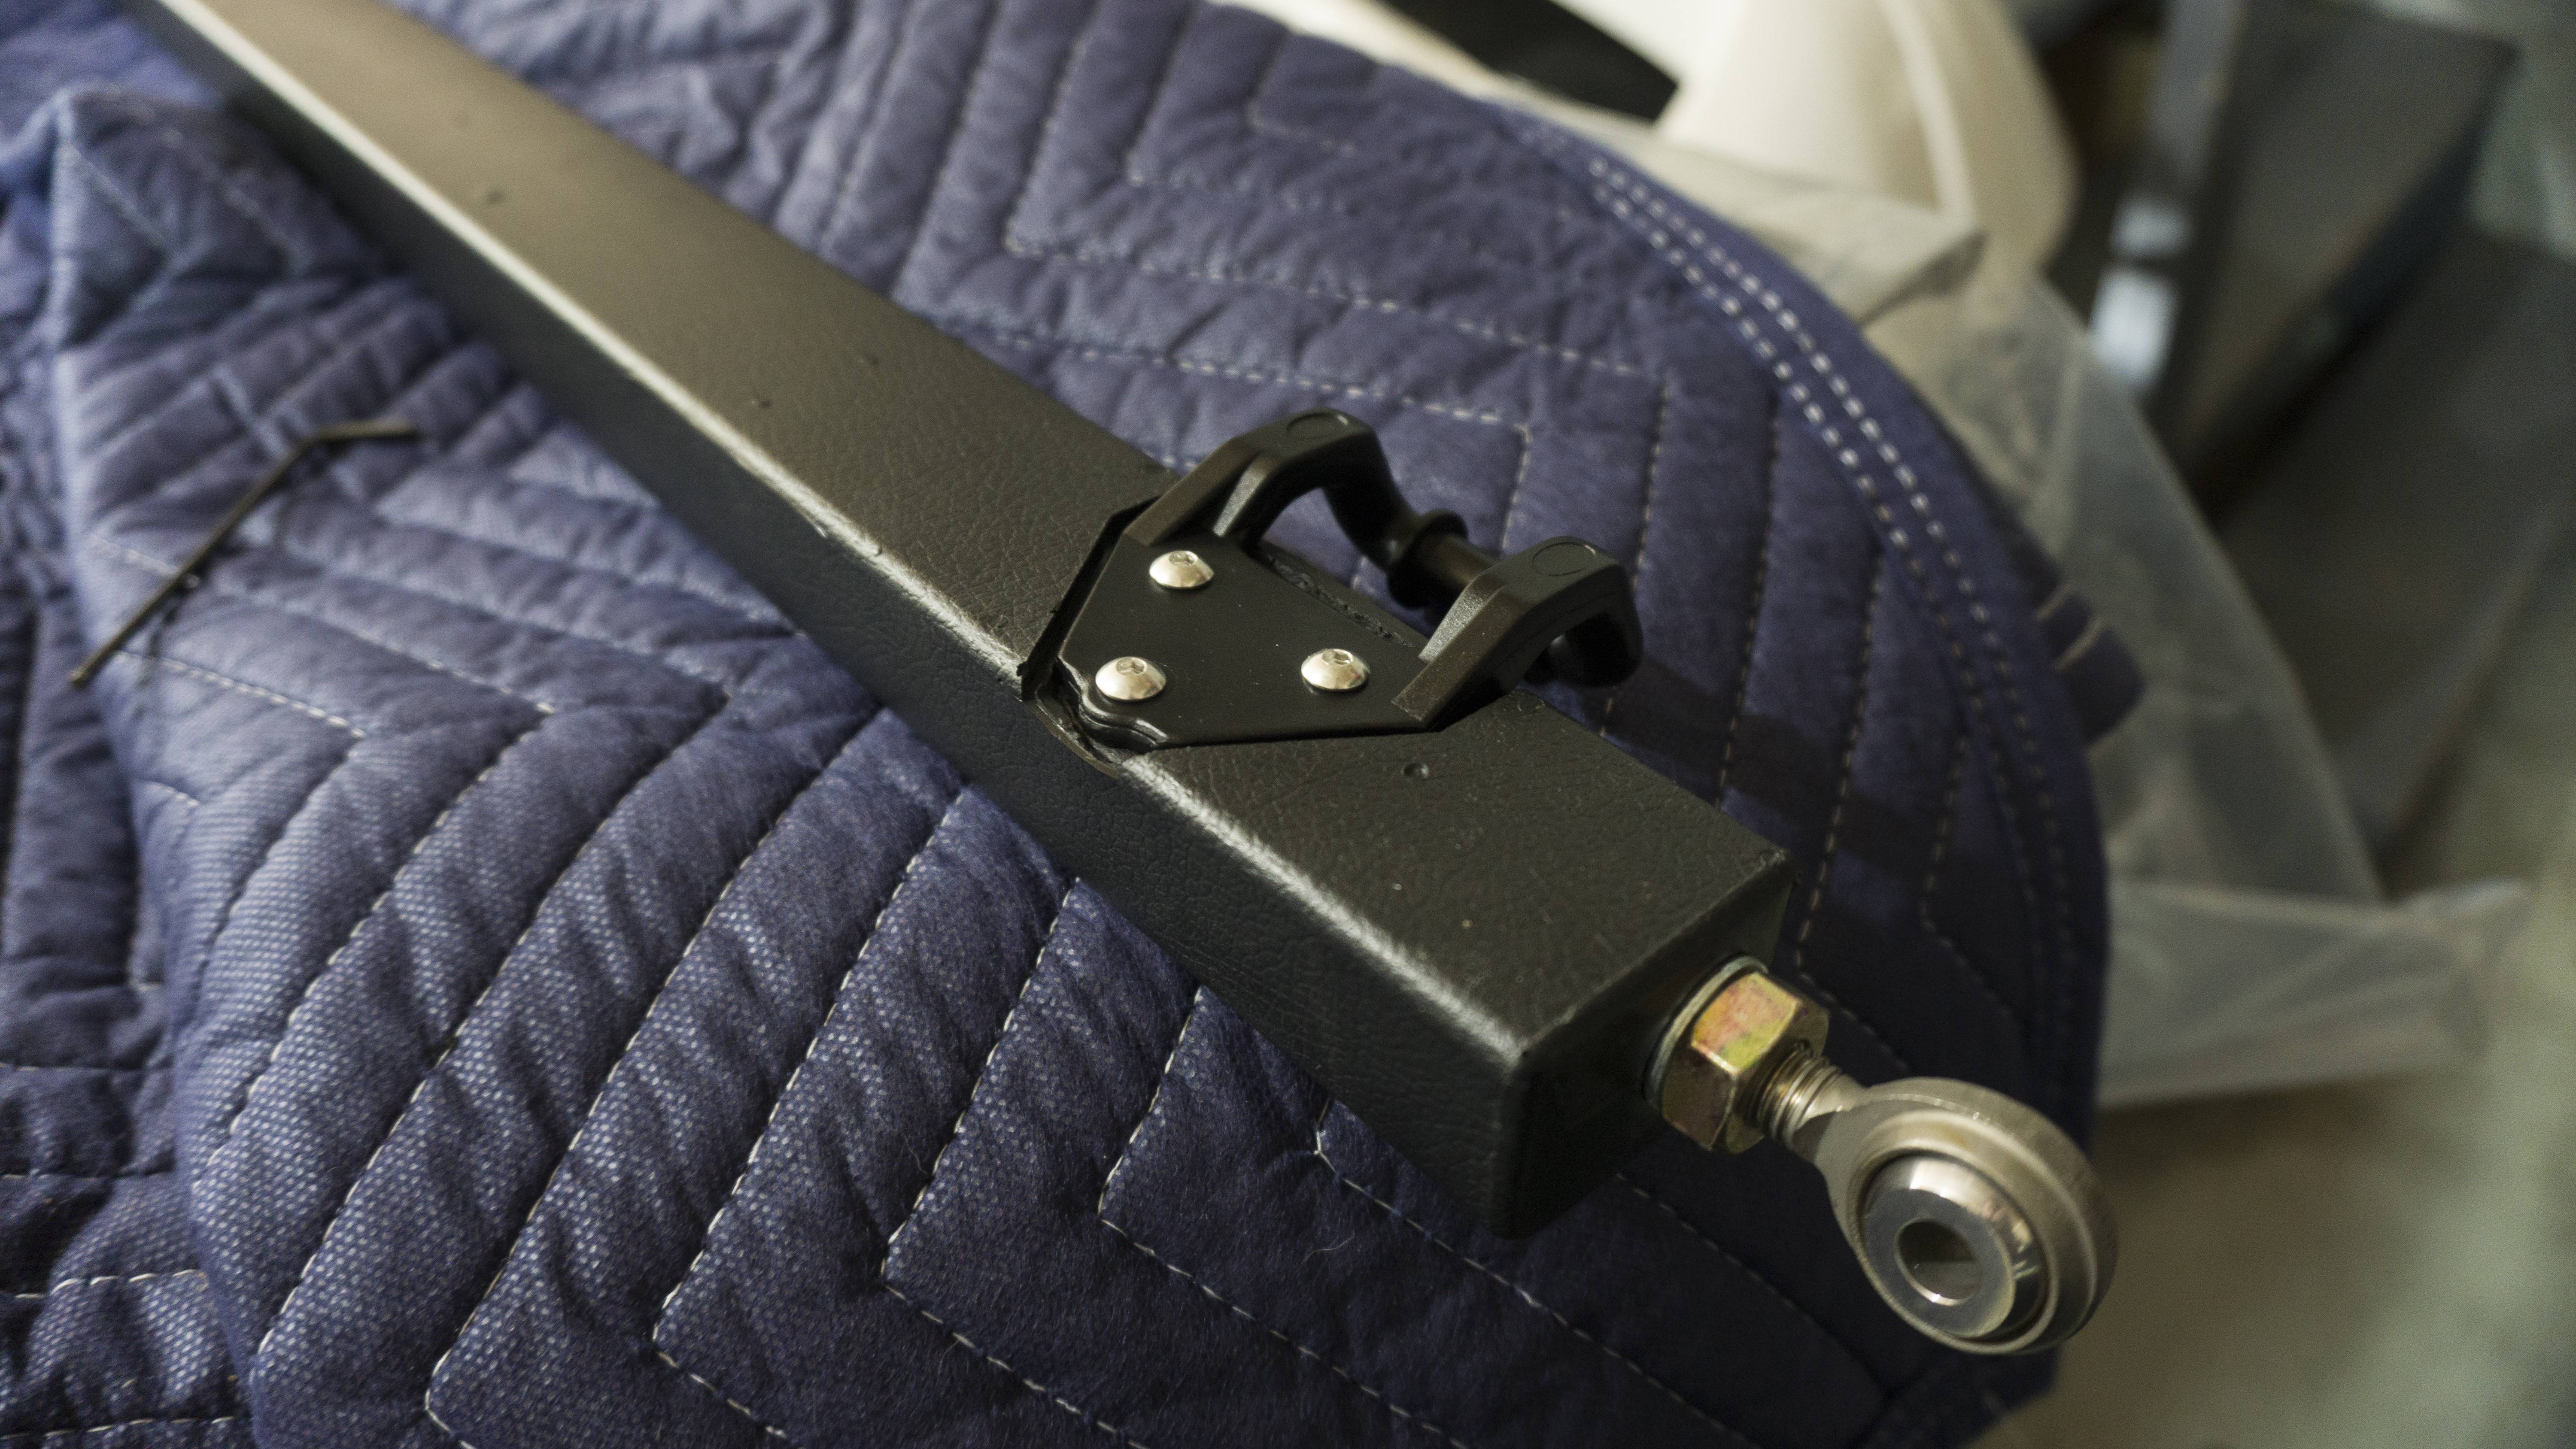
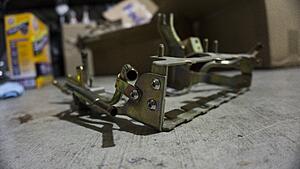
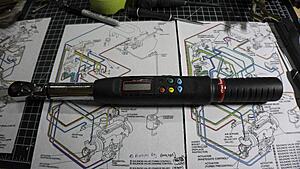
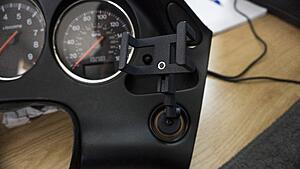
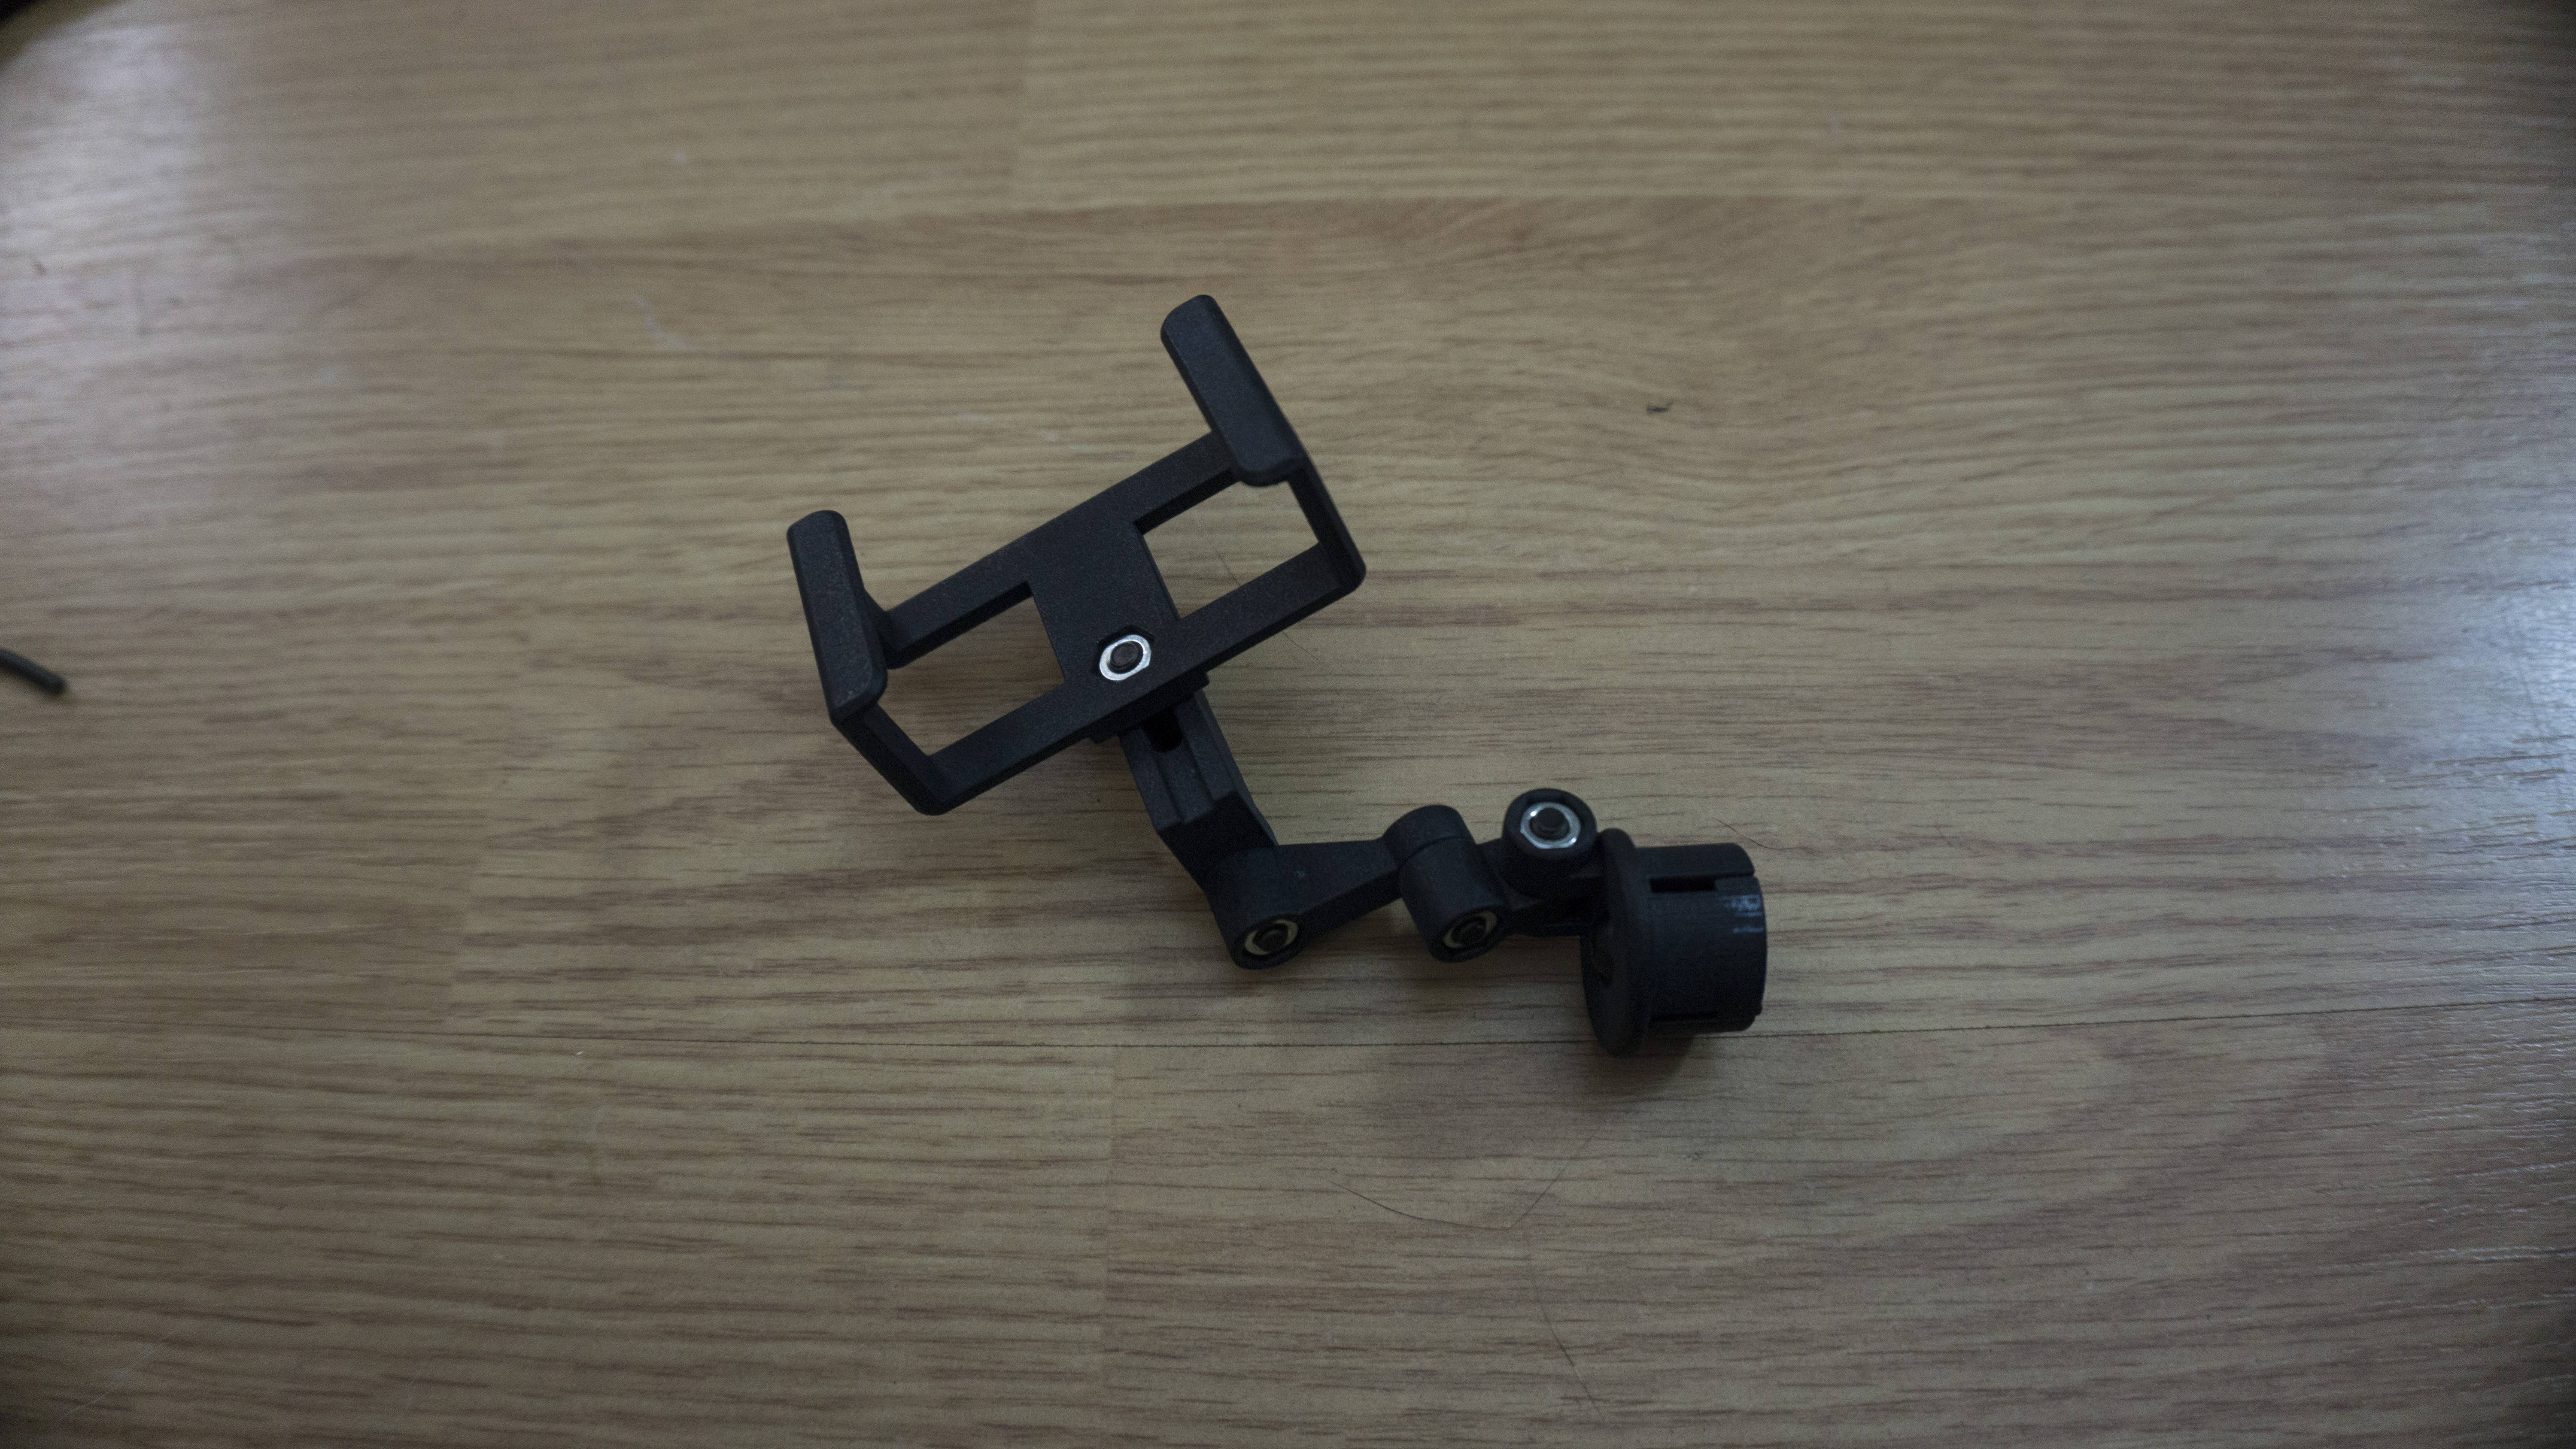
The FD has been progressing very nicely. I finished up the vacuum simplification. I took it a slight step further and removed a lot of the connectors that won�t be used. I de-pinned them and put them in a bag to keep for later if I ever need to restore the car to its original configuration. I think in the future, probably when the engine needs overhauled, I�ll create a custom bracket for the solenoids and the pressure chamber and move the coil packs outside from under the UIM. I think that will drastically help with working under the UIM and allow me to run a FPR/Gauge on the front of it. In the last update I discovered that my fender airbag connectors were unplugged. I decided to take off the front bumper and see if anything else was amiss. The bolts meant for the left and right airbag sensors was there, but no sensor was to be found. I decided to remove the last sensor I have and run without them, however, I plan to purchase the left and right airbag sensor in the event I�d like to revert it back. Everything under the front bumper seems to be in good shape, there is a bit of surface rust I plan on tackling, but nothing that caught my eye. The last thing I did to the car was run the wiring for the boost gauge and get it installed. It looks really good. I purchased a cigarette lighter Power FC holder from YAJ to so I can monitor coolant. I really don�t want to go super gauge heavy yet and if I ever decide to I�ll run a Defi controller instead of individually wiring all the gauges. In addition to the holder I also purchased a new tool. A Mac Tools ⅜ Electric Torque Wrench. I have already used it once and now I want them all! They are so much better than the Harbor Freight click types I was using. I�m not sure I could ever go back to click types now. The last thing I did was drop everything off at powder - once those come back I should be able to finish up everything. I might throw the stock airbox back in until my HKS RS intakes come in from being back ordered.
Here is the vacuum simplification:
Here is the fender harness reroute and how the car currently sits:
Here is the Defi gauge in the car:


Here is the new torque wrench:
The FD has been progressing very nicely. I finished up the vacuum simplification. I took it a slight step further and removed a lot of the connectors that won�t be used. I de-pinned them and put them in a bag to keep for later if I ever need to restore the car to its original configuration. I think in the future, probably when the engine needs overhauled, I�ll create a custom bracket for the solenoids and the pressure chamber and move the coil packs outside from under the UIM. I think that will drastically help with working under the UIM and allow me to run a FPR/Gauge on the front of it. In the last update I discovered that my fender airbag connectors were unplugged. I decided to take off the front bumper and see if anything else was amiss. The bolts meant for the left and right airbag sensors was there, but no sensor was to be found. I decided to remove the last sensor I have and run without them, however, I plan to purchase the left and right airbag sensor in the event I�d like to revert it back. Everything under the front bumper seems to be in good shape, there is a bit of surface rust I plan on tackling, but nothing that caught my eye. The last thing I did to the car was run the wiring for the boost gauge and get it installed. It looks really good. I purchased a cigarette lighter Power FC holder from YAJ to so I can monitor coolant. I really don�t want to go super gauge heavy yet and if I ever decide to I�ll run a Defi controller instead of individually wiring all the gauges. In addition to the holder I also purchased a new tool. A Mac Tools ⅜ Electric Torque Wrench. I have already used it once and now I want them all! They are so much better than the Harbor Freight click types I was using. I�m not sure I could ever go back to click types now. The last thing I did was drop everything off at powder - once those come back I should be able to finish up everything. I might throw the stock airbox back in until my HKS RS intakes come in from being back ordered.
Here is the vacuum simplification:


Here is the fender harness reroute and how the car currently sits:
Here is the Defi gauge in the car:


Here is the new torque wrench:

Thread Starter
Joined: Apr 2015
Posts: 398
Likes: 169
From: St. Louis, MO
Update 11/3/19:
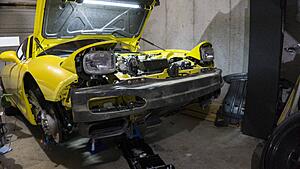
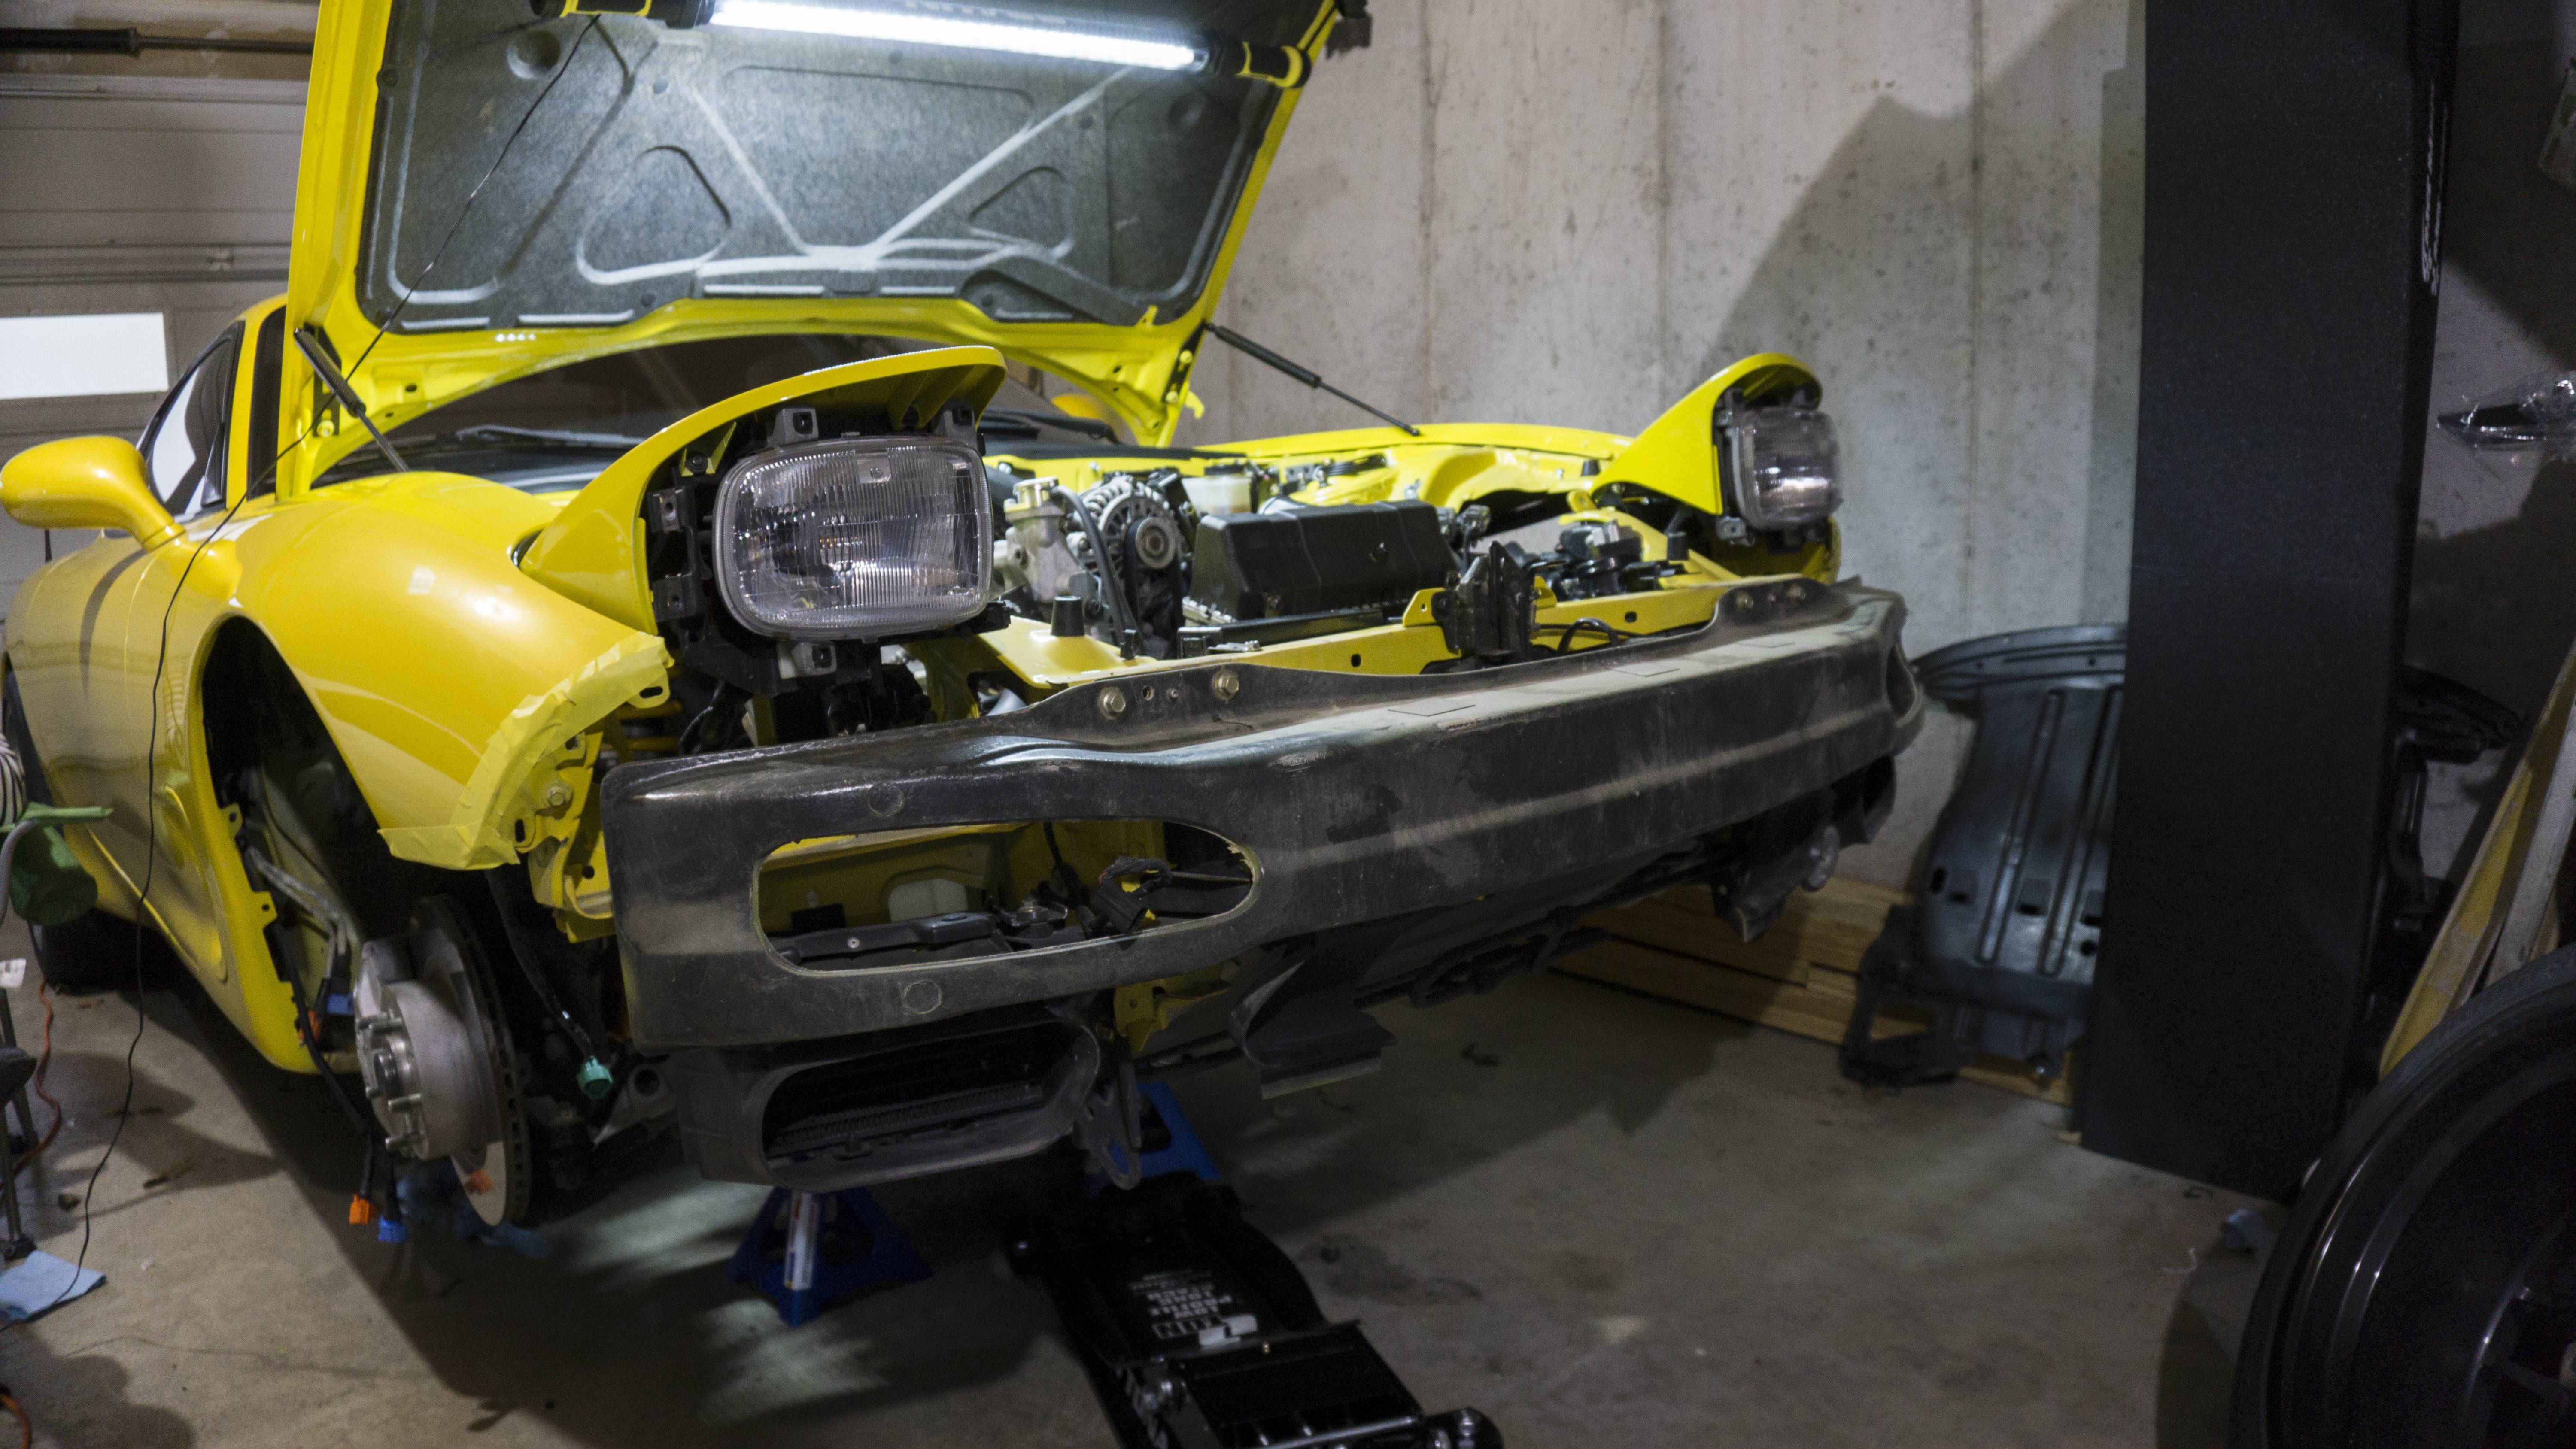
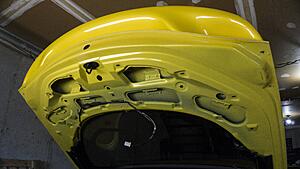
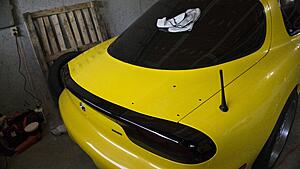
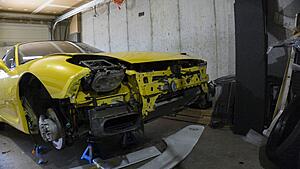
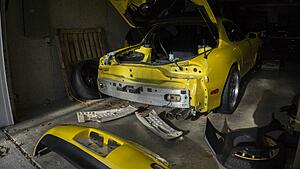
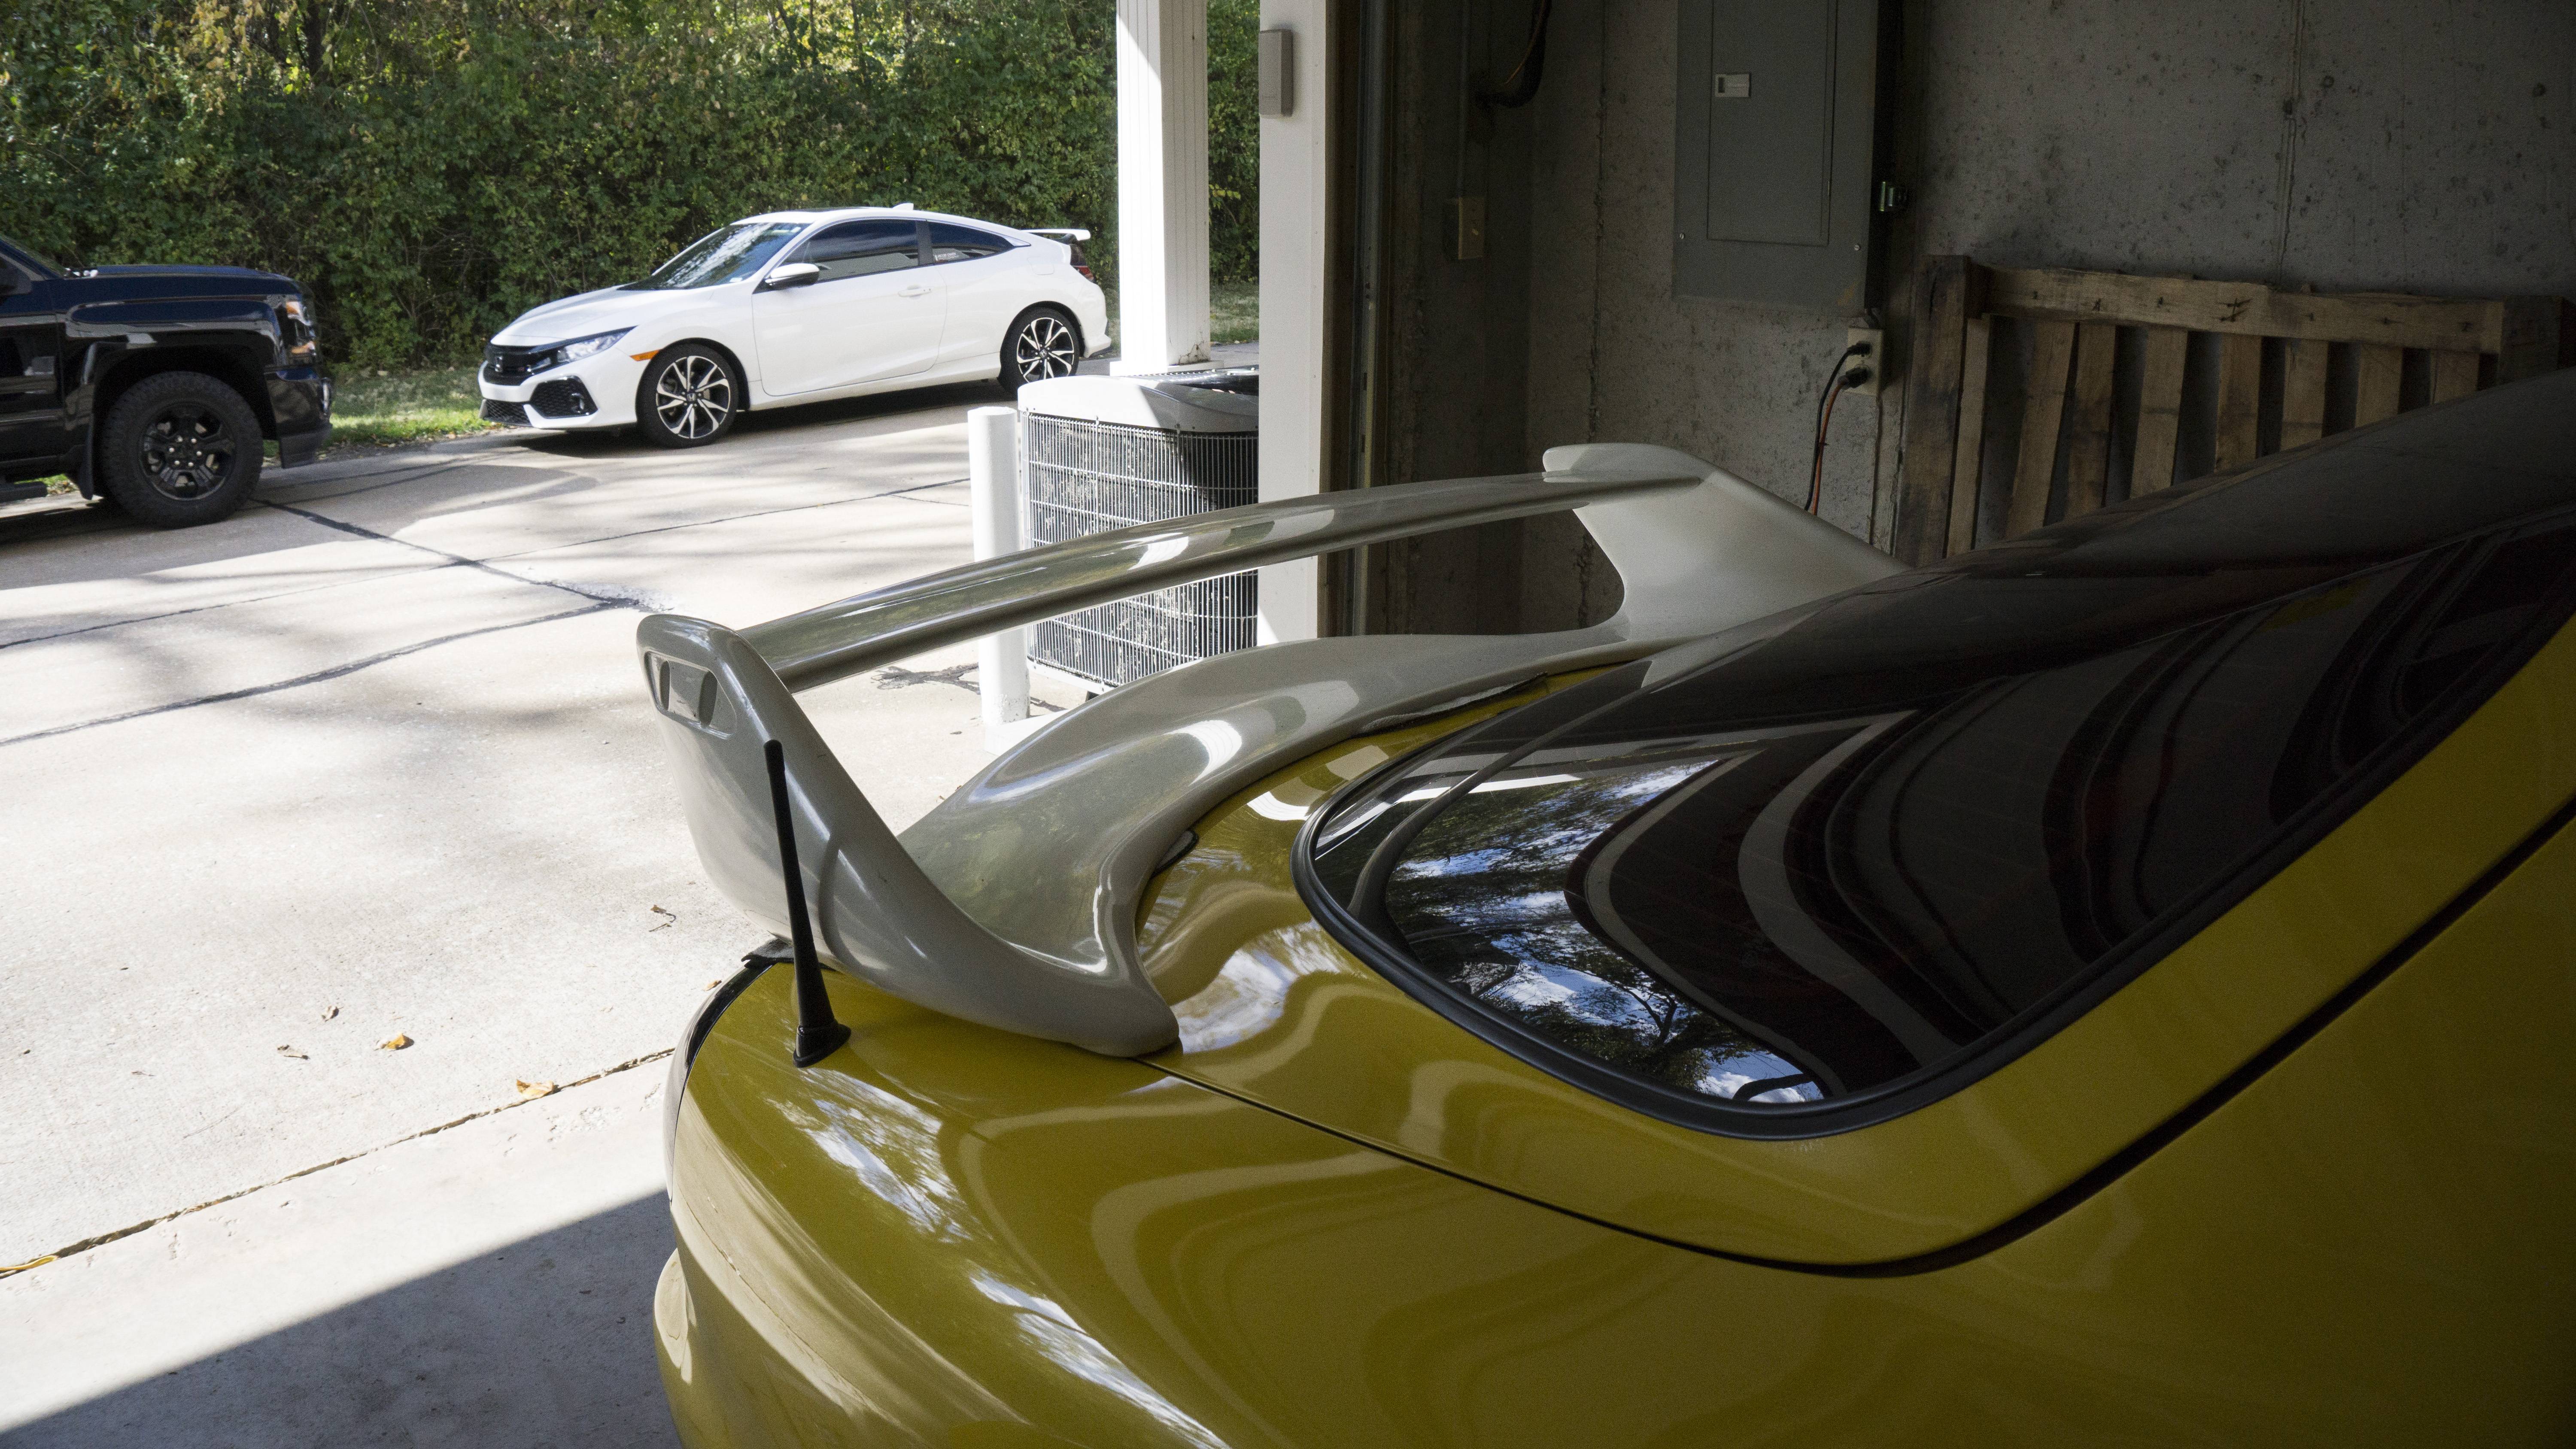
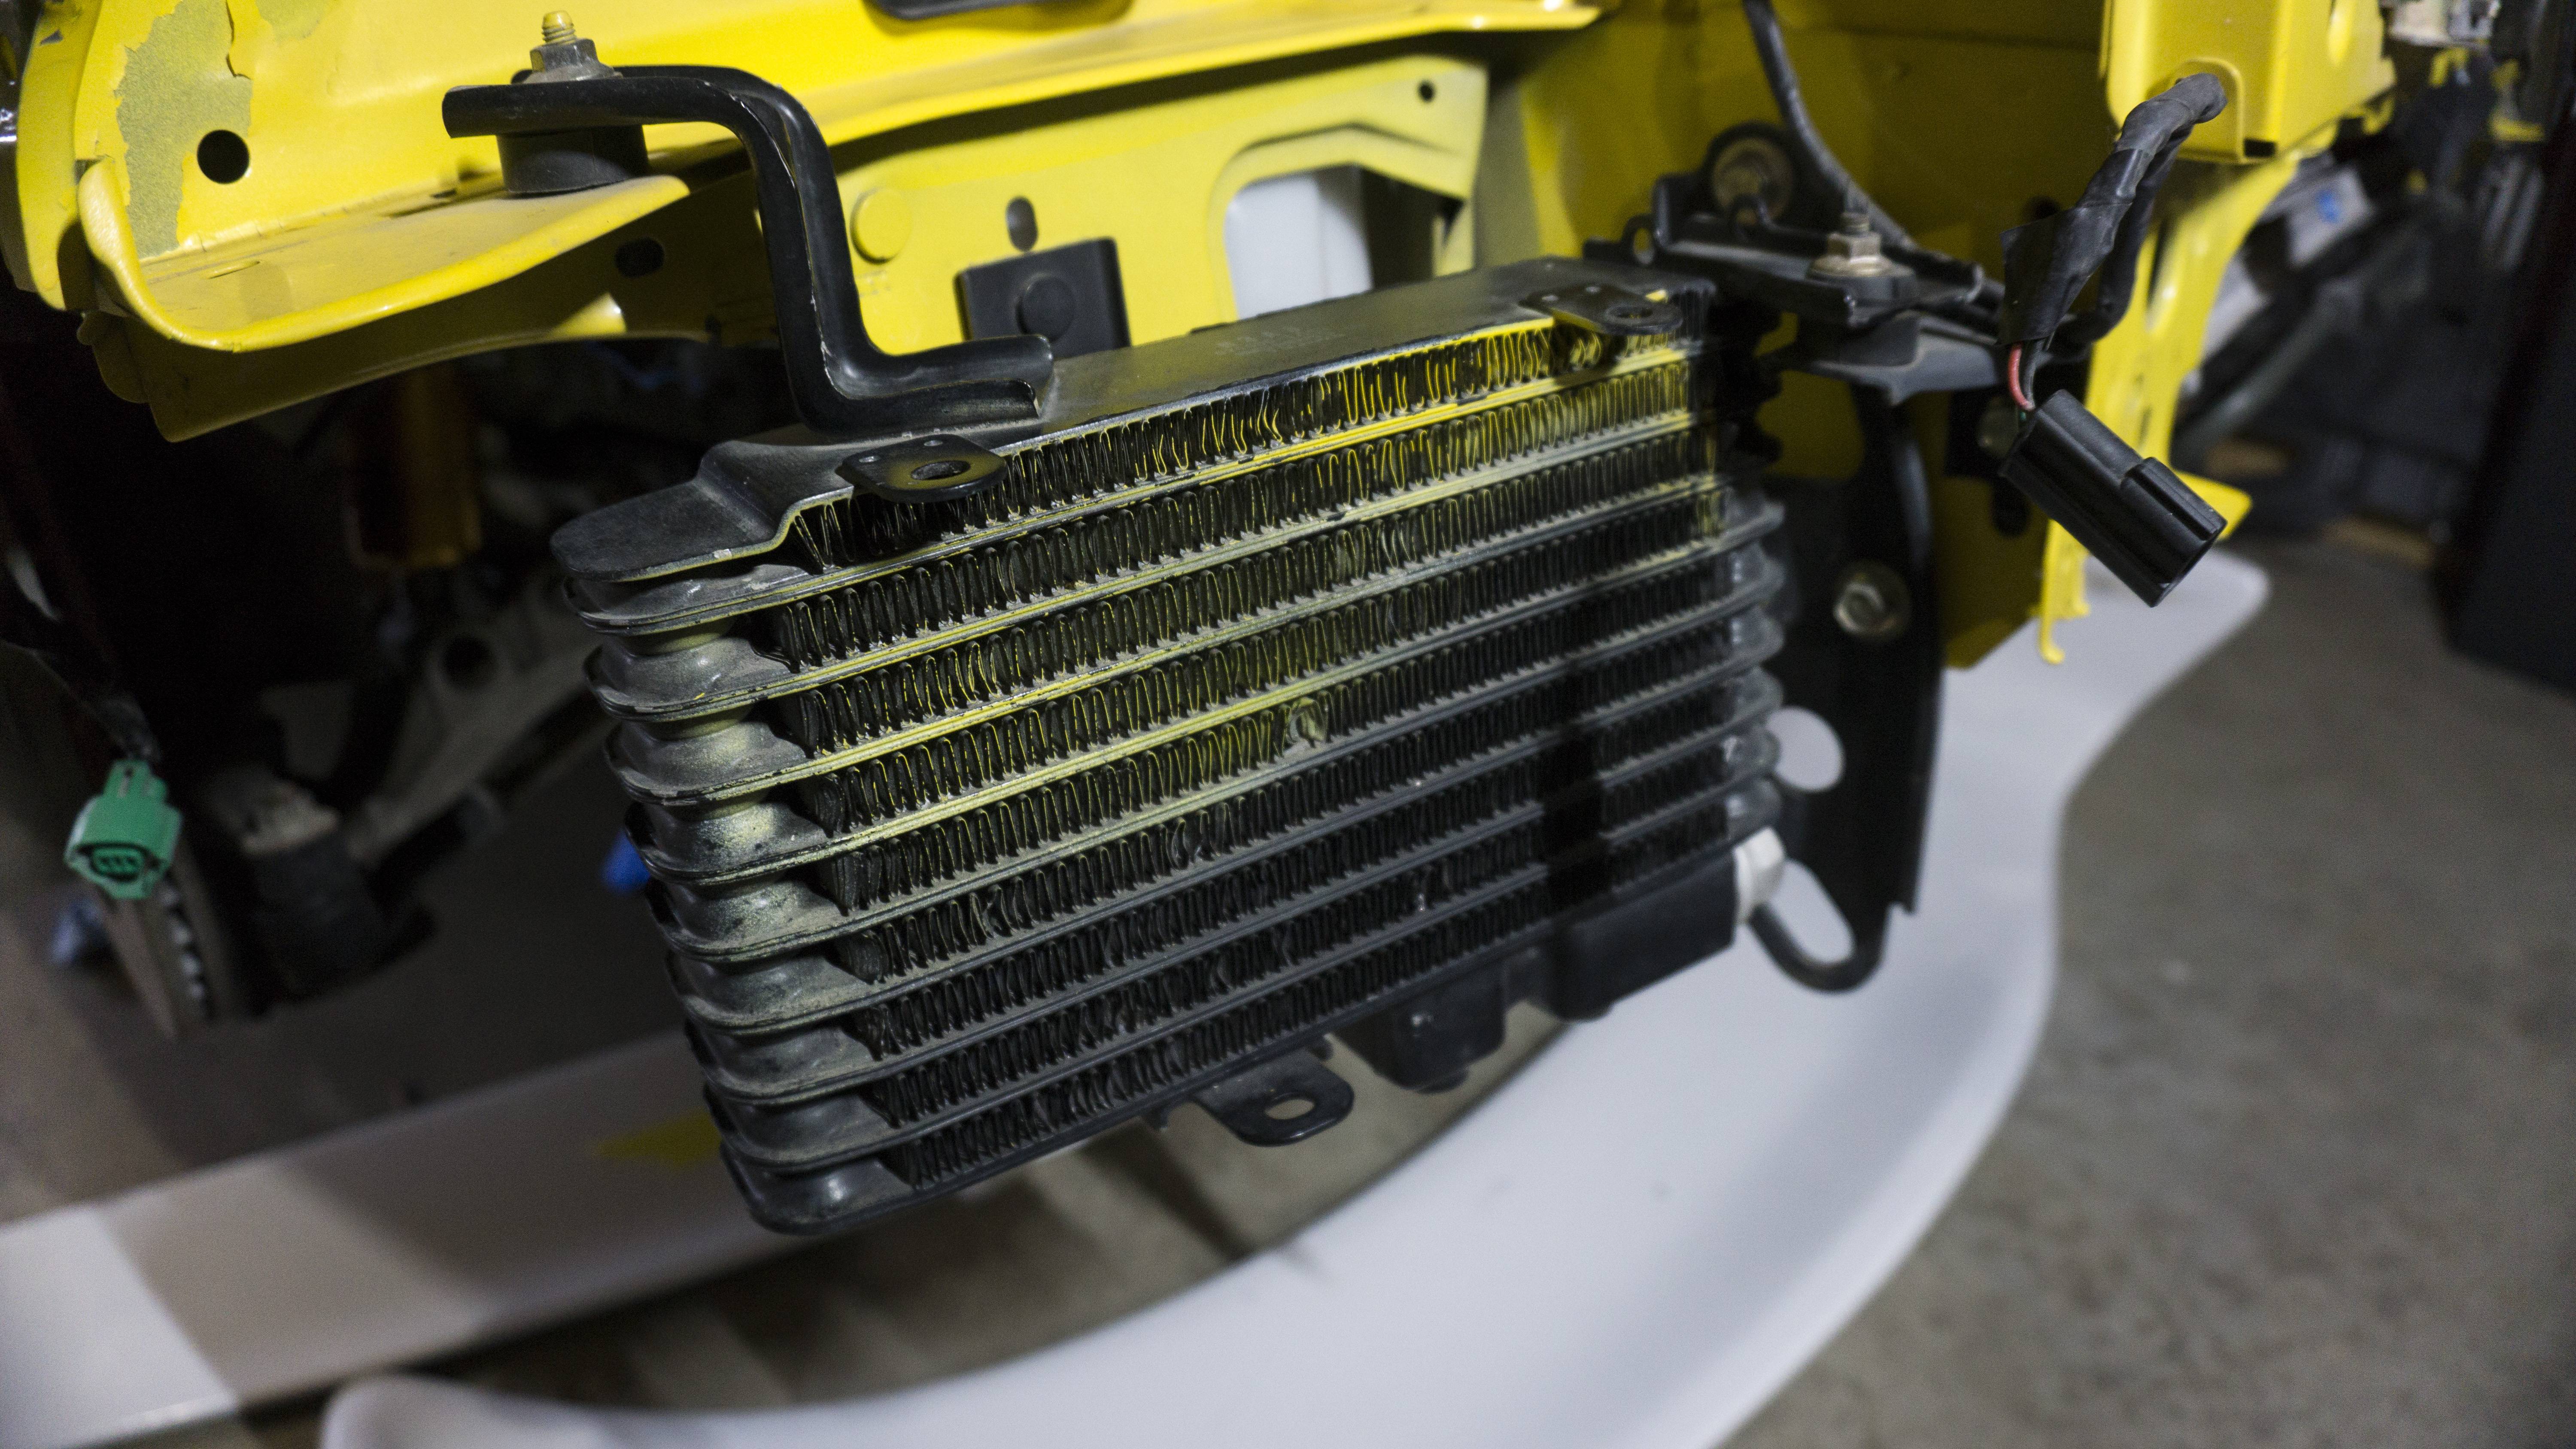
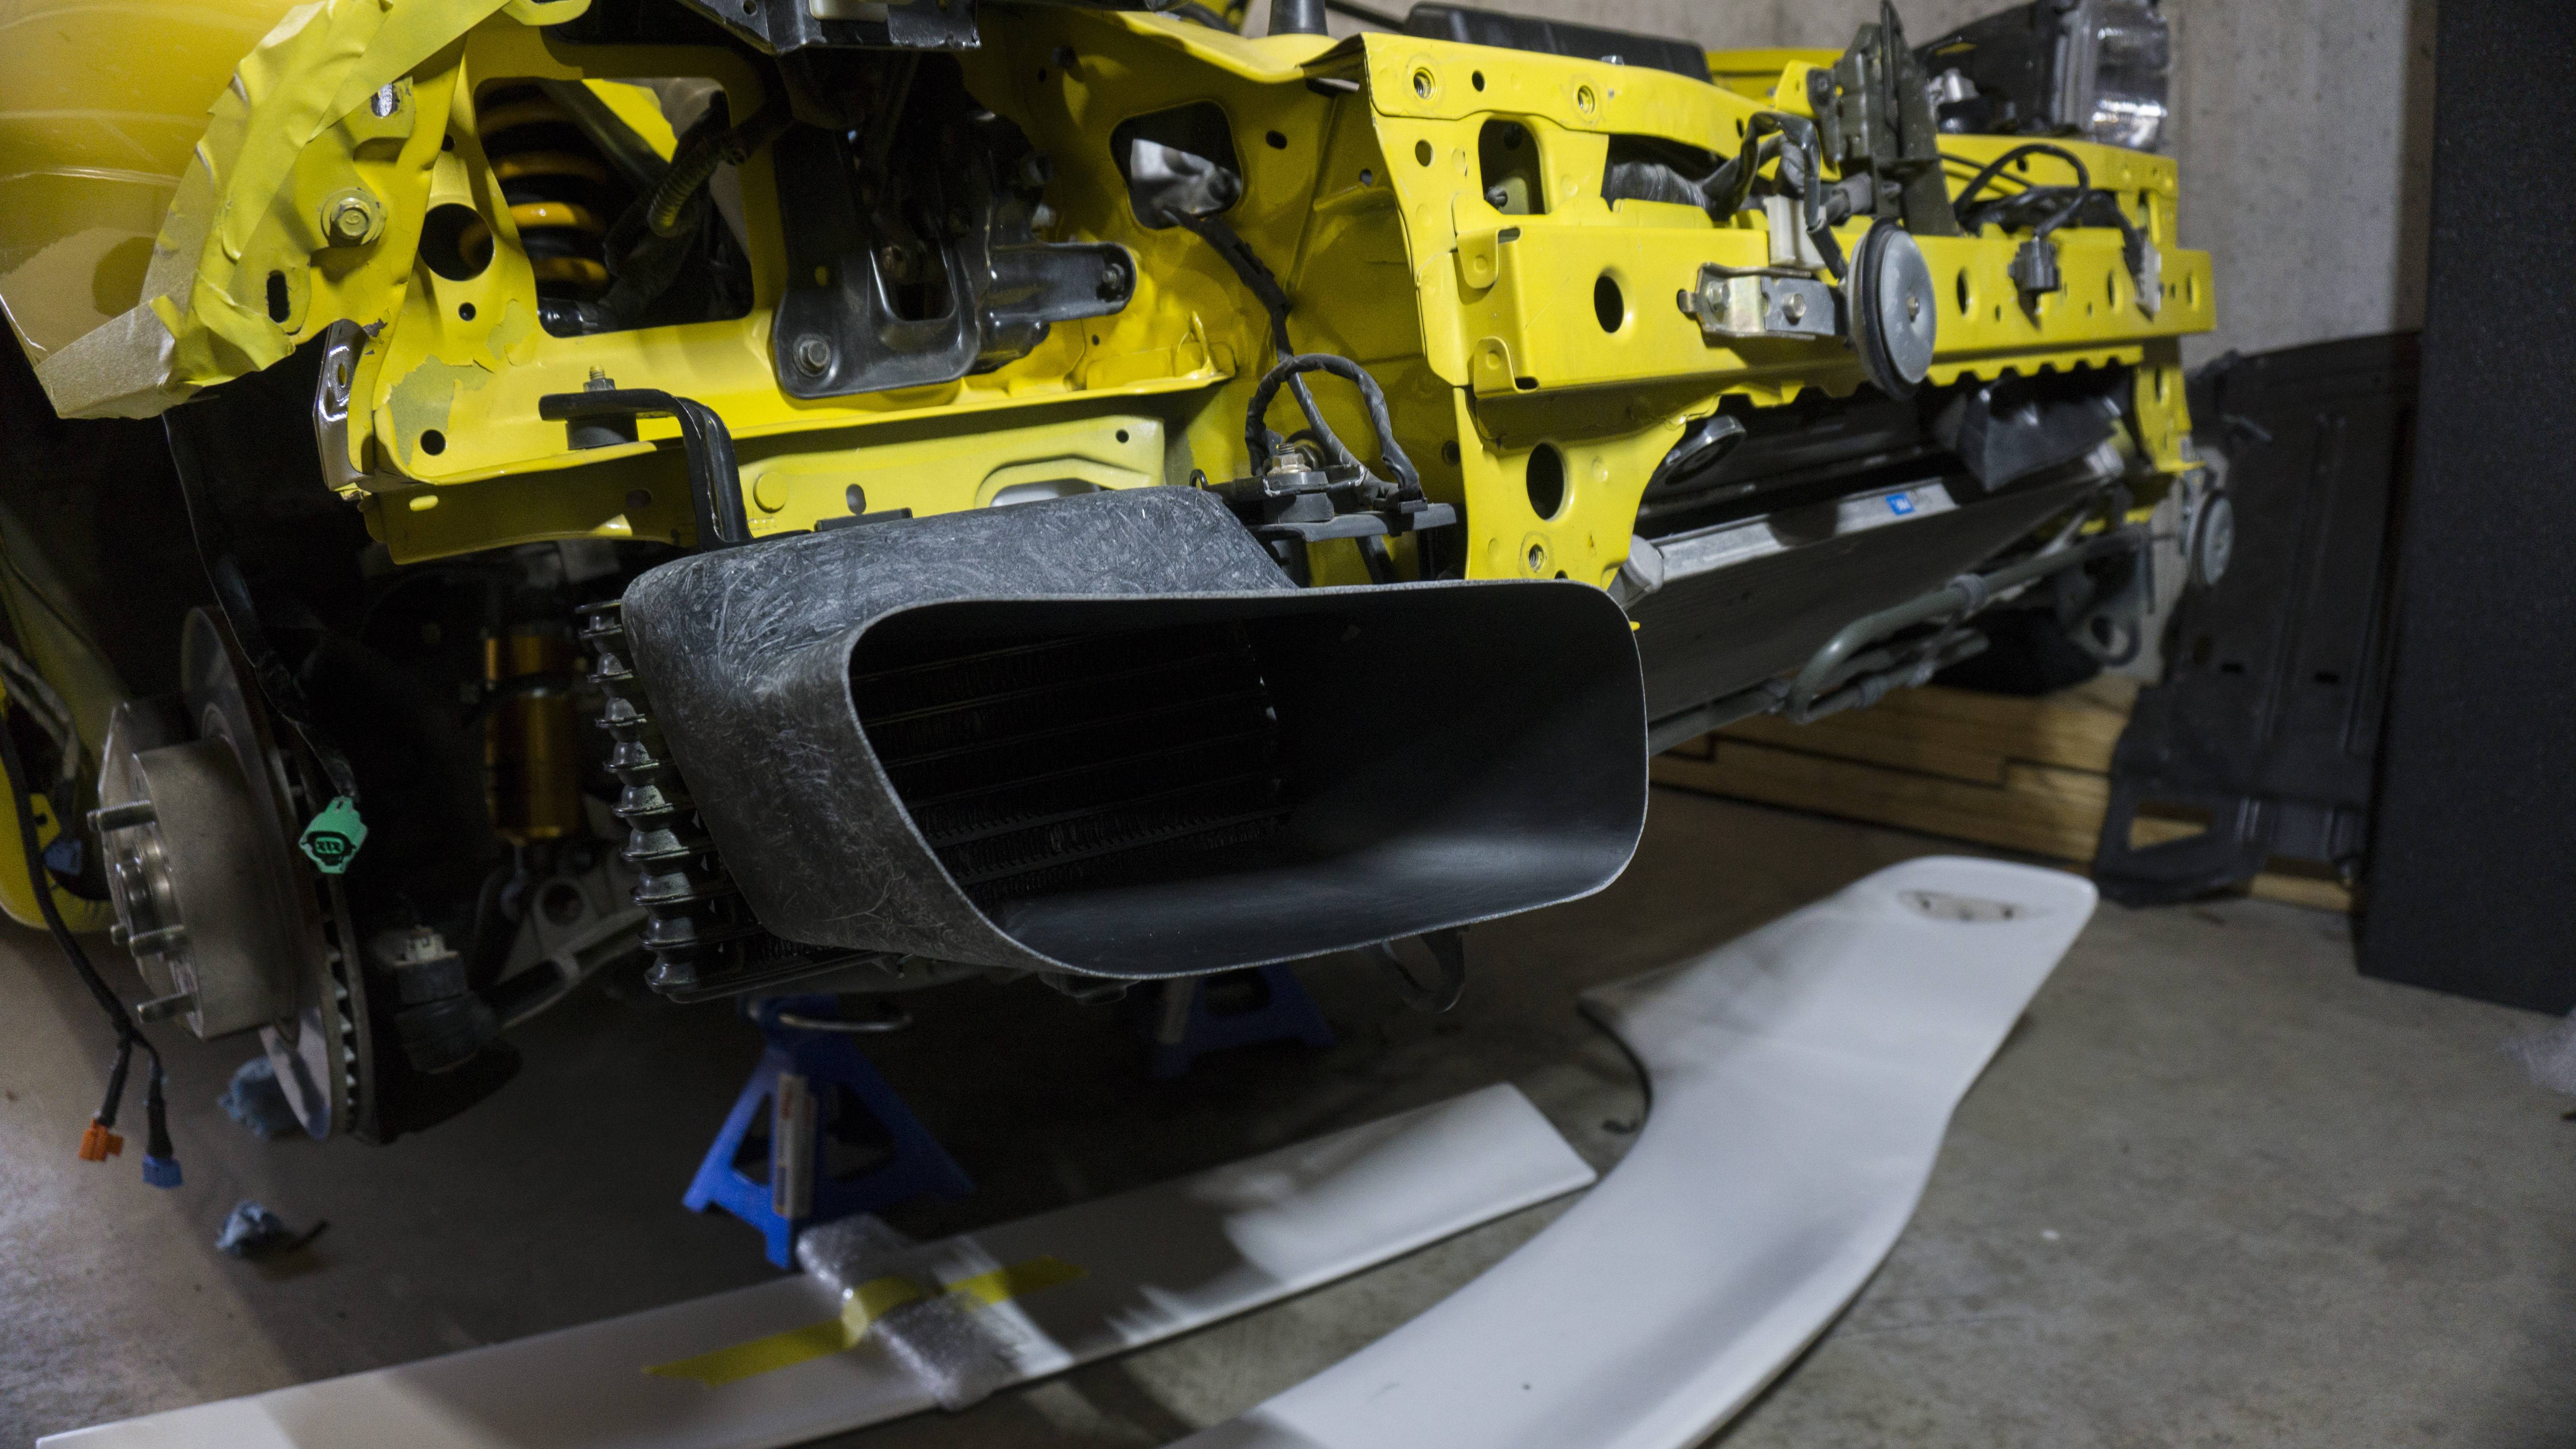
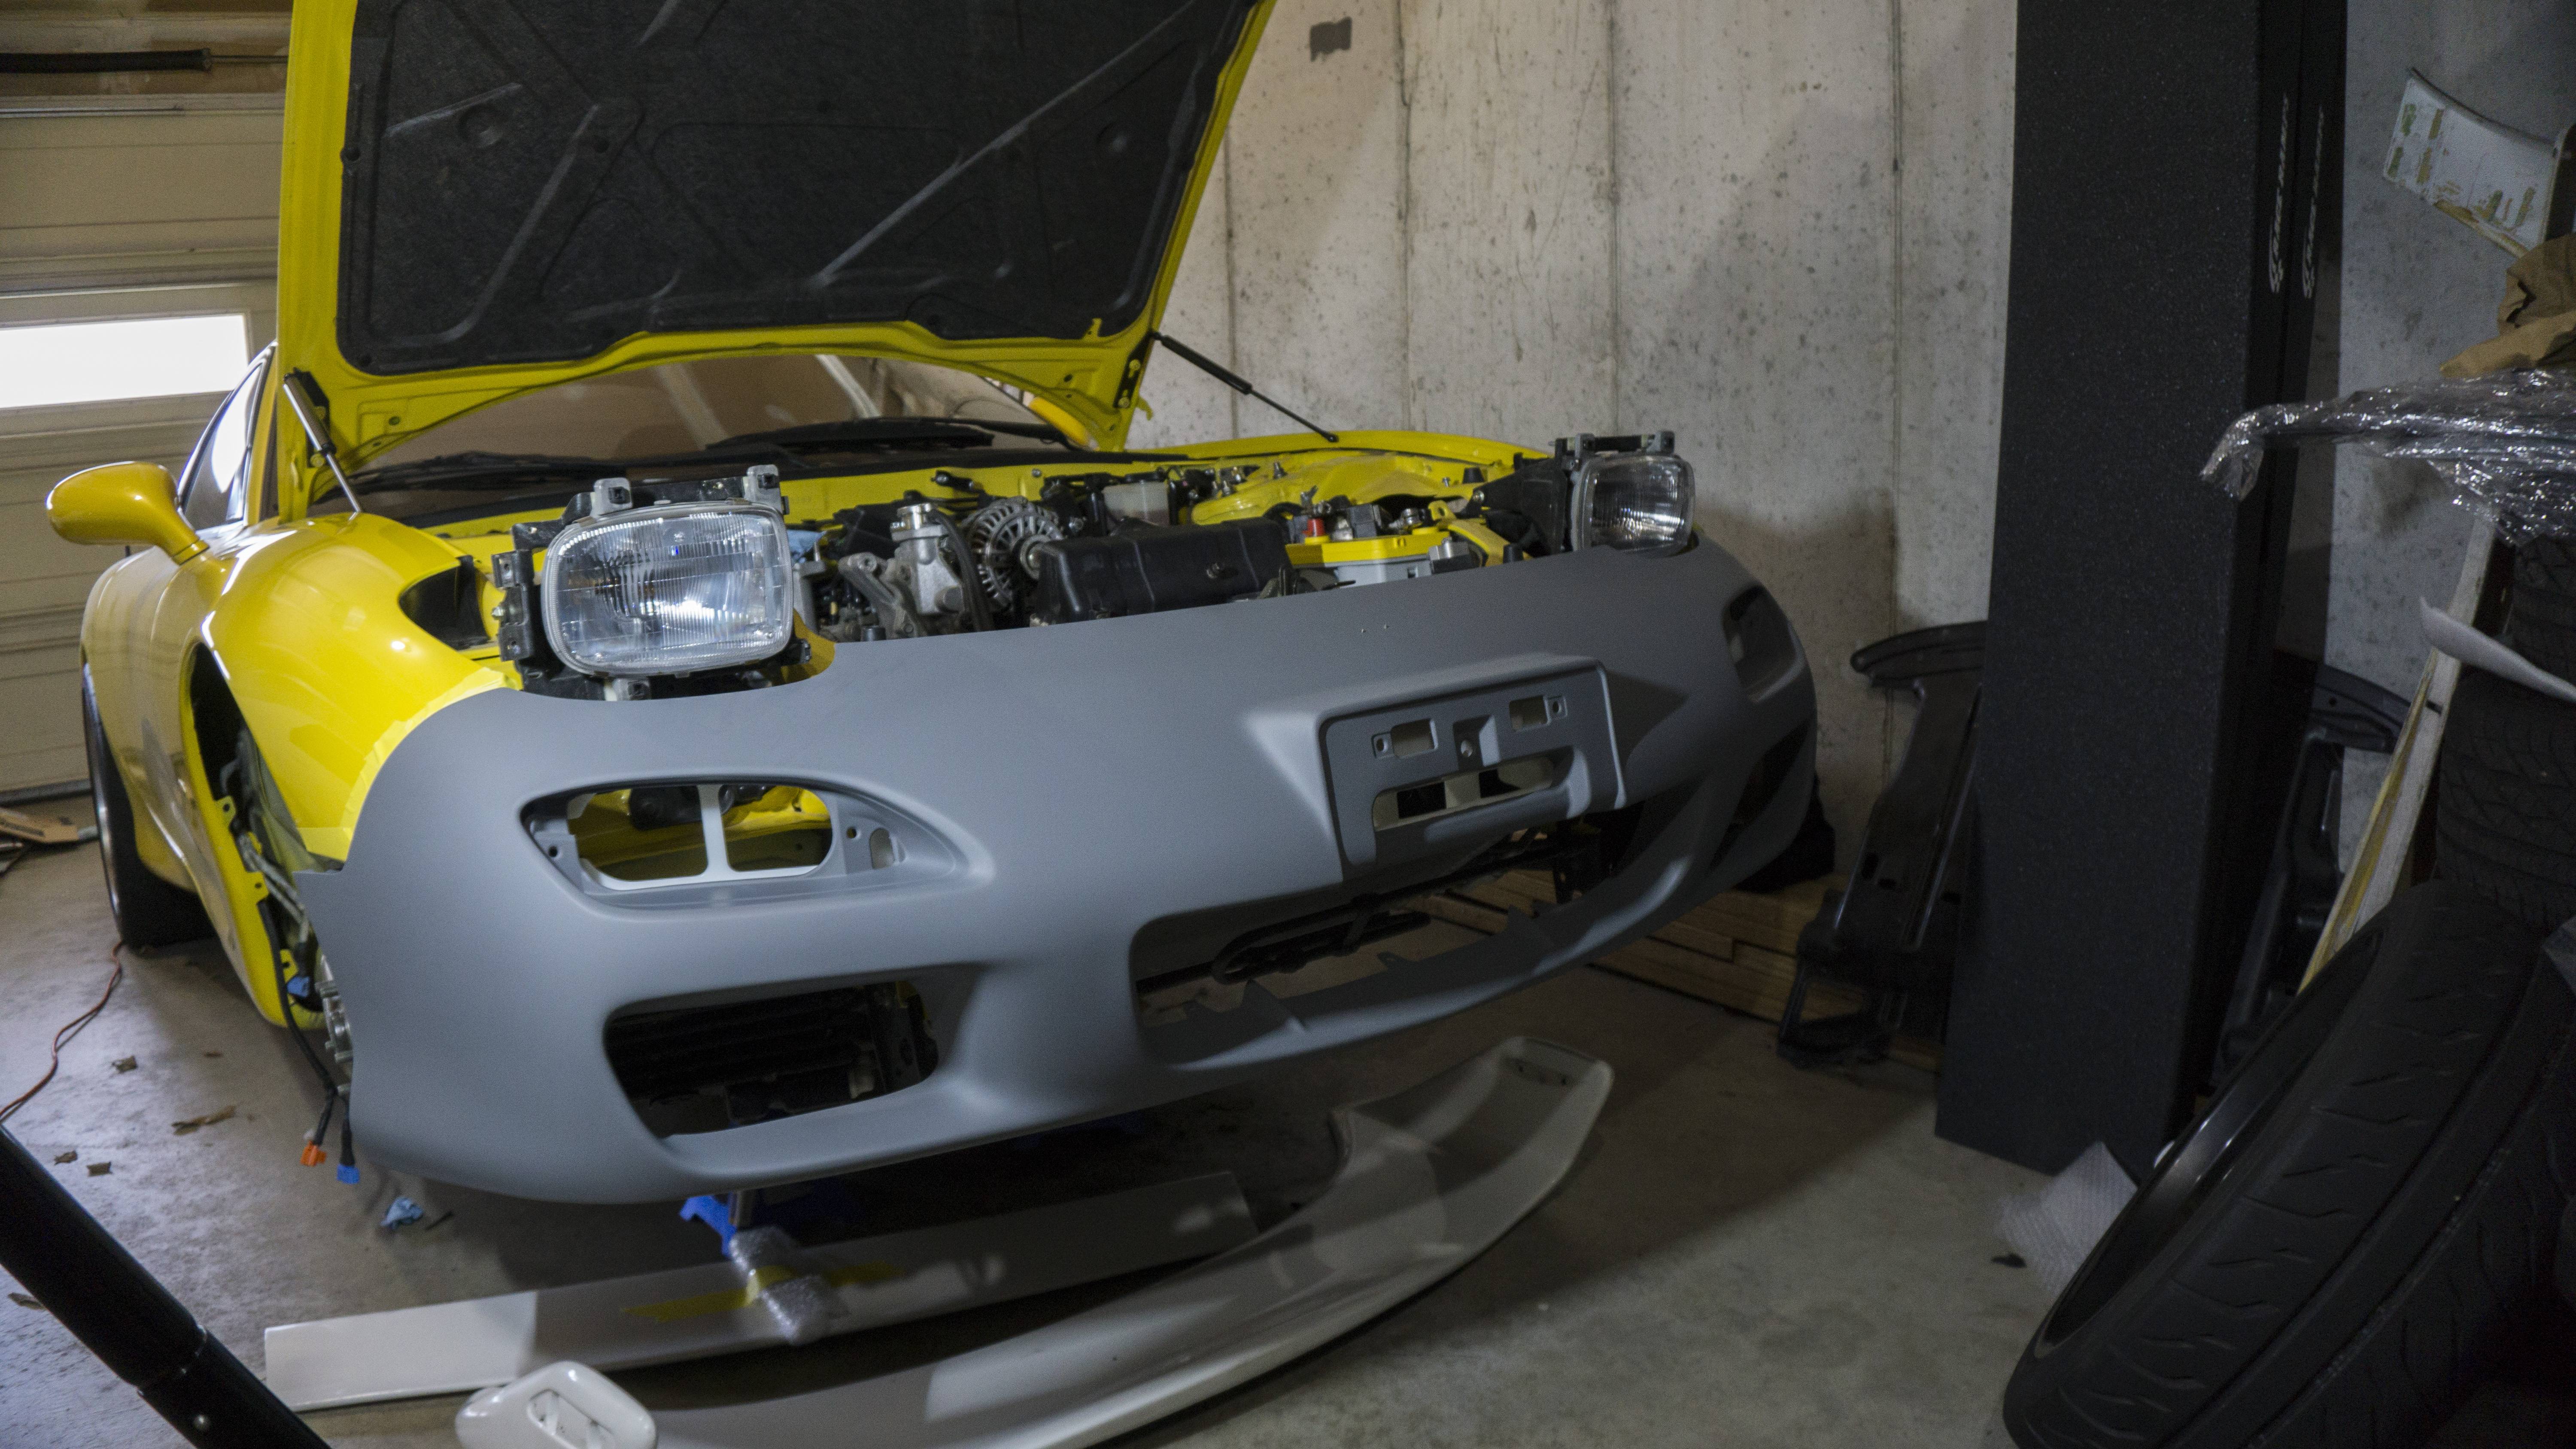
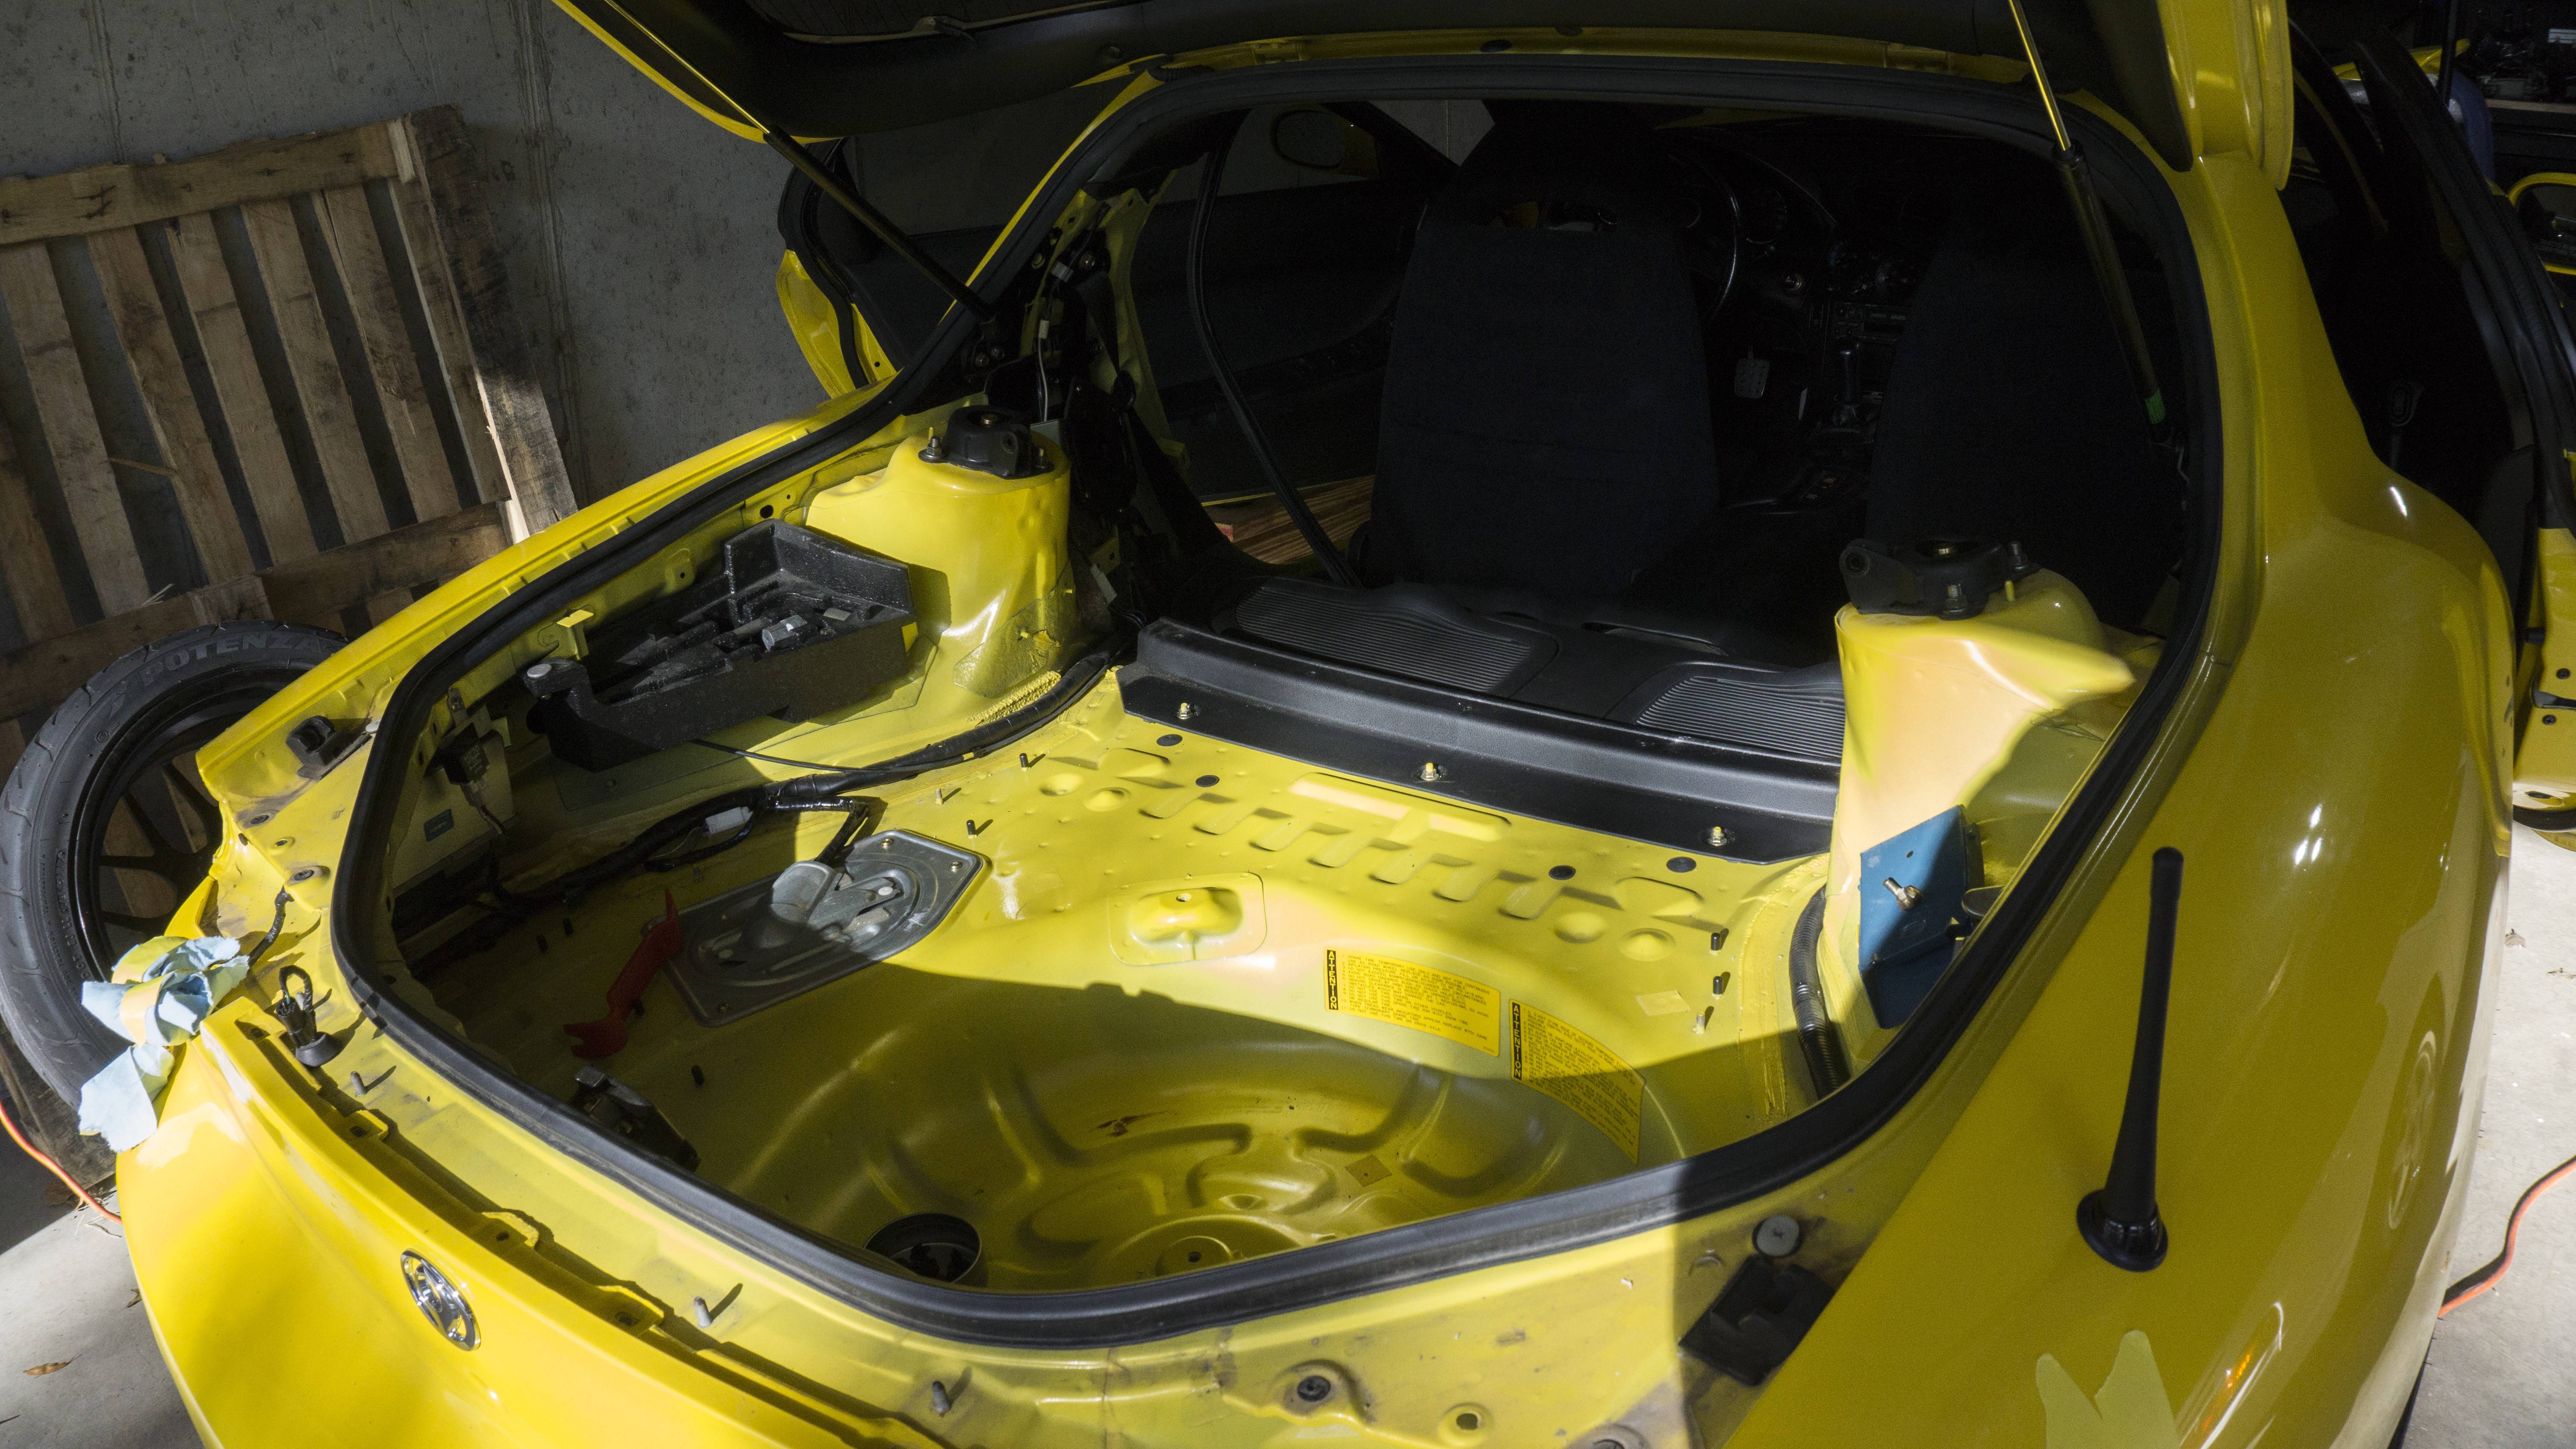
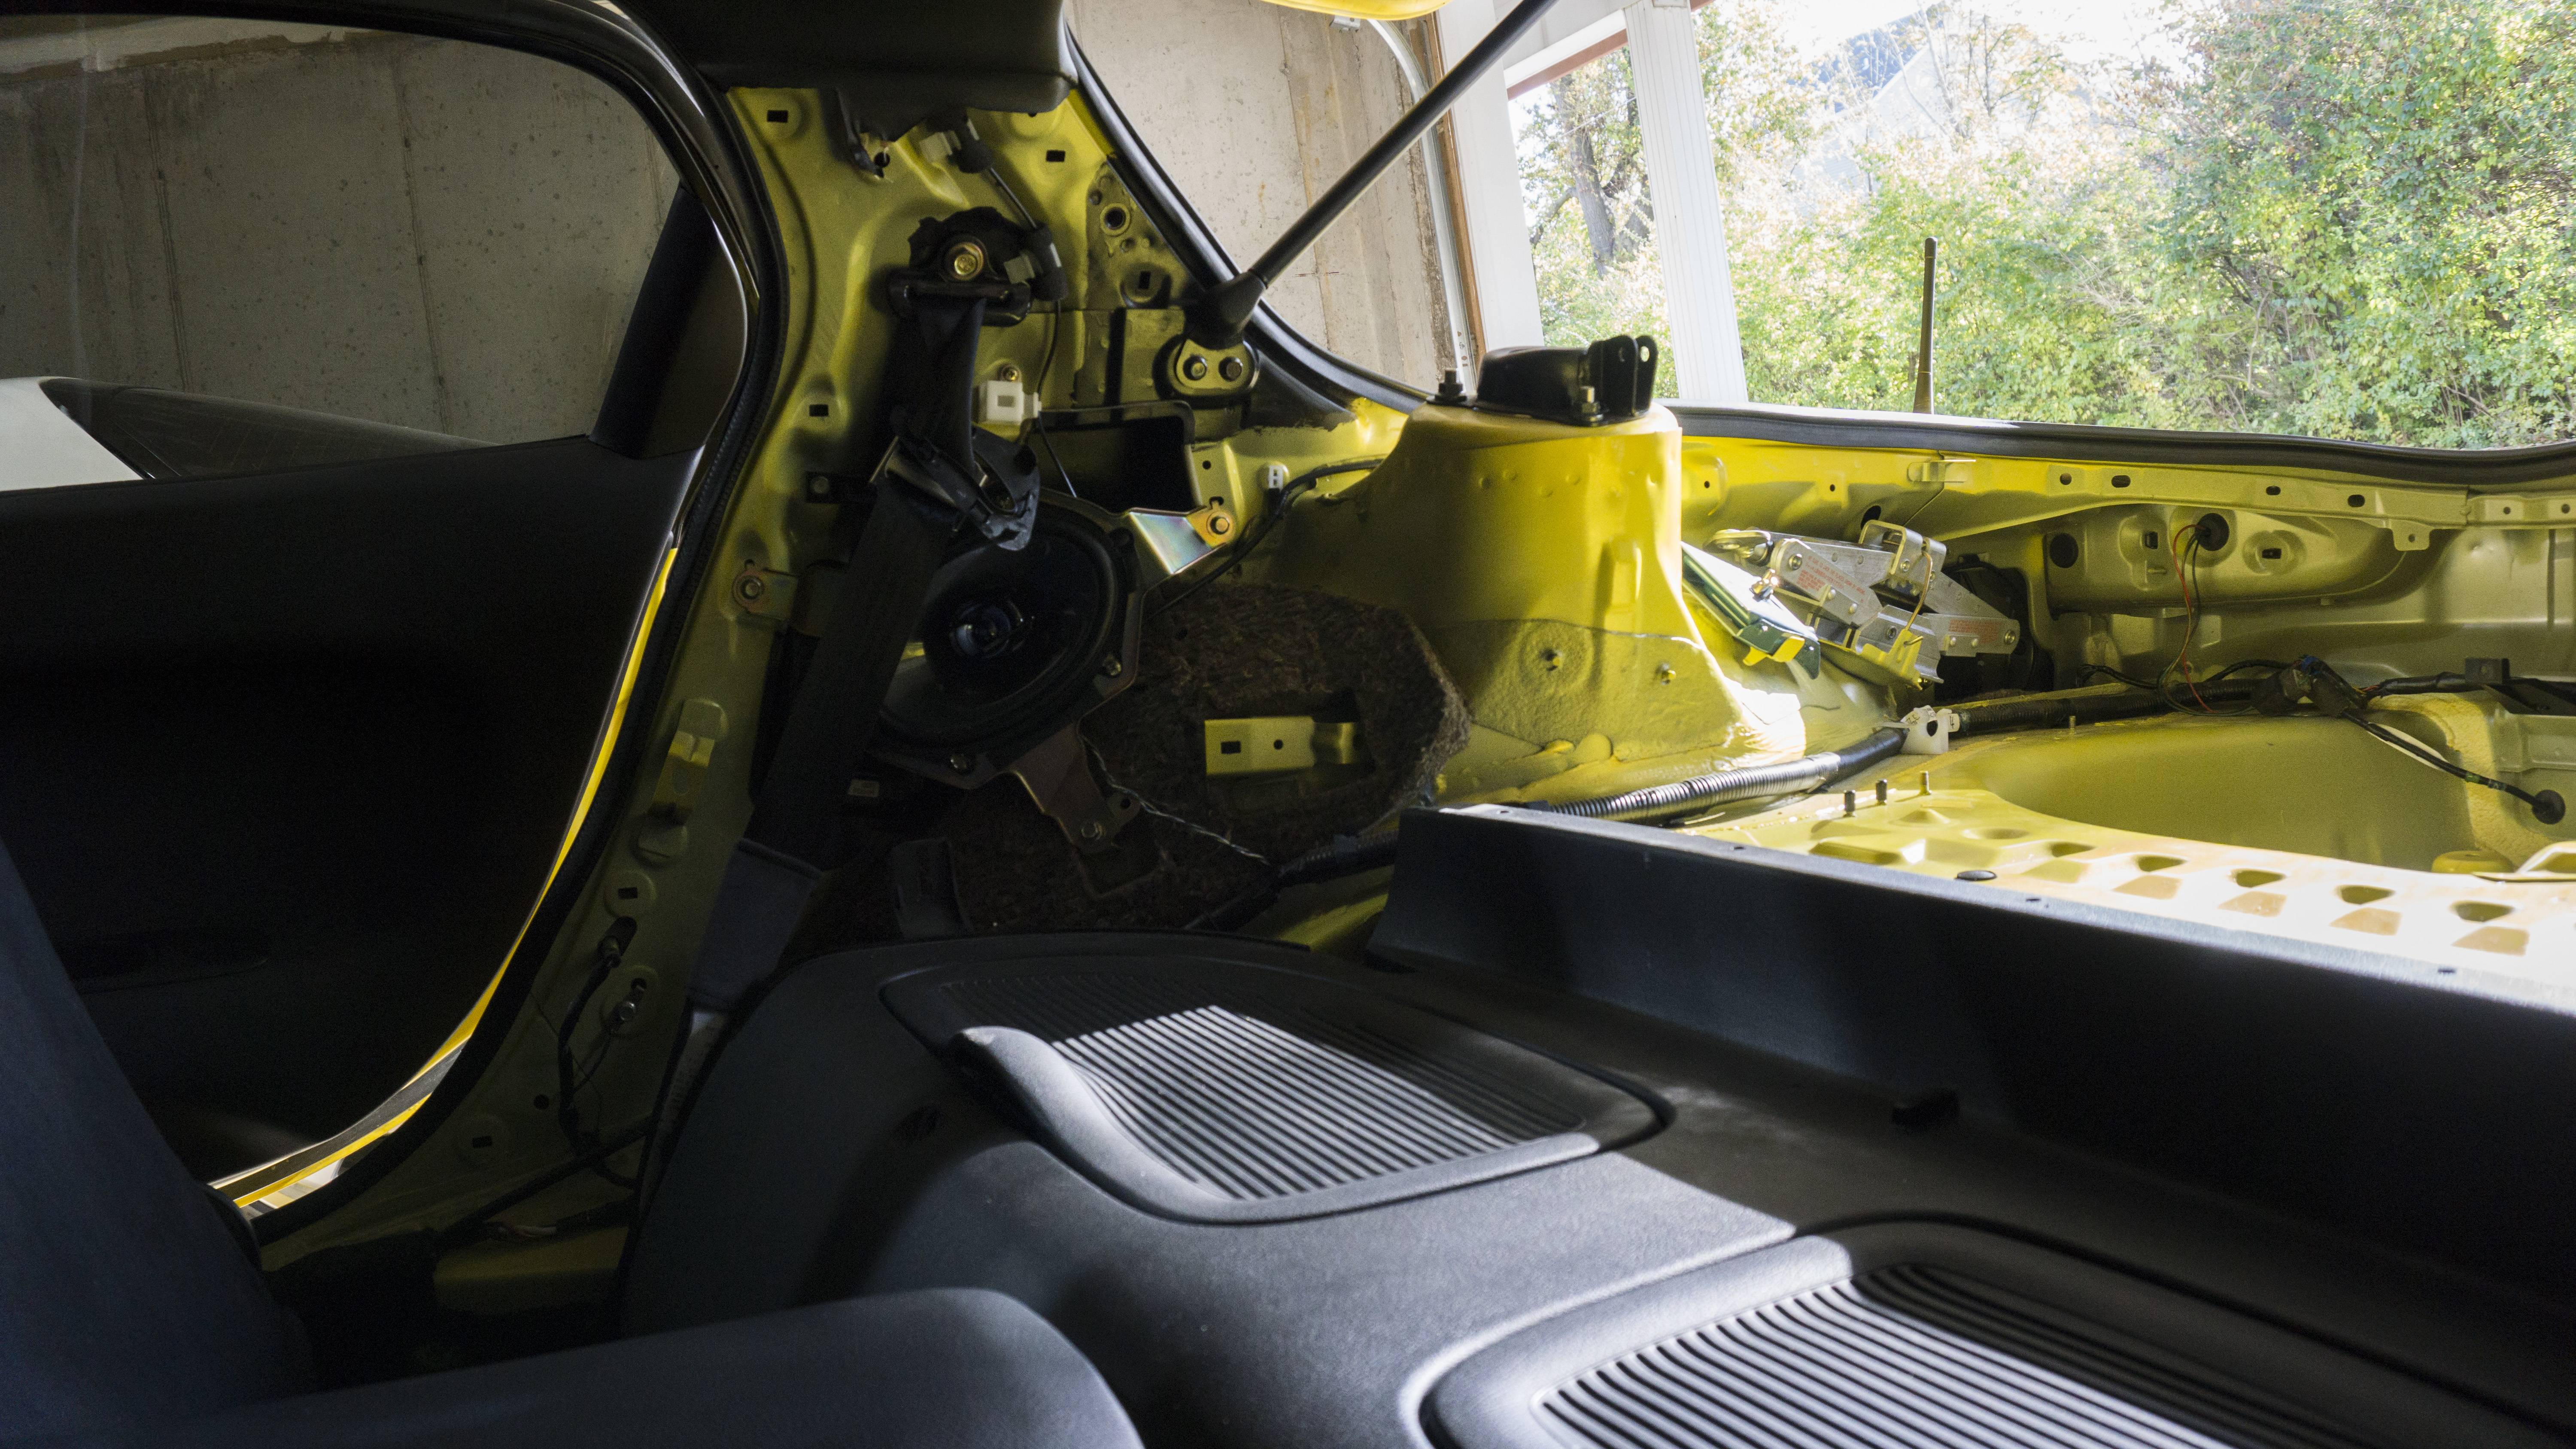
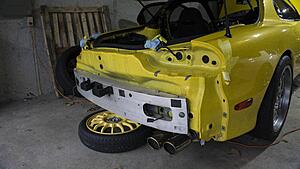
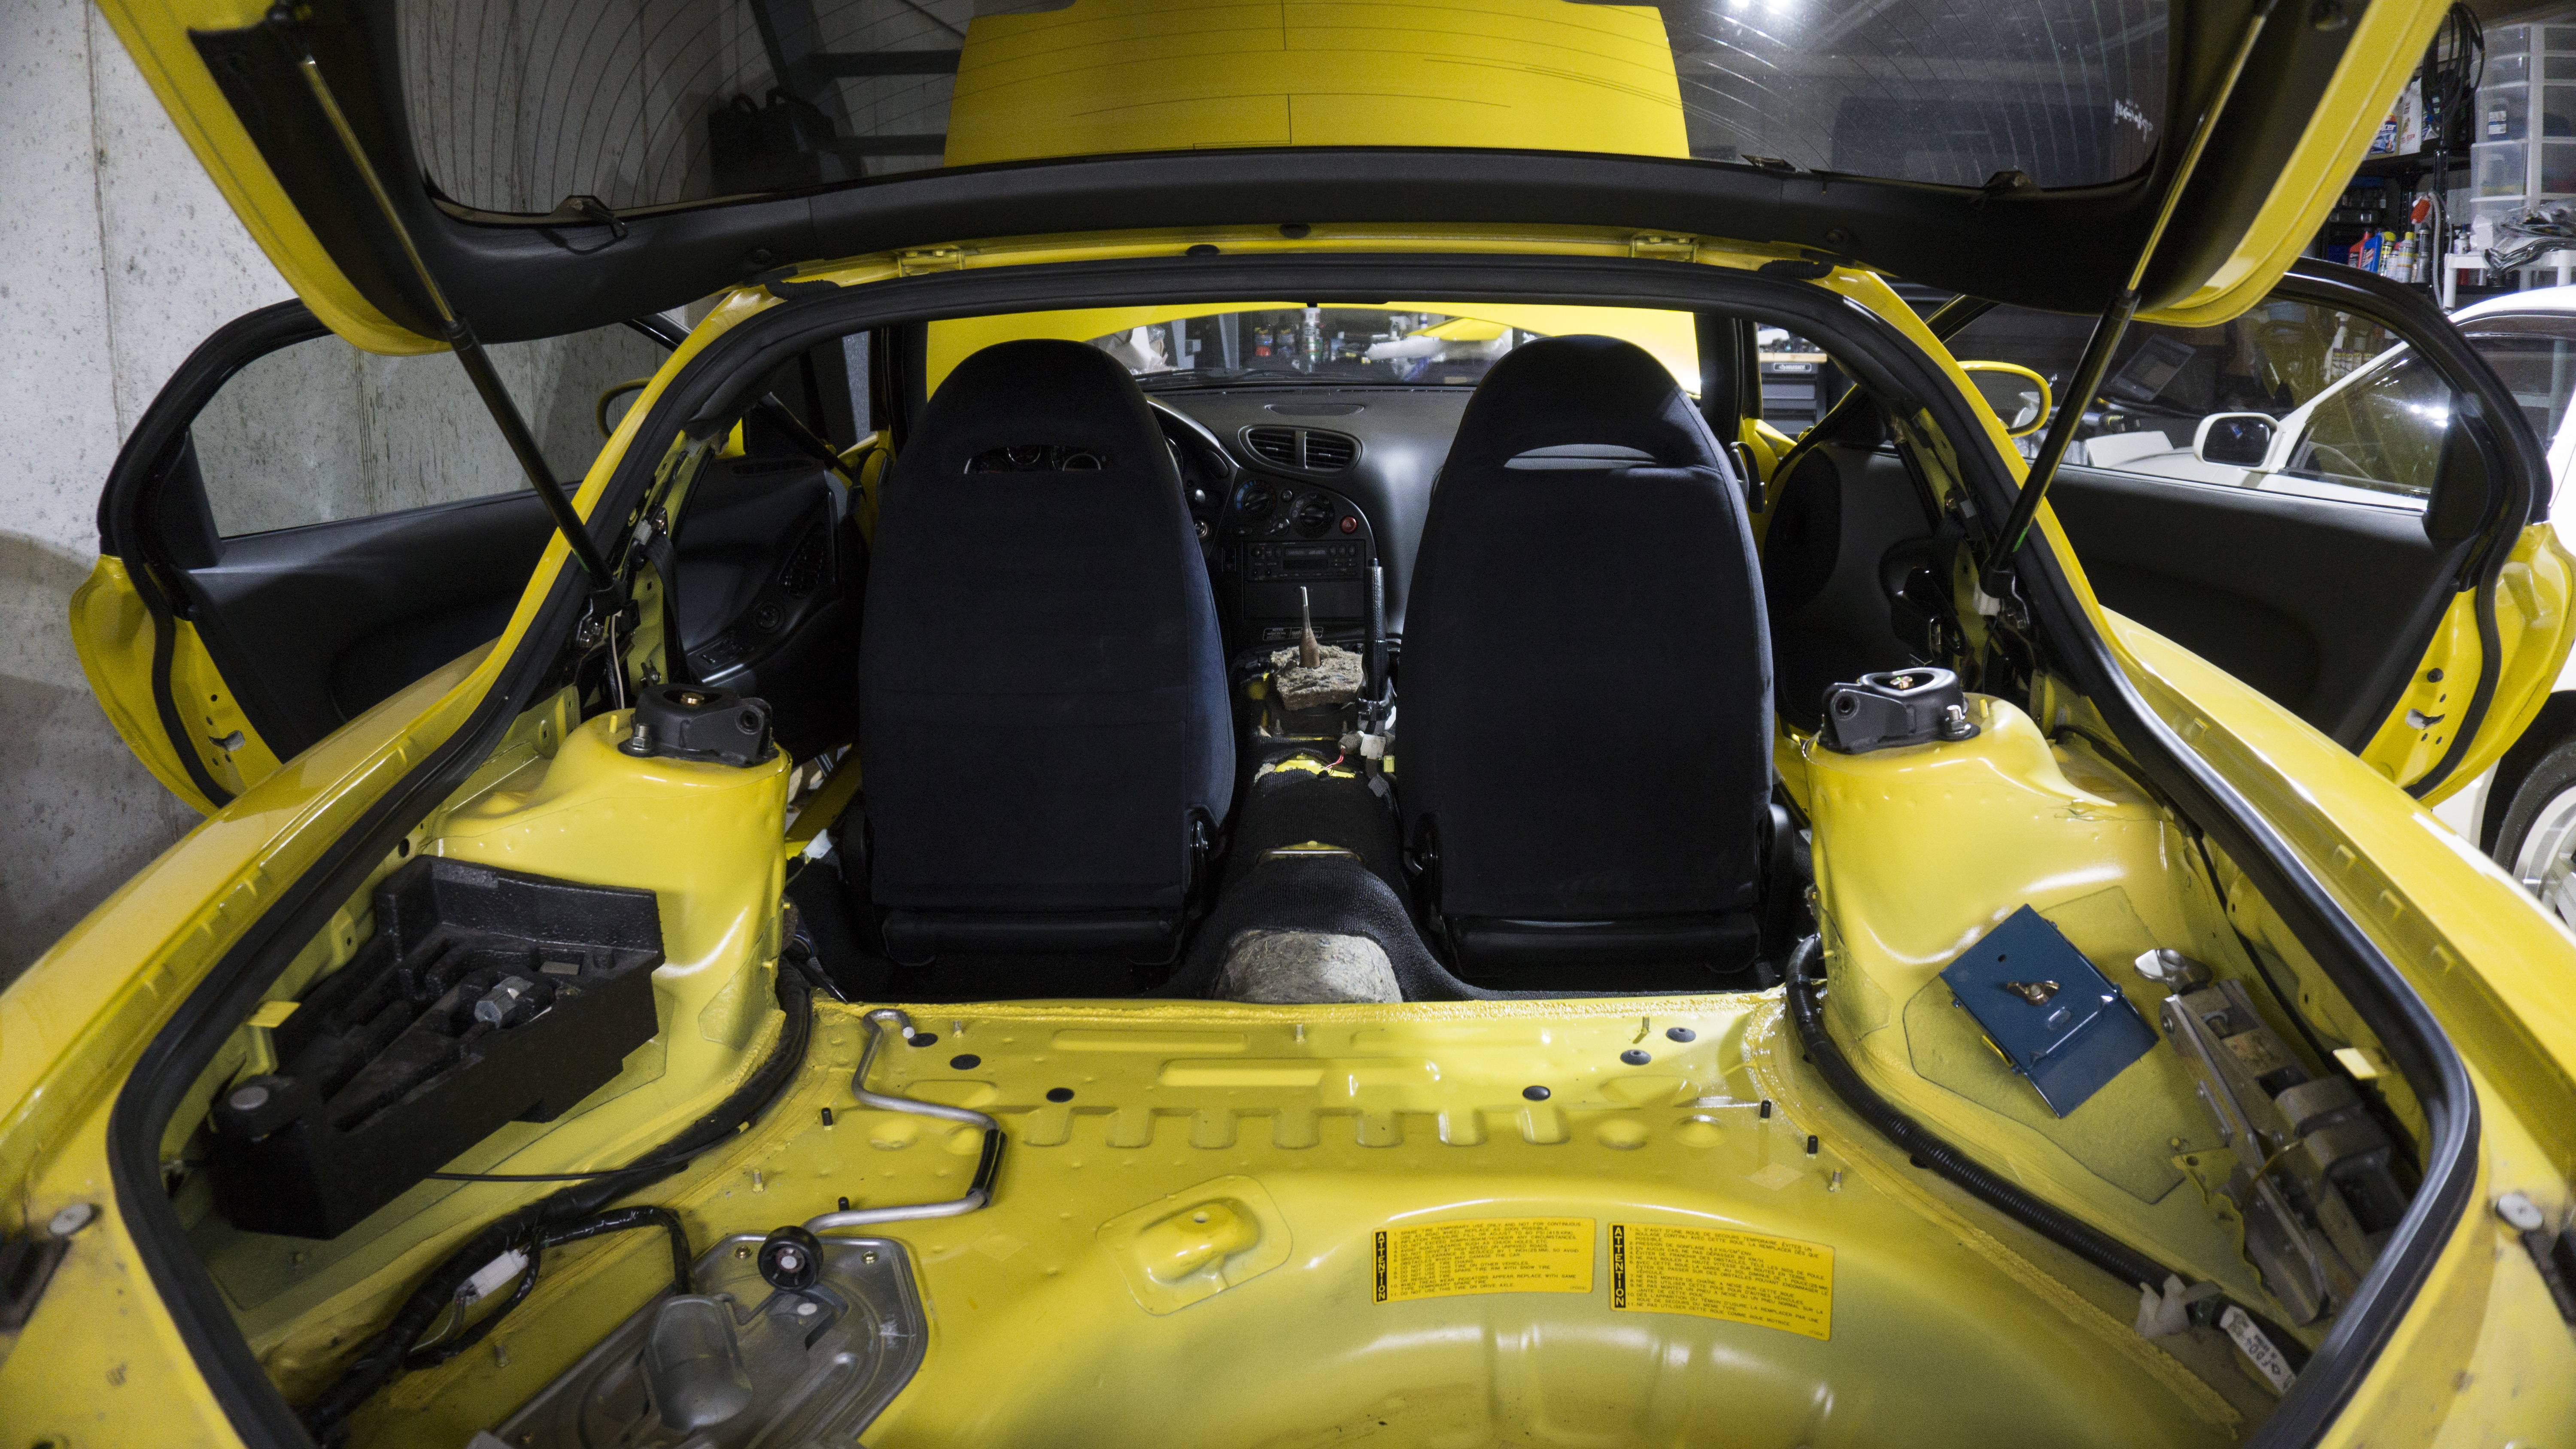
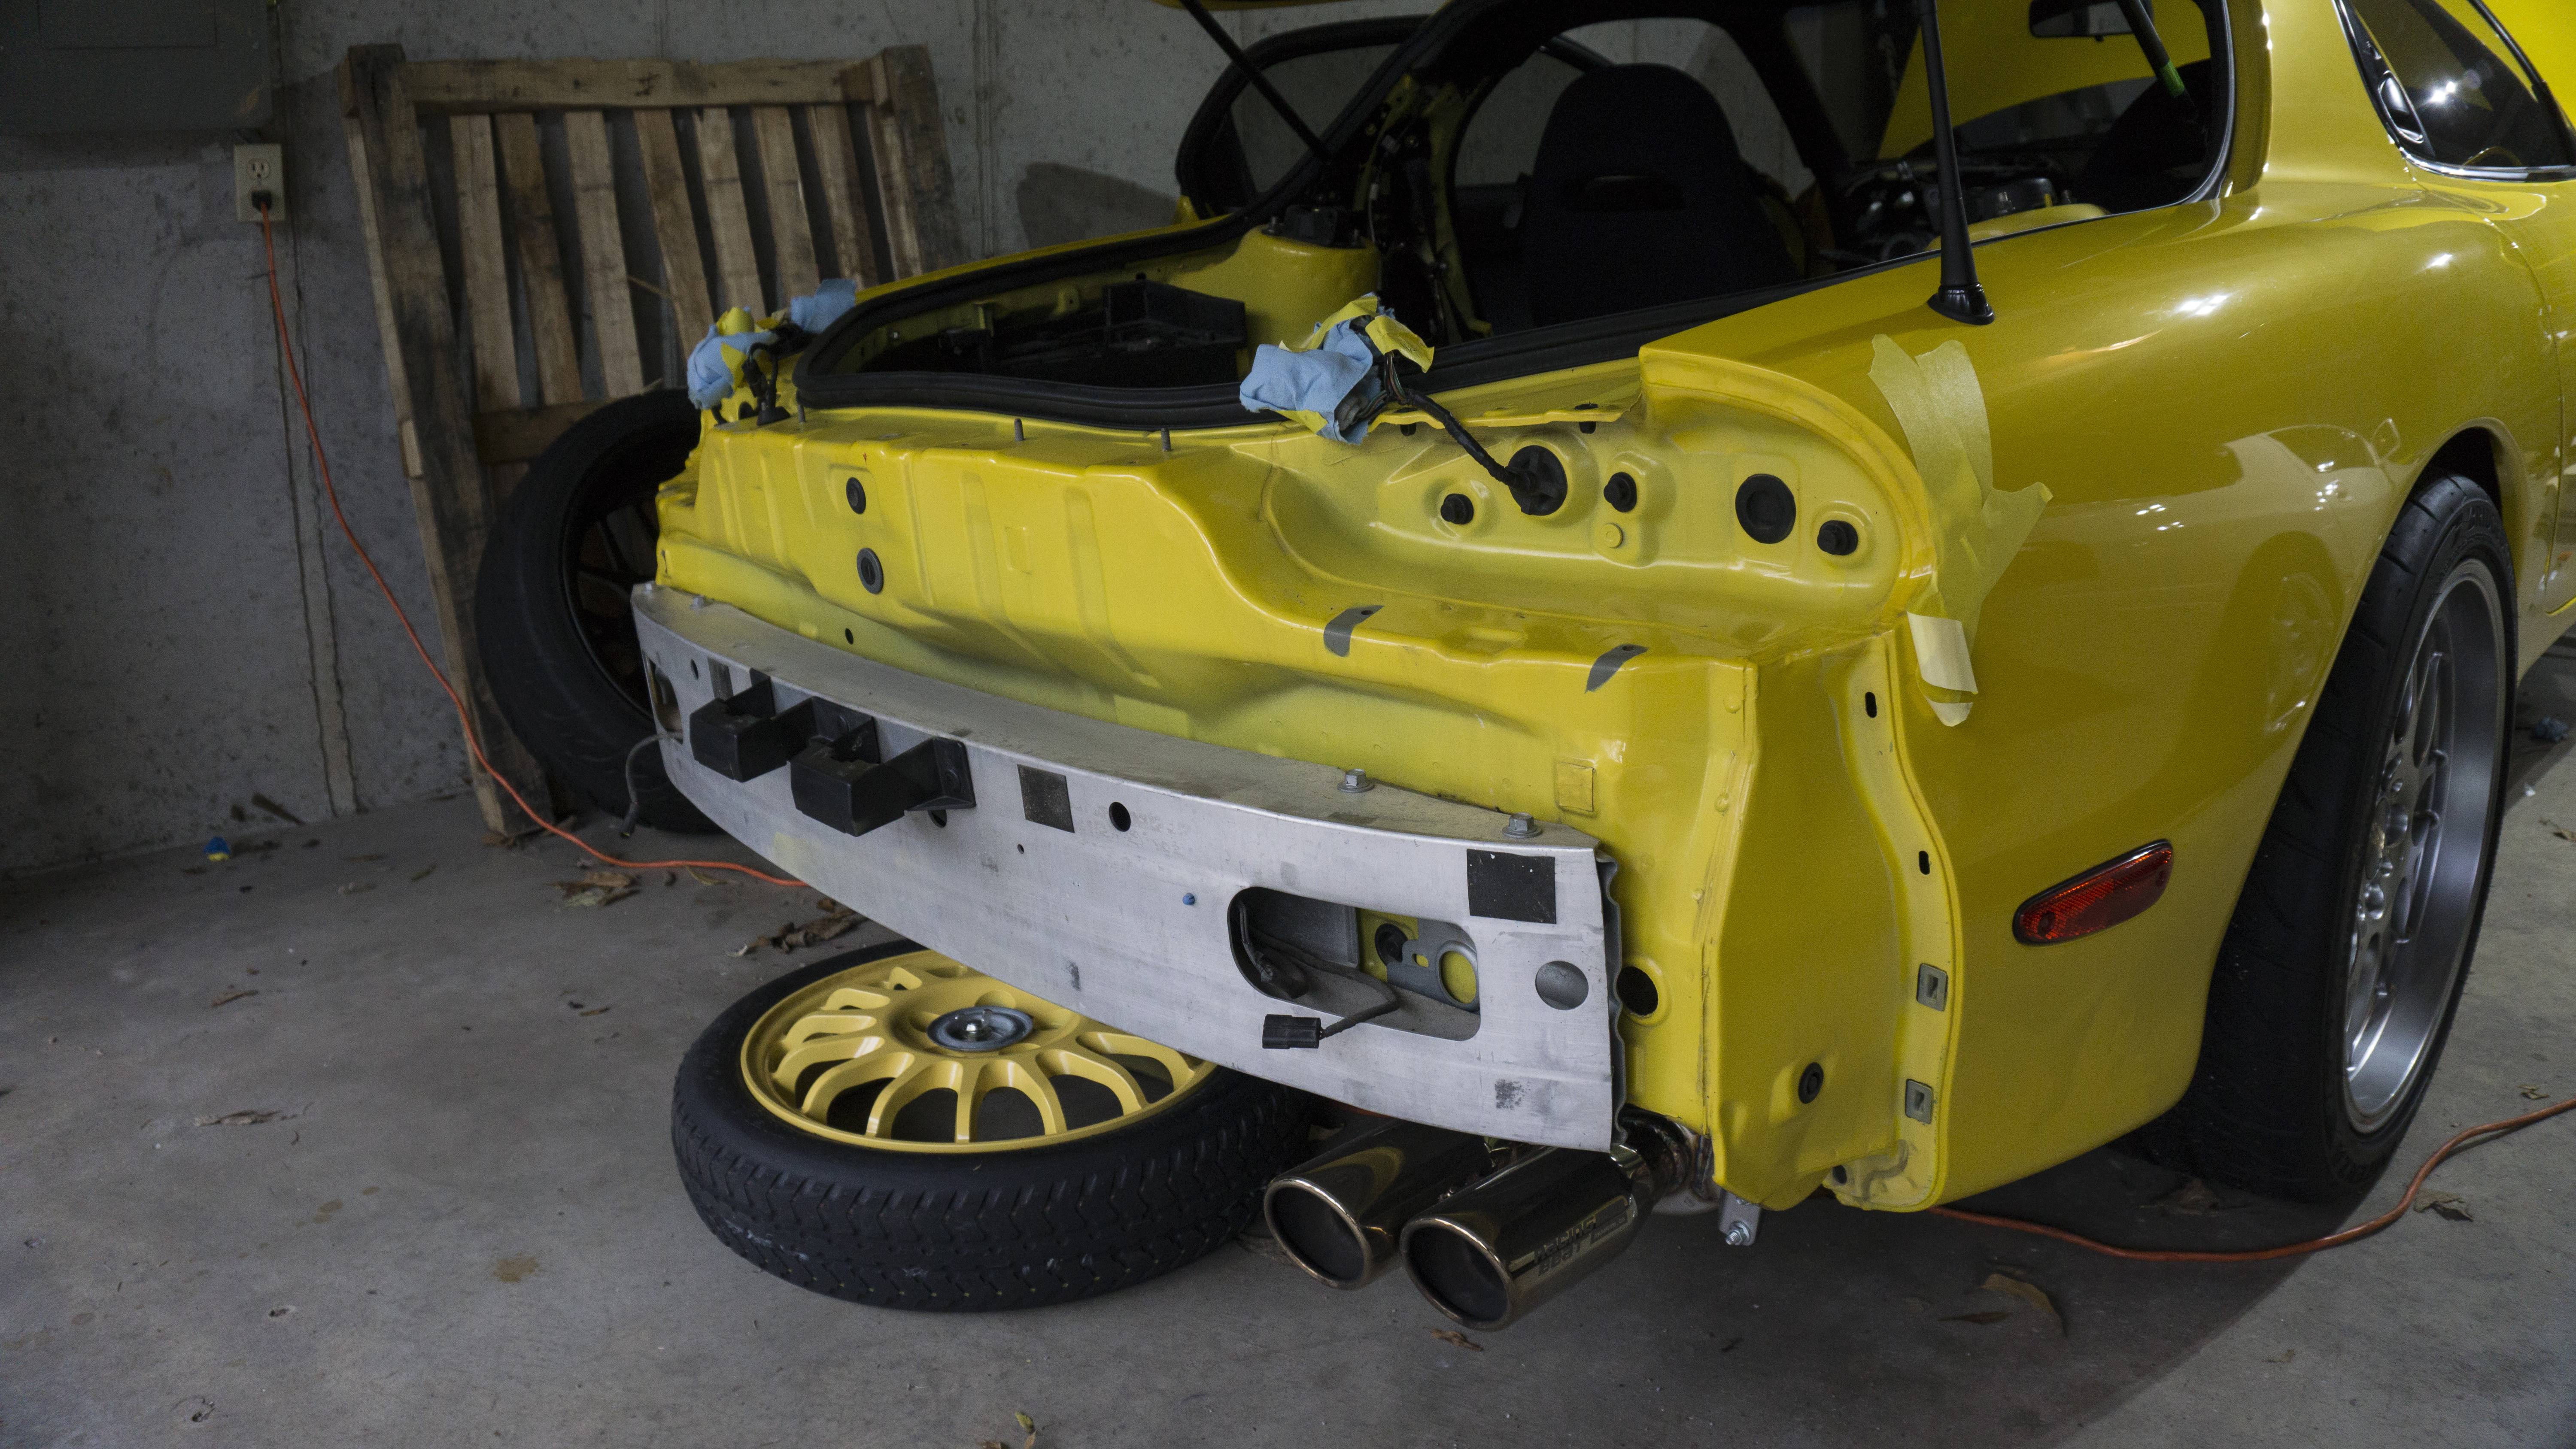
Been a pretty eventful weekend. I was only able to work on the car yesterday and today...largely due to motivation and it being cold out. I spent most of the days getting the car ready to go to paint. Although, I don’t plan on taking it to paint until I have it running again - which relies on my intakes coming in from backorder and everything else returning from powder. I may loosely slap back in the plastic airbox to get it to paint. Since the car has already been resprayed I will probably have them blend the front bumper into the fenders. I was able to get the R1 spoiler removed and test fit the MazdaSpeed spoiler. I think it will end up looking good once it is the same color as the car and will accent the 99 Spec lights and bumper nicely. I also test fit the R-Magic oil cooler ducts and the 99 spec rebar and front bumper. I’m doing this now so when the time comes and everything is nice and painted I’m not fumbling around trying to figure out where things go. I was not happy to see that there is previous overspray on the passenger oil cooler. I’m contemplating a few different ways to go about it. I don’t want to pull off the black anodizing by scraping it off, so I’ll need to be careful. I also finally took the time to remove the rear bumper. I expected it to be a pain since the clips, but as soon as I gave it a little bit of pressure it just popped out. Not sure if that's normal if the bumper has been removed before or not, but it is what it is. The last thing I did was remove the hatch interior - I plan to remove the bins as well, but didn’t get around to it. I decided since it’ll be down for a bit to go ahead and overhaul the interior like I wanted. Fortunately, I have most of the stuff already. I may go ahead and upgrade the speakers since I need to get the factory radio working again anyway.
I’m still debating on having the flying M badges sprayed with PZ paint. I’m hoping they are able to spray the Mazda and RX-7 stick on badges as well.
Here is the spoiler removal and quick fitting:

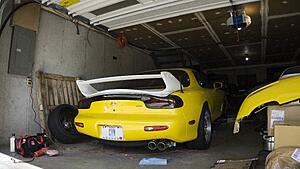
Here is the front bumper fittings:


Here is the hatch interior and rear bumper removed:


Been a pretty eventful weekend. I was only able to work on the car yesterday and today...largely due to motivation and it being cold out. I spent most of the days getting the car ready to go to paint. Although, I don’t plan on taking it to paint until I have it running again - which relies on my intakes coming in from backorder and everything else returning from powder. I may loosely slap back in the plastic airbox to get it to paint. Since the car has already been resprayed I will probably have them blend the front bumper into the fenders. I was able to get the R1 spoiler removed and test fit the MazdaSpeed spoiler. I think it will end up looking good once it is the same color as the car and will accent the 99 Spec lights and bumper nicely. I also test fit the R-Magic oil cooler ducts and the 99 spec rebar and front bumper. I’m doing this now so when the time comes and everything is nice and painted I’m not fumbling around trying to figure out where things go. I was not happy to see that there is previous overspray on the passenger oil cooler. I’m contemplating a few different ways to go about it. I don’t want to pull off the black anodizing by scraping it off, so I’ll need to be careful. I also finally took the time to remove the rear bumper. I expected it to be a pain since the clips, but as soon as I gave it a little bit of pressure it just popped out. Not sure if that's normal if the bumper has been removed before or not, but it is what it is. The last thing I did was remove the hatch interior - I plan to remove the bins as well, but didn’t get around to it. I decided since it’ll be down for a bit to go ahead and overhaul the interior like I wanted. Fortunately, I have most of the stuff already. I may go ahead and upgrade the speakers since I need to get the factory radio working again anyway.
I’m still debating on having the flying M badges sprayed with PZ paint. I’m hoping they are able to spray the Mazda and RX-7 stick on badges as well.
Here is the spoiler removal and quick fitting:


Here is the front bumper fittings:

Here is the hatch interior and rear bumper removed:

Thread Starter
Joined: Apr 2015
Posts: 398
Likes: 169
From: St. Louis, MO
Update 11/10/19:
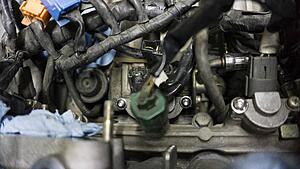
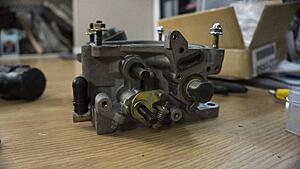
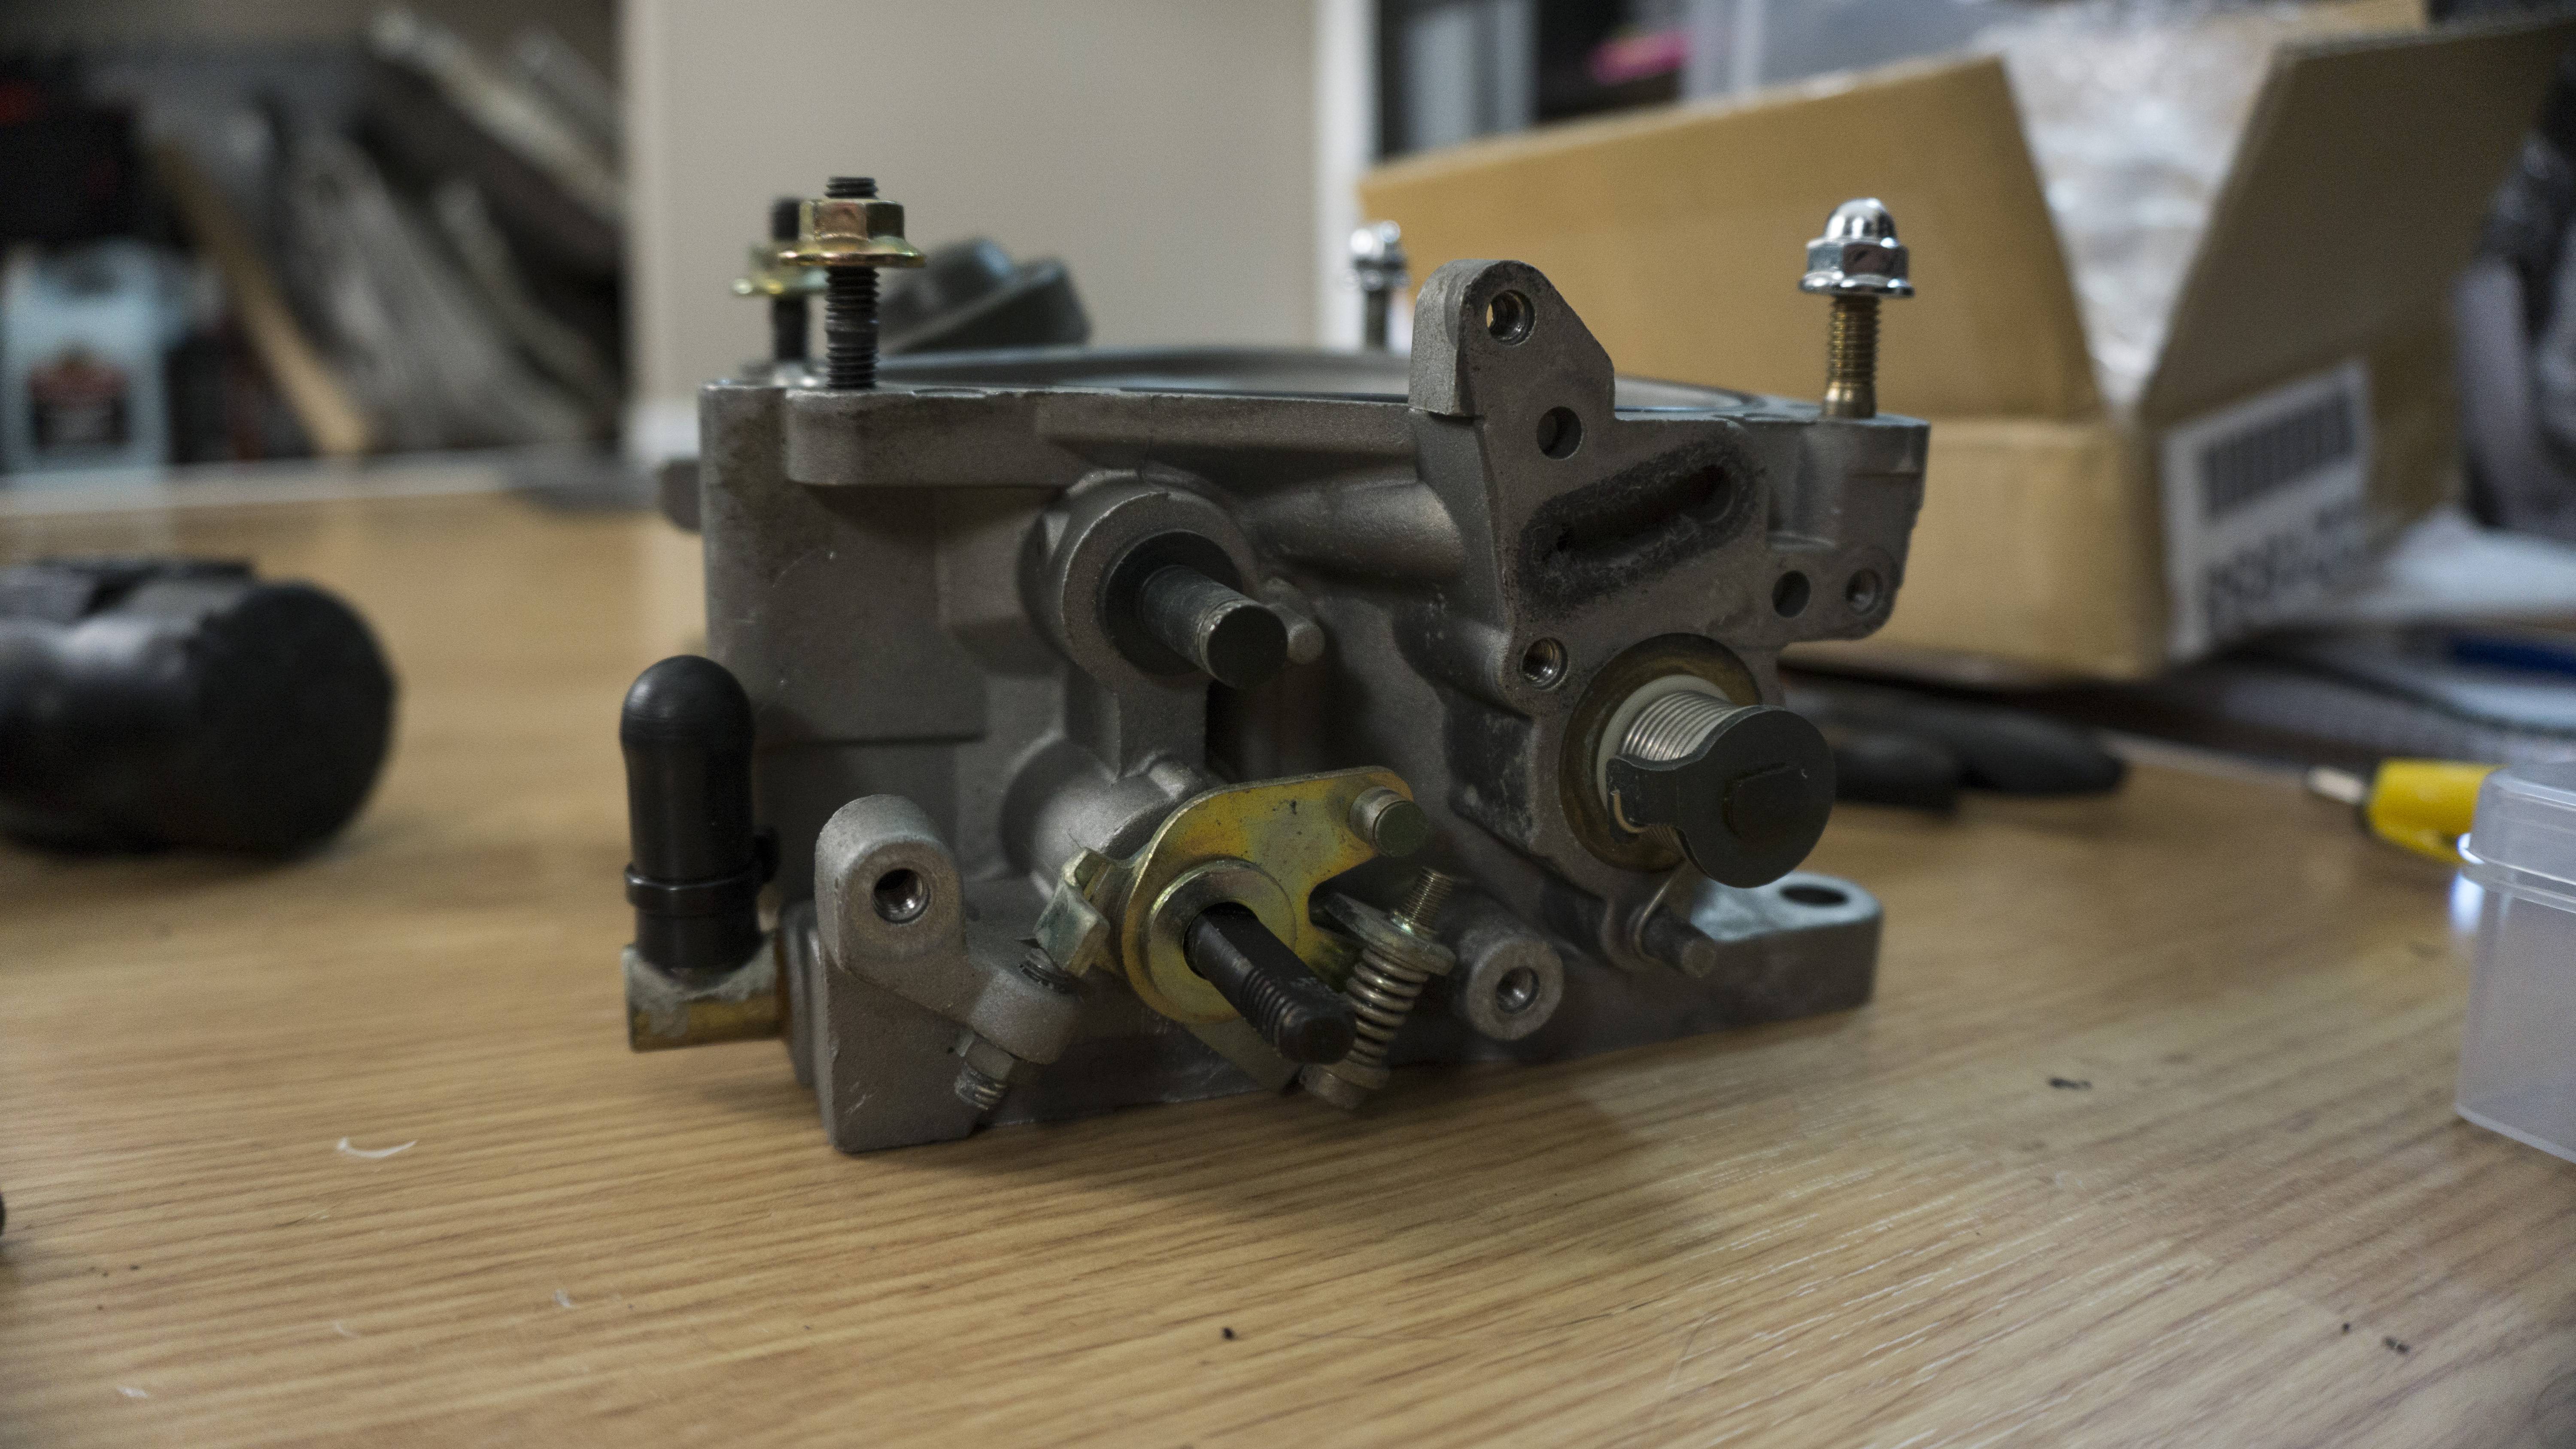
I think I�ve finally hit the end game for the things I can find wrong with this car. I�ve completely pulled apart the interior, minus the dash and carpet. Previous owner(s) did quite a few...rookie things. I�ll show you all the shenanigans below, I�ve fixed all of them for now. Except one - the radio - I hate the OEM radio. The problem with it was the antenna wire. I purchased another radio so I could swap my faceplate over and be good to go. However, the lines from the connector on the board to the antenna cable is so thin it twisted itself off. SO�.now I have two OEM radios that won�t receive FM/AM...which was really my only reason for fixing and keeping it. I don�t really want to run a double din, since I have to cut the cross section, but it is an option to retain the OEM look with a Miata/Millenium/Protege radio. I haven�t fully explored all my options yet, but I will not be using the OEM Clarion units. I wish a company made current day radios with an older school design. There were also double ground cables behind the driver side speaker panel. I have no idea what those were ran to, maybe an aftermarket amplifier? Either way, I removed them both and was able to get the rear bins cleaned up and put back in. The last thing I did this week was delete the thermowax from the throttle body. I won�t be utilizing it anyway, so it felt like a good idea to simplify the throttle body further. I�ll be creating my own block off plate (more of a want than a need) since no one makes one. For latest purchases I picked up a Cusco Type OS front strut bar. I wanted to keep the R1 bar pristine so I plan to have the Cusco powdered flat black. I also picked up a cigarette lighter Power FC commander holder. I ordered it from Yahoo Auctions Japan. I also ordered a ton of OEM screws, clips, and bolts from Amayama to have extras for the interior and exterior - I pretty much bought them out on some of them.
Next week all my stuff should come back from powder so I can get the car back up and running again. My friend is letting me borrow his extra set of APEXi intakes until mine come in from backorder. Once that happens I can call a local bodyshop and see about getting the 99-spec parts and MazdaSpeed spoiler sprayed.
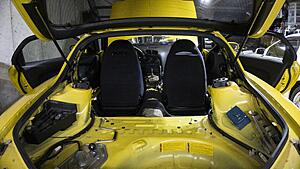
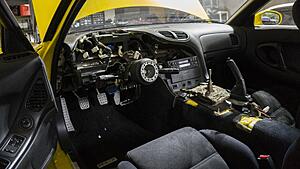
Here are some shots of the further interior tear down:
Here is the Power FC holder from YAJ:

Here is a quick shot of the throttlebody with thermowax removed:
Here is all the wiring shenanigans:

I think I�ve finally hit the end game for the things I can find wrong with this car. I�ve completely pulled apart the interior, minus the dash and carpet. Previous owner(s) did quite a few...rookie things. I�ll show you all the shenanigans below, I�ve fixed all of them for now. Except one - the radio - I hate the OEM radio. The problem with it was the antenna wire. I purchased another radio so I could swap my faceplate over and be good to go. However, the lines from the connector on the board to the antenna cable is so thin it twisted itself off. SO�.now I have two OEM radios that won�t receive FM/AM...which was really my only reason for fixing and keeping it. I don�t really want to run a double din, since I have to cut the cross section, but it is an option to retain the OEM look with a Miata/Millenium/Protege radio. I haven�t fully explored all my options yet, but I will not be using the OEM Clarion units. I wish a company made current day radios with an older school design. There were also double ground cables behind the driver side speaker panel. I have no idea what those were ran to, maybe an aftermarket amplifier? Either way, I removed them both and was able to get the rear bins cleaned up and put back in. The last thing I did this week was delete the thermowax from the throttle body. I won�t be utilizing it anyway, so it felt like a good idea to simplify the throttle body further. I�ll be creating my own block off plate (more of a want than a need) since no one makes one. For latest purchases I picked up a Cusco Type OS front strut bar. I wanted to keep the R1 bar pristine so I plan to have the Cusco powdered flat black. I also picked up a cigarette lighter Power FC commander holder. I ordered it from Yahoo Auctions Japan. I also ordered a ton of OEM screws, clips, and bolts from Amayama to have extras for the interior and exterior - I pretty much bought them out on some of them.
Next week all my stuff should come back from powder so I can get the car back up and running again. My friend is letting me borrow his extra set of APEXi intakes until mine come in from backorder. Once that happens I can call a local bodyshop and see about getting the 99-spec parts and MazdaSpeed spoiler sprayed.
Here are some shots of the further interior tear down:

Here is the Power FC holder from YAJ:

Here is a quick shot of the throttlebody with thermowax removed:
Here is all the wiring shenanigans:


I'm a YAJ noob... Do you happen to have a link to that? Or the search term you used to find that?
I was going to make my own for that position but this is the easy button.

Thanks.
Thread Starter
Joined: Apr 2015
Posts: 398
Likes: 169
From: St. Louis, MO
@Akomix
I'm a YAJ noob... Do you happen to have a link to that? Or the search term you used to find that?
I was going to make my own for that position but this is the easy button.
Thanks.
I'm a YAJ noob... Do you happen to have a link to that? Or the search term you used to find that?
I was going to make my own for that position but this is the easy button.
Thanks.
Here is a direct link to another one
I went through Zen Market for the purchase. I think after it was all said and done it was 60 or so shipped. Not too bad, but I'm sure there are cheaper options.