
RENESISFD's Robust Build: Powered by Pepperoni Pizza and Chikken Nuggets

Thread Starter
Joined: Feb 2008
Posts: 2,979
Likes: 9
From: Long Island NY 11746
^ Thanks
I installed the rear suspension and the rear diff last night. Note the grease fittings. I also installed the rotary extreme trailing arm and toe links. Including all new pillow *****.


John
I installed the rear suspension and the rear diff last night. Note the grease fittings. I also installed the rotary extreme trailing arm and toe links. Including all new pillow *****.
John


Thread Starter
Joined: Feb 2008
Posts: 2,979
Likes: 9
From: Long Island NY 11746
^ You dont have to post. I know the only reason you visit this site is to look at my thread .
.
I worked on the car friday night and a few hours on sunday. I was able to wrap the turbo manifold. Matt welded in the EGT bungs and I installed my super awesome inconell turbo studs these come with stage 8 locking hardware too.
On to the pics.
These are the inconel studs from trackspeed engineering.

I also got my inconel t4 turbo gasket from twins turbo.

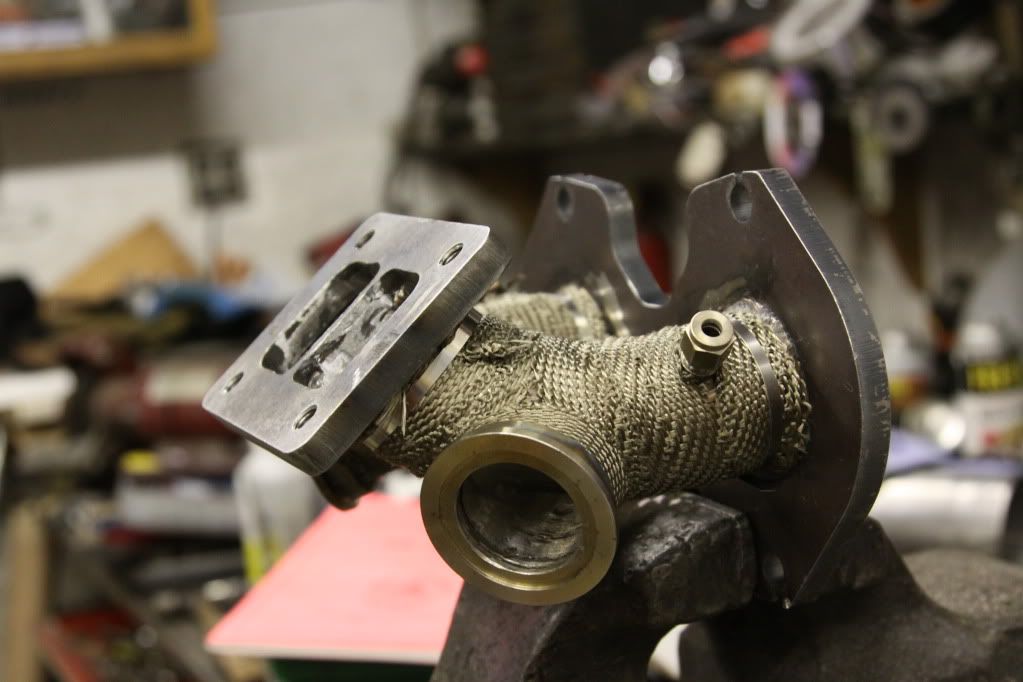


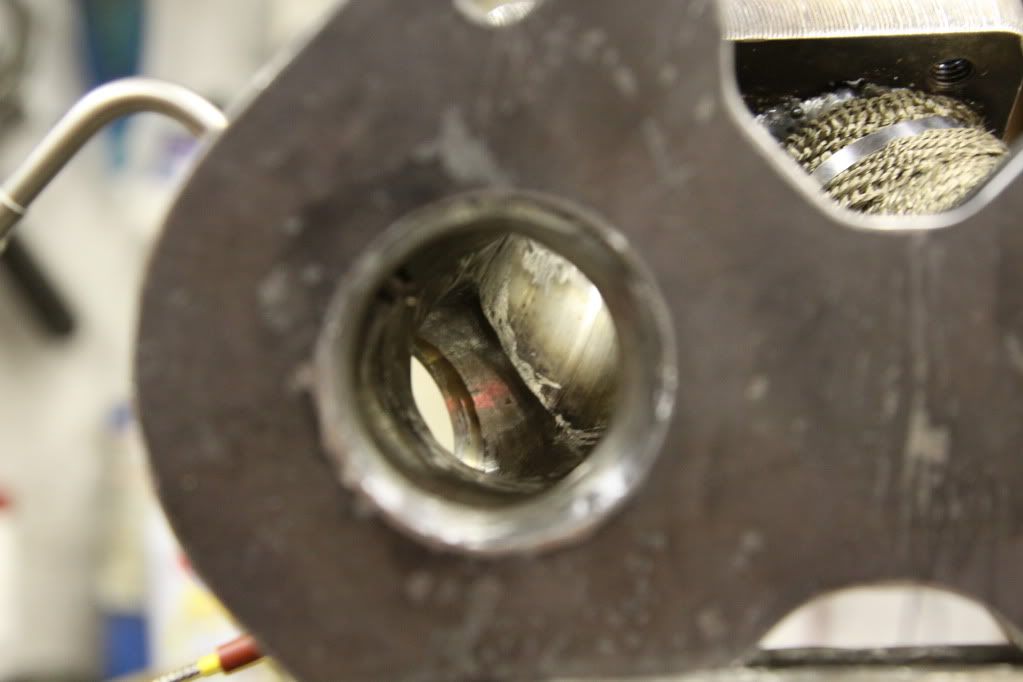
I smoothed out the runners as much as possible to increase flow.
New compared to old

I also bought new manifold bolts from Ray

.I worked on the car friday night and a few hours on sunday. I was able to wrap the turbo manifold. Matt welded in the EGT bungs and I installed my super awesome inconell turbo studs these come with stage 8 locking hardware too.
On to the pics.
These are the inconel studs from trackspeed engineering.
I also got my inconel t4 turbo gasket from twins turbo.
I smoothed out the runners as much as possible to increase flow.
New compared to old
I also bought new manifold bolts from Ray
Thread Starter
Joined: Feb 2008
Posts: 2,979
Likes: 9
From: Long Island NY 11746
I also installed the manifold and wastegates. I also removed one of the springs in the wastegates. I went from 1bar to 8PSI spring.

If you look to the right of the pic you can see the -6 welded bungs on the water pump housing.


I allso worked on a coil relocation bracket. This is a rough fabrication. I will remake it this week using better components.


I also made a ECU mounting plate. Thanks to rozado. He gave me the idea to use the stock ECU brackets. So all I had to do was make a plate and drill some holes. I really like how Haltech mounts their equipment.
One side.

Other side.


If you look to the right of the pic you can see the -6 welded bungs on the water pump housing.
I allso worked on a coil relocation bracket. This is a rough fabrication. I will remake it this week using better components.
I also made a ECU mounting plate. Thanks to rozado. He gave me the idea to use the stock ECU brackets. So all I had to do was make a plate and drill some holes. I really like how Haltech mounts their equipment.
One side.
Other side.

Yikes.... your compressor gonna fit on there? looks oober tight. I'm gonna run the inconel casket as well. Nice studs! Just out of curiosity why'd you go from 1 bar to 8psi spring? I just got my 60lb synapse springs for my gates.
Last edited by mannykiller; Mar 4, 2012 at 10:16 PM.
Thread Starter
Joined: Feb 2008
Posts: 2,979
Likes: 9
From: Long Island NY 11746
More boner, that is all I did today. It takes time to make something when you have to drive to three different places for supplies then remember you forgot the drill bits at home .
.
Mannykiller, I am running a low spring pressure so I can run low boost if I want. I will be using a 4 port boost solenoid so I will be able to still turn the boost past 25PSI if I want. Are you sure you put 60PSI springs in your wastegate, never heard of a pressure so high. How will you control boost?
And yes the compressor housing fits. There is about a 1/4" clearance between it and the LIM and about 1/2" clearance with the frame rail.
John
Thread Starter
Joined: Feb 2008
Posts: 2,979
Likes: 9
From: Long Island NY 11746
I worked on making the hard lines for the wastegate coolant and turbo coolant. I need to order a different tee to finish the job on the coolant return side. I was just not happy with how it looked.
Start off with straight tubing. I used -6 .035 wall 316l stainless tubing and -4 .020 wall 316l stainless tubing

Use these

And this

To get this

This is the first line I made. It is the cross over tube for the wastegates. I looped it to all for expansion and contraction.


This is the turbo coolant feed line.


All in all to get to this point took me about 6 hours and I am not even close to being finished.
John
Start off with straight tubing. I used -6 .035 wall 316l stainless tubing and -4 .020 wall 316l stainless tubing
Use these
And this
To get this
This is the first line I made. It is the cross over tube for the wastegates. I looped it to all for expansion and contraction.
This is the turbo coolant feed line.
All in all to get to this point took me about 6 hours and I am not even close to being finished.
John

Thread Starter
Joined: Feb 2008
Posts: 2,979
Likes: 9
From: Long Island NY 11746
^ Yup. I spent about 6 months looking on ebay to get them. Got them for about 45.00 each brand new with ferrules shipped . In case people havent noticed I am trying to elminate rubber under the hood
  .
.
.
Thread Starter
Joined: Feb 2008
Posts: 2,979
Likes: 9
From: Long Island NY 11746
^ Oh ok.
I used this bender.
http://www.amazon.com/gp/product/B00...00_i00_details
The thing pictured above in post 236 third photo down is a mastercool flaring tool set.. It is hydraulic and works so well.
http://www.amazon.com/Mastercool-Uni...6&sr=1-1-fkmr0
but to do AN fittings you need the 37 degree adapters.
http://www.amazon.com/Mastercool-MAS...sr=1-1-catcorr
If all you want to do is AN fitting flares you can use this set.
http://www.amazon.com/Mastercool-MSC...sr=1-1-catcorr
I can not stress how easy it is to flare with this tool, Much easier than a manual flaring tool. The only problem I see with it is how much room you need to do a flare, it makes it hard to make a tight 90 degree bend close to the fitting.
If you never bent tubing before..... all I can say is good luck. It takes some practice, because of bend take up.
I am a member of amazon prime so I buy everything I can from them because of the free 2 day shipping on eligible orders. They even sell the stainless tubing need for this job.
John
I used this bender.
http://www.amazon.com/gp/product/B00...00_i00_details
The thing pictured above in post 236 third photo down is a mastercool flaring tool set.. It is hydraulic and works so well.
http://www.amazon.com/Mastercool-Uni...6&sr=1-1-fkmr0
but to do AN fittings you need the 37 degree adapters.
http://www.amazon.com/Mastercool-MAS...sr=1-1-catcorr
If all you want to do is AN fitting flares you can use this set.
http://www.amazon.com/Mastercool-MSC...sr=1-1-catcorr
I can not stress how easy it is to flare with this tool, Much easier than a manual flaring tool. The only problem I see with it is how much room you need to do a flare, it makes it hard to make a tight 90 degree bend close to the fitting.
If you never bent tubing before..... all I can say is good luck
I am a member of amazon prime so I buy everything I can from them because of the free 2 day shipping on eligible orders. They even sell the stainless tubing need for this job.
John


Why are you still running the OMP? There is a huge difference between premix, and engines running the OMP in terms of engine internal cleanliness and carbon buildup.
Loving the progress, and attention to detail...
Loving the progress, and attention to detail...

holy bajebus that flaring tool looks intense. i love the look of the hard lines looks freaking amazing... i was tempted to buy that tube flaring kit when i saw you posted the picture.....................up until i clicked the link and saw the price tag! ouch! looks like an awesome tool tho.. is it easy to use? i hate the old school flaring tools. what a PITA.
Thread Starter
Joined: Feb 2008
Posts: 2,979
Likes: 9
From: Long Island NY 11746
Thanks for the compliments guys.
I am running the OMP because I use a low ash diesel engine oil ( Rotella t 5-40 synthetic). I also do not like if one only premixes there is no lubrication when you lift off of the throttle and the IDC goes to zero. IMHO that is not good for the engine at high RPM's. There is a lot of centrifugal force pushing the apex seals out and squeezing the oil film off. I also run AI when using 93 pump gas which helps clean the engine, and plan to run E85 locally. From what I have seen, engines running E-85 are super clean inside regardless of the OMP.
I will be premixing though.
holy bajebus that flaring tool looks intense. i love the look of the hard lines looks freaking amazing... i was tempted to buy that tube flaring kit when i saw you posted the picture.....................up until i clicked the link and saw the price tag! ouch! looks like an awesome tool tho.. is it easy to use? i hate the old school flaring tools. what a PITA.
Please note the bold writing. I can not stress how easy it is to use. Especially making all of the flares required for the job, there is no fatigue.
I should make a video showing how easy it is to use........
My advice would be to look for the hydraulic tool used on ebay and then buy the 37 degree adapters.
John
Edit: I also want to say, If you spend over an hour making a 1.5 foot long pipe with 6 bends all different angles and on different planes and the last thing you need to do is make the flare and the tool you use screws it up, you will wish you spent the extra money on a better flaring tool. It is almost as bad a forgetting to put the tube nut on before flaring the last flare..... Haha
I also do not like if one only premixes there is no lubrication when you lift off of the throttle and the IDC goes to zero. IMHO that is not good for the engine at high RPM's. There is a lot of centrifugal force pushing the apex seals out and squeezing the oil film off.
john you're absolutely right. i actually gave up on flaring my abs lines and got my mechanic to do it lol.... i wish i knew about this tool earlier... hmm im gonna have to figure out some new ideas that will require hardlines just to buy this took hahahaha
ps just saw a video on youtube... looks so easy that a caveman can do it...........!
ps just saw a video on youtube... looks so easy that a caveman can do it...........!