
Project Zoom Zoom Boom: a long term project

V-mount
I started installation of the Rx7store v-mount. I got everything in, but i just didn't like the way it was sitting in the car. The leading edge of the radiator was hanging just below the bottom edge of the bumper.
With bumper on:
The kit uses a modified Koyo N-Flow, but it's black because i had to spend time straightening fins and hit it with some spray to tidy it up. The kit came out of a wrecked car i think.
Soooo... i decided i was going to redo the brackets, and i got impatient and rather than removing the whole thing and doing it on the bench i was going to cut and weld it on the car. Stupidly. I used a sawzall.... yeah, i know. I was impatient and not thinking properly and ended up poking a hole in the core.
Time for a new plan... At least i can build it the way i want to without fixing someone else's stuff.
Last edited by squealy; Nov 1, 2016 at 10:13 AM.
New Welding Table!
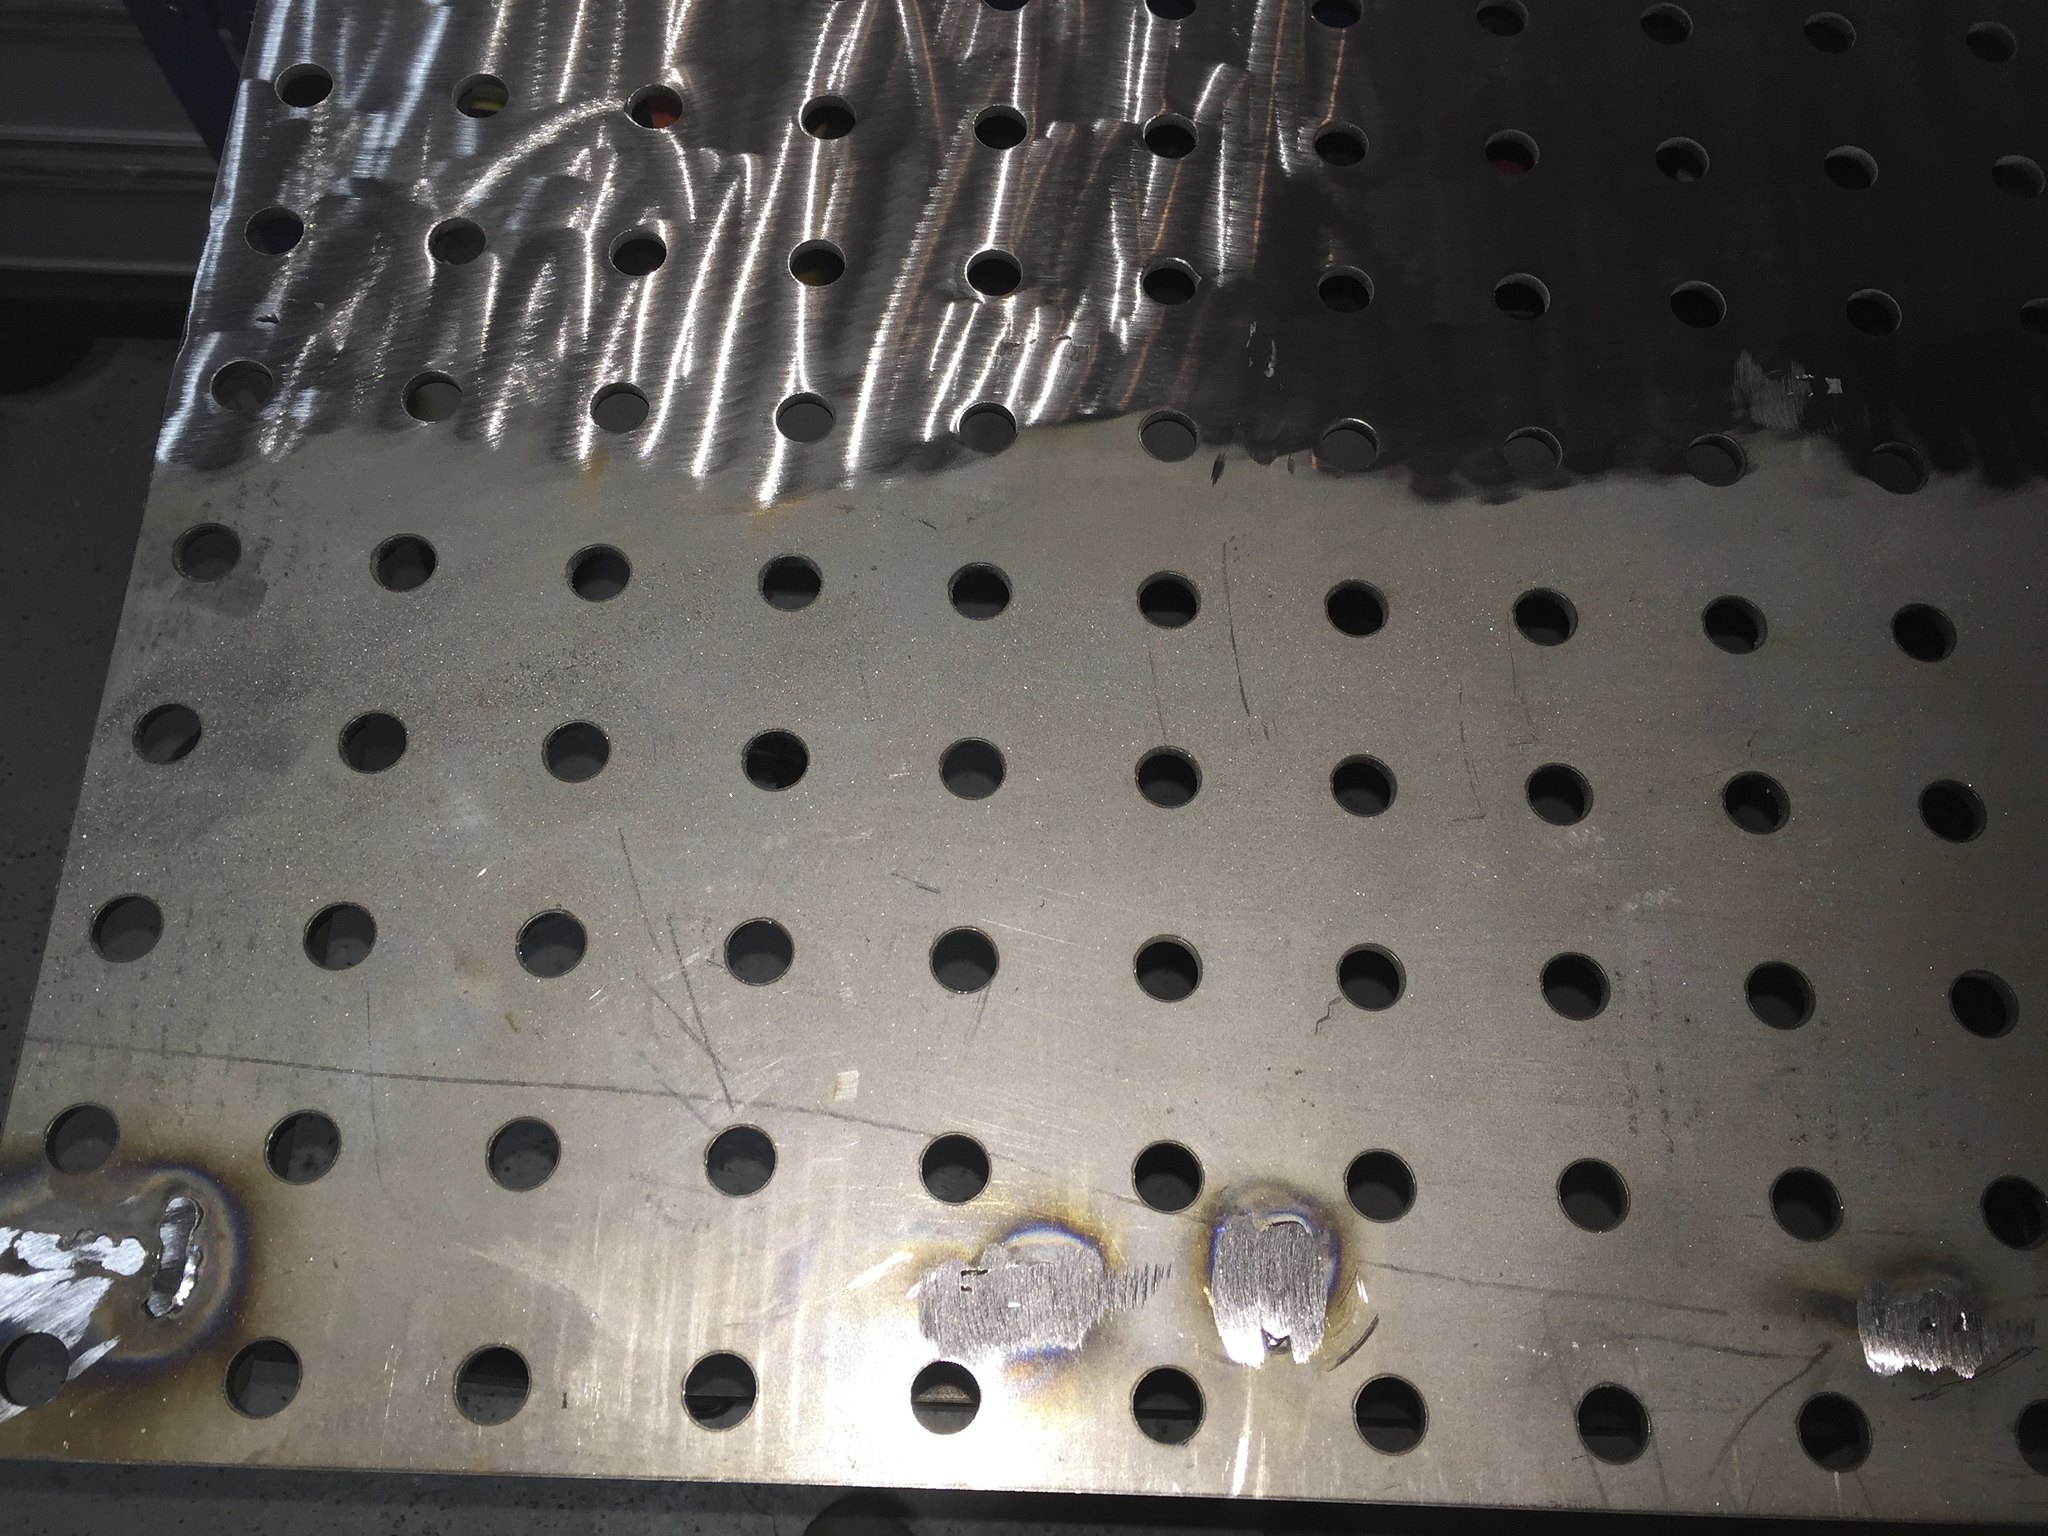
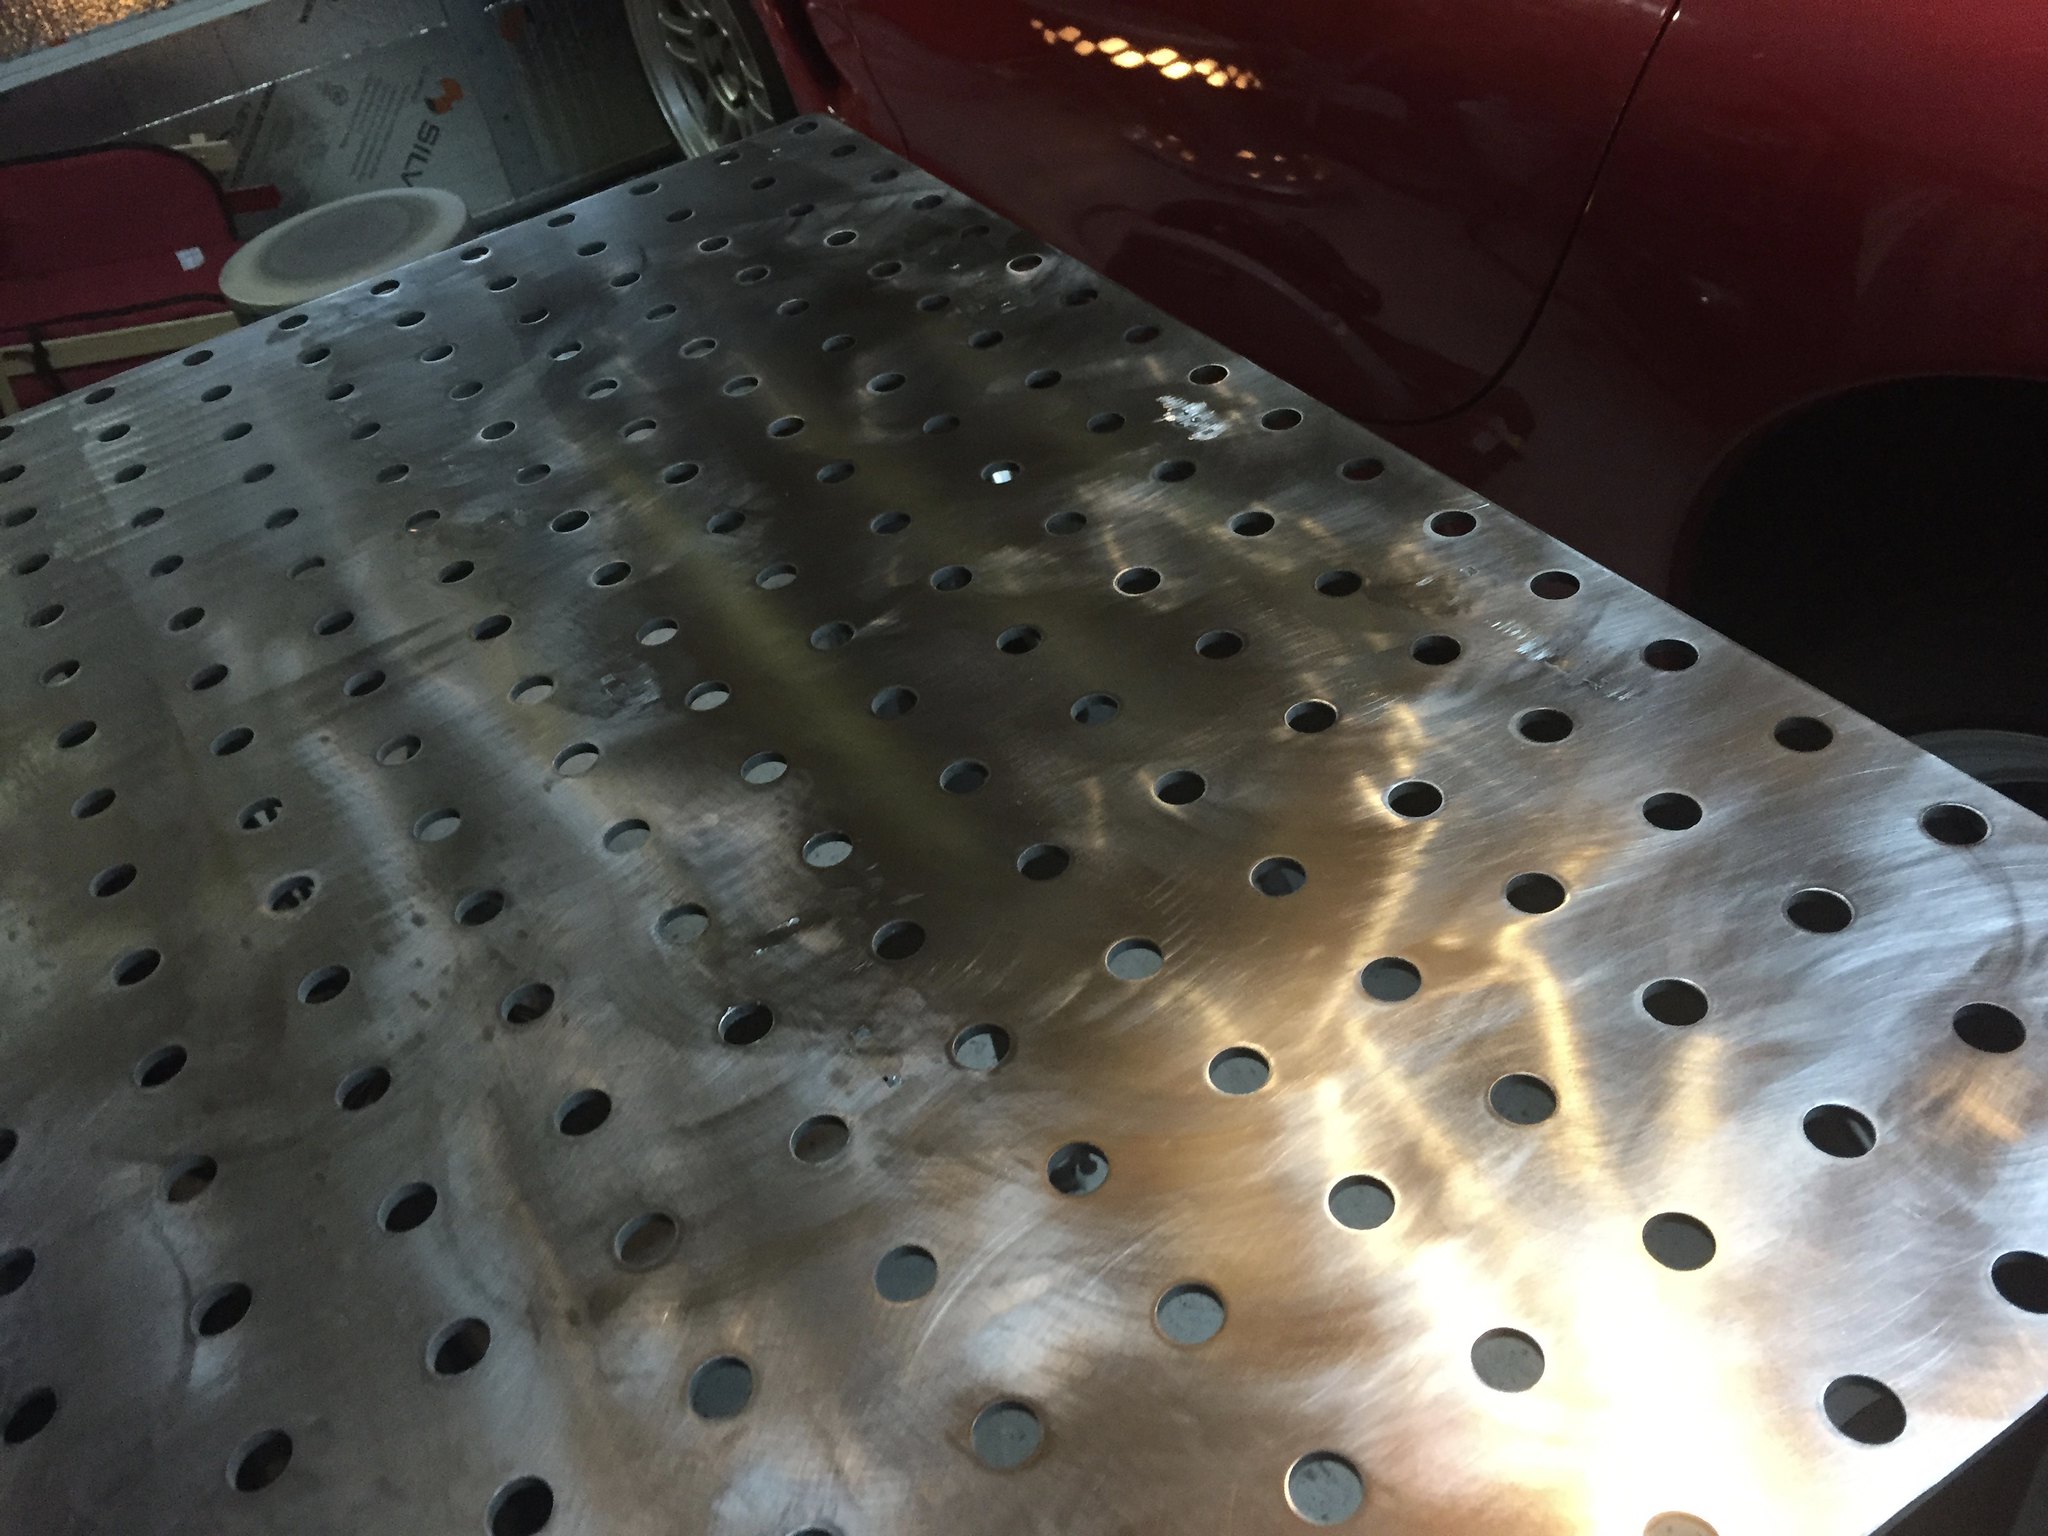
Here's a bit of a segue - I had been using a cheap old work bench that I tossed a piece of 3/8" steel plate on top of as a welding table. It wasn't bad, but the height sucked, and there was no way to clamp to it. Weldtables.com had a sale on their pro table kit, and i jumped at it. I wanted to get a big fab block from them, but i couldn't justify the cost as a hobby welder, but this has served me really well. Everything is laser-cut and goes together great, and then you just fill the slots with weld and grind it smooth. I also took some time to clean the mill-scale off of the table top to make it look pretty.
Here's the assembly:

The webbing underneath is tapped into place, clamped and then you flip the whole thing over to fill in the tabs with weld. I also put a bunch of weld under the table at each join to make sure things couldn't move. The only trick as an amateur welder is to try not to put too much heat in and warp things. Clamp everything tight!
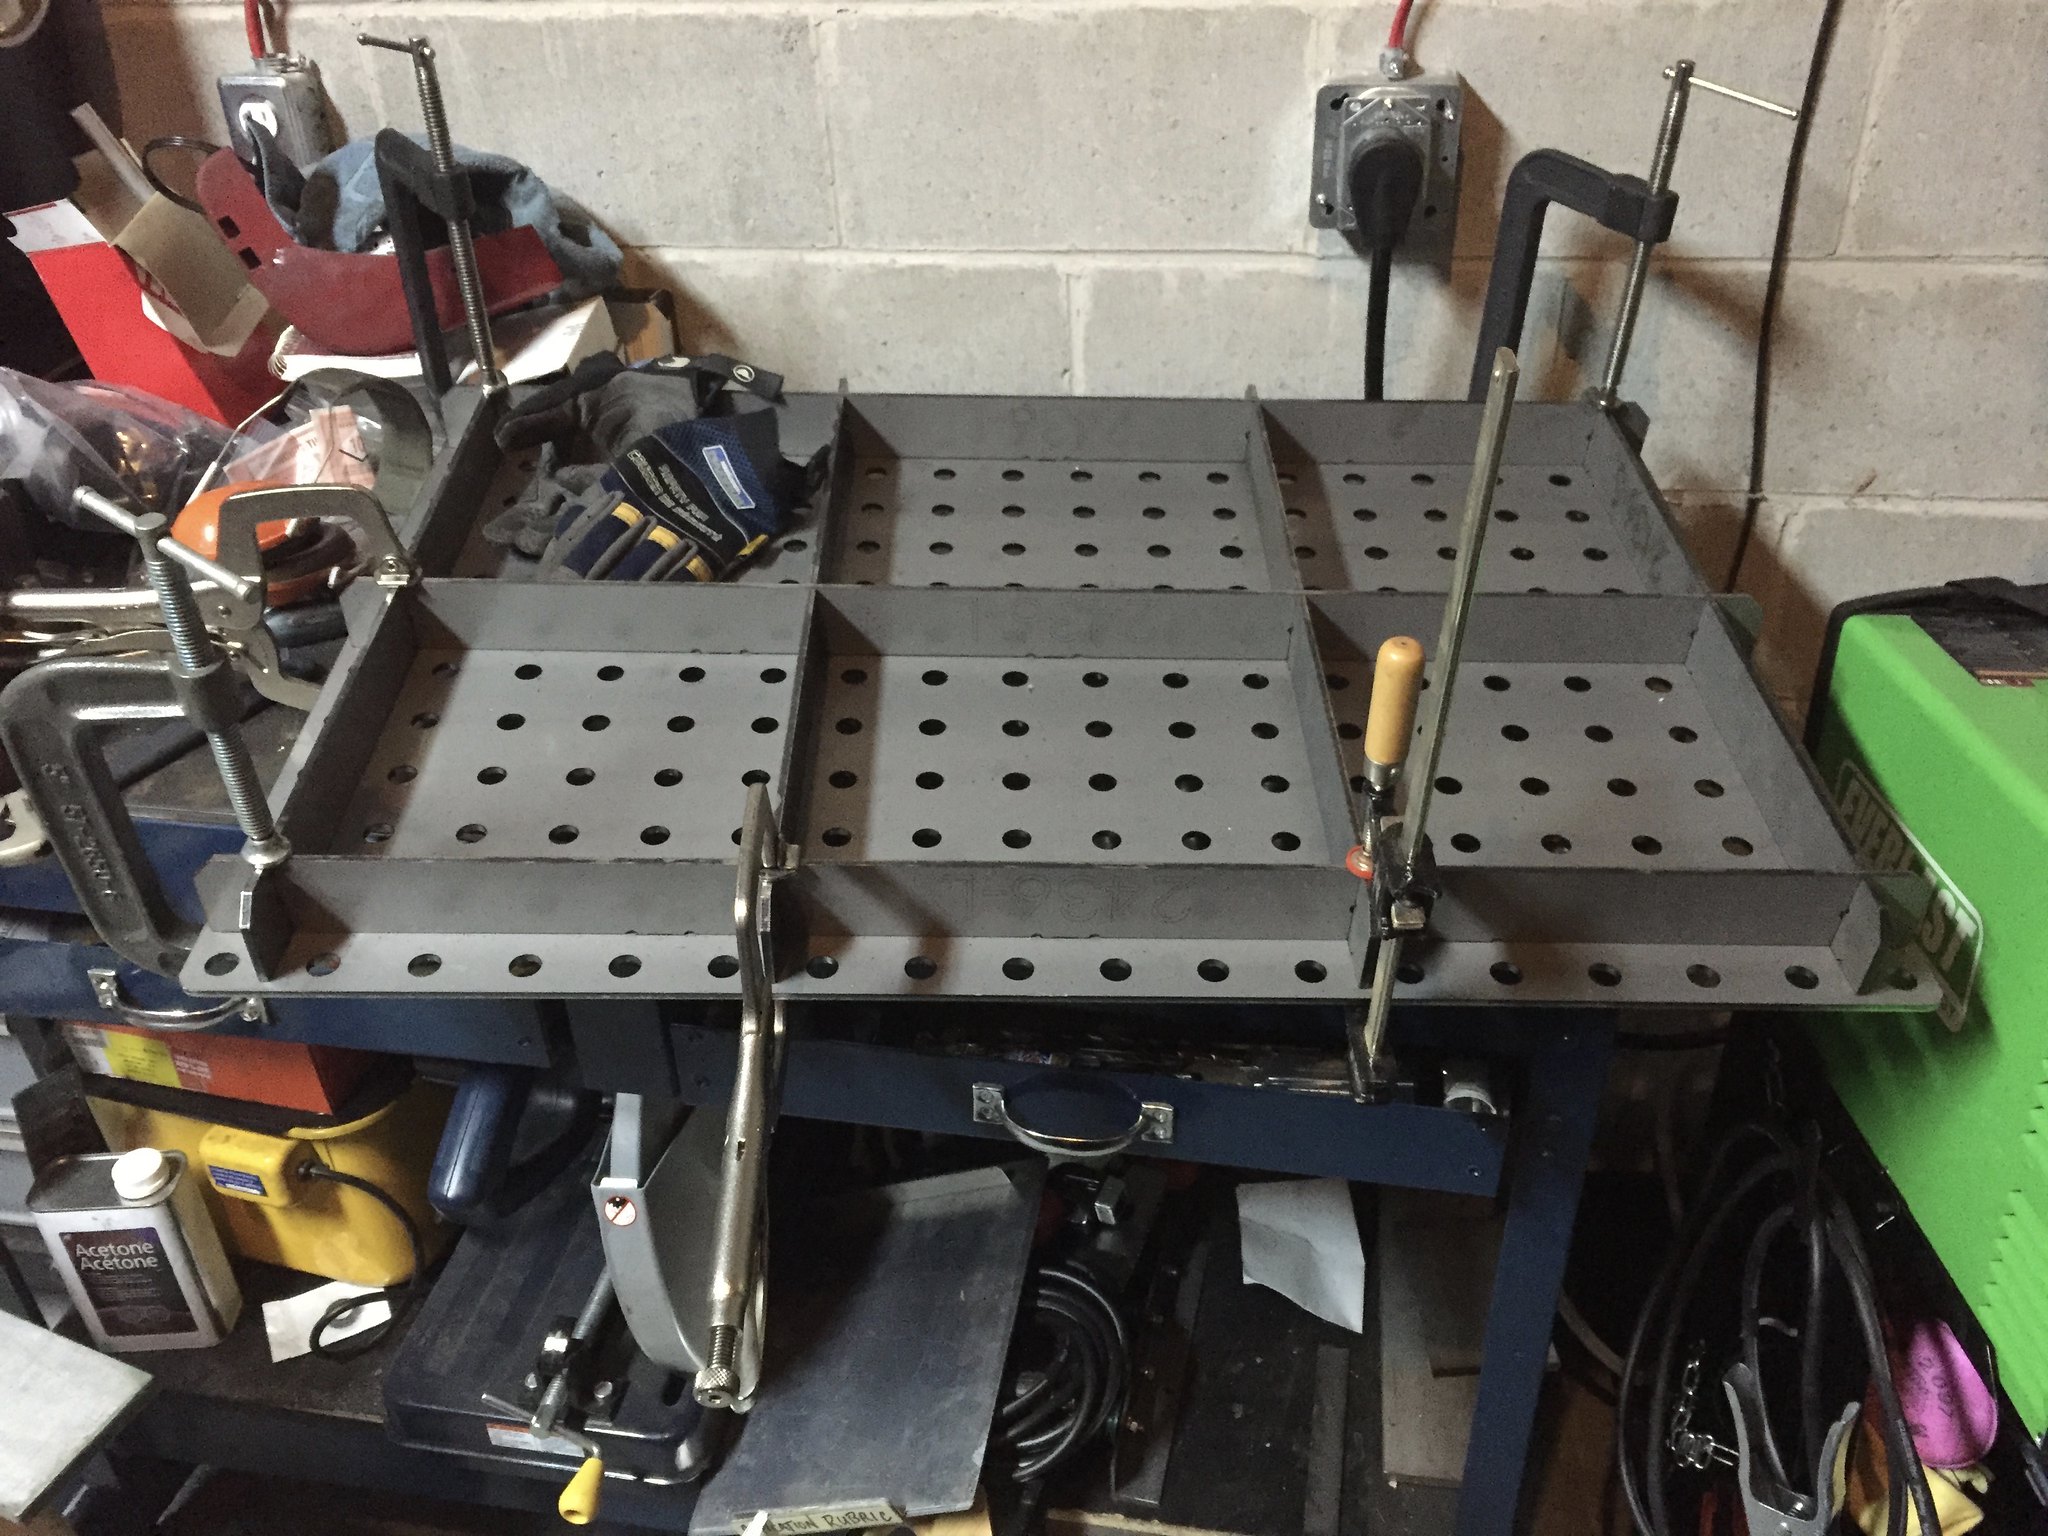
The top's holes are laser cut, and are 5/8" to accommodate most fixturing clamps from strong hand tools and others. I have yet to invest in the fixturing clamps, but c-clamps, my bench vise, and some big open vide-grip clamps have made things pretty easy.
I took an air sander to the top to clean everything up after i had ground down the weld flush. I also bought the leg kit, which went together easy, and comes with high quality locking casters.
I love this thing!
It puts the work surface at a good height for either standing or sitting on a raised stool, and i can clamp to it or through the vise for holding work.
Here's the assembly:
The webbing underneath is tapped into place, clamped and then you flip the whole thing over to fill in the tabs with weld. I also put a bunch of weld under the table at each join to make sure things couldn't move. The only trick as an amateur welder is to try not to put too much heat in and warp things. Clamp everything tight!
The top's holes are laser cut, and are 5/8" to accommodate most fixturing clamps from strong hand tools and others. I have yet to invest in the fixturing clamps, but c-clamps, my bench vise, and some big open vide-grip clamps have made things pretty easy.
I took an air sander to the top to clean everything up after i had ground down the weld flush. I also bought the leg kit, which went together easy, and comes with high quality locking casters.
I love this thing!
It puts the work surface at a good height for either standing or sitting on a raised stool, and i can clamp to it or through the vise for holding work.
Summer 2015
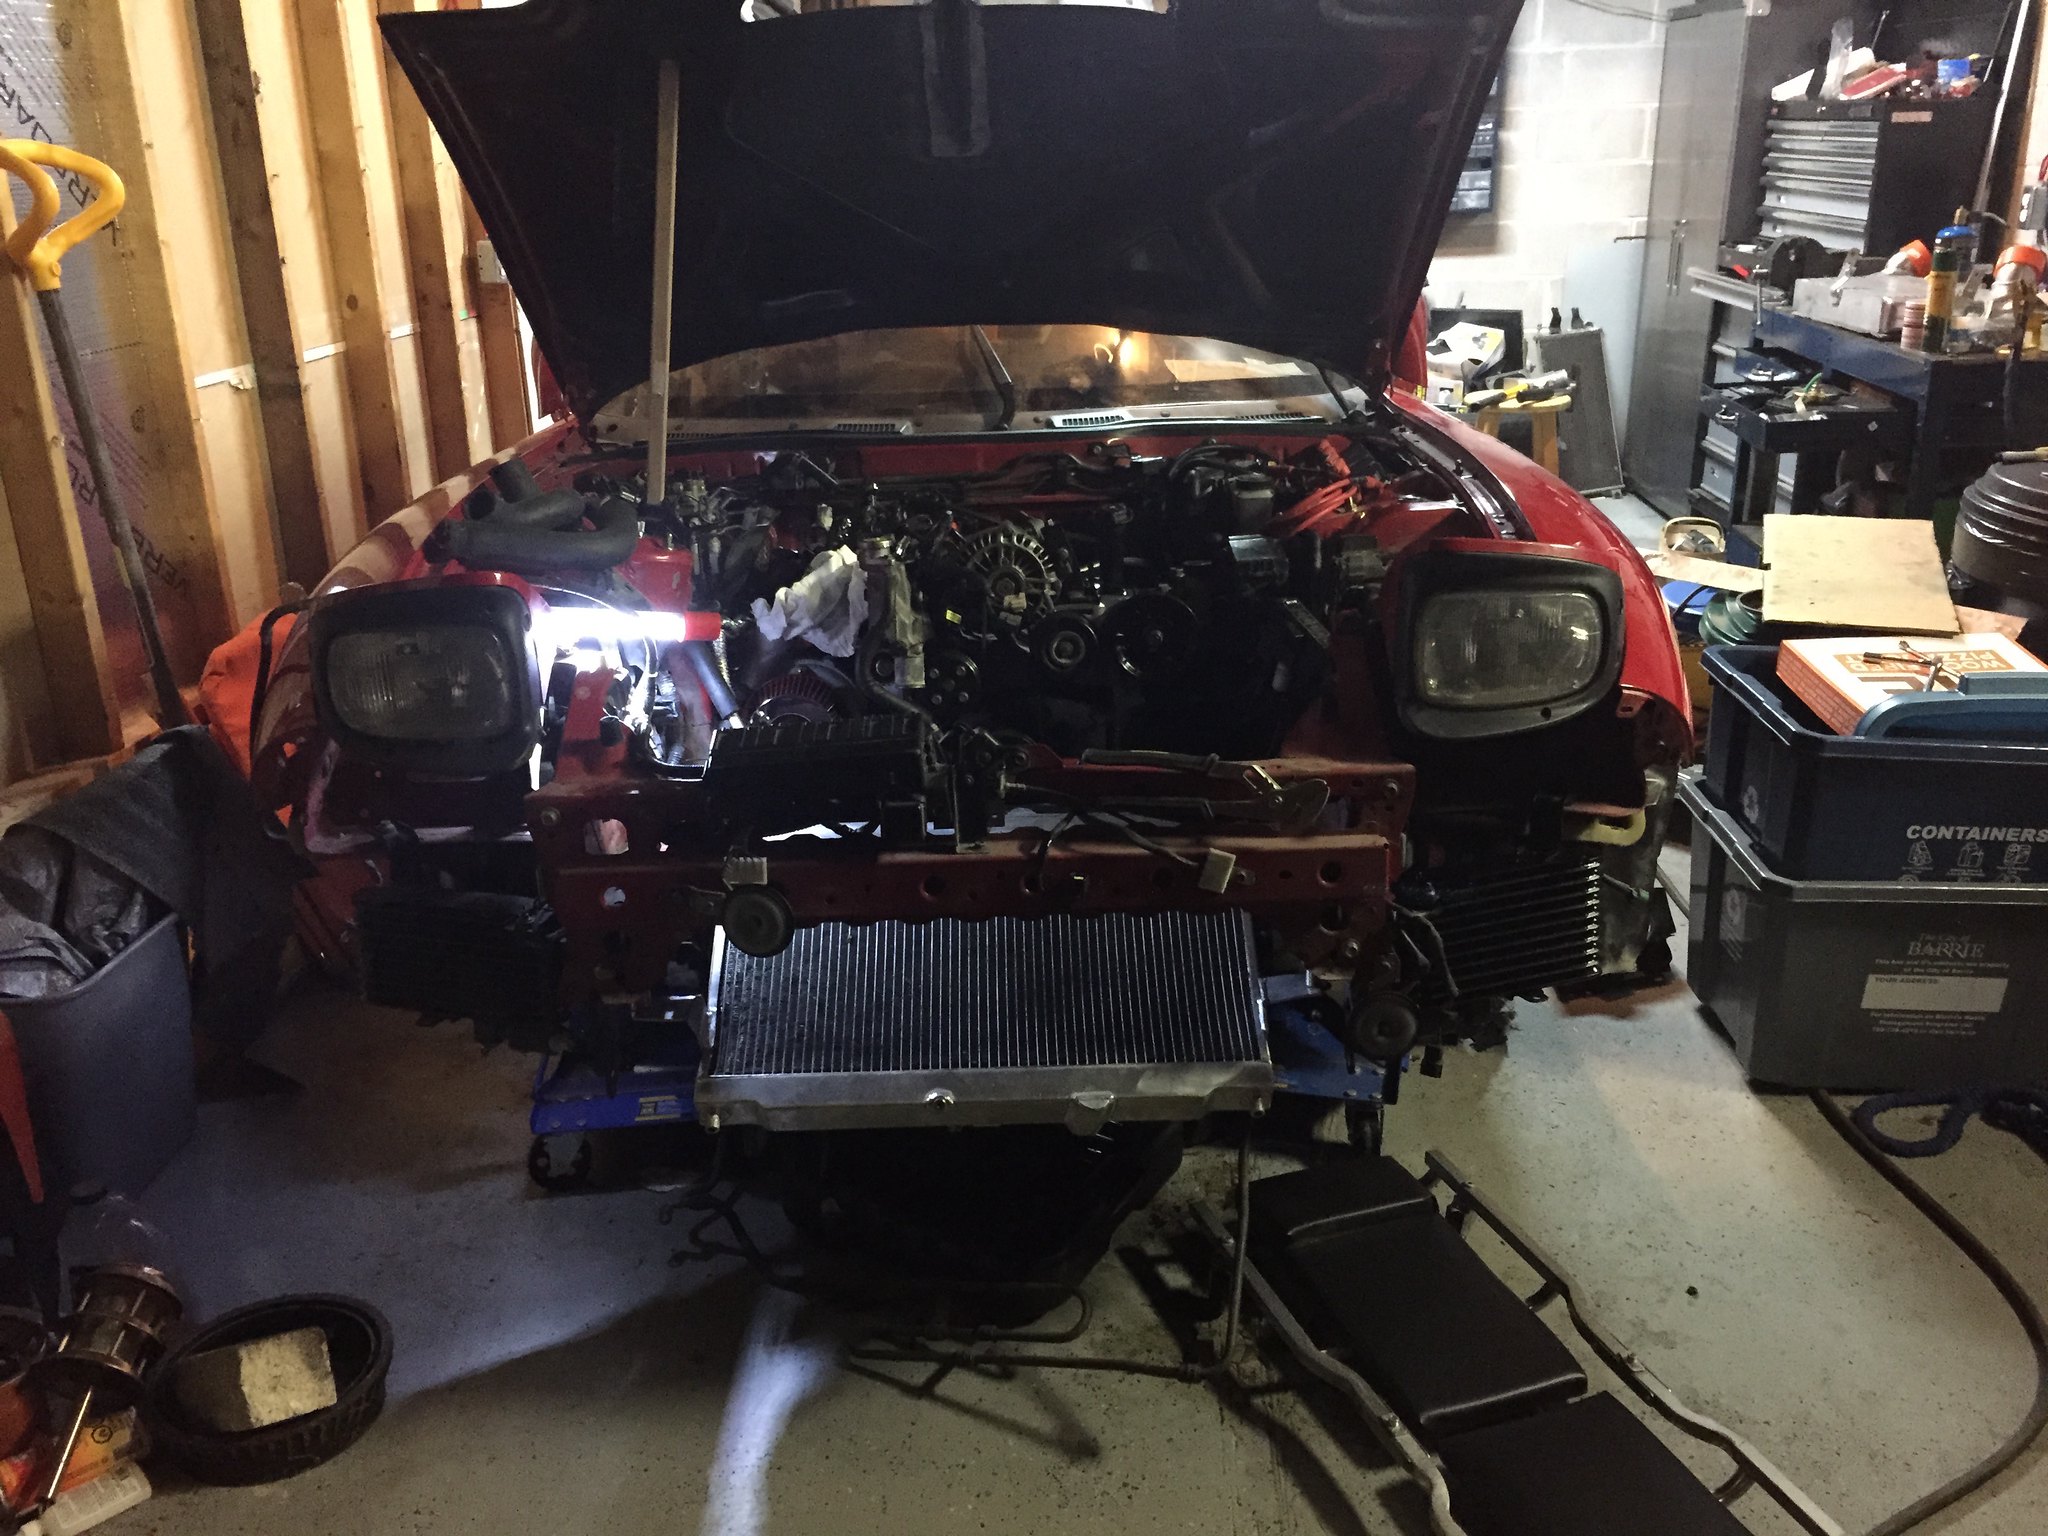
This takes me to summer of 2015. I got everything together, and was able to start the car. I had big dreams of having the whole thing together and tuned, but i couldn't let it go. I had a dump tube on my wastegate, the rad was hanging too low, i hadn't hooked up a boost control solution, and the intercooler wasn't mounted properly.
I was about ready to throw a match at the whole project, so I put it away and started brainstorming solutions.
Radiator hanging low - well, my solution was to cut and re-weld the brackets. punctured the Rad, and there's a Koyo down the tubes.
New Rad needed.
Clearance issues with the HKS racing wastegate. New solution needed.
Downpipe 1.0 has some fitment issues. It was going to leak for sure, so I had to cut and weld it again. Also needed a bung for the wideband, and a 2" v-band flange for the wastegate plumbing
Issues with the wiring harness - some bits were crispy, and some of the connectors had failed. Solution needed
Greddy Profec B boost controller: I wanted something that was integrated into the ECU control for safety.
PowerFC: I wanted to move to something that would give really solid boost control and have a bunch of features, and not require the use of a tuning box like the datalogit and adapters to get it to talk to a modern computer.
Power steering - I hate the way most v-mount arrangements just have the power steering loop flopping around under/behind the rad. Solution needed.

the list kept getting bigger, and i was more frustrated. Time to take a break.
I was about ready to throw a match at the whole project, so I put it away and started brainstorming solutions.
Radiator hanging low - well, my solution was to cut and re-weld the brackets. punctured the Rad, and there's a Koyo down the tubes.
New Rad needed.
Clearance issues with the HKS racing wastegate. New solution needed.
Downpipe 1.0 has some fitment issues. It was going to leak for sure, so I had to cut and weld it again. Also needed a bung for the wideband, and a 2" v-band flange for the wastegate plumbing
Issues with the wiring harness - some bits were crispy, and some of the connectors had failed. Solution needed
Greddy Profec B boost controller: I wanted something that was integrated into the ECU control for safety.
PowerFC: I wanted to move to something that would give really solid boost control and have a bunch of features, and not require the use of a tuning box like the datalogit and adapters to get it to talk to a modern computer.
Power steering - I hate the way most v-mount arrangements just have the power steering loop flopping around under/behind the rad. Solution needed.
the list kept getting bigger, and i was more frustrated. Time to take a break.
Fabrication sucks, unless you are good at it 
Can totally relate to what you are going through. I'm just getting back on the road after a 3 yr build ordeal
Regarding the PS loop, have you looked at replacing it with a finned cooler? Of course, that would require fabrication
Can totally relate to what you are going through. I'm just getting back on the road after a 3 yr build ordeal
Regarding the PS loop, have you looked at replacing it with a finned cooler? Of course, that would require fabrication
Power steering cooler
I ended up using a finned cooler from Derale, I originally had it mounted behind the front bumper, but afterwards i TiG'd it to a piece of 1" square aluminum bar and used some existing chassis points to mount it behind the new rad. Here's a pic of the one i used
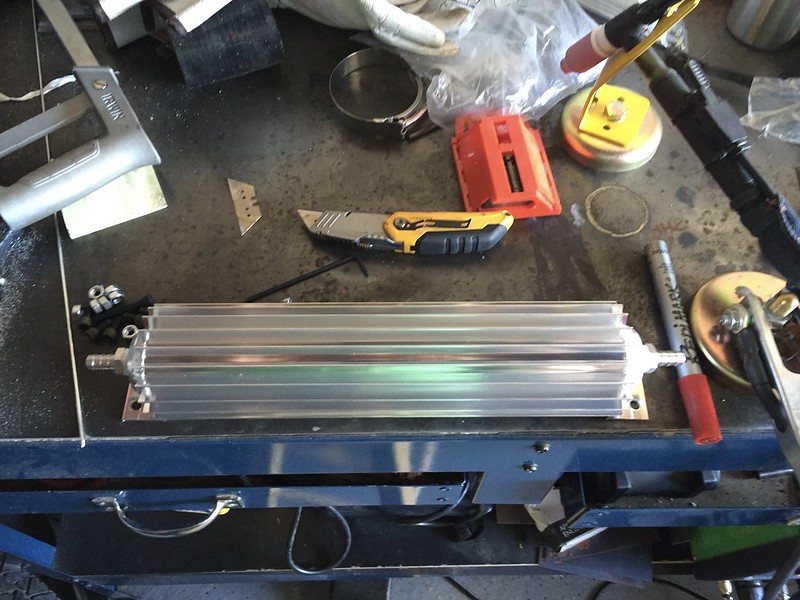
It's actually listed as a trans cooler, but who cares? A heat exchanger is a heat exchanger. I just used flexible hose to go from the existing hard lines to each end of the cooler. Works great!
It's actually listed as a trans cooler, but who cares? A heat exchanger is a heat exchanger. I just used flexible hose to go from the existing hard lines to each end of the cooler. Works great!
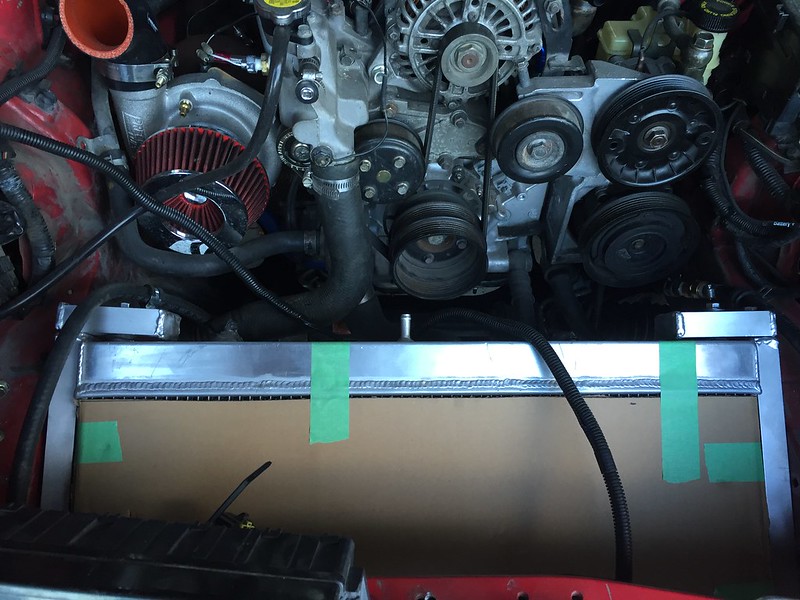
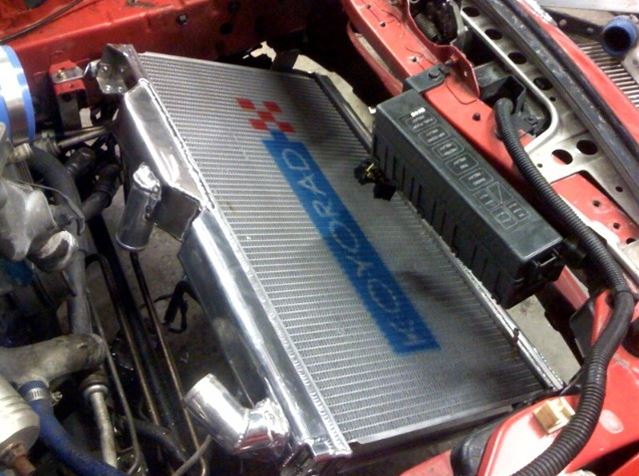
Well, over the winter I had a couple of choices. I came pretty close to packing the whole thing in and selling the project, but i couldn't bring myself to give up. After punching a hole in the rad core with my impatience and a sawzall, I needed an inexpensive alternative. eBay to the rescue! If you search eBay for "rx7 v mount radiator" this is one of the first options you get... from Speed Daddy.

Here it is on the weld table, along with some 1x2" AL tube and some big angle brackets.

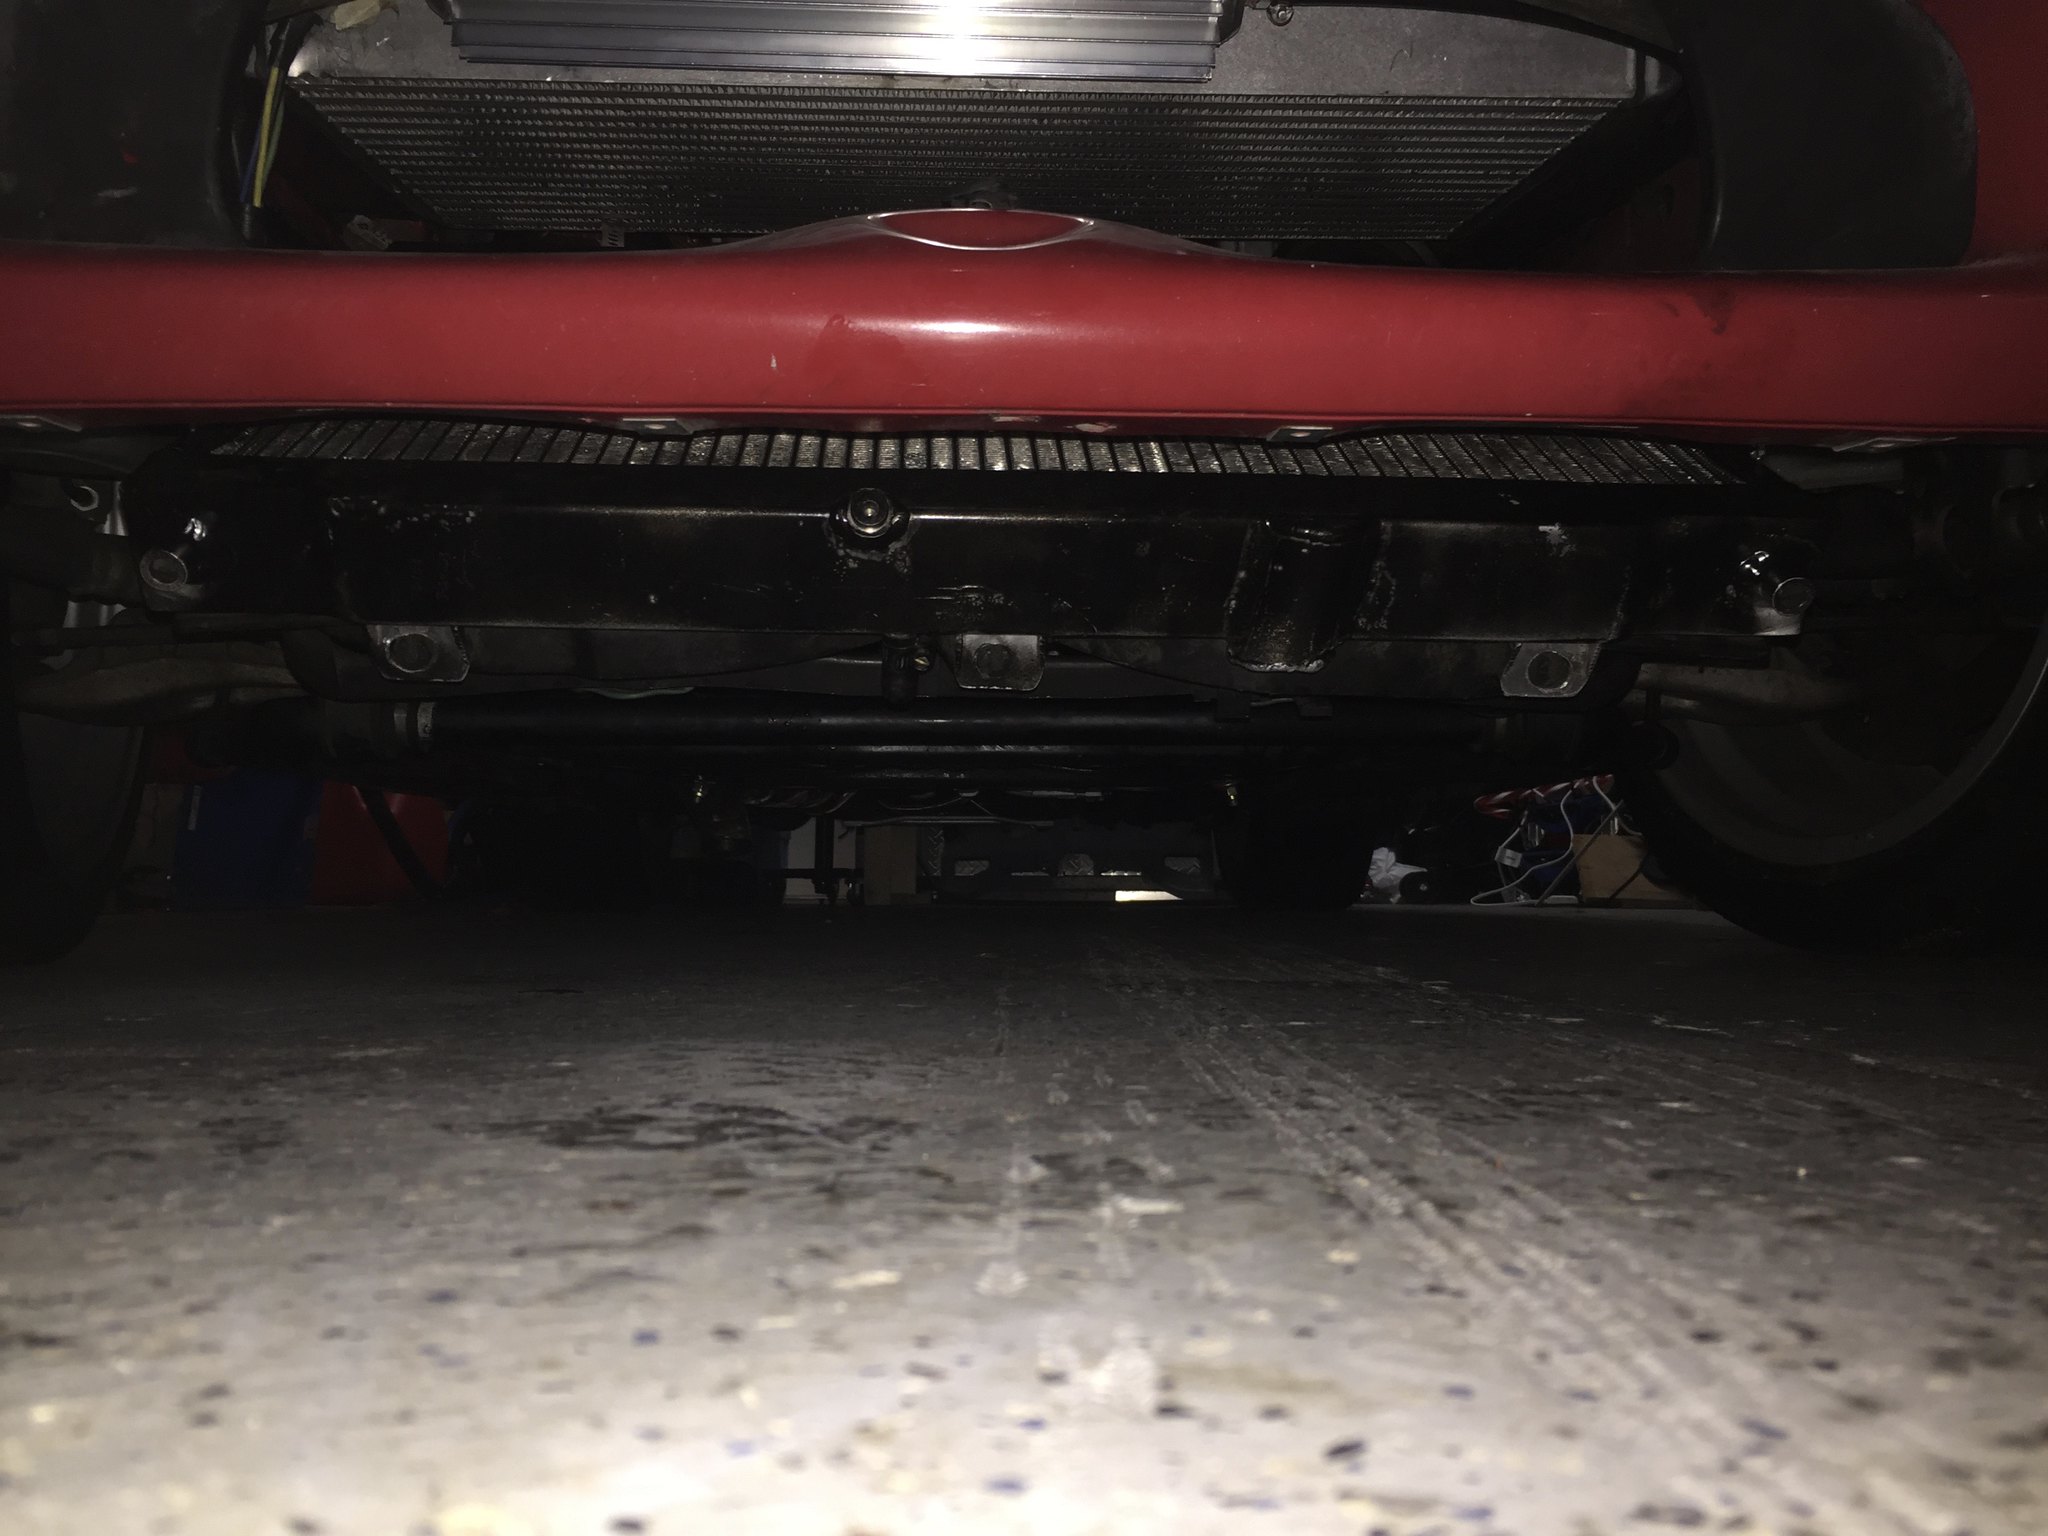
I decided that if it was going to be that low on the car, I'd build a frame for it that would include a bash bar for the bottom end tank. I put rubber isolators on the side mounts, and drilled holes in the sides of the frame to match. Rubber isolators on the top mounts too. Everything bolts together and mounts to the angle Al on the side, and then to the crossmember brackets above the P/S rack
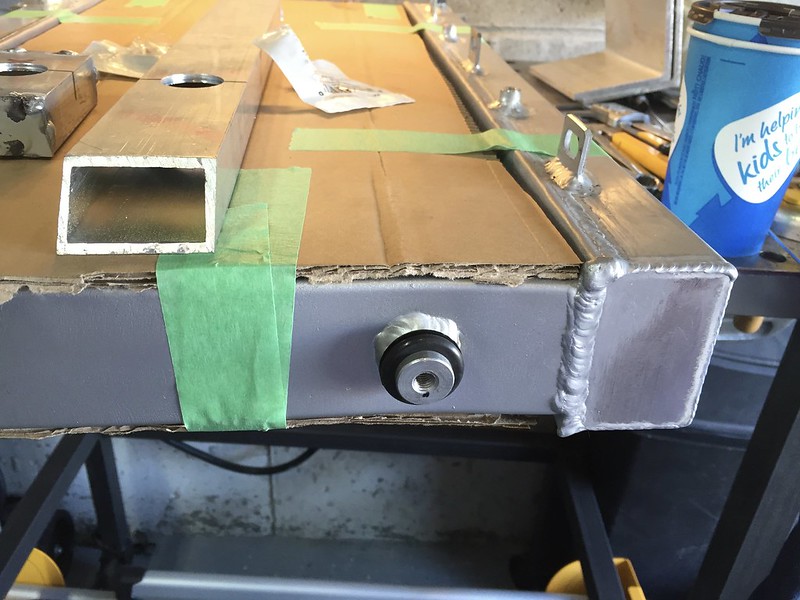
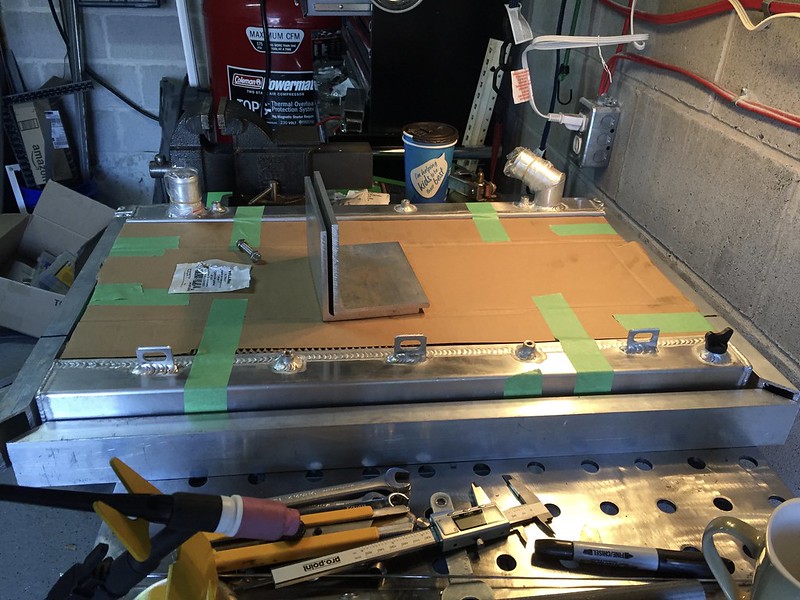
I don't own pipe clamps, so i used a ratchet strap to help keep things square while i tacked them in place.
[url=https://flic.kr/p/NpckgC]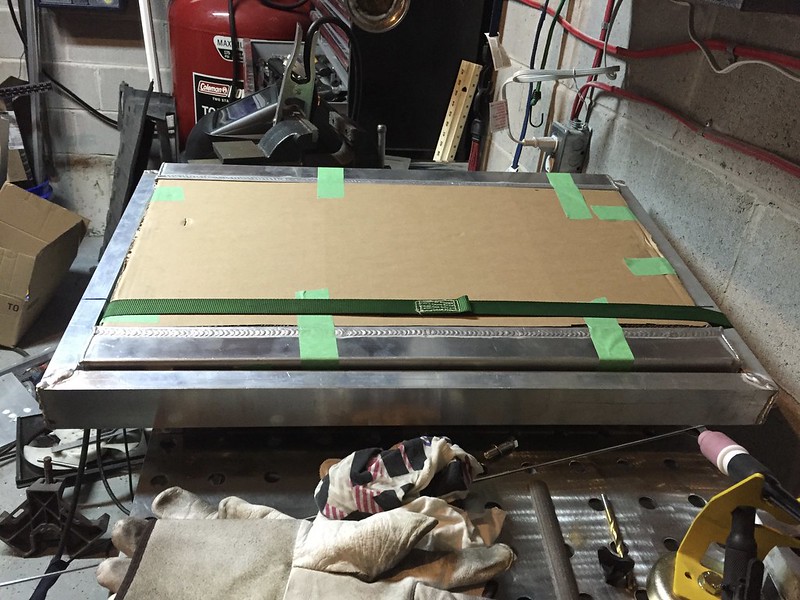
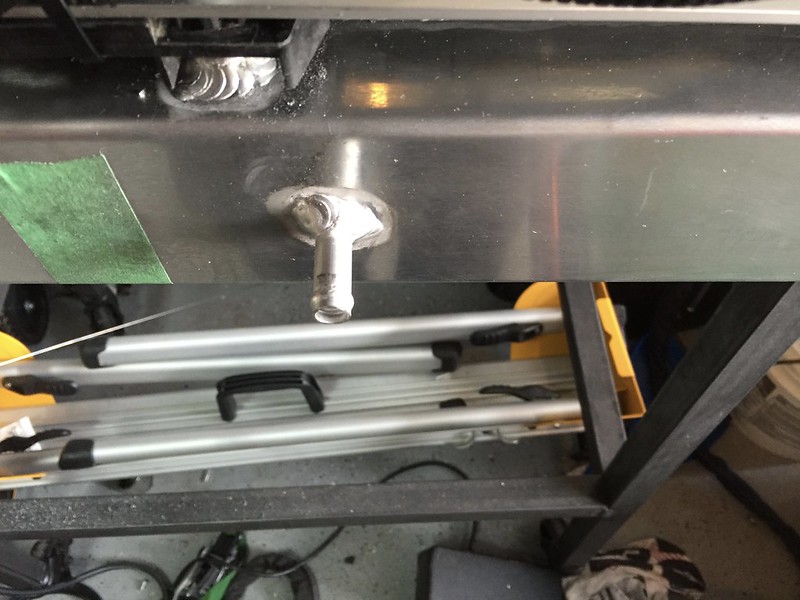
The rad comes with the nipple on the top for the AST. I cut it off and welded it shut since i was going to eliminate my AST and just use a TII neck and cap.
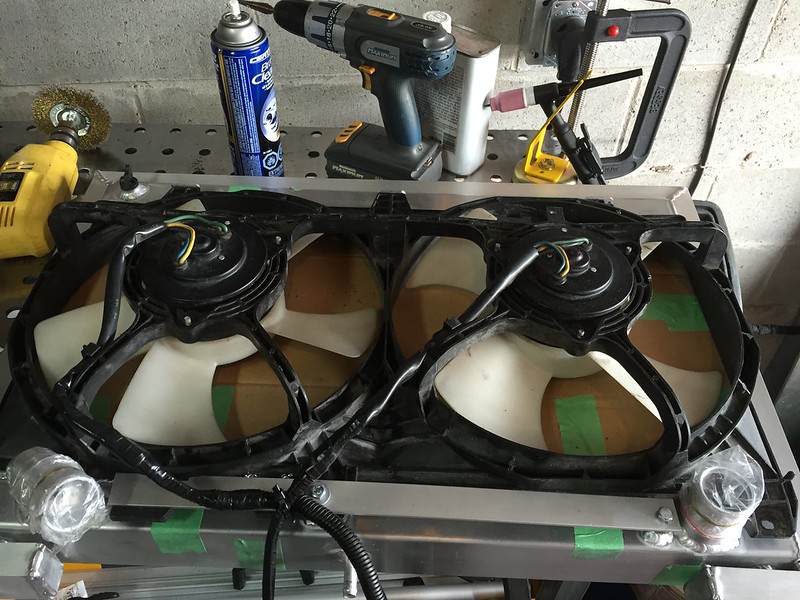
The fans i had were already modified for the V-mount as part of the kit, so i didn't have to extend any harness wiring. I did have to cut and modify the plastic frame for the fan so it would clear the inlets and outlets. Not all of the mounting holes lined up perfectly, so i used some 1" flat stock to make a retaining bar. I also had to modify the feet of the fan shroud so they would fit the tabs properly. All in all though, it wasn't too bad, just a bit fiddly.
Forgive my crappy TiG welding, this was my first welding project after doing practice lines on steel plate.
Here it is on the weld table, along with some 1x2" AL tube and some big angle brackets.
I decided that if it was going to be that low on the car, I'd build a frame for it that would include a bash bar for the bottom end tank. I put rubber isolators on the side mounts, and drilled holes in the sides of the frame to match. Rubber isolators on the top mounts too. Everything bolts together and mounts to the angle Al on the side, and then to the crossmember brackets above the P/S rack
I don't own pipe clamps, so i used a ratchet strap to help keep things square while i tacked them in place.
[url=https://flic.kr/p/NpckgC]
The rad comes with the nipple on the top for the AST. I cut it off and welded it shut since i was going to eliminate my AST and just use a TII neck and cap.
The fans i had were already modified for the V-mount as part of the kit, so i didn't have to extend any harness wiring. I did have to cut and modify the plastic frame for the fan so it would clear the inlets and outlets. Not all of the mounting holes lined up perfectly, so i used some 1" flat stock to make a retaining bar. I also had to modify the feet of the fan shroud so they would fit the tabs properly. All in all though, it wasn't too bad, just a bit fiddly.
Forgive my crappy TiG welding, this was my first welding project after doing practice lines on steel plate.
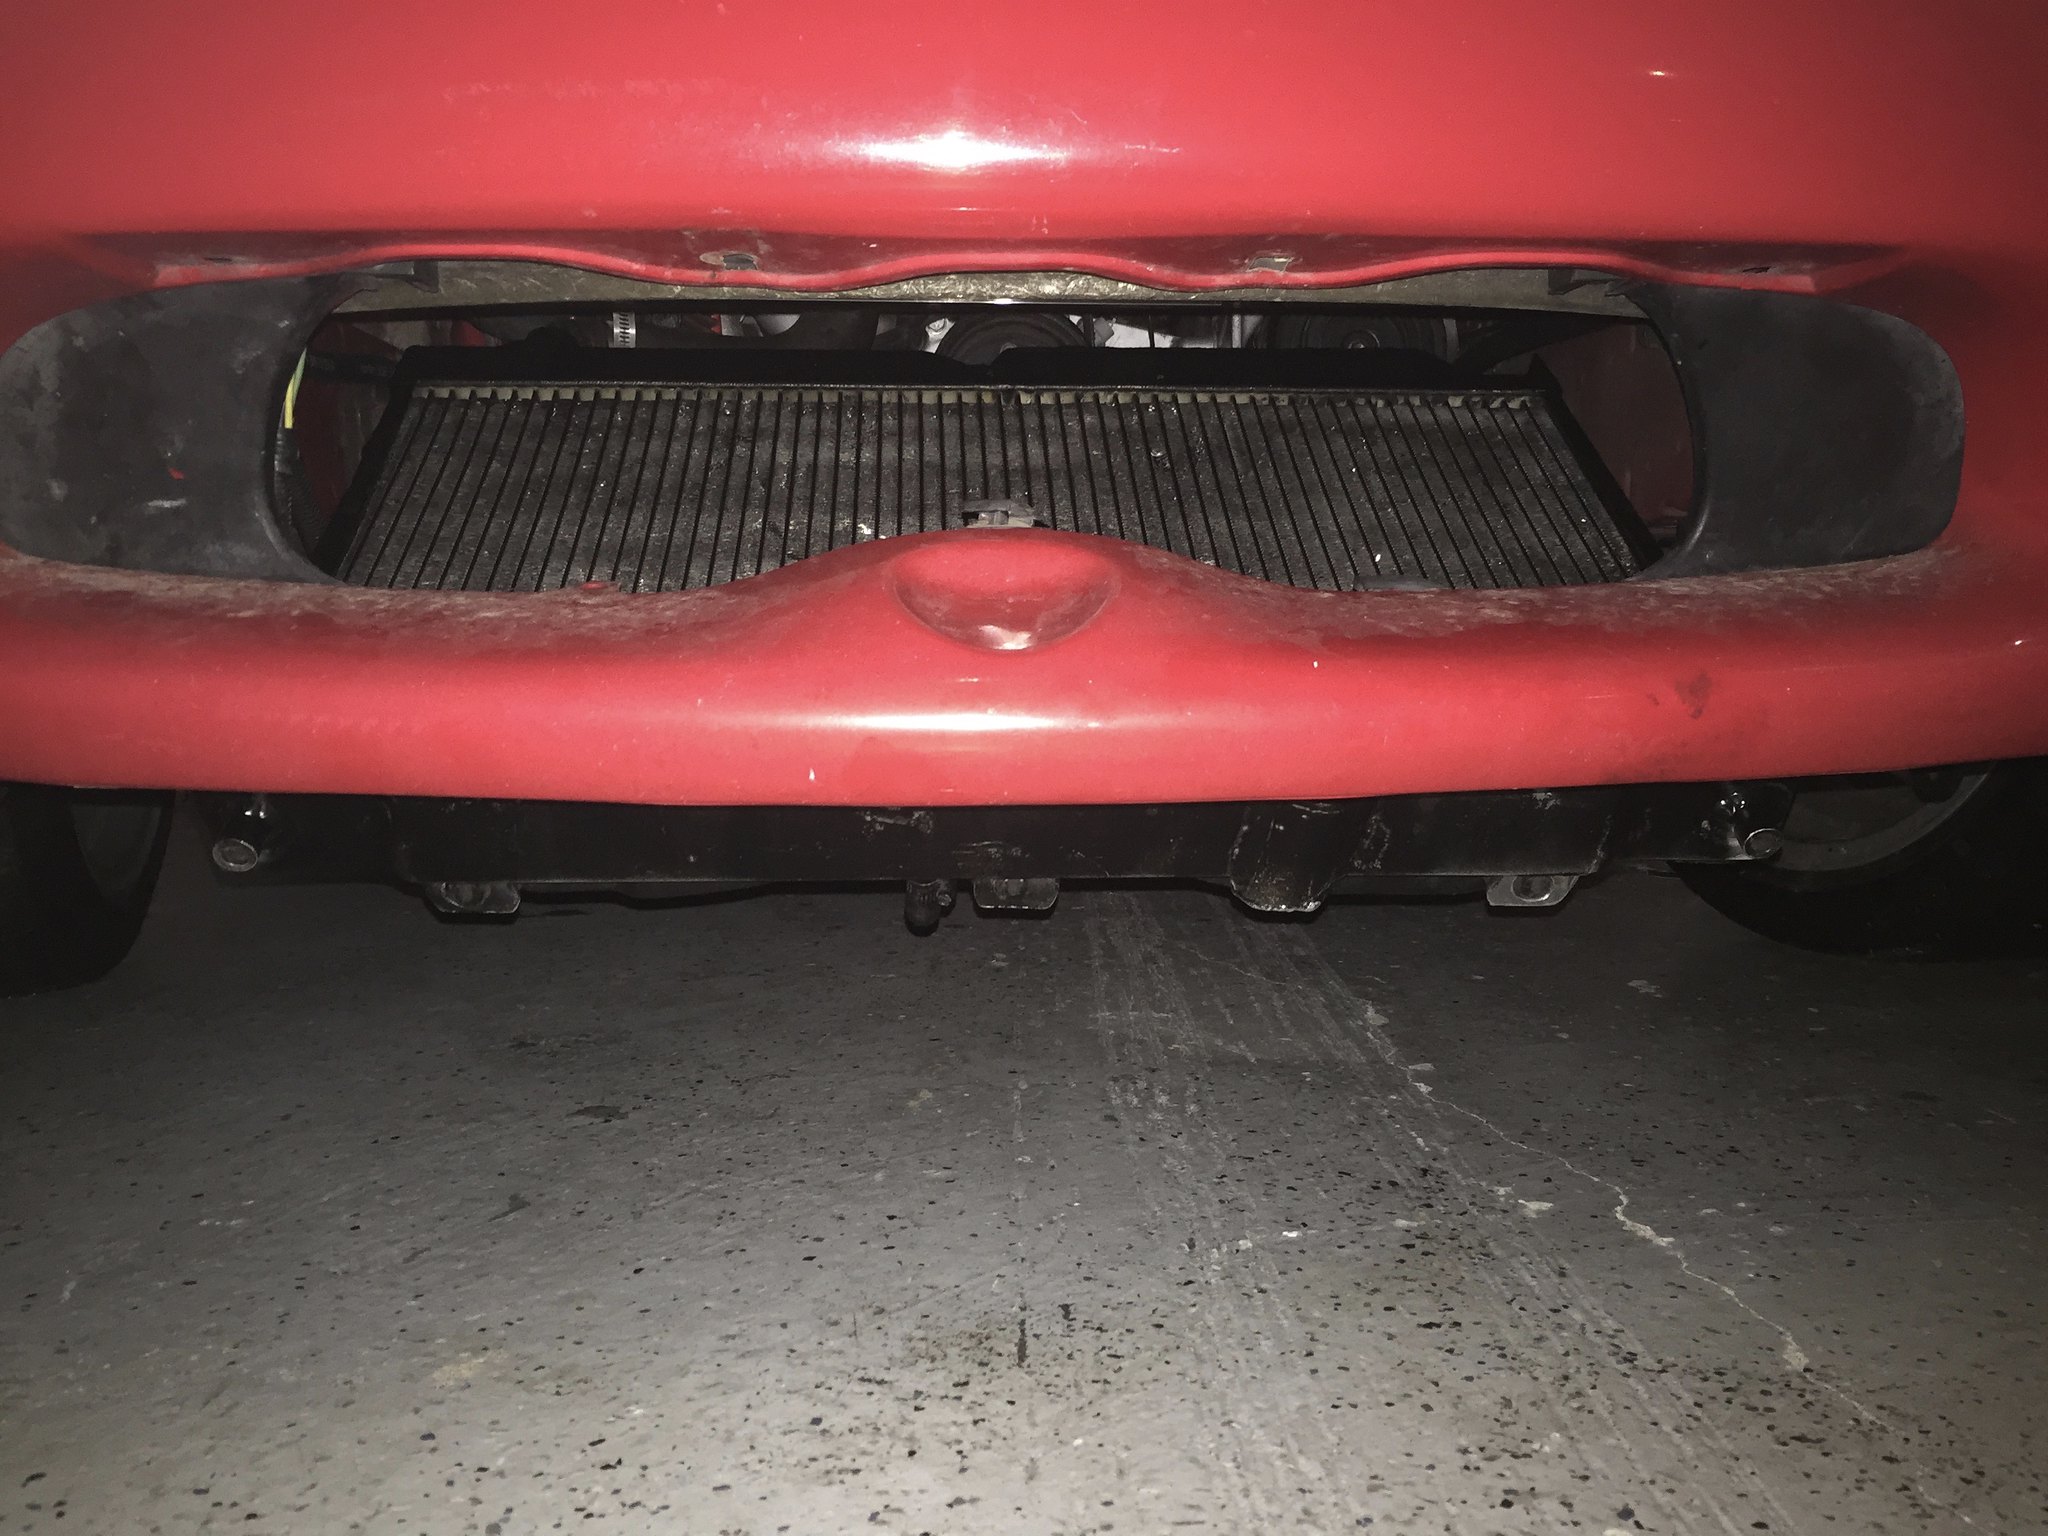
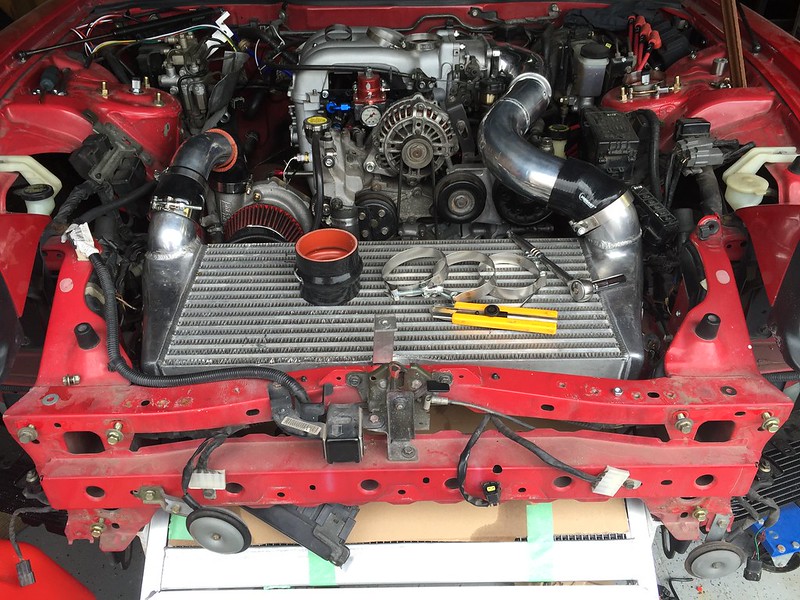
Radiator fitment
Test fitting the whole setup: It's really tight to the frame rails... very little ducting will be necessary!
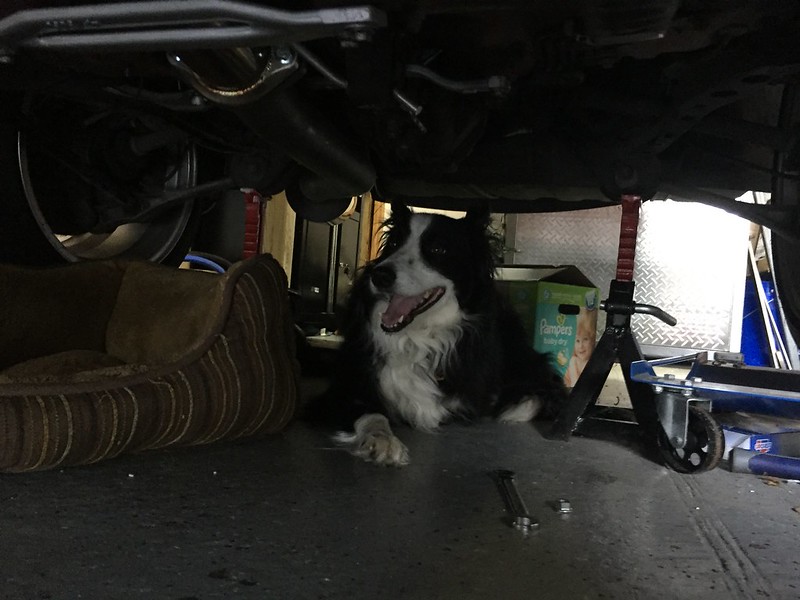
This is my shop pal. Zoe has spent almost as much time under this car as I have! It's nice to have her around when you're freezing your *** off under the car on a cement floor in winter.
The more I thought about it, the more I like the frame idea.
My friend Brent says it's probably overkill / unnecessary but I feel like I came up with a solution to my problem that works well, and didn't involve spending a ton on a kit.
This is my shop pal. Zoe has spent almost as much time under this car as I have! It's nice to have her around when you're freezing your *** off under the car on a cement floor in winter.
The more I thought about it, the more I like the frame idea.
- mounting surface for A/C heat exchanger
- mounting surface for ducting
- Hopefully makes up for removing the stamped brace that goes above the P/S rack
- protection for the bottom tank on the rad if I scrape on driveways etc. This will still be a street driven car
My friend Brent says it's probably overkill / unnecessary but I feel like I came up with a solution to my problem that works well, and didn't involve spending a ton on a kit.
Downpipe and Wastegate
Not one to take the easy path, i decided i wanted to plumb the wastegate back into the downpipe. I also decided to use a Synapse 50mm. I could have used a TiAL 44, but I was thinking bigger=better. I didn't want boost creep, and I've seen setups using dual TiAL 44's and that wasn't an option with my old HKS cast manifold, so this was the next best thing.
I had no idea what I was getting into though. There are adapter flanges made for HKS 4 bolt to v band for a TiAL 44, but i couldn't find one for a 50mm. Maybe the flange is the same, i never really thought of that, but my solution was to get one made. You can kind of see it in this photo:

I took the manifold and the v-band flange to a local machine shop, and they made one out of billet stainless for me, with a 1/2" flange so I wouldn't have warping issues. It wasn't cheap, but at the time i didn't think i had any other options. I suppose I could have made my own out of a stainless flange, some tubing and some weld, but this ended up being nice and compact and i don't have to worry about cracking.
Here's a decent shot of the downpipe installed:
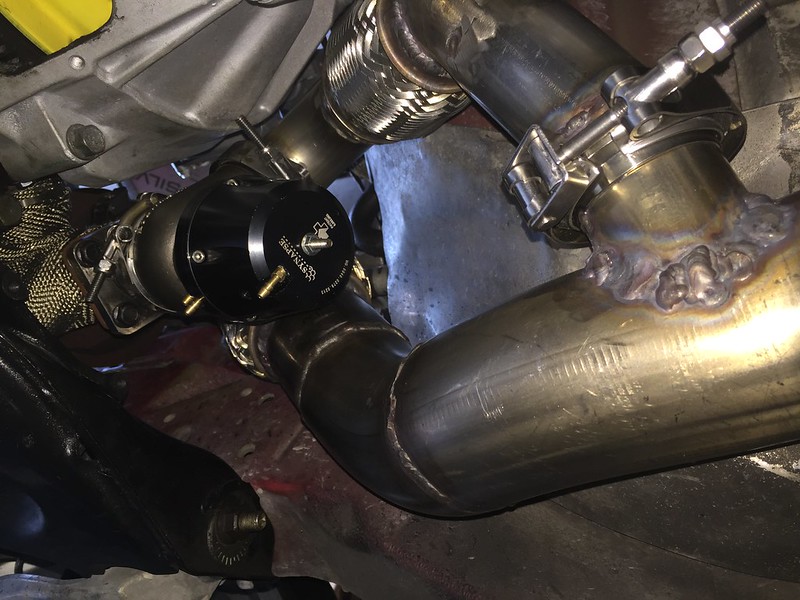

Once again, Flamesuit on about my TiG skills. Basically i would do a pass, blow a hole, have to go and seal it up, continue on, blow another hole, lather-rinse-repeat. I would like to think i'm getting better now after a year or so of hobby welding. Still not really pretty though, but at least they seem to be strong and don't leak.
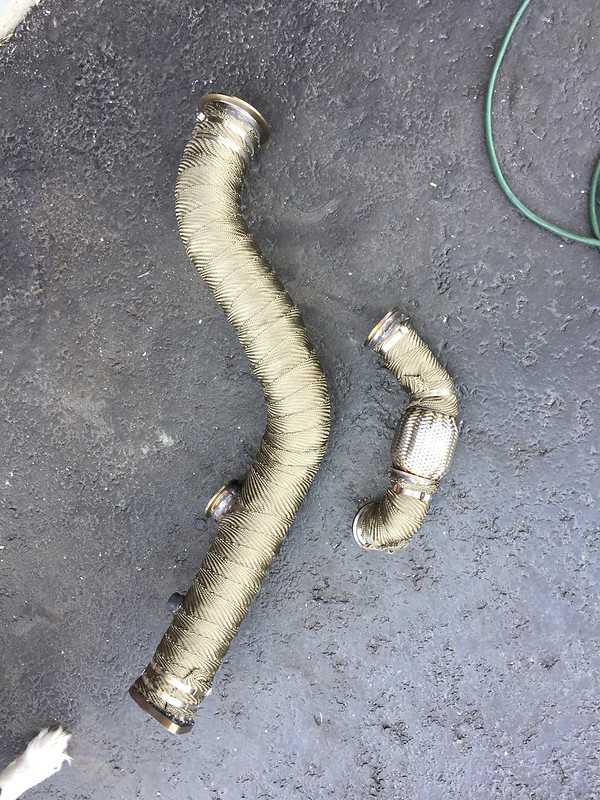
Here's a shot of the downpipe and the wastegate tube when it was all done. A grinder makes my welds look a lot less like ****, and i wrapped the ugliness up behind some DEI Titanium wrap.
I originally had put a flex joint near the turbo, but i removed it because of interference with the wastegate
I had no idea what I was getting into though. There are adapter flanges made for HKS 4 bolt to v band for a TiAL 44, but i couldn't find one for a 50mm. Maybe the flange is the same, i never really thought of that, but my solution was to get one made. You can kind of see it in this photo:
I took the manifold and the v-band flange to a local machine shop, and they made one out of billet stainless for me, with a 1/2" flange so I wouldn't have warping issues. It wasn't cheap, but at the time i didn't think i had any other options. I suppose I could have made my own out of a stainless flange, some tubing and some weld, but this ended up being nice and compact and i don't have to worry about cracking.
Here's a decent shot of the downpipe installed:
Once again, Flamesuit on about my TiG skills. Basically i would do a pass, blow a hole, have to go and seal it up, continue on, blow another hole, lather-rinse-repeat. I would like to think i'm getting better now after a year or so of hobby welding. Still not really pretty though, but at least they seem to be strong and don't leak.
Here's a shot of the downpipe and the wastegate tube when it was all done. A grinder makes my welds look a lot less like ****, and i wrapped the ugliness up behind some DEI Titanium wrap.
I originally had put a flex joint near the turbo, but i removed it because of interference with the wastegate
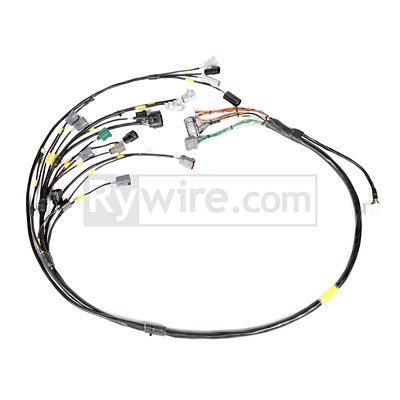
After much deliberation, here's my solution for an ugly, crispy wiring harness:
Rywire mil-spec harness
And my solution for an integrated control solution for engine management, boost control, and eventually meth/water injection:
https://www.adaptronic.com.au/product/e440d/
This arrived a little while after...
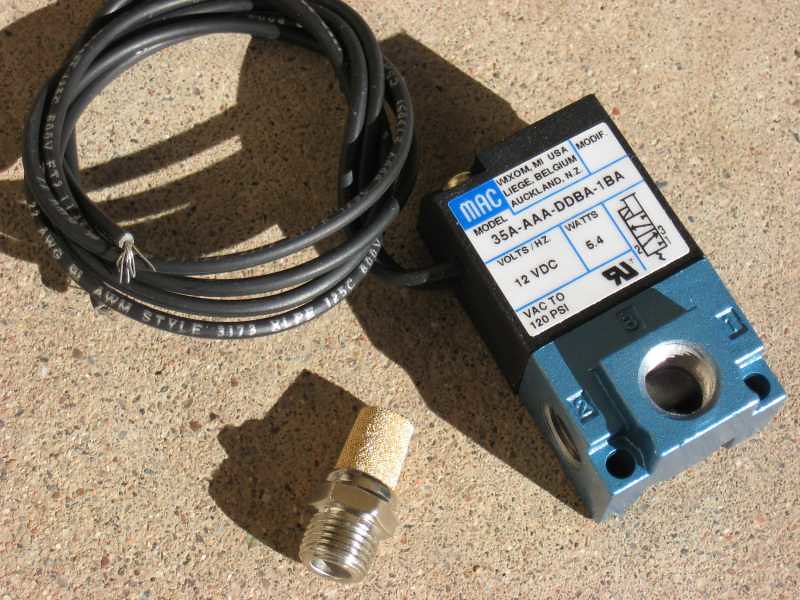
Right now i'm just using the wastegate spring pressure, which amounts to about 6.8psi max with no creep. MAC valve and ECU boost control coming for the spring
Rywire mil-spec harness
And my solution for an integrated control solution for engine management, boost control, and eventually meth/water injection:
https://www.adaptronic.com.au/product/e440d/
This arrived a little while after...
Right now i'm just using the wastegate spring pressure, which amounts to about 6.8psi max with no creep. MAC valve and ECU boost control coming for the spring
Finishing the IC piping
Once I got the radiator mounted in the car, I had to solve a piping issue. I was able to cut use one of the stock hoses for the hot side of the rad. Cold side I used a piece of 1.5" aluminum tube, and then went to my local parts store and browsed through their stock of rad hoses. I picked something that had a couple of different angles in it so I'd have some different bits to choose from to make couplers. I think the one i bought was for an Escalade.
Once I got it put together and leak free, I could move on to the intercooler piping.
I used some different pieces from vibrant to get the job done. A 90deg silicone coupler for the compressor outlet, and a 45deg AL bend cut to the right length on the hot side, with a straight reducer to mate up with the intercooler inlet size.

On the other side, I hacked a 45 deg silicone bend to fit, and used a vibrant 90deg AL bend for the cold side pipe.
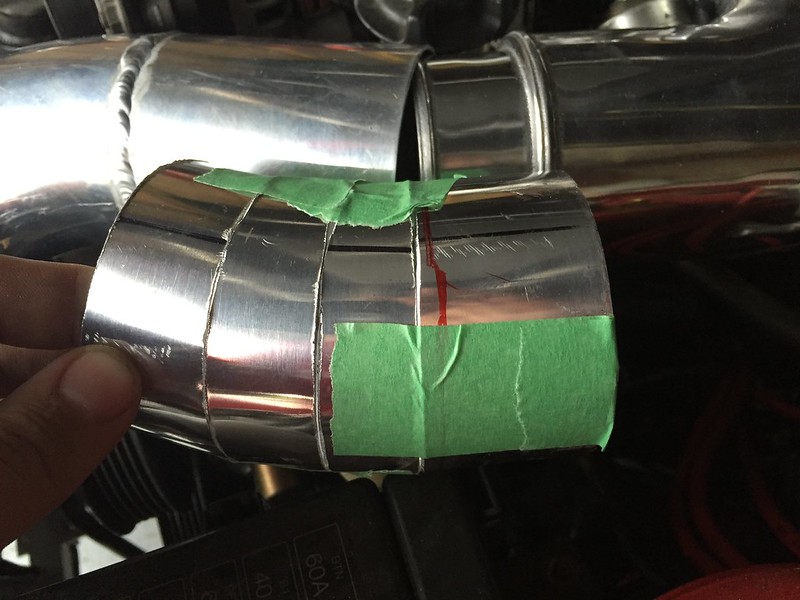
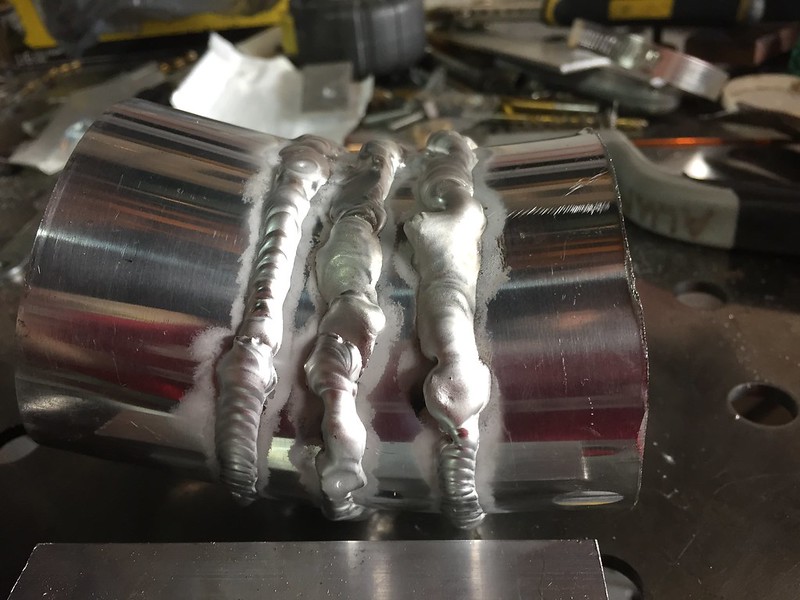
Things didn't line up properly at the Greddy elbow, so I had to do a a pie-cut joint. Once again, pardon the somewhat sloppy TiG work, but you can definitely see a progression in just these three welds. I suppose i can always file and polish the join, but in all probability i'll redo it to make it prettier, with more practice.
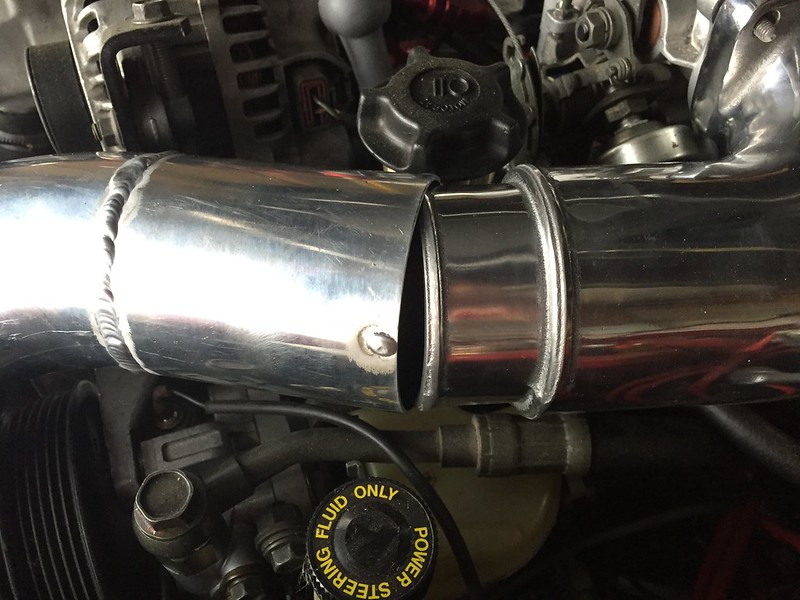
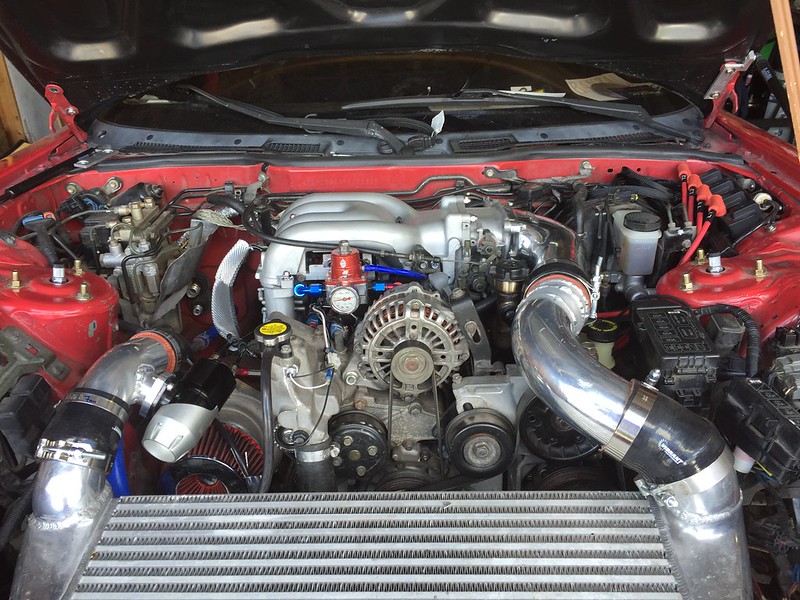
Here's the completed IC and piping, with the Synapse WG mounted on the hotside pipe. I know typically the closer to the throttle body the better, but there just wasn't enough room on the cold side piping or the elbow.
Once I got it put together and leak free, I could move on to the intercooler piping.
I used some different pieces from vibrant to get the job done. A 90deg silicone coupler for the compressor outlet, and a 45deg AL bend cut to the right length on the hot side, with a straight reducer to mate up with the intercooler inlet size.
On the other side, I hacked a 45 deg silicone bend to fit, and used a vibrant 90deg AL bend for the cold side pipe.
Things didn't line up properly at the Greddy elbow, so I had to do a a pie-cut joint. Once again, pardon the somewhat sloppy TiG work, but you can definitely see a progression in just these three welds. I suppose i can always file and polish the join, but in all probability i'll redo it to make it prettier, with more practice.
Here's the completed IC and piping, with the Synapse WG mounted on the hotside pipe. I know typically the closer to the throttle body the better, but there just wasn't enough room on the cold side piping or the elbow.
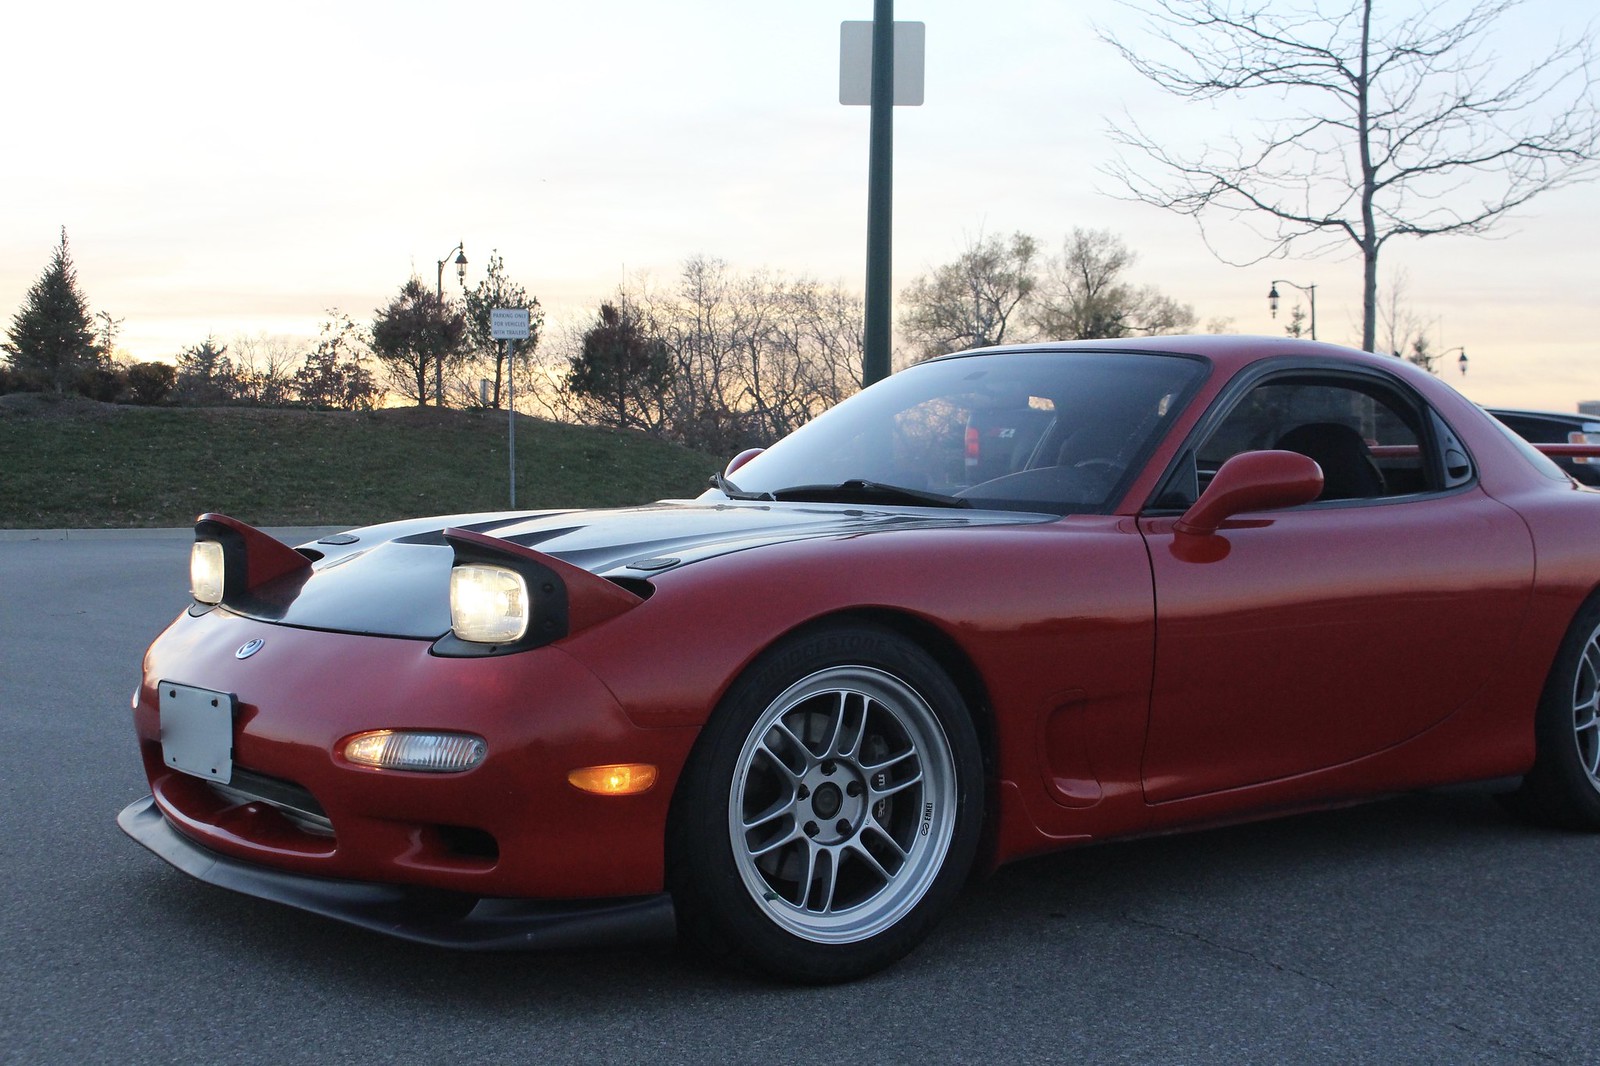
Wheels & Tires
Time for new shoes! I kept my RPF1's from my old street setup. 17" +45 offset. It seems the best deal around here is to order from Costco.ca
I think it was $185CDN each for a set of Bridgestone RE71R's in 255/40/17
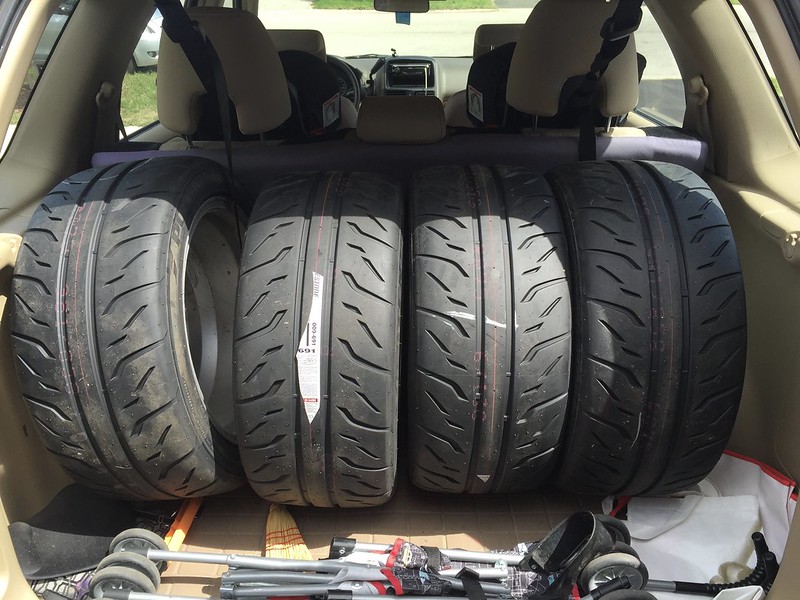
I think it was $185CDN each for a set of Bridgestone RE71R's in 255/40/17
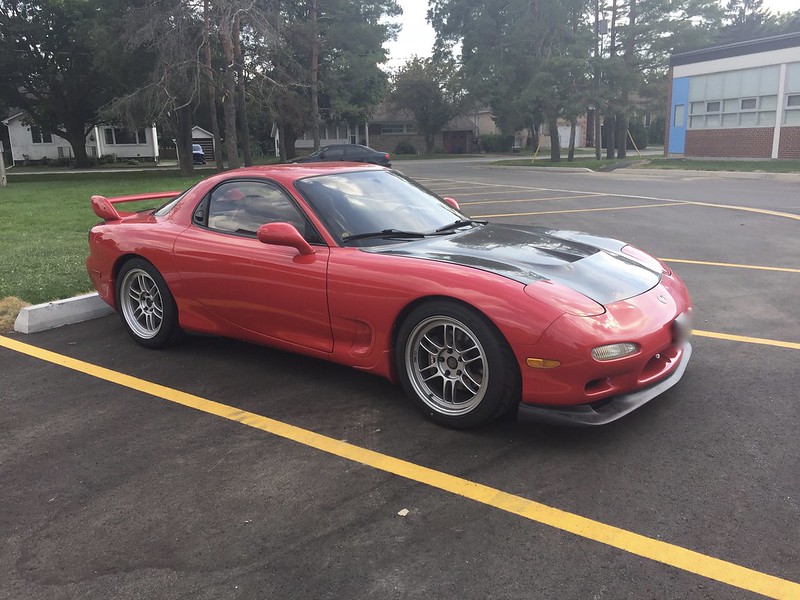
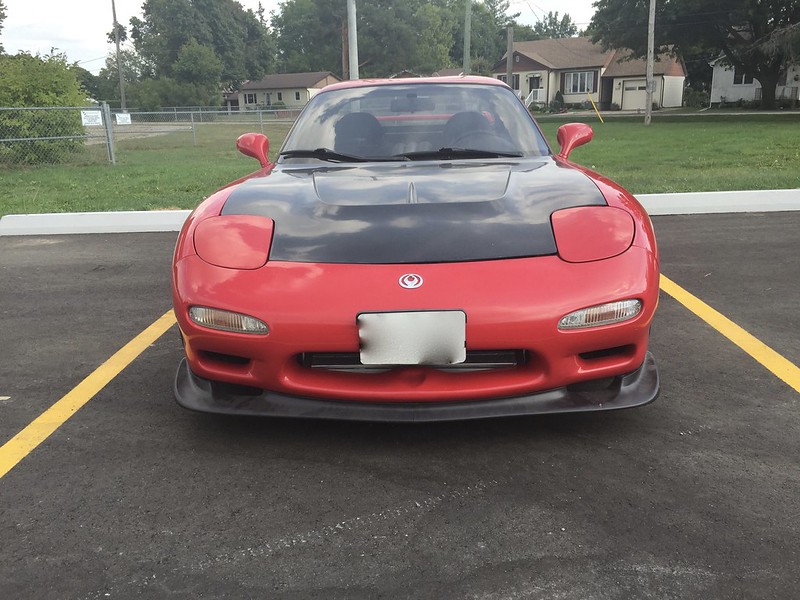
First day of work/school!
I ran into some drama when i was first trying to get it running with the new ECU. I was having problems getting a stable idle, presumably because I didn't have an IAC valve on the car anymore (seemed to be a standard delete with block off plates)
I also had trouble getting the coolant system purged properly and i had some overheating problems because of air in the system, but i couldn't get it to purge properly because i could barely keep it running. I was at a loss. Luckily my friends Aaron and Brent came through again. The next day after i texted them for help, Aaron had the system purged, and Brent came to help get the idle straightened out, and get a rough street tune happening, as I was totally green to the tuning game.
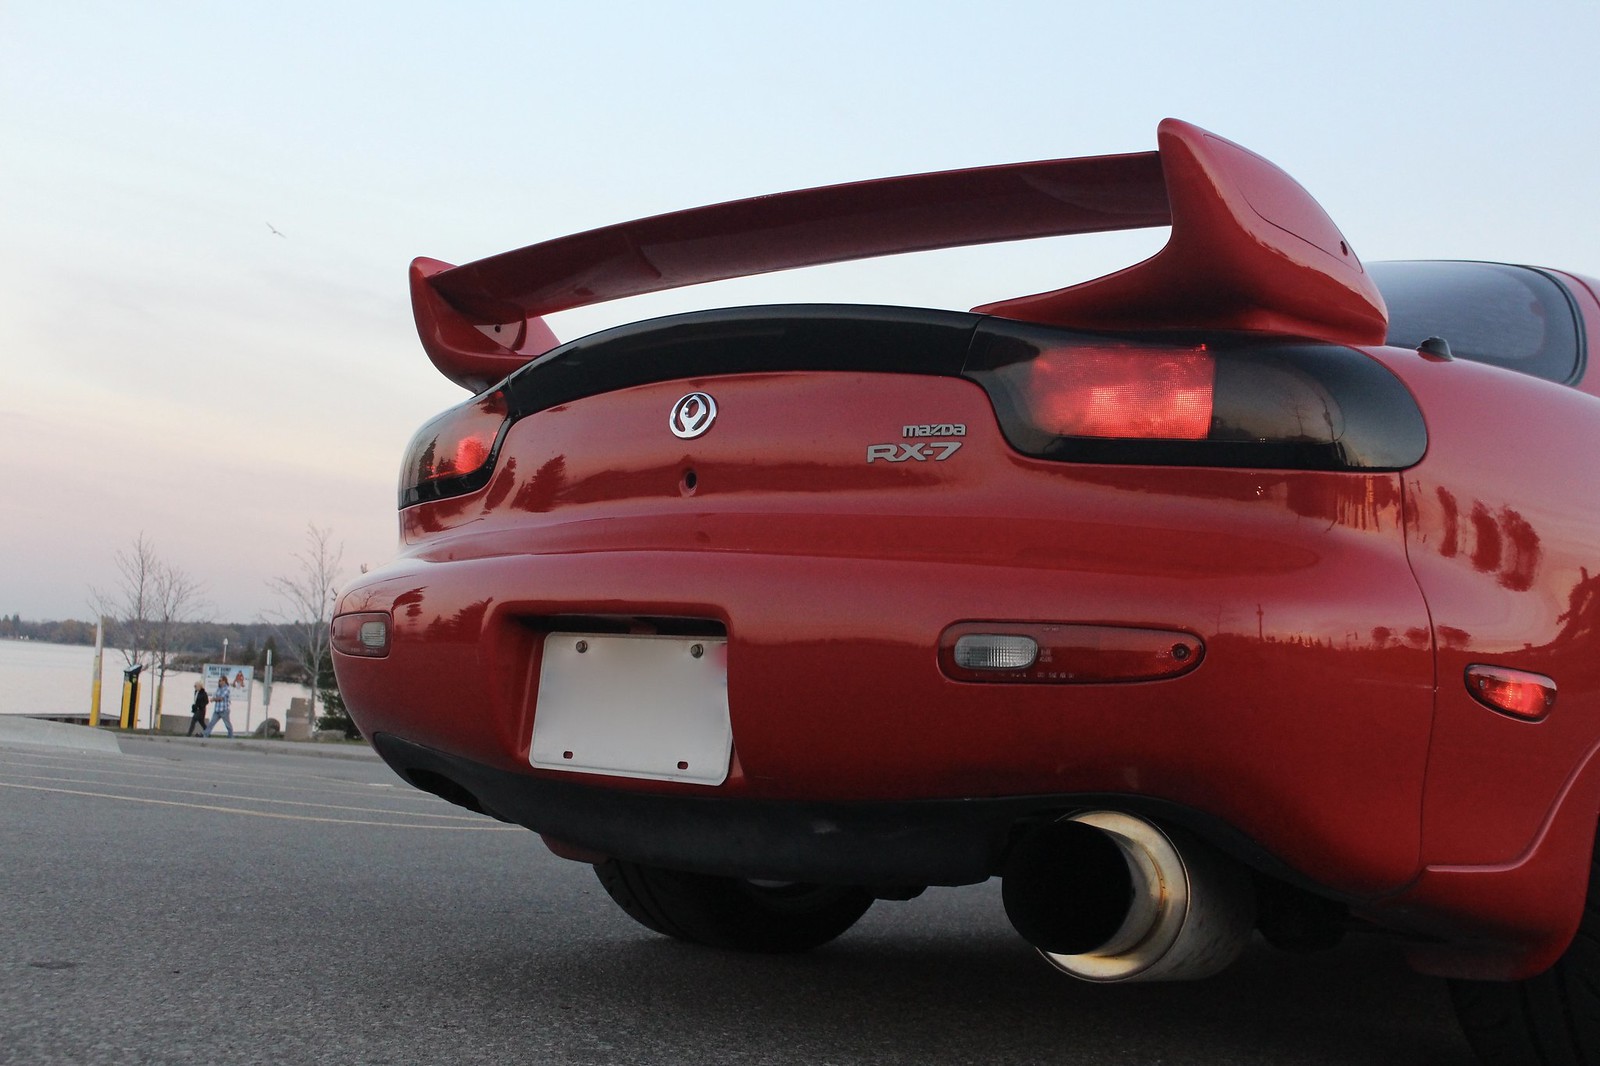
I drove it to work on the first day of school, coughing and sputtering at streetlights, loud and raw with some exhaust leakage, but with a smile on my face!
Here's the car as she sat on the first day of school (i teach high school music and history)
I also had trouble getting the coolant system purged properly and i had some overheating problems because of air in the system, but i couldn't get it to purge properly because i could barely keep it running. I was at a loss. Luckily my friends Aaron and Brent came through again. The next day after i texted them for help, Aaron had the system purged, and Brent came to help get the idle straightened out, and get a rough street tune happening, as I was totally green to the tuning game.
I drove it to work on the first day of school, coughing and sputtering at streetlights, loud and raw with some exhaust leakage, but with a smile on my face!
Here's the car as she sat on the first day of school (i teach high school music and history)
Not boosting, stupid loud exhaust, and a headache!
So apparently the standard exhaust gaskets that you can buy for a Greddy 4 bolt wastegate are not a good idea on a rotary. Or maybe i just bought a crappy one. It took a couple of days of driving and some solid pulls and I felt like things were getting louder, and the car was down on power. I looked at the logs and i wasn't boosting much at all. This turned out to be the culprit:

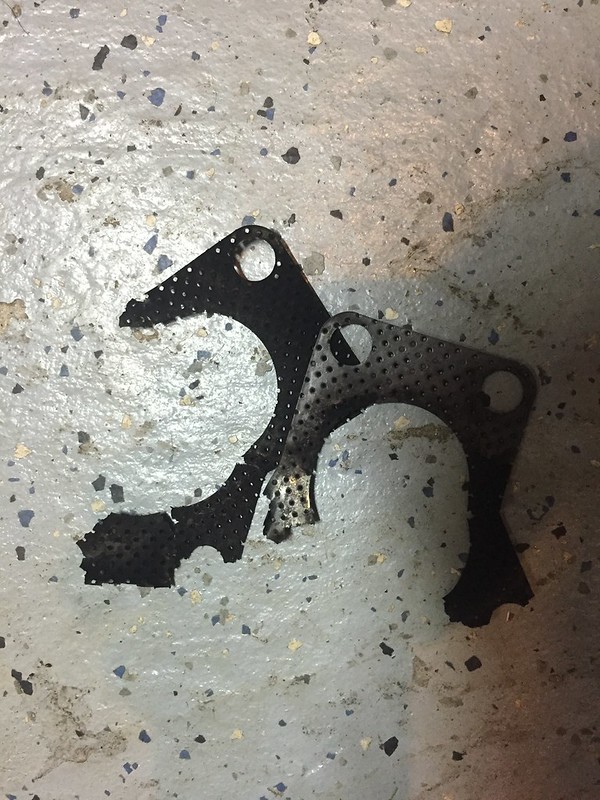
I had the car at work when it finally blew right out, so i nursed it the 30km back to home, stopping at my local Metal Supermarkets to buy a small sheet of copper.
Holy crap, driving that car with a bad wastegate gasket, i thought i was going to have a fire by the time i got home. The firewall/tunnel and my feet were pretty damn hot.
Later that night i pulled off the wastegate, traced the shape with the WG adapter onto the copper, cut it out, and then put it all back together. It's been holding nicely with no problems since! Homebrew solutions FTW!
Last edited by squealy; Nov 7, 2016 at 03:04 PM.
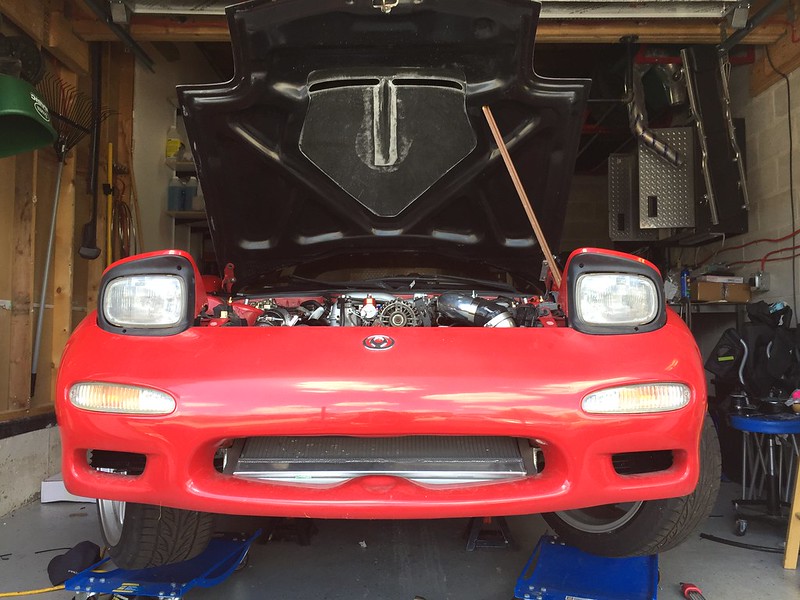
Winter hit here in Central Ontario, so the car is off the road until spring. We did have a gift of a day though last friday with temperatures of nearly +20C, which was fantastic. I snapped a few rushed pictures to share as I was losing the light.
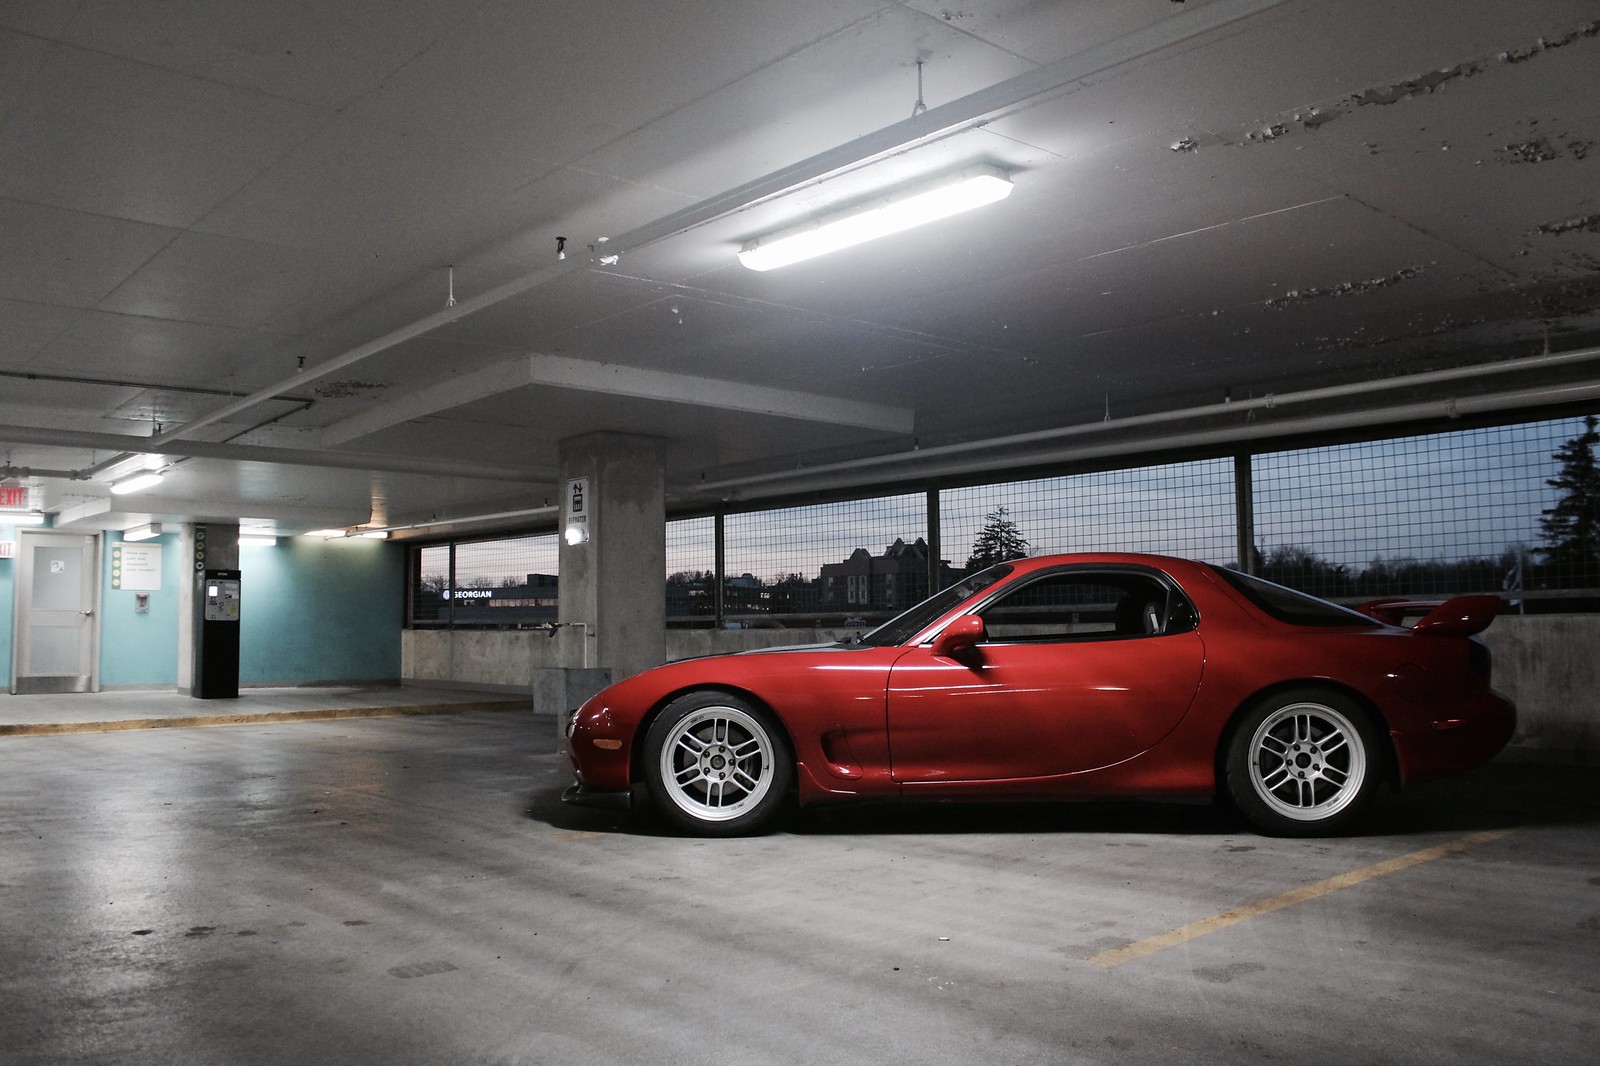
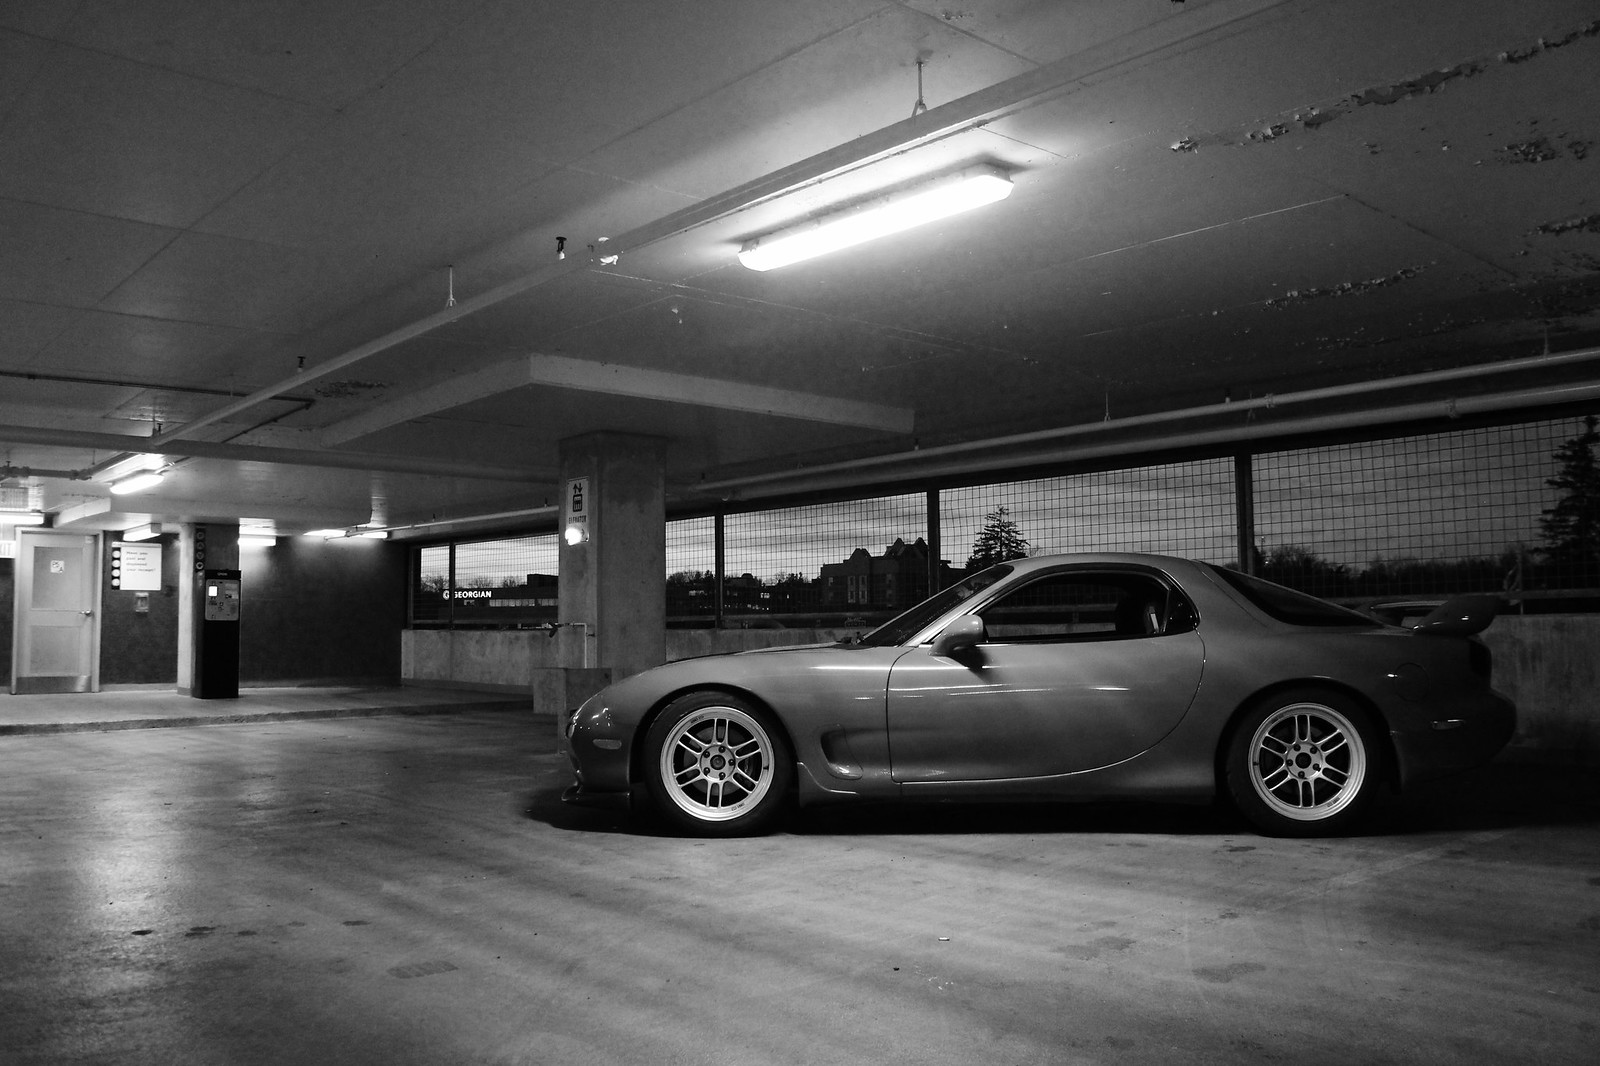
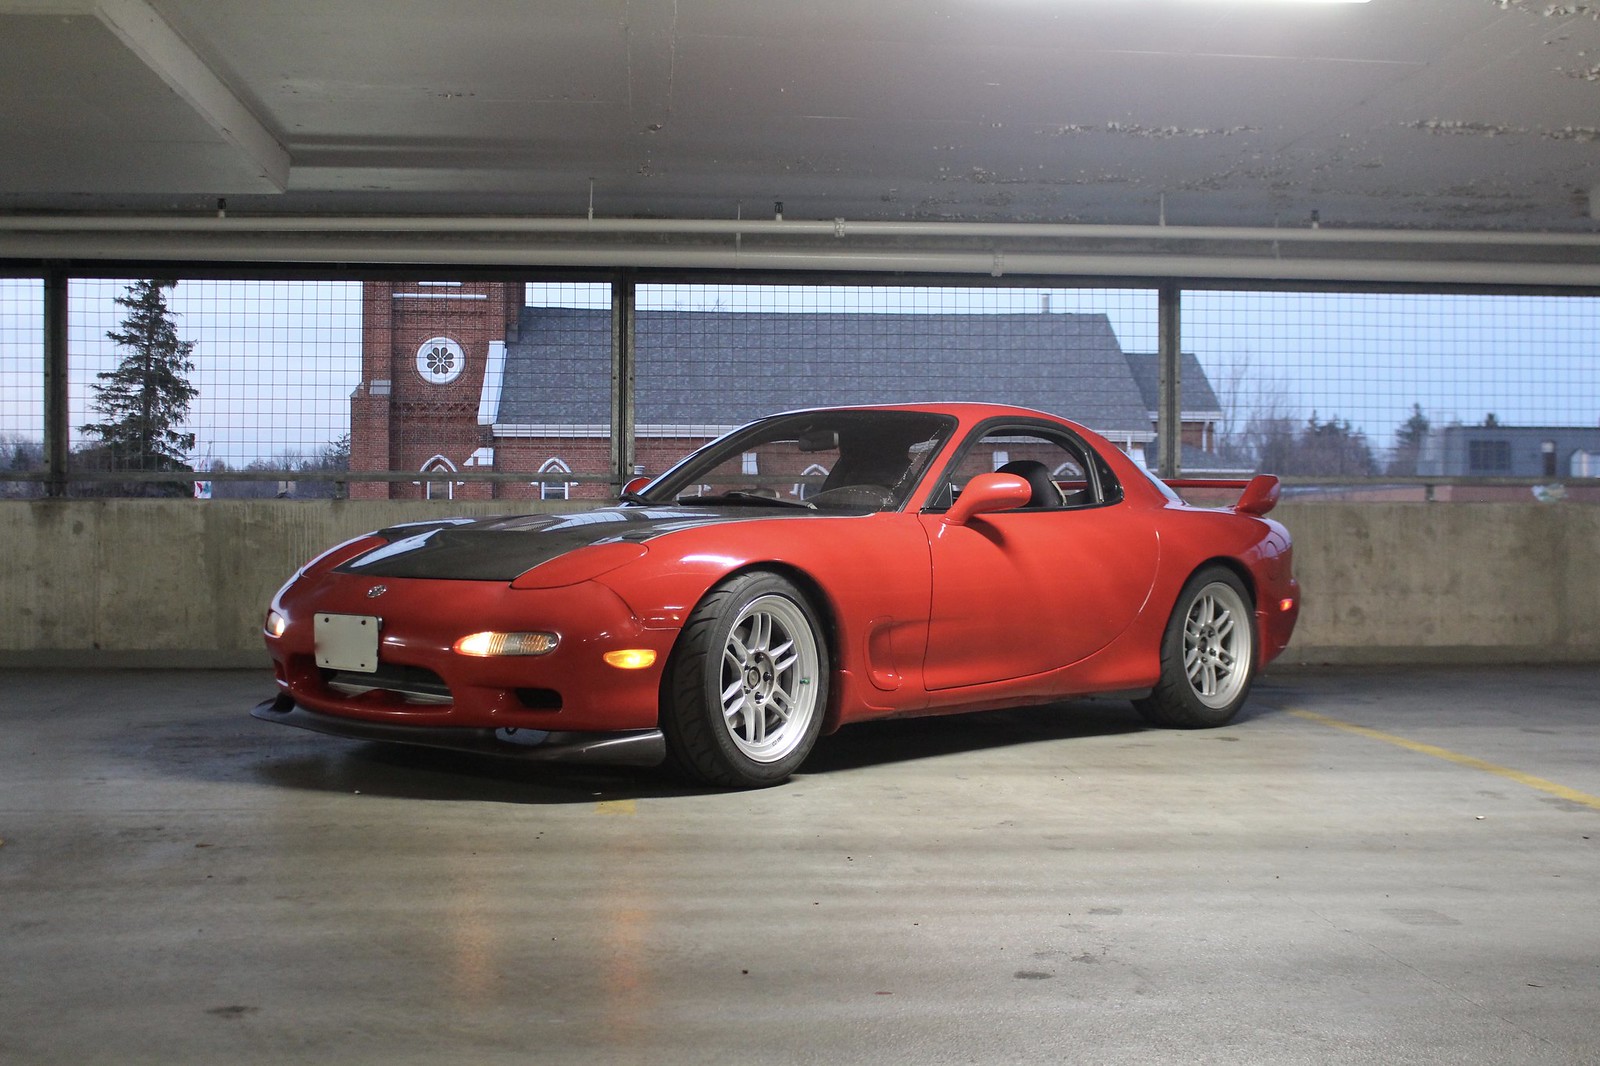
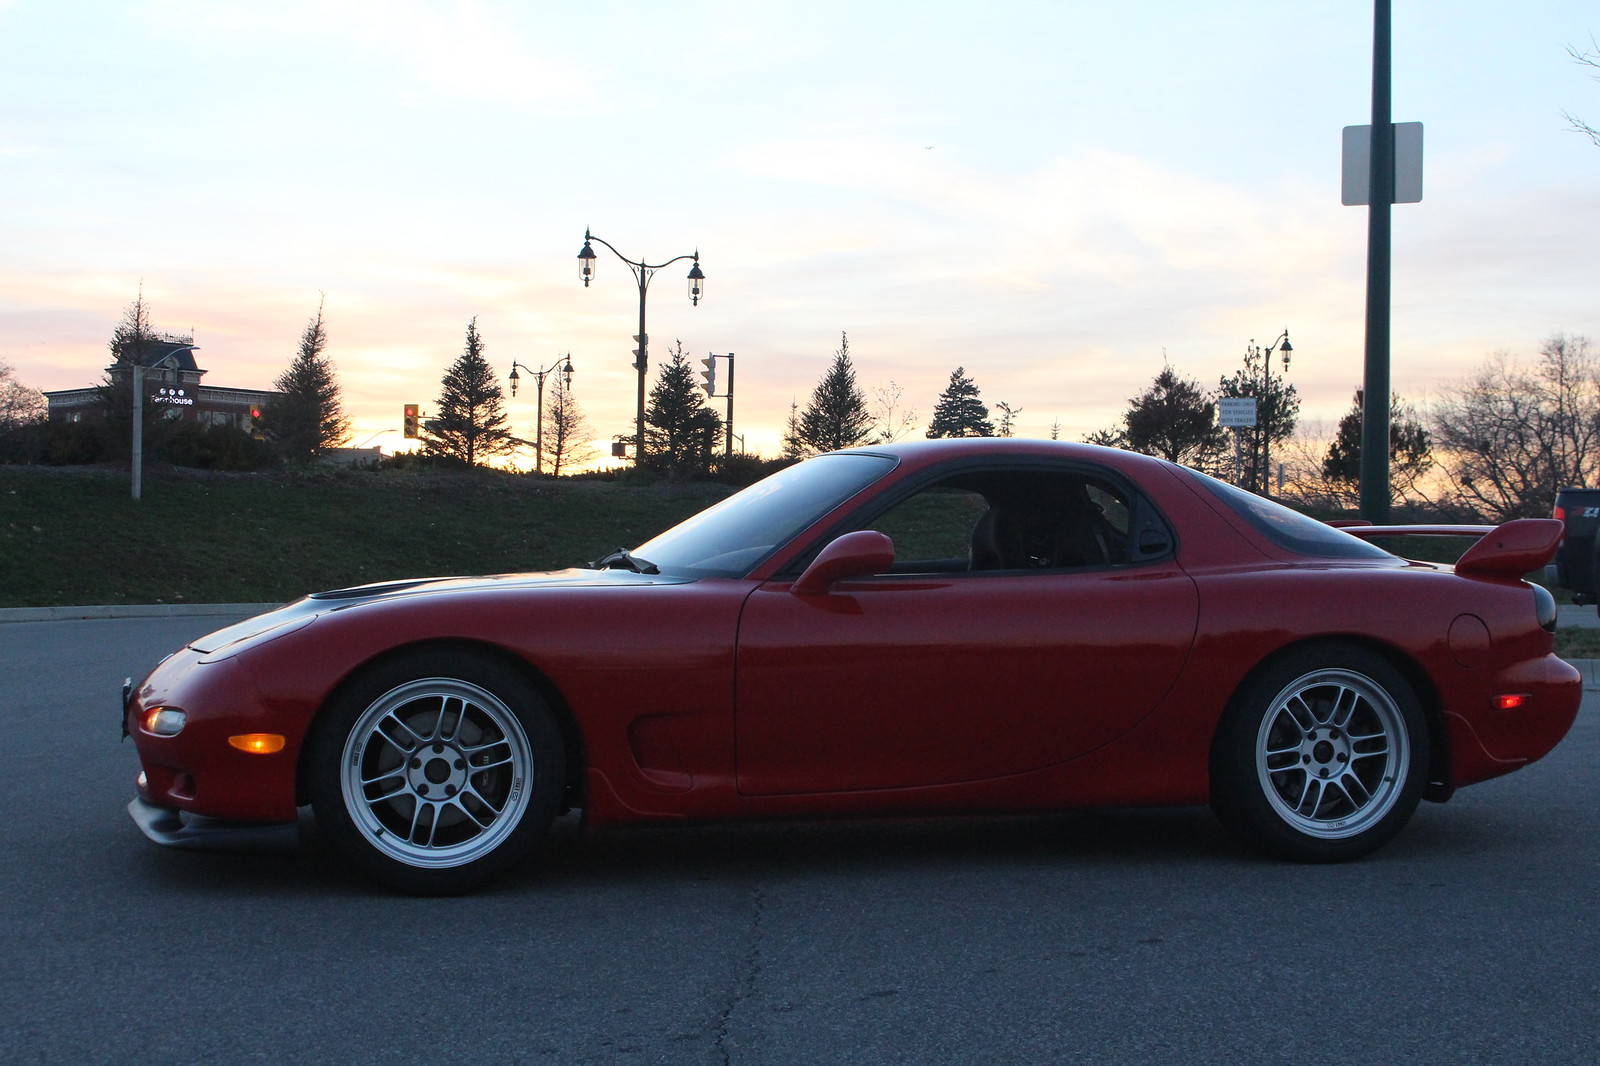


Thanks guys, it's been a long time coming. There's still lots to do, but once i got it rough tuned and drivable, I started enjoying it while I could. From here on out, it's some tidy up, tweaking, and some good old hot-rodding garage fab.
Matt
Matt
question about the ebay VMIC radiator:
it looks like it doesn't have a separator to force the coolant to flow through "top to bottom to top," like it could allow the coolant to skip straight across the radiator along the top. is there a provision for this? i noticed this same thing with the cx racing vmount radiator they sell, and I've held off buying it...
on a previous FD i had the rx7store vmic which uses an altered stock-style radiator, and it worked amazingly, like i almost didn't even need fans.
do you know anything about this? it seems like an easy manufacturing step to skip that most people won't notice, like unless you actually drive your car hard.
Last edited by jacobcartmill; Nov 26, 2016 at 06:23 PM.
question about the ebay VMIC radiator:
it looks like it doesn't have a separator to force the coolant to flow through "top to bottom to top," like it could allow the coolant to skip straight across the radiator along the top. is there a provision for this? i noticed this same thing with the cx racing vmount radiator they sell, and I've held off buying it...
on a previous FD i had the rx7store vmic which uses an altered stock-style radiator, and it worked amazingly, like i almost didn't even need fans.
do you know anything about this? it seems like an easy manufacturing step to skip that most people won't notice, like unless you actually drive your car hard.
it looks like it doesn't have a separator to force the coolant to flow through "top to bottom to top," like it could allow the coolant to skip straight across the radiator along the top. is there a provision for this? i noticed this same thing with the cx racing vmount radiator they sell, and I've held off buying it...
on a previous FD i had the rx7store vmic which uses an altered stock-style radiator, and it worked amazingly, like i almost didn't even need fans.
do you know anything about this? it seems like an easy manufacturing step to skip that most people won't notice, like unless you actually drive your car hard.
to have the inlet and outlet both at the top. Each one of those rads had the lower outlet welded up, and the top tank had to be cut and a baffle welded in and a new top tank fabricated on top for the outlet. Somewhere on the forum there's a thread on how to modify a Koyo for v mount and it's a lot of work. The eBay rad is made from the start with the inlets in the right spot. A split tank probably wasn't necessary as the baffle would have been put in when the tanks were fabricated. I drove this car a lot on the street after I put it together and with aggressive driving I never saw temps go above 190. As soon as the thermostat opens the temps drop like a rock on the ecu readout. I did autocross it in September with no issues. A track day will likely expose any weaknesses, as Will turning up the boost. I'll know for sure next season.
Is is it as robust as the modified Koyo? No. but the price was right, ease of fabrication was decent, and thus far it has been problem free

Thread
Thread Starter
Forum
Replies
Last Post
Jeff20B
1st Generation Specific (1979-1985)
73
Sep 16, 2018 07:16 PM
t-von
3rd Generation Specific (1993-2002)
9
Sep 10, 2015 01:56 PM