My 93 Montego single turbo build


 08-30-14, 01:39 PM
#53
Thanks Jacob, I feel I'm getting better. My first attempt at molding with fiberglass was pretty bad. I got better with prep work and pre-cutting material and it turns out a lot better. Still calculating the man hours spent doing this I could not make a living.
09-02-14, 05:06 PM
#55
Haven't bonded it yet. Most guys epoxy them I was debating on putting 1 more layer of mat on the bottom of the top and then clamping them together like that. I figure the extra layer will fill the gaps between a bit better while making the whole thing a bit stiffer. I will add 1 brace from front to back to keep it from flexing to much. The sides won't really go anywhere since it is tight in the wheel well all the way around except the very back.
09-03-14, 11:04 AM
#57
I reinforced a few areas to bolt down The centre used to hold the spare in place is point 1, I am using a couple of the Bose studs (M6) thus the large 'wing' on the left of the enclosure. Plus the M8 on the front of the spare tire well. I should have 4 good mounting points not to mention the snug fit of the well to keep that sucker secured and flex and rattle to a minimum.
09-05-14, 05:12 PM
#58
Got a few goodies in the mail today. I took a few risks with new higher risk vendors and I think it paid off. Got speaker adapters from PVC Speaker Adapters - CNC Machined - In Stock or Custom Made they seem to be decent quality, however my Energy 6" speakers seem to require a bit of trimming. I will take the grinder to the outer ring it needs just a small amount to get them to sit flush.
What I am more excited about is the first bit of CF for the car. Since I absolutely obliterated the gauge hood when I took it out of the car I needed a new one. Looking at the cost of a used OEM hood I decided I would go CF for a bit more bling. Ordered from CarbonRXX and am happy with the product overall. A bit of drilling and filing to the screw holes to make everything line up, but not to bad.
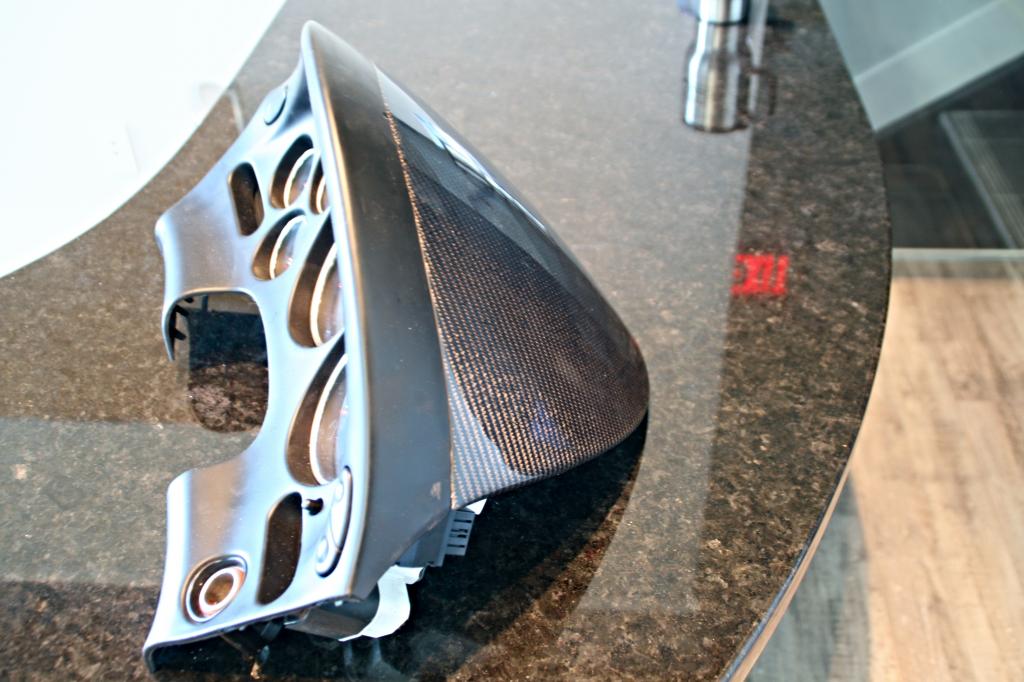
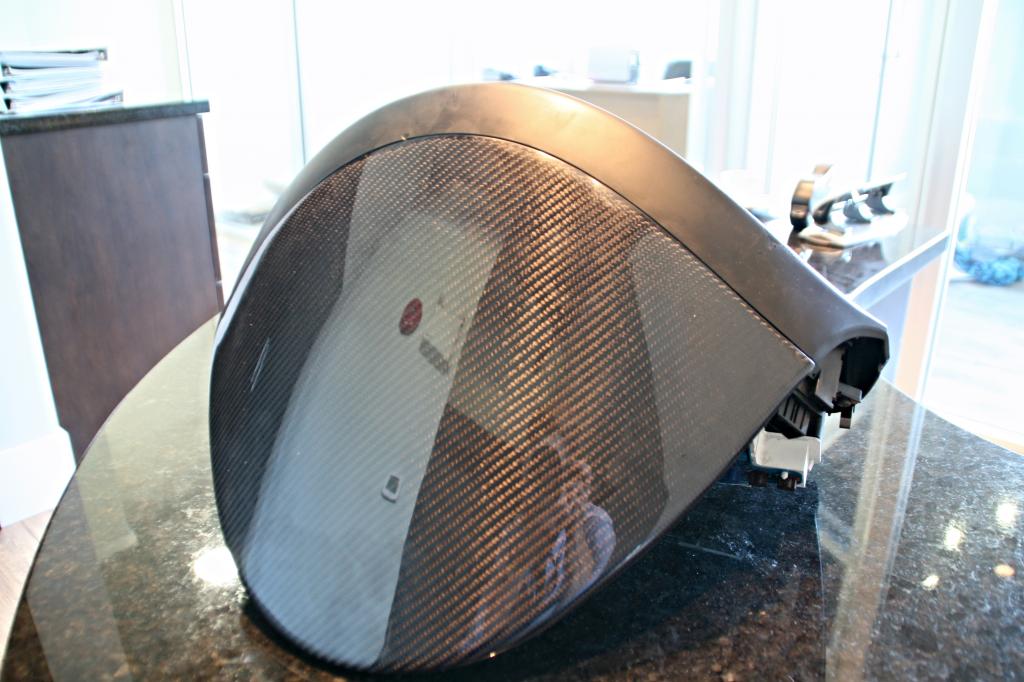
What I am more excited about is the first bit of CF for the car. Since I absolutely obliterated the gauge hood when I took it out of the car I needed a new one. Looking at the cost of a used OEM hood I decided I would go CF for a bit more bling. Ordered from CarbonRXX and am happy with the product overall. A bit of drilling and filing to the screw holes to make everything line up, but not to bad.


 09-14-14, 09:14 AM
#61
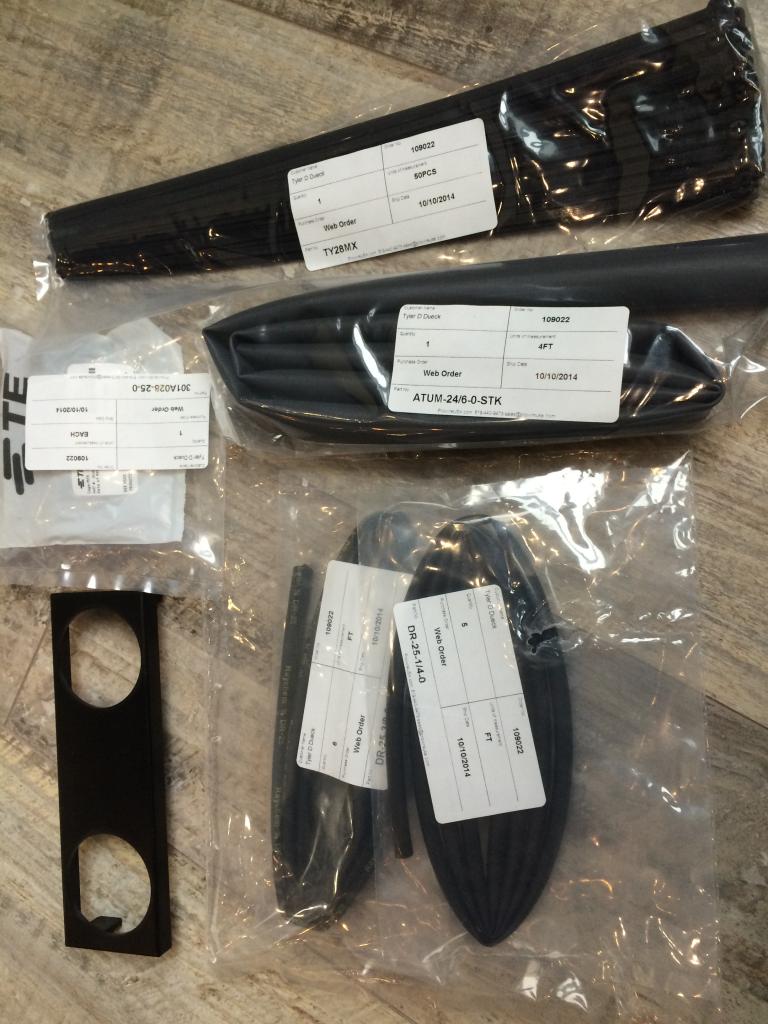
I have been using Online Components, Ballenger MotorSports and Pegasus Racing. The engine harness is all using Raychem DR-25 milspec, it's pricey but the best against heat and oil. Other places we used braided flex loom. The DR-25 in my opinion is the way to go for long term abuse against heat soak, plus... Race Car.
09-22-14, 04:34 PM
#62
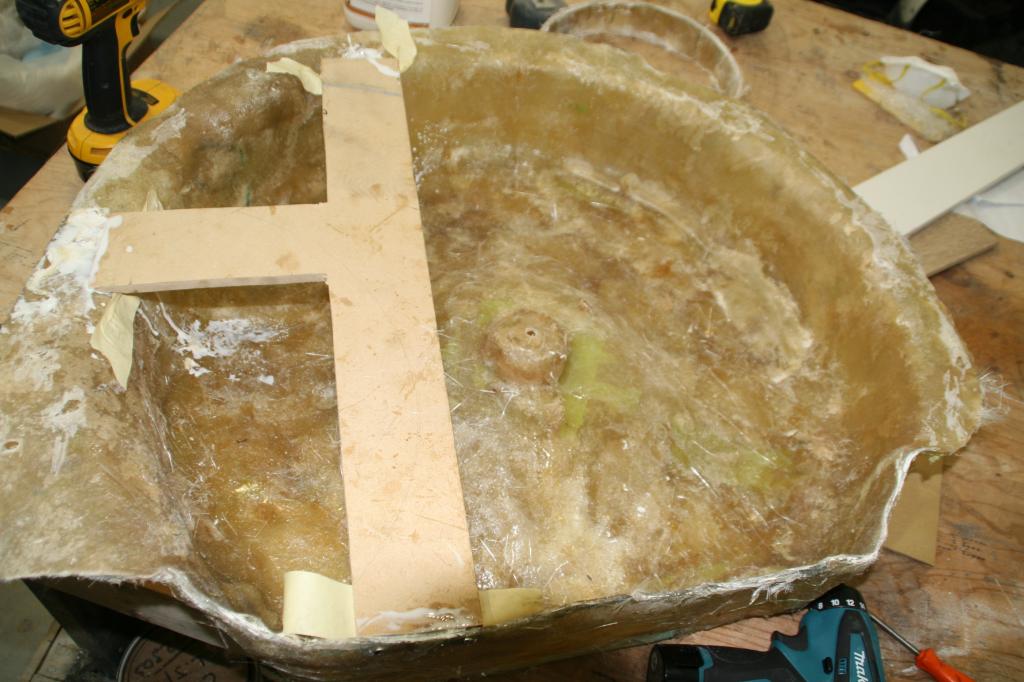
Well hopefully this will be the last of the audio posts I make. I got to the shop/office on Saturday to find a pile of real work to do so didn't get to spend much more than an hour on the RX7. I managed to get the sub box bonded up. Overall I am happy with it. Quality of finish certainly isn't my best work I attribute that to prep work (used a different type of foam to create the shape of the dome.) Bondo will fix that, more importantly it is quite strong. It is also much lighter than if I used MDF.
Strength testing, the scientific way.


Strength testing, the scientific way.


 10-08-14, 04:07 PM
#65
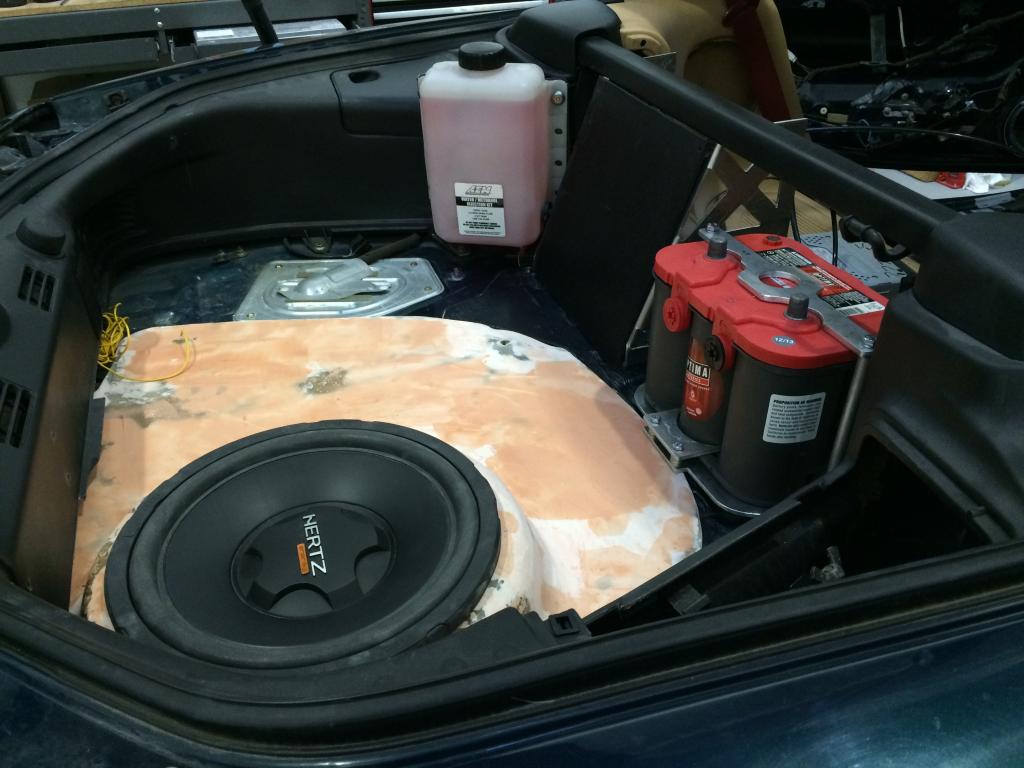
I have been spending my lunch break designing and building the battery tray. Eventually I will have this CNC machined to add some recess to the tray itself for a bit more security and a much more finished product.
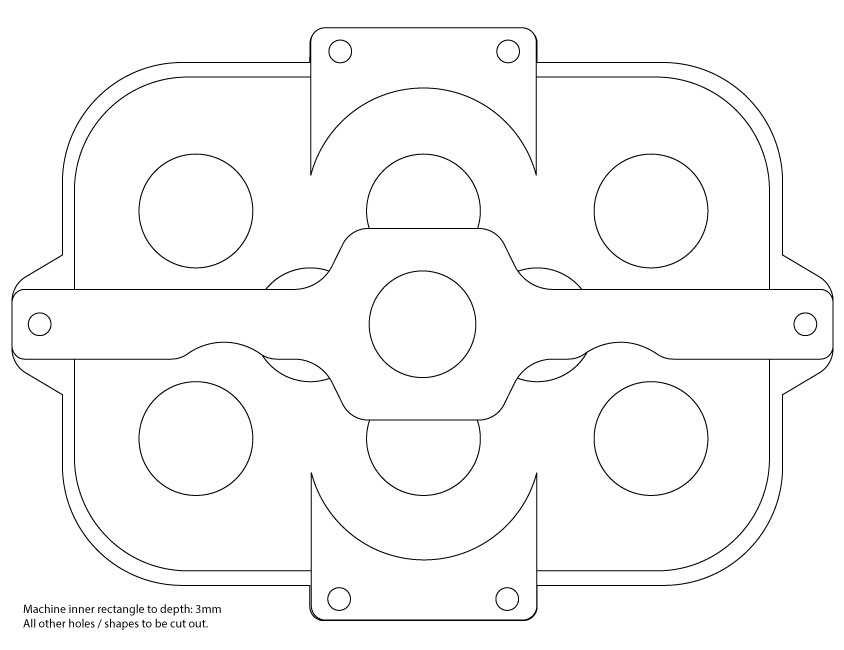
This is the prototype I will use until I can get free CNC labor.
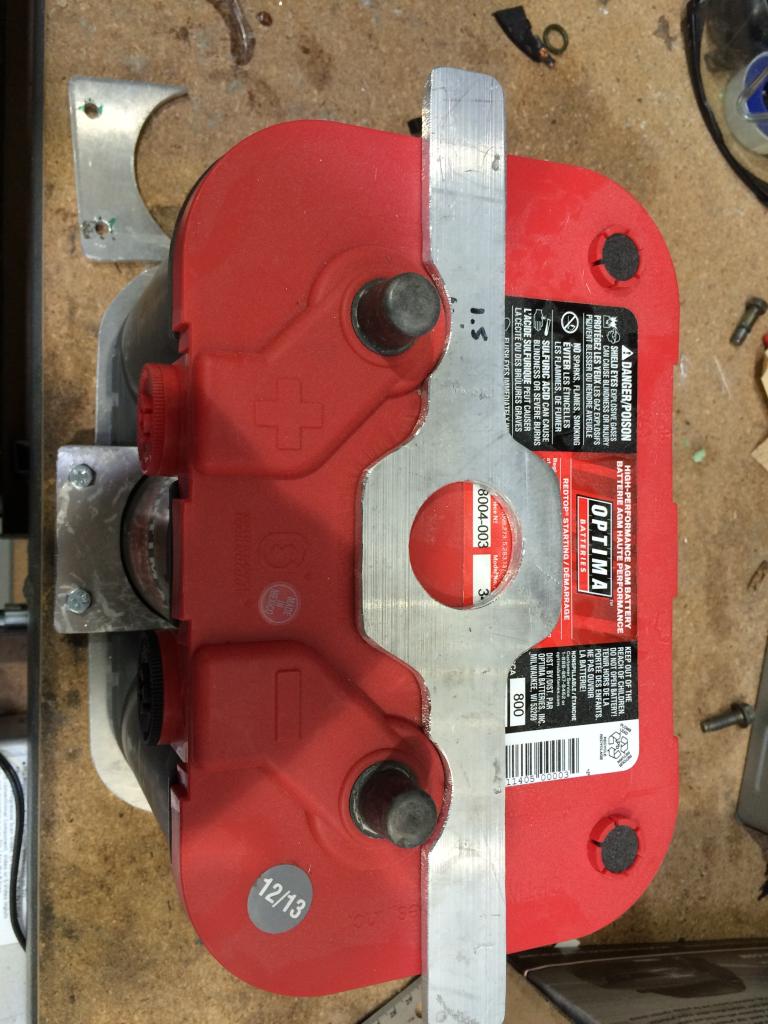

This is the prototype I will use until I can get free CNC labor.

 .
10-09-14, 03:26 PM
.
10-09-14, 03:26 PM
#67
Thanks, its been fun learning to put new skills to work. I have gone from bolt on mentality to trying to create my own parts where it is possible. Not sure if I will leave it raw alu polish or paint.
The loom is good stuff, raychem dr-25 which is mil-spec and used in most race cars. I am starting to spend a bit more money in the wiring since it is so important for the reliability and a PITA to troubleshoot. Next reliability upgrade will be going to hard lines.
The loom is good stuff, raychem dr-25 which is mil-spec and used in most race cars. I am starting to spend a bit more money in the wiring since it is so important for the reliability and a PITA to troubleshoot. Next reliability upgrade will be going to hard lines.
 10-22-14, 08:47 PM
#69
Mini update. No wiring just more cutting and bending metal. Im spending more time in the boot than I expected. Lost the weekend to work, and lost my buddies to work too. Why does real life get in the way of the important stuff. New radiator brackets made and a mount for the aux injection tank. 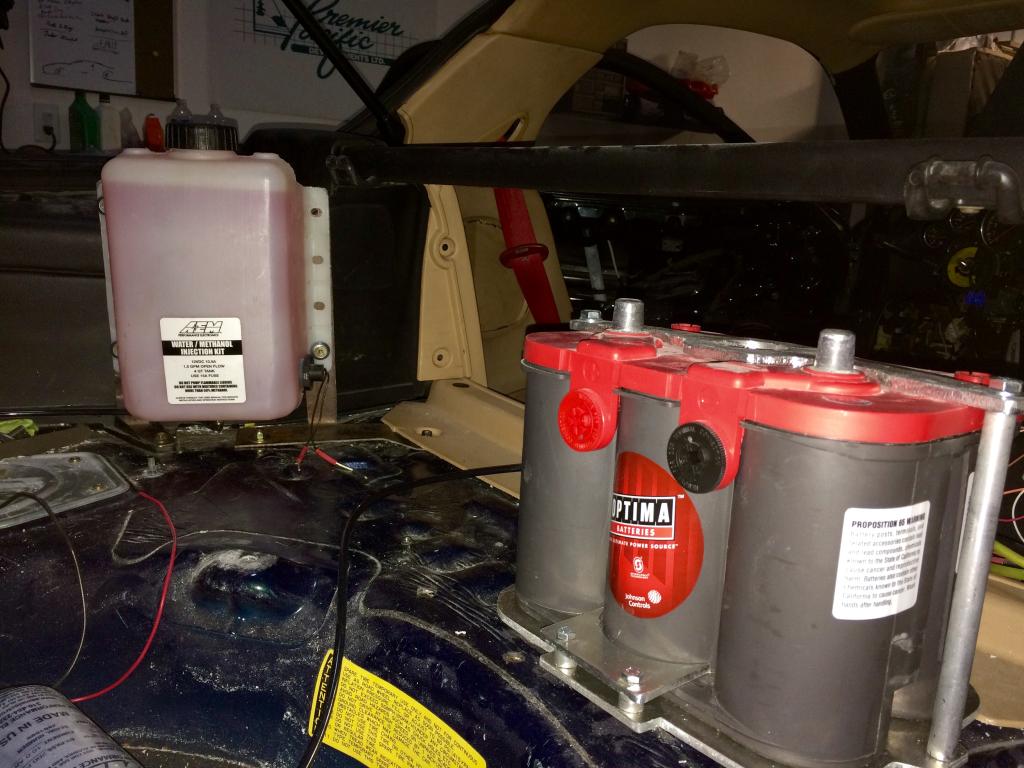
11-04-14, 05:22 PM
#70
My weekend certainly got screwed up. I went from a full day in the shop on Saturday to a full day dealing with a flooded apartment. All my floors need to be replaced as well as a piece of wall and kitchen cabinets. Water came from the main pipe through a faulty back flow preventer valve and up and over my sink. I was scooping black water from the kitchen sink draining it in the toilet, at some point I just had to give up. The building manager eventually called the plumber and then the restoration guy. I will likely have to spend this coming weekend moving all my stuff so they can replace the bedroom carpet and living room. I am going stir-crazy not able to get much done, so I have been skipping lunch the last couple days to keep things moving.
Layout for the trunk is finally done. Still need to bolt up the panel, mount the amp on the black panel and install the AI pump on the aluminum braces. At some point I will have to do the finish work, although I will try and pawn that off to a helper bee like my friend Jeremy with a beer bribe.

I also have the Cooling plate installed save one more bracket needing to be cut. Everything needs finishing but at least its functional.

Layout for the trunk is finally done. Still need to bolt up the panel, mount the amp on the black panel and install the AI pump on the aluminum braces. At some point I will have to do the finish work, although I will try and pawn that off to a helper bee like my friend Jeremy with a beer bribe.
I also have the Cooling plate installed save one more bracket needing to be cut. Everything needs finishing but at least its functional.
 11-25-14, 04:39 PM
#72
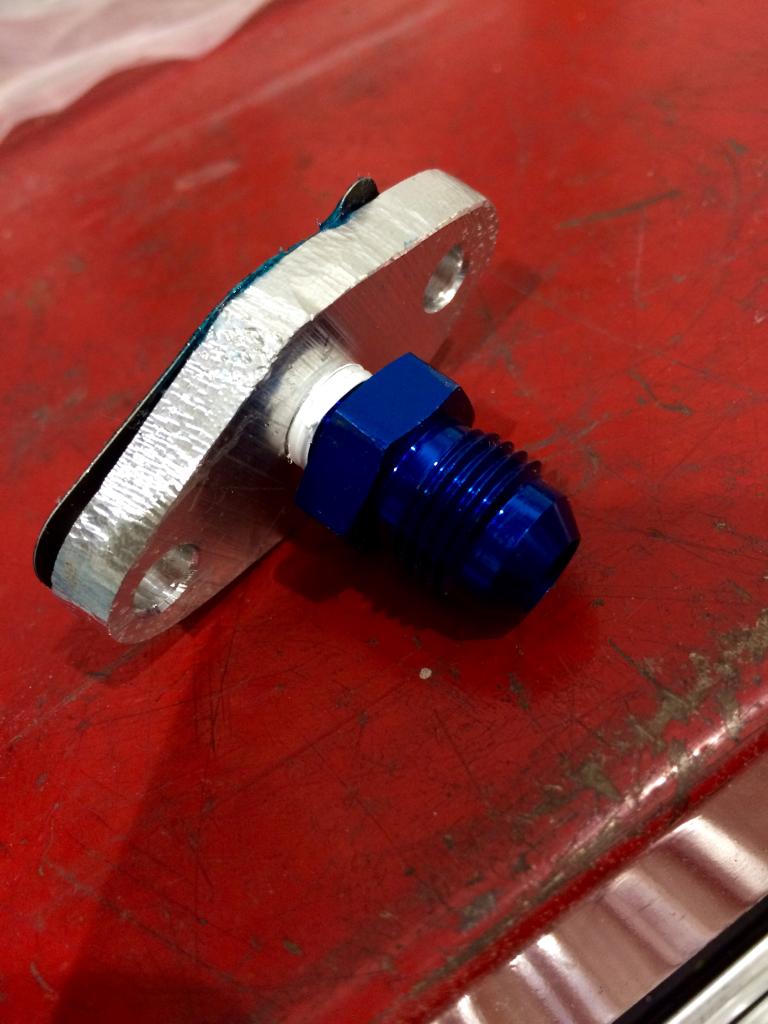
Not being able to live in my apartment has been a bit of a blessing as of late. The commute from the office to home has gotten significantly shorter for me, my wife on the other hand has to drive with traffic. This means I get time to sneak down to the shop at the office and tinker. Lots of little things have been done, or imortantly re-done to function better. I was able to move the FPR over by about 3cm which let me run a cleaner fuel setup. Importantly moving lines away from the heat sources. (Not shown in the following photos.)
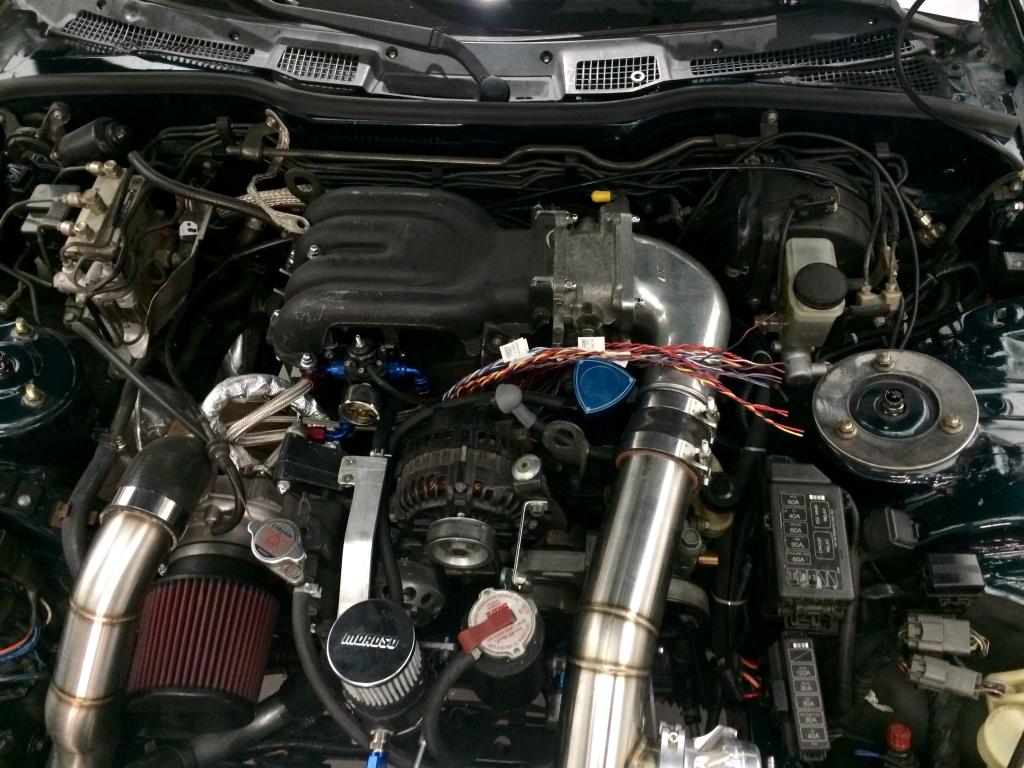
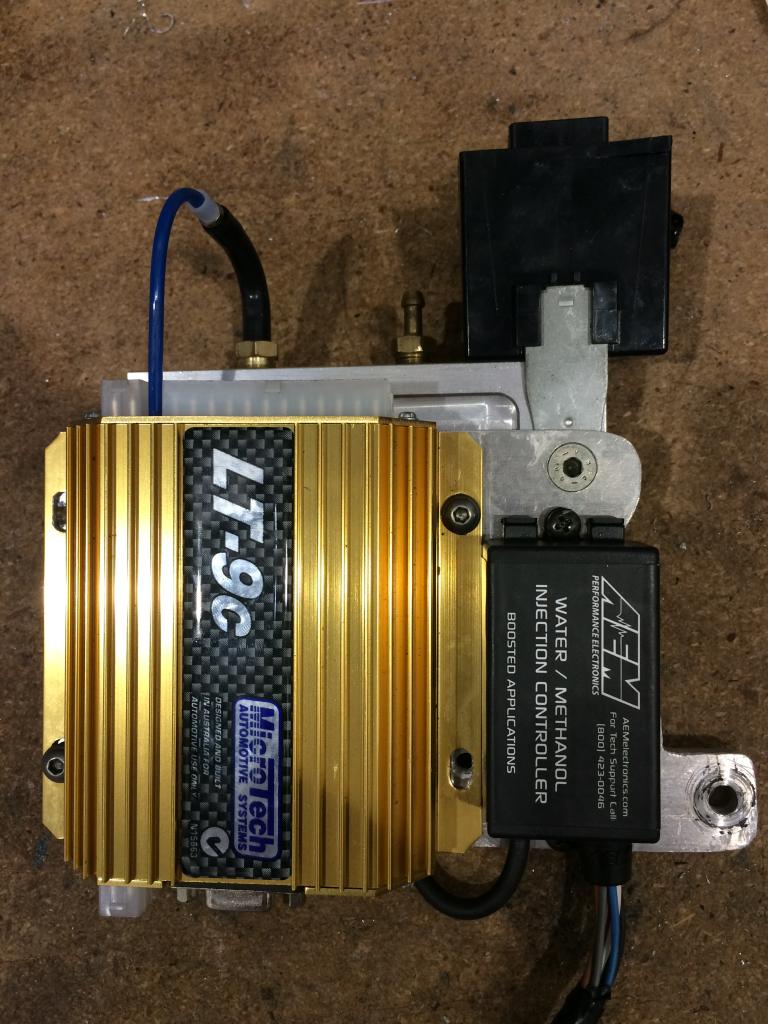
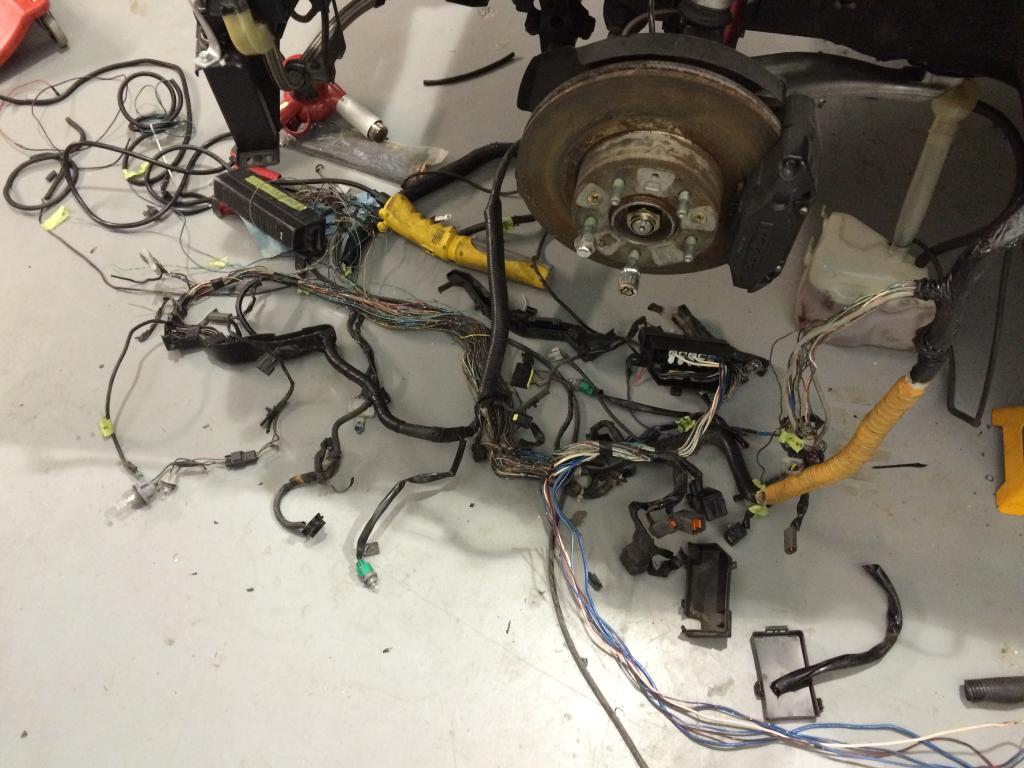
Spent way to much time making a vacuum manifold (pictured behind the ECU.) I only want to run 1 vacuum line into the cockpit and I didn't want to use plastic T's. Instead I waisted 2 hours of my life drilling, taping, grinding and cutting up a perfectly good piece that no one will ever see. The good news is I can just use one of the NPT ports for any gauges that would need a reference. Right now it is used for Aux injection and Map reference for ECU.
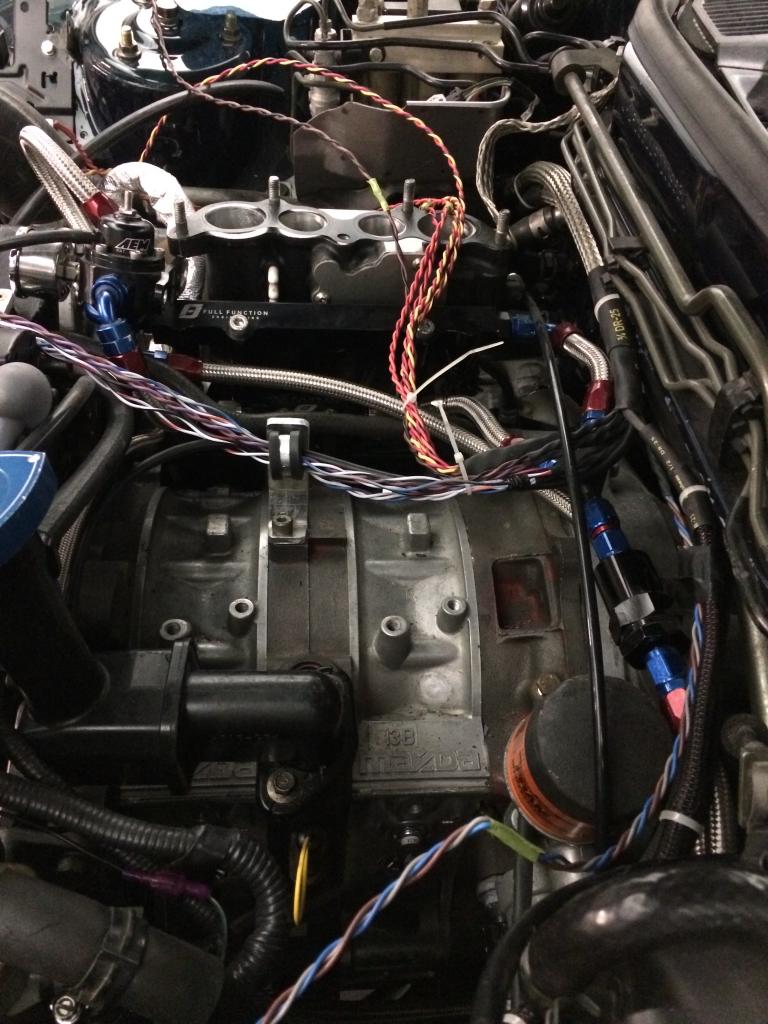
I have the engine harness plotted out. Waiting on the genius to have a moment to work his magic, or patience wears out and I just do it myself. He is better than I, but Ive been staring at it for months and figure I could do a pretty good job. I am lacking the professional crimping tools, my $30 set doesn't really compare to a proper set of Ideal crimpers.
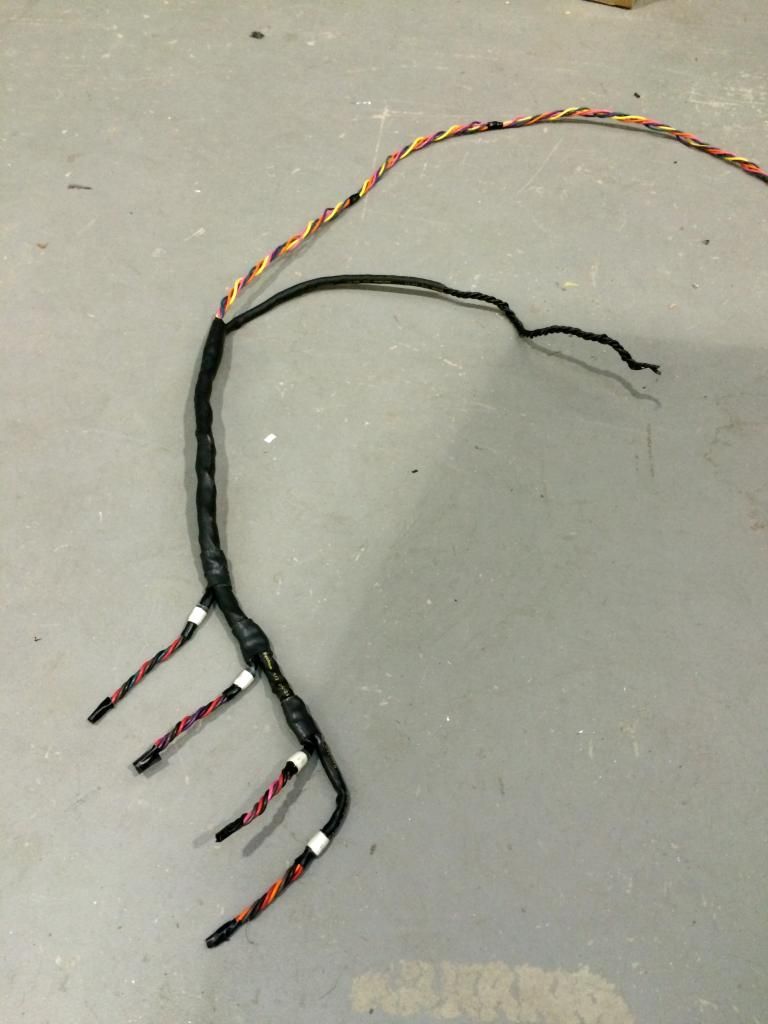
Got the ignition coil harness well under way. I will need to cut to length the ground and chassis end and add connectors yet.
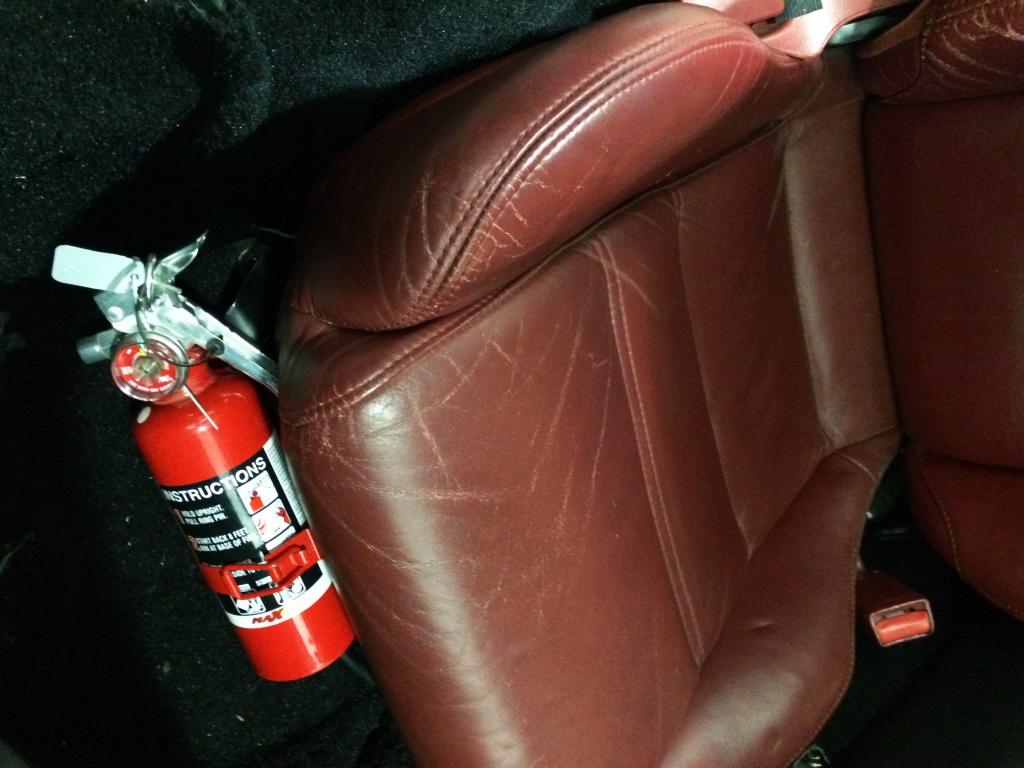
Decided to throw in the a fire extinguisher for good measure, fab'ed up this bracket. I think Banzai racing makes a kit but I had this extinguisher lying around as well as the steel.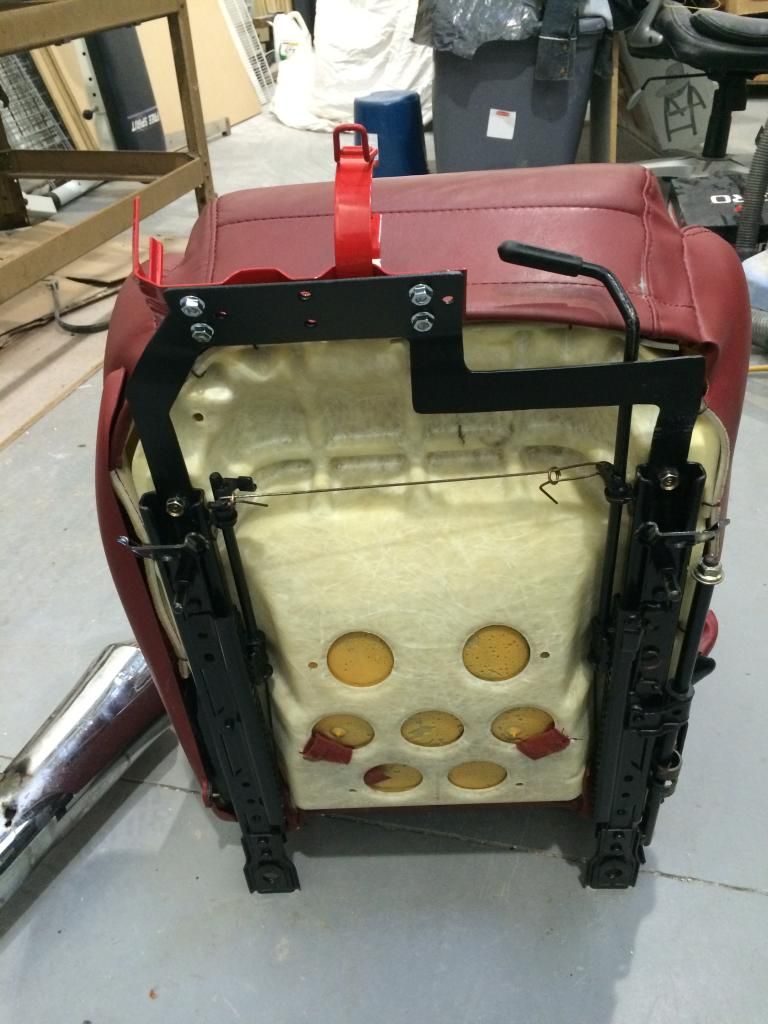
Spent way to much time making a vacuum manifold (pictured behind the ECU.) I only want to run 1 vacuum line into the cockpit and I didn't want to use plastic T's. Instead I waisted 2 hours of my life drilling, taping, grinding and cutting up a perfectly good piece that no one will ever see. The good news is I can just use one of the NPT ports for any gauges that would need a reference. Right now it is used for Aux injection and Map reference for ECU.
I have the engine harness plotted out. Waiting on the genius to have a moment to work his magic, or patience wears out and I just do it myself. He is better than I, but Ive been staring at it for months and figure I could do a pretty good job. I am lacking the professional crimping tools, my $30 set doesn't really compare to a proper set of Ideal crimpers.
Got the ignition coil harness well under way. I will need to cut to length the ground and chassis end and add connectors yet.
Decided to throw in the a fire extinguisher for good measure, fab'ed up this bracket. I think Banzai racing makes a kit but I had this extinguisher lying around as well as the steel.
11-28-14, 04:45 PM
#74
more pics of the wiring!
i generally like to leave a little more slack than you seem to have left. i'm curious to see how it turns out.
where did you purchase that DR-25 BTW? i like the way you're doing things --it's keeping me coming back to check for updates. haha.
i generally like to leave a little more slack than you seem to have left. i'm curious to see how it turns out.
where did you purchase that DR-25 BTW? i like the way you're doing things --it's keeping me coming back to check for updates. haha.
11-30-14, 09:37 AM
#75
Thanks 4g63rotary. It's kind of fun because I can see the progression of my skills as I go along. That's the best part of building anything, walking away with new abilities. Between my cafe racer and the rx7 I can now create composite parts and aluminum. My understanding of wiring has greatly expanded as well.
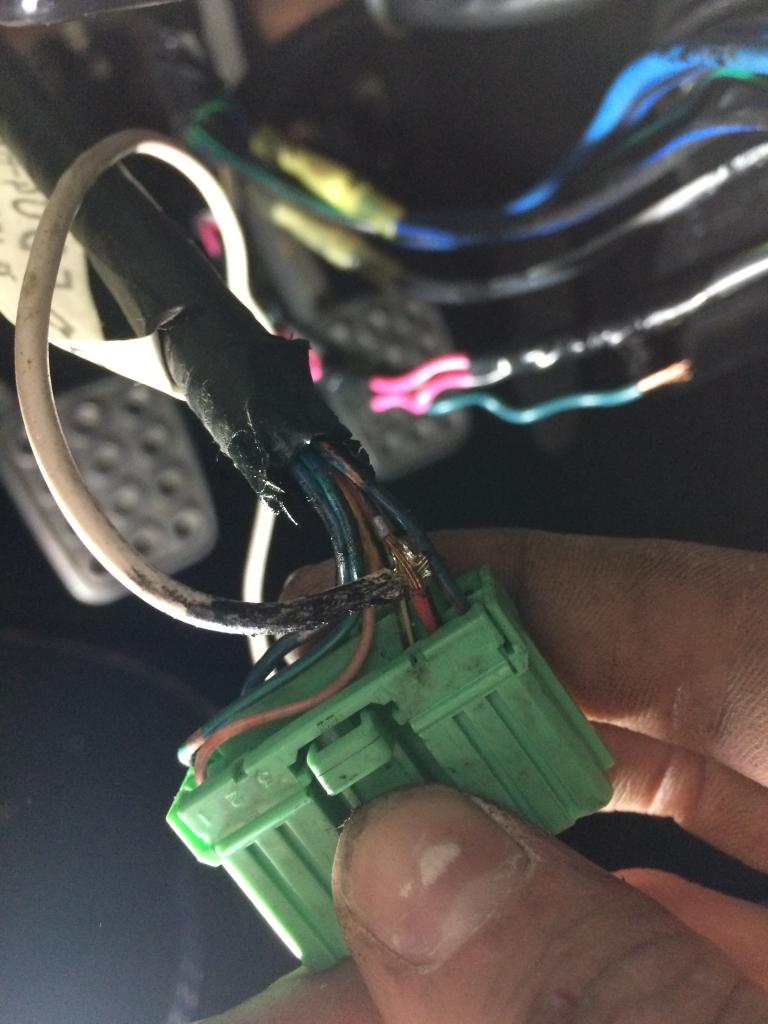
Jacobcartmill, as you requested see the mess below ☺️. I assume your referring to the cool ends when you say they are short. I am attempting to keep the wire close to the coil because the sit close to the steering shaft I am a bit on the nervous side to see if that works out. On the engine harness I really want to eliminate as much excess length as I can because I believe I created a clean path for the wires. I figure it may help a bit with heat soak. The fuel lines have also been re-routed for that reason.
Anyways here is the far less exciting reworking of the existing front body harness. I wanted to tackle the engine harness, but a few relays including the fan and fuel pump where going to be a bit Micky mouse if I didn't relocate them to beside the brake booster. I also didn't want to leave redundant relays in the engine bay. Instead I spent my day siting on a concrete floor doing this.
Here we have remnants of the last owners handy work. I should have snapped a photo of the melted Clifford alarm system, my wiring friend had never seen anything like it.
Here is the start of the new relay setup. I will be making a box to house that, a quick disconnect for the ignition coils and a blue seas fuse block.

