Kilo Racing 3 Rotor FD Conversion


I hope so Rich. Even if volts are dropping today on my test drive, I think the car is okay to drive as I know it isn't eating up alternators now.
My dilemma now is I am my mother-in-law's "patient advocate" and I have spent a lot of time over at the Mayo Clinic the past several weeks helping her through the process of dealing with some significant issues. We met with the cardiology group on Thursday and got less than good news so this is leading to two weeks of intensive testing and I am having a lot of guilt now for not being there for her if I go. My wife has cleared me to go but I would think my father-in-law is now out. I have another buddy that said he wanted to go but we shall see. I prepped the SUV for the trip so I am ready for the most part but I have to see how things pan out over the next few days.
My dilemma now is I am my mother-in-law's "patient advocate" and I have spent a lot of time over at the Mayo Clinic the past several weeks helping her through the process of dealing with some significant issues. We met with the cardiology group on Thursday and got less than good news so this is leading to two weeks of intensive testing and I am having a lot of guilt now for not being there for her if I go. My wife has cleared me to go but I would think my father-in-law is now out. I have another buddy that said he wanted to go but we shall see. I prepped the SUV for the trip so I am ready for the most part but I have to see how things pan out over the next few days.
is at a stable 12.8 but sometimes it hits lower 12's.. ill have to take pics and show u so you can understand what i did but is very simple.
how are you getting the FD there?
i would like to go but i dont want to drive by my self or have a suv to haul a car port
how are you getting the FD there?
i would like to go but i dont want to drive by my self or have a suv to haul a car port

Joined: Mar 2001
Posts: 30,814
Likes: 655
From: FL-->NJ/NYC again!
I sent you the email, you didn't get it? PM me later

Sure thing. You certainly could make your own grounds out of 8 gauge wire. The Hyper kit cost about $115 and I would think you could duplicate it for about $50 or so. It's a very high quality kit though and I knew reviews were good on it, so I spent the extra $$. I got the kit with the "smoke" color to complement my black stealth engine bay
Okay, the voltage is still low. With no accessories on, at idle it's in the 13.4 range which is good. With AC on though, it drops to 12.8 and then when the fans kick on, it's 12.0. Bummer.
So I know amps are now good, but am perplexed with the low volts. At 2,000 RPMs, it's 12.8 with the fans and AC on, and at 3,000 RPMs, above 13.
So I know amps are now good, but am perplexed with the low volts. At 2,000 RPMs, it's 12.8 with the fans and AC on, and at 3,000 RPMs, above 13.
I know I don't spend much time at idle, but won't this cause the battery to go dead over time?
Anyway, how about telling me what you did to lower your temps?
Glug Glug Glug Burp
Joined: Jan 2002
Posts: 3,819
Likes: 0
From: Scott AFB, IL
Sorry if it's been asked previously David, but is your alternator underdriven? My FD at idle would actually trip the battery light and interior lights would dim when I had a GReddy underdrive pully on the alternator. Idle was about 750 or so. Revved up it would clear and all was normal...
I also experienced the poor grounding after engine bay paint. Symptoms were far different, but cleaning up grounds (and adding one) corrected it.
Beautiful car.
I also experienced the poor grounding after engine bay paint. Symptoms were far different, but cleaning up grounds (and adding one) corrected it.
Beautiful car.
Have room in the SUV if this is of interest to you.
Okay so I tested voltage at both the battery and at the alternator to ensure there is no drop between the two. There isn't so that's good and checked off.
At idle the car is putting out 14.25 - 14.5 volts at the alternator. I see this building back at the battery as it is a bit low now from all of the work, starting at 13.6 and building to 14.5 over a minute or so. This might also be normal.
When the fans come on the car, volts drop at both the battery and the alternator to 13.4 or so and when the AC comes on, down to 12.4. I know when driving this goes down to 12.0 and I am assuming it's at both the alternator and at the battery.
The fans pull a little under 20 amps as this was tested by the shop. Any thoughts or ideas here? I will leave it to the shop tomorrow and will have two options for them:
- Find the voltage drain issue. I know the fans and the AC are dragging the alt down to this level and I also know there is no voltage drop between the alt and the battery so I am not sure where to go on this. Maybe the fans are wired wrong and pulling too many volts? But I know the amps they pull are within range so I don't think this is an issue. The AC is a problem? Maybe wiring is off somewhere?
- Spin up the alternator to achieve higher volts at idle. I can do this with a smaller pulley, or smaller 20B main pulleys or both. But am I causing a problem by doing this? I know this spins the alt faster throughout the RPM band but I would think this would be okay as I am using know parts and not anything crazy?
Remember, at 2,000 RPMs things go back to normal on the car so maybe the solution is to spin up the alt more at idle.
Thoughts? Ideas?
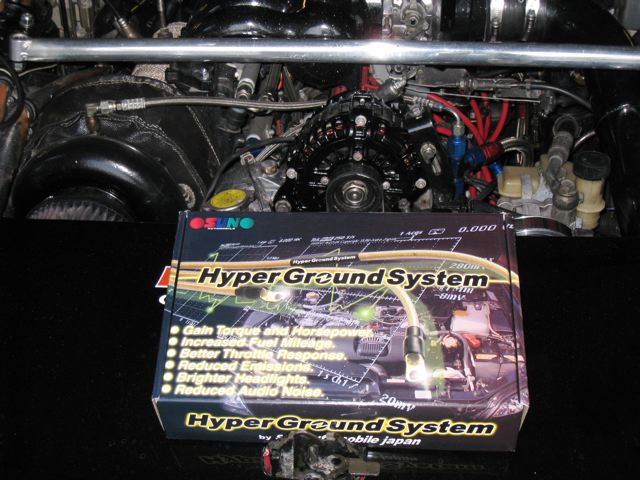
Hyper Ground System by Sun Automotive
I have been asked to post up some pics of my Hyper Ground System and where I ran the ground cables. As background, I installed the Hyper Ground System and reduced my amps at idle from 45 to 22. That's a lot of bad grounding going on and if you reviewed the grounds on my car, they were new and looked to be in good shape.
We pretty much followed the write up and pics Damien Della Huerta posted a while ago:

The kit I purchased was very high quality. It's from Sun Automotive and will set you back a little over $100. The wire is all braided copper. I am sure you can make your own kit for less but I'm lazy and this was a good way to go:
Here is a pic of one of the cables. To me, it seems much thicker than 8 gauge wire, closer to 4/6 gauge. Because I have relocated my battery to the back bin, I'm cutting this one in half and using it to run two grounds from the exhaust system to the chassis, one from the downpipe and one from the midpipe. It's probably overkill but it can't hurt.

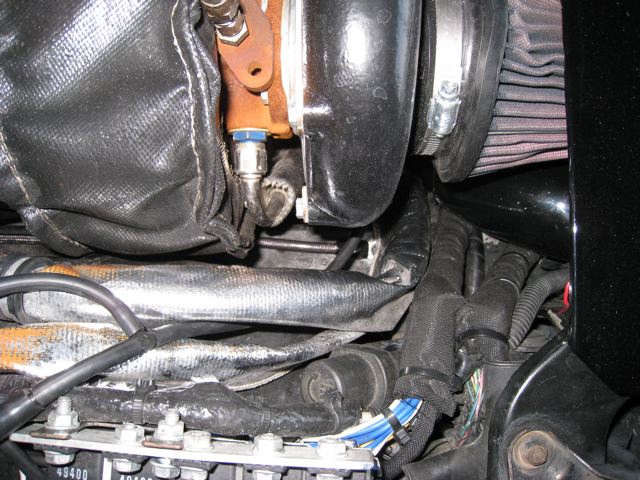
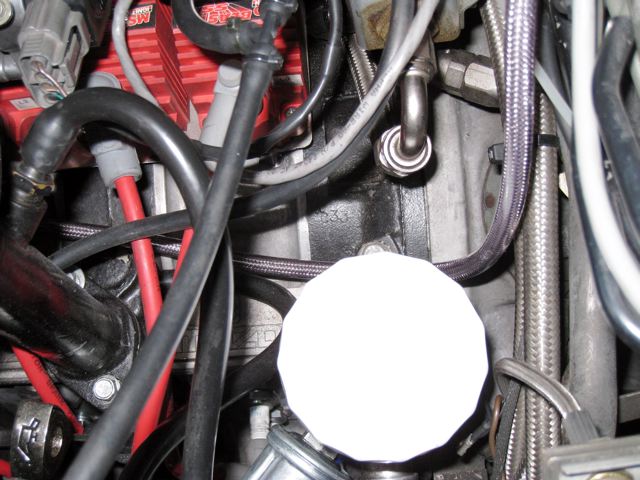
My first ground, from the UIM to the chassis of the car under my turbo. The bolt and washer of the UIM had nicely removed the powder coating from the UIM so the contact is good. UIM attachment:

To the chassis under the turbo. Look right above the bend in the heat shield for the top AC line:
We pretty much followed the write up and pics Damien Della Huerta posted a while ago:
The kit I purchased was very high quality. It's from Sun Automotive and will set you back a little over $100. The wire is all braided copper. I am sure you can make your own kit for less but I'm lazy and this was a good way to go:
Here is a pic of one of the cables. To me, it seems much thicker than 8 gauge wire, closer to 4/6 gauge. Because I have relocated my battery to the back bin, I'm cutting this one in half and using it to run two grounds from the exhaust system to the chassis, one from the downpipe and one from the midpipe. It's probably overkill but it can't hurt.
My first ground, from the UIM to the chassis of the car under my turbo. The bolt and washer of the UIM had nicely removed the powder coating from the UIM so the contact is good. UIM attachment:
To the chassis under the turbo. Look right above the bend in the heat shield for the top AC line:
Hyper Ground System by Sun Automotive
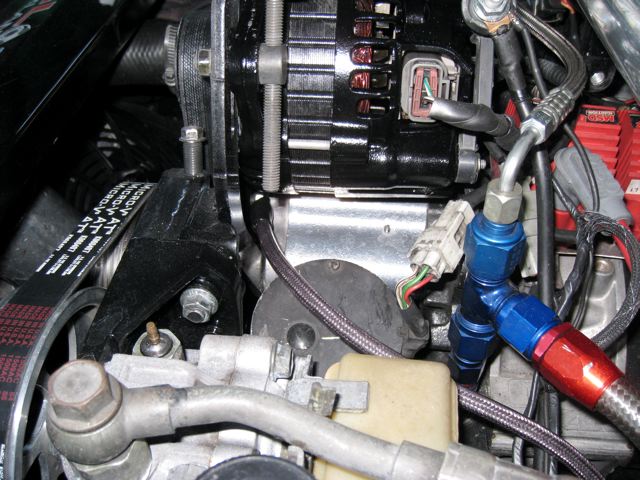
Second ground goes from the left side of the firewall, looking into the engine bay, to the right side of the engine.
Look on the left of the firewall, this is the beginning of this ground:
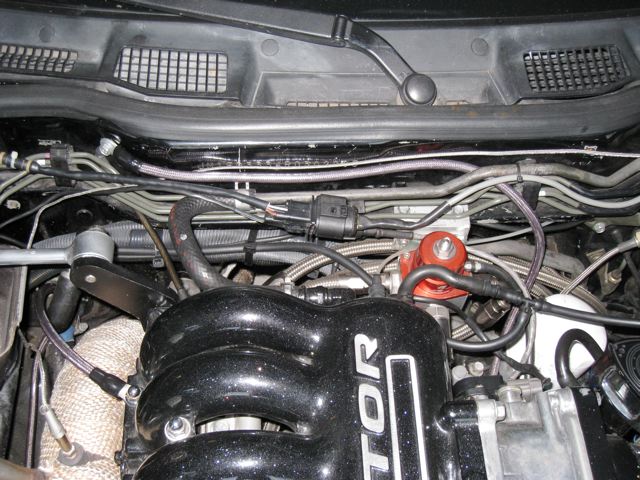
Around the right side of the firewall and down to the right side of the engine block:
To the engine block:
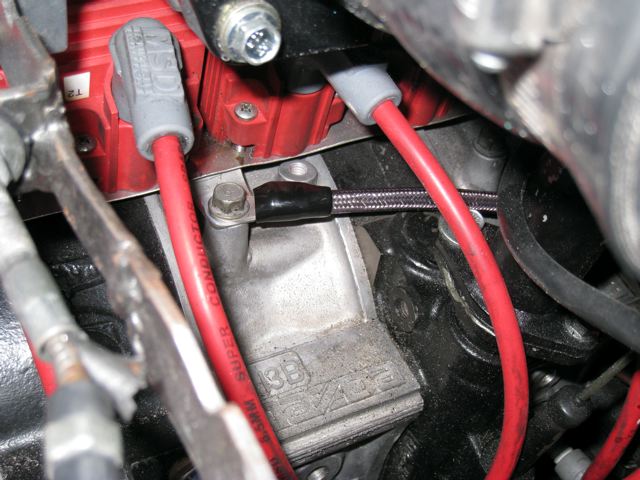
Third ground runs from the base of the front plate under the alternator to the ground point under the main fuse box on the right side of the engine bay. Front plate attachment:
To under the main fuse box. The blacked out intercooler piping gets in the way but you get the picture:

Look on the left of the firewall, this is the beginning of this ground:
Around the right side of the firewall and down to the right side of the engine block:
To the engine block:
Third ground runs from the base of the front plate under the alternator to the ground point under the main fuse box on the right side of the engine bay. Front plate attachment:
To under the main fuse box. The blacked out intercooler piping gets in the way but you get the picture:
Hyper Ground System by Sun Automotive
As I have a relocated battery, we used the fourth cable to ground from the negative battery cable to the frame of the car, right under the battery holder. There is a nice bolt there that works well. Conversely, you could run from the negative battery ground to the passenger seat belt bolt:
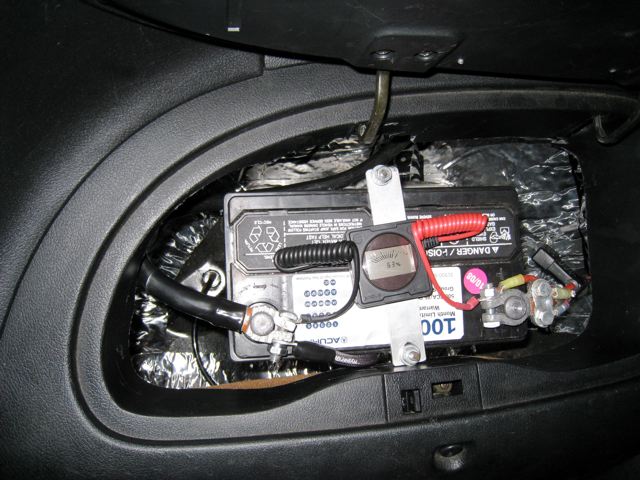
Note the extremely thick battery cable:

FYI - the electronics on the battery is a "battery bug" which can be purchased at O'Rielly's, Autozone, etc. It monitors and displays the health of the charging system and is the reason I knew I had an issue. Also beeps at you if the system is facing imminent failure and gives you a 30 minute warning so you can haul butt to an automotive shop.
Note the extremely thick battery cable:
FYI - the electronics on the battery is a "battery bug" which can be purchased at O'Rielly's, Autozone, etc. It monitors and displays the health of the charging system and is the reason I knew I had an issue. Also beeps at you if the system is facing imminent failure and gives you a 30 minute warning so you can haul butt to an automotive shop.
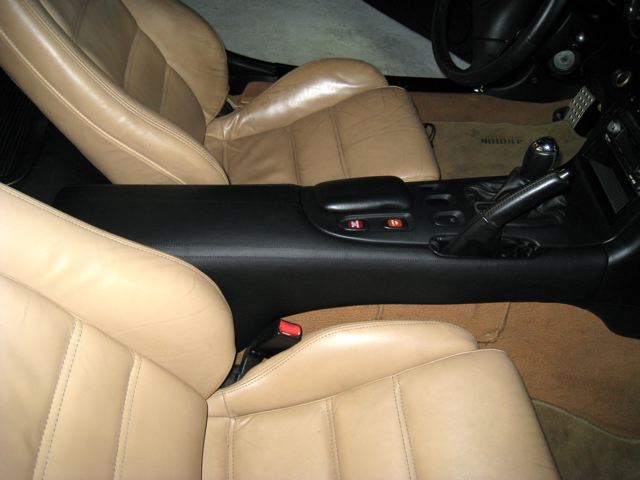
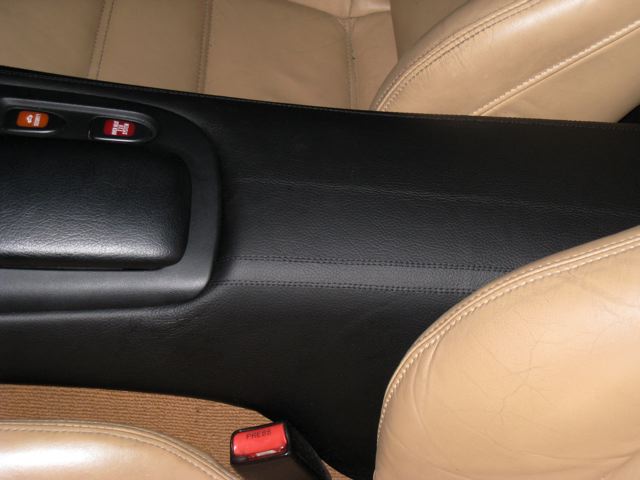
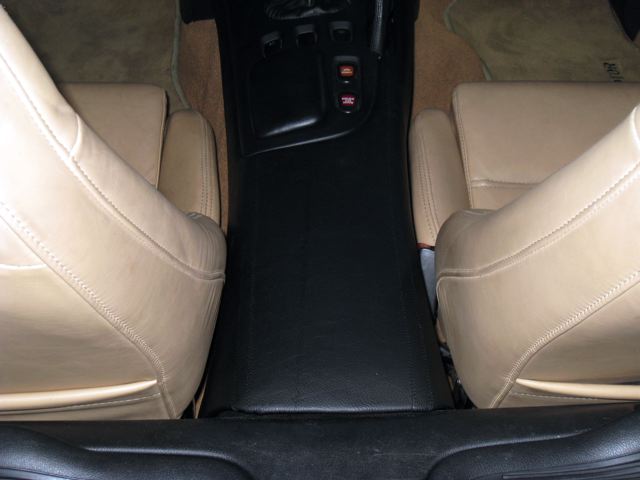
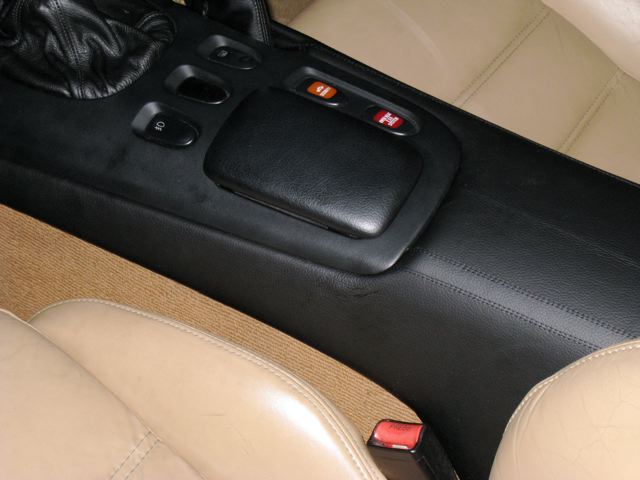
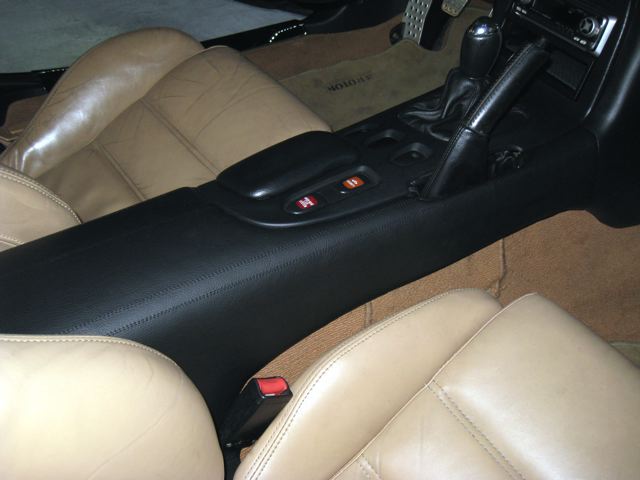
Reline Goods Leather Center Console
So I finally got around to installing my Reline Goods leather center console cover. I am extremely happy with the way it turned out and the quality of the piece. I have previously installed the Redline leather boot so I expected good quality.
An after teaser shot:
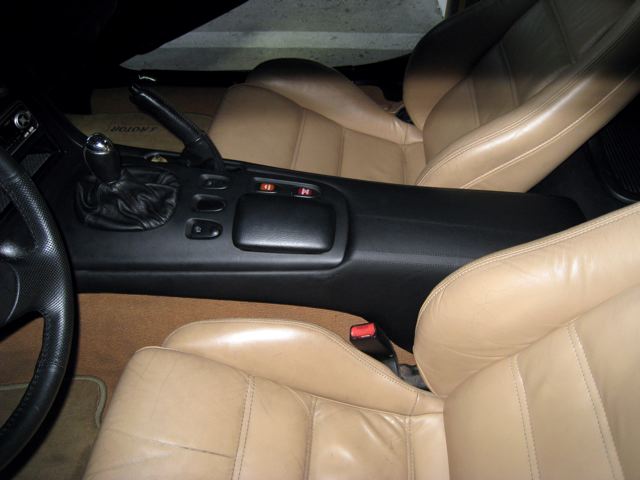
Installation was actually much easier than I expected. Previously read a thread by someone else who did the install and I was expecting it to be much harder. Time for total install: 1.5 hours, including removing the console, recovering the piece, and reinstallation.
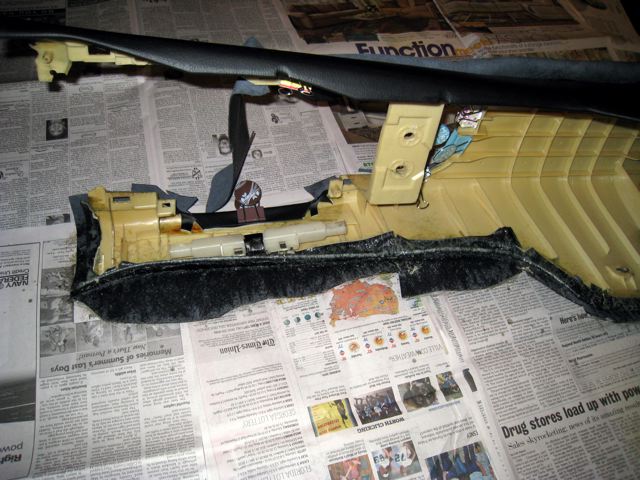
Taking off the console is a no brainer and I'll skip that part. Remove a few screws, unclip a few wires and it's out.
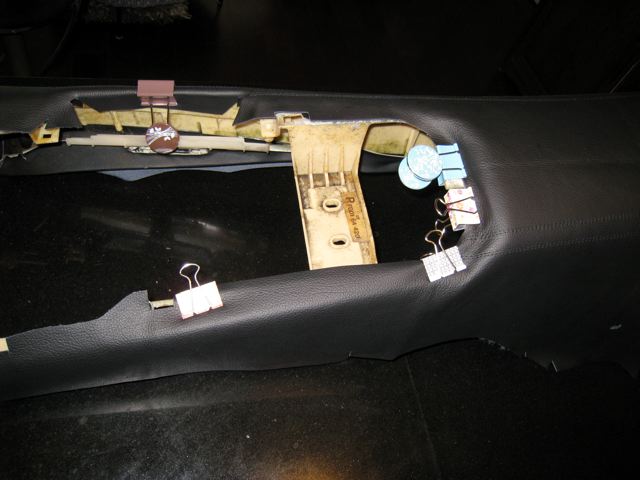
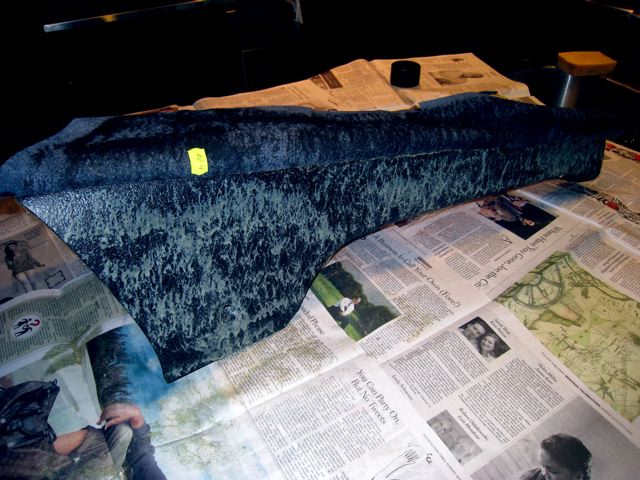
My wife lent a second set of hands, making the project much easier. We first laid out the new leather cover over the console and lined up the seams on each side:
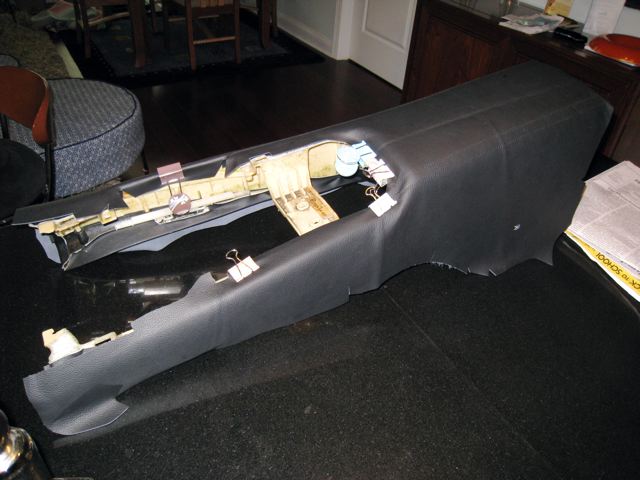
After ensuring the seams were in the position we wanted, we then clipped the leather cover in place with large paper clips as seen here:
An after teaser shot:
Installation was actually much easier than I expected. Previously read a thread by someone else who did the install and I was expecting it to be much harder. Time for total install: 1.5 hours, including removing the console, recovering the piece, and reinstallation.
Taking off the console is a no brainer and I'll skip that part. Remove a few screws, unclip a few wires and it's out.
My wife lent a second set of hands, making the project much easier. We first laid out the new leather cover over the console and lined up the seams on each side:
After ensuring the seams were in the position we wanted, we then clipped the leather cover in place with large paper clips as seen here:
Flooded, OEM Acura battery. Yes, I have read about the potential of the battery to emit toxics in the inside of the car and I will most likely swap it out for a dry cell. My previous dry cell Odyssey battery was crap and always died.
Reline Goods Leather Center Console
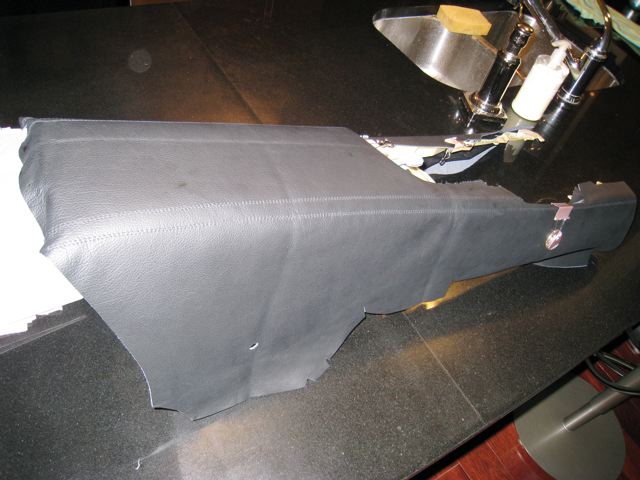
Now comes the fun part, spraying everything down with 3M #80 contact glue. Unlike the previous poster who did this, I chose not to spray everything down at one time, but kept the console clipped down and then sprayed a section at a time, starting with the center top area and working my way down the side, finishing with wrapping the top and front lips of the unit. I would highly recommend this as you only have to worry about a little section at a time. The downside: you have to wait 4 minutes per section to let the glue set. Good tradeoff if you ask me.
Pics:
In the above, I had already sprayed and attached the upper center section. I then sprayed the sides as show above. You spray both the leather as well as the vinyl OEM console. let dry for four minutes and then smooth into place.
[img][/img]
Here is a shot of the lips of the leather sprayed. We wrapped these around the existing lip on the console:
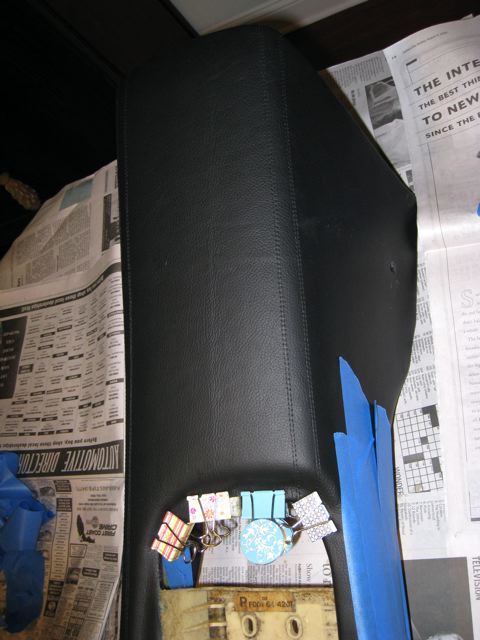
We then finished off the project by wrapping the upper inside lip of the console. Sprayed glue on the back of the leather and the top of the OEM vinyl and used the clips to hold everything in place while it dried:

Removed the clips after it had dried (30 minutes) and it was nice and smooth. Note the tape we used to keep the adhesive off of the front of the leather. Not to worry though as the adhesive is rubbery and comes right off:
Pics:
In the above, I had already sprayed and attached the upper center section. I then sprayed the sides as show above. You spray both the leather as well as the vinyl OEM console. let dry for four minutes and then smooth into place.
[img][/img]
Here is a shot of the lips of the leather sprayed. We wrapped these around the existing lip on the console:
We then finished off the project by wrapping the upper inside lip of the console. Sprayed glue on the back of the leather and the top of the OEM vinyl and used the clips to hold everything in place while it dried:
Removed the clips after it had dried (30 minutes) and it was nice and smooth. Note the tape we used to keep the adhesive off of the front of the leather. Not to worry though as the adhesive is rubbery and comes right off: