
GoodDreams/Nightmares 1994 R2


Thread Starter
Joined: Dec 2011
Posts: 75
Likes: 11
From: Central California
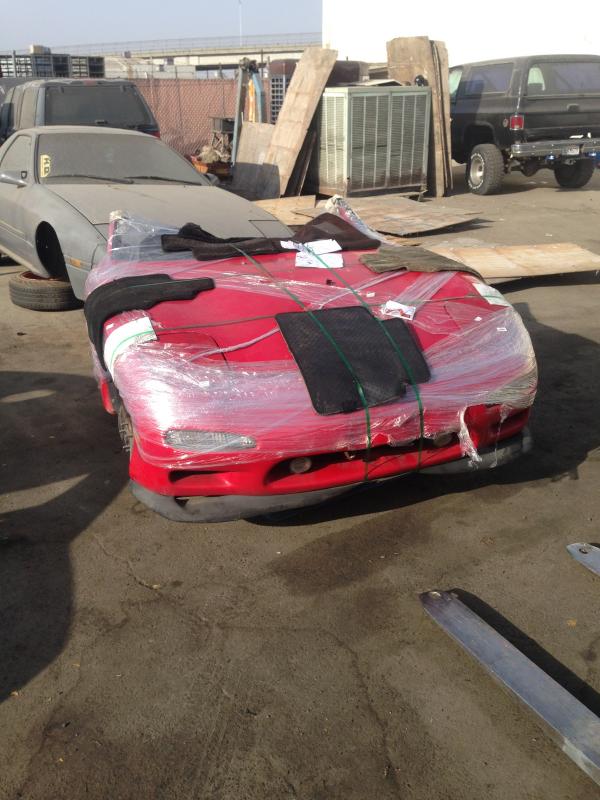
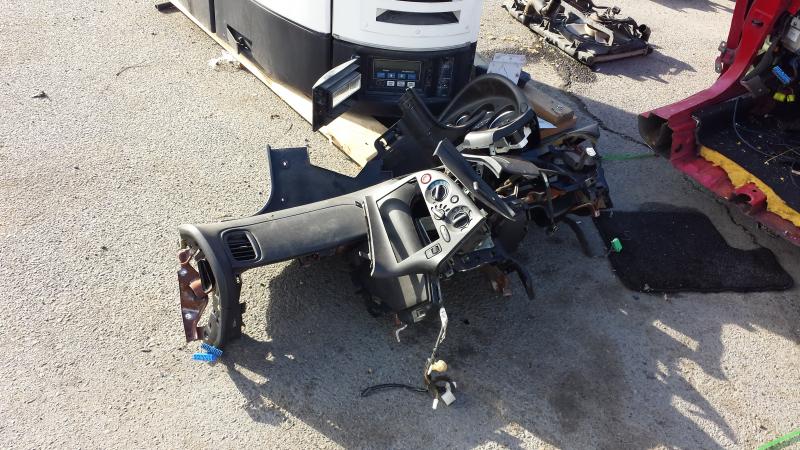
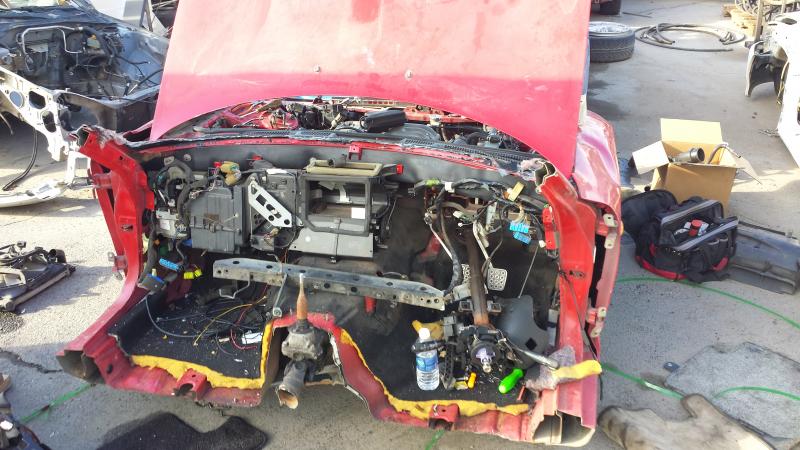
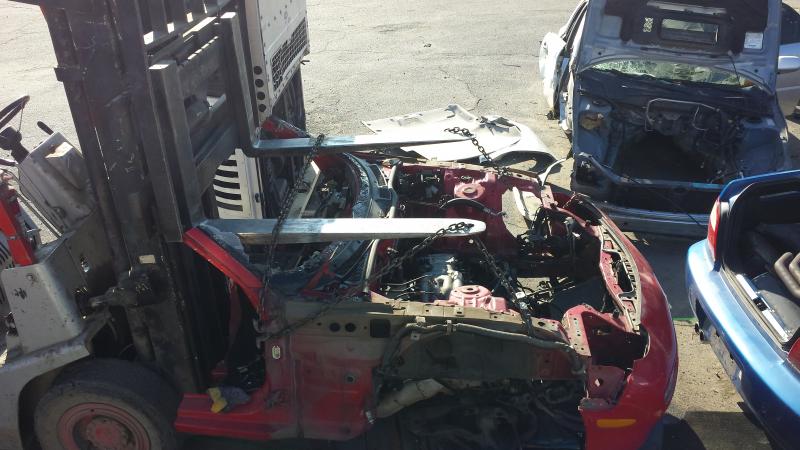
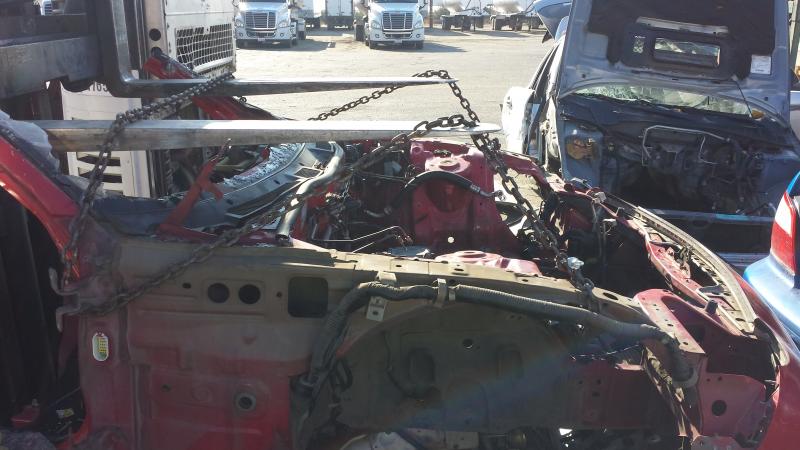
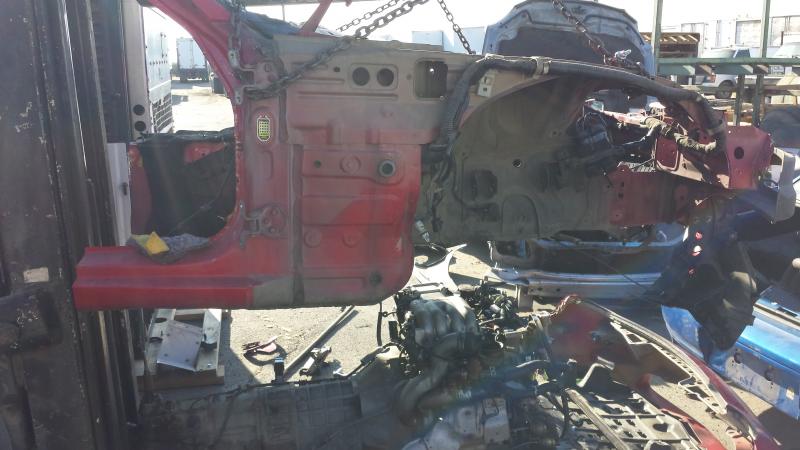
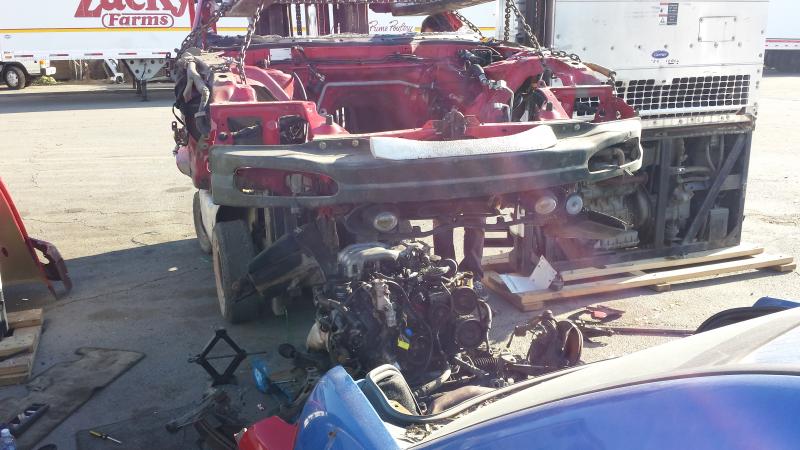
Front clip arrived
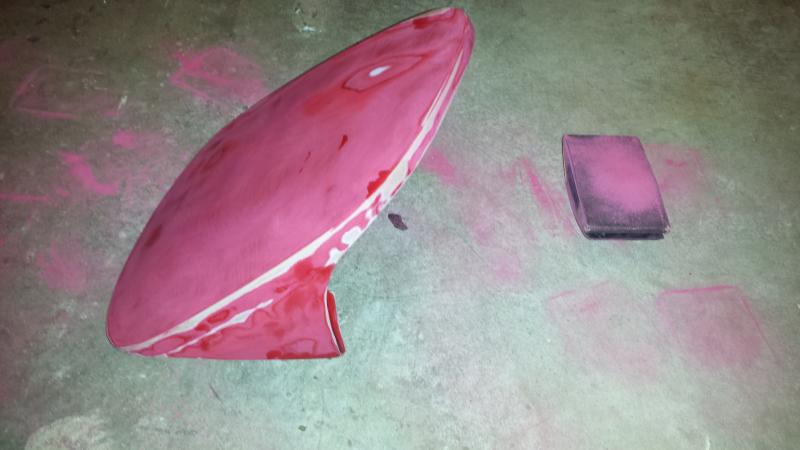
First thing i took was the headlights.
 the paint was from a rattle can mixed by Touchupdirect.com, it was ordered to match Mazda color code PZ but in direct daylight it has a bit more red in it than the factory color.
and then the airbox
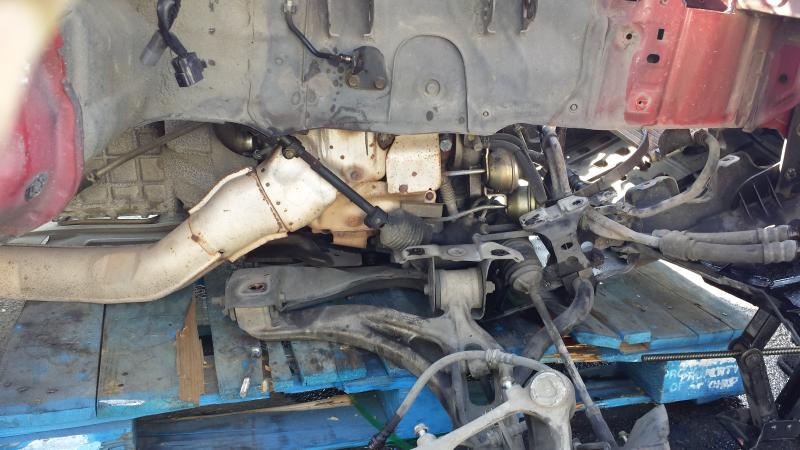
then back to work stripping the clip down

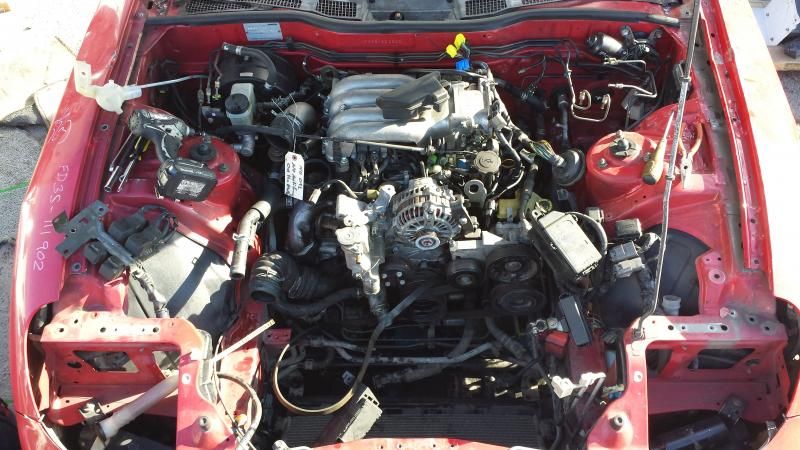
Tomorrow I hope to get the engine and transmission out and compression test.

First thing i took was the headlights.

 the paint was from a rattle can mixed by Touchupdirect.com, it was ordered to match Mazda color code PZ but in direct daylight it has a bit more red in it than the factory color.
and then the airbox

then back to work stripping the clip down


Tomorrow I hope to get the engine and transmission out and compression test.
Thread Starter
Joined: Dec 2011
Posts: 75
Likes: 11
From: Central California
It was one of the first things i checked when i looked at the car before buying it. they were a little harsh but after a mild cleaning and re greasing they feel really good.

Thread Starter
Joined: Dec 2011
Posts: 75
Likes: 11
From: Central California
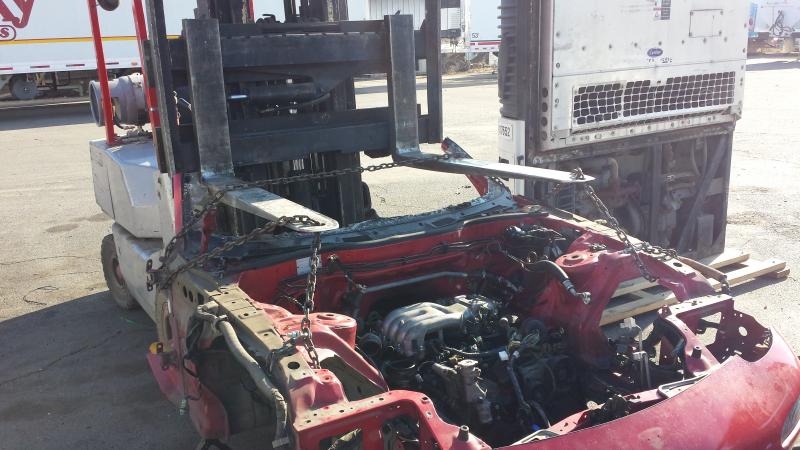
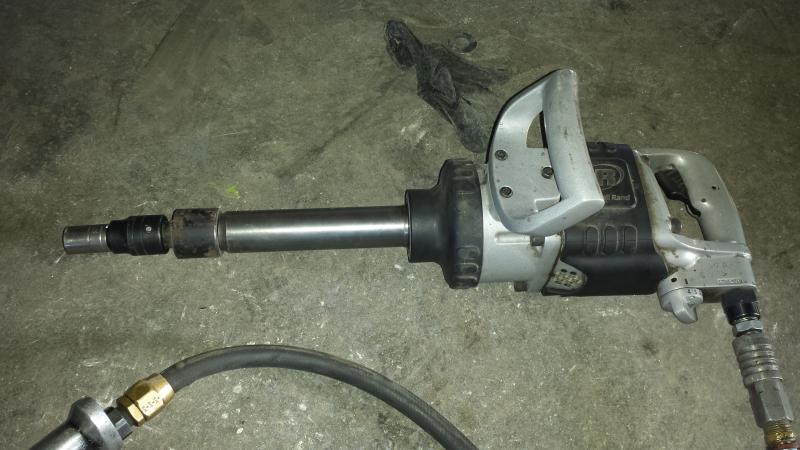
Did a front end conversion on my forklift today, let me know what you guys think.
I might still go with S15 headlights for more JDM cred.

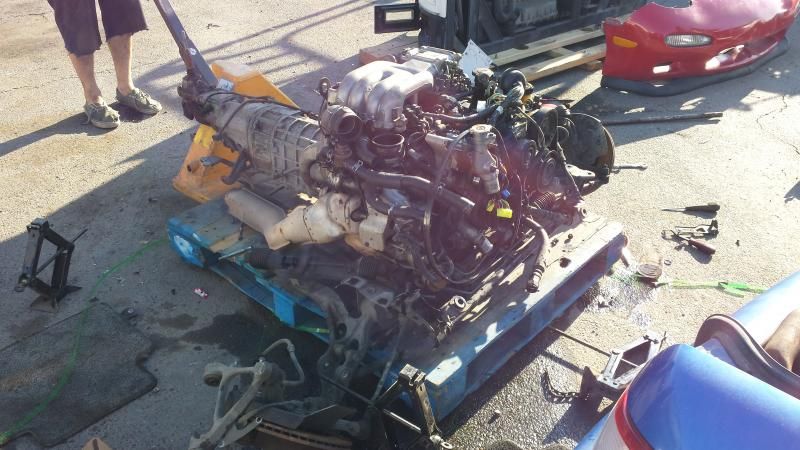
some pics from the engine removal part 1
I might still go with S15 headlights for more JDM cred.


some pics from the engine removal part 1


Thread Starter
Joined: Dec 2011
Posts: 75
Likes: 11
From: Central California
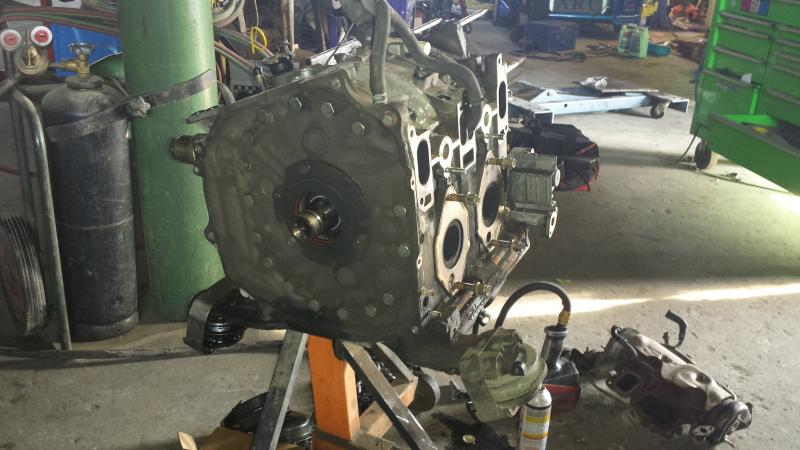
motor has been separated from the PPF
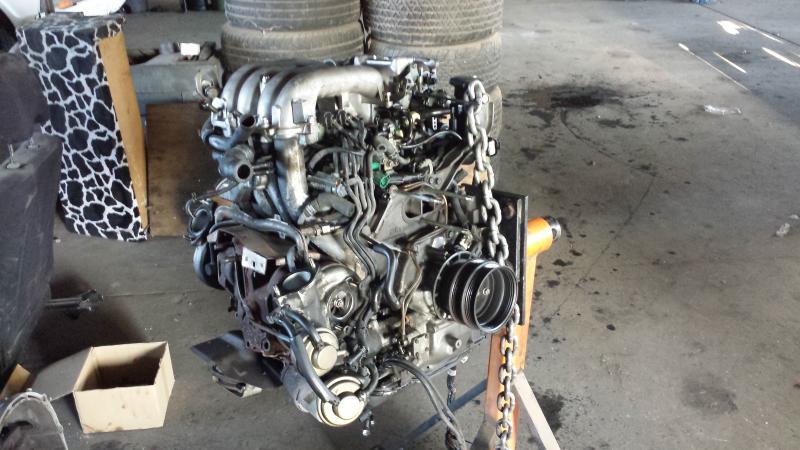
Then stripped down
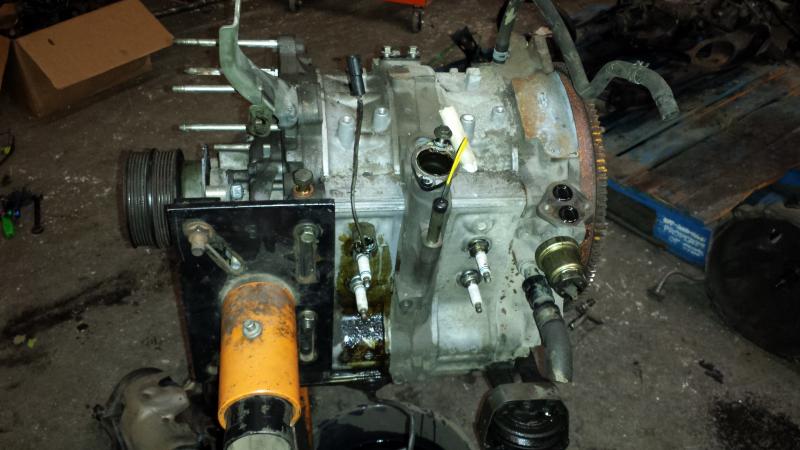
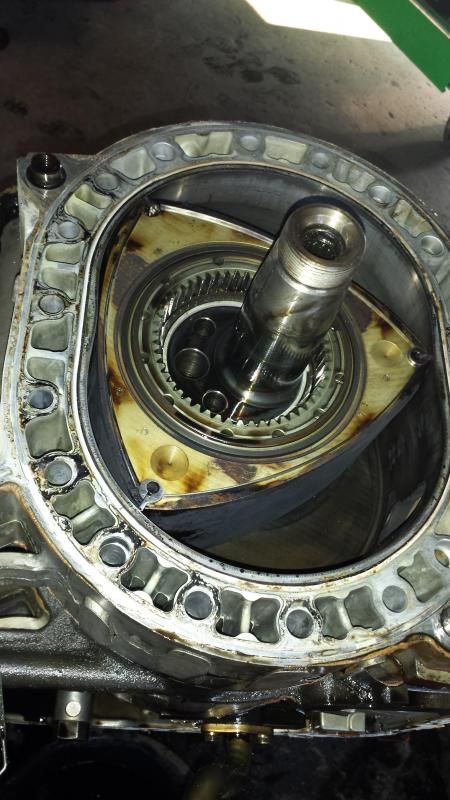
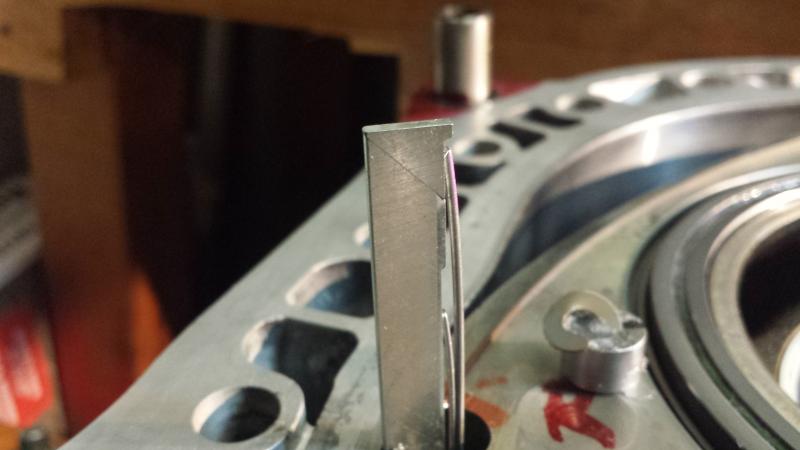
then I took a peak into the rotor housing to see what the problem was.
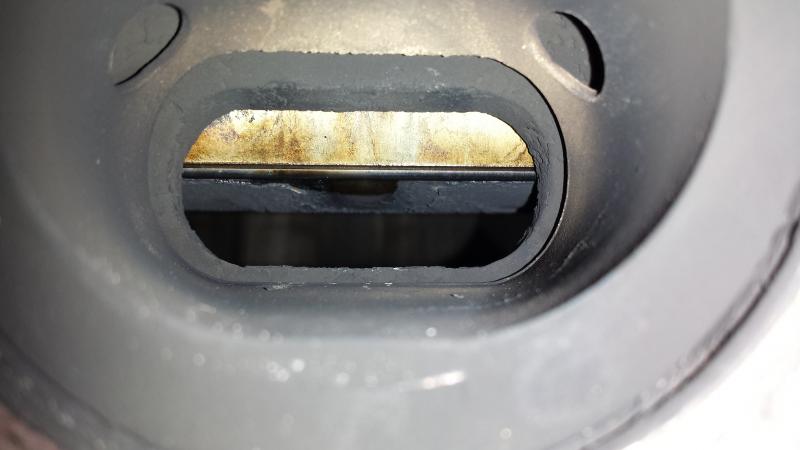
^ this is the good rotor with three apex seals that have spring tension and makes compression
The other one... not so much. two apex seals were MIA
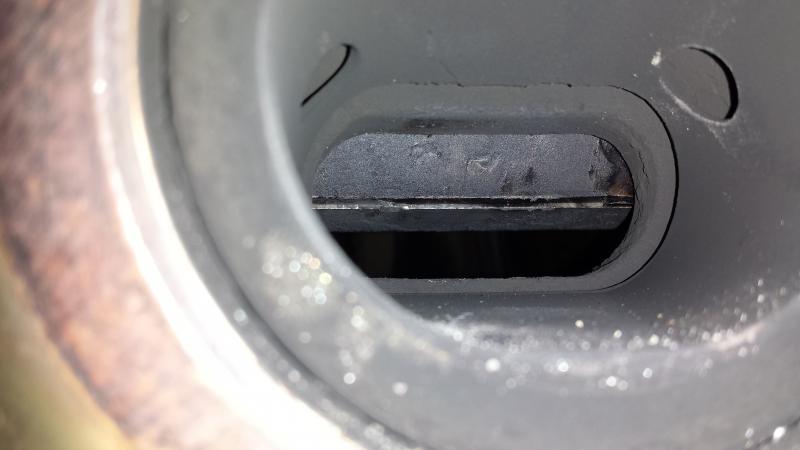
tomorrow I will tear it all down and see if the rotor and housing are salvageable.

Then stripped down

then I took a peak into the rotor housing to see what the problem was.

^ this is the good rotor with three apex seals that have spring tension and makes compression
The other one... not so much. two apex seals were MIA

tomorrow I will tear it all down and see if the rotor and housing are salvageable.
Thread Starter
Joined: Dec 2011
Posts: 75
Likes: 11
From: Central California
wow, Pretty busy for a few days there. Here's what's going on.
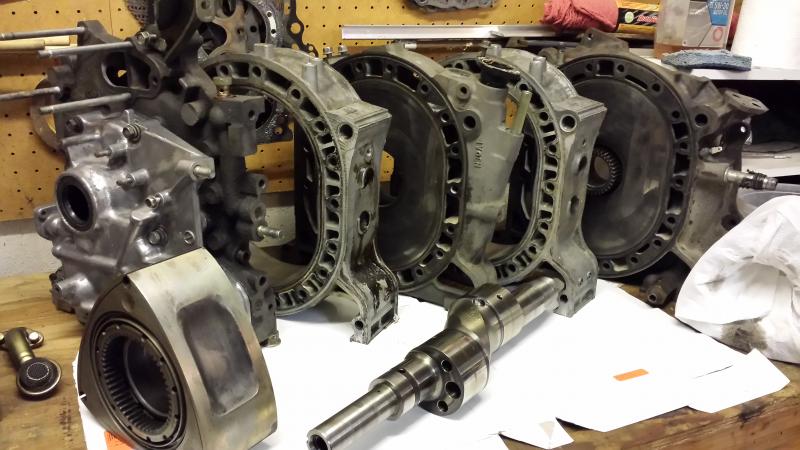
-I tore down the engine and inspected the front rotor and housing, unfortunately they are damaged beyond repair and will serve only as trophies to commemorate my first rotary build. I got in touch with a Rotary engine builder not too far away and made the trip down to Porterville to Palm Tree Rotary to pick up a used rotor and housing. Moe from Palm tree was VERY helpful and gave me lots of advice as well as inspecting and measuring a bunch of engine parts for me, I'm feeling a lot more confident in this build after having some face to face time with someone who knows what they are doing.
Here are some pics from the last few days.
The Flywheel was pretty difficult to get off, wasted a lot of time on this thing
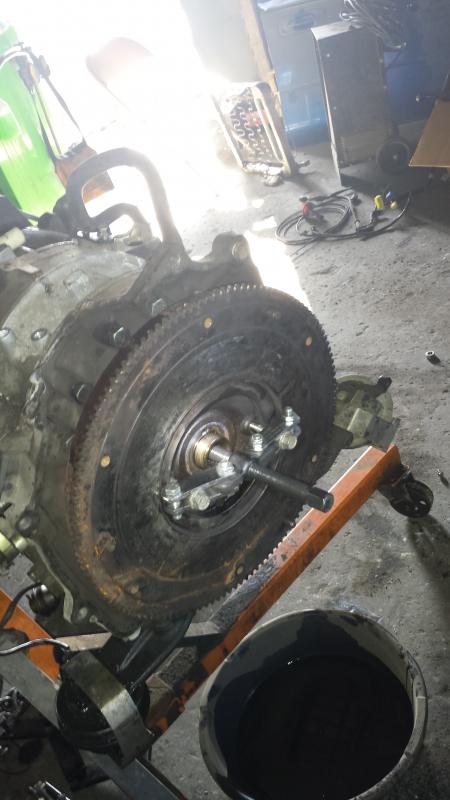
Finally off
the E Shaft Pulley bolt was no easy task either, i had to use the big impact for that one.
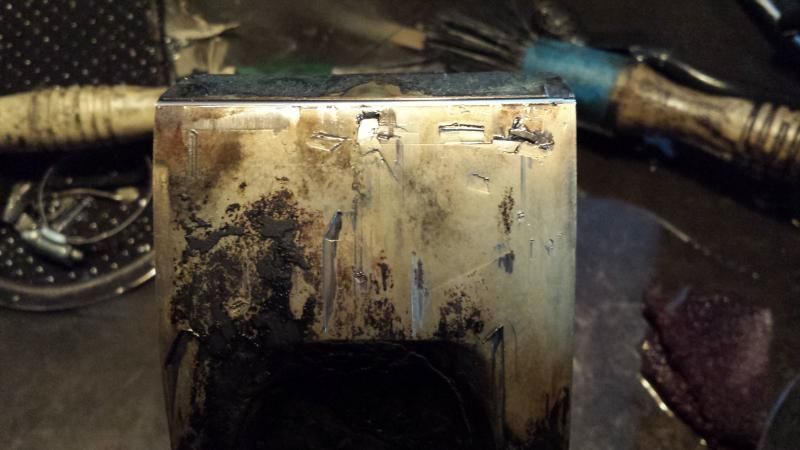
rear rotor and housing looked fine and after measurement, turned out to be in very good condition
the same could not be said for the front rotor.
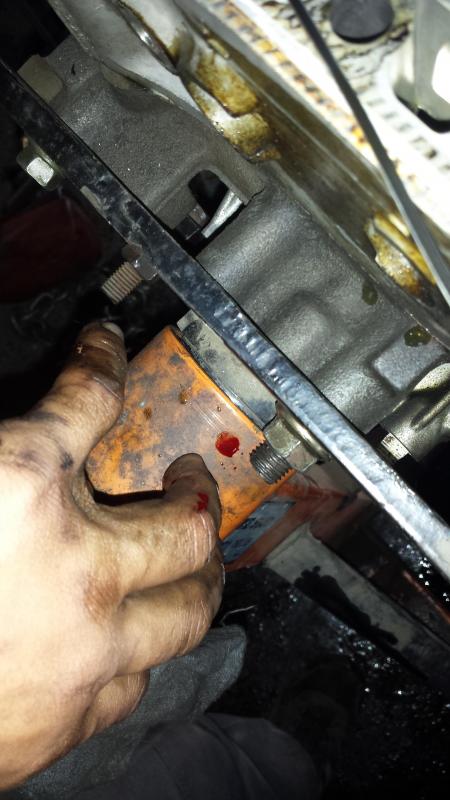
while disassembling and cleaning the housings i must have cut myself about a dozen goddamn times
after putting everything through the parts washer at least once I packed it all up and took it home to hunker down and start the reassembly process.
-I tore down the engine and inspected the front rotor and housing, unfortunately they are damaged beyond repair and will serve only as trophies to commemorate my first rotary build. I got in touch with a Rotary engine builder not too far away and made the trip down to Porterville to Palm Tree Rotary to pick up a used rotor and housing. Moe from Palm tree was VERY helpful and gave me lots of advice as well as inspecting and measuring a bunch of engine parts for me, I'm feeling a lot more confident in this build after having some face to face time with someone who knows what they are doing.
Here are some pics from the last few days.
The Flywheel was pretty difficult to get off, wasted a lot of time on this thing

Finally off

the E Shaft Pulley bolt was no easy task either, i had to use the big impact for that one.

rear rotor and housing looked fine and after measurement, turned out to be in very good condition

the same could not be said for the front rotor.


while disassembling and cleaning the housings i must have cut myself about a dozen goddamn times

after putting everything through the parts washer at least once I packed it all up and took it home to hunker down and start the reassembly process.

Thread Starter
Joined: Dec 2011
Posts: 75
Likes: 11
From: Central California
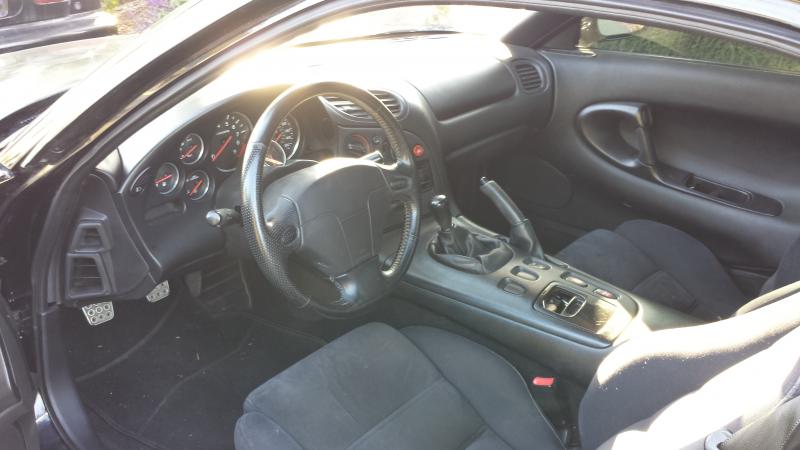
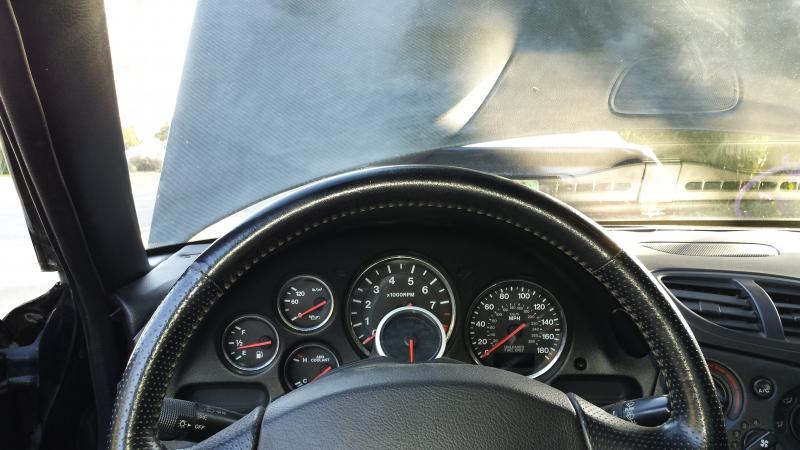
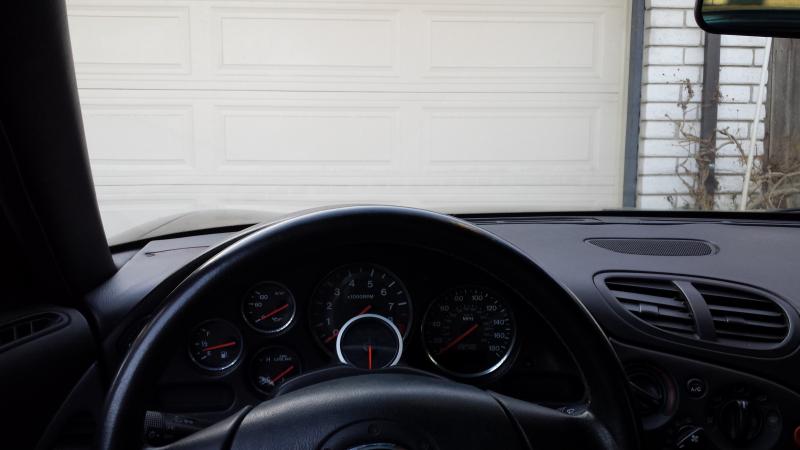
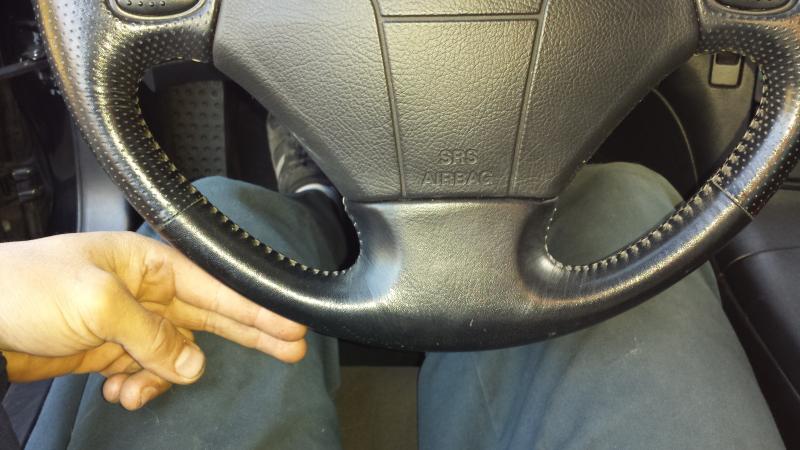
I bought a Nardi Steering wheel from ZE Power MX6. install was pretty simple, especially since He'd already modded the connectors to plug right in to the s6 US airbag and horn. At first i was a little disappointed that the diameter difference between the nardi and the stock 94 wheel wasn't greater, but after putting it in and driving for a bit, just the little difference there is makes for a much more comfortable driving position and feels much better in my hands.
Before
After
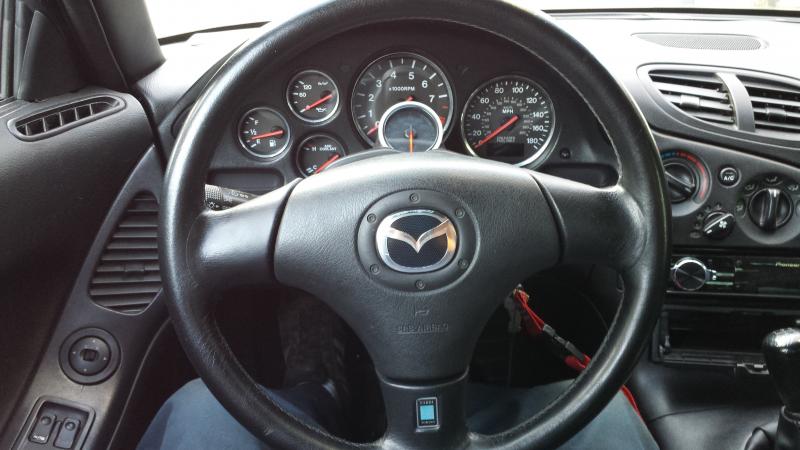
a comparison of forward visibility over the dash (this was an issue for me, the steering wheel was the highest point in my line of sight)
and Leg room
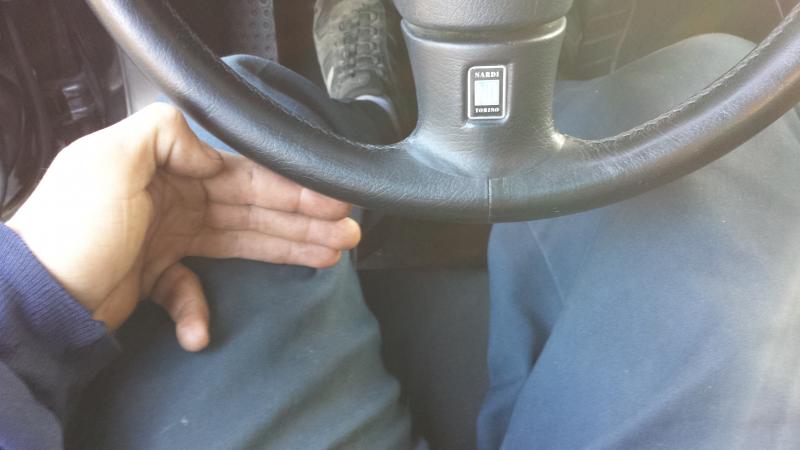
All in All, I love it
Before

After

a comparison of forward visibility over the dash (this was an issue for me, the steering wheel was the highest point in my line of sight)


and Leg room


All in All, I love it
Thread Starter
Joined: Dec 2011
Posts: 75
Likes: 11
From: Central California
Some pics from Palm Tree Rotary:
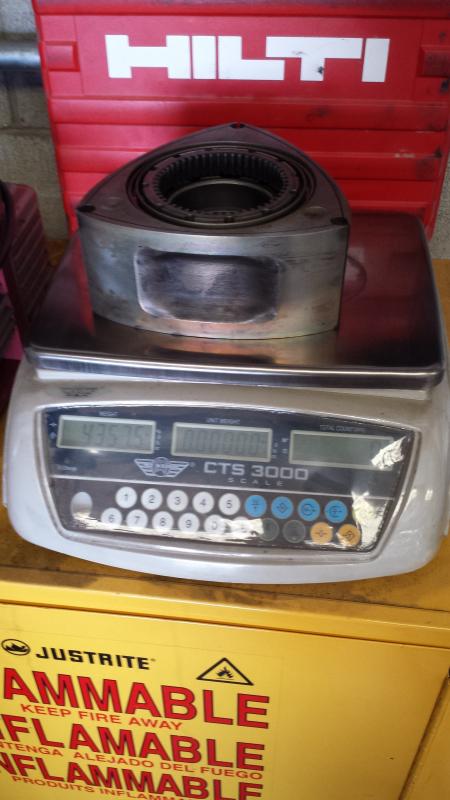
weighing the replacement rotor
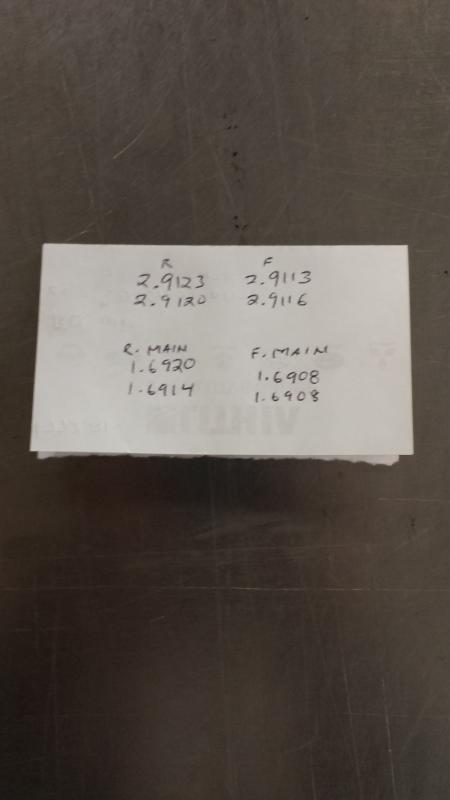
measuring the Eccentric shaft for journal thickness and straightness.


various measurements.
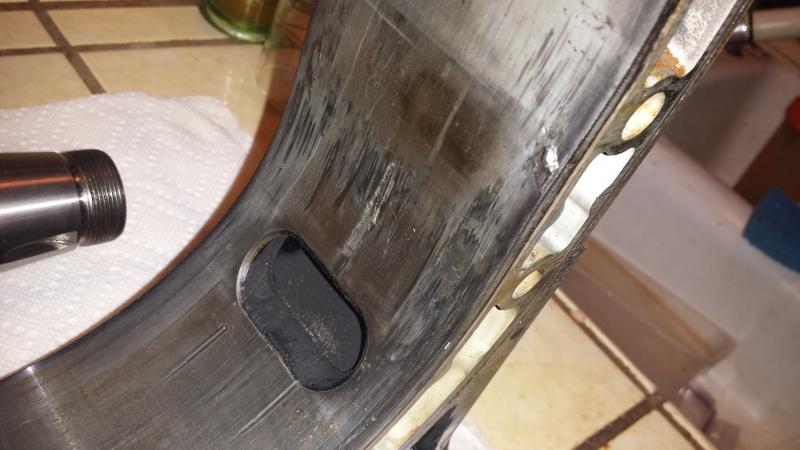
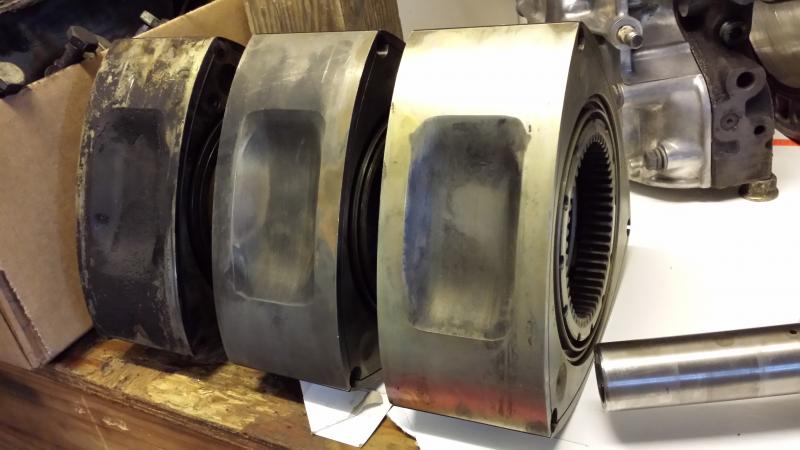
the new (Used) rotor housing

then back in my lair:
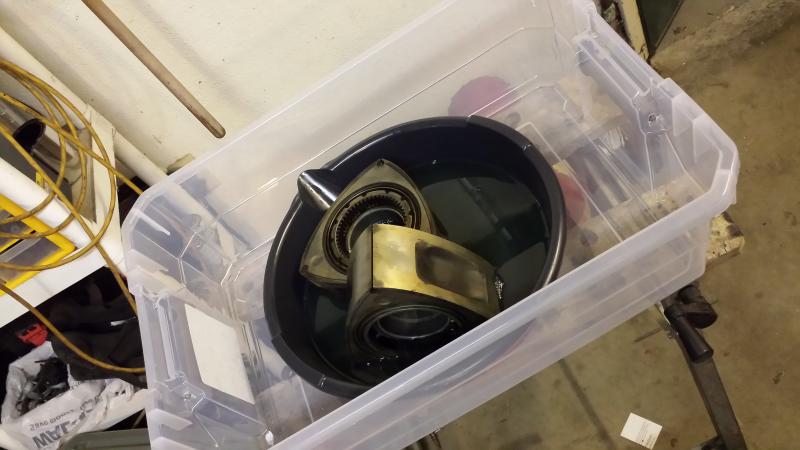
giving the rotors a nice bath in diesel to loosen up the carbon in those hard to reach places
then taking measurements to select the right bearings
bearings got pressed in, getting ready to set the side seal clearance here
as of right now the rotors are assembled and ready for the long block to be put together.
weighing the replacement rotor

measuring the Eccentric shaft for journal thickness and straightness.


various measurements.

the new (Used) rotor housing

then back in my lair:

giving the rotors a nice bath in diesel to loosen up the carbon in those hard to reach places

then taking measurements to select the right bearings

bearings got pressed in, getting ready to set the side seal clearance here

as of right now the rotors are assembled and ready for the long block to be put together.


Thread Starter
Joined: Dec 2011
Posts: 75
Likes: 11
From: Central California
Rotor in its housing
Apex seal going in
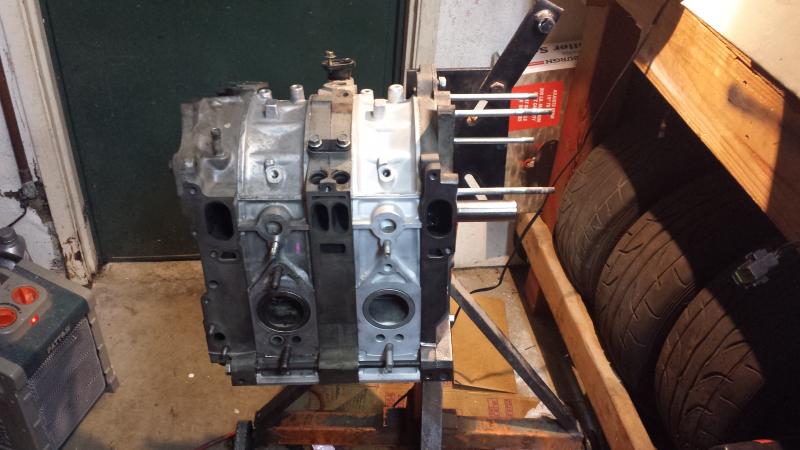
Assembled longblock (does that term even apply to rotaries?)
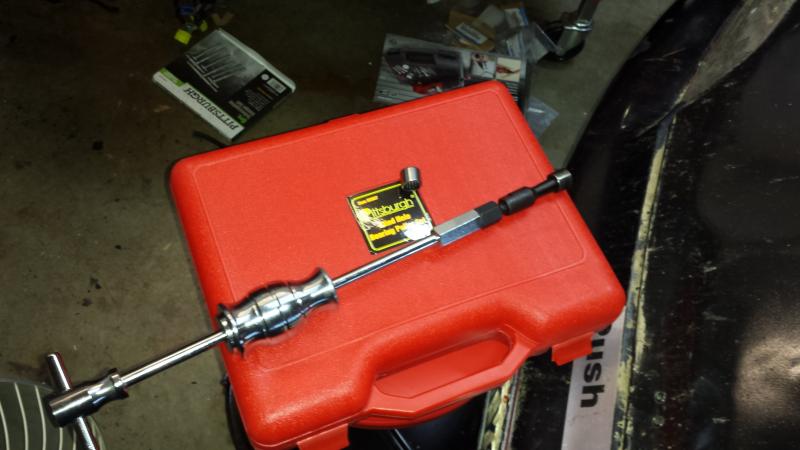
I tried the grease impact method to remove the pilot bearing, but it isn't really optimal for this style of bearing. so i bought a blind hole puller set and it worked like a charm.
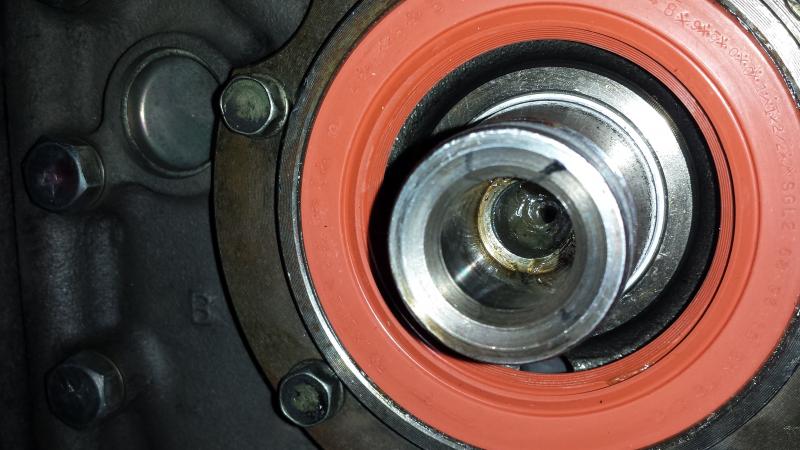
no bore damage whatsoever
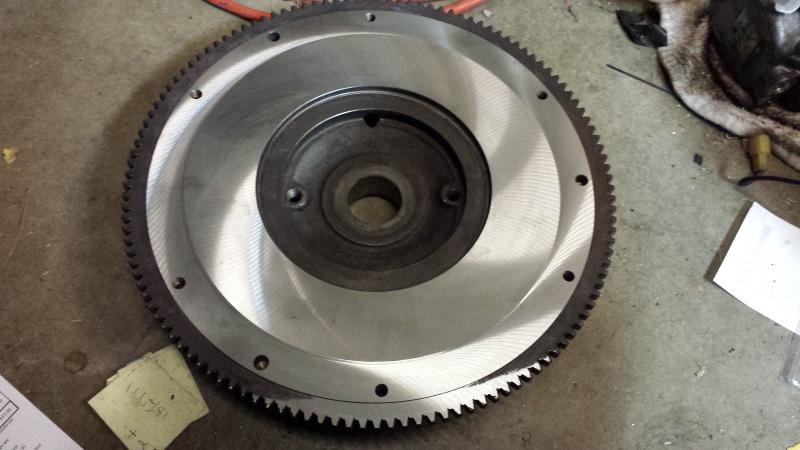
I got the flywheel resurfaced, apparently it was so warped that it started taking down the ring gear a bit on the machine.
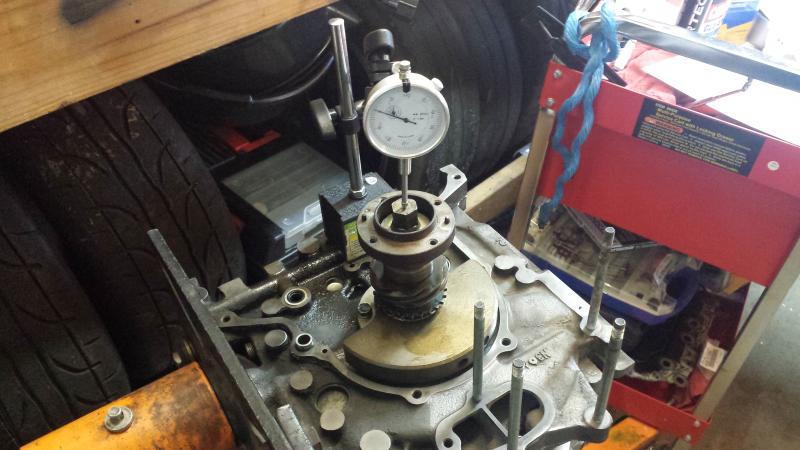
checked end float and it was a bit tight, so i ordered then next two smaller sized spacers to see what worked. For reference, smaller will make the clearance tighter, so i had to re order the larger spacers.
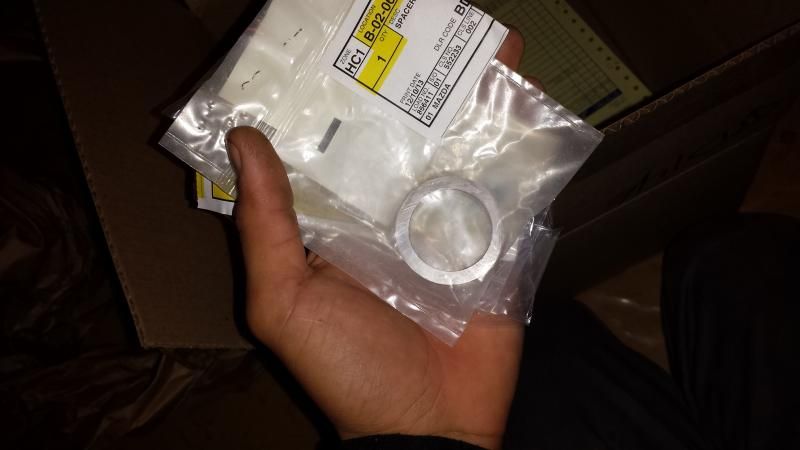
I've been ordering a lot of things from Mazda Motorsports lately, and I am convinced this it the smallest box they have.
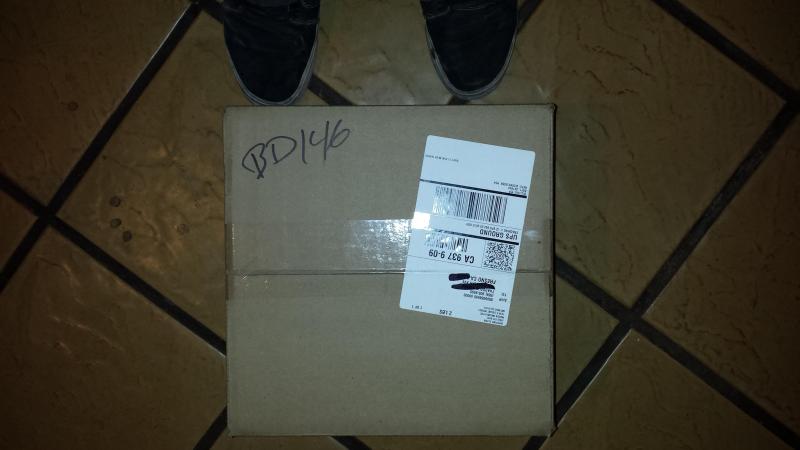
what could be inside?
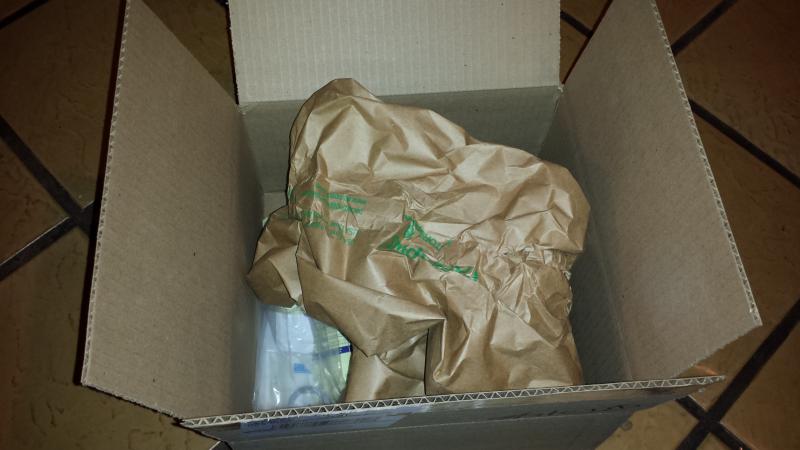
just these two spacers, Seriously, that's all that was in the box, two spacers and an invoice


Thread Starter
Joined: Dec 2011
Posts: 75
Likes: 11
From: Central California
12/16 - 12/17
had some more set backs over the weekend but managed to get the motor buttoned up.
here it is mostly assembled
http://www.flickr.com/photos/111893829@N08/11427579315/http://www.flickr.com/photos/111893829@N08/11427579315/ by http://www.flickr.com/people/111893829@N08/, on Flickr
Exhaust manifold on,
http://www.flickr.com/photos/111893829@N08/11427592846/http://www.flickr.com/photos/111893829@N08/11427592846/ by http://www.flickr.com/people/111893829@N08/, on Flickr
and fully assembled
http://www.flickr.com/photos/111893829@N08/11427597616/http://www.flickr.com/photos/111893829@N08/11427597616/ by http://www.flickr.com/people/111893829@N08/, on Flickr
I came up with a plan to transport the motor in my commuter since the timing didn't allow for me to borrow a truck.
step 1: remove passenger seat
http://www.flickr.com/photos/111893829@N08/11427596806/http://www.flickr.com/photos/111893829@N08/11427596806/ by http://www.flickr.com/people/111893829@N08/, on Flickr
step 2: remove pin from door hinge checker. This will allow the door to open wide enough to accept the engine on the stand.
http://www.flickr.com/photos/111893829@N08/11427576915/http://www.flickr.com/photos/111893829@N08/11427576915/ by http://www.flickr.com/people/111893829@N08/, on Flickr
At this point i ran into some interference issues with the engine hoist loop and the engine stand foot.
http://www.flickr.com/photos/111893829@N08/11427711804/http://www.flickr.com/photos/111893829@N08/11427711804/ by http://www.flickr.com/people/111893829@N08/, on Flickr
http://www.flickr.com/photos/111893829@N08/11427732423/http://www.flickr.com/photos/111893829@N08/11427732423/ by http://www.flickr.com/people/111893829@N08/, on Flickr
Both issues can be solved by...
Step 3: Jack up the car.
http://www.flickr.com/photos/111893829@N08/11427595024/http://www.flickr.com/photos/111893829@N08/11427595024/ by http://www.flickr.com/people/111893829@N08/, on Flickr
Step 4: roll engine right into place. (almost)
http://www.flickr.com/photos/111893829@N08/11427595854/http://www.flickr.com/photos/111893829@N08/11427595854/ by http://www.flickr.com/people/111893829@N08/, on Flickr
It was about then that my roommate woke up and mentioned that my GF was home sick so we might as well use her SUV, so we did that instead, Helluva lot easier but it didn't make me feel as clever and innovative.
Thread Starter
Joined: Dec 2011
Posts: 75
Likes: 11
From: Central California
Thread Starter
Joined: Dec 2011
Posts: 75
Likes: 11
From: Central California
the clip? It came from GA. via Frontline freight, Cal Top, and S3 Logistics booked through U-Ship.com. price was quoted at $450USD and has been held by U-ship but currently has not been released to S3. I figured, they took a month to get the thing to me and had to call and remind them to do their jobs just about every day, maybe I should let them do the same. However, a month has come and gone and no word from them. Kinda takes the **** out of it. the whole thing was a giant cluster F#%k.
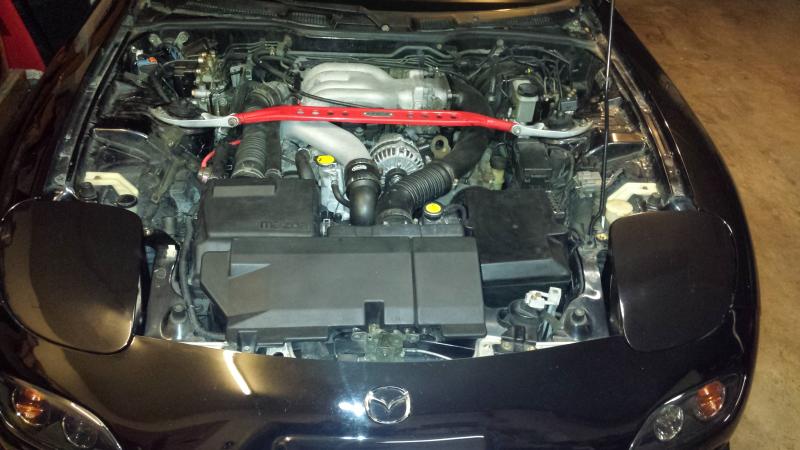
Update: the rebuilt engine is in with the JDM transmission from the clip. I am currently diagnosing the no start condition that is inherent in almost any engine R&R. Compression is a little low (I've read it tends to be on rebuilds with used housings) but consistent and even. I'm getting no signal to switch the fuel pump relays, and even when I jump them it won't run, same on starting fluid. I missed my second deadline on completion so the pressure is not as great, but i still need to get this thing out of my friends bay soon.
Update: the rebuilt engine is in with the JDM transmission from the clip. I am currently diagnosing the no start condition that is inherent in almost any engine R&R. Compression is a little low (I've read it tends to be on rebuilds with used housings) but consistent and even. I'm getting no signal to switch the fuel pump relays, and even when I jump them it won't run, same on starting fluid. I missed my second deadline on completion so the pressure is not as great, but i still need to get this thing out of my friends bay soon.
Thread Starter
Joined: Dec 2011
Posts: 75
Likes: 11
From: Central California
12/21 no start diag day 3
Code 23 Fuel Thermosensor. of course it would be buried under the rats nest. getting towed home tomorrow, hopefully I'l get it figured out soon and start putting some miles on.
compression numbers on both motors (as read cold with a cheap piston engine gauge with valve open)
Old motor:
front 70,30,30
rear 70,70,70
rebuild motor at 0 miles
front 60,60,60
rear 60,60,60
also of note, i took a look at the clutch, it has slipped the entire time I've owned the car. Not badly, but if you get after it in a low gear or shift too fast, rpms will shoot up and it starts to smell like to many evo launches. This is what it looks like when you don't break in your clutch properly.
http://www.flickr.com/photos/111893829@N08/11427729523/http://www.flickr.com/photos/111893829@N08/11427729523/ by http://www.flickr.com/people/111893829@N08/, on Flickr
almost no wear, just glazed and hot spotted.
http://www.flickr.com/photos/111893829@N08/11476321113/http://www.flickr.com/photos/111893829@N08/11476321113/ by http://www.flickr.com/people/111893829@N08/, on Flickr
same with the flywheel
http://www.flickr.com/photos/111893829@N08/11476288826/http://www.flickr.com/photos/111893829@N08/11476288826/ by http://www.flickr.com/people/111893829@N08/, on Flickr

the clip? It came from GA. via Frontline freight, Cal Top, and S3 Logistics booked through U-Ship.com. price was quoted at $450USD and has been held by U-ship but currently has not been released to S3. I figured, they took a month to get the thing to me and had to call and remind them to do their jobs just about every day, maybe I should let them do the same. However, a month has come and gone and no word from them. Kinda takes the **** out of it. the whole thing was a giant cluster F#%k.
Update: the rebuilt engine is in with the JDM transmission from the clip. I am currently diagnosing the no start condition that is inherent in almost any engine R&R. Compression is a little low (I've read it tends to be on rebuilds with used housings) but consistent and even. I'm getting no signal to switch the fuel pump relays, and even when I jump them it won't run, same on starting fluid. I missed my second deadline on completion so the pressure is not as great, but i still need to get this thing out of my friends bay soon.
Update: the rebuilt engine is in with the JDM transmission from the clip. I am currently diagnosing the no start condition that is inherent in almost any engine R&R. Compression is a little low (I've read it tends to be on rebuilds with used housings) but consistent and even. I'm getting no signal to switch the fuel pump relays, and even when I jump them it won't run, same on starting fluid. I missed my second deadline on completion so the pressure is not as great, but i still need to get this thing out of my friends bay soon.
Thread Starter
Joined: Dec 2011
Posts: 75
Likes: 11
From: Central California
I wish i could say with certainty that i did, but poor grounding has crossed my mind. i had to replace a few connectors when i was putting the harness back on before the install mostly due to cracking or hardened insulation. I replaced one of the ecu grounds under the manifold, i cut and soldered the ring terminal and the two wires that bolt to the solenoid rack using a fresher JDM harness as the donor. I've cleaned and check each ground on the chassis in the engine bay. I am curious about what was bolted to the stud on the oil filter pedestal, not sure if it was just support for the harness or if there is a ground missing.

Thread Starter
Joined: Dec 2011
Posts: 75
Likes: 11
From: Central California
engine install - 25 miles
Some progress has been made, though it has been a battle.
what looked like a simple fuel system fault turned into a trouble shooting spree. the engine started right up once i put some more oil in the rotor housings (all the oil from assembly burned off during cranking) so after a few warm up cycles to check for leaks and one more compression test, i got it ready and took it around the block. Immediate CEL, limp mode, and a very rough idle that got worse with headlights and being put in gear. two more days of probing sensors and i found the cause of the thremo sensor code. the X14 connector had a bent pin and was not fully connected, easy fix. then the ECU stopped flashing codes when 10 and gnd. were jumped, this one was a huge PITA. I swapped in the JDM ecu and started it up, got an OMP code. my friend spotted one branch of the OMP harness draped across the crank pulley cleanly severed. guess that'll do it. I forgot to re install the wire retainer under the water pump that holds the metering lines and harness, so one of the looms got snagged by the pulley reluctor and cut in half. I soldered in and extension and connectors , routed it away from moving parts and plugged it in. low and behold, no codes. The rough idle in gear was from an unplugged clutch switch. tomorrow i'll swap ecus back and see if the problem was just with the OMP wires or if the short fried the ecu. either way I'll be looking for a spare CA ecu.
here are the pics:
engine in but won't start
http://www.flickr.com/photos/111893829@N08/11559376245/http://www.flickr.com/photos/111893829@N08/11559376245/ by http://www.flickr.com/people/111893829@N08/, on Flickr
http://www.flickr.com/photos/111893829@N08/11664957764/http://www.flickr.com/photos/111893829@N08/11664957764/ by http://www.flickr.com/people/111893829@N08/, on Flickr
Hitchin a ride back home.
http://www.flickr.com/photos/111893829@N08/11664856153/http://www.flickr.com/photos/111893829@N08/11664856153/ by http://www.flickr.com/people/111893829@N08/, on Flickr
Found this little bugger pinched off while i was checking the thermosensor wires
http://www.flickr.com/photos/111893829@N08/11665383556/http://www.flickr.com/photos/111893829@N08/11665383556/ by http://www.flickr.com/people/111893829@N08/, on Flickr
so as of tonight I've got about 25 miles on it, the idle is still searching a bit.
Thread Starter
Joined: Dec 2011
Posts: 75
Likes: 11
From: Central California
while the bumper was off i decided to do some upkeep. one of the previous owners had removed or substituted a lot of OEM bits so i used what i had from the JDM front clip to replace them.
the 99 bumper had no bumper support behind it, so i took the one from the efini and modded it.
http://www.flickr.com/photos/111893829@N08/11664599315/http://www.flickr.com/photos/111893829@N08/11664599315/ by http://www.flickr.com/people/111893829@N08/, on Flickr
http://www.flickr.com/photos/111893829@N08/11664598365/http://www.flickr.com/photos/111893829@N08/11664598365/ by http://www.flickr.com/people/111893829@N08/, on Flickr
http://www.flickr.com/photos/111893829@N08/11664845623/http://www.flickr.com/photos/111893829@N08/11664845623/ by http://www.flickr.com/people/111893829@N08/, on Flickr
http://www.flickr.com/photos/111893829@N08/11665539153/http://www.flickr.com/photos/111893829@N08/11665539153/ by http://www.flickr.com/people/111893829@N08/, on Flickr
http://www.flickr.com/photos/111893829@N08/11666073406/http://www.flickr.com/photos/111893829@N08/11666073406/ by http://www.flickr.com/people/111893829@N08/, on Flickr
The skin was fastened to the aluminum mounting bracket with some old rusty home depot nuts and bolts, so i replaced them with aluminum rivets and added the weather srips that were missing as well.
http://www.flickr.com/photos/111893829@N08/11664594725/http://www.flickr.com/photos/111893829@N08/11664594725/ by http://www.flickr.com/people/111893829@N08/, on Flickr
http://www.flickr.com/photos/111893829@N08/11664952144/http://www.flickr.com/photos/111893829@N08/11664952144/ by http://www.flickr.com/people/111893829@N08/, on Flickr
http://www.flickr.com/photos/111893829@N08/11664592875/http://www.flickr.com/photos/111893829@N08/11664592875/ by http://www.flickr.com/people/111893829@N08/, on Flickr
the lip was held on with the same rusty home depot treatment, so it got some speed clips
http://www.flickr.com/photos/111893829@N08/11664592225/http://www.flickr.com/photos/111893829@N08/11664592225/ by http://www.flickr.com/people/111893829@N08/, on Flickr
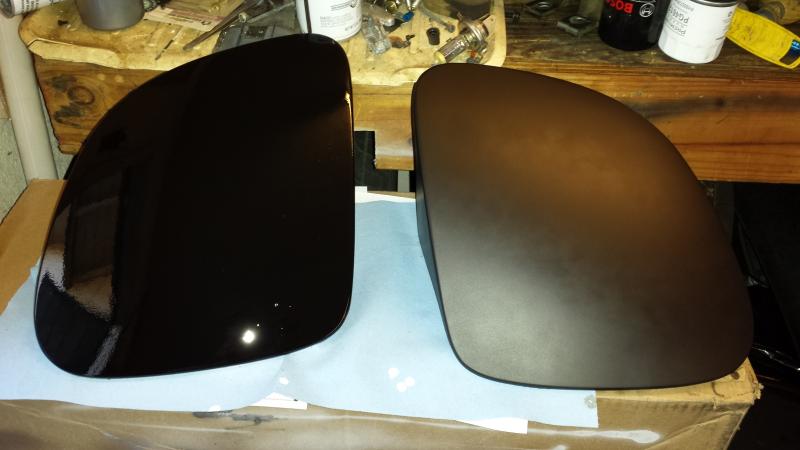
the little wind deflectors between the healight and the fender were missing so i installed those.
http://www.flickr.com/photos/111893829@N08/11664946474/http://www.flickr.com/photos/111893829@N08/11664946474/ by http://www.flickr.com/people/111893829@N08/, on Flickr
http://www.flickr.com/photos/111893829@N08/11664951634/http://www.flickr.com/photos/111893829@N08/11664951634/ by http://www.flickr.com/people/111893829@N08/, on Flickr
http://www.flickr.com/photos/111893829@N08/11664844623/http://www.flickr.com/photos/111893829@N08/11664844623/ by http://www.flickr.com/people/111893829@N08/, on Flickr
after riveting the mounting bracket and weather strips on, i was surprised at how much rigidity the bumper skin gained, without them, it would sag and droop when it was off the car, now it feels pretty solid.
the 99 bumper had no bumper support behind it, so i took the one from the efini and modded it.
http://www.flickr.com/photos/111893829@N08/11664599315/http://www.flickr.com/photos/111893829@N08/11664599315/ by http://www.flickr.com/people/111893829@N08/, on Flickr
http://www.flickr.com/photos/111893829@N08/11664598365/http://www.flickr.com/photos/111893829@N08/11664598365/ by http://www.flickr.com/people/111893829@N08/, on Flickr
http://www.flickr.com/photos/111893829@N08/11664845623/http://www.flickr.com/photos/111893829@N08/11664845623/ by http://www.flickr.com/people/111893829@N08/, on Flickr
http://www.flickr.com/photos/111893829@N08/11665539153/http://www.flickr.com/photos/111893829@N08/11665539153/ by http://www.flickr.com/people/111893829@N08/, on Flickr
http://www.flickr.com/photos/111893829@N08/11666073406/http://www.flickr.com/photos/111893829@N08/11666073406/ by http://www.flickr.com/people/111893829@N08/, on Flickr
The skin was fastened to the aluminum mounting bracket with some old rusty home depot nuts and bolts, so i replaced them with aluminum rivets and added the weather srips that were missing as well.
http://www.flickr.com/photos/111893829@N08/11664594725/http://www.flickr.com/photos/111893829@N08/11664594725/ by http://www.flickr.com/people/111893829@N08/, on Flickr
http://www.flickr.com/photos/111893829@N08/11664952144/http://www.flickr.com/photos/111893829@N08/11664952144/ by http://www.flickr.com/people/111893829@N08/, on Flickr
http://www.flickr.com/photos/111893829@N08/11664592875/http://www.flickr.com/photos/111893829@N08/11664592875/ by http://www.flickr.com/people/111893829@N08/, on Flickr
the lip was held on with the same rusty home depot treatment, so it got some speed clips
http://www.flickr.com/photos/111893829@N08/11664592225/http://www.flickr.com/photos/111893829@N08/11664592225/ by http://www.flickr.com/people/111893829@N08/, on Flickr
the little wind deflectors between the healight and the fender were missing so i installed those.
http://www.flickr.com/photos/111893829@N08/11664946474/http://www.flickr.com/photos/111893829@N08/11664946474/ by http://www.flickr.com/people/111893829@N08/, on Flickr
http://www.flickr.com/photos/111893829@N08/11664951634/http://www.flickr.com/photos/111893829@N08/11664951634/ by http://www.flickr.com/people/111893829@N08/, on Flickr
http://www.flickr.com/photos/111893829@N08/11664844623/http://www.flickr.com/photos/111893829@N08/11664844623/ by http://www.flickr.com/people/111893829@N08/, on Flickr
after riveting the mounting bracket and weather strips on, i was surprised at how much rigidity the bumper skin gained, without them, it would sag and droop when it was off the car, now it feels pretty solid.
Thread Starter
Joined: Dec 2011
Posts: 75
Likes: 11
From: Central California
to do list:
-swap RHD shifter to original LHD one (they have a different angle)
- replace and repin beat up ecu plug
-Swap back to US ecu and check for code reading ability
- continue break in
-100 mile oil change
-possibly do diff fluid change with friction modifier (seems pretty harsh)
-strip paint off aluminum hood and fix dent
- fix exhaust leak (warped flange at the cat)
-smog the damn thing (least favorite activity ever)
Last edited by thad; Jan 1, 2014 at 03:23 PM. Reason: i remembered another