
funnyscreennames 93' FD Super SSSLLLOOOWWW Build!

2/7/13
so i've decided to go ahead and spot weld all the seams on the chassis. at least the interior and engine bay anyway. may end up doing the hatch area in the future. been waiting until i either find a friend with a welder or until i purchase my own welder before i take out the dash harness and all. once that's done i'll still have the sound deadening to remove then wire wheel all the seam sealer from all the seams. after that's all done i can do the welding i want and also lay the aftermarket sound deadener/heat barrier. once that's done the pedals can go in and the interior slowly start coming back together.
i've also started thinking more about weight and trying to save alittle here and there wherever i can so i'm gonna try and keep that in mind during my build. i also want the car to be safe so i've been thinking about a cage. not sure if i wanna go with a prefabbed piece or what tho.
i've decided to get rid of the airbag system and all it's wiring. gonna remove the srs harness from the dash harness and front harness as well. i've got the protege steering wheel and airbag and i wanna try to remove the airbag from the wheel. not only is it more weight but, it's just dangerous from what i've read. i have also been given an rx8 seat. it's actually the pass side but from what i've seen so far, i should be able to make it fit for a drivers seat. i wanna remove the airbag from the seat as well. i like the hard plastic backing on the seat too and the fact that it only weighs ~5 lbs more is good. it'll shed more weight once the airbag is removed.
i'm not really sure i'm gonna keep the seat yet. i'm sure it'll look good but, i'd really like to get a pair of aftermarket seats from bride or recaro. i haven't given much more thought to the interior. right now i'm worried about wiring and getting all that sorted. i'm just trying to read and gather as much info as possible.
If I was at this point. I would strip the entire car and go ahead and blast all the undercarriage then get a paintjob as well as coat the underside in some durable rhinoliner or something. Then replace all the old exterior plastics and moulding, replace the interior carpet, refinish the plastics. replace all the necessary bushings and suspension parts, then start building up the engine.
I literally went the exact opposite. If I had to do it over I'd do it like this.
I'll be keeping up with this build
I literally went the exact opposite. If I had to do it over I'd do it like this.
I'll be keeping up with this build
i've got alot to do and everyday a new idea comes to mind. i'm an avid speedhunters reader so i love seeing all the time attack cars and things they do to improve their cars and times. they're really an inspiration.
as far as my car goes, i'm not stripping the car entirely. it'd be great to get it stripped and on a rotisserie. i haven't given too much thought to spraying the undercarriage. i did get some aerosol rubberized undercoating to spray the wheel wells with when i get that far.
i've also been wanting to replace alotta the bushings but, i'm finding it hard to drop the cash on a new bushing set. i have been keeping my eyes open for good deals on here tho. i got some superpro toe link bushings from a guy that had some left over while selling some other parts. once i pulled the toe links i was only able to get one side out. i did try pressing the new bushings in but it didn't happen. i'm trying to find a friend with a press to get these things in. right now the bushings have taken a backseat until that happens.
i haven't done any work on the car in a week or so. i need to get more motivated and finish removing the carpet & sound deadener. i've also decided to remove that loose padding from under the carpet too. i think that's where the "old" smell is coming from. don't think i'm gonna replace it.
been thinking more and more about getting a welder. not sure exactly what i need to get to start off on the right foot. i've been reading up on different types of welding and how to go about it. i think a mig welder would be good to start off with. saw some flux core welders on the cheaper side but, i'm still not sure if it'll give me the results i want. i just want a nice clean spot weld to join the seams in the car. any ideas?
2/16/13
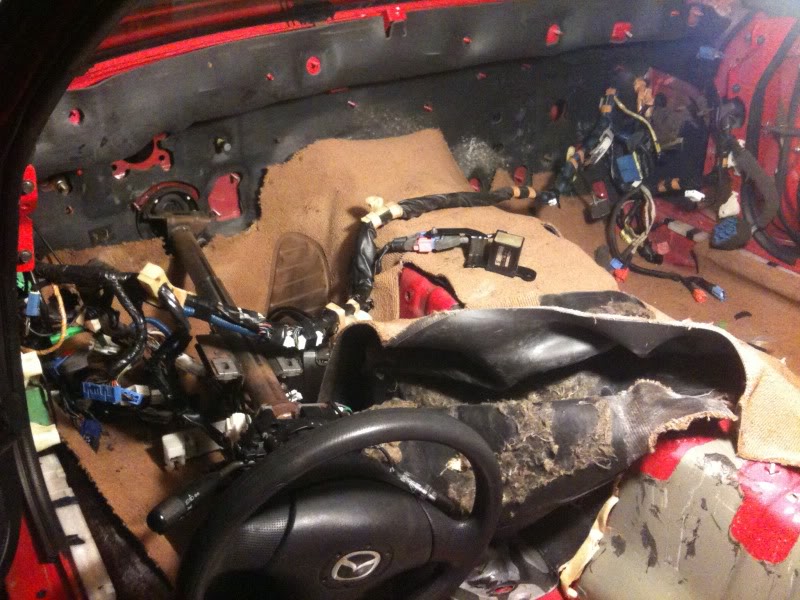
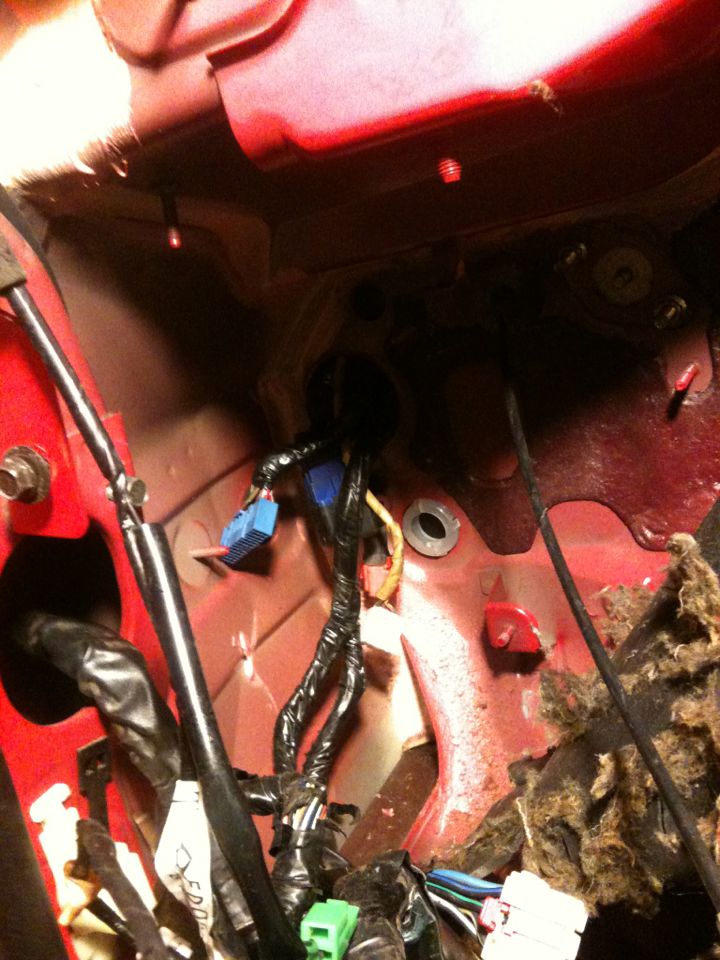
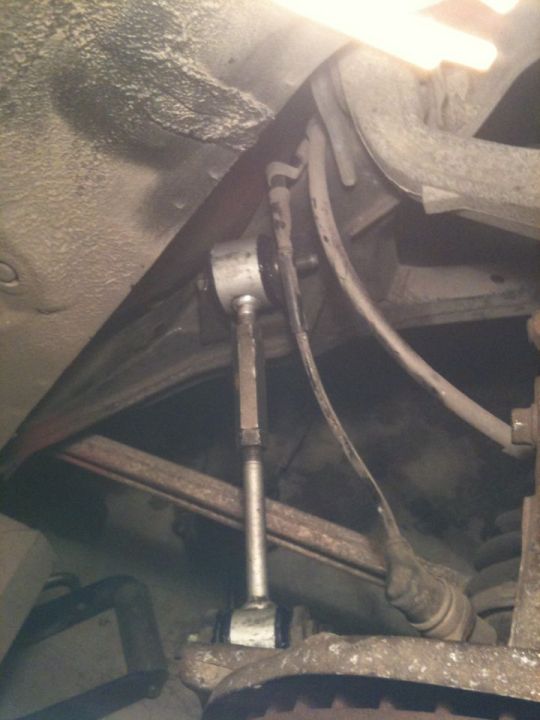
tonite i decided to do alittle work on the car. i went ahead and removed the ac/heater components from the firewall. i was going to go ahead and remove all of the srs wiring and computer but, i thought i'd better go over the wiring diagram again just to make sure i take out the correct wires. i think i've tracked down the srs harness from side to side. on the pass side i pulled the wiring from the hole behind the fender and it looks like the loom is blue to the srs computer. from the drivers side it looks like it's pretty easily traced as well. here's what i'm dealing with

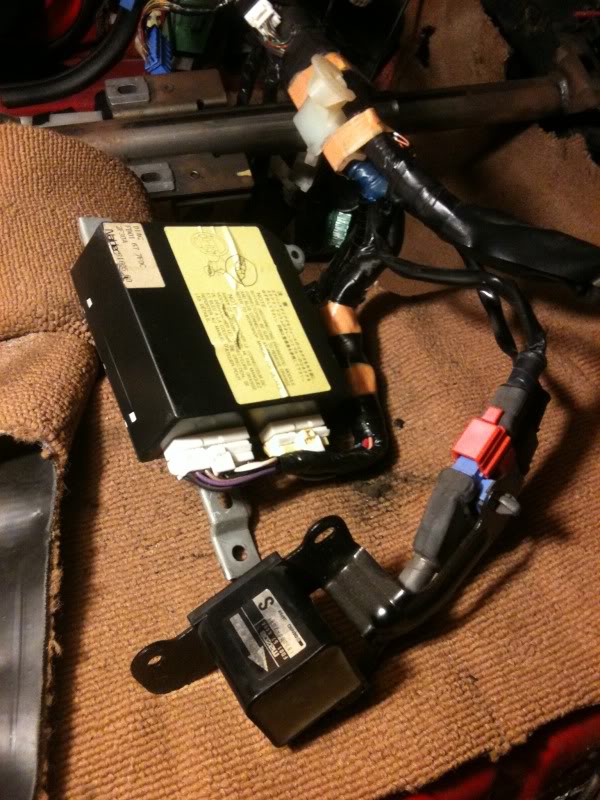
i'm pretty sure all the srs wiring runs to this
i've already removed the front crash sensors and wiring from the front harness. actually it's all pretty much by itself it seems in the front. i think the dash harness srs wiring is all thats left to do. after the wiring i wanna remove the airbag from it's cover since it's not going to be used anyway (weight redux what what jk). anyway, if anyone else has experience removing the srs wiring and can tell me if i'm on the right track that'd be great.
in other news, i bought an intake from another member. it's the ramhorn intake he made. if you haven't seen it looks like this

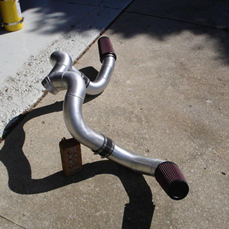
and this installed
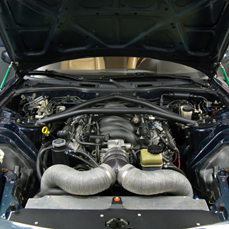
i just like how unique it is. couldn't pass it up. i know it'll be awhile before it's installed but, at least i can look at it in the garage.
i've been trying to read up on wiring lately to get myself familiar with the terminology and everything before i start tackling the rest of the loom and removing different systems. i just started with the srs because it seemed to be pretty straight forward. i have the wiring diagram pdf file downloaded. is there something out there that's simplified and tells more about which systems you don't need with the LSx? i've read a few of the stickies and when i look at the circuit diagram i get confused as to what's what. any advice guys? i've never been a wiring guy but since i've spent some time reading and trying to familiarize myself with everything i've definitely learned a good bit. i'm just gonna keep reading and learn all that i can. advice is always apppreciated.
well that's about it for now. with the ac/heater components removed i'll be removing the carpet and the rest of the sound deadening soon. that'll have to wait until tomorrow tho. thanks for looking. any input or advice is always appreciated.
tonite i decided to do alittle work on the car. i went ahead and removed the ac/heater components from the firewall. i was going to go ahead and remove all of the srs wiring and computer but, i thought i'd better go over the wiring diagram again just to make sure i take out the correct wires. i think i've tracked down the srs harness from side to side. on the pass side i pulled the wiring from the hole behind the fender and it looks like the loom is blue to the srs computer. from the drivers side it looks like it's pretty easily traced as well. here's what i'm dealing with
i'm pretty sure all the srs wiring runs to this
i've already removed the front crash sensors and wiring from the front harness. actually it's all pretty much by itself it seems in the front. i think the dash harness srs wiring is all thats left to do. after the wiring i wanna remove the airbag from it's cover since it's not going to be used anyway (weight redux what what jk). anyway, if anyone else has experience removing the srs wiring and can tell me if i'm on the right track that'd be great.
in other news, i bought an intake from another member. it's the ramhorn intake he made. if you haven't seen it looks like this
and this installed
i just like how unique it is. couldn't pass it up. i know it'll be awhile before it's installed but, at least i can look at it in the garage.
i've been trying to read up on wiring lately to get myself familiar with the terminology and everything before i start tackling the rest of the loom and removing different systems. i just started with the srs because it seemed to be pretty straight forward. i have the wiring diagram pdf file downloaded. is there something out there that's simplified and tells more about which systems you don't need with the LSx? i've read a few of the stickies and when i look at the circuit diagram i get confused as to what's what. any advice guys? i've never been a wiring guy but since i've spent some time reading and trying to familiarize myself with everything i've definitely learned a good bit. i'm just gonna keep reading and learn all that i can. advice is always apppreciated.
well that's about it for now. with the ac/heater components removed i'll be removing the carpet and the rest of the sound deadening soon. that'll have to wait until tomorrow tho. thanks for looking. any input or advice is always appreciated.
2/27/13
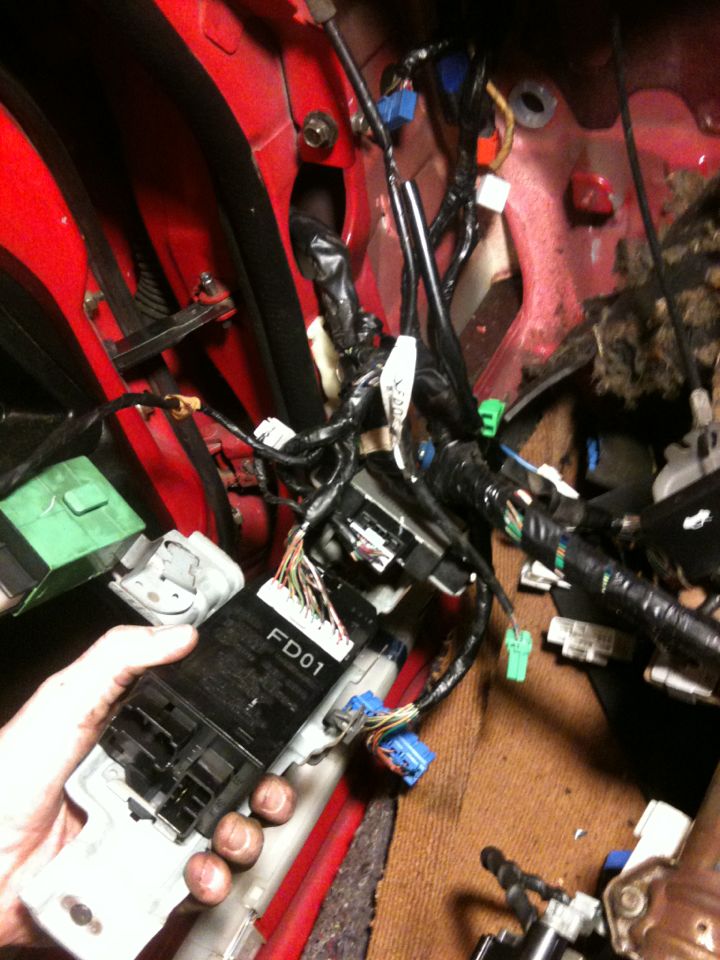
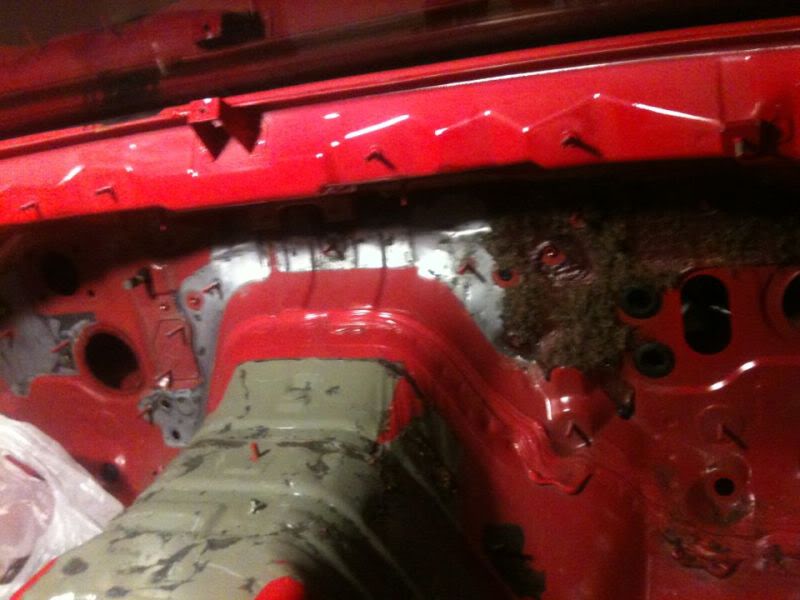
well last time i left you all i still had a good bit to do to get to the firewall and floorboard area in the front. last nite i got off alittle early and decided to get some work done. i started out by removing the srs harness from the dash harness. it was still taped to the dash harness so i cut the tape and removed the wiring, crash sensor, and srs computer.

i've removed the sensors from the front harness but, i still have some more wiring to remove.
i was wondering what these plugs are for:
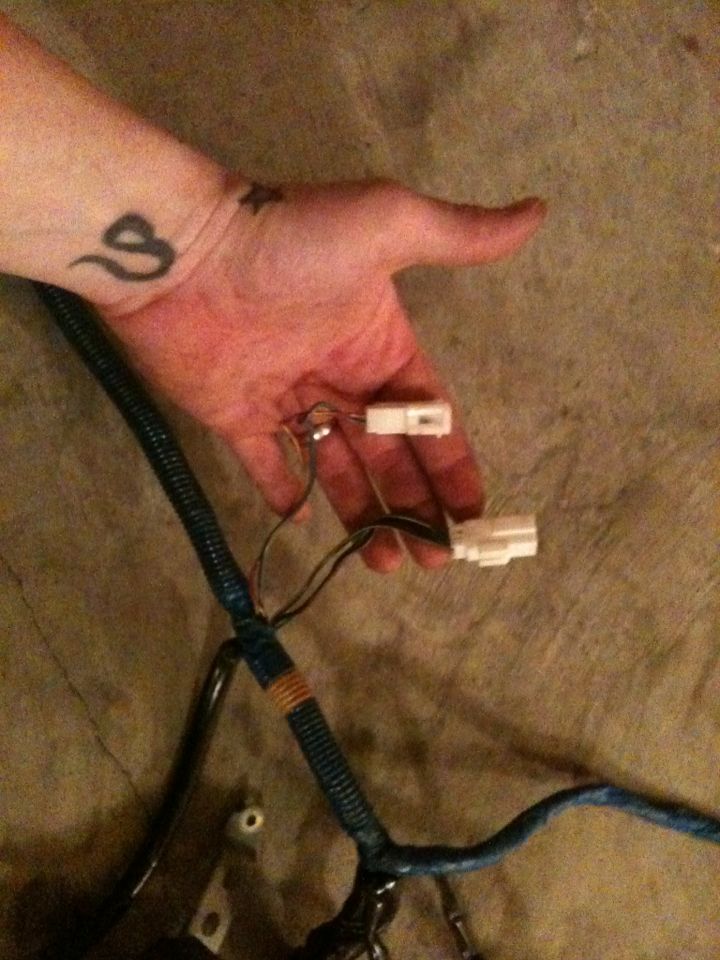
they're plugs in the srs harness that plug into some plugs in the dash harness...plugs.
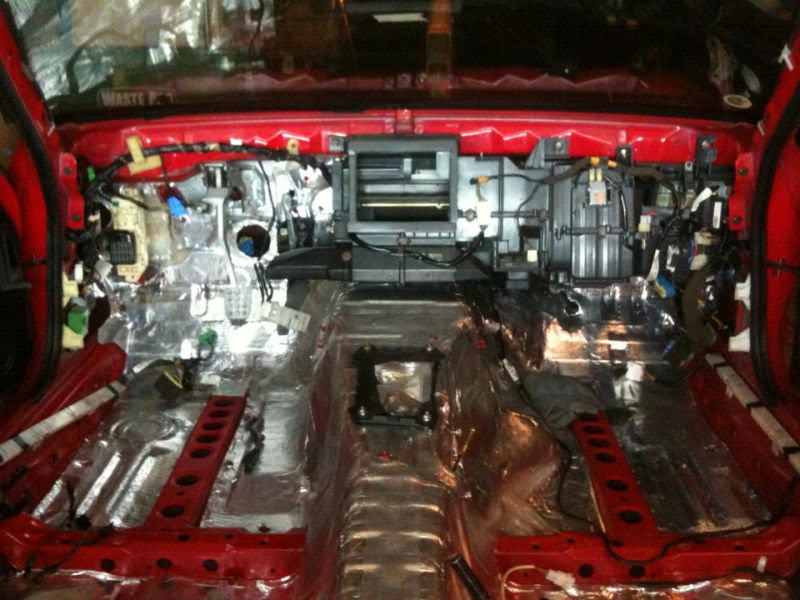
after the srs harness was removed i was left with this
of course on the driver side i was left with this:
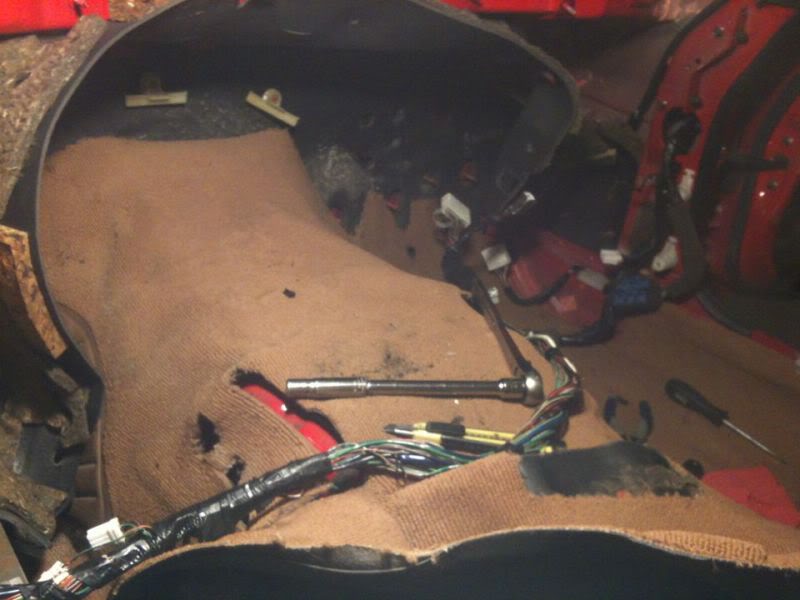
i began feeding the wires through the hole in the firewall
almost there!
finally the harness is out.
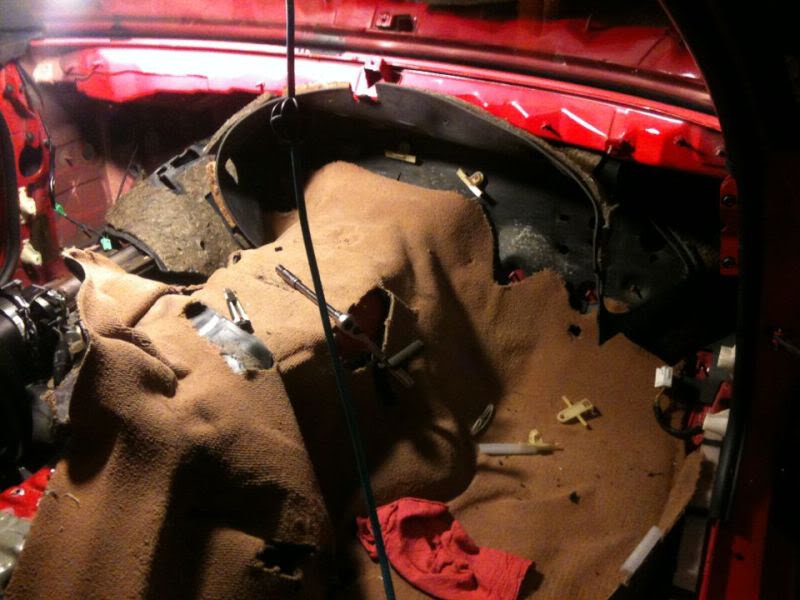
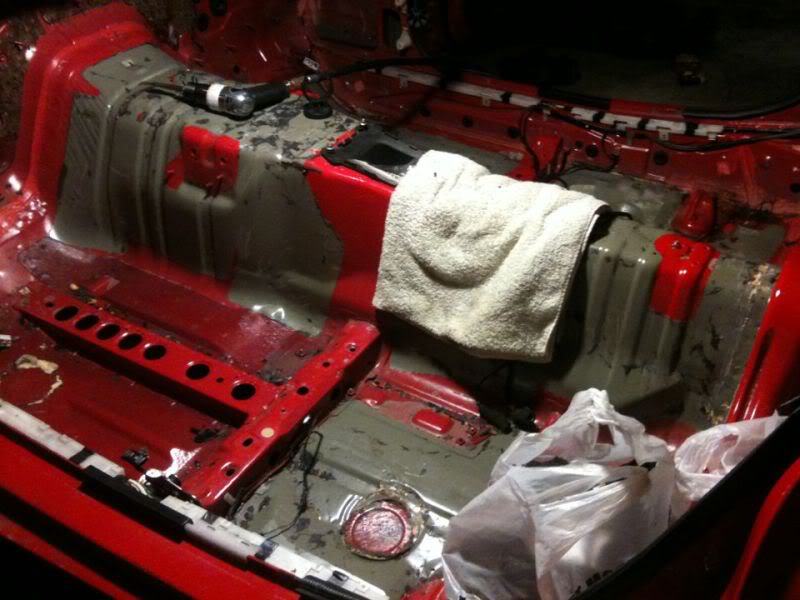
now that the wiring is out it's time to get down to the metal. first i gently removed the carpet
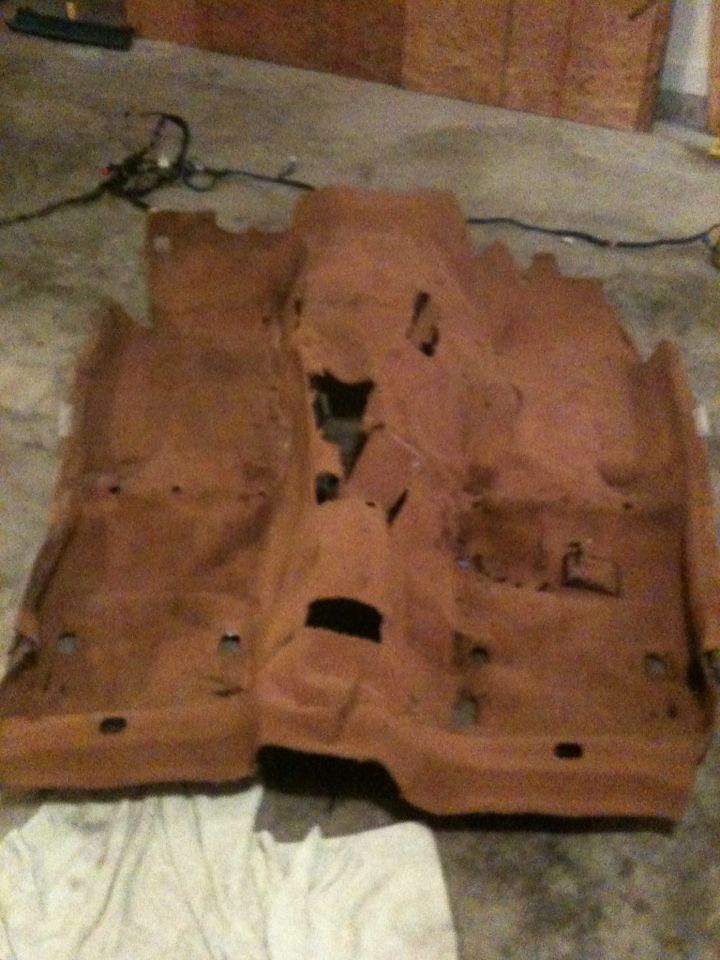
my plan is to pressure wash it and dye it black. i'm gonna remove the padding off the bottom of it. my car has that old car smell so i'm really wanting to get rid of that and also remove the little bit of weight to it.
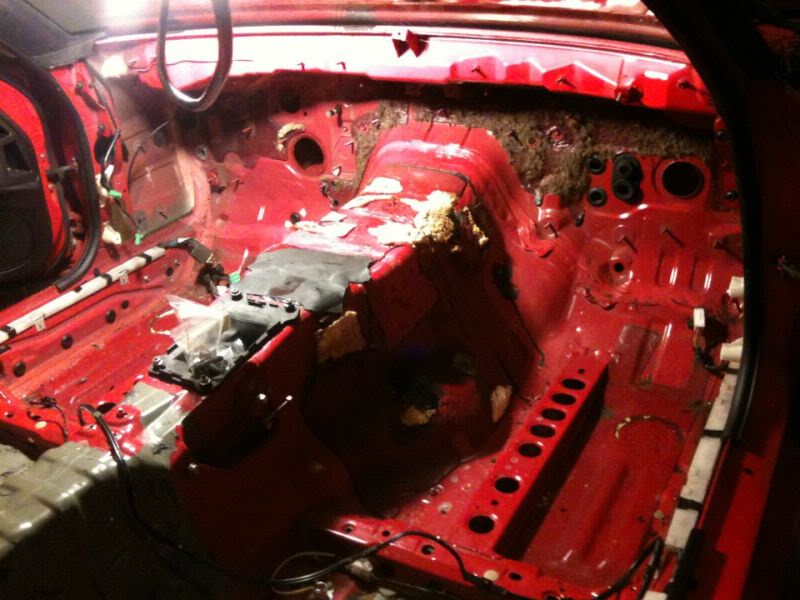
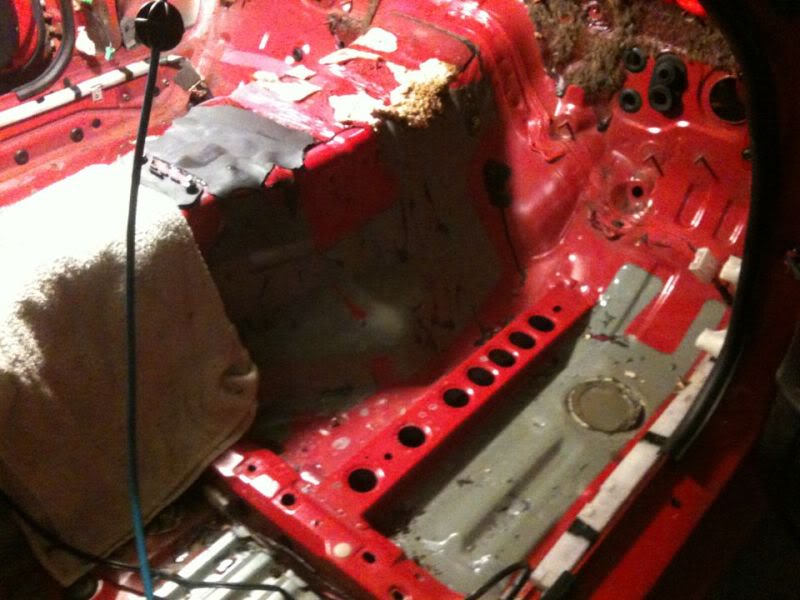
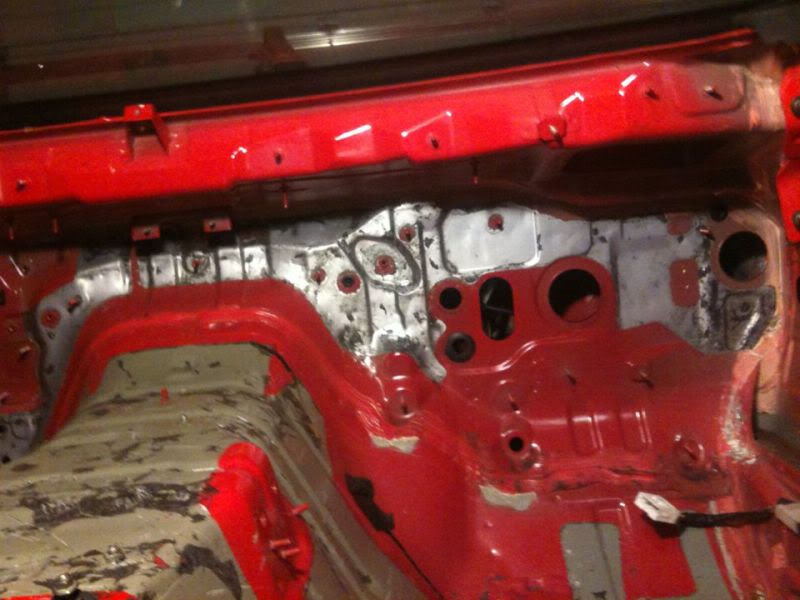
once the carpet was out i was left with this

i took out the steering wheel and was then able to take out the black pad without having to cut it. i'm not sure yet if i'm gonna reuse it.
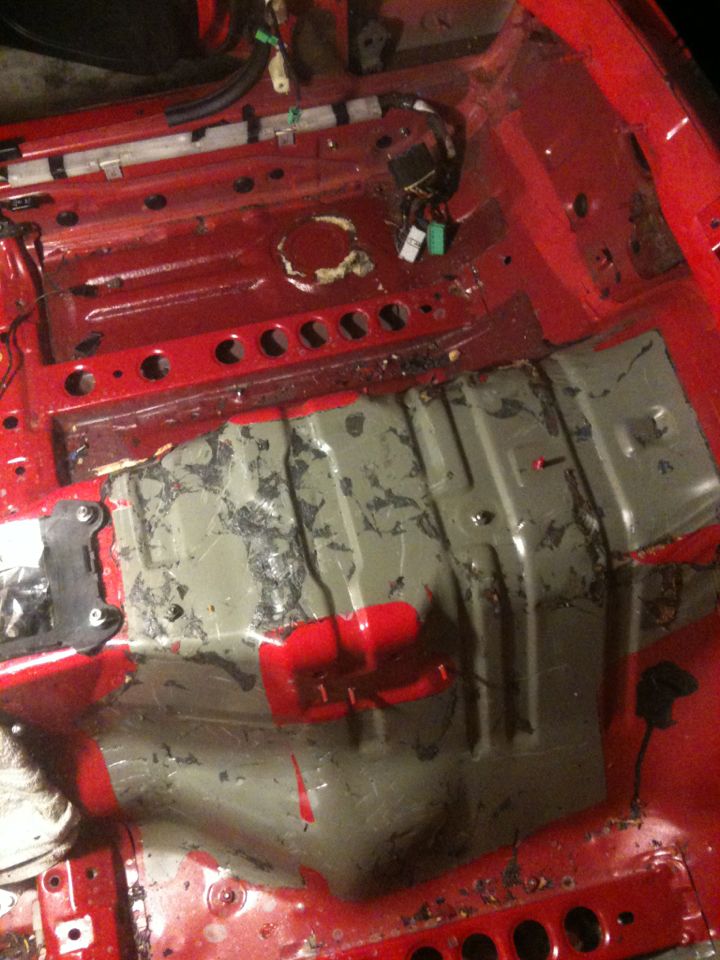
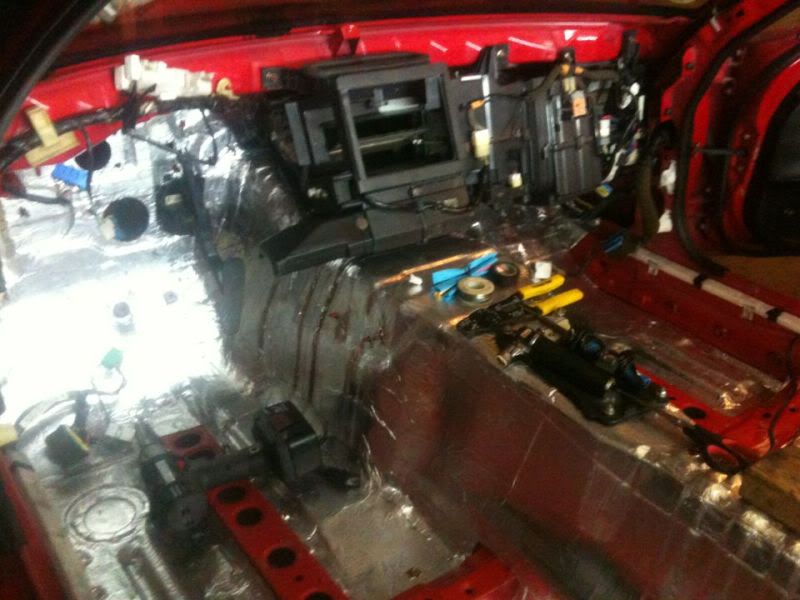
the black mat had to be removed to get to the rest of the sound deadening but i also wanted to get it out so i could address this
it looks like a mold or something. gonna give it a good cleaning incase i decide to reuse it.
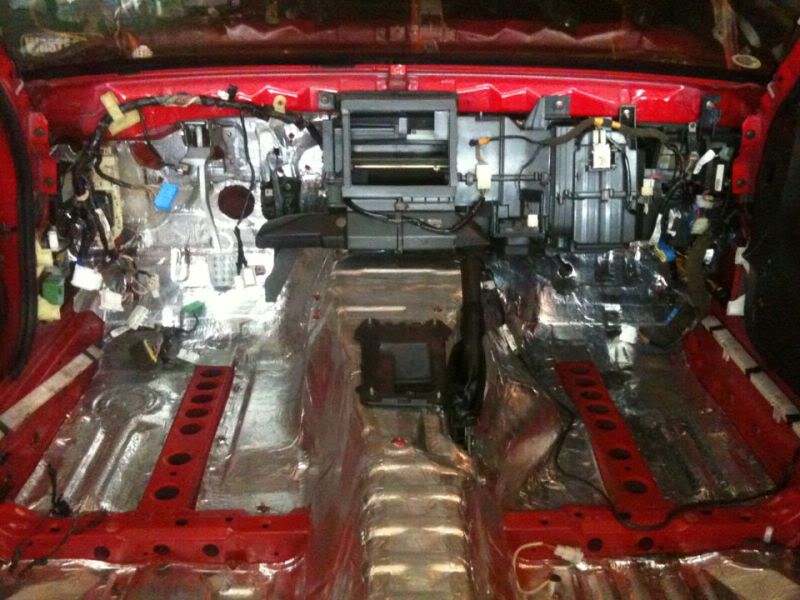
when the black mat was out this is what i was looking at
now to remove the rest of the sound deadener
BUT
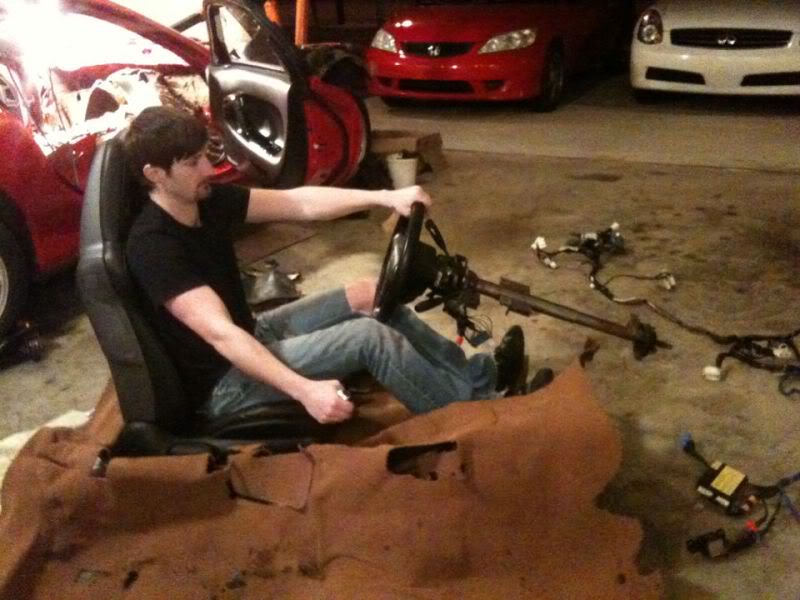
not before i acted goofy
i got back at it
well last time i left you all i still had a good bit to do to get to the firewall and floorboard area in the front. last nite i got off alittle early and decided to get some work done. i started out by removing the srs harness from the dash harness. it was still taped to the dash harness so i cut the tape and removed the wiring, crash sensor, and srs computer.
i've removed the sensors from the front harness but, i still have some more wiring to remove.
i was wondering what these plugs are for:
they're plugs in the srs harness that plug into some plugs in the dash harness...plugs.
after the srs harness was removed i was left with this
of course on the driver side i was left with this:
i began feeding the wires through the hole in the firewall
almost there!
finally the harness is out.
now that the wiring is out it's time to get down to the metal. first i gently removed the carpet
my plan is to pressure wash it and dye it black. i'm gonna remove the padding off the bottom of it. my car has that old car smell so i'm really wanting to get rid of that and also remove the little bit of weight to it.
once the carpet was out i was left with this
i took out the steering wheel and was then able to take out the black pad without having to cut it. i'm not sure yet if i'm gonna reuse it.
the black mat had to be removed to get to the rest of the sound deadening but i also wanted to get it out so i could address this
it looks like a mold or something. gonna give it a good cleaning incase i decide to reuse it.
when the black mat was out this is what i was looking at
now to remove the rest of the sound deadener
BUT
not before i acted goofy
i got back at it
i was moving right along in hopes of having all the deadening material removed
and then DISASTER STRUCK! well not really but, the attachment for my air hose decided to keep popping off my air hammer. i kept putting it back on and then it popped off and the valve remained open. the air was flowing and the hose was flying around. unfortunately the other fittings i had were either broken themselves or a different fitting so that was it for the air compressor use tonite.
i didn't wanna stop at that point tho. i had come so far. i began removing the padding from the black rubbery panels and getting it nice and clean.

i was actually able to remove the epoxy that held it on too
i don't think i ended up taking a pic once it was done but it did come out nicely.
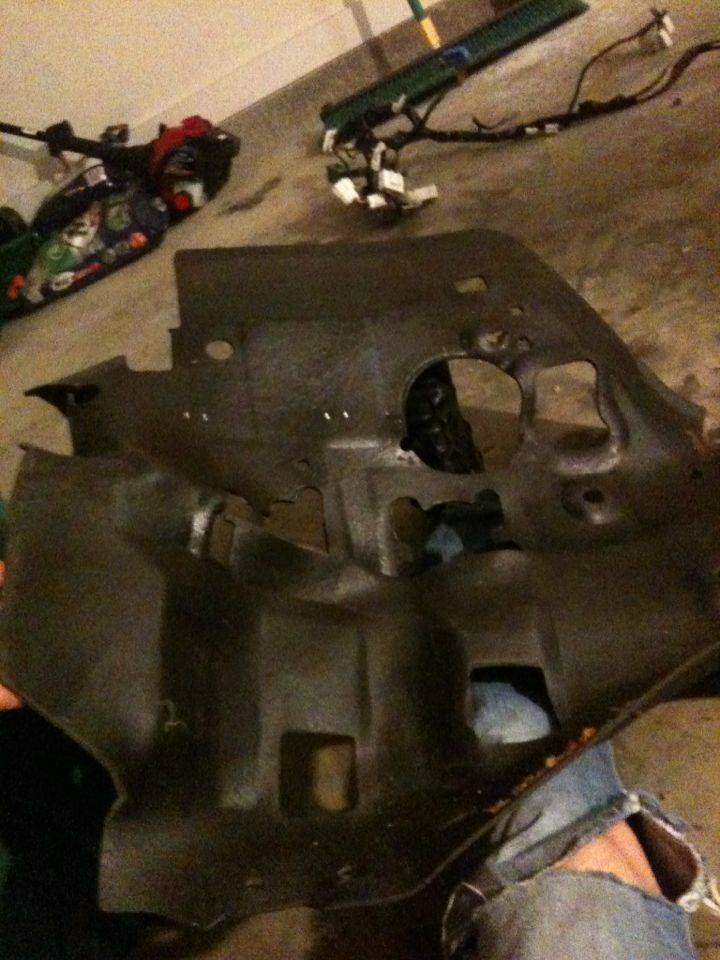
i sprayed it down with some goo gone andgave it a good wiping and it looks new. i'll most likely end up using it again but if not, it'll be clean for someone else to use.
that's it for now. i'm about to get up and go get a few more hose attachments so i can remove the rest of the sound deadening today. after that i'll start with the wire wheel to clean everything up and then i'll start getting the seams ready to weld.
STAY TUNED!
and then DISASTER STRUCK! well not really but, the attachment for my air hose decided to keep popping off my air hammer. i kept putting it back on and then it popped off and the valve remained open. the air was flowing and the hose was flying around. unfortunately the other fittings i had were either broken themselves or a different fitting so that was it for the air compressor use tonite.
i didn't wanna stop at that point tho. i had come so far. i began removing the padding from the black rubbery panels and getting it nice and clean.
i was actually able to remove the epoxy that held it on too
i don't think i ended up taking a pic once it was done but it did come out nicely.
i sprayed it down with some goo gone andgave it a good wiping and it looks new. i'll most likely end up using it again but if not, it'll be clean for someone else to use.
that's it for now. i'm about to get up and go get a few more hose attachments so i can remove the rest of the sound deadening today. after that i'll start with the wire wheel to clean everything up and then i'll start getting the seams ready to weld.
STAY TUNED!
well then you're in luck because tonite i got back out in the garage and got busy finishing what i couldn't last nite.
i started off where i left off on the sound deadening on the trans tunnel. it didn't take too long to get to this point
and from there to
and a few minutes later the floorboard was done

next up was the firewall
the first piece actually came off pretty easily as one piece. next up was the mid section which was alittle tougher
i kept going at it until...
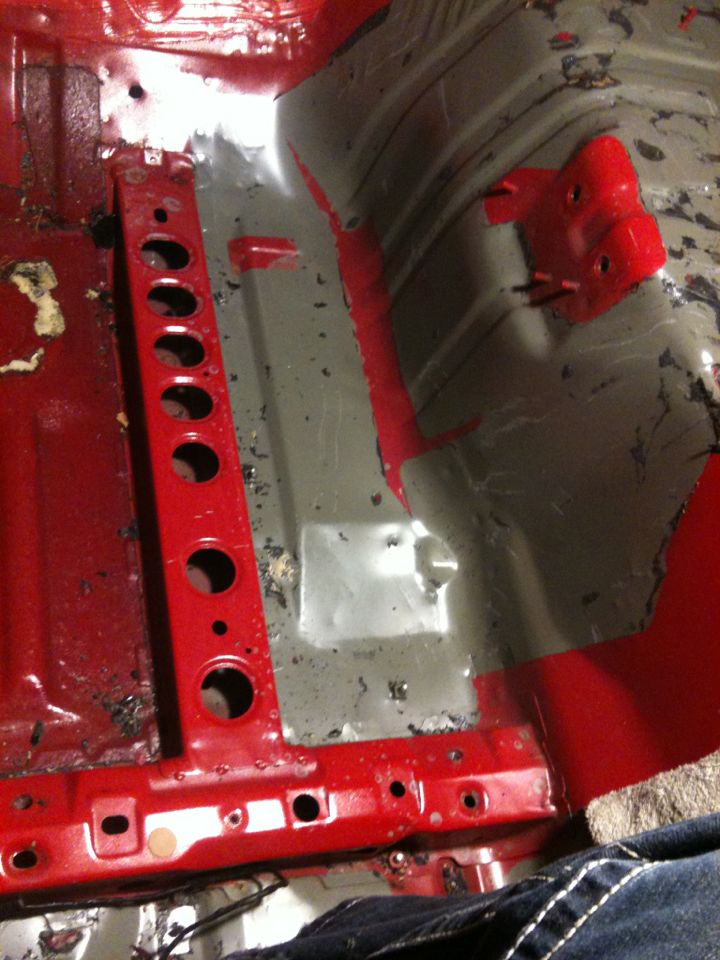
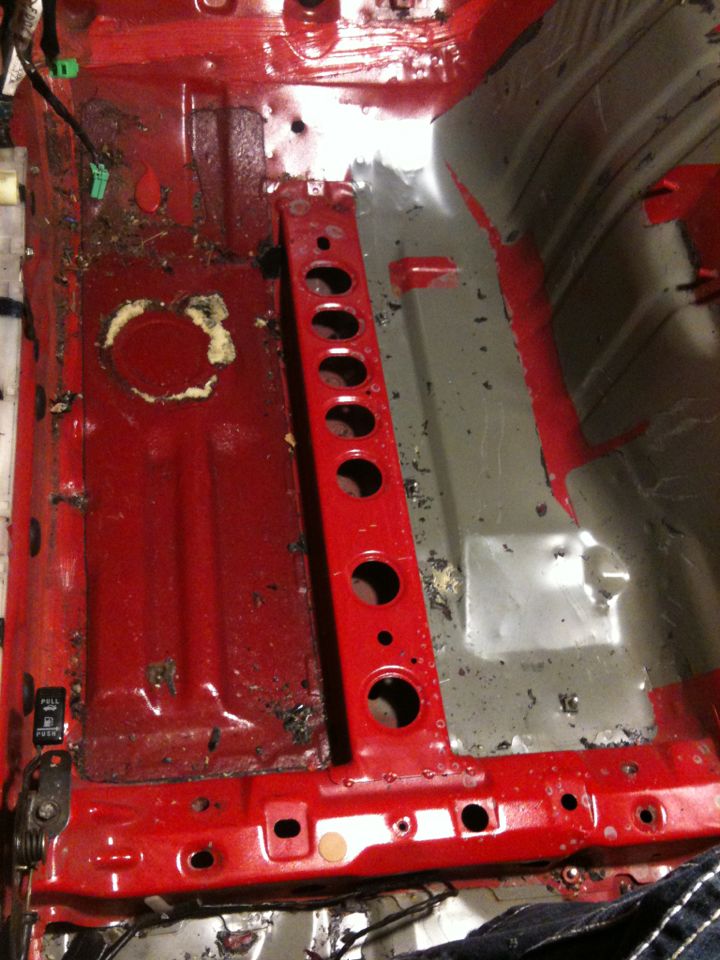
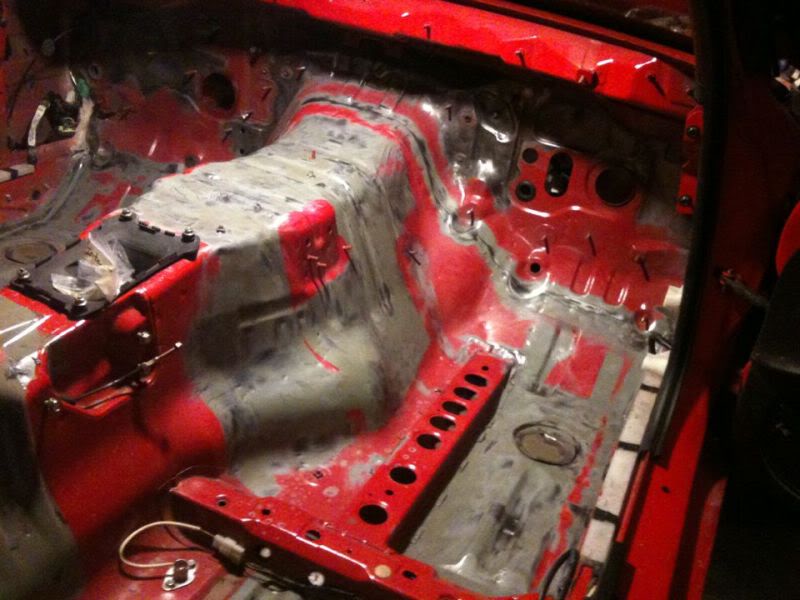
FINALLY, all the sound deadening material was gone...almost anyway. i wasn't satisfied until all the little remnants were gone. i also had to start removing the seam sealer so i broke out the drill and some wire wheel attachments
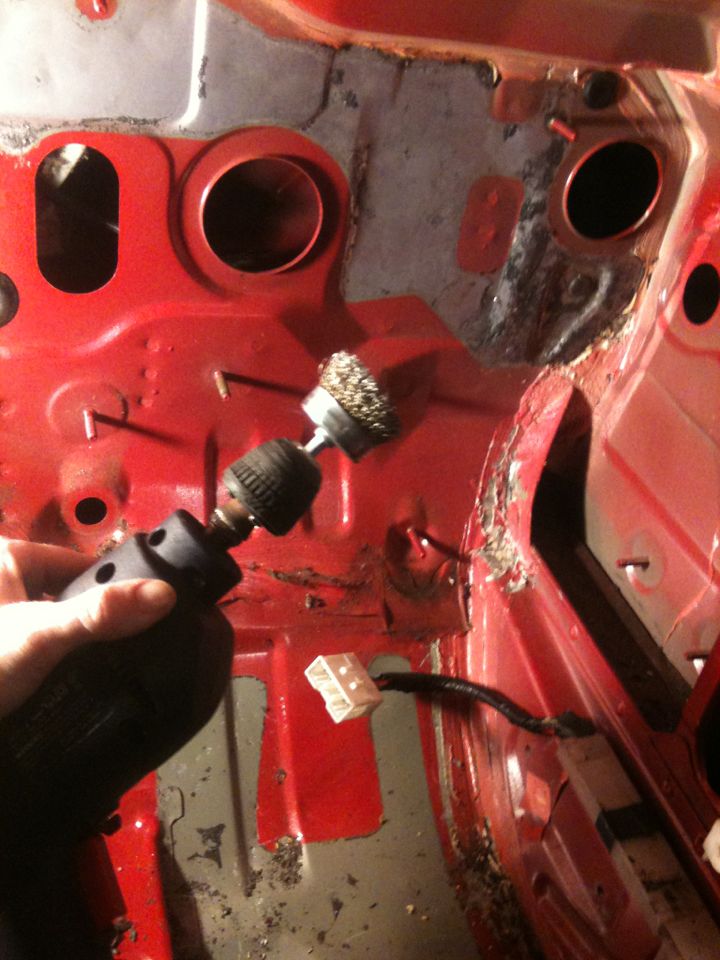
i quickly realized this was gonna take alittle more time than i had hoped. i started focusing more on the little sound deadening pieces that were left over since they were harder to remove than the seam sealer. i began getting the hang of it
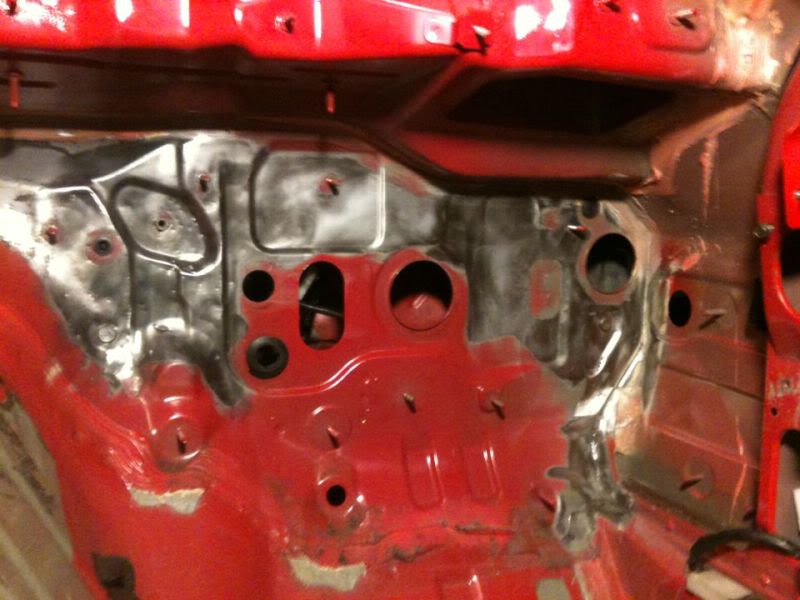
and from there i just took off. i would do alittle bit of the sd and then alittle of the seam sealer. dust started to pile up so every so often i would stop and vacuum. it actually helped me to see the progress alittle better as well. after a few hours i had the front half of the floorboard and the firewall DONE. i decided this was a good stopping point
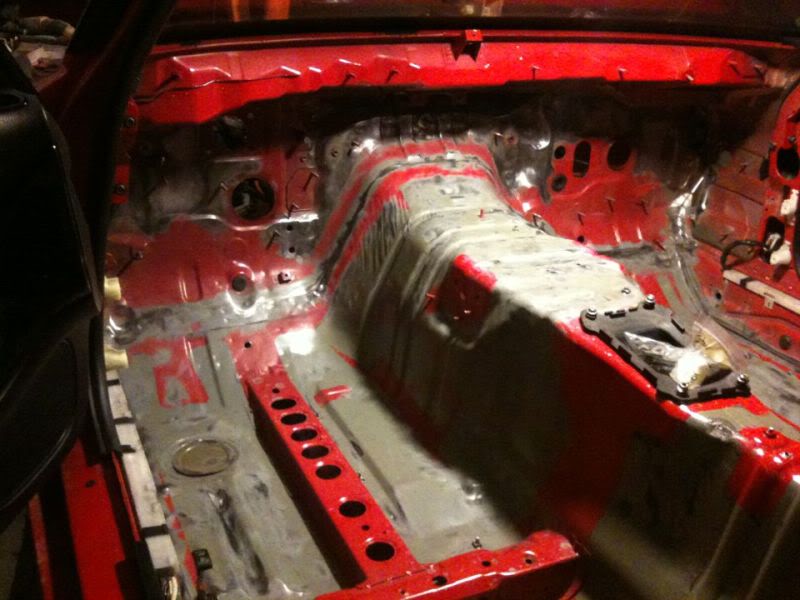
since i had the wire wheel out i went ahead and went over the entire floorboard and all just to give my aftermarket sound deadening alittle something more to hold on to. i was also thinking of spraying some adhasive promoter before putting it down. it should stick fine without it but, i just wanna make sure.
i've still got a good bit to go before i can start preparing to weld the seams. i may be able to get out there with the wire wheel tomorrow and get the rest of the floorboard and seams cleaned up. i may switch it up alittle and try some welding tomorrow just for a change of pace. i'm alittle sore from all the different bending, squating, pushing, pulling, etc but i'm kind of on a roll these last 2 days and i'd like to keep it up.
anyway, i guess we'll see if you guys get another update tomorrow. until then, comments welcome.
i started off where i left off on the sound deadening on the trans tunnel. it didn't take too long to get to this point
and from there to
and a few minutes later the floorboard was done
next up was the firewall
the first piece actually came off pretty easily as one piece. next up was the mid section which was alittle tougher
i kept going at it until...
FINALLY, all the sound deadening material was gone...almost anyway. i wasn't satisfied until all the little remnants were gone. i also had to start removing the seam sealer so i broke out the drill and some wire wheel attachments
i quickly realized this was gonna take alittle more time than i had hoped. i started focusing more on the little sound deadening pieces that were left over since they were harder to remove than the seam sealer. i began getting the hang of it
and from there i just took off. i would do alittle bit of the sd and then alittle of the seam sealer. dust started to pile up so every so often i would stop and vacuum. it actually helped me to see the progress alittle better as well. after a few hours i had the front half of the floorboard and the firewall DONE. i decided this was a good stopping point
since i had the wire wheel out i went ahead and went over the entire floorboard and all just to give my aftermarket sound deadening alittle something more to hold on to. i was also thinking of spraying some adhasive promoter before putting it down. it should stick fine without it but, i just wanna make sure.
i've still got a good bit to go before i can start preparing to weld the seams. i may be able to get out there with the wire wheel tomorrow and get the rest of the floorboard and seams cleaned up. i may switch it up alittle and try some welding tomorrow just for a change of pace. i'm alittle sore from all the different bending, squating, pushing, pulling, etc but i'm kind of on a roll these last 2 days and i'd like to keep it up.
anyway, i guess we'll see if you guys get another update tomorrow. until then, comments welcome.
Last edited by funnyscreenname; Feb 28, 2013 at 01:19 AM.
anyway, today i had to get another wire wheel but afterwards i got back to the car and finished up with the sound deadening/seam sealer removal. i don't know if i mentioned it but, the other day i went to harbor freight and picked up a cheap mig welder so i can learn to weld. i didn't have any scrap to practice on until today. i got a thin sheet of steel from lowe's and when i got home i gave it a shot just to get the feel of it all. the sheet of metal i got was really thin so i did burn through it. i messed around with wire speed and all and before putting everything up for the nite i decided to try spot welding a few spots that were already stripped down on the car.
it was basically just point and shoot. i didn't wanna burn through the car. there are some spots where i did go through the floorpan when removing the sound deadener with a chisel and i wanna be able to weld those spots back up. i don't wanna burn through tho. any tips on welding for a beginner? i've done alittle reading and all but, i didn't realize the metal was so thin on the car. the welds that i did do were quick but i could still see the undercoating smoke. after it cooled i felt underneath and i could feel the coating peel. it didn't burn through tho so i guess it worked fine. any advice before i tackle the rest of the interior?
here's the outcome of the past 3 days
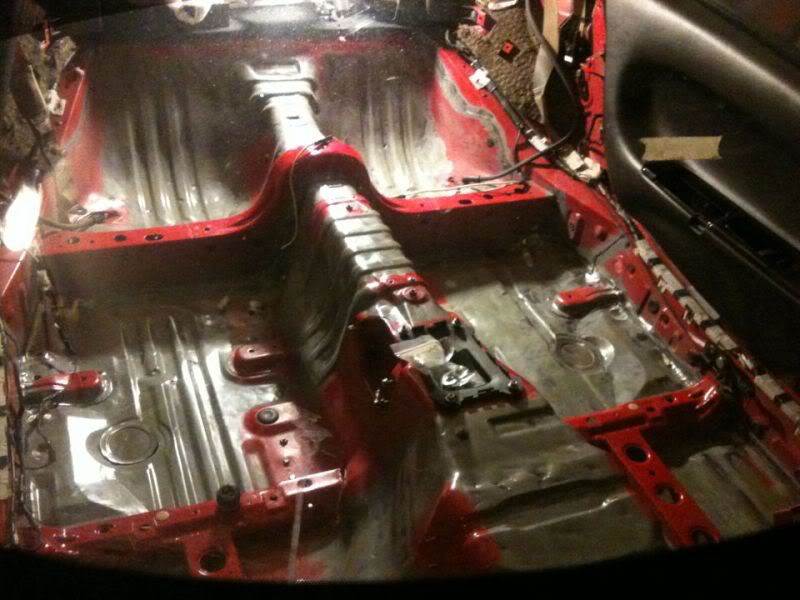
it may not look like much but, man what a tedious task it was and it's still not over. well, that's it for now. i've got a full week of work starting tomorrow but, i'm gonna try and get more done when i get off at nites. hopefully the next pic i post is of a bunch or spot welds evenly spaced between the seams.
3/9/13
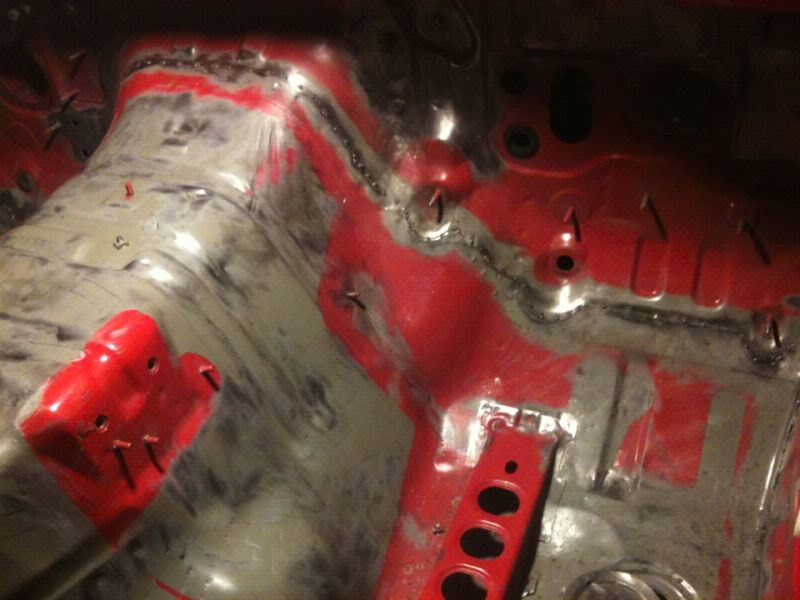
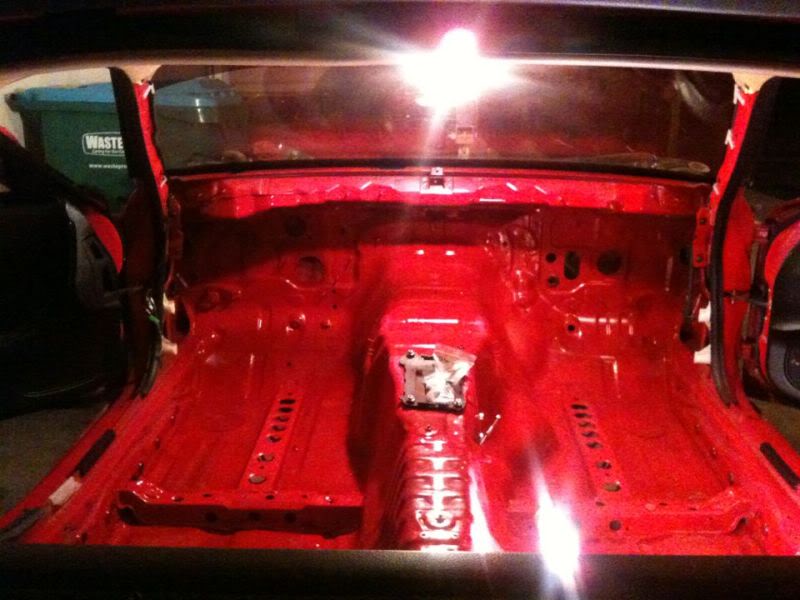
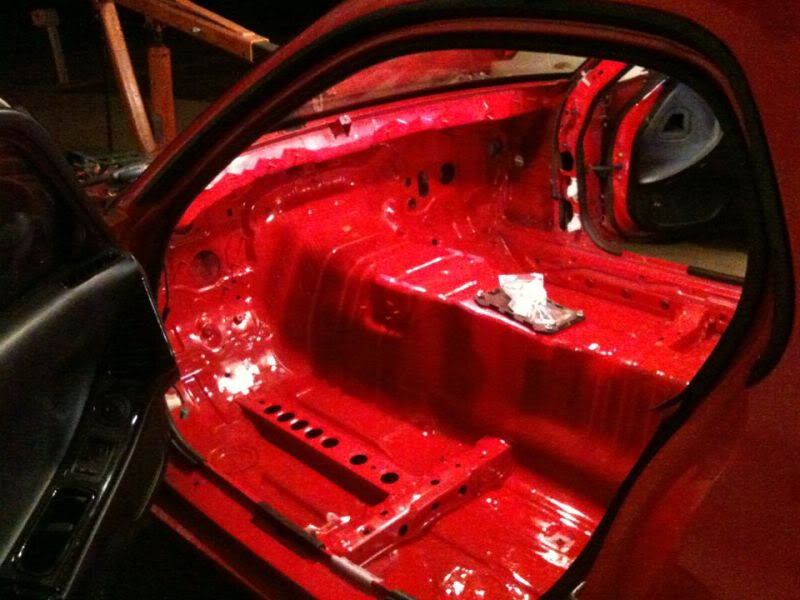
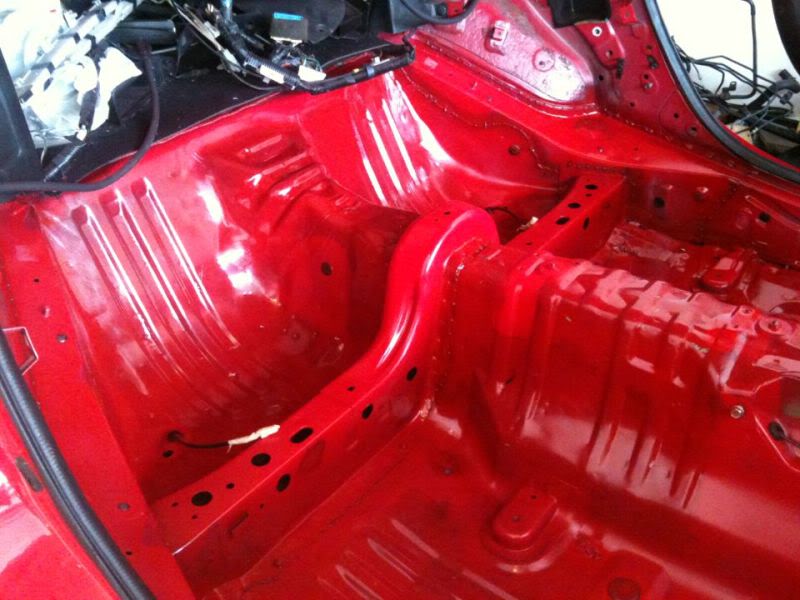
past few days i've only done alittle bit here and there. i did prep the metal and started welding the seams. so far i've got the firewall and upper most section of the trans tunnel spot welded. i've done alittle more but, haven't finished up yet. this week when i'm off i plan on getting some more done. until then, here's a few pics of what's been done.

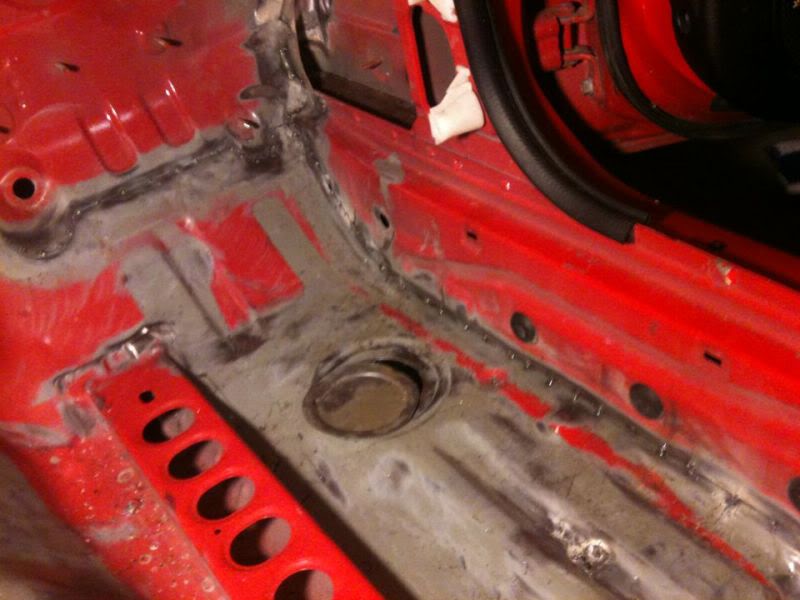
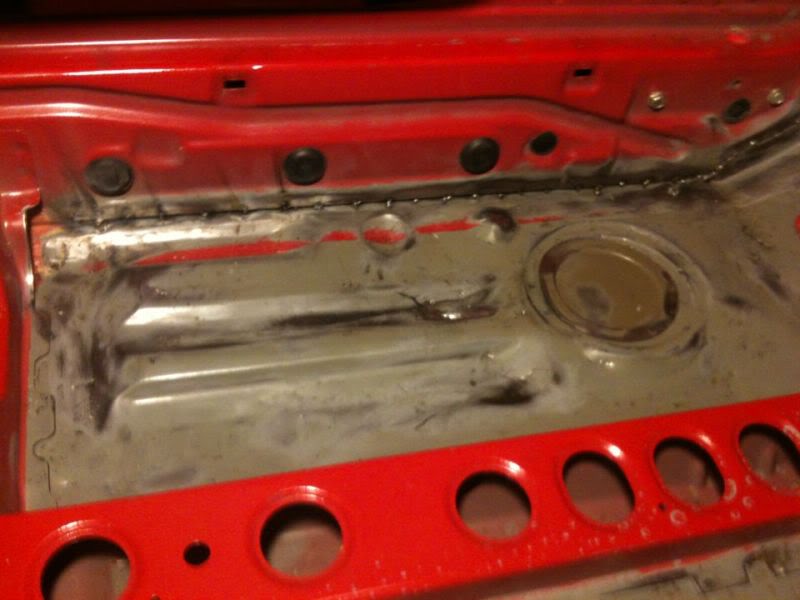
tomorrow i'll be heading out to belle rose, LA for Import Face Off so tonite i went ahead and stopped by the parts store to get some oil to do an oil change in my G35. while there i picked up a can or duplicolor perfect match paint to see how well it'd match the paint. i just sprayed a small section of the firewall about the trans tunnel. the color was close but, still just alittle off. take a look
i'll try another color to see if i can match it alittle better. i'm not too worried about the color behind the firewall but, for some of the other areas i'd like the color to match. i may just go ahead and have a friend professionally paint it. i'd really like to give it a shot myself tho. just don't think my compressor is suitable for painting.
well that's it for now. as always, comments welcome.
past few days i've only done alittle bit here and there. i did prep the metal and started welding the seams. so far i've got the firewall and upper most section of the trans tunnel spot welded. i've done alittle more but, haven't finished up yet. this week when i'm off i plan on getting some more done. until then, here's a few pics of what's been done.
tomorrow i'll be heading out to belle rose, LA for Import Face Off so tonite i went ahead and stopped by the parts store to get some oil to do an oil change in my G35. while there i picked up a can or duplicolor perfect match paint to see how well it'd match the paint. i just sprayed a small section of the firewall about the trans tunnel. the color was close but, still just alittle off. take a look
i'll try another color to see if i can match it alittle better. i'm not too worried about the color behind the firewall but, for some of the other areas i'd like the color to match. i may just go ahead and have a friend professionally paint it. i'd really like to give it a shot myself tho. just don't think my compressor is suitable for painting.
well that's it for now. as always, comments welcome.
3/17/13
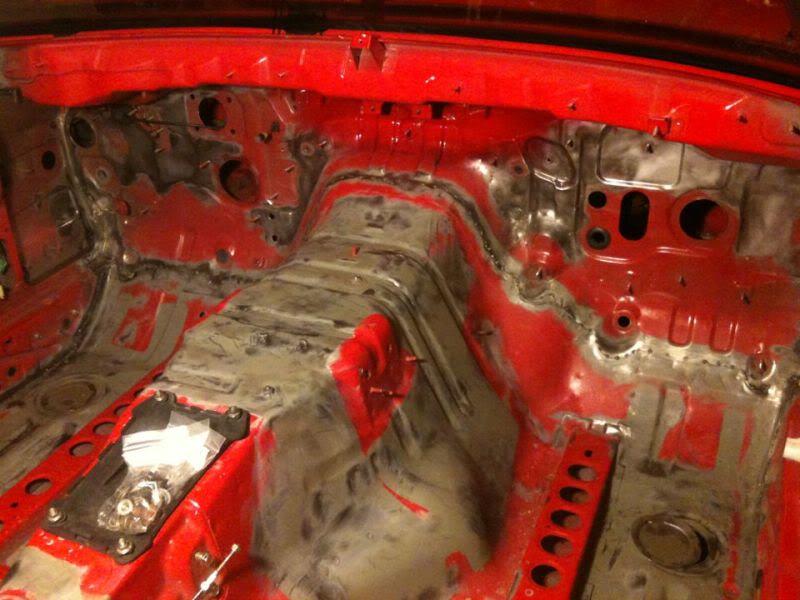
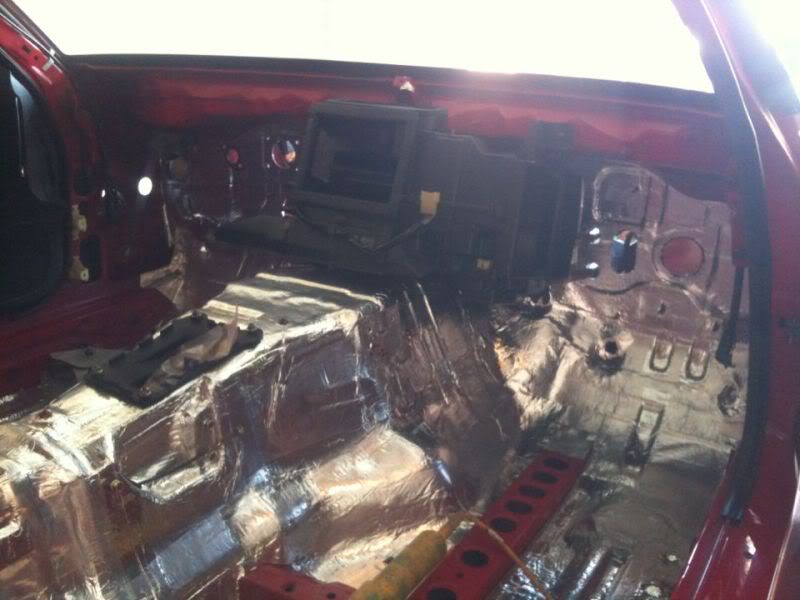
the past few nites i've been in the garage past 2 a.m. working on the car. when i last left off i still had some prep work & welding to do. sunday nite i was determined to get the cabin spot welding done and start with the paint. here's what was accomplished...


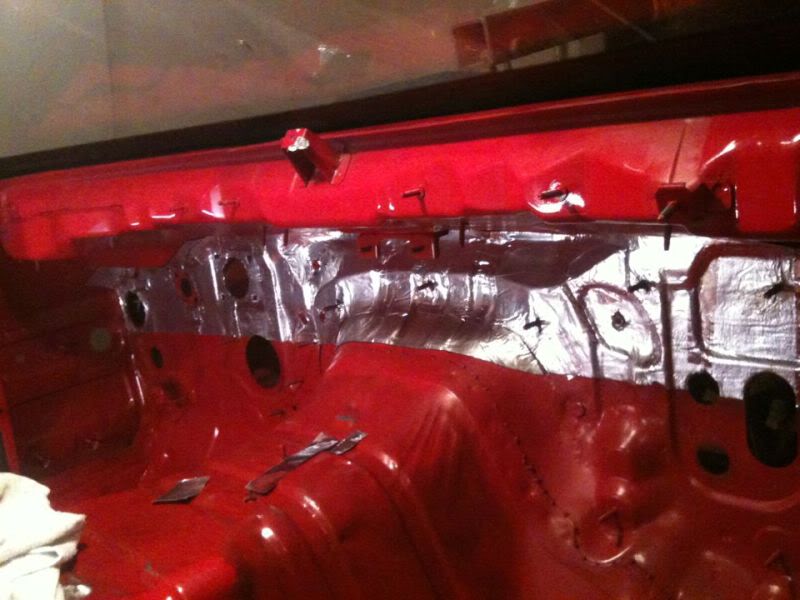
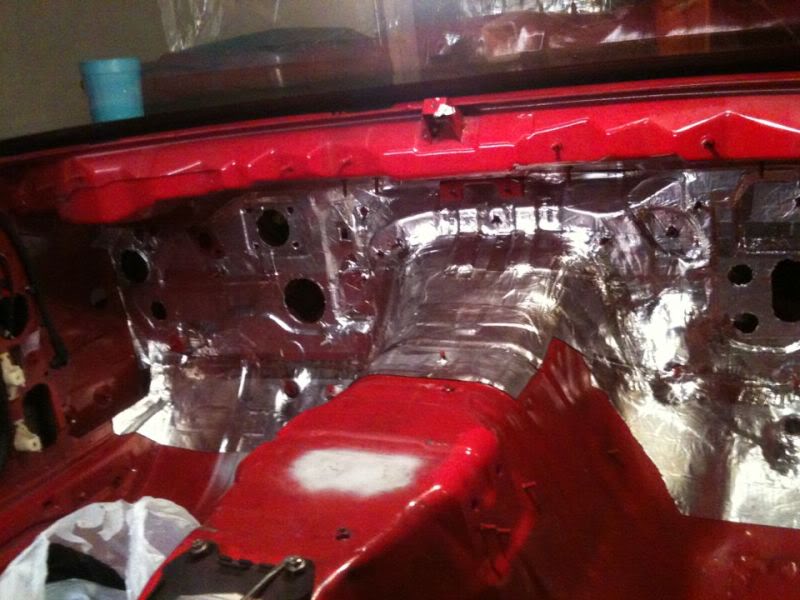
the paint came out pretty nice i think. too bad it won't be seen. last nite i scuffed the paint alittle to make the surface alittle more rough and then i wiped it all down, sprayed the area with adhesive, and began installing the sound deadener/heat barrier material. i started with the firewall...

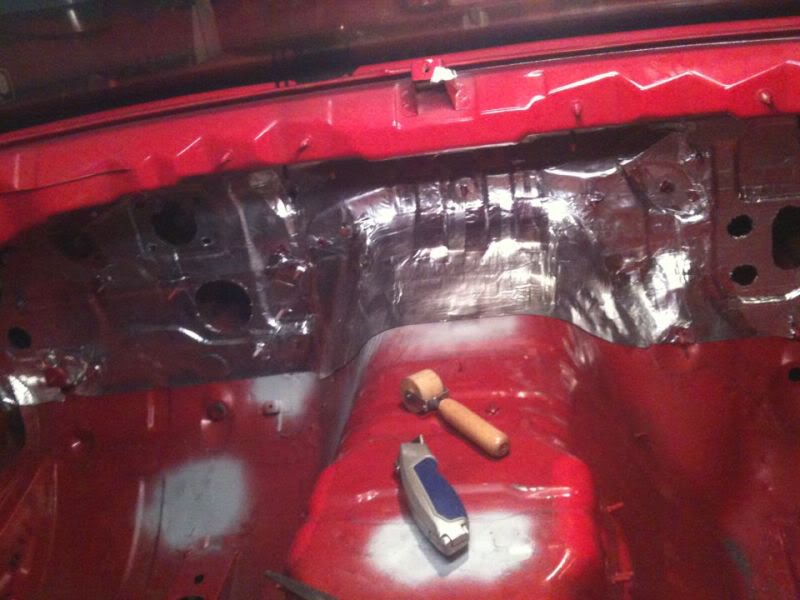
i began working with a small piece until i figured out the best way to work the material, afterall, this is my first time using this stuff. once the section was up it was time to smoth everything out. this is where it got tedious. with all the little curves, cracks, and crevasses it took some time to get everything nice and smooth but it came out looking great. i wanted to, at least, get the upper firewall squared away so i worked on until i was done with the upper most part of the firewall.

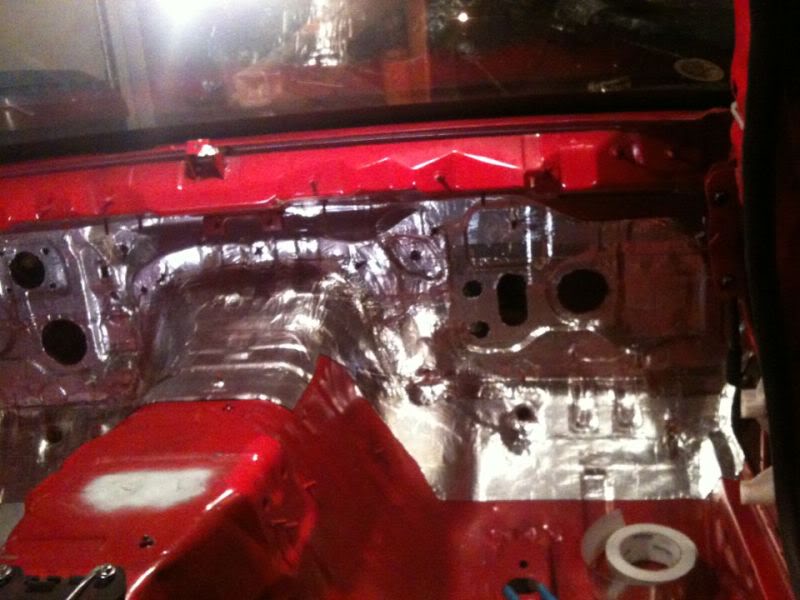
looks seamless right? there's actually a few relief cuts all over. i just used some aluminum tape to tape over them and to also go over the seams where the pieces overlap.
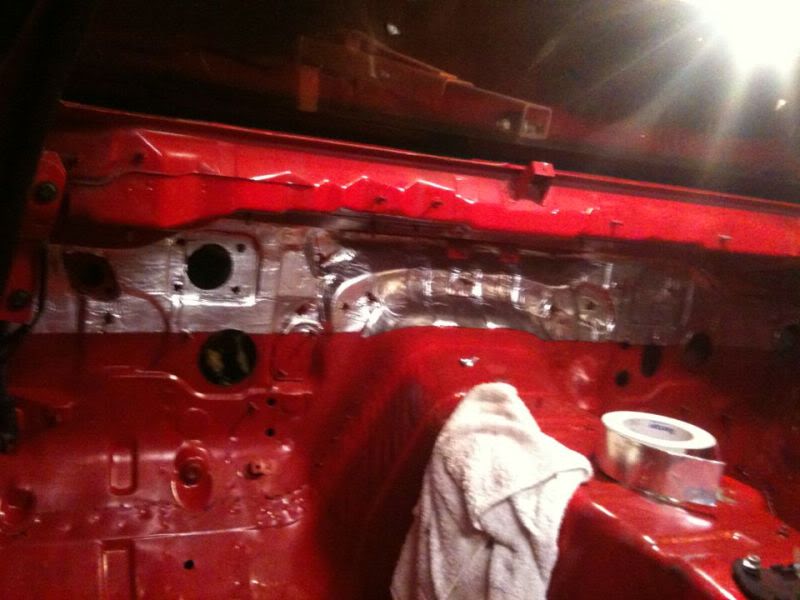
once the top row was finished i started on the section below. it was getting late so this is where i left off...

the pictures really don't show the results well but, it came out well. i've just gotta finish now.
i'm really happy with how far i was able to come in only 2 nites. i'm off the next 2 days and will do some more so stay tuned. any questions or comments welcome. thanks for looking everyone.
the past few nites i've been in the garage past 2 a.m. working on the car. when i last left off i still had some prep work & welding to do. sunday nite i was determined to get the cabin spot welding done and start with the paint. here's what was accomplished...
the paint came out pretty nice i think. too bad it won't be seen. last nite i scuffed the paint alittle to make the surface alittle more rough and then i wiped it all down, sprayed the area with adhesive, and began installing the sound deadener/heat barrier material. i started with the firewall...
i began working with a small piece until i figured out the best way to work the material, afterall, this is my first time using this stuff. once the section was up it was time to smoth everything out. this is where it got tedious. with all the little curves, cracks, and crevasses it took some time to get everything nice and smooth but it came out looking great. i wanted to, at least, get the upper firewall squared away so i worked on until i was done with the upper most part of the firewall.
looks seamless right? there's actually a few relief cuts all over. i just used some aluminum tape to tape over them and to also go over the seams where the pieces overlap.
once the top row was finished i started on the section below. it was getting late so this is where i left off...
the pictures really don't show the results well but, it came out well. i've just gotta finish now.
i'm really happy with how far i was able to come in only 2 nites. i'm off the next 2 days and will do some more so stay tuned. any questions or comments welcome. thanks for looking everyone.


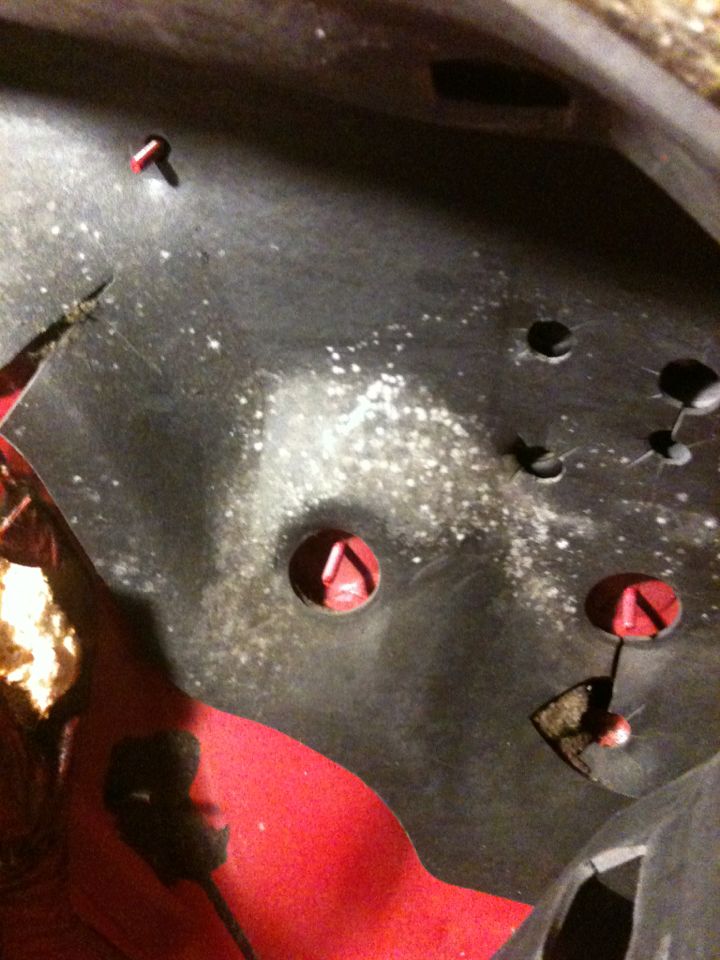
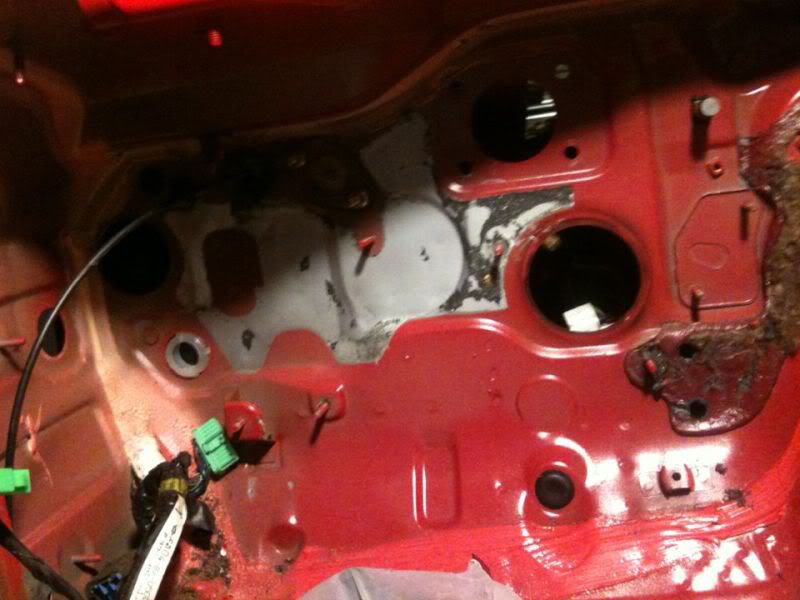
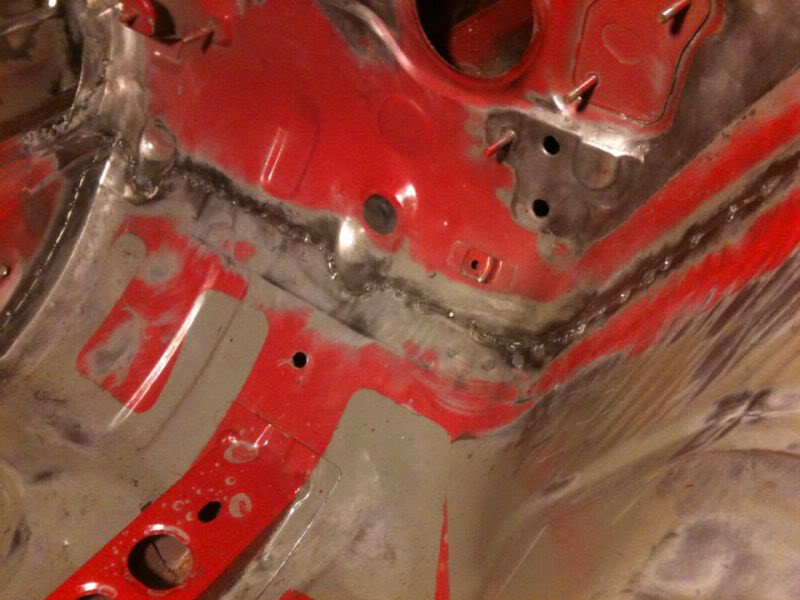
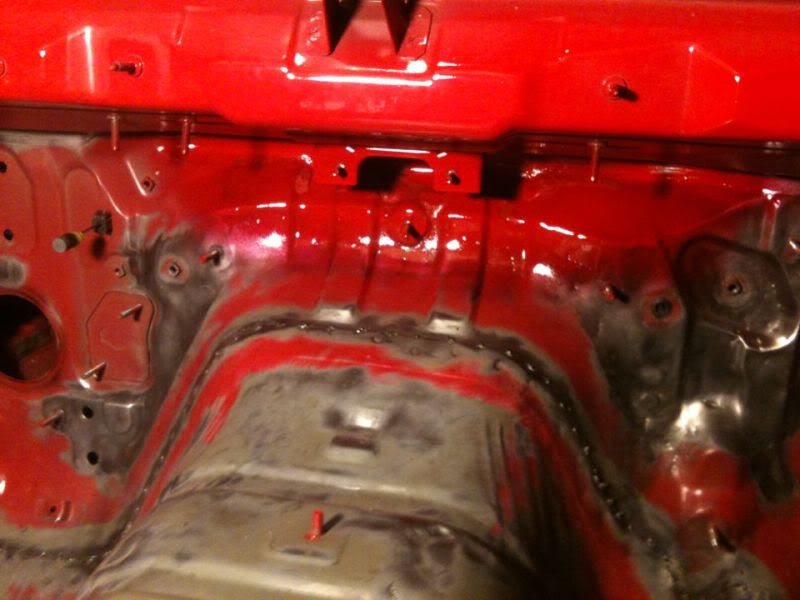
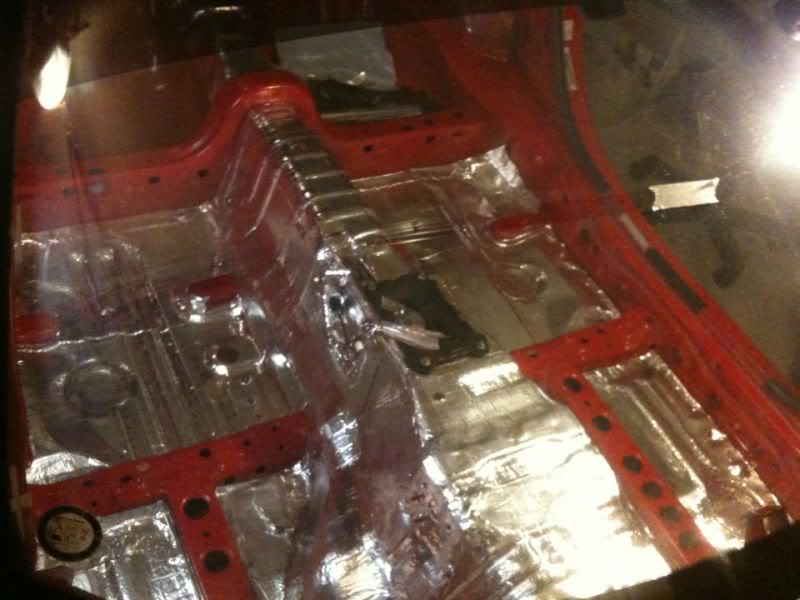
last nite i didn't do too much. i was going to begin putting down more material and when i went out i was quickly reminded that i had some holes to patch before the next section goes down on the driver side.
in this pic you can see three holes in the floor and firewall from the previous owner. this is where he ran the power wire through. i'm not too sure why there's three but, last nite i went ahead and patched the holes. i may snap a pic before i begin putting the rest of the material down but, if i don't, you've all seen a few holes welded up i'm sure.
thanks for the comments guys. they give me inspriation to keep up the work.
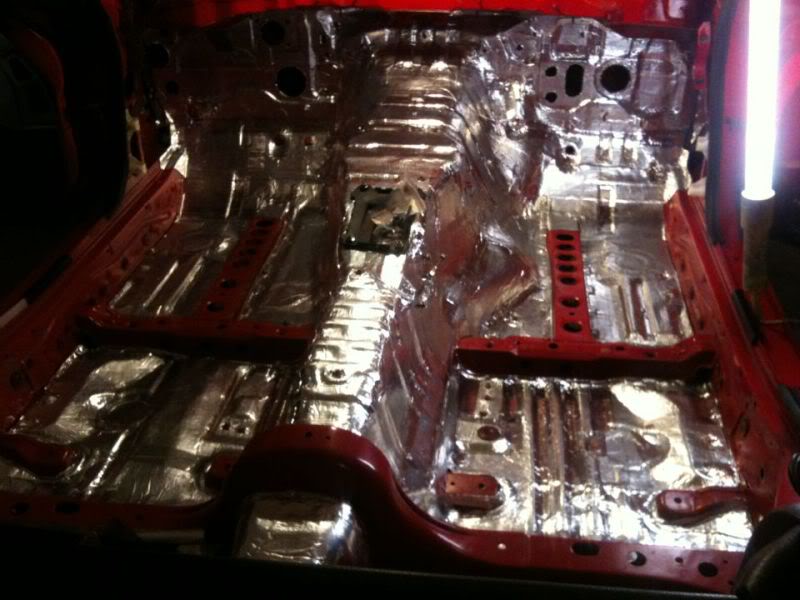
decided to get out in the garage tonite and make alittle progress.
figured i'd try and keep the rows even. once i get alittle further i'm hoping i can use a large sheet to go from side to side.

trying to leave a few plugs open so i can run wire if i have to. there are a few others along the floor and sides and i'm wondering if i should leave those open or just cover them. i'm not really sure i'd ever use any of those. has anyone ever had any use for any of the holes other than the ones in the firewall?
this is where i stopped for the nite. next time i get at it i'm not stopping until i'm past the curved part of the floor. maybe i'll even get the rest of the floor done and be able to start with the rear storage bin area.
figured i'd try and keep the rows even. once i get alittle further i'm hoping i can use a large sheet to go from side to side.
trying to leave a few plugs open so i can run wire if i have to. there are a few others along the floor and sides and i'm wondering if i should leave those open or just cover them. i'm not really sure i'd ever use any of those. has anyone ever had any use for any of the holes other than the ones in the firewall?
this is where i stopped for the nite. next time i get at it i'm not stopping until i'm past the curved part of the floor. maybe i'll even get the rest of the floor done and be able to start with the rear storage bin area.
Excellent Idea!! I'm not sure if I'd do the same thing just because i've become lazy at the end of my build but It looks great!! and you'll definitely be able to tell the difference in cabin temp. Are you running AC? it'll help keep temps regulated as well!
i haven't quite decided on ac yet. in a way i wanna say screw it but, i live in MS and the summers here aren't just hot as hell, they're also humid. i won't be using ac for awhile tho, that i do know. i know i'll want it when cruising and heading to meets and shows and all.
well i havent updated for awhile so i'll go ahead and show you guys what i've been up to.
UPDATE 4/4/13
i haven't been doing a ton of work to the car lately. still just trying to get the cabin lined so that i can move on to the hatch area. i'm nearly done with the cabin now. just have to finish the bin area then i'll be ready to move on. i know no one will ever see the floor but i still want it to be clean and seamless.


i keep forgetting to get new razors for my razor knife so i've been using the same dull one this whole time. it make cutting the material a pain kinda. have to use more pressure when cutting out a section.
it's a tedious job cutting out all the holes and welded nuts that the underpanels fasten into. i've gotta be careful to remember where the holes are. once the material is laid down and you move on to a different section you pretty much forget about them. i'll get under the car with a small pick and poke through all the areas i missed.
speaking of the underbody, whenever i was welding i noticed areas of the undercoating would catch fire. i've got some rubberized undercoating to spray but i'm not sure how well it'll spray while the can is horizontal. guess i'll see. still need to get under there and remove a few brackets and panels to refinish. hell, i haven't even removed the ppf yet so that needs to go. i doubt anyone will need that so looks like it'll go to the scrap yard along with the subframe and driveshaft unless someone wants to pay the shipping on them. i don't need to keep anything fom the driveshaft do i? i don't think so but doesn't hurt to ask.
as i get closer to finishing putting in the sd/heat barrier i'm thinking more and more about the engine bay. i know i wanna remove the seam sealer and spot weld the seams as i did inside but, i'm not sure whether i wanna try repainting it myself or have someone else do it. i'm also unsure if i wanna stick with the stock color or maybe go with a different color. in a way i'd like to have a different color in the bay to make it kinda stick-out but, on the other hand i kinda wanna keep it simple and clean with the red. i just think it'd be cool to have a different colored bay if it was detailed, tucked, and had a few parts that stuck out. i do love seeing a fast car with a clean engine bay that's had attention given to make it look as good as it runs.
lately i've been having trouble deciding what direction i wanna take the car. i tell myself i want a competitive daily. i guess that's the best way to describe it. i wanna be able to hit the track for the day and when done, drive the car home. i also wanna be able to daily the car if i choose and also take it to meets, events, etc. i guess i need to just sit down and make up my mind on what i want and then go from there.
i also need to make a list of **** i need and list priorities first. i don't need to buy anything for aesthetics right now that's for sure. just need to save until i find the right swap parts at the right prices. so far i've got my subframe, bumpsteer kit, trans mount, motor mounts, and diff brace. need a driveshaft still but, i've been thinking of getting a different subframe so i wanna hold off incase i do that.
alright guys, that's enough for tonite. i'll come back later and fill you guys in on a curing oven that may be built for my powdercoating. thanks for looking. as always, comments welcome.
4/25/13
well I've been kinda slacking on the build lately. been trying to decide what it is I actually wanna do with a few things and been alittle unmotivated. gonna try and get back at it pretty hard next week. there's a local car meet this sunday that i'm sure will motivate and inspire me to get back to building a well rounded car.
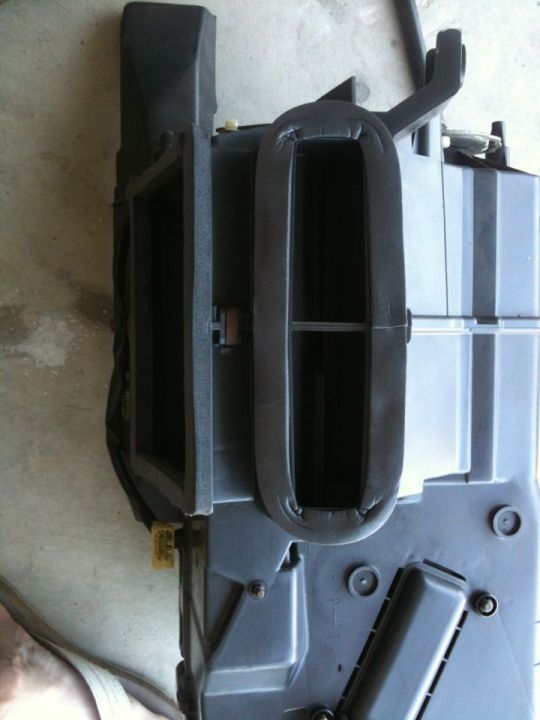
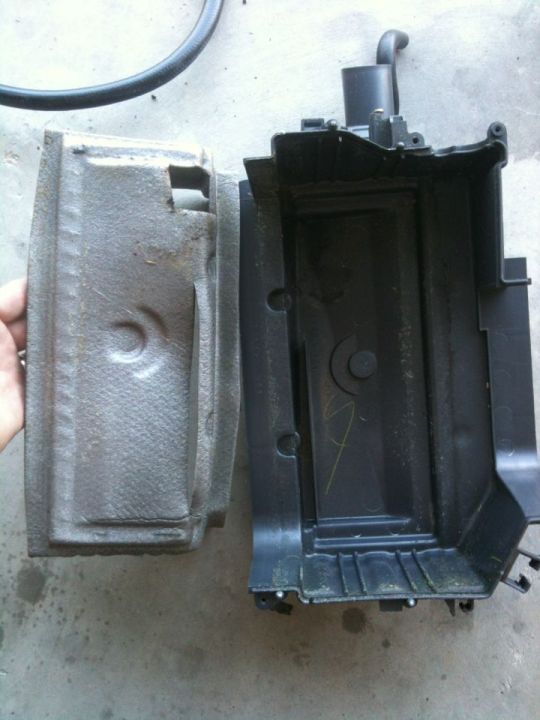
I've been wanting to start putting the interior back in but I've needed to clean up the ac/heater components behind the dash. all the components were dirty and some even had leaves and other debris in them. they've definitely never been cleaned before so today I got to it. this is the first part I started with

all the foam seal was dry and flaking off so I went ahead and replaced it all with...
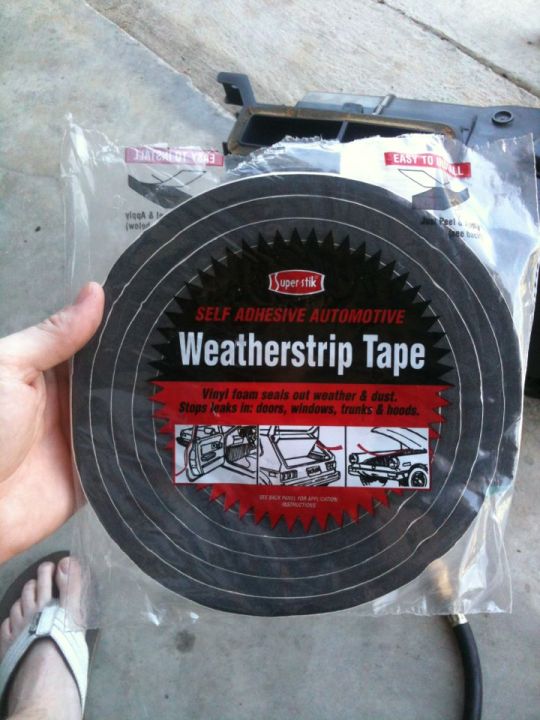
...that I got from o'reilly auto parts

not the best looking job but it'll seal well. you'll see after I did this section I decided to try and make it look alittle cleaner even tho no one will see the ****.
luckily the old foam adhesive strip came off pretty easily


after the old material was removed and the area was cleaned I put the new seal on
I think it came out well.
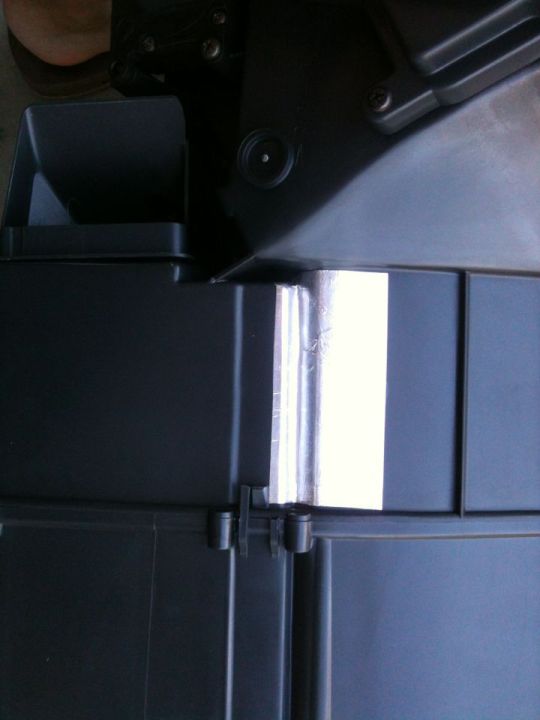
after I got the new seal put on I was doing more cleaning and found a crack
fortunately it didn't seem too bad. I don't think it's going to effect the air much, especially after I did a super quick fix...
anyway, after that part was all cleaned and good to go I decided to start fitting the pieces back into the car. I didn't bolt anything down yet. I think it'll be easier to put it all back in if the pieces are loose...
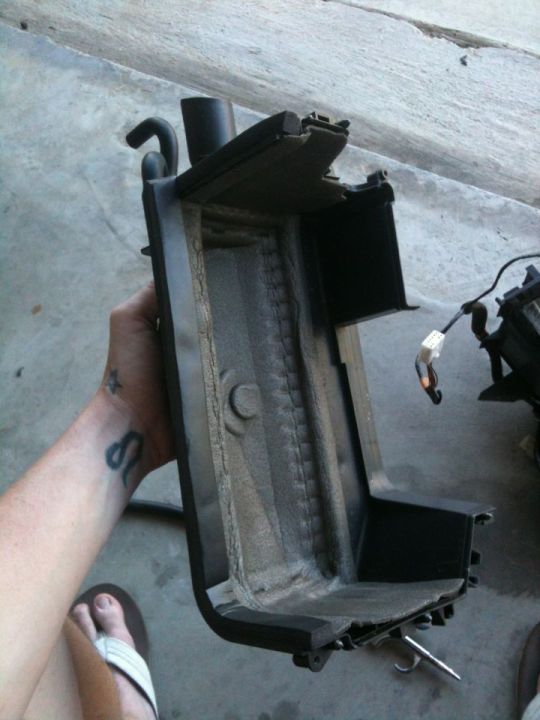
I soon moved on to the next piece of the puzzle. it had alotta debris in it so I decided the only way to really get everything cleaned out was to take it apart...
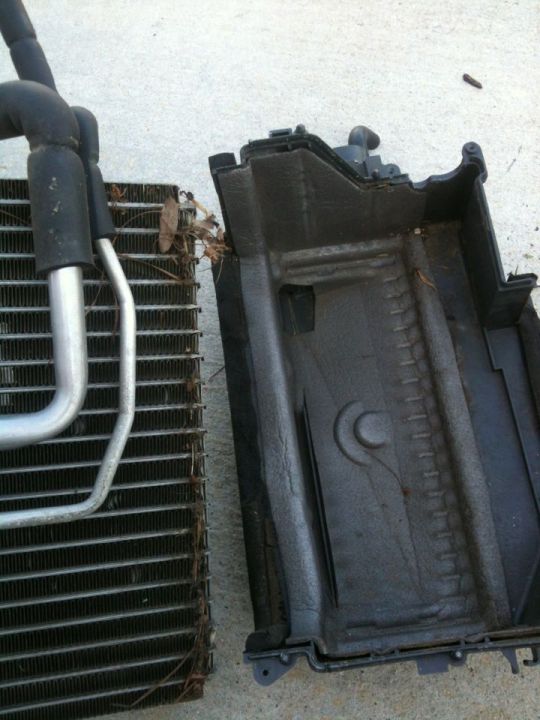
...and this was the mess in the bottom I couldn't have gotten to without taking it apart. for a 20 year old car I guess it could be worse.
this foam piece was loose so I went ahead and cleaned up the area it sits in then sprayed some adhesive and put it back.
as you can see, all the pieces needed the new seal. after all the debris was removed the piece was cleaned and the new seal was put on and ready to go in the car.
well I've been kinda slacking on the build lately. been trying to decide what it is I actually wanna do with a few things and been alittle unmotivated. gonna try and get back at it pretty hard next week. there's a local car meet this sunday that i'm sure will motivate and inspire me to get back to building a well rounded car.
I've been wanting to start putting the interior back in but I've needed to clean up the ac/heater components behind the dash. all the components were dirty and some even had leaves and other debris in them. they've definitely never been cleaned before so today I got to it. this is the first part I started with

all the foam seal was dry and flaking off so I went ahead and replaced it all with...

...that I got from o'reilly auto parts

not the best looking job but it'll seal well. you'll see after I did this section I decided to try and make it look alittle cleaner even tho no one will see the ****.
luckily the old foam adhesive strip came off pretty easily


after the old material was removed and the area was cleaned I put the new seal on

I think it came out well.
after I got the new seal put on I was doing more cleaning and found a crack
fortunately it didn't seem too bad. I don't think it's going to effect the air much, especially after I did a super quick fix...

anyway, after that part was all cleaned and good to go I decided to start fitting the pieces back into the car. I didn't bolt anything down yet. I think it'll be easier to put it all back in if the pieces are loose...

I soon moved on to the next piece of the puzzle. it had alotta debris in it so I decided the only way to really get everything cleaned out was to take it apart...

...and this was the mess in the bottom I couldn't have gotten to without taking it apart. for a 20 year old car I guess it could be worse.

this foam piece was loose so I went ahead and cleaned up the area it sits in then sprayed some adhesive and put it back.

as you can see, all the pieces needed the new seal. after all the debris was removed the piece was cleaned and the new seal was put on and ready to go in the car.


I saved the blower for last.


took it apart and of course it was filthy...

there's foam on each of the vents that open and close and it's in the same poor shape as the other seal. I decided to go ahead and remove it all. as I was blowing the parts clean with compressed air the foam just blew off and I knew if I would've left it alone it would've been a big mess once the air was turned on high...

the housing cleaned up nicely. I was alittle surprised at how clean the actual motor and blade assembly came out...


everything went back together nicely. I did end up running outta seal so i'll get more tomorrow and maybe get everything bolted down and connected...

well that's it for now


Joined: May 2005
Posts: 3,243
Likes: 42
From: Kennewick, Washington
That is a nice job on restoring the blower motor and stuff. After I get my dash out, I will be doing the same thing.
I think if enough people keep showing how consistently the seals are just in horrible shape, we will see more and more restoration work like this on our increasingly uncommon vehicles.
Keep up the good work. (Even if you are creating a soulless Mazdolet) ;-)
I think if enough people keep showing how consistently the seals are just in horrible shape, we will see more and more restoration work like this on our increasingly uncommon vehicles.
Keep up the good work. (Even if you are creating a soulless Mazdolet) ;-)
last nite I decided to start putting the wiring back in the car. I had to rewrap a section and I added the little mounts to put the wiring back in it's regular location. I also started putting the a/c back in since I finished with the seal.

I've also got a new set of toe links and started installing the superpro bushings. what a PITA. I had to order another set of outter bushings because one was alittle damaged. when they get here i'll press them in and put them back on the car. i'm half way there tho.

I was checking out the engine bay the other day and thought about taking the subframe and steering rack out and while checking out the steering rack I noticed the bushings were alittle beat so I went ahead and ordered another set.

that's it for now. i'll get more done soon. been busy putting up a privacy fence with my wife. will hopefully finish that tomorrow tho. we'll see how things go tho.
Today I got off alittle early and decided to come home and do some cleaning in the garage. After alittle organization, I decided to go ahead and finish putting the outer bushings in my toe links.
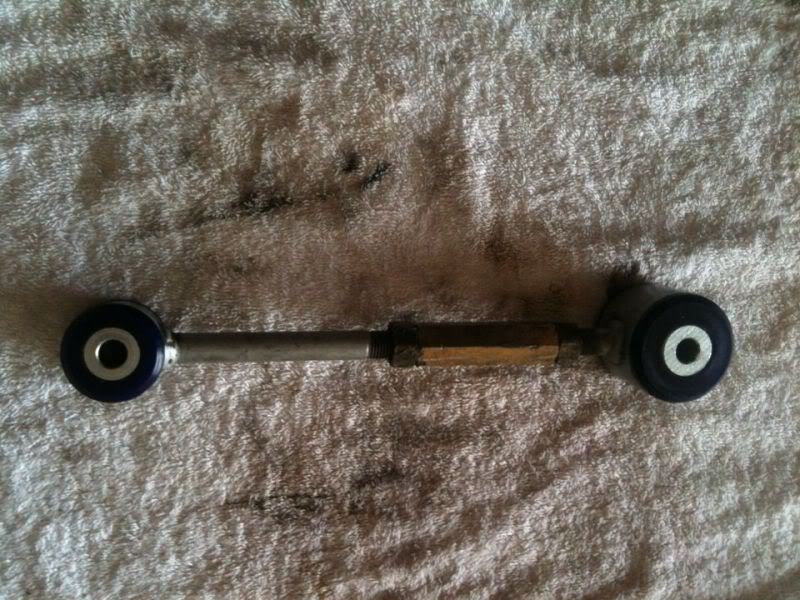
One down, one more to go...

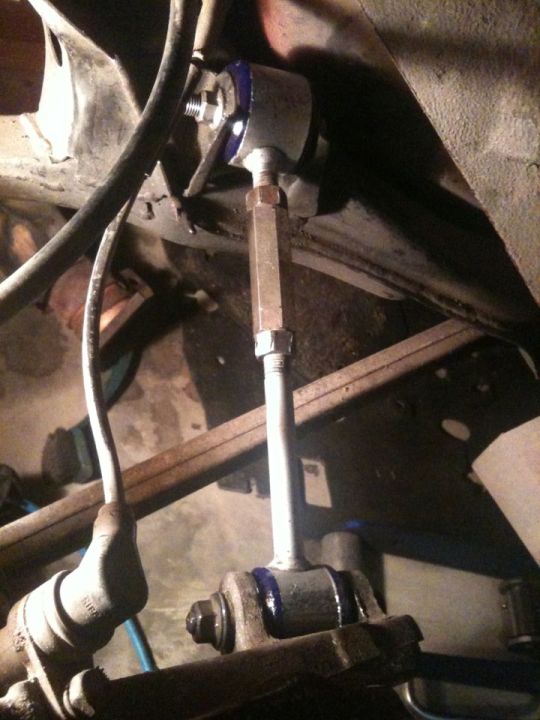
I decided to go ahead and install them since I'm tired of friends asking "Are your rear wheels sticking out?" Once the wheels were off I looked around and remembered how dirty things were. I mean, I knew it was dirty but, I guess I'd forgotten HOW dirty. I broke out a brush and the air compressor and scrubbed. Soooo much dirt/dust came outta the wheel wells. It was horrible.
Not only was everything caked in dust but all of the aluminum parts were oxidized. I planned on taking parts off and blasting them and powdercoating a few of them but I really don't remember everything being so dirty. I guess it has been awhile since I've been under the car. This is the first time I think I've been glad I don't have a high res camera. I'm sure you'll still be able to tell it's filthy though.
After seeing the state of the wheel wells and undercarriage I've decided that once the interior is back in I'll push the car outta the garage and pressure wash and scrub the car top to bottom. Awhile back I got some 3M rubberized undercoating and I've been planning on respraying the wells and undercarriage. I think once the interior is back in I'll go ahead and start refurbing the underside along with the rest of the components. Just wanna finish, or get close to finishing, the interior before starting on another part of the car.
Right now my funds are low so I'll continue with the interior and save for other parts. Surely there will be smaller parts that need to be replaced but, I really wanna save up enough $ so when the right engine deal comes along I can get it. I've got plenty of time...I guess.

One down, one more to go...

I decided to go ahead and install them since I'm tired of friends asking "Are your rear wheels sticking out?" Once the wheels were off I looked around and remembered how dirty things were. I mean, I knew it was dirty but, I guess I'd forgotten HOW dirty. I broke out a brush and the air compressor and scrubbed. Soooo much dirt/dust came outta the wheel wells. It was horrible.


Not only was everything caked in dust but all of the aluminum parts were oxidized. I planned on taking parts off and blasting them and powdercoating a few of them but I really don't remember everything being so dirty. I guess it has been awhile since I've been under the car. This is the first time I think I've been glad I don't have a high res camera. I'm sure you'll still be able to tell it's filthy though.
After seeing the state of the wheel wells and undercarriage I've decided that once the interior is back in I'll push the car outta the garage and pressure wash and scrub the car top to bottom. Awhile back I got some 3M rubberized undercoating and I've been planning on respraying the wells and undercarriage. I think once the interior is back in I'll go ahead and start refurbing the underside along with the rest of the components. Just wanna finish, or get close to finishing, the interior before starting on another part of the car.
Right now my funds are low so I'll continue with the interior and save for other parts. Surely there will be smaller parts that need to be replaced but, I really wanna save up enough $ so when the right engine deal comes along I can get it. I've got plenty of time...I guess.
Tonite I wanted to get alittle work done on the car so I went out and finished putting in the ac/heater components. After I made sure all the connections were good I was pretty much done with that. I had the pedals sitting in the car so I went ahead and put the brake & gas pedals in. Also the fuse box was laying in there so I went ahead and hooked it up.
Whenever I was removing the brake pedal the first time I damaged a connector. I ended up salvaging one from some unused wiring and broke out the solder. Pretty soon it was good as new.
After heat shrinking the connections I kinda found myself wondering, what next? I was moving some things around when I came across the E brake handle assembly. I decided to go ahead and put that in as well.
Afterwards, I found myself trying to track down a broken ground wire I found while going over the dash. No luck. I wanted to do more but, figured I wouldn't start anything I couldn't finish tonite.
I've been wanting to dye my carpet and reuse it. I'd like to be able to soak the carpet awhile to get a uniform color but, I'm not quite sure how to go about it. I was thinking of maybe cutting the carpet down the middle and dying the pieces separately in the tub. I'm not sure if the dye will stain the tub or not though and it seems like it'd be a better idea to do it outdoors. What do you guys think? Any ideas?
Since my driver seat was in such bad shape and I had an RX8 seat sitting in the garage I decided I'd put the FD rails on the RX8. It's probably gonna take alittle welding but, it definitely seems doable. I was really excited about it until I came across a Corbeau seat for cheap locally on Craigslist. Now I'm not sure if I'll finish the rail swap or not.
There's still some wiring I've gotta take care of before the carpet goes in but, not much at all. I'd really like to get the carpet dyed and ready to go soon so I can get it back in the car and off the garage floor. I've still gotta refinish my headliner and interior panels. I've been thinking of trying the dye method with those as well. I've been thinking of a way to dye the rear bins as well if the other parts turn out well. Just need a bigger container...and alotta dye.
Anyway, that's it for now. I know it isn't much but, I figured I'd post it anyway. I'd really like to hear you guys opinions on dying the carpet and paneling. I'm open to ideas.

Whenever I was removing the brake pedal the first time I damaged a connector. I ended up salvaging one from some unused wiring and broke out the solder. Pretty soon it was good as new.

After heat shrinking the connections I kinda found myself wondering, what next? I was moving some things around when I came across the E brake handle assembly. I decided to go ahead and put that in as well.

Afterwards, I found myself trying to track down a broken ground wire I found while going over the dash. No luck. I wanted to do more but, figured I wouldn't start anything I couldn't finish tonite.
I've been wanting to dye my carpet and reuse it. I'd like to be able to soak the carpet awhile to get a uniform color but, I'm not quite sure how to go about it. I was thinking of maybe cutting the carpet down the middle and dying the pieces separately in the tub. I'm not sure if the dye will stain the tub or not though and it seems like it'd be a better idea to do it outdoors. What do you guys think? Any ideas?
Since my driver seat was in such bad shape and I had an RX8 seat sitting in the garage I decided I'd put the FD rails on the RX8. It's probably gonna take alittle welding but, it definitely seems doable. I was really excited about it until I came across a Corbeau seat for cheap locally on Craigslist. Now I'm not sure if I'll finish the rail swap or not.
There's still some wiring I've gotta take care of before the carpet goes in but, not much at all. I'd really like to get the carpet dyed and ready to go soon so I can get it back in the car and off the garage floor. I've still gotta refinish my headliner and interior panels. I've been thinking of trying the dye method with those as well. I've been thinking of a way to dye the rear bins as well if the other parts turn out well. Just need a bigger container...and alotta dye.
Anyway, that's it for now. I know it isn't much but, I figured I'd post it anyway. I'd really like to hear you guys opinions on dying the carpet and paneling. I'm open to ideas.