
FD Maintenance / Build


FD Maintenance / Build
Thought I would create a build thread so that I could document the progress and share lessons learned around my maintenance / build.
1st rotary which happens to be a FD.
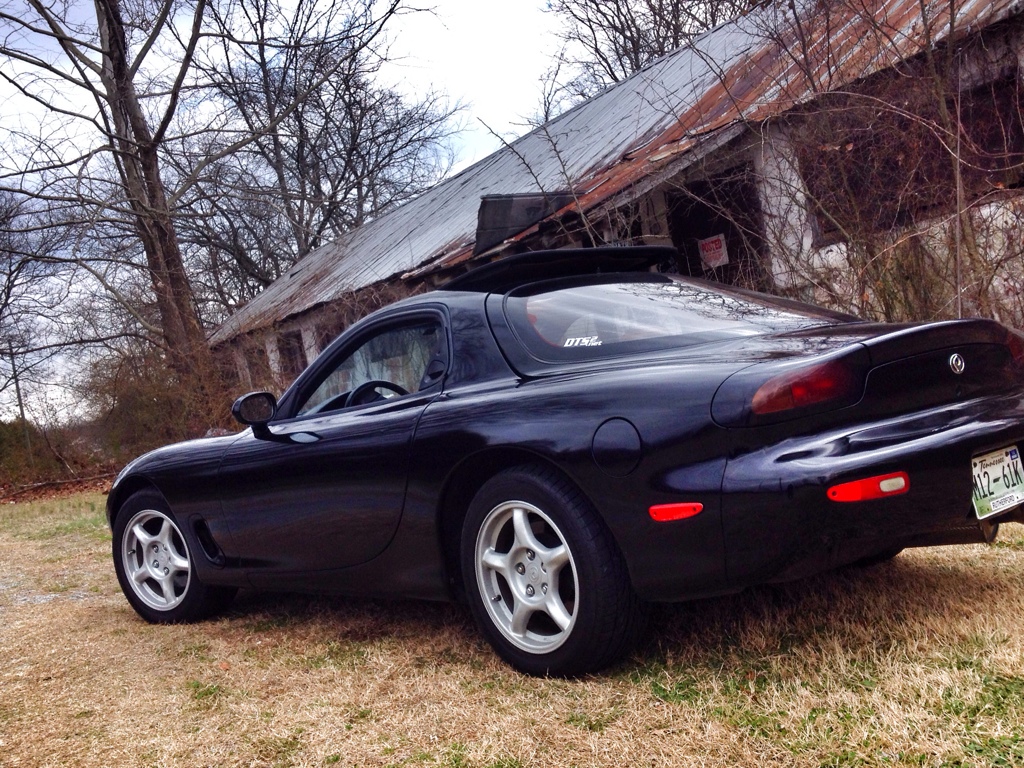
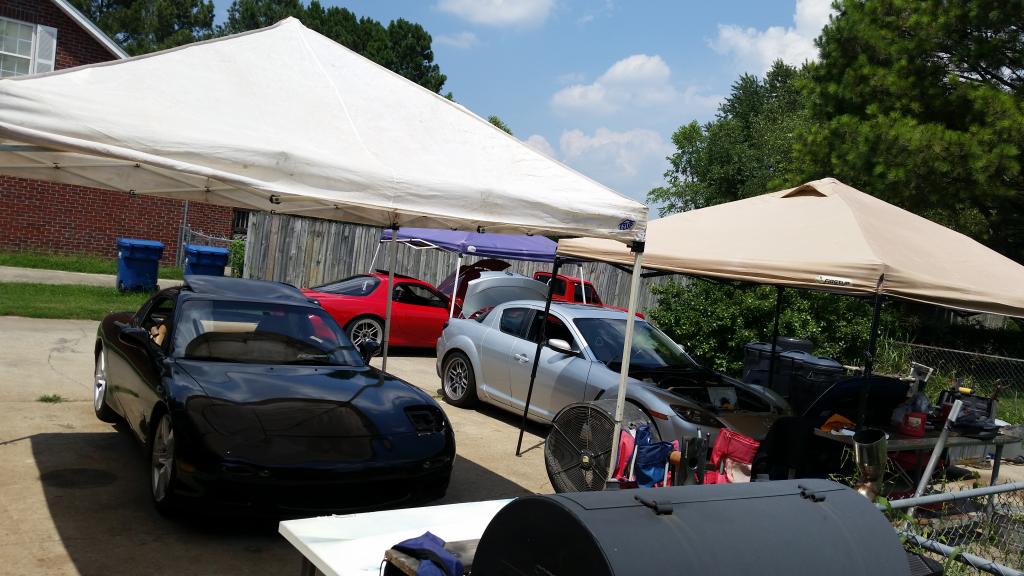
3/1 � Picked up the car in Laurel, MS
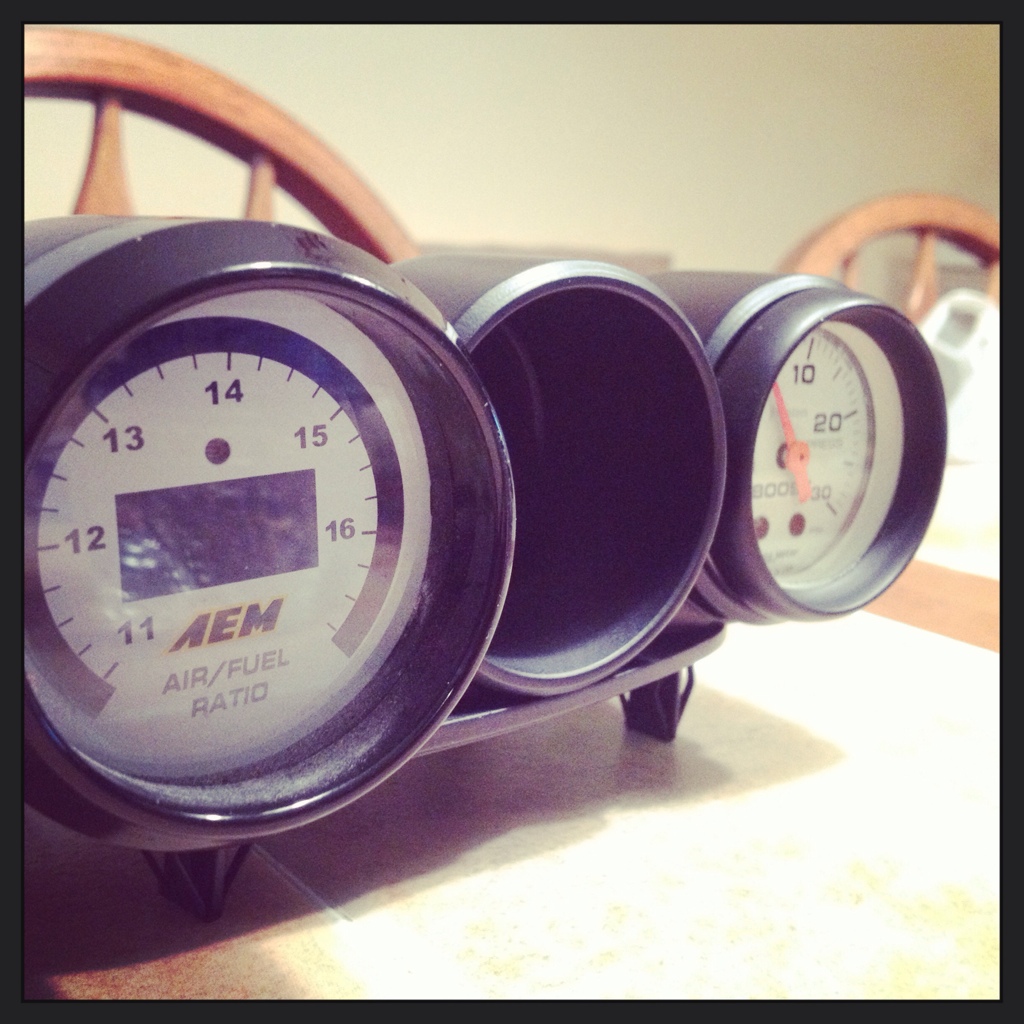
3/2 � Installed boost gauge and made an extra key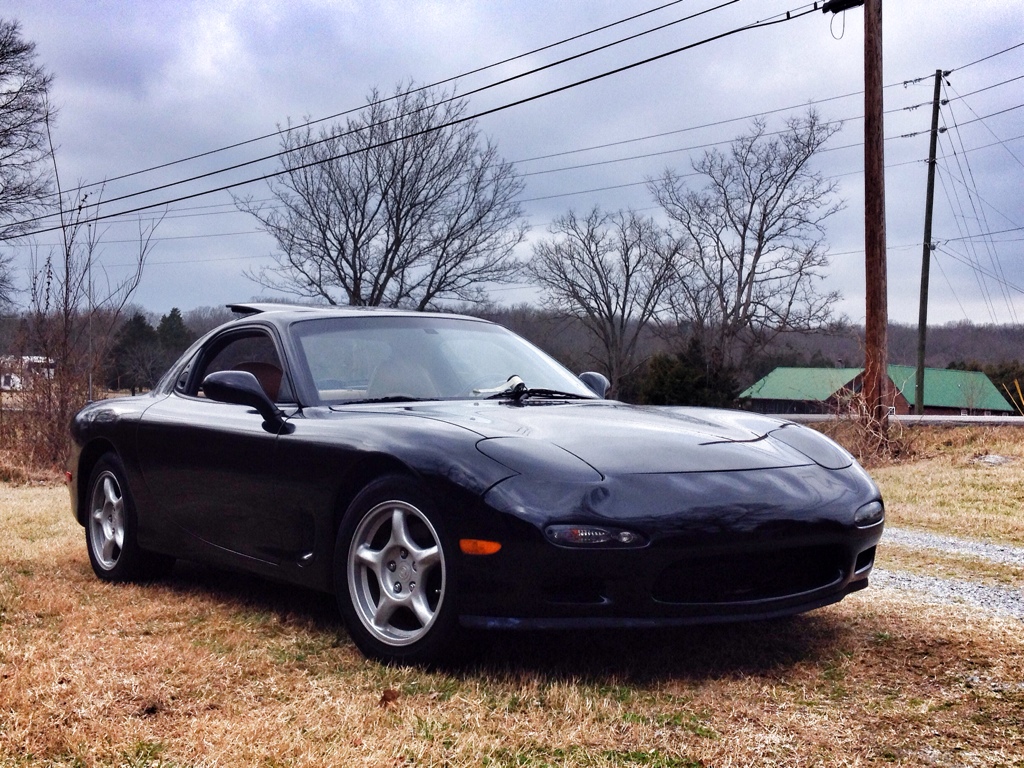
3/8 � 3/9 Marks the 2nd week of owning the car.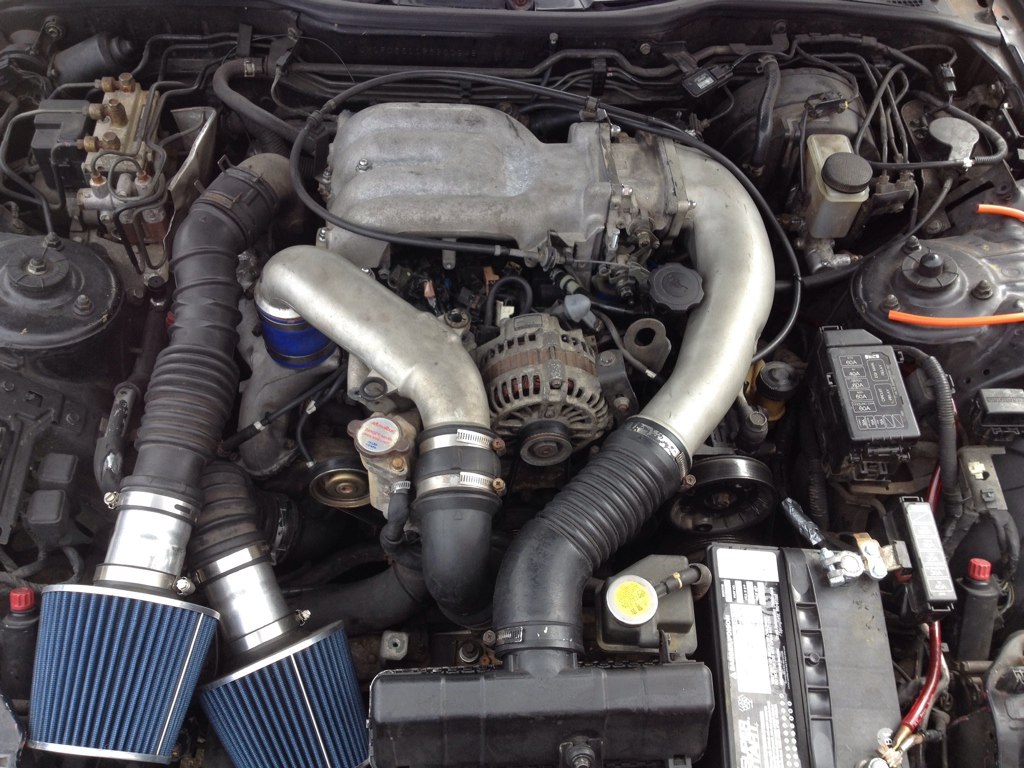
3/10
When the time and funding is right I'd like to go with a single turbo setup using the BW s360 Turbo with either a Sidemount or V mount intercooler.
Comments and Feedback are welcomed.
1st rotary which happens to be a FD.
3/1 � Picked up the car in Laurel, MS
- Left Smyrna, TN 6:00 am and got back in town 8:00 pm
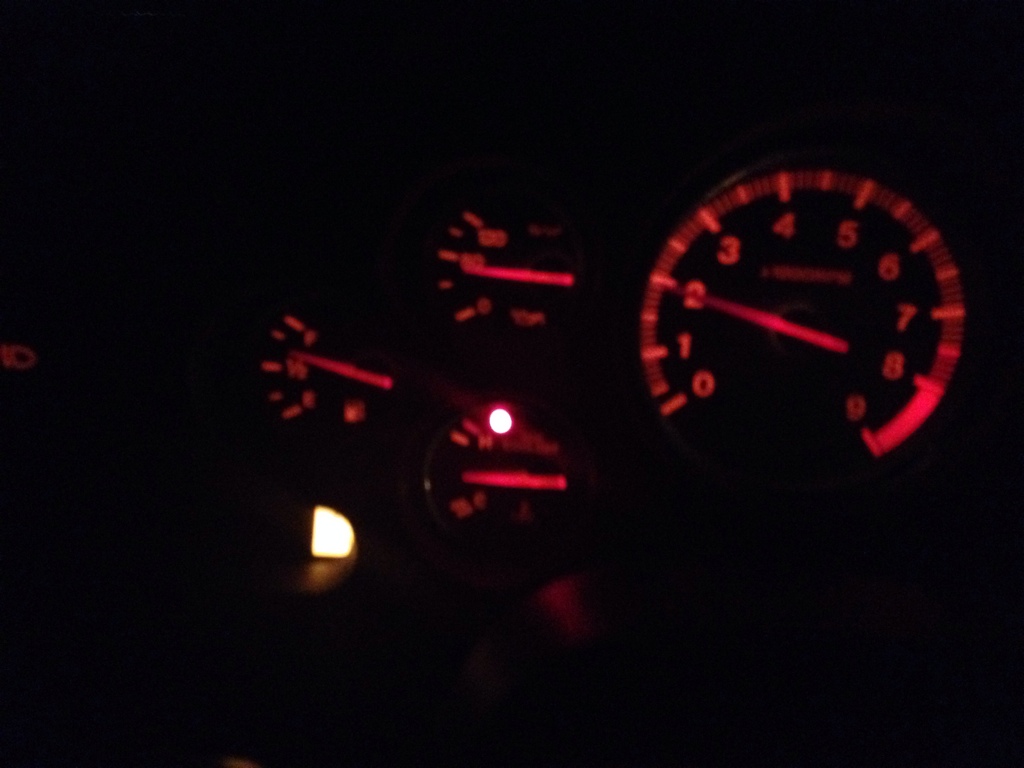
- Planned on doing a compression check but car drove fine and engine was too hot to do a compression check
- Thought it had 89k miles but tach and odometer works when it want to so miles are unknown
- Boost, Compression and Mileage unknown

3/2 � Installed boost gauge and made an extra key
- Installed auto meter gauge I had for the FC build, taped it on the windshield and noticed it wasn�t hitting fuel cut and getting up to 15 psi.

3/8 � 3/9 Marks the 2nd week of owning the car.
- Registered and insured
- Drove the car from Smyrna to La Vergne (15 miles) trying to stay out of boost and it did great.
- Compression checked showed 100 psi on the front housing and 90 in the rear, Removed boost controller and rerouted a few vacuum lines and got boost down to 10 psi
- Inspected AST and it appears to be in good shape
- Hitting fuel cut at 5 and 10 psi
- Installed AEM Wideband and noticed that it starts leaning out above 5 psi
- Next steps order gauge pod and gasket set

3/10
- Put together the gasket set and block off plates order for non-sequential mod, the car is supposed to already have the block off plates but I think I better go ahead and order it, just in case.
- Ordered flyrx7 dash pod
When the time and funding is right I'd like to go with a single turbo setup using the BW s360 Turbo with either a Sidemount or V mount intercooler.
Comments and Feedback are welcomed.
FYI, even though the odometer isn't displaying mileage data, it's still recording. You can repair it yourself by searching on this forum by replacing a capacitor.
Looks like a clean FD. You might want to check under the UIM, some of the wiring looks kinda funky under there.
is the car currently running non sequential?
Looks like a clean FD. You might want to check under the UIM, some of the wiring looks kinda funky under there.
is the car currently running non sequential?
Yea I have a spare gauge cluster to help fix the issue.
And yes it running non sequential but don think it was done right. Plan on removing the UIM this wknd going through it and this link as a guide.
Rotary Resurrection home of the budget rebuild.
Car also has 3 inch DP and full 3 inch exhaust and stage 3 ACT clutch.
I'm hoping to get it running good for DGRR this yr.
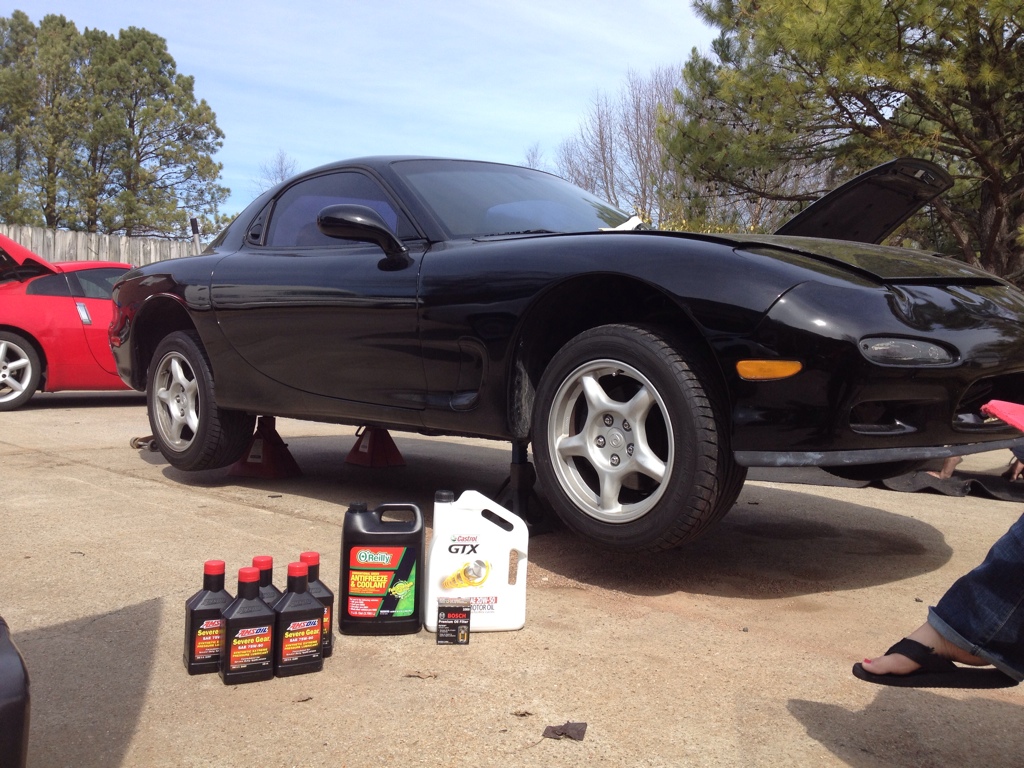
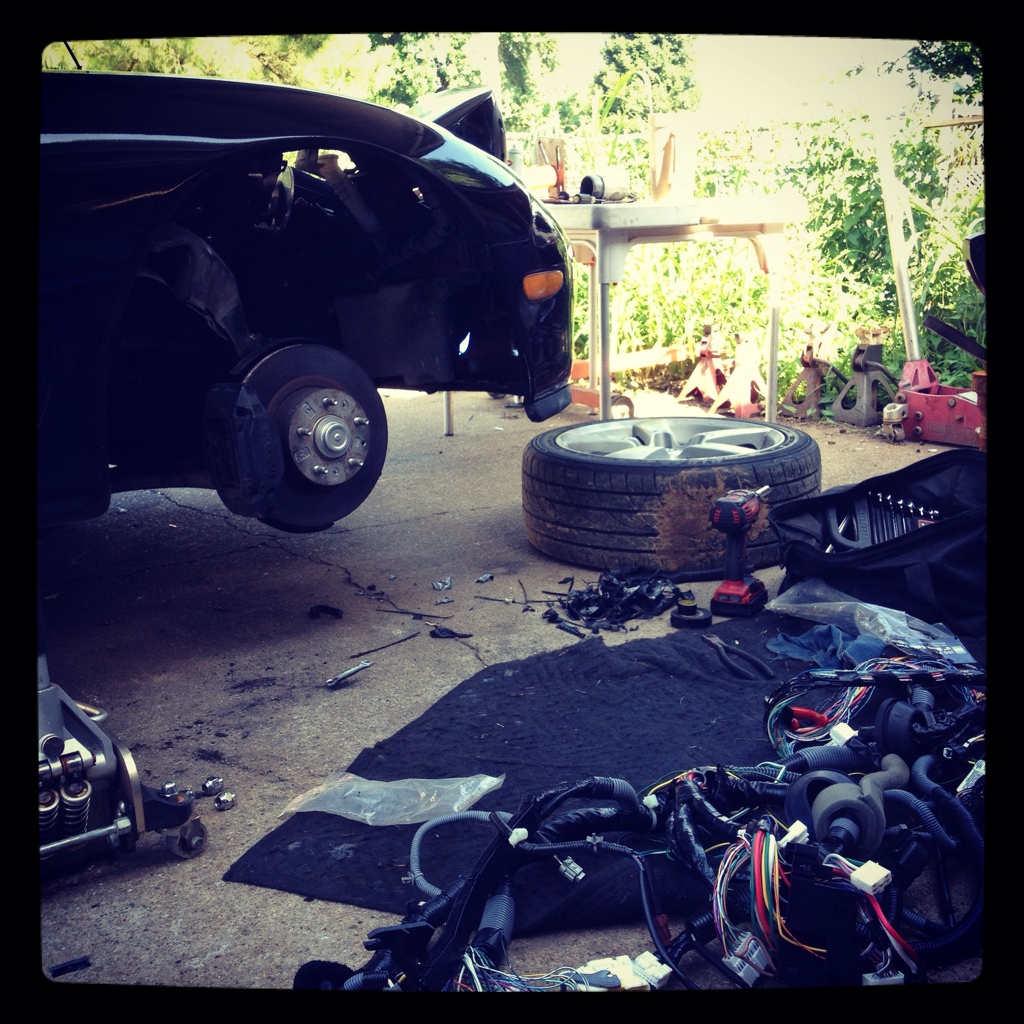
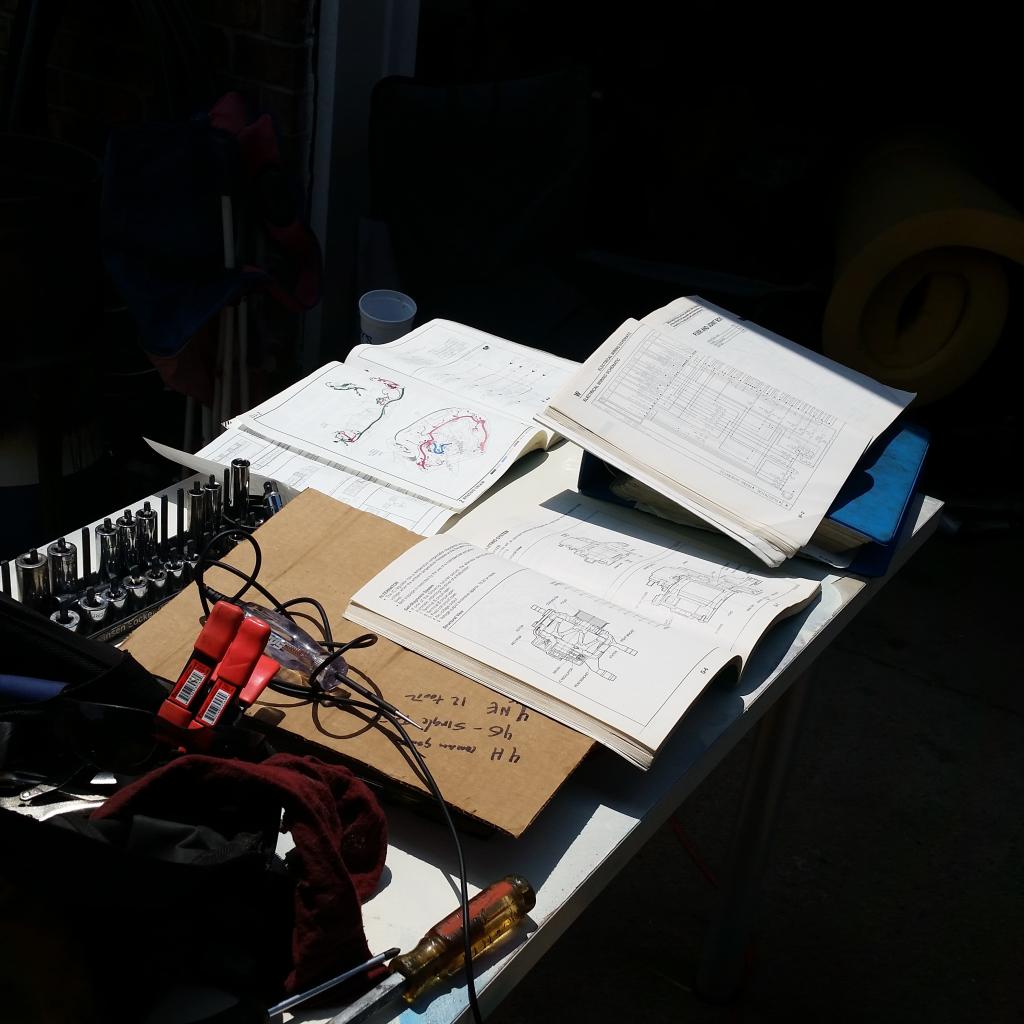
3/15
- changed oil, trans and diff fluid
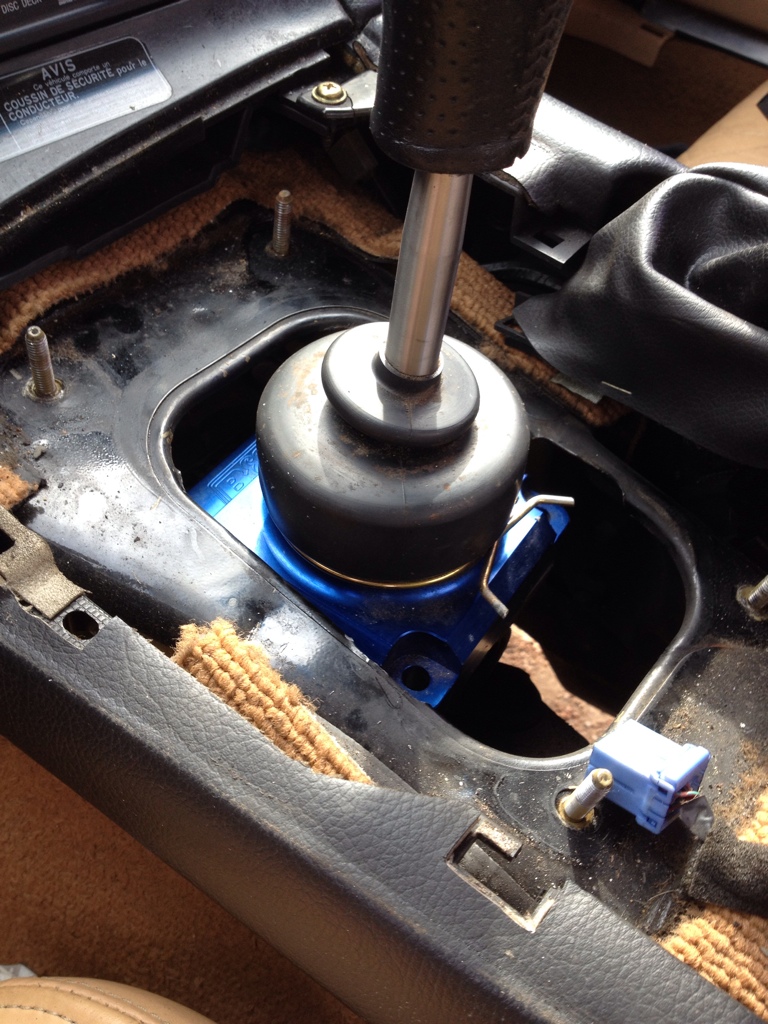
- installed B&M short shifter
- got my flyrx7 dash gauge pod holder
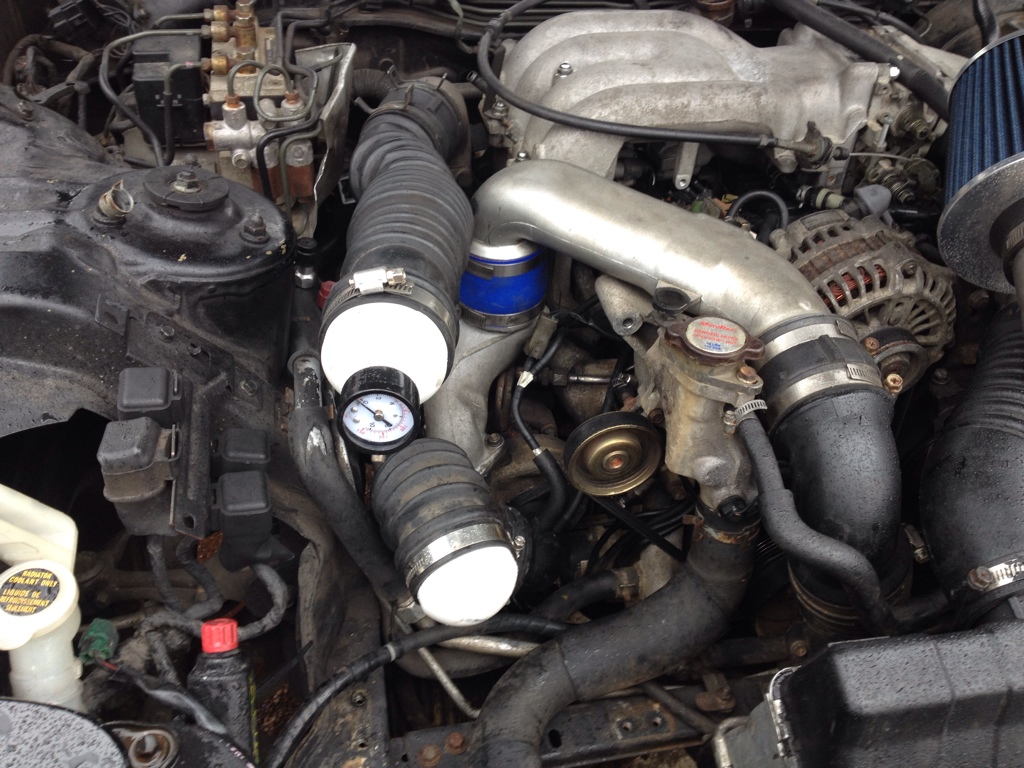
- pressure tested the system and found an intake leak
- removed DP to install extra bung and wrapped it up. Also found an exhaust leak.
Rained all day 3/16 so I didn't get to install the DP or gauge pod. Hoping to tinkering with it again soon.
- changed oil, trans and diff fluid
- installed B&M short shifter
- got my flyrx7 dash gauge pod holder
- pressure tested the system and found an intake leak
- removed DP to install extra bung and wrapped it up. Also found an exhaust leak.
Rained all day 3/16 so I didn't get to install the DP or gauge pod. Hoping to tinkering with it again soon.
thxs and yea the body is in decent shape. I just need to get it back on the ground and drive it some so that i feel confortable driving it to DGRR. Will you be at DGRR this yr?
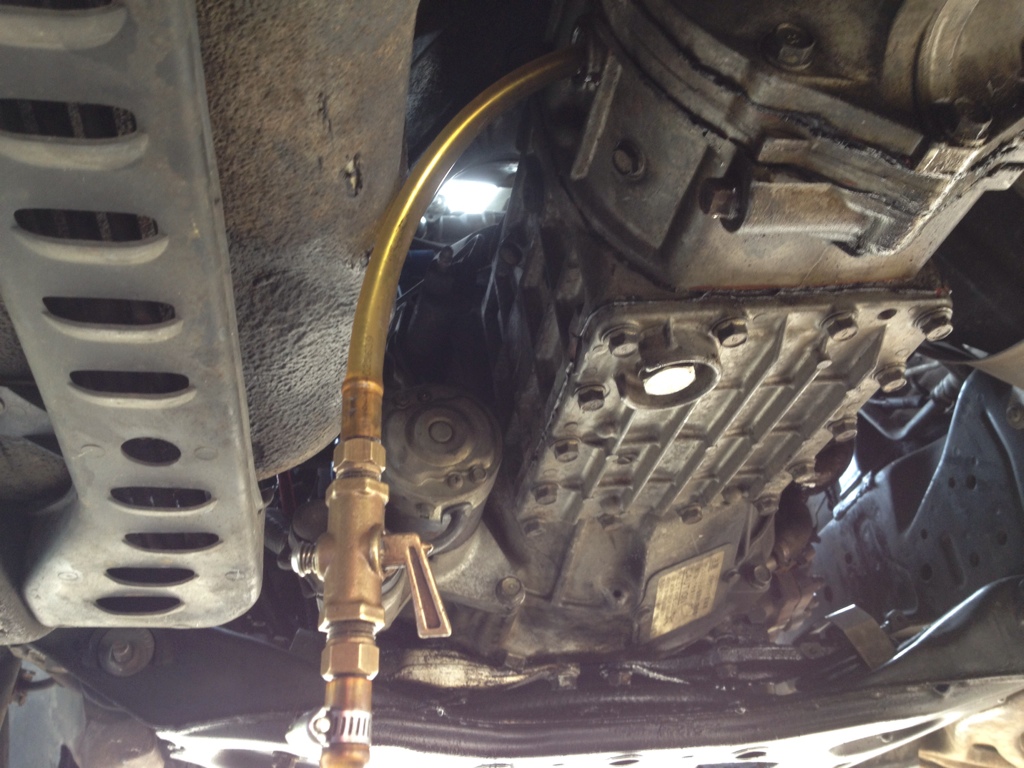
intake leak was from y pipe going into the turbo, the o ring was torn. Going to button it up and see how she does. Will remove and examine UIM and rats nest next wk.
Exhaust leak is from where the DP gets bolted to the turbo. One of the studs is broken off so only 2 nuts and 1 bolt is holding it on instead on 2 nutes and 2 bolts. I really dont want to take everything apart to take out the broken stud, so I'm going use RTV around the broken stud and just deal with the exhaust leak until go single.
Exhaust leak is from where the DP gets bolted to the turbo. One of the studs is broken off so only 2 nuts and 1 bolt is holding it on instead on 2 nutes and 2 bolts. I really dont want to take everything apart to take out the broken stud, so I'm going use RTV around the broken stud and just deal with the exhaust leak until go single.
Trending Topics
intake leak was from y pipe going into the turbo, the o ring was torn. Going to button it up and see how she does. Will remove and examine UIM and rats nest next wk.
Exhaust leak is from where the DP gets bolted to the turbo. One of the studs is broken off so only 2 nuts and 1 bolt is holding it on instead on 2 nutes and 2 bolts. I really dont want to take everything apart to take out the broken stud, so I'm going use RTV around the broken stud and just deal with the exhaust leak until go single.
Exhaust leak is from where the DP gets bolted to the turbo. One of the studs is broken off so only 2 nuts and 1 bolt is holding it on instead on 2 nutes and 2 bolts. I really dont want to take everything apart to take out the broken stud, so I'm going use RTV around the broken stud and just deal with the exhaust leak until go single.
and RTV will blow out of that turbo/downpipe area within about 10 minutes of interstate driving. ask me how i know. are you sure that was the big exhaust leak?
8 months later and have a few updates.
Been doing some non cool mods but at least the car is running better. Found another intake leak at the LIM and huge exhaust leak between the turbos and manifold. Brand new exhaust gaskets would have been $400 +, but lucky I found a set of lower mileage turbo that include all the gaskets for like $250 shipped. So i snatched those up, pulled the engine, replace the gaskets a few things.
Picked up lower mileage turbos and manifold which i converted them to a non sequential setup.
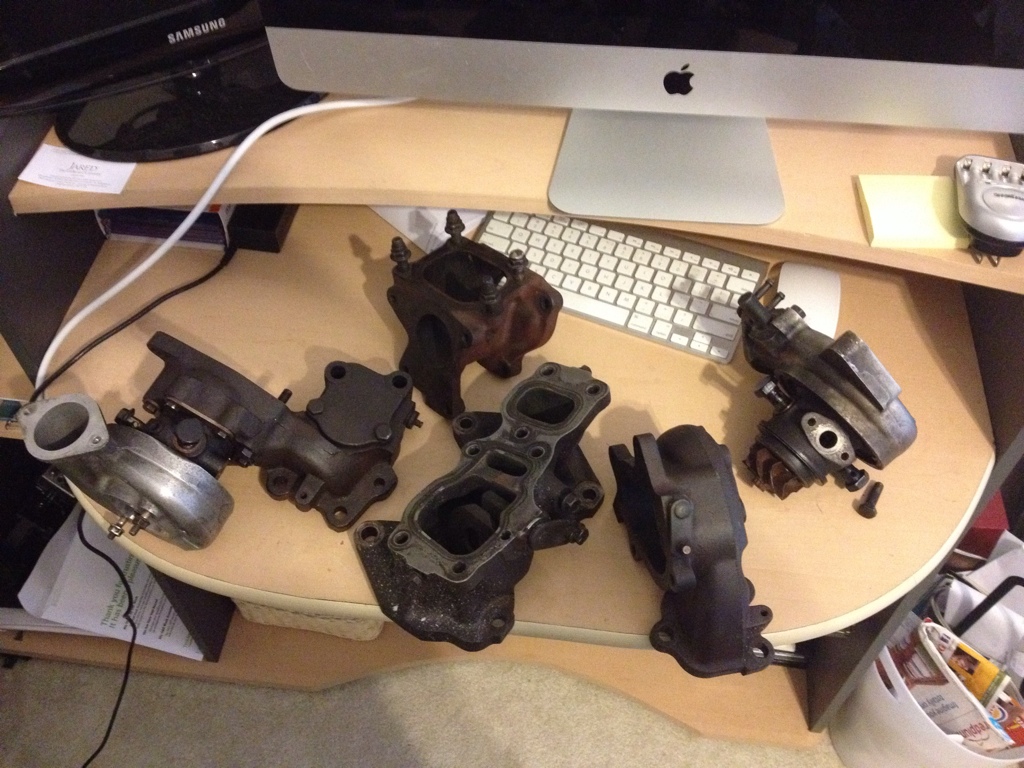
Engine pulled and old turbos
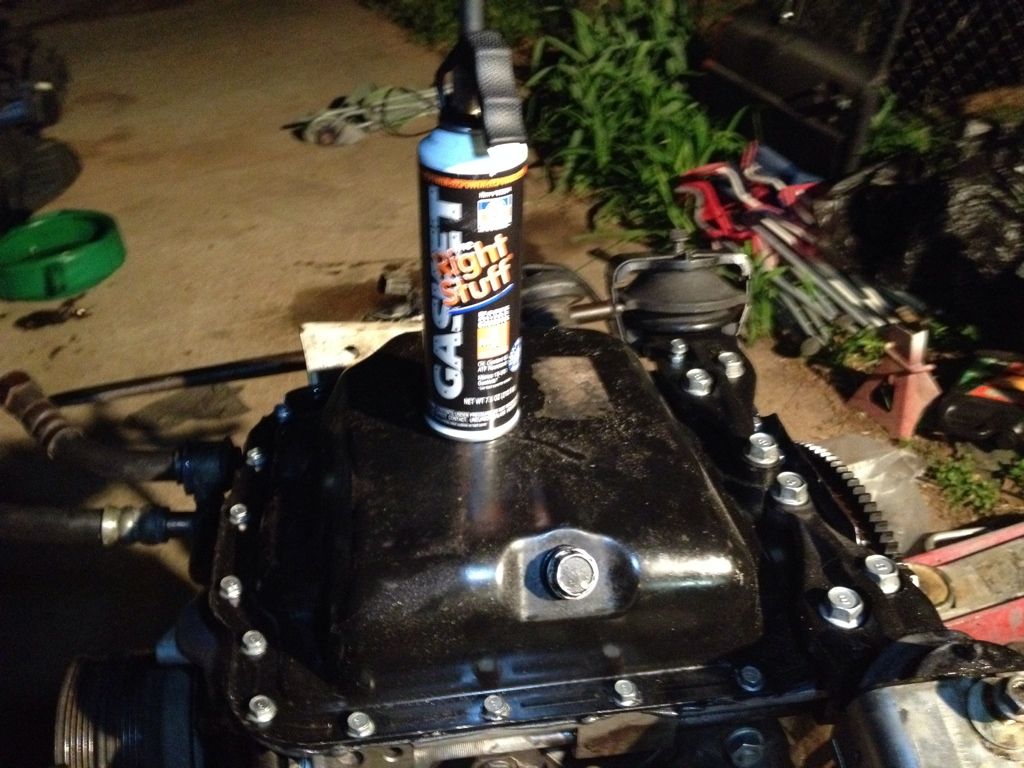
This stuff worked out great, no oil pan leaks from April till Oct. Rebuilt my engine in April.
Got the engine in and running 4 days prior to DGRR but it wasn't idling all that great and was leaking a lil coolant, so I drove my gurls boosted 1st gen to deals gap.
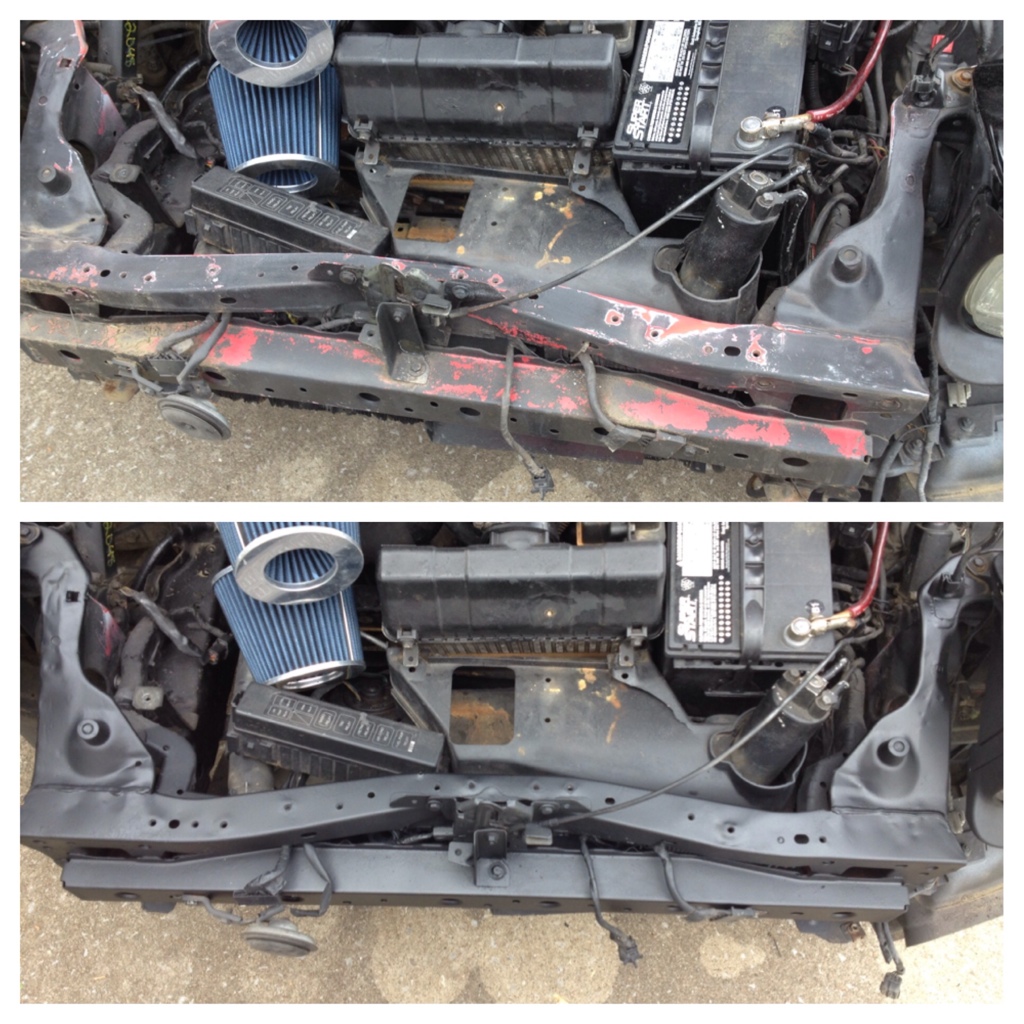
Looks like the front was replaced with stuff from a red FD and wasn't painted very well so I cleaned it up some.
Had a blowout the one day I drive it to work, so instead of getting new tires, I decided to throw on my wife's rx8 wheels. Donk status for 1 day.

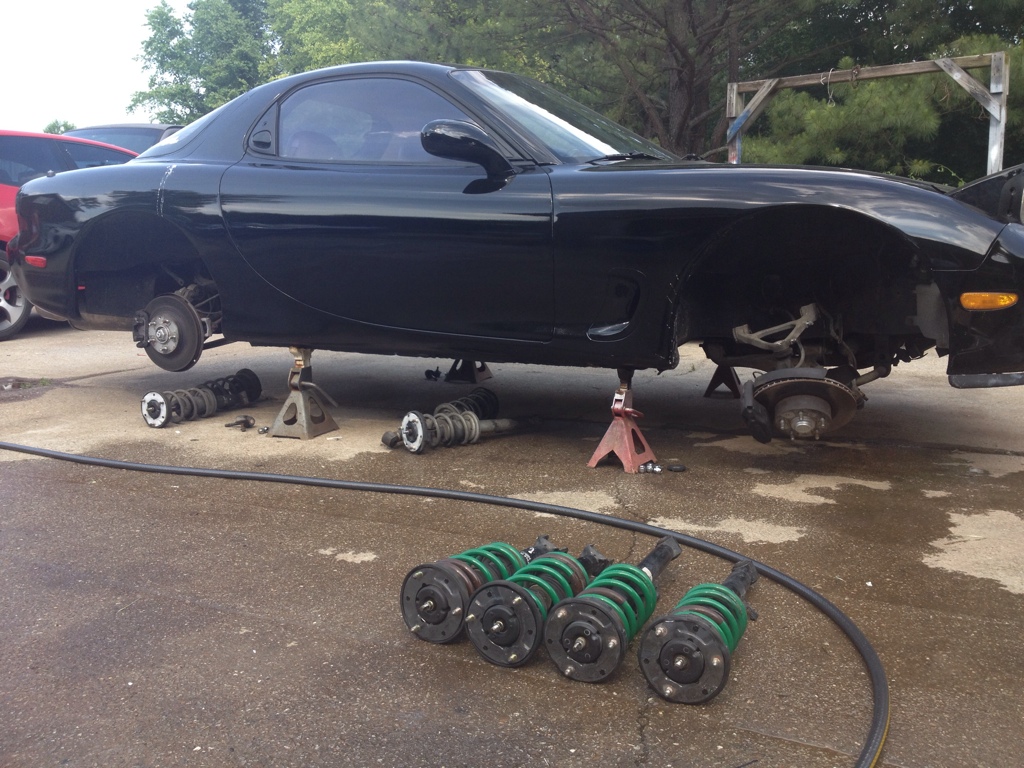
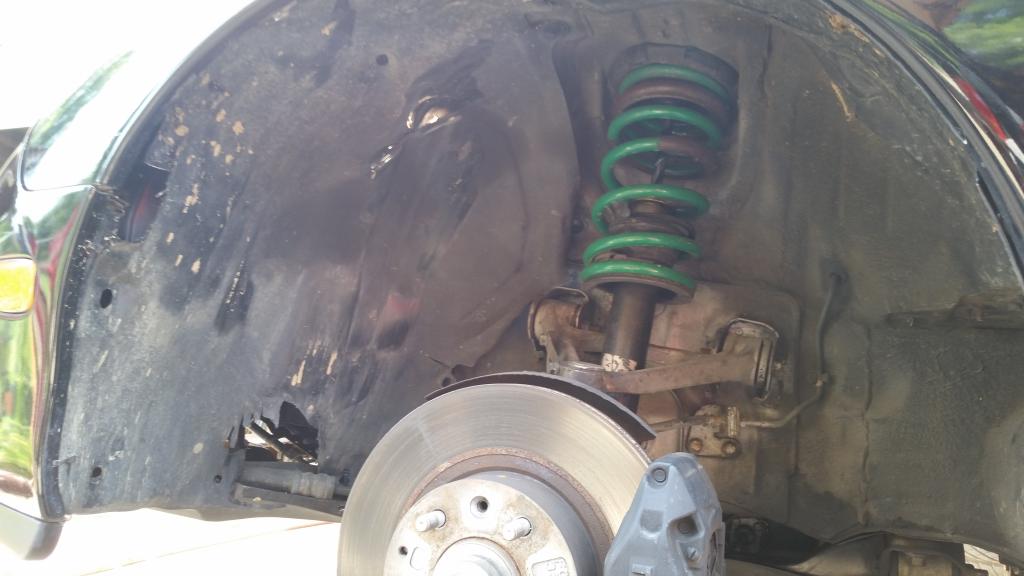
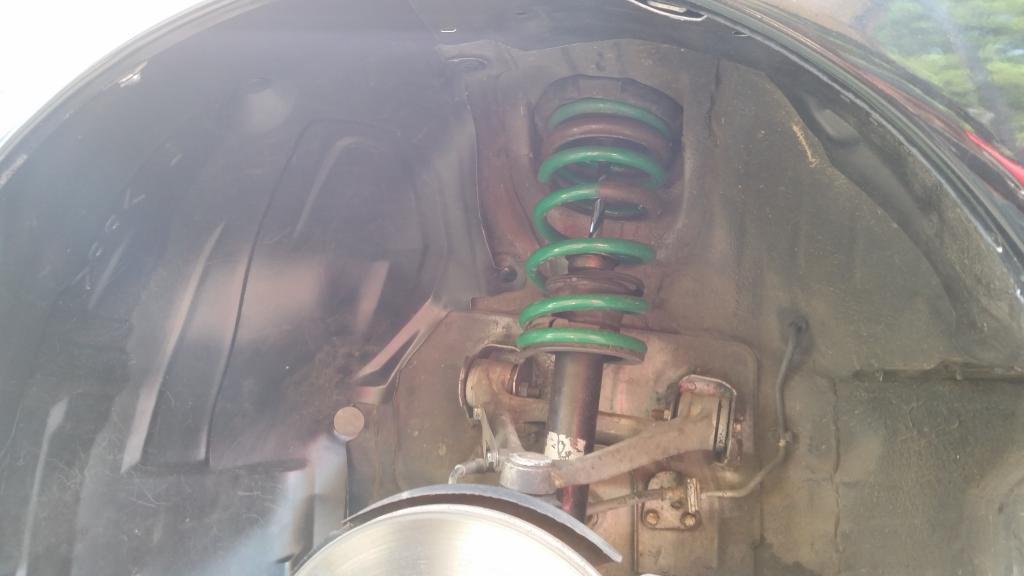
Got a good deal on some tein springs
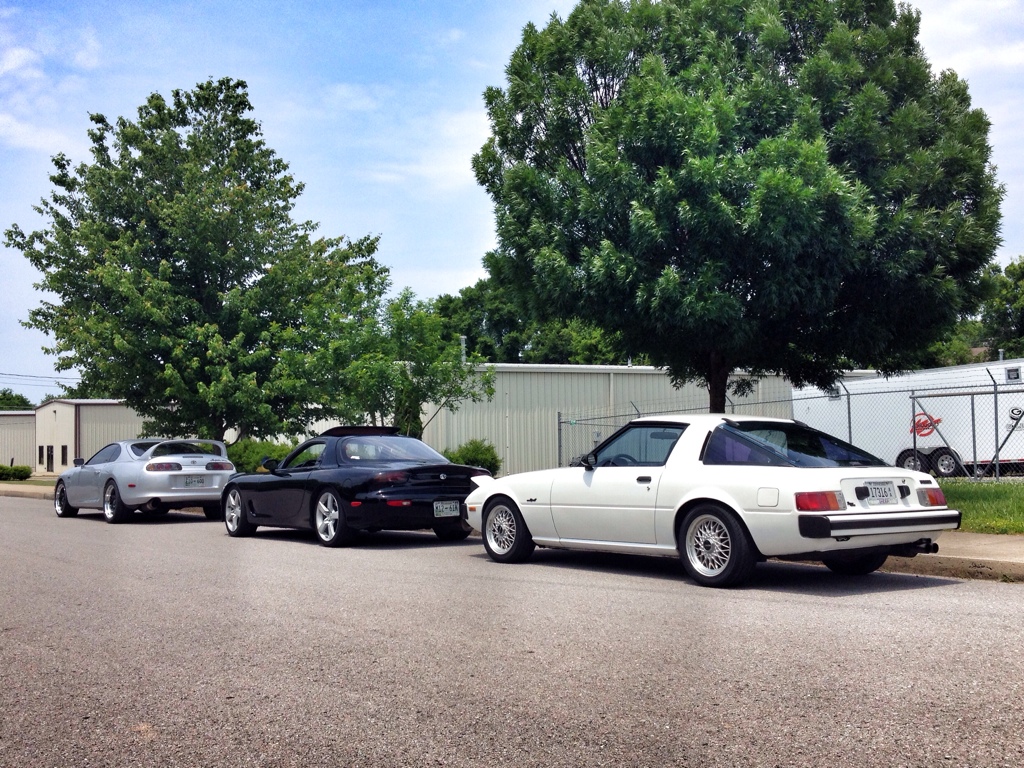
Drove it around to the local meets some.
Been doing some non cool mods but at least the car is running better. Found another intake leak at the LIM and huge exhaust leak between the turbos and manifold. Brand new exhaust gaskets would have been $400 +, but lucky I found a set of lower mileage turbo that include all the gaskets for like $250 shipped. So i snatched those up, pulled the engine, replace the gaskets a few things.
Picked up lower mileage turbos and manifold which i converted them to a non sequential setup.

Engine pulled and old turbos

This stuff worked out great, no oil pan leaks from April till Oct. Rebuilt my engine in April.

Got the engine in and running 4 days prior to DGRR but it wasn't idling all that great and was leaking a lil coolant, so I drove my gurls boosted 1st gen to deals gap.

Looks like the front was replaced with stuff from a red FD and wasn't painted very well so I cleaned it up some.

Had a blowout the one day I drive it to work, so instead of getting new tires, I decided to throw on my wife's rx8 wheels. Donk status for 1 day.

Got a good deal on some tein springs

Drove it around to the local meets some.


Typical wknd all summer
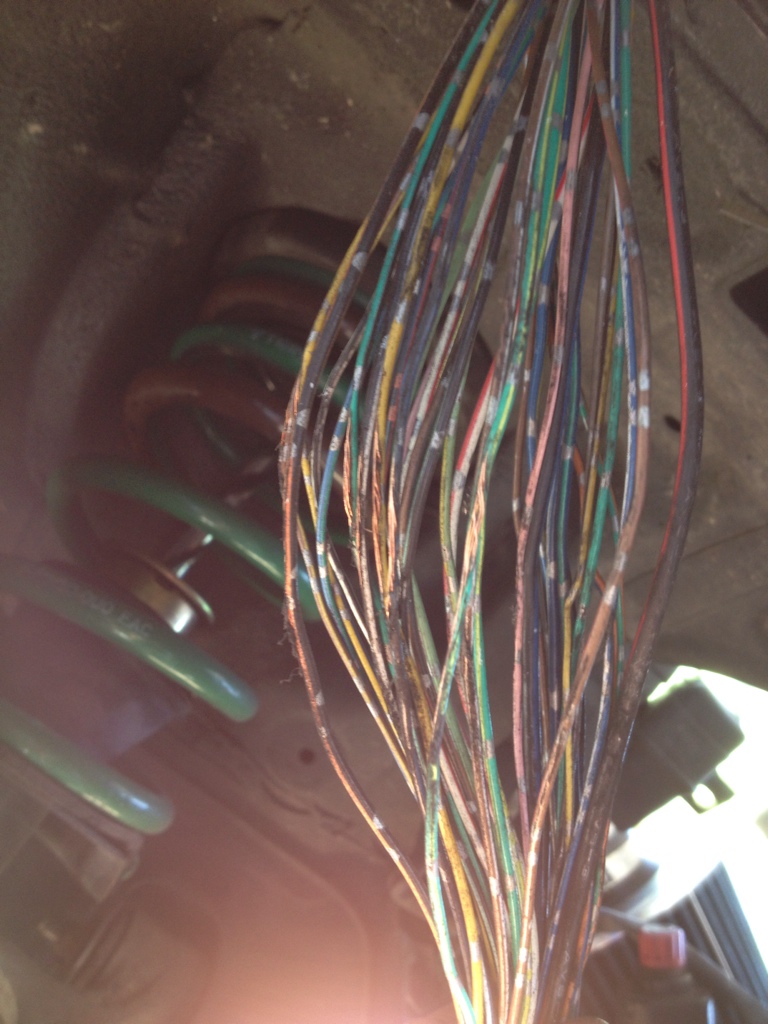
Lowered car without fender harness or tucking up the wires = exposed wiring
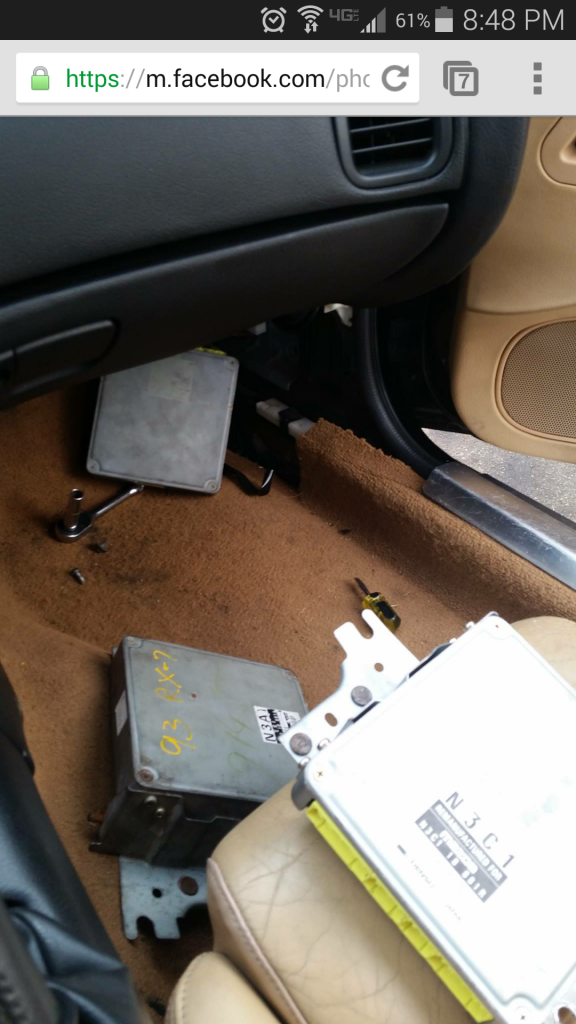
Not sure if something grounded out but i somehow fried my ecu and had to go towed to the house.
noticed that other wires were also exposed.
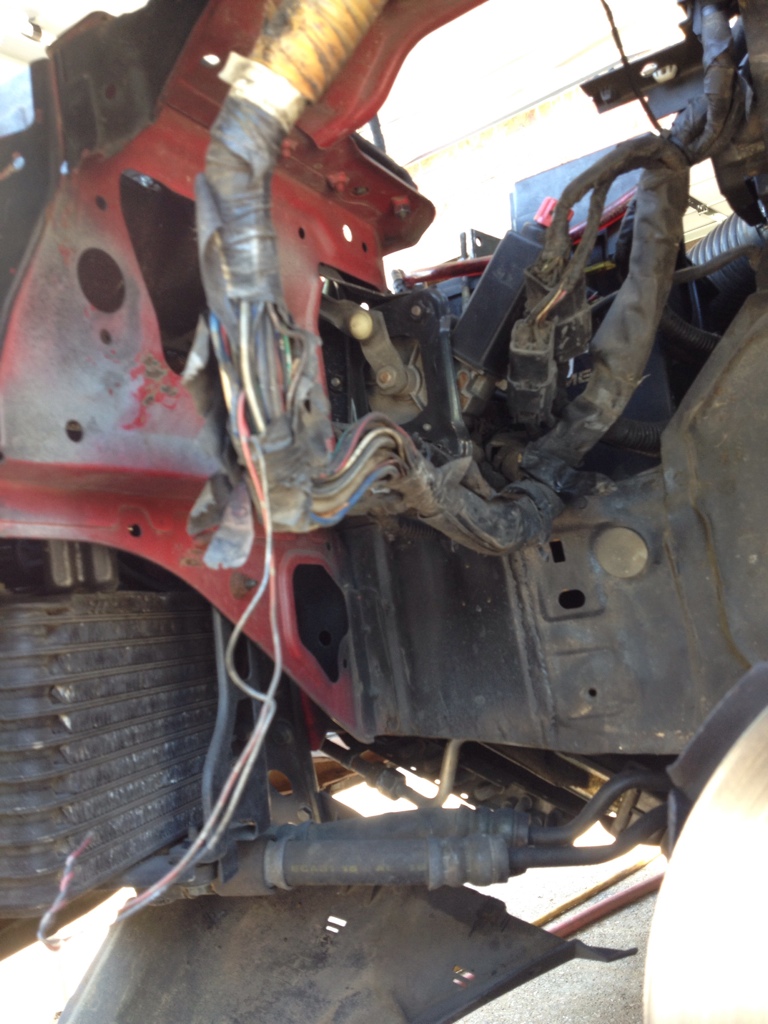
So i got them cleaned up
The car ran for a little bit before i broke down again, seems like i've spend a lot of time troubleshooting
Fried ecu, ecu for the car and spare ecu
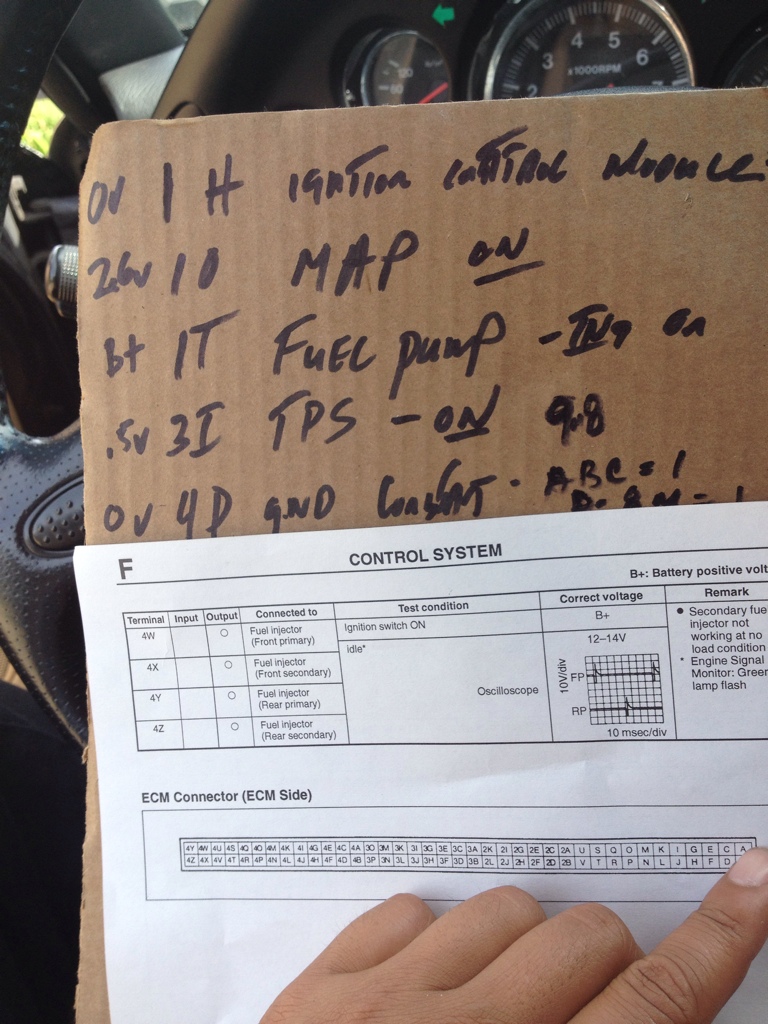
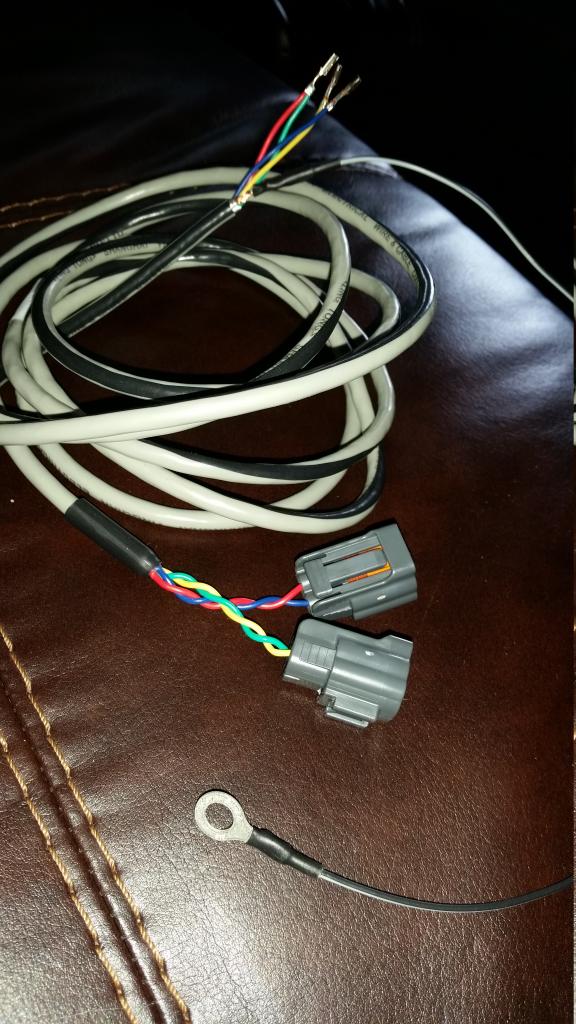
Car would loose spark after 20 mins of driving, figured it had something to do with the CAS wire. We tested it for continuity and turns out it was good but the car wouldnt stay running. Figured i would get a new flying lead from the ecu that terminated to new plugs. And after 4 successful test drive through the neighborhood, the car was ready to go.
Once i got it running and staying running. This stupid low coolant light and buzzer kept going on.
Troubleshot it and turns out I needed a new sensor and 1 of 2 connectors wasn't connected.
Got some new fender lining
B4
After

Lowered car without fender harness or tucking up the wires = exposed wiring

Not sure if something grounded out but i somehow fried my ecu and had to go towed to the house.

noticed that other wires were also exposed.

So i got them cleaned up

The car ran for a little bit before i broke down again, seems like i've spend a lot of time troubleshooting

Fried ecu, ecu for the car and spare ecu

Car would loose spark after 20 mins of driving, figured it had something to do with the CAS wire. We tested it for continuity and turns out it was good but the car wouldnt stay running. Figured i would get a new flying lead from the ecu that terminated to new plugs. And after 4 successful test drive through the neighborhood, the car was ready to go.

Once i got it running and staying running. This stupid low coolant light and buzzer kept going on.

Troubleshot it and turns out I needed a new sensor and 1 of 2 connectors wasn't connected.

Got some new fender lining
B4

After


^ thxs.
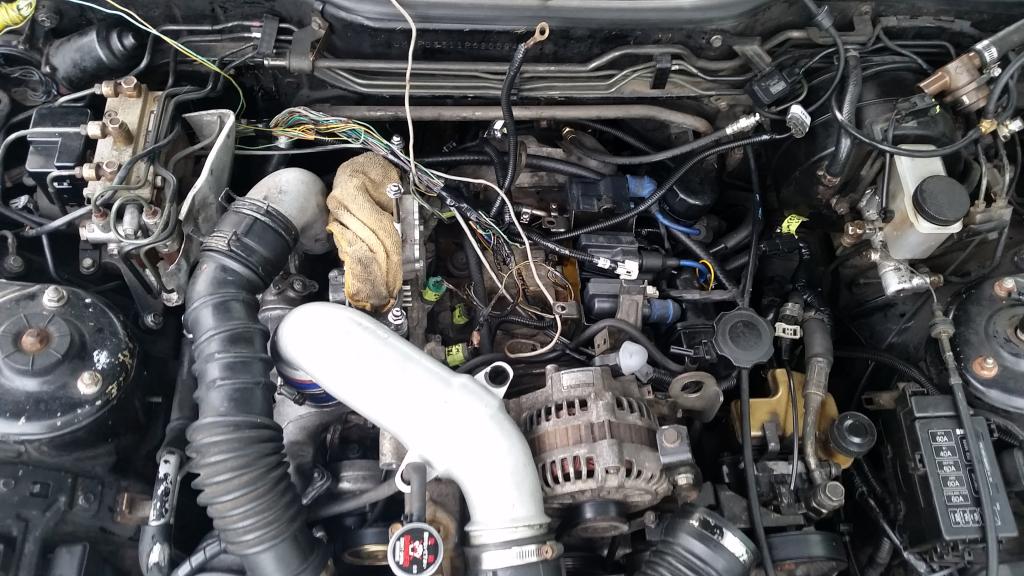
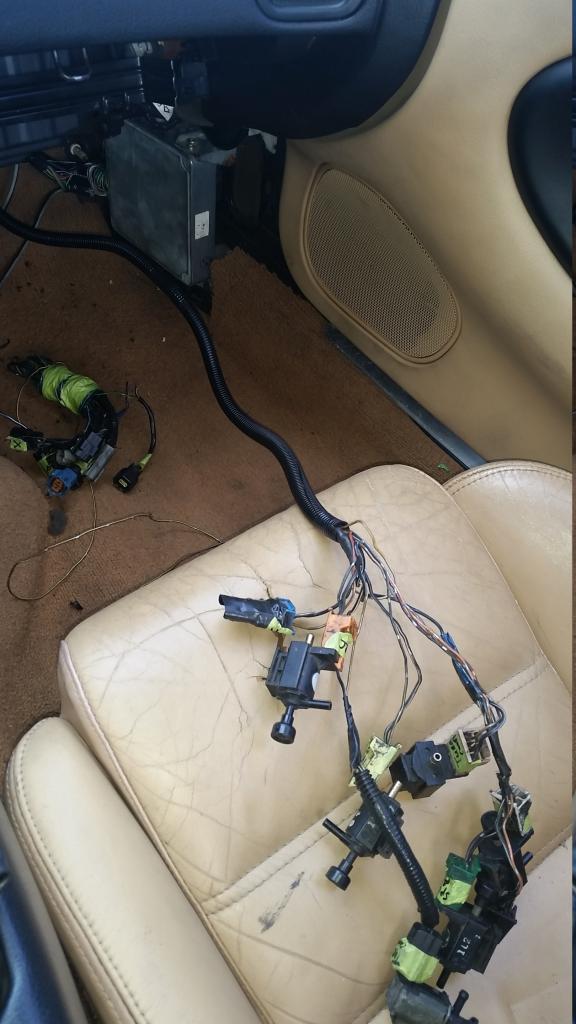
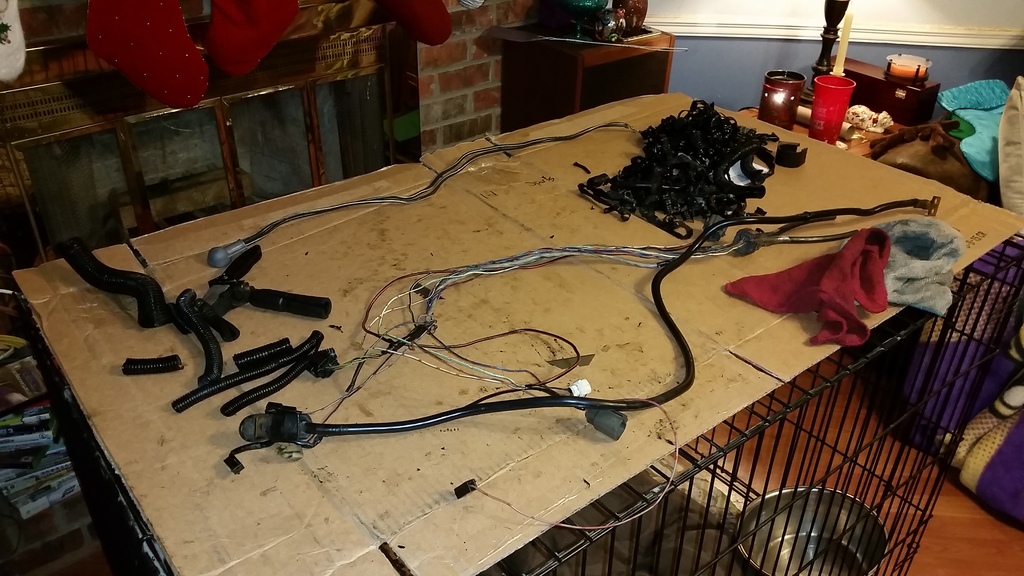
Deloomed entire harness and removed emission stuff from ECU connector and ran the seq stuff inside the car so that it's not under the intake manifold. This cleans things up a bunch.
Trying to figure out what i could cut because a lot of the wires share common grounds.
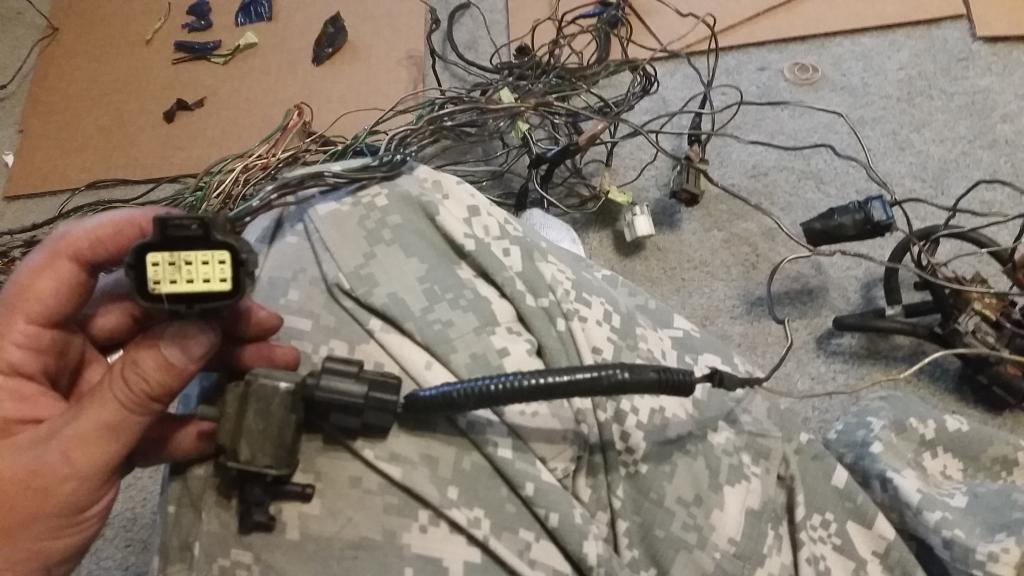
Checked for continuity on all the plugs and triple checked everything. Wiring harness is partial reloomed and ready to go in the car.
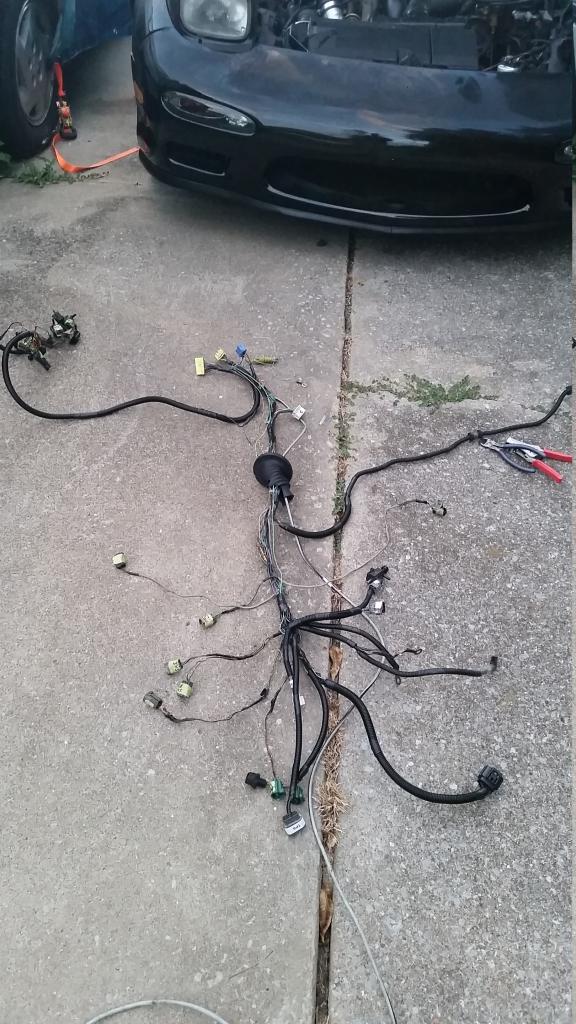
In progress, note that this is temporary test. It has now been reloomed and taped up.
The plugs on the floor board, is what i removed. The plugs on the seats are what i relocated to inside the car. I no longer have resistors in place of the solenoids.
Got married

Went to Jamaica for our honeymoon

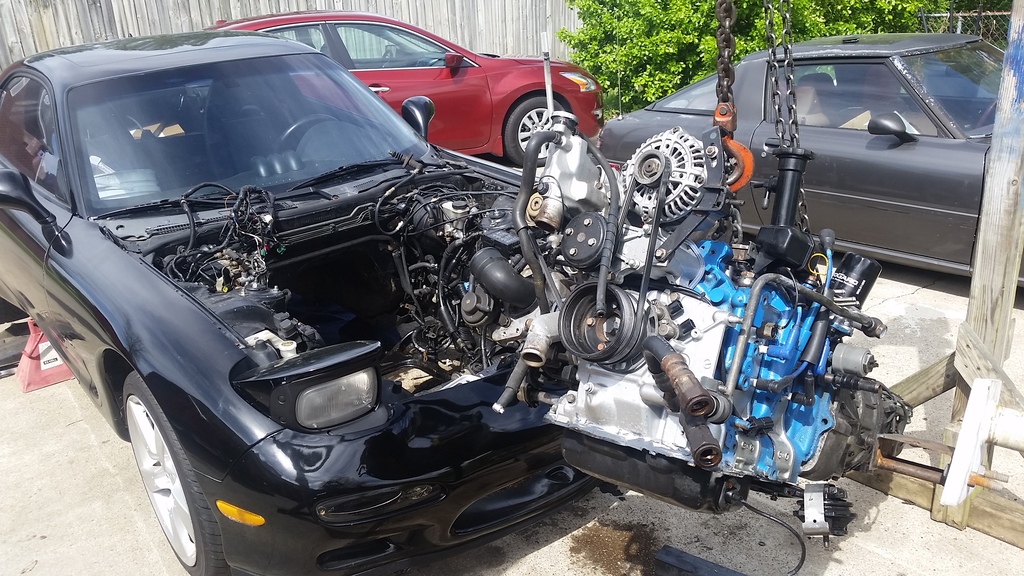
Got off the plane from my honeymoon, unpacked and pulled the engine and trans out.
Deloomed entire harness and removed emission stuff from ECU connector and ran the seq stuff inside the car so that it's not under the intake manifold. This cleans things up a bunch.
Trying to figure out what i could cut because a lot of the wires share common grounds.

Checked for continuity on all the plugs and triple checked everything. Wiring harness is partial reloomed and ready to go in the car.

In progress, note that this is temporary test. It has now been reloomed and taped up.

The plugs on the floor board, is what i removed. The plugs on the seats are what i relocated to inside the car. I no longer have resistors in place of the solenoids.

Got married


Went to Jamaica for our honeymoon

Got off the plane from my honeymoon, unpacked and pulled the engine and trans out.

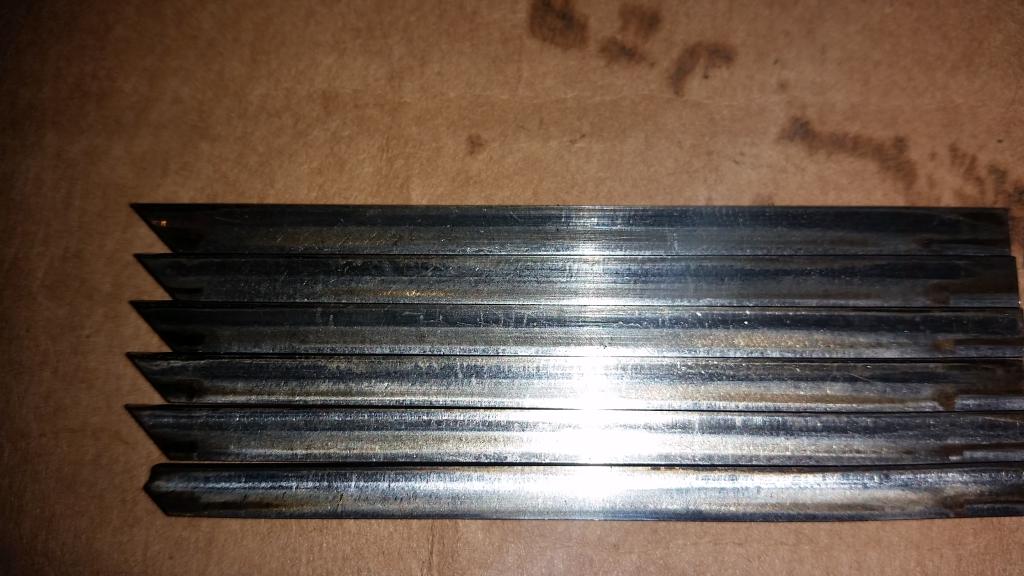
5.5 apex seals
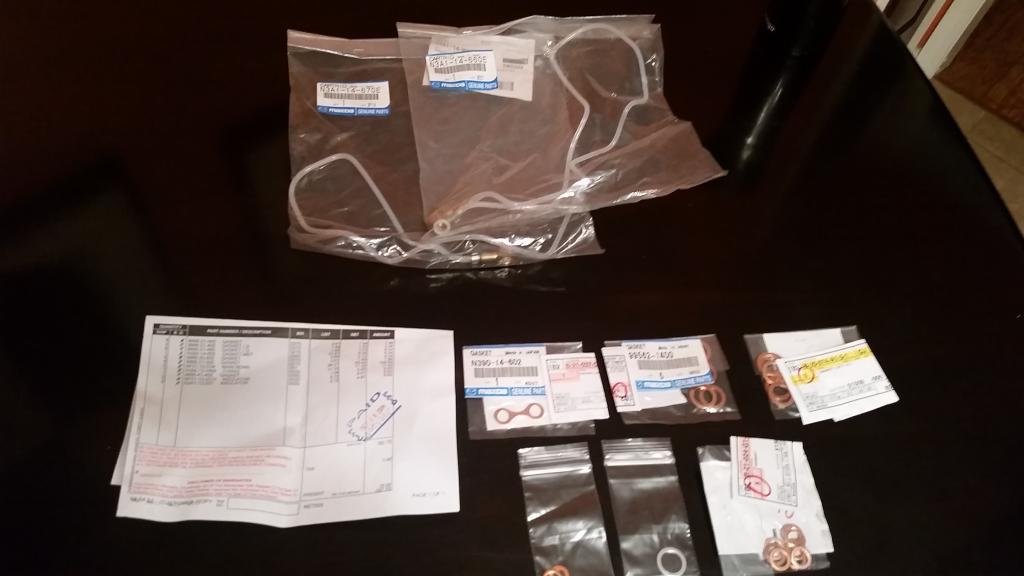
Decided to keep my OMP and get new lines and crush washers.
Sunday 11/2 around 1:00 PM. Started setting stuff out, organizing it, and cleaned up a few parts.
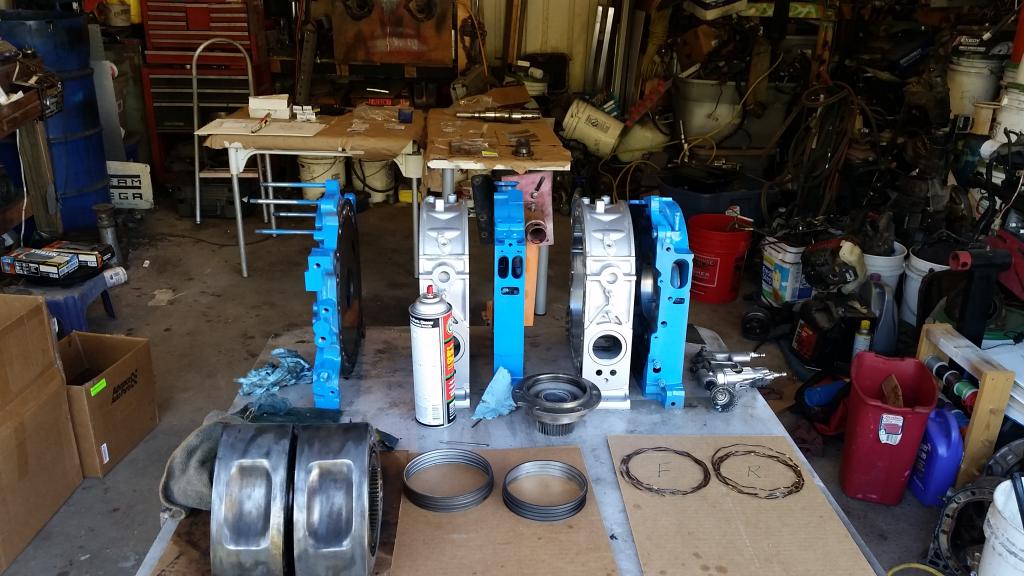
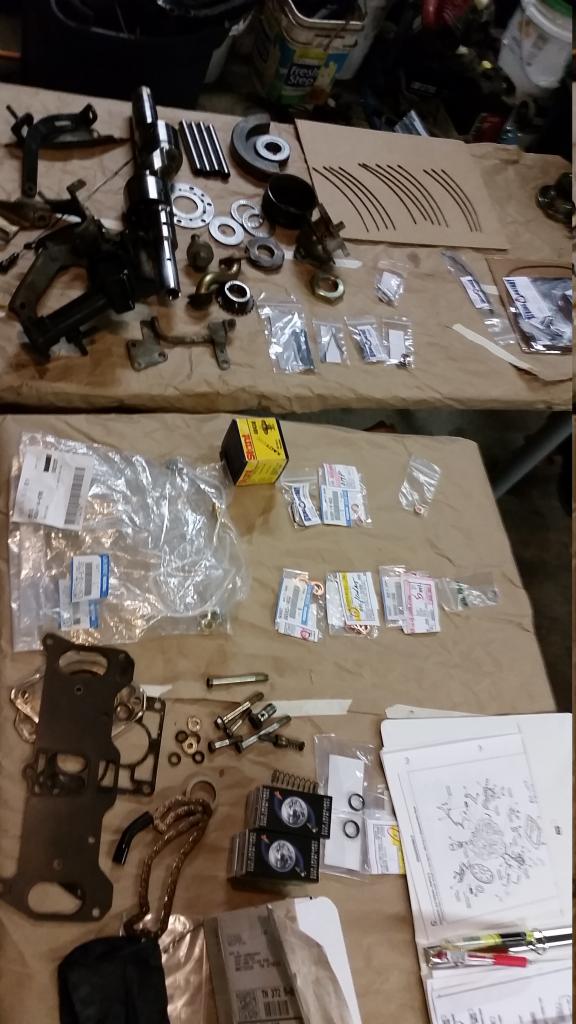
Took a little break for dinner, watched walking dead and was back in the garage and here's how I left it around 9:30 PM

Decided to keep my OMP and get new lines and crush washers.

Sunday 11/2 around 1:00 PM. Started setting stuff out, organizing it, and cleaned up a few parts.


Took a little break for dinner, watched walking dead and was back in the garage and here's how I left it around 9:30 PM

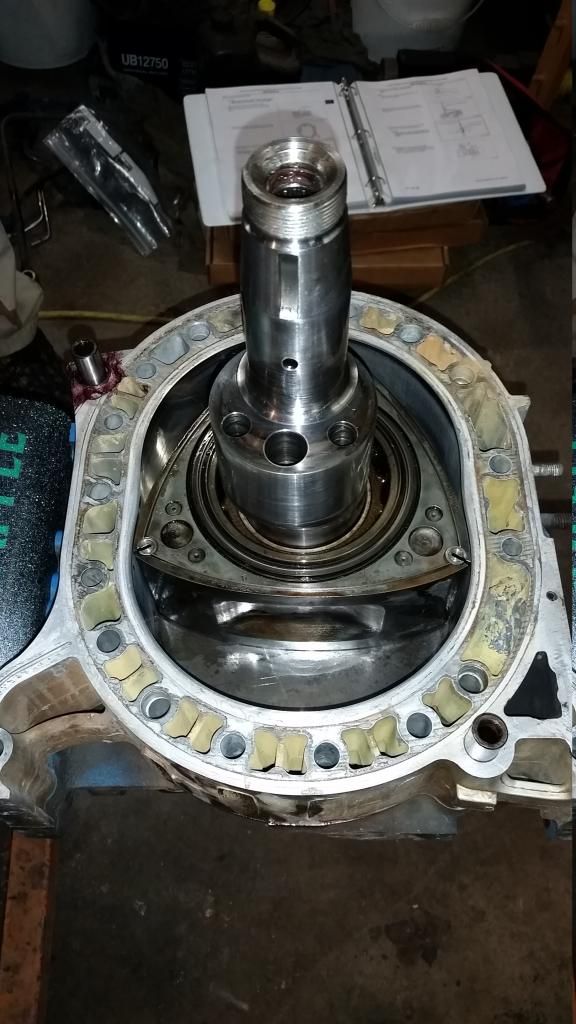
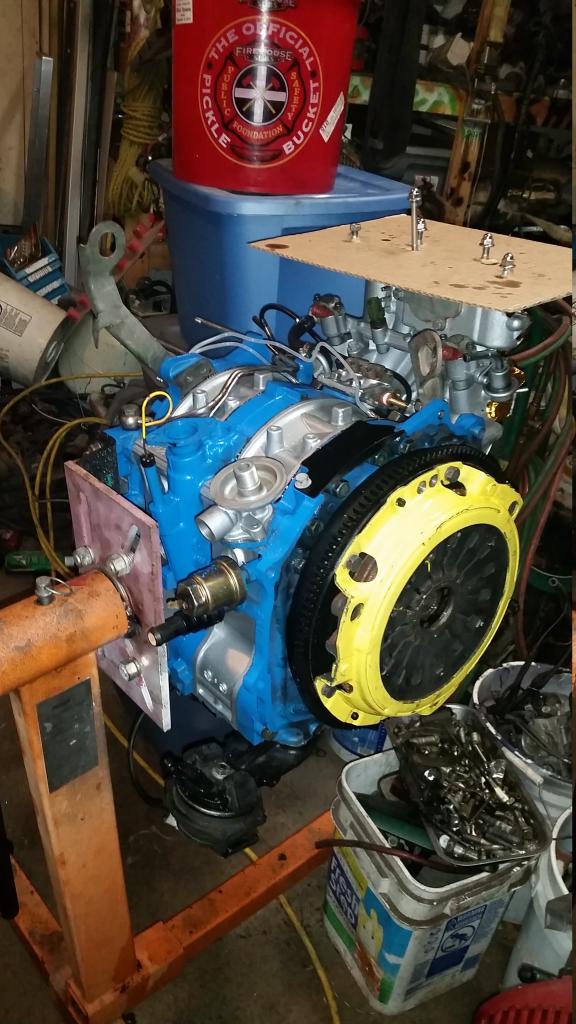
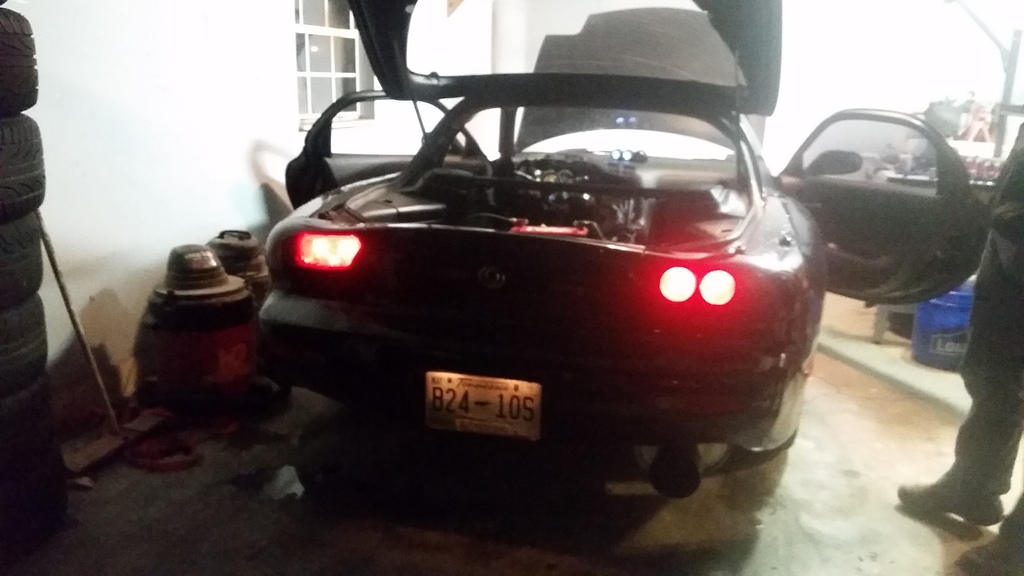
11/28 Engine installed
Built the engine too bad *** and was getting too much oil pressure which pushed oil through the turbo seals

Prob got close to 100 miles on it. Just got to titey up a few things and give it a bath.

Built the engine too bad *** and was getting too much oil pressure which pushed oil through the turbo seals

Prob got close to 100 miles on it. Just got to titey up a few things and give it a bath.

1/18/15
Changed diff bushing
Pillow *****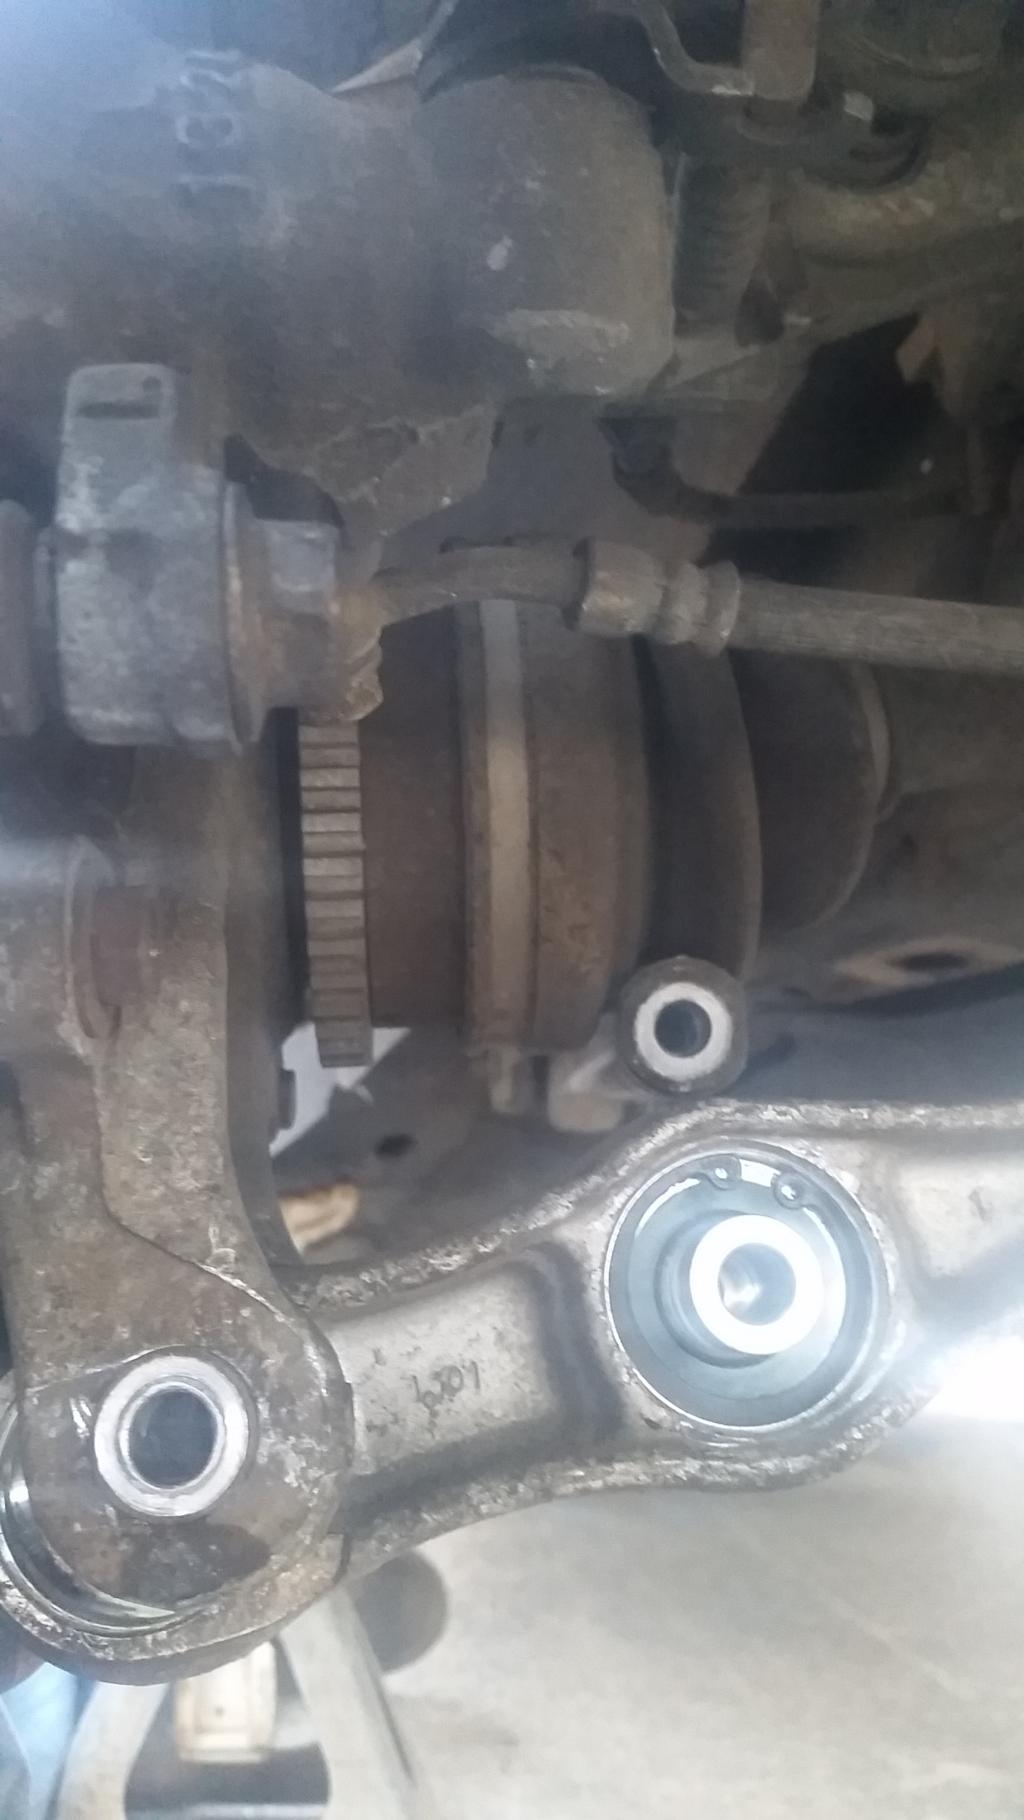
Installed supra fuel pump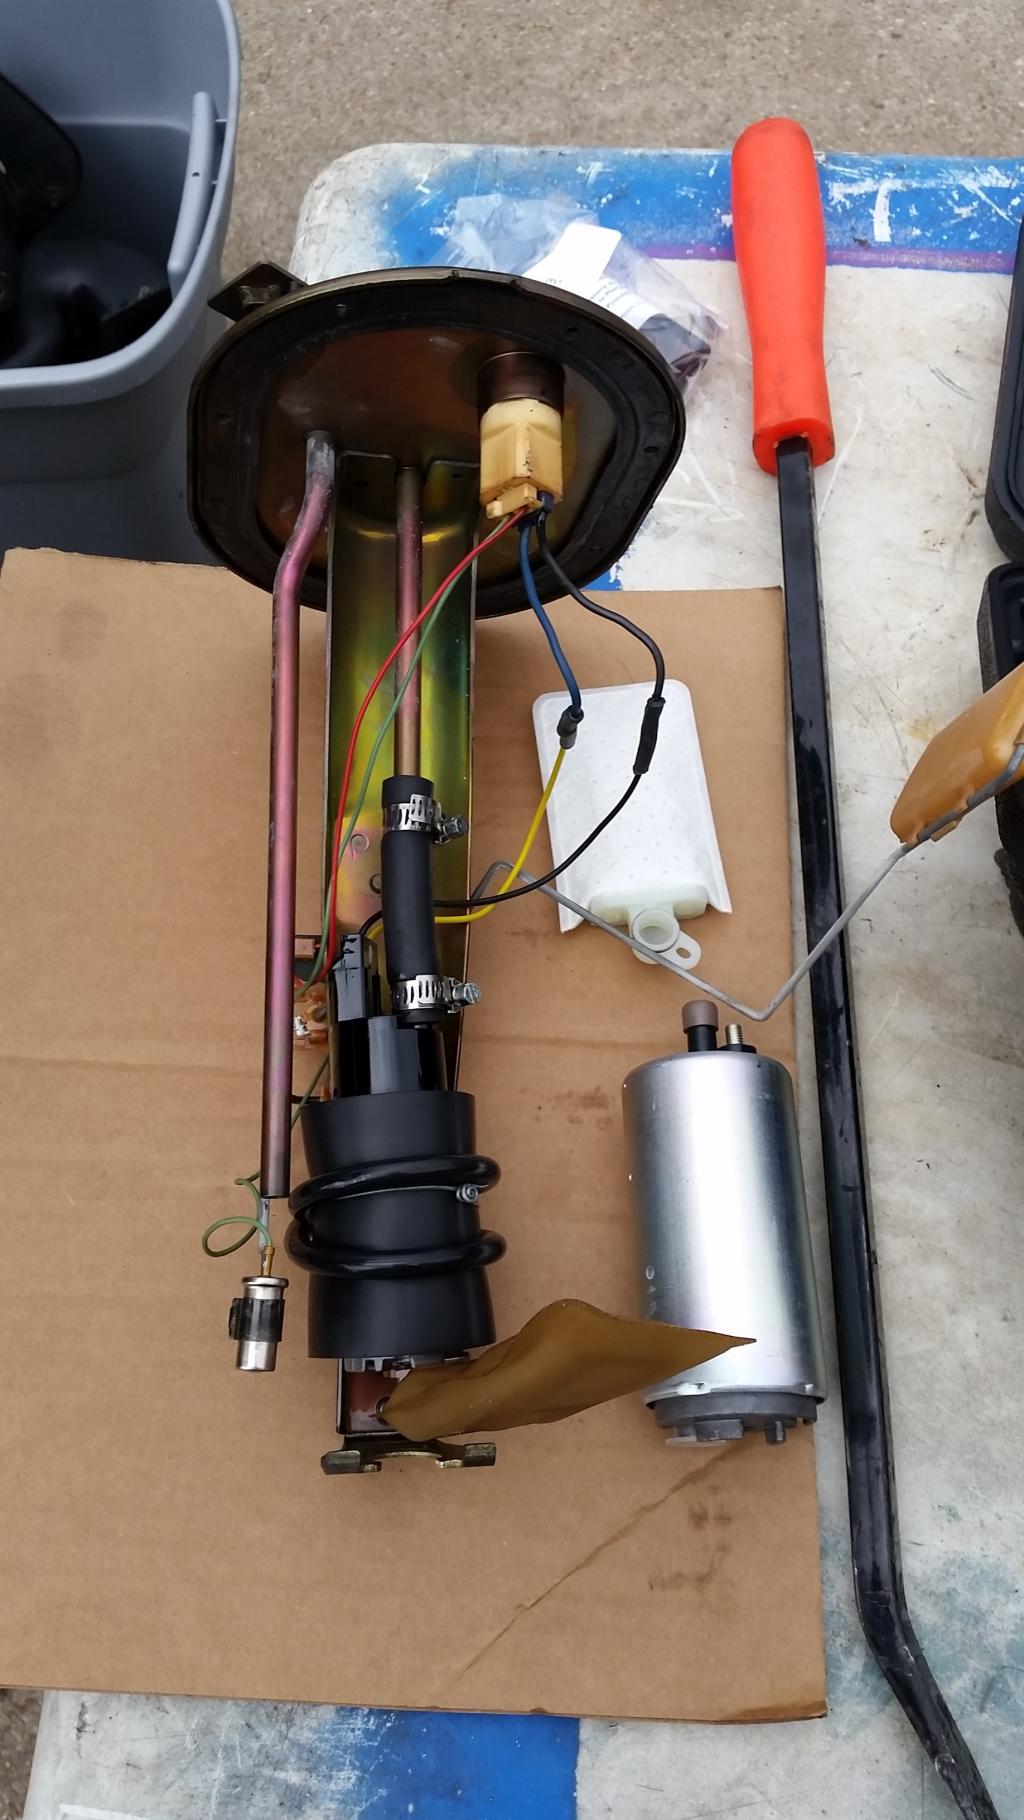
Got some blk door panels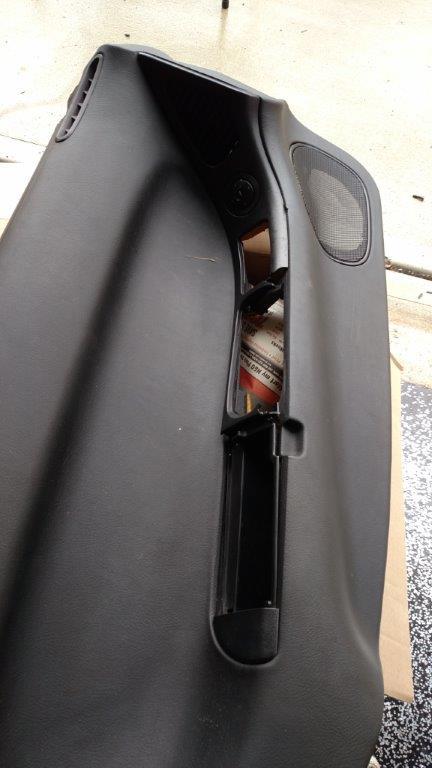
Fixed my broken door handle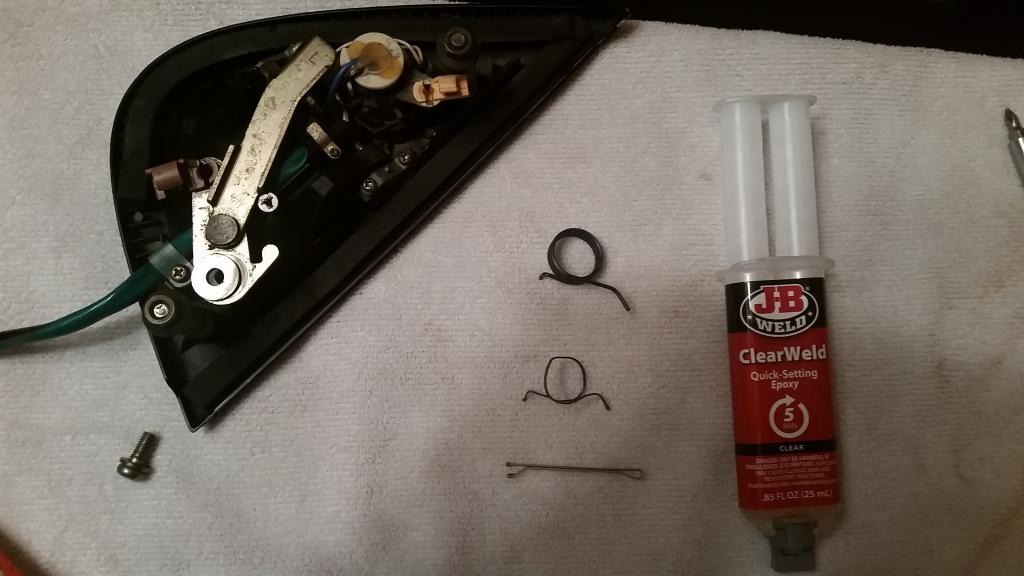
2/16/15
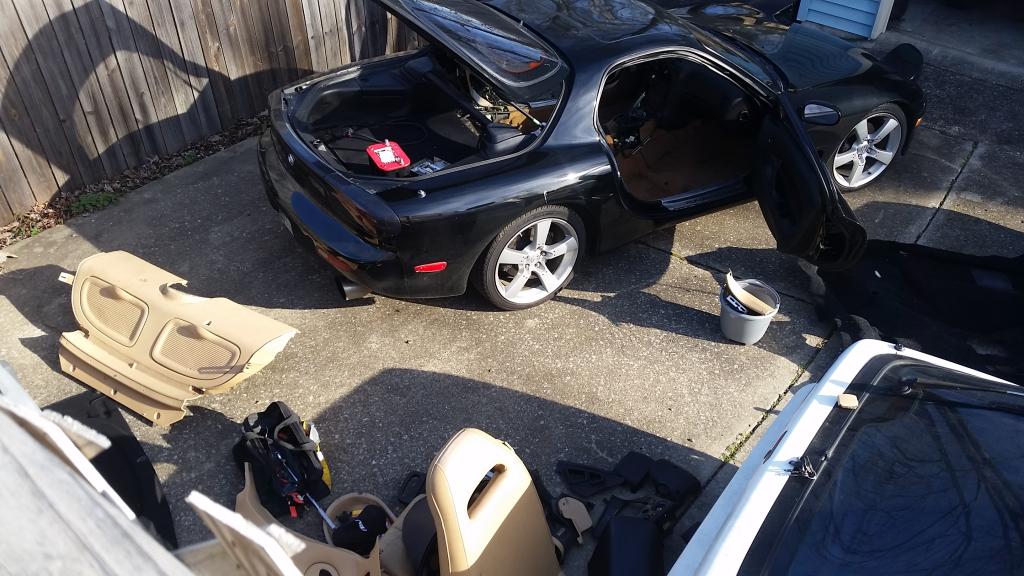
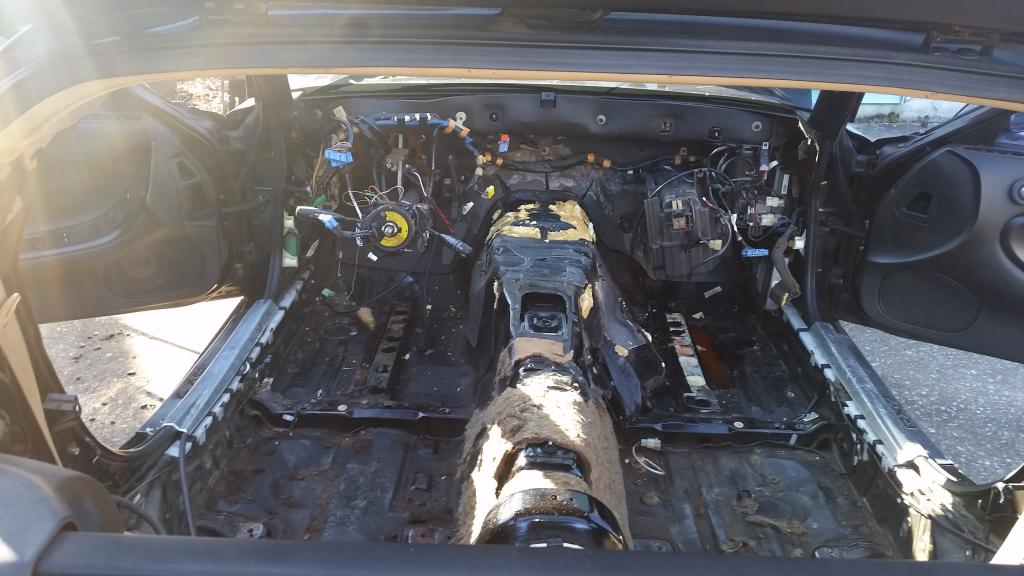
Gutted the interior.
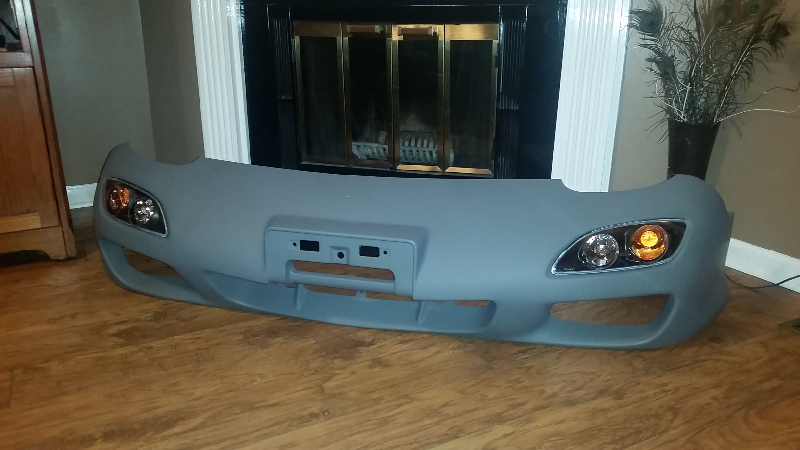
Got my OE 99 spec front bumper and aftermarket lights
Tested fitted some wheels
3/28/15
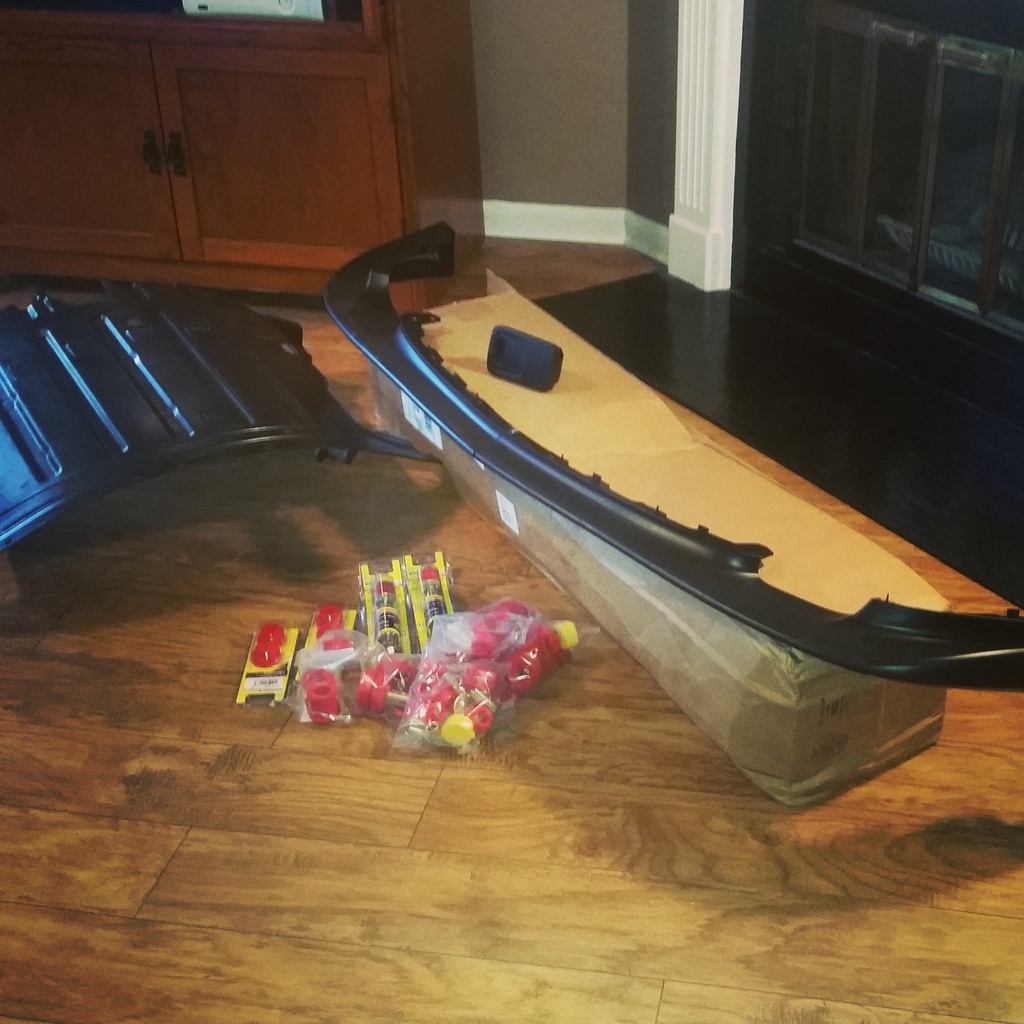
picked up 99 spec lip and under tray.
Also picked a 99 spec wheel which is pictured on the left
and lastly 99 spec tail lights.
Installed a new head unit, door speakers and 6x8s for the rear.
Changed diff bushing

Pillow *****

Installed supra fuel pump

Got some blk door panels

Fixed my broken door handle

2/16/15
Gutted the interior.


Got my OE 99 spec front bumper and aftermarket lights

Tested fitted some wheels

3/28/15
picked up 99 spec lip and under tray.

Also picked a 99 spec wheel which is pictured on the left

and lastly 99 spec tail lights.

Installed a new head unit, door speakers and 6x8s for the rear.
Last edited by Johnny Kommavongsa; Nov 4, 2015 at 06:18 PM.
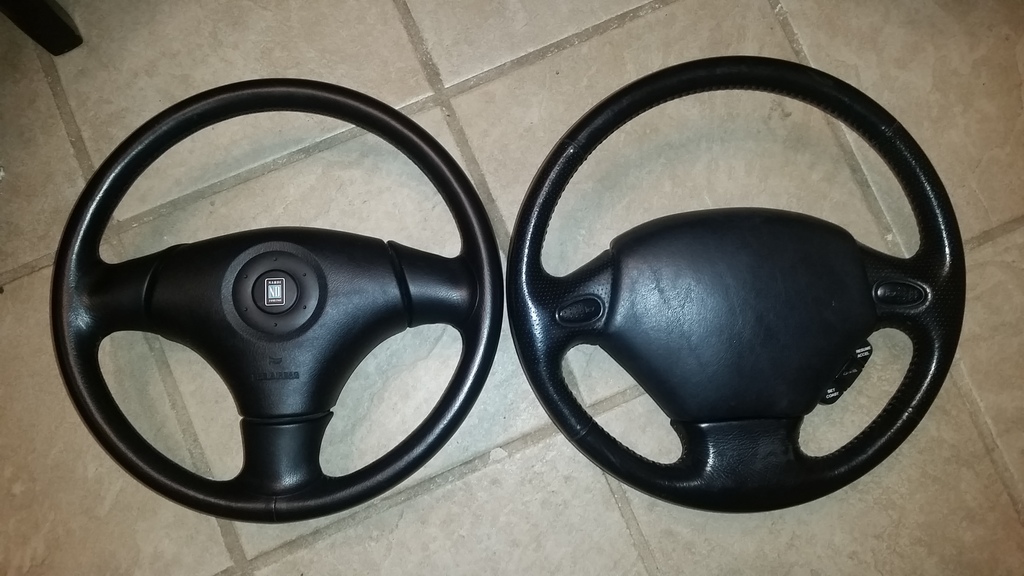
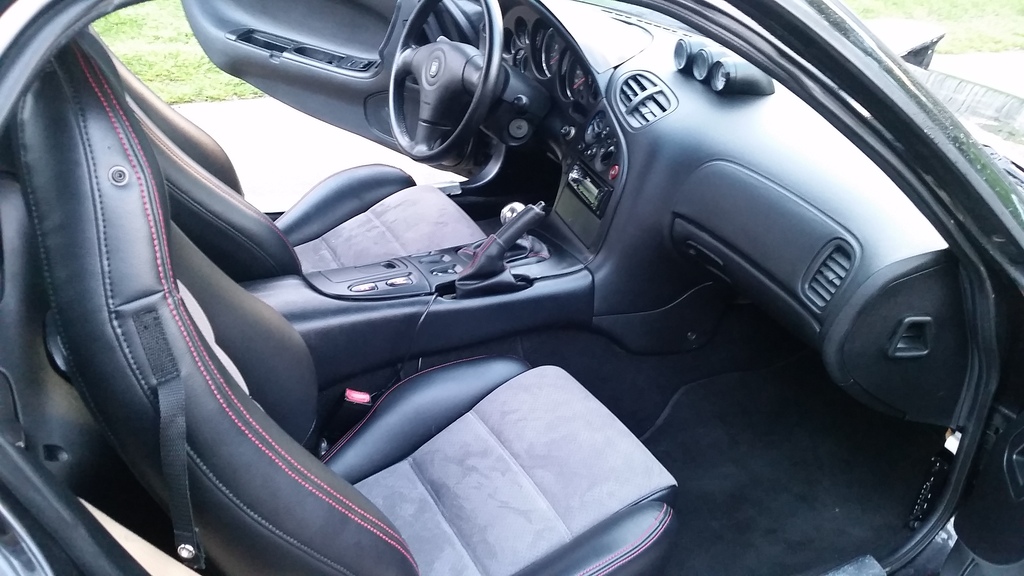
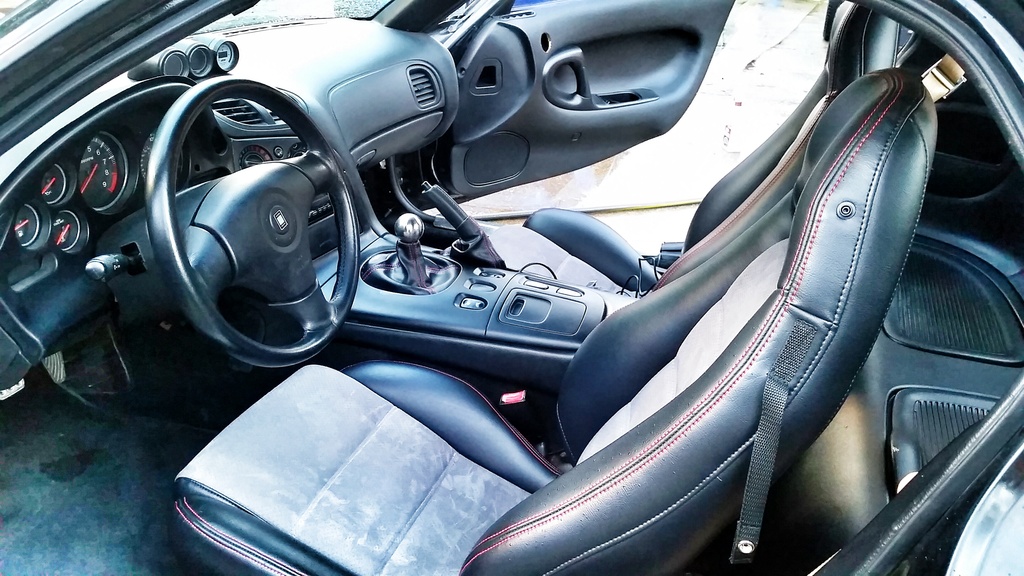
4/22/15
Replaced tan interior with black interior and installed steering wheel, head unit and speakers. Still need to update a few interior items but having the new items make the interior look a lot better.
Test fitted some wheels
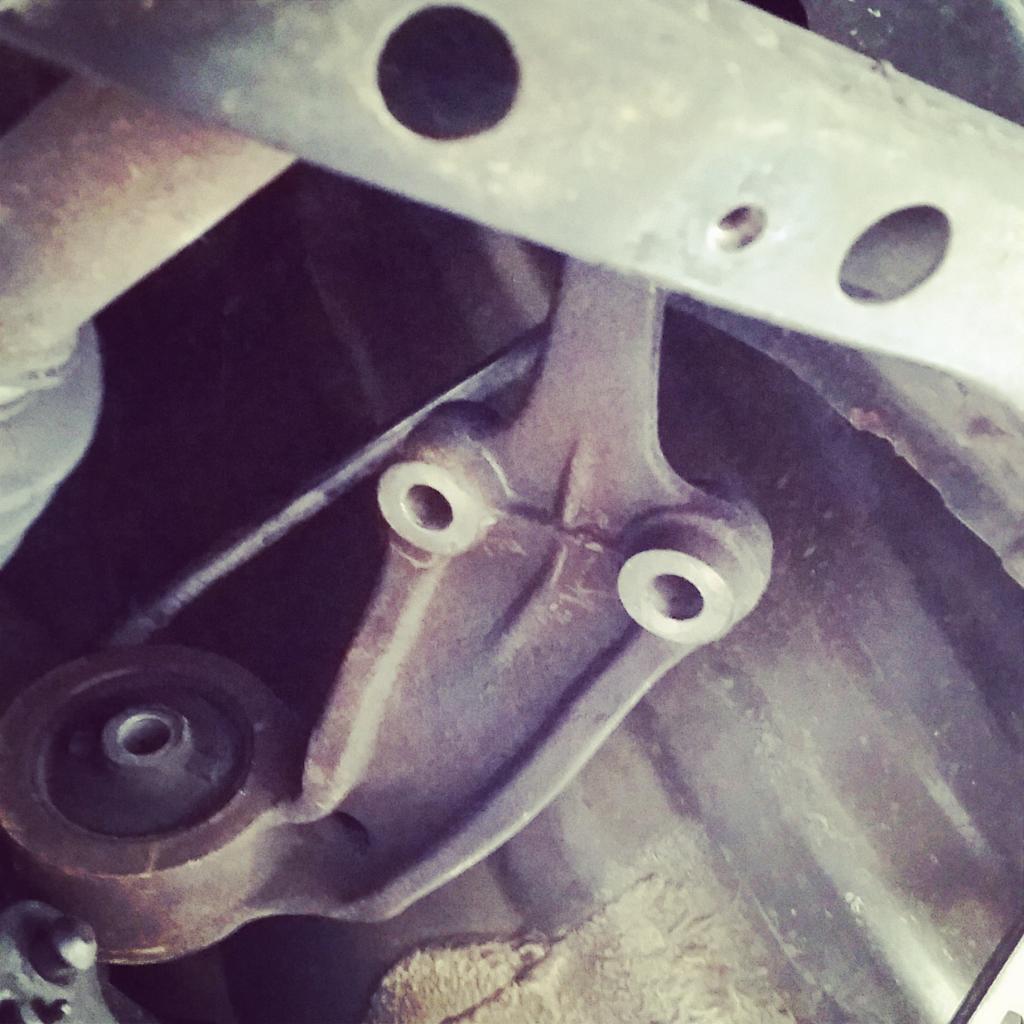
Pulled the engine to fix an oil pressure issue and replace the front turbo and engine mount while the engine was out.
Installed engine and did some street tuning

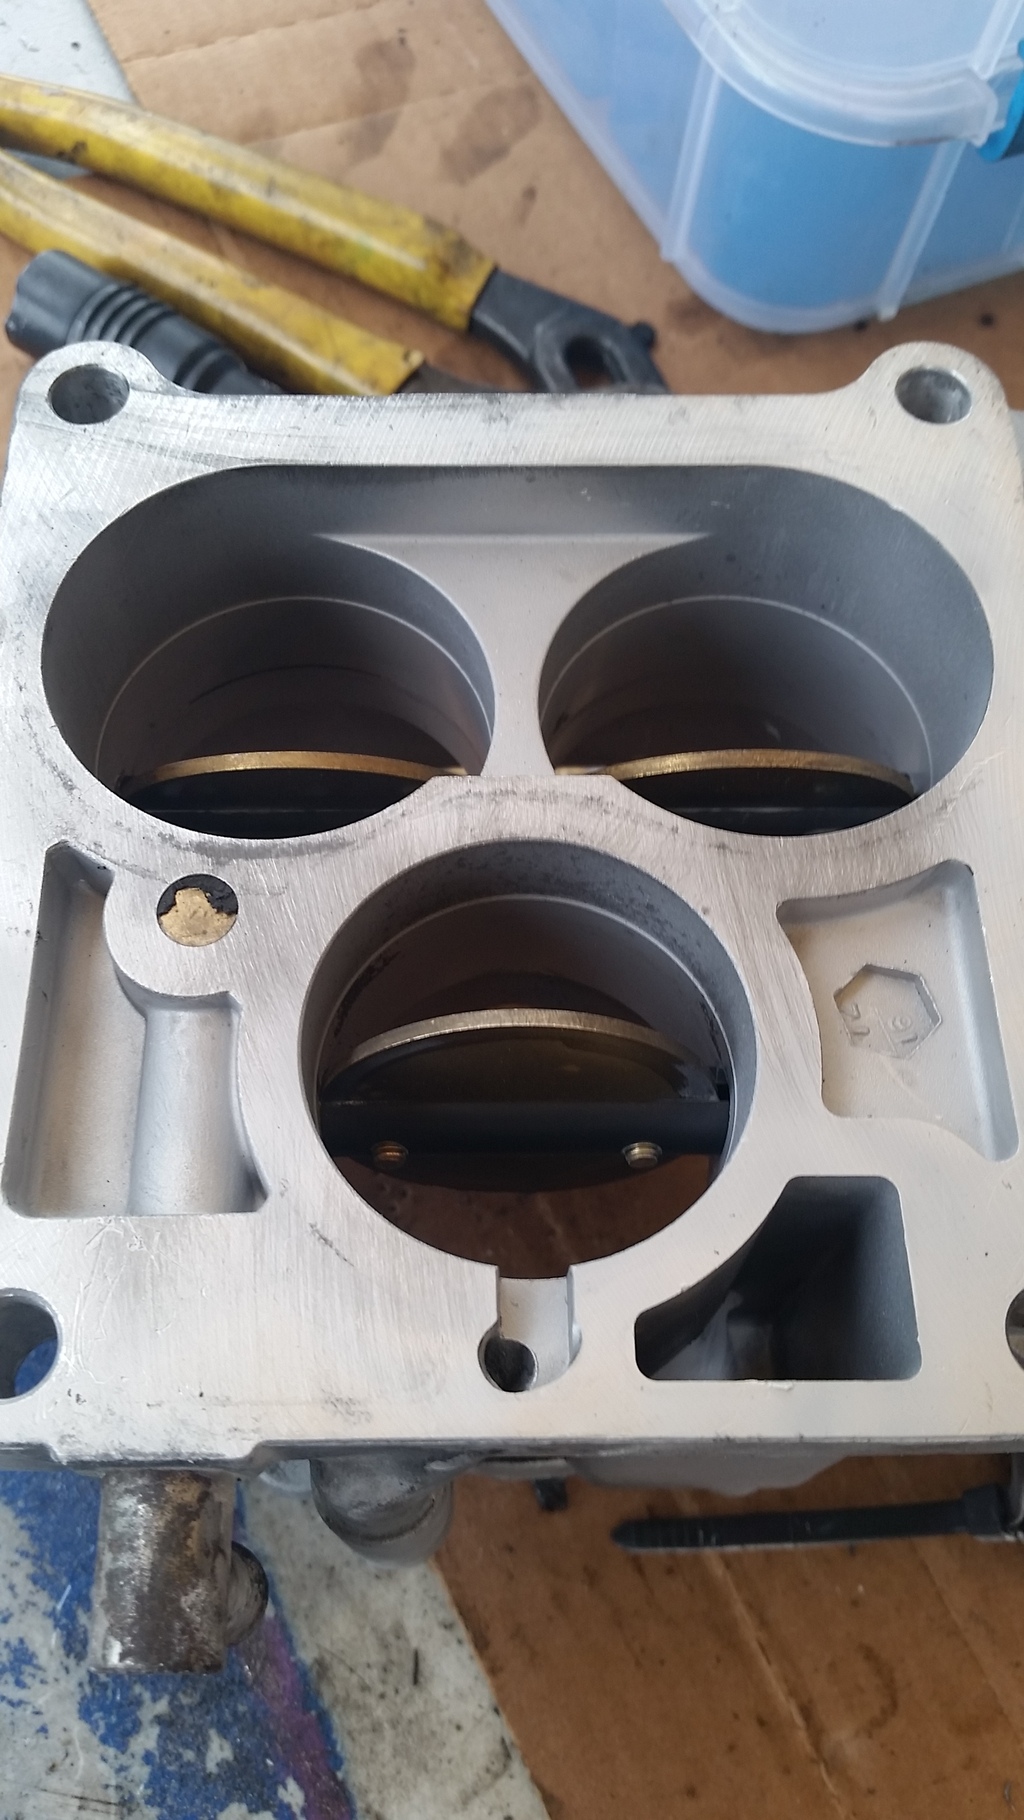
Got a blasting cabinet awhile back and decided to blast my TB.
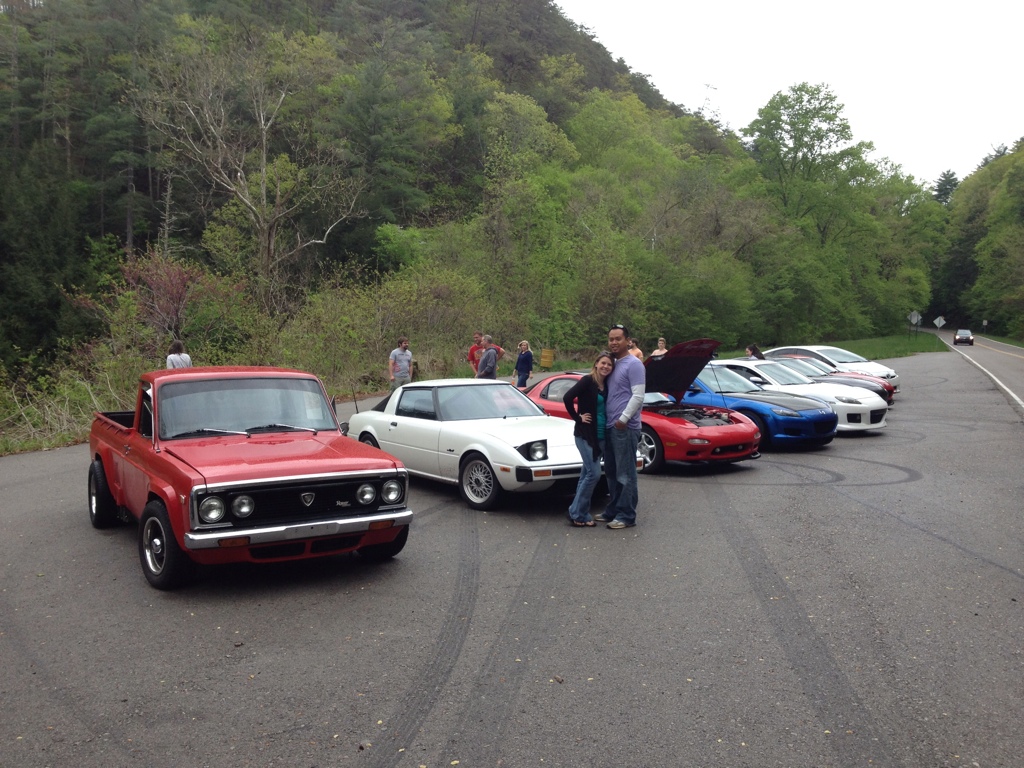
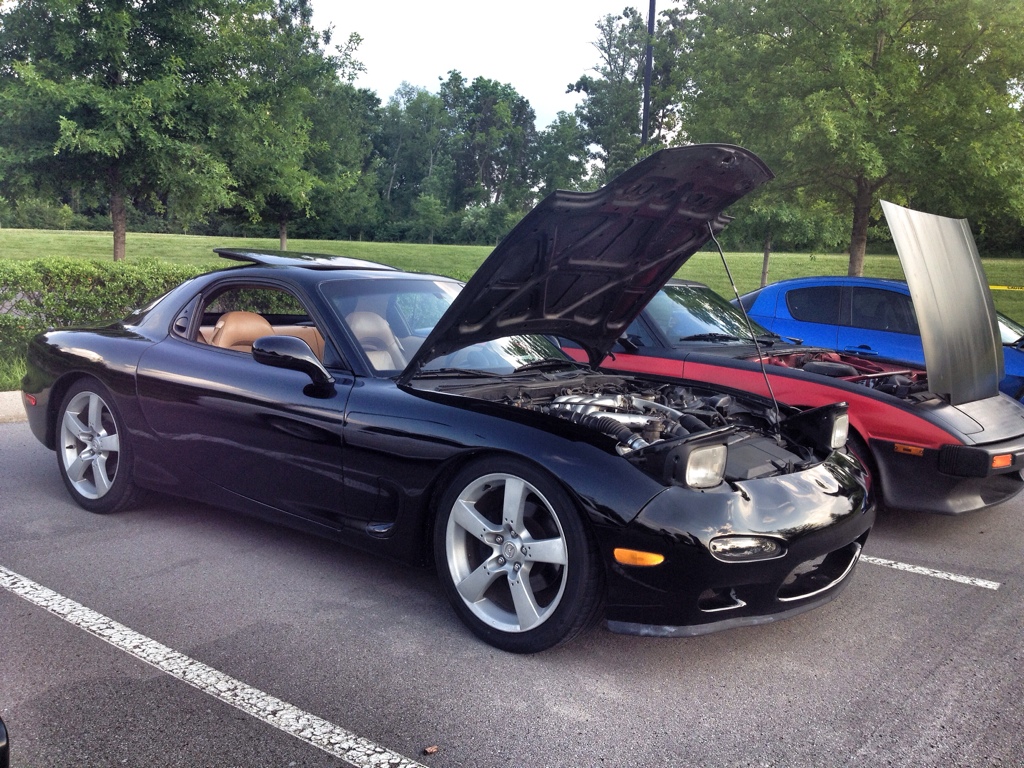
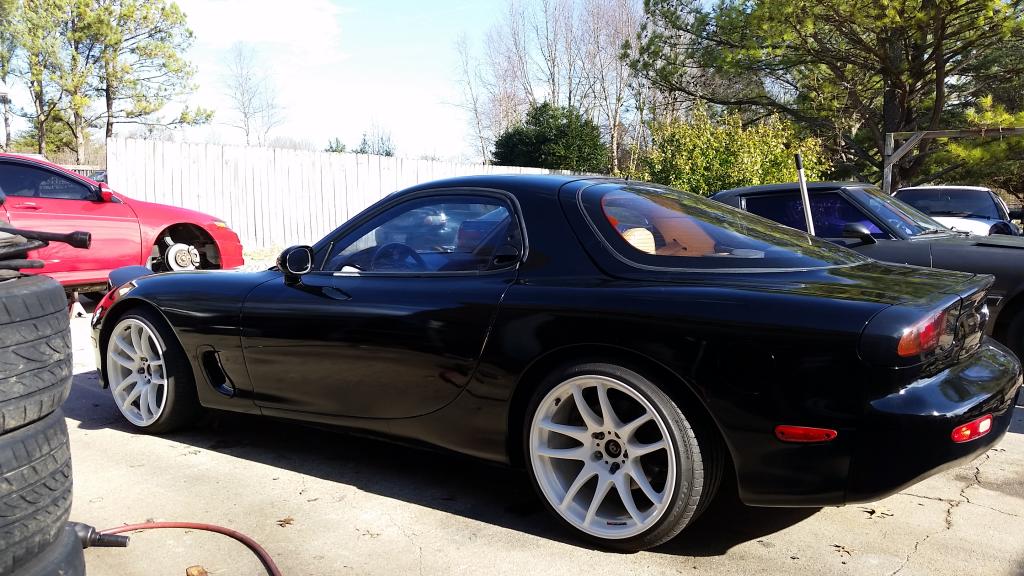
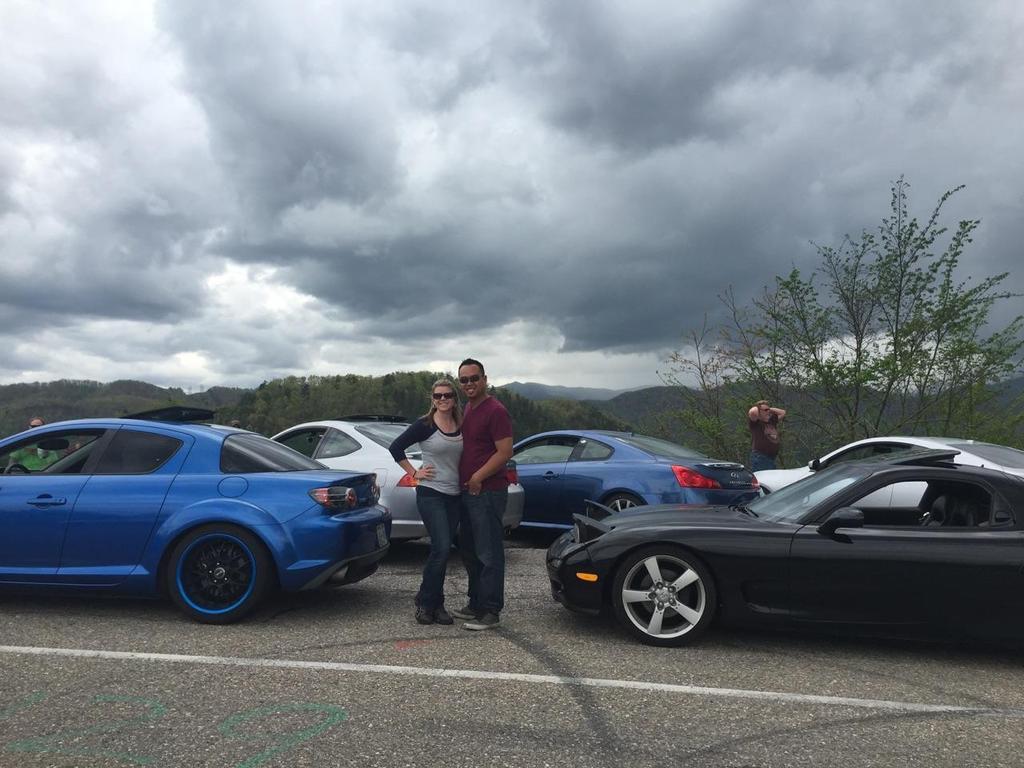
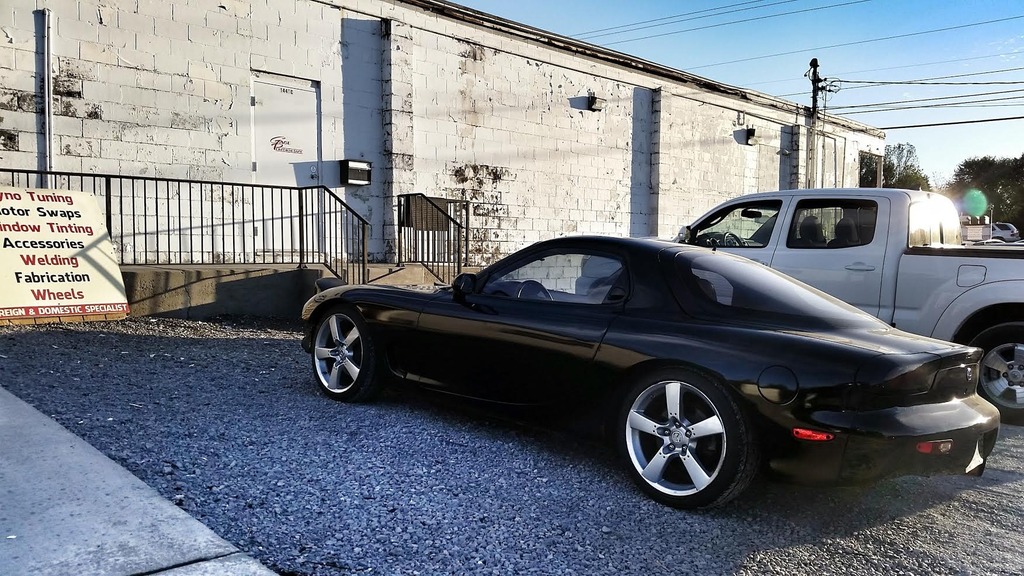
Made it to Deals Gap and ran it through the dragon twice. Didn’t handle as good as I would like. Need to install new suspension, replace some bushing, get wider wheels and tires. Car smokes under a lot of boost.
Still need to paint and install front bumper and lip.
11/1/15
Few rear suspension updates
- Got some aftermarket new toe arms
- 1 of the trailing arms missed up when my buddy tried to press out the bushing. So i got another used one
- Got Vin to press in some aftermarket bushings
- Installed LCA bushings
My car only came with 1 oil cooler so i decided to installed an OEM rx8 oil cooler on the passenger side to help with oil temps when I do track events. No pics of this setup but pretty happy with the way it came out.
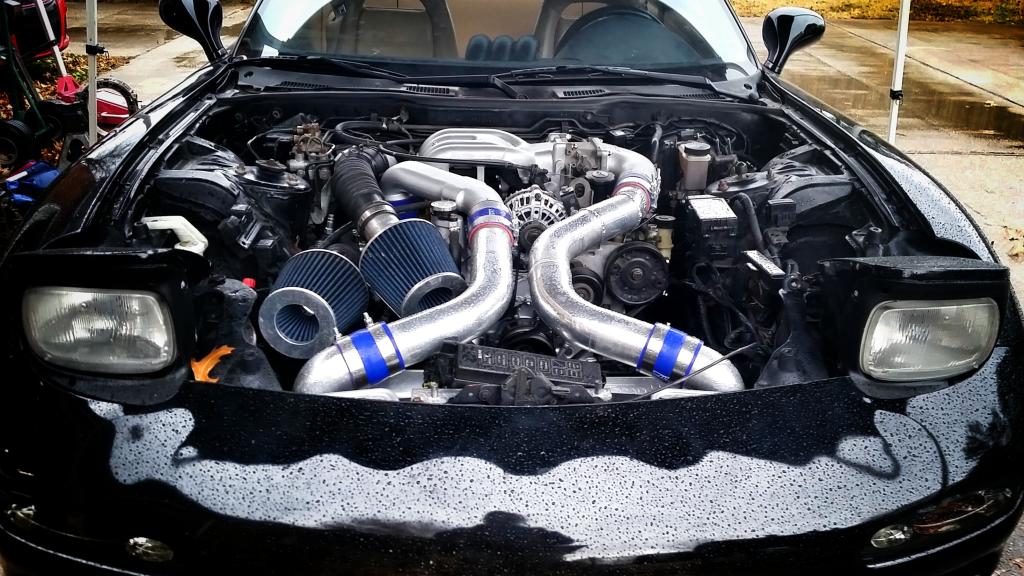
Went with single setup
- HKS cast manifold
- Tial 44mm WG with 9 psi spring
- Garret t04e with a 57 trim / .86 A/R
- Modified CX racing dp, re routed wg into DP by Gage Performance
- Tial BOV
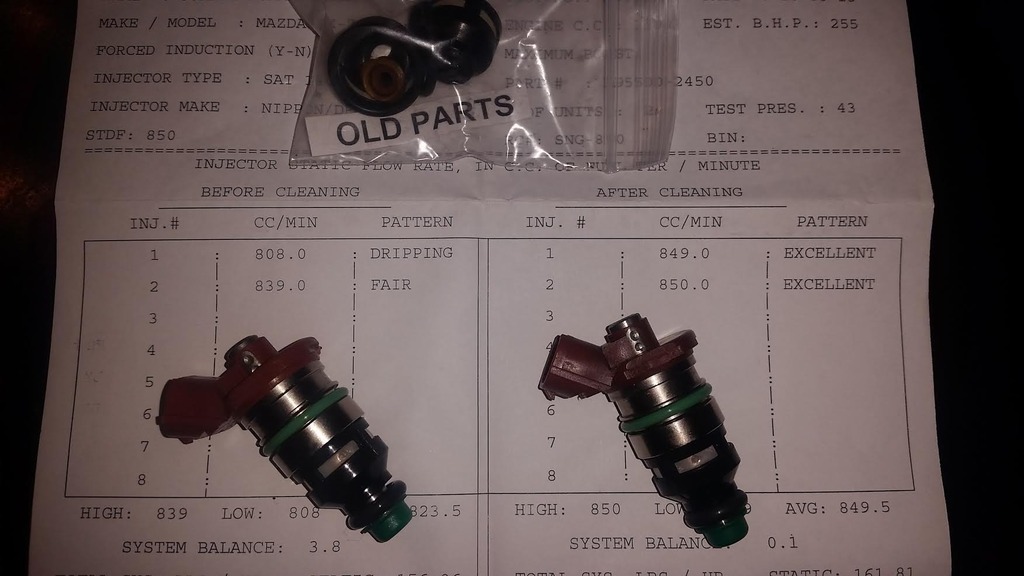
- Install fresh cleaned OEM 850s in the primary
Very happy with the RC Engineering quality of work and how quick then test and clean the injectors.

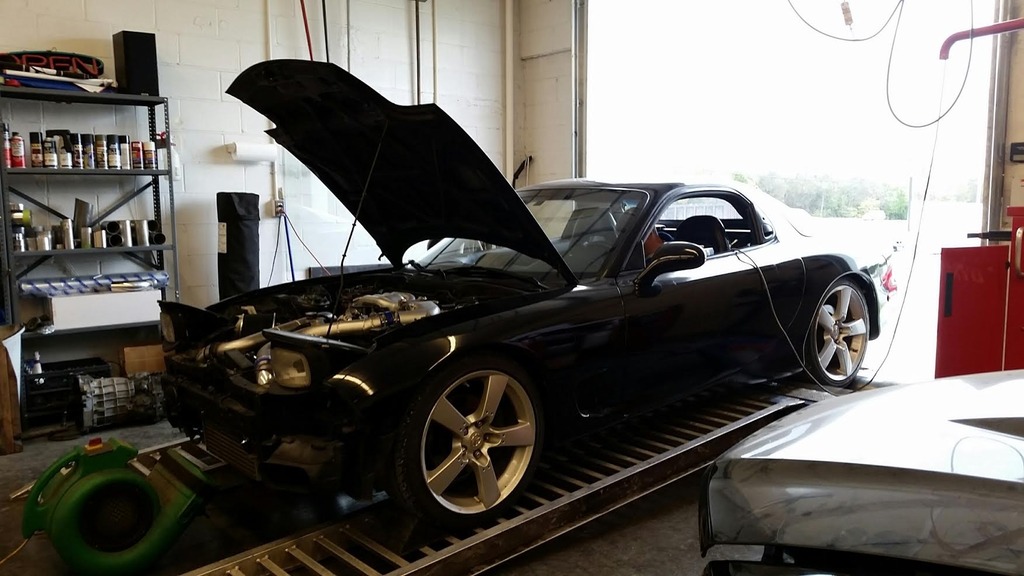
Tuned on an adaptronic
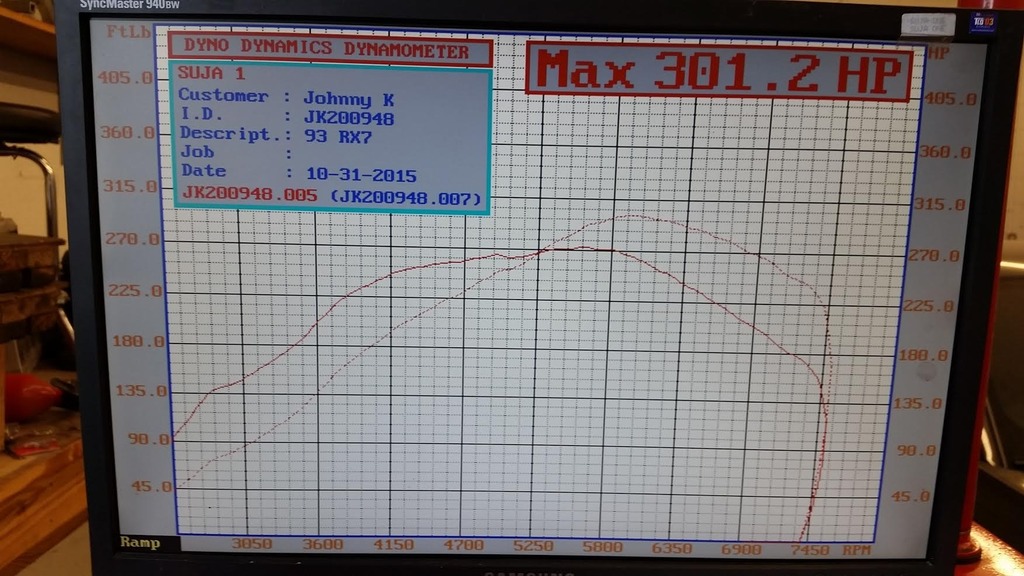
Not huge numbers but I'm happy with it. Simple setup, quick spooling and should be fun to drive on the streets and a decent setup for 2-3 track events a year.
This was a 12 psi
Replaced tan interior with black interior and installed steering wheel, head unit and speakers. Still need to update a few interior items but having the new items make the interior look a lot better.


Test fitted some wheels

Pulled the engine to fix an oil pressure issue and replace the front turbo and engine mount while the engine was out.

Installed engine and did some street tuning

Got a blasting cabinet awhile back and decided to blast my TB.

Made it to Deals Gap and ran it through the dragon twice. Didn’t handle as good as I would like. Need to install new suspension, replace some bushing, get wider wheels and tires. Car smokes under a lot of boost.

Still need to paint and install front bumper and lip.
11/1/15
Few rear suspension updates
- Got some aftermarket new toe arms
- 1 of the trailing arms missed up when my buddy tried to press out the bushing. So i got another used one
- Got Vin to press in some aftermarket bushings
- Installed LCA bushings
My car only came with 1 oil cooler so i decided to installed an OEM rx8 oil cooler on the passenger side to help with oil temps when I do track events. No pics of this setup but pretty happy with the way it came out.
Went with single setup
- HKS cast manifold
- Tial 44mm WG with 9 psi spring
- Garret t04e with a 57 trim / .86 A/R
- Modified CX racing dp, re routed wg into DP by Gage Performance
- Tial BOV
- Install fresh cleaned OEM 850s in the primary
Very happy with the RC Engineering quality of work and how quick then test and clean the injectors.


Tuned on an adaptronic

Not huge numbers but I'm happy with it. Simple setup, quick spooling and should be fun to drive on the streets and a decent setup for 2-3 track events a year.
This was a 12 psi

Last edited by Johnny Kommavongsa; Nov 4, 2015 at 06:17 PM.

You really are bringing this car back from the brink. You really breezed thru a lot of hard work in this thread like it was nothing lol.
You put in a lot of hours and did a nice job as far as I can tell. Keep us posted of the progress.
You put in a lot of hours and did a nice job as far as I can tell. Keep us posted of the progress.
Yea 20 months of ownership feels like 60 months. There is always something that needs loving on this thing.
Other boring mods that I done recently
- New OEM door handles thanks to Rich
- New OEM key ( I broke a copy last year and every since then the other copy always felt flimsy
- Non Bose rear carpet
- Black seat belt buckle (i painted my tan ones and it was starting to chip)
- Un wrap my charge harness and replaced the ground and re wrapped it. (Car was getting any power to the main fuse and left me stranded on 12/23)
Next up
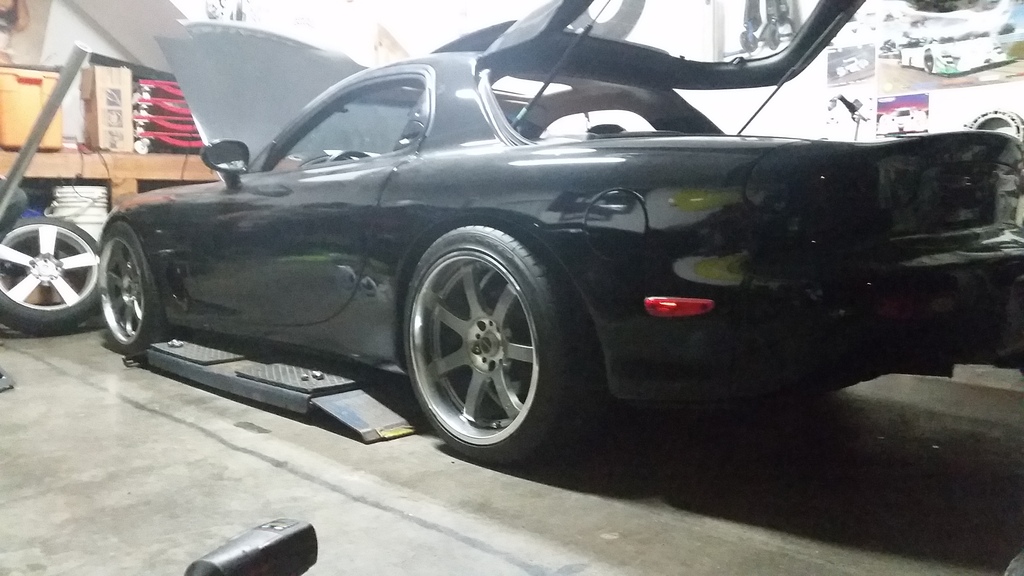
- 17x9 +45 RPF1 with 255/40 Dunlop Direzza ZII. Can't wait to drive on these bad boys
- New PS line and cooler
Last edited by Johnny Kommavongsa; Dec 29, 2015 at 12:52 PM.

Took apart my charge harness, changed out the ground wire, checked wires and re tapped it.
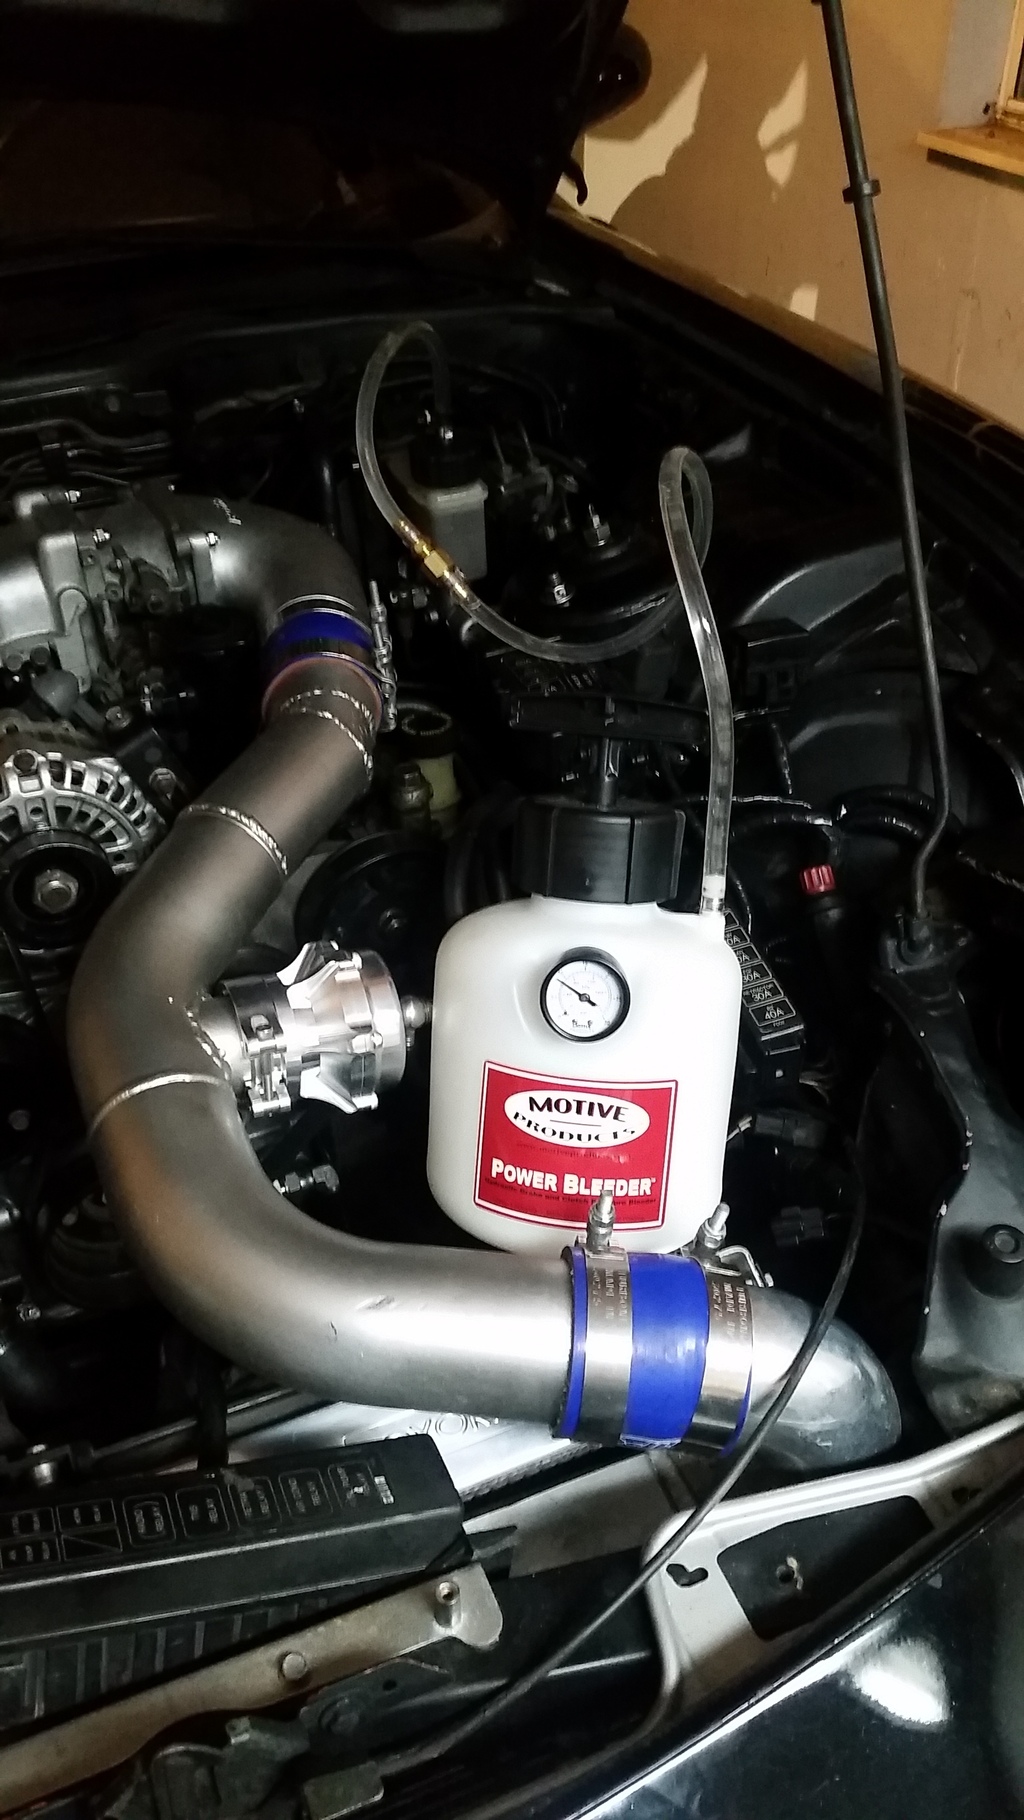
Finally got around to install the SB brake lines
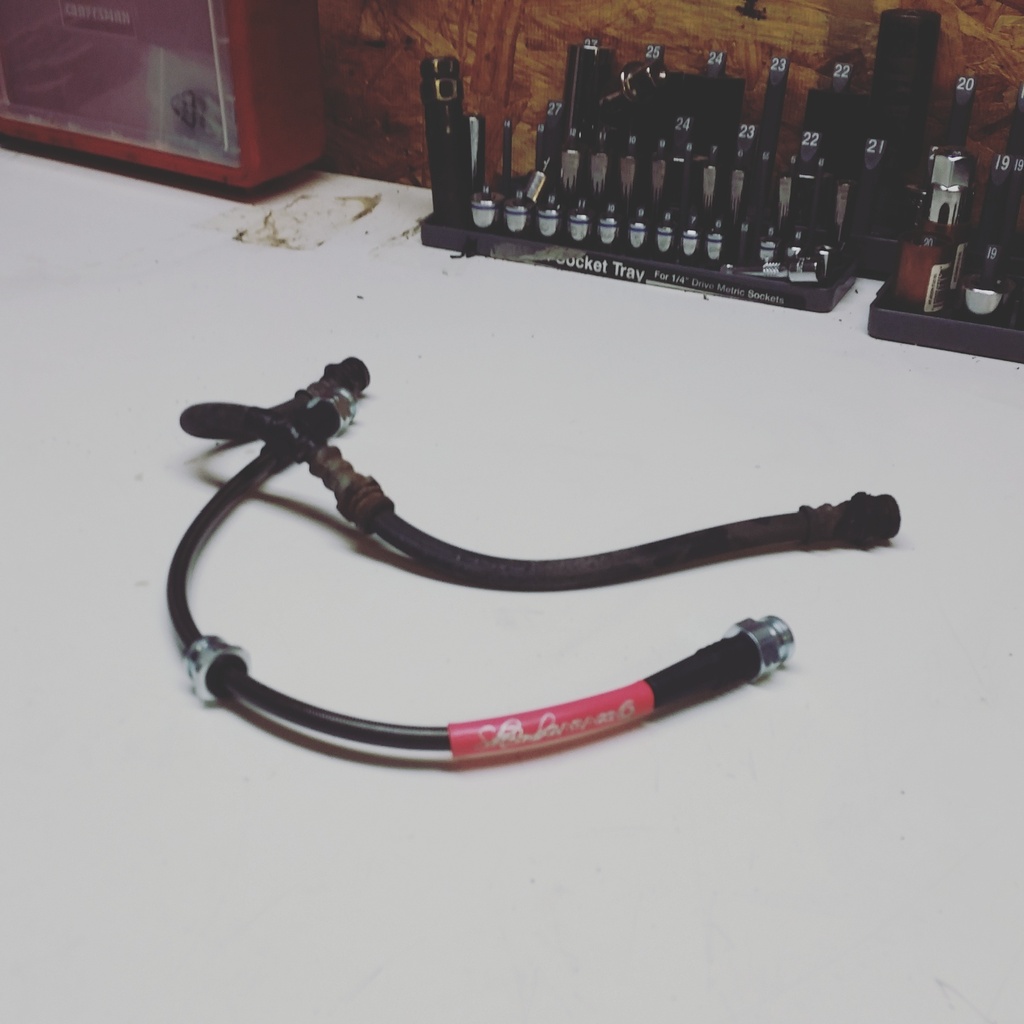
and finally got to use this brake bleeder this thing is awesome
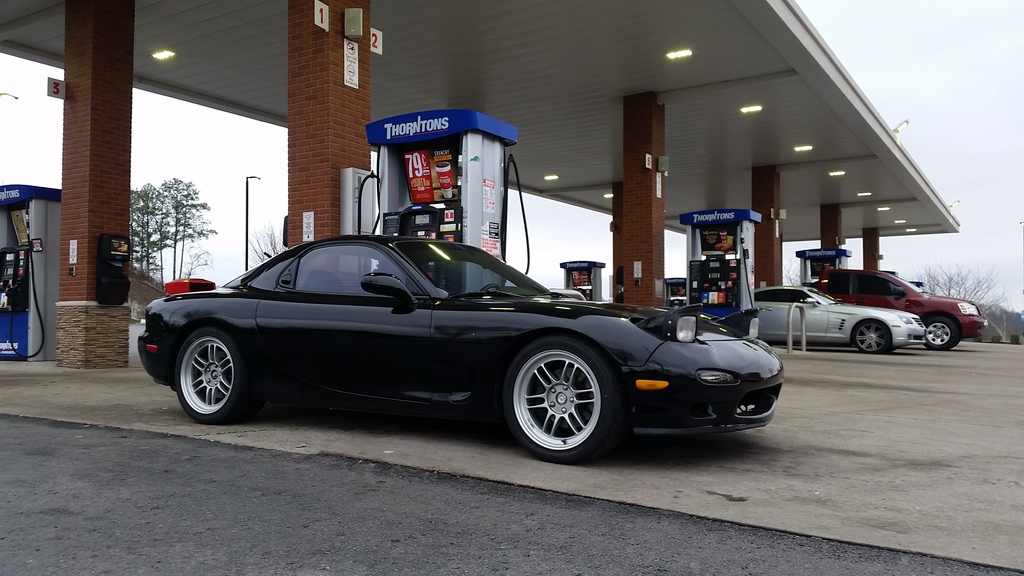
Started off 2016 by putting some wheels on.

Finally got around to install the SB brake lines

and finally got to use this brake bleeder this thing is awesome

Started off 2016 by putting some wheels on.
