Anthony's Build Thread

Thread Starter
Joined: May 2006
Posts: 594
Likes: 0
From: Los Angeles, CA
Last weekend and also today Tony and Myself got busy as hell on my suspension. We got most of the bushings out and got the new ones installed during the weekend. To make a very long and horribly difficult story short: It was a huge pain in the *** to get the stock bushings out. The new bushings went in with extreme ease aside from the toe link bushings. Those sucked too. We ended up having to travel to harbor freight in Alexandria to buy a bushing press which helped immensely.
Tony did an extremely good job cleaning the control arms. I cleaned a couple but they were sub par so he redid them. I did the paint while he cleaned the c-arms.

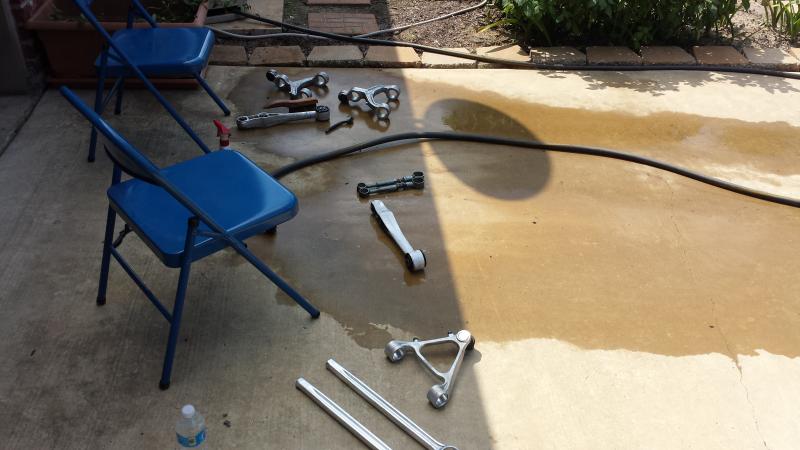
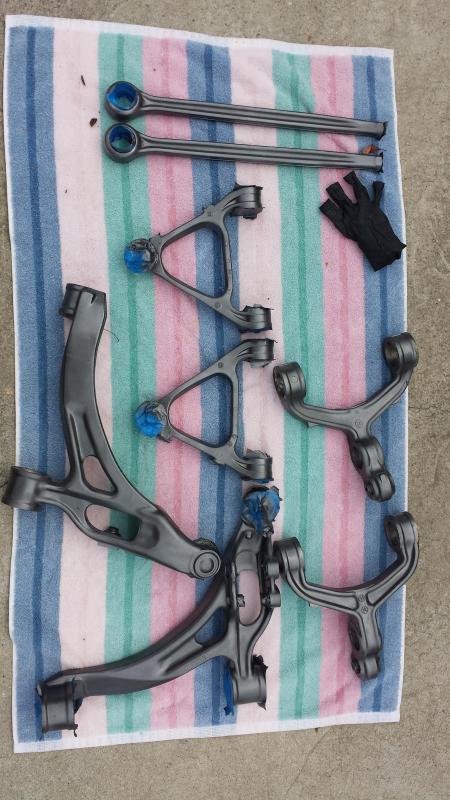
Fresh graphite colored paint (which i still think is an excellent choice)
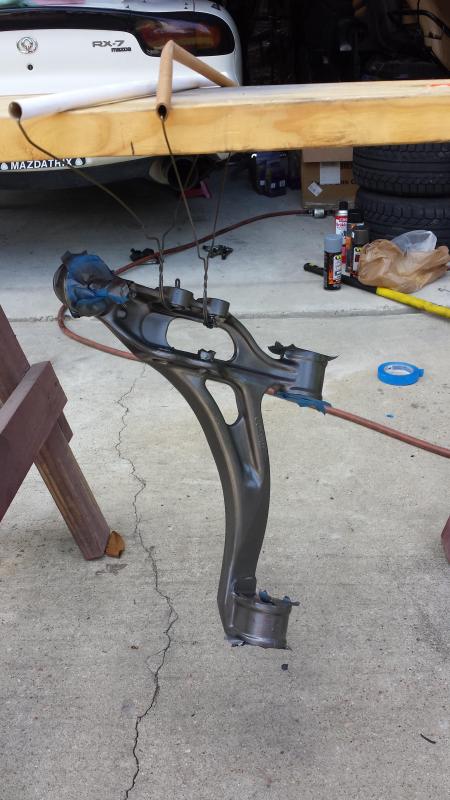
Painted control arms drying out on a towel.
Previous suspension (Koni shocks and eibach springs...i think)
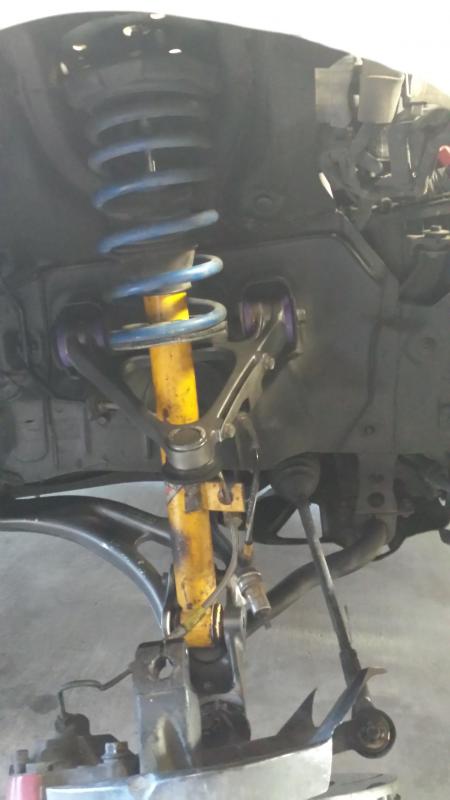
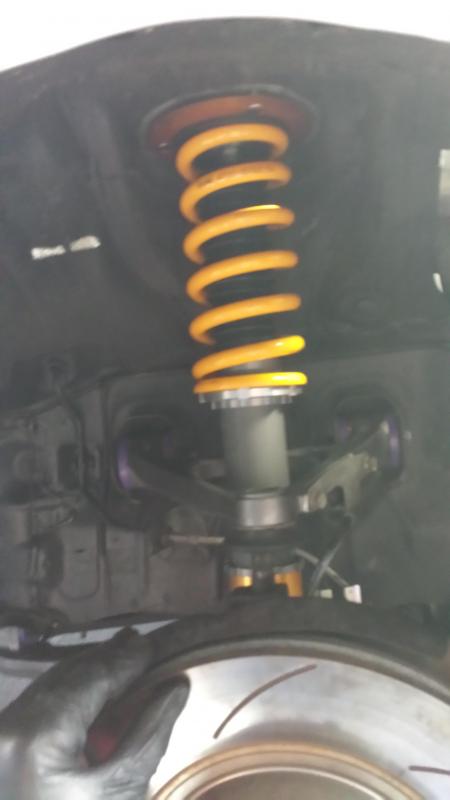
New Ohlins coilovers
Rears
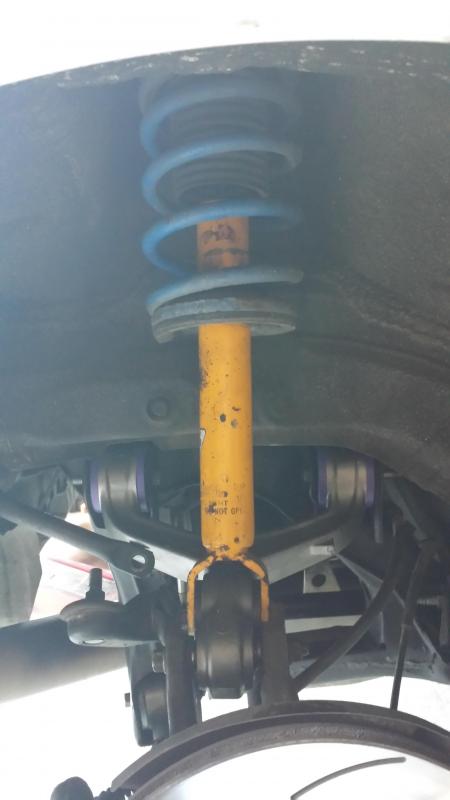
Rear ohlins

Tony did an extremely good job cleaning the control arms. I cleaned a couple but they were sub par so he redid them. I did the paint while he cleaned the c-arms.


Fresh graphite colored paint (which i still think is an excellent choice)

Painted control arms drying out on a towel.

Previous suspension (Koni shocks and eibach springs...i think)

New Ohlins coilovers

Rears

Rear ohlins

Thread Starter
Joined: May 2006
Posts: 594
Likes: 0
From: Los Angeles, CA
Does anyone know what the general cost of having a Haltech ecu installed into your car and have a base map put in it is? I would install it myself but I'm not very good on the electrical side of things. I have the wiring diagram but I would prefer not to screw this stuff up....ya know? I emailed PRT performance but they havent gotten back to me. I'm going to see about Reliable performance in Garland just so I can get another idea.
Out of curiosity what made ya land on haltech? I would recommend contacting Elliot at turblown before you make up your mind. You'll thank me later 
Btw looks like a clean build man keep up the good work!
Btw looks like a clean build man keep up the good work!


Thread Starter
Joined: May 2006
Posts: 594
Likes: 0
From: Los Angeles, CA
I already have the ECU so I'm already knee deep in this direction. I've owned a haltech before when I had my FC. It was an excellent ECU. I'm sure there are others out there that will do what the haltech will do but I am usually very inclined to go with somebody I trust and have used before.
Thanks for the replies guys. All good information.
Thanks for the replies guys. All good information.

Thread Starter
Joined: May 2006
Posts: 594
Likes: 0
From: Los Angeles, CA
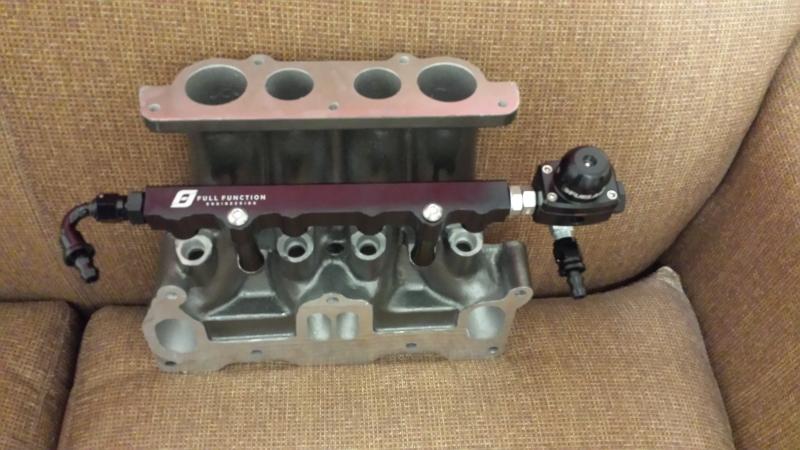
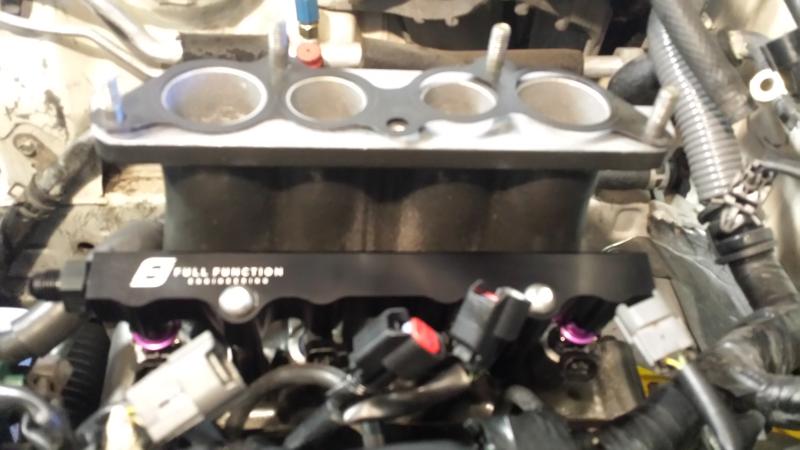
Update: I just purchased my fuel system through Full Function engineering. They were very informative and patient with my questions and gave me a pretty good deal. I ended up getting a single rail kit for the xcessive LIM 2 ID 1000's and 2 ID 2000's with the fuel lab FPR and a Fore fuel filter.
Now that my fuel system is finally coming along I am going to start looking into the turbo questions. I have read in the alternative fuel section about having the fuel to support the maximum boost level of your turbo in the event of a wastegate spring sticking. I will have around 6000 cc's max of fuel room to move around and I was wondering which turbo I should go with if I want 400 whp at around 20-25 PSI. I was looking into the Turbonetics billet GTK 750 or 850 but I'm pretty sure I wont have enough fuel to handle those at max boost if one of my WG's stick closed.
Any suggestions?
Thread Starter
Joined: May 2006
Posts: 594
Likes: 0
From: Los Angeles, CA
Update: I finally got around to picking up the fuel kit that I ordered from FFE. The build quality is very nice and I am very happy with the product so far. I have yet to install the kit but this weekend I may get into it. I have to first modify a bunch of little things in order for my xcessive LIM to fit correctly. I have also got an IRP stainless filler neck coming in, hopefully tomorrow so that will go on this weekend as well, assuming everything works out. So stay tuned!


Haha, nice....you got the oil filler neck. I might pick up one too depending on how nice it is. Let me know when you want to knock it out this weekend. If you still need to use the shop that is.
Thread Starter
Joined: May 2006
Posts: 594
Likes: 0
From: Los Angeles, CA
Hey fellas, the install of all that stuff is complete. I am currently using the stock twins but I plan on going single turbo very soon. While Tony and I were taking the engine bay apart, we ruined the down pipe gasket and then while we were putting it back together, I made some bad decisions regarding other gaskets. Either way it goes, the car is still in good working order but I will not be driving it with the massive exhaust leak it now has, haha. I made the decision that my single turbo swap is coming now so I'm doing some research and will make some phone calls tomorrow regarding the parts I want to use. If all goes right, I will be using a Turbonetics billet GTK 750 with a manifold and downpipe made by A-spec, it will be twin scroll with a divided turbine housing on the gtk. I'm also going to be going with the defined autoworks v mount set up as there really isnt any other reasonable alternative at this moment and I dont have the knowledge or skill to create my own custom set up. Pics will come later on, I just have to organize some things.
Thread Starter
Joined: May 2006
Posts: 594
Likes: 0
From: Los Angeles, CA
The quote of the year goes to...
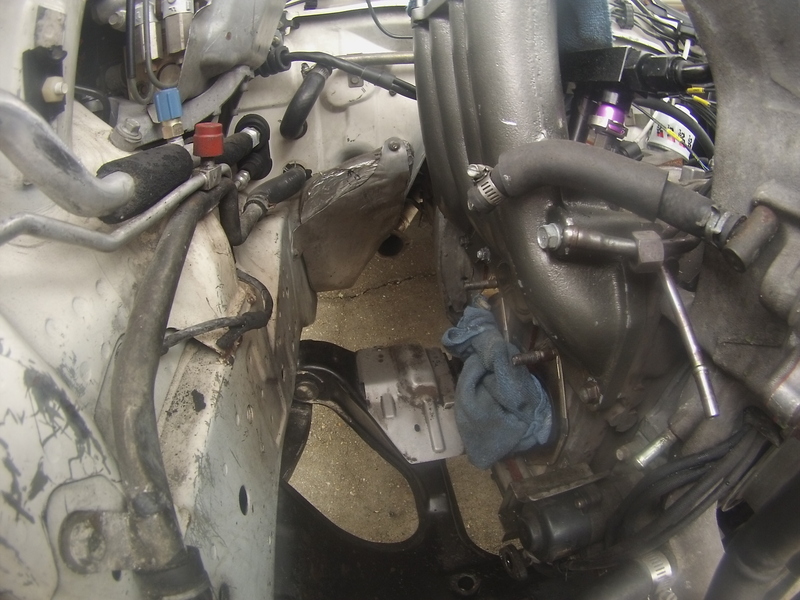
Yeah, so a couple of years ago, I needed a new down pipe and I needed it quickly. Against my better judgement, I went with the megan downpipe and midpipe. The quality of the pipes themselves is not bad, but the engineering that went into creating the pipes, is practically non-existant. Since the stock pipe has a 'crush' tube or expansion tube it makes it relatively easy to work with in the limited space between the turbo manifold and the engine bay wall. Well megan decided that they aint got no time for that crap and went ahead and left the pipe the standard diamater the whole way through. We had to take off one of the nuts for the passenger side engine mount in order to jack the engine up and get that precious amount of space needed to uninstall and reinstall the pipe.
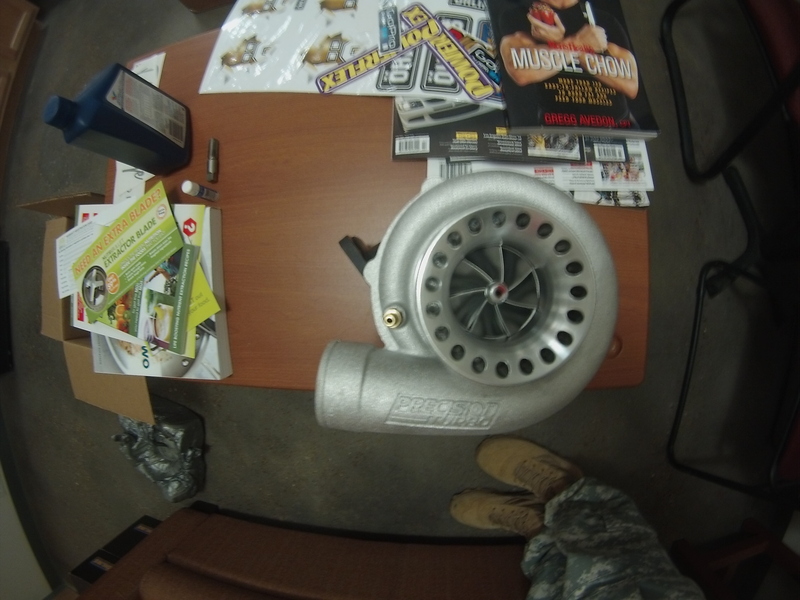
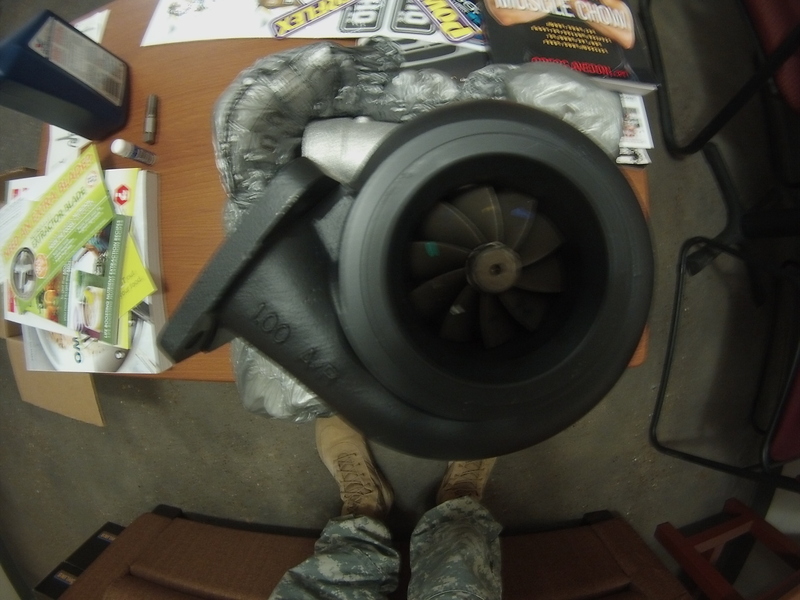
On to the pictures:
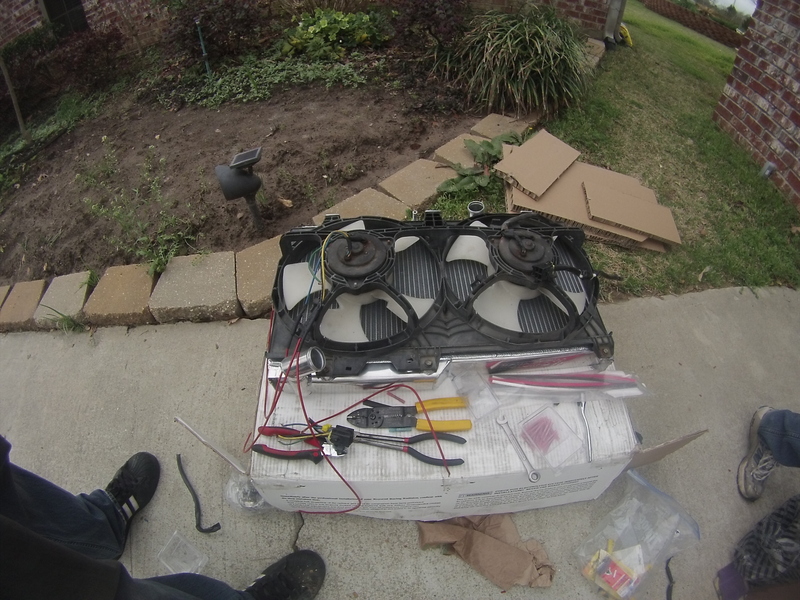
I did a small mock up in my living room the day before we got to work.
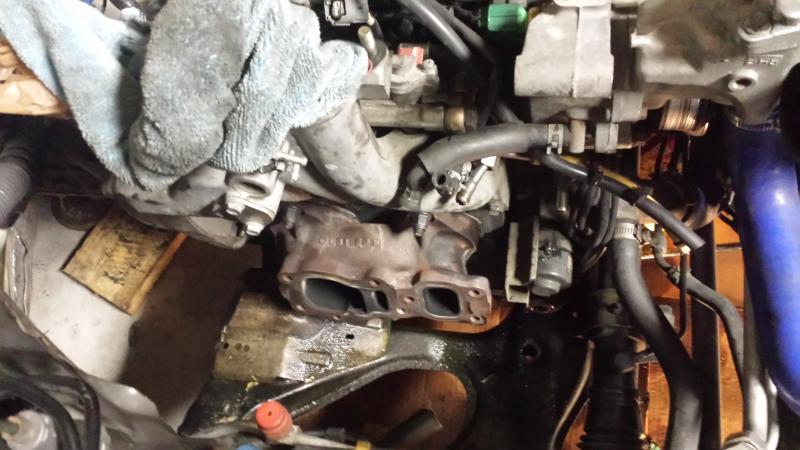
The turbos weren't hard to take off but the downpipe was. During the time we were taking the dp off we ruined the gasket.
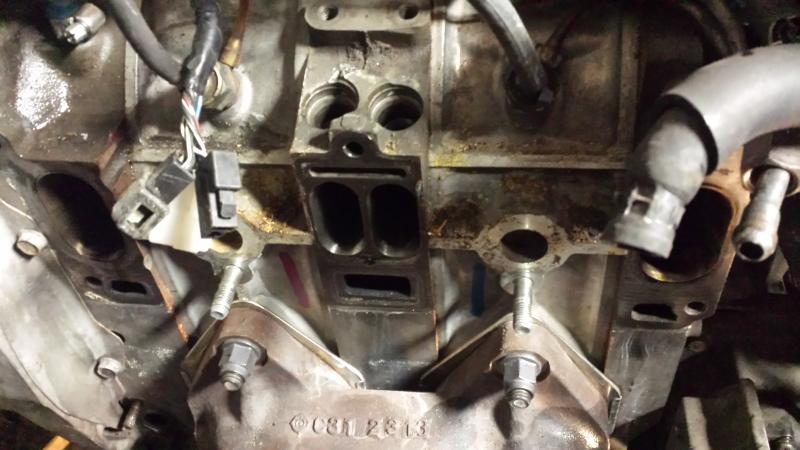
Then the last step was to take off the UIM which wasn't hard at all.
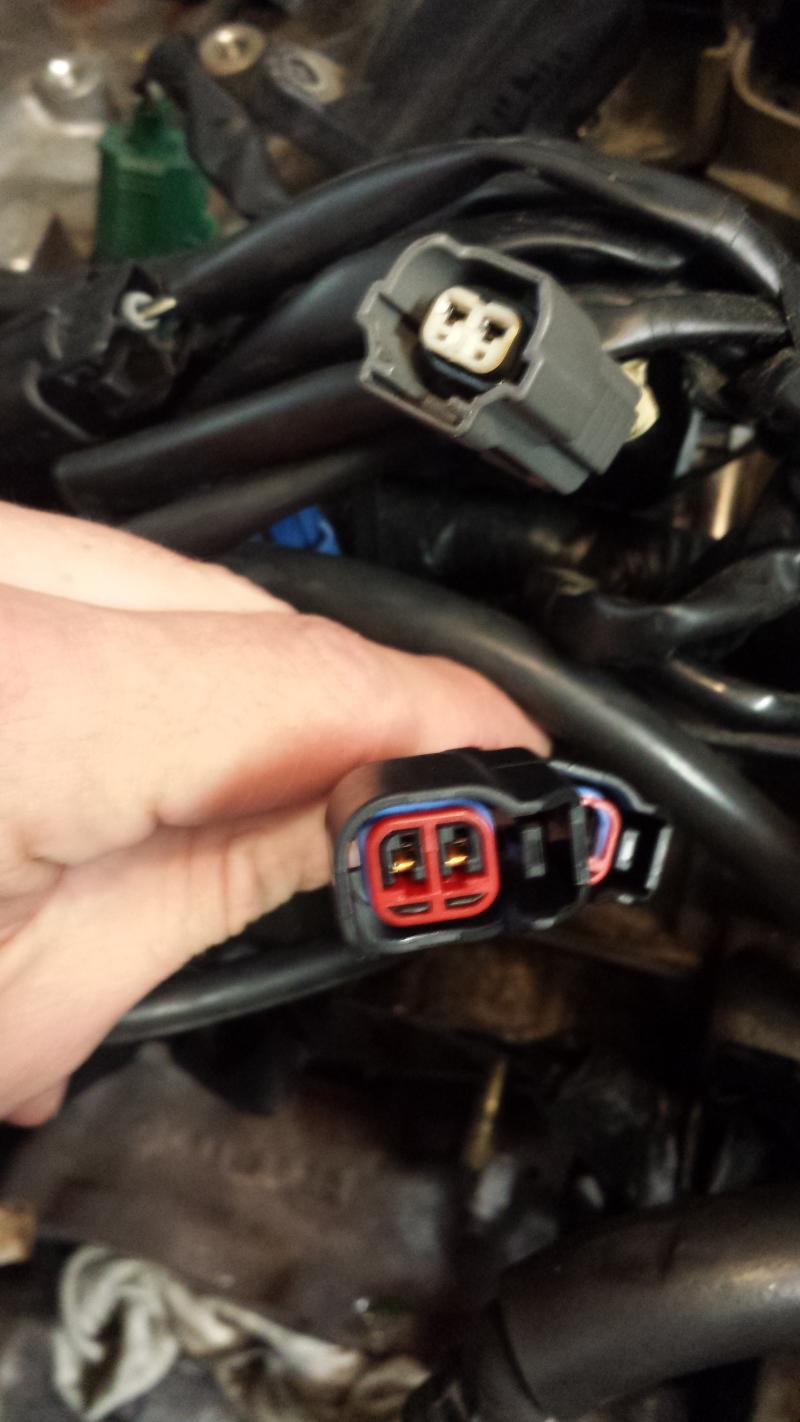
Once all that was done, we started the install. Changing the two primary injector plugs to the compatible plugs for the ID 1000's was a pain, but only because of the super fine details you had to pay attention to. While re-pinning one of the connectors the damn wires wouldn't lock in, due to some unfathomable reason having to do with the plug.
At the end of the day, it all went together but, not without more hickups and other small changes. Bend a line out of the way here, move something there. Heating the oil filler neck and pushing it out of the way is simple. Bending the oil line for the turbo and trying to get it to reconnect is another thing entirely.
For anybody looking to do this LIM mod, be prepared. FFE has a nice write up that you can download in a PDF file for how to de-pin and re-pin your injector connectors, but now that I have done it, I recommend just going with 4 ID 2000's so you dont have to change them at all. Also, there is also a pretty good write up on the forums about what all you need to do to get the Xcessive LIM to fit, I highly recommend looking that up, it just helps to prepare that much more.
Yeah, so a couple of years ago, I needed a new down pipe and I needed it quickly. Against my better judgement, I went with the megan downpipe and midpipe. The quality of the pipes themselves is not bad, but the engineering that went into creating the pipes, is practically non-existant. Since the stock pipe has a 'crush' tube or expansion tube it makes it relatively easy to work with in the limited space between the turbo manifold and the engine bay wall. Well megan decided that they aint got no time for that crap and went ahead and left the pipe the standard diamater the whole way through. We had to take off one of the nuts for the passenger side engine mount in order to jack the engine up and get that precious amount of space needed to uninstall and reinstall the pipe.
On to the pictures:
I did a small mock up in my living room the day before we got to work.

The turbos weren't hard to take off but the downpipe was. During the time we were taking the dp off we ruined the gasket.

Then the last step was to take off the UIM which wasn't hard at all.

Once all that was done, we started the install. Changing the two primary injector plugs to the compatible plugs for the ID 1000's was a pain, but only because of the super fine details you had to pay attention to. While re-pinning one of the connectors the damn wires wouldn't lock in, due to some unfathomable reason having to do with the plug.

At the end of the day, it all went together but, not without more hickups and other small changes. Bend a line out of the way here, move something there. Heating the oil filler neck and pushing it out of the way is simple. Bending the oil line for the turbo and trying to get it to reconnect is another thing entirely.

For anybody looking to do this LIM mod, be prepared. FFE has a nice write up that you can download in a PDF file for how to de-pin and re-pin your injector connectors, but now that I have done it, I recommend just going with 4 ID 2000's so you dont have to change them at all. Also, there is also a pretty good write up on the forums about what all you need to do to get the Xcessive LIM to fit, I highly recommend looking that up, it just helps to prepare that much more.
Thread Starter
Joined: May 2006
Posts: 594
Likes: 0
From: Los Angeles, CA
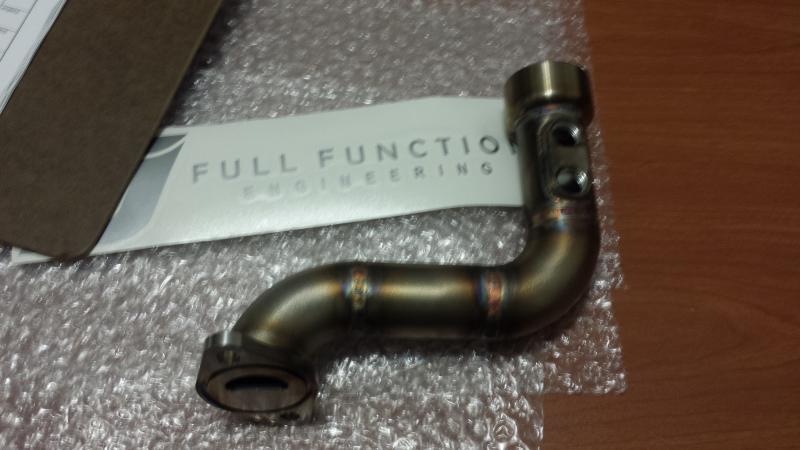
As promised, I received my Oil filler neck. It's a very good quality piece. I'm sure that this specific part has had a lot of spot light time around the forums but one more picture for good measure couldn't hurt.

Thread Starter
Joined: May 2006
Posts: 594
Likes: 0
From: Los Angeles, CA
I just lined up a few things for my build:
1. I'm getting some help putting my turbo kit together Howard Coleman for my turbo, manifold and waste gate.
2. Defined Autoworks V-mount intercooler
3. Flex fuel sensor and a couple of other nick nacks that I need.
Next on the list is:
1. BOV
2. Gaskets
I'm also going to start a for sale thread pretty soon for my "going single" sale.
Y-pipe, non-sequential turbos, fuel rails with 1300 cc secondaries and 550 primaries. I may also be selling my 10k mile wiring harness and my Power FC. We will see how everything works out.
Thread Starter
Joined: May 2006
Posts: 594
Likes: 0
From: Los Angeles, CA
Alright guys, major update here. My defined autoworks intercooler kit came in. I have not started work on it yet but it has indeed arrived. Flex fuel sensor and harness have arrived. Sakebomb AEM smart coil kit has also arrived (though I have not been to open it up yet). I have also ordered my turbo as well. I ordered a Precision 6266 and had the turbine housing ceramic coated black because who wants a gross, rusty looking turbine housing sitting around in your engine bay. I guess it also slightly helps with maintaining turbine housing heat. I went with Turblown for my manifold and downpipe. They have a good rep and their work looks to be very good quality. I couldn't hold out on Howard anymore as, he is a busy man and he's got a lot of work to do to get ready for the Texas mile. I also tried to contact a-spec but after a solid week and speaking with some of his customers, his parts while extremely nice and of very good quality, in my opinion are not worth the sometimes 6 and 7 month wait. I have also ordered a catch can.
Links:
TURBLOWN - Turbo Kits, Turbochargers, Engine Rebuilds and Car Parts
VS Catch Cans
Precision 6266 Ball Bearing Gen2 CEA - AGP Turbochargers, Inc. Store
Redhorse Performance - We Bring Fast Things To Life
DEFINED AUTOWORKS
Now, still on the list for me to get:
Wastegates, I may go with dual turbosmart 40mm's as they come with better recommendations from a few people and they flow a little more than the 38 mvs Tial.
Electronic boost controller, I'm getting rid of my Apexi AVCR. It's a good unit but it's just too much. I just need something simple to gauge my boost and to control it. The AVCR is a digital nightmare for somebody who doesn't know how to use it.
Other than those two things, the rest of it is lines, fittings and other small things that are ordered in quantities exceeding 1.
On to the pictures!
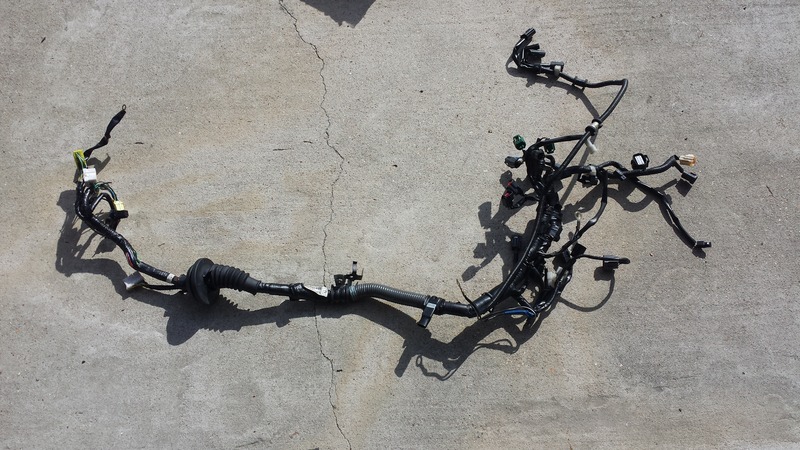
My almost stock wiring harness. Tony did most of the work taking this out. It's in pretty good shape and I will probably be putting it up for sale soon.
Rywire harness has been run through the firewall and is currently laid out in my engine bay. Good quality, very light and very flexible.
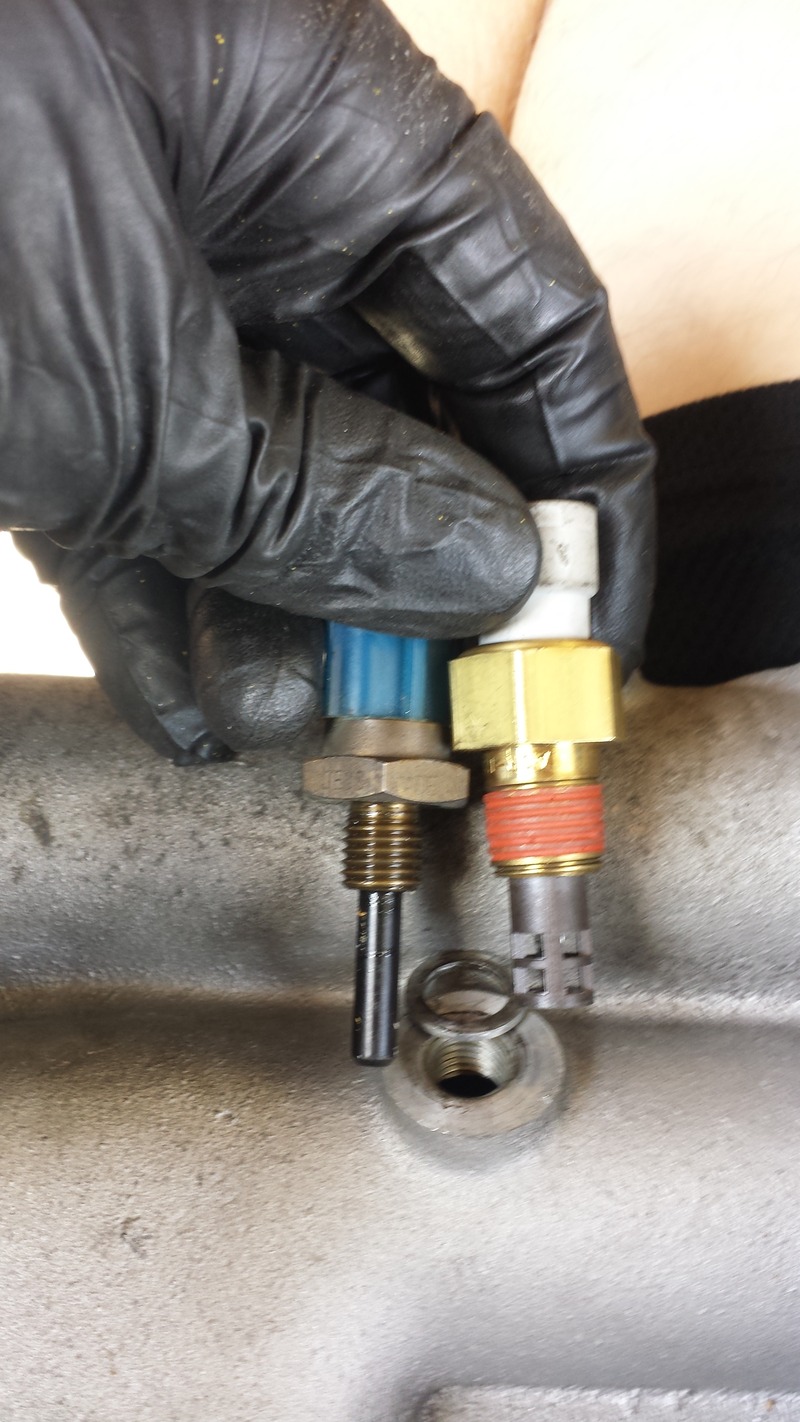
Ran into a snag with the fact acting delphi IAT. The bung for the stock IAT in the intake manifold is much smaller than the delphi. Solution: Go to a hardware store and buy a tap, drill the hole out and tap it. I am almost there, just need the correct size tap.
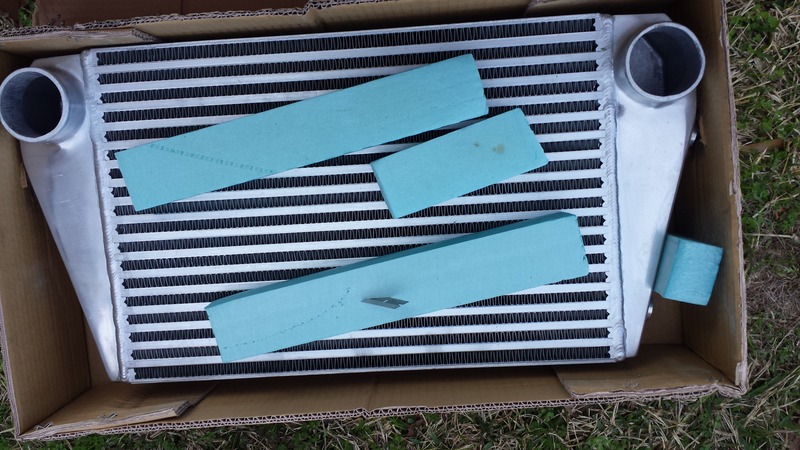
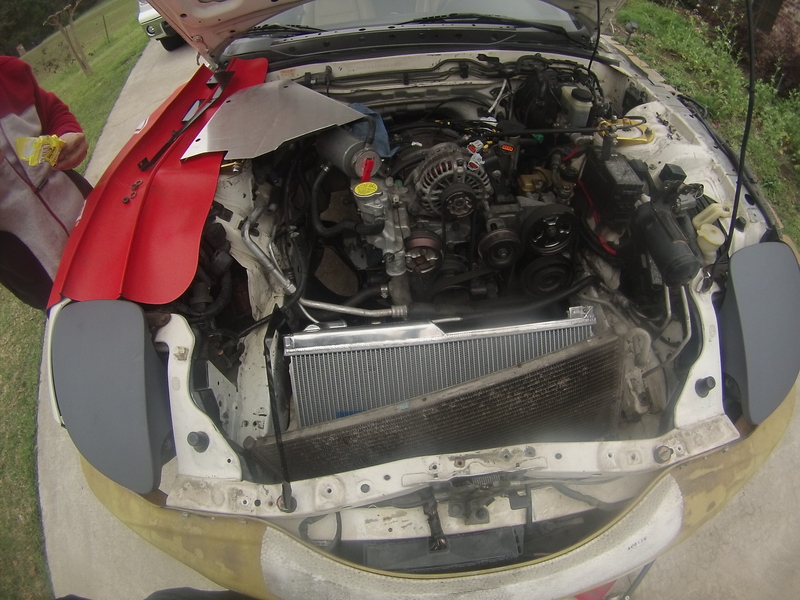
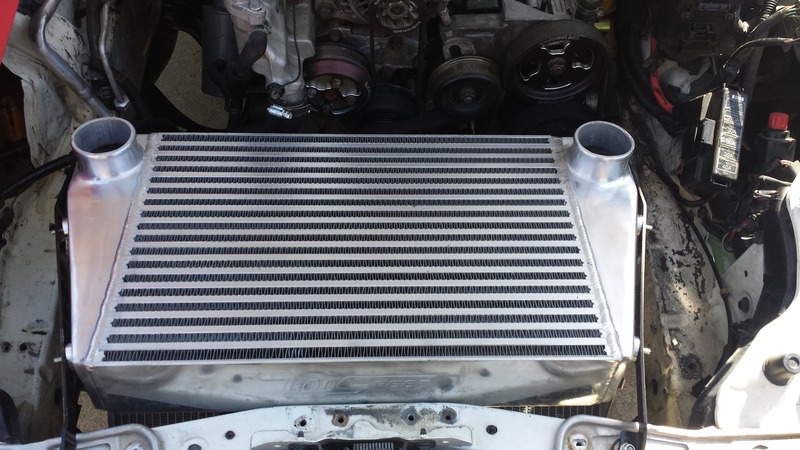
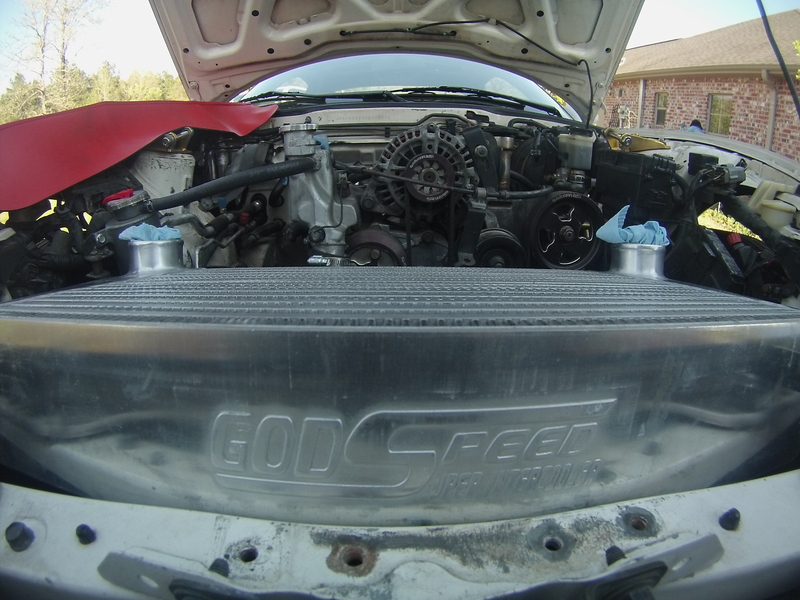
Defined autoworks V-mount intercooler. Comes with everything you need to install it and apparently keep your air conditioner. I have yet to find out, but I will keep you guys posted. It does not come with directions so it might be an educational day full of bad words.
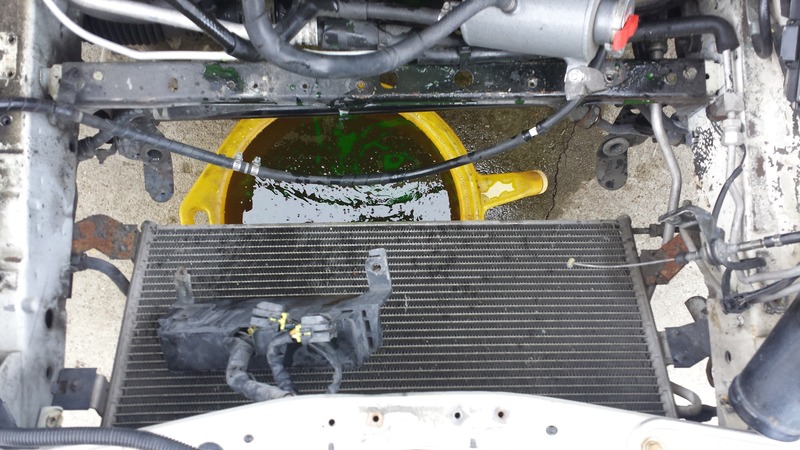
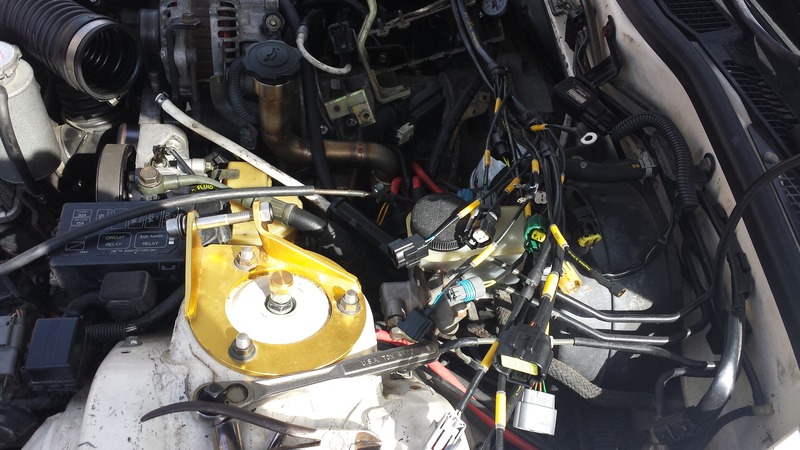
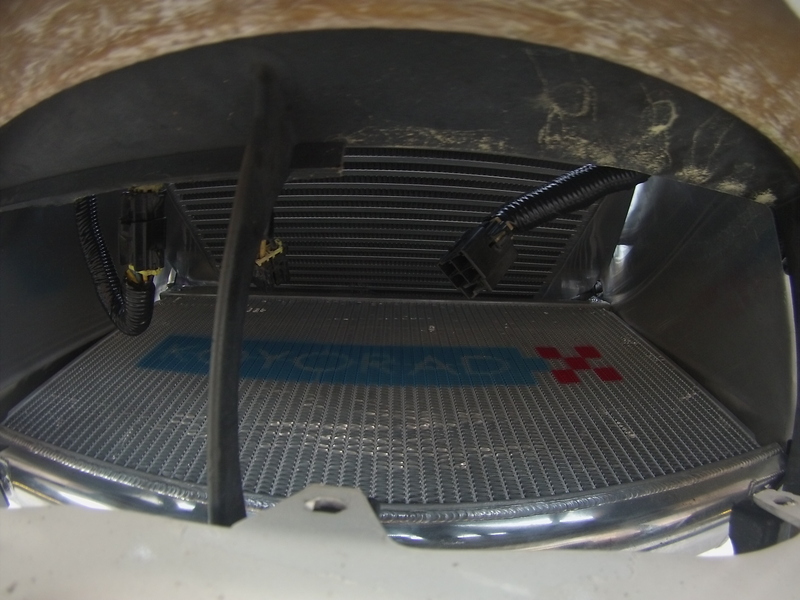
Radiator came out very easily. After this picture was taken I cleaned up the bay a little bit and started working on relocating the relay box that sits on the front rail. I will be painting a couple of brackets in the bay soon.
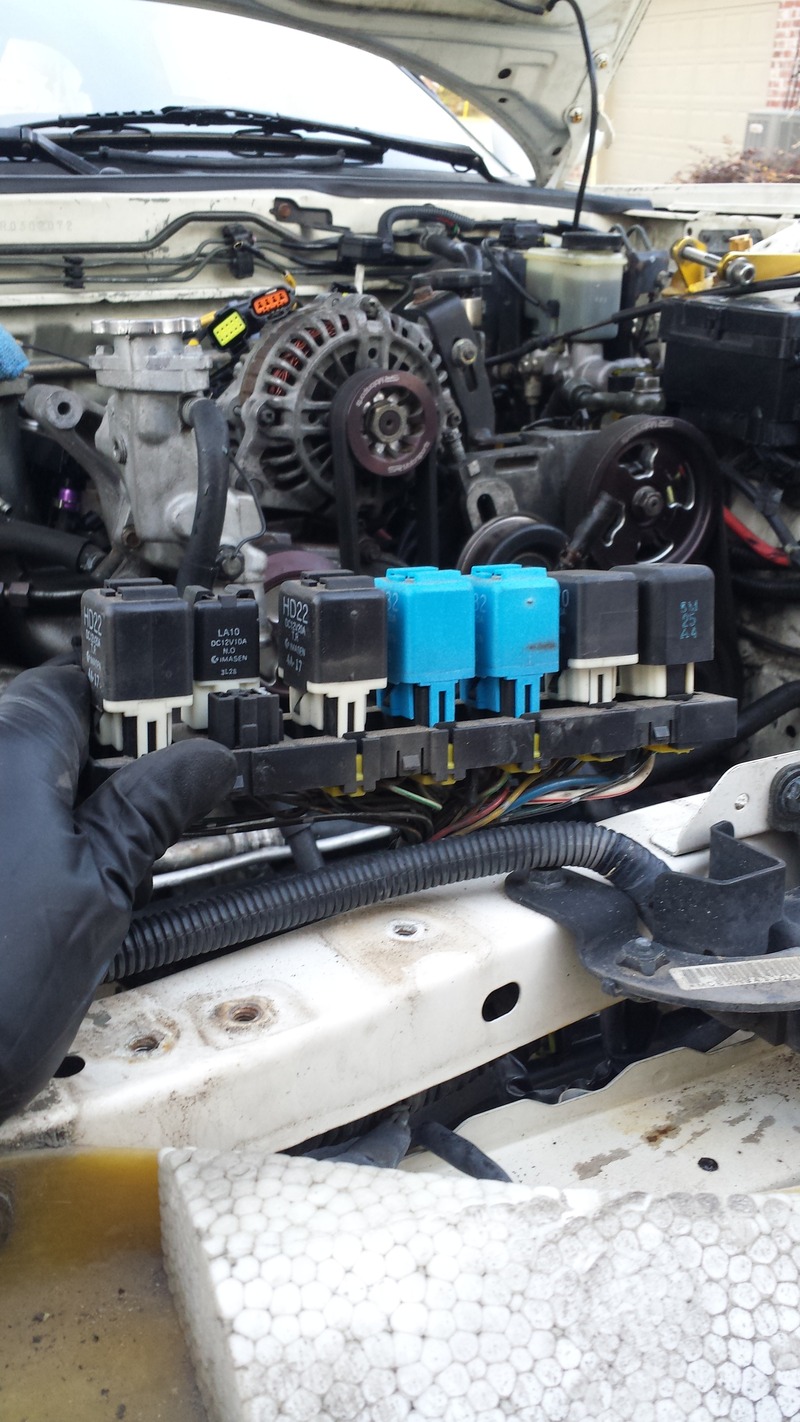
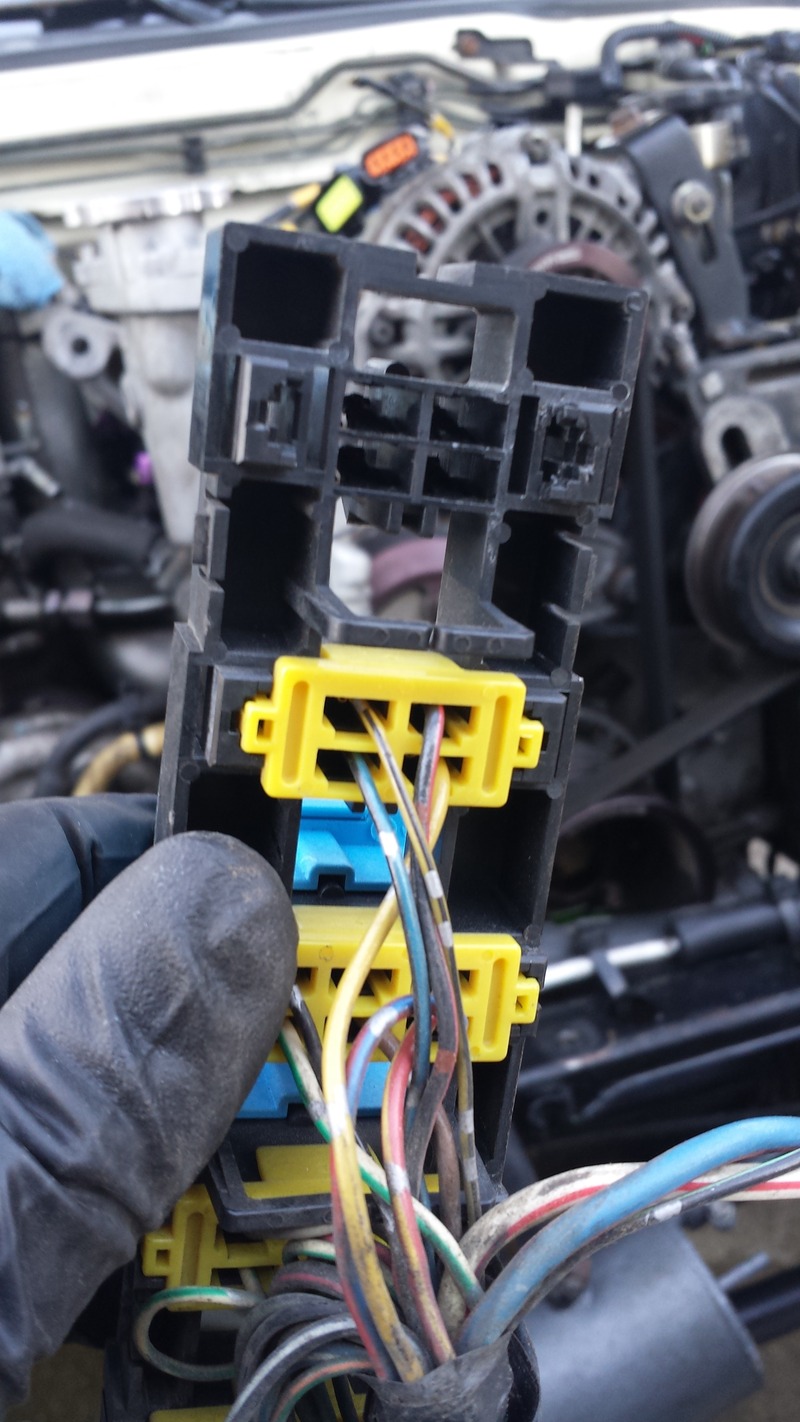
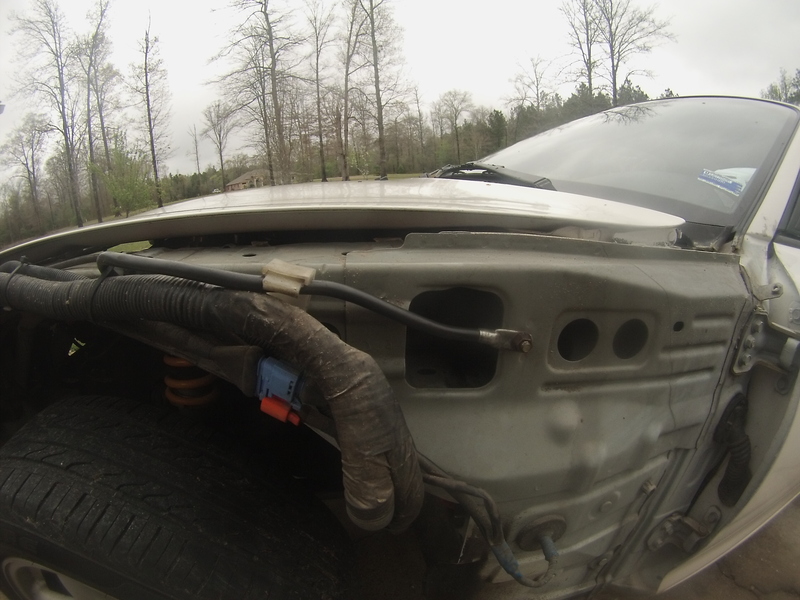
Relay box was taken apart and I was ready to de-pin these plugs. We got through a few of them and then Tony's dad took care of pushing it between the rail and the and the bumper rebar.
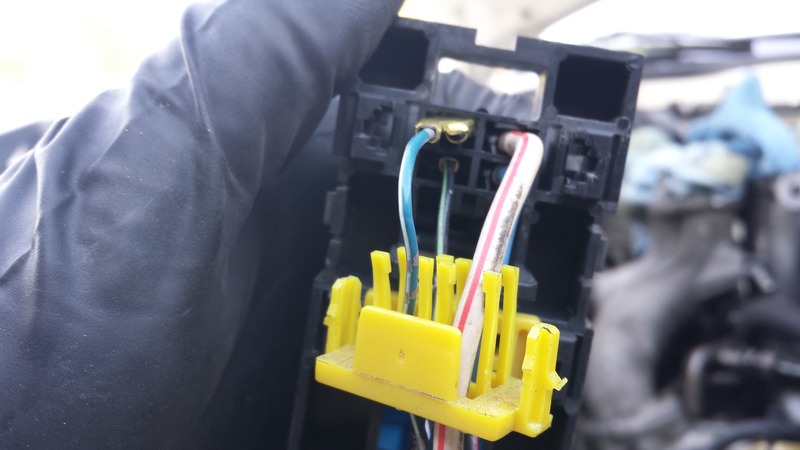
De-pinned and now the relay box sits in that small space right under the hood latch.
Links:
TURBLOWN - Turbo Kits, Turbochargers, Engine Rebuilds and Car Parts
VS Catch Cans
Precision 6266 Ball Bearing Gen2 CEA - AGP Turbochargers, Inc. Store
Redhorse Performance - We Bring Fast Things To Life
DEFINED AUTOWORKS
Now, still on the list for me to get:
Wastegates, I may go with dual turbosmart 40mm's as they come with better recommendations from a few people and they flow a little more than the 38 mvs Tial.
Electronic boost controller, I'm getting rid of my Apexi AVCR. It's a good unit but it's just too much. I just need something simple to gauge my boost and to control it. The AVCR is a digital nightmare for somebody who doesn't know how to use it.
Other than those two things, the rest of it is lines, fittings and other small things that are ordered in quantities exceeding 1.
On to the pictures!

My almost stock wiring harness. Tony did most of the work taking this out. It's in pretty good shape and I will probably be putting it up for sale soon.

Rywire harness has been run through the firewall and is currently laid out in my engine bay. Good quality, very light and very flexible.

Ran into a snag with the fact acting delphi IAT. The bung for the stock IAT in the intake manifold is much smaller than the delphi. Solution: Go to a hardware store and buy a tap, drill the hole out and tap it. I am almost there, just need the correct size tap.

Defined autoworks V-mount intercooler. Comes with everything you need to install it and apparently keep your air conditioner. I have yet to find out, but I will keep you guys posted. It does not come with directions so it might be an educational day full of bad words.

Radiator came out very easily. After this picture was taken I cleaned up the bay a little bit and started working on relocating the relay box that sits on the front rail. I will be painting a couple of brackets in the bay soon.

Relay box was taken apart and I was ready to de-pin these plugs. We got through a few of them and then Tony's dad took care of pushing it between the rail and the and the bumper rebar.


De-pinned and now the relay box sits in that small space right under the hood latch.
Thread Starter
Joined: May 2006
Posts: 594
Likes: 0
From: Los Angeles, CA
Got quite a few things done yesterday:
Removed twin turbos and associated oil and coolant lines
Removed the exhaust manifold
Removed downpipe
Removed the coils and any other brackets that were still left
Relocated the starter ground wire
Test fit and started installation on the v mount setup
Removed ac condenser and dryer
Finished tapping my intake manifold for the Delphi IAT that haltech supplies
Did all that and a few other minor things.
Extended the fan wires.
Installed steering rack bushings.

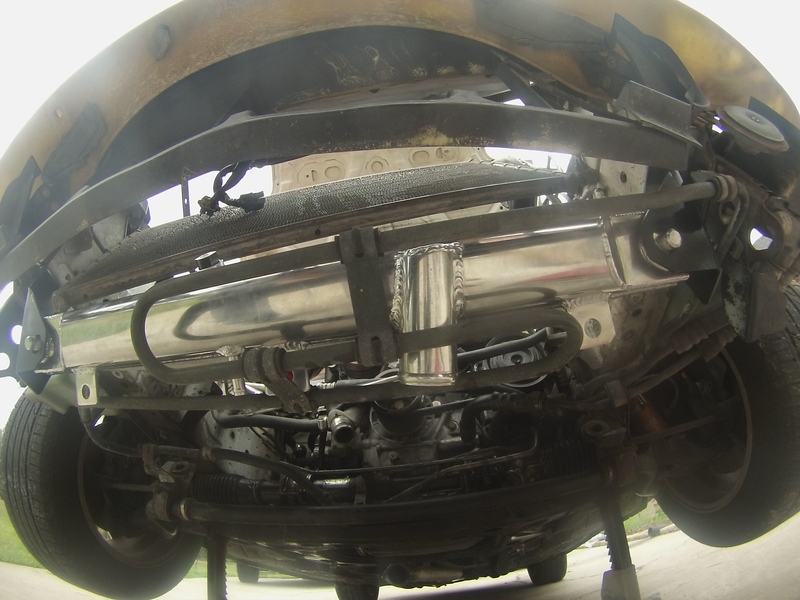
Relocated my starter ground wire to the fender. It was in a really crappy spot and was contributing to the gigantic wire mess in my engine bay.
Started the test fit. Ended up having to remove the ac condenser and the dryer. I will be finding a way to get my AC back. I will probably go with an aftermarket condenser that's a little smaller and some soft lines as I do not feel with dealing with hard lines anymore.
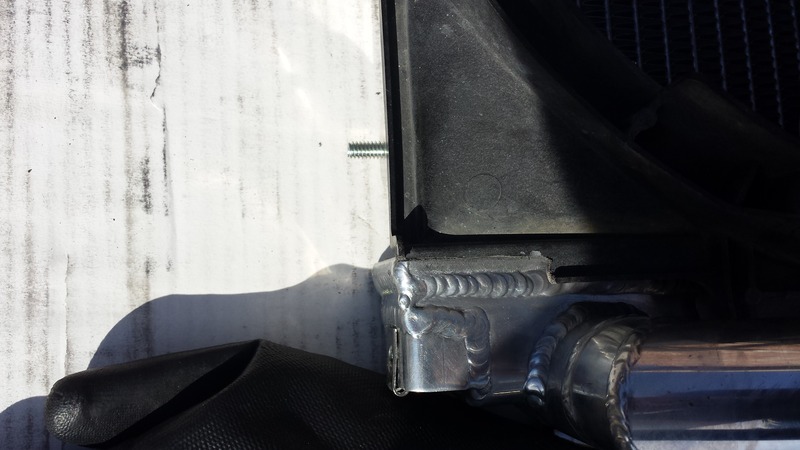
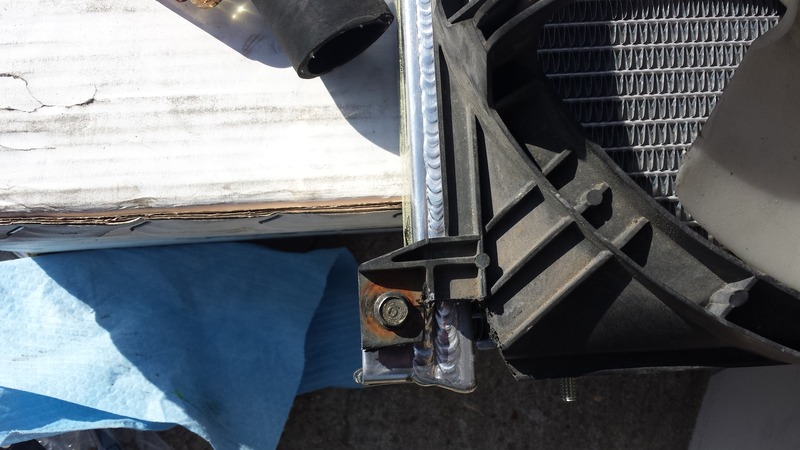
The radiator fits but rubs on the power steering cooler. I'll figure out a way around that pretty soon. This is just a test fit after all.
Also cleaned up some of the stuff in my engine bay. Got some of the big grease and grime chunks off. I would like to eventually put my thermo tec heat shield on the transmission tunnel, but I will probably do that when I change my clutch out.
Right now I'm looking for a way to pipe the vacuum lines to the oil injectors. If you guys recall, the oil injectors tap into vacuum on the front turbo elbow and it runs through the hardline under your UIM to both oil injectors. I've read a couple of threads regarding what some people do but a lot of guys take them off. I would rather keep them on. I suppose we will just have to see what I come up with. Any recommendations are welcome.
Removed twin turbos and associated oil and coolant lines
Removed the exhaust manifold
Removed downpipe
Removed the coils and any other brackets that were still left
Relocated the starter ground wire
Test fit and started installation on the v mount setup
Removed ac condenser and dryer
Finished tapping my intake manifold for the Delphi IAT that haltech supplies
Did all that and a few other minor things.
Extended the fan wires.

Installed steering rack bushings.

Relocated my starter ground wire to the fender. It was in a really crappy spot and was contributing to the gigantic wire mess in my engine bay.

Started the test fit. Ended up having to remove the ac condenser and the dryer. I will be finding a way to get my AC back. I will probably go with an aftermarket condenser that's a little smaller and some soft lines as I do not feel with dealing with hard lines anymore.

The radiator fits but rubs on the power steering cooler. I'll figure out a way around that pretty soon. This is just a test fit after all.

Also cleaned up some of the stuff in my engine bay. Got some of the big grease and grime chunks off. I would like to eventually put my thermo tec heat shield on the transmission tunnel, but I will probably do that when I change my clutch out.

Right now I'm looking for a way to pipe the vacuum lines to the oil injectors. If you guys recall, the oil injectors tap into vacuum on the front turbo elbow and it runs through the hardline under your UIM to both oil injectors. I've read a couple of threads regarding what some people do but a lot of guys take them off. I would rather keep them on. I suppose we will just have to see what I come up with. Any recommendations are welcome.
Thread Starter
Joined: May 2006
Posts: 594
Likes: 0
From: Los Angeles, CA
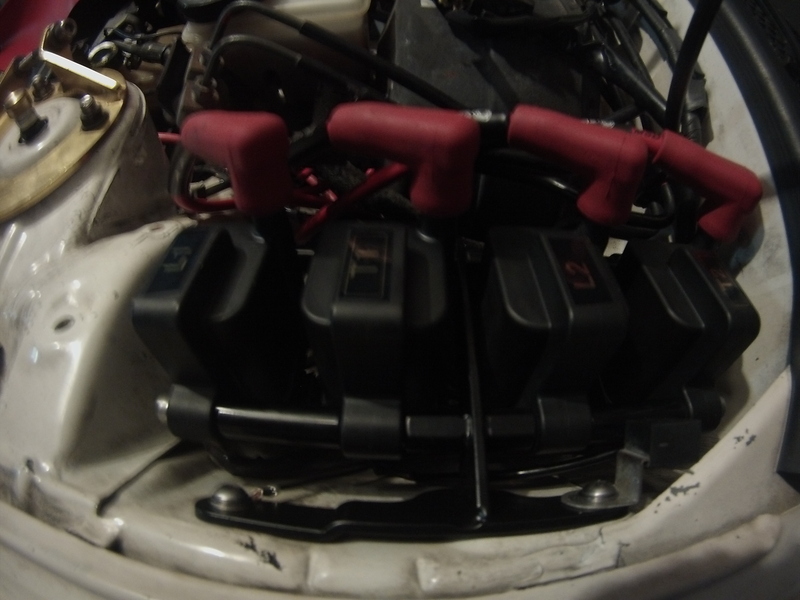
Yesterday we installed the intercooler, ignition system and got most of the wiring harness plugged in. I still dont like the way the wires are routed so I'm going to get in and fix that next weekend. I ran into a couple of bumps with the intercooler and the coil kit but nothing that drastically hindered progress. The ducting for the intercooler kit needed slight adjustment to the holes for the radiator screws and the coil kit recommended that the ground wire be placed on the negative battery terminal. My battery is in the trunk so the alternate point was somewhere on the chassis. Other than that, it went pretty smoothly. I also found the answer to my question about the oil injector vacuum tubes. I found a thread explaining a bunch of stuff about why they require an air source and Ihor said that he just uses a standard vacuum line filter and plugs it into the hose that runs off of the oil injectors so, thats what I did.
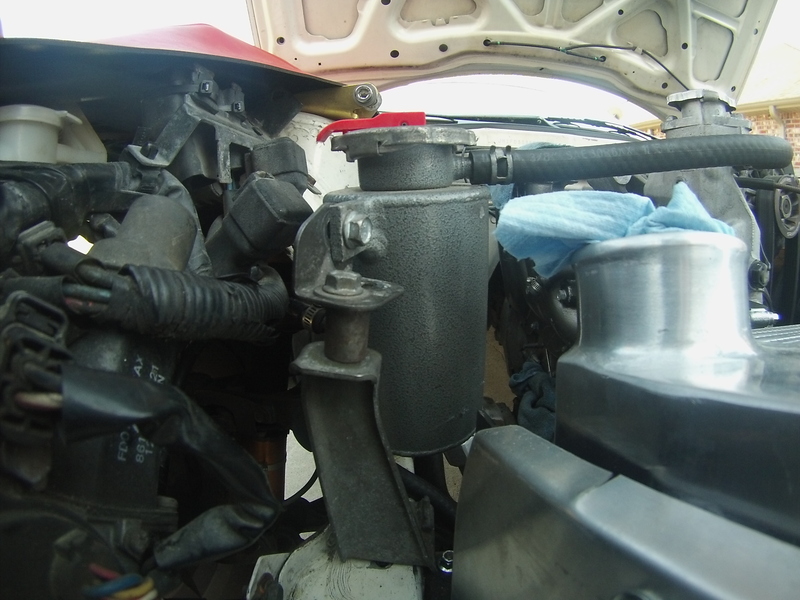
Had to relocate my AST. We reused a bracket that I no longer needed.
Had to cut away a little of the fan shroud in order to make the radiator fit properly on the mounts.
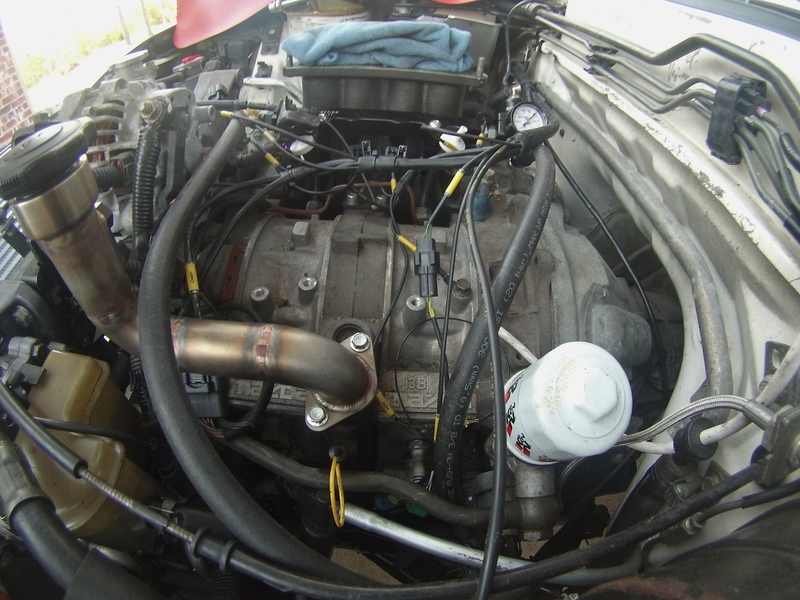
The wiring harness is kind of a mess right now. I'm going to route it underneath my fuel lines and make it look a little more presentable.
The sakebomb smartcoil kit is very high quality and it comes with directions that make sense. Between the paper directions and the video on their website, it's an easy install that is nearly painless. My kit is still wired for waste spark, I am planning to change it over to direct fire when I get the car tuned.


Had to relocate my AST. We reused a bracket that I no longer needed.

Had to cut away a little of the fan shroud in order to make the radiator fit properly on the mounts.


The wiring harness is kind of a mess right now. I'm going to route it underneath my fuel lines and make it look a little more presentable.

The sakebomb smartcoil kit is very high quality and it comes with directions that make sense. Between the paper directions and the video on their website, it's an easy install that is nearly painless. My kit is still wired for waste spark, I am planning to change it over to direct fire when I get the car tuned.

Thread Starter
Joined: May 2006
Posts: 594
Likes: 0
From: Los Angeles, CA
Thanks Lukes, I'm going to be doing a bunch more updates as soon as the rest of my parts get here. Feel free to ask any questions about anything I've installed or any of the work that has been done.
Thread Starter
Joined: May 2006
Posts: 594
Likes: 0
From: Los Angeles, CA
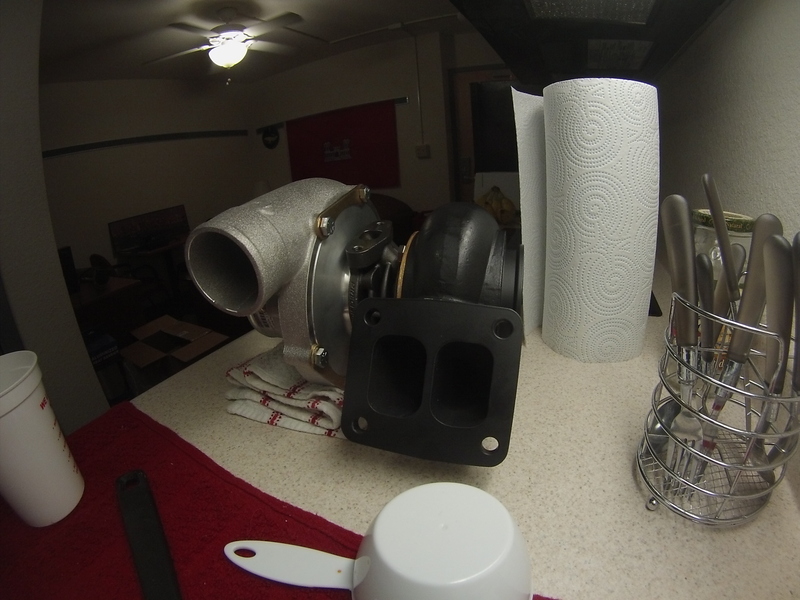
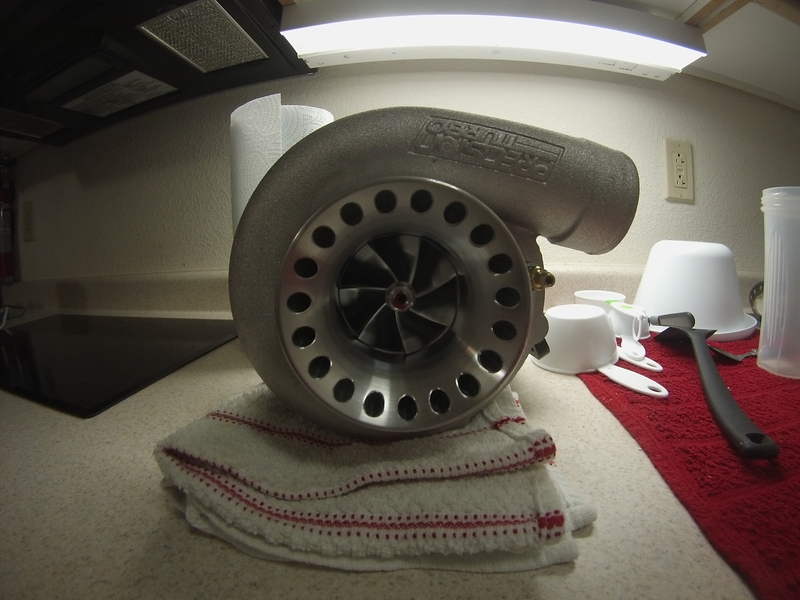
Update: My turbo finally came in. Through much deliberation, I've decided to go with the Precision 6266 CEA Gen 2. I got the turbine housing ceramic coated black because I absolutely detest seeing anything rusty or corroding on my car. Anyway, here are the pics: