
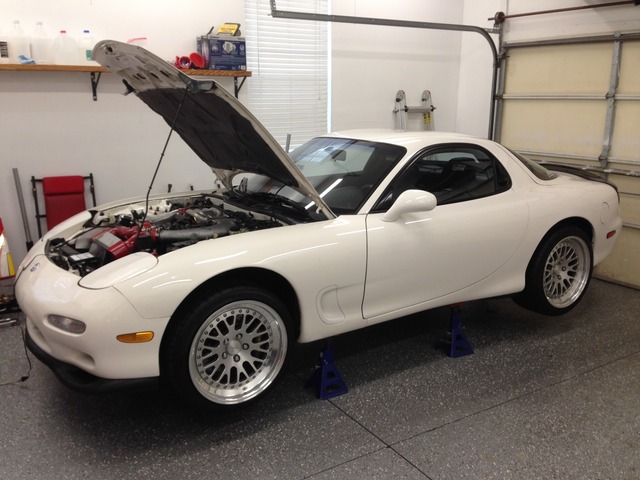
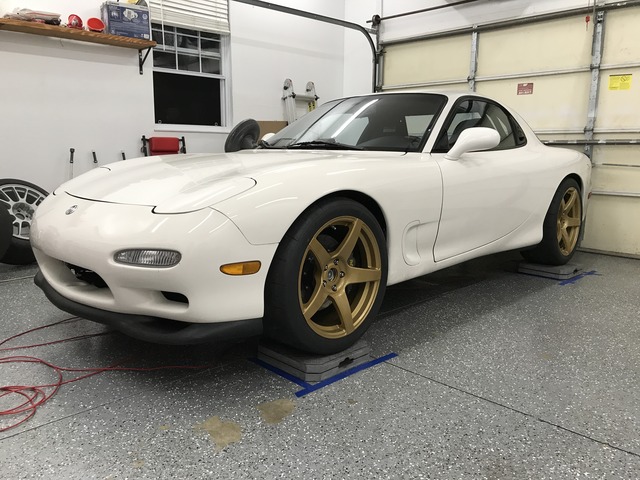
94 white track/street build. Simple but effective


And, as I say that: https://www.rx7club.com/3rd-generati...tback-1110919/


Thread Starter
Joined: Oct 2005
Posts: 886
Likes: 50
From: Columbus, OH
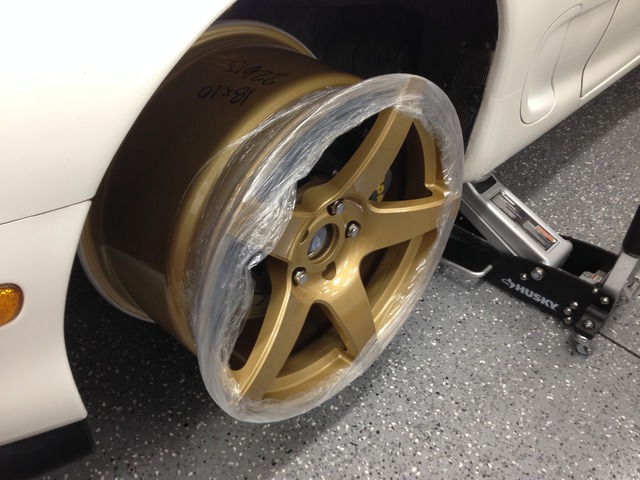
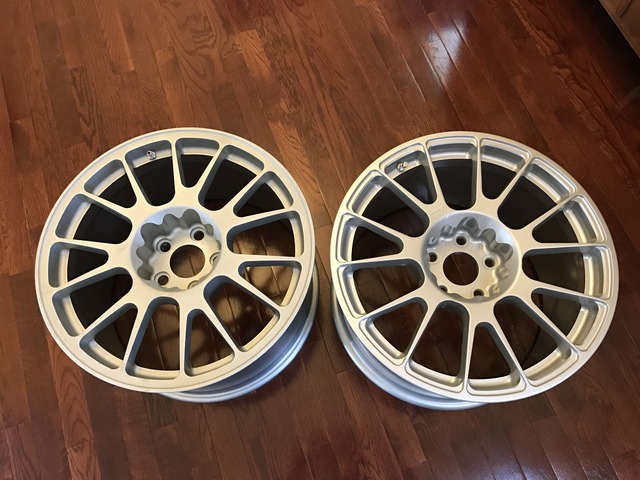
Thank you. Wheels are CCW classics with anodized/matte titanium centers. 18x10 +38 front and rear. Tires are 255/35-18 front and 275/35-18 rear.
Not to my understanding. My 93 had it but supposedly had a newer 96+ tank in it. This 94 didn't have it standard. Ray may be able to scrounge one up for you though.
Not to my understanding. My 93 had it but supposedly had a newer 96+ tank in it. This 94 didn't have it standard. Ray may be able to scrounge one up for you though.
Thread Starter
Joined: Oct 2005
Posts: 886
Likes: 50
From: Columbus, OH
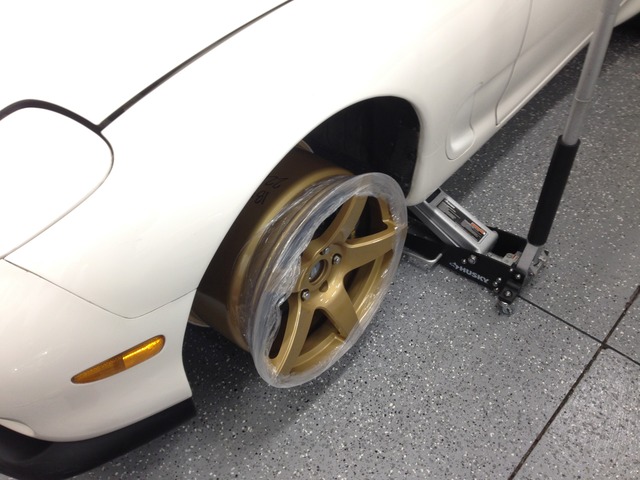
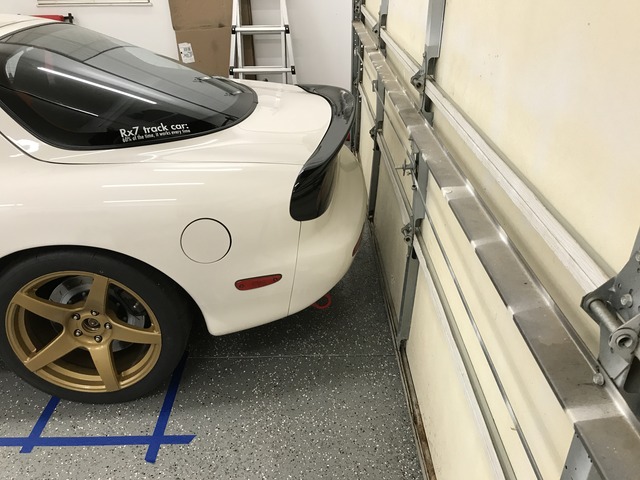
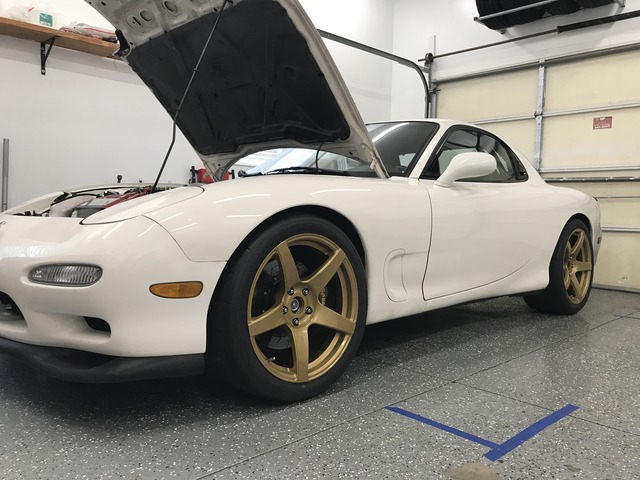
I've been lazy in getting to work on the car for the upcoming season, but it's finally assumed the position it'll be in for the next couple of months. Haha. Hopefully it didn't get too used to being on the ground.
I have started getting in some parts for this years updates. With going to a square wheel/tire setup I'll be going to stiffer front springs on the Ohlins.
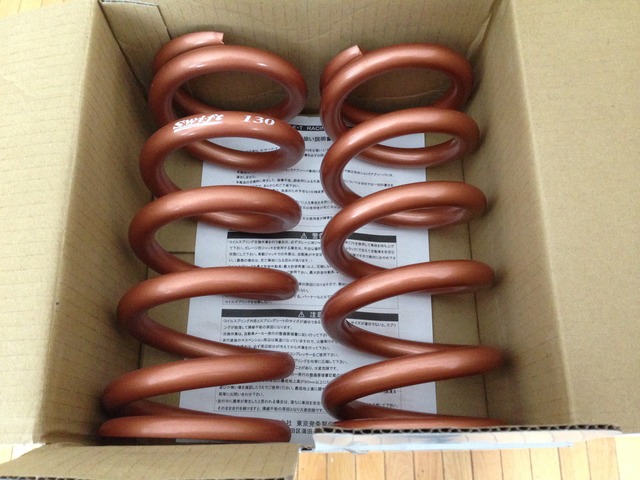
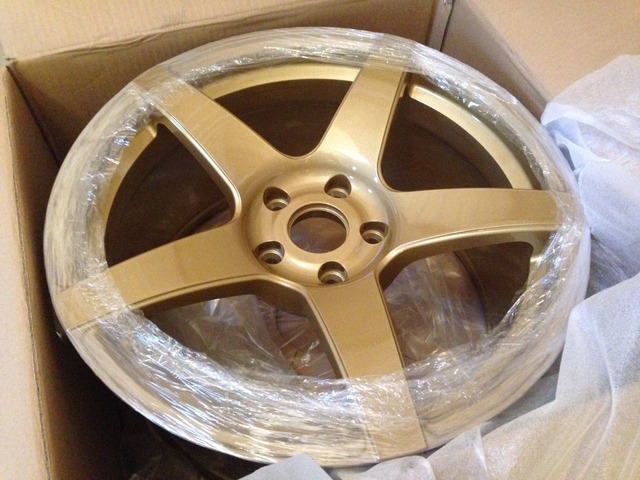
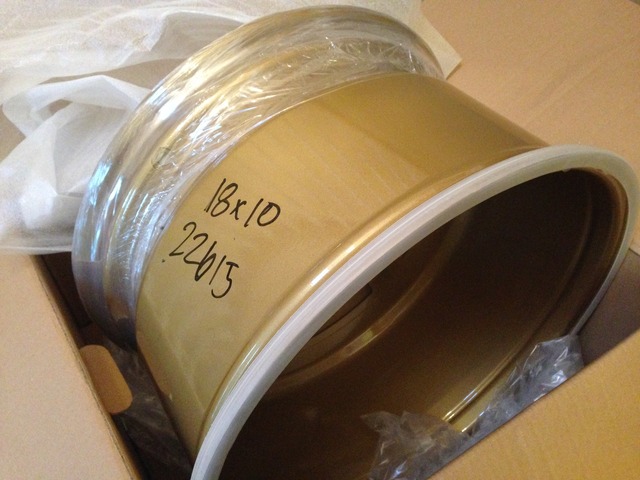
I also got in the first set of the new track wheels. Nitto NT-01s forthcoming for them but here's a test fit.

I have started getting in some parts for this years updates. With going to a square wheel/tire setup I'll be going to stiffer front springs on the Ohlins.

I also got in the first set of the new track wheels. Nitto NT-01s forthcoming for them but here's a test fit.


Looking great Johnny - good luck this season
Last edited by ZumSpeedRX-7; Mar 25, 2017 at 09:12 AM.
Thread Starter
Joined: Oct 2005
Posts: 886
Likes: 50
From: Columbus, OH
Thread Starter
Joined: Oct 2005
Posts: 886
Likes: 50
From: Columbus, OH
trying to catch up on this thread. Still prepping for the first event of 2017 in May.
Trying out something different with the catch can/oil fill neck. One o the theories was to reduce as much pressure as possible, so I took a stock oil fill neck and fitted it with a -10 bulkhead fitting so I could use my existing -10 line to the catch can.
I noticed that when taking things apart that the boost juice is leaving behind some pink residue. I'm actually switching this year to mixing my own methanol. I found a source down by Athens that I can buy and it won't have the pink coloring. It's cheaper to boot which is an added bonus.

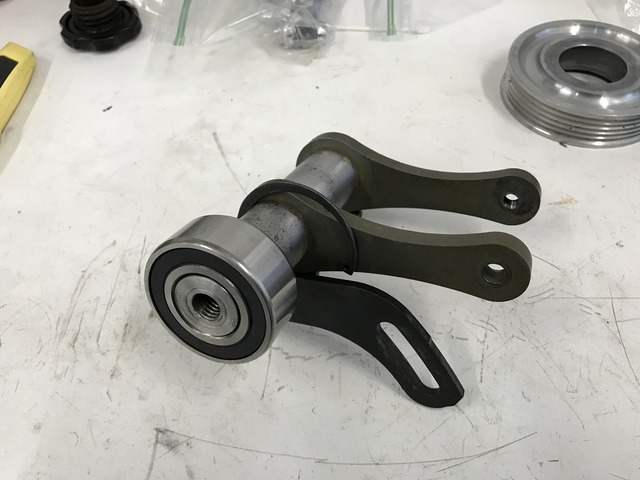
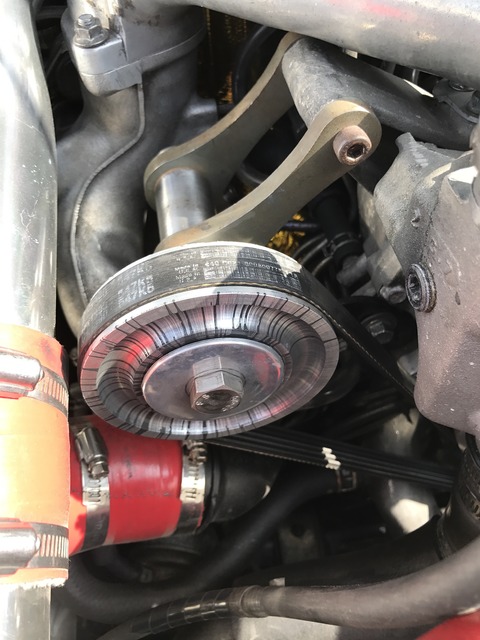
Next up I replaced the bearing in the idler pulley as mine was making noise and I didn't want it to fail.
got the springs swapped on the front coilovers and then put everything back together.
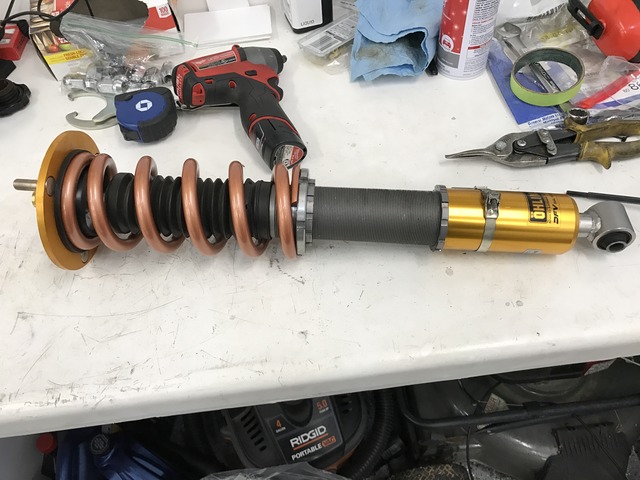
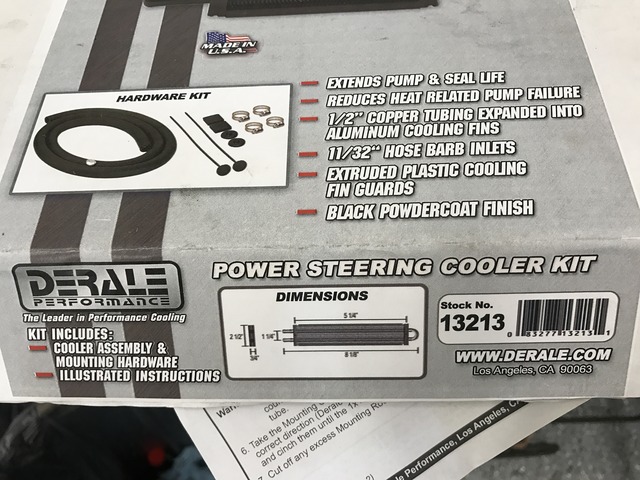
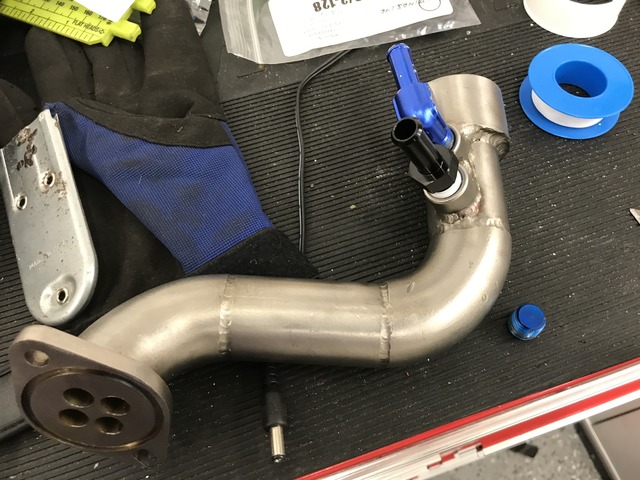
Next up was brake cooling. I had backing plates made previously, but I haven't been able to use the duct hose routing I previously did because the power steering hard line runs in the way. Last year I chose to run without the cooling ducts, but I was getting faster brake component wear than I'd like. So the goal was to come up with ducting to see if I could get better pad/rotor life. First thing was to remove the power steering hard line and put an aftermarket cooler in place. I used this little Derale cooler:
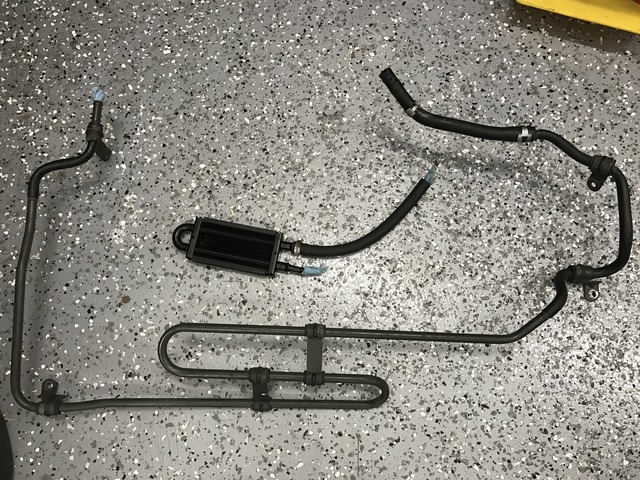
Here you can see the cooler in comparison to the hard lines that came off of the car.
Trying out something different with the catch can/oil fill neck. One o the theories was to reduce as much pressure as possible, so I took a stock oil fill neck and fitted it with a -10 bulkhead fitting so I could use my existing -10 line to the catch can.

I noticed that when taking things apart that the boost juice is leaving behind some pink residue. I'm actually switching this year to mixing my own methanol. I found a source down by Athens that I can buy and it won't have the pink coloring. It's cheaper to boot which is an added bonus.

Next up I replaced the bearing in the idler pulley as mine was making noise and I didn't want it to fail.

got the springs swapped on the front coilovers and then put everything back together.

Next up was brake cooling. I had backing plates made previously, but I haven't been able to use the duct hose routing I previously did because the power steering hard line runs in the way. Last year I chose to run without the cooling ducts, but I was getting faster brake component wear than I'd like. So the goal was to come up with ducting to see if I could get better pad/rotor life. First thing was to remove the power steering hard line and put an aftermarket cooler in place. I used this little Derale cooler:

Here you can see the cooler in comparison to the hard lines that came off of the car.

Thread Starter
Joined: Oct 2005
Posts: 886
Likes: 50
From: Columbus, OH
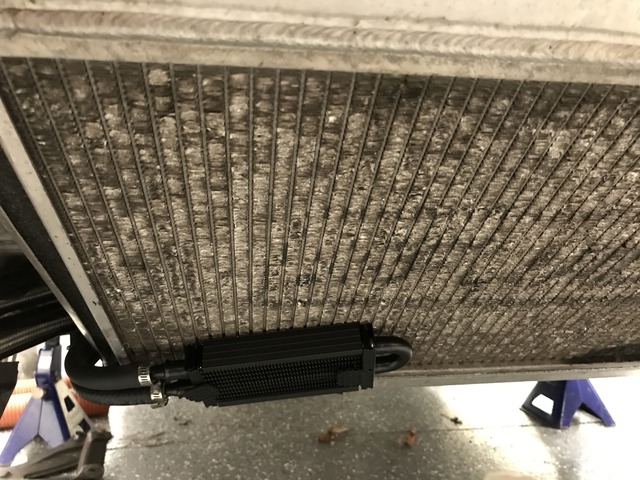
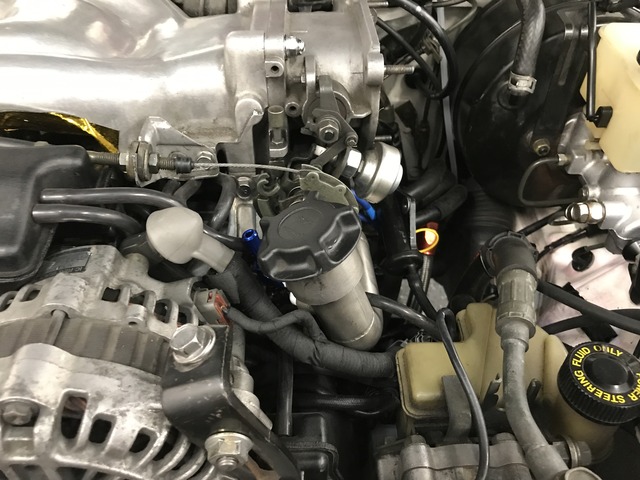
Here's where I mounted the P/S cooler. I'm not pumped about taking cooling priority away, but this seems to be the best option at this point.
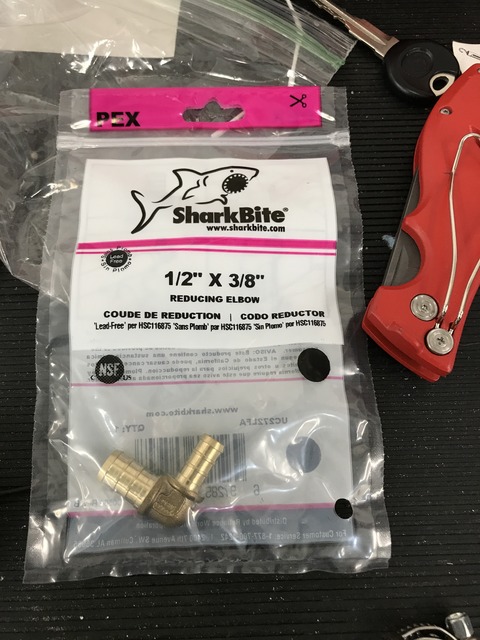
To make the lines work, I used a little bit of Home Depot engineering and used this fitting to adapt the stock line from the P/S reservoir to the aftermarket line running to the cooler.
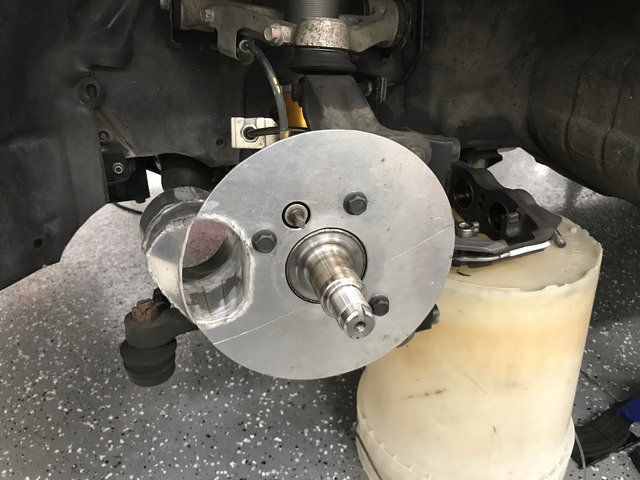
On to brake ducting: I mounted the backing plates
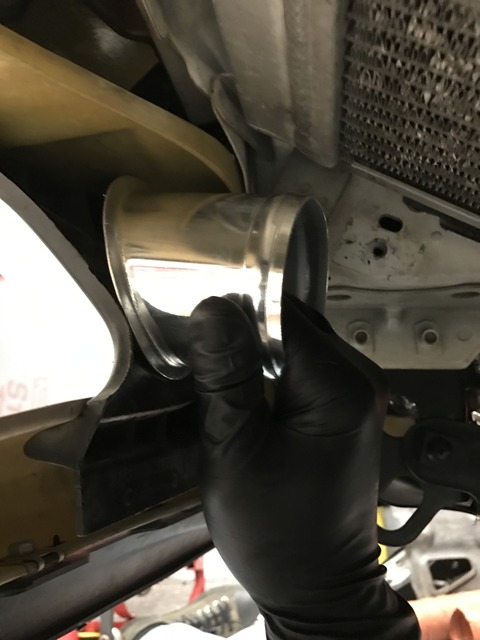
I still had the stock "clamshells" for the front radiator opening on this car, so Tinman helped make some sweet ducts that would go thru them which would feed fresh air to the brake ducting.
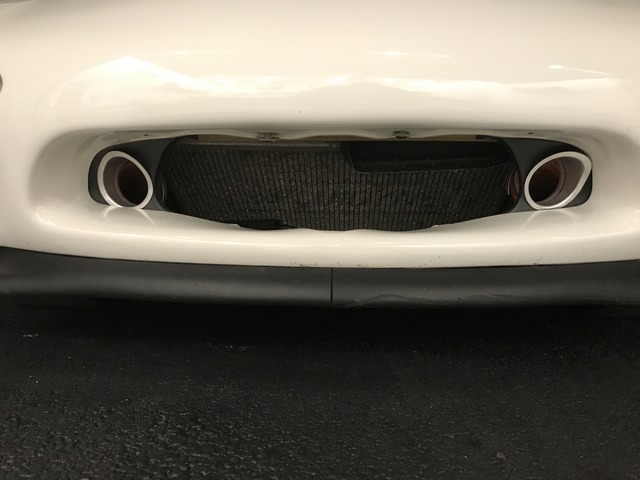
Here's a shot of the finished product from the front
to run the hoses I had to trim up the underpanel a bit. I also put in some new foam to make sure all remaining air was getting directed to the radiator.
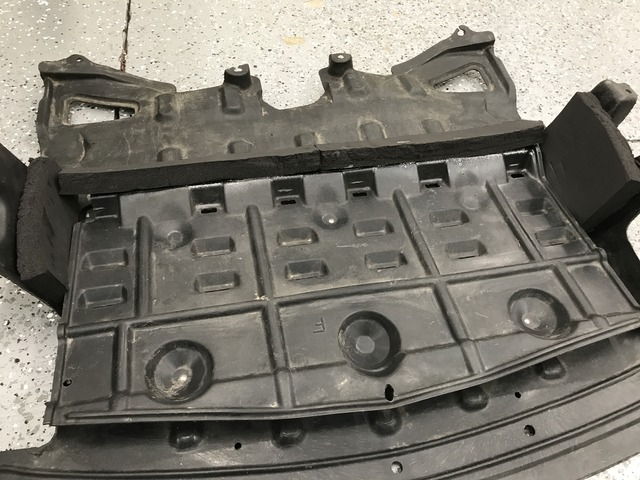
Here's the routing from the wheel well side
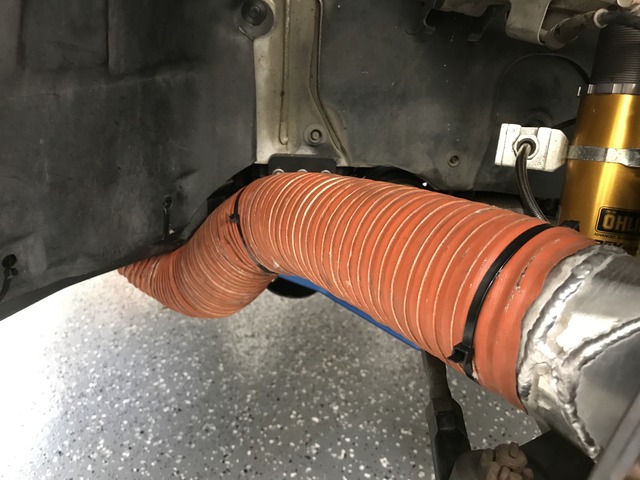
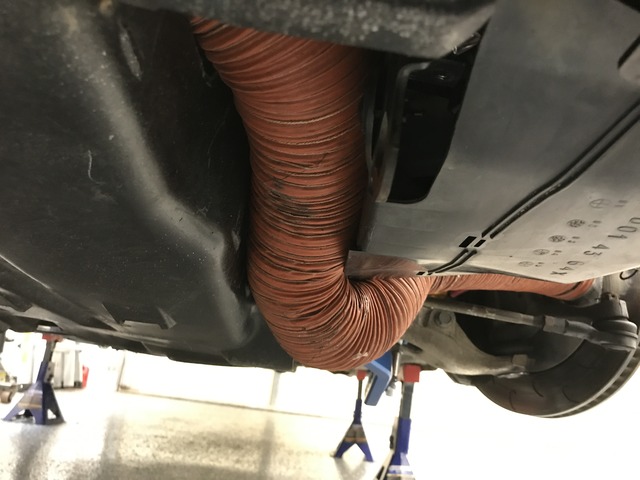
Underneath where it runs by the underpanel
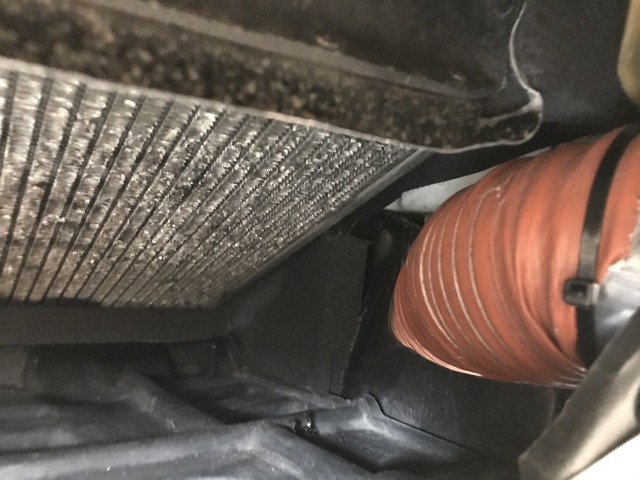
view from the front bumper opening
also the new wheels showed up that I'll use to run Pirelli DH slick scrubs this year. CCW C14s. I had a pair that I got used on a decent deal, and then ordered 2 new ones direct from CCW. The design has changed a bit and they no longer offer anodized finish, but I think it'll be close enough for what I'll use them for.
I got the Nittos mounted on the forgestars. Mounter jacked them up a bit when putting the tires on. I know they're track wheels that will get beat up, but still wasn't very happy about it.

To make the lines work, I used a little bit of Home Depot engineering and used this fitting to adapt the stock line from the P/S reservoir to the aftermarket line running to the cooler.

On to brake ducting: I mounted the backing plates

I still had the stock "clamshells" for the front radiator opening on this car, so Tinman helped make some sweet ducts that would go thru them which would feed fresh air to the brake ducting.

Here's a shot of the finished product from the front

to run the hoses I had to trim up the underpanel a bit. I also put in some new foam to make sure all remaining air was getting directed to the radiator.

Here's the routing from the wheel well side

Underneath where it runs by the underpanel

view from the front bumper opening

also the new wheels showed up that I'll use to run Pirelli DH slick scrubs this year. CCW C14s. I had a pair that I got used on a decent deal, and then ordered 2 new ones direct from CCW. The design has changed a bit and they no longer offer anodized finish, but I think it'll be close enough for what I'll use them for.

I got the Nittos mounted on the forgestars. Mounter jacked them up a bit when putting the tires on. I know they're track wheels that will get beat up, but still wasn't very happy about it.

Thread Starter
Joined: Oct 2005
Posts: 886
Likes: 50
From: Columbus, OH
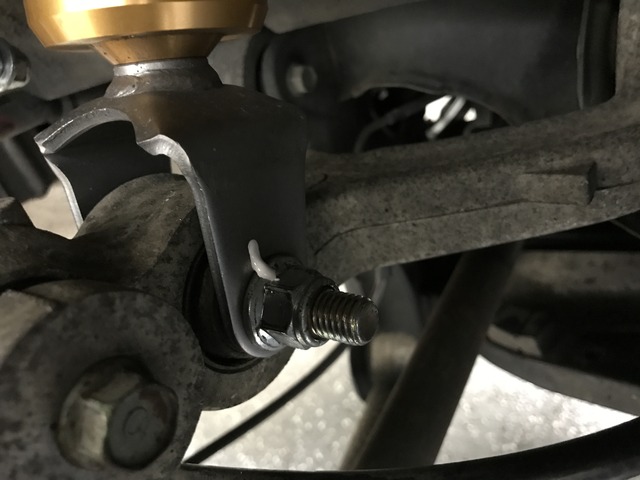
during the winter I felt some loose play in the driver's rear shock bushing. I figured it just needed replaced so I bought a set of super-pros to put in there. I go to replace it and upon taking it apart I discovered that the bushing wasn't actually bad, but that the nut/bolt had come loose....damn. Well let this be a lesson to you kids to make sure you're staying on top of that stuff. I typically nut/bolt check the car at the beginning of each season, but now will implement another option.
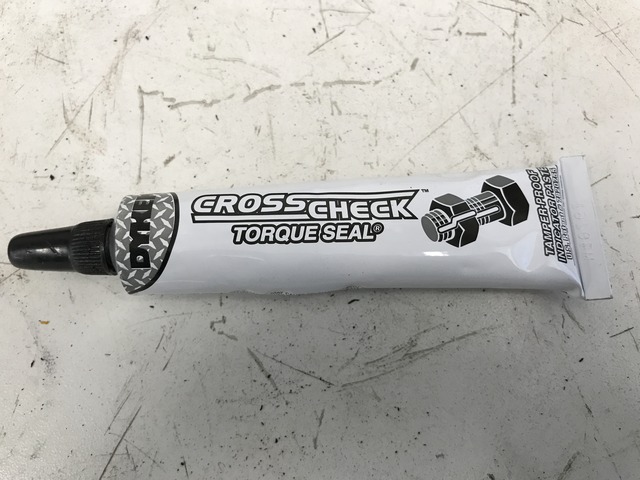
This stuff is supposedly used in the aircraft world and you put on a beat like a paint pen, but it make s very clean break if/when it rotates/moves so it should be easy to see if something has loosened up. I went to town putting this **** on everything! haha. Here's how it looks on said shock bolt/nut that had loosened previously.
Hopefully that makes it much easier to once-over the car between events during the year.
Next up in the ongoing saga of heat management, I decided to get the cat-back ceramic coated. One of the bends runs right by the differential and couldn't be helping with my heat management issues. I've had my downpipe ceramic coated for a couple of years with good success, and since I'm doing the cat-back I also did the mid-pipe. I used performance powdercoating on the south side of town which is who did my downpipe. I think the exhaust came out pretty well.
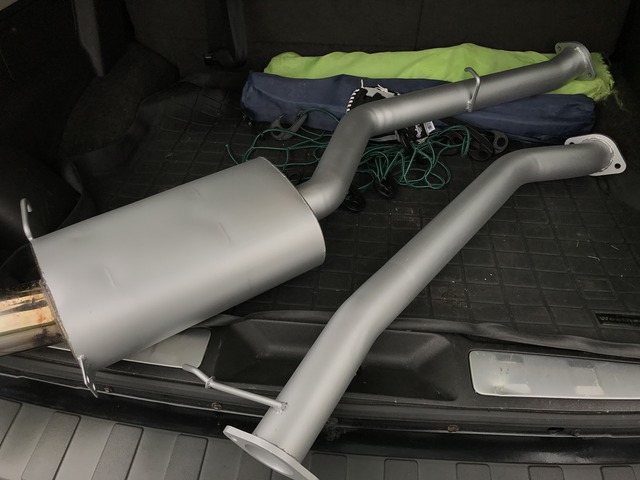
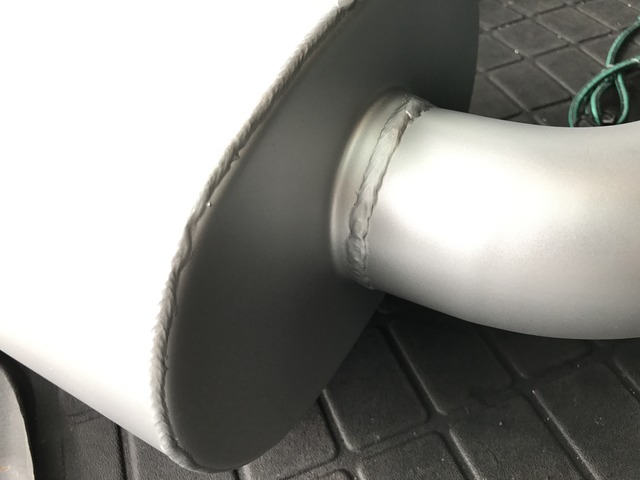
I thought about having them leave the entire muffler body untouched, but it was easier to have them just leave the polished end/tip un-coated and do the rest.
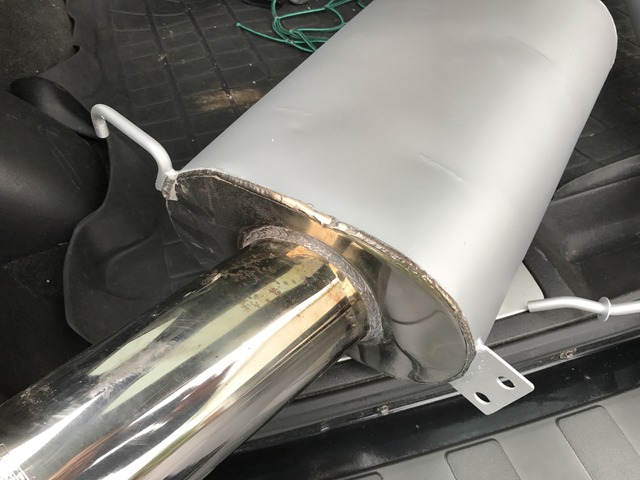
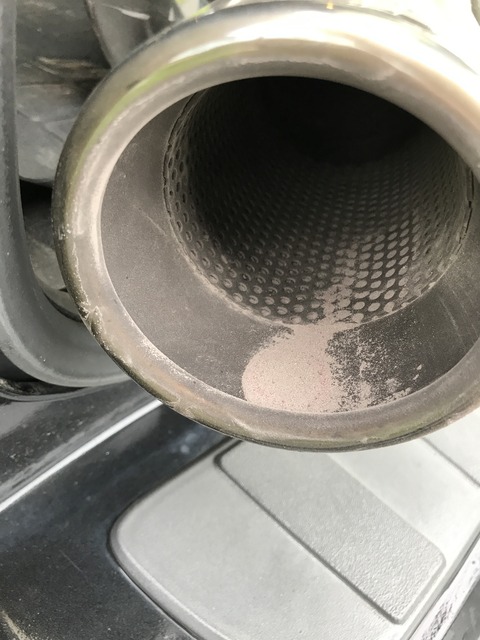
the only downside was some powder left in the muffler when it was done, which I got most out and then the rest blew out when I first stepped on it..haha.
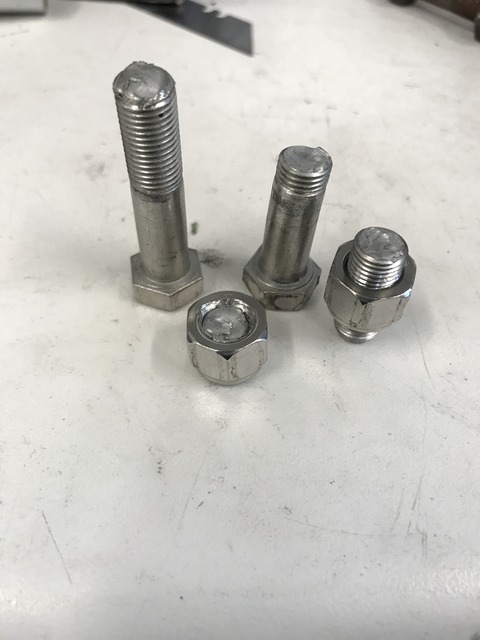
of course why not put some new hardware on for my updated exhaust? So I got some new stainless hardware to replace the old beat up stuff. Cool right? WRONG. My dumbass didn't realize that stainless hardware is a poor choice here as stainless/stainless will ruin the threads and sieze....had to learn the hard way I suppose and it involved some breaker bar work to snap everything off...doh.
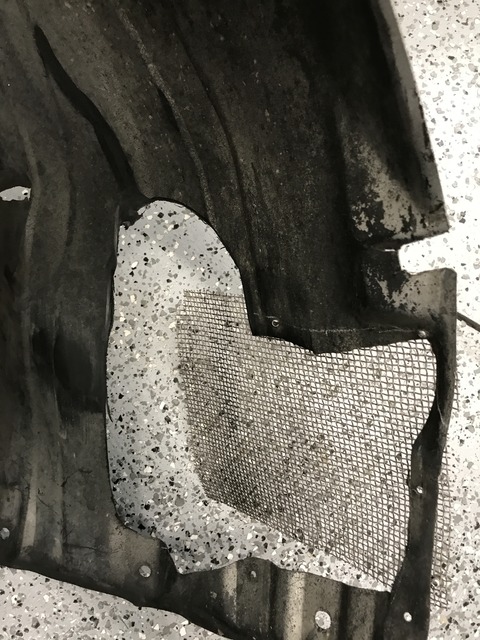
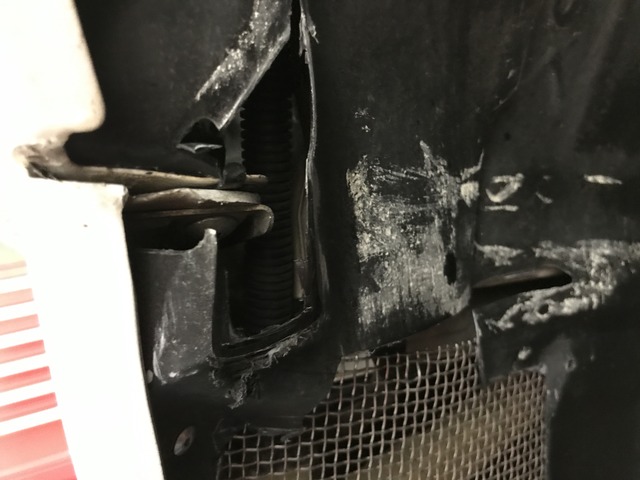
in some of the carnage from last year, the tires had worn the fender liners around the screens I had put in last year on the passenger side. Unfortunately I was concerned that the loose edge would cut a tire so the whole screen had to come out. It stinks that the back of the oil cooler is unprotected, so I'll have to figure out a solution going forward, but for now it's just one big open hole
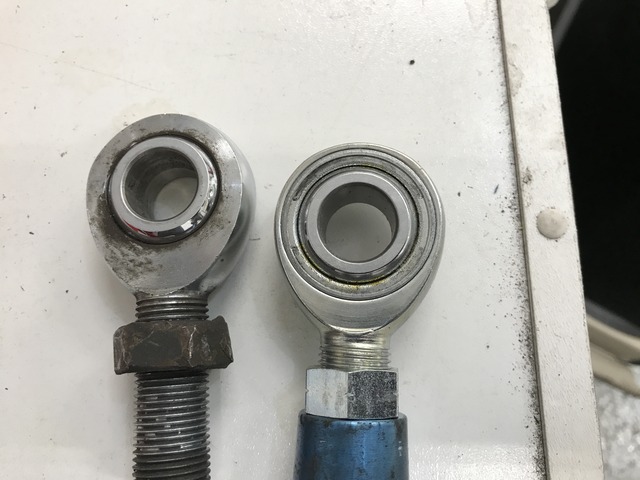
Next up was to replace the rod ends on the rear trailing arms and toe links. I have had M2 arms for 8+ years and had previously replaced the rod ends with QA1 units from JEGS. They would only last about 1.5-2 seasons though before getting play in them. This time I'm going with FK rod ends which were easy to procure through Summit Racing. I like the 3-piece design of the FK over the QA1 as well. Here's a picture of old vs new

This stuff is supposedly used in the aircraft world and you put on a beat like a paint pen, but it make s very clean break if/when it rotates/moves so it should be easy to see if something has loosened up. I went to town putting this **** on everything! haha. Here's how it looks on said shock bolt/nut that had loosened previously.

Hopefully that makes it much easier to once-over the car between events during the year.
Next up in the ongoing saga of heat management, I decided to get the cat-back ceramic coated. One of the bends runs right by the differential and couldn't be helping with my heat management issues. I've had my downpipe ceramic coated for a couple of years with good success, and since I'm doing the cat-back I also did the mid-pipe. I used performance powdercoating on the south side of town which is who did my downpipe. I think the exhaust came out pretty well.


I thought about having them leave the entire muffler body untouched, but it was easier to have them just leave the polished end/tip un-coated and do the rest.

the only downside was some powder left in the muffler when it was done, which I got most out and then the rest blew out when I first stepped on it..haha.

of course why not put some new hardware on for my updated exhaust? So I got some new stainless hardware to replace the old beat up stuff. Cool right? WRONG. My dumbass didn't realize that stainless hardware is a poor choice here as stainless/stainless will ruin the threads and sieze....had to learn the hard way I suppose and it involved some breaker bar work to snap everything off...doh.

in some of the carnage from last year, the tires had worn the fender liners around the screens I had put in last year on the passenger side. Unfortunately I was concerned that the loose edge would cut a tire so the whole screen had to come out. It stinks that the back of the oil cooler is unprotected, so I'll have to figure out a solution going forward, but for now it's just one big open hole

Next up was to replace the rod ends on the rear trailing arms and toe links. I have had M2 arms for 8+ years and had previously replaced the rod ends with QA1 units from JEGS. They would only last about 1.5-2 seasons though before getting play in them. This time I'm going with FK rod ends which were easy to procure through Summit Racing. I like the 3-piece design of the FK over the QA1 as well. Here's a picture of old vs new

Thread Starter
Joined: Oct 2005
Posts: 886
Likes: 50
From: Columbus, OH
I was able to get some junk worn out slicks that I used for test fit. Here they are mounted.
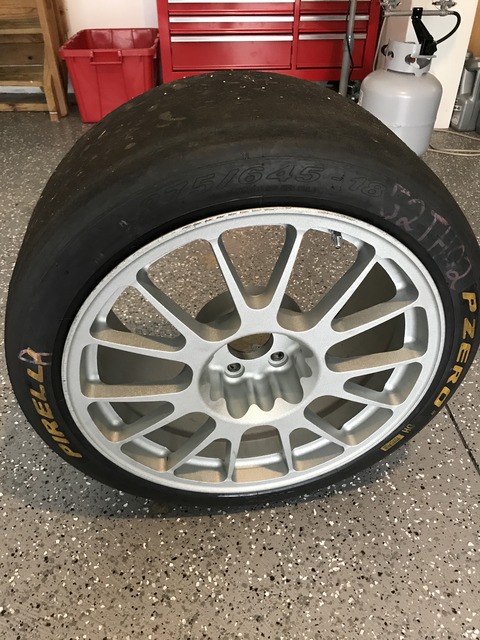
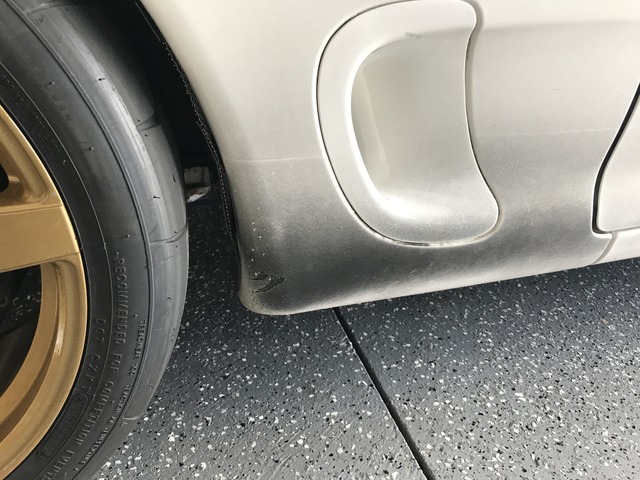
The tires are so damn tall up front that fitting them is a chore. I had to raise the car up a decent amount to get everything to fit and try to minimize rubbing. It's always going to be a compromise, I'm sure I could keep them off of the fender liners if I wanted, but the car would have to be stupid high. The top isn't the only concern though. Here's an example of how close the tire is to the front connection of the bumper and fender and there's this metal joint that would cut a tire. Thankfully it just barely clears.
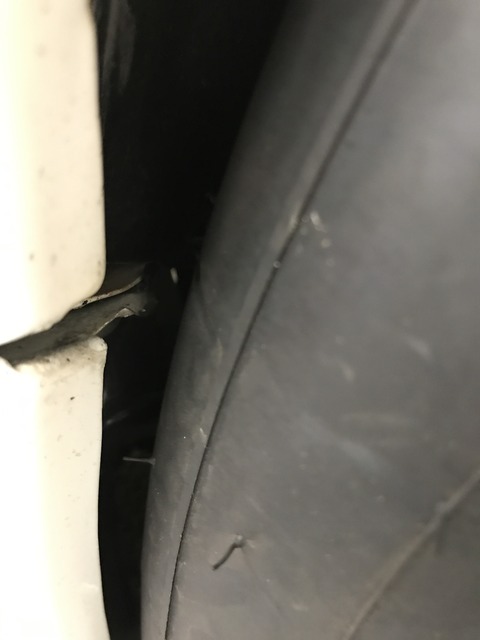
I had to clearance the fender liner around that portion as well as it was catching on the tire. The white stuff is sidewalk chalk I was using to find rub areas.
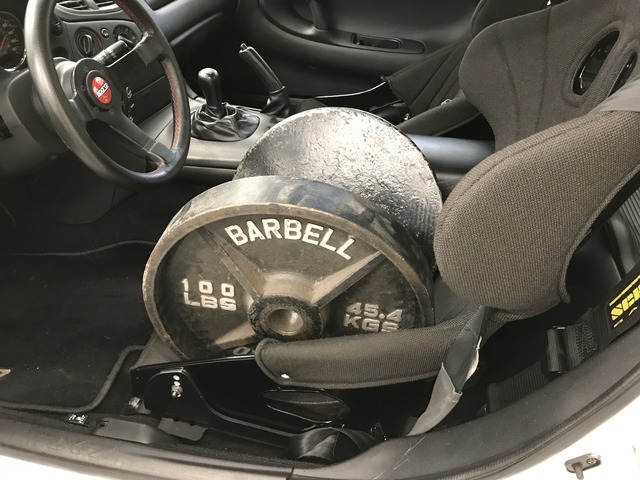
Once I agreed on a painfully high ride height it was time to corner weight the car and get it ready for its alignment. I was able to find a place in my garage where I could level the scales....JUST BARELY fits! haha.
when corner-weighting it's always good to have a good relationship with a guy who owns a gym so you can have easy ballast.
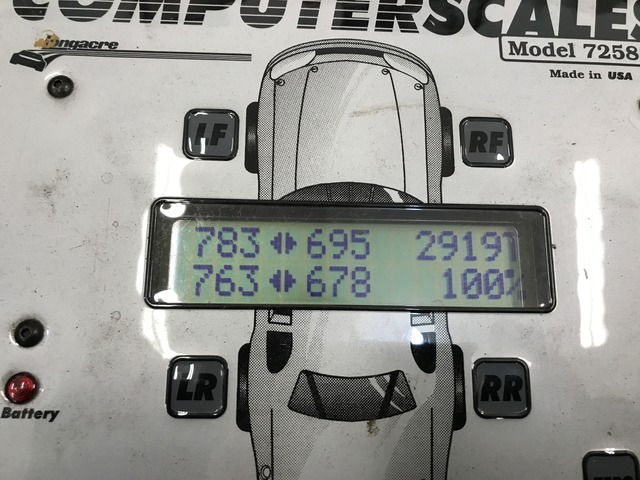
here it is on the scales (being done with Nittos and heavier wheels)
The good news is that setting appropriate heights on the car evidently gets is really close on corner weights! Here's how it looked the first time putting it on the scales.
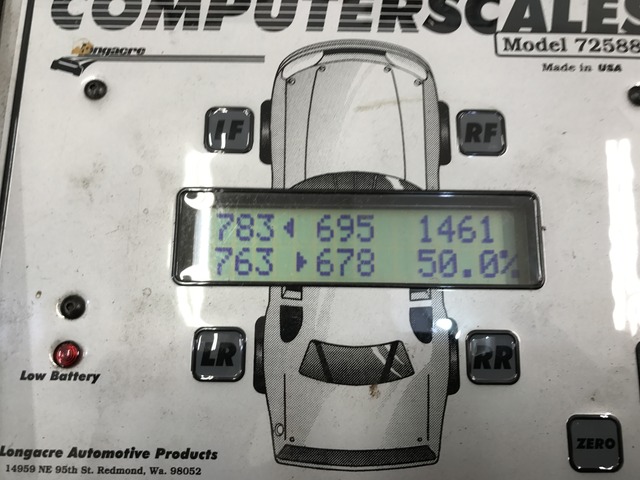
Couldn't ask for better than that! I was weighing the car this time around with only about 1/4 tank of gas, so it was pretty light too, as this is with 200lbs of ballast.
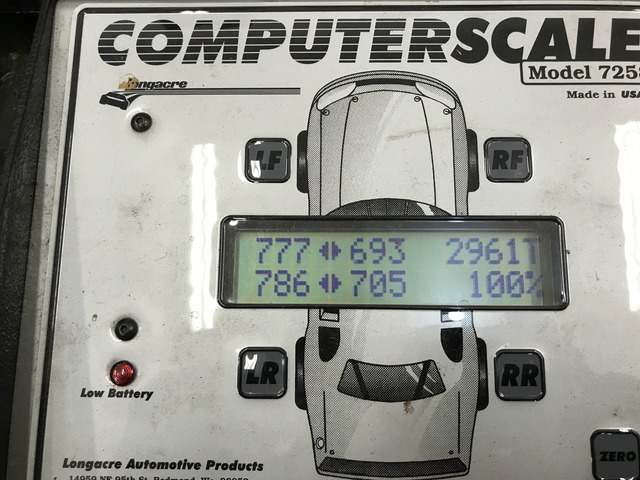
Here's the weight with more like a half tank which is more likely where I'd drive it on track. It was good to see how the weight affected balance too, and the good news is very little. Cross weights only went to 49.8% at this weight. Gotta love how light the FD is.
Here's the final ride height after all said and done. Fender/tire gap isn't bad, but the rocker height tells how high the car truly is.

The tires are so damn tall up front that fitting them is a chore. I had to raise the car up a decent amount to get everything to fit and try to minimize rubbing. It's always going to be a compromise, I'm sure I could keep them off of the fender liners if I wanted, but the car would have to be stupid high. The top isn't the only concern though. Here's an example of how close the tire is to the front connection of the bumper and fender and there's this metal joint that would cut a tire. Thankfully it just barely clears.

I had to clearance the fender liner around that portion as well as it was catching on the tire. The white stuff is sidewalk chalk I was using to find rub areas.

Once I agreed on a painfully high ride height it was time to corner weight the car and get it ready for its alignment. I was able to find a place in my garage where I could level the scales....JUST BARELY fits! haha.

when corner-weighting it's always good to have a good relationship with a guy who owns a gym so you can have easy ballast.

here it is on the scales (being done with Nittos and heavier wheels)

The good news is that setting appropriate heights on the car evidently gets is really close on corner weights! Here's how it looked the first time putting it on the scales.

Couldn't ask for better than that! I was weighing the car this time around with only about 1/4 tank of gas, so it was pretty light too, as this is with 200lbs of ballast.

Here's the weight with more like a half tank which is more likely where I'd drive it on track. It was good to see how the weight affected balance too, and the good news is very little. Cross weights only went to 49.8% at this weight. Gotta love how light the FD is.

Here's the final ride height after all said and done. Fender/tire gap isn't bad, but the rocker height tells how high the car truly is.

Thread Starter
Joined: Oct 2005
Posts: 886
Likes: 50
From: Columbus, OH
Got the car aligned at Auto Assets who is always great. Ended up doing -2.3 degrees camber up front and could only keep caster to around 6.3-ish. I wanted it closer to 5.5-6, but caster is always a compromise. Front was barely toe-in like 1/16" total. Rear was -2.0 camber with zero toe.
Once I got back home I torqued all of the camber bolts and marked them with the torque check paint.
After alignment it was time to road test the car a bit. The car felt good, but I was getting a mysterious black dust from the tires and/or brakes it seemed.
I was still using the street pads at this point and the dust was very light not like brake dust. The best I can figure was that it was release mold from the tires. I haven't had that previously from Nittos, but maybe it's something new? It kept happening thru the first couple of sessions at the track, but then subsided.
After my street test, I noticed a decent amount of oil in my catch can....DOH. Perhaps the stock fill neck idea wasn't going to pan out. To test this theory I went to the only place in town I could find that still has an old-school "cloverleaf" and I did 20 minutes of highway on-ramp and exit ramps to see if I could test the catch can. Sure enough, got home to find this:
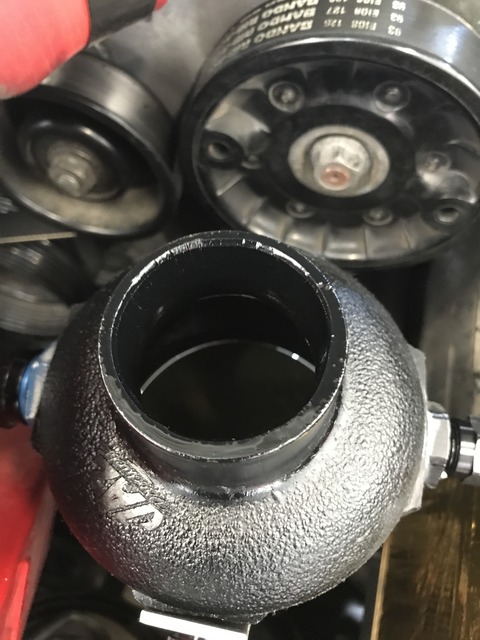
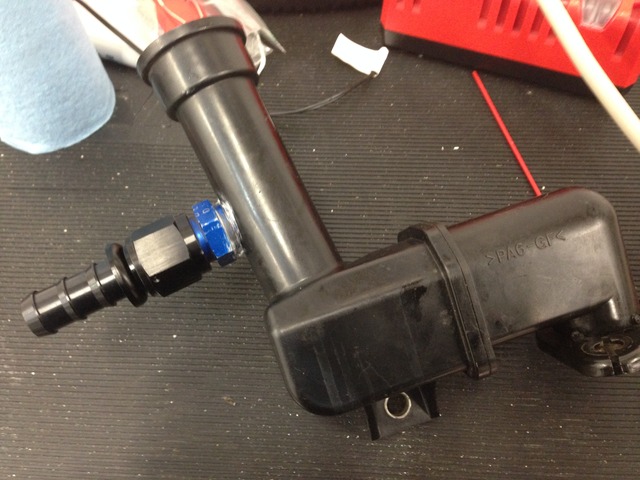
well....if I could do that on the street it wasn't going to be better on track and I didn't want to risk it. So to dig back in the old parts bin I'm going back to my old ZeeHan oil fill neck. To be honest I like the design, baffles, and build quality of the IRP oil neck better, but this one allows me to run a simple 3/8" nipple to the catch can line which is WAY WAY WAY easier for me to just take out the catch can and dump it in-between sessions. That makes time and effort required much less which is what I'm going for. I'm also taking the opportunity to try out what Fritz suggested and hook back up a line from the oil fill neck to the stock PVC line which I had previously blocked off. Here's the neck and fittings
Here it is installed
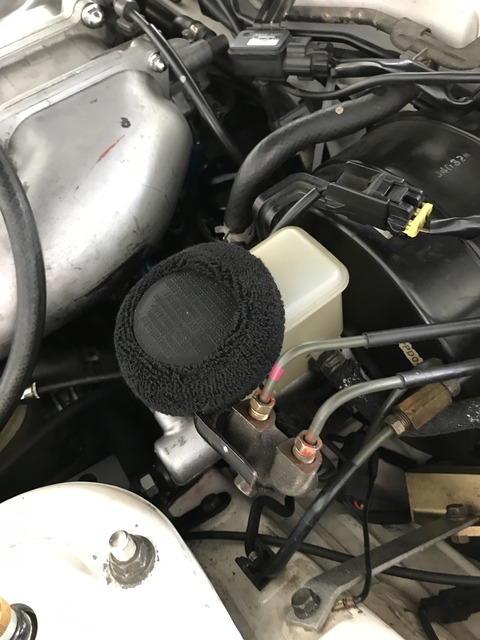
Also, since the brake master cylinder cap seems to always leak a bit on the track, I bought child wrist sweat bands to help keep the mess contained. Taking a queue from our old motorcycle days.
Once I got back home I torqued all of the camber bolts and marked them with the torque check paint.

After alignment it was time to road test the car a bit. The car felt good, but I was getting a mysterious black dust from the tires and/or brakes it seemed.


I was still using the street pads at this point and the dust was very light not like brake dust. The best I can figure was that it was release mold from the tires. I haven't had that previously from Nittos, but maybe it's something new? It kept happening thru the first couple of sessions at the track, but then subsided.
After my street test, I noticed a decent amount of oil in my catch can....DOH. Perhaps the stock fill neck idea wasn't going to pan out. To test this theory I went to the only place in town I could find that still has an old-school "cloverleaf" and I did 20 minutes of highway on-ramp and exit ramps to see if I could test the catch can. Sure enough, got home to find this:

well....if I could do that on the street it wasn't going to be better on track and I didn't want to risk it. So to dig back in the old parts bin I'm going back to my old ZeeHan oil fill neck. To be honest I like the design, baffles, and build quality of the IRP oil neck better, but this one allows me to run a simple 3/8" nipple to the catch can line which is WAY WAY WAY easier for me to just take out the catch can and dump it in-between sessions. That makes time and effort required much less which is what I'm going for. I'm also taking the opportunity to try out what Fritz suggested and hook back up a line from the oil fill neck to the stock PVC line which I had previously blocked off. Here's the neck and fittings

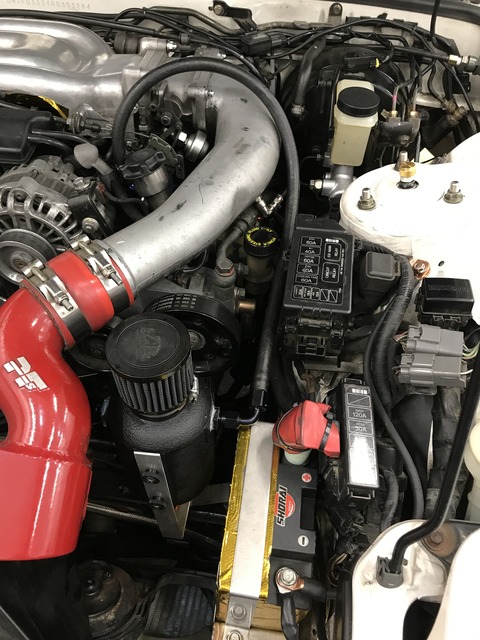
Here it is installed


Also, since the brake master cylinder cap seems to always leak a bit on the track, I bought child wrist sweat bands to help keep the mess contained. Taking a queue from our old motorcycle days.

Thread Starter
Joined: Oct 2005
Posts: 886
Likes: 50
From: Columbus, OH
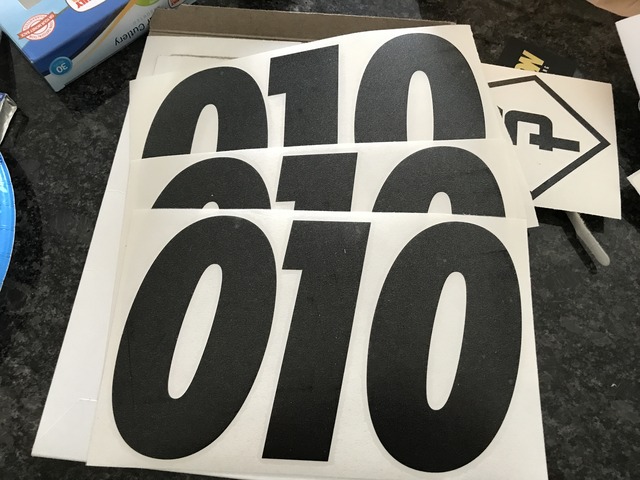
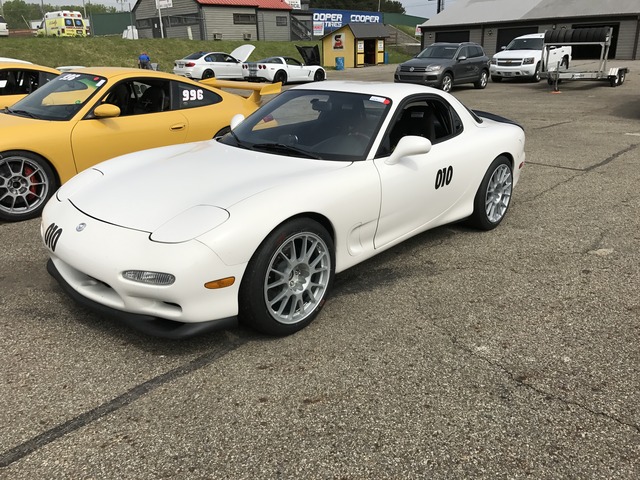
finishing up prep for the first event. Got vinyl numbers from Paragon vinyl who's always done well by me. Trying to get away from using painters tape for numbers..haha. This year some of the PCA clubs are now requiring 4 sets of numbers too.
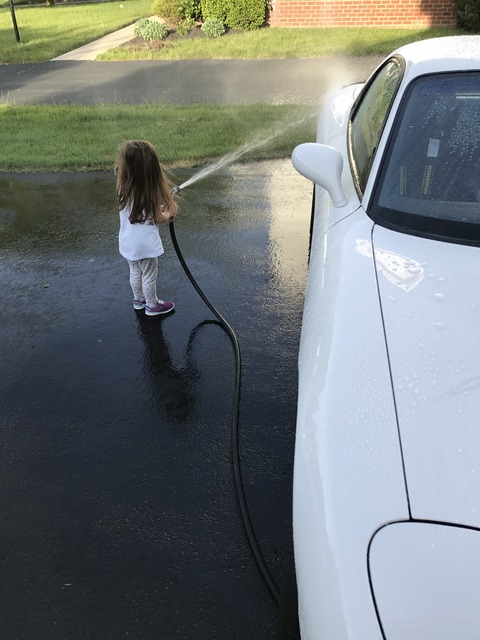
getting some help cleaning it up
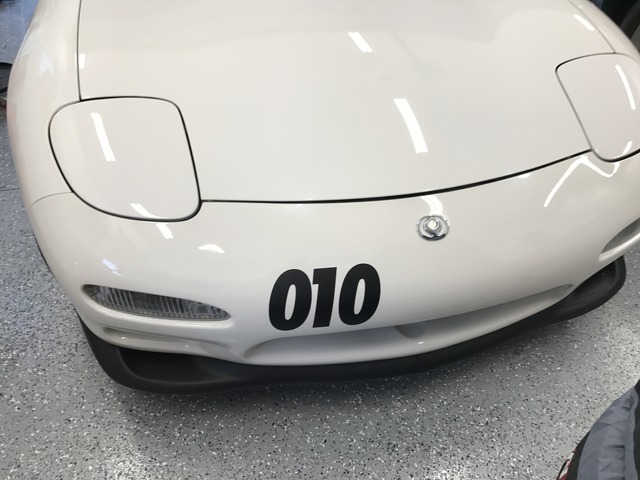
this event required 4 sets of numbers to now have them on front and back of the car as well. Probably as clean as this car will be for the remainder of the season!

getting some help cleaning it up

this event required 4 sets of numbers to now have them on front and back of the car as well. Probably as clean as this car will be for the remainder of the season!

Thread Starter
Joined: Oct 2005
Posts: 886
Likes: 50
From: Columbus, OH
First event: NNJR PCA @ Mid Ohio. This event was changed to an advanced/instructor event only which gave us TONS of track time. We'd get 5 30 minute sessions every day which means one day was roughly equivalent to a typical Sat/Sun event.
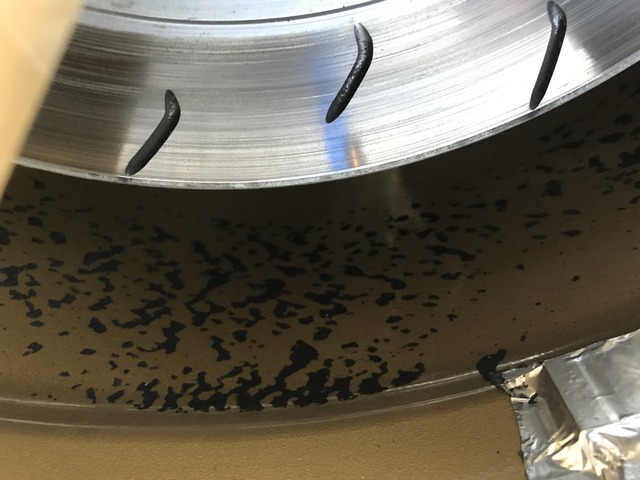
The forecast called for rain Sat/Sun though which stunk, but you can't control that. So Friday I knew I wanted to get up to speed quickly. That was unfortunate for my Nittos. NT-01s are still the best track tire in my opinion in that they're the perfect mix of durability, predictability, and value as they last well. The one weakness they have though is that at full tread depth they need some easy track time to break them in. Go too hard too quick and you get this: graining on the tire. Tends to happen when you slide them at full depth.
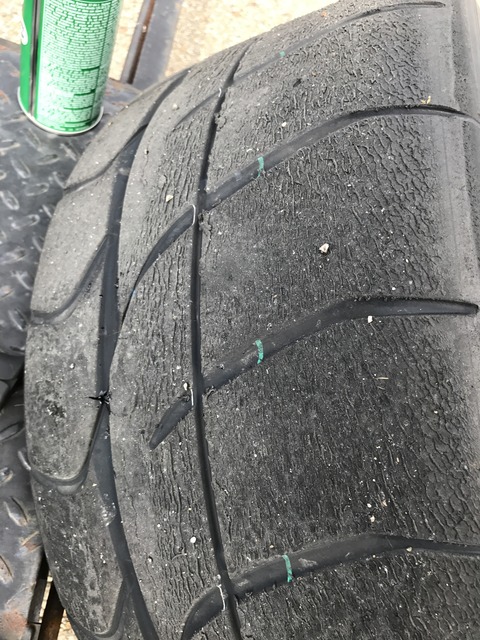
I was able to rotate them and try to minimize the wear, but I'll have to look after them. If you keep pushing after doing this you'll just scrub the rubber off of the tire and lose tons of life and never get the grip out of them you'd want. I still want the Nittos to be my primary tire and I'd like to have this set last the full season, so hopefully I can do that.
I also managed to forget the mount for my AIM Solo on Friday which was annoying. I always seem to forget something I swear.
Ran the first session and the car did well. The updated catch can setup kept the amounts in the can reasonable and made removing/dumping the can easy as pie. I was still emptying every session but could probably push it to 2 if I'd want to which is nice. Of course this is still with keeping it about 1/4 level on the dipstick. I'm not sure if the PCV line is helping or dumping oil in the intake, but I'll have to investigate that later.
after the 2nd session my new bearing on the idler pulley puked its guts out....DOH. Fortunately it was just messy and it wasn't making noise nor did it give further issue thru the weekend.
Friday afternoon it was time to try out the new change on the car I'd been itching to....SLICKS!
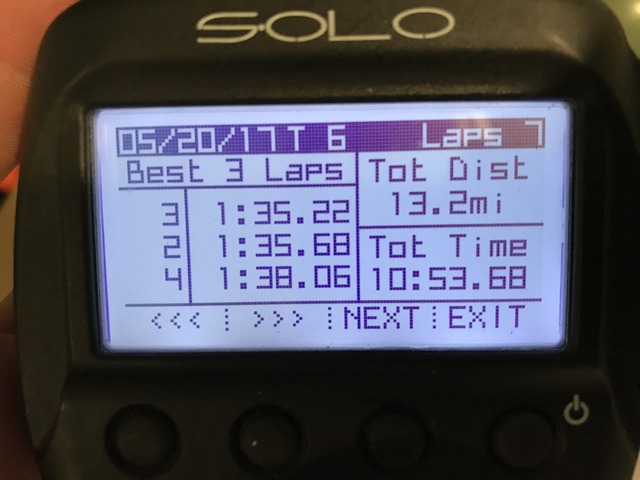
Driving on them is fun! It's a different experience for sure in that yes they're different than Nittos, but not so different that it feels like a different car or something. You just start to find that you can carry a little more speed and make time in a bunch of different places and it adds up over a lap. I stole my brother's Solo and got some times Friday afternoon. My best on Nittos at Mid Ohio was a 1:38.2 that was done last fall. In taking experience from my brother's use of the Pirellis they should have been about 2.5 - 3 seconds/lap quicker than the Nittos. Here's where I was Friday afternoon.
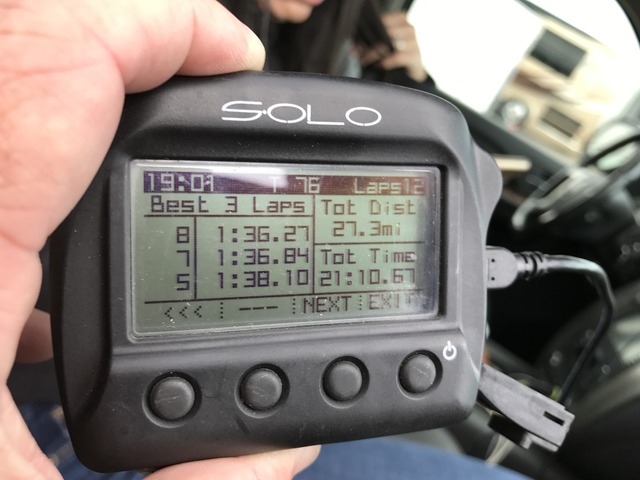
I was pretty happy to be right where I thought I should be on just the 2nd session ever running slicks. Where the slicks are a little crazy in my mind is that from Apex off of a corner the Nittos drive just as hard/fast as slicks (although slicks you're starting from higher min speed). Where you make up ALL of the time on the stickier rubber is from braking, turn in, and corner entry speed. This is also the hardest/scariest place to build up speed so it's a fun challenge.
At the end of Friday I had turned almost 200 track miles and the car did great overall.
The forecast called for rain Sat/Sun though which stunk, but you can't control that. So Friday I knew I wanted to get up to speed quickly. That was unfortunate for my Nittos. NT-01s are still the best track tire in my opinion in that they're the perfect mix of durability, predictability, and value as they last well. The one weakness they have though is that at full tread depth they need some easy track time to break them in. Go too hard too quick and you get this: graining on the tire. Tends to happen when you slide them at full depth.

I was able to rotate them and try to minimize the wear, but I'll have to look after them. If you keep pushing after doing this you'll just scrub the rubber off of the tire and lose tons of life and never get the grip out of them you'd want. I still want the Nittos to be my primary tire and I'd like to have this set last the full season, so hopefully I can do that.
I also managed to forget the mount for my AIM Solo on Friday which was annoying. I always seem to forget something I swear.
Ran the first session and the car did well. The updated catch can setup kept the amounts in the can reasonable and made removing/dumping the can easy as pie. I was still emptying every session but could probably push it to 2 if I'd want to which is nice. Of course this is still with keeping it about 1/4 level on the dipstick. I'm not sure if the PCV line is helping or dumping oil in the intake, but I'll have to investigate that later.
after the 2nd session my new bearing on the idler pulley puked its guts out....DOH. Fortunately it was just messy and it wasn't making noise nor did it give further issue thru the weekend.

Friday afternoon it was time to try out the new change on the car I'd been itching to....SLICKS!

Driving on them is fun! It's a different experience for sure in that yes they're different than Nittos, but not so different that it feels like a different car or something. You just start to find that you can carry a little more speed and make time in a bunch of different places and it adds up over a lap. I stole my brother's Solo and got some times Friday afternoon. My best on Nittos at Mid Ohio was a 1:38.2 that was done last fall. In taking experience from my brother's use of the Pirellis they should have been about 2.5 - 3 seconds/lap quicker than the Nittos. Here's where I was Friday afternoon.

I was pretty happy to be right where I thought I should be on just the 2nd session ever running slicks. Where the slicks are a little crazy in my mind is that from Apex off of a corner the Nittos drive just as hard/fast as slicks (although slicks you're starting from higher min speed). Where you make up ALL of the time on the stickier rubber is from braking, turn in, and corner entry speed. This is also the hardest/scariest place to build up speed so it's a fun challenge.
At the end of Friday I had turned almost 200 track miles and the car did great overall.
Thread Starter
Joined: Oct 2005
Posts: 886
Likes: 50
From: Columbus, OH
Saturday was pretty much ideal conditions in that it was overcast and cooler but still warm enough for good track temperature. It reminded me a lot of fall. My friend came up and we took tire temps as well which was helpful. Seems like the car wants more camber on slicks. I'll have to try to get some temps on the Nittos to see how they compare. I know the alignment is always going to be a compromise and I'm probably not going to change anything at the moment.
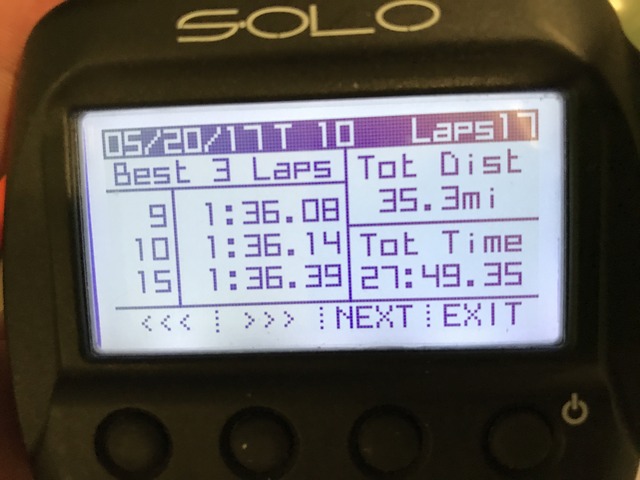
On the session he was taking temps I got my fastest laps of the weekend shortly after coming out of the pits.
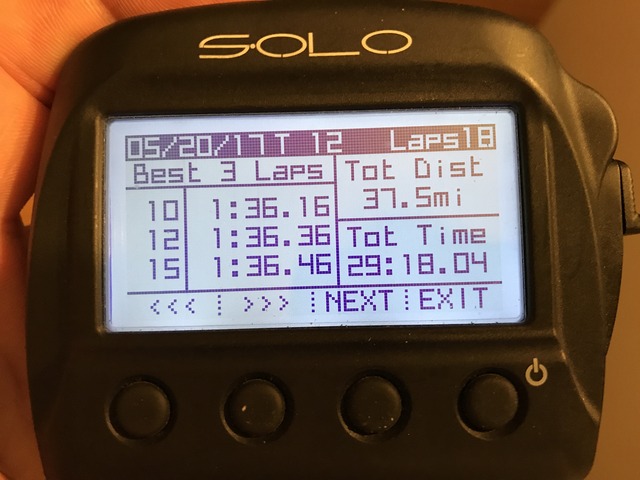
I was definitely blown away with that level of speed with the car and for the first event on slicks. I think the weather being ideal helped too. I think that in the fall when the car always runs best if I can put together a good lap it's got a :34 in it. THe rest of the day when it warmed up I didn't get back to the :35s, but the car was consistent and plenty fast.
Unfortunately I had an issue with the GoPro. It ran out of battery during the session and didn't seem to finalize the file. Where the video ends here is where the videos split due to size (normal) but the 2nd file won't play or open in GoPro editor because the battery died while writing that file. Anybody got a good fix for this?
Here's video of the 2nd fastest lap and 1/2 of the fast lap. You can see on the timer that I give up time in keyhole and whole back straight then get it back at the end of the straight (fast lap reference was an off line pass the lap before). You can also see me be hacky and throw the car over the hill in 8 and upset the car. I need to smooth that crap out, but it's part of the learning with the new tires.
You can also hear something new I wasn't expecting. wheel spin during hard corner loads. You can notice it in turn 9, 11 into thunder valley and the carousel. What's happening is that with the slicks it's loading the outside tires so much that it's completely lifting the inside rear and then my torsen diff will spin the inside wheel. It's a bummer, but I'm not replacing the diff this year (hopefully), so I'll look at clutch diffs next year. Plus, I don't want to put an aftermarket diff in there until I can get the temps under control.
I also had an interesting interaction with one of the NNJR guys who has a stripped/caged 996 GT2. The car is crazy fast, but he was clearly having some struggles with handling....that must have affected his ability to see in his mirrors! haha. Had to turn on the pop-up lights on him. Sometimes it's like the FD is Rodney Dangerfield on the track....can't get no respect
Here's also an example of how the slicks work differently than Nittos. You're able to brake much later and carry more speed into corners. Here I'm taking a late pass going into turn 1 on someone I know/trust. Of course he was messing with me a bit not lifting when pointing....always remember students out there...lift when you point. I was good with it since I know this person, but I was also surprised how many cars would point and not lift over the weekend and I couldn't pull them..haha.
On the session he was taking temps I got my fastest laps of the weekend shortly after coming out of the pits.

I was definitely blown away with that level of speed with the car and for the first event on slicks. I think the weather being ideal helped too. I think that in the fall when the car always runs best if I can put together a good lap it's got a :34 in it. THe rest of the day when it warmed up I didn't get back to the :35s, but the car was consistent and plenty fast.


Unfortunately I had an issue with the GoPro. It ran out of battery during the session and didn't seem to finalize the file. Where the video ends here is where the videos split due to size (normal) but the 2nd file won't play or open in GoPro editor because the battery died while writing that file. Anybody got a good fix for this?
Here's video of the 2nd fastest lap and 1/2 of the fast lap. You can see on the timer that I give up time in keyhole and whole back straight then get it back at the end of the straight (fast lap reference was an off line pass the lap before). You can also see me be hacky and throw the car over the hill in 8 and upset the car. I need to smooth that crap out, but it's part of the learning with the new tires.
You can also hear something new I wasn't expecting. wheel spin during hard corner loads. You can notice it in turn 9, 11 into thunder valley and the carousel. What's happening is that with the slicks it's loading the outside tires so much that it's completely lifting the inside rear and then my torsen diff will spin the inside wheel. It's a bummer, but I'm not replacing the diff this year (hopefully), so I'll look at clutch diffs next year. Plus, I don't want to put an aftermarket diff in there until I can get the temps under control.
I also had an interesting interaction with one of the NNJR guys who has a stripped/caged 996 GT2. The car is crazy fast, but he was clearly having some struggles with handling....that must have affected his ability to see in his mirrors! haha. Had to turn on the pop-up lights on him. Sometimes it's like the FD is Rodney Dangerfield on the track....can't get no respect
Here's also an example of how the slicks work differently than Nittos. You're able to brake much later and carry more speed into corners. Here I'm taking a late pass going into turn 1 on someone I know/trust. Of course he was messing with me a bit not lifting when pointing....always remember students out there...lift when you point. I was good with it since I know this person, but I was also surprised how many cars would point and not lift over the weekend and I couldn't pull them..haha.
Thread Starter
Joined: Oct 2005
Posts: 886
Likes: 50
From: Columbus, OH
Here are some other takeaways/notes from the first event:
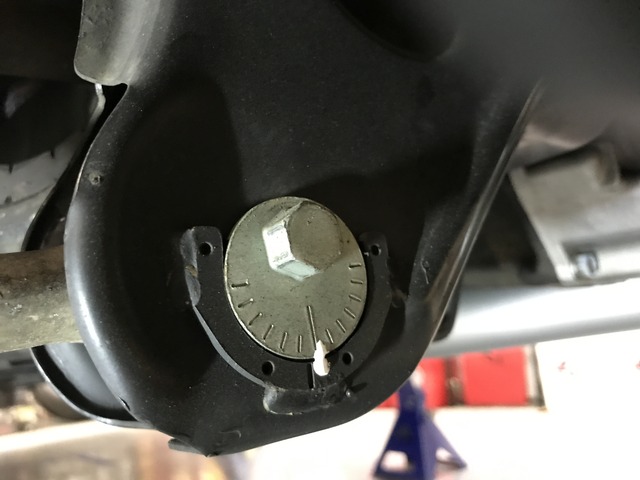
� Looking forward I still need to figure out a diff cooling solution as I was able to get it up to 250 degrees on the drain plug at the end of the day Sat. Granted, I ran the car HARD including a 45 min session at one point Sat (almost a full tank of fuel used! Haha), but it also wasn�t super hot, and I think that means I could be asking for trouble again at Indy and Watkins in August.
� The car is WAY faster on slicks�.faster than I was expecting. Best I was getting on the Nittos were mid-high :39s so even if we exclude the :35s I was able to turn some consistent low :36s on the slicks so on comparable days the slicks were 3.5-ish seconds faster/lap. Perhaps the car is suited to sticky tires and that�s the way it�ll be? I'll find out. the gap will close a bit too as the Nittos get more in their prime.
� I think the catch can is about as good as it�s getting. Not sure if the PCV valve connection is really helping or not. I�d like to see if/how much oil is going back to the intake. If some is going in there I may disconnect that line again and see what difference it makes. Other than that, I�m happy that it�s at least easy to remove and dump the can now. If I had the ***** to run the oil all the way at the bottom of the dipstick then I wouldn�t have to empty it every session either, but not sure I�m there yet.
� Used A LOT of fuel� About 38 gallons each day!
� Brake cooling appears to have helped. I�ll measure the pads when I get them off of there, but to my eye it looks like I used as much pad as I did last year in the Fall Mid Ohio event which was less driving for sure, so that�s a good step forward. There was a tradeoff in slightly higher water temps so I just need to keep an eye on that during July. May have to see if I can get some sort of rear scoops for brake ducting or something.
� Little power steering cooler appears to have worked well. When I was in the pits and put the thermo on it, it only showed like 150 degrees, so that seems pretty good to me.
� Brake M/C cap still leaks and the little sweat bands work to keep it from flinging around the engine bay, but they just become a brake fluid absorbed mess each day. I�ve tried new caps and even different reservoirs (between old/new car) and it doesn�t seem to make a difference.
� The rear inside tire is spinning now under heavy cornering. If I�m using curb on the gas it spins like 7, 9, carousel, and especially going into Thunder Valley�.like continual up/down RPM from it spinning and hooking. Slightly worried I�ll cord a tire doing that, but not sure on options. Supposedly the 93 rear sway bar was thinner and softer, but nobody has documented by how much. Or do I dare try running no rear bar? Or do I go fully opposite and try stiffer bars front and rear? I honestly didn�t even touch shock settings this past weekend and just wanted to drive and get a feel for the car�.it feels VERY MUCH like the old setup..haha. Could be fun to play around with different stuff though. It would be relatively easy to change bar settings during a weekend, but would be difficult to fully change a rear bar during an event�.or more just a bigger pain in the butt than I�d want to do. Likely the solution here is to go to a proper clutch-type diff, but I won�t have that in the budget for this season as by the time I get new bearings and what not it�ll end up being like $1,500+. Plus I want to make sure I�m not going to end up cooking the new expensive diff once it goes in.
� The car seems to get more loose during sessions�no good reason why other than I must be working the rear tires harder? I bleed them to the same pressures though so they should end up similar pressure/temp.
� Rear brakes were squeaking for some damn reason. The rotors are newer so I�d like to think they�re not warped, but who knows. I was getting vibrations thru the pedal but the car never failed to stop and rotor temps stayed even left/right so I don�t think they were hanging up or anything. I think the grease I�m using in the rear is getting sticky though so maybe I can find a better high temp grease.
Always Bad Advice


Joined: Nov 2005
Posts: 327
Likes: 89
From: San Diego
I think the confusion, over the years, on which bar is stiffer may lie in that some people reported that the 1993 rear swaybar tubing thickness was slightly thinner (I have not verified this) leading folks to believe it is torsionaly less rigid than the smaller diameter 1994 bar.
Thread Starter
Joined: Oct 2005
Posts: 886
Likes: 50
From: Columbus, OH
Brake hose is doing ok. With the hose on though I can only go about one full turn to lock before the tire will rub. Not a problem on the track but I have to remove them on the street.

Junior Member
Joined: Feb 2008
Posts: 6
Likes: 0
From: ohio
For those that don't have a reference point, 1:35 on Mid Ohio club configuration in a car with full interior, no aero, used take-off tires and the power to weight over 9:1 is a huge accomplishment.
**edit** from first hand experience Chris is going to easily go 2:03-2:04 at The Glen in August and will likely be in that 2:03-04 neighborhood at VIR should we make it in October.
Well done!!!
**edit** from first hand experience Chris is going to easily go 2:03-2:04 at The Glen in August and will likely be in that 2:03-04 neighborhood at VIR should we make it in October.
Well done!!!
Last edited by AudiOn19s; Jun 20, 2017 at 11:19 AM.
Thread Starter
Joined: Oct 2005
Posts: 886
Likes: 50
From: Columbus, OH
I'm using this Mocal pump: https://www.racerpartswholesale.com/...al_Cooler_Pump
I like the durability of the brass head and gears.
I'm using all -8 pushlock line and fittings, and then planning on going to a small 115 matrix Mocal cooler. I don't think the diff needs a ton of cooling, so this should suffice to keep things in check. I'll let you know how it shapes up.