
1993 RX7 R1 - (Budget/DIY) - Pic Heavy


Thread Starter
Full Member
Joined: Oct 2005
Posts: 88
Likes: 0
From: Las Vegas, NV
1993 RX7 R1 - (Budget/DIY) - Pic Heavy
Purchase Date: 9/25/2012
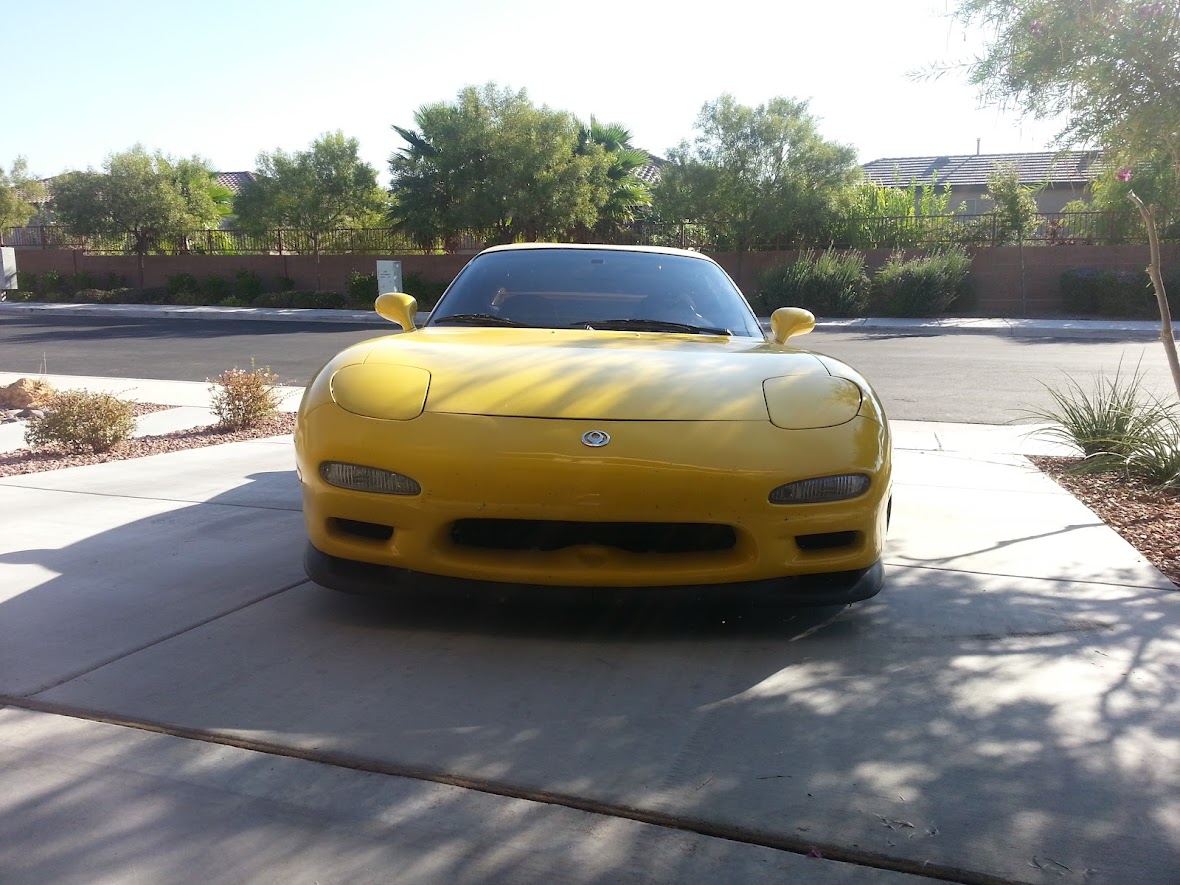
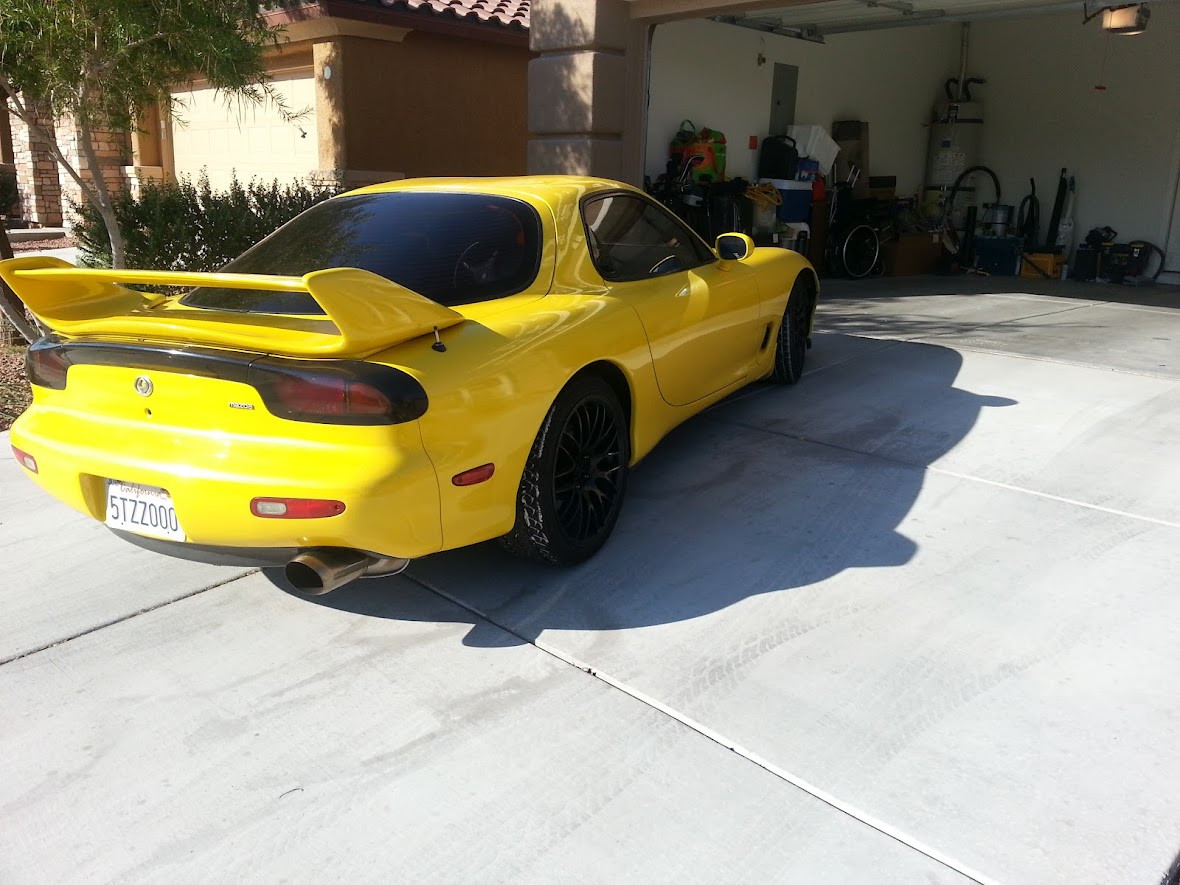
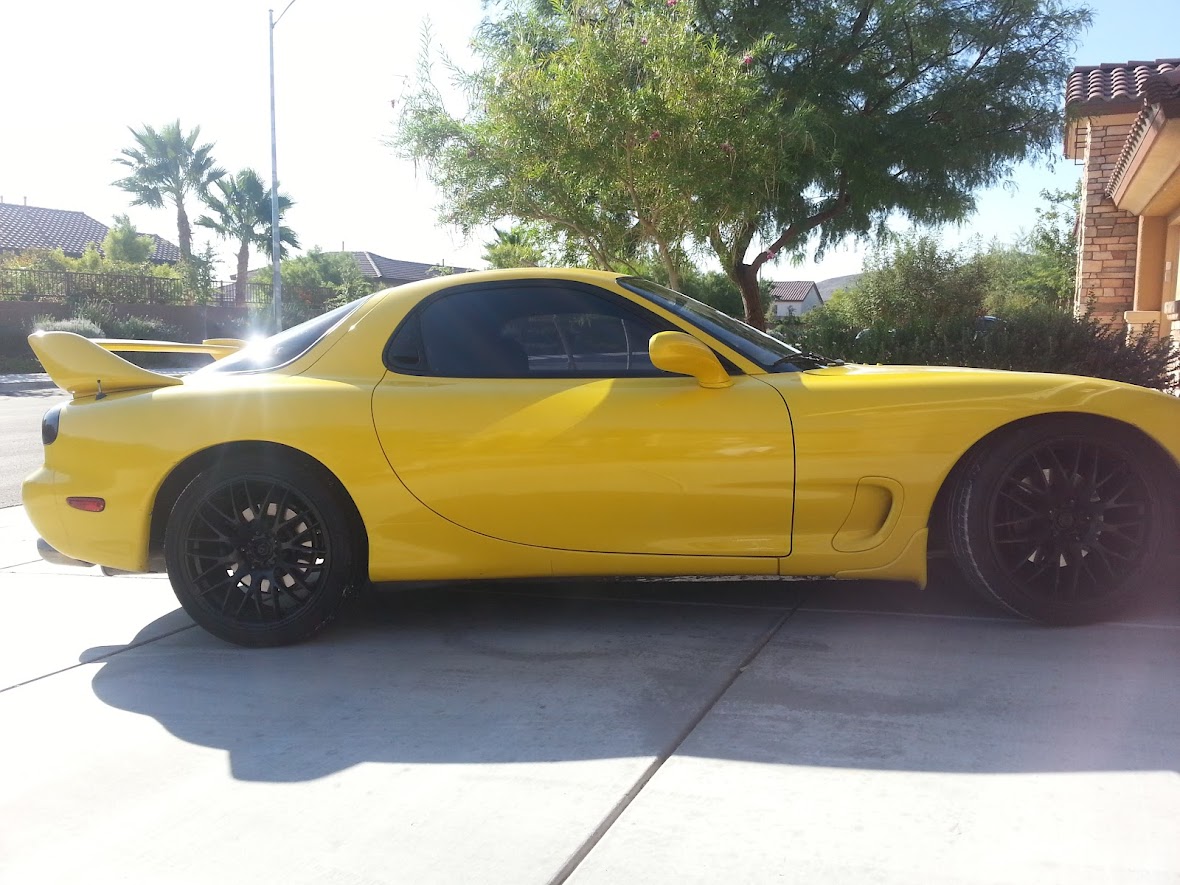
Year: 1993
Model: RX7 R1
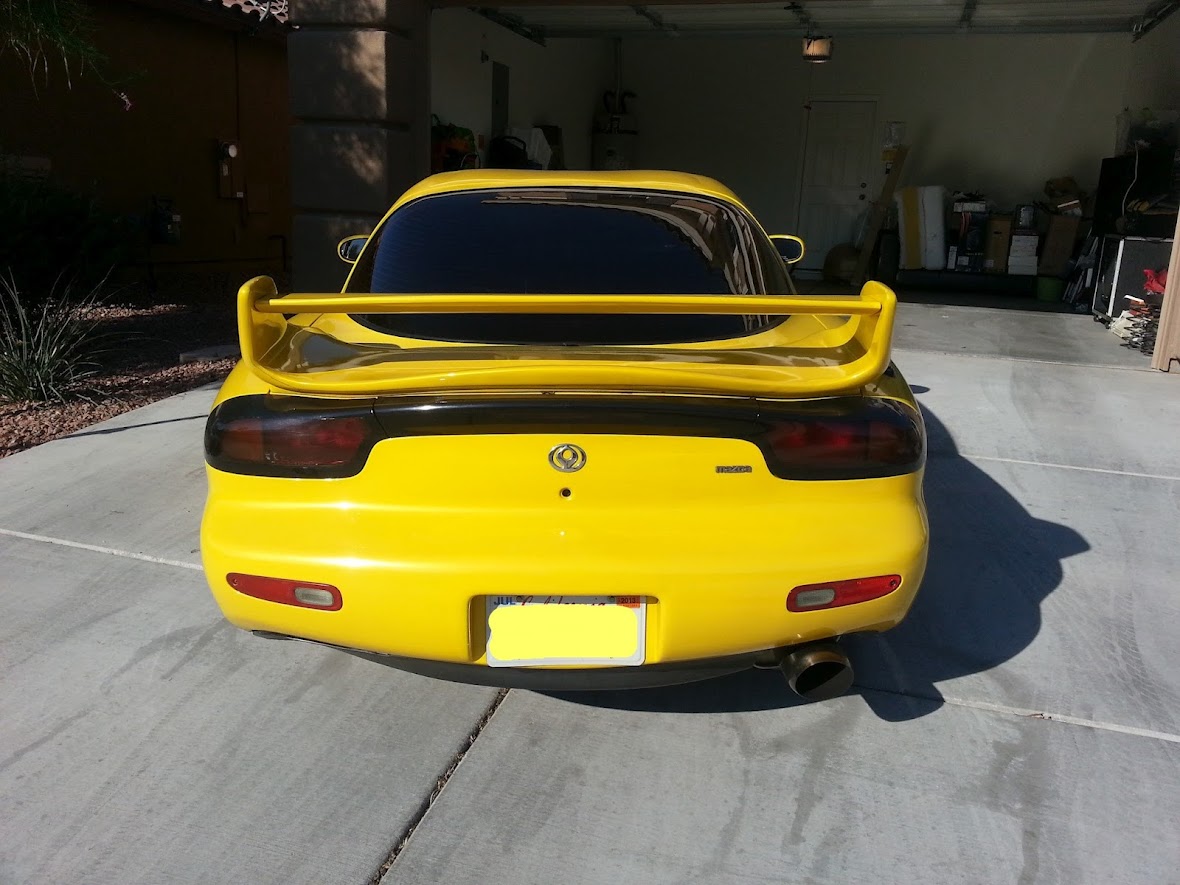
Color and Code: Competition Yellow Tri-Coat Pearl / J9
Miles: 120,500
Modifications:
HKS Blow Off Valve
3" Catback Exhaust
Apexi Air Filters
MSM Wheels (Sprayed or Coated Black)
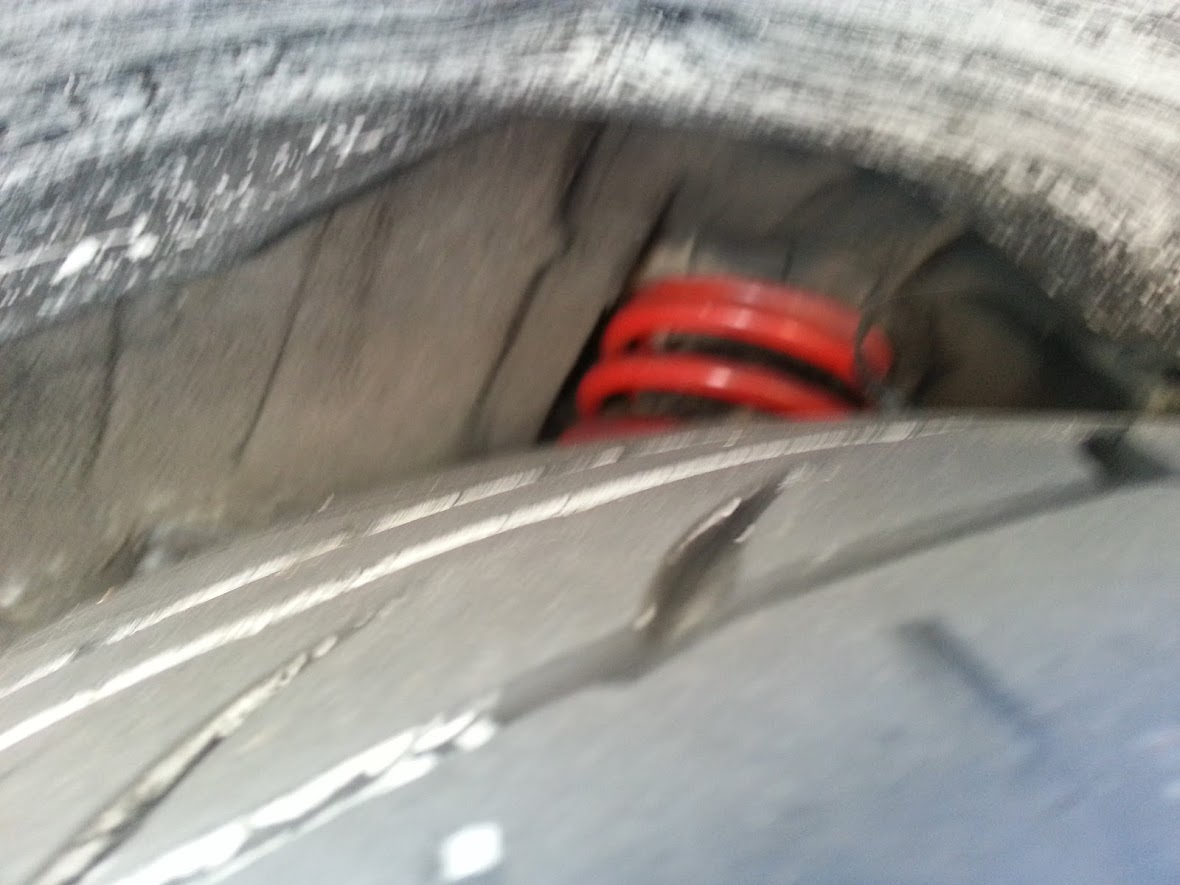
Lowering Springs
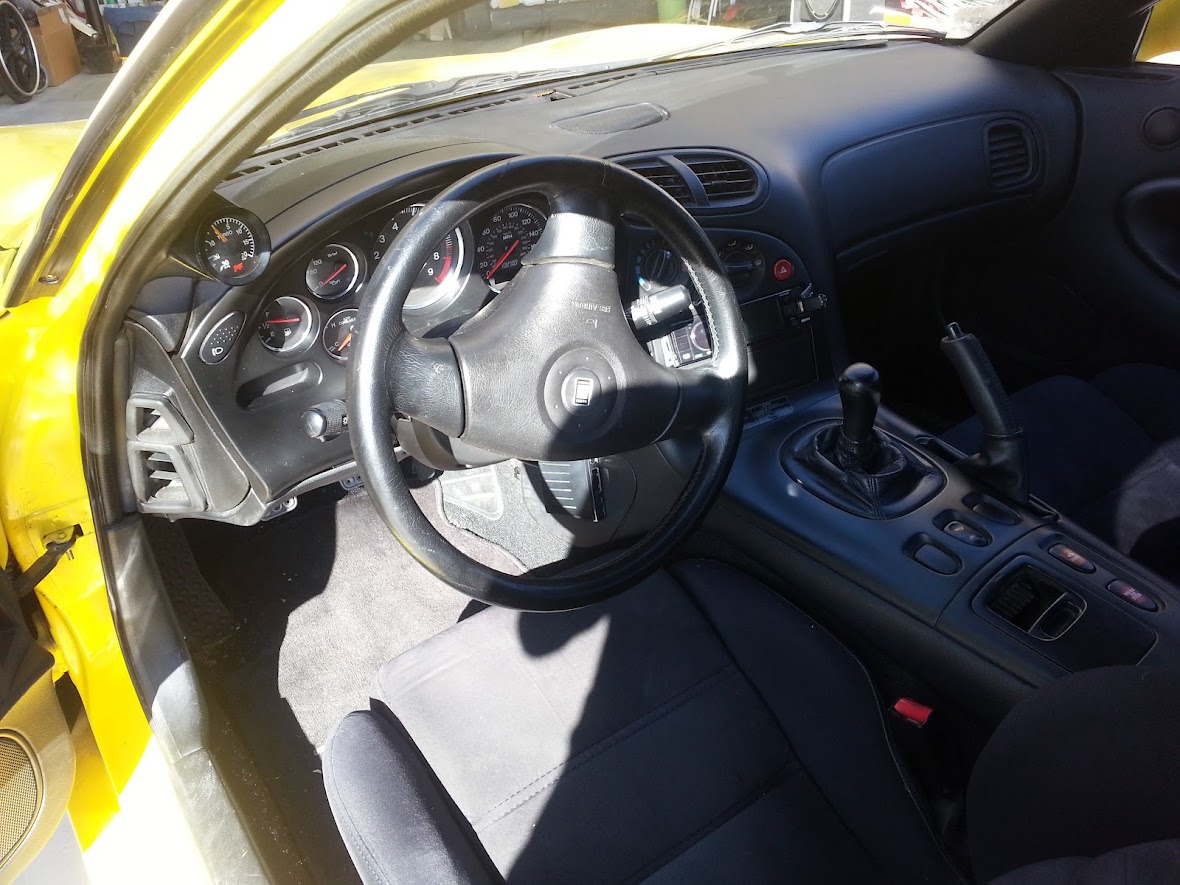
Nardi Turino Steering Wheel (Air Bag Light Flashes)
Included With Purchase:
Stock Springs
Stock Exhaust
Aftermarket Headlights
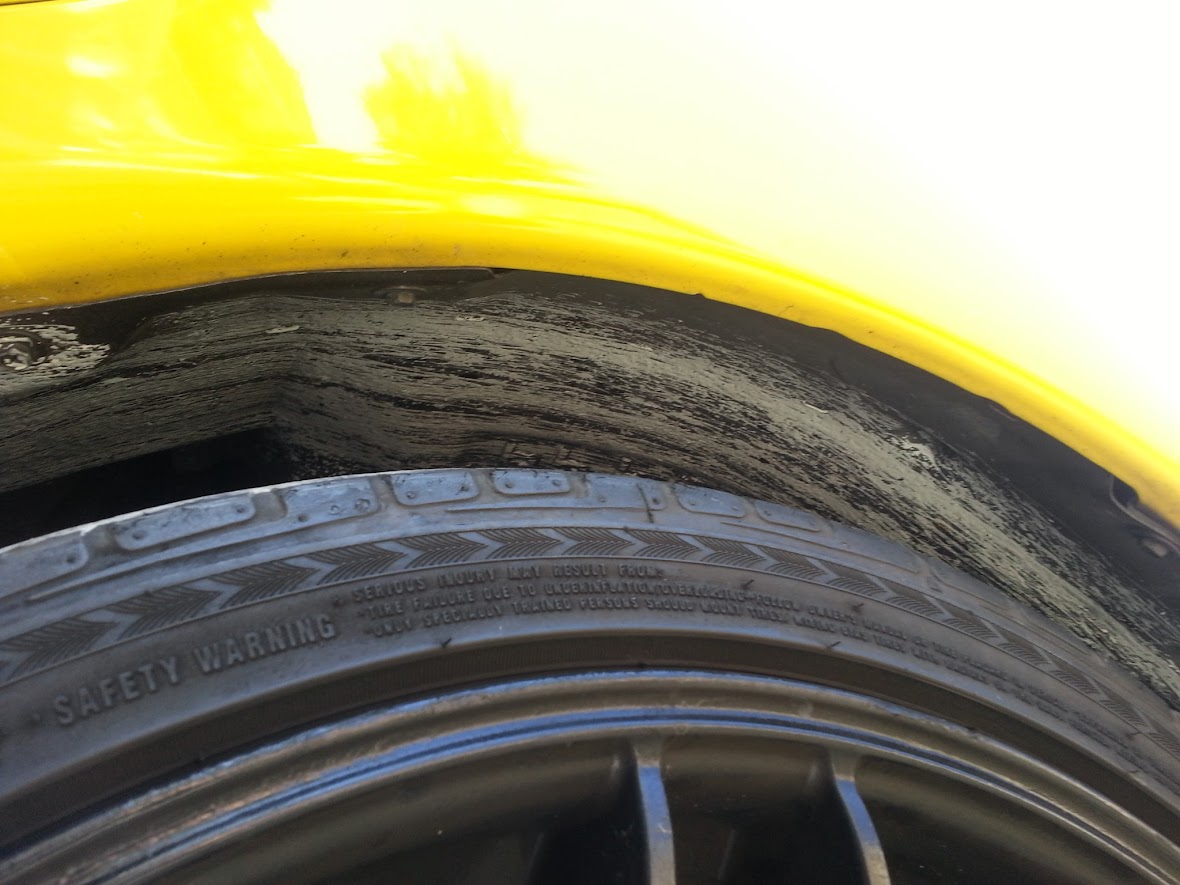
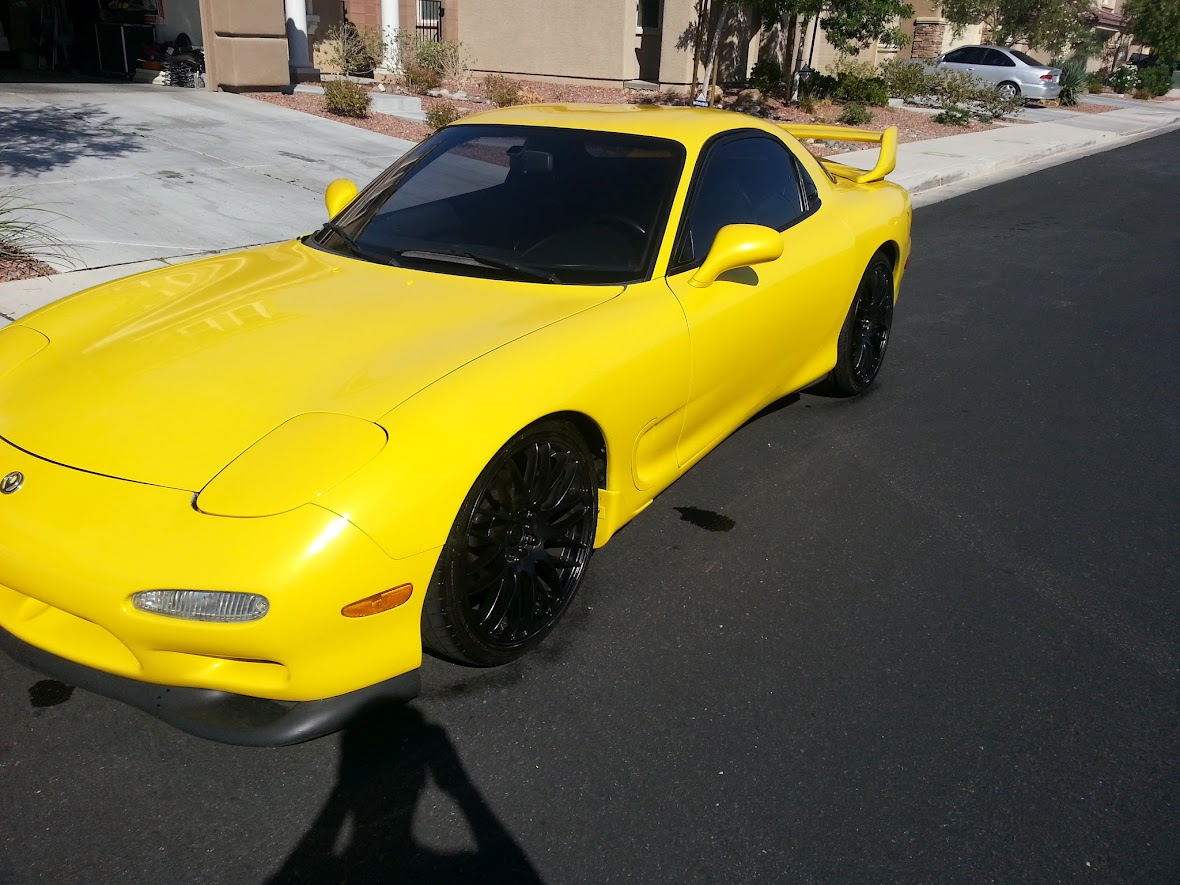
So I thought I would post and share some information. Before purchasing this vehicle I owned a 2008 Subaru STI and before that a Red/Tan Touring 1993 RX7. I am not a car or FD expert but I plan to do everything I can by myself and share the links that I use videos/forum links. Hopefully with a little time and dedication I can be satisfied with the vehicle until money allows. I went over my budget purchasing this vehicle so unfortunately I cannot do amazing rebuilds/work. There are minor flaws in the vehicle, a few spider cracks, the front wheel well is completely gone, the previous owner drove over paint so there is paint on the tires (not a big deal), paint on the wheel wells and paint on the body and frame (minor). It also looks as though there are 2 identical indents on the roof, it doesnt look like it was manufactured that way anyone feel free to step in, but it looks like someone placed something on the roof and make an indent it almost looks like where the sides of a sun roof would meet but the indents aren't perfect creases and have some bumps like if you were to fold a paper in half. Oh, and the drivers side door handle is broken.
My plans over the next few weeks will be purely cosmetic, the engine runs strong had 0 issues after driving it 600 miles yesterday, the turbo's began bucking last night when I was almost home after getting off the freeway, after more research it may be a relay or alternator issue with the headlights/stereo etc on. I will begin to look into more and update.
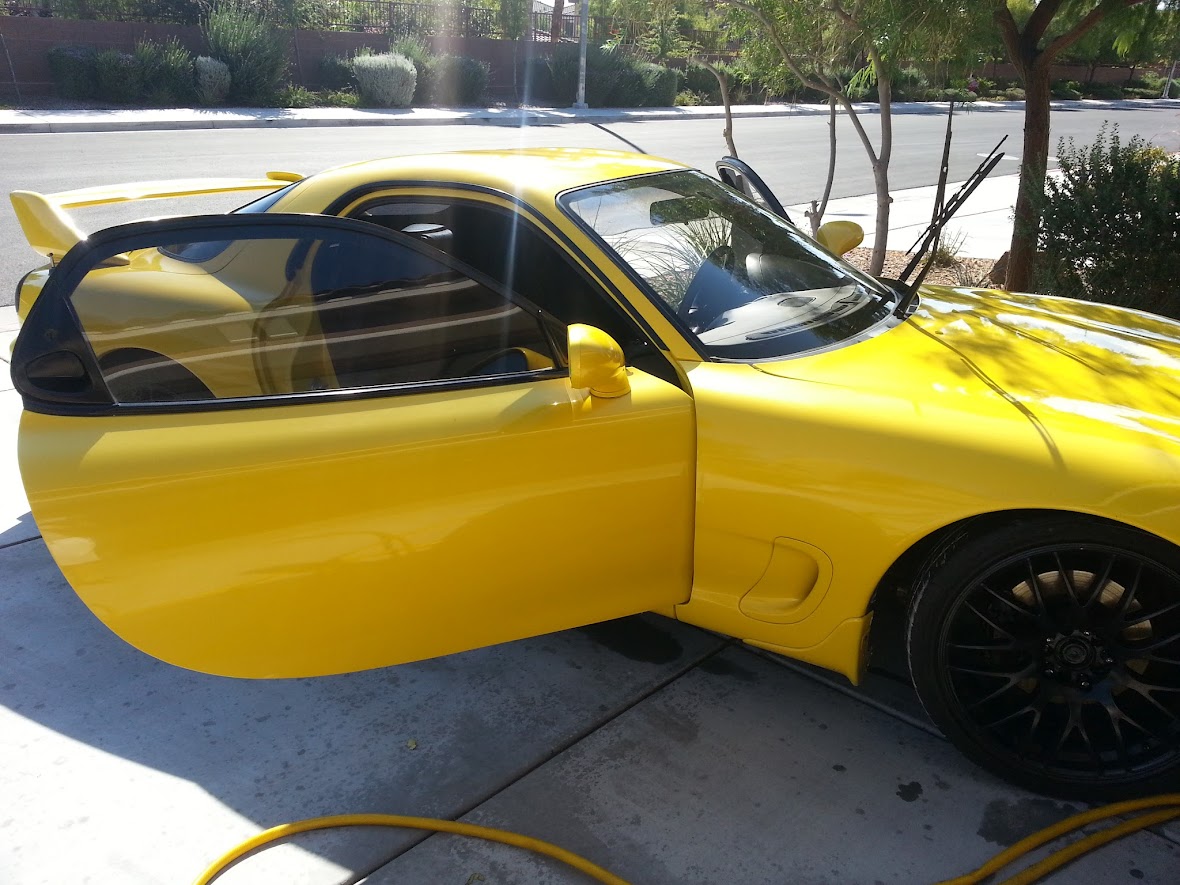
9/27/2012 - Pictures Updated Interior / Exterior Before and After Quick Wash.


Year: 1993
Model: RX7 R1
Color and Code: Competition Yellow Tri-Coat Pearl / J9
Miles: 120,500
Modifications:
HKS Blow Off Valve
3" Catback Exhaust
Apexi Air Filters
MSM Wheels (Sprayed or Coated Black)
Lowering Springs
Nardi Turino Steering Wheel (Air Bag Light Flashes)
Included With Purchase:
Stock Springs
Stock Exhaust
Aftermarket Headlights
So I thought I would post and share some information. Before purchasing this vehicle I owned a 2008 Subaru STI and before that a Red/Tan Touring 1993 RX7. I am not a car or FD expert but I plan to do everything I can by myself and share the links that I use videos/forum links. Hopefully with a little time and dedication I can be satisfied with the vehicle until money allows. I went over my budget purchasing this vehicle so unfortunately I cannot do amazing rebuilds/work. There are minor flaws in the vehicle, a few spider cracks, the front wheel well is completely gone, the previous owner drove over paint so there is paint on the tires (not a big deal), paint on the wheel wells and paint on the body and frame (minor). It also looks as though there are 2 identical indents on the roof, it doesnt look like it was manufactured that way anyone feel free to step in, but it looks like someone placed something on the roof and make an indent it almost looks like where the sides of a sun roof would meet but the indents aren't perfect creases and have some bumps like if you were to fold a paper in half. Oh, and the drivers side door handle is broken.
My plans over the next few weeks will be purely cosmetic, the engine runs strong had 0 issues after driving it 600 miles yesterday, the turbo's began bucking last night when I was almost home after getting off the freeway, after more research it may be a relay or alternator issue with the headlights/stereo etc on. I will begin to look into more and update.
9/27/2012 - Pictures Updated Interior / Exterior Before and After Quick Wash.


There should be a nice smooth double bubble in the roof. If there are dents than they are not supposed to be there. From the pic it appears you have a dent and it was not manufactured that way.
Please tell us that you are not going to install those god awful aftermarket headlights.
Please tell us that you are not going to install those god awful aftermarket headlights.

Trending Topics
Thread Starter
Full Member
Joined: Oct 2005
Posts: 88
Likes: 0
From: Las Vegas, NV
lol, I am NOT going to install the headlights. The previous owner said he purchased them to take the bulb out to place in the stock pop ups. I will probably just sell the assembly.
9/27/2012
I needed to remove the window tint because the scratches in them, I haven't decided the rear but the easiest way I found was using this. (Approx. 20 Minutes)
Steamer if needed to purchase: $25.00
Luckily my roommate had a steamer, I steamed it for a few minutes took my nail and just peeled the corner and it pretty much just came right off.


After removing the tint I cleaned out all of the door and trunk jams along with taking off all of the plastic pieces in the rear to clear the mud/leaves.
I know there are alot of mixed reviews about wrapping the interior in carbon fiber but the interior isn't in the best shape. I am contemplating purchasing the 3m DiNOC Carbon Fiber vinyl and wrapping the plastic pieces along with the door triangles front and rear with them and possibly see if there is a DIY for sueding the dash and doors.
9/27/2012
I needed to remove the window tint because the scratches in them, I haven't decided the rear but the easiest way I found was using this. (Approx. 20 Minutes)
Steamer if needed to purchase: $25.00
Luckily my roommate had a steamer, I steamed it for a few minutes took my nail and just peeled the corner and it pretty much just came right off.
After removing the tint I cleaned out all of the door and trunk jams along with taking off all of the plastic pieces in the rear to clear the mud/leaves.
I know there are alot of mixed reviews about wrapping the interior in carbon fiber but the interior isn't in the best shape. I am contemplating purchasing the 3m DiNOC Carbon Fiber vinyl and wrapping the plastic pieces along with the door triangles front and rear with them and possibly see if there is a DIY for sueding the dash and doors.


Thread Starter
Full Member
Joined: Oct 2005
Posts: 88
Likes: 0
From: Las Vegas, NV
^ Yeah I have to check it out, the wheels are so close to the well that its hard to even get my hand under there, I am going to see if I can manage anything from the top side before raising it up.
I will have to find a new front well and install it.
Does anyone have any suggestions on what to do about the white paint on the side skirt and on the frame? I was thinking about just spraying over the white on the frame but it will still have alot of texture on it (I guess it doesn't really matter) but I am open to anything. Also going to spray the wells.
Thread Starter
Full Member
Joined: Oct 2005
Posts: 88
Likes: 0
From: Las Vegas, NV
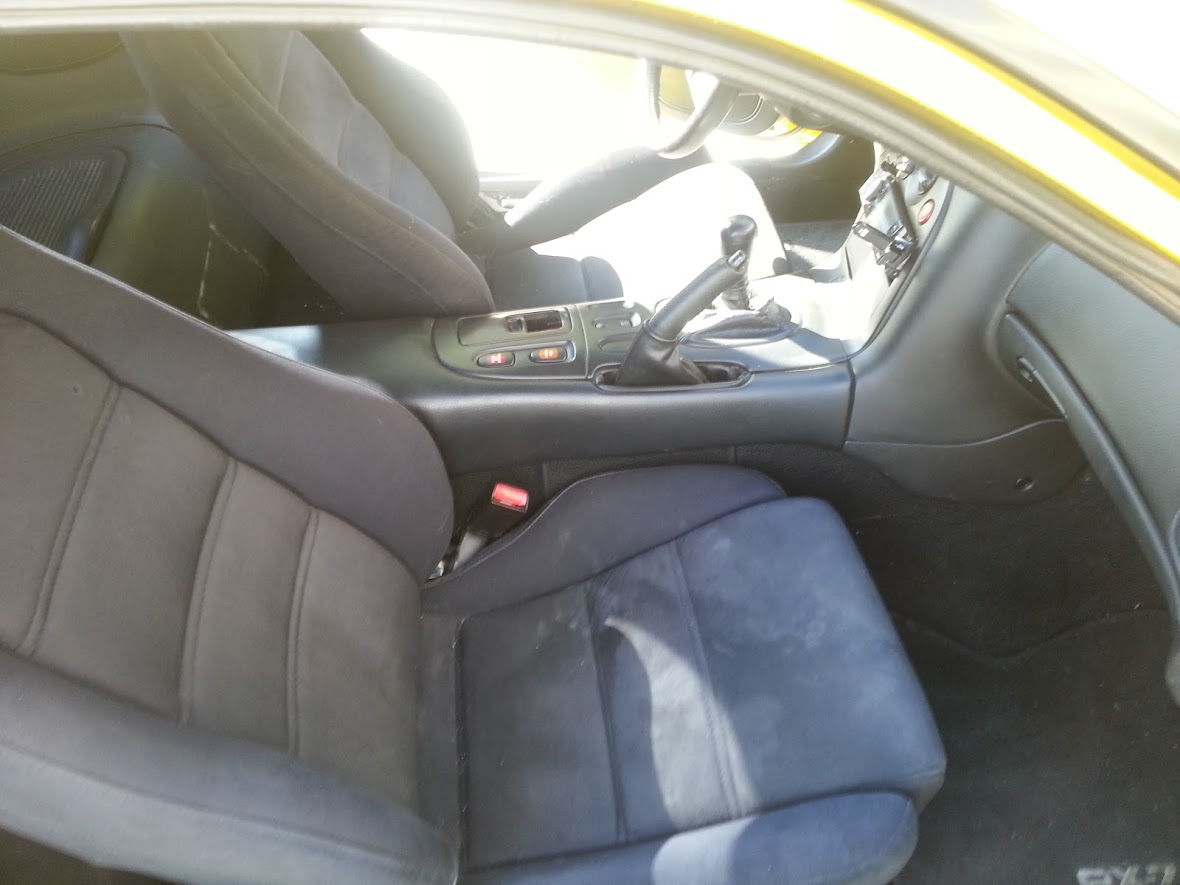
Pulled the seats out, there were leafs and dirt everywhere. The one bar that goes from the chassis along side of the seat was kind of a pain to take off and put back on. Found a dollar under the seat! Was going to use it to vacuum but the vacuum was 2 dollars ugh, so instead of driving back I used a mini vacuum that plugs into the 12v.

^The texture or the design? Texture should be the same, design is different. Also, be careful when removing the tint from the rear as the defroster lines tend to come off with the tint.
Also, Next time just unbolt the rod from the chassis when removing the seat.
Also, Next time just unbolt the rod from the chassis when removing the seat.
Highwayman
Joined: Nov 2008
Posts: 570
Likes: 0
From: Houston
Tint on side windows came off very easily but left behing a horrendous amount of glue (yay). Tint on rear is very, very stubborn to get off but no residue whatsoever is left behind. So far no issues with the defroster lines pulling off, but I am only half done back there.
Of the two alternatives, I prefer the hard-to-remove but perfectly-clean-afterwards rear tint.
Thread Starter
Full Member
Joined: Oct 2005
Posts: 88
Likes: 0
From: Las Vegas, NV
Ok Awesome @RENESISFD, is the drivers setup the same way also?
@Chiefboon, let me know how it turns out, the rear is a little faded and it actually looks blurry to see out the back so I am planning to remove mine today also. How are you doing the back?
@FD-Josh I will try to find out lol, the pillar pod you got isn't fitting the column well? or the gauge pod isn't fitting in the pillar pod well? lol, also here is a link to a thread that someone is selling one for $15. if the fitment is bad pretty cheap replacement to see if this one fits better
https://www.rx7club.com/3rd-generati...parts-1011974/
Highwayman
Joined: Nov 2008
Posts: 570
Likes: 0
From: Houston
Ok Awesome @RENESISFD, is the drivers setup the same way also?
@Chiefboon, let me know how it turns out, the rear is a little faded and it actually looks blurry to see out the back so I am planning to remove mine today also. How are you doing the back?
@FD-Josh I will try to find out lol, the pillar pod you got isn't fitting the column well? or the gauge pod isn't fitting in the pillar pod well? lol, also here is a link to a thread that someone is selling one for $15. if the fitment is bad pretty cheap replacement to see if this one fits better
https://www.rx7club.com/3rd-generati...parts-1011974/
@Chiefboon, let me know how it turns out, the rear is a little faded and it actually looks blurry to see out the back so I am planning to remove mine today also. How are you doing the back?
@FD-Josh I will try to find out lol, the pillar pod you got isn't fitting the column well? or the gauge pod isn't fitting in the pillar pod well? lol, also here is a link to a thread that someone is selling one for $15. if the fitment is bad pretty cheap replacement to see if this one fits better
https://www.rx7club.com/3rd-generati...parts-1011974/
Although I am now pretty damn nervous about lifting the defroster lines
 Oh well, no issues yet. Will wrap up tonight / this weekend.
Ok Awesome @RENESISFD, is the drivers setup the same way also?
@Chiefboon, let me know how it turns out, the rear is a little faded and it actually looks blurry to see out the back so I am planning to remove mine today also. How are you doing the back?
@FD-Josh I will try to find out lol, the pillar pod you got isn't fitting the column well? or the gauge pod isn't fitting in the pillar pod well? lol, also here is a link to a thread that someone is selling one for $15. if the fitment is bad pretty cheap replacement to see if this one fits better
https://www.rx7club.com/3rd-generati...parts-1011974/
@Chiefboon, let me know how it turns out, the rear is a little faded and it actually looks blurry to see out the back so I am planning to remove mine today also. How are you doing the back?
@FD-Josh I will try to find out lol, the pillar pod you got isn't fitting the column well? or the gauge pod isn't fitting in the pillar pod well? lol, also here is a link to a thread that someone is selling one for $15. if the fitment is bad pretty cheap replacement to see if this one fits better
https://www.rx7club.com/3rd-generati...parts-1011974/
thanks for the link
Highwayman
Joined: Nov 2008
Posts: 570
Likes: 0
From: Houston
Untinted cabin is just awesome though
