Wrinklng a UIM
 02-03-13, 05:24 PM
#1
Wrinklng a UIM
It was a sad story. During my phase of accumulating parts for various builds and to satisfy my packratting nature I had acquired a few UIM's. Too many in fact...all are gone but two now, thank goodness. In this clutter of UIM's I had a real basket case that I was literally ready to throw away. It was rattle can painted black - no primer, no prep, and all the fittings just sprayed over. What a mess. And the paint as a result was chipped to hell and flaking all over. Why was it painted? Oh, well, that would be to cover up the half assed attempt at polishing it. It appears an angle grinder was taken to to in a lame attempt to take the sandcast surface off. Wrong answer. There were flat spots, gouges, and in some places mounting tabs had been half ground off.... by mistake. It was a mess. Who would even consider buying this piece of crap? What to do?
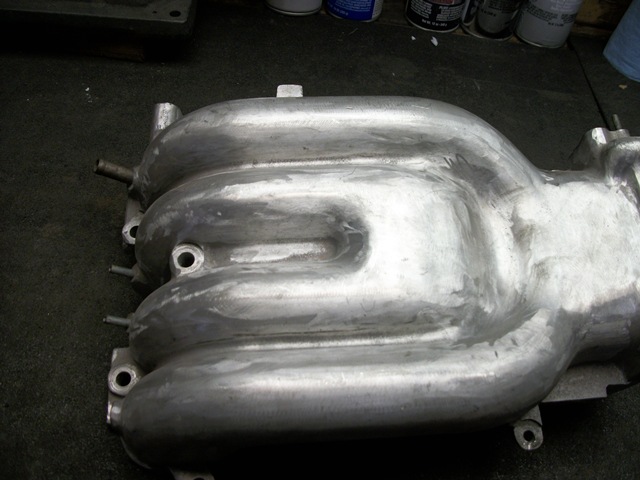
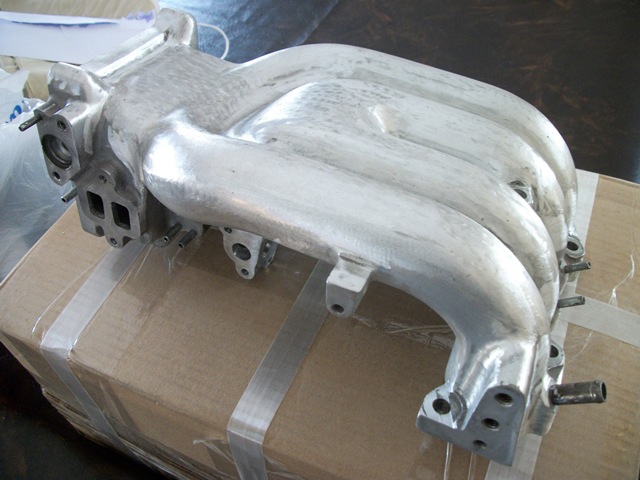
Well....I had seen an image of a red UIM. I thought it looked really pretty sharp. This one was too far gone to try and polish...maybe I could paint too? Hmmm...inspired byt that forum membermaybe a wrinkle finish - IN RED! Ferrari has it on their valve covers...so does Honda...even Subaru's. So why not an FD UIM? So I got to work cleaning up the UIM...cleaning up the grinding mess left behind by Mr. Hamfisted Powertool (emphsasis on "tool"). And while I was at it I removed all the excess casting flash, some of the unsightly support ribs, and even took out the webbing between the center runners.

With it all prepped I shot it with VHT wrinkle finish red (I had to order the damn stuff on-line - NO ONE sells it off-the-shelf!) and then to let it dry....for days and days and days. But I did cure it for 20
minutes at 200deg in the oven... as directed. (I did this when no-one was home so I wouldn't have to listen to all the comments on the smell - which really wasn't that bad)
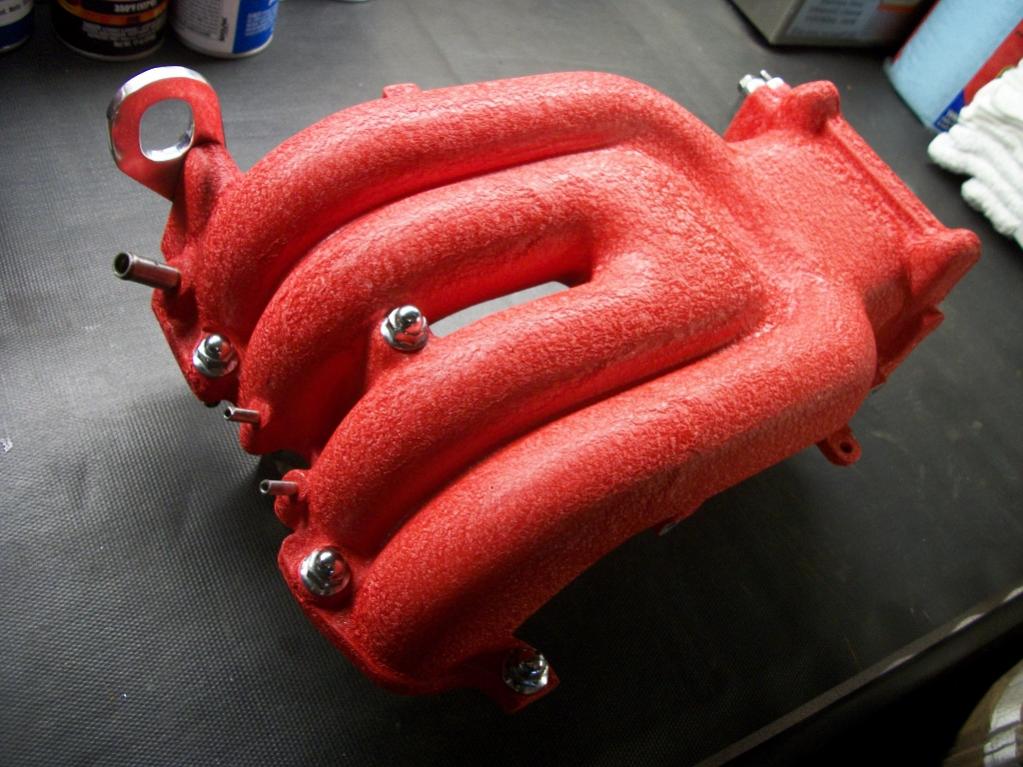
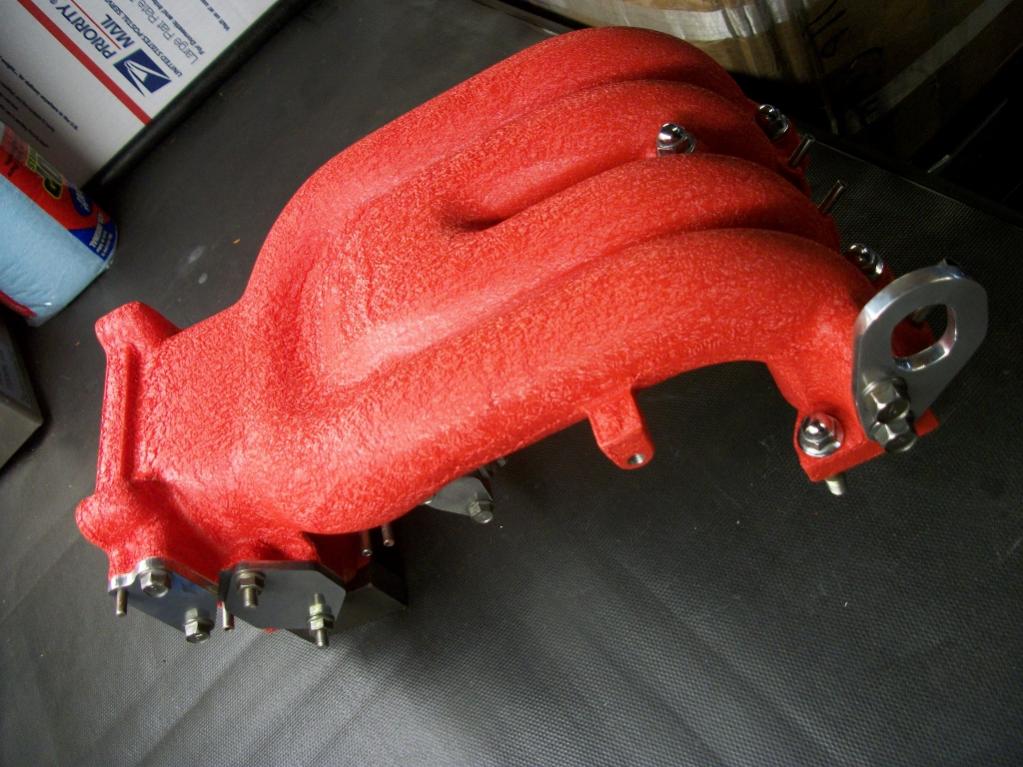
The result is pretty damn good. Not perfect (I learned a few lessons on how to apply the paint...which is tricky) but a far cry from what I started with. And I really want to see it on an engine. I think looks REALLY good espcially with the stock chrome acorn nuts. You be the judge. Oh, and it will be FS if anyone is interested in making me an offer.
Just felt like sharing this trash to treasure story.
Regards,
Crispy
Well....I had seen an image of a red UIM. I thought it looked really pretty sharp. This one was too far gone to try and polish...maybe I could paint too? Hmmm...inspired byt that forum membermaybe a wrinkle finish - IN RED! Ferrari has it on their valve covers...so does Honda...even Subaru's. So why not an FD UIM? So I got to work cleaning up the UIM...cleaning up the grinding mess left behind by Mr. Hamfisted Powertool (emphsasis on "tool"). And while I was at it I removed all the excess casting flash, some of the unsightly support ribs, and even took out the webbing between the center runners.
With it all prepped I shot it with VHT wrinkle finish red (I had to order the damn stuff on-line - NO ONE sells it off-the-shelf!) and then to let it dry....for days and days and days. But I did cure it for 20
minutes at 200deg in the oven... as directed. (I did this when no-one was home so I wouldn't have to listen to all the comments on the smell - which really wasn't that bad)
The result is pretty damn good. Not perfect (I learned a few lessons on how to apply the paint...which is tricky) but a far cry from what I started with. And I really want to see it on an engine. I think looks REALLY good espcially with the stock chrome acorn nuts. You be the judge. Oh, and it will be FS if anyone is interested in making me an offer.
Just felt like sharing this trash to treasure story.
Regards,
Crispy


Trending Topics
 02-04-13, 11:55 AM
#13
I'll see what I can do. 
Indeed!
My thoughts exactly. Mounted in an all polished engine bay or with appropriate all black accents I think it woudl look really good.
And thanks for the comments...it was somewhat of an experiment and I wasn't sure how it would turn out. Nice to see some folks find it appealing.
Regards,
Crispy
Indeed!
And thanks for the comments...it was somewhat of an experiment and I wasn't sure how it would turn out. Nice to see some folks find it appealing.
Regards,
Crispy
 02-04-13, 07:24 PM
#16
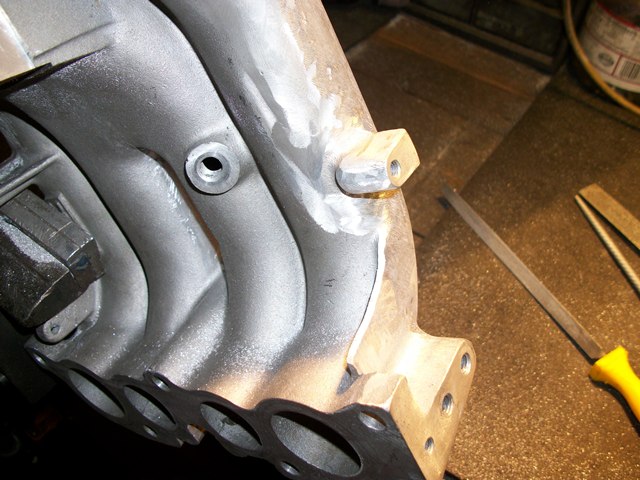
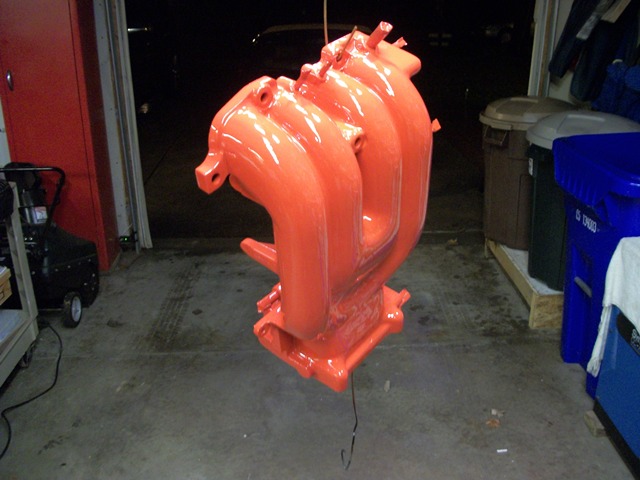
I used half a can. And 3 decent coats during the paint process according to the instructions. Pic attached during the painting process. As you can see no wrinkles at that time.
From what I can gather it holds up very well...better than regular paint. No indication it will chip or peel very easily at all. I was worried about the fact that no primer was necessary. The durability is likely a function of the curing process. Like I said this paint needs a curing step that involves baking it in an oven for 20 minutes. Of course if you whack it with a wrnch it's gonna chip.
Regards,
Crispy
Regards,
Crispy
02-04-13, 08:53 PM
#24
REPU Garage
iTrader: (17)

Join Date: Jun 2007
Location: Northern Colorado
Posts: 623
Likes: 0
Received 0 Likes
on
0 Posts
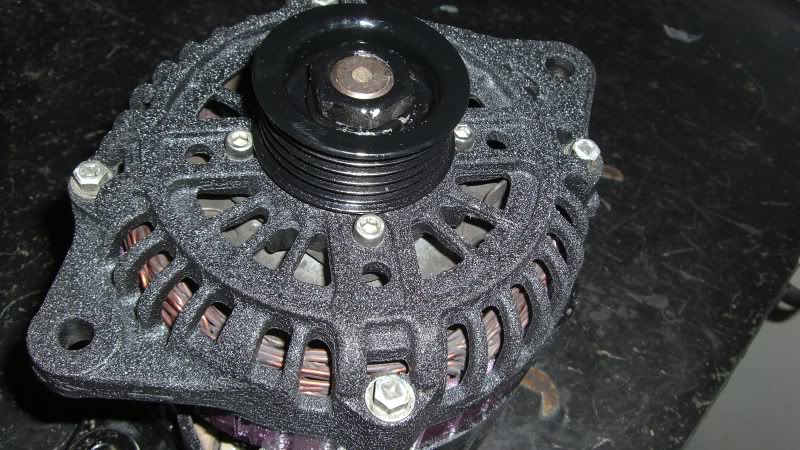
I did the same wrinkle type finish to my UIM, LIM, TB, elbow, charge pipe, and alternator, except in black. I really like it, gives a much more "professional" appearance to the engine bay for sure, plus, it seems very durable and has held up. I used a satin clear coat as well:
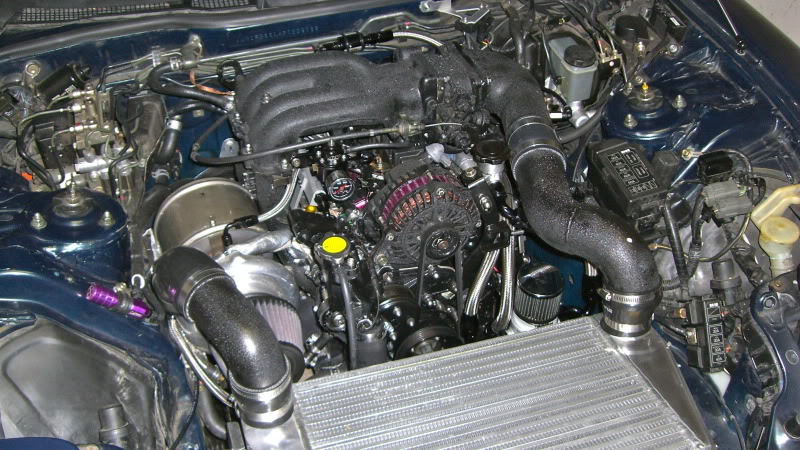
Close up:
Close up: