
Remote Profec Boost switch custom wired into stock switch with LED

Thread Starter
Eats, Sleeps, Dreams Rotary
Joined: Apr 2001
Posts: 3,736
Likes: 10
From: Dallas, Texas
Remote Profec Boost switch custom wired into stock switch with LED
I've been working on this for awhile and finally got it done.
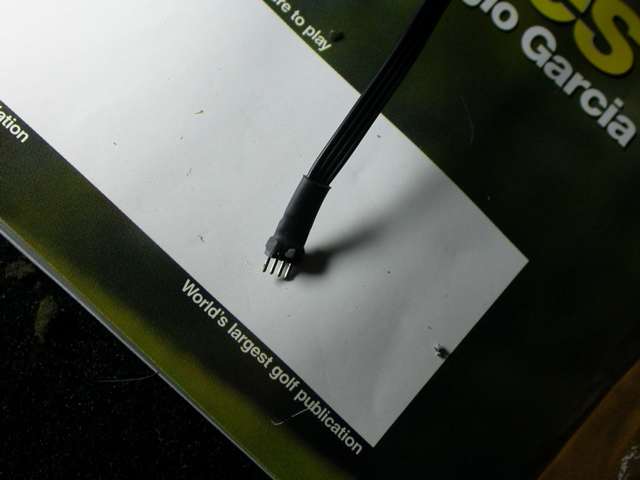
As most of you know you can buy a remote boost switch from Greddy that let's you switch from low to high boost on the fly. However, people have found that you can easily make one by using a stereo plug and a momentary switch.
Here I have soldered the ground and the (+) terminal, it's to the portion at the end of the tip. The other one is used for power (which we don't need)
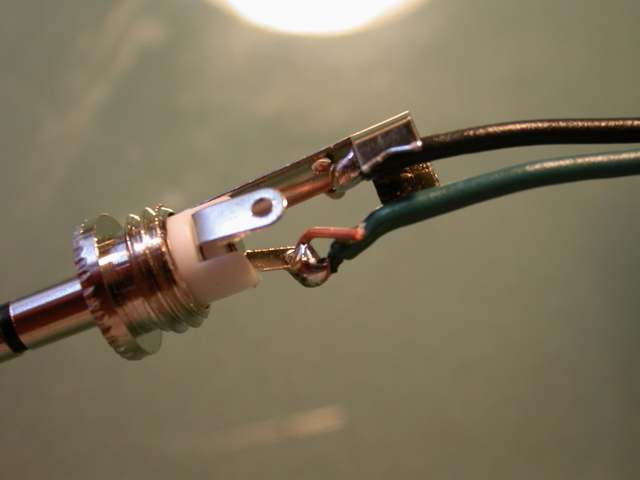
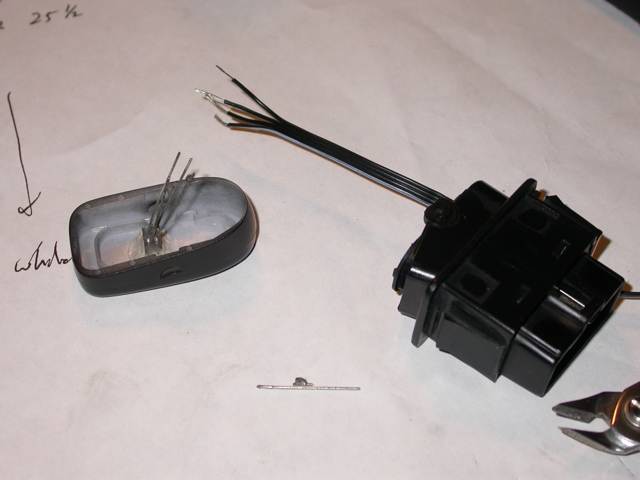
The stock FD defroster switch makes a perfect momentary switch. The two prongs in the center are for the switch, the prongs on the right are for the bulb that illuminates the whole switch at night.

Here I took the two ends that I soldered to the stereo plug and then to the female harness plug for the defroster switch (thanks Fritz for the parts)
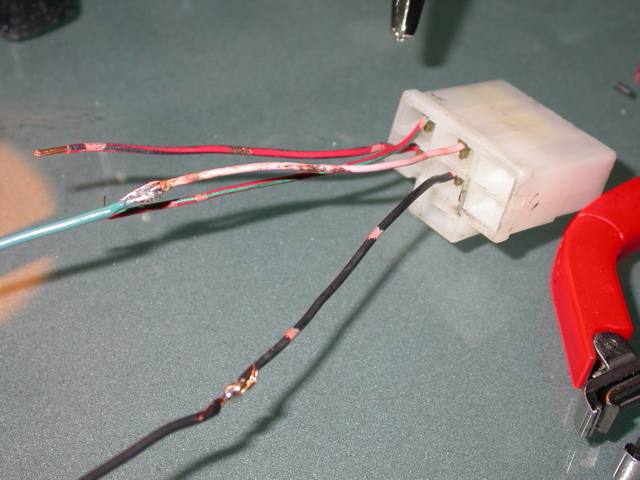
That's it...the switch is basically done and you can tap it on the fly to go from low to high boost! However, I have my profec hidden in the glove box and I can't "see" when it is on low vs. high boost.
Here comes the nerve racking part. I basically cracked open the profec B and spliced into the LED lights. To open the Profec first take a small screw driver and pop the front off. Then the top from the bottom. You will see that the front is connected by a ribbon connector. Unplug that. Now that's it off you need to figure out which is the cathode and anode. You would think that there is a common ground and you only need to splice three wires. However, I couldn't get that to work.
Here I soldered into the LED (yea my soldering skills sux a**), but thanks DamonB for the tips and electrical help.
For reference:
Low Boost LED
Red wire (-)
Black (+)
High Boost LED
Green (-)
White (+)
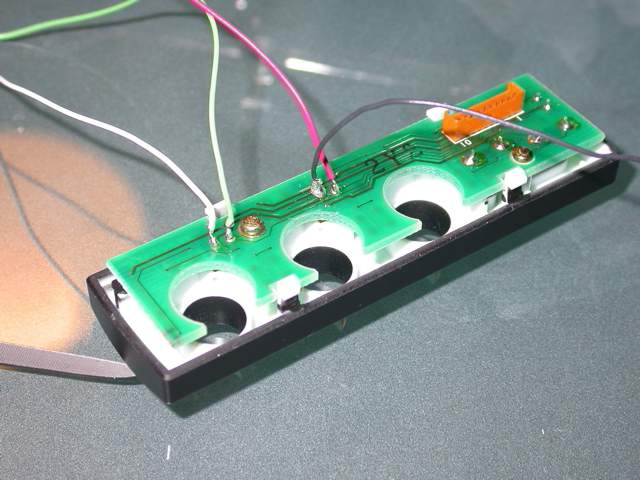
There is a nice opening on the side of the profec to run the wires out of. I did that and purchased a nice 4 wire ribbon connector from a local hobby shop.
As most of you know you can buy a remote boost switch from Greddy that let's you switch from low to high boost on the fly. However, people have found that you can easily make one by using a stereo plug and a momentary switch.
Here I have soldered the ground and the (+) terminal, it's to the portion at the end of the tip. The other one is used for power (which we don't need)
The stock FD defroster switch makes a perfect momentary switch. The two prongs in the center are for the switch, the prongs on the right are for the bulb that illuminates the whole switch at night.
Here I took the two ends that I soldered to the stereo plug and then to the female harness plug for the defroster switch (thanks Fritz for the parts)
That's it...the switch is basically done and you can tap it on the fly to go from low to high boost! However, I have my profec hidden in the glove box and I can't "see" when it is on low vs. high boost.
Here comes the nerve racking part. I basically cracked open the profec B and spliced into the LED lights. To open the Profec first take a small screw driver and pop the front off. Then the top from the bottom. You will see that the front is connected by a ribbon connector. Unplug that. Now that's it off you need to figure out which is the cathode and anode. You would think that there is a common ground and you only need to splice three wires. However, I couldn't get that to work.
Here I soldered into the LED (yea my soldering skills sux a**), but thanks DamonB for the tips and electrical help.
For reference:
Low Boost LED
Red wire (-)
Black (+)
High Boost LED
Green (-)
White (+)
There is a nice opening on the side of the profec to run the wires out of. I did that and purchased a nice 4 wire ribbon connector from a local hobby shop.
Last edited by 7racer; May 31, 2005 at 12:23 AM.
Thread Starter
Eats, Sleeps, Dreams Rotary
Joined: Apr 2001
Posts: 3,736
Likes: 10
From: Dallas, Texas
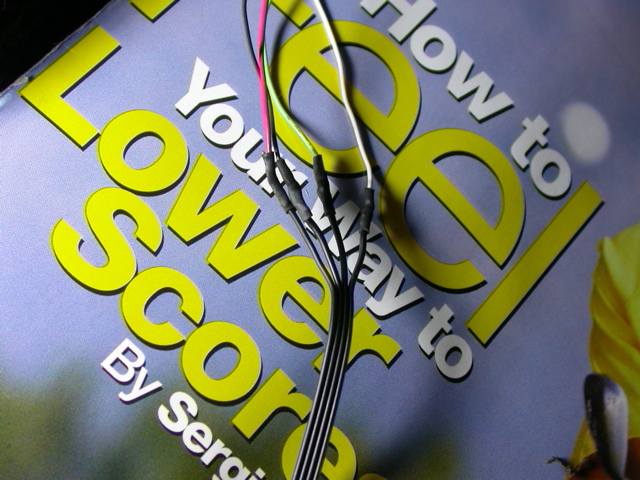
The other end of the 4 wire ribbon I ran to the new defroster switch.
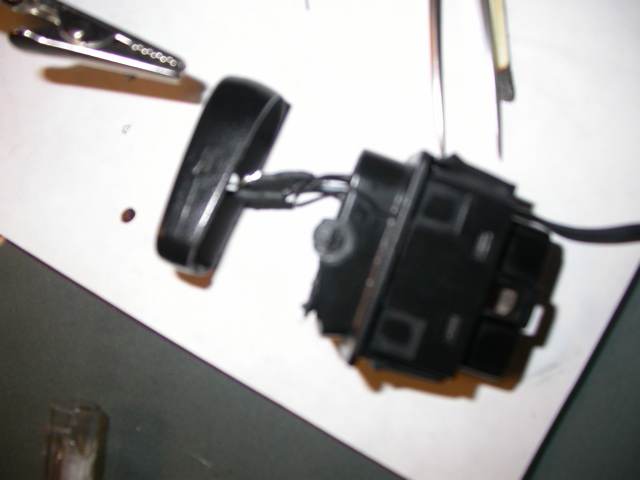
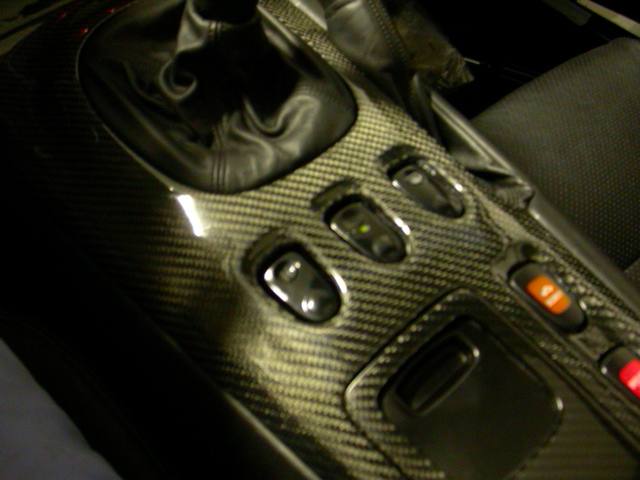
Now here is the cool part. I bought two LED's one red and one green (actually I bought two three way ones when I found out it wouldn't work I use them individually). I cut a hole and glued them into the switch head. Before this I sanded the head of the switch, molded the plastic with plastic puddy, wet sanded and painted it to match the stock switches. If you buy LED's don't get a high power one. The volt readings on the profec were 1.7v. These LED from mouser.com were rated at 2v. Crap I can't seem to find the part number. But there were square with a flat top. Here you can see the LED glued in and the other end of the ribbon connector running through the switch.
Soldered in.
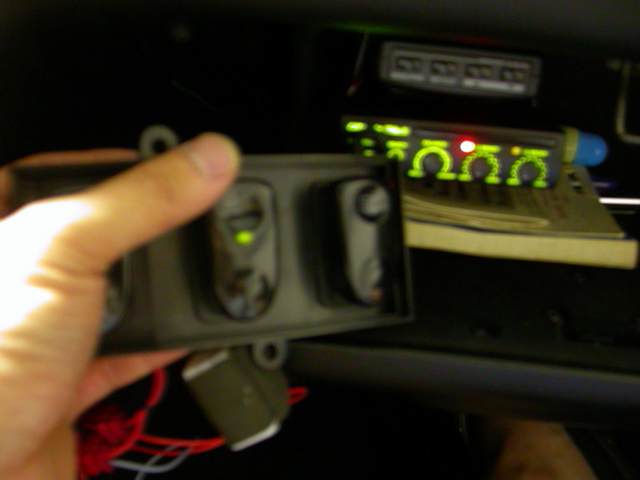
Plugged in and tested: Low Boost=Green (I was alittle disappointed at how dim the green is)
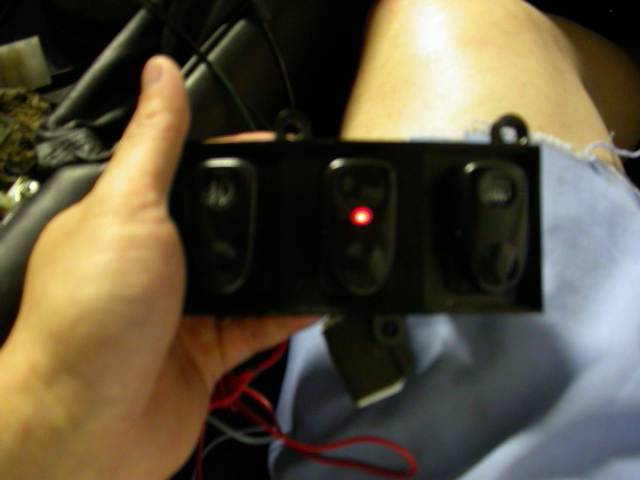
Tested High Boost=Red (that's easy to see )
)
Now here is the cool part. I bought two LED's one red and one green (actually I bought two three way ones when I found out it wouldn't work I use them individually). I cut a hole and glued them into the switch head. Before this I sanded the head of the switch, molded the plastic with plastic puddy, wet sanded and painted it to match the stock switches. If you buy LED's don't get a high power one. The volt readings on the profec were 1.7v. These LED from mouser.com were rated at 2v. Crap I can't seem to find the part number. But there were square with a flat top. Here you can see the LED glued in and the other end of the ribbon connector running through the switch.
Soldered in.
Plugged in and tested: Low Boost=Green (I was alittle disappointed at how dim the green is)
Tested High Boost=Red (that's easy to see
)Last edited by 7racer; May 31, 2005 at 12:35 AM.
Thread Starter
Eats, Sleeps, Dreams Rotary
Joined: Apr 2001
Posts: 3,736
Likes: 10
From: Dallas, Texas
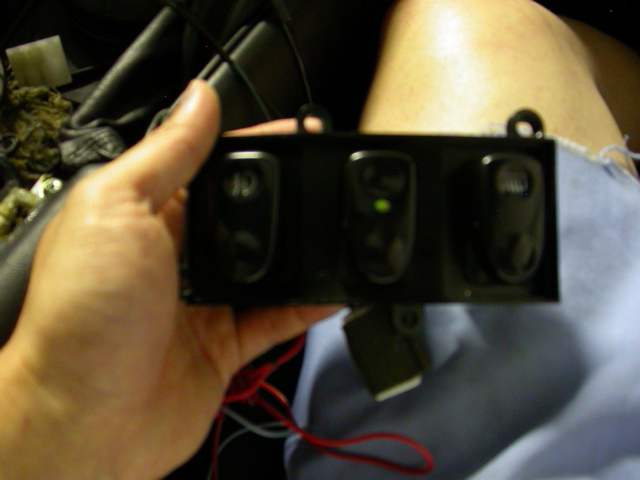
Here you can see it next to the profec B and the LED matching the boost setting going from Low to High by tapping the switch.
High:

Low:
Plug the mess of wires that you created:
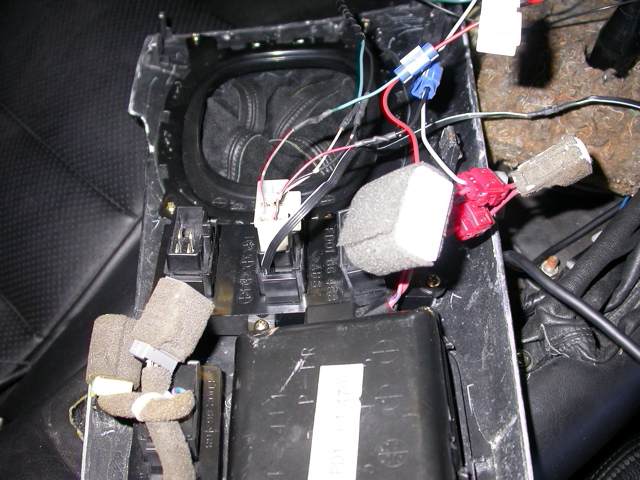
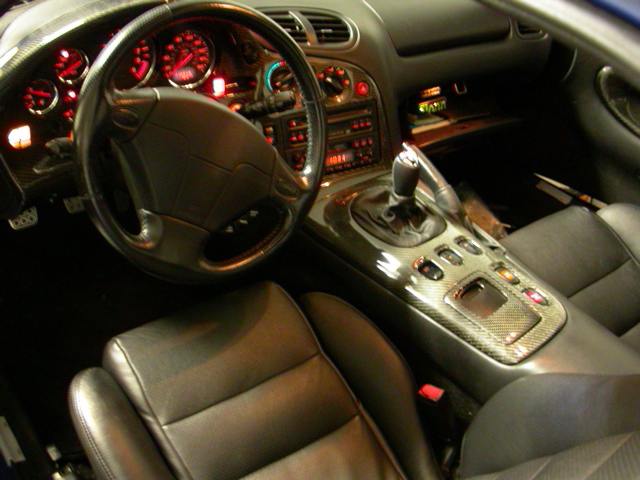
With everything back in and the Greddy hidden inthe glove box.
High Boost:
Low Boost:
High:
Low:
Plug the mess of wires that you created:
With everything back in and the Greddy hidden inthe glove box.
High Boost:
Low Boost:
Last edited by 7racer; May 31, 2005 at 12:41 AM.
Thread Starter
Eats, Sleeps, Dreams Rotary
Joined: Apr 2001
Posts: 3,736
Likes: 10
From: Dallas, Texas
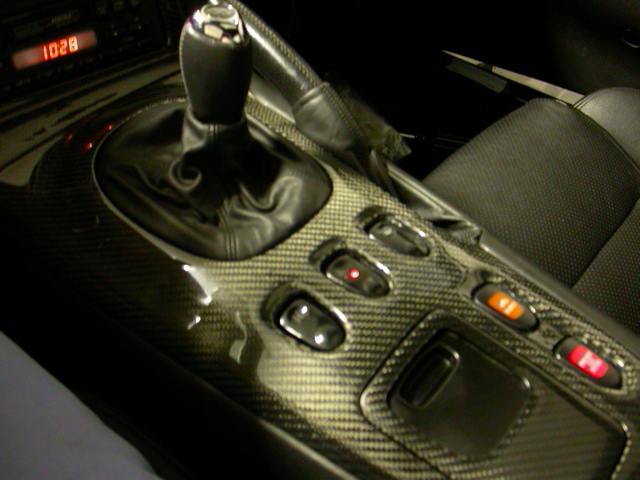
And finally, everything back together. I still need to put a resister on the RX-8 shift **** to knock the light down. Also, I think I will unplug the light to the new boost switch that turns on with the car head lights. the light dims the green switch too much at night.
yes...it's my contribution to rice
yes...it's my contribution to rice

Trending Topics
Thread Starter
Eats, Sleeps, Dreams Rotary
Joined: Apr 2001
Posts: 3,736
Likes: 10
From: Dallas, Texas
HAHAHA! Thanks. Nice to contribute to the forum and do something that no one else posted about yet.
The only thing is that my soldering skills sux and I'm half expected one of the wires to come apart down the road.
but yea, I like the way it turned out!
Plus, I can turn the profec off, lock the glove box and no one can screw with the boost settings!

The only thing is that my soldering skills sux and I'm half expected one of the wires to come apart down the road.
but yea, I like the way it turned out!
Plus, I can turn the profec off, lock the glove box and no one can screw with the boost settings!
Thread Starter
Eats, Sleeps, Dreams Rotary
Joined: Apr 2001
Posts: 3,736
Likes: 10
From: Dallas, Texas
Originally Posted by Force13B
Thats great! How long start to finish did that take?
A couple of weeks. The car is a project. I have no electrical skills and basic knowledge on wiring and NO soldering skills.
I had to keep asking people (DamonB in particular) on how to splice, solder, measure voltage etc. I only like to do things once, so I planned everything out as well as possible. The thing that took the longest was sanding down the switch and molding the LED into it. The wires are 30g and can be a PITA to deal with. I think that you could easily get all the wiring done in 1-2 hours easily. The sanding and painting and glueing of the LED to the switch, a day or two?
I unfortunately rushed it a bit. I thought the clear was dry on the switch. After I mounted it I noticed a little "dent". I should be able to wet sand it again and clean it up.
Thanks!
Last edited by 7racer; May 31, 2005 at 10:25 AM.


Joined: Aug 2003
Posts: 545
Likes: 2
From: Niagara Falls, Ontario, Canada
Beauty, I love seeing genius stuff like this. It's great that you took the time to do all this and it looks professional. I know what you mean about bright lights though, I have the autometer c2 white face/blue lit gauges, and man are they bright. I attached a resistor and mounted it in the ashtray compartment. If I don't turn them down, I get this crazy blue light shining in my face all night.

Senior Member
Joined: Feb 2005
Posts: 321
Likes: 0
From: Austin, Texas
hey 7racer, where did you get your carbon fiber inlay,
can you please pm me with where you got yours from,
i have been looking for a good deal on one forever because there are some scrathces on my stock console and door and instrument panels that i think the overlay would cover up.
thanks
Thomas
can you please pm me with where you got yours from,
i have been looking for a good deal on one forever because there are some scrathces on my stock console and door and instrument panels that i think the overlay would cover up.
thanks
Thomas
Full Member
Joined: Sep 2004
Posts: 143
Likes: 0
From: Indianapolis, Indiana
Very nice...I was trying to think of a way to hide the Profec B in the glove compartment but still have a high-low boost button. Your idea is awesome. Hope you don't mind if I borrow the idea in the future. BTW: What did you mean by put a resistor on your RX-8 shift ****?
Last edited by TwoTwinTurbos; May 31, 2005 at 04:23 PM.
Thread Starter
Eats, Sleeps, Dreams Rotary
Joined: Apr 2001
Posts: 3,736
Likes: 10
From: Dallas, Texas
Originally Posted by Lil Red 7
hey 7racer, where did you get your carbon fiber inlay,
can you please pm me with where you got yours from,
i have been looking for a good deal on one forever because there are some scrathces on my stock console and door and instrument panels that i think the overlay would cover up.
thanks
Thomas
can you please pm me with where you got yours from,
i have been looking for a good deal on one forever because there are some scrathces on my stock console and door and instrument panels that i think the overlay would cover up.
thanks
Thomas
Thomas,
Pm'd you...but that work is done by Mark Koch who I think got burned out and busy with his normal job, and is no longer doing it. He did state that he might start back up.
http://www.carbonfiberparts.net/
here is my thread on the car and info:
https://www.rx7club.com/forum/showthread.php?t=274682
Last edited by 7racer; May 31, 2005 at 04:41 PM.
Thread Starter
Eats, Sleeps, Dreams Rotary
Joined: Apr 2001
Posts: 3,736
Likes: 10
From: Dallas, Texas
Originally Posted by RedBaronII
Very Nice indeed.
I hope you have better skills with the blade........... 


I hope you have better skills with the blade...........
I can hold the blade steady as well as the solder gun...however, getting it too hot and placing the solder on it are another issue all together

Thanks Robert!
Thread Starter
Eats, Sleeps, Dreams Rotary
Joined: Apr 2001
Posts: 3,736
Likes: 10
From: Dallas, Texas
Originally Posted by TwoTwinTurbos
Very nice...I was trying to think of a way to hide the Profec B in the glove compartment but still have a high-low boost button. Your idea is awesome. Hope you don't mind if I borrow the idea in the future. BTW: What did you mean by put a resistor on your RX-8 shift ****?
Please do. Things that I think I could have done better are the soldering of the joints especially at the LED side on the switch and Profec side.
I kinda made an optical illusion with the bulb. They are really two flat square bulbs glued together. Even though they are square, I placed a oval mask on it for the paint to give it the appearance of one light. I search mouser forever, but couldn't find a single "bulb" with four prongs and two colors.
Post how yours turns out!
The lighted RX-8 shift **** is much brighter than the rest of the lights in the interior. I was going to add a resisitor to get it to be less bright.
Thread Starter
Eats, Sleeps, Dreams Rotary
Joined: Apr 2001
Posts: 3,736
Likes: 10
From: Dallas, Texas
Originally Posted by dubulup
...Keeps the cockpit clean...
Yup, I'm a minimalist. I don't like all the gauges but still want access to the information they provide.
Hence the HUD boost guage, hidden PFC, hidden profec B, and inconspicuous WI switch.
Thanks
Full Member
Joined: Sep 2004
Posts: 143
Likes: 0
From: Indianapolis, Indiana
Originally Posted by 7racer
The lighted RX-8 shift **** is much brighter than the rest of the lights in the interior. I was going to add a resisitor to get it to be less bright.