When you click on links to various merchants on this site and make a purchase, this can result in this site earning a commission. Affiliate programs and affiliations include, but are not limited to, the eBay Partner Network.
Refinishing 93 FD plastics ... finally found a match to the OEM finish
I've been looking into refinishing the 93 plastics over the years and have used products from several manufacturers. Most have been relatively close but not exact match to both the look and feel of the finish on the new, OEM plastics from Mazda.
I think I've finally found the right stuff. It has the same shade as OEM and also retains that "soft touch" feel. Not sure yet on durability (likely will still be prone to damage from keys and deep fingernail scratches), however I believe it's likely the same as the original 93 finish.
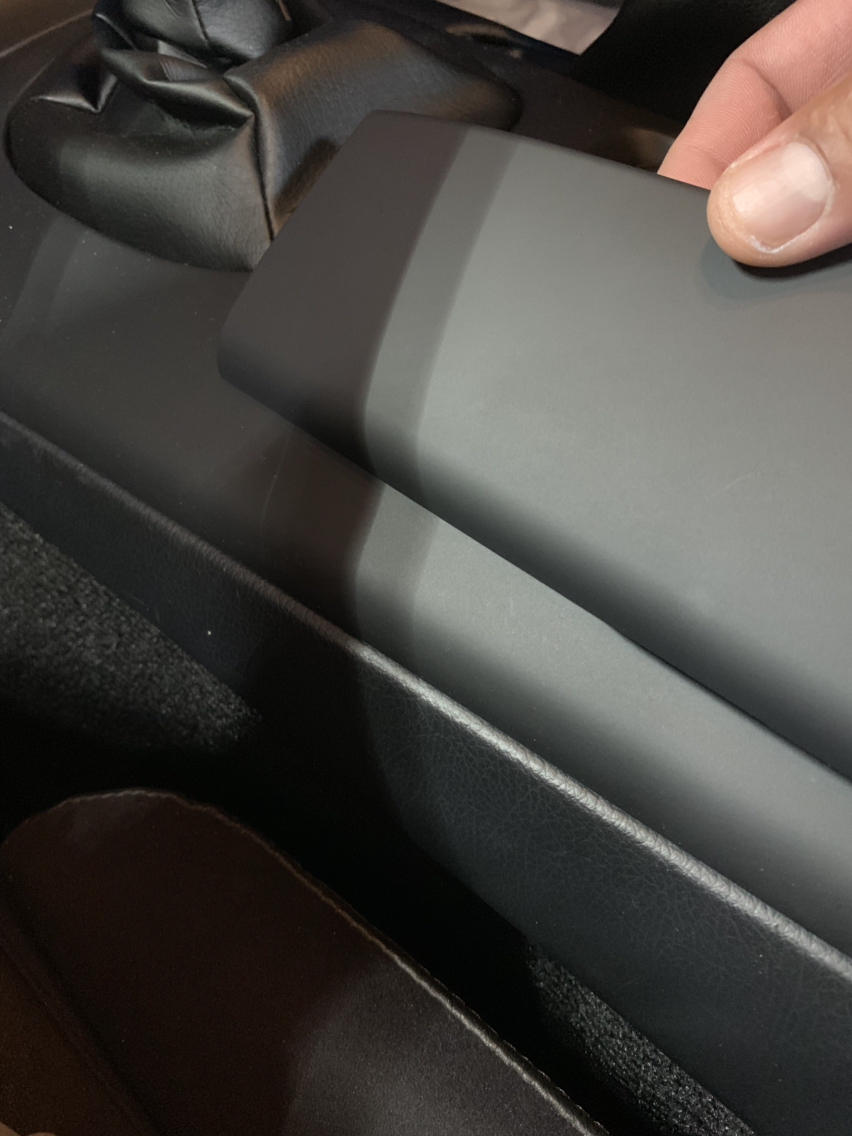
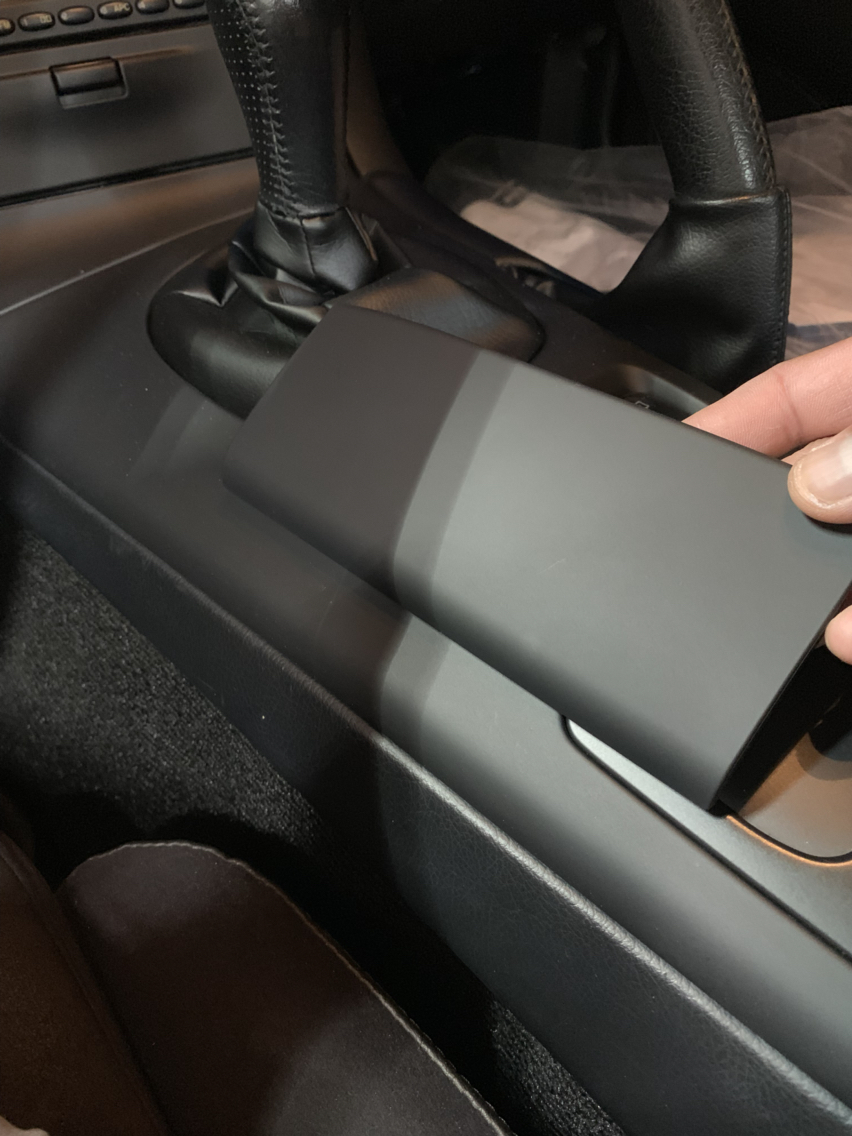
Test panel used was a 93 map lid. The worn finish was removed and prepped for the new coating. The shifter console seen in the pic was purchased new from Mazda a few months ago.
I think the original 93 finish was more of a glossy finish. Mazda updated the plastics at some point to the more matte finish.
Dale
Thanks, Dale.
Not sure if it was glossy originally or if the finish became glossy via use of armor-all type products? In any case, I think the matte finish looks sharp. I had purchased several new pieces (cluster and gauge hood, HVAC, shifter console), however, the the door plastics were still in good shape, but no longer matched the new ones. This coating will help with that match.
I am going through the same process. I also pruchased a new OEM shifter panel and set out to replicate the finish on the rest of my plastics. I ended up custom mixing some black 2k urethane paint with a small amount of white until I got the correct shade. Then I went over that with soft touch 2K urethane clear from Big Brain Graphics, which they say is "diamond hard" and super scratch resistant. Dead Flat Flattest Flat Big Brain Soft Touch Graphics Highly UV Protected Urethane
It looked damn near perfect - until it didn't cure. Turns out the hardener on the soft touch clear was bad. So now I am stripping them all down again for another try
I also came across a product from Sherwin Williams called SoftSwade which is probably very similar, but I think it only comes in gallons and is probably $$$. But, it is actually pigmented so it would be a single step instead of the color+clear that I am trying to do now.
Thanks for posting! In that last picture ... the HVAC is your refinish process and the shifter panel is the new OEM finish?
Thanks for posting! In that last picture ... the HVAC is your refinish process and the shifter panel is the new OEM finish?
Yes that is correct. I think yours is probably a slightly better match, and mine didn't cure properly so I am in the process of stripping all the parts again...many many hours of sanding.
looks really good, my biggest gripe is that the soft touch tends to look like **** after a couple weeks even if you are careful. its all easy to scratch. Those of us who produce parts have our tricks, but there are like 5 different finish and texture combinations, and everybody wants their brand new part to match their 25 year old interior. even if we provide a perfect shade and texture, time does weird things to these interior plastics.
overall I suggest people just refinish their plastics with something more durable and that will hide damage and scuffs easier if they are doing interior upgrades.
ill make a public post underlying how I achieve each finish as I am tired of this silly game of hide the technique/product. meant a long delay and a lot of money and testing to figure out on my end which is fine if you are trying to make money i guess. idk good results nevertheless, let us know when you are ready to share the product.
You got that right. I'm still playing around with the finish and seeing if longer cure time will help with durability. I'm holding off disclosure oh what I've used until I can confirm if it's actually a viable option. No one is playing any games here, and many have already found some alternatives and posted the products used.
What I can share is the method to remove the oem rubber coating on the 93 stuff. Best method I've found to work, as confirmed by others who posted about it is Easy Off Oven cleaner. It just works and doesn't damage the underlying plastic.
looks really good, my biggest gripe is that the soft touch tends to look like **** after a couple weeks even if you are careful. its all easy to scratch.
Have you tried a catalyzed (2-component) soft touch coating?
Pro Tip: If you're going to use Easy Off to remove old coating, make sure you get the old school stuff with the yellow cap and noxious fumes, the Blue cap stuff that smells like lemons and won't kill you also won't remove anything. PS, old school stuff will also remove anodizing, and skin. Ask me how I know.
-Have you confirmed if the paint is actually a viable option? (AKA finally tell us what you're using)
-Are you mixing your own paint or is this off the shelf in a can?
First sample holds up "Just OK", but not enough to my liking. If I am going to take apart the interior to re-do the plastics, I would want it to be more durable. I am waiting for my body shop contact to get back to me. I've gone through many of the single stage off the shelf options and reality is, they will look good only for a while, until they get scratched up.
First sample holds up "Just OK", but not enough to my liking. If I am going to take apart the interior to re-do the plastics, I would want it to be more durable. I am waiting for my body shop contact to get back to me. I've gone through many of the single stage off the shelf options and reality is, they will look good only for a while, until they get scratched up.
If you don't mind me asking, what was the brand and color of the single stage you used off the shelf in the above photo? Was it the matte dupli color bumper paint that they sell in every autoparts store?
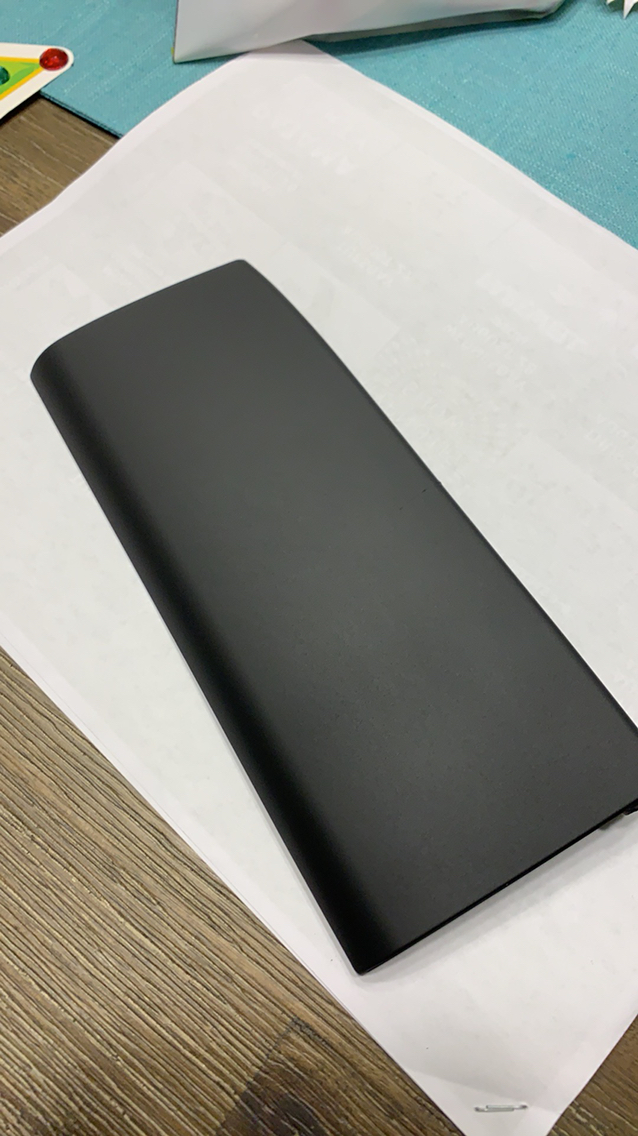
So my second attempt with the Big Brain Brain Dead Soft Touch went much better. This stuff is really tough, so far it seems like it is going to hold up really well. Plus the soft feel is really nice and the dead flat finish doesn't show fingerprints compared to satin or gloss. I did screw up a little on my color though - I mixed white and black again (I didn't mix enough the first time around so I had to do it again, and I didn't keep track of the ratio so I was starting over) and this time I went a little heavy on the white so in the direct sun it looks more gray than it should. plus I think the two layers of clear (the dead flat, then the soft touch) are helping to lighten it more than expected because they are kinda milky and not super clear. I would say about a 20:1 ratio of black to white would be a good starting point. It only took about 6 ounces of mixed paint to do all the plastics. Progress pic below - center console is new OEM and the rest is painted. Some parts are a little dusty because I never got a chance to wipe it all down after installation.
Wow! That looks fantastic! Let us know how it holds up! Thank you for sharing! On the other hand, I'm tired of the silly games like Drakelore was saying about hide the technique/product. What's the point of making a thread claiming you found the perfect OEM match but doesn't share? Anyway's hats off to you Azieger.
Can you list more detail? Did you use primer? and if so, what color/brand? And is it just regular black and white paint? or was there some kind of mix to make it flat like that? I'm assuming the "Dead Flat Flattest Flat Big Brain Soft Touch Graphics Highly UV Protected Urethane" made it flat like that? Lastly, how many coats did you do per primer, base, and clear?
What silly game? It's a mixture concocted by my body shop. It's not holding up to my expectations and we are reformulating. I don't know the exact mixtures but once we find the right combination, then I can get the body shop to nail down the formula. Why send people on a wild goose chase to spend money on something that hasn't passed muster? You want another option? Azieger's solution seems very close and is a great option. Thanks.
My method is expensive and assumes you have access to a good quality spray gun and air system. That said, this is what I used
Sanded all plastics down to bare plastic, 220 then 400 grit. You might be able to skip the 400 since there will be several layers of paint and the soft touch goes on pretty thick, but I didn�t chance it.
Sprayed Duplicolor adhesion promoter
Sprayed 2K urethane color coat, one medium wet coat
Wait 30 minutes for paint to flash
Sprayed Big Brain Dead Flat clear, one medium wet coat
Wait ~20 minutes for clear to flash
Sprayed Big Brain Brain Dead soft touch, one medium wet coat, followed a couple minutes later by a dust coat to make sure to kill the gloss. Not sure if that�s the best way, since they warn that it doesn�t stick to itself. A single, lighter coat might be a better technique.
For paint, I used Summit Racing flat black and flat white. If you buy gray and black instead, you would be able to make a lot more usable paint out of it. I don�t know what the ratio would be but I would imagine it would be closer to 2:1 black to gray or something. I also reduced the paint as much as allowed so it would lay down smoother.
All in all the above will cost you close to $250 after shipping. Not for the faint of heart, but I used the paint for other items as well. You would have enough paint to do the entire interior 4 times or more.