
My Battery Relocation

Just thought I'd throw up some pictures of my battery relocation, how I did it, and parts I used. There is some good information regarding this but everyone seemed to do it a little different and nobody really had process pictures. I wanted to utilize my passenger bin without any major cutting/eye sores and that was the train of thought throughout this project.
The battery I chose to use was a Braille B2317R. I originally was considering the Odyssey pc925 since it can fit in the bin without cutting but the cheapest spot I could find it for was $150 shipped. I would also need to source SAE terminals for is which run like $15. Instead, I opted to get the Braille from JEGS with free shipping and a little gift they had on promotion. It came out to be the same exact price I would have paid for the Odyssey yet the specs on the Braille are better.
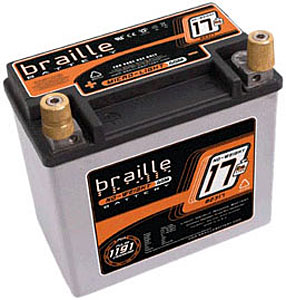
Braille Battery B2317R Braille Advanced AGM Lightweight Racing Batteries - Free Shipping on All Orders @ JEGS
specs:
17 lbs
6.8'' L x 4.0'' W x 6.1'' H
Cold Cranking Amps: 475
Cranking Amps: 770
1191 (PCA) Pulse Cranking Amps
Next step was figuring out how to mount it securely. Lots of ideas on the forum here I came across from pieces of 2x4, engine belts, straps, $100 name brand holders, to nothing at all!
Since cheap is the name of my game I took a trip to autozone and picked up a set of j-hooks and a universal holder for a grand total of $8....tax was extra. I actually can't find it on autozone's website but it is identical to this set from JEGS. Only difference is you buy the bracket and the hooks separately and it actually comes out to be cheaper.
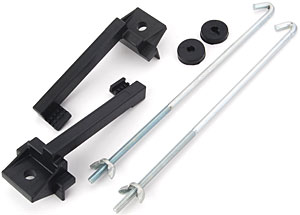
JEGS Performance Products 10264 JEGS Universal Battery Hold Down Kit - Free Shipping on All Orders @ JEGS
The battery I chose to use was a Braille B2317R. I originally was considering the Odyssey pc925 since it can fit in the bin without cutting but the cheapest spot I could find it for was $150 shipped. I would also need to source SAE terminals for is which run like $15. Instead, I opted to get the Braille from JEGS with free shipping and a little gift they had on promotion. It came out to be the same exact price I would have paid for the Odyssey yet the specs on the Braille are better.
Braille Battery B2317R Braille Advanced AGM Lightweight Racing Batteries - Free Shipping on All Orders @ JEGS
specs:
17 lbs
6.8'' L x 4.0'' W x 6.1'' H
Cold Cranking Amps: 475
Cranking Amps: 770
1191 (PCA) Pulse Cranking Amps
Next step was figuring out how to mount it securely. Lots of ideas on the forum here I came across from pieces of 2x4, engine belts, straps, $100 name brand holders, to nothing at all!
Since cheap is the name of my game I took a trip to autozone and picked up a set of j-hooks and a universal holder for a grand total of $8....tax was extra. I actually can't find it on autozone's website but it is identical to this set from JEGS. Only difference is you buy the bracket and the hooks separately and it actually comes out to be cheaper.
JEGS Performance Products 10264 JEGS Universal Battery Hold Down Kit - Free Shipping on All Orders @ JEGS
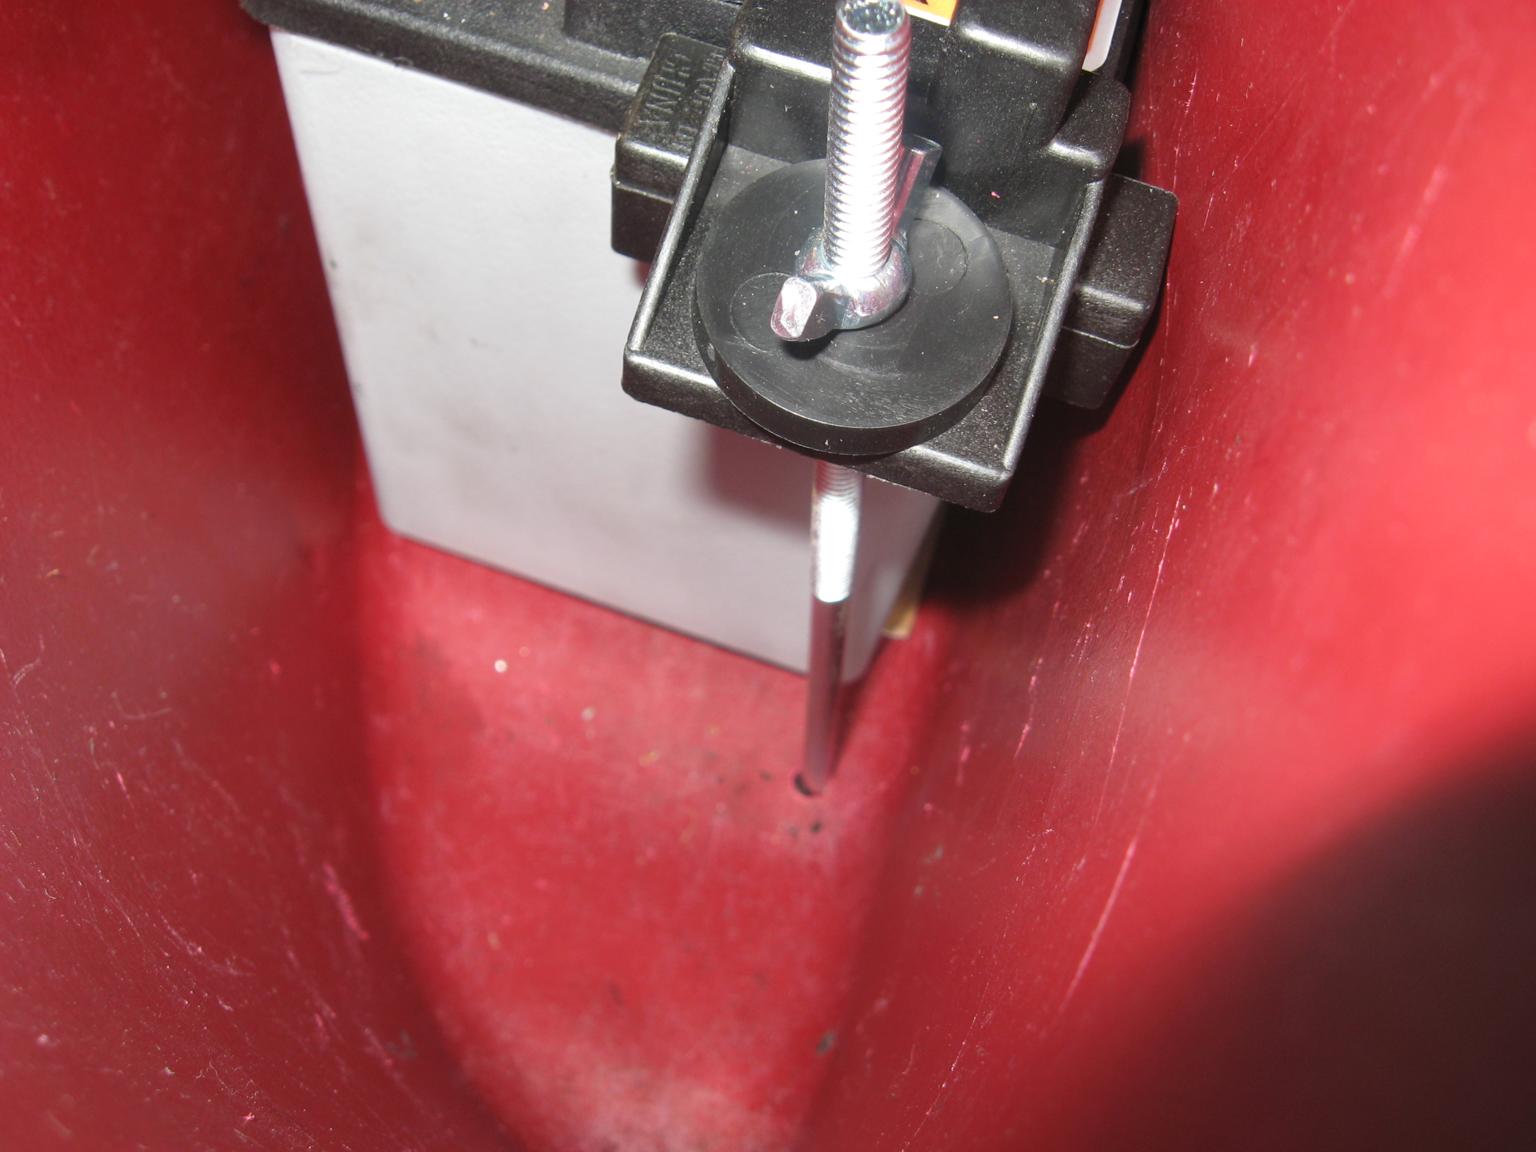
I started by mocking up the battery/bracket and then drilled two tiny holes for the j-hooks.
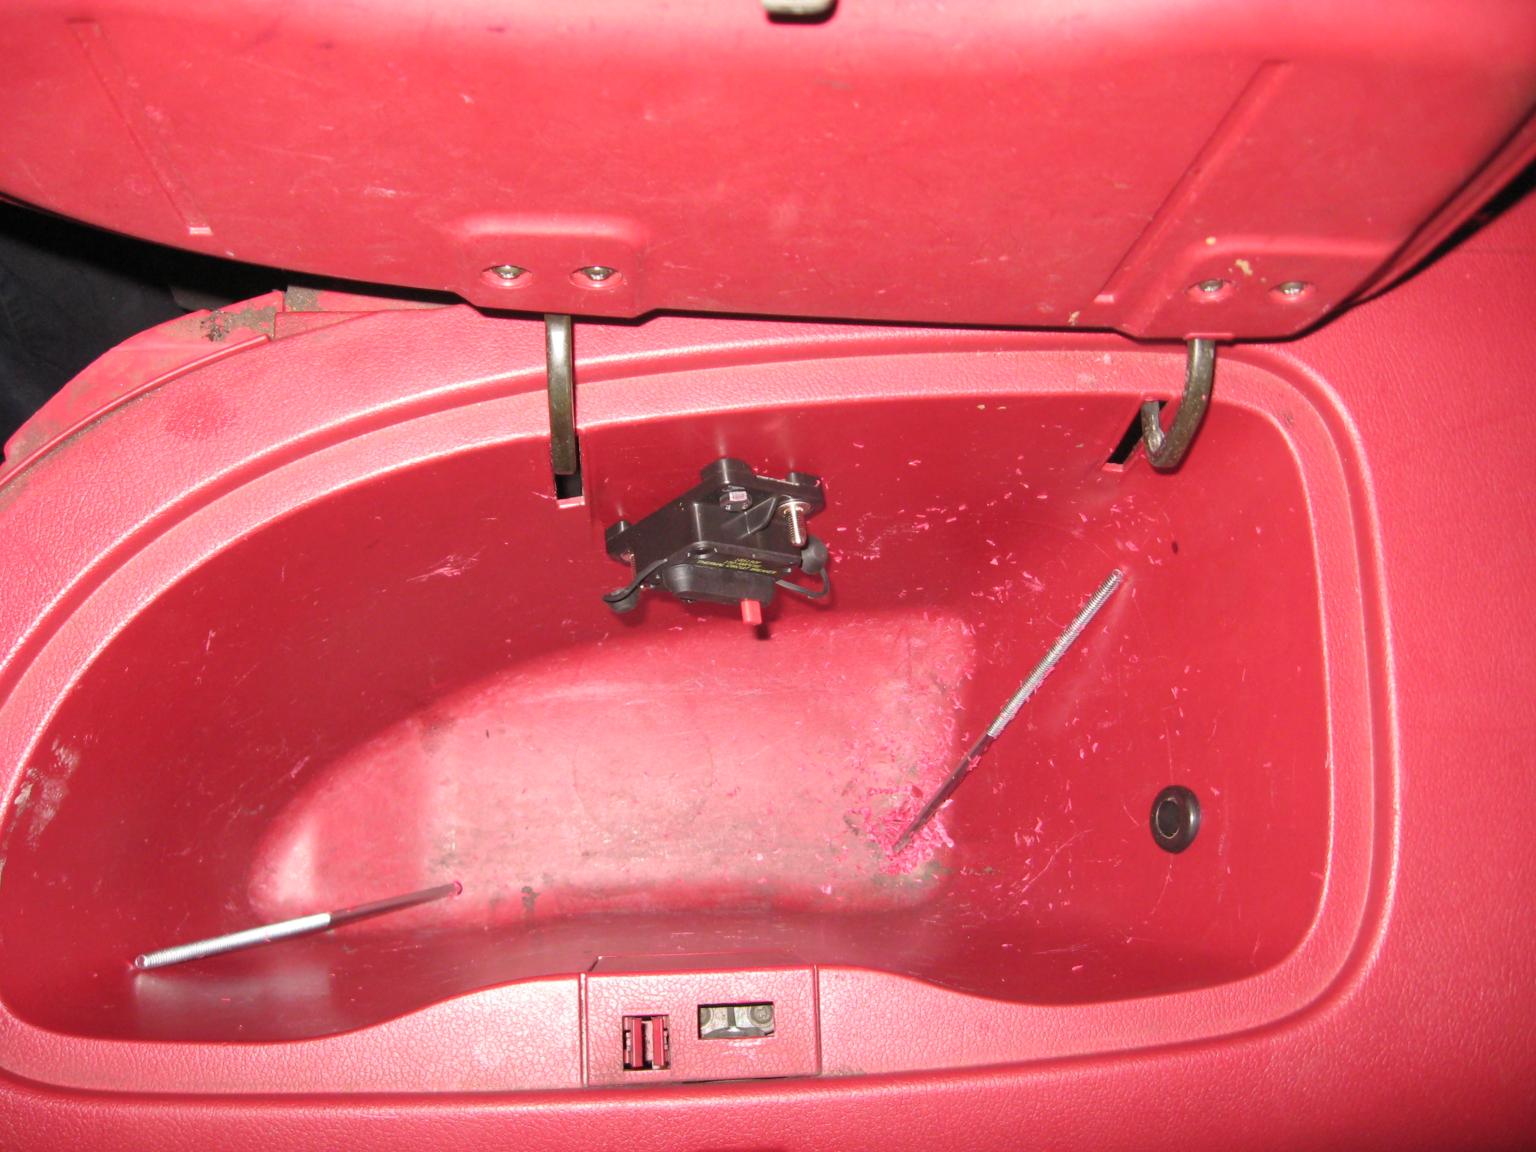

They conveniently hook on the bottom curve of the bins which makes for an easy, rock solid mount.
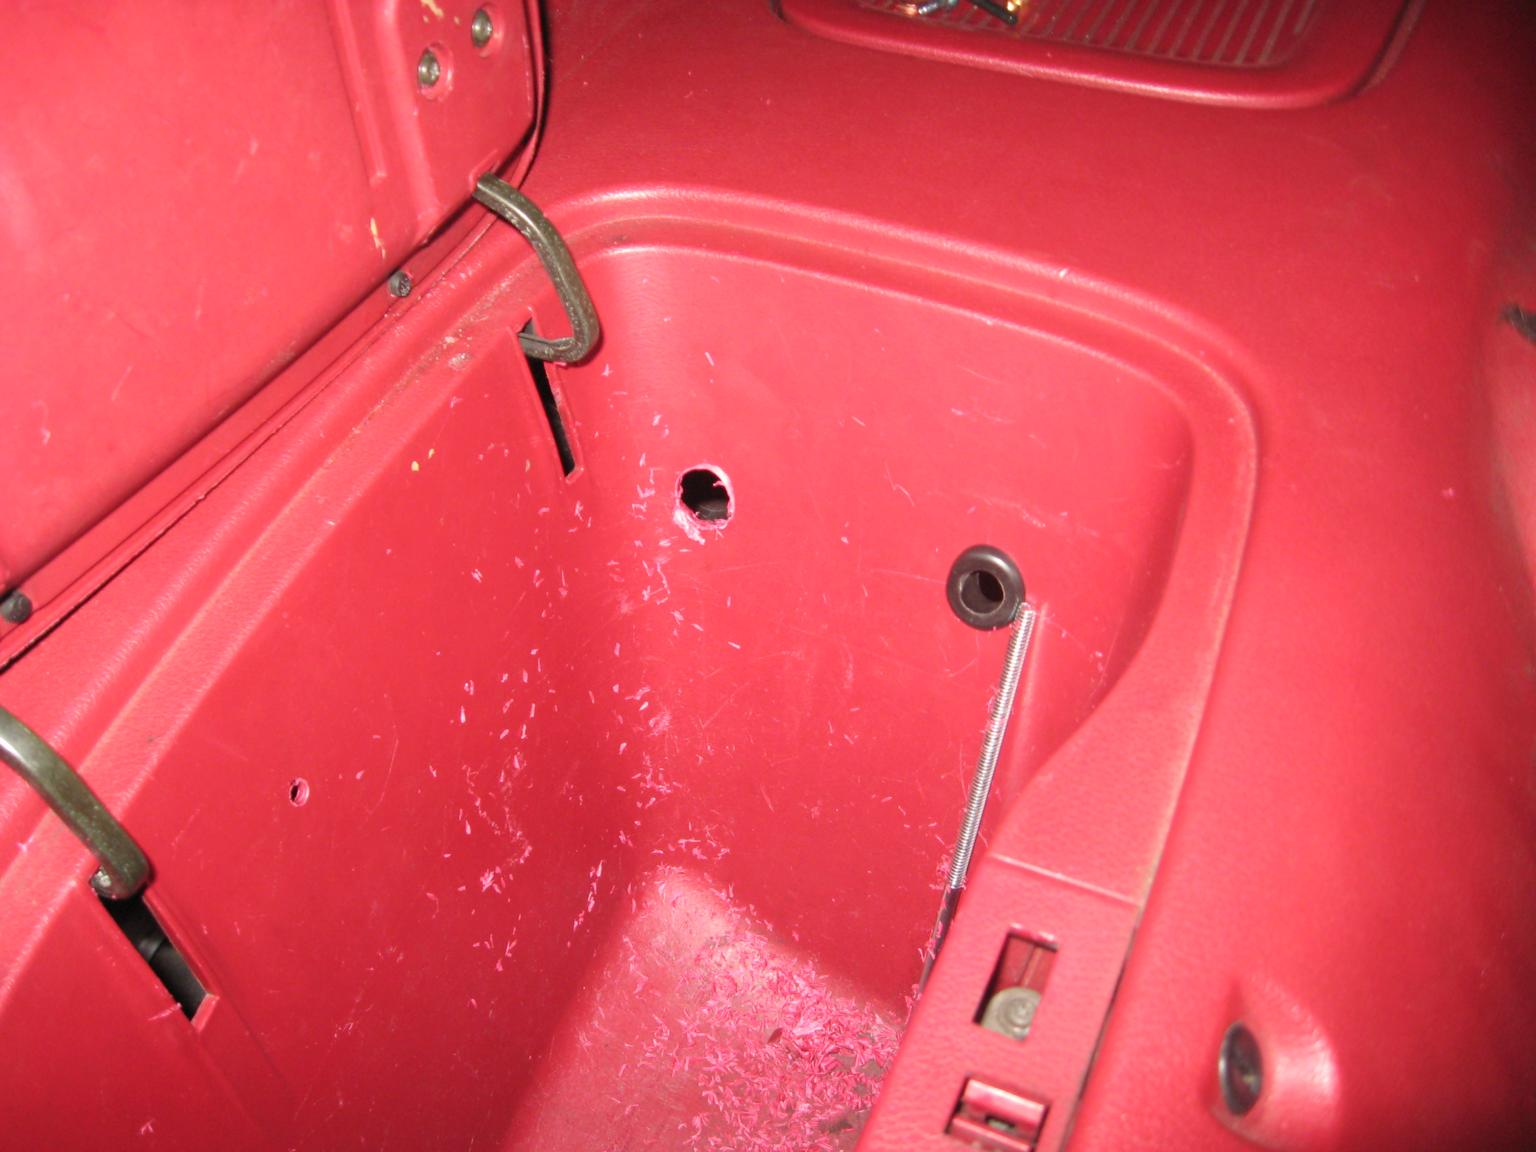
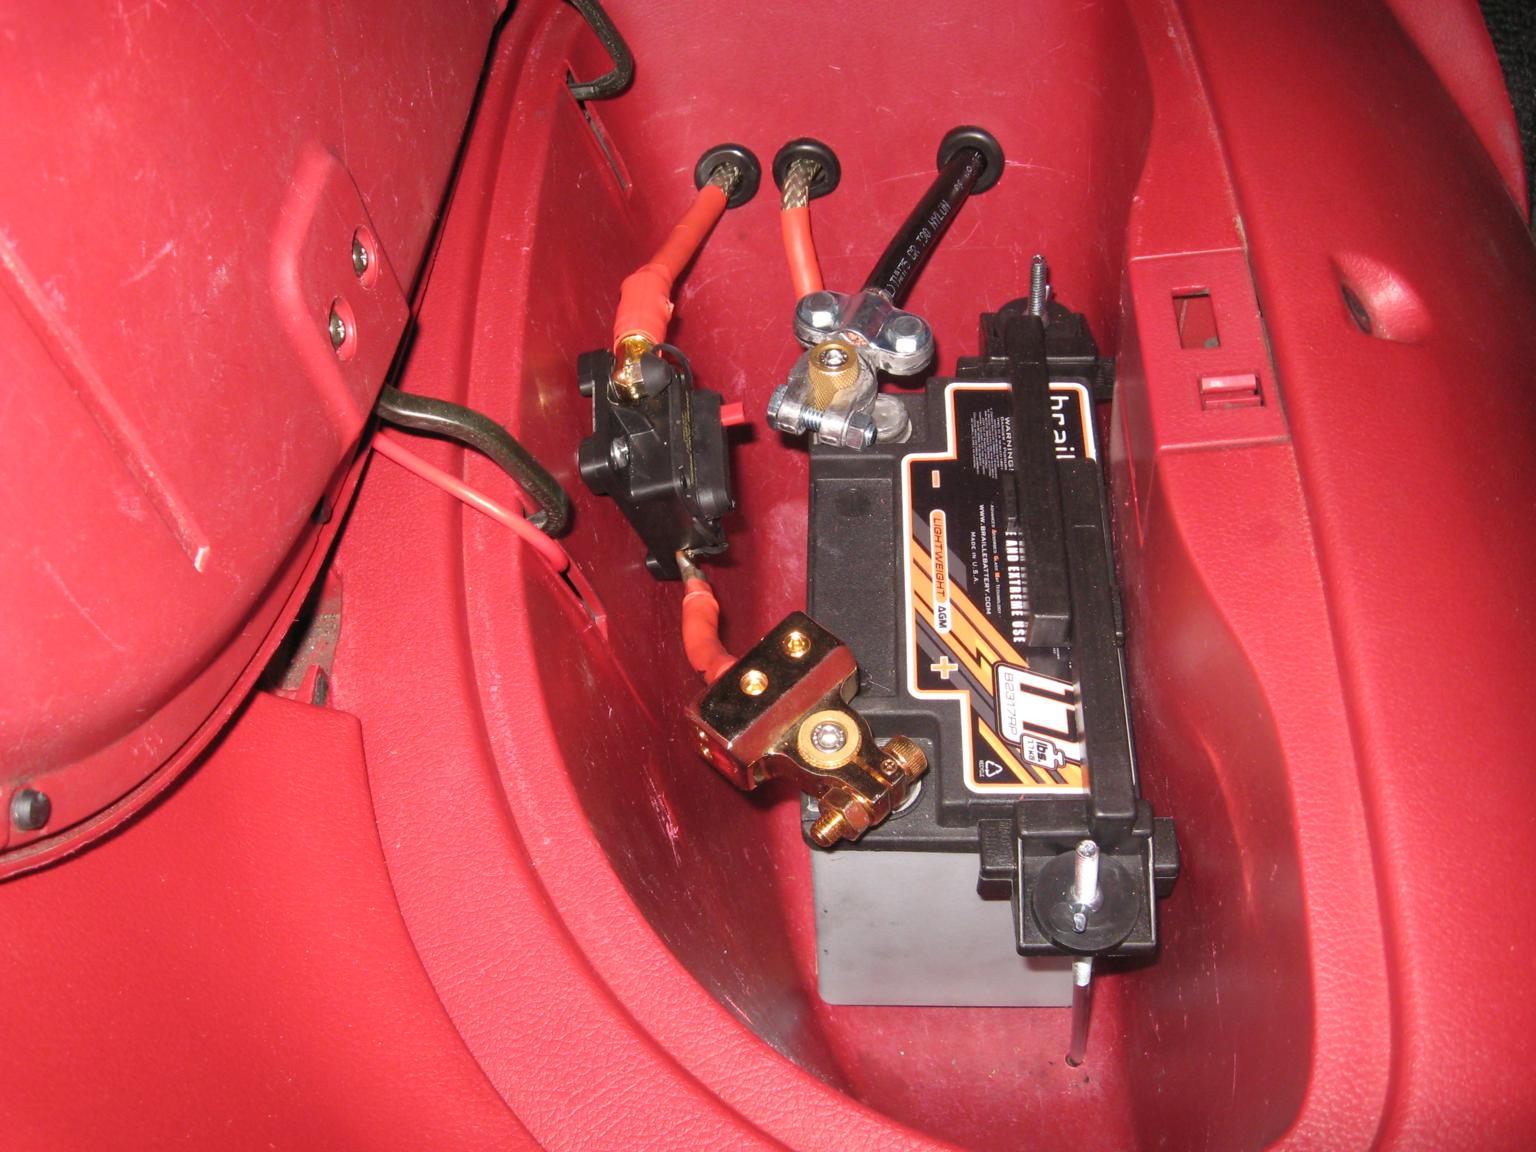
Next I made 3 holes for the main wires. 2 positive holes since one will eventually run back to the amp. I had some grommets laying around which cleaned things up nicely. I also mounted a circuit breaker with a manual reset (great for easily disconnecting the battery). I used a 150amp breaker from autozone which ran something like $22.
They conveniently hook on the bottom curve of the bins which makes for an easy, rock solid mount.
Next I made 3 holes for the main wires. 2 positive holes since one will eventually run back to the amp. I had some grommets laying around which cleaned things up nicely. I also mounted a circuit breaker with a manual reset (great for easily disconnecting the battery). I used a 150amp breaker from autozone which ran something like $22.
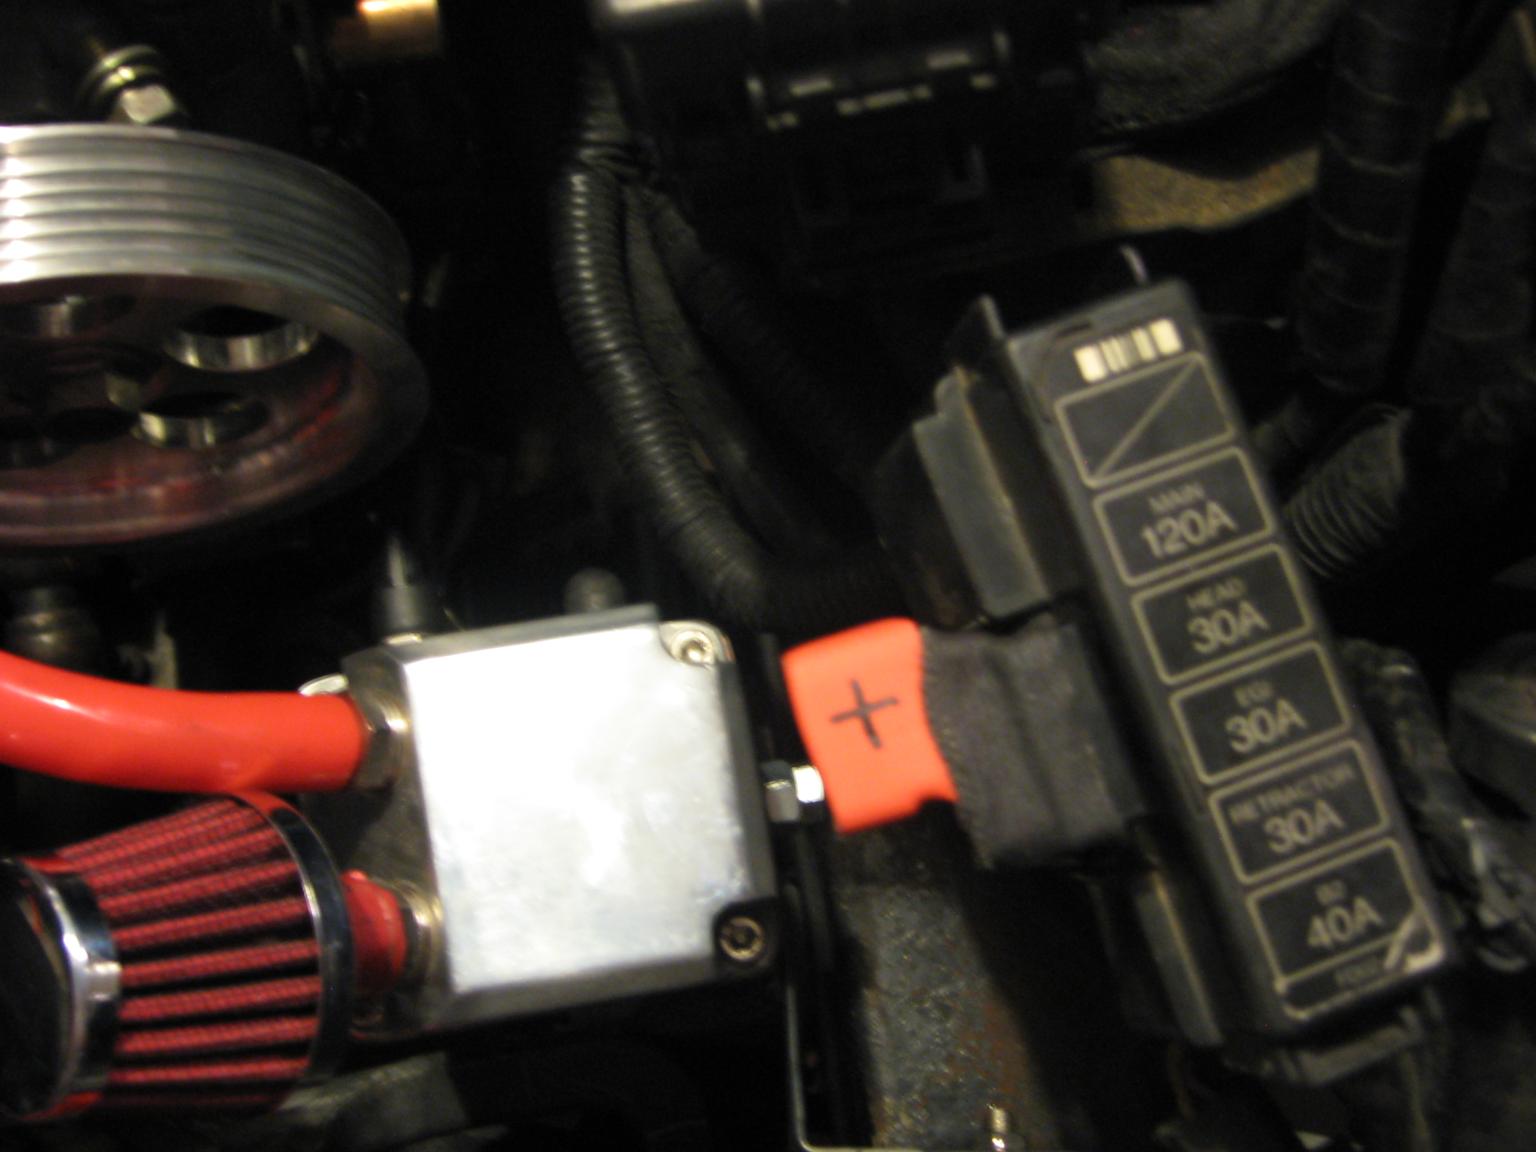
I have a small audio system in the car so years ago I ran a positive wire from the battery (in the bay) all the way though the interior back to the hatch which made things a breeze. After the battery came out of the bay I just re-routed that wire directly down to the starter, using the existing starter wire to back feed to the fuse block. No pics but self-explanatory.
The ground wire I chose to use was a 2 gauge that I picked up from the local hardware store. 4-5 feet cost me something like $12. I ended up cutting this into two parts and made terminals for the ends with heat shrink.
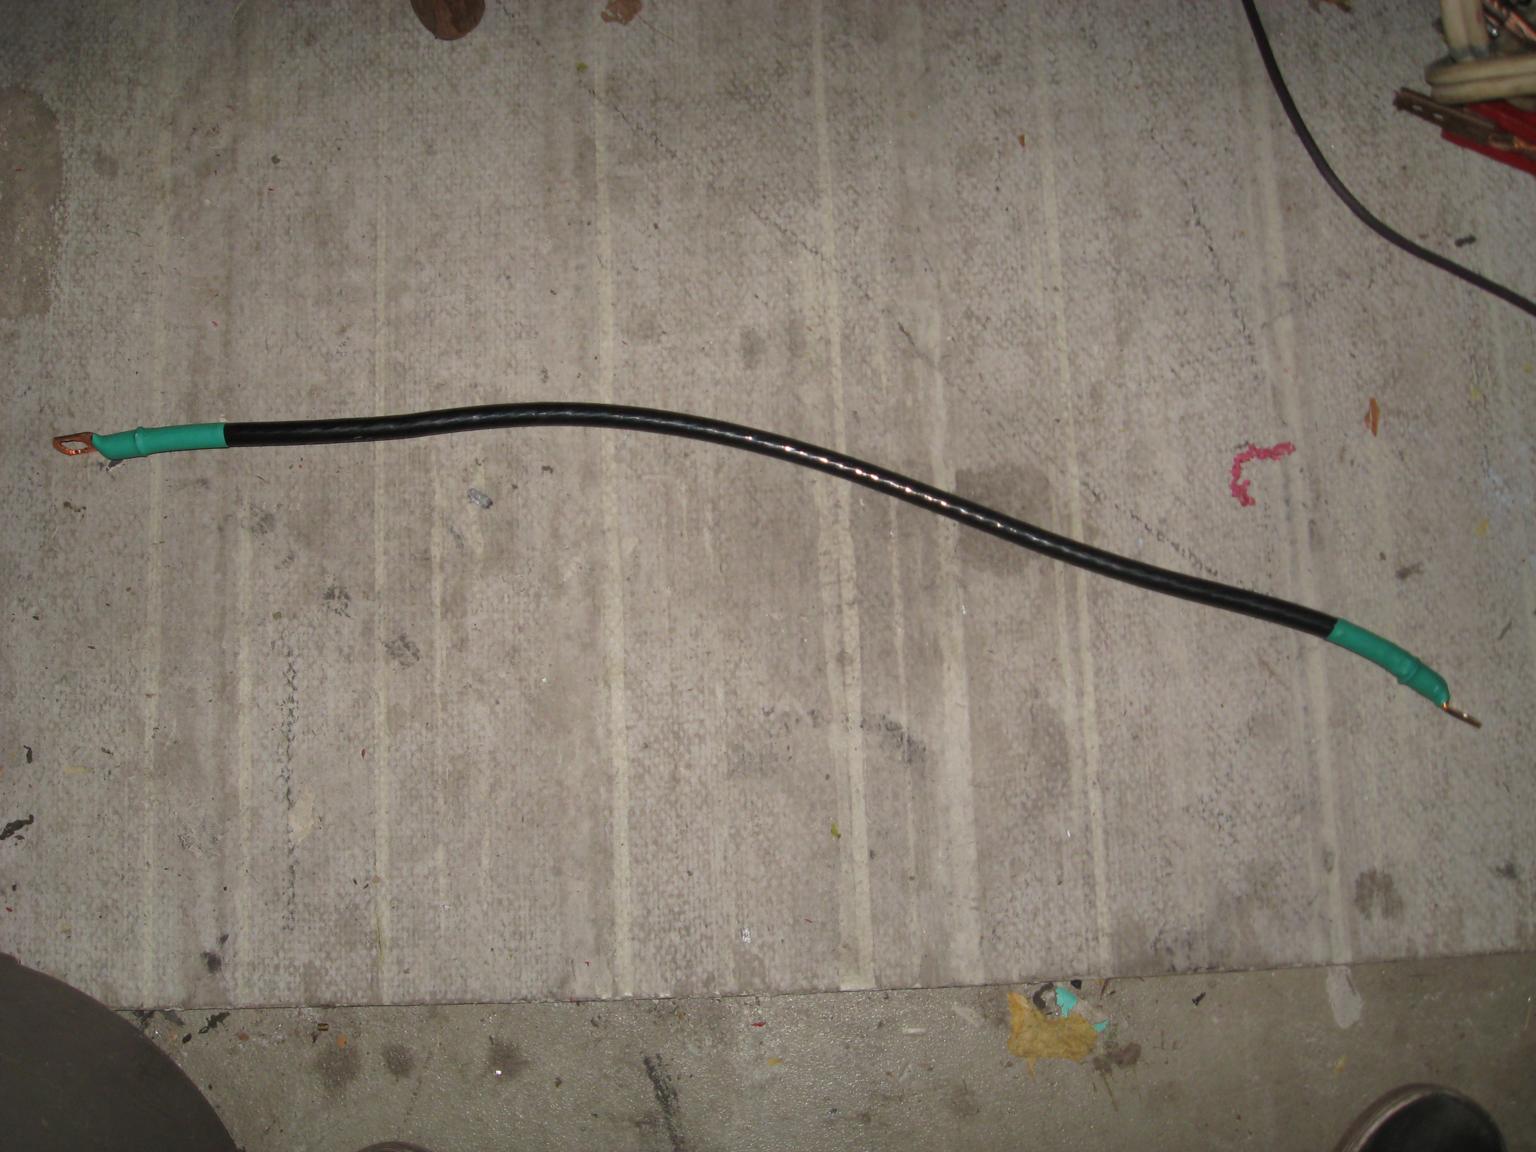
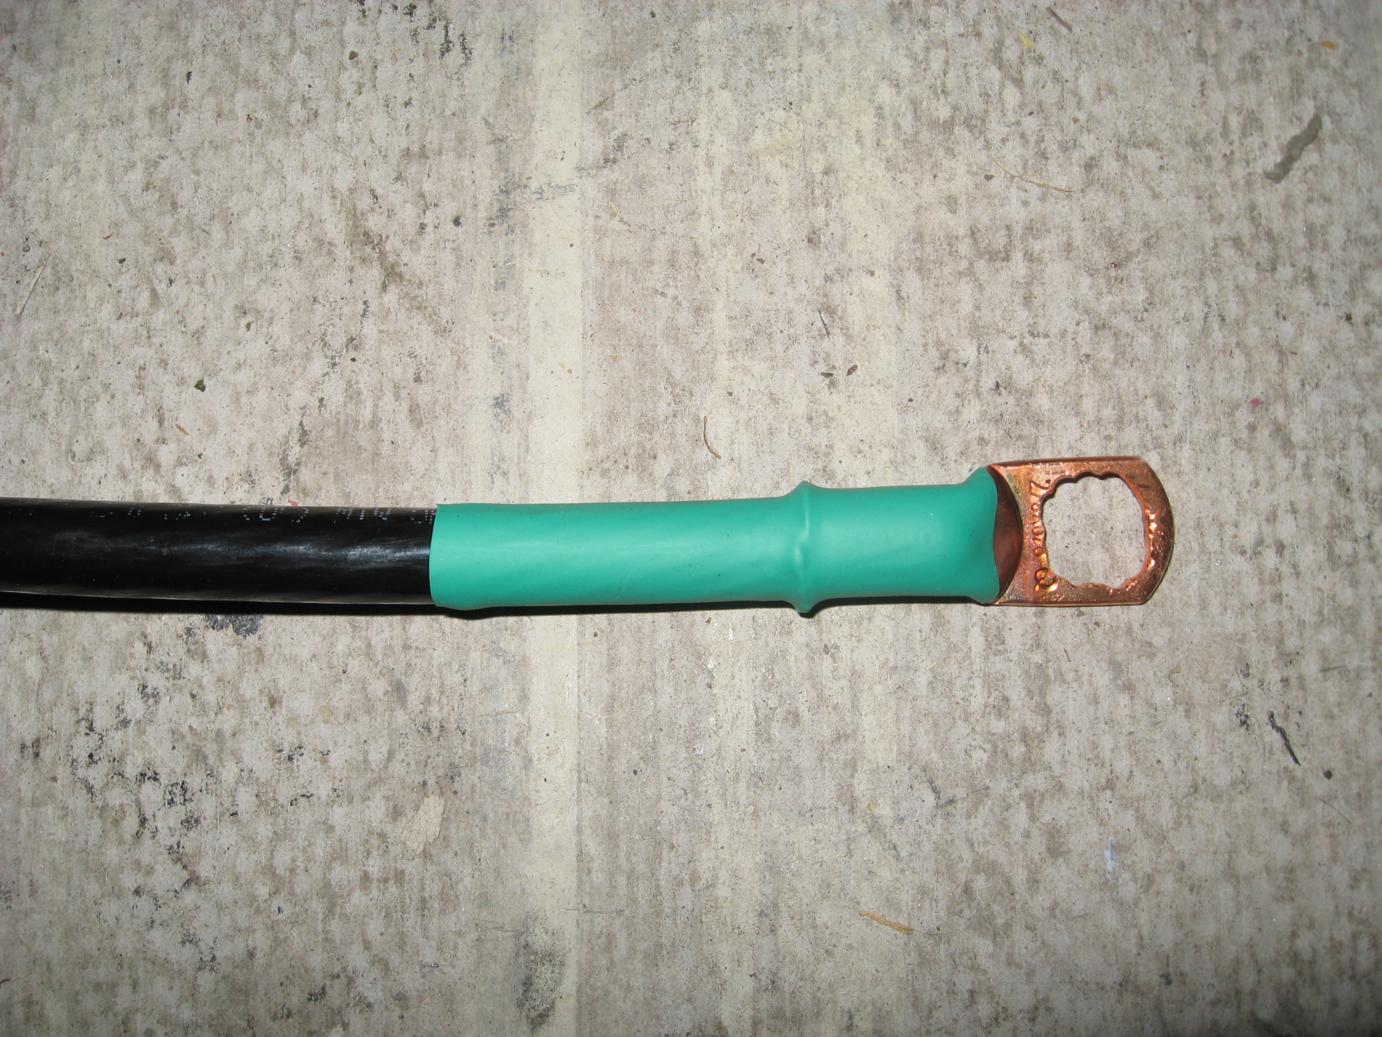
I did have to enlarge the terminal hole on one end to fit onto the bolt that I was going to used to attach to the transmission.
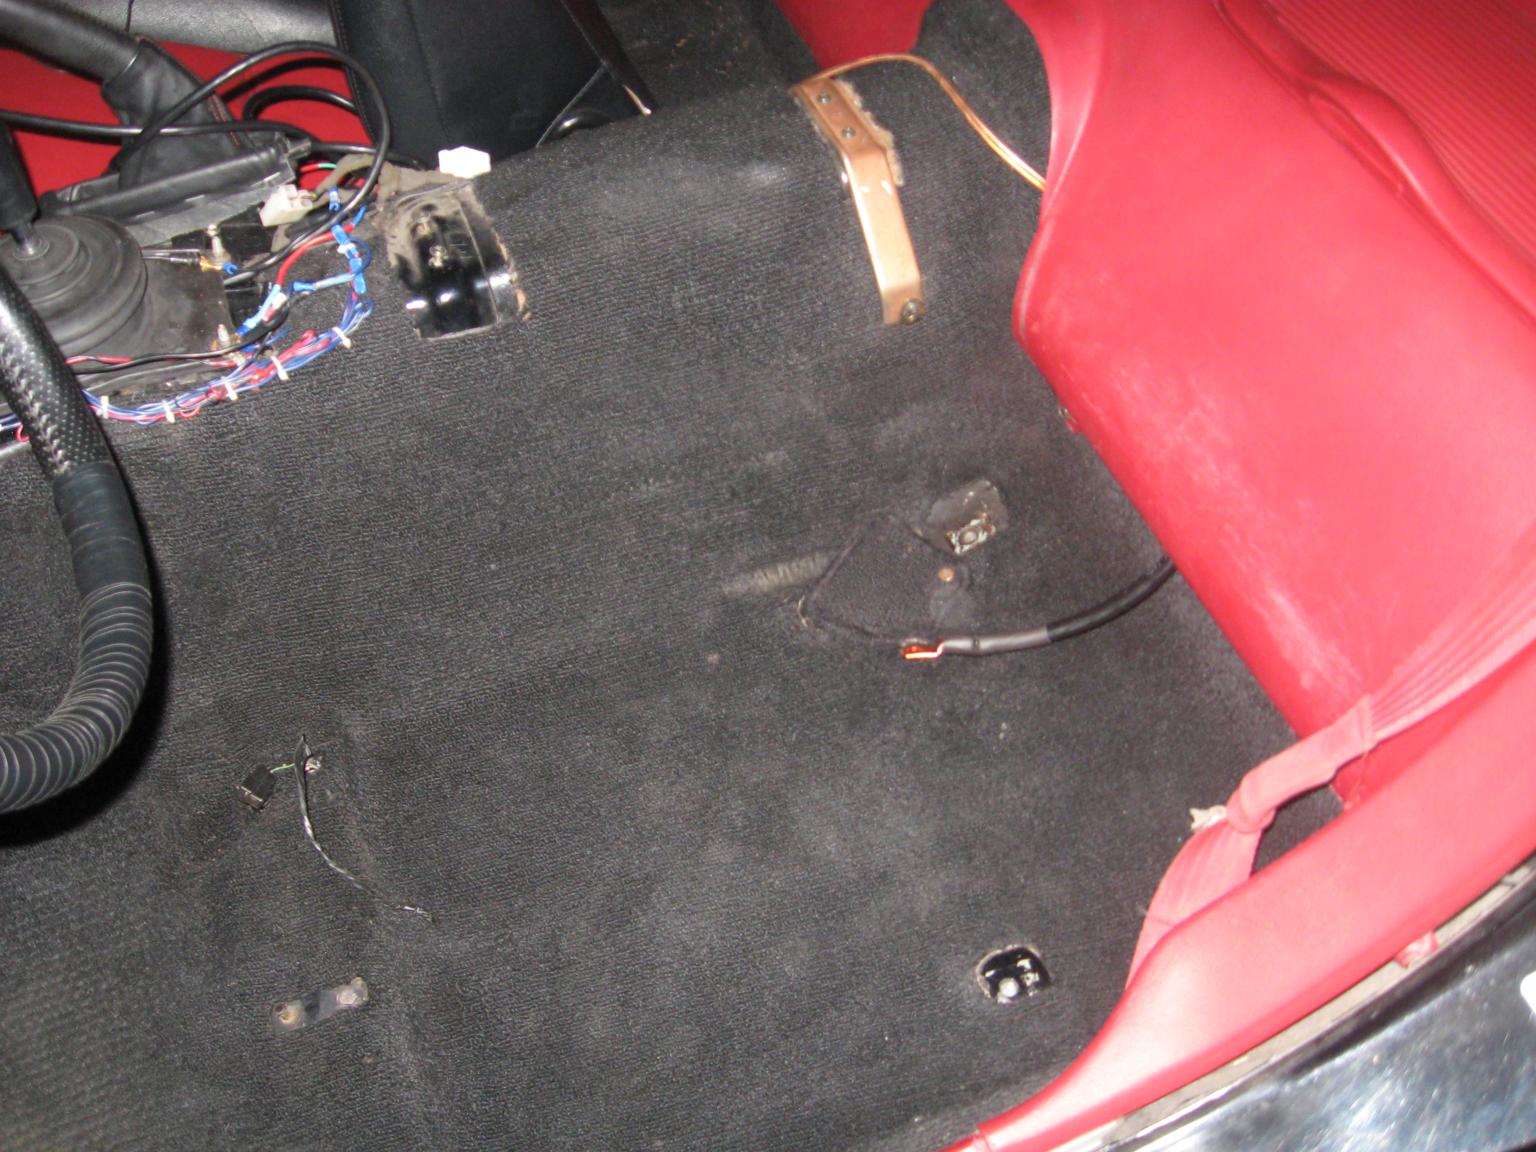
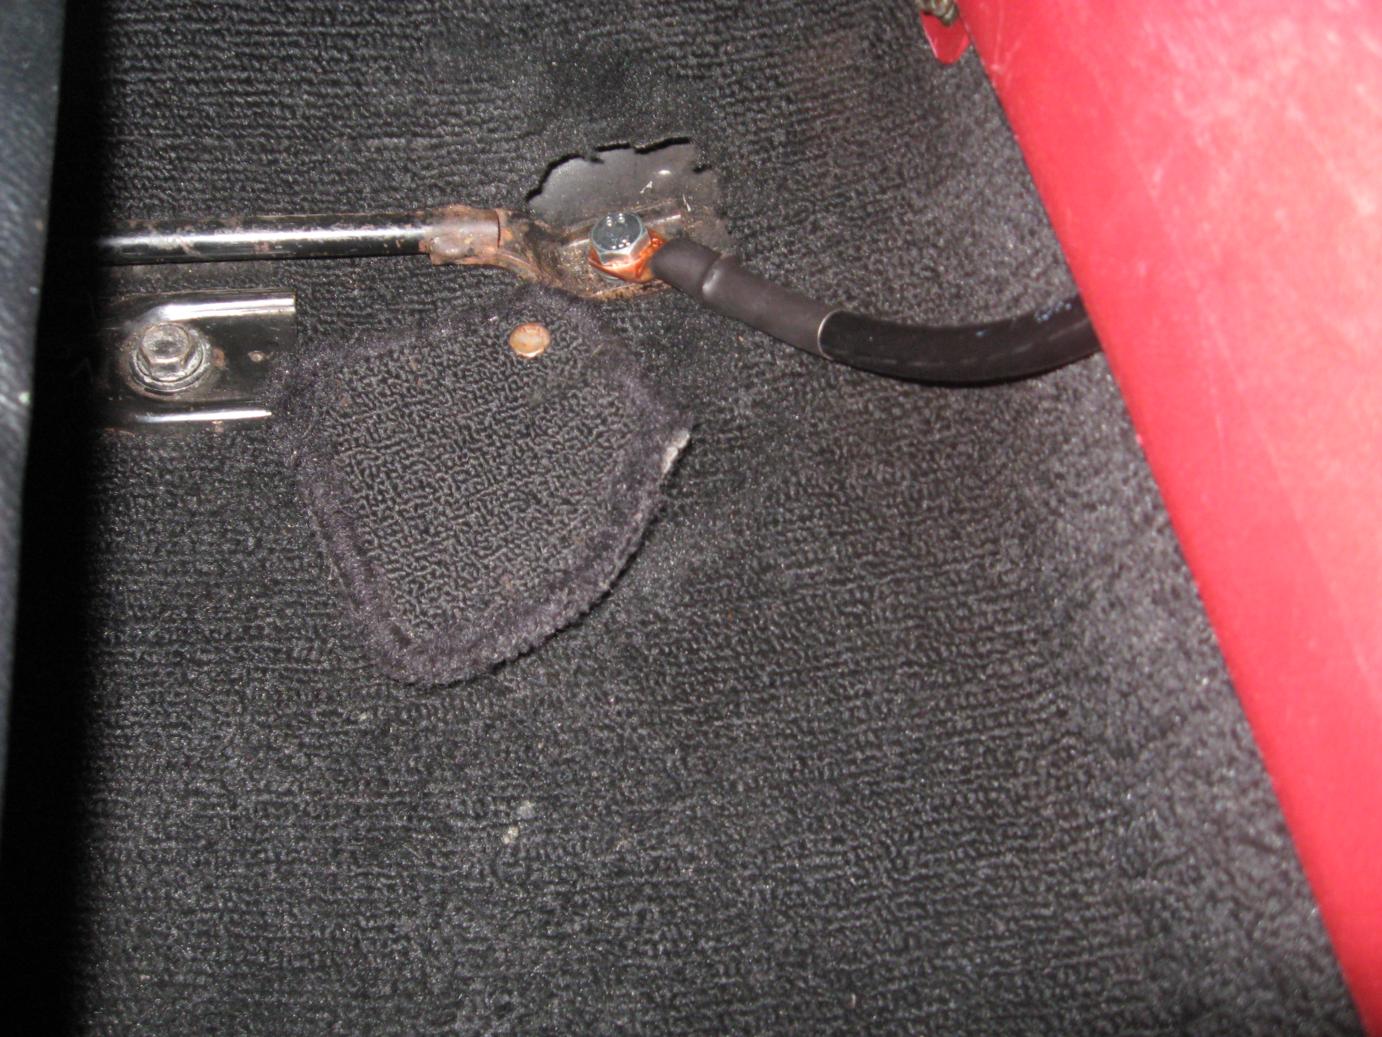
I ran the cable from the bin down to the drivers seat rail anchor bolt. This threads all the way through the floor and is exposed underneath the car. I simply used a longer bolt so that enough would be exposed under the car to attach the second ground cable to it.

The ground wire I chose to use was a 2 gauge that I picked up from the local hardware store. 4-5 feet cost me something like $12. I ended up cutting this into two parts and made terminals for the ends with heat shrink.
I did have to enlarge the terminal hole on one end to fit onto the bolt that I was going to used to attach to the transmission.
I ran the cable from the bin down to the drivers seat rail anchor bolt. This threads all the way through the floor and is exposed underneath the car. I simply used a longer bolt so that enough would be exposed under the car to attach the second ground cable to it.
Next I ran my second ground cable from the exposed bolt underneath the car to one of the big transmission studs for the PPF. I originally meant to use a different, smaller, bolt location on the transmission but I actually ran out of cable length so I just modified the one terminal and attached it where I could.
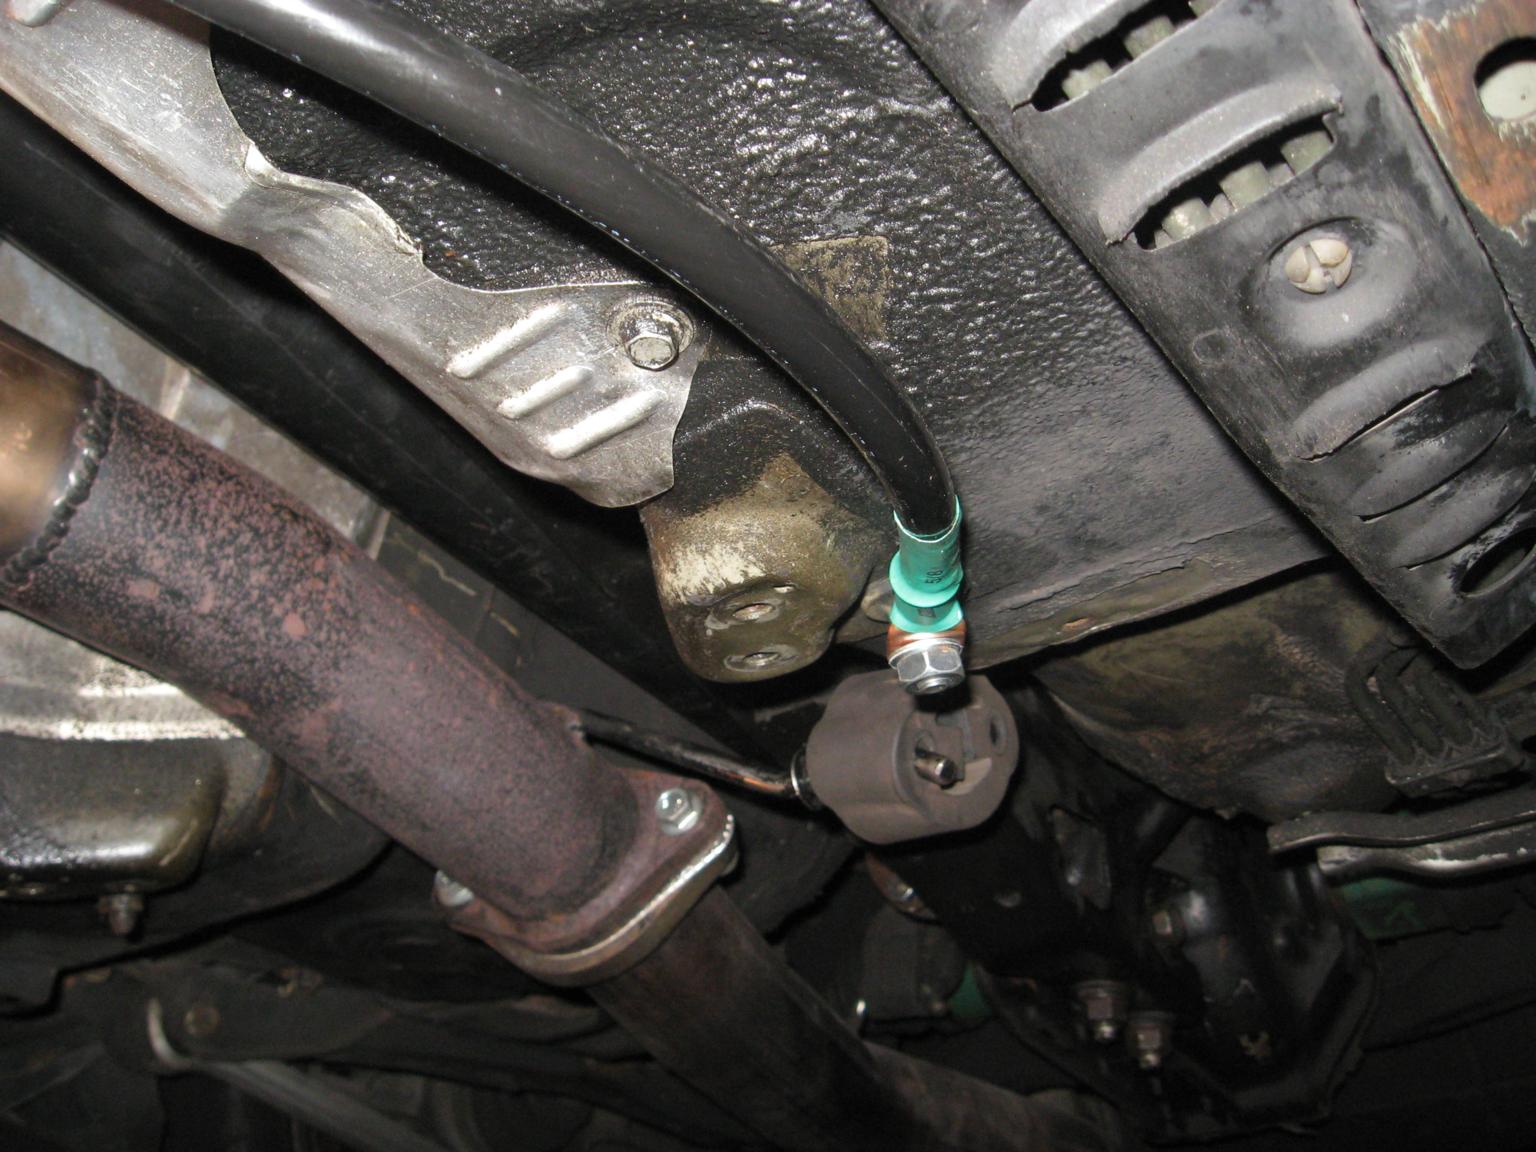
I sanded off some paint on the PPF just to be sure, though the grounding is done through the actual bolt.
I sanded off some paint on the PPF just to be sure, though the grounding is done through the actual bolt.
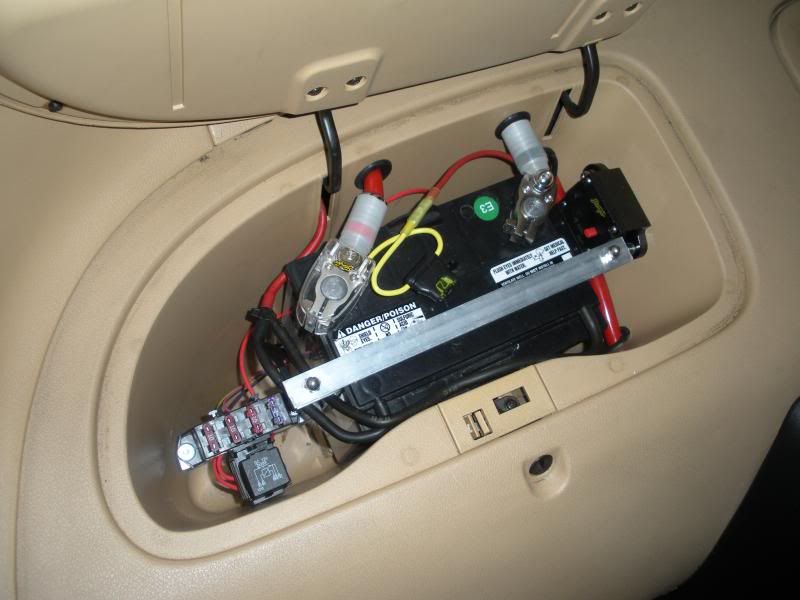
Finally I added the battery terminals which I had laying around (I've worked for numerous auto parts stores and repair shops and have all sorts of random smalls laying around) and connected everything up. The second positive wire is just hanging down at the moment until I get the audio all hooked back up since I didn't want a live wire just chilling in the hatch.....safety people...safety. It will eventually hook into the second port on the positive terminal.
Close up shot of the J-hooks
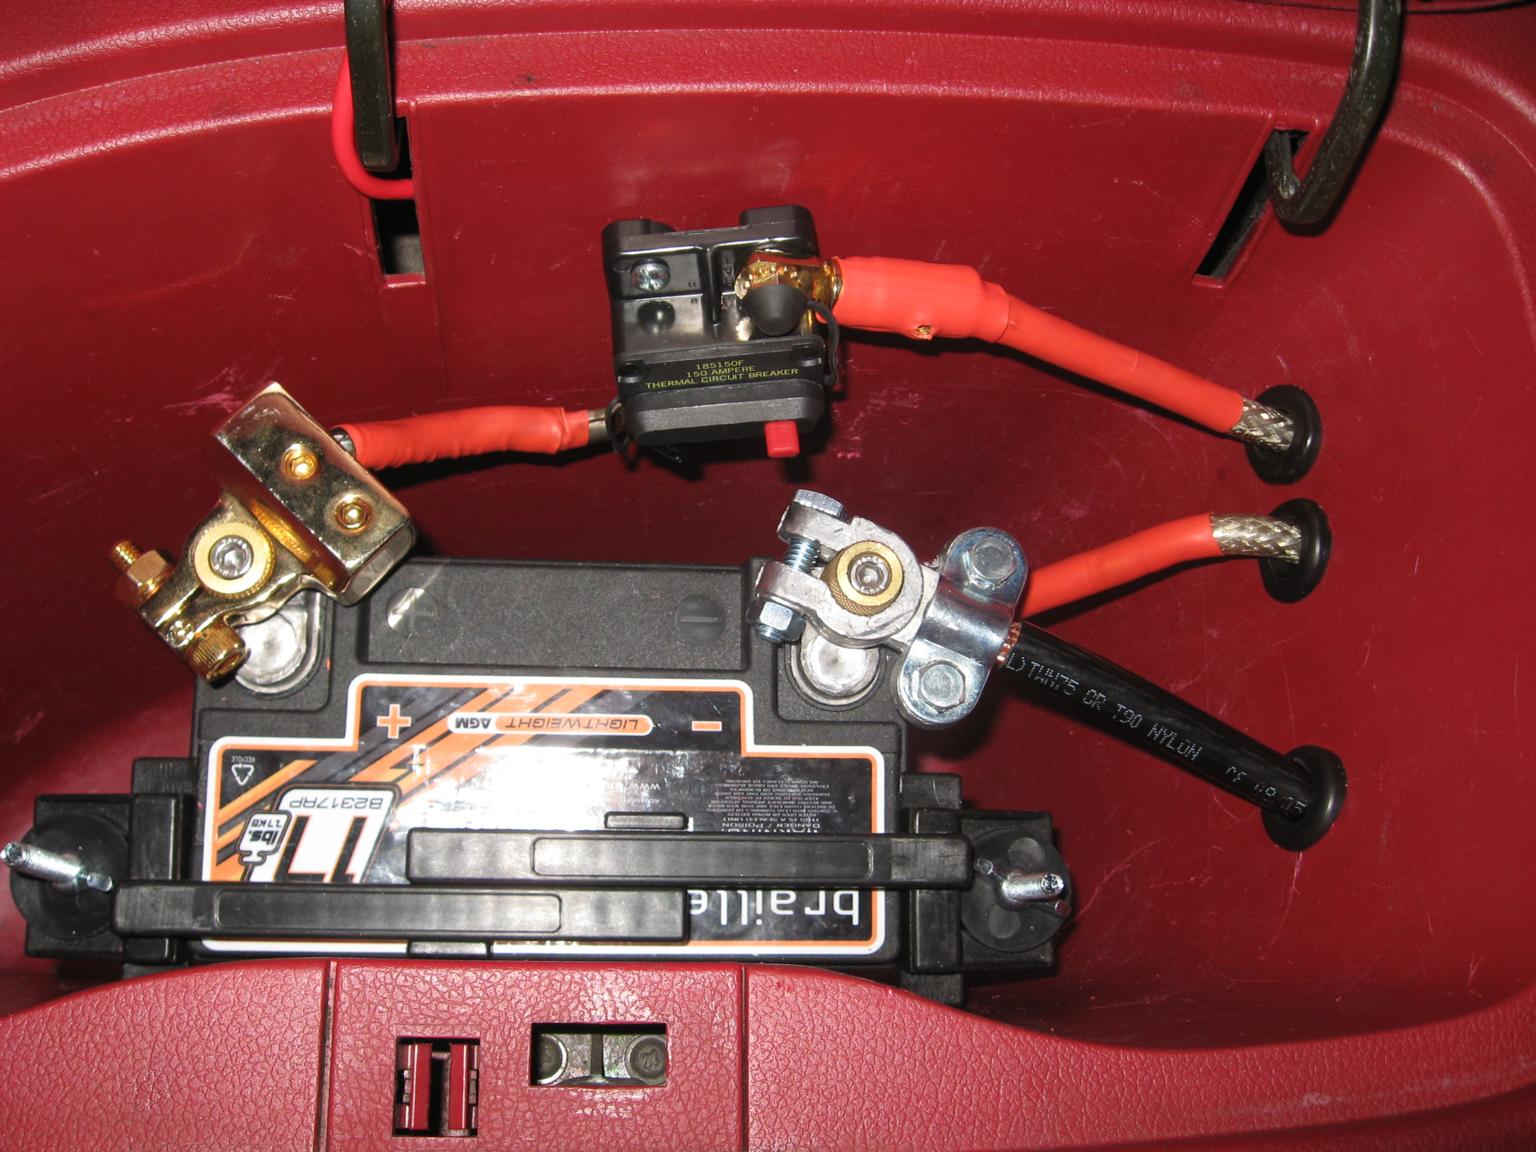
and voila!
I also trimmed the factory ground wire in the engine bay and nicely wrapped the positive terminal hanging off the fuse block. I though about cutting it off but decided not to just because.
Close up shot of the J-hooks
and voila!
I also trimmed the factory ground wire in the engine bay and nicely wrapped the positive terminal hanging off the fuse block. I though about cutting it off but decided not to just because.
So that's it. This thing is rock solid mounted and not going anywhere. Comments, questions, and concerns are most definitely appreciated. Now I just gotta get the energy to do my complete build thread since I just finished my full rebuild custom single turbo setup and this was my last step!
Teaser shots!
Teaser shots!
Full Member
Joined: Feb 2013
Posts: 116
Likes: 0
From: France
Very nicely done et very useful ! I'll keep that somewhere in the pc for the day i'll have to replace my already weak stock mounted battery ! 
Let us know if the battery is strong enough to cope with a daily ? / weekend warrior ? use.
Let us know if the battery is strong enough to cope with a daily ? / weekend warrior ? use.
Trending Topics
When I got my car it had an optima in the drivers side bin, but it didn't have a hold down. I bought an aluminum battery tray and welded brackets to each side to bolt to what I assume are the seat belt mounting points on j spec cars(they both had plugs but are threaded the same as the front seat belt bolts) My ground wire is tied to one of these bolts also. I had to remove the bins to put it all together but I was happy to not drill any more holes in the car and it all went back together nicely. I can post some pictures later if anyone is wants to see them.


 why didn't you spend the 3 seconds to put the ground wire under the carpet?
Thanks for the comments. The 3121 was like $50 more and just a bit more power...with all my other projects cost was a huge concern and all those pennies saved add up.
I guess I could have run it under the carpet but it never even crossed my mind. I was so focused and mentally submersed in the process that I just didn't think of it. No worries as the driver seat doesn't ever move and its hidden pretty good
I guess I could have run it under the carpet but it never even crossed my mind. I was so focused and mentally submersed in the process that I just didn't think of it. No worries as the driver seat doesn't ever move and its hidden pretty good

/\ while I did see your setup during my searching I just honestly couldn't see myself spending over $100 on a mount that would be hidden anyways. I do think your setup is awesome though


I was debating between the B2317R and the Miata battery when I did my relocation, I ended up using the Miata battery because of the higher RC. Wish I knew the B3121 fits tho, with even higher RC I would've give that one a try.
same with me, i wanted it but for the price, it just wasnt worth it like you said because its hidden, now if you have cash to throw around or HAVE to have things, sure why not
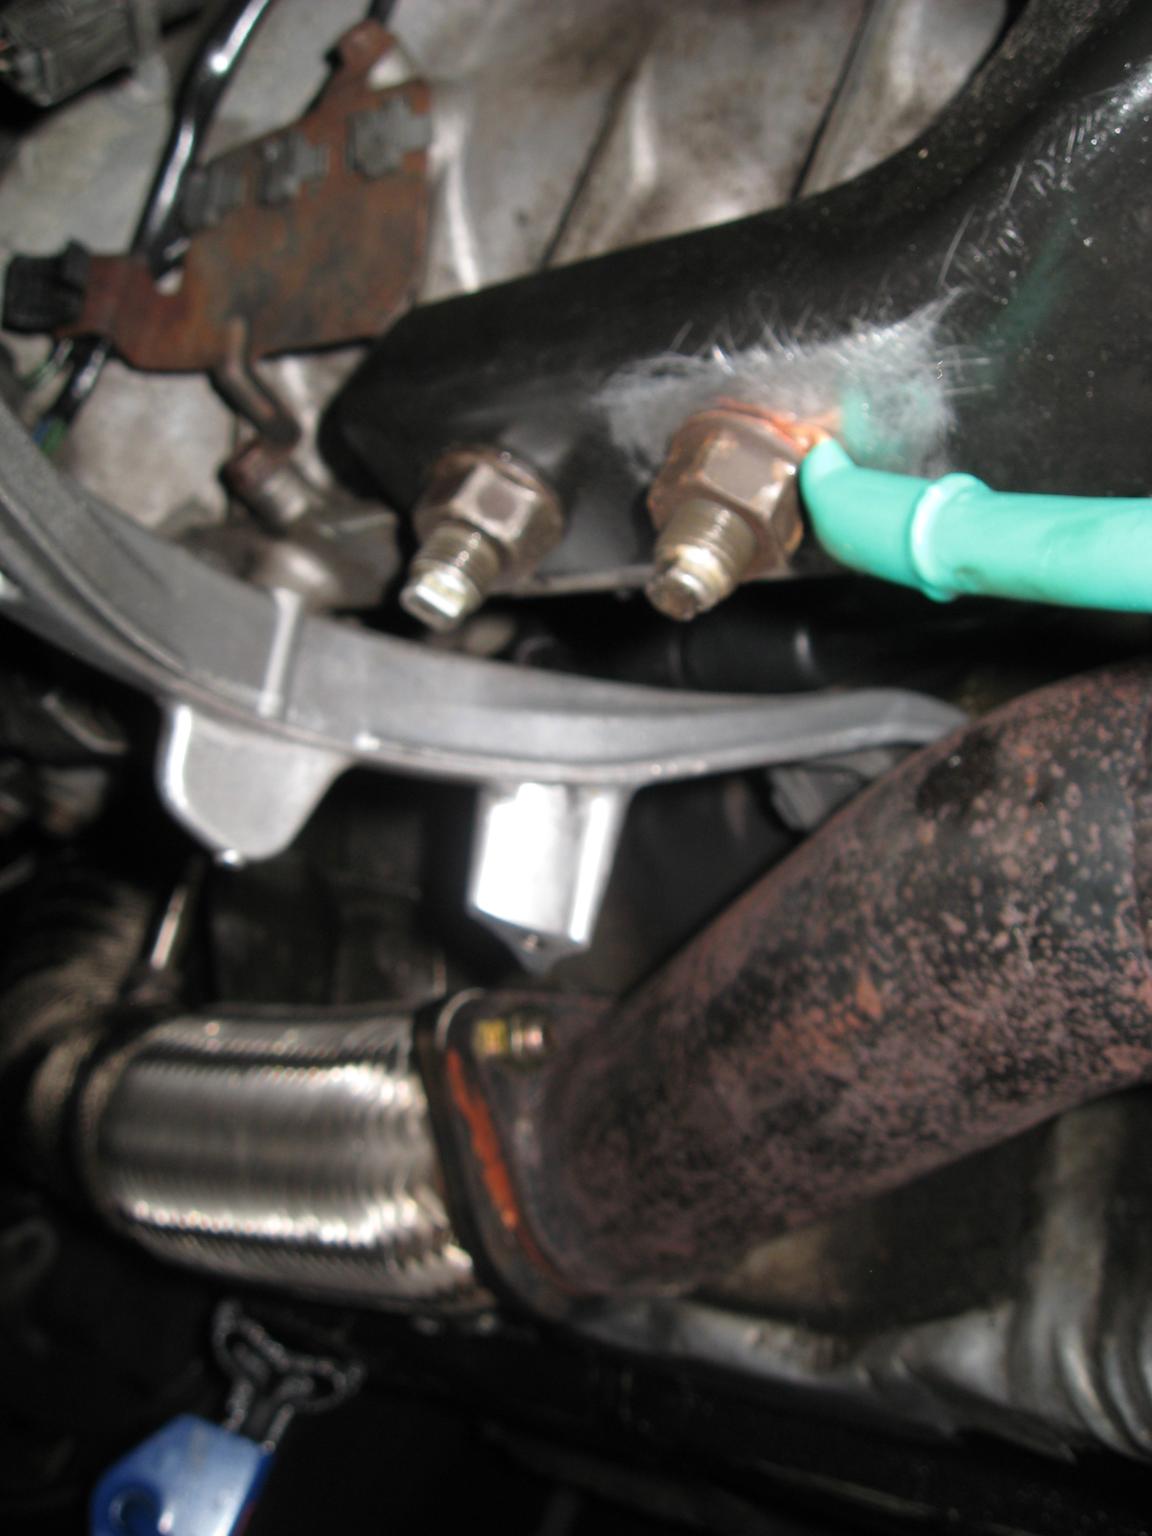
My number one goal besides price was safety. Most people use Miata batteries but I'm fairly sure most, if not all, of those need to still be ventilated. They have two tiny vent ports on the factory setup that connect to tubes that run to the outside the car. I've seen them listed as sealed batteries but the vent ports always made me wonder. Maybe I'm wrong but here's what I'm talking about
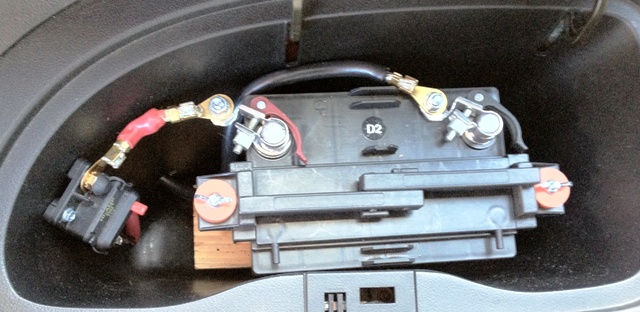
the vent ports are facing the front of the bin.
here's showing them hooked up to the vent tubes

I have had bad experiences with Optimas in the past so it was down to Braille and Odyssey batteries and I explained my decision rationale above.
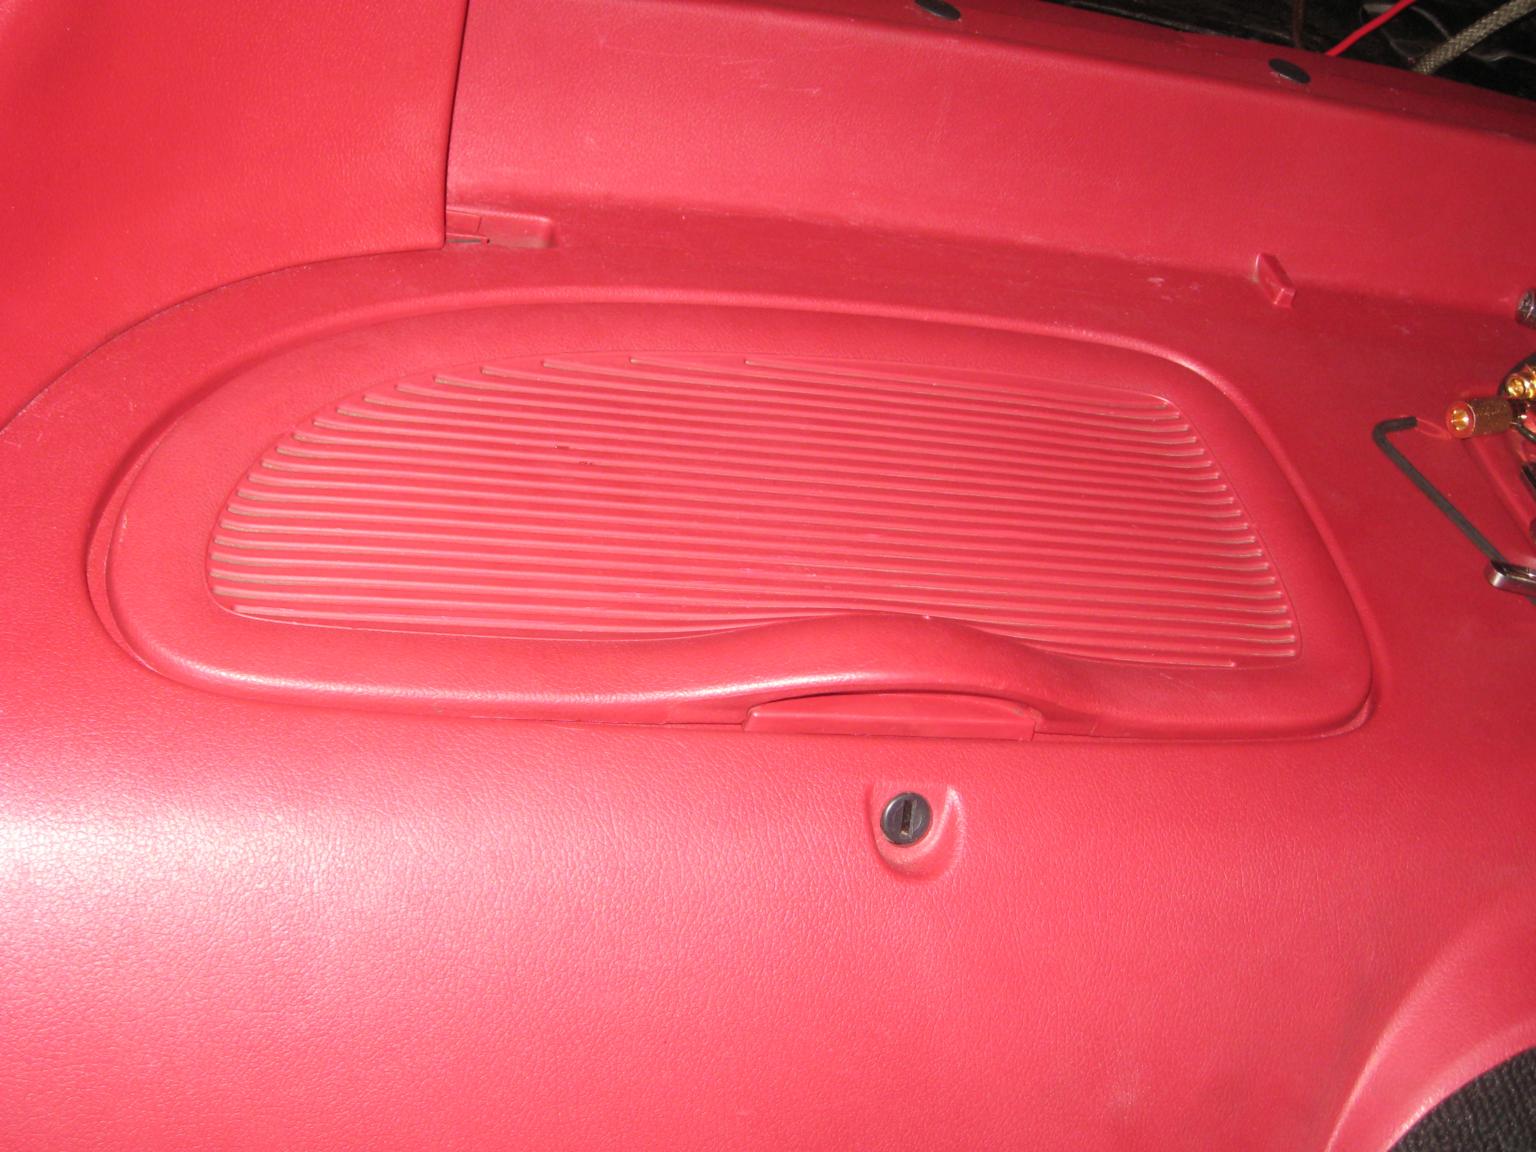
The mount was also of extreme importance and I will reiterate that this thing is rock solid and I am 100% confident that it's not going anywhere in the event of a crash. The added bonus is I placed it in the passenger bin because that gives me the option/ability of locking the bin closed if I so chose.
the vent ports are facing the front of the bin.
here's showing them hooked up to the vent tubes
I have had bad experiences with Optimas in the past so it was down to Braille and Odyssey batteries and I explained my decision rationale above.
The mount was also of extreme importance and I will reiterate that this thing is rock solid and I am 100% confident that it's not going anywhere in the event of a crash. The added bonus is I placed it in the passenger bin because that gives me the option/ability of locking the bin closed if I so chose.
^ Any picture of it in the rear bin? I'm gonna go with the 3121 when my Miata battery dies.
Ahh, I vented my Miata battery
I drilled a hole behind the bin, inserted a grommet and run that red silicone hose out by the rear subframe. The rubber hoses are some tight angle pre-bent hose I have laying around from my MX-6, so they are not pinch against the bin.
Ahh, I vented my Miata battery
I drilled a hole behind the bin, inserted a grommet and run that red silicone hose out by the rear subframe. The rubber hoses are some tight angle pre-bent hose I have laying around from my MX-6, so they are not pinch against the bin.
OP, really nice relocation. I've done similar relocations, but not as nice as yours. I also had previously mounted the battery tie down to plastic bins to anchor it. I would highly recommend taking another look at this. In the event(and I hope that day never comes) you have a vehicle rollover, everything not solid mounted has the potential to become a projectile. Hopefully the plastic mounts will hold, but I would argue it is an unnecessary risk. The battery alone has enough potential force to kill you or your passenger.
+1 on the nice write up. Sure wish I had this before I cut my bin, although I did a clean, level cut and then sliced vac hose and lined the cut surface, like a grommet, so there were no sharp edges. For whatever it is worth, I now use a Braille B2015. This is my second battery since its relocation 4 years ago when I was using a much larger battery, hence the need for cutting the passenger bin. Not quite as powerful as the B2317R, but it does very nicely for weekend warrior driving. I use, and recommend using, a battery tender.
Thanks for the feedback guys. Even though the hooks do mount to the "plastic" bins they are made out of a very thick strong composite. The bins themselves seem to be different in composition then say the rest of the interior plastics.
There is also the ability to lock the top of the bin closed as an extra precaution but I feel confident the way I have set this up.
There is also the ability to lock the top of the bin closed as an extra precaution but I feel confident the way I have set this up.