
HOW TO: Handbrake Removal & Replace


Thread Starter
Full Member
Joined: Jun 2013
Posts: 243
Likes: 2
From: LONDON
HOW TO: Handbrake Removal & Replace
So I posted a few days ago to see if anyone knew if this was possible to do jacked up on a road without removing PPF or Prop Shaft.....no replies so thought id give it a go and took pics along the way to help anyone else who may want to do this.
CAR: 1993 FD3S RHD (JDM)
HOURS: 1 Hour 40mins
Right, so I managed to do this without dropping the PPF or removing the prop shaft, it was a bit tricky in places but actually easier than I thought it would be, so lets get started
1. Jack up the rear of the car and use some jack stands, make sure you have enough space to work. I found setting the jack stands up one notch was enough. Ensure you put chocks or bricks under the front wheels so the car don't roll on you or fall off the stands
My new cable came in 3 parts. Thanks to the guys at Atkins Rotary for the fast delivery of this. My cable did not come with a new adjuster nut....if you want to get a new one the size is M6 x 1.25. or reuse the old one if its good.
NOTE My cable came with these brackets attached to them. The cable in my car upon inspection did not come with these so I removed them. Maybe the USDM FDs came with these as the way they attach to the vehicle so keep them on the cables in case. Once you pull the old one out you will know if you need them or not. theres one on each cable leg and they join together and have a bolt hole in the middle.
2. Next, get inside your sexy rex and pop the plastic gear surround off, it just clips in. Pull from the back first and you should be able to move it out the way.
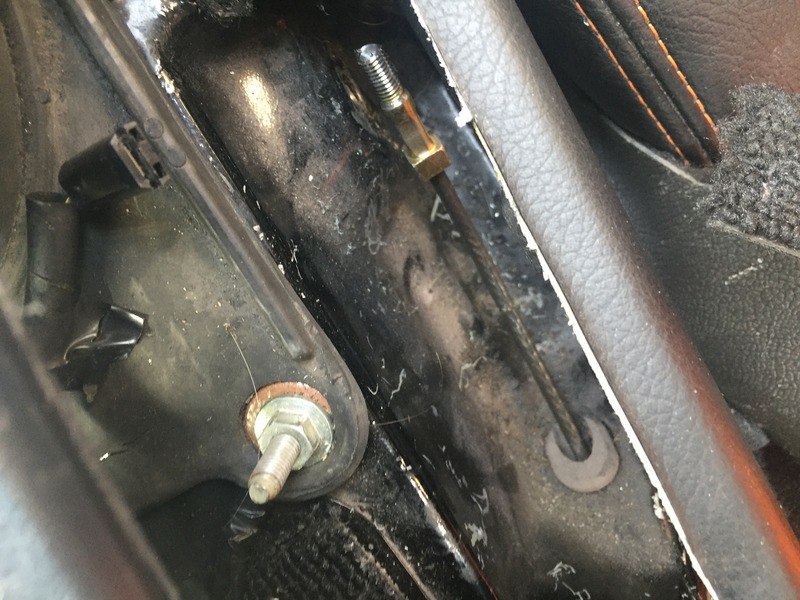
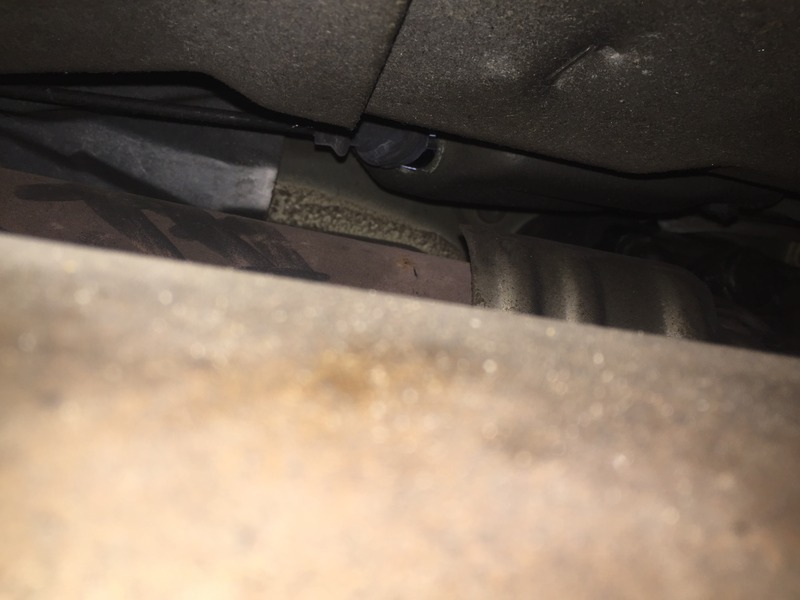
3. You can now see, underneath the handbrake gaiter the adjuster nut and the parking brake switch connection. Pull the black connector off the pin ....and take the adjuster nut off with a 10mm long socket. then tap the end of the adjuster screw lightly down.....
4. On the side of the handbrake there will be a flap of carpet, fold this down and you will reveal the 3 bolts that hold the handbrake in place.
....They zip off with a 12mm socket, (or was it 13mm, I cant remember).
5. Pull the handbrake assembly out and you will be left with this...
 [/URL]
...then use a screwdriver to poke the rubber grommet through to underneath the car...
6. Get underneath the car, and disconnect the handbrake cable from the rear calipers. Yours maybe slightly different to mine as I have aftermarket rear brakes and handbrake assy, but its pretty much the same. If I remember theres a U clip you pull out then unhook the end of the handbrake cable from where it sits and job done.
7. Once you have unhooked both cables from both calipers, theres a bracket with a 12mm (I think) bolt that bolts the cable onto the subframe arm, right next to the toe control arm (sorry forgot to take pic), unbolt these both sides.
8. Now on my car I don't have this, but normally ontop of the differential theres a bracket with 2 hoops that the cables are held in place by. you can normally bend these out enough to remove the cables, if not that bracket it held in place with a bolt (again maybe a 12mm)
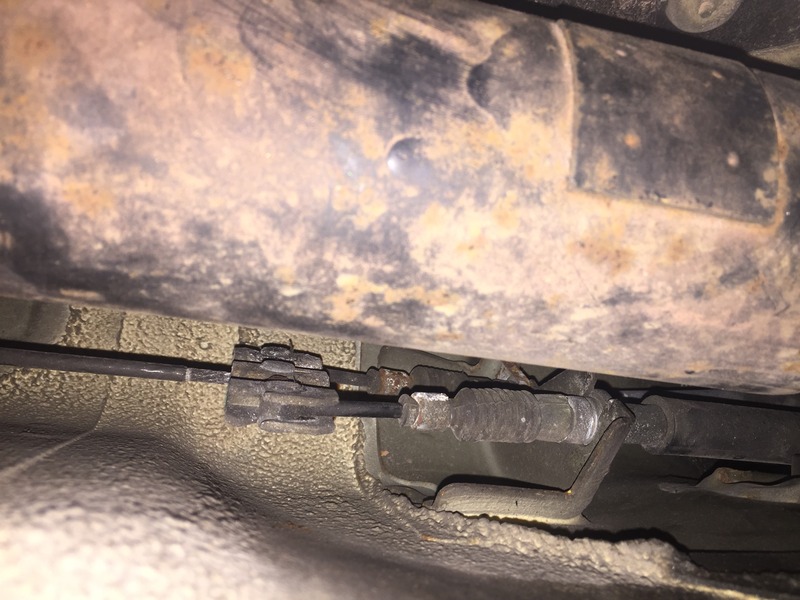
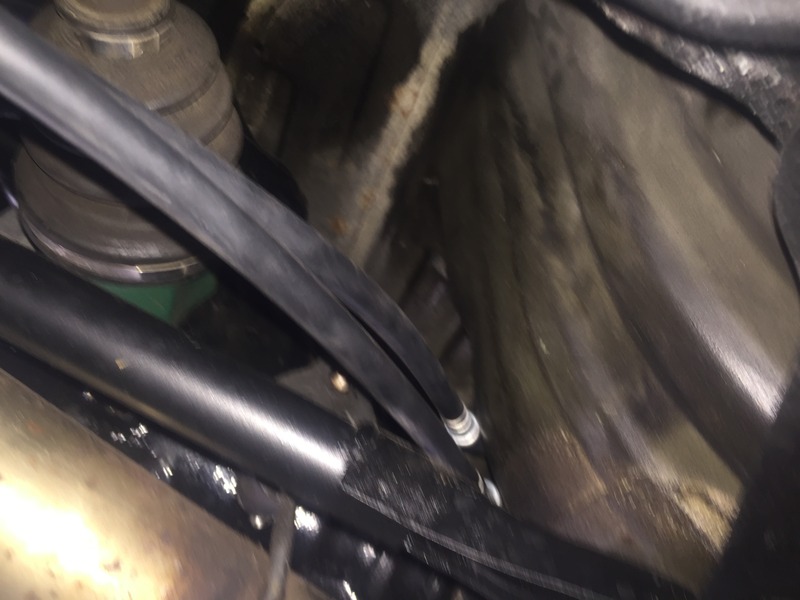
9. Once those steps are completed you need to tackle this bracket that's further up, above the ppf and prop shaft.
 [/URL]
.... space is tight here, these 2 cables are held in place with those U clips, in the pic I have removed the lower one already, the other one on the top is still there...you can use a set of long needle nose pliers to remove these or a long flat screwdriver to pry them out, once almost out I squeezed hand up there and removed the clips. to dislodge the cables from this bracket you simply pull them back (towards the back of the car) then wedge them out with the screwdriver)
TIP: Reach one hand back, above the differential to pull the cables and the other hand to wedge it out of place.
NOTE: Remember those brackets at the beginning of this guide which I didn't need. Maybe the USDM cars do not have the system in step 9. Maybe in place of this, those brackets are used, in which case im guessing youll have to squeeze a ratchet or long spanner up there to undo a bolt. I don't know this for certain...so just a heads up incase you got this far and it looked totally different.
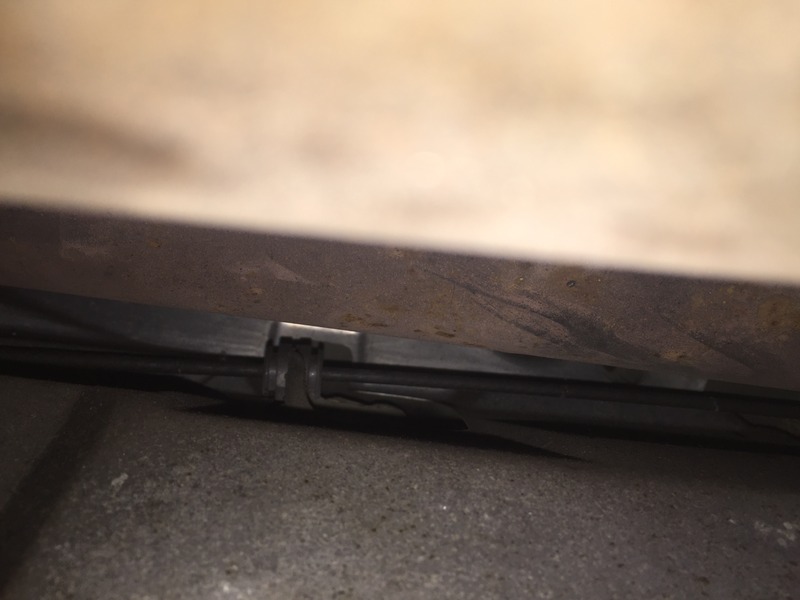
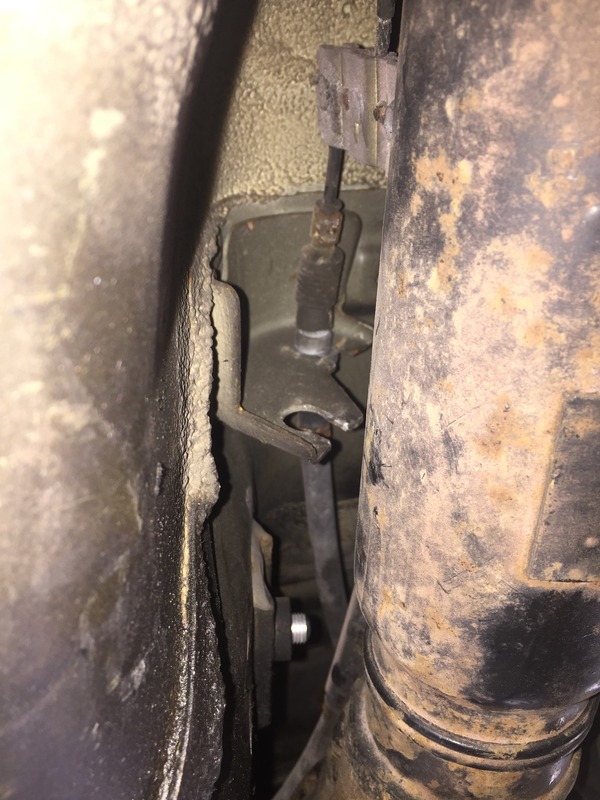
10. Once those cables are removed from the fixed bracket....follow the cable up further and youll see its attached to another bracket with a round style push in rubber mount. (sorry for poor pic)
 [/URL]
...simply pry this out with a flat screwdriver, you can use the screwdriver against the prop shaft for leverage. If its stubborn, just pry it from both sides of the bracket and work it out. If you have small hands, squeeze them up there and pull it out.
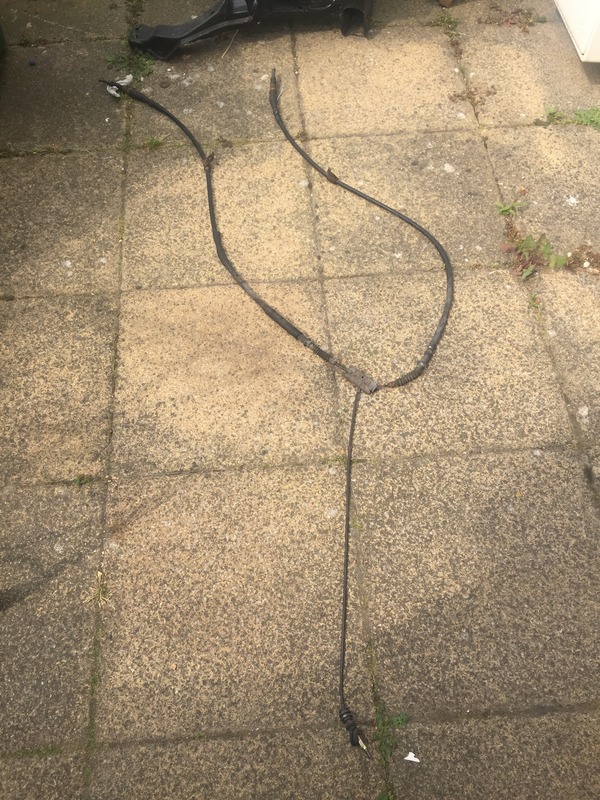
11. Once that's out just pull the cable out from the inside of the car....
.... then feed the whole cable assembly out the rear of the car and its out!
 [/URL]
12. Assemble your new cable (or take off and replace the part your replacing) and ensure it matches your existing one.
 [/URL]
.... You will notice one of the cables is longer than the other. Ensure the longer cable is routed to the REAR PASSENGER SIDE WHEEL. If you install them the wrong way around, you wont get equal pressure on the brakes when the handbrake is lifted, one caliper pretty much be securing the car because of the different cable lengths.
13. begin to feed the cables in through the back above the differential.....put both legs in together and when you have fed the cable back far enough you can split the legs to either side. REMEMBER, longer leg goes to the passenger side rear wheel.
 [/URL]
14. Now begins the fidly part......feed the single cable up into the cabin pushing the grommet through aswell. Go to the bracket that holds the 2 cables in place, starting with the top one....reach up above the diff and grab one cable leg....you want to push it, at the same time using your other hand or a long screw driver to position it into the bracket...
 [/URL]
... look at the picture, the part of the cable sitting in the bracket has a small round recessed groove...you need to locate this groove to the entrance of the bracket so you can push the cable in. Once its in this position (position in the picture), grab the cable from above the diff and push it towards the front of the car.......this then will reveal a second round recessed groove in which you have to push the U clip into to secure the cable to the bracket. if you don't push the cable towards the rear of the car, you cant put the u clip in and the cable will just fall out. To do this I pushed the cable with my left hand, with my right I held the U clip between my first and second finger and squeezed my hand up between the prop shaft and sliped the U clip into the recessed groove enough so it would hole, then simply grab your screwdriver and push it on the rest of the way. Do the same with the lower cable.
15. Once those are secured, reinstall the round bush on the single cable back onto the bracket, I wedged my hand up there to locate it in the correct place and pushed it on with my fingers.....if you have big hands locate it and wedge it on with a long screwdriver, its quite easy.
 [/URL]
16. Reinstall the cables back onto the calipers, should be easy as theres no tension on the cables. Then remember to secure the cables back onto the subframe arms.
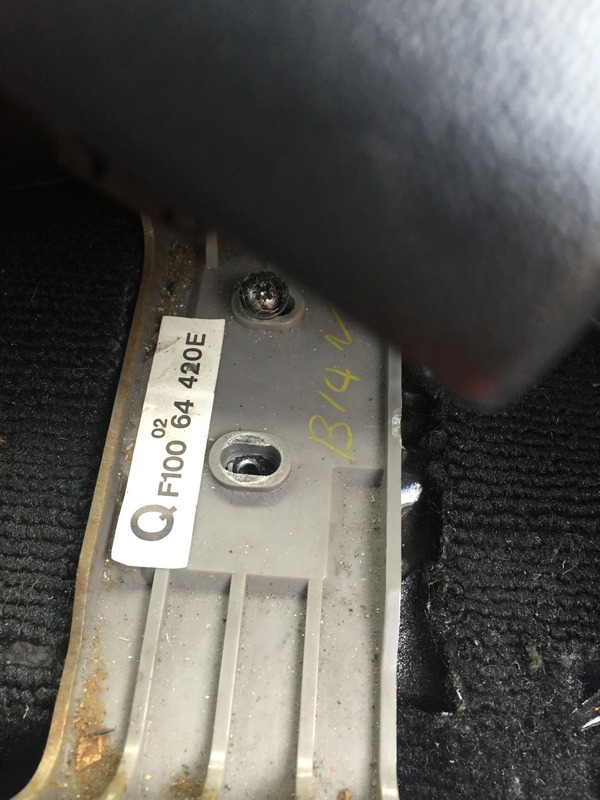
17. Get inside your rex, remove the console surround, 4 screws....
 [/URL]
 [/URL]
Pull off the surround, grab your handbrake and feed the cable back into position...
 [/URL]
...thread the adjuster nut on enough so the cable stays in place, then reinstall your handbrake with the 3 bolts on the side, then plug back in your parking brake light connector.......resintall all your trim....t'ighten the adjuster nut to the desired setting...........and go grab a beer! you deserve it
It wasn't as hard as I thought and anyone could do it with basic tools in 2 hours or so. Hope this helps anyone out there who is undertaking this job, and of course any questions or anything your not sure about drop me a message or pm and ill be happy to help/explain anything. I would of added more pics but you are limited to posting only 12, which is a shame.
CAR: 1993 FD3S RHD (JDM)
HOURS: 1 Hour 40mins
Right, so I managed to do this without dropping the PPF or removing the prop shaft, it was a bit tricky in places but actually easier than I thought it would be, so lets get started
1. Jack up the rear of the car and use some jack stands, make sure you have enough space to work. I found setting the jack stands up one notch was enough. Ensure you put chocks or bricks under the front wheels so the car don't roll on you or fall off the stands
My new cable came in 3 parts. Thanks to the guys at Atkins Rotary for the fast delivery of this. My cable did not come with a new adjuster nut....if you want to get a new one the size is M6 x 1.25. or reuse the old one if its good.
NOTE My cable came with these brackets attached to them. The cable in my car upon inspection did not come with these so I removed them. Maybe the USDM FDs came with these as the way they attach to the vehicle so keep them on the cables in case. Once you pull the old one out you will know if you need them or not. theres one on each cable leg and they join together and have a bolt hole in the middle.
2. Next, get inside your sexy rex and pop the plastic gear surround off, it just clips in. Pull from the back first and you should be able to move it out the way.
3. You can now see, underneath the handbrake gaiter the adjuster nut and the parking brake switch connection. Pull the black connector off the pin ....and take the adjuster nut off with a 10mm long socket. then tap the end of the adjuster screw lightly down.....
4. On the side of the handbrake there will be a flap of carpet, fold this down and you will reveal the 3 bolts that hold the handbrake in place.
....They zip off with a 12mm socket, (or was it 13mm, I cant remember).
5. Pull the handbrake assembly out and you will be left with this...
[/URL]...then use a screwdriver to poke the rubber grommet through to underneath the car...
6. Get underneath the car, and disconnect the handbrake cable from the rear calipers. Yours maybe slightly different to mine as I have aftermarket rear brakes and handbrake assy, but its pretty much the same. If I remember theres a U clip you pull out then unhook the end of the handbrake cable from where it sits and job done.
7. Once you have unhooked both cables from both calipers, theres a bracket with a 12mm (I think) bolt that bolts the cable onto the subframe arm, right next to the toe control arm (sorry forgot to take pic), unbolt these both sides.
8. Now on my car I don't have this, but normally ontop of the differential theres a bracket with 2 hoops that the cables are held in place by. you can normally bend these out enough to remove the cables, if not that bracket it held in place with a bolt (again maybe a 12mm)
9. Once those steps are completed you need to tackle this bracket that's further up, above the ppf and prop shaft.
[/URL].... space is tight here, these 2 cables are held in place with those U clips, in the pic I have removed the lower one already, the other one on the top is still there...you can use a set of long needle nose pliers to remove these or a long flat screwdriver to pry them out, once almost out I squeezed hand up there and removed the clips. to dislodge the cables from this bracket you simply pull them back (towards the back of the car) then wedge them out with the screwdriver)
TIP: Reach one hand back, above the differential to pull the cables and the other hand to wedge it out of place.
NOTE: Remember those brackets at the beginning of this guide which I didn't need. Maybe the USDM cars do not have the system in step 9. Maybe in place of this, those brackets are used, in which case im guessing youll have to squeeze a ratchet or long spanner up there to undo a bolt. I don't know this for certain...so just a heads up incase you got this far and it looked totally different.
10. Once those cables are removed from the fixed bracket....follow the cable up further and youll see its attached to another bracket with a round style push in rubber mount. (sorry for poor pic)
[/URL]...simply pry this out with a flat screwdriver, you can use the screwdriver against the prop shaft for leverage. If its stubborn, just pry it from both sides of the bracket and work it out. If you have small hands, squeeze them up there and pull it out.
11. Once that's out just pull the cable out from the inside of the car....
.... then feed the whole cable assembly out the rear of the car and its out!
[/URL]12. Assemble your new cable (or take off and replace the part your replacing) and ensure it matches your existing one.
[/URL].... You will notice one of the cables is longer than the other. Ensure the longer cable is routed to the REAR PASSENGER SIDE WHEEL. If you install them the wrong way around, you wont get equal pressure on the brakes when the handbrake is lifted, one caliper pretty much be securing the car because of the different cable lengths.
13. begin to feed the cables in through the back above the differential.....put both legs in together and when you have fed the cable back far enough you can split the legs to either side. REMEMBER, longer leg goes to the passenger side rear wheel.
[/URL]14. Now begins the fidly part......feed the single cable up into the cabin pushing the grommet through aswell. Go to the bracket that holds the 2 cables in place, starting with the top one....reach up above the diff and grab one cable leg....you want to push it, at the same time using your other hand or a long screw driver to position it into the bracket...
[/URL]... look at the picture, the part of the cable sitting in the bracket has a small round recessed groove...you need to locate this groove to the entrance of the bracket so you can push the cable in. Once its in this position (position in the picture), grab the cable from above the diff and push it towards the front of the car.......this then will reveal a second round recessed groove in which you have to push the U clip into to secure the cable to the bracket. if you don't push the cable towards the rear of the car, you cant put the u clip in and the cable will just fall out. To do this I pushed the cable with my left hand, with my right I held the U clip between my first and second finger and squeezed my hand up between the prop shaft and sliped the U clip into the recessed groove enough so it would hole, then simply grab your screwdriver and push it on the rest of the way. Do the same with the lower cable.
15. Once those are secured, reinstall the round bush on the single cable back onto the bracket, I wedged my hand up there to locate it in the correct place and pushed it on with my fingers.....if you have big hands locate it and wedge it on with a long screwdriver, its quite easy.
[/URL]16. Reinstall the cables back onto the calipers, should be easy as theres no tension on the cables. Then remember to secure the cables back onto the subframe arms.
17. Get inside your rex, remove the console surround, 4 screws....
[/URL][/URL]Pull off the surround, grab your handbrake and feed the cable back into position...
[/URL]...thread the adjuster nut on enough so the cable stays in place, then reinstall your handbrake with the 3 bolts on the side, then plug back in your parking brake light connector.......resintall all your trim....t'ighten the adjuster nut to the desired setting...........and go grab a beer! you deserve it
It wasn't as hard as I thought and anyone could do it with basic tools in 2 hours or so. Hope this helps anyone out there who is undertaking this job, and of course any questions or anything your not sure about drop me a message or pm and ill be happy to help/explain anything. I would of added more pics but you are limited to posting only 12, which is a shame.
Thanks for this write-up. I replaced the front cable only two months ago. Disconnecting and connecting the U clip (I think it's called "equalizer") was a bitch to work on, until I grabbed the equalizer lips with the longest screw driver I had and pushed them out like you did.

Thread Starter
Full Member
Joined: Jun 2013
Posts: 243
Likes: 2
From: LONDON
Thanks for the positive feedback guys. Reading back on the guide, it's not as clear as I wanted to make it, plus being limited to 12 pics didn't let me illustrate it as well as I wanted. So anyone tackling this and are unsure of anything just pm or post on here and I'll be happy to clear anything up and explain further 


GregS


Joined: Aug 2010
Posts: 176
Likes: 24
From: Clearwater
Thanks for the write-up.....I'm just replacing the E brake handle assembly, I've got the centre console cap off....can I leave the console surround in place? Looks like the new assembly should just slide in there.