When you click on links to various merchants on this site and make a purchase, this can result in this site earning a commission. Affiliate programs and affiliations include, but are not limited to, the eBay Partner Network.
Ok. Having some issues. This is easily the most frustrating install ive ever done on anything, not all the rails fault just what a pain of a place to get to.
the vacuum hard lines where the banjo bolt attaches have to be moved quite a bit. Like totally twisted away or pulled up. Annoying. As dale mentioned the hose on the fpr side has to be shortened. The 3 vacuum lines that go across from the rats nest through the LIM are in the way of the thermo sensor. Will have to move those hard lines over and possibly extend vacuum lines for the curve around.
On my car (jdm 92), the rear pedestal bolt is hitting the LIM, along with the FPR mount from the rail. Theres no way im taking a grinder to my LIM with all the fuel around (still leaking after hoses removed). Even if so, how the fk did you guys get the rail bolts down there? Ive already had to re pull the rail again to dive deep for a dropped bolt.
Ok. Had to take a break and rant, sorry.
Last edited by AE_Racer; Apr 16, 2019 at 04:28 PM.
Jacked car up so my tall dumb self doesnt have to bend over so far. Drank a beer. Got it all in there. Tightening the rail bolts down alleviated my rail to lim clearance issues. Mine is notched for ACV but it wont be going back on. Gonna get all this fuel cleaned up and check for leaks.
Did you have to bend those vacuum hard lines up at a 45� angle like that? It looks like it's been bent up quite a bit. I'm looking at this rail myself but still have the ACV and other factory parts I'd like to keep
Yea i took a pair of pliers and rotated it up and left as youre viewing the pic. its a tight spot to get into and I dont have a huge variety of pliers strong enough to move it. Im gonna try to clean that up a bit as I just wanted to get the rail and injectors in to stop the fuel coming out.
after taking those I also bent the 4 lines in the center towards the front so the rubber lines that cross can be routed around the sensor.
im not sure about fitment with the acv. I removed the studs and put on the block off plate with bolts, ill try to take a look this evening and see if theres room for it. You can see mine is notched for it though, where I believe testrun’s was not. I did not ask for it to be notched they just sent it that way.
So my understanding is this rail is a tight fit with emissions equipment but otherwise its easy? Luckily for me Ontario just eliminated emissions lol and I'm single turbo so I should have no issue with this install. Looks like a really nice part.
i had a hard time installing mine as well. had to lengthen vac lines from rats nest to lim around the temp sensor on the rail; all the vac lines from the turbos to the solenoids had to be lengthened, after bending the lines to clear without hitting the banjo bolt in front of the rail and also have room for the coolant line going to the water pump housing. be patient, and it'lll go in 1 way or another lol
So I'm thinking about buying/installing this rail along with the 2200's offered by RP this winter. I would like a little more headroom since I'm having to turn down my boost in colder weather to avoid high inj duty (trying to stay below 90%) on the stock 850's.
A few questions:
1. Should I get the 2200's or something a little smaller since I'm never going to need that much fuel on twins?
2. AE_Racer did you ever clean up the install or have additional pointers on that banjo bolt hitting the hard pipes in the front?
3. Are the lag numbers provided with the 2200 injectors spot on? I've read a bit in the PFC group recently about injector lags being miscalculated/plugged in to the PFC wrong creating lean condition right around transition that is hard to tune out.
Alex, get the 2200cc injectors. The price difference is negligible and the headroom is nice to have in the event you decide to get crazy later on. My last setup was stock primaries and 2200 secondaries (with a PFC) and it was great. I'm doing the same thing with this new FD right now too.
I had the same duty cycle issue as you. I saw 99% once and thats when I ordered this. The headroom for down the road is great as above.
I will have to look at the car again to be sure but I think I just rotated that line back down and bent it forward a bit so I could get a wrench on the banjo bolt and tighten it down. If the bolt needs to come out I will have to fiddle with it again. Would love to see any other ideas or fixes for that, but its working so I will prob leave it until it needs to be removed.
Looks like that thing is pretty much just a manifold connecting 3 hoses to the primary elbow filtered air. I wonder if I could just cut that thing out and replace it with a 4-way hose barb fitting.
3. Are the lag numbers provided with the 2200 injectors spot on? I've read a bit in the PFC group recently about injector lags being miscalculated/plugged in to the PFC wrong creating lean condition right around transition that is hard to tune out.
Alex,
The ID2200 require more lag that the Power FC calculates by simply changing the secondary lag vs. batt voltage tables. There is more lag correction that needs to be added to the Power FC to make sure you don't go lean at transition. Once you add the additional lag, these work great. I would do the 2200's. I have the same setup with the stock 550's, the ID2200's, and the original RP fuel rail from 2014. Spot on transition with proper settings. I will send you my settings if you need them once you install everything.
Mike
Mike,
That would be awesome if you could send the correction #'s to me.
It's going to be 2-4 months until these are in the car. Moving to a new house and trying to hit a few more races before the season is over.
How did you come up with the #'s? Were they provided or did you go thru the spreadsheet on the PFC group where you have to measure harness resistance, etc?
This rail finally went in my car. The part of the rat's nest everyone is having trouble with is just a manifold connecting some hoses to the primary inlet elbow.
I removed it by pinching the metal tube going down with wire cutters and wiggling it back and forth. Replaced with 3/16" barbed 4-way brass cross fitting. The 3/16" cross fits the both the small and large vac hose sizes.
If you aren't using the factory boost control solenoids you can remove that whole metal vacuum line mess that attaches to the front of the primary turbo that has that manifold. I think the only lines you need to run are to the turbo control actuator, just run 2 silicone hoses down to it and to the nipples on the main rat's nest. Drops some weight and that metal spider on the primary turbo is always in the damn way.
Here's a writeup of my experiences installing this fuel rail and injectors. I initially went in to replace the fuel pulsation dampener but after realizing how much work it was to get to them I decided to upgrade the fuel rail while I was in there. My car is mostly stock but running a PowerFC and BNR stage 3 twins now.
The rail and injectors as I received them (about $580 shipped). Nicely packaged and labelled, with injector settings printed out:
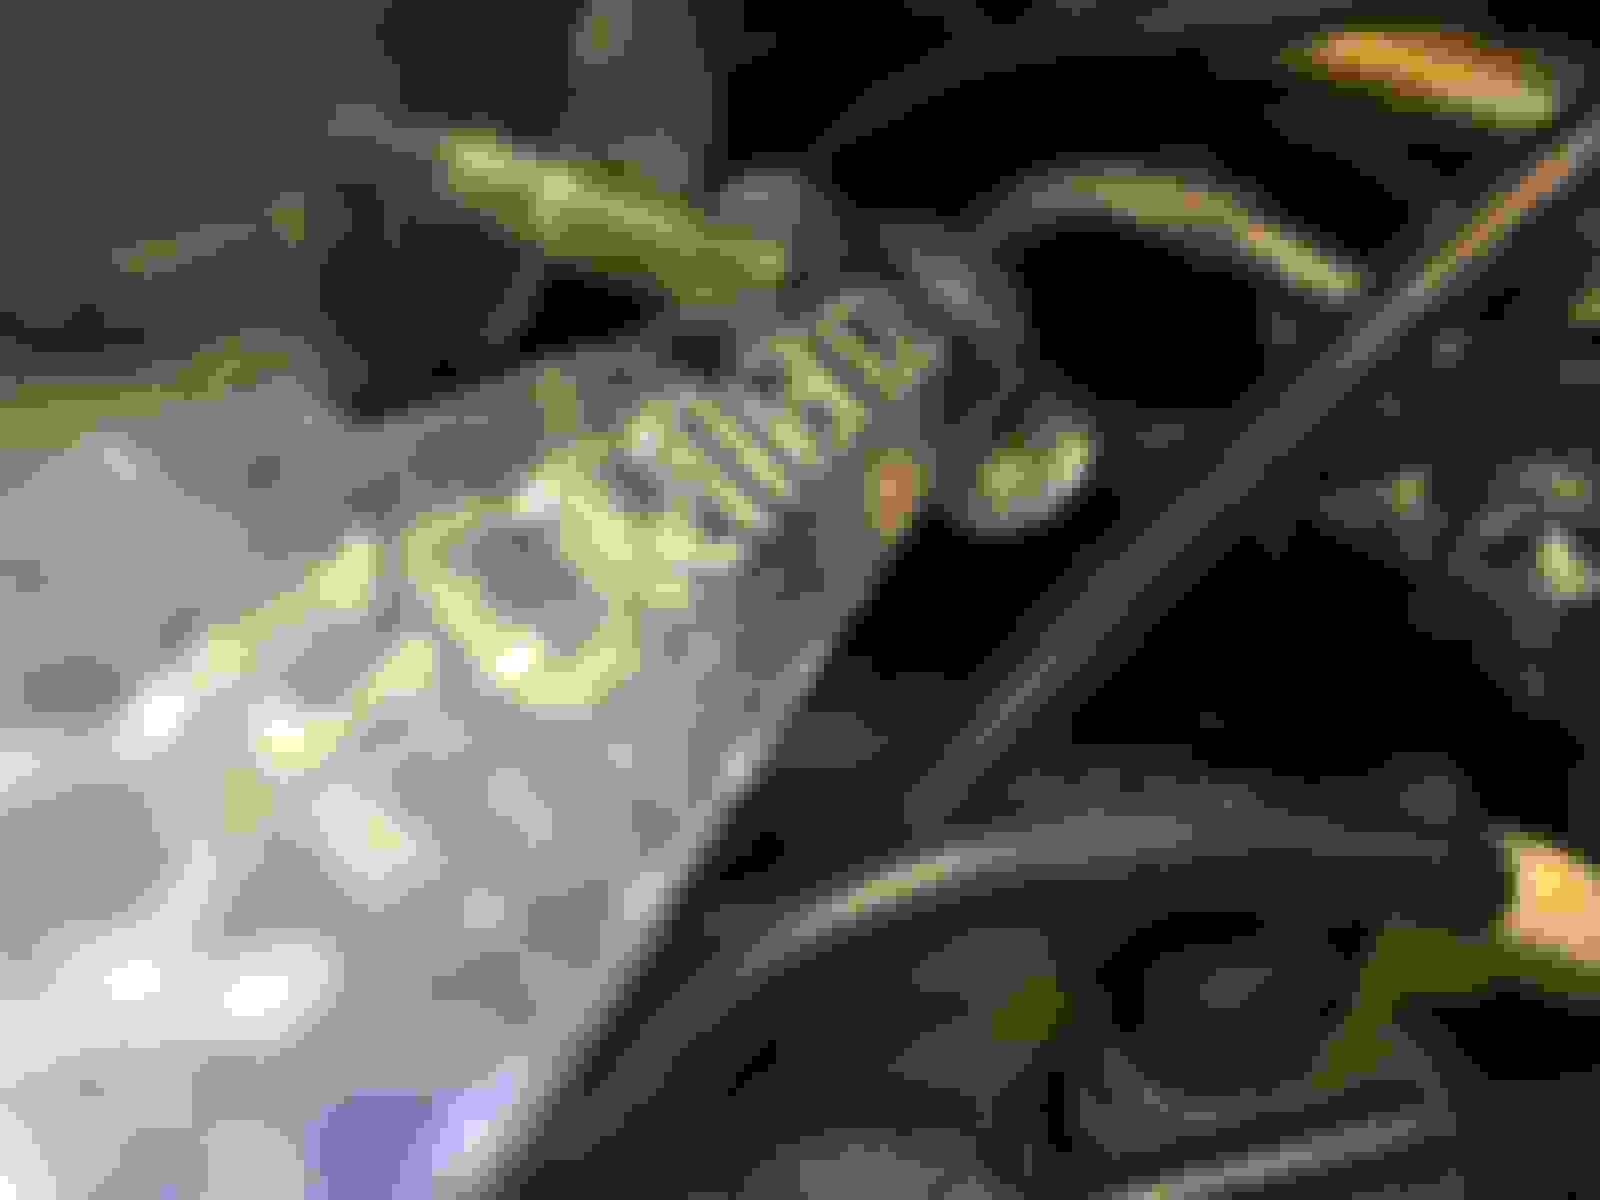
The problem with the rail and the vacuum spider hardlines is right here. This bent part with three large hoses comes into contact with the banjo bolt because the rail is longer than the factory one here. In this picture it's not quite in the right place yet.
I wound up bending the hardlines out of the way with pliers. It took an hour or so of tinkering, because they need to bend a little further than is comfortable. I made this work, but if I could do this again I would take the time to pull the necessary turbo intake components off to get the spider off and modify it outside the car by cutting some of the metal that holds them all together. Rotary Performance actually recommends doing this and eliminating some of the hardlines entirely (Dale referenced this above also). I didn't really want to do this in case I need to pass emissions in the future. See the end of this post for the instructions provided by Rotary Performance.
All in all, I didn't damage the hardlines too much, and since many people have these laying around their garages I didn't feel bad messing it up. I did have to cut longer vacuum hoses to reach after this so make sure you have extra
Note: these new injectors do not work with the diffusers. You will need to CAREFULLY remove them without any plastic getting into the engine. If you do get a piece of plastic in, try using a shop vac on the LIM top hole. It worked for me.....
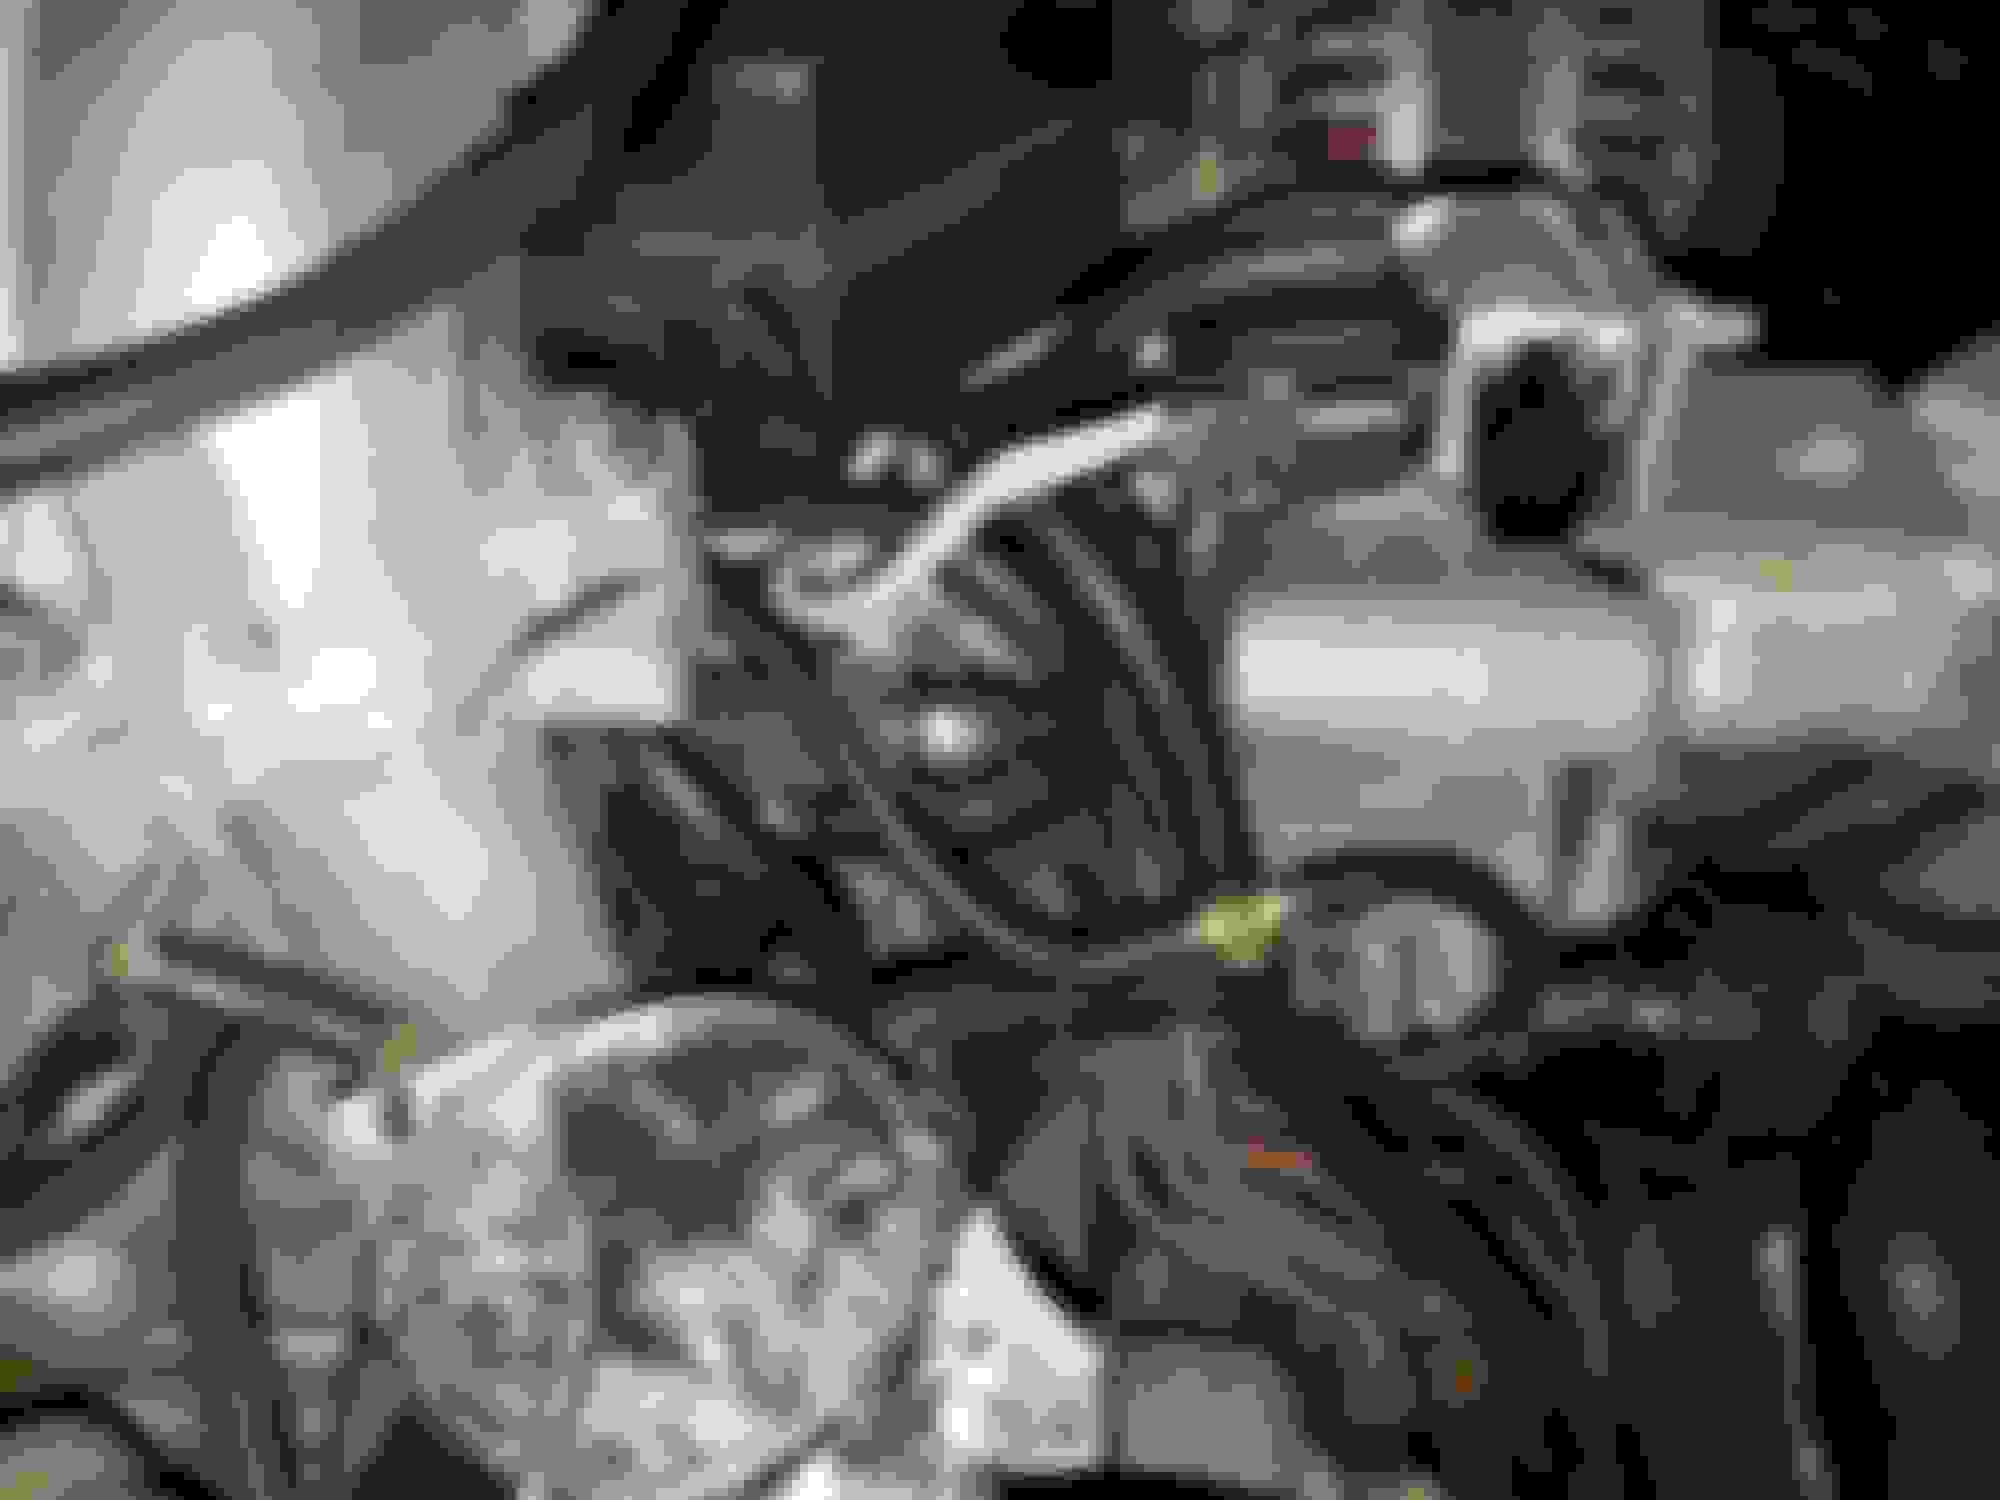
Next problem: you can see that the rail is notched to fit the ACV. Well, kind of. The stud fits just over the rail, but the clearance is so tight the nut can't fit on there and it definitely can't screw on enough to touch the ACV. First, you have to grind the bottom bolt hole on the ACV until the hole is barely still complete to get it to slide on. Next, I created a 'spacer' to give the nut some possibility of clamping down. I did this by taking a spare nut and grinding it down similar to the ACV, then superglueing it to the ACV. Why superglue? I had to do this twice.. the first nut got dropped somewhere into the engine because there's no room for your fingers down there. I also swapped the nut for one without flanges, and was able to get it just a couple turns onto the stud. Hopefully this holds – I honestly don't know what else I could do.
Just when I thought the ACV was going to fit, it didn't. This little screw makes contact with the rubber fuel line (a new one I had just installed). It digs in enough to prevent installation. In the picture below you can see the ACV hitting the hose clamp.
To fix this, I removed the screw and ground down the ACV where the screw goes through. Don't let the picture below fool you – this still didn't clear even sitting more than a quarter inch lower. In the end, I would have had to grind off so much that the screw wouldn't be clamping anything effective anymore, so I just left the screw off. I really don't know of another way to do it. I hope it doesn't cause problems.
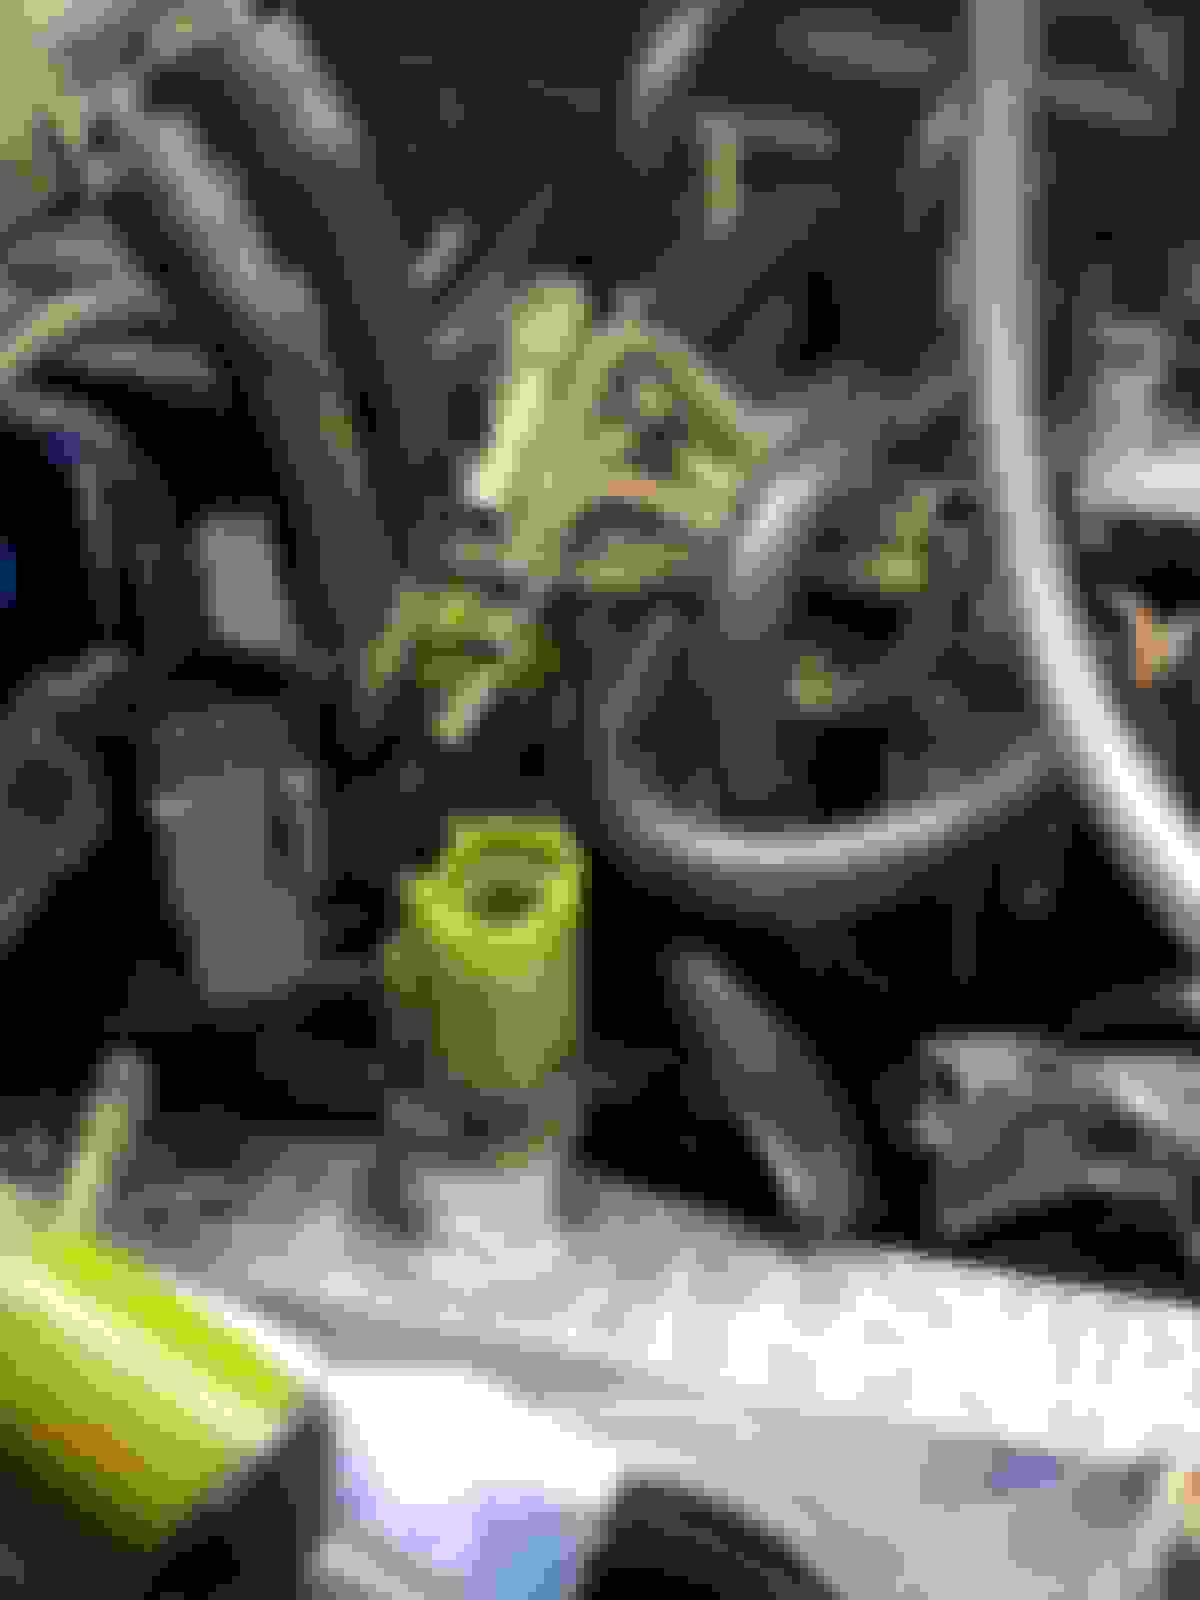
The last problem you run into is with the fuel temp sensor. The 4 parallel hardlines between the vacuum spider and the manifold point right at it. I twisted the bottom 2 out of the way slightly with some pliers and cut longer hoses for them. Not bad at all.
The hoses sort of wrap around the sensor plug, so unplugging that in the future might involve removing a hose or two. You could probably cut longer hoses and avoid that problem.
With that, I could put everything back together like normal. I did have to make some adjustments to the secondary injector settings in the PowerFC using FC Edit (the controller isn't adequate for it). I am both happy to have an upgraded fuel rail with emissions compatibility and happy with the support I received from Rotary Performance throughout the process. They answered my questions before purchase and during installation on the phone.
During this process, I also replaced the fuel pulsation dampener and the soft fuel lines between the fuel rails and vacuum spider. I picked up brand new Gates brand fuel injection hose from Oreilly.
Does this fuel rail work with factory emissions? Yes... sort of... I guess so. It took an awful lot of prying, cursing, grinding, and bending but I do have it installed in my car right now successfully. It's just far from a simple drop-in procedure I am happy with the quality of the rail but I would strongly encourage Rotary Performance to include instructions on how to do these modifications as well as elaborate on the extensiveness of the modifications up front. This is a lot more than I expected and it took significantly longer to install.
That said, one day after I got the rail bolted in, I received additional instructions from Rotary Performance:
Good morning, I took some time to take a couple photos of the hard lines that go from the waste gate and pre-control up to the duty solenoids under the upper intake. If you look at the lines closely, you will notice I cut out the negative pressure line that goes to the intake side if the primary turbo. This line has a large barrel that is what blocks the new rail from being installed. Now lets talk about what the line actually goes to and does. The barrel has 4 ports on it that all combine to go down to the intake. The 4 lines that attach to it are as listed.
Okay, now that we know what they go to, what do they do?? It was for emissions. The duty solenoids are a pulsed width modulated switch. What happens is boost is applied to these solenoids and the two diaphragms. This is how the boost and pre-control regulates. The ecu will pulse the solenoids, when that pulse occurs the bottom port releases some pressure. Well that pressure can go to the atmosphere for all I care. But as far as a standard emissions car from a dealer. No way. Mazda made sure to re-circulate that waste. As for the two lines that go to the oil injectors. This ones fun. Its for noise dampening. Yeah Mazda and their nerdiness. If that's even a word.
Man, this is hilarious it seems like everyone is adding the RP rail to their car this winter!
I don't have the ACV, so didn't have to deal with this. The lines that interfere with the fuel temp sensor I just bent forward slightly so the vacuum hoses now pass right in front of the temp sensor and connector.
I don't want/like to leave vents open in case an insect decides to make a nest in them (mud dauber wasps are notorious for this) and block the passage on anything you leave exposed.
Used the opportunity to put on new Gates 5/32 hoses where I had to touch. They are a nice tight fit.
3/16 hose barb 4 way cross connector replacing the interfering barrel manifold shown below:
Alex, thanks for that picture of the 4 way you installed. I like that.
For anyone wondering about the ACV, I used a block off plate on mine and the bolts supplied with the plate kit. It was close but I cleared the rail with no further modifications.
As much as I like the RP rail there are a few things that I wish they would do - doesn't seem like they would have to do a crazy amount of re-engineering to improve the fit. Would be nice if it would straight bolt on a stock car.
I know they just changed some things with the design, kind of strange that they are a little off on fit.
But, it is good you can make it work with an ACV and have a fully functioning emissions system.
Their pricing, before add-ons, seems to be up there with the likes of CJM and Radium. With the comparatively poorer fitment from what has been shown, a website that does not clearly make this thing configurable (I am looking for the whole package) unit, my money will be going to one of those other outfits instead.