
A/C Evaporator Rebuild w/ Photos

Thread Starter
Group Buy Vendor
iTrader: (9)
Joined: Dec 2005
Posts: 751
Likes: 17
From: Orlando, FL
A/C Evaporator Rebuild w/ Photos
I recently took my interior apart to restore the air conditioning blower, evaporator, and heater core. Over time the rubber gaskets on these things deteriorate and you get pieces of foam blowing out of your A/C vents.
Here's the thread with the blower restoration: https://www.rx7club.com/3rd-generation-specific-1993-2002-16/c-blower-rebuild-w-photos-993190/
I just did the evaporator, which was a very similar procedure. The evaporator is obviously connected to your A/C lines, so you will have to evacuate the system to disconnect it. Seal the ends of the lines to prevent dirt from getting in and oil from dripping out.
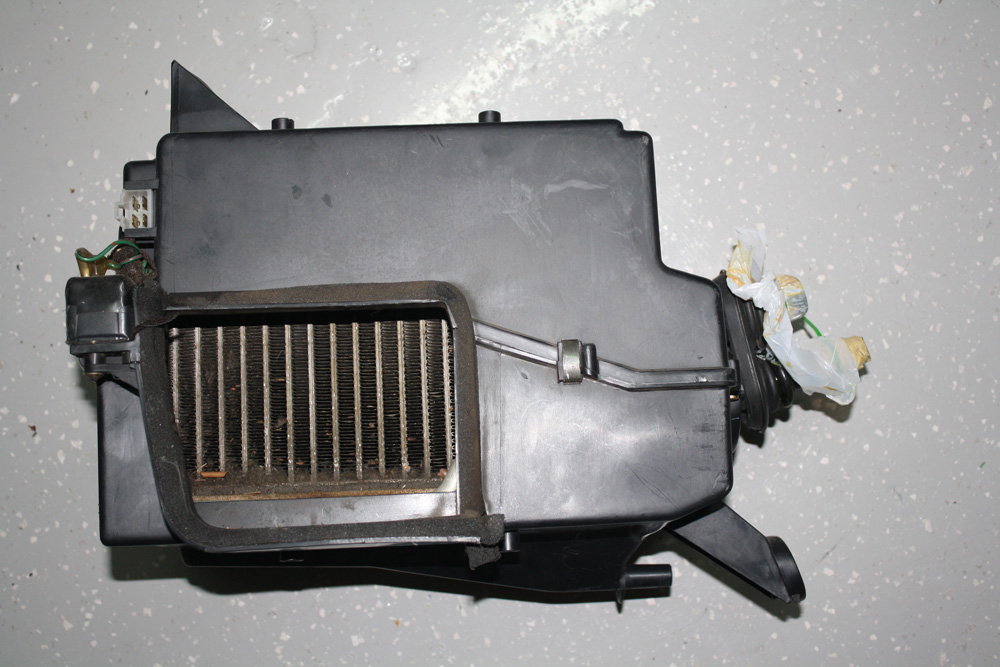
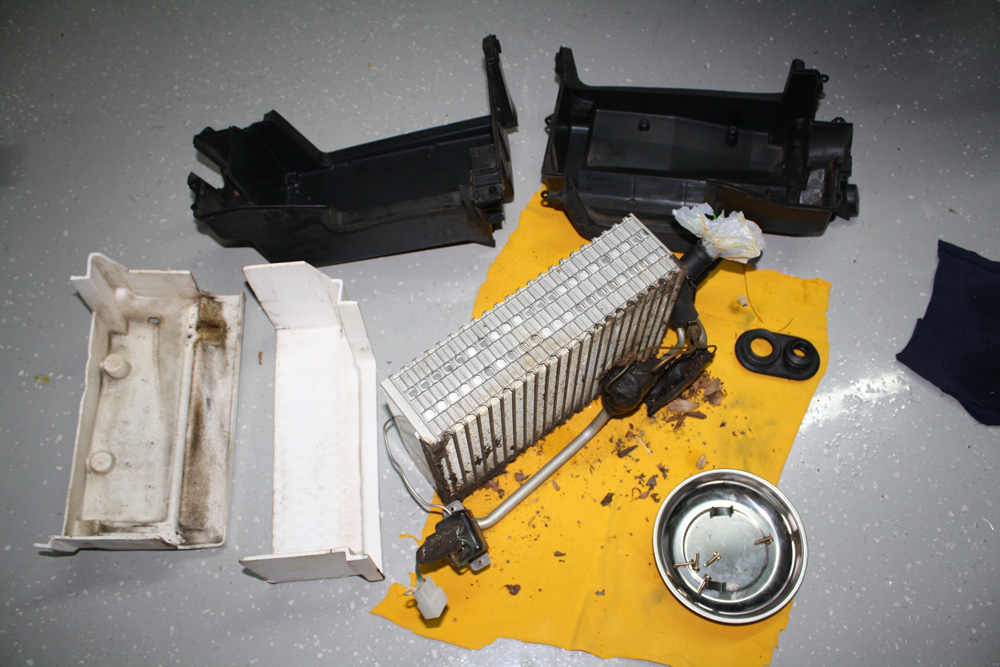
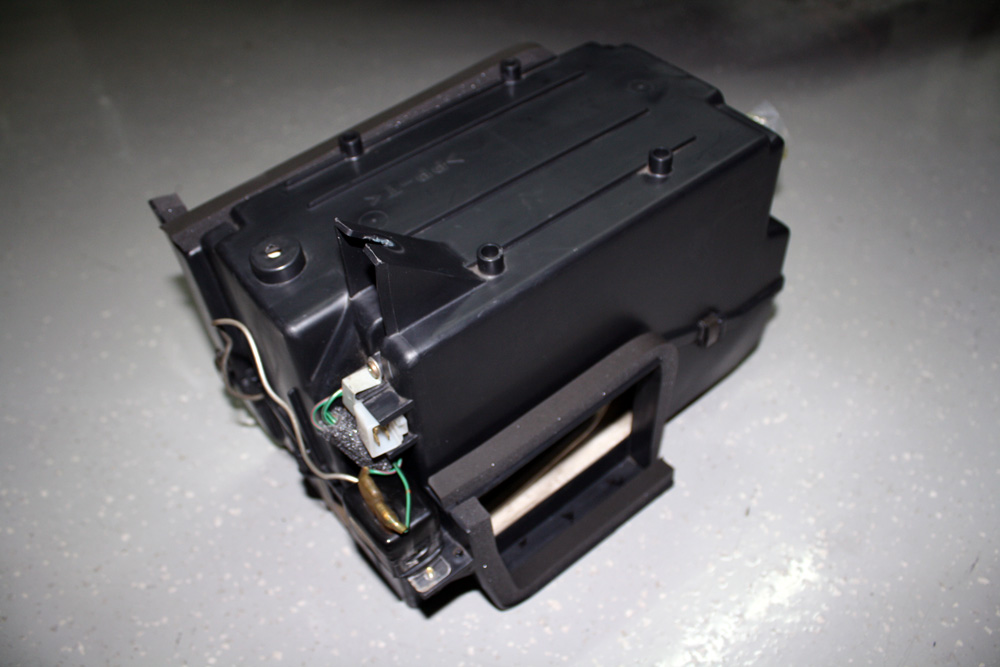
Here's what the evaporator looks like after removal:
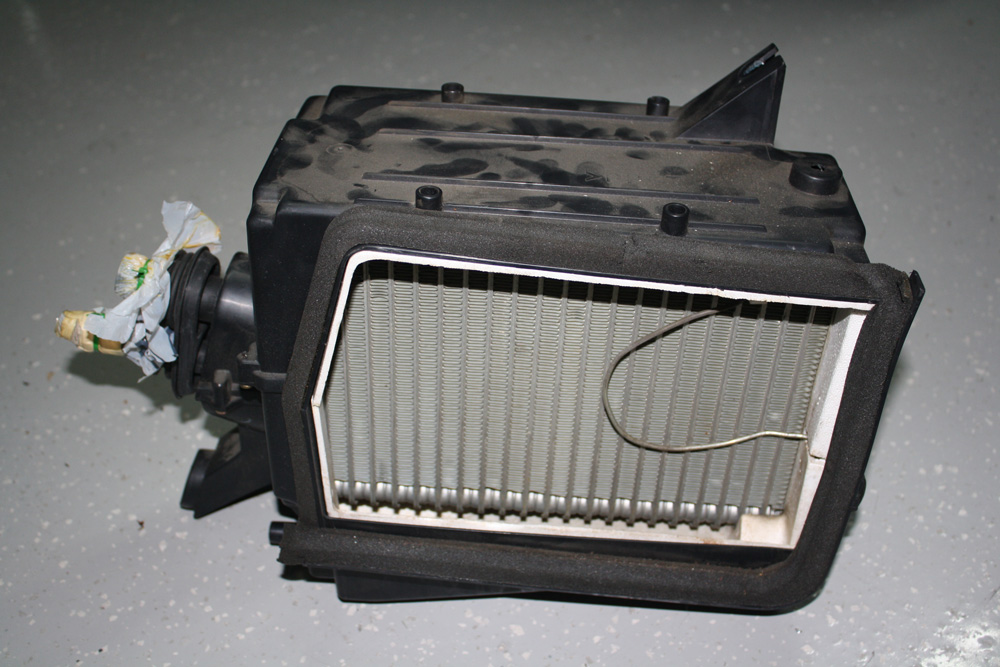
The foam gasket doesn't look too bad, but it was disintegrating. As soon as you touch it, it falls part. There is also some foam on the opposite side:
Disassembly is straightforward. There are a couple of clips and a few screws securing the plastic enclosure. You'll probably find quite a bit of dirt and leaves inside.
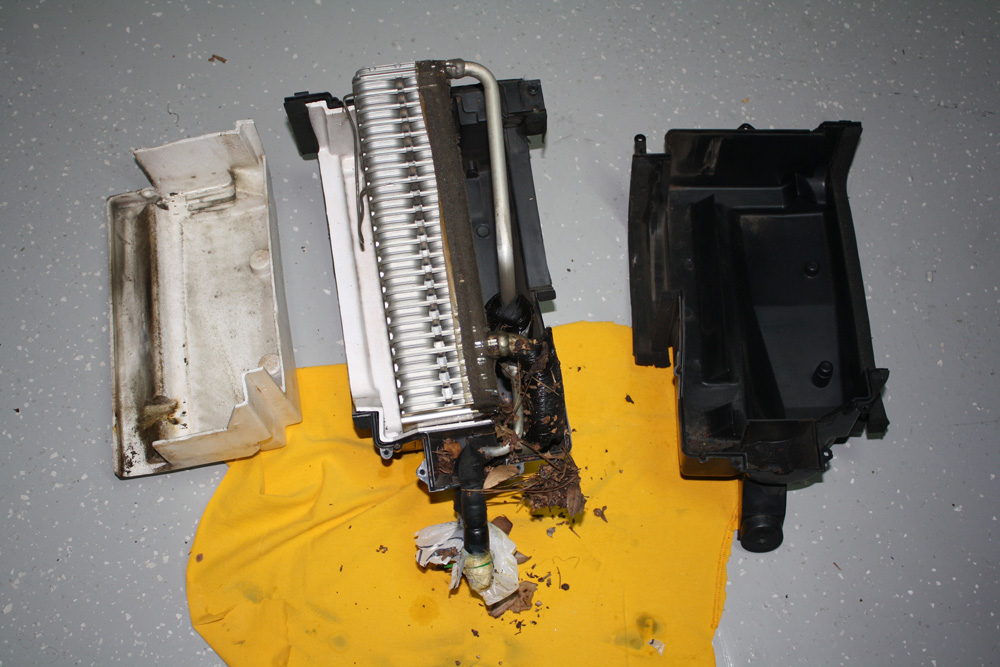
The Styrofoam insulation breaks easily so be careful. Don't just try to yank it off. It may be glued to the radiator in some of the corners, so you may have to use a razor blade to cut it free:
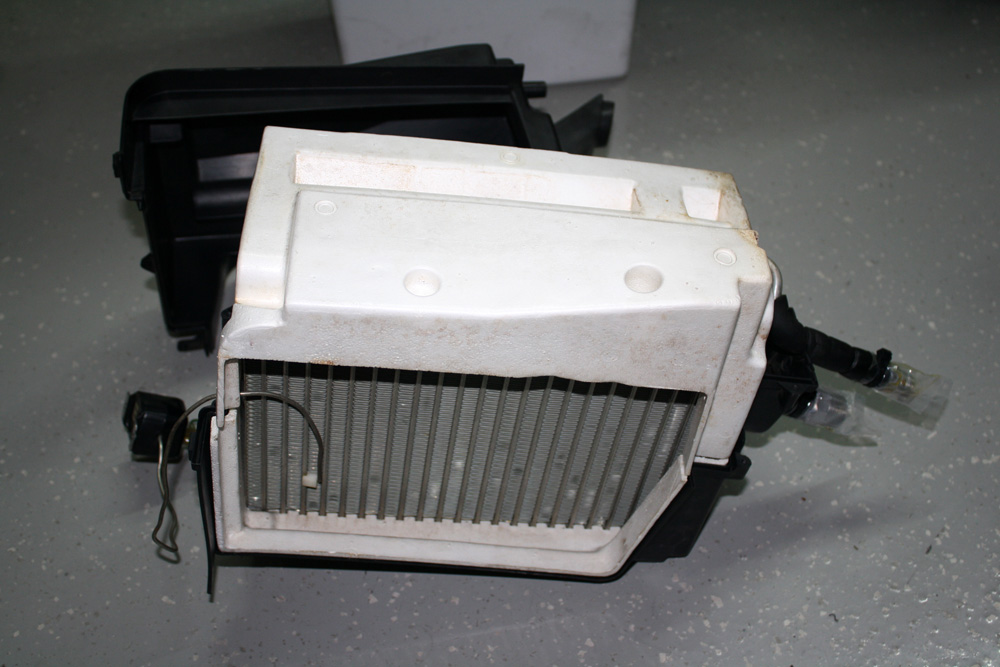
Here's the whole unit dissassembled:
(Continued in next post...)
Here's the thread with the blower restoration: https://www.rx7club.com/3rd-generation-specific-1993-2002-16/c-blower-rebuild-w-photos-993190/
I just did the evaporator, which was a very similar procedure. The evaporator is obviously connected to your A/C lines, so you will have to evacuate the system to disconnect it. Seal the ends of the lines to prevent dirt from getting in and oil from dripping out.
Here's what the evaporator looks like after removal:
The foam gasket doesn't look too bad, but it was disintegrating. As soon as you touch it, it falls part. There is also some foam on the opposite side:
Disassembly is straightforward. There are a couple of clips and a few screws securing the plastic enclosure. You'll probably find quite a bit of dirt and leaves inside.
The Styrofoam insulation breaks easily so be careful. Don't just try to yank it off. It may be glued to the radiator in some of the corners, so you may have to use a razor blade to cut it free:
Here's the whole unit dissassembled:
(Continued in next post...)
Last edited by RaceDriver7; Apr 2, 2012 at 05:33 PM.
Thread Starter
Group Buy Vendor
iTrader: (9)
Joined: Dec 2005
Posts: 751
Likes: 17
From: Orlando, FL
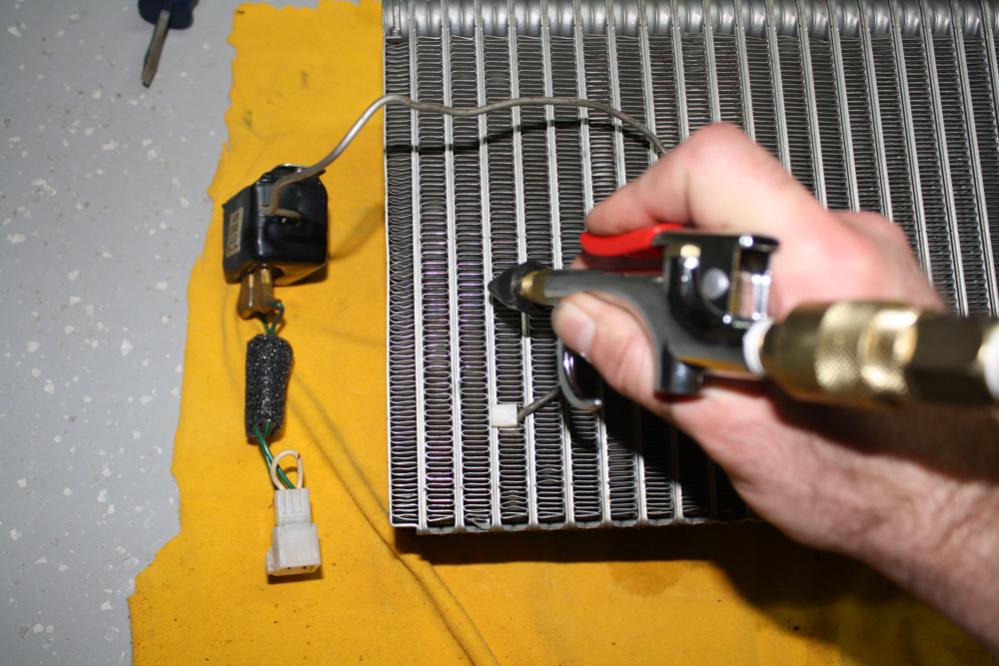
Compressed air works pretty well to blow out all of the leaves and junk that get stuck in the radiator. This is also a good time to gently and very carefully straighten out any bent fins.
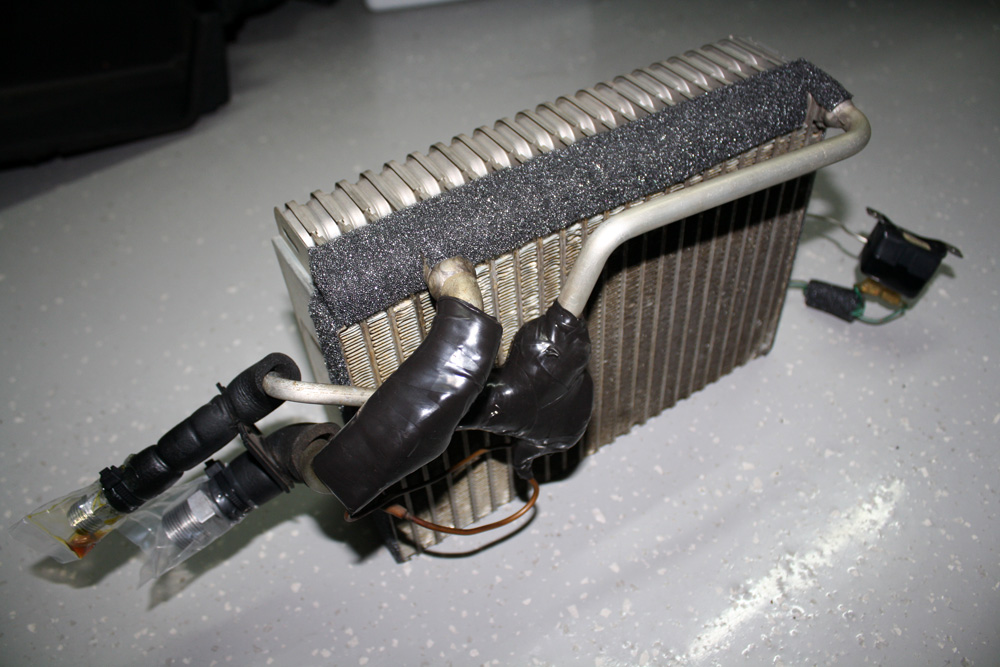
There is a strip of thin foam along the top edge and sides of the radiator, which will be, of course, completely deteriorating.
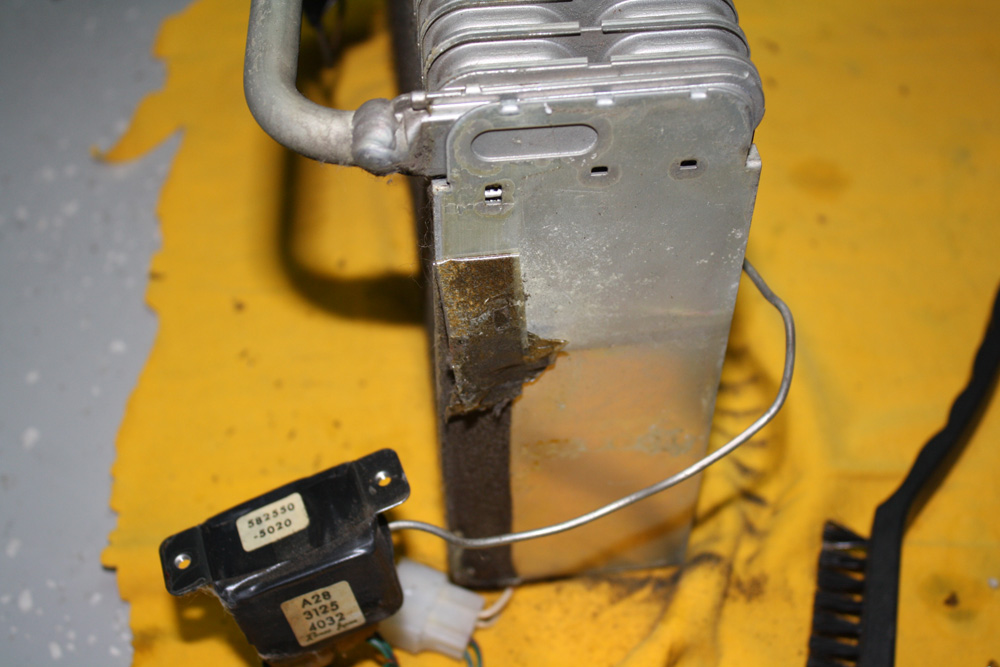
It was replaced with adhesive-backed, 1/8" thick foam rubber. I used McMaster.com part number 8614K71. It comes in a big roll; just cut to size.
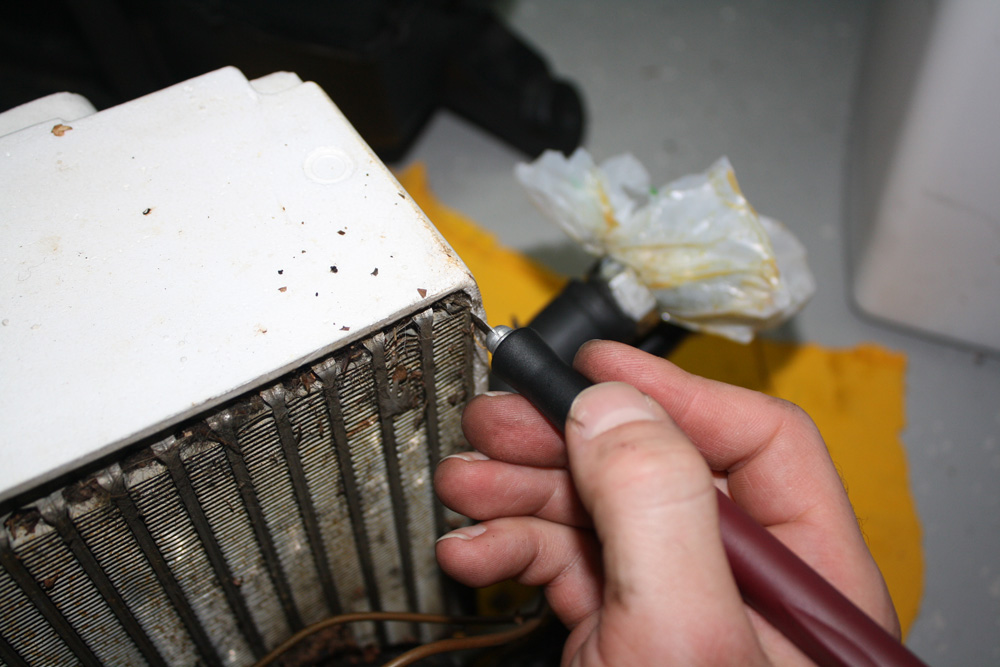
There are some connections and sensors attached to the lines inside of these really goopy, sticky, insulation pads:
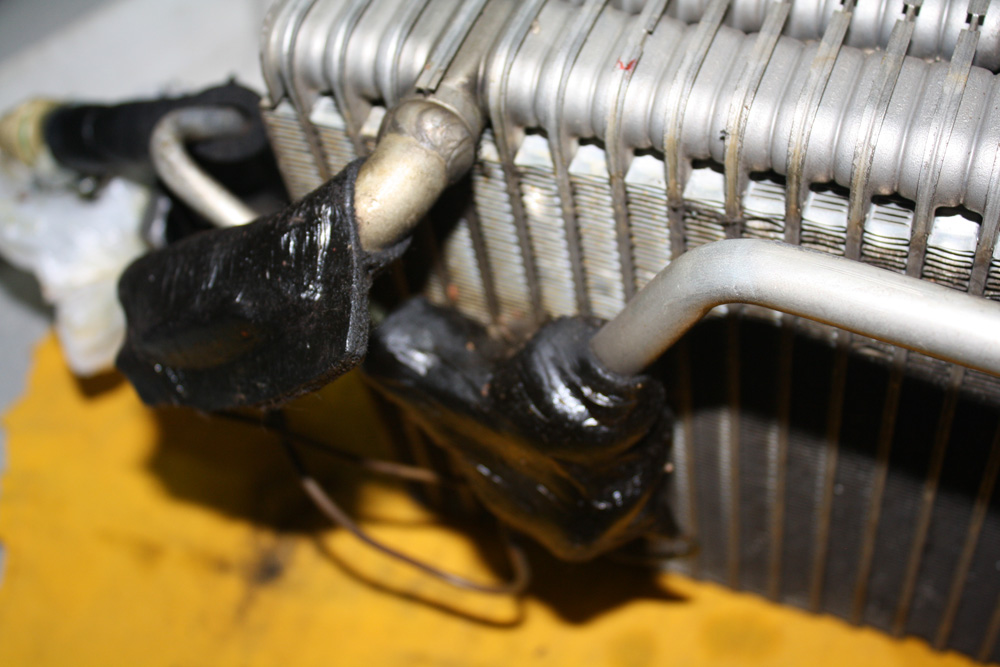
I decided not to remove them, but they are so sticky that they attract dirt, leaves, etc. So I decided to wrap them with self-vulcanizing electrical tape. No more sticky mess.
(Continued in next post...)
There is a strip of thin foam along the top edge and sides of the radiator, which will be, of course, completely deteriorating.
It was replaced with adhesive-backed, 1/8" thick foam rubber. I used McMaster.com part number 8614K71. It comes in a big roll; just cut to size.
There are some connections and sensors attached to the lines inside of these really goopy, sticky, insulation pads:
I decided not to remove them, but they are so sticky that they attract dirt, leaves, etc. So I decided to wrap them with self-vulcanizing electrical tape. No more sticky mess.
(Continued in next post...)
Thread Starter
Group Buy Vendor
iTrader: (9)
Joined: Dec 2005
Posts: 751
Likes: 17
From: Orlando, FL
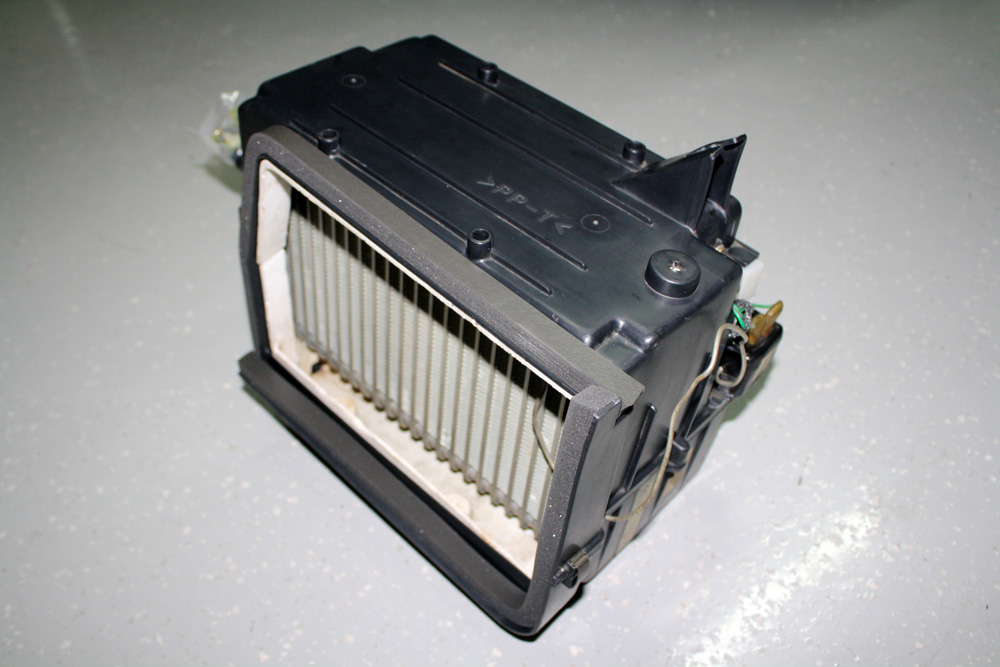
The enclosure is just plastic, so you can wash and scrub it in the sink if you like. Don't try to clean the Styrofoam too much though, it's fragile. After everything is clean, re-assembly is pretty simple.
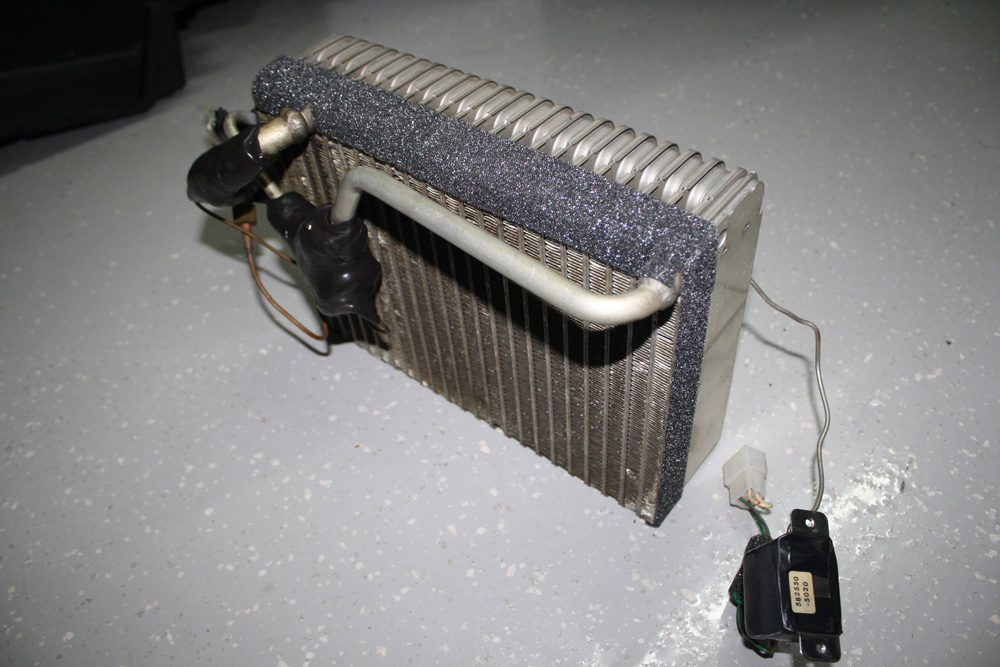
Once assembled, you can replace the foam gasket on the outer edges of the evaporator. I used McMaster-Carr part number 93275K52. It's adhesive-backed and 1/2" x 1/2" which is pretty much perfect.
Here's the unit re-assembled, clean, with new foam.
I'll be doing the heater core next, which is very similar to the A/C blower. Should be able to rebuild it using the same materials.


Why didn't you replace the expansion valve, or at least all the o-rings while you had it all out and apart?
Also, the refrigerant oil that dribbled out into the plastic bag looks awful dark. Factory ND-7 oil is clear. Has it had an R-134a conversion done?
Also, the refrigerant oil that dribbled out into the plastic bag looks awful dark. Factory ND-7 oil is clear. Has it had an R-134a conversion done?
Thread Starter
Group Buy Vendor
iTrader: (9)
Joined: Dec 2005
Posts: 751
Likes: 17
From: Orlando, FL
Yes, it's R-134a. Car has an LS1 swap.
Last edited by RaceDriver7; Apr 3, 2012 at 11:37 AM.
Trending Topics


I've never seen an expansion valve go bad before, so I didn't really think to replace it. Is that a common problem? The valve is also a little pricey at $100. EDIT: I just realized the entire unit is only $168 from Mazda Motorsports. Maybe I should replace the whole thing... hmm...
Yes, it's R-134a. Car has an LS1 swap.
Yes, it's R-134a. Car has an LS1 swap.
Thread Starter
Group Buy Vendor
iTrader: (9)
Joined: Dec 2005
Posts: 751
Likes: 17
From: Orlando, FL
It isn't particularly common for them to fail but to me it is a while-I'm-at-it sort of swap out. It is actually a universal design and can be had for $15 or so.
I'm rebuilding the heater core right now, which is kind of a pain. I'll post a write-up soon.
Originally Posted by M104-AMG
FWIW, spray down the evaporator with Lysol or other germ & bacteria killing aersol to kill anything that might make it stink.
:-) neil
:-) neil
Thread Starter
Group Buy Vendor
iTrader: (9)
Joined: Dec 2005
Posts: 751
Likes: 17
From: Orlando, FL
It isn't particularly common for them to fail but to me it is a while-I'm-at-it sort of swap out. It is actually a universal design and can be had for $15 or so.
It is a crapshoot. I've bought some A/C parts that do include o-rings, and some that don't. I haven't ordered that particular valve just yet, but I expect I'll be getting one for my car in a month or two when I get the drier situation sorted.
Thread Starter
Group Buy Vendor
iTrader: (9)
Joined: Dec 2005
Posts: 751
Likes: 17
From: Orlando, FL


Thread
Thread Starter
Forum
Replies
Last Post
rx8volks
Canadian Forum
0
Sep 1, 2015 10:46 PM
ac, auto, bad, clean, core, evaporator, foam, ls1, mazda, rebuild, rebuilding, replacing, restoration, rx8, thick