
RS/RZ brakes install notes and pics (warning... many big pics)


RS/RZ brakes install notes and pics (warning... many big pics)
Ok, it took a while (long while) but I finally got the RS/RZ calipers from the group buy and got them installed. I didn't do
a good job this time of taking pics during each step but I do have some pics and notes for ya.
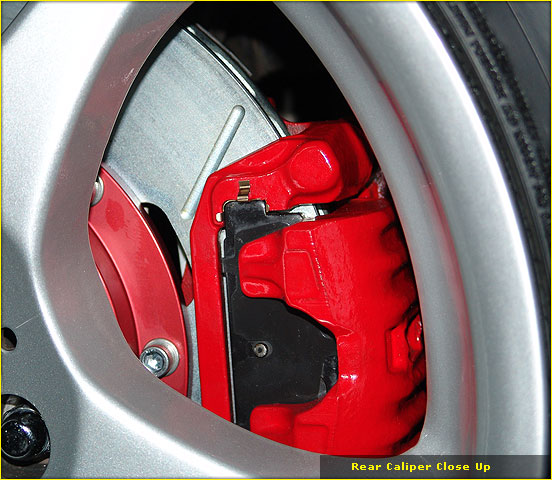
Here is what they look like on the car:
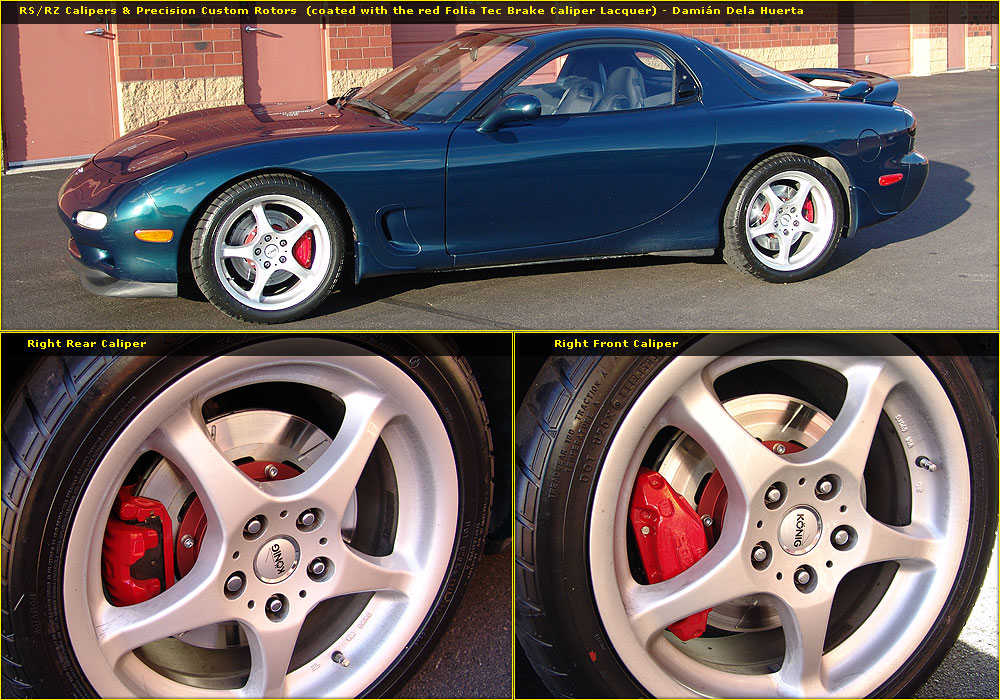
I'll put more pics in the posts below.
Install notes:
Pre-install
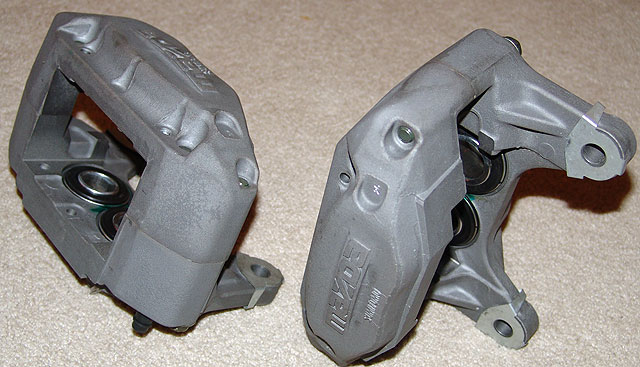
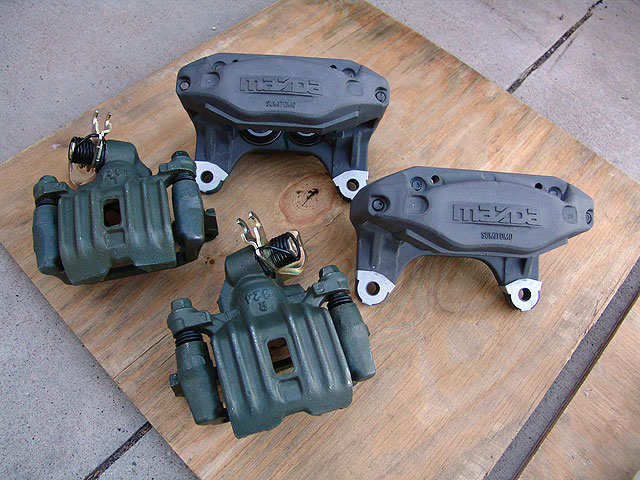
- coat/paint calipers as per directions of coating (be sure not to coat parts that should not be coated like rubber grommets, nipple holes, brake line threads, et)
- make sure have a torque wrench and other standard tools
- have some new copper crush washers for the rears
- possibly buy the new rear banjo bolts (read below)
- a rubber mallet will help
- might need impact screw driver (philips head, read below)
- get a high quality brake flare nut wrench
Install
- I suggest to use the same pattern as the bleeding procedure since you basically have to 'bleed' the caliper once you get it on and all hooked up, so start with the RR, then RL, then RF, then LF, the LR.
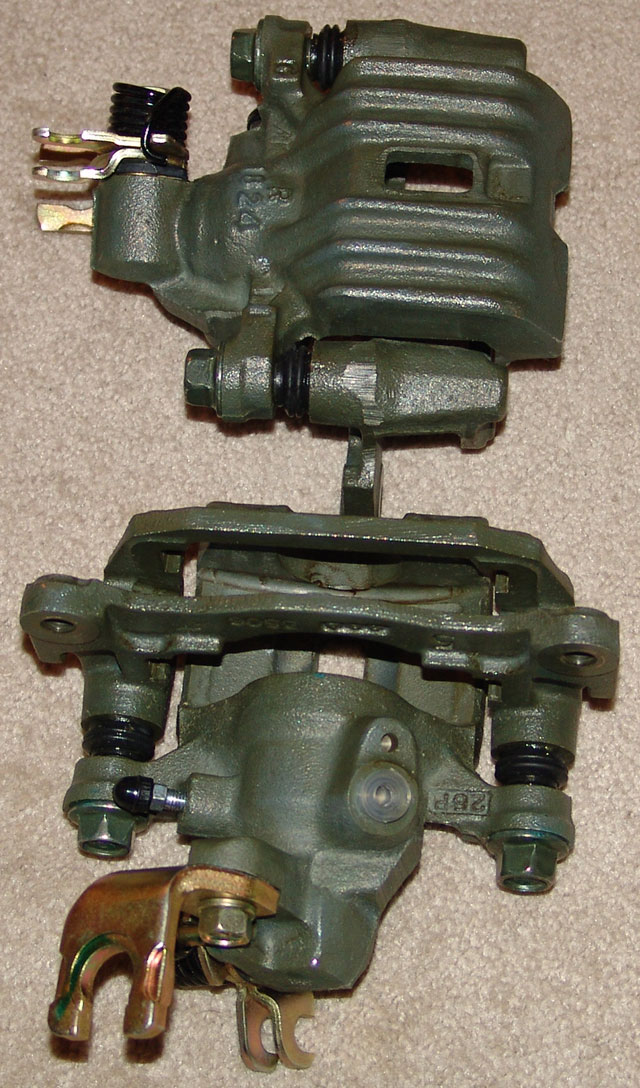
Rears
- use the standard procedure to take the old caliper off, only two bolts hold it on, so just disconnect the hand brake line, brake line, and two main bolts, be sure to have something to plug the brake line with once you disconnect it because it will keep dripping out, i used a silicone hose cut in half and shoved it into the end of the brake line
- take the old rotor off, may need to 'rubber mallet' it off
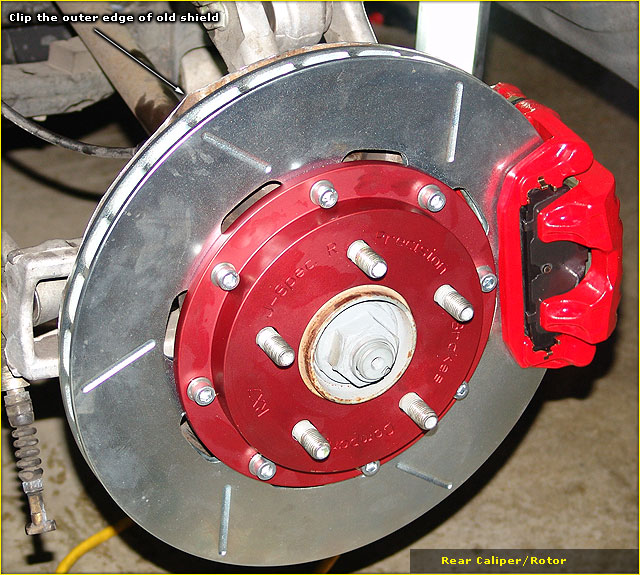
- after caliper and rotor is off (and brake line plugged and to the side), clip the rim on the shield so that it does not hit the new, bigger, rotor, i had to rebend it after clipping so there was no rubbing on the new rotor. (or put new shields on if you got em, or take these off, but you have to do more work to do either of those)
- now put the new rotor on, MAKE SURE its the proper side rotor, the internal veins should be pulling air from the inside rotor and pushing it out of the rotor as it spins in the forward direction, check it twice as it can look right but on the double check you may see otherwise :-)
- now put the new caliper in place and bolt down
- then put in the pads
- then attach the hand brake line
- OPTIONAL - replace stock bleed nipple with speedbleeders ( http://www.speedbleeder.com/ ), I did this as I liked using them on both my cars.
- finally, reconnect the brake line, this is where I made a mistake of over-torquing the banjo bolt and twisted it into a spiral (uggg), SO START OUT EASY AND USE A TORQUE WRENCH!!! use NEW copper crush washers and I suggest buying the new, updated version of the banjo bolt, its seems like a better design. part number: B001-43-694A you will need one for each side in the rear (fronts use flare fitting, not needed there)
- now everything should be ready so its time to bleed
- bleed the caliper as you normally would, make the sure the reservoir stays filled
- now do the other rear caliper the same way
Fronts
- basically same as rear but for some minor changes
- use the standard procedure to take the old caliper off, only two bolts hold it on, so just disconnect brake line, and two main bolts, be sure to have something to plug the brake line with once you disconnect it because it will keep dripping out, i used a small rubber plug and shoved it into the end of flare in the hard brake line
- I DID NOT have to get the new hard lines, I just used the old ones and did not have to bend them, there is a trick to getting them on that i will explain below
- the rotors may have some screws holding them to the hub, they can be a 'biaatch' to get out without stripping them so this is where you may need the impact screw driver to get them out, I had to drill one out, no need to keep them since the new rotor hats don't use them
- after caliper and rotor is off (and brake line plugged and to the side), clip the rim on the shield so that it does not hit the new, bigger, rotor, i had to rebend it after clipping so there was no rubbing on the new rotor. (or put new shields on if you got em, or take these off, but you have to do more work to do either of those)
- now put the new rotor on, MAKE SURE its the proper side rotor, the internal veins should be pulling air from the inside rotor and pushing it out of the rotor as it spins in the forward direction, check it twice as it can look right but on the double check you may see otherwise :-)
- now put the new caliper in place and bolt down, BUT DO NOT BOLT THE HARD LINE BRACKET ON THE CALIPER YET, leave it off to the side, also don't tighten down the top bolt
-now tighten the bottom bolt enough so that the caliper does not move but is in its proper place, - then remove the top bolt, it was just in to make sure the caliper is in its proper place
- remove the top bolt
- now put the hard line in the new caliper and tighten the flare nut, BE CAREFUL, they can strip easy, in order to get the hard line to match up you have to put its bracket in place, but kinda loose, against the caliper, it should be so that it IS NOT distorting the hard line but the bracket will not match up to the caliper hole exactly....yet :-)
- now use the top bolt as a mini 'pry-bar' and put it through the hard line bracket, at an angle, so that you can get the end of it in the caliper hole, then use it to pry the bracket hole to match the caliper hole to thread the bolt in, this SHOULD NOT take a lot of force, i was able to do it using just my hand and thread the bolt with my fingers, so if you need to use a lot of force to try to get the holes to match then something is not right
- after you get the top bolt threaded then torque the bolts down and make sure the flare nut is tight
- then put in the pads
- now everything should be ready so its time to bleed
- bleed the caliper as you normally would, make the sure the reservoir stays filled
- now do the other front caliper the same way
Post_install
- make sure the pedal is firm
- make sure nothing is rubbing incorrectly
- be sure to bed the pads in
- check brake fluid level
Thats about it!!!
More pics below.....
a good job this time of taking pics during each step but I do have some pics and notes for ya.
Here is what they look like on the car:
I'll put more pics in the posts below.
Install notes:
Pre-install
- coat/paint calipers as per directions of coating (be sure not to coat parts that should not be coated like rubber grommets, nipple holes, brake line threads, et)
- make sure have a torque wrench and other standard tools
- have some new copper crush washers for the rears
- possibly buy the new rear banjo bolts (read below)
- a rubber mallet will help
- might need impact screw driver (philips head, read below)
- get a high quality brake flare nut wrench
Install
- I suggest to use the same pattern as the bleeding procedure since you basically have to 'bleed' the caliper once you get it on and all hooked up, so start with the RR, then RL, then RF, then LF, the LR.
Rears
- use the standard procedure to take the old caliper off, only two bolts hold it on, so just disconnect the hand brake line, brake line, and two main bolts, be sure to have something to plug the brake line with once you disconnect it because it will keep dripping out, i used a silicone hose cut in half and shoved it into the end of the brake line
- take the old rotor off, may need to 'rubber mallet' it off
- after caliper and rotor is off (and brake line plugged and to the side), clip the rim on the shield so that it does not hit the new, bigger, rotor, i had to rebend it after clipping so there was no rubbing on the new rotor. (or put new shields on if you got em, or take these off, but you have to do more work to do either of those)
- now put the new rotor on, MAKE SURE its the proper side rotor, the internal veins should be pulling air from the inside rotor and pushing it out of the rotor as it spins in the forward direction, check it twice as it can look right but on the double check you may see otherwise :-)
- now put the new caliper in place and bolt down
- then put in the pads
- then attach the hand brake line
- OPTIONAL - replace stock bleed nipple with speedbleeders ( http://www.speedbleeder.com/ ), I did this as I liked using them on both my cars.
- finally, reconnect the brake line, this is where I made a mistake of over-torquing the banjo bolt and twisted it into a spiral (uggg), SO START OUT EASY AND USE A TORQUE WRENCH!!! use NEW copper crush washers and I suggest buying the new, updated version of the banjo bolt, its seems like a better design. part number: B001-43-694A you will need one for each side in the rear (fronts use flare fitting, not needed there)
- now everything should be ready so its time to bleed
- bleed the caliper as you normally would, make the sure the reservoir stays filled
- now do the other rear caliper the same way
Fronts
- basically same as rear but for some minor changes
- use the standard procedure to take the old caliper off, only two bolts hold it on, so just disconnect brake line, and two main bolts, be sure to have something to plug the brake line with once you disconnect it because it will keep dripping out, i used a small rubber plug and shoved it into the end of flare in the hard brake line
- I DID NOT have to get the new hard lines, I just used the old ones and did not have to bend them, there is a trick to getting them on that i will explain below
- the rotors may have some screws holding them to the hub, they can be a 'biaatch' to get out without stripping them so this is where you may need the impact screw driver to get them out, I had to drill one out, no need to keep them since the new rotor hats don't use them
- after caliper and rotor is off (and brake line plugged and to the side), clip the rim on the shield so that it does not hit the new, bigger, rotor, i had to rebend it after clipping so there was no rubbing on the new rotor. (or put new shields on if you got em, or take these off, but you have to do more work to do either of those)
- now put the new rotor on, MAKE SURE its the proper side rotor, the internal veins should be pulling air from the inside rotor and pushing it out of the rotor as it spins in the forward direction, check it twice as it can look right but on the double check you may see otherwise :-)
- now put the new caliper in place and bolt down, BUT DO NOT BOLT THE HARD LINE BRACKET ON THE CALIPER YET, leave it off to the side, also don't tighten down the top bolt
-now tighten the bottom bolt enough so that the caliper does not move but is in its proper place, - then remove the top bolt, it was just in to make sure the caliper is in its proper place
- remove the top bolt
- now put the hard line in the new caliper and tighten the flare nut, BE CAREFUL, they can strip easy, in order to get the hard line to match up you have to put its bracket in place, but kinda loose, against the caliper, it should be so that it IS NOT distorting the hard line but the bracket will not match up to the caliper hole exactly....yet :-)
- now use the top bolt as a mini 'pry-bar' and put it through the hard line bracket, at an angle, so that you can get the end of it in the caliper hole, then use it to pry the bracket hole to match the caliper hole to thread the bolt in, this SHOULD NOT take a lot of force, i was able to do it using just my hand and thread the bolt with my fingers, so if you need to use a lot of force to try to get the holes to match then something is not right
- after you get the top bolt threaded then torque the bolts down and make sure the flare nut is tight
- then put in the pads
- now everything should be ready so its time to bleed
- bleed the caliper as you normally would, make the sure the reservoir stays filled
- now do the other front caliper the same way
Post_install
- make sure the pedal is firm
- make sure nothing is rubbing incorrectly
- be sure to bed the pads in
- check brake fluid level
Thats about it!!!
More pics below.....

Trending Topics

Full Member
Joined: Mar 2004
Posts: 152
Likes: 1
From: Indianapolis
Hey Damian,
Quick question about the RZ brakes in general. Are the rear calipers any different? They look practically identical to the 93 calipers. Obviously the rotors are larger, but is it just a different bracket to move them out further? I plan on going with Stoptech's kit up front and going to the 99+'s in the rear. Especially since one of my rear pistons appears to be seized .
.
Quick question about the RZ brakes in general. Are the rear calipers any different? They look practically identical to the 93 calipers. Obviously the rotors are larger, but is it just a different bracket to move them out further? I plan on going with Stoptech's kit up front and going to the 99+'s in the rear. Especially since one of my rear pistons appears to be seized
.
Lives on the Forum
Joined: Dec 2001
Posts: 14,716
Likes: 10
From: San Lorenzo, California
Yes, the caliper can just be relocated, in fact Rotaryextreme was developing a kit for this. Since you have the same brake plans I do, may I suggest that you get the custom Stoptech kit from http://www.zeckhausen.com/Mazda/RX-7...stallation.htm, which accounts for the larger rear brakes.


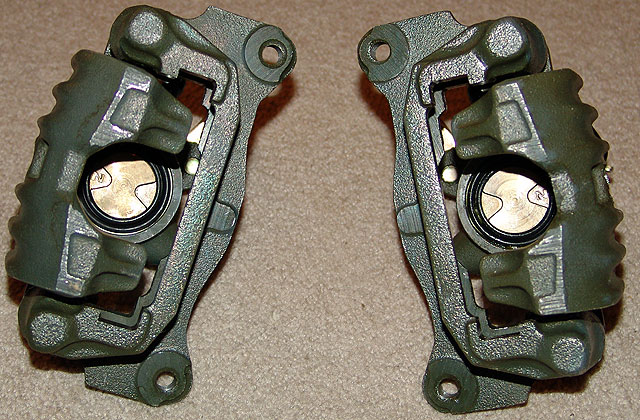
I believe it was the Folia Tec caliper paint. I've had the blue on my car for awhile now (7 years) and has held up nicely, although time and the occasional wheel cleaner is slowly taking it's toll. That's my mind's rationalization for the need for new 99 front and rears
Got the rears from Fritz and the front from the GB.
Tim
Got the rears from Fritz and the front from the GB.
Tim
Eats, Sleeps, Dreams Rotary
Joined: Apr 2001
Posts: 3,736
Likes: 10
From: Dallas, Texas
Tim,
I don't think its the folia tec as I have it on my 99 brakes and it doesn't have that metalic look.
also the folia tec is thick and applying it with a brush leave brush lines....damians looks very smooth.
I don't think its the folia tec as I have it on my 99 brakes and it doesn't have that metalic look.
also the folia tec is thick and applying it with a brush leave brush lines....damians looks very smooth.

Lives on the Forum
Joined: Sep 2001
Posts: 6,131
Likes: 2
From: IN
Glad to see people are finally running '99 J-spec Type RS/RZ brakes. They're absolutely awesome on street & track. I have the factory J-spec rotors all around. Those custom rotors look nice. How much?


Thread
Thread Starter
Forum
Replies
Last Post
immanuel__7
2nd Generation Specific (1986-1992)
89
Sep 5, 2015 10:23 AM
82streetracer
1st Generation Specific (1979-1985)
7
Aug 23, 2015 09:28 AM