
WRITE UP: Removing Rear Sub-Frame

Thread Starter
Joined: Jun 2004
Posts: 9,337
Likes: 6
From: Columbus, Ohio
WRITE UP: Removing Rear Sub-Frame
Alright guys, I have seen a lot of people with questions on how to drop the sub frame and remove the diff etc. I am hoping this will help out. I have received a lot of helpful information and help from you guys and I would like to make my own contribution. I am going to start with the exhaust already removed.
WHAT YOU WILL NEED:
14mm socket/wrench
17mm socket
21mm socket
breaker bar (recommended, not necessary)
PB Blaster (recommended, not necessary)
impact gun/air compressor (recommended, not necessary)
rubber mallet (recommended, not necessary)
floor jack
jackstands
TIME NEEDED:
1-2 hours
PROCEDURE:
1. Loosen lug nuts.
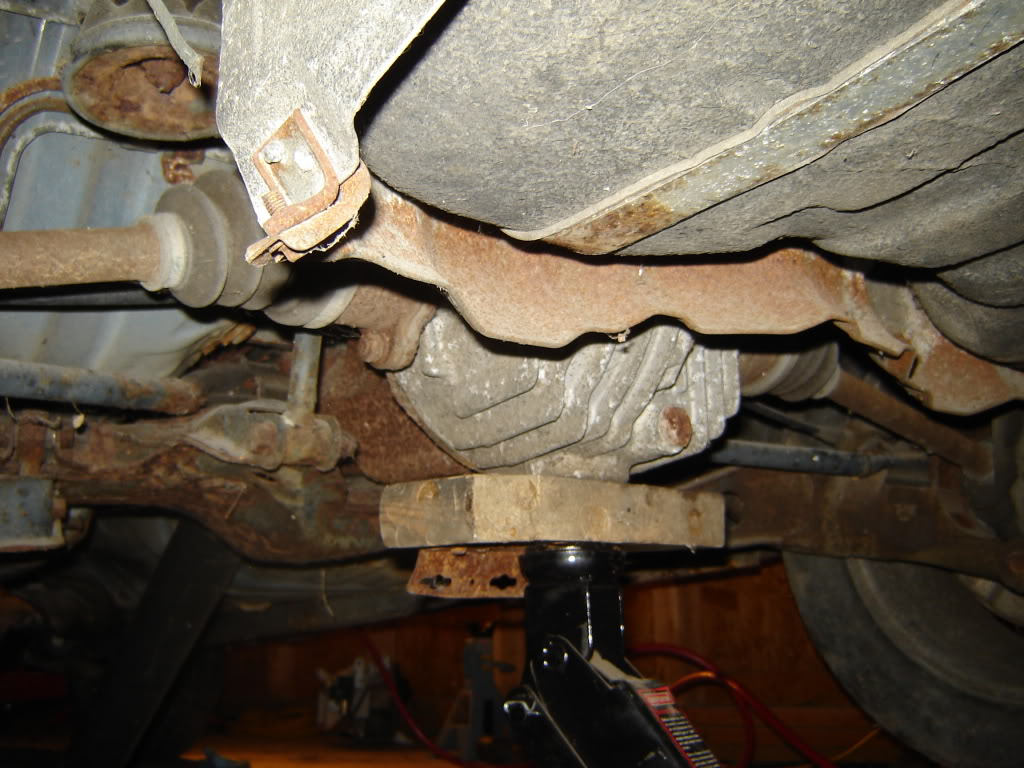
2. Jack up rear end from under differential (I use a piece of wood on the jack to get the rear end up higher and to prevent damage to the diff housing).
3. Remove lug nuts and rear wheels.
4. Place rear sub frame on jackstands (I also leave the differential on the jack).

5. Remove rear caliper mounting bolts (two 14mm bolts on each caliper).
6. Remove both calipers (rubber mallet comes in handy here).
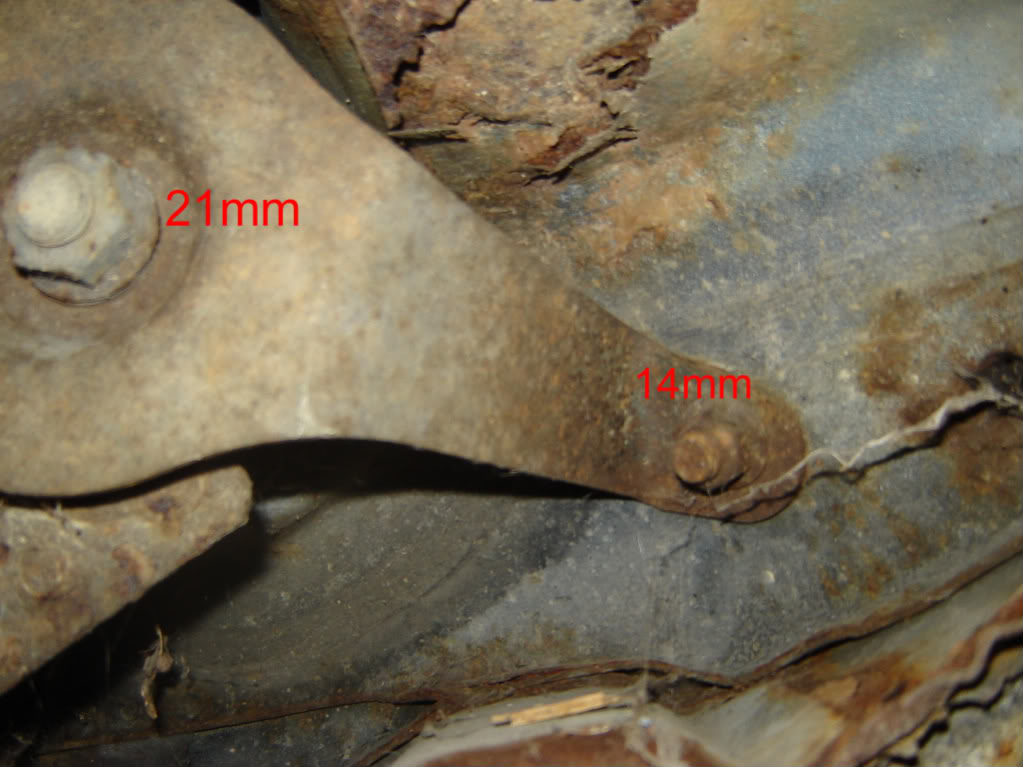
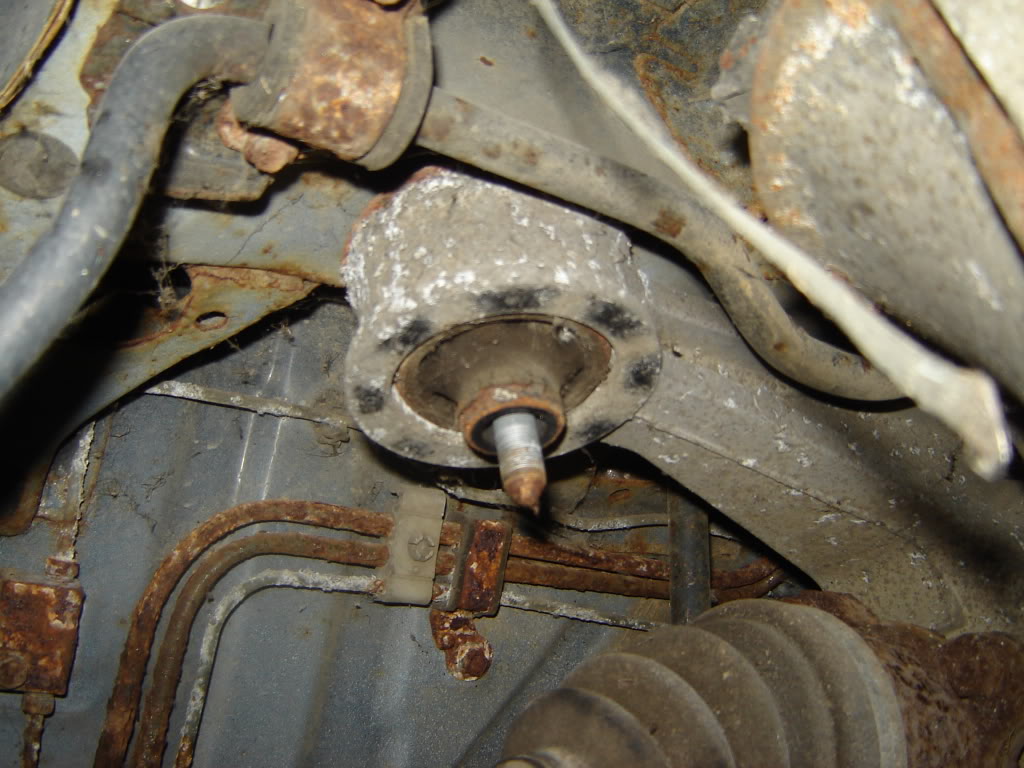
7. Locate and remove front subframe mounting plates (21mm and 14mm nuts)
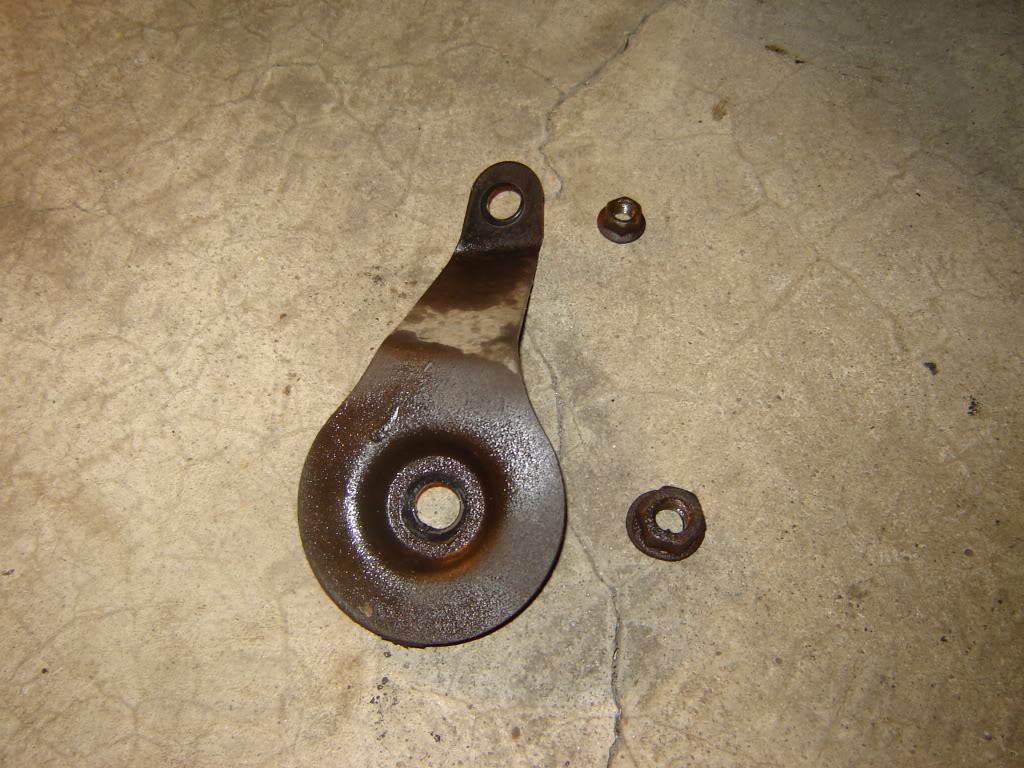
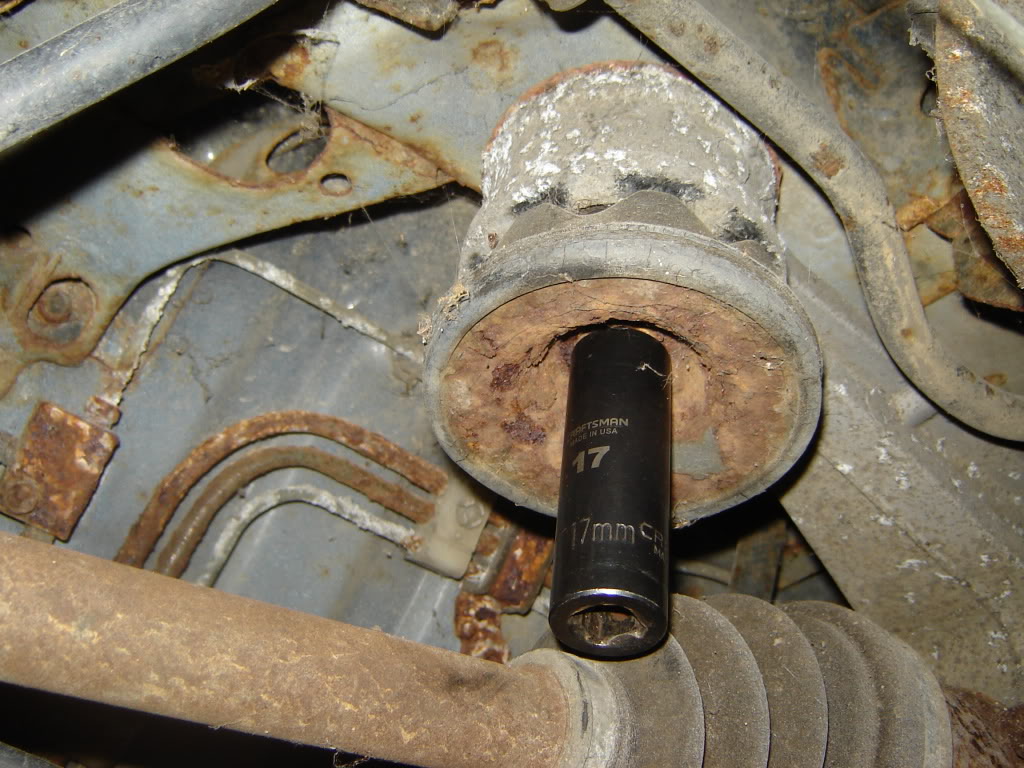
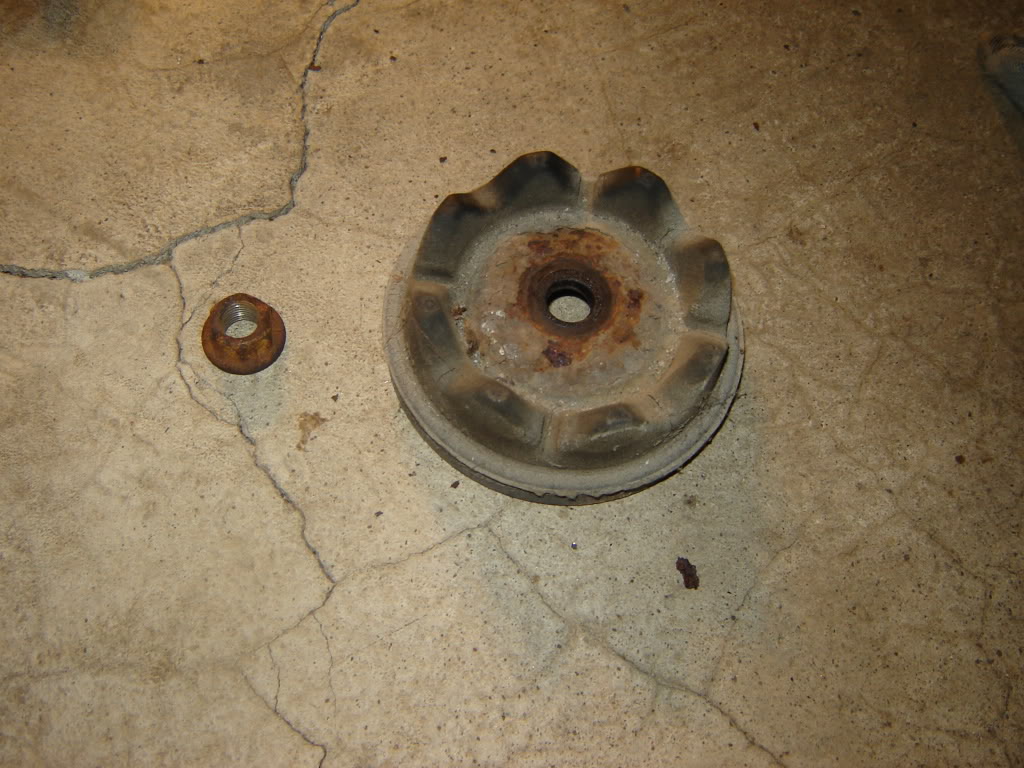
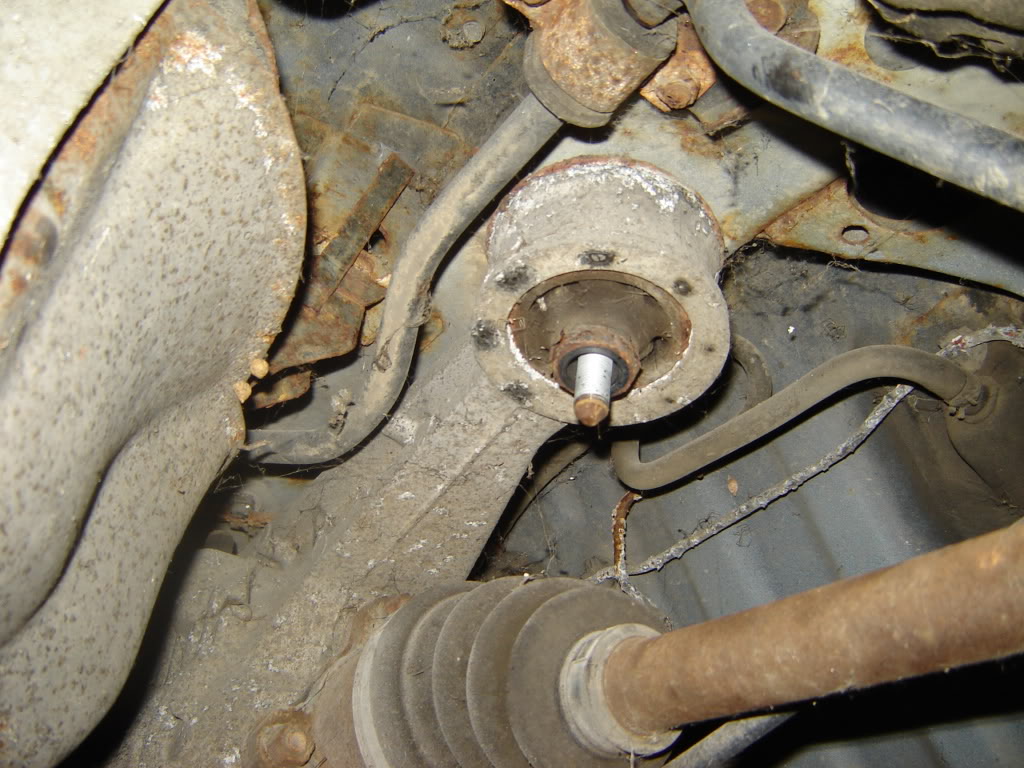
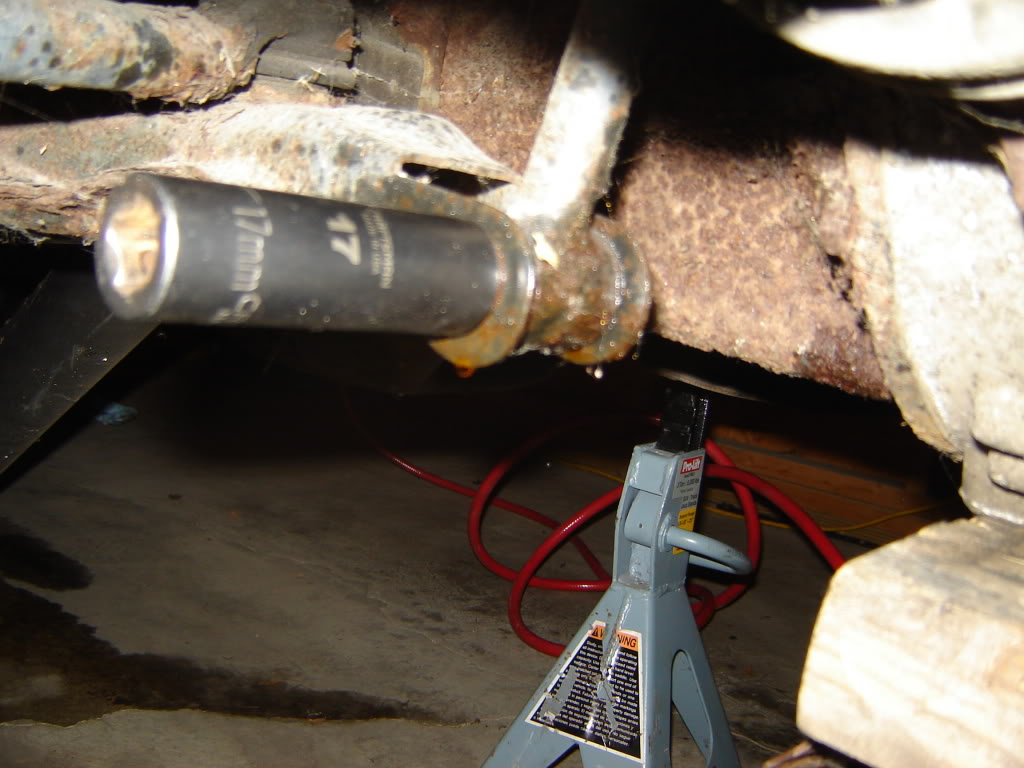
8. Locate and remove diff ear mount cups (one 17mm nut on each side)
WHAT YOU WILL NEED:
14mm socket/wrench
17mm socket
21mm socket
breaker bar (recommended, not necessary)
PB Blaster (recommended, not necessary)
impact gun/air compressor (recommended, not necessary)
rubber mallet (recommended, not necessary)
floor jack
jackstands
TIME NEEDED:
1-2 hours
PROCEDURE:
1. Loosen lug nuts.
2. Jack up rear end from under differential (I use a piece of wood on the jack to get the rear end up higher and to prevent damage to the diff housing).
3. Remove lug nuts and rear wheels.
4. Place rear sub frame on jackstands (I also leave the differential on the jack).
5. Remove rear caliper mounting bolts (two 14mm bolts on each caliper).
6. Remove both calipers (rubber mallet comes in handy here).
7. Locate and remove front subframe mounting plates (21mm and 14mm nuts)
8. Locate and remove diff ear mount cups (one 17mm nut on each side)
Thread Starter
Joined: Jun 2004
Posts: 9,337
Likes: 6
From: Columbus, Ohio
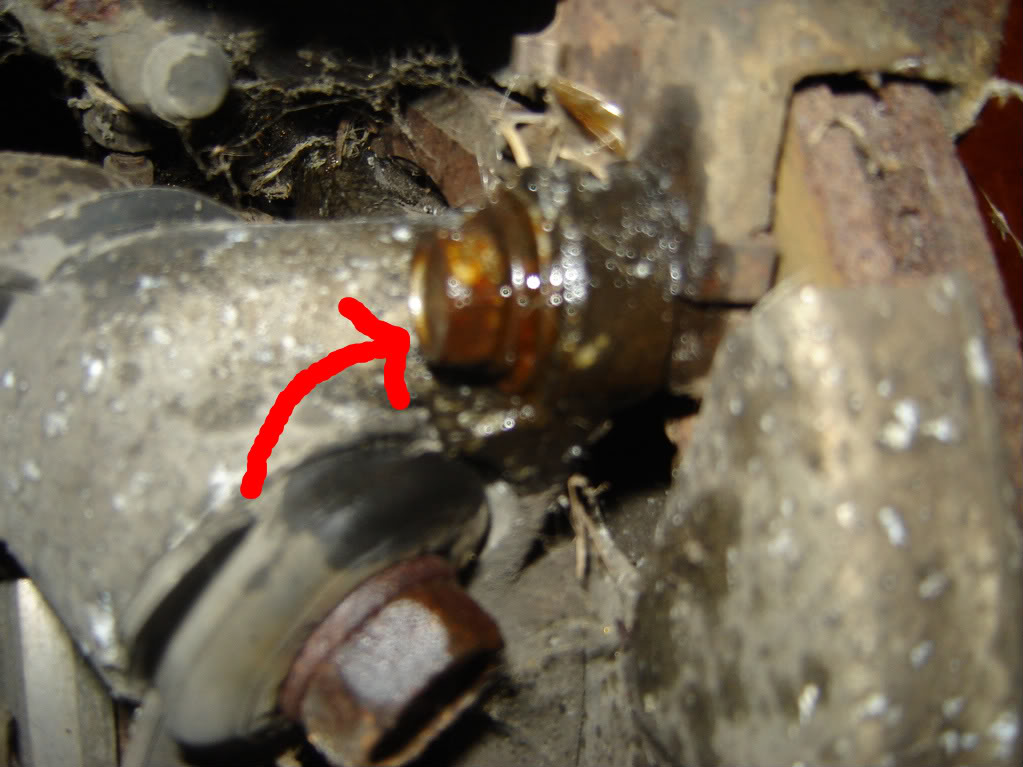
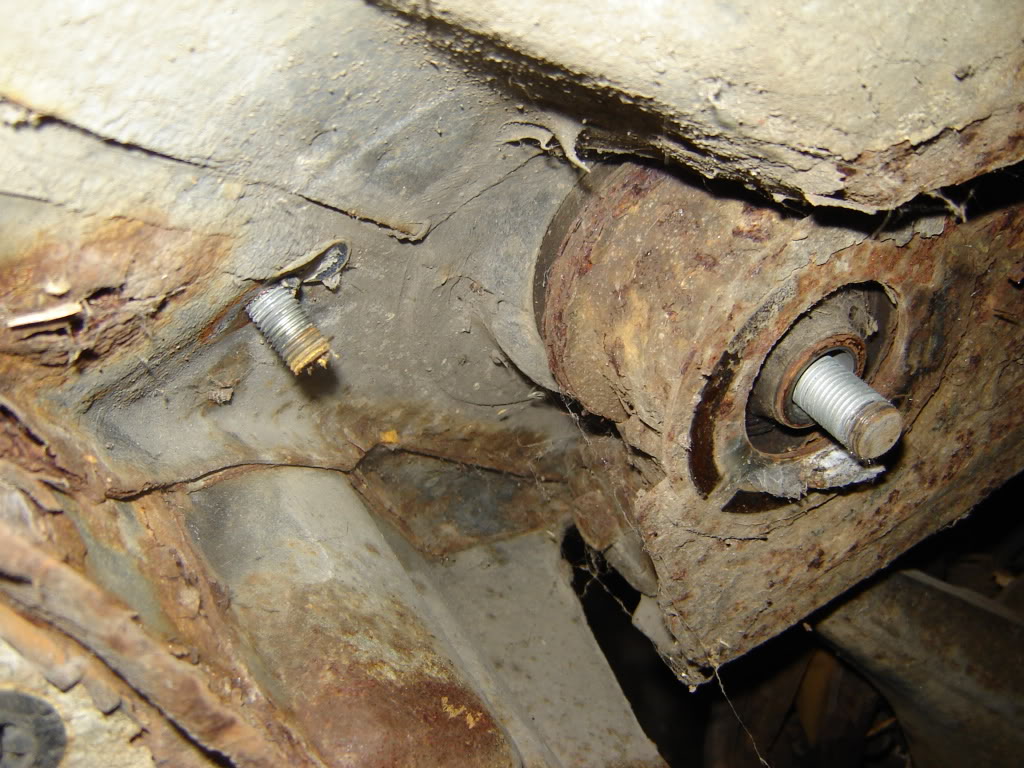
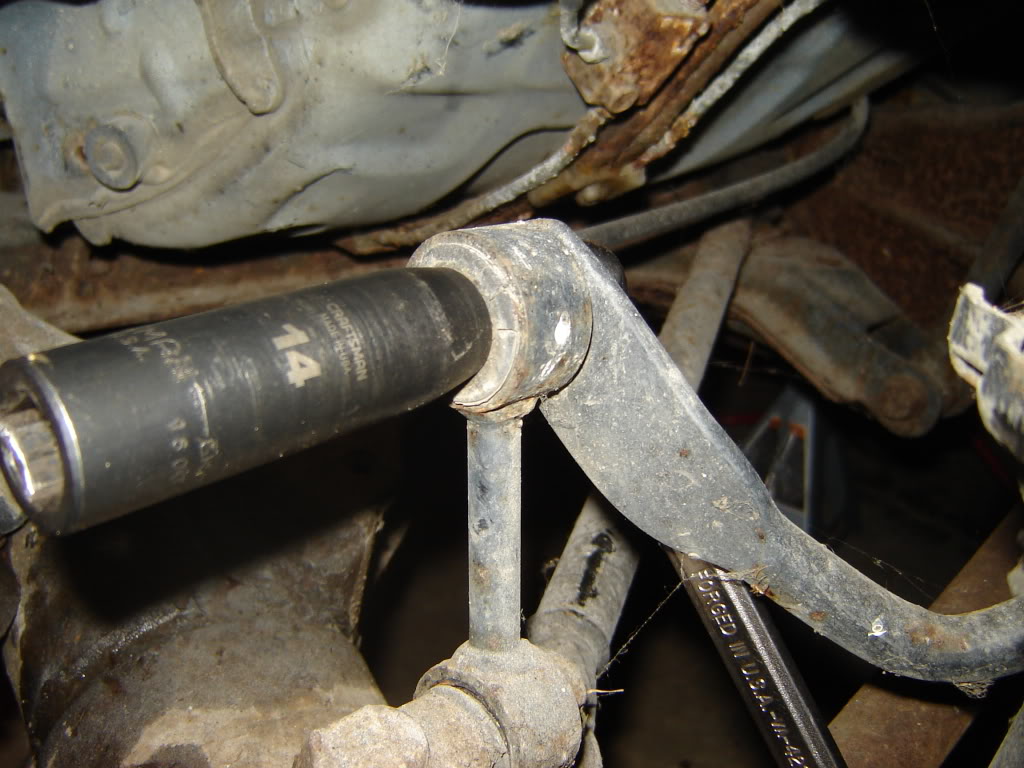
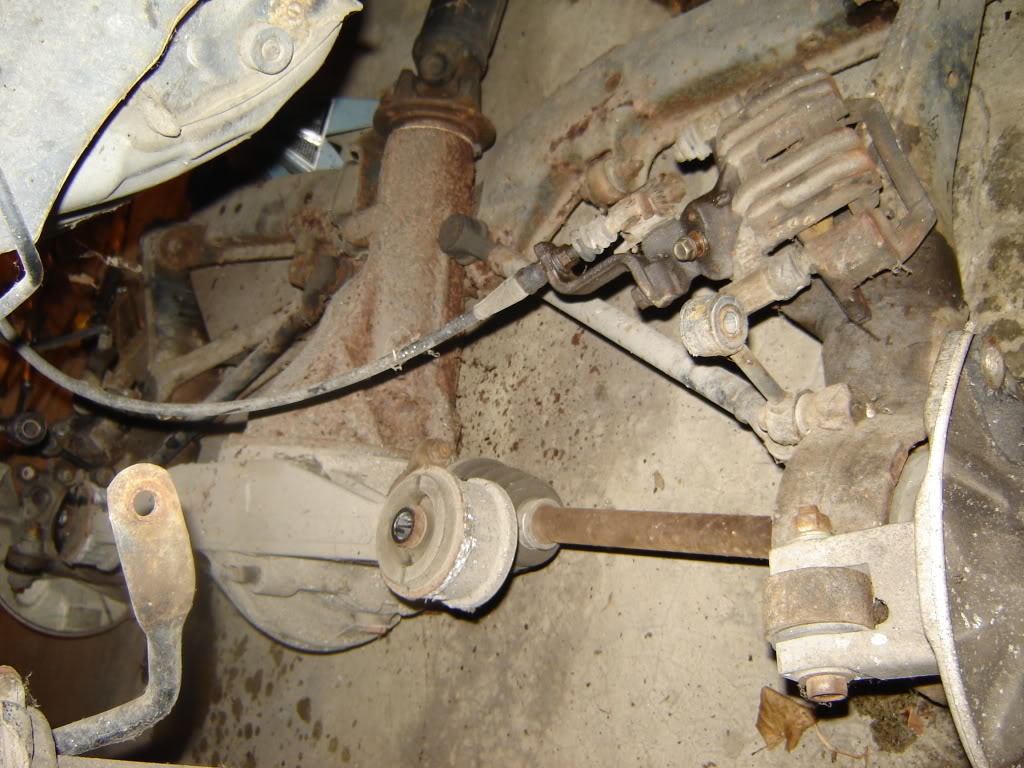
9. Remove sway bar end links on each side (one 14mm nut on each side and a bolt)
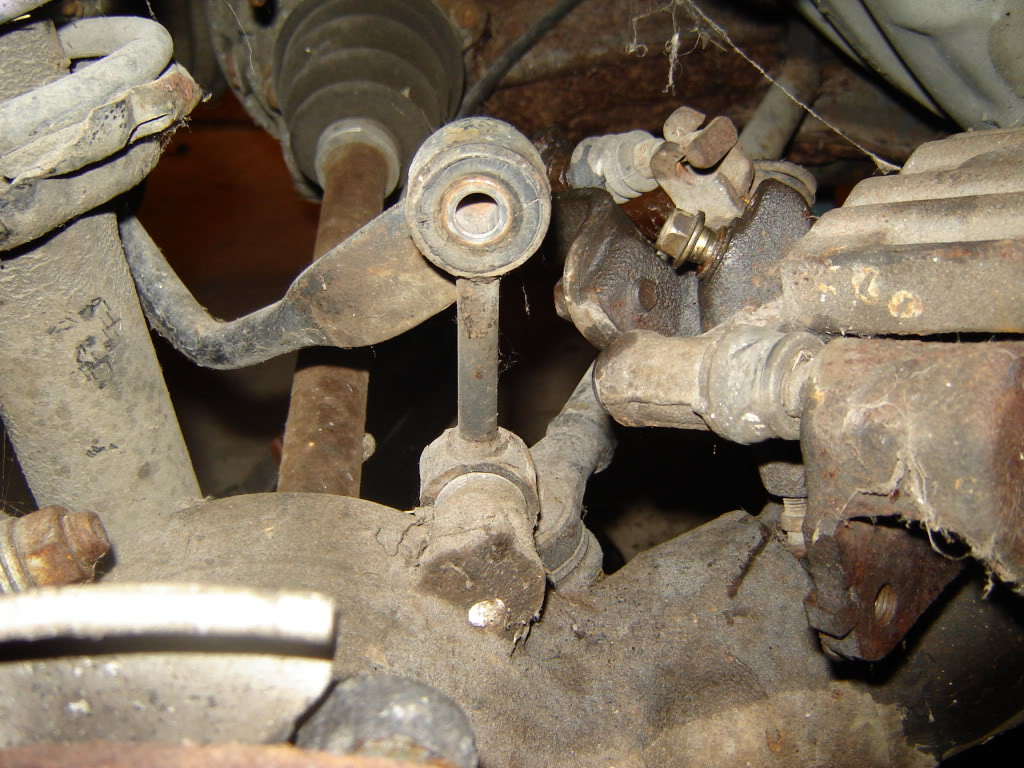
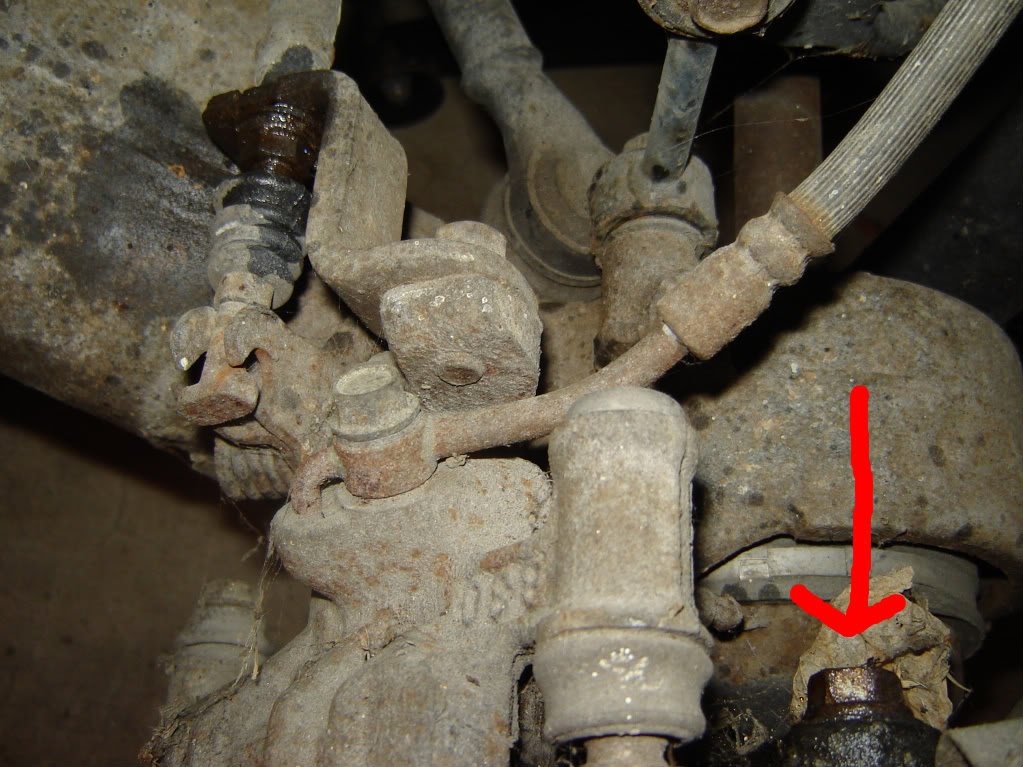
10. Remove vertical link from driver side, next to the diff (one 17mm nut and a bolt)
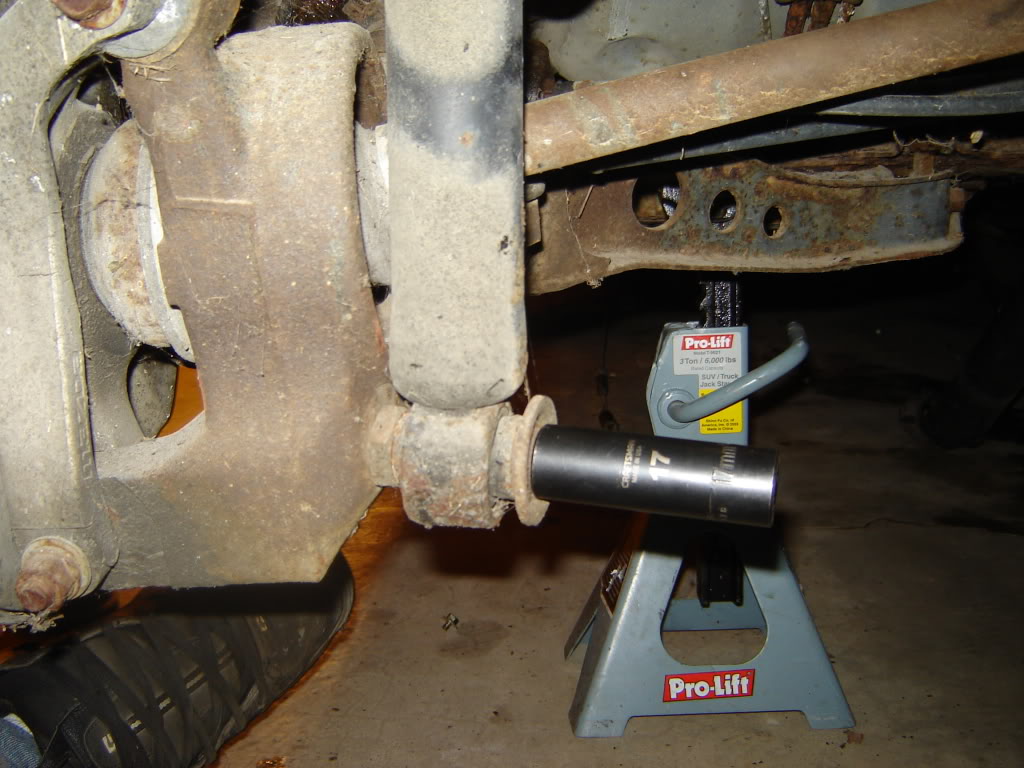
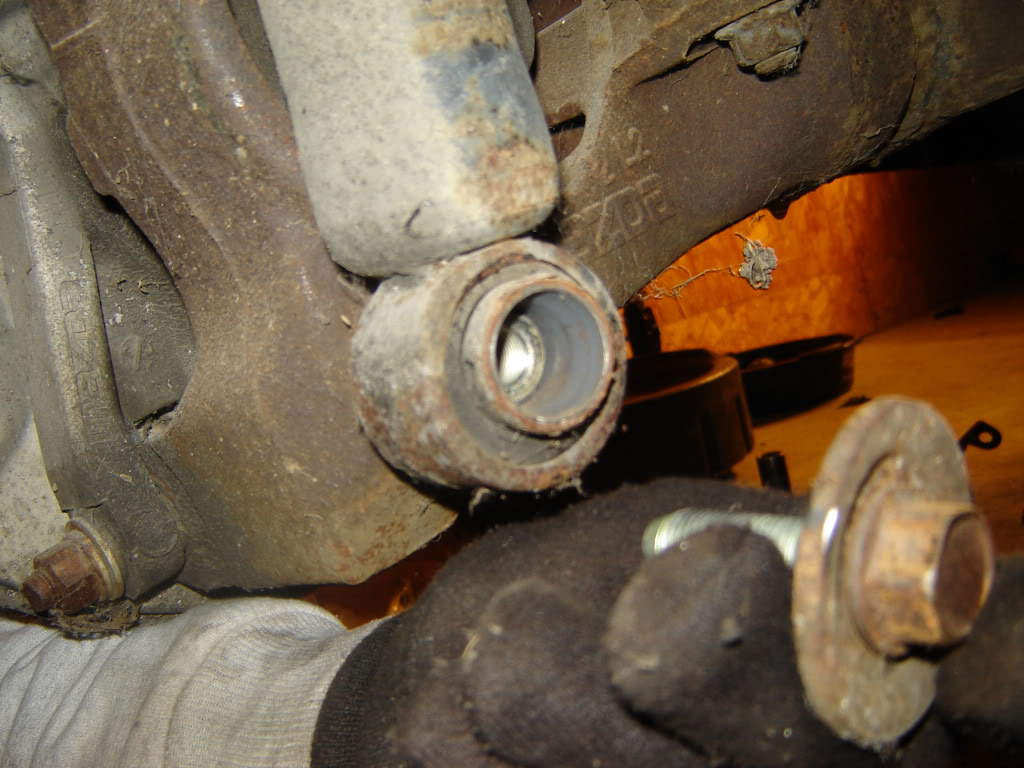
11. Remove bolt on each side holding the struts to the hub (17mm bolt)
Alright, thats it for the nuts and bolts that need removed. Now for the fun part...
12. Tap the strut bottoms to remove them from the hubs.
13. Jack the differential up again to remove jack stands from the sub frame.
14. Move the jack stands forward to support the rear of the car, keeping everything in the air.
15. Remove the jack from the bottom of the diff and at least one side of the sub frame should fall. If you have two jacks its much easier to put one on the diff, one on the sub frame, and lower them both at the same time.
16. More than likely only one side fell (if both sides fell you got lucky). Use a pry bar to pry the sub frame off the front mount that is still stuck. Standing on the hub on wiggling the whole mess will sometimes cause the other side to fall. If the transmission is still in the car you will want something to catch the transmission fluid when the drive shaft pops out.
17. Have a beer.
Reinstall in reverse order. Again, it's much easier to use 2 jacks to get everything lined up properly.
10. Remove vertical link from driver side, next to the diff (one 17mm nut and a bolt)
11. Remove bolt on each side holding the struts to the hub (17mm bolt)
Alright, thats it for the nuts and bolts that need removed. Now for the fun part...
12. Tap the strut bottoms to remove them from the hubs.
13. Jack the differential up again to remove jack stands from the sub frame.
14. Move the jack stands forward to support the rear of the car, keeping everything in the air.
15. Remove the jack from the bottom of the diff and at least one side of the sub frame should fall. If you have two jacks its much easier to put one on the diff, one on the sub frame, and lower them both at the same time.
16. More than likely only one side fell (if both sides fell you got lucky). Use a pry bar to pry the sub frame off the front mount that is still stuck. Standing on the hub on wiggling the whole mess will sometimes cause the other side to fall. If the transmission is still in the car you will want something to catch the transmission fluid when the drive shaft pops out.
17. Have a beer.
Reinstall in reverse order. Again, it's much easier to use 2 jacks to get everything lined up properly.
Last edited by 87 t-66; Nov 26, 2008 at 12:26 AM.

Junior Member
Joined: May 2007
Posts: 42
Likes: 0
From: brisbane
awsome man, im about to take mine out and swap it for another one but with a whole lot of custom bits. i might put the chassis rails straight onto jack stands and then have 2 jacks under the subframe. i might post up my pics in this thread if you dont mind.

**** man much appreciation for posting this! My car is about to be back home with lots of hp and will need rear diff mounts and new bushings all around so this is a big step in the right direction. Thanks again!
Thread Starter
Joined: Jun 2004
Posts: 9,337
Likes: 6
From: Columbus, Ohio

Trending Topics
Banned. I got OWNED!!!
Joined: Mar 2006
Posts: 1,970
Likes: 1
From: Connecticut
Nice writeup Adam.... If I may offer some advice though.
In my experience it has been better to remove the heatshields to gain access to the "frame rails" and position the jacks there. They need to be much taller, larger capacity though.
With the jackstands in the back, & with two or three jacks you can lower the subframe. One jack under the diff, one jack on each side of the subframe or just one in the center of the subframe. As opposed to letting it fall. Having an extra set of hands around to operate the other jack and help keep the thing balances when it gets sideways
Thread Starter
Joined: Jun 2004
Posts: 9,337
Likes: 6
From: Columbus, Ohio
Nice writeup Adam.... If I may offer some advice though.
In my experience it has been better to remove the heatshields to gain access to the "frame rails" and position the jacks there. They need to be much taller, larger capacity though.
With the jackstands in the back, & with two or three jacks you can lower the subframe. One jack under the diff, one jack on each side of the subframe or just one in the center of the subframe. As opposed to letting it fall. Having an extra set of hands around to operate the other jack and help keep the thing balances when it gets sideways
In my experience it has been better to remove the heatshields to gain access to the "frame rails" and position the jacks there. They need to be much taller, larger capacity though.
With the jackstands in the back, & with two or three jacks you can lower the subframe. One jack under the diff, one jack on each side of the subframe or just one in the center of the subframe. As opposed to letting it fall. Having an extra set of hands around to operate the other jack and help keep the thing balances when it gets sideways
Basically I just wanted to show that its not really that hard to do and can be done with minimal tools, by one person, and doesn't take all that long.
Im with TTT, but I usually put the stands on the rockers by the rear wheel opening. I place a 1.5 foot scrap peice of 2x4 between the rocker and the stand to distribute the weight. This way no need to remove the shields. Then I use my shitty Horror Freight tranny scissor jack under the diff, and lower it down.
Nice w/u btw.
-a
Nice w/u btw.
-a

Thread Starter
Joined: Jun 2004
Posts: 9,337
Likes: 6
From: Columbus, Ohio
ive basically removed everything from the shell already. the previous owner just rattle canned the whole engine bay some creamy white color. they painted over all of the rust which is now coming through and didnt do any prep work. the frame rails are all dented in from improperly jacking the car etc. etc.

53.6%/46.4% - Crap!
Joined: Apr 2006
Posts: 337
Likes: 1
From: Canton, OH
Nice write up! 
I dropped the rear subframe on my car a few months ago, and I finally got it back in and torqued last weekend. Mine didn't look quite that bad but it did have a little surface rust... northern cars ftl haha.
I dropped the rear subframe on my car a few months ago, and I finally got it back in and torqued last weekend. Mine didn't look quite that bad but it did have a little surface rust... northern cars ftl haha.
Last edited by Rexpelagi; Nov 27, 2008 at 01:01 AM.
Banned. I got OWNED!!!
Joined: Mar 2006
Posts: 1,970
Likes: 1
From: Connecticut
I have yet to buy an impact set mainly becuase the one I'm eyeing is >$400... so whenever I break a 3/8" or 1/2" piece on my something like 500ft/lb impact I just go to sears with a confused look and get another.


Mother****ing Wow
Joined: Jul 2008
Posts: 1,290
Likes: 0
From: NJ
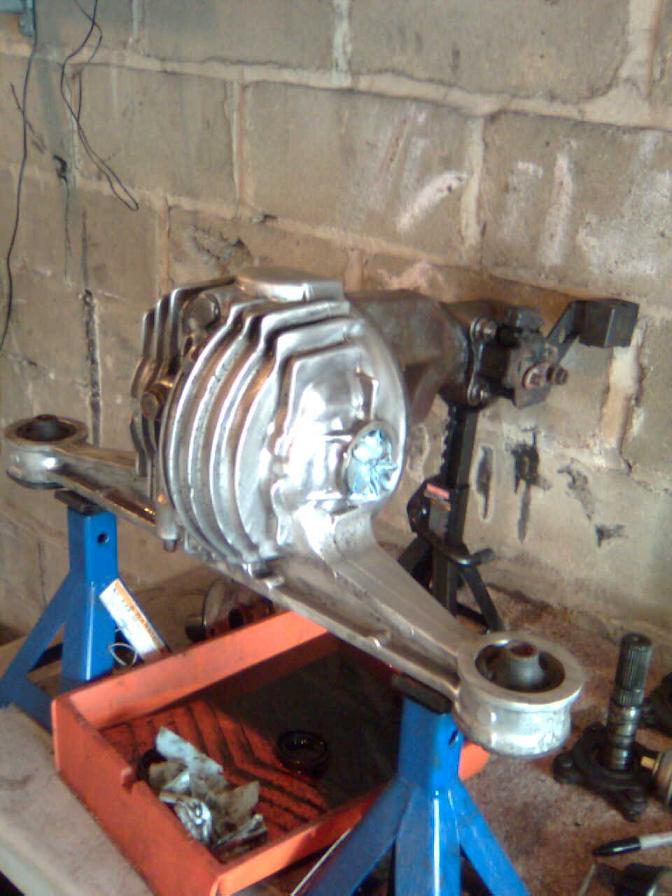
Just cleaned up my TII diff and am buying a new (well used) rear subframe next weekend to refurbish and install. I did the seals on the diff as well, VLSD for now OS Giken in the near future.


Ok so I'm going to be Bolting my diff and subframe up this weekend.
Problem: I'm guessing before when I had tightened the subframe/diff mounting bolts that they(the subframe and Differential alignment) were skewed and then when I bolted the subframe/diff to the chassi it straghtened out and ripped my subframe diff mount tab off. <Does that make any sense? I hope so...
My #1 question is: When bolting the Diff mount to the Subframe, How do you make sure that the diff/subframe are aligned correctly before tightening the mounting bolts down and then tightening to the chassi? (I don't want to rip off my new tab)
#2 Can you tighten those damn diff mount bolts with the subframe and diff in place? Or can you?
I have lowered the subframe and diff as much as possible while there still bolted on, but they seem to be kinda tweaked/misaligned, and fear if I torque down the mounting tab bolts that I could risk tearing my new tab off when I tighten it back up to the chassi...
Thanks in advance
Old thread revival.
Just removed my sub-frame. Did it to get easier access to all the fuel lines, so I had removed the tank, exhaust and heat shields.
I'm just posting to say I did this with one floor jack, but two, or even better, three, would have been very convenient and would have saved quite a bit of work and delay switching jack positions.
Just because when you lower the diff or one of the sides of the sub-frame a little and then move the jack around, one corner always likes to hang up on the bolt.


