My 86 GXL Turbo build...take two

 12-24-09, 12:30 PM
#27
Canned. I got CORNED!
Thread Starter
iTrader: (5)

Join Date: Mar 2007
Location: Appleton, WI
Posts: 1,029
Likes: 0
Received 0 Likes
on
0 Posts
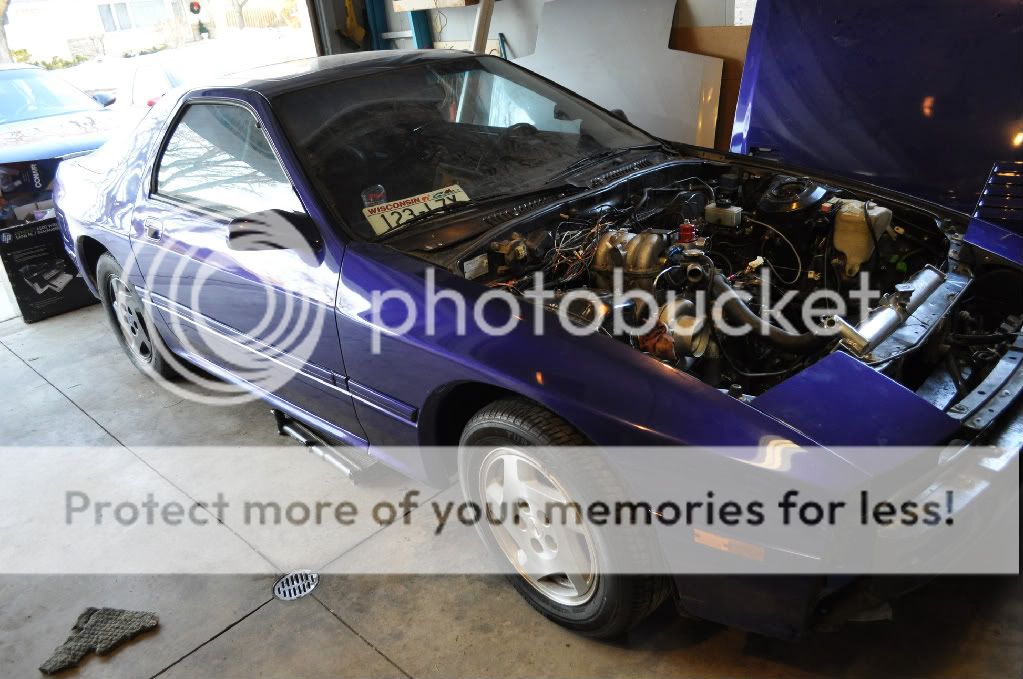
Because I already bought my intercooler, and I think it's too large to go anywhere but the front bumper! Core is 36x12x3. I was planning on running a little bit of ducting to direct air from front bumper, through intercooler, through oil cooler, through radiator, and then right out the top.
Would a vmic be that much better?
Would a vmic be that much better?
12-24-09, 01:25 PM
#30
patience is everything
Join Date: Oct 2007
Location: Aruba
Posts: 95
Likes: 0
Received 0 Likes
on
0 Posts
well i had the same problem with the hotside hitting the strut tower , my fix was to bend the strut tower a bit inwards , because i could not put the turbo on ,but when its on its all good , brake line is okay too ,
you can see the pix in my thread , also same turbo holset h1e but with a 19cm hot side
you can see the pix in my thread , also same turbo holset h1e but with a 19cm hot side
12-24-09, 02:28 PM
#31
Canned. I got CORNED!
Thread Starter
iTrader: (5)
Join Date: Mar 2007
Location: Appleton, WI
Posts: 1,029
Likes: 0
Received 0 Likes
on
0 Posts
I tapped the strut tower a little, but shimming the motor mount with half a hockey puck is really what helped out the most  Your build looks pretty similiar, and equally cool You also have the 7 blade impeller on your turbo, mine is 8.
Taking a little break from the garage to spend time with my family...crazy, right? Merry Christmas to all, hopefully I can get that intercooler mounted sooooon!
Your build looks pretty similiar, and equally cool You also have the 7 blade impeller on your turbo, mine is 8.Taking a little break from the garage to spend time with my family...crazy, right? Merry Christmas to all, hopefully I can get that intercooler mounted sooooon!
01-08-10, 12:58 PM
#32
Canned. I got CORNED!
Thread Starter
iTrader: (5)
Join Date: Mar 2007
Location: Appleton, WI
Posts: 1,029
Likes: 0
Received 0 Likes
on
0 Posts
Some overdue updates! I've been busy in the garage!
Intercooler pipes are 95% done. I bought a big kit with the intercooler from CXracing on eBay. Core is 36x12x3", and was kind of a pain to fit, I could have gone a little shorter, maybe 28x12 or 28x9 would have been perfect.
The pipes are nice thick aluminum and came with beads rolled onto some of them. Really high quality stuff. They cut and weld just fine.
I was going to rent a TIG welder, or have someone do these, but I decided against it...I'm currently more broke than Africa, and I've done everything else on the car by myself, why not try this? Nothing on the car is show-quality, i'm just overbuilding everything, function over form.
So, I did some reading, rented a tank of 100% argon and bought a spool of 4043. It took some practice to get it to feed without birdsnesting (aluminum is softer and doesn't like to be pushed all the way down the welding whip), and then it took some more practice to get some welds out of it, but I'm satisfied with the results.
In the places where the pipes fit perfectly together, I can produce dimes that look like they were TIG-ed. In places with a little bit of air, I don't have a second regulator to flow Argon through the inside of the pipe, so the air inside the pipe contaminates the weld, and I have problems with the weld "sticking"...so they get a little blobby.
All pipes were pressure tested to 20 psi. Problem areas were marked, cleaned up, inspected, and re-welded until leak-free.
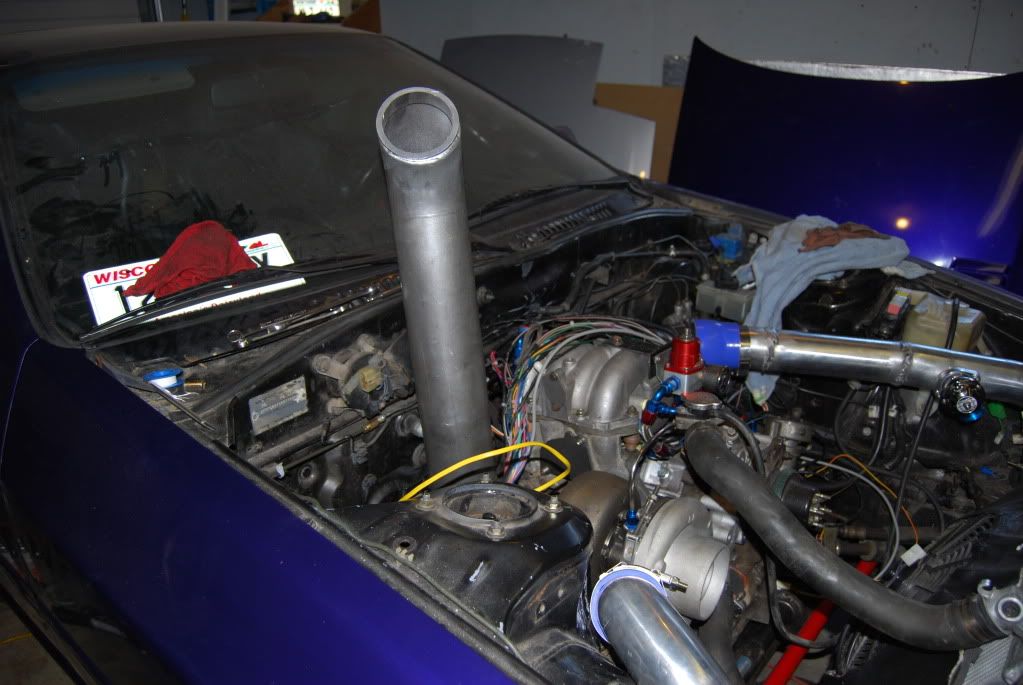
Here's my testing "rig". I needed a plug for one end, and I could only find one suitable item...hahahaha.
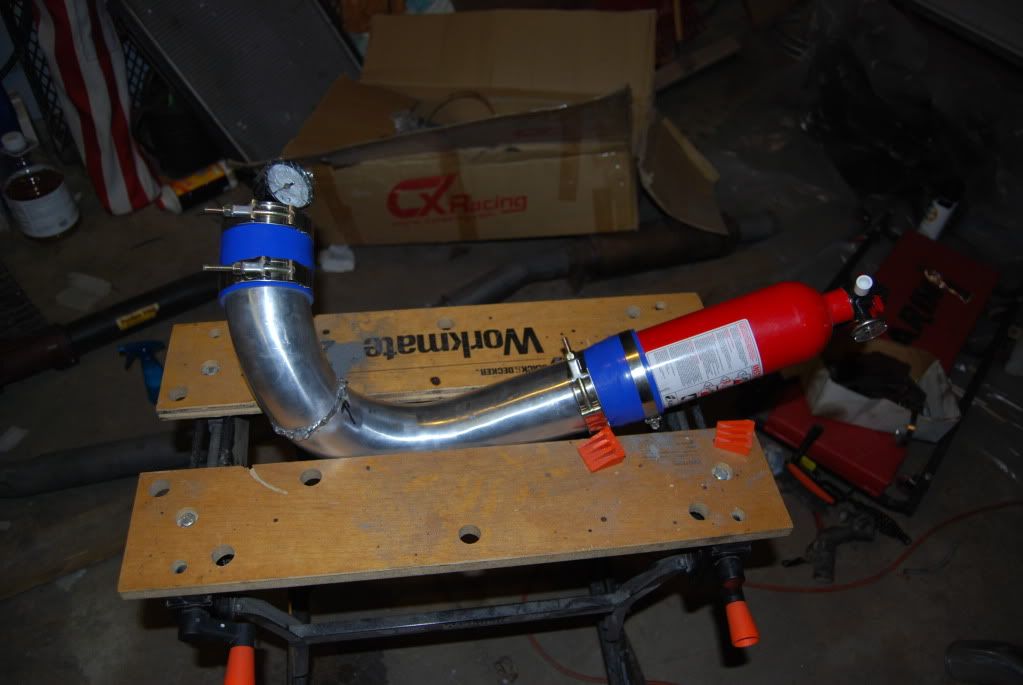
COMPRESSED AIR IS DANGEROUS! I know I wasn't really taking too much warning, and I'm lucky I wasn't seriously injured. I was thinking that 15, 20 psi wasn't that much...well, my 3" diameter pipe, at 20PSI has 141 pounds of force behind it! That's enough to lift my little brother into the air!
Long story short, I didn't have one end securely fastened. I brought a pressurized pipe inside. Five minutes later, I was holding it, and BOOOM!!!!! The gauge blew out the end and smashed on the ceiling...so I fixed it.
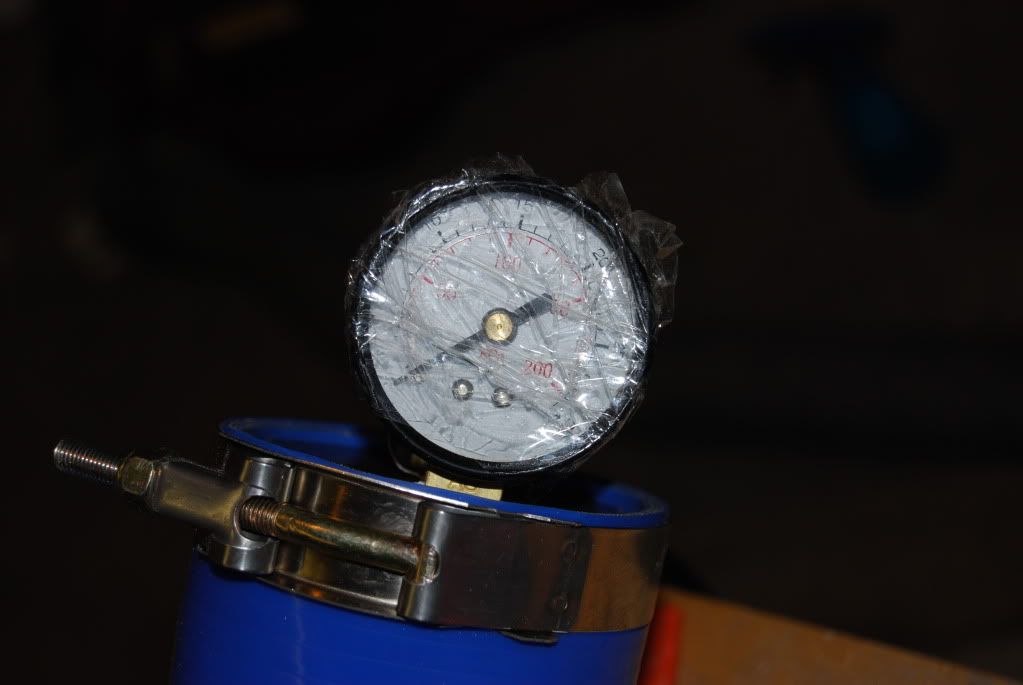
(Because I know someone's going to ask, the lack of a bead rolled on the fire extinguisher, combined with me not having T bolt clamps that large meant that I had to use two worm clamps...and yes, I did launch the fire extinguisher 15 feet across the garage at one point. Very lucky it didn't hit me, or the car, or break open!)
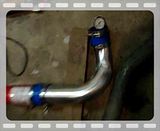
Here are the first two intercooler pipes done. From intercooler up to turbo outlet, and intercooler out to driver's headlight. The last one, from driver's headlight to throttle body got finished late last night, so no pics of that yet...
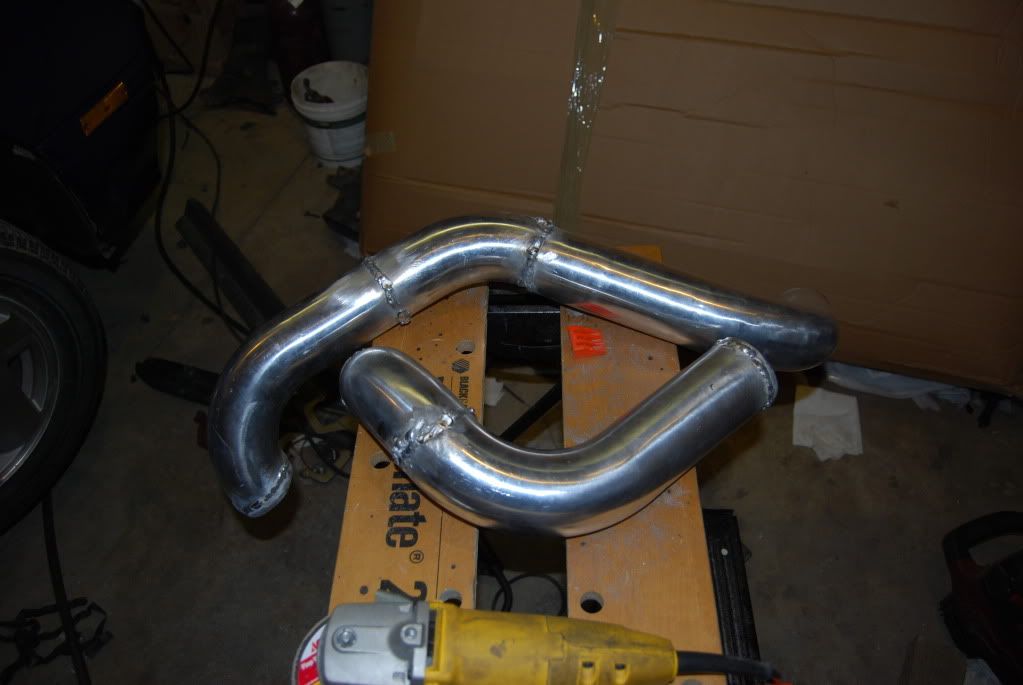
And here's a vid of the pressure testing...proving that even though the welds are not super pretty and professional, I can weld alright with what I'm given :P
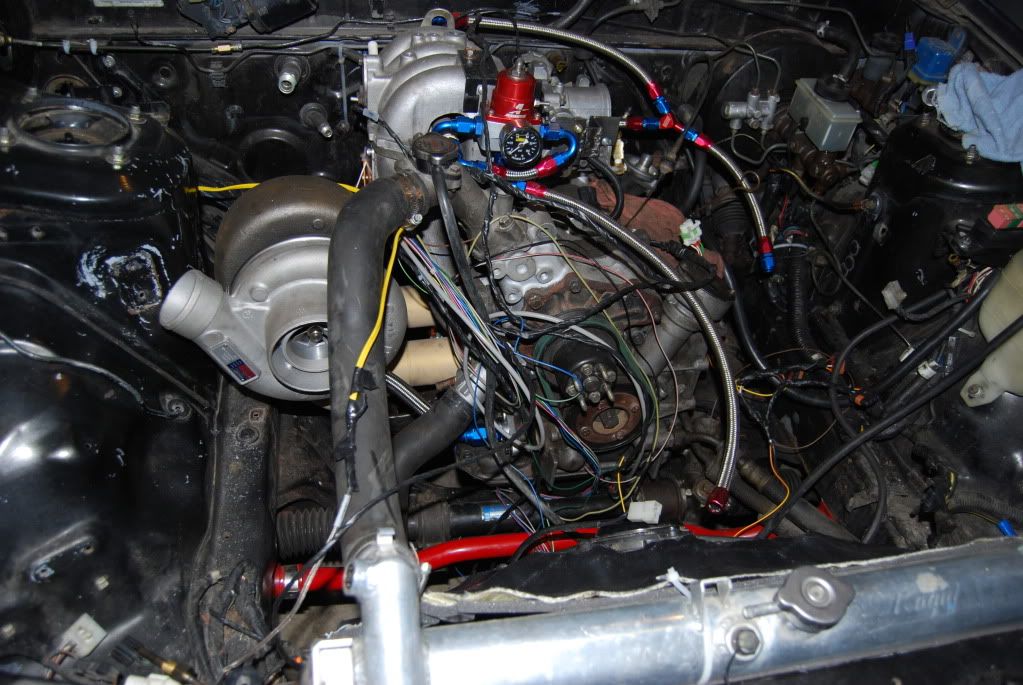
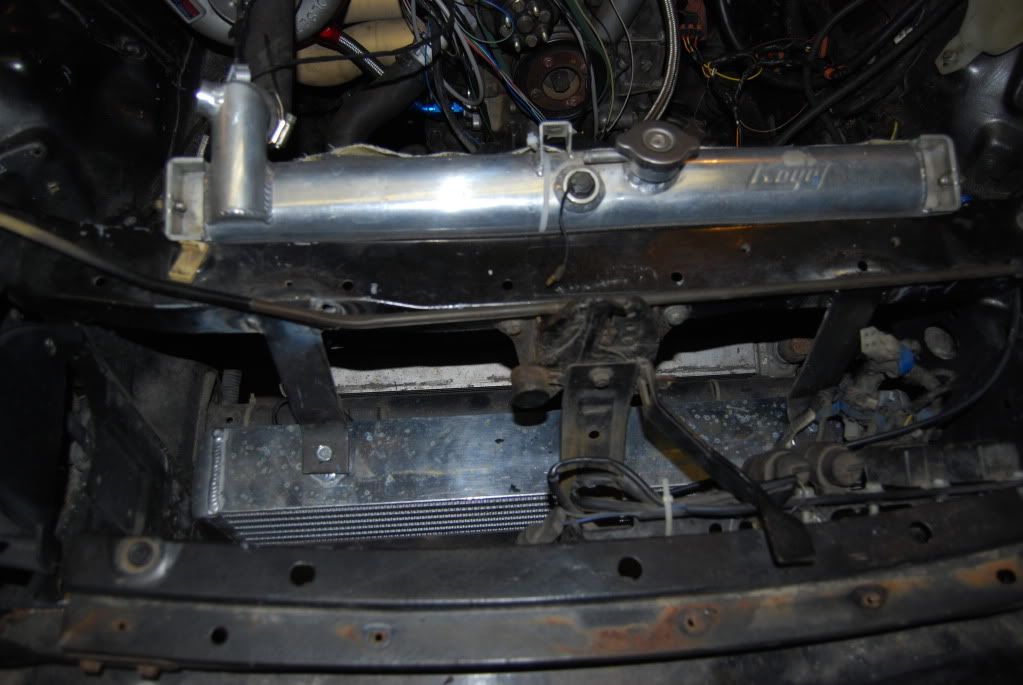
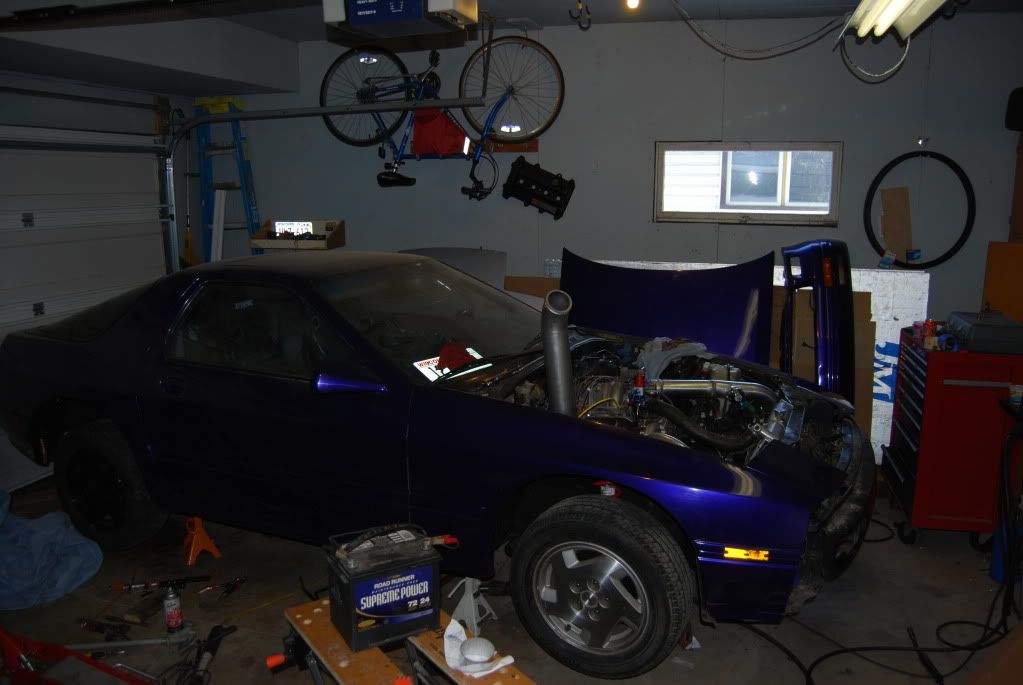
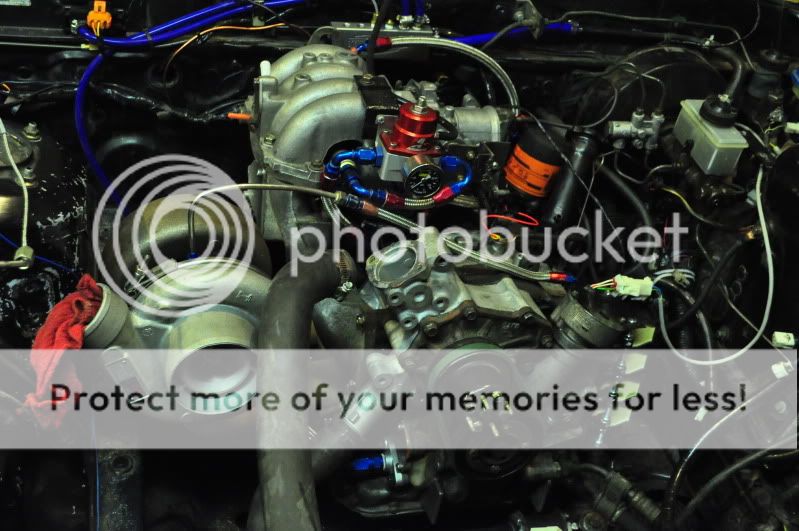
As for the rest of the car...turbo oil feed/drain lines have been installed, along with the radiator, and a shroud my little brother fiberglassed me. I'll replace it with something better later if I feel this isn't adequate.
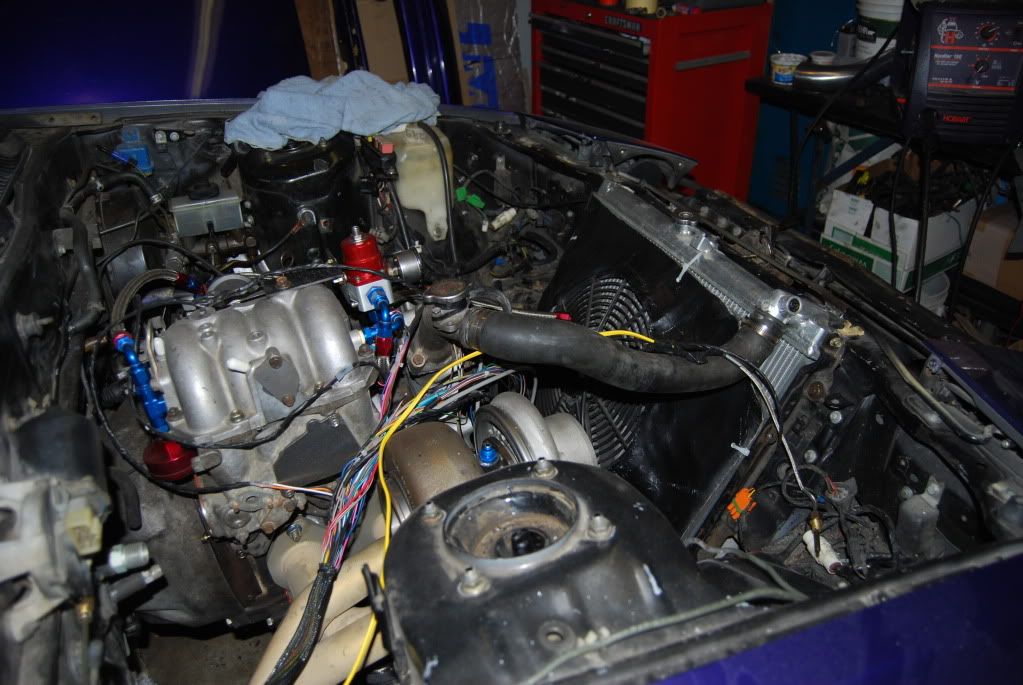
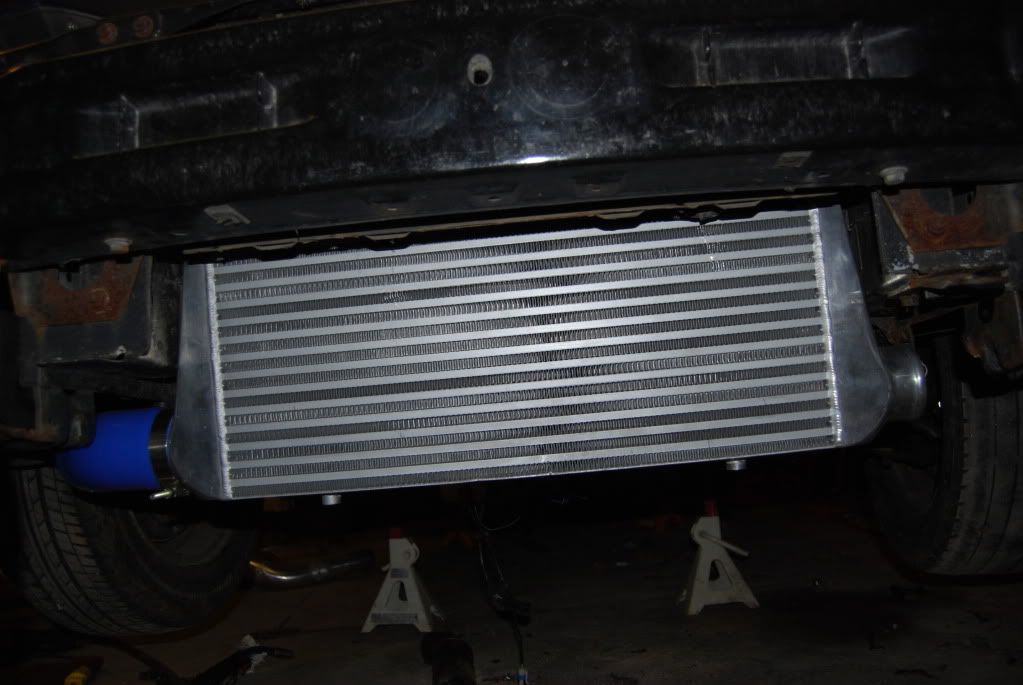
Intercooler also has been mounted. It's as high as I could put it without cutting too much, or interfering with the headlight motors, and it's still going to be the lowest point on the front of the car. It's only about an inch lower than the bumper, so I'm sure I can make it work.
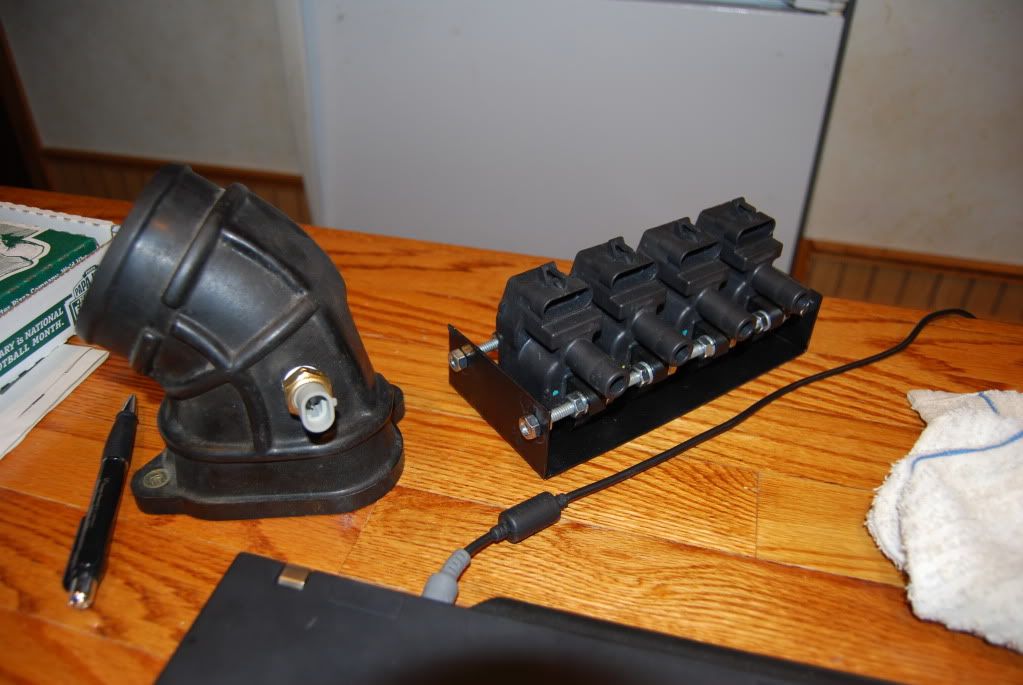
Here's my solution for the Haltech IAT sensor (3/8 npt threaded), and a mounting bracket for my LS1 coilpacks.
Finally, here's a project that has been on the back burner for a long, long time. The newspaper that I put down to protect the floor of my car has the date of January 1st, 2009 on it...that's when I first fiberglassed this. It was ugly, and looked like a ton of work to make it even presentable...I bondoed and sanded it 3 or 4 times over the next year, but it wasn't getting much prettier, and I was considering a different option. Finally, I tried some old trunk carpeting I had laying around, and was super happy with the results. The holesaw I bought was 1/16" too big, so the gauges fit awesome snug with the carpet.
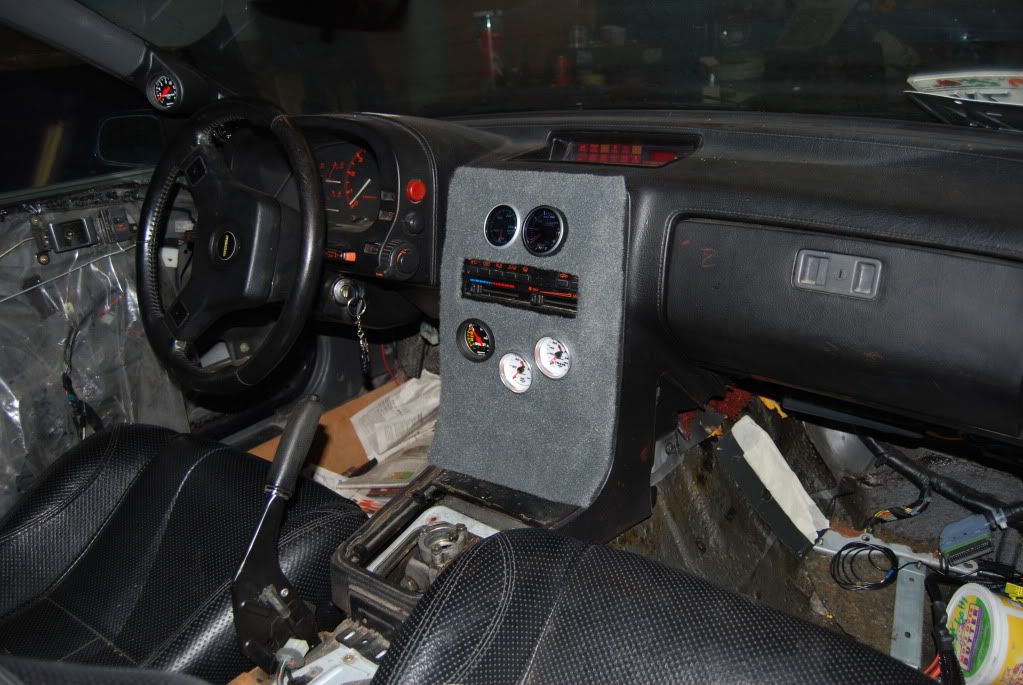
Again, not a show car, I just didn't want to screw all the gauges to my dashboard. It looks more goofy in the above picture than it actually does. I blame the flash.
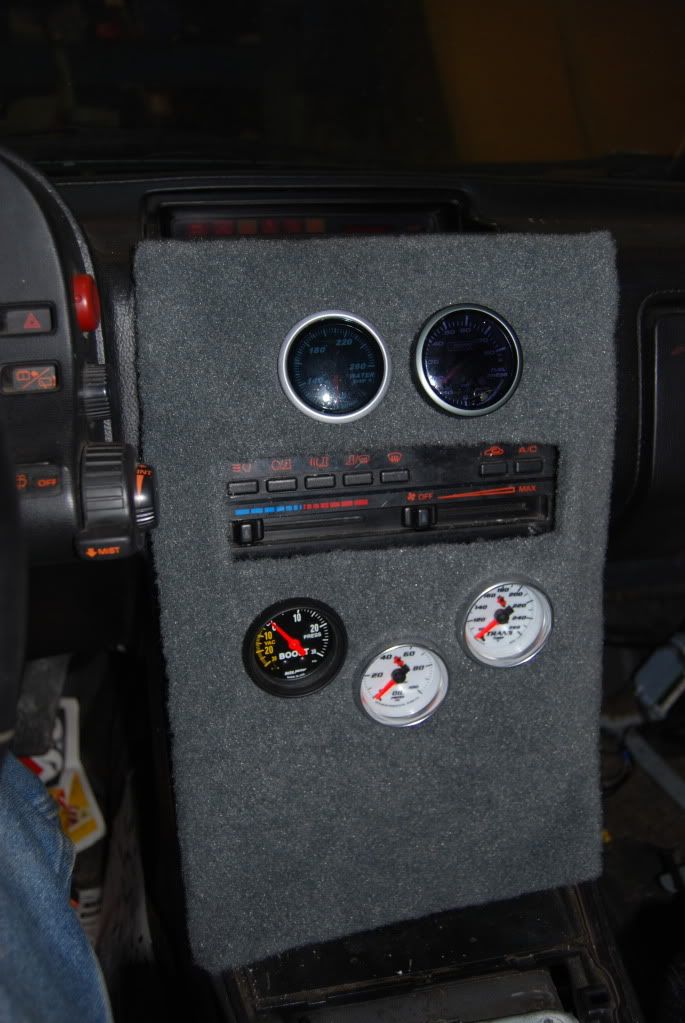
All the gauges have been wired up into a neat little panel with four wires coming off of it that get connected to headlight, ground, 12v constant, and 12v accessory. Should make for an easy installation and removal!
Also, my downpipe arrived. 4" is really, really big. This is going to be a challenge getting this thing to fit. Wastegate is going to have to come off for starters.
Intercooler pipes are 95% done. I bought a big kit with the intercooler from CXracing on eBay. Core is 36x12x3", and was kind of a pain to fit, I could have gone a little shorter, maybe 28x12 or 28x9 would have been perfect.
The pipes are nice thick aluminum and came with beads rolled onto some of them. Really high quality stuff. They cut and weld just fine.
I was going to rent a TIG welder, or have someone do these, but I decided against it...I'm currently more broke than Africa, and I've done everything else on the car by myself, why not try this? Nothing on the car is show-quality, i'm just overbuilding everything, function over form.
So, I did some reading, rented a tank of 100% argon and bought a spool of 4043. It took some practice to get it to feed without birdsnesting (aluminum is softer and doesn't like to be pushed all the way down the welding whip), and then it took some more practice to get some welds out of it, but I'm satisfied with the results.
In the places where the pipes fit perfectly together, I can produce dimes that look like they were TIG-ed. In places with a little bit of air, I don't have a second regulator to flow Argon through the inside of the pipe, so the air inside the pipe contaminates the weld, and I have problems with the weld "sticking"...so they get a little blobby.
All pipes were pressure tested to 20 psi. Problem areas were marked, cleaned up, inspected, and re-welded until leak-free.
Here's my testing "rig". I needed a plug for one end, and I could only find one suitable item...hahahaha.
COMPRESSED AIR IS DANGEROUS! I know I wasn't really taking too much warning, and I'm lucky I wasn't seriously injured. I was thinking that 15, 20 psi wasn't that much...well, my 3" diameter pipe, at 20PSI has 141 pounds of force behind it! That's enough to lift my little brother into the air!
Long story short, I didn't have one end securely fastened. I brought a pressurized pipe inside. Five minutes later, I was holding it, and BOOOM!!!!! The gauge blew out the end and smashed on the ceiling...so I fixed it.
(Because I know someone's going to ask, the lack of a bead rolled on the fire extinguisher, combined with me not having T bolt clamps that large meant that I had to use two worm clamps...and yes, I did launch the fire extinguisher 15 feet across the garage at one point. Very lucky it didn't hit me, or the car, or break open!)
Here are the first two intercooler pipes done. From intercooler up to turbo outlet, and intercooler out to driver's headlight. The last one, from driver's headlight to throttle body got finished late last night, so no pics of that yet...
And here's a vid of the pressure testing...proving that even though the welds are not super pretty and professional, I can weld alright with what I'm given :P
As for the rest of the car...turbo oil feed/drain lines have been installed, along with the radiator, and a shroud my little brother fiberglassed me. I'll replace it with something better later if I feel this isn't adequate.
Intercooler also has been mounted. It's as high as I could put it without cutting too much, or interfering with the headlight motors, and it's still going to be the lowest point on the front of the car. It's only about an inch lower than the bumper, so I'm sure I can make it work.
Here's my solution for the Haltech IAT sensor (3/8 npt threaded), and a mounting bracket for my LS1 coilpacks.
Finally, here's a project that has been on the back burner for a long, long time. The newspaper that I put down to protect the floor of my car has the date of January 1st, 2009 on it...that's when I first fiberglassed this. It was ugly, and looked like a ton of work to make it even presentable...I bondoed and sanded it 3 or 4 times over the next year, but it wasn't getting much prettier, and I was considering a different option. Finally, I tried some old trunk carpeting I had laying around, and was super happy with the results. The holesaw I bought was 1/16" too big, so the gauges fit awesome snug with the carpet.
Again, not a show car, I just didn't want to screw all the gauges to my dashboard. It looks more goofy in the above picture than it actually does. I blame the flash.
All the gauges have been wired up into a neat little panel with four wires coming off of it that get connected to headlight, ground, 12v constant, and 12v accessory. Should make for an easy installation and removal!
Also, my downpipe arrived. 4" is really, really big. This is going to be a challenge getting this thing to fit. Wastegate is going to have to come off for starters.
01-09-10, 06:25 PM
#33
Canned. I got CORNED!
Thread Starter
iTrader: (5)
Join Date: Mar 2007
Location: Appleton, WI
Posts: 1,029
Likes: 0
Received 0 Likes
on
0 Posts
This will be my last update for a few weeks, going on vacation and then back to school. Looking at starting it for the first time in the next month or so!
I think that's where the downpipe goes, right?
RAWR!
Intercooler piping is 90% finished. Test-fitted the hood today, and the BOV hits the vent My options are trimming the hood or moving the BOV, I'll have to think about it. Probably end up moving the BOV. Passenger side pipe needs to be shortened a little bit near the intercooler as well, fits perfect in the engine bay though!
Last night I worked all day, and up till 3:30AM. Got the fuel tank installed back in the car, and all the fuel lines run. Summit Twist-tite fuel line from tank, over axle, to body, solid steel line from body to engine bay, braided stainless through the entire engine bay. Made brackets to attach lines to car.
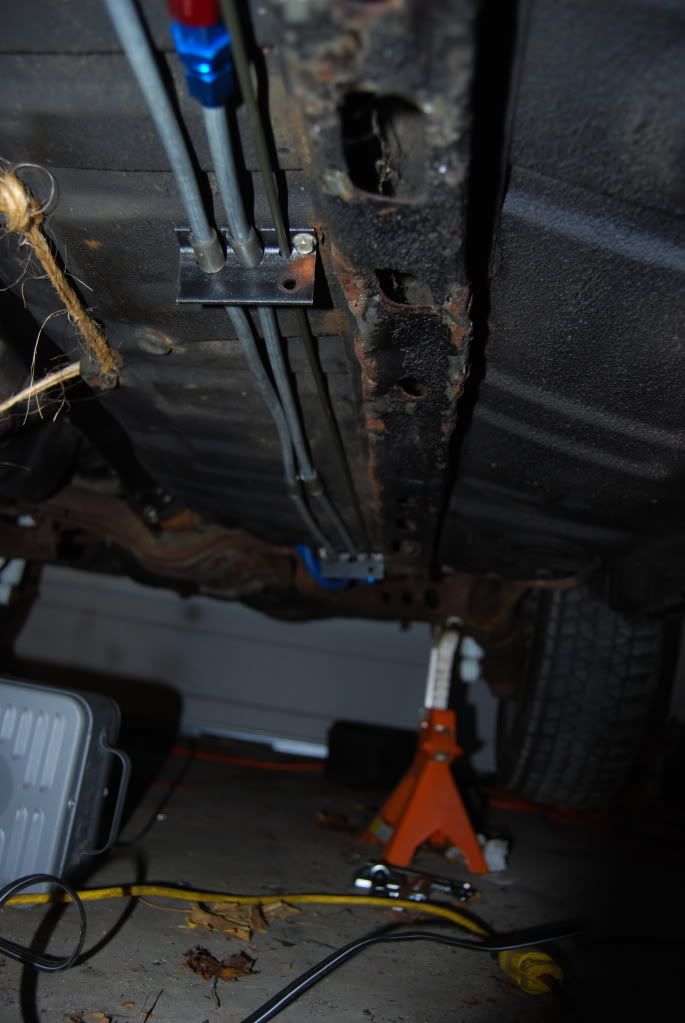
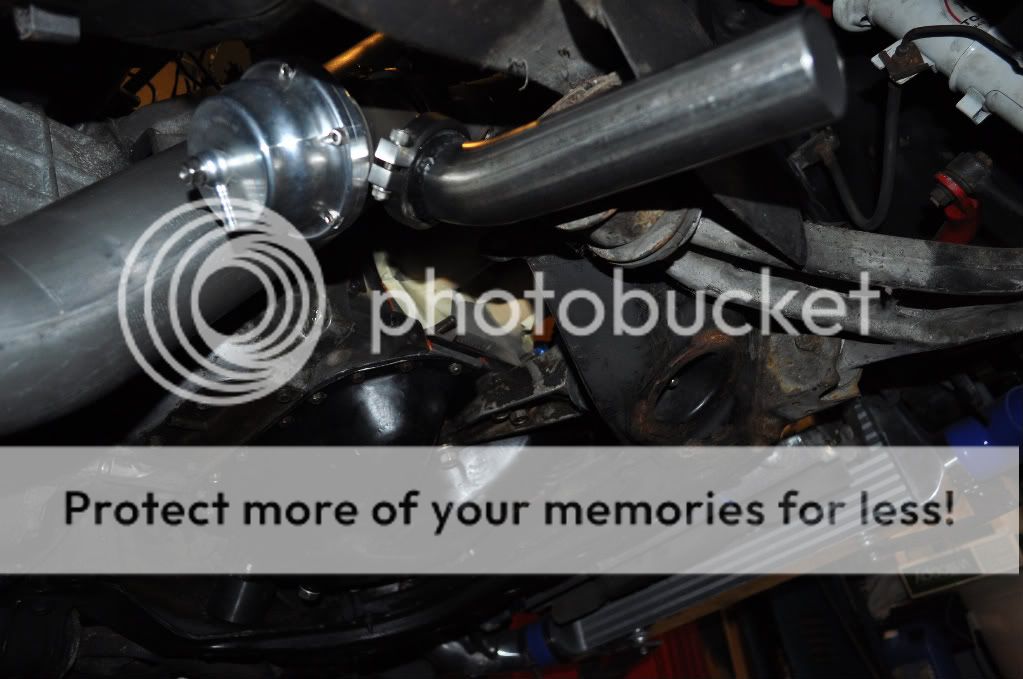
Finally, a shot underneath at what I'm working with on this downpipe. I'm going to try to bend the transmission tunnel upwards a bit and see if I can get it to fit. I've also got header wrap for the downpipe, so that will help with heat issues and little clearance.

Things to do before the car starts:
Finish intercooler piping
Make downpipe fit
Hang exhaust
Fill oil, coolant, fuel
Find somewhere to mount coil packs
Finish engine bay wiring, wire in electric fan
Wire fuel pump and haltech
Install nifty gauge panel
Cross fingers
I think that's where the downpipe goes, right?
RAWR!
Intercooler piping is 90% finished. Test-fitted the hood today, and the BOV hits the vent
My options are trimming the hood or moving the BOV, I'll have to think about it. Probably end up moving the BOV. Passenger side pipe needs to be shortened a little bit near the intercooler as well, fits perfect in the engine bay though!Last night I worked all day, and up till 3:30AM. Got the fuel tank installed back in the car, and all the fuel lines run. Summit Twist-tite fuel line from tank, over axle, to body, solid steel line from body to engine bay, braided stainless through the entire engine bay. Made brackets to attach lines to car.
Finally, a shot underneath at what I'm working with on this downpipe. I'm going to try to bend the transmission tunnel upwards a bit and see if I can get it to fit. I've also got header wrap for the downpipe, so that will help with heat issues and little clearance.
Things to do before the car starts:
Finish intercooler piping
Make downpipe fit
Hang exhaust
Fill oil, coolant, fuel
Find somewhere to mount coil packs
Finish engine bay wiring, wire in electric fan
Wire fuel pump and haltech
Install nifty gauge panel
Cross fingers
01-10-10, 10:47 AM
#37
Engine, Not Motor
iTrader: (1)
Join Date: Feb 2001
Location: London, Ontario, Canada
Posts: 29,789
Likes: 0
Received 108 Likes
on
91 Posts
Did you replace the feed liner when you switched to aluminum wire? Aluminum needs a Teflon liner but most MIGs have a steel liner from the factory. Going to the appropriate liner fixes a lot of the birdsnesting problems.
I love the fact that you launched a fire extinguisher across the garage.
I love the fact that you launched a fire extinguisher across the garage.
 01-20-10, 02:23 PM
#40
Canned. I got CORNED!
Thread Starter
iTrader: (5)
Join Date: Mar 2007
Location: Appleton, WI
Posts: 1,029
Likes: 0
Received 0 Likes
on
0 Posts
The turbo vband outlet is holset specific...it's somewhere between 3.5" and 4", so a usual sized Vband won't fit. This downpipe has the correct size vband (I think it's 3.86" or so) and the rest of the downpipe is 4". Egad!
I'm excited too! I will take plenty of pics and vid, as always.
I knew I should have a plastic liner, or a feed gun, but I really didn't have the money to do a full aluminum conversion...I barely had enough to afford a little spool of aluminum and to rent the argon. All the birdsnesting problems I had were solved when I switched from .030" to .035" wire. I also put the pipes on that workbench and I stretch the whip all the way across the garage so it's completely straight, so the welder doesn't have to feed around any corners. I was really surprised it's working so well!
Also very happy I don't have a fire extinguisher lodged in my face!
Fuel line is -5an stock...mine is -6an, which is 6/16ths, which is 3/8". The hard line is a 3/8" aluminized steel spool I bought on eBay. I'll take another pic of the fuel setup when I get a chance!
Did you replace the feed liner when you switched to aluminum wire? Aluminum needs a Teflon liner but most MIGs have a steel liner from the factory. Going to the appropriate liner fixes a lot of the birdsnesting problems.
I love the fact that you launched a fire extinguisher across the garage.
I love the fact that you launched a fire extinguisher across the garage.
Also very happy I don't have a fire extinguisher lodged in my face!
Fuel line is -5an stock...mine is -6an, which is 6/16ths, which is 3/8". The hard line is a 3/8" aluminized steel spool I bought on eBay. I'll take another pic of the fuel setup when I get a chance!
03-09-10, 03:15 PM
#41
Canned. I got CORNED!
Thread Starter
iTrader: (5)
Join Date: Mar 2007
Location: Appleton, WI
Posts: 1,029
Likes: 0
Received 0 Likes
on
0 Posts
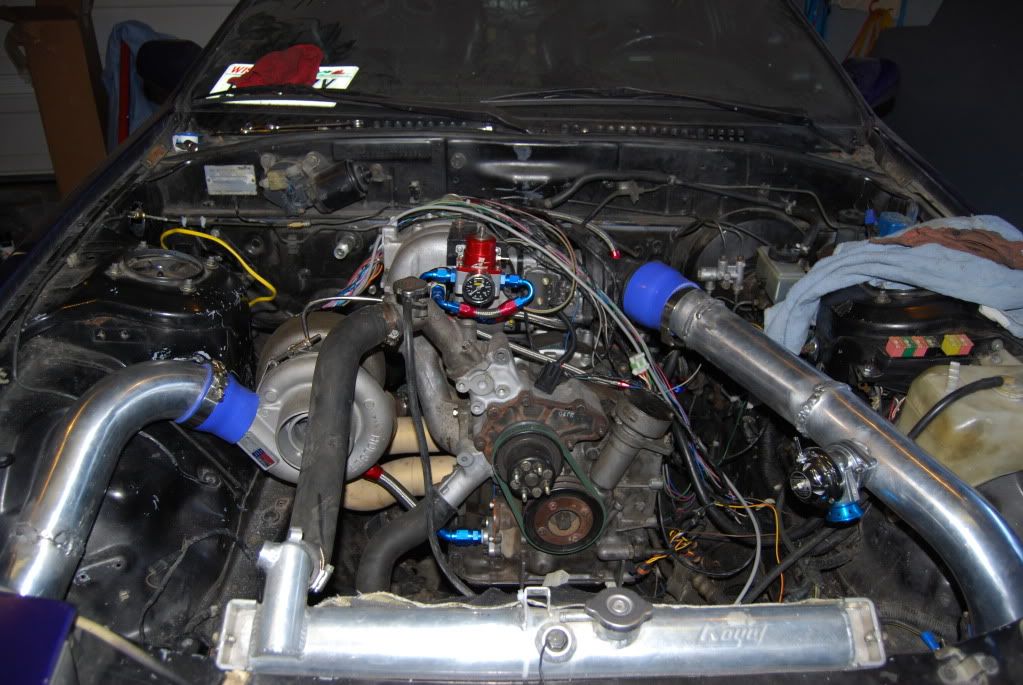
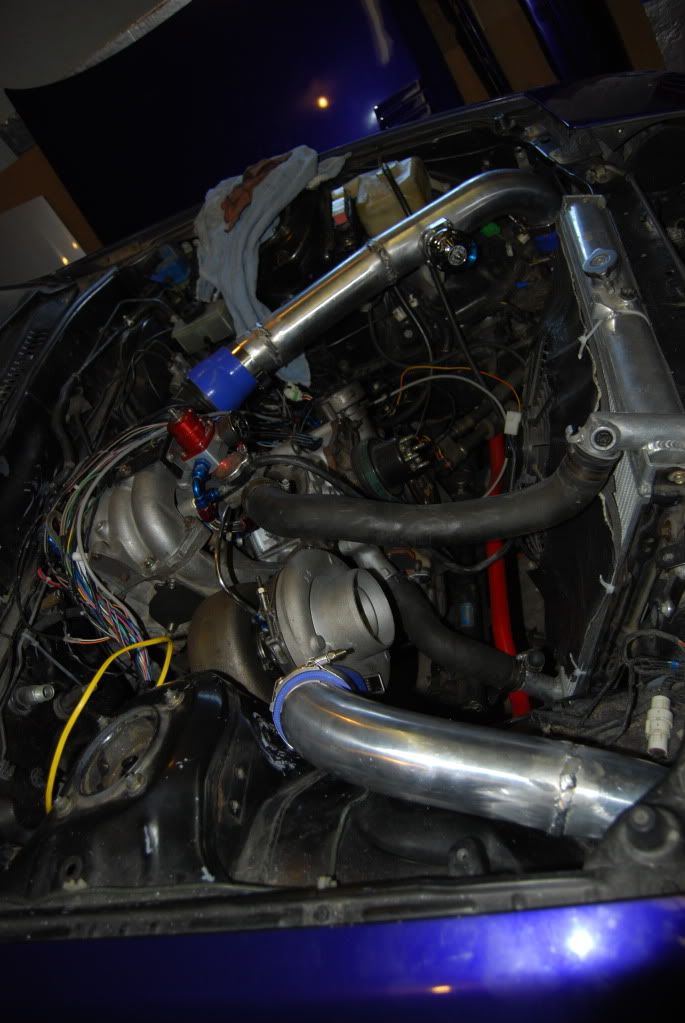
Bit of an overdue update....
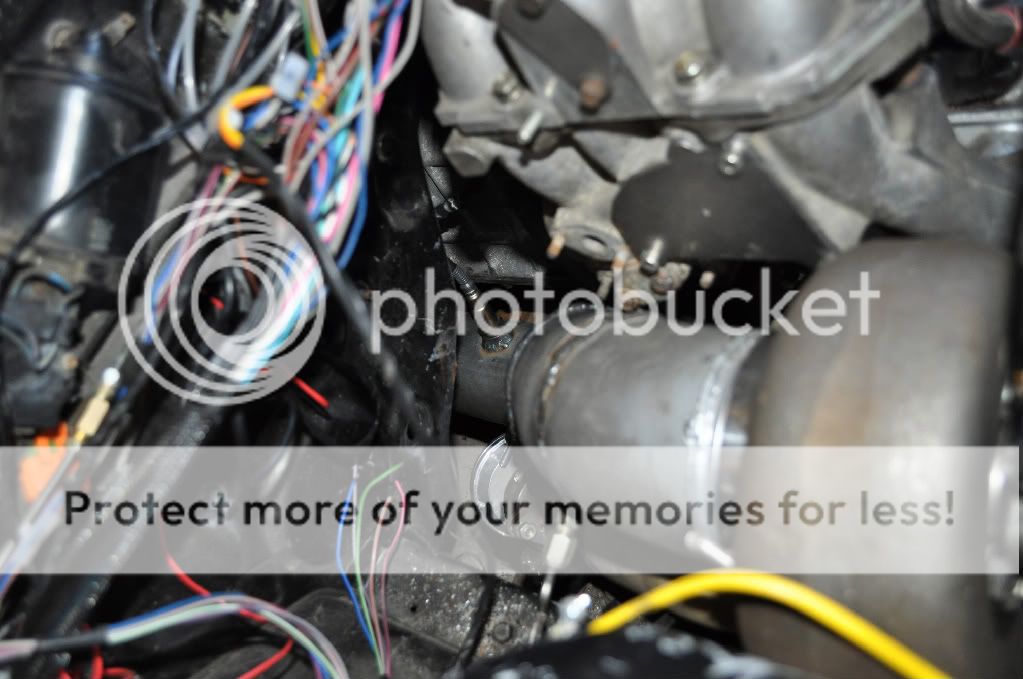
Got the downpipe installed! *V band needs some tweaking yet, it's loose...*scratches head*. *Downpipe was shortened by about 6" and needed two little bends. *
4" was a beast to fit! *I've got half an inch of clearance on THREE sides of it, between the rest of the exhaust manifold, the intake manifold, and the wastegate. *I had to cut into my pretty manifold and put a little more angle on the wastegate tube. *I think this should work. *I'm going to make a exhaust hanger for the back of the downpipe, then header wrap the **** out of it. *
Test fitting:
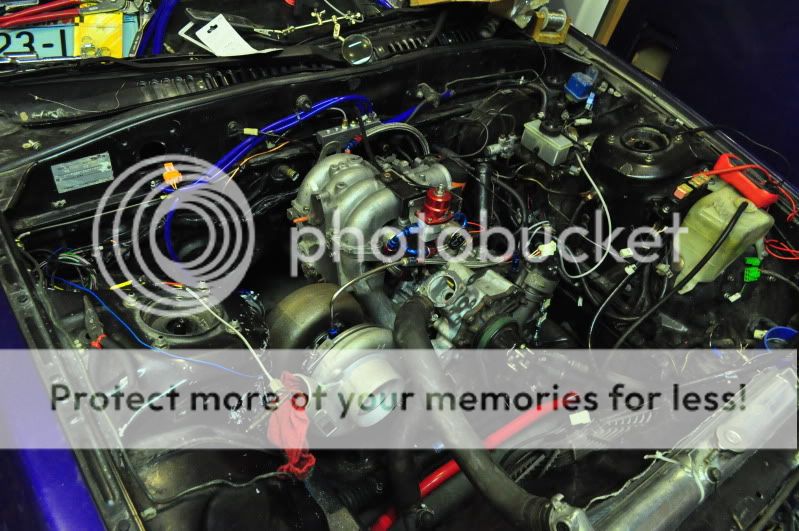
Final fit:

Also got the coilpacks mounted and the sparkplug wires installed...(not pictured)
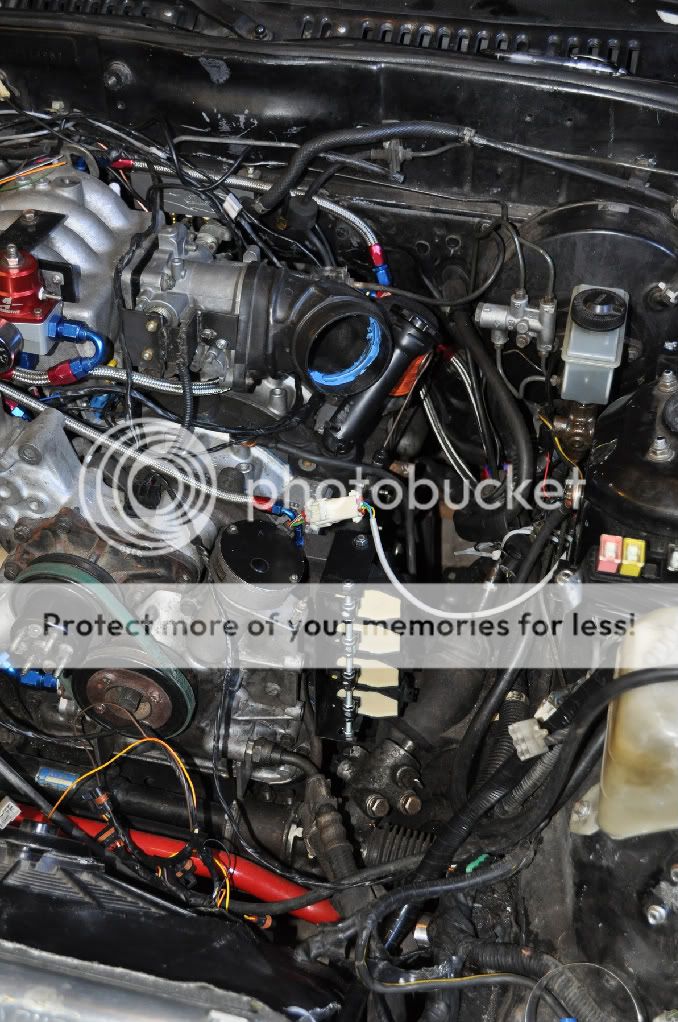
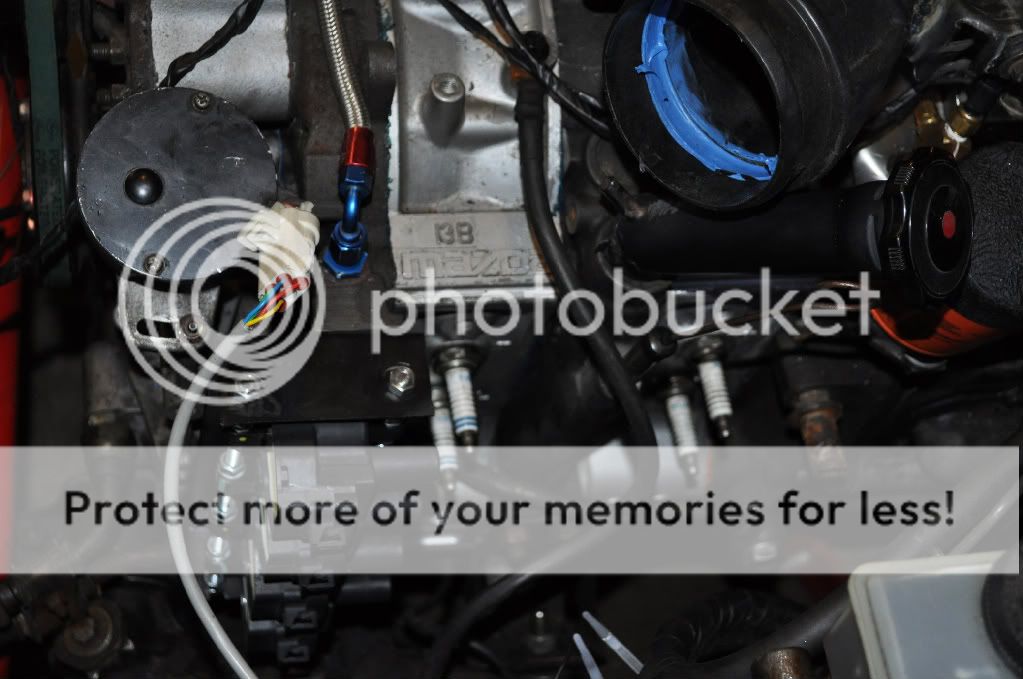
I mounted the coils right to the front iron. **shrugs*
Also, take note of the modified oil filler neck installed, and the CAS harness that I took out of the main harness and routed all the way around the engine bay. Hopefully the coils won't interfere with the CAS signal too much...?
Here's the panel I made to mount the haltech on, and the mess of wiring I'm wrist-deep in. *You can't really see it, but there are two relays mounted to that board in addition to the main fuse panel and the haltech. *

Got the downpipe installed! *V band needs some tweaking yet, it's loose...*scratches head*. *Downpipe was shortened by about 6" and needed two little bends. *
4" was a beast to fit! *I've got half an inch of clearance on THREE sides of it, between the rest of the exhaust manifold, the intake manifold, and the wastegate. *I had to cut into my pretty manifold and put a little more angle on the wastegate tube. *I think this should work. *I'm going to make a exhaust hanger for the back of the downpipe, then header wrap the **** out of it. *
Test fitting:
Final fit:
Also got the coilpacks mounted and the sparkplug wires installed...(not pictured)
I mounted the coils right to the front iron. **shrugs*
Also, take note of the modified oil filler neck installed, and the CAS harness that I took out of the main harness and routed all the way around the engine bay. Hopefully the coils won't interfere with the CAS signal too much...?
Here's the panel I made to mount the haltech on, and the mess of wiring I'm wrist-deep in. *You can't really see it, but there are two relays mounted to that board in addition to the main fuse panel and the haltech. *
04-09-10, 09:41 PM
#42
Canned. I got CORNED!
Thread Starter
iTrader: (5)
Join Date: Mar 2007
Location: Appleton, WI
Posts: 1,029
Likes: 0
Received 0 Likes
on
0 Posts
Anyways, I've put two more weekends of work down. *Got all the wiring and vacuum lines ran. *Engine bay looks 100% more finished now!
Finally today, I chased down a power issue I was having, and now I have ignition power! *The gauges all work and the car is beeping confusedly. *It's grand. *I ran the fuel pump and found a leak where the hardline underneath meets a braided hose....I really shouldn't have even messed with the hard lines, just gone braided or twist-tite all the way, that twist-tite **** is awesome. *I also installed a new OEM thermostat and gasket.
Hooked the laptop up to the Haltech and they linked up on the first try! *I was way too excited to mess with anything...going to have to find a map close enough to get it to idle, then worry about it later.
So, next weekend I'm home will be time to tear that fuel line apart and see if I can't fix it....then continue filling it with fluids and maybe turn the key once
07-24-10, 10:15 AM
#44
three spinning triangles
Join Date: Oct 2003
Location: SE Wisconsin
Posts: 1,441
Likes: 0
Received 0 Likes
on
0 Posts
 07-26-10, 12:24 PM
#45
Canned. I got CORNED!
Thread Starter
iTrader: (5)
Join Date: Mar 2007
Location: Appleton, WI
Posts: 1,029
Likes: 0
Received 0 Likes
on
0 Posts
I forgot about this thread...haha
I have some media but can't get to it cause I'm at work right now...
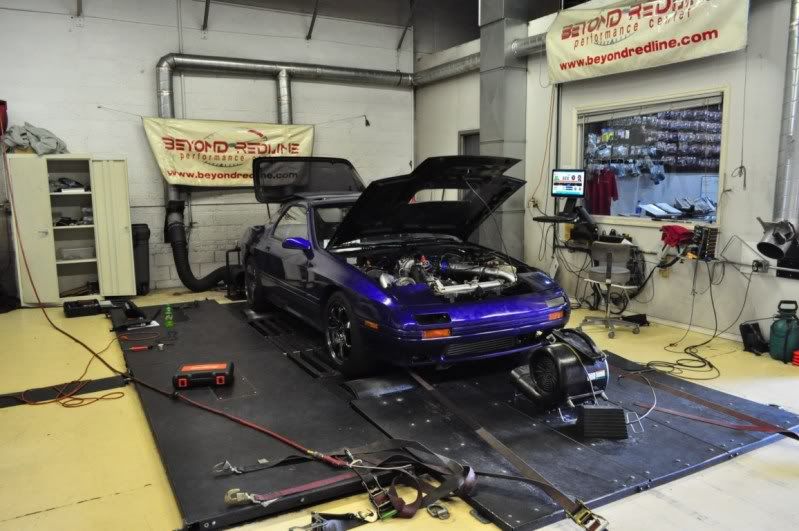
Long story short, car put down 361WHP on 14 PSI with lots of room for more Wideband is pegged rich the whole time I'm boosting. Spraying water meth 50/50 at anything over 4,000RPM, currently.
Injector driver on the Haltech was dead from the factory, took us about 3 hours to chase that down.
Car is an absolute blast to drive. 4" open downpipe and wastegate dump sound disgusting at speed. I have a 3" exhaust to put on the car but it won't be for a week or two yet.
Throwing the car on a tow dolly and heading to Deal's gap this weekend, should be a blast!
I have some media but can't get to it cause I'm at work right now...
Long story short, car put down 361WHP on 14 PSI with lots of room for more
Wideband is pegged rich the whole time I'm boosting. Spraying water meth 50/50 at anything over 4,000RPM, currently.Injector driver on the Haltech was dead from the factory, took us about 3 hours to chase that down.
Car is an absolute blast to drive. 4" open downpipe and wastegate dump sound disgusting at speed. I have a 3" exhaust to put on the car but it won't be for a week or two yet.
Throwing the car on a tow dolly and heading to Deal's gap this weekend, should be a blast!
 07-28-10, 06:29 PM
#48
Canned. I got CORNED!
Thread Starter
iTrader: (5)
Join Date: Mar 2007
Location: Appleton, WI
Posts: 1,029
Likes: 0
Received 0 Likes
on
0 Posts
This is the best I can do for you...haha

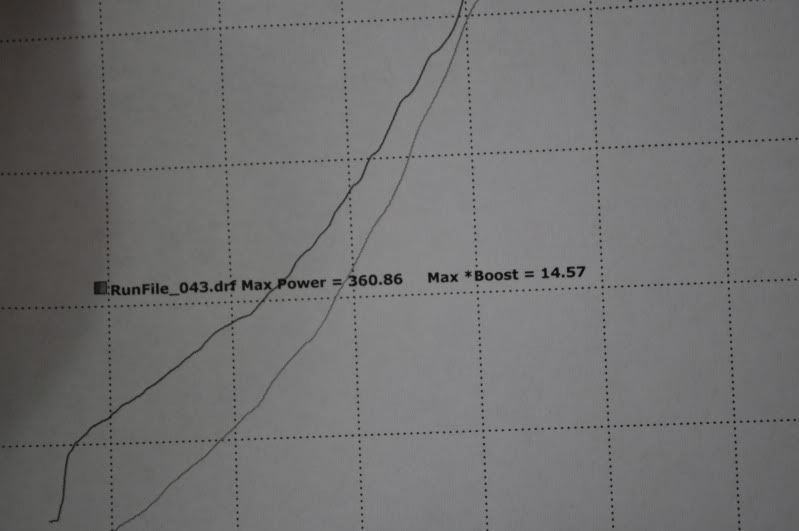
Big bar is HP, smaller bar is boost. RPM signal wasn't working great, so graph is in MPH and no TQ graph, but if my math is correct, should be about 289.
Dip in the middle is a misfire from bogging rich.
Big bar is HP, smaller bar is boost. RPM signal wasn't working great, so graph is in MPH and no TQ graph, but if my math is correct, should be about 289.
Dip in the middle is a misfire from bogging rich.