
mounting body kit?

mounting body kit?
So my body kit just showed up today. Turns out they are only half bumpers. The side skirts seem to be simple to mount. However I am kinda confused on the front and rear bumper. I know most people use screws to mount on the inner fenders. I have also read people using 3m tape to hold the rest on. So I am just curious how everyone mounted their kits
welcome to the hole body kit world...most of the time they fit like **** especially if you got a cheap kit gp sports replica etc... what ever you do..do it cleanly and right.no bumpers half on and dangling in the wind down the highway.alot of people also screw in the side skirts to the inner of the front and rear fenders then besides that they use the double sided 3m tape to hold on the front and rear bumpers..
oh ok. Everyone makes it sound like it is so much more then that. I got an erebuni kit. From everything I have heard they fit really well. Most people say they are on the thin side though. I will probably give them a test fit this weekend. Need to work on more of the body before I put the kit on. That way when they do go on it is straight to a paint job.
Joined: Sep 2005
Posts: 25,581
Likes: 136
From: Smiths Falls.(near Ottawa!.Mapquest IT!)
I have Half style Bumpers on my Car..What I used Was Industrial Velcro..it is like Tape,so you can position it,then Push and it is on..The stuff was not exactly Cheap at 13 dollars for 4 feet.(I got it at Canadian Tire,here in Canada) If you want to go this route,as you can always remove the bumper with a couple screws and then 'Rippppp",it's off!,you should check into it.

I am a body kit installer. I have two pieces of advice. As for attaching the parts together, I use these little screws that have an included threaded insert that goes behind the screw for the threads to hit. You can use a method like this for your car to attach it everywhere, but you should also use some sort of adhesion that bonds the whole kit edge to the body panel it will attach to. I use epoxy glue usually, followed by a layer or two of fiber to blend the new body line together, and after the whole process is over I buff it out really well to blend the body line into the car. This only works really great for fg to fg fitment, as is your case. The other big suggestion is to make sure the part fits without needing to flex it before it is mounted. You don't want to have to stress the part AT ALL to make it fit up to the mounting point. If you bend it in the process and it stays out of its natural shape, over time it crack itself and the edges and pull off.
Trending Topics
Another point, regarding blind rivets, I can't suggest bondoing over those. If you put bondo over an aluminum fastener like that, you are bound to have weathering issues inside of a few months. The expansion and contraction of the rivets with temperature makes them only really viable for daily driven cars if they remain exposed, maybe a little flexible sealer or adhesive on the back side of them to keep them in place and tight, but nothing else.
Full Member
Joined: Jun 2006
Posts: 109
Likes: 0
From: Idaho
I did my own body kit install - the RaceonUSA Rmagic 8 piece kit. first time for me.
Biggest advice, get a dremil w/ all the sanding and cutoff accessories. Best tool I ever bought. Most of the non-fittment issues came from flashing on the back side of the pieces when trying to join them together. When I removed -cutted,grinded,sanded off the piece as needed, a seemingly impossible piece to align became quite easy.
As far as assembly to hold the pieces in place, I am glassing in the whole kit and widened the rear fenders. But to hold on the parts, I used recessed screws and nuts w/ blue loc-tite.
I used the tip of the right sized drill bit to create a slight dimple that fit the screw diameter . It seemed to work really well and hid the the screws easily when I glassed over them. It didn't seem to weaken the strength of the kit piece either where the possibility of it pulling out through the hole would happen.
hope that helps,
Pic's would be cool. Which one did you get?
TFitz.
couple pic's to inspire!!
[IMG]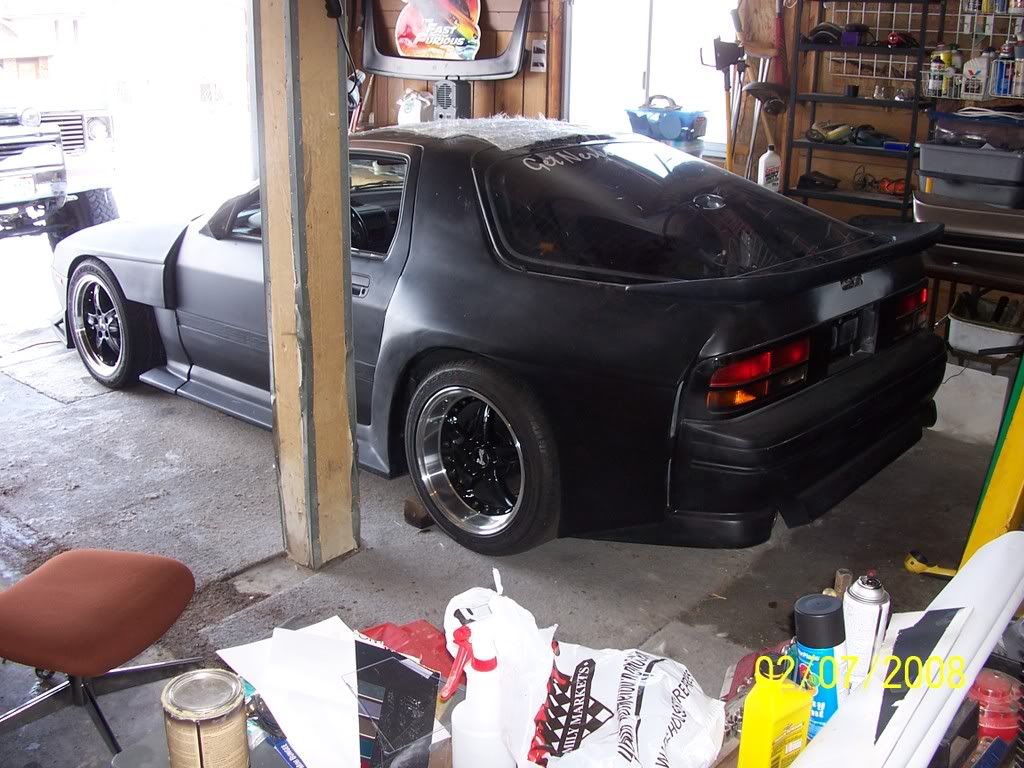 [/IMG]
my car
[IMG] [/IMG]
The widened rear fender glassed in.
[IMG] [/IMG]
Most of the bolts are done from the underside and never seen. The front didn't have any exposed hardware. And where I did need to join the front to the fender, I did it using the side signal. Good solid screws and nuts that can't be seen hidden under the lens.
Obviously, still a work in progress.
Biggest advice, get a dremil w/ all the sanding and cutoff accessories. Best tool I ever bought. Most of the non-fittment issues came from flashing on the back side of the pieces when trying to join them together. When I removed -cutted,grinded,sanded off the piece as needed, a seemingly impossible piece to align became quite easy.
As far as assembly to hold the pieces in place, I am glassing in the whole kit and widened the rear fenders. But to hold on the parts, I used recessed screws and nuts w/ blue loc-tite.
I used the tip of the right sized drill bit to create a slight dimple that fit the screw diameter . It seemed to work really well and hid the the screws easily when I glassed over them. It didn't seem to weaken the strength of the kit piece either where the possibility of it pulling out through the hole would happen.
hope that helps,
Pic's would be cool. Which one did you get?
TFitz.
couple pic's to inspire!!
[IMG]
[/IMG]my car
[IMG]
[/IMG]The widened rear fender glassed in.
[IMG]
[/IMG]Most of the bolts are done from the underside and never seen. The front didn't have any exposed hardware. And where I did need to join the front to the fender, I did it using the side signal. Good solid screws and nuts that can't be seen hidden under the lens.
Obviously, still a work in progress.

Thread
Thread Starter
Forum
Replies
Last Post
82streetracer
1st Generation Specific (1979-1985)
7
Aug 23, 2015 09:28 AM