
Josh's Build Thread

Day 52: Forgot to update this last night. I did some more roof sanding, rust treated the rear subframe and realized I shouldn't replace my subframe bushings. Tonight I'll paint the rear subframe and maybe do some prep on the rear control arms. This weekend is game time for painting the engine bay and interior. I'll also press out the rear control arm bushings and install the new ones and hopefully paint the control arms.
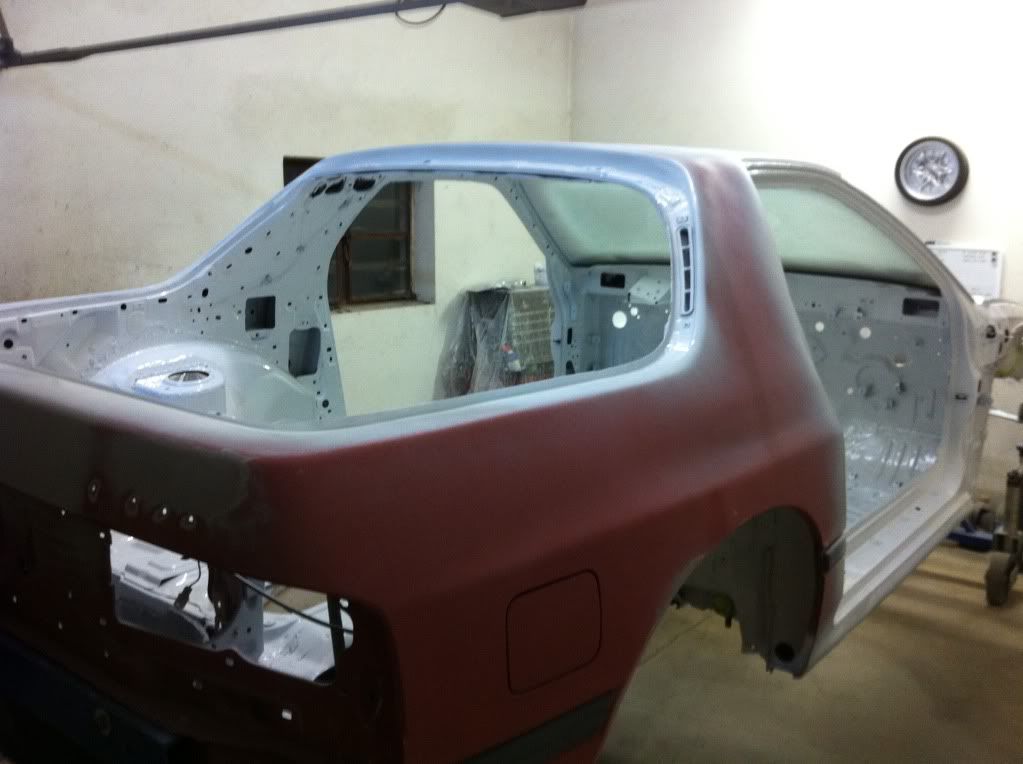
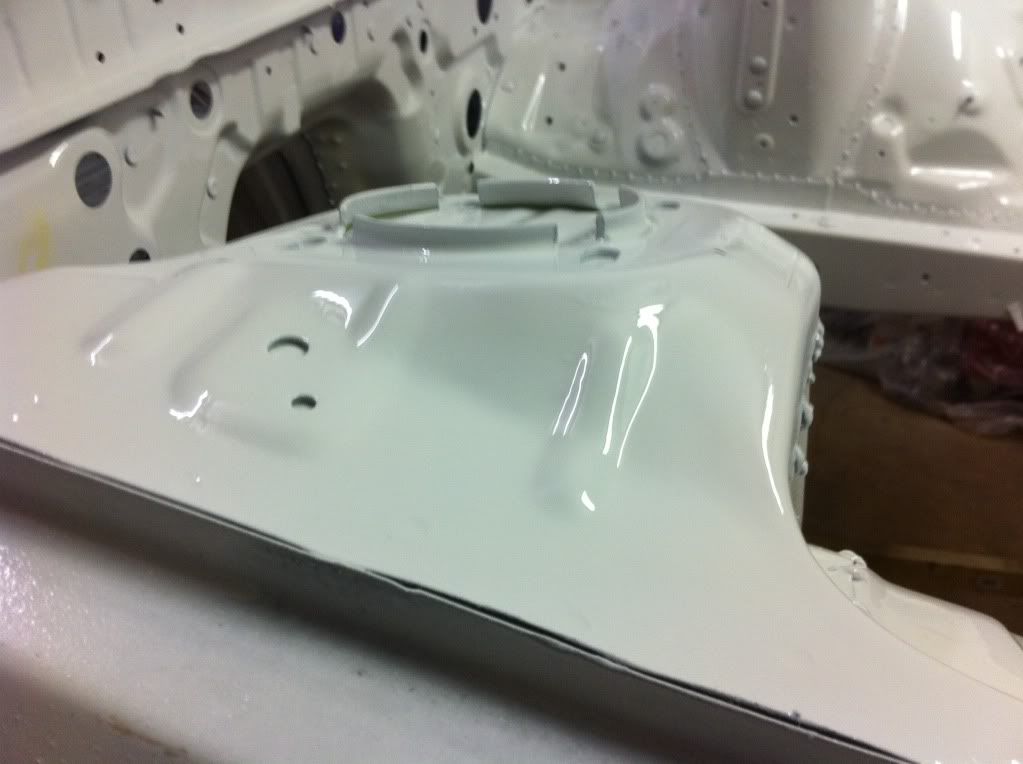
Day 53: Today I painted the engine bay, interior, and door jams. I also painted the rear subframe and the tow hook (safety orange for the tow hook). In order to do all that I had to pull the car out and clean everything up. It was a long day, but it was nice to get behind a paint gun again...it's been a while.

My wife is having surgery on Monday, so I'll have to watch my 3 boys all day. But I think I can still work on my wiring harness in my bar while I watch them. Gotta keep working if I'm going to hit my deadline.
My wife is having surgery on Monday, so I'll have to watch my 3 boys all day. But I think I can still work on my wiring harness in my bar while I watch them. Gotta keep working if I'm going to hit my deadline.
I'm not sure who or what TTT is, but I hope it's a good thing, lol.
I think today I'll be waxing the fiberglass molds...I need to get my body parts done and molded to do the last bit of painting.
I think today I'll be waxing the fiberglass molds...I need to get my body parts done and molded to do the last bit of painting.
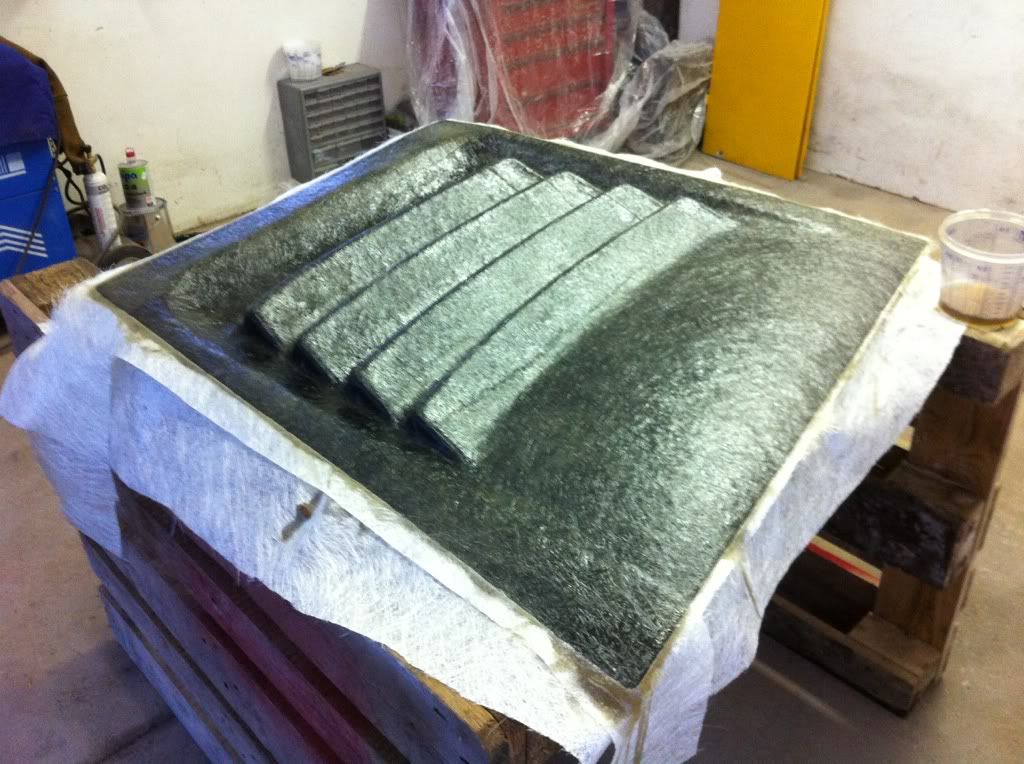
Day 54: This evening I washed and waxed all the molds. They are now ready to be used. The next few days I'll be working on my wiring harness while my wife heals up.
For those that are curious; the molds are made of gel coated fiberglass with some portions bolted on for easier use. I waxed them with three coats of carnuba wax. I'll be applying PVA (Polyvinyl Alcohol) before I use them. PVA basically forms a trash bag type of surface on the mold and makes it release much easier. The wax allows multiple consecutive applications of PVA, without the use of PVA you'd have to wax after each use. With PVA you can use the mold multiple times before having to re-wax.
I suppose I could do up an actual DIY article, if there's interest...I just need to start taking some pics before it gets too late.
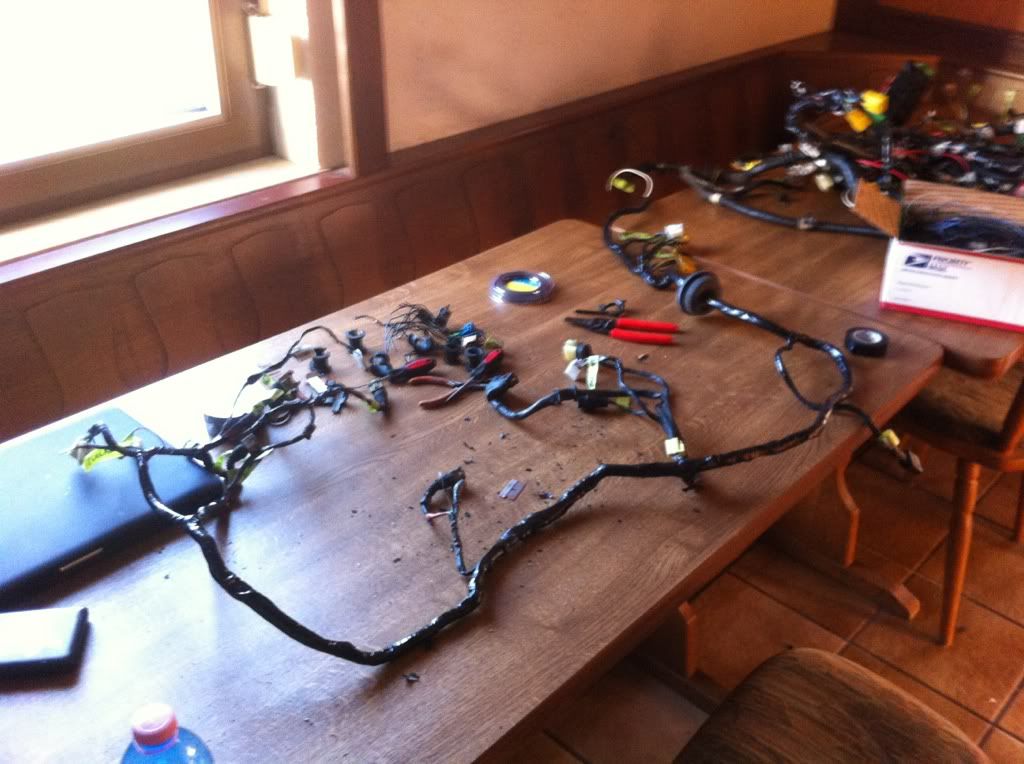
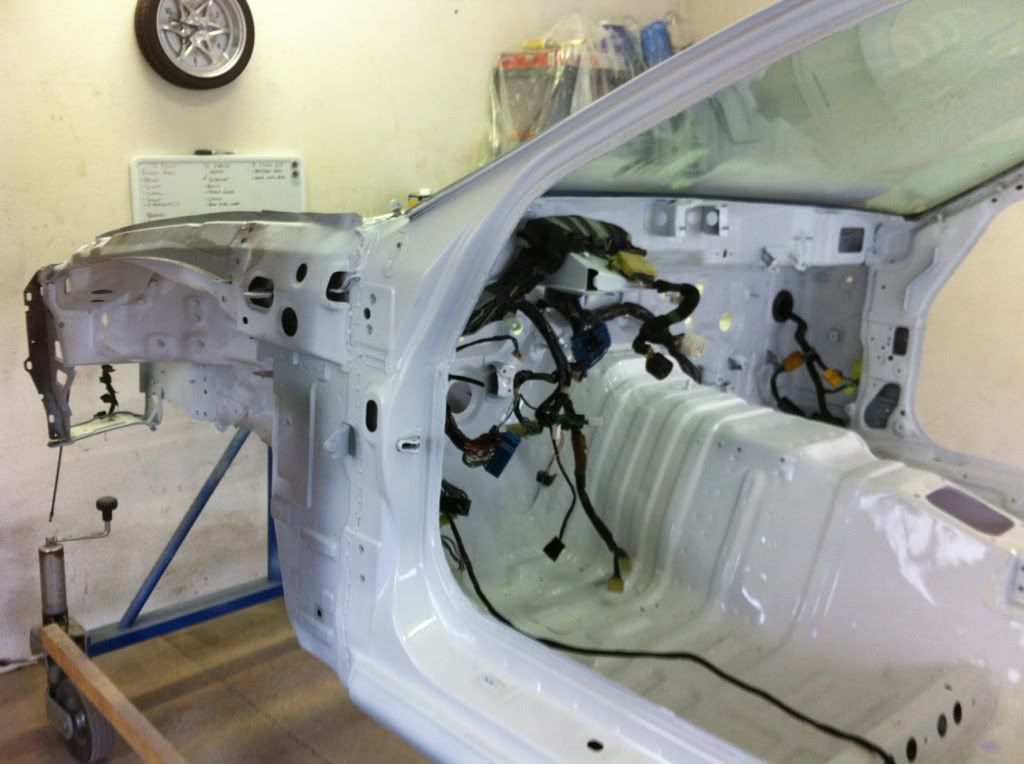
Day 55: My wife's surgery went well and she is in better shape than we thought she would be. I still have to take care of my boys to keep her from tearing any sutures. However, I was able to remove all the emissions wiring and a couple other obsolete wires from the engine harness and re-wrapped it. Tomorrow I'll start working on the chassis harness. I may try to pick up the brake hard lines I need to replace my old corroded ones. There's only a few more things I need to do before I can take the car off the rotisserie.
Here's a pic:
Here's a pic:
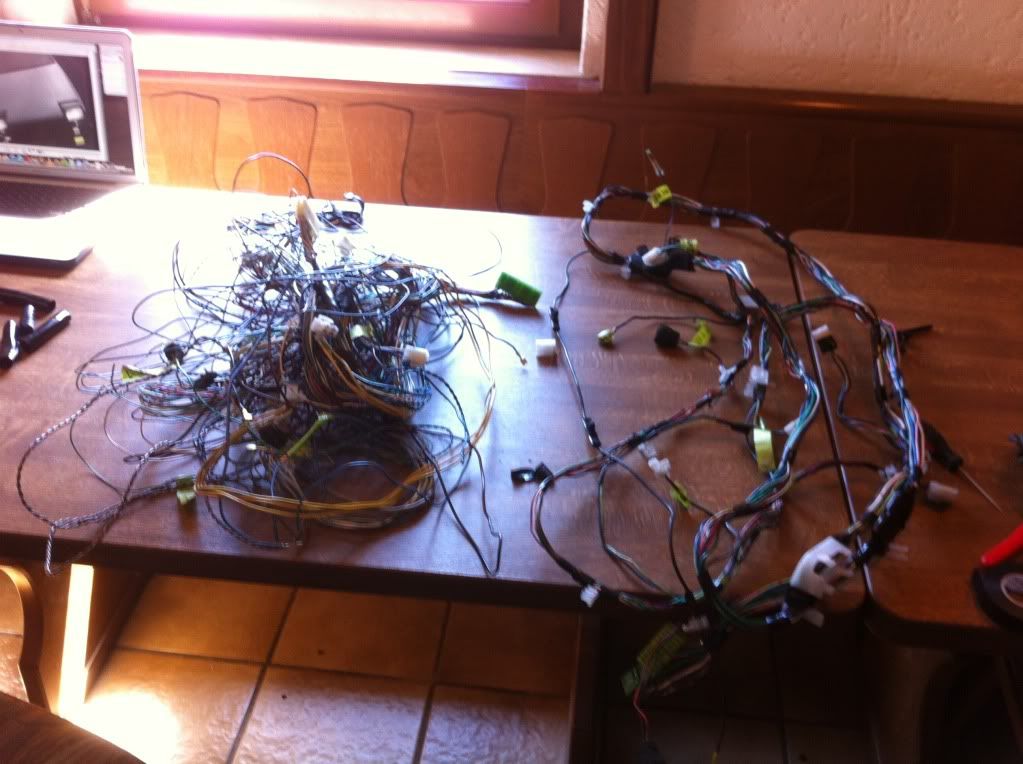
Day 56: Today I finished all my harnesses. The pile on the left is all the wire pulled from the harness on the right. This is where most of the trimming came from. There was about 10lbs in all, taken from all the harnesses. This should simplify any future electrical troubleshooting, if there is any, and the weight savings is a bonus. It should also clean up the interior, since none of the panels are going back in.
Day 57: Today I primed the roof after "smoothing" it with a DA. It'll be wavy as hell, but all well. I also shot white on the insides of the doors. I started running the wiring harnesses as well.
Day 58: I only got about an hours worth of work done. I re-primed the roof with lighter color super-crappy german primer, with a 1/2" spray pattern. I welded the emblem holes shut on the back...I hadn't originally intended to do that, but the wing risers are going to cut right through the emblem, so it had to go. I bondoed the holes. And that's it...not very happy. Tomorrow I'm going to work pretty late. If I get all the noisy stuff done before 10, I can work on the fiberglass later than that. If I'm super fast I can get the glass done before I pass out from exhaustion. I want, ever so desperately, to spray the exterior this weekend, so I can resume reassembly during the week.
Oh yeah, I received my Corksport TID and oil cooler lines. Working on getting the last three major parts: mirrors (APR GT3), v-mount intercooler, and headlights for the FC2000 bumper.

Day 59: Primed the rest of the car, ran out before I could do the doors. I also glassed my first mold. Tomorrow I'll do the rest of the molds, prime the doors, finesse the new fiber panels and get ready for paint...who knows, I just might get her painted tomorrow. Lots of work to do still.
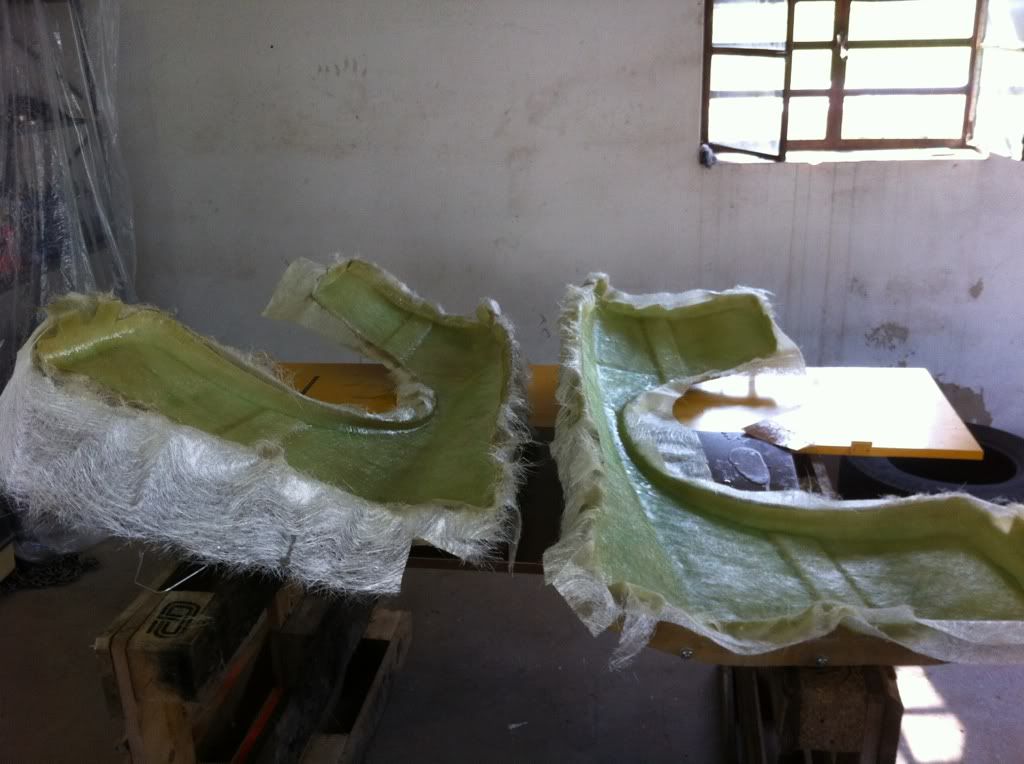
Day 60: Today I learned some lessons from the fiberglass session last night, after I took the scoop off the mold. I then proceeded to fiberglass the fenders. I got them done, but it looks like all the pieces are going to need some body filler love. I PVAed the front bumper mold and will glass it tomorrow, I'll also start the body work on the fenders and scoop and get them fitted. Don't worry, I haven't forgotten about the DIY...I'm saving it for the second run of parts, when I have things down to more of a science and am able to take more time.
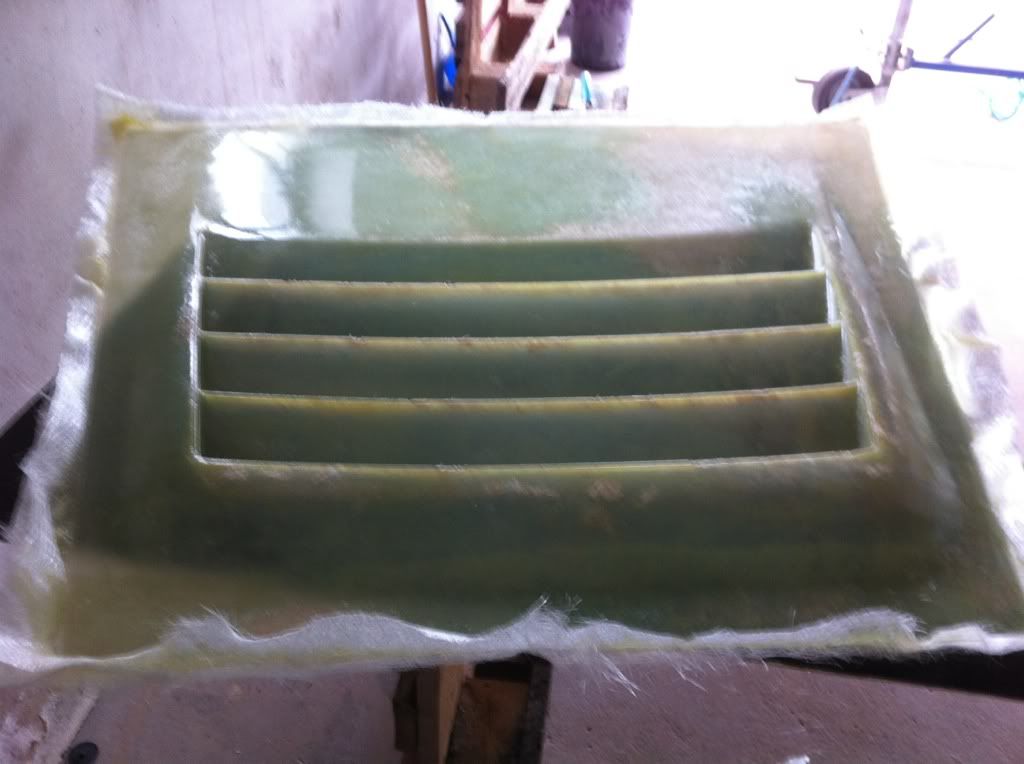
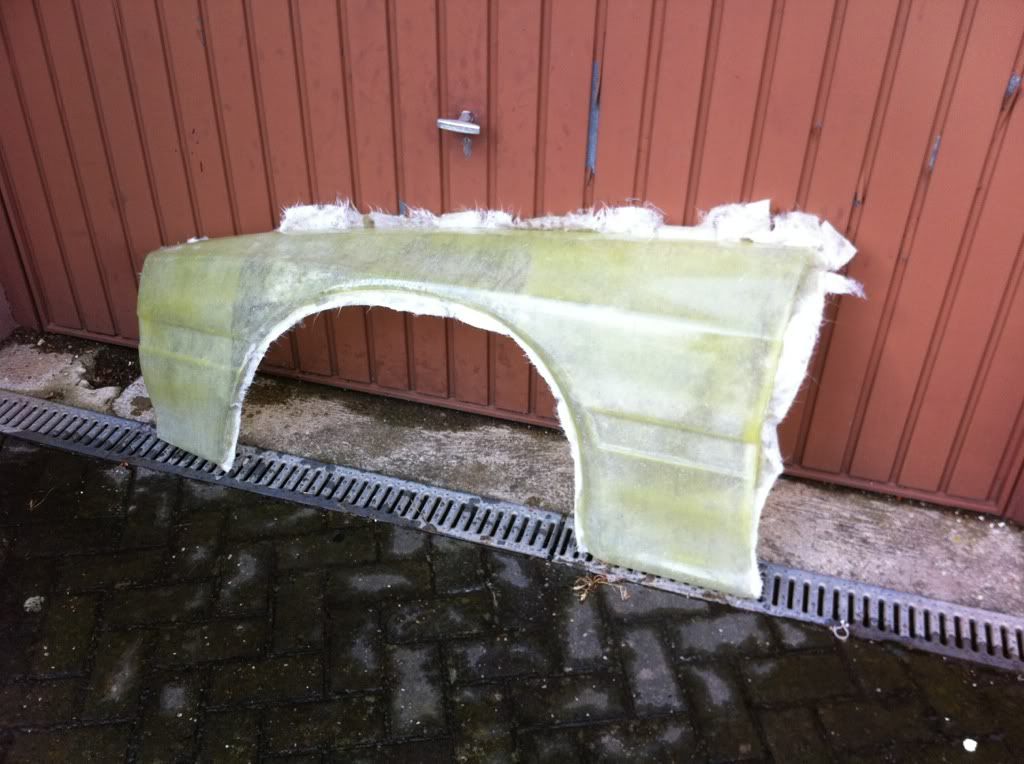
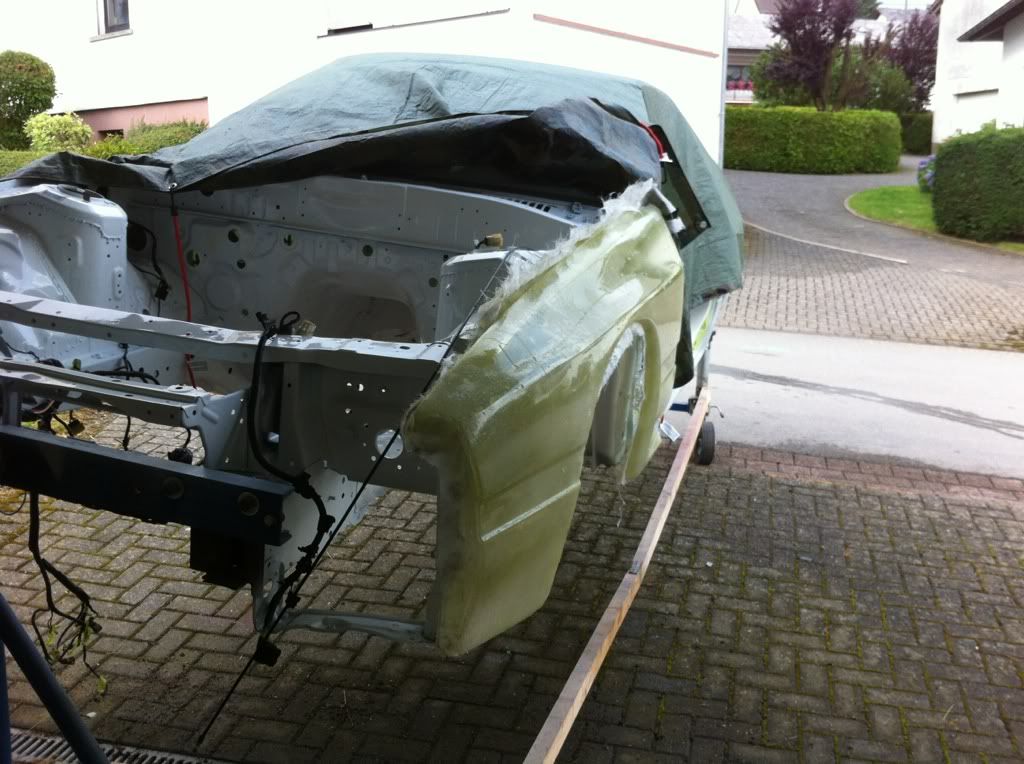
Oh, and if you're thinking, "man, I can see through those!" It's because you can. I am doing all the parts with only 2-3 layers of fiberglass. Because of the resin I'm using, you can actually push the panels in and they 'pop' back out. I think this will actually make them more durable on a day to day basis. However, I may have to put in some small reinforcement "rods" so that the panels don't distort too much at speed.
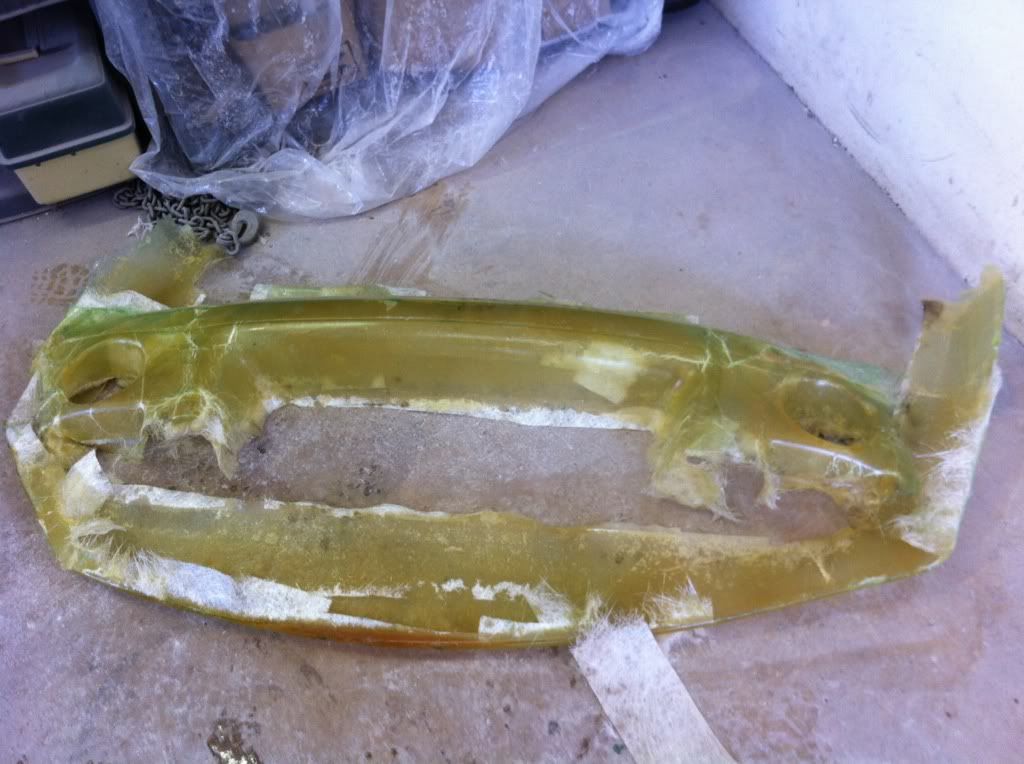
Day 61: This is the carnage after my attempt at molding the bumper. Obviously it didn't go as planned. I'm going to order a few more supplies and try again, with a different technique, in a day or two. While I wait for the supplies I'll work on fixing up the fenders and scoop. The bumper really beat up my confidence and motivation, but I'm slowly recovering. I spent the rest of the day cleaning the scoop and bumper molds. This is why I'm waiting to do the DIY.
Well I don't know where it came from, it was in the car from the beginning, but I'll sell you mine for 40eur shipped 
I won't be using it, since I'm ditching the whole stereo.
I won't be using it, since I'm ditching the whole stereo.
Day 62: Feeling my 18 Aug deadline slipping away. I may have to reconsider the compromises I'm making for the sake of meeting that deadline. The roof is one thing, but other things are starting to slip and suffer. I worked the fenders a bit today and am reconsidering their immediate serviceability.
Day 63: Tonight I started doing some of the motor work. I got the front cover off and started working on fixing the damn oil leak that's plagued me for over a year. My fix involved a salvaged piece of brake line and a little work with a file. I'm basically doweling a oil passage that leaks at the front engine cover. I'll be glad to have it permanently fixed. Tomorrow I'll put the front cover back on and maybe see about taking the fly wheel off to get ready to install my twin plate clutch.
Here's the details on my fix:
1. I am currently using the modified RX8 front cover gasket:
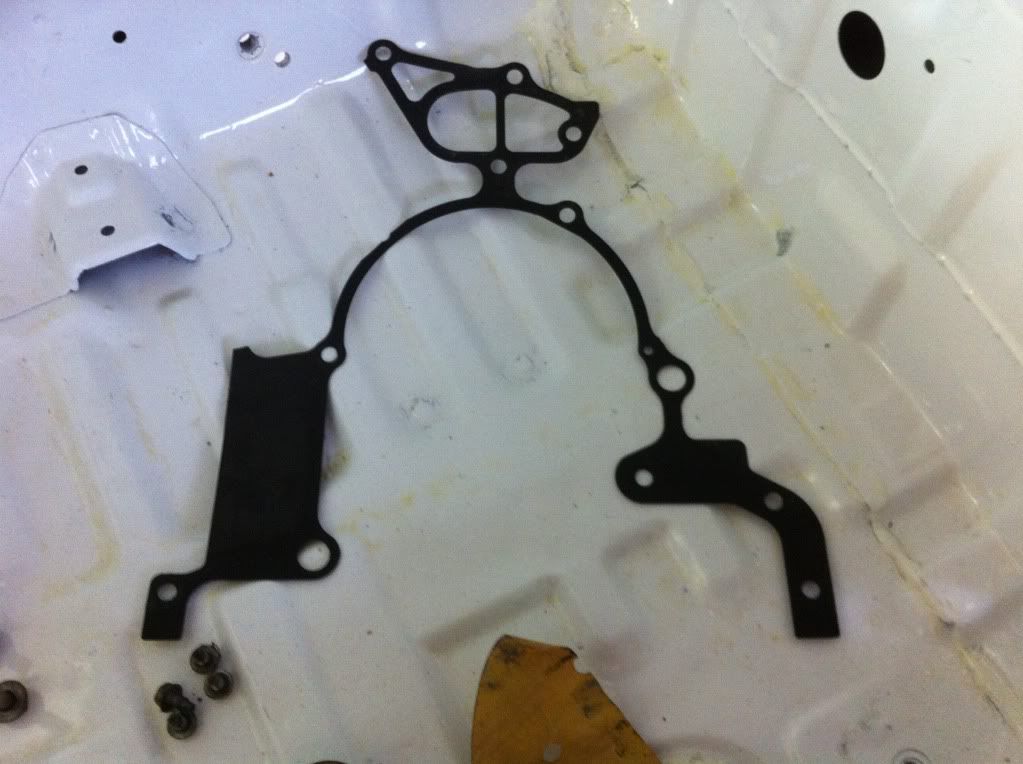
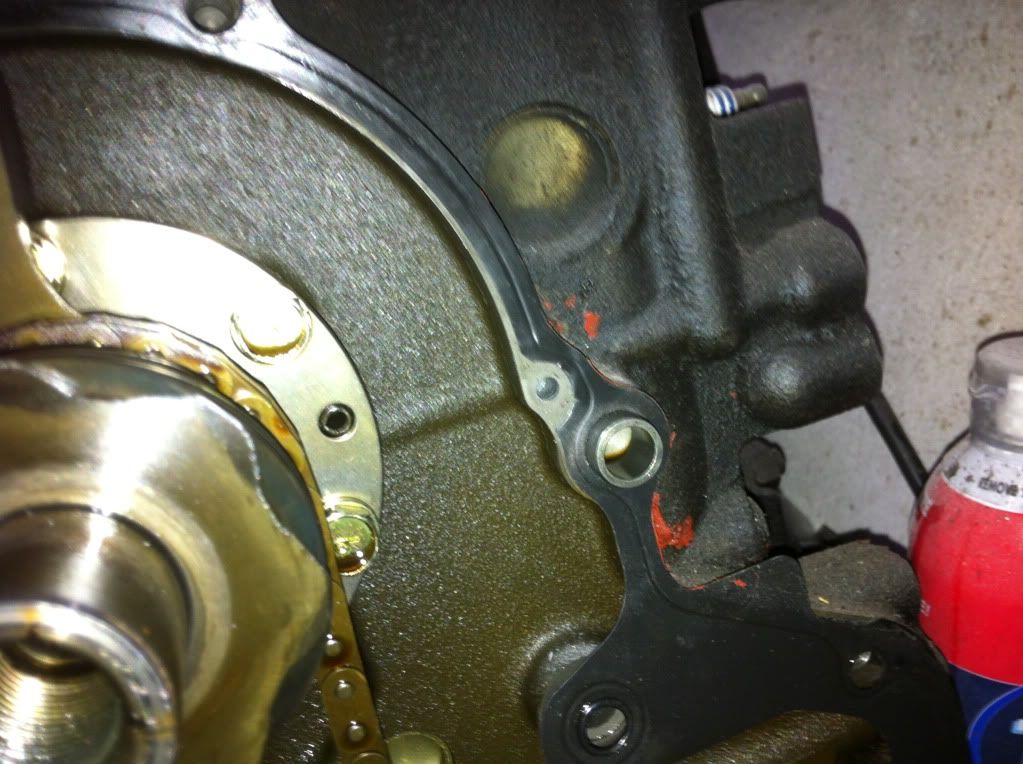
2. After you remove the front cover (which I won't go over here), this is what you'll be looking at:
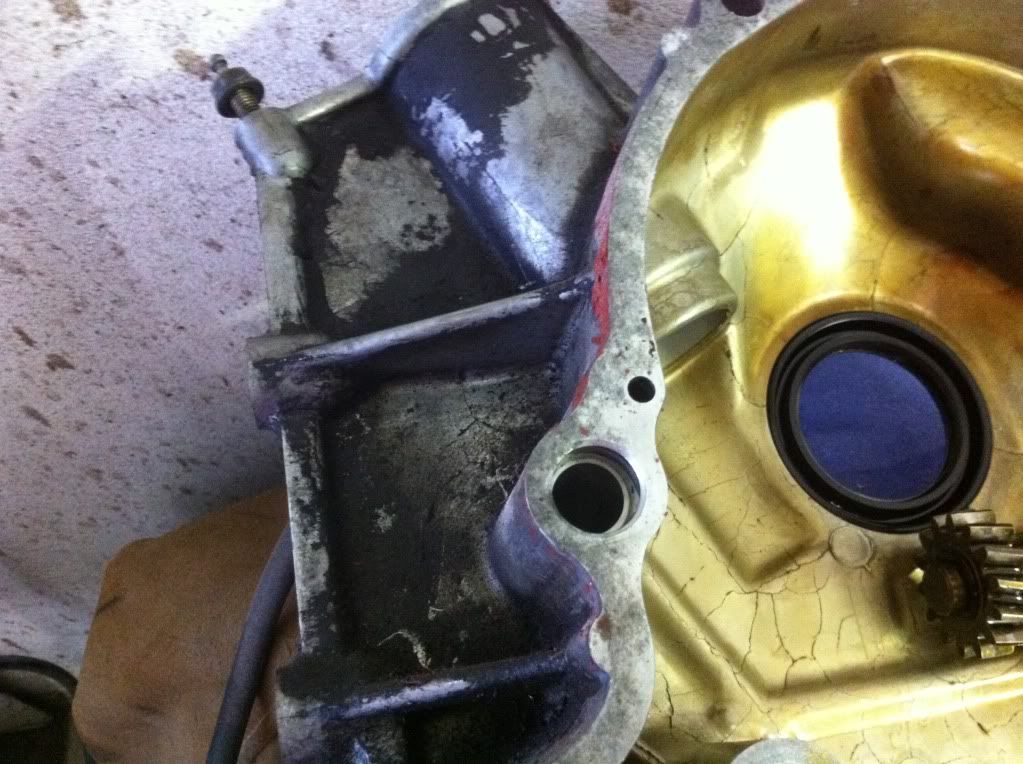
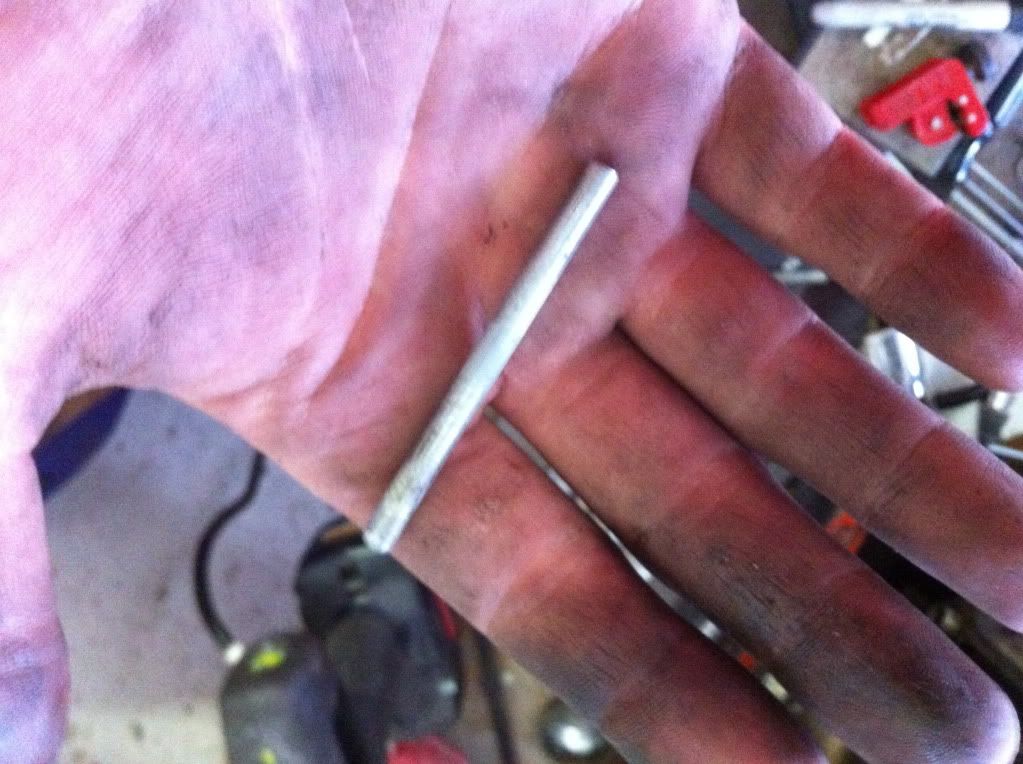
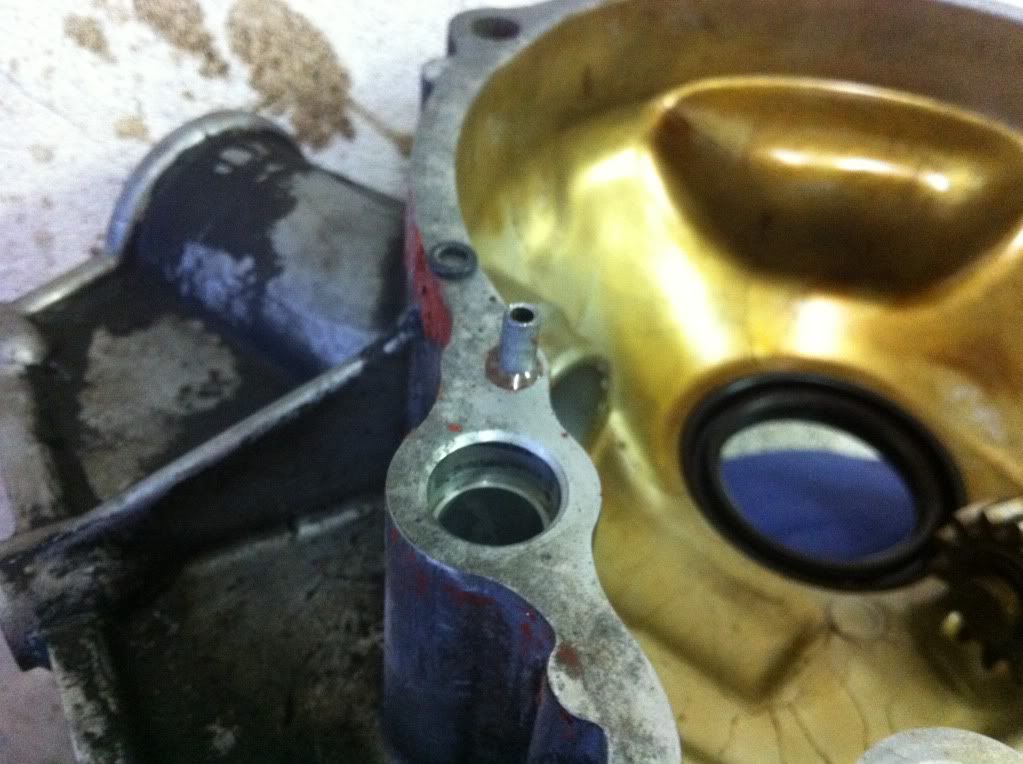
3. First I started by finding a piece of tubing that would fit into the holes. Now, the pipe I used is leftover brake line (or the gas tank vent hardline). It fit cleanly into the front cover side, but not at all into the front iron side. I used some sandpaper to remove the vinyl coating from the tube and I pushed it all the way into the front cover. Then, using some drill bits, I stepped the hole in the front iron up one step to 3/16". This allows for a nice and tight press fit. The overall length of the pipe ended up being 61mm.
4. I found an o-ring in my assorted o-ring kit that fit very snugly onto the tube without having to be stretched too much.
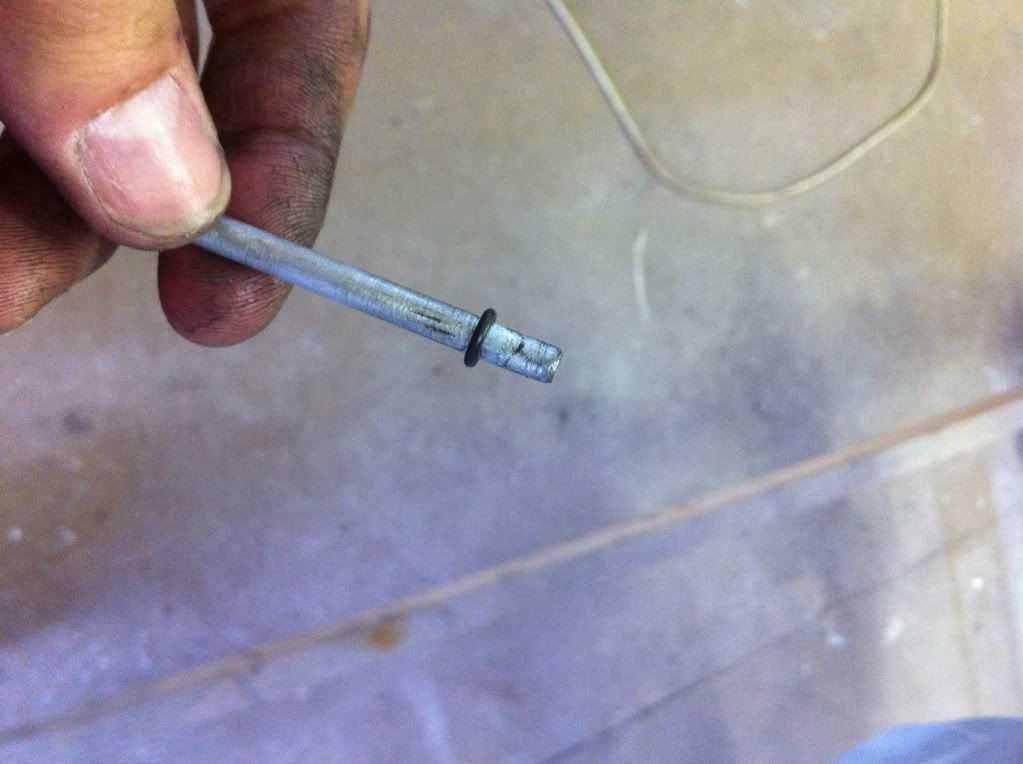
5. Because the o-ring is a little harder than the original hole on the gasket, it will have to be modified further. I removed the metal around the smallest hole:
Before:
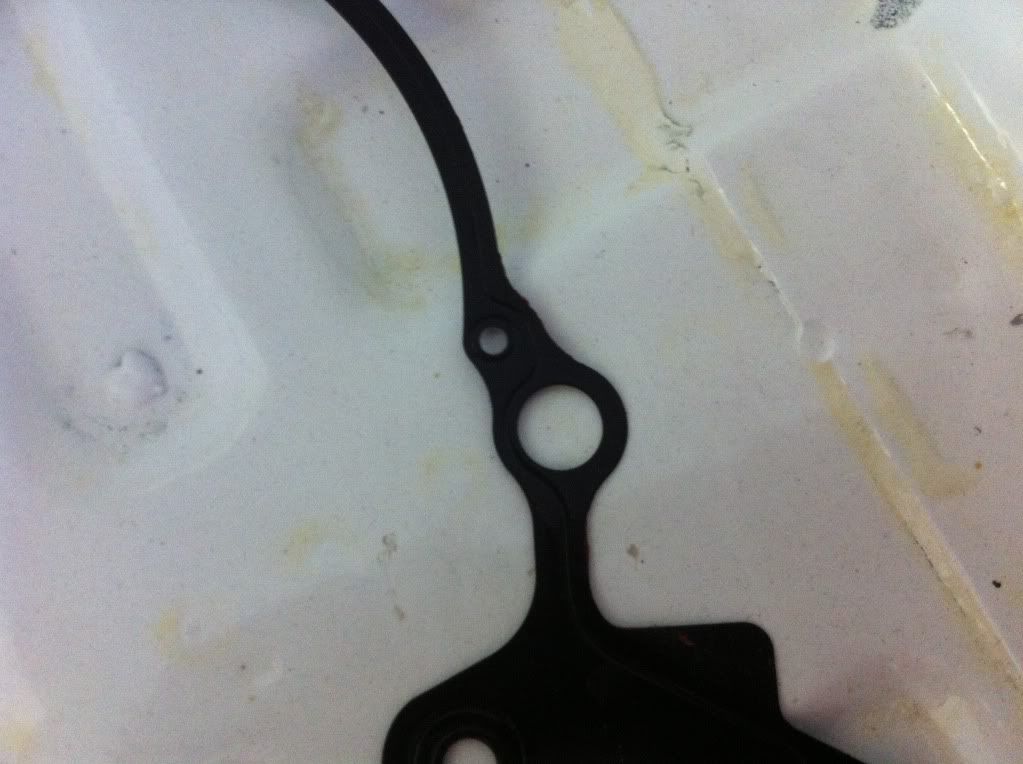
After:
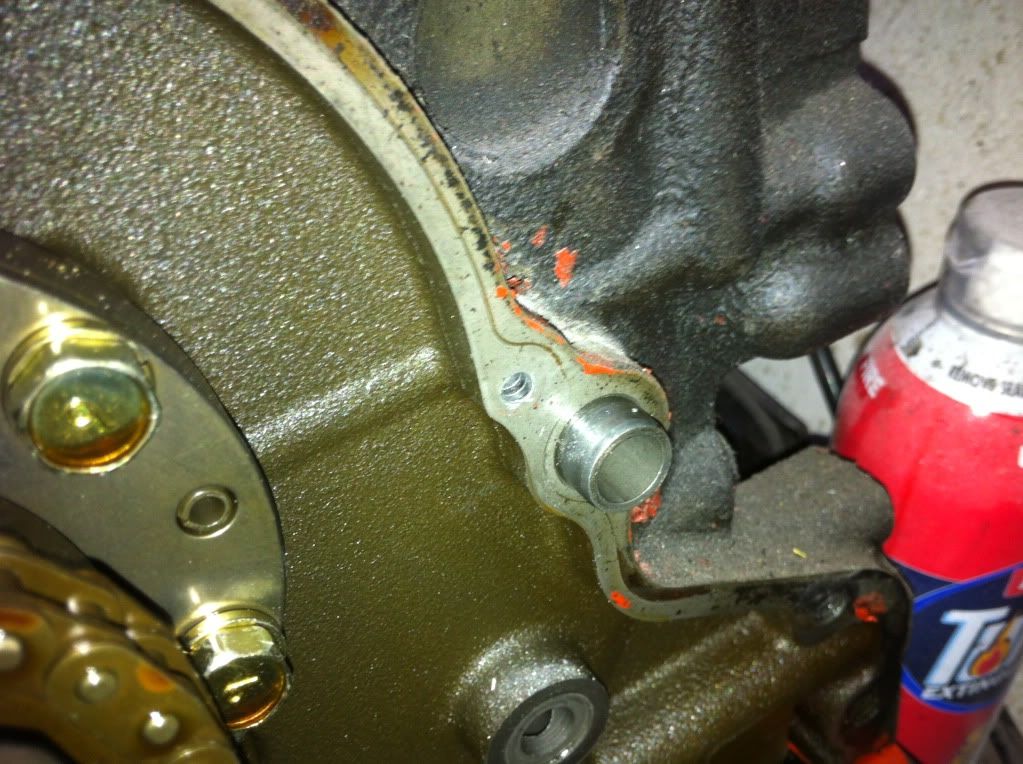
6. I then got some leak lock and applied it at about the halfway mark on the tube, then slide it all the way into the front cover. It looks like this:
7. Once the leak lock is dried (letting it sit over night), I'll remove the slight excess around the tube and place the o-ring on it. Then reassemble everything.
Hopefully this will help some others that may have a similar issue down the road. I'm hoping it works out well for me, but only time will tell.
Here's the details on my fix:
1. I am currently using the modified RX8 front cover gasket:
2. After you remove the front cover (which I won't go over here), this is what you'll be looking at:
3. First I started by finding a piece of tubing that would fit into the holes. Now, the pipe I used is leftover brake line (or the gas tank vent hardline). It fit cleanly into the front cover side, but not at all into the front iron side. I used some sandpaper to remove the vinyl coating from the tube and I pushed it all the way into the front cover. Then, using some drill bits, I stepped the hole in the front iron up one step to 3/16". This allows for a nice and tight press fit. The overall length of the pipe ended up being 61mm.
4. I found an o-ring in my assorted o-ring kit that fit very snugly onto the tube without having to be stretched too much.
5. Because the o-ring is a little harder than the original hole on the gasket, it will have to be modified further. I removed the metal around the smallest hole:
Before:
After:
6. I then got some leak lock and applied it at about the halfway mark on the tube, then slide it all the way into the front cover. It looks like this:
7. Once the leak lock is dried (letting it sit over night), I'll remove the slight excess around the tube and place the o-ring on it. Then reassemble everything.
Hopefully this will help some others that may have a similar issue down the road. I'm hoping it works out well for me, but only time will tell.
Oh, by the way, when you drill out the front iron hole; the passage is connected to the oil supply for the turbo. I used my blow gun and blew air into the turbo supply line to blow out any small metal shavings that may have tried to stay in the hole.
And as well oil supply to the front stationary gear bearing.....since you have front cover off, you can remove stationary gear and make sure there is nothing what what you wouldnt want in there...