
FC3S Rear Camber Link and Rear Toe Link DIY


FC3S Rear Camber Link and Rear Toe Link DIY
I couldn't find a thread on how to install the rear camber link and rear toe links, so I thought I'd just make one. I bought the links from battle version.... battleversion.com
The products are well made and actually went on quick easily. The new smaller top insert on the toe links made installation fairly easy.
Here's how they compare to the stocks
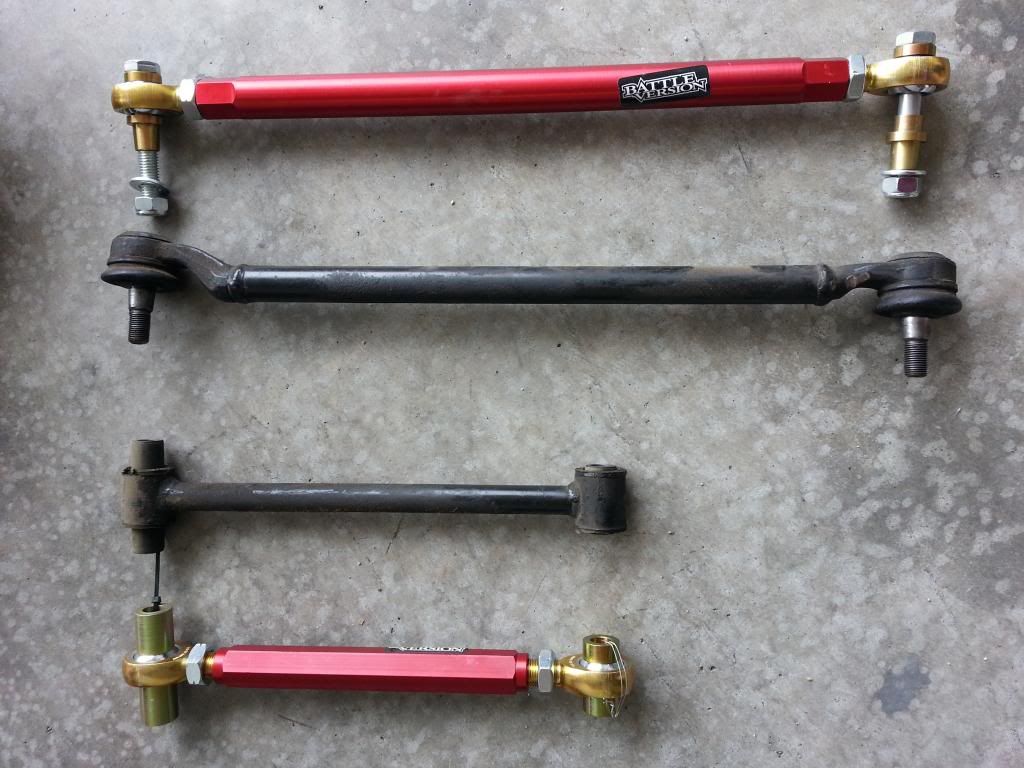
Nice thing about these, if any part breaks you can order replacements from them or just go to your local fastenal to buy replacements.
Tools you'll need...
Toe Links:
->17mm wrench (or ratchet with head) x2 (the stocks only need 1 but you'll need two for the new ones
->14mm wrench (or ratchet) x2 because you will have to remove the sway bar links and removing the camber link helps as well
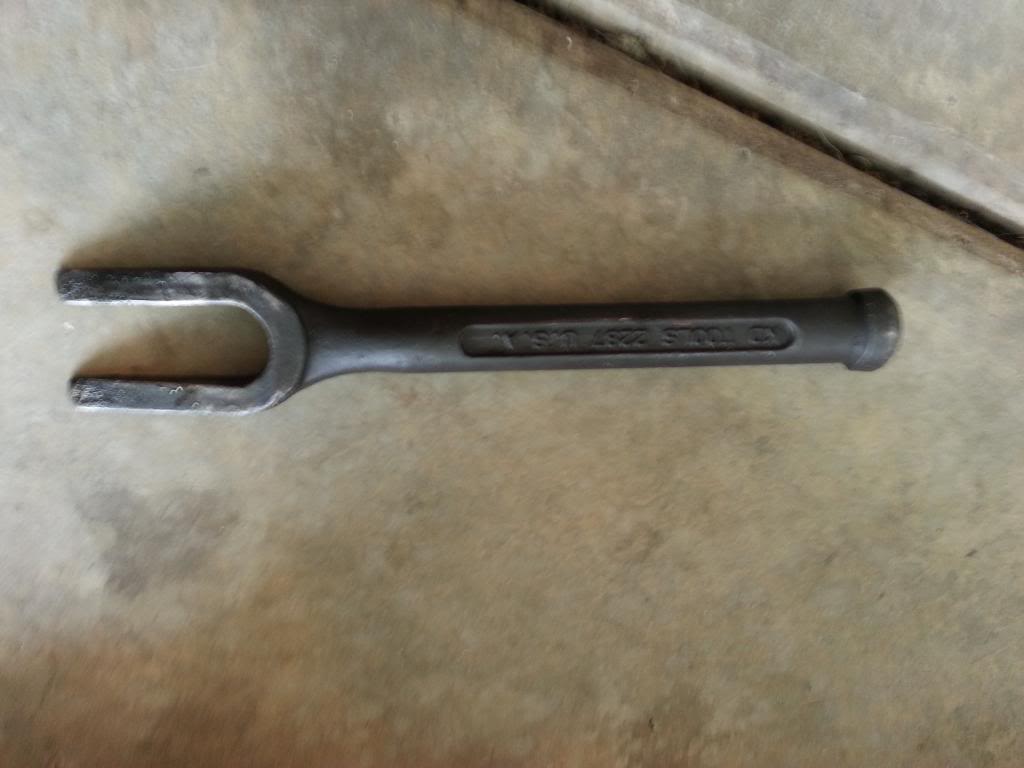
->Toe Link remover..... because I can almost guarantee that one of those joints will be crammed in there so hard you'll thank me for it later...
Camber Link
->14mm wrench (or ratchet) x2
Removal...
Toe Links...
There are two bolts holding on each link...
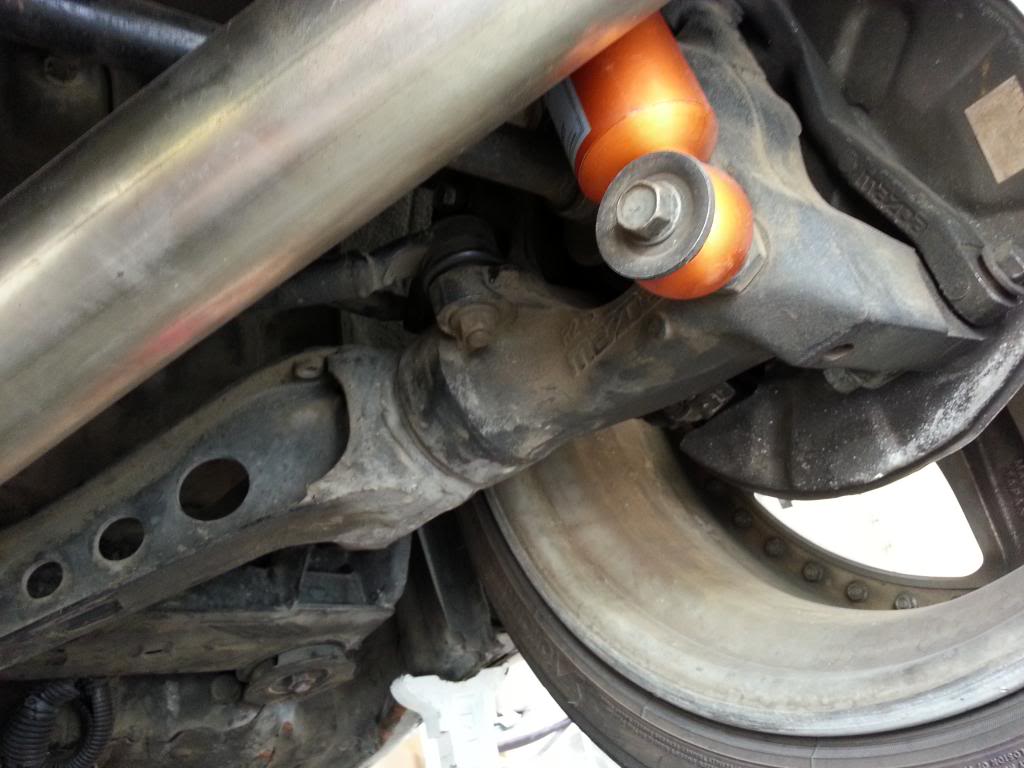
One by the wheels/brake assembly
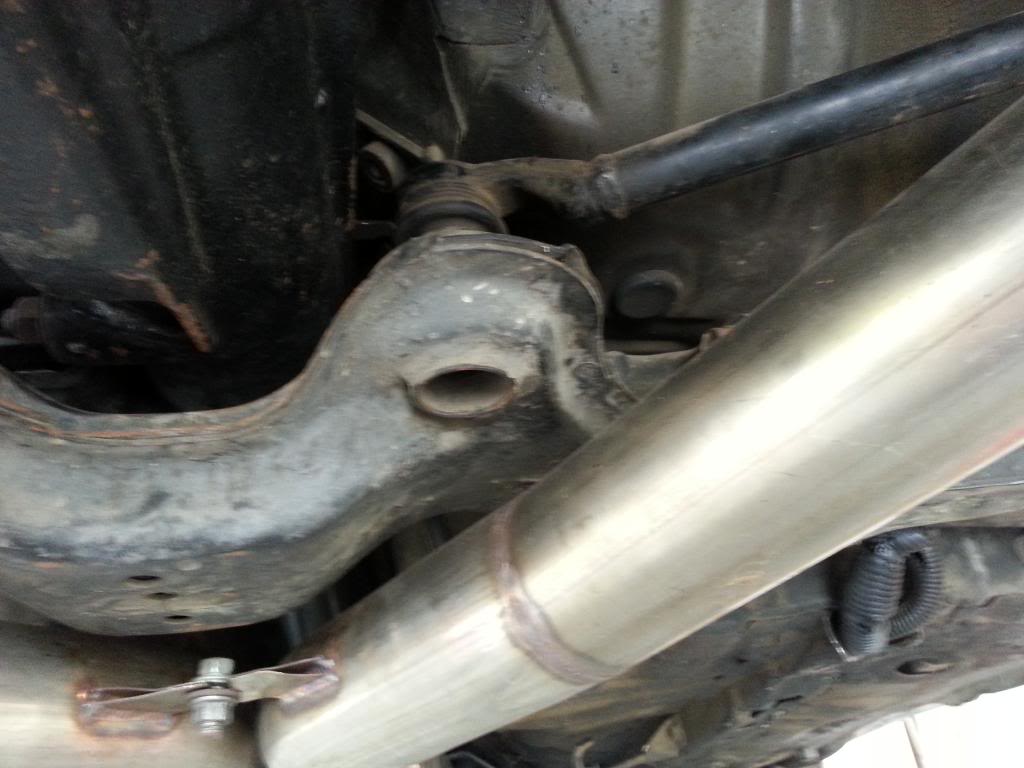
and one by the front of the differencial
These are both 17 mm and you might need a breaker bar if you undrecarriage is as dirty as mine.lol
remove both of these, then remove the bottom bolt to the rear swaybar link
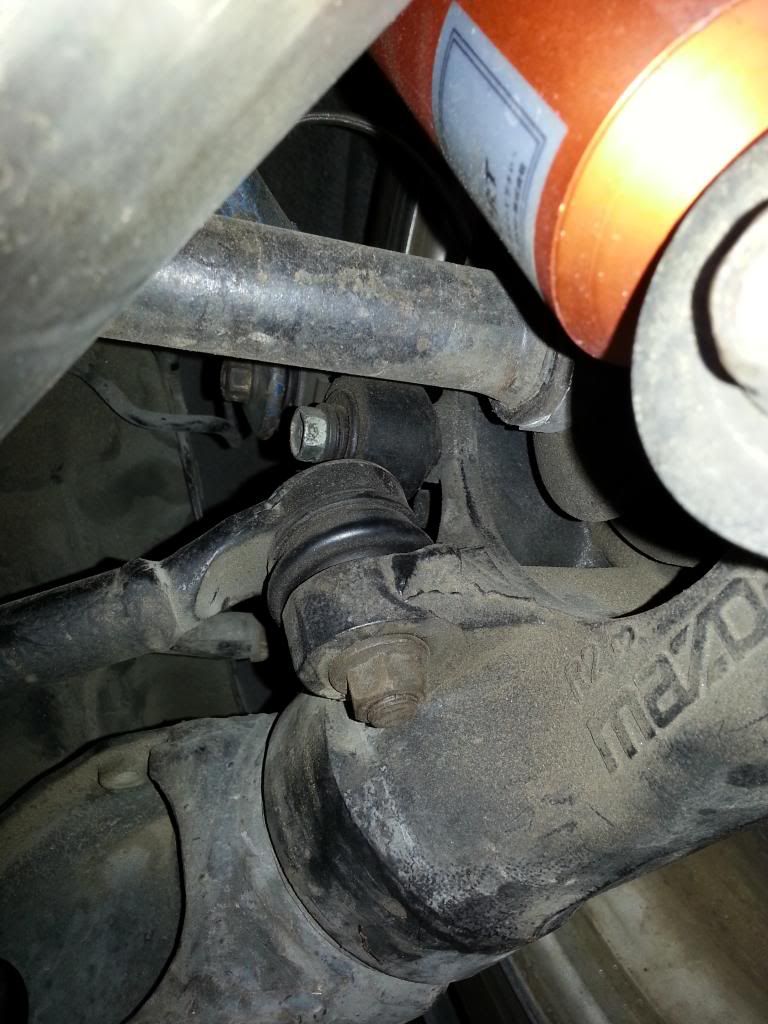
because it make removing the toe link that much easier...lol
Same steps for both sides.
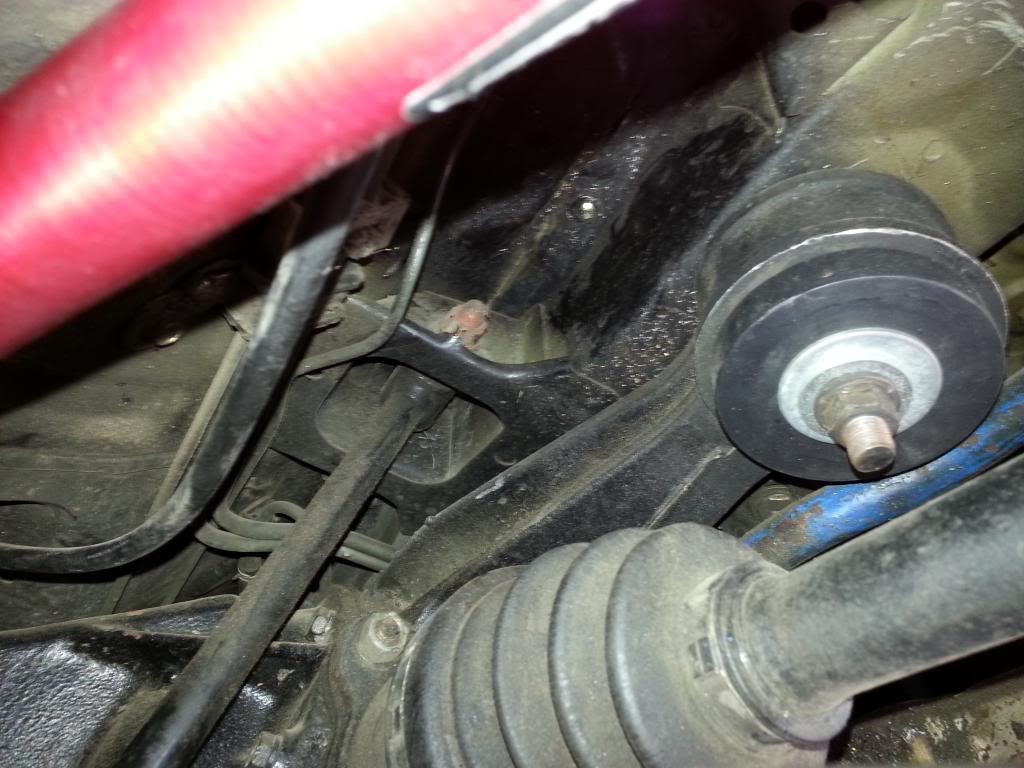
You may need the toe link removal tool at this time... it will also help to remove the center camber link at this time (you might need to pull down on the center suspension right where the camber link bolts up to be able to remove the links.... and you will need to do that again to install the new links..)
Camber Link Removal
There are two bolt and nut combos that hold this puppy on... one at the bottom
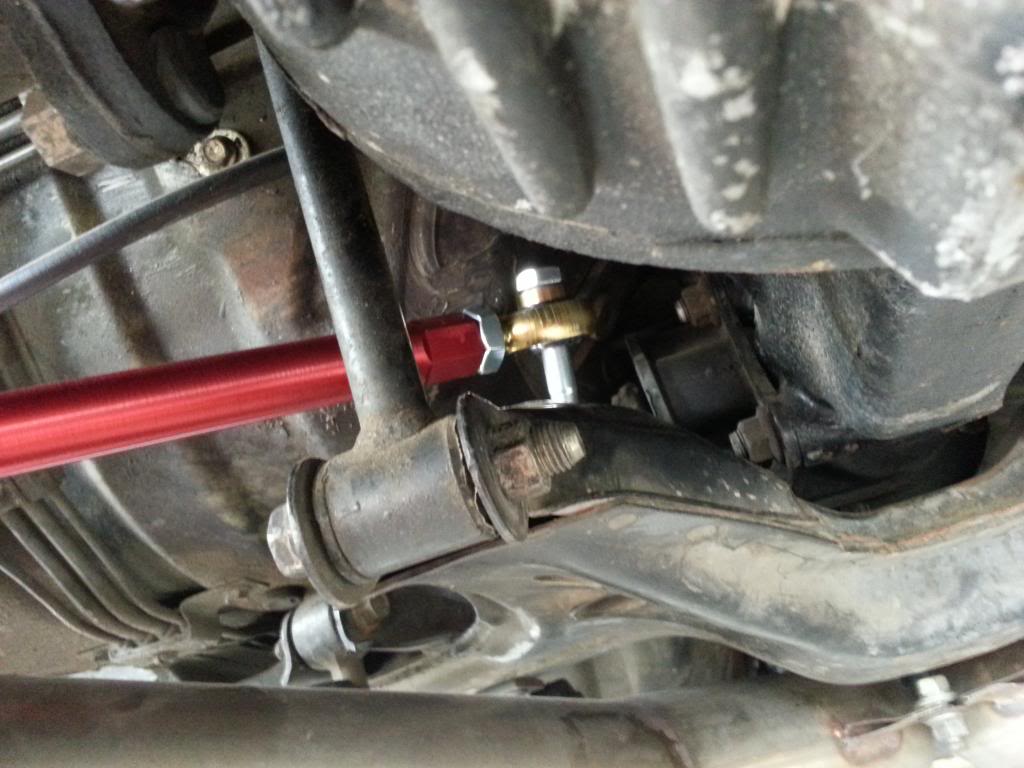
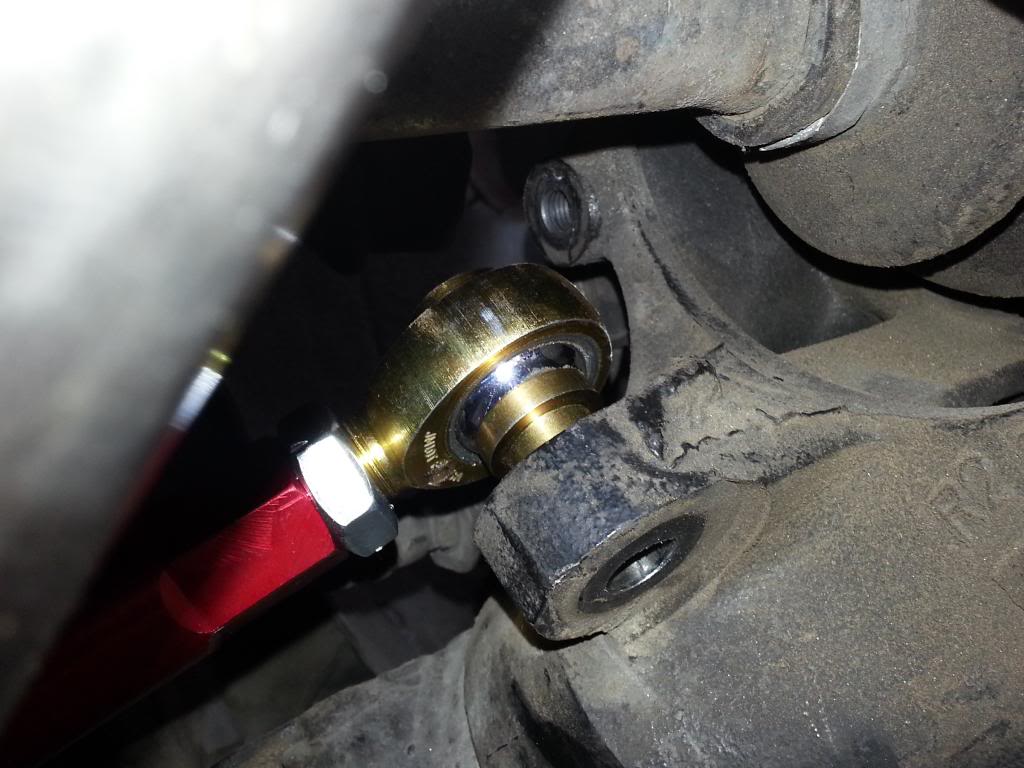
and one at the top

Sorry photoshop was being a pain so to clarify... its the bolt at the top center of the picture, slightly hidden by fuel/brake lines, not sure which those are from the picture.
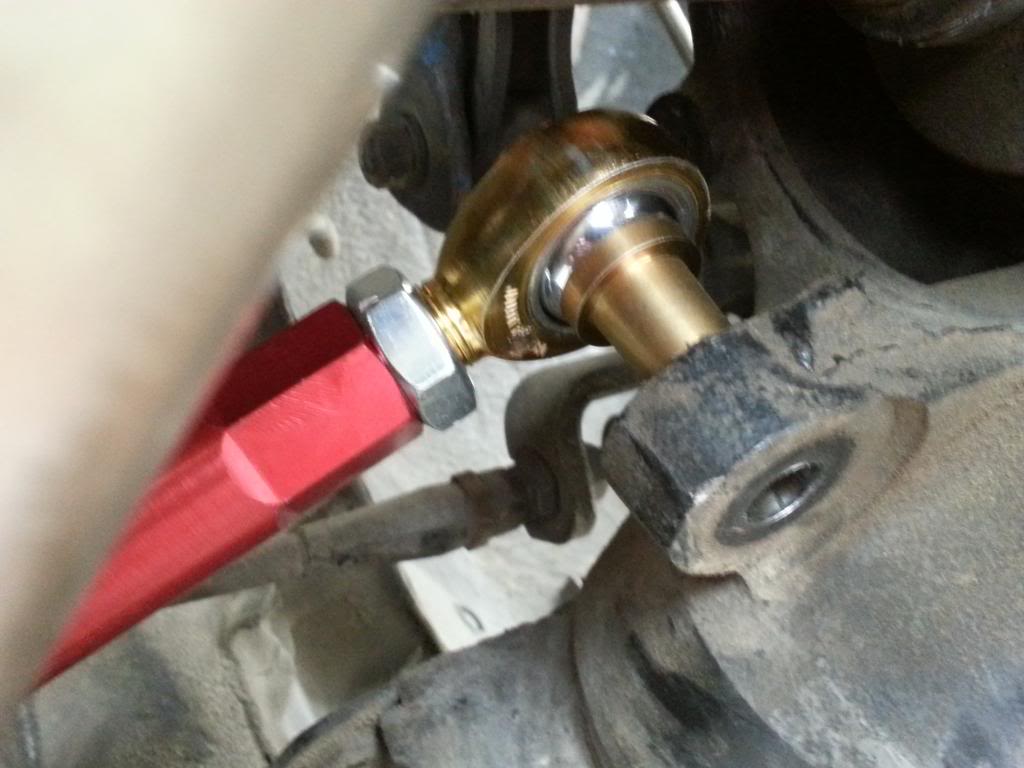
closeup
They both use 14mm heads... one to loosen, one to hold... you need two...
Once this is done, remove the link, pull down right where the bottom of the link bolted up and you should be able to use another hand (or person) to remove the link.
Installation
Is the reverse of removal but you have to use two 17mm wrenches/ratchets.
First and foremost... match the length of the new toe links to the the stock ones... you can adjust them once on the car *explained at the bottom
Just remember the tapered inserts that go into the rod ends, go on to and into the suspension.
Keep tightening those bolts until the tapered ends are flush with the suspension.
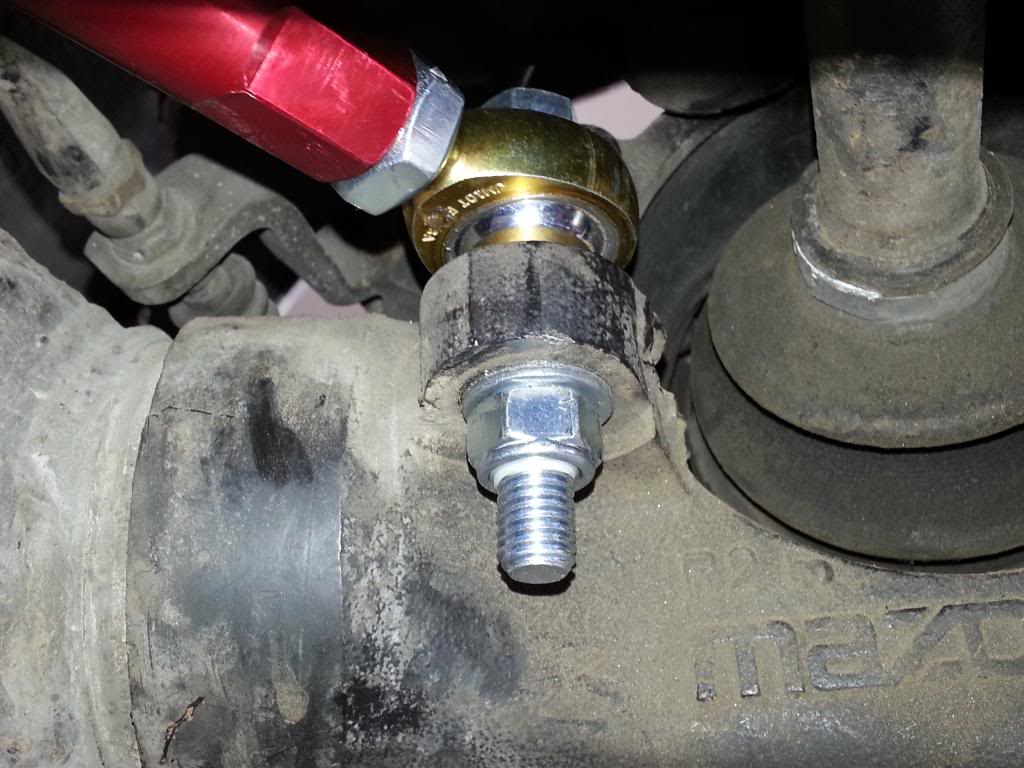
Make sure to do the same on both sides...
Last thing to do is to attach the rear sway-bar links with the 14mm bolt that was on there originally
and then...
Rear Camber Link Installation
is opposite of removal...
the side with the long inserts goes on the top... and the small inserts, on the bottom...
tighten with two 14mm wrenches/ratchets... I recommend matching it to the stock size then adjusting it down... or you can lower it all the way down and then install it, but you'll have to push the lower mounting point up to match it... if you're strong, np... if not... a jack works well...
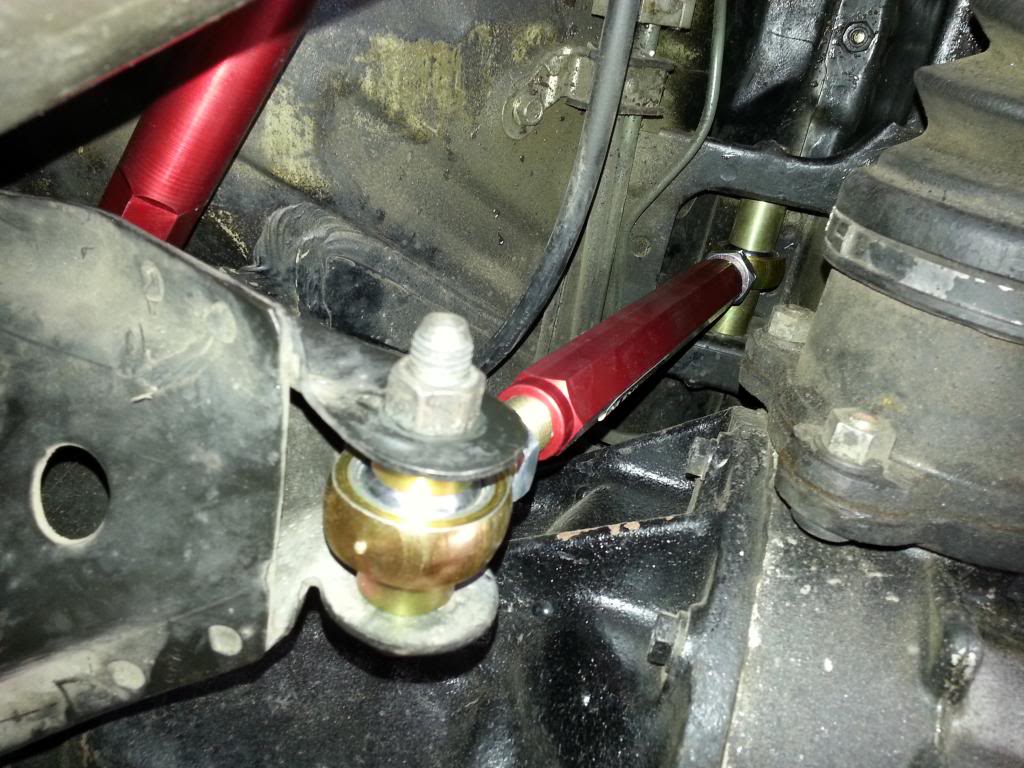
Should look like this when done...
Adjusting the Toe/Camber
The way these are designed is really quite nice... even with load on the suspension you can had twist the red adjustment bar easily... so,
first, loosen the two locking nuts and unwind them till they are all the way out. Then turn the bar clockwise to shorten...counter clockwise to lengthen. Once you are at your desired length, tighten the locking nuts all the way.
Do a last once over to make sure everything is tightened to specs and and voila! you are finished.
The products are well made and actually went on quick easily. The new smaller top insert on the toe links made installation fairly easy.
Here's how they compare to the stocks
Nice thing about these, if any part breaks you can order replacements from them or just go to your local fastenal to buy replacements.
Tools you'll need...
Toe Links:
->17mm wrench (or ratchet with head) x2 (the stocks only need 1 but you'll need two for the new ones
->14mm wrench (or ratchet) x2 because you will have to remove the sway bar links and removing the camber link helps as well
->Toe Link remover..... because I can almost guarantee that one of those joints will be crammed in there so hard you'll thank me for it later...
Camber Link
->14mm wrench (or ratchet) x2
Removal...
Toe Links...
There are two bolts holding on each link...
One by the wheels/brake assembly
and one by the front of the differencial
These are both 17 mm and you might need a breaker bar if you undrecarriage is as dirty as mine.lol
remove both of these, then remove the bottom bolt to the rear swaybar link
because it make removing the toe link that much easier...lol
Same steps for both sides.
You may need the toe link removal tool at this time... it will also help to remove the center camber link at this time (you might need to pull down on the center suspension right where the camber link bolts up to be able to remove the links.... and you will need to do that again to install the new links..)
Camber Link Removal
There are two bolt and nut combos that hold this puppy on... one at the bottom
and one at the top
Sorry photoshop was being a pain so to clarify... its the bolt at the top center of the picture, slightly hidden by fuel/brake lines, not sure which those are from the picture.
closeup
They both use 14mm heads... one to loosen, one to hold... you need two...
Once this is done, remove the link, pull down right where the bottom of the link bolted up and you should be able to use another hand (or person) to remove the link.
Installation
Is the reverse of removal but you have to use two 17mm wrenches/ratchets.
First and foremost... match the length of the new toe links to the the stock ones... you can adjust them once on the car *explained at the bottom
Just remember the tapered inserts that go into the rod ends, go on to and into the suspension.
Keep tightening those bolts until the tapered ends are flush with the suspension.
Make sure to do the same on both sides...
Last thing to do is to attach the rear sway-bar links with the 14mm bolt that was on there originally
and then...
Rear Camber Link Installation
is opposite of removal...
the side with the long inserts goes on the top... and the small inserts, on the bottom...
tighten with two 14mm wrenches/ratchets... I recommend matching it to the stock size then adjusting it down... or you can lower it all the way down and then install it, but you'll have to push the lower mounting point up to match it... if you're strong, np... if not... a jack works well...
Should look like this when done...
Adjusting the Toe/Camber
The way these are designed is really quite nice... even with load on the suspension you can had twist the red adjustment bar easily... so,
first, loosen the two locking nuts and unwind them till they are all the way out. Then turn the bar clockwise to shorten...counter clockwise to lengthen. Once you are at your desired length, tighten the locking nuts all the way.
Do a last once over to make sure everything is tightened to specs and and voila! you are finished.
Joined: Sep 2005
Posts: 25,581
Likes: 136
From: Smiths Falls.(near Ottawa!.Mapquest IT!)
You actually do not need a Tie rod tool.
the Nut has a lip on it.Use a 17mm deep socket and an extension and re-thread the Nut on a couple turns,Whack it with a hemmer and it POPS right UP..Poof.off.
the Nut has a lip on it.Use a 17mm deep socket and an extension and re-thread the Nut on a couple turns,Whack it with a hemmer and it POPS right UP..Poof.off.
lol Yeah I tried that but I ended up needing the tie rod tool... you shouldn't need it though... it's just helpful to have if you have one jammed on so tight that nothing else works.
Joined: Sep 2005
Posts: 25,581
Likes: 136
From: Smiths Falls.(near Ottawa!.Mapquest IT!)
Still,another way..with no tie rod tool.
you can always use the floor jack.Put the 17mm up to the nut,put the extension on the socket.put it snug on the jack and pump.
The car will act as 2000 pounds of down force,the jack should pop the link out.
You end up with ideas like this when you do not have a garage..haha!
you can always use the floor jack.Put the 17mm up to the nut,put the extension on the socket.put it snug on the jack and pump.
The car will act as 2000 pounds of down force,the jack should pop the link out.
You end up with ideas like this when you do not have a garage..haha!
Eat. Sleep. Rotate.
Joined: Dec 2011
Posts: 220
Likes: 0
From: South Carolina
How did you go about putting the inboard toe-link bolts in? I have my stock ones out now which just barely cleared enough to pull them out and the bolts that came with the Battle Versions are a good bit longer. Or am I missing something?
Eat. Sleep. Rotate.
Joined: Dec 2011
Posts: 220
Likes: 0
From: South Carolina
The guy I'm working with suggested coming up with the bolt on the inboard side (since the clearance is so tight) and going down on the outboard side, should that work?
Also, we're having a hard time getting these sleeves into the holes on the car, they seem slightly too thick?
Also, we're having a hard time getting these sleeves into the holes on the car, they seem slightly too thick?
Trending Topics
Still,another way..with no tie rod tool.
you can always use the floor jack.Put the 17mm up to the nut,put the extension on the socket.put it snug on the jack and pump.
The car will act as 2000 pounds of down force,the jack should pop the link out.
You end up with ideas like this when you do not have a garage..haha!
you can always use the floor jack.Put the 17mm up to the nut,put the extension on the socket.put it snug on the jack and pump.
The car will act as 2000 pounds of down force,the jack should pop the link out.
You end up with ideas like this when you do not have a garage..haha!


Inboard toe links - you need to disconnect the rear camber link and then pull down right where the rear camber link attaches to the suspension sub frame... I pointed it out in the pictures... pull down on that, and it should cause the arm to go down enough to remove and to replace that bolt... you'll still have to wiggle it...just a little bit... you know make it move...lol jk You will have to still work it in, just keep pulling down until you can clear enough space to remove the stock bolt and put in the new one from battle version.
Top Camber Bolt - I loosened the bolts using a 1/4" ratchet with a long extension on it and then used a breaker bar on the nut to loosen it, then just used a regular wrench and loosened from the bolt with the ratchet and extension... you might have to push on the bolt from the opposite side while you turn the ratchet and of course wiggling the bolt and the camber link can help loosen it up to... try that first, it should just pull out.
Top Camber Bolt - I loosened the bolts using a 1/4" ratchet with a long extension on it and then used a breaker bar on the nut to loosen it, then just used a regular wrench and loosened from the bolt with the ratchet and extension... you might have to push on the bolt from the opposite side while you turn the ratchet and of course wiggling the bolt and the camber link can help loosen it up to... try that first, it should just pull out.
Junior Member
Joined: Jun 2010
Posts: 12
Likes: 0
From: South Carolina
I bought and installed these toe links about 2 years ago. But the toe links get in the way of my sway bar end link anyone else have this problem ? :/ I really want to run my rear sway bar again but it seems almost impossible

I have mmr diff bushings and I had to put them in from the top and theb use the stock bottom cup to hold the mount and diff up. The mount in my opinion is upside down. The subframe bushings are the same and they go in from the top
