
Flip up Projection lights project

im still not quite sure what your building there, will these be fiberglass housings for your lights? I guess you will be fabricating another piece for the front to hold the lights? How will the lights themselves mount to the housings?
Good chance no one is saying anything is because most headlight projects fade away and we are left with lights mounted on metal brackets with no shrouds.
Sniper used to make a decent shroud for not alot of money, i think its been discontinued probably because no one wants to spend any money
Good chance no one is saying anything is because most headlight projects fade away and we are left with lights mounted on metal brackets with no shrouds.
Sniper used to make a decent shroud for not alot of money, i think its been discontinued probably because no one wants to spend any money
Thread Starter
Full Member
Joined: Jun 2006
Posts: 109
Likes: 0
From: Idaho
Hey Rob,
The idea is that I will use the original chrome headlight mounting bracket screwed or glassed into the housing shells I am making. That way, I retain the original mounting position and can utilize the stock mount holes.
So, right, when I have the perfect shape, I will use it to overlay the fiberglass w/ a release agent. So when it dries, I may need to make a couple relief cuts, but when I remove the fiberglass, it should make a perfect shell housing for the lights.
When I get the light kit, I purchased G5 series, the newest w/ the smallest diameter, I should be able to fit two lights w/in the one housing if all works right.
I am then going to fabricate two rings into the shell to mount and secure the projector lights.
With this set up, I can control the depth as needed to make sure I have the right clearance for the length of the projectors.
Fiberglass forums has some pretty good projects that have turned out great using this same method.
If you have any suggestions to improve the design idea, feel free to do so.
I have seen you on quite a few HID type threads on this forum.
I did the second coat, but time ran out before making much shaping progress.
Will have more time tomorrow - w/ pic's of progress.
Tfitz.

Thread Starter
Full Member
Joined: Jun 2006
Posts: 109
Likes: 0
From: Idaho
Update:
Got a 2nd w/ an add'l skim coat on the housing today. But it was windy and rained most of the day, and I hate getting filler dust all over the garage. So once sanded it should just need some spot glazing to get the final mold shape.
Turbo,
If the lights were exposed all the time, it would be more of a concern to me.
But being the lights will be protected in the down position 85% of the time, the rings that the projectors will be housed in should keep them safe.
I will also be using canned foam to seal the back of the housing for any leaks.
I don't really foresee this has a problem.
If you have any suggestions, or a better insight as to what the repercussions of non-sealed projectors would be, I would appreciate the info.
I'm no expert, so anything you can tell me would be welcome.
Tfitz.
It's won't matter if the lights are down or not. The inside of the projectors contains the solenoid and a circuit board for the led's that make the inside of the projector red. Moisture will get into these things and mess it all up and the clear lens will get destroyed by rocks and dirt will get up into it and so on.
i too is a little confused on how this will look?
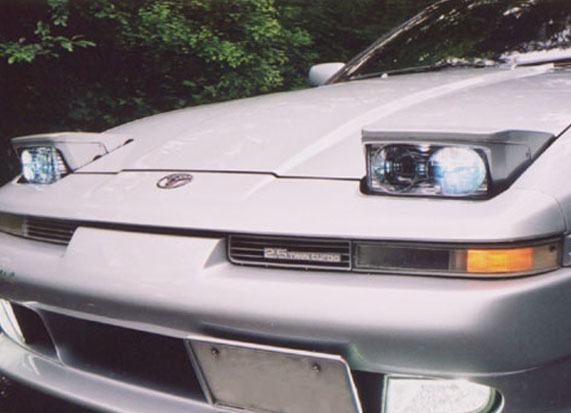
i also did the projector retrofit myself on my car, which was very cheap and easy to do. here is a pic of my finished project

my suggestion is to create a bracket that hold two projectors side by side and build a custom housing similar to the stock covers around the original headlight...
TSX projectors are one of the smallest projectors out there and are easily fitted in a lot of retrofits out there.
i also did the projector retrofit myself on my car, which was very cheap and easy to do. here is a pic of my finished project
my suggestion is to create a bracket that hold two projectors side by side and build a custom housing similar to the stock covers around the original headlight...
TSX projectors are one of the smallest projectors out there and are easily fitted in a lot of retrofits out there.
Thread Starter
Full Member
Joined: Jun 2006
Posts: 109
Likes: 0
From: Idaho
Update:
Was able to get enough time to finish up the housing mold.
Next step is to find some mold release.
Then overlay 3 layers of mat glass on the housing mold, pull it off and have a shell to use to mount the projectors into.
At that point, I won't be able to continue until I receive the light kit.
If, as suggested, I need to use the headlight lens to "seal" the projectors, I don't see that as much of a problem. Will do more research on that.
Shika, your suggestion is pretty much what I am doing. This is the custom housing that will fit the two lights, but should still be able to use the stock mounting hardware to install it, with a little tweaking of course.
Pic's for now . .
I see a new mold in the future as the one you are making now won't fit two g5 projectors correctly. You a really over thinking this just do a normal retro like shika, and use a real projector. My one projector in my headlight will probably over power two g5's running at the same time and have a better width also.
If you really want to do the double lights in one pop up housing i would suggest buying hella sealed projectors. All you would have to do is make a bracket the would hold the two lights and bolt it to the pop up frame. There would be no need to make a whole new housing.
If you really want to do the double lights in one pop up housing i would suggest buying hella sealed projectors. All you would have to do is make a bracket the would hold the two lights and bolt it to the pop up frame. There would be no need to make a whole new housing.
Thread Starter
Full Member
Joined: Jun 2006
Posts: 109
Likes: 0
From: Idaho
gotta go, but did a quick cut out.
Please notice that the bevel on the headlight continues to narrow the width again.
That was planned. So it should fit the chrome headlight mounting frame and hardware.
I understand the additional fiberglass will add width, but the fun thing about fiberglass is you can do whatever you want with it.
The plan is to glass the bezel onto the housing - If I need to add a lens it doesn't really matter.
G5's are supposed to fit, when I get them, I guess I will find out.
But thanks for the info.
Pic's
shinka- any trimming behind the lights?
whats that around the projector? sealant? is it sealed or is there space around it?
when I get around to it, which wont be for a while because I am a bit swamped, I planned on making a FG shroud to sit behind the housings to hold the projector in place. I have seen people use foil tape, foam, and other items sprayed black. I figure once I get around to it I can then sell off the pieces needed for others to make their own retrofit kits.I wont get rich off it, but I figure it will help others.
i dont see why you dont spend 26.00 on these headlight cases (HERE) and just retro fit the projector assembly into these instead of going through the wasted time to make your own headlamp shell..... they already come with a removeable h4 bulb which is dual beam... you can throw that craptastic bulb away and throw away their fake projector piece they got in there away... it be so much easier for you and save so much time...
buy those, stick them in the oven on 250 for 5-10 mins/or use a heat gun, take off glass front cover and do the retrofitting... then once done heat it back up or apply new sealant...
7x6 is the standard size which is also the h6054 sealed headlight beam size... they fit perfectly...
buy those, stick them in the oven on 250 for 5-10 mins/or use a heat gun, take off glass front cover and do the retrofitting... then once done heat it back up or apply new sealant...
7x6 is the standard size which is also the h6054 sealed headlight beam size... they fit perfectly...
Last edited by FC3S Mitchell; Mar 21, 2011 at 02:21 AM.
Thread Starter
Full Member
Joined: Jun 2006
Posts: 109
Likes: 0
From: Idaho
Simple, because what you consider a waste of my time, I consider great fun, and enjoy the process just about as much as the final product.
Nobody in the world owns an RX7 that looks like mine. And if I am successful, nobody in the world will have headlights that will be the same as mine.
Fiberglassing is very empowering. You very quickly realize you have been given the ability to create just about anything you want.
For a person who has never made something out of FG from their own imagination and seen it take form into a physical shape, it's hard to understand.
To me, this is not a big deal at all.
I have never seen an RX7 2nd gen w/ 4 projectors, so I decided to give it a shot. I have seen a 4 light Hella conversion once, but never projectors.
1 light is cool, and is to be commended, but that's not what I want.
Update:
I bought the supplies to start the glassing.
Snowed the last two days, but supposed to be pretty good on Monday, so may get some work done then.
More later . .
Tfitzwil.
i know what it feels like to make something from nothing. i used to make (dont laugh) halo armor and helmets, i actually live 5 mins from ithica (from the 405th)
i didnt realize that you were going for a 2 projector per housing style. that was my mistake. thats why i offered those ideas, as i thought you were going for singles. Well, good luck with the build and i'll be watching for the final result! ^_^
i didnt realize that you were going for a 2 projector per housing style. that was my mistake. thats why i offered those ideas, as i thought you were going for singles. Well, good luck with the build
Thread Starter
Full Member
Joined: Jun 2006
Posts: 109
Likes: 0
From: Idaho
Ah, so you do understand then.
Halo rocks! Used to do the Halo 2 online gaming thing on the link up at a friends home.
12 of us on 3 tv's.
But I was so bad at it, I changed my gamer tag to "Cannon Fodder" -
But then again, I did rank 5th in the world on Midnight Club II - DuB addition - online.
Progress. - none - lousy day huge winds, and 100% chance of snow tonight.
Thread Starter
Full Member
Joined: Jun 2006
Posts: 109
Likes: 0
From: Idaho
Update
Got a little fiberglassing done today. Although we had big snow in the AM, by the early PM, most of it had melted.
So took advantage, and got busy.
Due to the cold, it's taking some time to dry, but it's getting there.
I did about 2 layers of shredded mat glass for now. I need it strong, but also semi pliable to be able to remove it from it's mold.
More hopefully tomorrow . .
Pic's for now:
So took advantage, and got busy.
Due to the cold, it's taking some time to dry, but it's getting there.
I did about 2 layers of shredded mat glass for now. I need it strong, but also semi pliable to be able to remove it from it's mold.
More hopefully tomorrow . .
Pic's for now:
Thread Starter
Full Member
Joined: Jun 2006
Posts: 109
Likes: 0
From: Idaho
Update:
Had to make a few more relief cuts than I wanted to pull the shell off of the mold.
That's what I get for looking at alternatives for a mold release substance.
I read quite a few threads that stated 5-6 coats of Turtle Wax would work as an effective agent between the two parts. I guess maybe it was the shape.
But it's no biggie. I just need to pinch the cut gap and re-glass it.
This is 2 layers right now - and going to add two more layers to strengthen it.
The bottle top projector lights are a very close match to the actual diameter of the Projectors I will be using. The larger one is 3 3/8" - so I think with a little creativity, I should be able to mount both lights.
The inside of the shell turned out pretty smooth. I will need to clean it up, but overall, very satisfied with the outcome.
More to come . .
Pic's:
there was a guy on this forum a ways back who was making dual projector brackets with hella housings and modified flip up arms for reduced throw so the flips wouldn't pop up fully.
i installed the kit for the customer a few years back but i don't feel like digging through the forum to try and find the pictures from way back.
not sure how many he sold or if he still makes the kits. i should have made a template of the fitment since i'm sure that guy is long gone from making them.
thresher- I have extensive fg knowledge, I make my living doing it, trying to get that to pull from a scratchy plug with turtle wax was a uphill battle to say the least
yea, he eventually sold them but i thought they looked fine.
they could have really used some sort of shell housing but even without, they looked better than anything i have seen in this thread so far, hopefully no offense. if he had made some shrouds it would have looked more similar to an NSX style flip up versus the stock FC flips.
they looked very similar to this style but they had no housings or side covers, which wouldn't have really been that difficult to fabricate.
i know it was a really basic bracket with 2/3 mounting points and a shortened throw arm to the motor, the swing arm on the motor had to be shortened also. the hella lamps simply screwed to a flat piece of cut out aluminum with adjusters set in it which sat in the stock headlight buckets.
the most difficult part i had with that whole kit was getting the headlights to move full swing properly, i had an issue with one jamming up on the headlight down position stop which caused the motor to constantly stall and stop working. the whole mechanism seemed to move around a bit so shortly after i would fix it, it would come back.
Last edited by RotaryEvolution; Mar 24, 2011 at 12:11 PM.
I think the opposite, brackets and lights are easy, a nice looking well fitting shroud is the hard part. anyone can bend some brackets and have lights in there, making it look like it came that was is the art


