
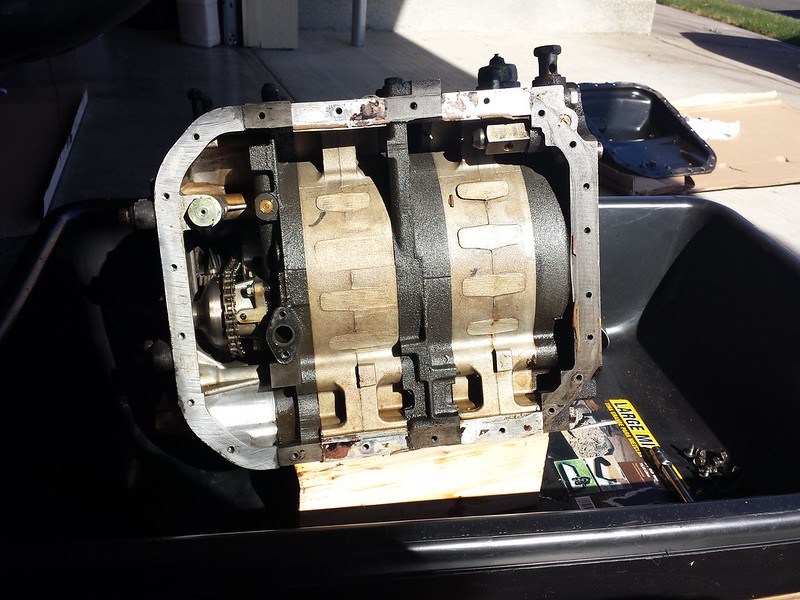
Working on carbon locked motor - motor pulled


I didn't go back through the entire thread, but make sure the front eccentric bolt is loosened before removing the flywheel. This won't help with flywheel removal, but that front bolt can be hard to remove without using the flywheel as a stop.
Heat the rear nut with a MAPP torch then give er hell. I got the 3/4" breaker bar, never snapped that one but went thru some 1/2"ers. Slide a pipe over the breaker bar for more leverage. I've been impressed and horrified with the threadlocker some builders use.
Thread Starter
Joined: Aug 2006
Posts: 904
Likes: 4
From: Vancouver, WA
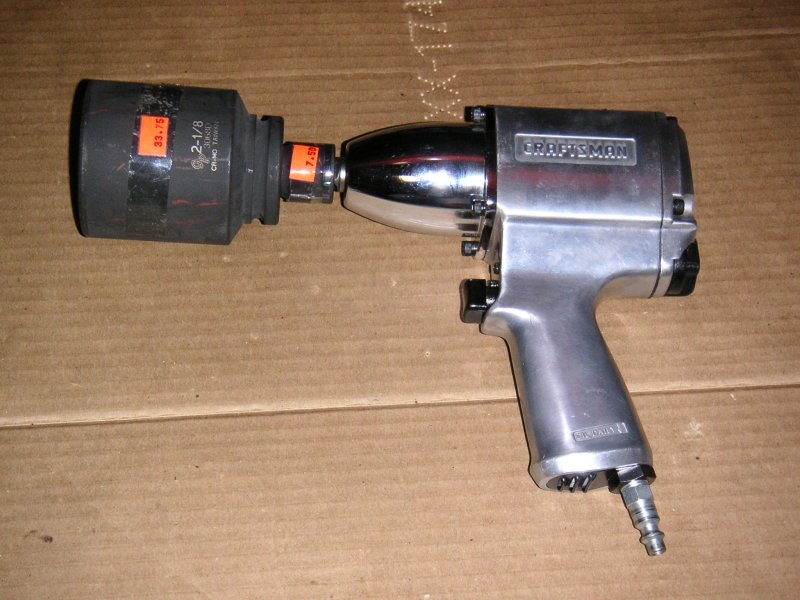
Thanks for the advice. I've picked up a 3/4" drive impact gun so that should help. We will heat it up and give it a go. And thanks for the suggestion to add multiple anchor points on the chain.
Joined: Jun 2006
Posts: 4,815
Likes: 24
From: Columbia, Tennessee
What you might try is heat it up and then freeze it immediately with an upside down can of air duster. Try that a few times then it should come right off. Its a must if anyone has ever lock tighted the flywheel.
Same issue. Had the motor on a bench and no where to clamp it. Map torch to the nut then rapid cooled it with a hand full of ice. Did this about 3 times and it broke loose with a regular breaker bar.
The only 54mm nut that was ever hard to remove was on an Atkins engine where someone had used like a whole tube of blue loctite. I had to buzz it with the impact for the entire time it was turning just to take it off the end of the shaft. I'd never seen such a stupid inappropriate use of a product before. The engine was also over-ported and had blue loctite everywhere! They even used it on the alt pulley nut and waterpump pulley. Who does that!?!
Did Atkins actually build this thing? Someone else could have. It was built with Atkins parts. That's all I know.
Did Atkins actually build this thing? Someone else could have. It was built with Atkins parts. That's all I know.
Thread Starter
Joined: Aug 2006
Posts: 904
Likes: 4
From: Vancouver, WA
The only 54mm nut that was ever hard to remove was on an Atkins engine where someone had used like a whole tube of blue loctite. I had to buzz it with the impact for the entire time it was turning just to take it off the end of the shaft. I'd never seen such a stupid inappropriate use of a product before. The engine was also over-ported and had blue loctite everywhere! They even used it on the alt pulley nut and waterpump pulley. Who does that!?!
Did Atkins actually build this thing? Someone else could have. It was built with Atkins parts. That's all I know.
Did Atkins actually build this thing? Someone else could have. It was built with Atkins parts. That's all I know.
Joined: Aug 2002
Posts: 2,614
Likes: 31
From: Freeland, MI

Joined: Mar 2001
Posts: 31,857
Likes: 3,243
From: https://www2.mazda.com/en/100th/
i think the first easy sign, is just an even covering of dirt/grease. a rebuilt engine will be clean(er).
the second thing to look for is signs that things were painted, a post 78 engine from Mazda has iron colored irons, and the housings are bare aluminum, the only thing that gets painted are the oil pan, and water pump housings. all the bolts are a gold zinc plating. if you see black irons, its either an old engine, or someone was in there.
sealer. Mazda used a grey sealant, on the oil pan only, and their application is very tidy. a big tip off an engine has been rebuilt is sealant between the "legs" of the housings.
incorrect parts. there are a LOT of engines that get built with a set of unmatched housings. especially the 12A's as there are a variety of different ones that are "the same"
other things to look for are on the periphery, like the wrong hose clamps, painted transmissions, twisted clutch hoses, etc etc
Agreed. That is an original engine. Enjoy the teardown on a masterpiece of mass produced rotary goodness. Not a bastard with mismatched parts, too much loctite or too much porting. The way you find everything inside is as it should be with no RTV on the front counterweight lol.
Thread Starter
Joined: Aug 2006
Posts: 904
Likes: 4
From: Vancouver, WA
Just picked up a 3/4" drive impact gun so that should do the trick. I'll need to borrow my neighbor's air compressor but should be easy enough once I get it warmed up and use the air gun. Sheeeesh....I just need one bolt off to see if I need to start looking for new housings and/or rotors!
Joined: Jun 2006
Posts: 4,815
Likes: 24
From: Columbia, Tennessee
Id be more worried about the condition of the housings then the rotors. SE housings are usually good with minimal flake and are still available new, but expensive either way. Rotors are cheap.
Thread Starter
Joined: Aug 2006
Posts: 904
Likes: 4
From: Vancouver, WA
Finally got the Flywheel nut off. The air gun did the trick and was silly we didn't get it sooner. I was able to get the whole engine disassembled and everything was in better shape than I was expecting. The housings seem to be in good shape and I will get some better pictures once I get them cleaned.
Any advise for soaking them in degreaser and how long? I bought a Cement mixing tub (24"x36") so I can lay most of the housings and rotors down to soak. I will get getting bulk cleaning done hopefully this afternoon so I can get some better pictures of the housings and rotors.
Thanks
 20150307_113336 by tallbozo, on Flickr
 20150307_114352 by tallbozo, on Flickr
 20150307_131057 by tallbozo, on Flickr
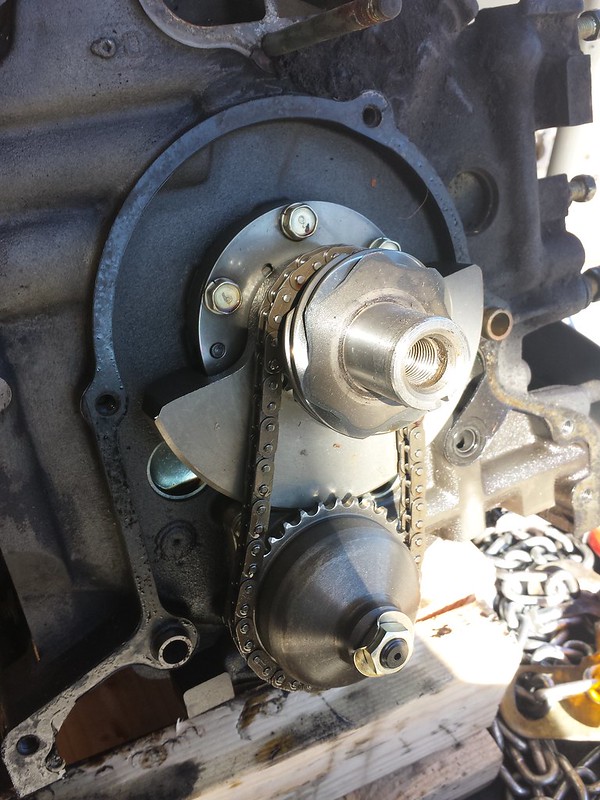
Rear Housing:
 20150307_131640 by tallbozo, on Flickr
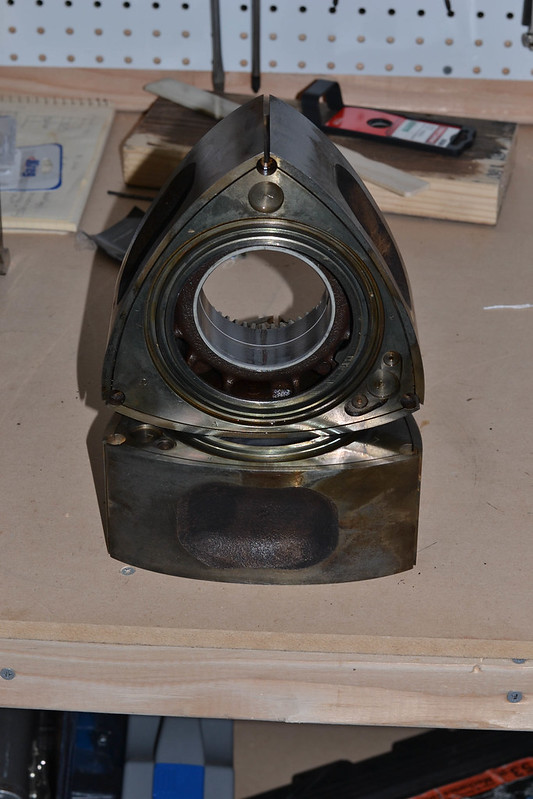
Carbon Lock:
 20150307_132051 by tallbozo, on Flickr
Center Plate surface:
 20150307_135306 by tallbozo, on Flickr
 20150307_151107_1 by tallbozo, on Flickr
Any advise for soaking them in degreaser and how long? I bought a Cement mixing tub (24"x36") so I can lay most of the housings and rotors down to soak. I will get getting bulk cleaning done hopefully this afternoon so I can get some better pictures of the housings and rotors.
Thanks
20150307_113336 by tallbozo, on Flickr20150307_114352 by tallbozo, on Flickr20150307_131057 by tallbozo, on FlickrRear Housing:
20150307_131640 by tallbozo, on FlickrCarbon Lock:
20150307_132051 by tallbozo, on FlickrCenter Plate surface:
20150307_135306 by tallbozo, on Flickr20150307_151107_1 by tallbozo, on Flickr
Joined: Jun 2006
Posts: 4,815
Likes: 24
From: Columbia, Tennessee
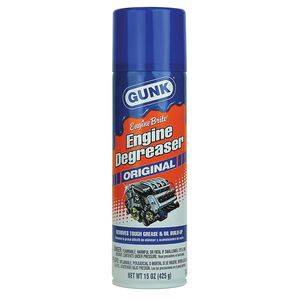
This is the best stuff Ive found so far for soaking. Soak each part for 10 minutes then scrape with a razor blade and rinse with brake cleaner. Soak again for 10 minutes and scrub with a nylon brush and tooth brush plus a tiny dental type scraper for the seal grooves being careful not to score them Rinse with brake cleaner again and spray with WD40 to prevent rust.
I suppose after the second GUNK soak you could fill your tub with as straight as possible Super Clean or Purple Power for a 30 minutes soak then rinse again with brake cleaner.
Thread Starter
Joined: Aug 2006
Posts: 904
Likes: 4
From: Vancouver, WA
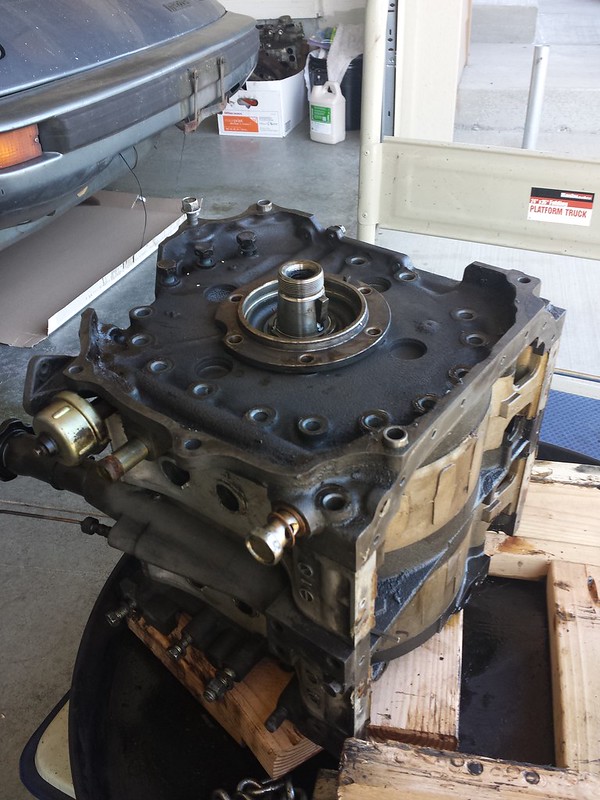
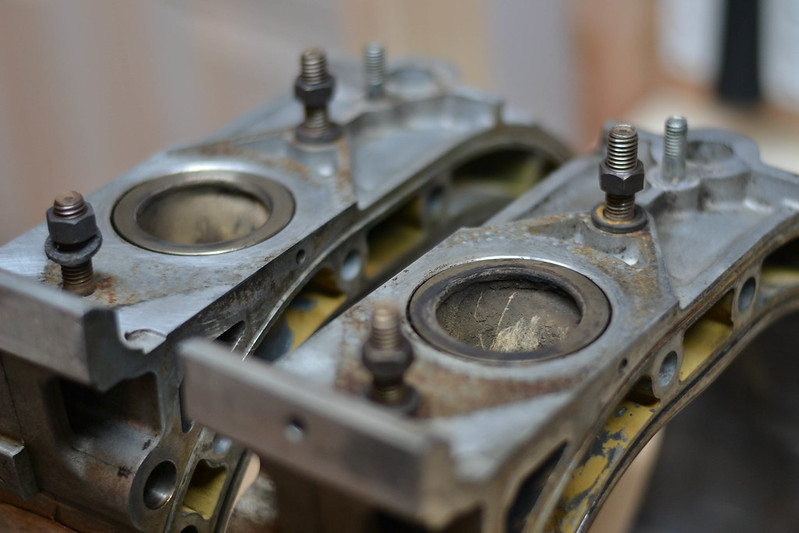
Alright....I got the housings and rotors cleaned fairly well. I tried to get some pictures so I can get some advise about the condition and if they are reusable.
One of the housings has some slight marring. Not flaking but its a rough edge for about an inch.
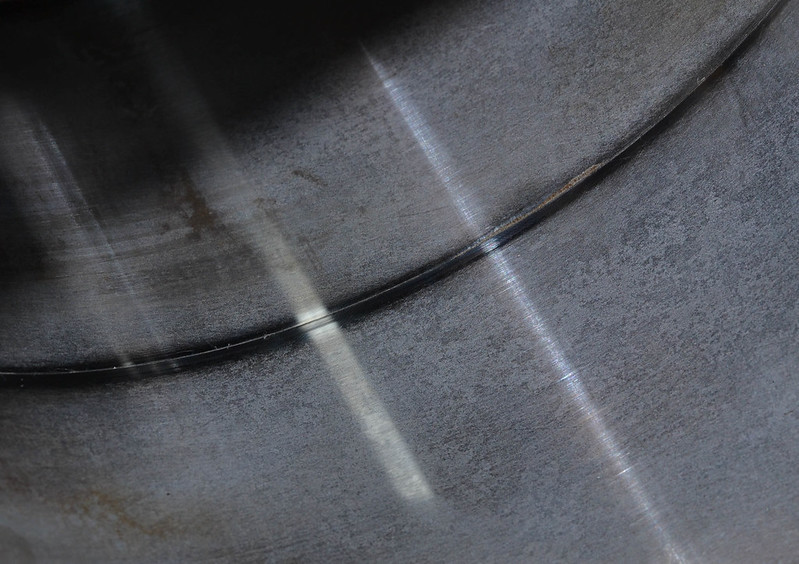 DSC_0997 by tallbozo, on Flickr
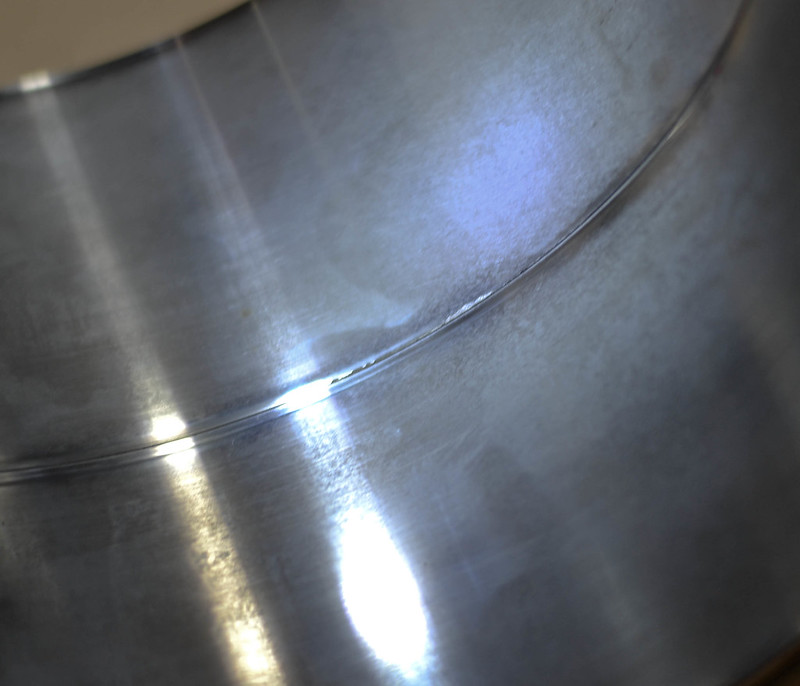 DSC_1009 by tallbozo, on Flickr
Also one of the rotors on the apex seal channel has a couple nicks, that I wanted to get your opinions on...
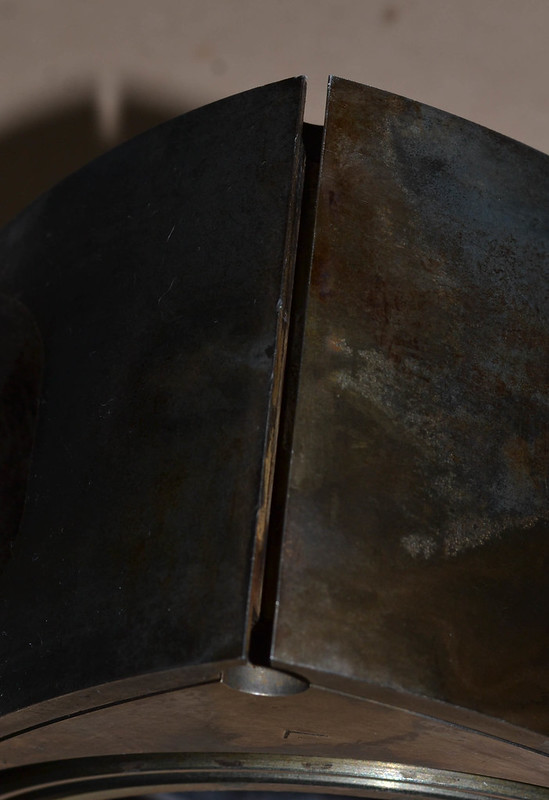 DSC_1002 by tallbozo, on Flickr
Other than those two items, I think they are in really good shape. No scratches or groves on the housings and the rotors cleaned up nice.
 DSC_0995 by tallbozo, on Flickr
 DSC_0988 by tallbozo, on Flickr
 DSC_0976 by tallbozo, on Flickr
 DSC_1000 by tallbozo, on Flickr
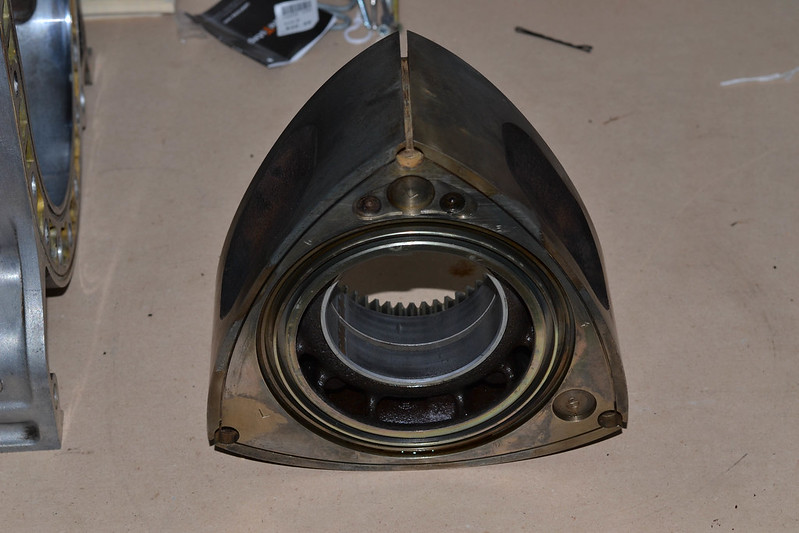 DSC_1001 by tallbozo, on Flickr
 DSC_1004 by tallbozo, on Flickr
One of the housings has some slight marring. Not flaking but its a rough edge for about an inch.
DSC_0997 by tallbozo, on FlickrDSC_1009 by tallbozo, on FlickrAlso one of the rotors on the apex seal channel has a couple nicks, that I wanted to get your opinions on...
DSC_1002 by tallbozo, on FlickrOther than those two items, I think they are in really good shape. No scratches or groves on the housings and the rotors cleaned up nice.
DSC_0995 by tallbozo, on FlickrDSC_0988 by tallbozo, on FlickrDSC_0976 by tallbozo, on FlickrDSC_1000 by tallbozo, on FlickrDSC_1001 by tallbozo, on FlickrDSC_1004 by tallbozo, on Flickr
Thread Starter
Joined: Aug 2006
Posts: 904
Likes: 4
From: Vancouver, WA
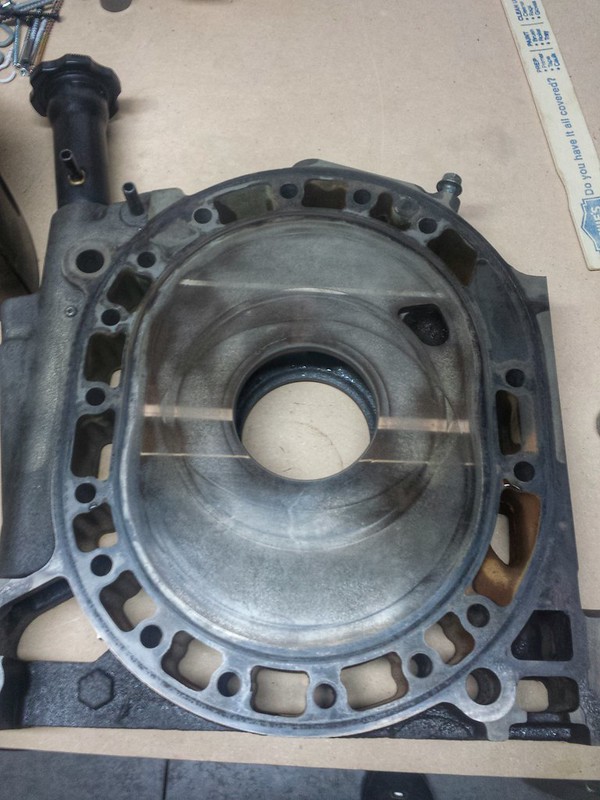
Worked on the intermediate plate tonight and made some progress. Enough i guess to get some pictures up on here so you can see the surface anyways. I am curious, how hard can I scrub the chrome surface and what should I use? I have a nylon scrub brush and have been keeping the brass brush away.
Here are a couple pictures. I edited them slightly so you can see the surface better. Nice and smooth but some discoloring. No flaking.
 20150309_202020_1 by tallbozo, on Flickr
 20150309_202040_1 by tallbozo, on Flickr
Here are a couple pictures. I edited them slightly so you can see the surface better. Nice and smooth but some discoloring. No flaking.
20150309_202020_1 by tallbozo, on Flickr20150309_202040_1 by tallbozo, on Flickr
The irons aren't "chromed". They are nitrided which is a surface hardening treatment, and from what I can see in the pics, is in very good shape.
It's pretty hard but can be damaged and ruined when idiots send their irons out to be lapped or resurfaced. DON'T do that. Instead, take a razor blade and carefully "shave" off the residue from the coolant seals and any other high areas of buildup from carbon and old coolant. That's all I ever do on my irons, and it keeps the nitriding from getting damaged.
You will notice some slightly weaker areas where the coolant seals sit. Don't try to dig out the weak material because it can lead to coolant leaks in the future. Just shave them flat with a razor blade using the adjacent surface as a support guide. Does that make sense?
Then in the end, I like to use compressed air to clean out the loose iron dust. It might be possible to use a nylon brush, or even a brass brush (if you're super careful) to clean these areas after the shaving process, but I prefer compressed air.
Thread Starter
Joined: Aug 2006
Posts: 904
Likes: 4
From: Vancouver, WA
The irons aren't "chromed". They are nitrided which is a surface hardening treatment, and from what I can see in the pics, is in very good shape.
It's pretty hard but can be damaged and ruined when idiots send their irons out to be lapped or resurfaced. DON'T do that. Instead, take a razor blade and carefully "shave" off the residue from the coolant seals and any other high areas of buildup from carbon and old coolant. That's all I ever do on my irons, and it keeps the nitriding from getting damaged.
You will notice some slightly weaker areas where the coolant seals sit. Don't try to dig out the weak material because it can lead to coolant leaks in the future. Just shave them flat with a razor blade using the adjacent surface as a support guide. Does that make sense?
Then in the end, I like to use compressed air to clean out the loose iron dust. It might be possible to use a nylon brush, or even a brass brush (if you're super careful) to clean these areas after the shaving process, but I prefer compressed air.
It's pretty hard but can be damaged and ruined when idiots send their irons out to be lapped or resurfaced. DON'T do that. Instead, take a razor blade and carefully "shave" off the residue from the coolant seals and any other high areas of buildup from carbon and old coolant. That's all I ever do on my irons, and it keeps the nitriding from getting damaged.
You will notice some slightly weaker areas where the coolant seals sit. Don't try to dig out the weak material because it can lead to coolant leaks in the future. Just shave them flat with a razor blade using the adjacent surface as a support guide. Does that make sense?
Then in the end, I like to use compressed air to clean out the loose iron dust. It might be possible to use a nylon brush, or even a brass brush (if you're super careful) to clean these areas after the shaving process, but I prefer compressed air.