
My GSL-SE Project


My GSL-SE Project
I've owned this car since 2005. It was dropped off at a shop I used to work at as a no-start and I made the owner an offer that he couldn't refuse. I replaced the starter and she fired right up. It was 100% original... no modifications of any kind, original paint, minimal rust. I'm in Ontario, Canada, and if you've ever seen some of our cars, especially one's of this "vintage"... you know that the salt sure does a number on them. Obviously this one has NEVER been winter driven. I've never so much as had a bolt stick or round off. It is a great basis for a project.
I'm planning on getting the new engine (LS1 V8, of course) running perfectly in normally aspirated form on the standalone, then turbocharging it over this upcoming winter.
Fresh paint:


Modifications at this point were a full Racing Beat exhaust (whose sound I love regardless of how restrictive it is), Mazdatrix stainless brake lines, slotted/drilled rotors, and PBR brake pads.
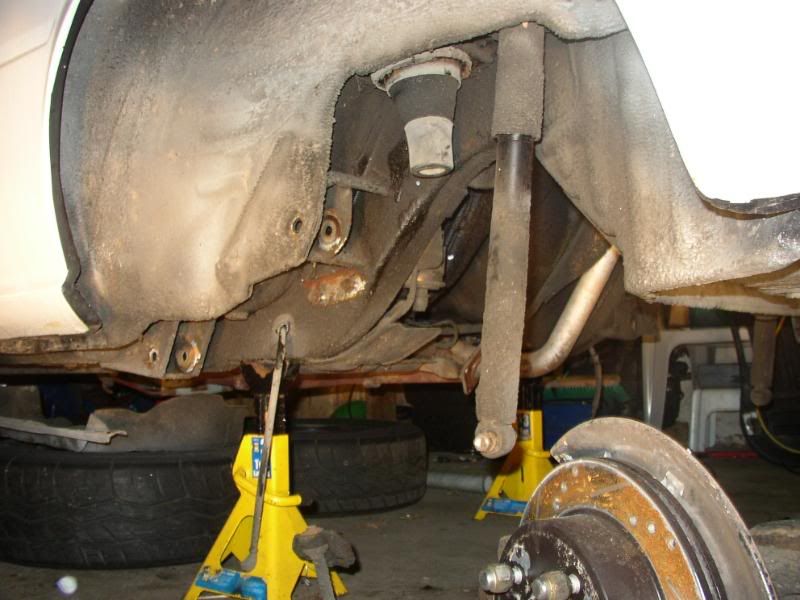
Replacing suspension bushings with Energy Suspension Urethane bushings (black):


I'm planning on getting the new engine (LS1 V8, of course) running perfectly in normally aspirated form on the standalone, then turbocharging it over this upcoming winter.
Fresh paint:
Modifications at this point were a full Racing Beat exhaust (whose sound I love regardless of how restrictive it is), Mazdatrix stainless brake lines, slotted/drilled rotors, and PBR brake pads.
Replacing suspension bushings with Energy Suspension Urethane bushings (black):
Tear down:
Intact:
Putting my lovely girlfriend to work:

Useless stuff gone:
Getting ready to pull the engine:

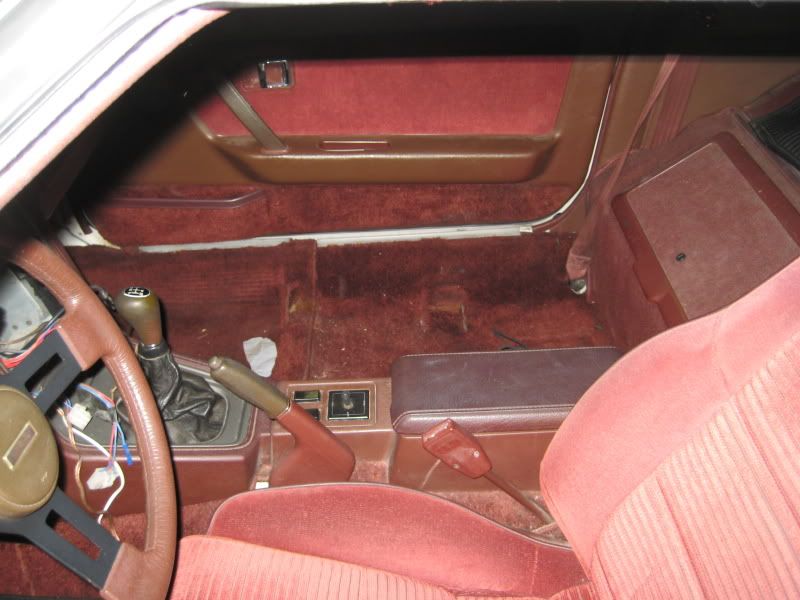
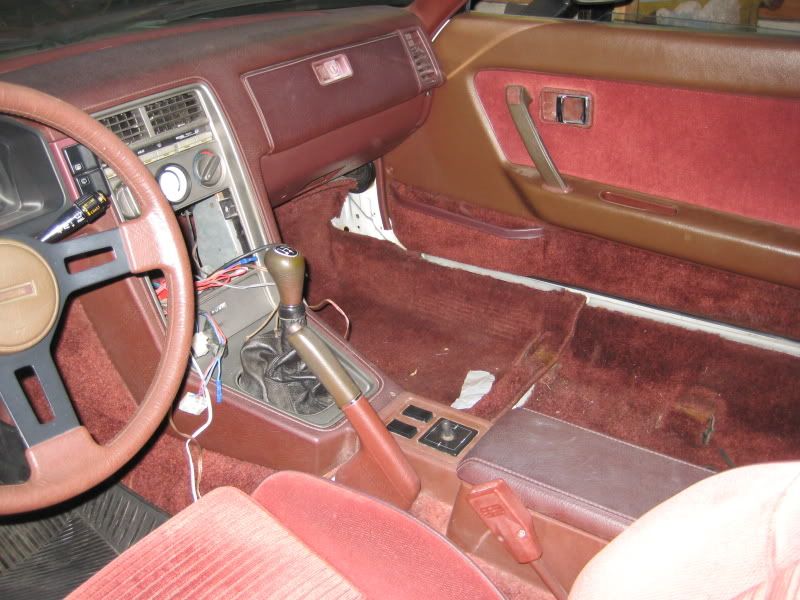
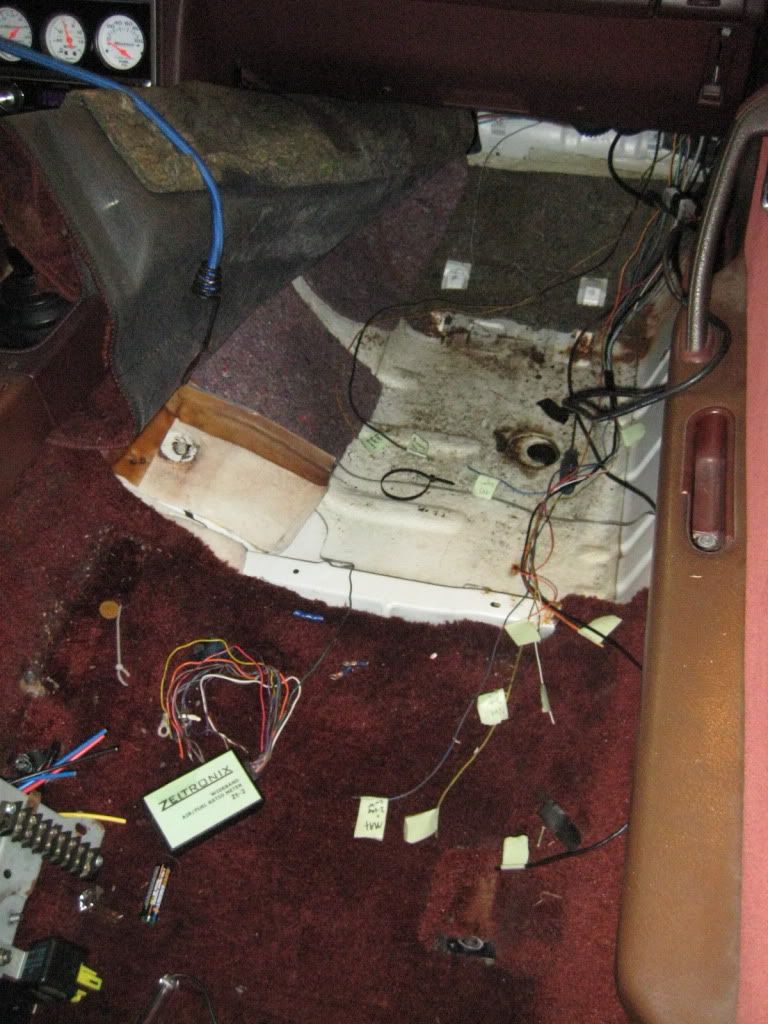
Taking the interior apart:
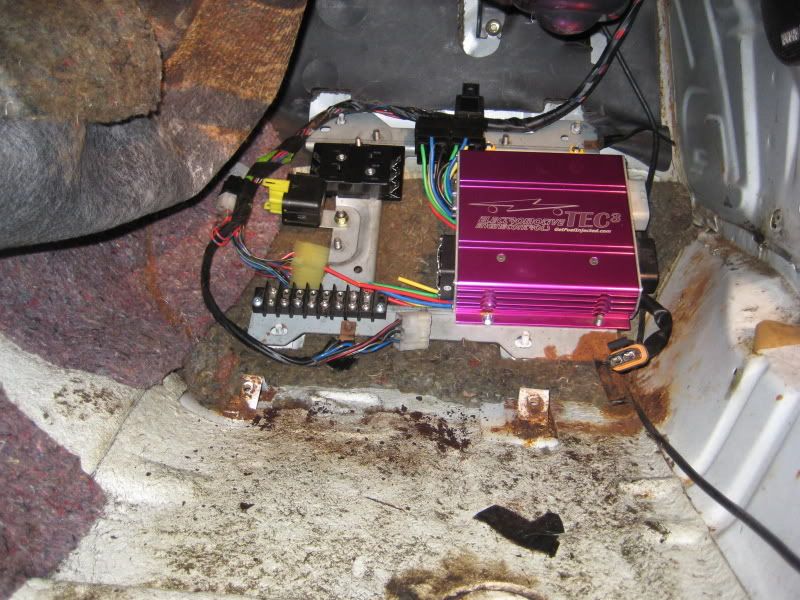
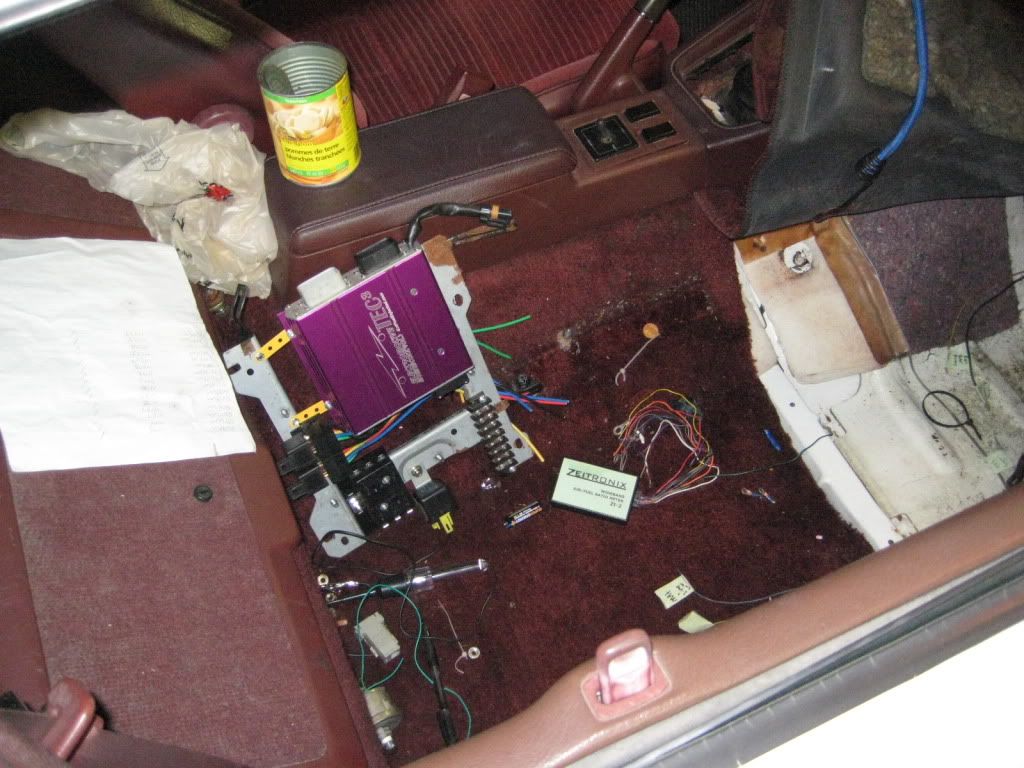
OEM ECU removed, trying to figure out where to mount things:

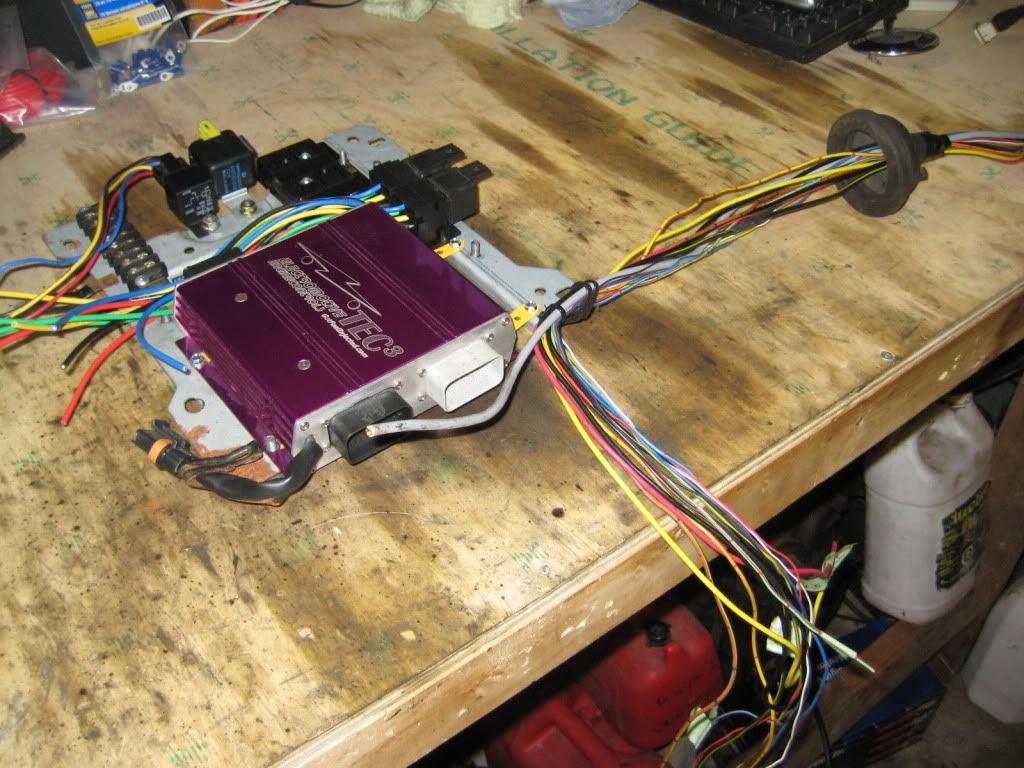
Aforementioned things mounted:
Intact:
Putting my lovely girlfriend to work:
Useless stuff gone:
Getting ready to pull the engine:
Taking the interior apart:
OEM ECU removed, trying to figure out where to mount things:
Aforementioned things mounted:
Engine:
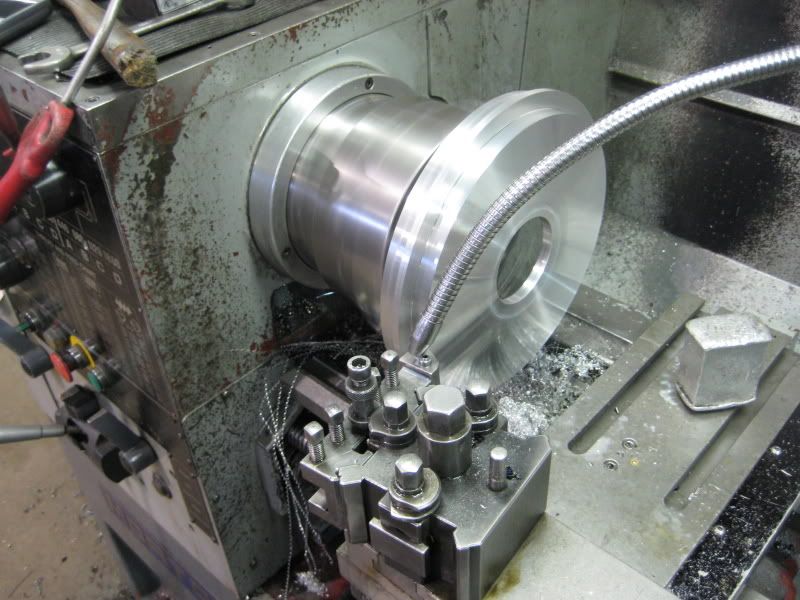
Designed a flywheel in Solidworks:

Machining said flywheel:

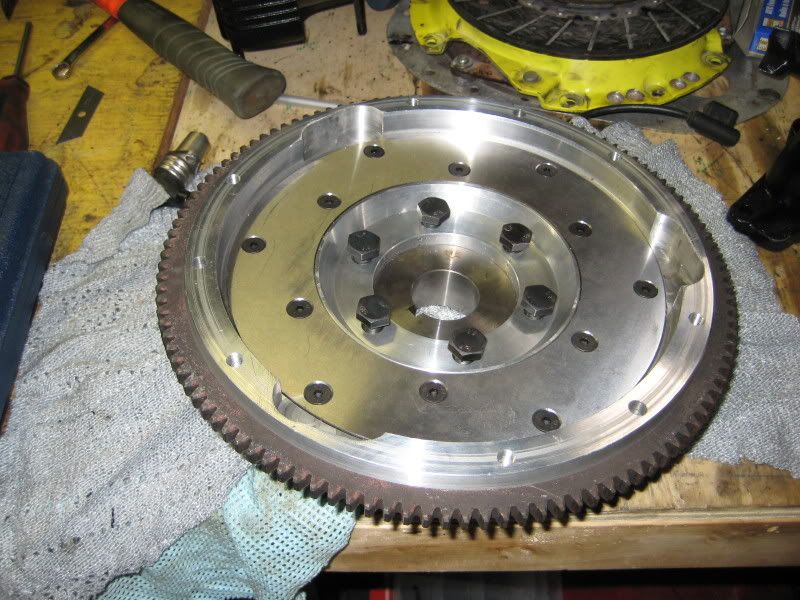
Flywheel done (also shown is an ACT street clutch):

S5 13B - Rebuilt and Street Ported

Machining trigger wheel:
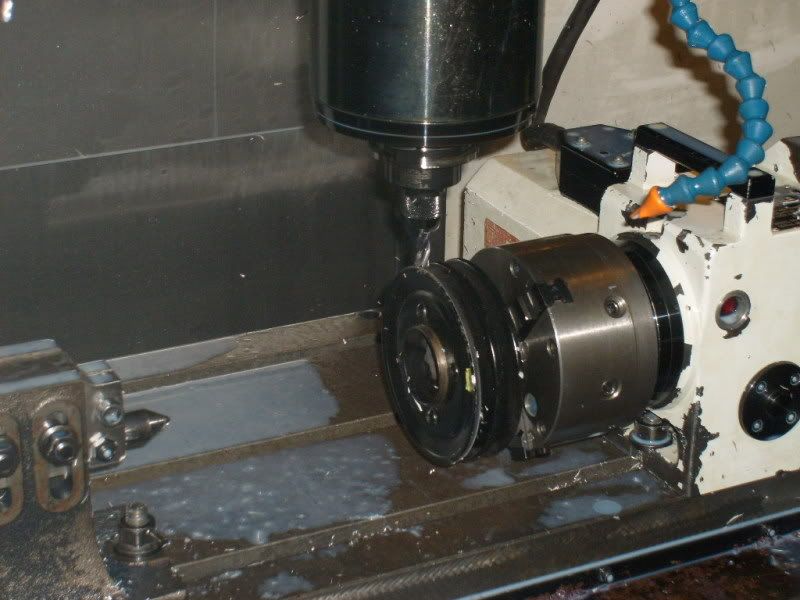
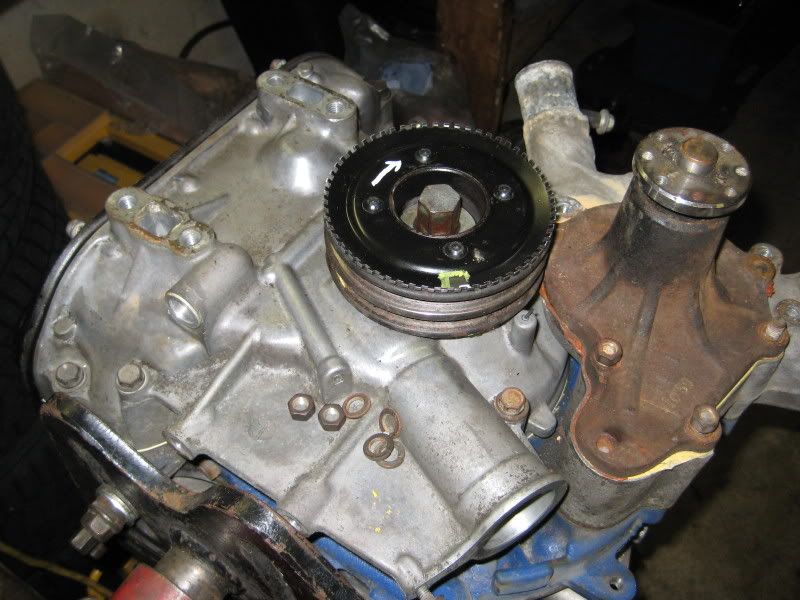
Figuring out the hard way how the OEM crank pulley is made:
Continuing to machine the wheel (original design changed... see next few pics)

This is it for now...
Designed a flywheel in Solidworks:
Machining said flywheel:
Flywheel done (also shown is an ACT street clutch):
S5 13B - Rebuilt and Street Ported
Machining trigger wheel:
Figuring out the hard way how the OEM crank pulley is made:
Continuing to machine the wheel (original design changed... see next few pics)
This is it for now...
I didn't get the bushing from Respeed... I made a list of the part numbers from the Energy Suspension website and ordered them from a local shop.
There was a huge difference... the car feels a lot tighter now. The biggest difference was that before changing the bushings (which is a job I'll never do again), you could feel body settle back down on the rear end after taking a corner hard, and now that's gone.
There was a huge difference... the car feels a lot tighter now. The biggest difference was that before changing the bushings (which is a job I'll never do again), you could feel body settle back down on the rear end after taking a corner hard, and now that's gone.
Trending Topics
That flywheel is hardcore. Very awesome. Looks like everything is in the right place. From where did you aquire the starter ring gear? Did you make the friction plate yourself?
From where did you aquire the starter ring gear? Did you make the friction plate yourself?
I pressed the starter ring gear off the old flywheel. I supported the gear on three blocks and pressed the centre of the flywheel down using a hydraulic press. It popped right off. To install it on the new flywheel, I heated it using an Oxy-acetylene torch and it slid right on.
I made the friction plate too.
I made the friction plate too.

 High dollar horsepower....Are you fabbing a similar trigger as the electomotive universal?
I'm using an Electromotive TEC 3 ECU so I have to run a 60-2 toothed wheel and a mag sensor. I've designed and machined the pieces for a mag sensor bracket. After my friend is finished welding it together, I'll post pics of the setup.
Thanks for the comments guys.
I could never sell these for $250. Material alone was $100, and there would be three different setups on CNC just to machine the aluminum flywheel. If I did a production run of 50, maybe it would be possible....
I was going to do that, but I feel pretty confident the shrink fit will hold. If not, I'll just have to push start it until the engine comes back out in the winter for turbocharging
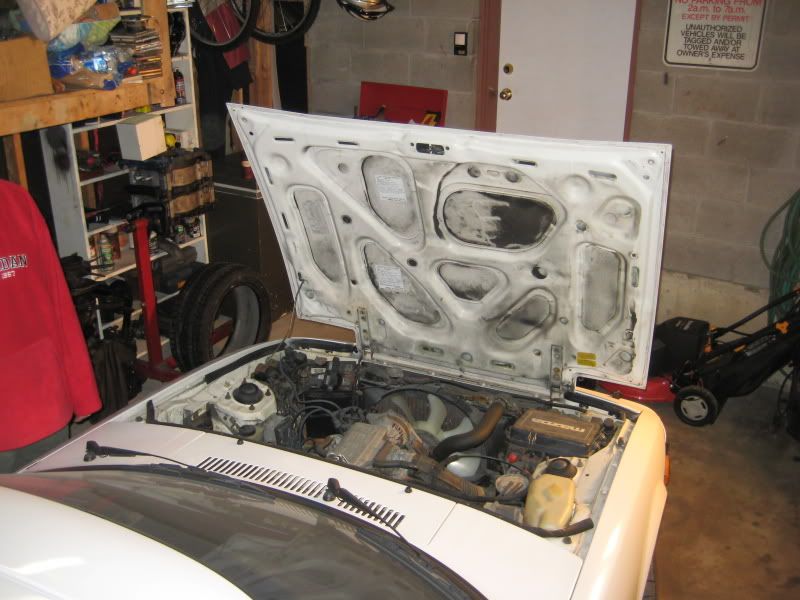
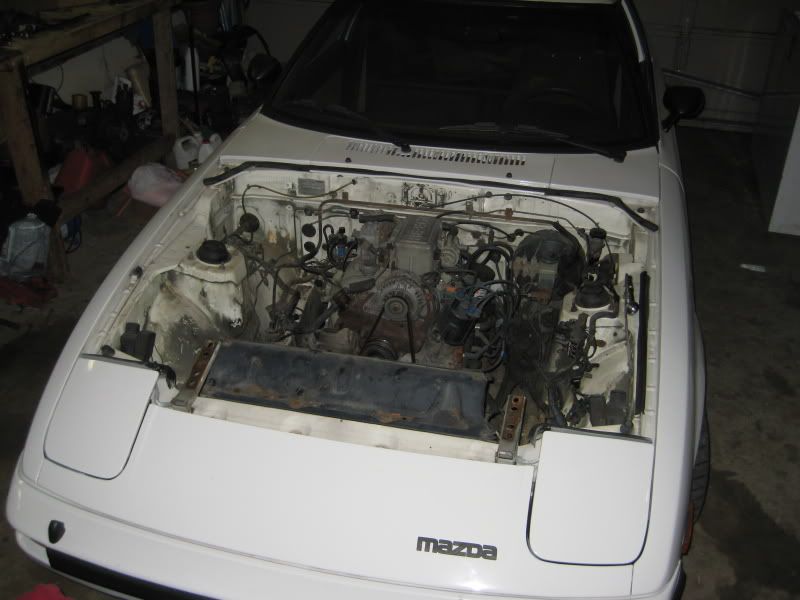
I started cleaning the engine bay today. It was oil sprayed about 25 years ago, so it's more 'scraping' then 'cleaning'.
I could never sell these for $250. Material alone was $100, and there would be three different setups on CNC just to machine the aluminum flywheel. If I did a production run of 50, maybe it would be possible....
I started cleaning the engine bay today. It was oil sprayed about 25 years ago, so it's more 'scraping' then 'cleaning'.
Try spraying some paint thinner or mineral spirits on the rust proofing to soften it. Once most of it's scraped off, a scotch pad and either solvent will clean up the remnants left.
Iirc, Racing Beats aluminum flywheel goes for around 400, so even 300 would be a bargain.
Iirc, Racing Beats aluminum flywheel goes for around 400, so even 300 would be a bargain.


Update...
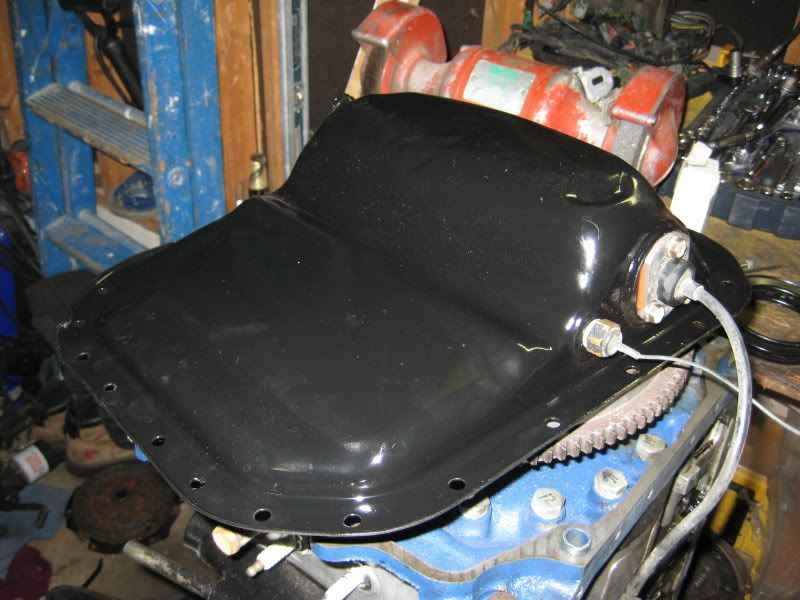
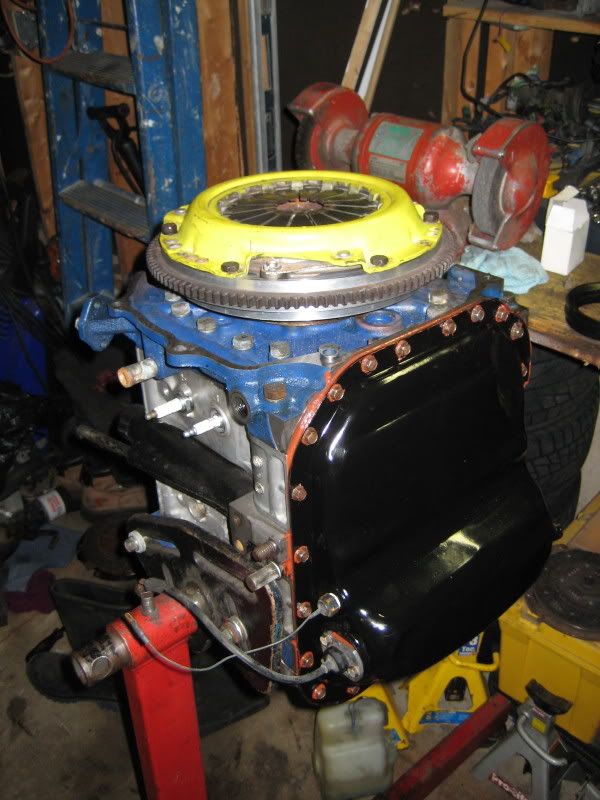
Oil Pan sand-blasted and re-painted:
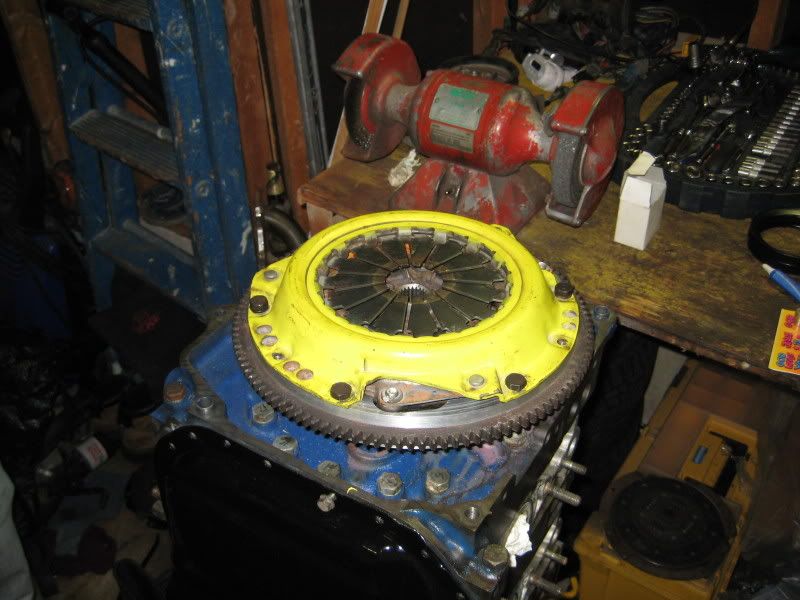
Flywheel bolted up:
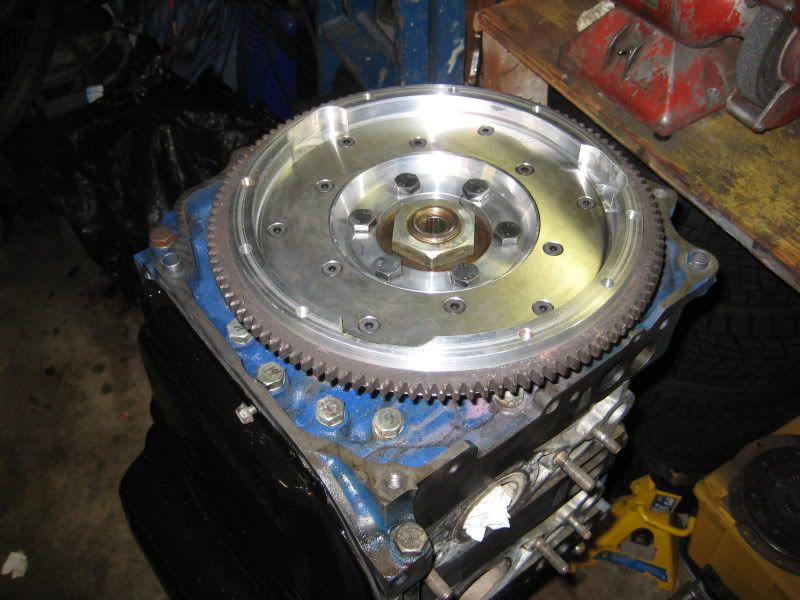
Clutch installed:
Engine ready to go in:
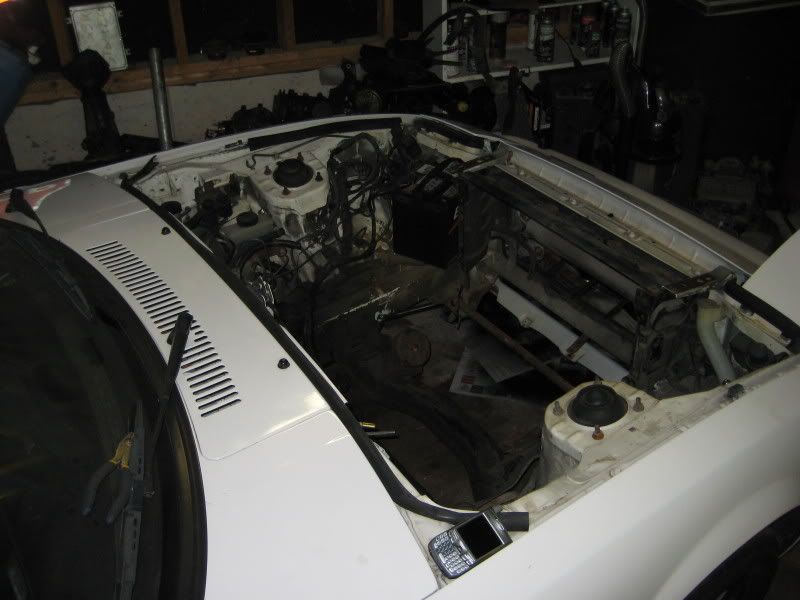
No engine:
Didn't take pictures for a while...
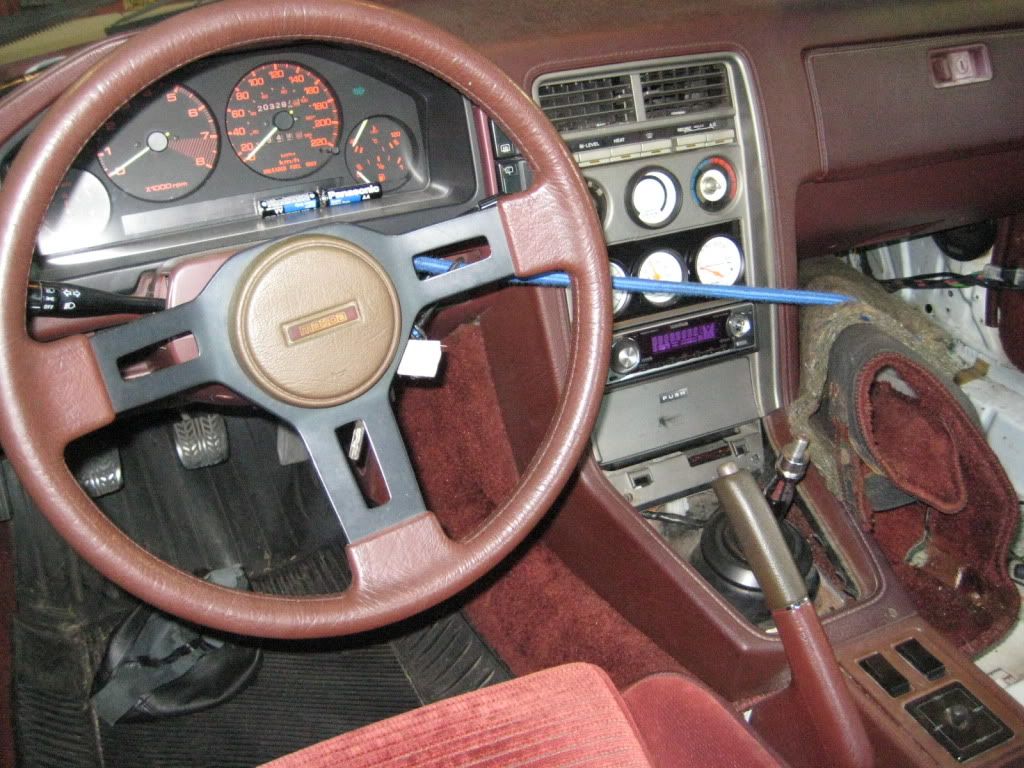
Gauges mounted (Boost, AFR, Fuel Pressure, EGT) and CD player installed:
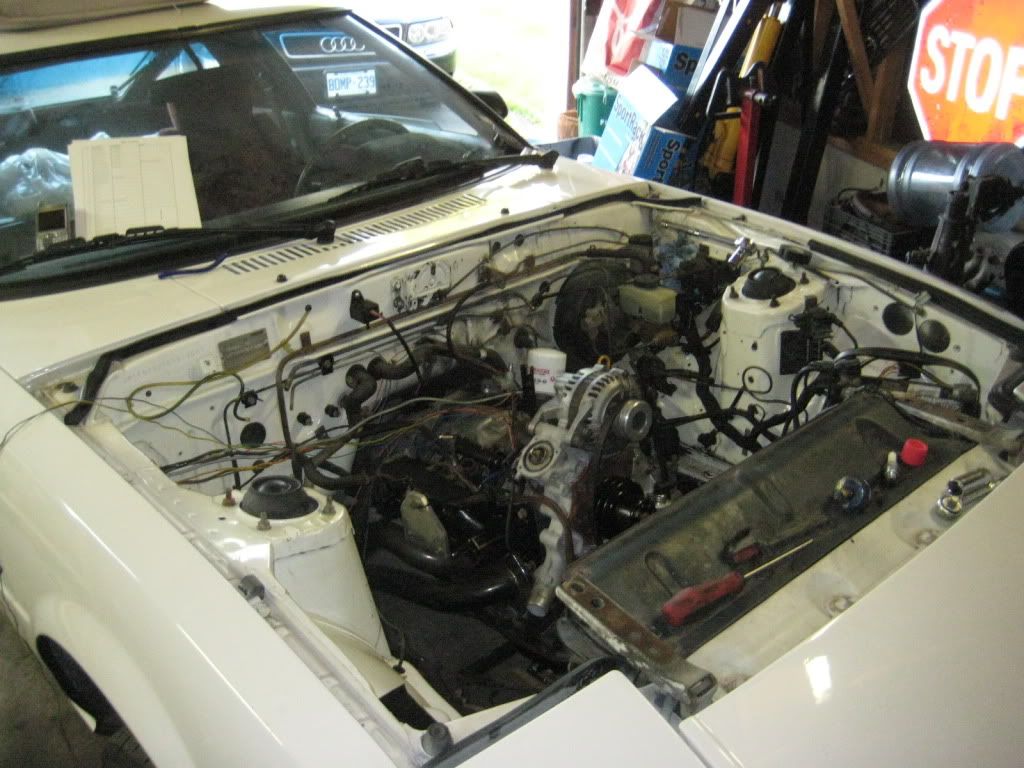
Engine installed:
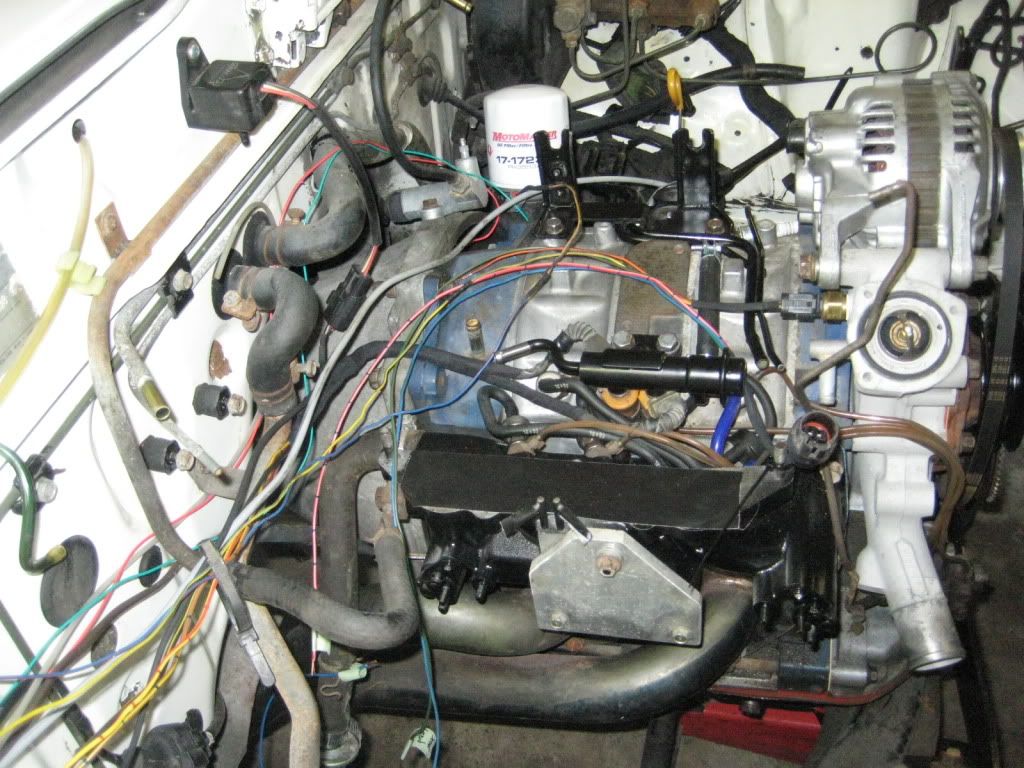
Wiring Began:

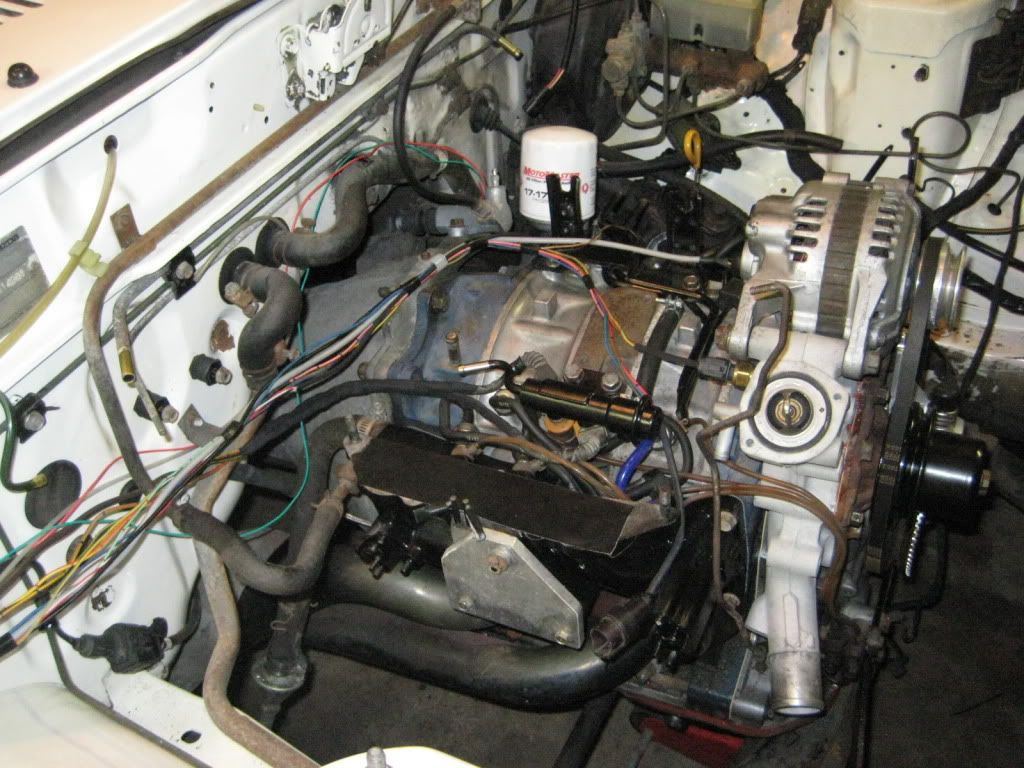
More wiring:
More wiring:
More wiring:
Random:
Right now my focus is on wiring. All the sensors are installed and wired. Tomorrow I will finish wiring the secondary injectors. Then I can remove the wiring from the car and finish it on the bench where I will pin the wires and insert them into their spot in the plug. I'll run the coil and injector power wires, wire up all the relays, run the coil switched grounds, and prepare the ECU to connect to the car. After that is done, I have to fabricate a coil mount, finish the crank trigger, install the rad fan, and finish minor mechanical work (fill with oil, install intake manifold, install OEM oil and coolant temp sensors into the rear iron).
Hope you guys like it!
Oil Pan sand-blasted and re-painted:
Flywheel bolted up:
Clutch installed:
Engine ready to go in:
No engine:
Didn't take pictures for a while...
Gauges mounted (Boost, AFR, Fuel Pressure, EGT) and CD player installed:
Engine installed:
Wiring Began:
More wiring:
More wiring:
More wiring:
Random:
Right now my focus is on wiring. All the sensors are installed and wired. Tomorrow I will finish wiring the secondary injectors. Then I can remove the wiring from the car and finish it on the bench where I will pin the wires and insert them into their spot in the plug. I'll run the coil and injector power wires, wire up all the relays, run the coil switched grounds, and prepare the ECU to connect to the car. After that is done, I have to fabricate a coil mount, finish the crank trigger, install the rad fan, and finish minor mechanical work (fill with oil, install intake manifold, install OEM oil and coolant temp sensors into the rear iron).
Hope you guys like it!


Just a small update today.
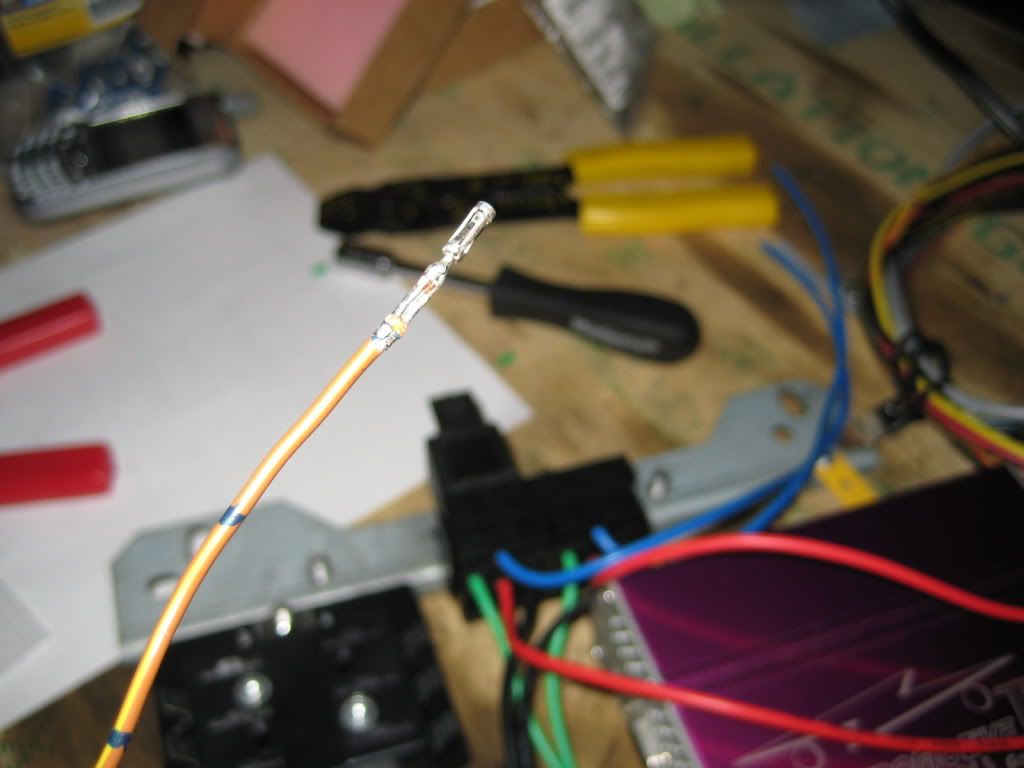
I started putting terminals on the wires. The crimps weren't the best, so I soldered each wire for additional insurance.
All the sensors wires are pinned. I just need to pin the injector and coil wires, and small stuff like tach, CEL, and the GPOs
I started putting terminals on the wires. The crimps weren't the best, so I soldered each wire for additional insurance.
All the sensors wires are pinned. I just need to pin the injector and coil wires, and small stuff like tach, CEL, and the GPOs