
my custom door panels *PICS*

Thread Starter
boost my 7
Joined: Jun 2004
Posts: 884
Likes: 0
From: Colfax, Washington
my custom door panels *PICS*
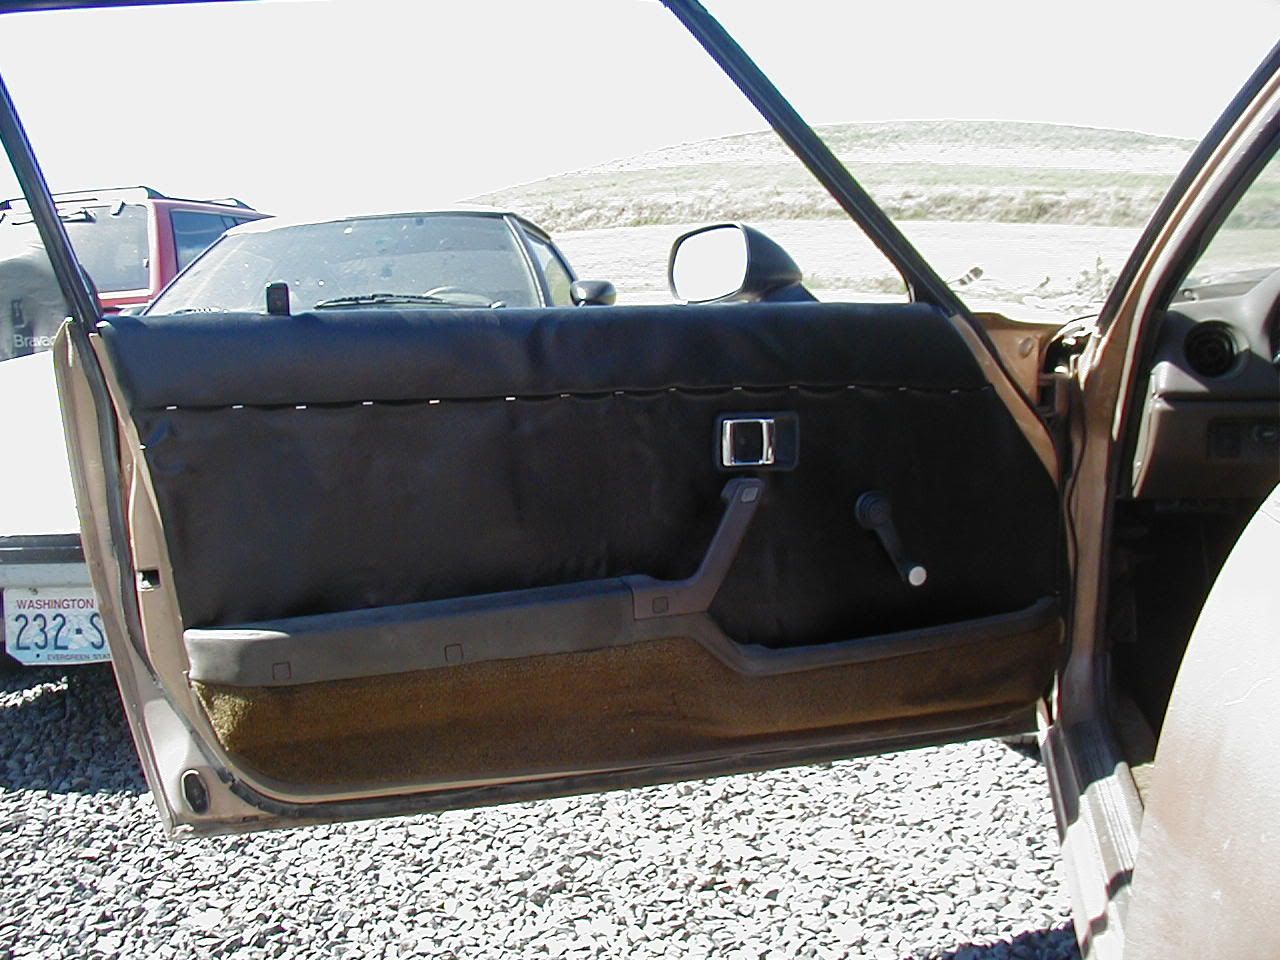
well i just bought an '83 rx7 and the interior was pretty much shot...the seats were barely there and the door panels were falling apart...SO...i swapped the seats out of my other rx7 but i was stuck on what to do with the door panels...
i went to my local fabric store and bought some black vinyl fabric...enough to lay over both door panels...i took out all the staples that held the fabric on the cardboard template on the old door panels and then peeled off the fabric (it was also adhesed to the template)...then i purchased a can of 3mm (brand name) general adhesive.
FIRST - remove all of the staples off of the back of the door panel template and remove the 5 screws that hold on the lower pocket.
SECOND - peel off all of the fabric and small layer of foam, while leaving the upper, thick padding in tact.
THIRD - cut your new fabric of choice the appropriate size to fit on the new door panel, leaving a good 2" extra all around so you can wrap the fabric over the panel.
FOURTH - spray your general adhesive on *both* the back of the fabric and the template, while letting sit for a few minutes to set. then stretch your fabric good and well over the whole front of the template.
FIFTH - take a staple gun and place as many staples as necessary under the upper foam padding to give it a good, defined shape.
SIXTH - you will notice that you havnt done anything with the extra 2" of fabric all around. you are going to need to cut parts out of the fabric so that when you wrap it around the other side of the template, the fabric does not overlap itself. once you have done this, spray adhesive to *both* the fabric and the template, while letting set for a few minutes, then stretch it over so that it adheses well.
SEVENTH - cut the appropriate holes in the fabric using your old fabric as a guide. these holes are necessary not only for the door handles and the window handles, but for bolts as well.
EIGHTH - replace the 5 screw that you took out earlier so that your old pocket will go back into place, cover up some off your fabric. the carpet *can* be removed and replaced to better suit your interior, or you can dye it, but i left mine as it was for simplicities sake.
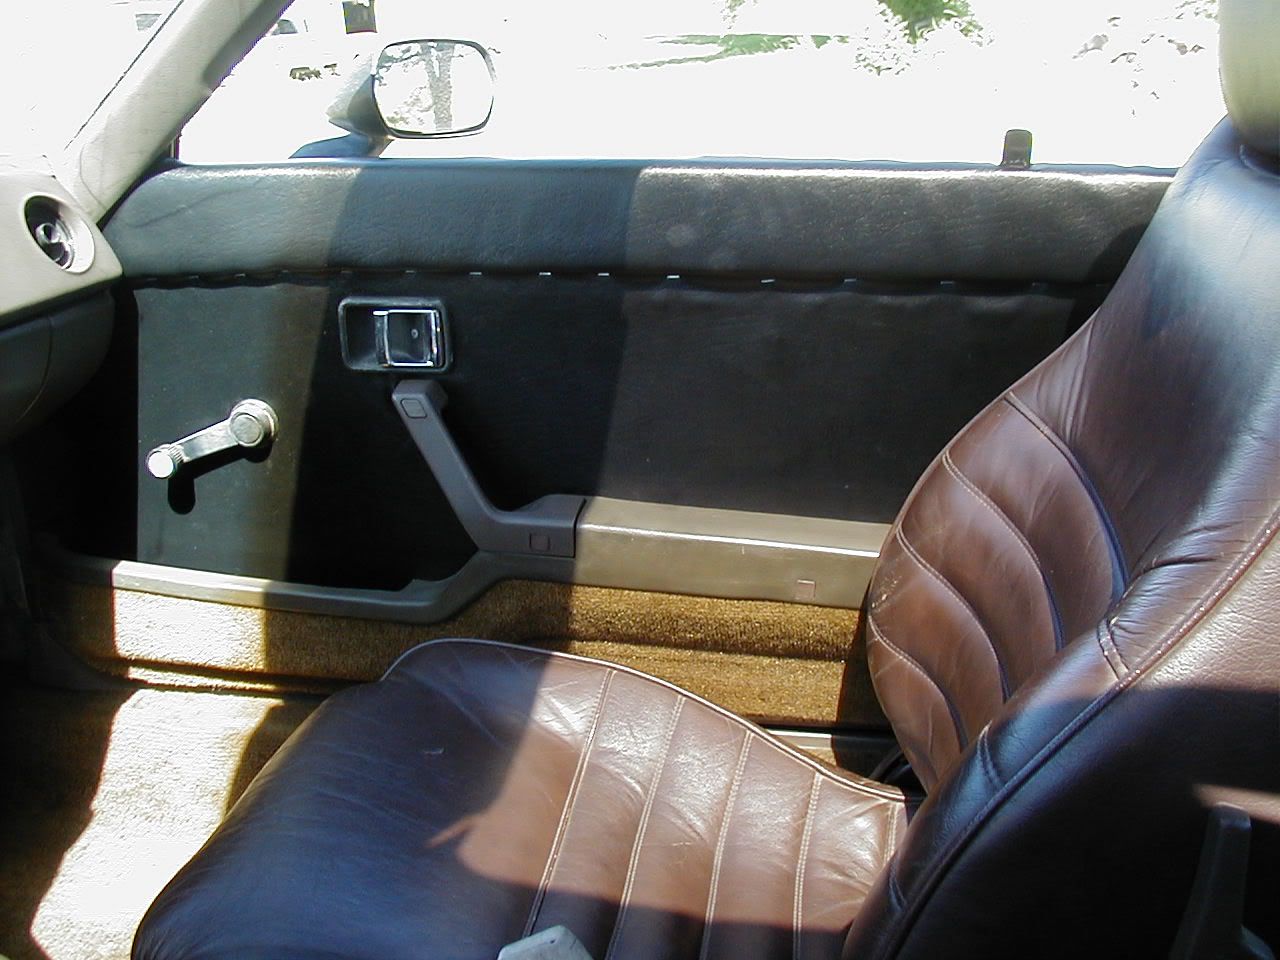
VIOLA! new door panels!
*NOTE*
there are a few extra things you can do to spice up your panels. one of which i suggest is to add an accent strip of some sort that will cover up the exposed staples. but if you are feeling really adventurous, try and cut some foam or fabric and underlay it underneath your fabric, embossing something like "Rx-7" or the shape of a rotor. or you could choose a different fabric to cover the upper foam padding, giving a better contrast.
PM me if you have some questions...or just post :P
i went to my local fabric store and bought some black vinyl fabric...enough to lay over both door panels...i took out all the staples that held the fabric on the cardboard template on the old door panels and then peeled off the fabric (it was also adhesed to the template)...then i purchased a can of 3mm (brand name) general adhesive.
FIRST - remove all of the staples off of the back of the door panel template and remove the 5 screws that hold on the lower pocket.
SECOND - peel off all of the fabric and small layer of foam, while leaving the upper, thick padding in tact.
THIRD - cut your new fabric of choice the appropriate size to fit on the new door panel, leaving a good 2" extra all around so you can wrap the fabric over the panel.
FOURTH - spray your general adhesive on *both* the back of the fabric and the template, while letting sit for a few minutes to set. then stretch your fabric good and well over the whole front of the template.
FIFTH - take a staple gun and place as many staples as necessary under the upper foam padding to give it a good, defined shape.
SIXTH - you will notice that you havnt done anything with the extra 2" of fabric all around. you are going to need to cut parts out of the fabric so that when you wrap it around the other side of the template, the fabric does not overlap itself. once you have done this, spray adhesive to *both* the fabric and the template, while letting set for a few minutes, then stretch it over so that it adheses well.
SEVENTH - cut the appropriate holes in the fabric using your old fabric as a guide. these holes are necessary not only for the door handles and the window handles, but for bolts as well.
EIGHTH - replace the 5 screw that you took out earlier so that your old pocket will go back into place, cover up some off your fabric. the carpet *can* be removed and replaced to better suit your interior, or you can dye it, but i left mine as it was for simplicities sake.
VIOLA! new door panels!
*NOTE*
there are a few extra things you can do to spice up your panels. one of which i suggest is to add an accent strip of some sort that will cover up the exposed staples. but if you are feeling really adventurous, try and cut some foam or fabric and underlay it underneath your fabric, embossing something like "Rx-7" or the shape of a rotor. or you could choose a different fabric to cover the upper foam padding, giving a better contrast.
PM me if you have some questions...or just post :P
Thread Starter
boost my 7
Joined: Jun 2004
Posts: 884
Likes: 0
From: Colfax, Washington
Originally Posted by evil_motors
the staples look like ****.. but the rest is nice


If you have accesses to a sewing machine, make a welt cord, with a wide bias and use that as a joiner between the fabric on the panel and the vinyl at the top of the door. With the extra wide welt, you can back staple that, then it glue up. That will hide the staples and give the cover a break between the fabric and vinyl.
Too old to act my age
Joined: Feb 2005
Posts: 3,164
Likes: 0
From: Tulsa, Ok.
If you fold the material back up towards the top prior to stapling it, then drape it down for the lower half, the staples will not show. Using cloth for the lower section, lay it face down, on the top part of the door panel, and staple it. Then fold it down over the top of the staples. The bottom still goes under the map pockets, and the ends fold over.
Lemme get a couple pics of mine. The top has been redone in heavy vinal, while the lower part was done in the same fabric as my seats. Looks quite good. The seats were completely redone in all cloth, no vinal/leather at all.
Lemme get a couple pics of mine. The top has been redone in heavy vinal, while the lower part was done in the same fabric as my seats. Looks quite good. The seats were completely redone in all cloth, no vinal/leather at all.
Trending Topics
Thread Starter
boost my 7
Joined: Jun 2004
Posts: 884
Likes: 0
From: Colfax, Washington
hey...thx for the input and suggestions...i was talking to my dad earlier today and he thinks, as well as i do, that i should get a nice piece of wood...sand it down, stain it, and screw it on from behind...i think it will complement my interior well...but i will then need to work in some wood elsewhere in the car...which shouldnt be hard...but this will look very classy...
Rogue_Wulff, i would like to see some pics of yours tho...i might reconsider if i see what your idea looks like.
Rogue_Wulff, i would like to see some pics of yours tho...i might reconsider if i see what your idea looks like.
No,please ! no wood.
I couldn't explain this to a friend until I compared it to wood on a jet or rocket.
He wanted to put a teakwood grill on his brothers drag car.
I couldn't explain this to a friend until I compared it to wood on a jet or rocket.
He wanted to put a teakwood grill on his brothers drag car.
Last edited by Stevan; Jul 7, 2005 at 09:53 PM. Reason: pucntuation
Thread Starter
boost my 7
Joined: Jun 2004
Posts: 884
Likes: 0
From: Colfax, Washington
Originally Posted by Stevan
No,please ! no wood.
I couldn't explain this to a friend until I compared it to wood on a jet or rocket.
He wanted to put a teakwood grill on his brothers drag car.
I couldn't explain this to a friend until I compared it to wood on a jet or rocket.
He wanted to put a teakwood grill on his brothers drag car.

Thread Starter
boost my 7
Joined: Jun 2004
Posts: 884
Likes: 0
From: Colfax, Washington
UPDATE! here is my write-up on custom making door panels...and i made one even better that will NOT expose the staples 
http://www.cardomain.com/ride/645548/5
http://www.cardomain.com/ride/645548/5
Last edited by bkm_rx7; Jul 8, 2005 at 03:02 AM.
Banned. I got OWNED!!!
Joined: Nov 2003
Posts: 850
Likes: 0
From: Mill Creek, WA
I'm wondering if a heat gun would help it lay down better. Might help with embossing an emblem like bkm suggested in the original post, too.
I've thought about using some sort of thin plastic panel instead of cardboard for the backing, as the B-pillar panels have cracked every time I've removed one. Anyone have a likely source? I suppose I should start with an arts&crafts store.
I've thought about using some sort of thin plastic panel instead of cardboard for the backing, as the B-pillar panels have cracked every time I've removed one. Anyone have a likely source? I suppose I should start with an arts&crafts store.

Senior Member
Joined: Jul 2004
Posts: 444
Likes: 0
From: Delhi, CA
door panels
I have the supplies for my 1979 door panels.
The car is yellow with brown interior.
I will probably move the yellow applique back about 6 inches to line up directly below the front edge of the window.
The brown is called "Cappuchino whisper and the yellow is nearly a perfect match for the paint.
[IMG]door panel[/IMG]
If the image attached does not come through will someone please clue me in as to how to make the pictures come through?
Thread Starter
boost my 7
Joined: Jun 2004
Posts: 884
Likes: 0
From: Colfax, Washington
Originally Posted by wecycle
Door Panel

I guess we will need to see ACTUAL pics b4 we judge it more...but im not sure how well those colors go together my friend...keep us posted tho
Banned. I got OWNED!!!
Joined: Nov 2003
Posts: 850
Likes: 0
From: Mill Creek, WA
Originally Posted by wecycle
I have the supplies for my 1979 door panels.
The car is yellow with brown interior.
I will probably move the yellow applique back about 6 inches to line up directly below the front edge of the window.
The brown is called "Cappuchino whisper and the yellow is nearly a perfect match for the paint.
[IMG]door panel[/IMG]
If the image attached does not come through will someone please clue me in as to how to make the pictures come through?
The car is yellow with brown interior.
I will probably move the yellow applique back about 6 inches to line up directly below the front edge of the window.
The brown is called "Cappuchino whisper and the yellow is nearly a perfect match for the paint.
[IMG]door panel[/IMG]
If the image attached does not come through will someone please clue me in as to how to make the pictures come through?
If you want to post an unedited hi-res pic, you'd need to find web hosting on another server like PhotoBucket, Yahoo! Photos, etc. Then use the IMG code to link to it, i.e. [IMG]www.heresmyhiresphoto.com[/IMG].

Too old to act my age
Joined: Feb 2005
Posts: 3,164
Likes: 0
From: Tulsa, Ok.
Ok, here are the pics I took of my door panels and seats. They are not very good, but the best I can do right now. Also, please overlook the needed cleaning, cause I haven't had the time to vacuum it out, too busy driving it 
BTW, they are actually red, not turd brown as they look. Crappy, cheepo digicam
BTW, they are actually red, not turd brown as they look. Crappy, cheepo digicam
Last edited by Rogue_Wulff; Jul 8, 2005 at 07:33 PM.

Full Member
Joined: Feb 2005
Posts: 64
Likes: 0
From: North Canton, Ohio
Dude, where the hell were you doing this work at? On the Moon? That's what it looks like to me. I'm about ready to see Neal Armstrong bouncing around in that ****** background. Less traffic on the moon though...
Senior Member
Joined: Dec 2004
Posts: 620
Likes: 1
From: Boone, NC
Originally Posted by daviddh85
Dude, where the hell were you doing this work at? On the Moon? That's what it looks like to me. I'm about ready to see Neal Armstrong bouncing around in that ****** background. Less traffic on the moon though...
