
How-to: Remove the moldings from your bumpers.

Thread Starter
Joined: Sep 2002
Posts: 2,932
Likes: 6
From: Surrounded by Sebey parts, Rhode Island
How-to: Remove the moldings from your bumpers.
Yep, another how-to.
The catch on this is, I'm posting it while I'm doing it. So, you're gonna see my ideas, and my ****-ups. I take NO responsibility if you try it and ruin your bumper. This is going to be my first time doing fiberglass, so hey, here goes nothin'.
Here's the basic gist: I am removing all my side trim. I love the looks of all the FBs I've seen without it, except for one thing... It doesn't look right with the moldings on the bumpers. Since the bumpers on my FB look like ****, I bought an extra set of bumper covers. I was going to use my old, shitty bumpers to try this, but it's snowing outside, so I thought, oh what the hell, I'll use the other ones.
I've been brainstorming how to do this for a while. I knew that if I cut out the moldings, I would need to fiberglass something in their place. Then, I started debating what I could put in there to give me the basic shape I would need, and I was going to use balsa wood hot glued into place. I knew I'd need something flat, yet somewhat flexible, to go along with the shape of the bumper.
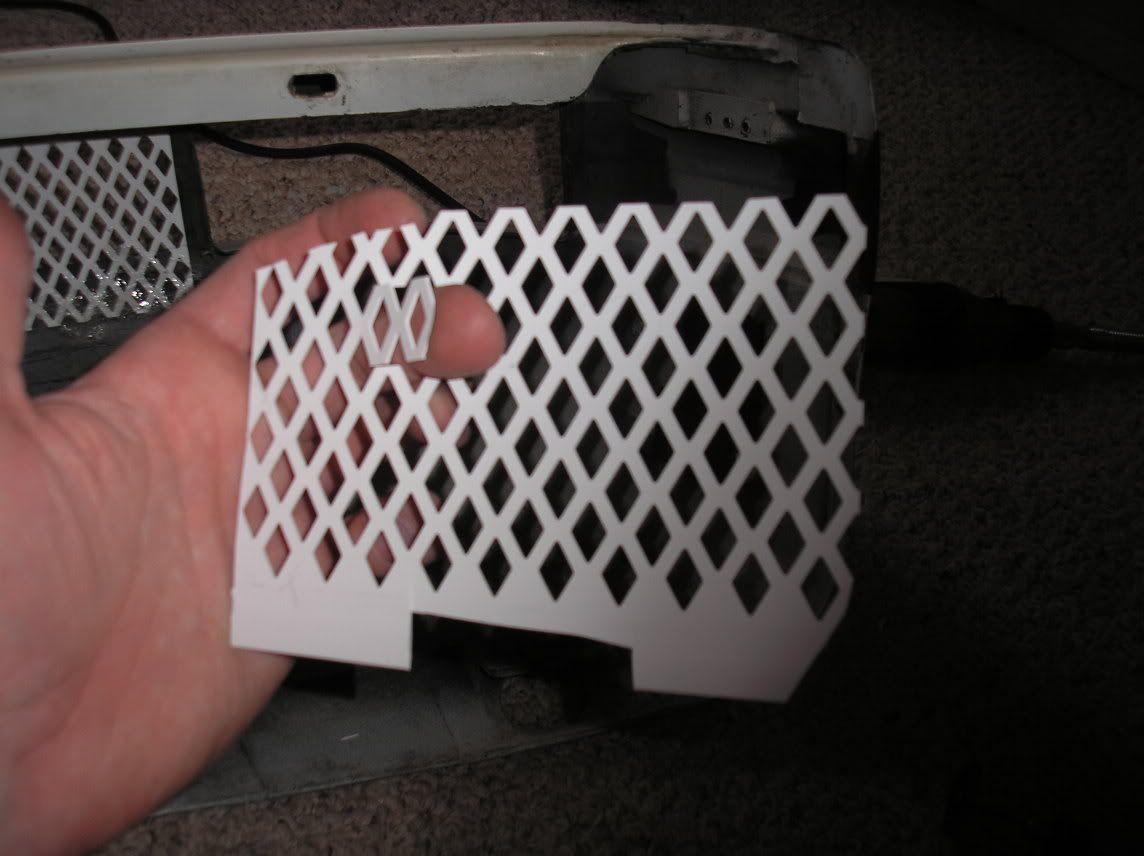
Walking through Home Depot, I found this:

It's a cover for a rain gutter. It's cheap (like $1.09 each or something), made of PVC, flexible, and cuts pretty easily with a pair of scissors.
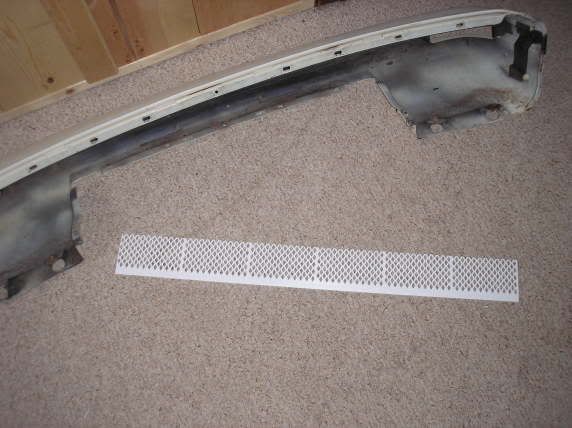
I cut it to the width I would need to glue it to the back of the bumper. One piece wasn't quite big enough to fit, so I had to cut a smaller, similar piece from another one. ($100T2's hindsight: When I do the rear bumper, I will divide it evenly so the seam is in the middle. If you try this, do it that way.)


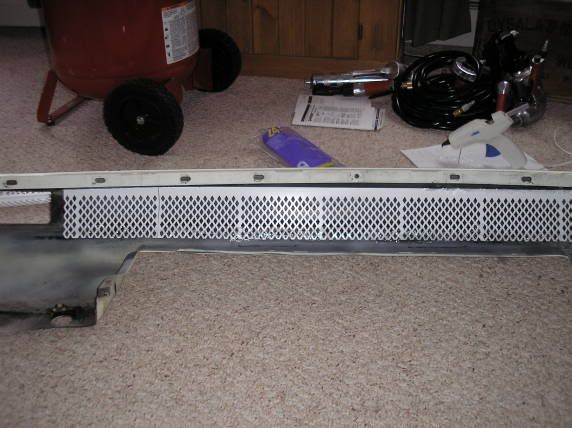
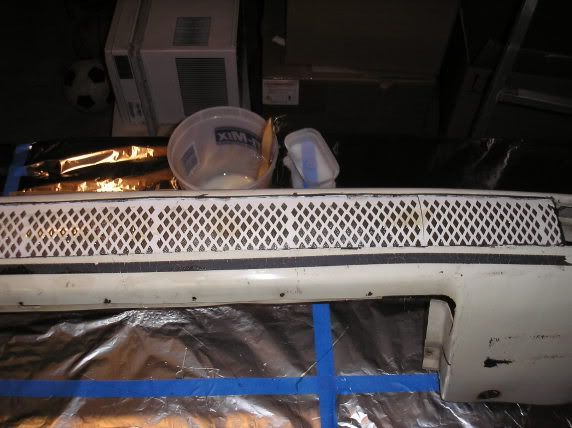
Then, I cleaned the ever loving **** out of the inside of the bumper. I used sandpaper while I did it, to help scuff up the surface so the glue would stick well. Next up, I glued it to the inside of the bumper. I did it before I cut the molding out, that way the bumper would maintain it's original shape. Here it is, glued into place. Notice I flipped it and put the solid part of the PVC piece at the top of the bumper. There is less space there for the glue to stick to, so I gave it as strong a bond as I could.
Then I busted out the dremel. I bought an attachment at Depot that goes on the dremel... It's a flexible hose with a smaller hand held piece at the end... Gives far better control and is easier to use. It's about $30, well worth the price.
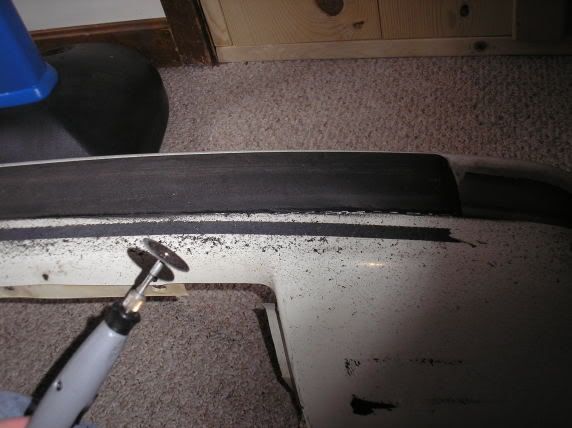
Cut carefully. You don't want to slice through the pieces you glued on the back. You're going to, no matter how careful you are, but you want to keep it to a minimum. Here you can see that I've done an OK job of it.
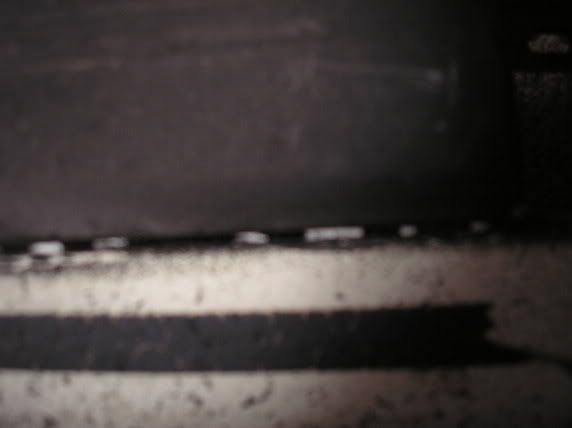
And, after about a half hour of very, very careful cutting, this is where we're at.

I went and washed off all the **** from the cutting. WEAR GOGGLES OR SAFETY GLASSES WHEN CUTTING!!! Next step is to do the sides, then I'm going to double check the glue and make sure everything is attached/shaped the way I want it. Then, I will spray adhesive on the cloth for the fiberglass. I bought a couple different kinds of fabric, which I will show you when I determine which will be the best to use.
More coming soon.
The catch on this is, I'm posting it while I'm doing it. So, you're gonna see my ideas, and my ****-ups. I take NO responsibility if you try it and ruin your bumper. This is going to be my first time doing fiberglass, so hey, here goes nothin'.
Here's the basic gist: I am removing all my side trim. I love the looks of all the FBs I've seen without it, except for one thing... It doesn't look right with the moldings on the bumpers. Since the bumpers on my FB look like ****, I bought an extra set of bumper covers. I was going to use my old, shitty bumpers to try this, but it's snowing outside, so I thought, oh what the hell, I'll use the other ones.
I've been brainstorming how to do this for a while. I knew that if I cut out the moldings, I would need to fiberglass something in their place. Then, I started debating what I could put in there to give me the basic shape I would need, and I was going to use balsa wood hot glued into place. I knew I'd need something flat, yet somewhat flexible, to go along with the shape of the bumper.
Walking through Home Depot, I found this:
It's a cover for a rain gutter. It's cheap (like $1.09 each or something), made of PVC, flexible, and cuts pretty easily with a pair of scissors.
I cut it to the width I would need to glue it to the back of the bumper. One piece wasn't quite big enough to fit, so I had to cut a smaller, similar piece from another one. ($100T2's hindsight: When I do the rear bumper, I will divide it evenly so the seam is in the middle. If you try this, do it that way.)
Then, I cleaned the ever loving **** out of the inside of the bumper. I used sandpaper while I did it, to help scuff up the surface so the glue would stick well. Next up, I glued it to the inside of the bumper. I did it before I cut the molding out, that way the bumper would maintain it's original shape. Here it is, glued into place. Notice I flipped it and put the solid part of the PVC piece at the top of the bumper. There is less space there for the glue to stick to, so I gave it as strong a bond as I could.
Then I busted out the dremel. I bought an attachment at Depot that goes on the dremel... It's a flexible hose with a smaller hand held piece at the end... Gives far better control and is easier to use. It's about $30, well worth the price.
Cut carefully. You don't want to slice through the pieces you glued on the back. You're going to, no matter how careful you are, but you want to keep it to a minimum. Here you can see that I've done an OK job of it.
And, after about a half hour of very, very careful cutting, this is where we're at.
I went and washed off all the **** from the cutting. WEAR GOGGLES OR SAFETY GLASSES WHEN CUTTING!!! Next step is to do the sides, then I'm going to double check the glue and make sure everything is attached/shaped the way I want it. Then, I will spray adhesive on the cloth for the fiberglass. I bought a couple different kinds of fabric, which I will show you when I determine which will be the best to use.
More coming soon.
Last edited by $100T2; Apr 5, 2006 at 02:08 PM.
Thread Starter
Joined: Sep 2002
Posts: 2,932
Likes: 6
From: Surrounded by Sebey parts, Rhode Island
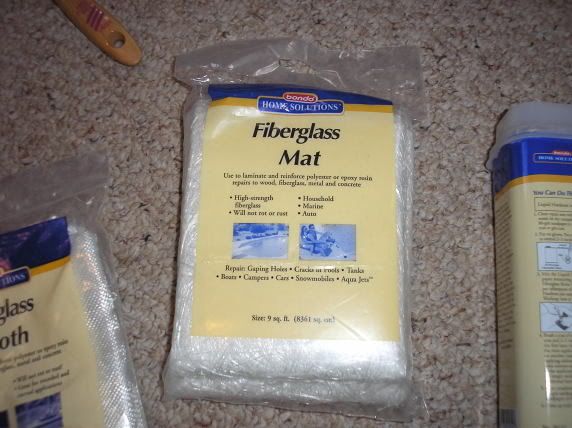
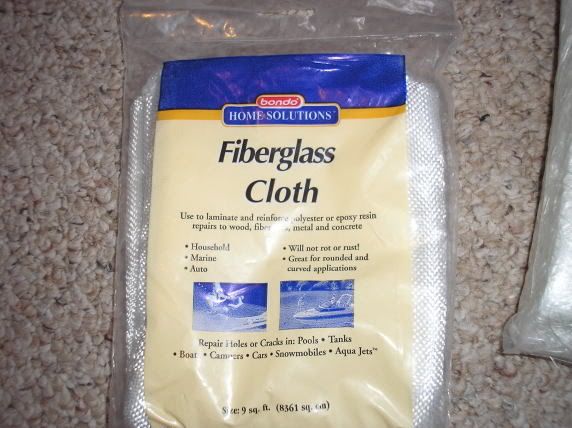
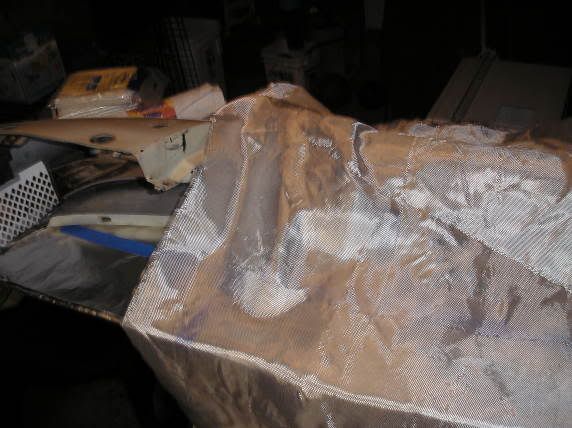
Alright, here's what I bought. This stuff was maybe $25 total at Home Depot. The yellow stuff is roofing repair fabric. I think I'm going to put that on the back of the PVC, just to kinda strengthen it up from the back of the bumper. The other stuff, "Fiberglass Mat" as seen in the pic, will go on the front. Then, it should hopefully be just a matter of following directions to lay the fiberglass. I'll take pics when I start that. For now, I'm going to go start on the sides of the bumper. I have to come up with a bit of a creative solution for that, I'll explain with the pics.

Nice start.
Here's my suggestions to make it easier. Since you are going to glass in the part you cut out, use the fiberglass resin to bond your rain gutter cover in place. That way you have matching bonding agents and the resin will hold better than the hot glue, no incompatability problems this way.
When you get ready to lay your 1st layer of glass over the gutter, trim your glass piece to fit first, then brush the resin on the gutter cover, lay the glass in and brush more resin into the glass until it becomes semi-translucent. First layer or two of glass should be chopped mat. It will build up the needed thickness quicker and is stronger than the woven finish glass.
When that first layer is set on the front side, go to the back side and cover the entire gutter piece, with at leat a 1" overlap on all sides with chopped mat. This will secure the bridge piece in place and strengthen it.
When you have the front gap built up flush to the rest of the cover and sanded, cover that part with a single layer of woven finish mat, overlapping it just short of the rounded curves at the top and bottom of the bumper. You may need to brush on another layer of resin to fill the voids in the finish mat, after the first one has set.
When everything is set up, use a filler designed for urethane bumpers to smooth everything out. It's more expensive, but more flexable than regular putty and will not crack or spider. If your putty is too thick and won't spread smoothly, get some putty honey, neat stuff.
The only reason I know how to do this is it was one of the mods I wanted to do on the widebody. I had doubts as to what to use for the backing, gutter guard is a great idea. I was going to use expanded metal lath, but that didn't seem workable.
for a good bond between the the cover and resin, scuff with nothing finer than 80 grit paper.
Good job, keep us posted.
Thread Starter
Joined: Sep 2002
Posts: 2,932
Likes: 6
From: Surrounded by Sebey parts, Rhode Island
Originally Posted by trochoid
Nice start.
Here's my suggestions to make it easier. Since you are going to glass in the part you cut out, use the fiberglass resin to bond your rain gutter cover in place. That way you have matching bonding agents and the resin will hold better than the hot glue, no incompatability problems this way.
Here's my suggestions to make it easier. Since you are going to glass in the part you cut out, use the fiberglass resin to bond your rain gutter cover in place. That way you have matching bonding agents and the resin will hold better than the hot glue, no incompatability problems this way.
Here's where I am now... In my last post, I mentioned a little problem I had to work out.
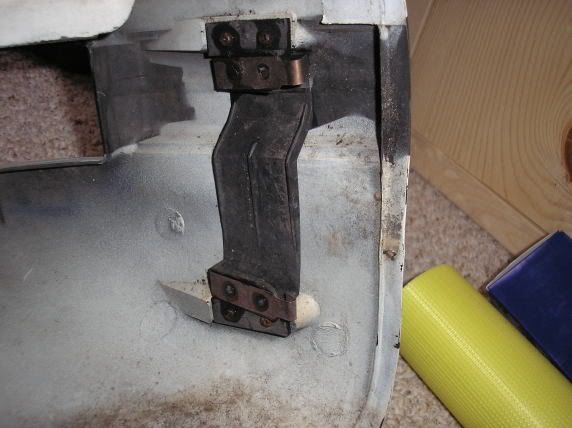
Notice that piece is fit to the molding. I took it out (it's held in by four screws):

Then I trimmed it. I reinstalled just the bottom piece, and put a bit of hot glue behind it to hold it to the bumper. I will fiberglass over it when I do the inner part of the bumper. You can see the dremel attachment I was talking about earlier.

I fit my piece of gutter to the bumper... Notice it requires a bit of shaping, as well as a notch in the center, where my finger is:
Then, I cut out the hole in the bumper. Notice I left the end intact. My rationale for that is, A) I don't want the bumper to sag, and B) I will be doing enough fiberglassing and sanding that it should be able to blend in nicely. Worst case, I cut it out later.

Now to glue the form into place, and then do the other side.


rotarless
Joined: Sep 2005
Posts: 120
Likes: 0
From: N/A
Are you cutting and sanding all this stuff on top of that carpet?? The fiberglass mat strands get all over the place and stick to stuff once you starting cutting it up so maybe you want to use the cloth you got and just do an extra layer...or get the vaccum ready.

Suicidal Death Missile
Joined: Mar 2004
Posts: 1,782
Likes: 0
From: Newport News, Virginia
Would it have been easier to clean the **** out of the inside of the bumper and scuff it up with 80 grit emory cloth, then lay some urethane epoxy compound to the inside of the bumper then cut/sand the mouldings off? I don't think the glass is going to stick to the urethane bumper all that well, but I'm interested in how well it does stick.
Trending Topics
Thread Starter
Joined: Sep 2002
Posts: 2,932
Likes: 6
From: Surrounded by Sebey parts, Rhode Island
Originally Posted by alxpril
Are you cutting and sanding all this stuff on top of that carpet?? The fiberglass mat strands get all over the place and stick to stuff once you starting cutting it up so maybe you want to use the cloth you got and just do an extra layer...or get the vaccum ready.

Thread Starter
Joined: Sep 2002
Posts: 2,932
Likes: 6
From: Surrounded by Sebey parts, Rhode Island
Originally Posted by lovintha7
Would it have been easier to clean the **** out of the inside of the bumper and scuff it up with 80 grit emory cloth, then lay some urethane epoxy compound to the inside of the bumper then cut/sand the mouldings off? I don't think the glass is going to stick to the urethane bumper all that well, but I'm interested in how well it does stick.

On the curves at the ends, remove the bracket. The fake part of the rub strip, coat with vasoline or aluminum foil on the part that will get cut out. Without cutting, glass it in from the back. Once the glass is set, then trim the rub strip and sand down the glass that has filled the bump out. This way you will retain the original shape and not cut out too much.
Thread Starter
Joined: Sep 2002
Posts: 2,932
Likes: 6
From: Surrounded by Sebey parts, Rhode Island
Sorry, I got nothing else done last night... Ended up down in the basement getting a start on spring cleaning. I have FB parts all over the place, and then there's 11 years worth of crap down there. I might get to it a bit tomorrow, we'll see.
Thread Starter
Joined: Sep 2002
Posts: 2,932
Likes: 6
From: Surrounded by Sebey parts, Rhode Island
Ok, well, warning: This **** STINKS. Definitely do it OUTSIDE. I did it in my basement, and wow, it's noxious. The only reason I did it indoors was because it's raining. Bad idea. Wait until a sunny day and do it outside.
Thread Starter
Joined: Sep 2002
Posts: 2,932
Likes: 6
From: Surrounded by Sebey parts, Rhode Island
Alright, so this is the basic set-up. You need a nice, big work area. I covered two pieces of MDF with aluminum foil so that clean up would be easy.

Get all your **** together.
I cut a piece of fiberglass cloth to fit.

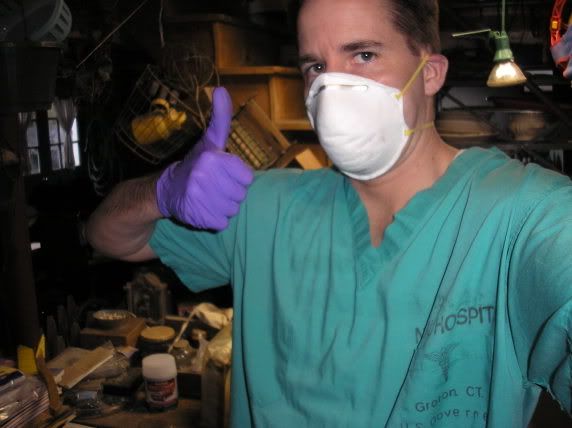
This is how you get down. The mask is 110% necessary, as are the gloves. I went through at least 15 pairs of gloves, maybe more. Luckily for me, I own an assload of scrubs... Wear something you don't give a ******* **** about, because odds are, you're gonna ruin it. Oh yeah, p-choppers, be clever, ok? I'm sure this pic will end up with "I'd hit it" or some ****, but let's try to be respectful.
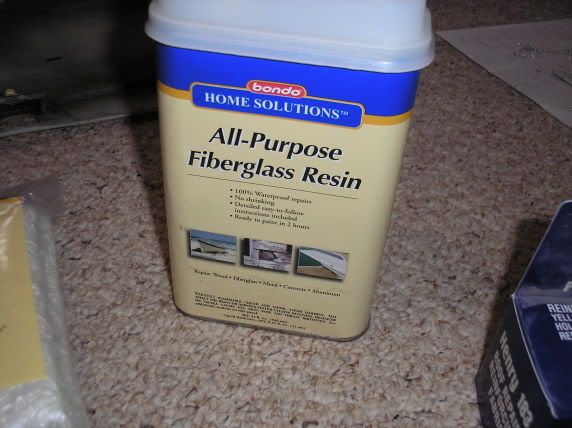
I mixed up the resin and hardener according to the directions on the back, put some down on the inside of the bumper and on the rain guards, then put down the cloth. After that, I put more resin on it until it was transparent, then put down some mat. Then, more resin, and another piece of cloth. You have to work fast... The working time on the resin is 10-15 minutes after you add hardener. I made up just two ounces at first (use a measuring cup that you don't give a **** about), because I wasn't sure how fast I'd go through it. The answer? You go through it FAST. I made 2 oz, then 6 oz, then 2 oz, then 8 oz.
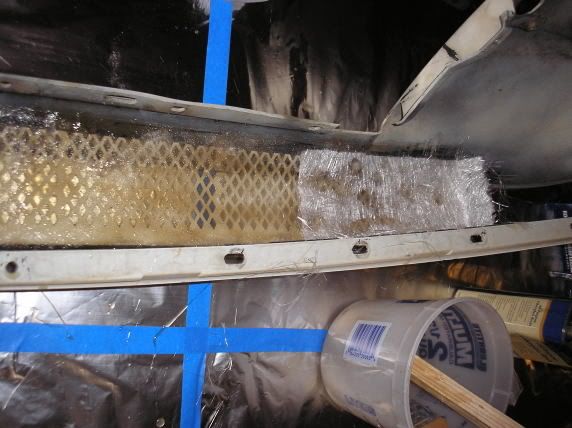
OK, I just told you I made 2 then 6... That was for the back. Then, I flipped the bumper over and coated the other side with resin. Then, I placed mat, resin, mat, etc... Got it pretty close to the level of the actual bumper, then covered the new glass and part of the bumper with mat. Coat it with resin, then you're done for now. I'm letting it cure until tomorrow afternoon, then I will sand it down a bit, fill it in with bondo, let that cure, sand it down, and primer it. Voila.
Get all your **** together.
I cut a piece of fiberglass cloth to fit.
This is how you get down. The mask is 110% necessary, as are the gloves. I went through at least 15 pairs of gloves, maybe more. Luckily for me, I own an assload of scrubs... Wear something you don't give a ******* **** about, because odds are, you're gonna ruin it. Oh yeah, p-choppers, be clever, ok? I'm sure this pic will end up with "I'd hit it" or some ****, but let's try to be respectful.
I mixed up the resin and hardener according to the directions on the back, put some down on the inside of the bumper and on the rain guards, then put down the cloth. After that, I put more resin on it until it was transparent, then put down some mat. Then, more resin, and another piece of cloth. You have to work fast... The working time on the resin is 10-15 minutes after you add hardener. I made up just two ounces at first (use a measuring cup that you don't give a **** about), because I wasn't sure how fast I'd go through it. The answer? You go through it FAST. I made 2 oz, then 6 oz, then 2 oz, then 8 oz.
OK, I just told you I made 2 then 6... That was for the back. Then, I flipped the bumper over and coated the other side with resin. Then, I placed mat, resin, mat, etc... Got it pretty close to the level of the actual bumper, then covered the new glass and part of the bumper with mat. Coat it with resin, then you're done for now. I'm letting it cure until tomorrow afternoon, then I will sand it down a bit, fill it in with bondo, let that cure, sand it down, and primer it. Voila.
Last edited by $100T2; Apr 23, 2006 at 04:27 PM.
Senior Member
Joined: Oct 2002
Posts: 596
Likes: 0
From: Hampton, VA
Nice work man, I've always been kinda curious as to how the whole fiberglassing thing works, and the $ involved. It looks so much easier than I imagined it. Again, nice work, I'll be keeping an eye on the thread to see how it turns out when you're done!
Thread Starter
Joined: Sep 2002
Posts: 2,932
Likes: 6
From: Surrounded by Sebey parts, Rhode Island
Originally Posted by mr_ouija
Nice work man, I've always been kinda curious as to how the whole fiberglassing thing works, and the $ involved. It looks so much easier than I imagined it. Again, nice work, I'll be keeping an eye on the thread to see how it turns out when you're done!
Of course, it's going to be really interesting when I start making my front and rear spoilers...
Next up will be a special subwoofer enclosure.
