
help removing some screws - GSL-SE

help removing some screws - GSL-SE
i'm trying to remove the plates from my TB but they are stuck on there pretty good...i had it soaking in pb blaster for 2 days and still they don't budge...anyone have any idea's on what i can do?
here's a pic of the screws i'm talking about...
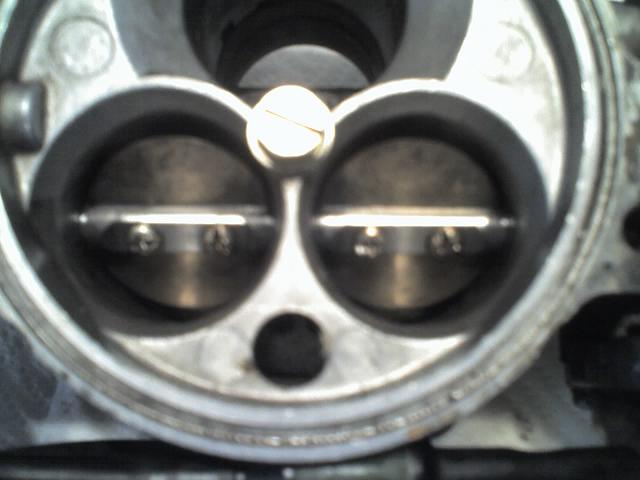
sorry its so blurry...
here's a pic of the screws i'm talking about...
sorry its so blurry...

It Runs!
Joined: Aug 2003
Posts: 955
Likes: 2
From: PA
Get a pair of vise grips, and get them in there as tight as you can. Try a few times, and dont twist it if it's going to strip. Eventually enough pressure will do. Also you can try using screw driver bits on a ratchet. If you strip them, the just grind them off and be on your way. You'll get it, it wasnt really hard, just use some muscle.


Originally Posted by John64
Hector, what the hell are you doing now? Did you go by more tools or you still using your son's set?
Originally Posted by ArmyOfOne
If you cant get them in there then just use a small drill bit big enough to take the head off.
Originally Posted by Anex 570
Find some needle nose vise grips or mini vise grips. Also try the phillips head bit on a ratchet, you'll be suprised how much torque you can use with it.
Last edited by bizarro; Jul 30, 2005 at 12:56 PM.
Trending Topics
Rotary Freak
Joined: Sep 2002
Posts: 2,815
Likes: 0
From: SF BayArea
I would NEVER try to torque it out like that because you take a chance of causing a forced rupture on the screw shaft which will leave you with a worse problem than before. Better is to use something with a little hammer blow impact like the DeWalt DW052 impact driver. It costs about $200 but you can get cheaper impact drivers at Home depot, Autostores, etc. They're pretty common now, so you can probably rent one someplace too (they're great for running a series of woodscrews in carpentry). The DW052 is small and compact, uses a 12v. battery and puts out about 1000 in-lbs of torque which is more than enough for small screws. You should also use a spring-loaded collar over a flat-blade so the blade doesn't slide off the head and gall things. DeWalt sells a little kit of these for about $10: very useful for any application involving old flat-blade screws.
Impact drivers make a series of little hammer raps which works better than a static force application.. Practice with some woodscrews in a 2x4 first since most people use too much trigger the first time out and ruin their work. It's amazing what you can drive with that little thing. I've driven lag screws without pilot holes all the way thru. I've saved a lot of guys time at the JY by pulling out the little DW052 with a hex to 3/8 adapter so they can loosen up a tight old bolt or nut they've been cursing at.
B
Airflow is my life
Joined: Aug 2002
Posts: 6,736
Likes: 2
From: Orlando, Fl
The screws are loctited in. You need to use an impact gun and a new phillips apex tip. And use a good quality tip or you run the risk of stripping the head completely. Whats up? I thought we were gonna swap entire assemblies to iron out this idle problem?
i want to swap out the plates and the bars holding them with the one you sent to see if it irons out the bouncing idle...
i got the top one which i think is the one causing the problem...i'll leave the 2 bottom ones in for now...now i'm reassembling...sheesh...what a jigsaw puzzle...do you or anyone have pix of the linkages?
thanks
i got the top one which i think is the one causing the problem...i'll leave the 2 bottom ones in for now...now i'm reassembling...sheesh...what a jigsaw puzzle...do you or anyone have pix of the linkages?
thanks
Airflow is my life
Joined: Aug 2002
Posts: 6,736
Likes: 2
From: Orlando, Fl
Search, there was a thread where I aske for pics of the same thing cause I lost pics of yours. 
I thought you were gonna swap just the big assemblies? Like the base/throttle body. You shouldnt have to remove the shafts. And definately dont try to remove the shafts on the one I built!
EDIT, found it. Linkie
https://www.rx7club.com/showthread.p...ghlight=owners
I thought you were gonna swap just the big assemblies? Like the base/throttle body.
You shouldnt have to remove the shafts. And definately dont try to remove the shafts on the one I built! EDIT, found it. Linkie
https://www.rx7club.com/showthread.p...ghlight=owners
Originally Posted by Rx7carl
Search, there was a thread where I aske for pics of the same thing cause I lost pics of yours.
I thought you were gonna swap just the big assemblies? Like the base/throttle body. You shouldnt have to remove the shafts. And definately dont try to remove the shafts on the one I built!
EDIT, found it. Linkie
https://www.rx7club.com/showthread.p...ghlight=owners
I thought you were gonna swap just the big assemblies? Like the base/throttle body.
You shouldnt have to remove the shafts. And definately dont try to remove the shafts on the one I built! EDIT, found it. Linkie
https://www.rx7club.com/showthread.p...ghlight=owners
oh man...i didn't know i shouldn't have removed the shafts!!!
do you have AIM? my screen name is heqtorius or if you have a number i can call you...
Airflow is my life
Joined: Aug 2002
Posts: 6,736
Likes: 2
From: Orlando, Fl
Originally Posted by bizarro
yeah...i looked at those pix and the angles prevent me from seeing what is needed...
oh man...i didn't know i shouldn't have removed the shafts!!! do you have AIM? my screen name is heqtorius or if you have a number i can call you...
oh man...i didn't know i shouldn't have removed the shafts!!!
do you have AIM? my screen name is heqtorius or if you have a number i can call you...Well if you got em out than its ok. They were loctited in with some hi temp stuff. I was just concerned you would strip the screw heads.
well...i got it back together, don't have any locktite so i'll be heading to the store tomorrow 
just for good measure can someone take some detailed shots of their linkages so that i can compare and make sure its assembled right?
thanx!
just for good measure can someone take some detailed shots of their linkages so that i can compare and make sure its assembled right?
thanx!

Thread
Thread Starter
Forum
Replies
Last Post
Jeff20B
1st Generation Specific (1979-1985)
73
Sep 16, 2018 07:16 PM
risingsunroof82
1st Generation Specific (1979-1985)
8
Sep 7, 2015 01:11 PM