
Excessive oil inside rotor housings

Thread Starter
love the braaaap
Joined: Jul 2003
Posts: 3,771
Likes: 5
From: Bognor, Ontario
Excessive oil inside rotor housings
Well some may remember I posted earlier this summer about my car blowing blue smoke on deceleration above 5000 rpm and acting like I fogged the engine after sitting for only a few days. I got the engine removed today and got a chance to look into the exhaust ports. The car sat for about 3 weeks without being run before the engine was removed.
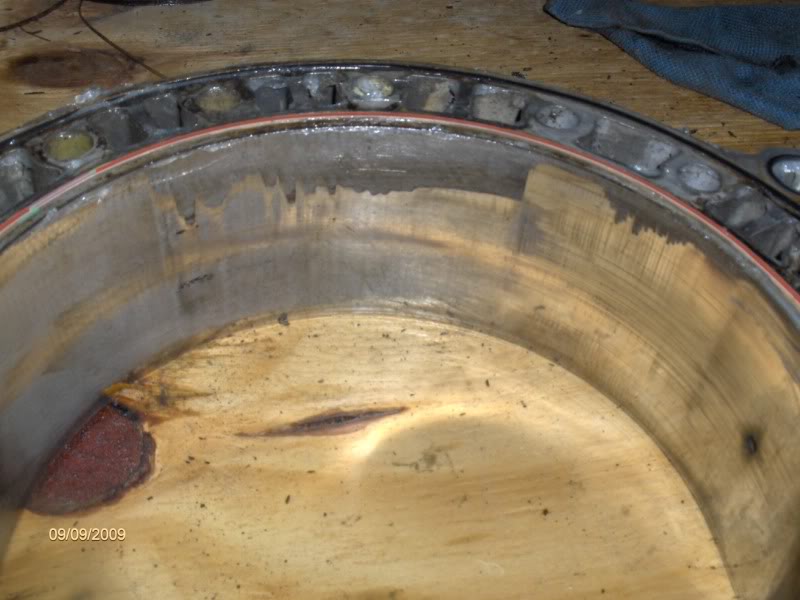
I got a bit concerned when I saw how much oil the rotor was carrying up to the exhaust port when I rotated it by hand. Can bad oil seals on the rotor really let this much oil past while sitting? I don't know of any other areas that have oil flowing right by the rotor housings. I have attached a picture of the rear exhaust port, hard to see it but that black spot at the bottom left of the port is oil. What I could see of the rotors and apex seals there was a decent amount of oil in there.
I guess the question is, should I be concerned about this? Is it possible the problem is worse than a soft seal kit can fix?
yes and no.
bad oil seals will allow the oil in the rotor to drain into the CC, it isn't uncommon to see pools of oil in there on old tired engines. be more concerned about the condition of the rotor housings upon teardown.
bad oil seals will allow the oil in the rotor to drain into the CC, it isn't uncommon to see pools of oil in there on old tired engines. be more concerned about the condition of the rotor housings upon teardown.
Thread Starter
love the braaaap
Joined: Jul 2003
Posts: 3,771
Likes: 5
From: Bognor, Ontario
I will closely inspect the housings, though I don't suspect a problem since the engine was far from tired I think. Physically it is old and many seals are dried out and leaking but showed no sign of power loss at all and is not a real high mileage unit. It made good, smooth power all the way to 7000 rpm, but I know that isn't always an indicator of good housings.

acdelco d1906 Nkg 49034


Joined: Aug 2012
Posts: 1,166
Likes: 97
From: huntsville
rotarypower 85, my rotary seemed to suddenly gain 10 HP right on the day it died. And it never gave me a hint that it was tired at all , all the way up to its death. What happened was apex seal failure, also Atkins said that both rotors were unsalvageable.
Thread Starter
love the braaaap
Joined: Jul 2003
Posts: 3,771
Likes: 5
From: Bognor, Ontario
Oh yes I know all about the mysterious gain in power just before a rotary dies. Thats what happened on my previous 82 GSL, had a gain in power for about a day before a rear apex seal gave out on startup taking the rotor and rotor housing with it. I'm pretty sure I was having detonation problems with that engine though due to an unknown lean condition only on the rear rotor and me being young and dumb pushing the timing a little too far advanced. Made good power but I am pretty sure now that it had detonation.
Had a better look into the exhaust ports and it looks like the housing are decent, from what I could see. What I could see looked no worse, possibly better, than the housings that ray green has in his recent thread.
Had a better look into the exhaust ports and it looks like the housing are decent, from what I could see. What I could see looked no worse, possibly better, than the housings that ray green has in his recent thread.
 We're here to help.
Trending Topics
I tore apart a 12A that had the leak of death (dowel pin 20 cent o ring) but ran like a champ just like you describe, pulling smooth all the way to redline, easy start, etc, however... the flaking on the rotor housings wound up being pretty bad. I think I might have a pic of it still...
Full Member
Joined: Nov 2011
Posts: 242
Likes: 1
From: Sacramento
Yes, I've seen it so bad...
Yes, I've seen it so bad where the moron owner ran it out of oil and stopped just before it seized. When we went to get the car during the day, it smoked so much the fire department came. We ended up moving the car at night.
When we tore down the engine, the rotor oil seals were toast but the worst part were the end housings, they were beyond lapping.
When we tore down the engine, the rotor oil seals were toast but the worst part were the end housings, they were beyond lapping.
Thread Starter
love the braaaap
Joined: Jul 2003
Posts: 3,771
Likes: 5
From: Bognor, Ontario
I am planning on a rebuild, but I am on a budget as well. All I am really looking to do is solve the oil consumption problems this engine has so likely won't get into apex or even side seals. I have my eye on the Atkins kit A, seems to have everything I need I think. Its hard for me to know for sure since this will be the first time I will rebuild a rotary, although I have disassembled 3 complete engines.
I will know more about the internal condition of this engine in the new year. Doesn't look like I will have much time to disassemble it until then between work and Christmas. It will take some time I suspect as I plan to be diligent in organizing the seals so they go back in the same spots but be able to clean the rotors as well. Hope all is good as I would like to keep all the original parts since it does seem to be original non EGR north american spec 79 12A. R5 front, intermediate and rear plates on this beast.
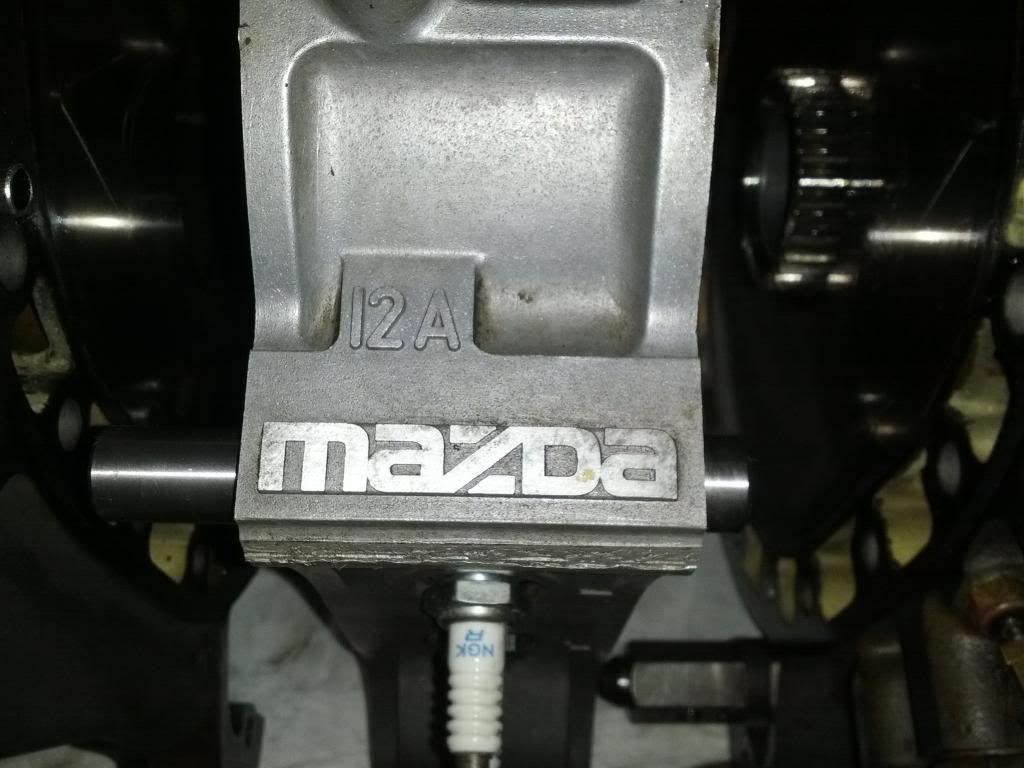
I will know more about the internal condition of this engine in the new year. Doesn't look like I will have much time to disassemble it until then between work and Christmas. It will take some time I suspect as I plan to be diligent in organizing the seals so they go back in the same spots but be able to clean the rotors as well. Hope all is good as I would like to keep all the original parts since it does seem to be original non EGR north american spec 79 12A. R5 front, intermediate and rear plates on this beast.

Joined: Mar 2001
Posts: 31,857
Likes: 3,243
From: https://www2.mazda.com/en/100th/
I tore apart a 12A that had the leak of death (dowel pin 20 cent o ring) but ran like a champ just like you describe, pulling smooth all the way to redline, easy start, etc, however... the flaking on the rotor housings wound up being pretty bad. I think I might have a pic of it still...
i think what happened with those is that they were mildly overheated for a long time, and this sounds silly typed, but i think it fries the orings and causes the chrome to flake off. every leaky dowel pin 12A car i've had (5 i think, all of them), has needed a radiator too.
Thread Starter
love the braaaap
Joined: Jul 2003
Posts: 3,771
Likes: 5
From: Bognor, Ontario
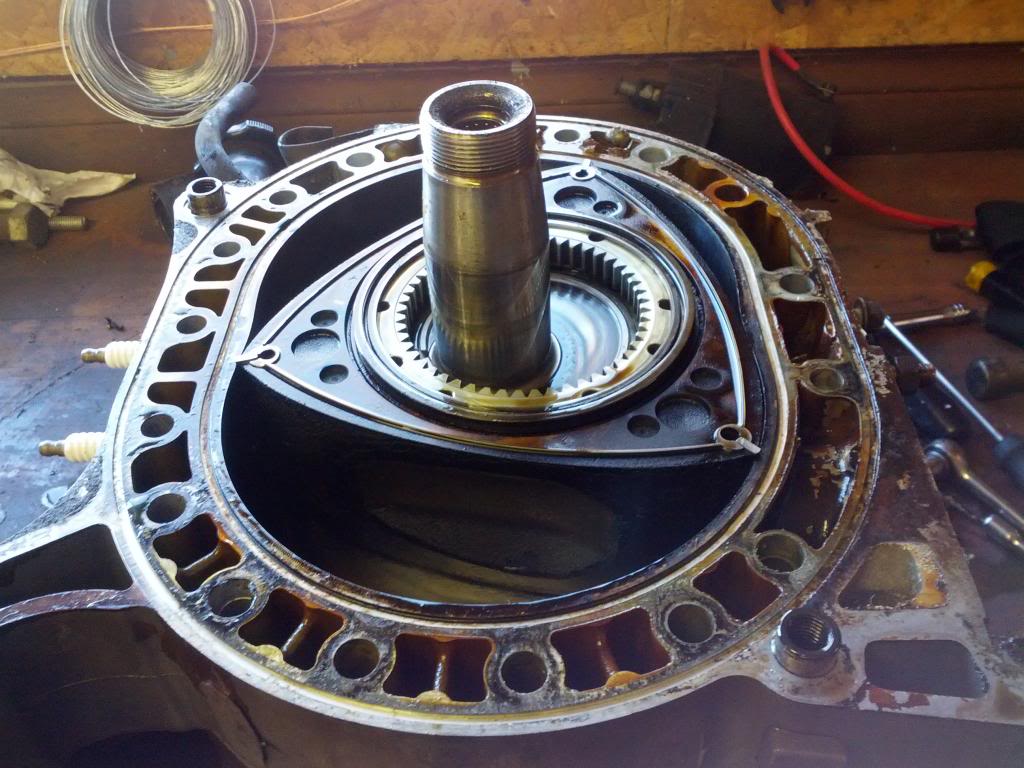
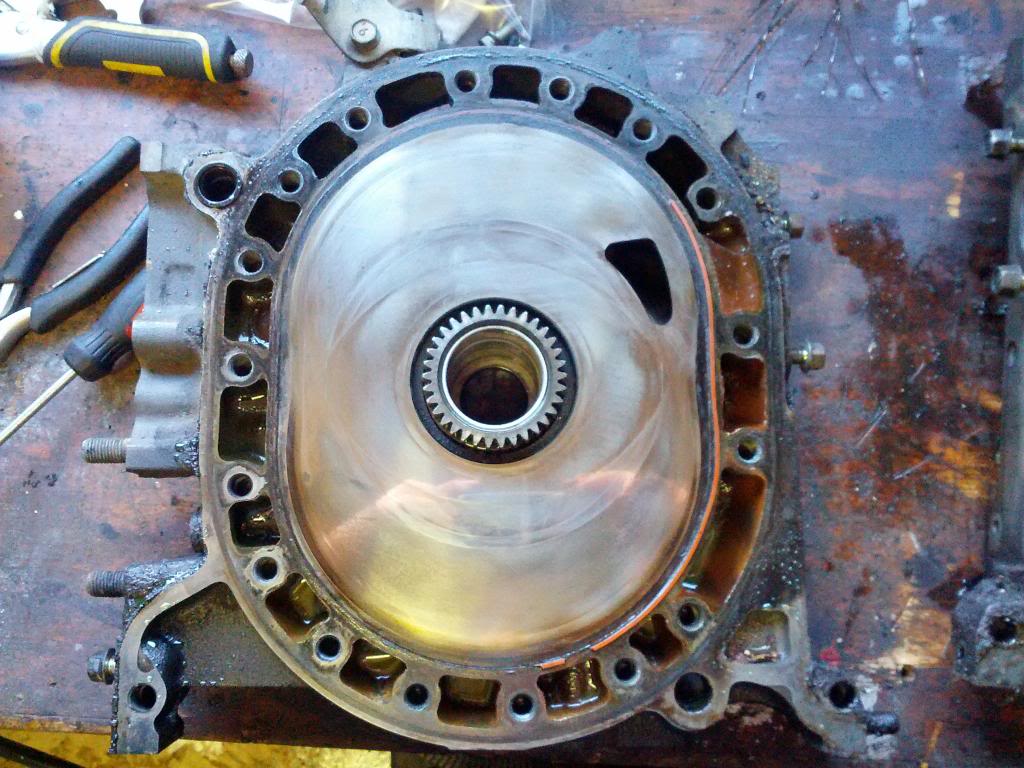
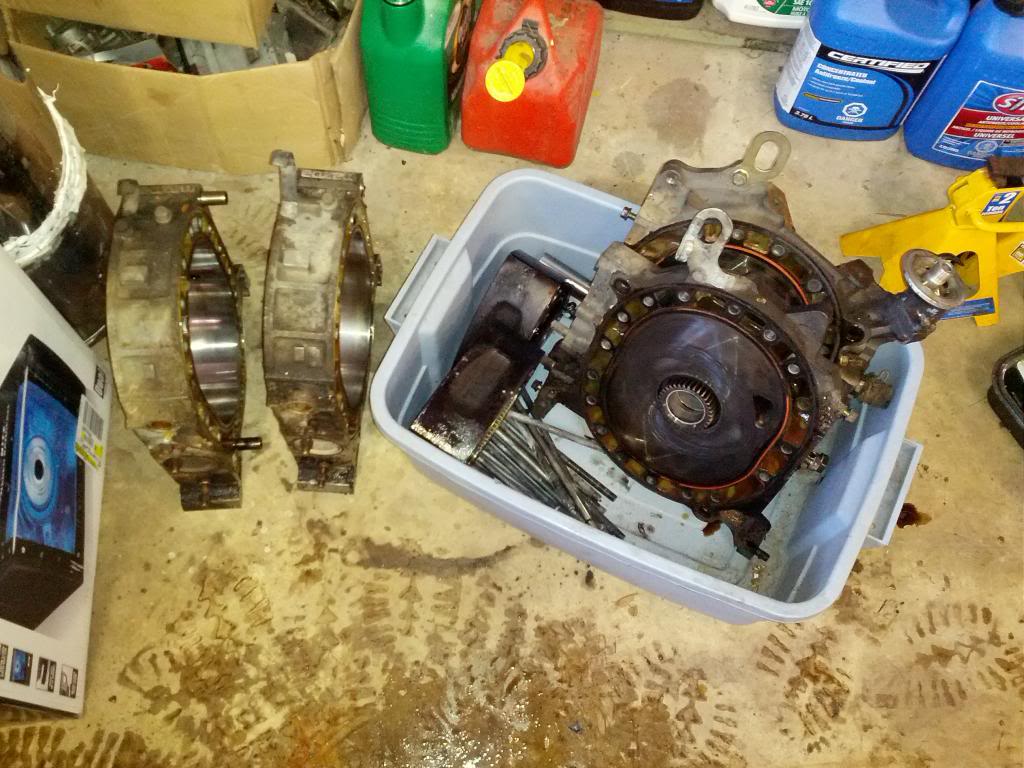
Well I finally got my engine tore apart and I am quite pleased to say I have no excessive flaking of chrome on the housings! Nothing at all in the combustion area, just a bit at the edge for about 3-4 inches along the bottom of the housings. Both show similar flaking, but from my reading, these would be considered excellent housings these days. Besides the slight flaking, they seem to be near perfect.
Onto the other parts of the engine. I am pretty sure all the oil control seal o-rings are toast as they literally fell out when I lifted the rotors off the housings. Overall the engine looks nice inside, good coating of oil on almost everything and a bit of carbon buildup. Looked like I had fogged the engine before storage there was so much oil on the housings and plates. Side and intermediate plates show what I think is usual wear for an engine of this mileage but no odd wear anywhere. I need to get out the straight edge and check for warpage yet, but I don't suspect any.
My new concern is with seal wear, and this is where the questions start. I measured up most of the seals and wear seems to be quite even across the board. Most hard seals are within 0.05 mm of spec according to the FSM on height, even closer on width, and very little variation at multiple locations on the seals. This is with the exception of the apex seals which show the most wear. They are wore fairly even all around, but the height is far below original spec at 7.4-7.5mm. Original according to FSM is 8.5mm. This is considerable in my books and I think it warrants replacement. Width however is within .1mm of 3mm. Would these even be reusable? If so, how long could they last before wearing out or causing catastrophic damage?
Another thing of note is that all the corner seal plugs were none existent. I am unsure if they were even installed from the factory on 12a's, although I would assume they would be since they seem to be a bit of a critical sealing item, at least to me. Its possible this engine was broke open before for a rebuild and someone didn't install the plugs. I suspect this may be the case since the oil pan had no fiber gasket, only RTV to seal it up.
I think my plan is to reuse all the hard seals except the apex seals since they are all very close to original spec still. Apex seals will be standard seals from Atkins I think, unless someone has another good option. Rest of the kit will be kit A from Atkins. I have heard good things about their parts in general and their price is good.
Thread Starter
love the braaaap
Joined: Jul 2003
Posts: 3,771
Likes: 5
From: Bognor, Ontario
I'll just continue in this thread with my rebuild. Just going to include general information for someone to do the same kinda budget build as I am I think.
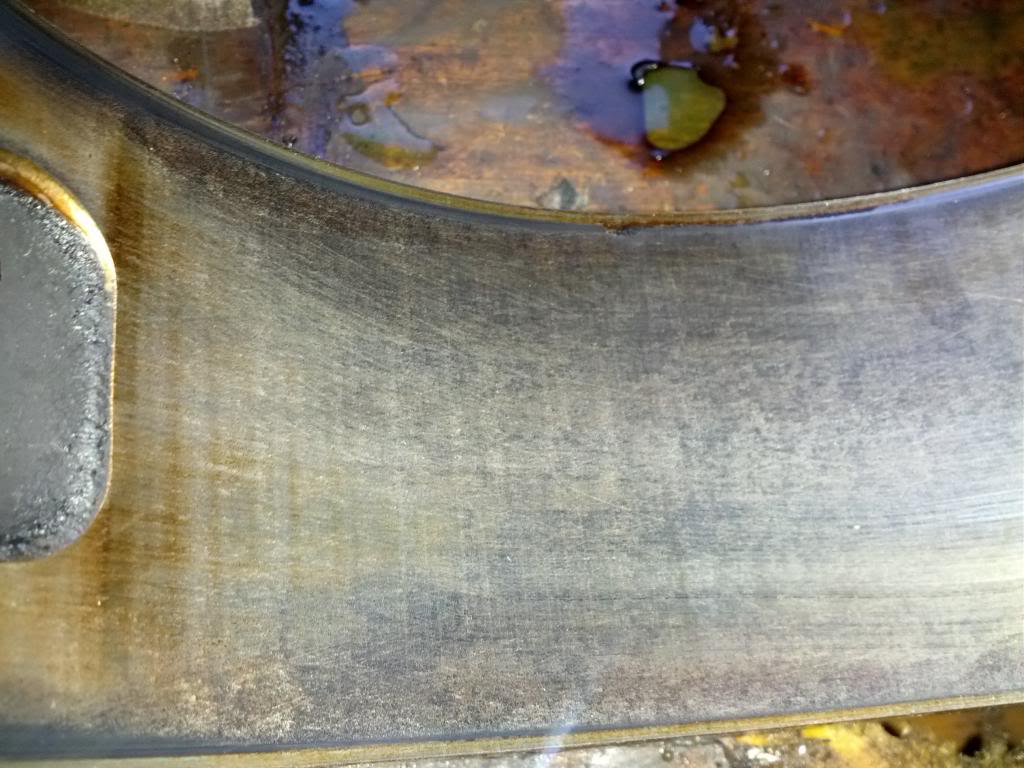
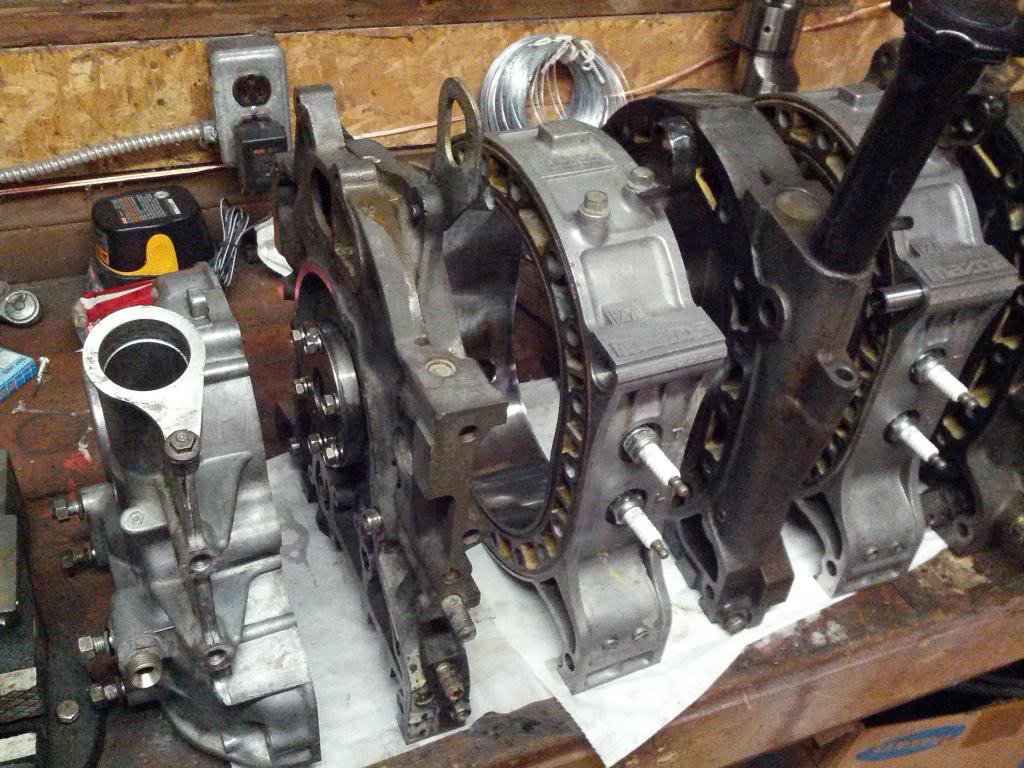
I have no new information really since my earlier post today, but I will add some pics of the irons and housings for all to see. Chrome flaking on one housing was a little closer to the combustion side than I thought originally but I don't believe it is too close. What you see is the full extent of the flaking though.
I think I have decided to get a set of apex seals from Atkins for this rebuild. I don't want to be doing it any time soon again, as much fun as it has been thus far, and Jeff20B makes a good point about them in Ray's thread.
I have all the rotor parts organized so I can re-install everything exactly where it came from, so I hope it all goes back together well. With new apex seals, I think I could end up with a virtually new engine. Next step in the process, cleaning all the dirt and grime off all the parts and preparing for reassembly, along with going through my 12A parts bin to hopefully find the 81-82 front counterweight I think I still have from when I tore down the engine from my 82. Flywheel is unfortunately long gone.
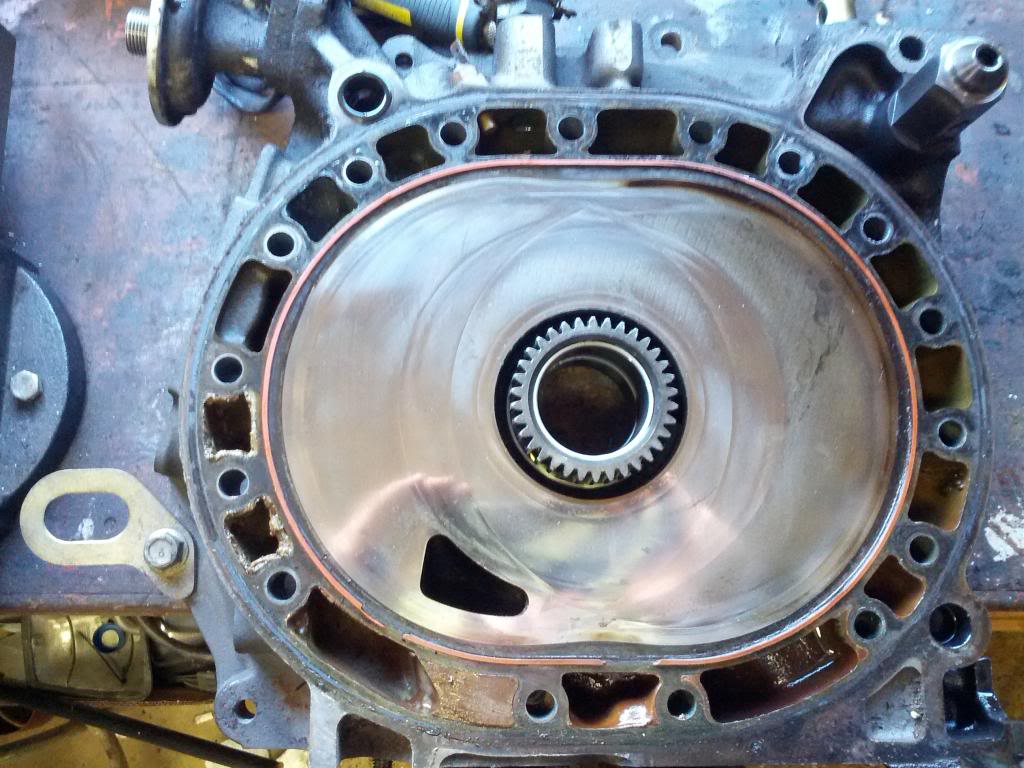
Rear Plate.
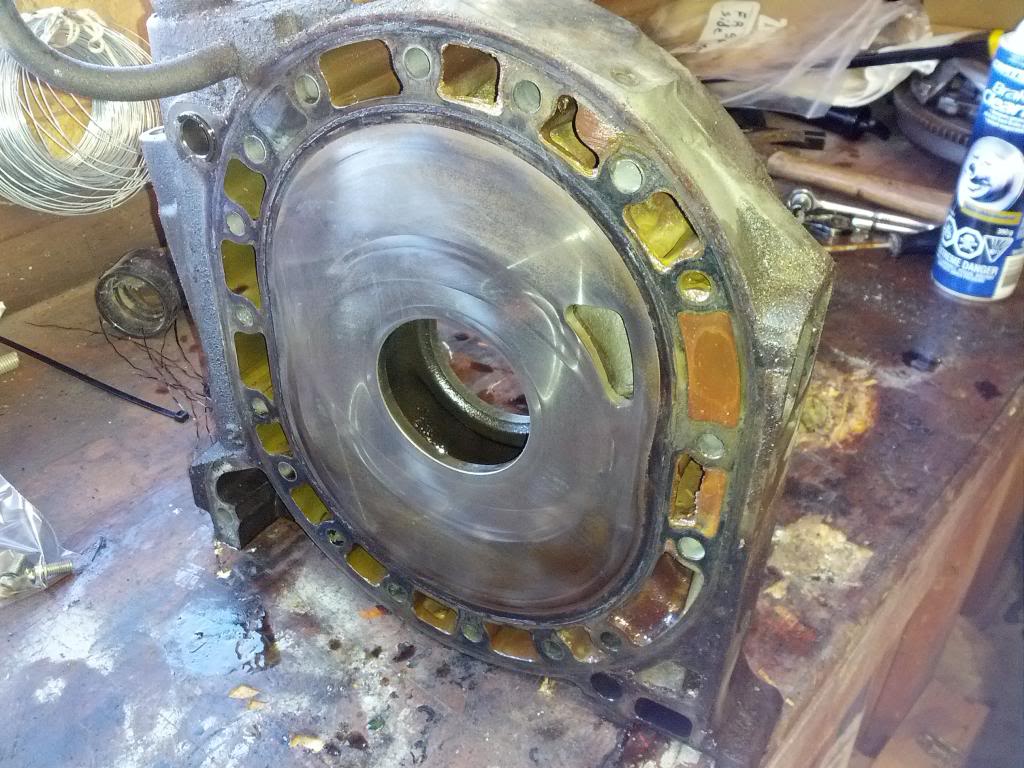
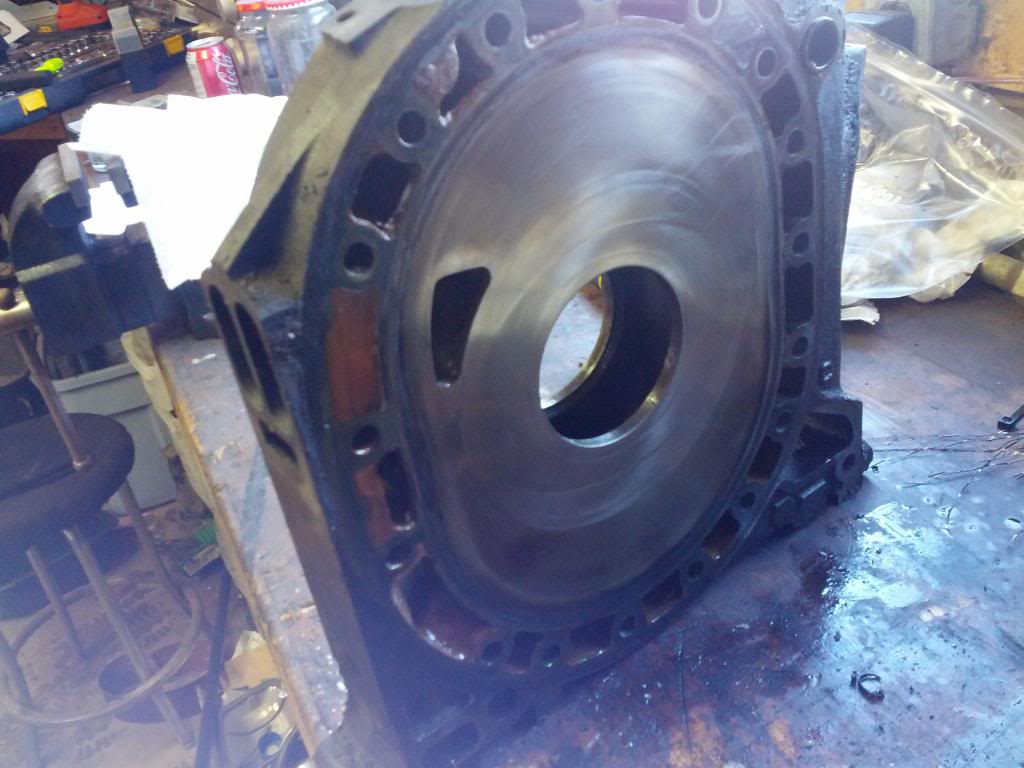
Rear rotor housing, worst of the chrome flaking.
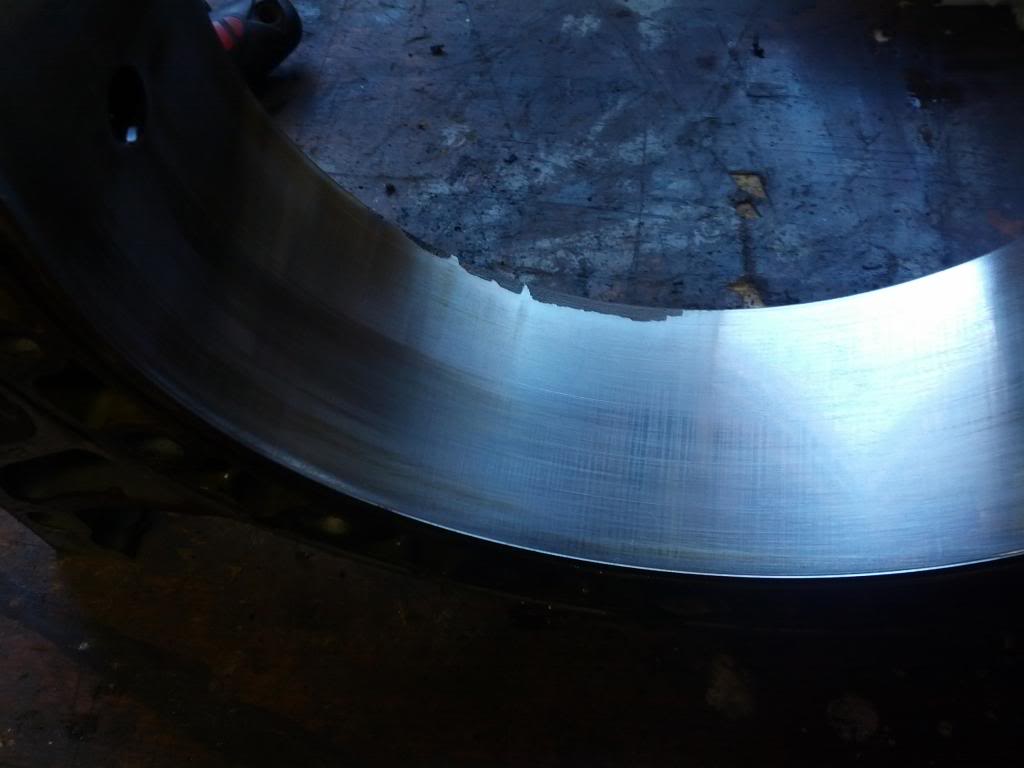
Exhaust port side of rear housing.

Front rotor housing, very little chrome flaking, some slight discolouring around the edges but no groves or scratches that can be felt.
Front plate.
Intermediate plate, rear side.
Intermediate plate, front side
I have no new information really since my earlier post today, but I will add some pics of the irons and housings for all to see. Chrome flaking on one housing was a little closer to the combustion side than I thought originally but I don't believe it is too close. What you see is the full extent of the flaking though.
I think I have decided to get a set of apex seals from Atkins for this rebuild. I don't want to be doing it any time soon again, as much fun as it has been thus far, and Jeff20B makes a good point about them in Ray's thread.
I have all the rotor parts organized so I can re-install everything exactly where it came from, so I hope it all goes back together well. With new apex seals, I think I could end up with a virtually new engine. Next step in the process, cleaning all the dirt and grime off all the parts and preparing for reassembly, along with going through my 12A parts bin to hopefully find the 81-82 front counterweight I think I still have from when I tore down the engine from my 82. Flywheel is unfortunately long gone.
Rear Plate.
Rear rotor housing, worst of the chrome flaking.
Exhaust port side of rear housing.
Front rotor housing, very little chrome flaking, some slight discolouring around the edges but no groves or scratches that can be felt.
Front plate.
Intermediate plate, rear side.
Intermediate plate, front side

Wow!
We're at about the same place with teardowns. Funny. I tore down an extra 80 engine yesterday that I grabbed out of the junkyard. I've been following Ray's thread too, and I agree with you and the majority on reusing worn apex seals.
Good luck to you! I'll definitely be watching your progress.
Good luck to you! I'll definitely be watching your progress.
Junior Member
Joined: Nov 2007
Posts: 13
Likes: 0
From: Barrie, Ontario
It is with a bit of sadness I sit in the Yukon seeing my old engine torn down....but I am still happy someone who cares about it owns it...
Last edited by Cosmo77; Feb 11, 2013 at 11:00 PM. Reason: spelling
Thread Starter
love the braaaap
Joined: Jul 2003
Posts: 3,771
Likes: 5
From: Bognor, Ontario
Not to worry Cosmo, your old girl is in good hands. I may have made some mistakes with my first RX, but this one will not see the same fate if I have anything to say about it. Its redemption time!
Thread Starter
love the braaaap
Joined: Jul 2003
Posts: 3,771
Likes: 5
From: Bognor, Ontario
Well time for an update I think. The engine is all cleaned up now and the parts painted. Decided on getting new rotor and stat gear bearings, atkins apex seals, and the atkins kit A to put this all back together. Should be fun to put it back together and get it running. Will video the first startup and post here. Hopefully it starts first try... Pics of the progress so far to come real soon.
Thread Starter
love the braaaap
Joined: Jul 2003
Posts: 3,771
Likes: 5
From: Bognor, Ontario
Dirty engine parts ready to be cleaned.
All cleaned up and ready for painting. Yes I am painting before reassembly.
All painted up.
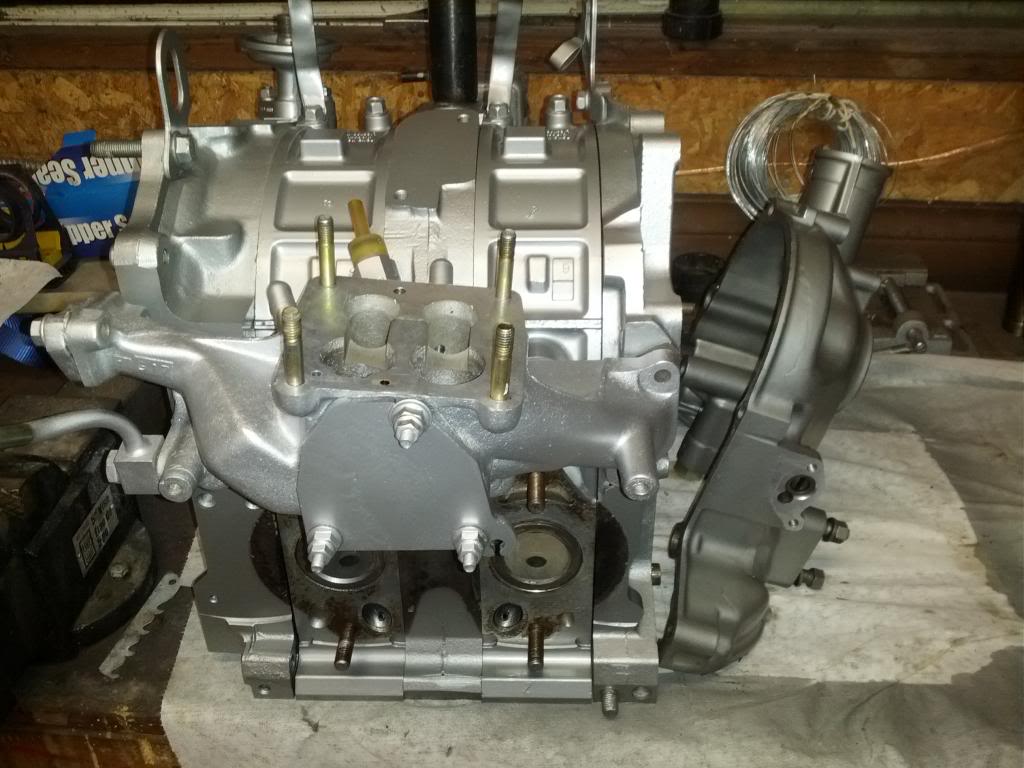
Even the water pump painted silver instead of the ugly blue.
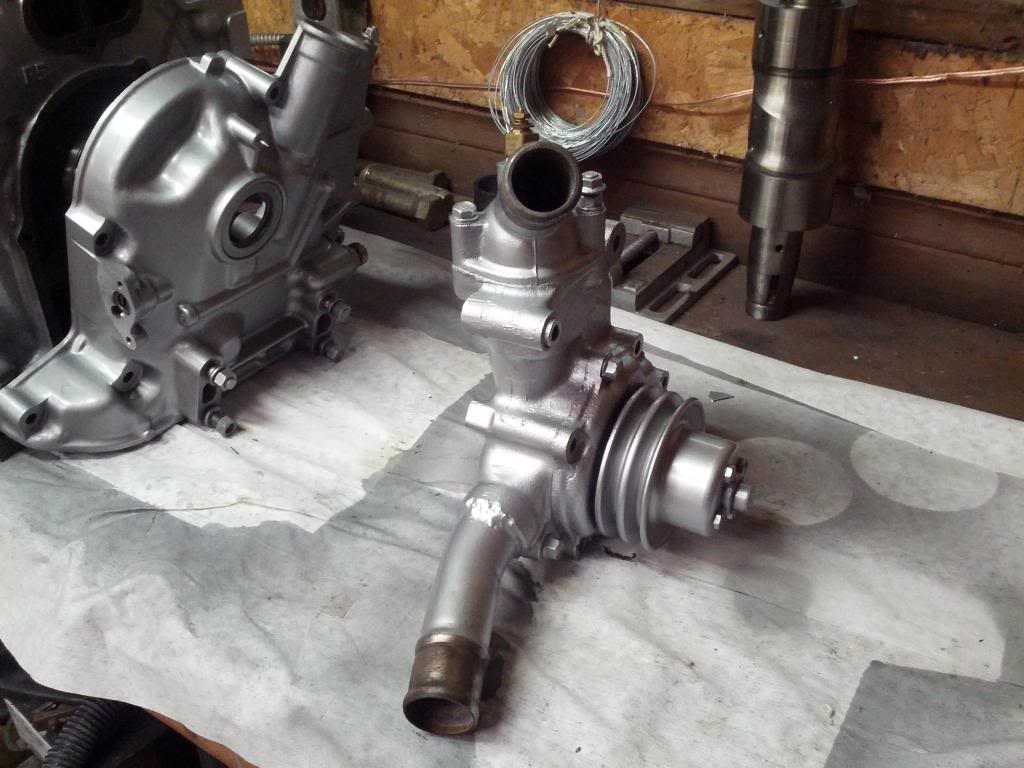
One more shot.
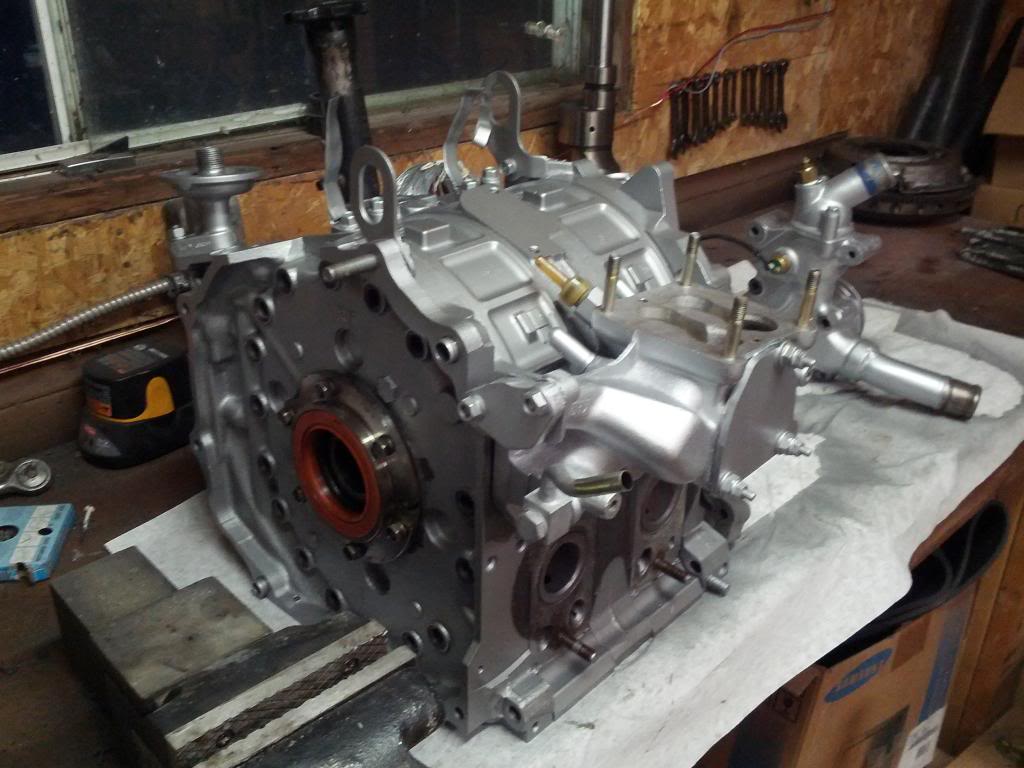
I was debating on painting the rotor housings silver and the rest a darker grey or even dark red but decided to keep it a little more subtle by keeping it all the same colour. Looks a little industrial, but I think it will work well with the rest of the car which is all stock. To me it just wouldn't look right having a flashy engine in a stock car. Not really my style I guess.
The parts have been ordered to put it all back together so now I get to play the waiting game.
All cleaned up and ready for painting. Yes I am painting before reassembly.
All painted up.
Even the water pump painted silver instead of the ugly blue.
One more shot.
I was debating on painting the rotor housings silver and the rest a darker grey or even dark red but decided to keep it a little more subtle by keeping it all the same colour. Looks a little industrial, but I think it will work well with the rest of the car which is all stock. To me it just wouldn't look right having a flashy engine in a stock car. Not really my style I guess.
The parts have been ordered to put it all back together so now I get to play the waiting game.
Looks great!!
Wow. I can't tell you how jealous I am right now. Your engine looks awesome. Didn't think of going one color but it does look good. Great job!
Let us know how the rebuild goes. I'll need to see lots of pics to make sure I know what I'm doing when it's my turn!
Let us know how the rebuild goes. I'll need to see lots of pics to make sure I know what I'm doing when it's my turn!
Thread Starter
love the braaaap
Joined: Jul 2003
Posts: 3,771
Likes: 5
From: Bognor, Ontario
There is lots of information on this website on rebuilding so i don't plan to post up any pics of that process. I'll be referring to a few videos on the internet on how to assemble a rotary engine however and getting getting a bit of help from the local rotorheads. This build will mostly be done by me though as its something I have wanted to do for a long time now.
coming together, Bro. i know you must be anxious and excited! the waiting sucks.  it doesn't matter how many engines i've built, i always get anxious when waiting for parts and i always get excited when it comes time for assembly and that first fire. i even get excited for other people's builds (can you tell?) i figure if i ever stop feeling that way, it'll be time for me to hang it all up. i await your progress.
it doesn't matter how many engines i've built, i always get anxious when waiting for parts and i always get excited when it comes time for assembly and that first fire. i even get excited for other people's builds (can you tell?) i figure if i ever stop feeling that way, it'll be time for me to hang it all up. i await your progress.
Thread Starter
love the braaaap
Joined: Jul 2003
Posts: 3,771
Likes: 5
From: Bognor, Ontario
Picked up the parts I ordered from Atkins today. Well packaged and everything was there. Got the Atkins overhaul kit A, rotor and stat gear bearings, upper and lower rad hoses and a set of apex seals. Looks like I have everything I need now. Will keep everyone updated on my progress.
Thread Starter
love the braaaap
Joined: Jul 2003
Posts: 3,771
Likes: 5
From: Bognor, Ontario
Ok, I have finally made more progress on this. I found a local guy to press in the rotor and stat gear bearings, which is something I didn't have the tools for and is about all the progress I have made. I made the mistake of not checking out how the job was done though, which brings me to the question I now have.
Is it normal for the rotor bearings to slide onto the e-shaft easily before being pressed in, but after installed to the rotor, they do not exactly glide onto the e-shaft. They don't show any signs of damage and do slide on with a bit of work and have a bit of resistance to rotation. After removing the rotor from the shaft, the bearings have some odd marking going on, nothing that can be felt, more just a bit of shining up of areas of contact. What concerns me is the fact that this contact area does not seem to be even all around.
I don't want to make the mistake of assembling this engine when the rotor bearings are possibly not right. The stat gear bearings seem to be perfectly fine and don't show the same resistance to rotation and slid onto the shaft easily.