
Awesome Rotor Pics (modem guys go bitch at your MP for rural highspeed)

Thread Starter
Joined: May 2002
Posts: 5,972
Likes: 37
From: Ottawa, Soviet Canuckistan
Awesome Rotor Pics (modem guys go bitch at your MP for rural highspeed)
Hey Guys!
I picked up a set of rotors I bought off ebay today. Awesome looking things. I think they've been media blasted or coated with something.. they look kind of... uniformly coloured. Other than that oddity though they're in amazing shape. I can read all the identifying marks like the R and F in the combustion recess and the weight stamps, so I thought I'd share some pics of them with you guys for reference. And who doesn't like pics of rotors?
Jon

Thread Starter
Joined: May 2002
Posts: 5,972
Likes: 37
From: Ottawa, Soviet Canuckistan
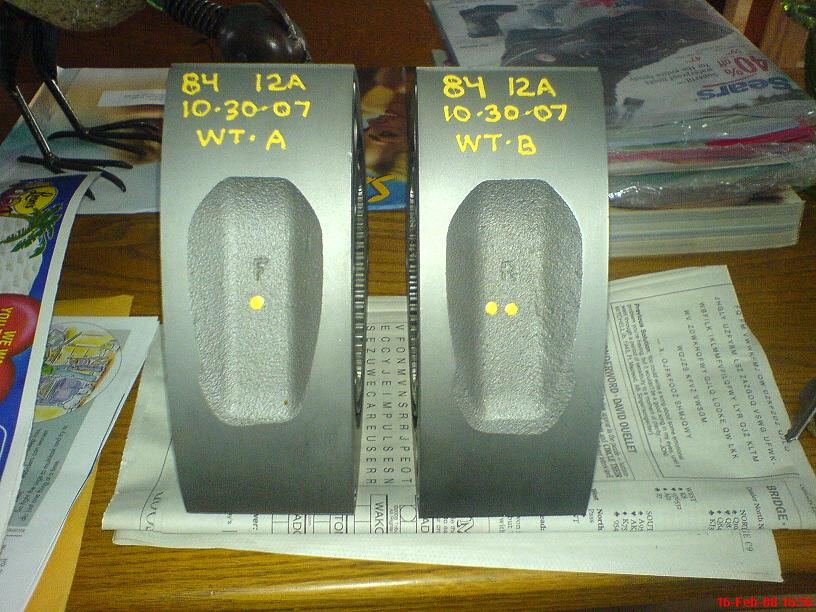
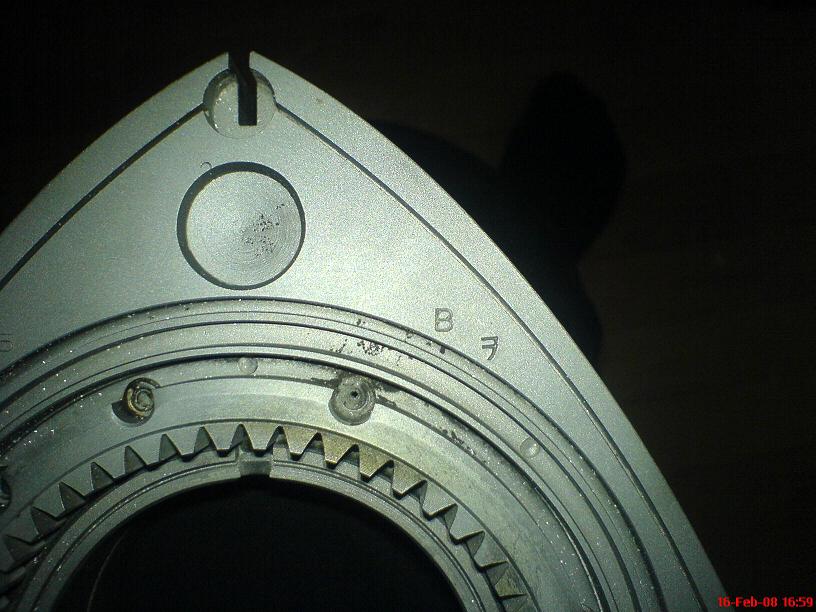
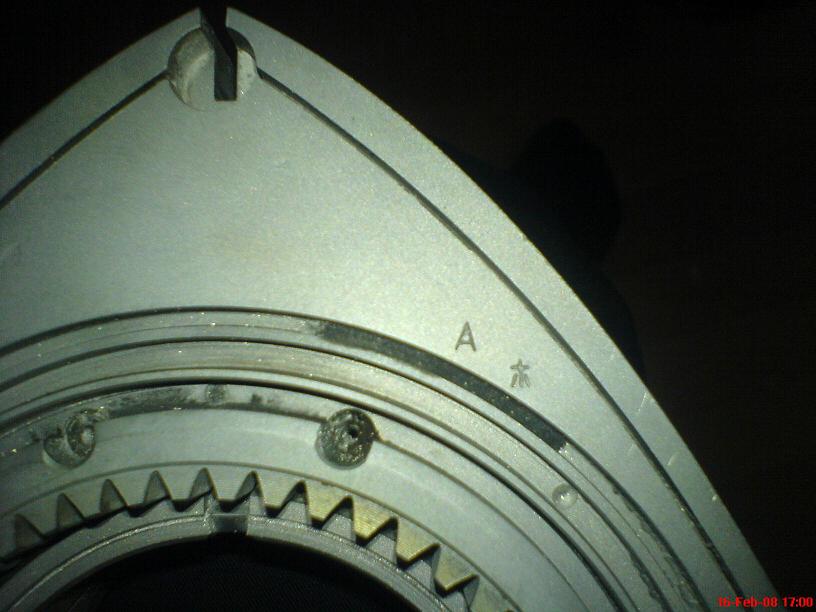
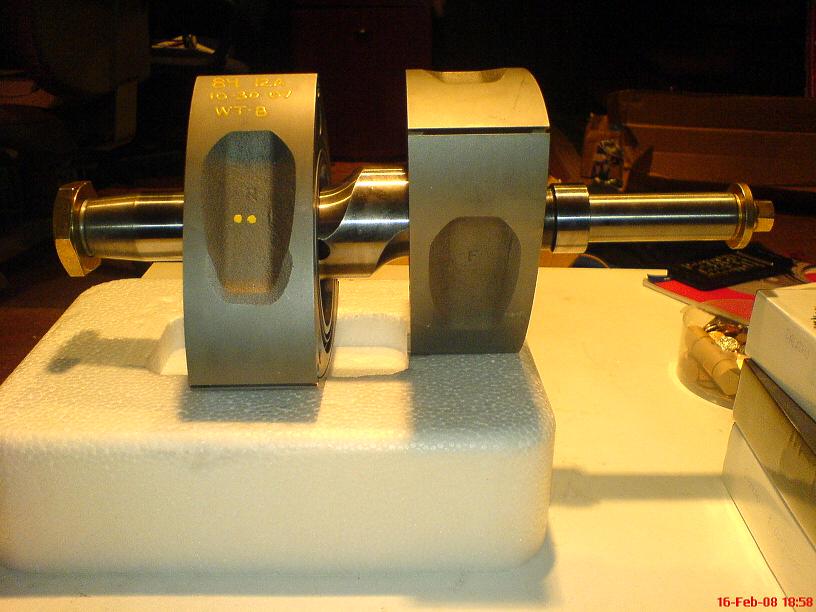
So in picture 1 you can see the F and R that show the difference between the Front and Rear rotor (S3 rotors would have an "N" stamped there as well, so these rotors were mislabeled)
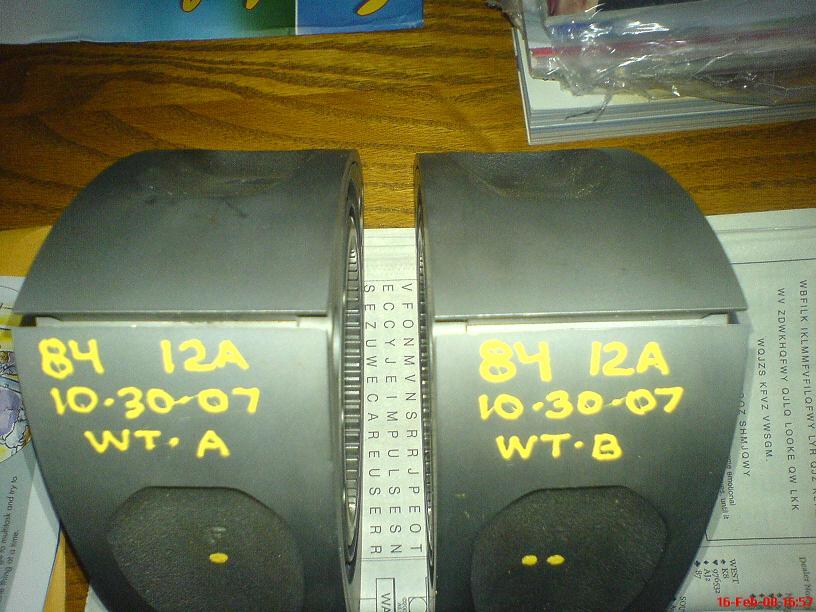
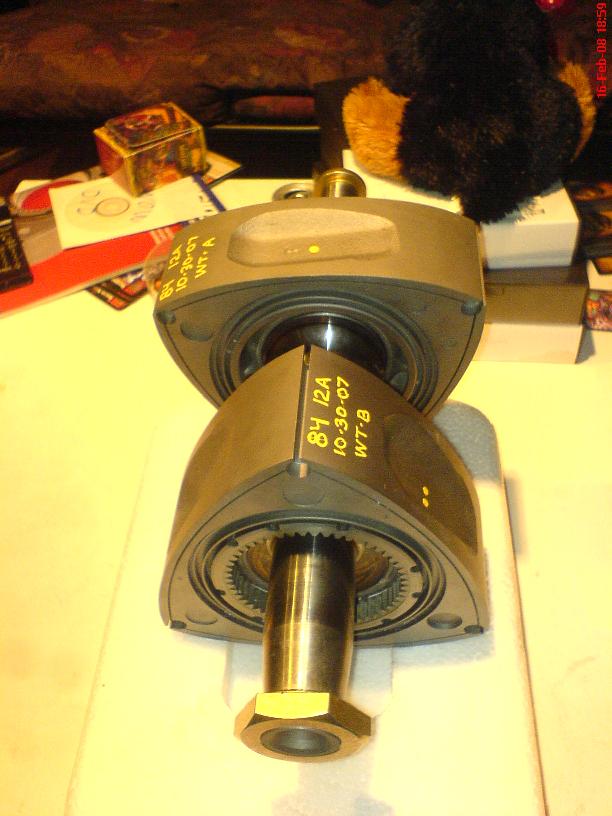
Pic 5 and 6 show the weight stamps, in this case one rotor is weight B and one is weight A. The letters can go as far as weight "D", and when building a motor your two rotors can't be more than one letter apart. So for instance, these A and B could work together. Or a B and C could work, or a C and D. Of course the best would be matching sets of AA BB CC or DD but it rarely happens.
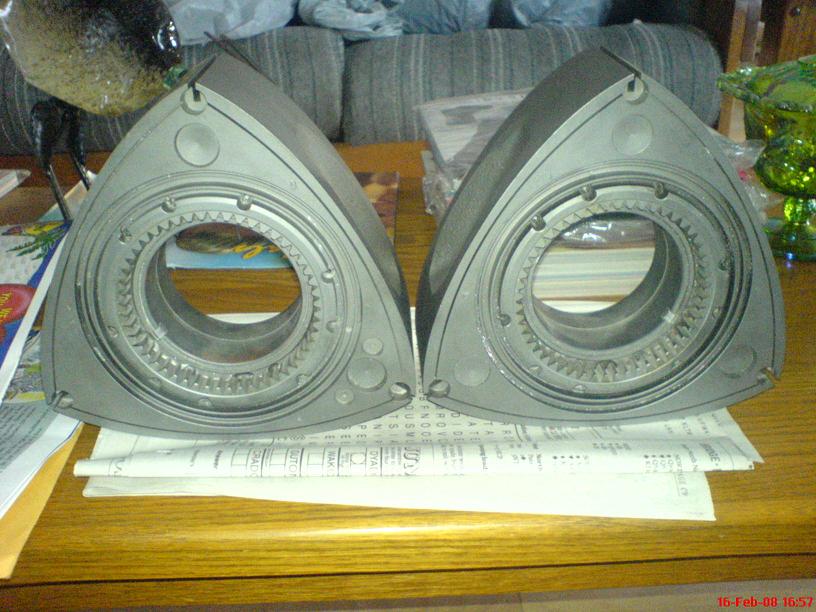
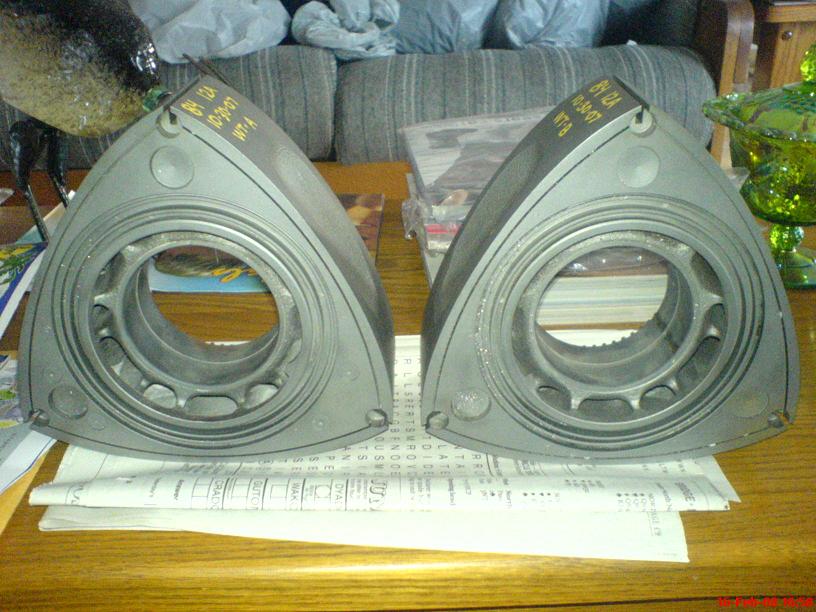
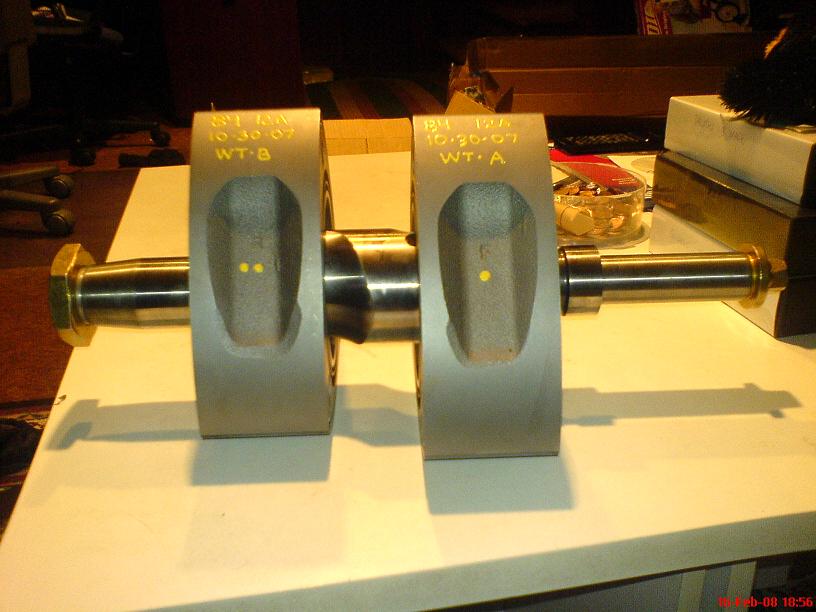
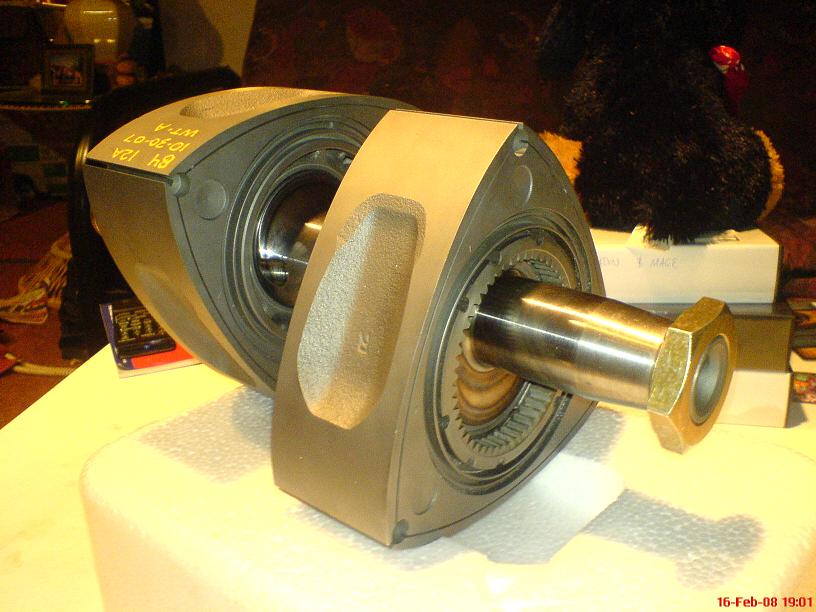
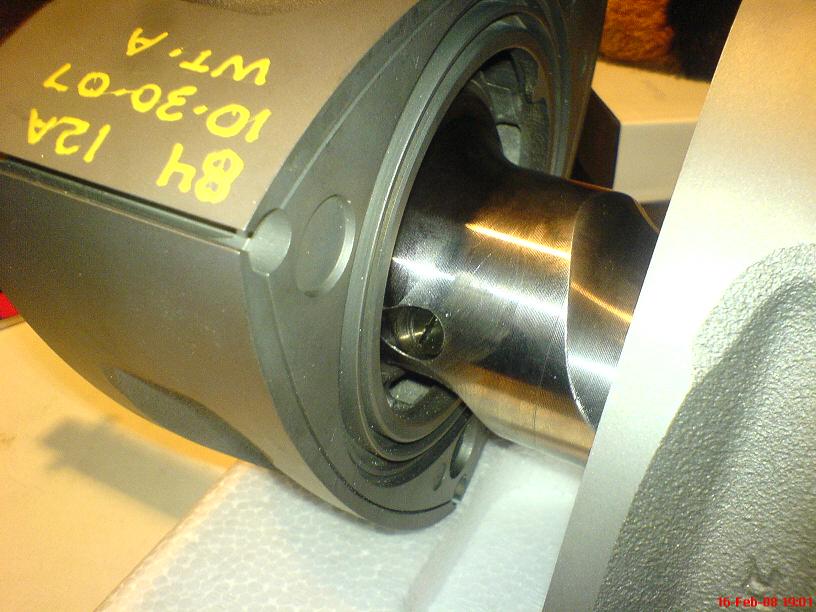
Pics 9-15 show the rotors on an e-shaft arranged the way they would be if they were inside an engine without any housings in the way so that we can see them. In a 2 rotor engine the rotors sit 180* apart from one another. IIRC in the 20b they each sit 120* apart from each other instead.
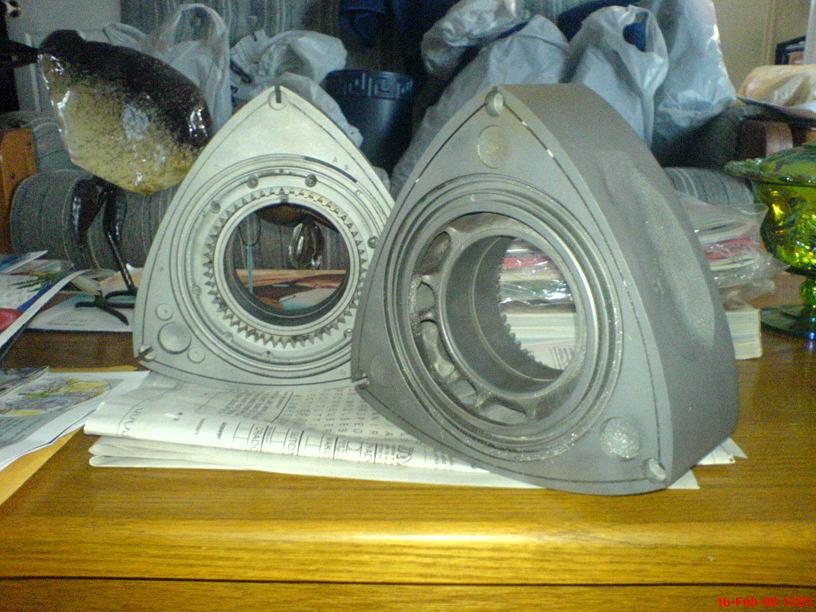
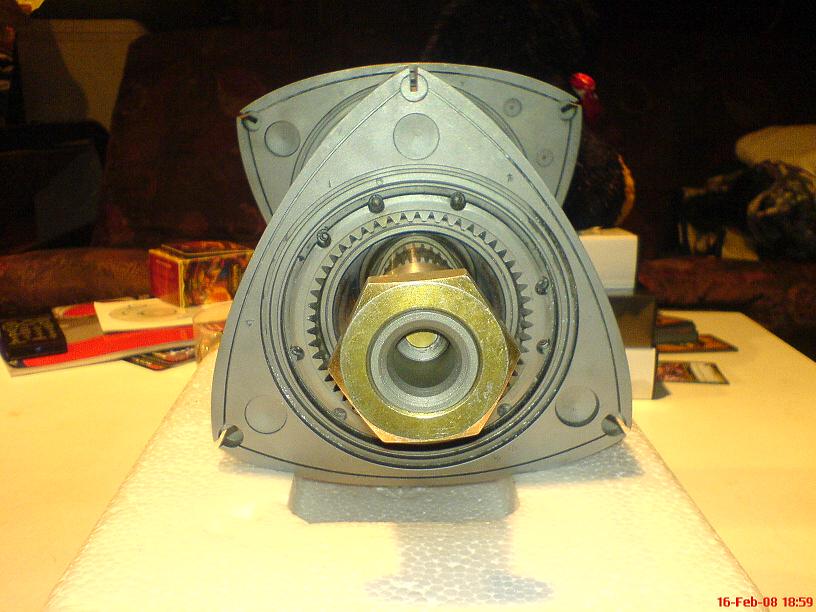
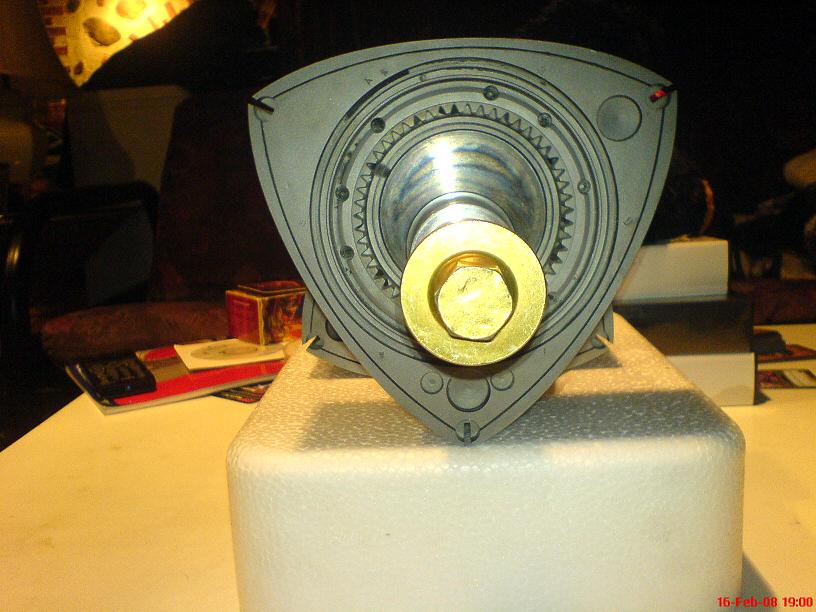
Pic 15 gives a nice view of one of the eccentric shaft oil jets which shoot oil into the insides of the rotors. You can see the oil recesses more clearly in pictures 4 and 7. The oil returns to the pan through the space in the centre housing I believe. So the oil gets sprayed in, has its "cooling" effect on the rotor, then sloshes its way out up against the intermediate housings where it's held in place by the oil seals and makes its way into the hole where the e-shaft goes through, then drains down into the pan... I could be wrong on this but that's how I understand it.
Note of course that the F rotor is at the front (longer section) of the e-shaft where the R rotor is at the back (shorter section with big forkin' flywheel bolt). The gears built into the rotors face "out" (so front faces front and rear faces rear) since the stationary gears are mounted there in the front and rear housings.
Oh, and if anyone's wondering about the odd symbols close to the A and B weight symbols, those are actually japanese characters. Each face of the rotor has a symbol stamped near it which helps you identify rotor faces so that you can identify which side seals and side seal springs go with it when you reassemble the rotor.
Some people think "why do I need to put the side seals back on exactly the same side of exactly the same face of exactly the same rotor when I reassemble?" - well there are casting differences which make each side seal groove slightly different from every other side seal groove. When you buy new side seals they're extra long and you have to clearance them by slowly shaving them down until they fit in the groove within tolerance. When you're re-using them, you mark them so that you can just reinstall them properly without (necessarily) having to spend a huge amount of time re-clearancing them.
Jon
Pic 5 and 6 show the weight stamps, in this case one rotor is weight B and one is weight A. The letters can go as far as weight "D", and when building a motor your two rotors can't be more than one letter apart. So for instance, these A and B could work together. Or a B and C could work, or a C and D. Of course the best would be matching sets of AA BB CC or DD but it rarely happens.
Pics 9-15 show the rotors on an e-shaft arranged the way they would be if they were inside an engine without any housings in the way so that we can see them. In a 2 rotor engine the rotors sit 180* apart from one another. IIRC in the 20b they each sit 120* apart from each other instead.
Pic 15 gives a nice view of one of the eccentric shaft oil jets which shoot oil into the insides of the rotors. You can see the oil recesses more clearly in pictures 4 and 7. The oil returns to the pan through the space in the centre housing I believe. So the oil gets sprayed in, has its "cooling" effect on the rotor, then sloshes its way out up against the intermediate housings where it's held in place by the oil seals and makes its way into the hole where the e-shaft goes through, then drains down into the pan... I could be wrong on this but that's how I understand it.
Note of course that the F rotor is at the front (longer section) of the e-shaft where the R rotor is at the back (shorter section with big forkin' flywheel bolt). The gears built into the rotors face "out" (so front faces front and rear faces rear) since the stationary gears are mounted there in the front and rear housings.
Oh, and if anyone's wondering about the odd symbols close to the A and B weight symbols, those are actually japanese characters. Each face of the rotor has a symbol stamped near it which helps you identify rotor faces so that you can identify which side seals and side seal springs go with it when you reassemble the rotor.
Some people think "why do I need to put the side seals back on exactly the same side of exactly the same face of exactly the same rotor when I reassemble?" - well there are casting differences which make each side seal groove slightly different from every other side seal groove. When you buy new side seals they're extra long and you have to clearance them by slowly shaving them down until they fit in the groove within tolerance. When you're re-using them, you mark them so that you can just reinstall them properly without (necessarily) having to spend a huge amount of time re-clearancing them.
Jon
Last edited by vipernicus42; Feb 17, 2008 at 12:51 PM. Reason: correction on rotor series and 20b timing
Trending Topics
Thread Starter
Joined: May 2002
Posts: 5,972
Likes: 37
From: Ottawa, Soviet Canuckistan
Yeah, I really nailed an *awesome* deal for these. A hundred bucks for the pair plus shipping off E-bay. Just goes to show that good deals come to those who wait! They look awesome. The apex seal grooves look straight and not worn or warped at the tips, and everything else looks good... It's just the colour that has me confuzzled with these. They look to uniformly coloured and the surface has an almost imperceptible texture to it that makes me think they may have been blasted or coated with something.
It doesn't really matter though. They're getting new MFR rotor bearings, all the grooves will be hit with compressed air to get dust out of them, then they're getting brand new seals all around. So the rotor itself should never contact anything and thus whatever coating or surface texture it has shouldn't matter.
Jon

Pics 9-15 show the rotors on an e-shaft arranged the way they would be if they were inside an engine without any housings in the way so that we can see them. In a 2 rotor engine the rotors sit 180* apart from one another. IIRC in the 20b they each sit 90* apart from each other instead.
360deg/3 lobes = 120deg/lobe
Two rotor: 360deg/2 lobes = 180deg/lobe
Four rotor: 360deg/4 lobes = 90deg/lobe
Equal spacing is necessary for smooth power output, among many other factors (like balance).

Thread Starter
Joined: May 2002
Posts: 5,972
Likes: 37
From: Ottawa, Soviet Canuckistan
... They're S1 rotors?!
How can you tell? I'm not the one who labeled them, so I was going by the auction but I thought the F and the R in the combustion chamber recess meant S3 rotors..?
Jon
Edit: In either case, the entire rotating assembly is being rebalanced anyway. As good as the balancing is from the factory, I want "the best" so I'm paying for a complete rebalance as part of my "ultimate streetable 12a" build.
Correction: Okay, so it wasn't the "F" and the "R", those are always there, but if they were S3 12a rotors they'd have an extra "N" stamped there. Thanks for the corrections guys.
Last edited by vipernicus42; Feb 17, 2008 at 12:52 PM. Reason: Added line about proper S3 12a rotor identification
Thread Starter
Joined: May 2002
Posts: 5,972
Likes: 37
From: Ottawa, Soviet Canuckistan
Well it doesn't "wipe off" ...
The bearings are being replaced, and it's getting all new oil seals and springs, side seals and springs and apex seals and springs.... If it has a coating, it doesn't scratch off. I think it might just have been bead blasted or something.... Or I could be crazy, but I thought rotors should be shinier.
Jon
13b P-port on a budget
Joined: Nov 2004
Posts: 3,003
Likes: 0
From: Louisville KY

FB+FC=F-ME
Joined: Jul 2004
Posts: 3,353
Likes: 5
From: Rohnert Park CA
Looks like a media blasted set of rotors.
Thats kinda a bad thing.Considering all the voids and holes that the material can get into on a rotor,you better make sure to flush and clean EVERYTHING before using them.......especially inside the cooling voids.
Its too bad they didnt protect the wearing surfaces of the rotors too,like the bearings and gears.Its usually best to reuse the old bearings as they last a long time and new bearings greatly increase break-in time.Im not sure about any impact that might occur from blasting the running surfaces of the stat. gears,but it doesnt seem like a good idea to be altering the wearing face of such a loaded part of the engine.
Rotary Enthusiast
Joined: May 2007
Posts: 770
Likes: 0
From: Canada
Kinda weird that they blasted them. The only areas that would really need cleaning would be the 3 faces of the rotor.
I'm sure the blasting didn't ruin the rotors, but in general I would be sketchy about blasting bearing areas and gears on any item with an abrasive.
You never hear of anybody media blasting pistons to clean them, mind you pistons are aluminum, which would be much more affected than iron. Or anyone tearing down a differential and blasting the ring and pinion. Those examples are kinda extreme, but somewhat relevant.
But I guess it makes them look real purdy.
Thread Starter
Joined: May 2002
Posts: 5,972
Likes: 37
From: Ottawa, Soviet Canuckistan
Yeah it would net you more on ebay but that's the thing.... they went for peanuts on ebay so they didn't do it for looks to make more money.
Either way I wouldn't have used the stock bearings. I want Race Rotor Bearings (MFR) so I'd be replacing them anyway.
Well we'll see what happens. I plan to use them, let's hope that the microscopic matte finish on the gear that meshes with the stationary gear doesn't fork things up. The rest of the rotor isn't touching anything so in my mind it doesn't matter anywhere but there.
Jon
Easier to spray them off with solvent, dry them off with a blow gun, then bake at 350 for about 15 minutes and blow gun again to get any dust off...
Thanks for the edit Jon (sneaky vampire lookin' bastard lol)
Thanks for the edit Jon (sneaky vampire lookin' bastard lol)
Last edited by IanS; Feb 16, 2008 at 09:48 PM.