When you click on links to various merchants on this site and make a purchase, this can result in this site earning a commission. Affiliate programs and affiliations include, but are not limited to, the eBay Partner Network.
Not terrible for a first attempt. However, the vents are a little rattly even though they're a little oversized. These didn't twist easy at first because a filament printer doesn't print round pegs on its side very well.
For the second version I might add a second rail but I need to think of a way of retaining it at the bottom. Or just design a whole separate cage and attach that to the stock vent casing.
An SLS printer would do a better job with the round bits, but hiring that out gets expensive. Shapeways quoted $10 per vent fin in PA12 nylon.
The stock vent has a casing with 2 snaps on each side, it disassembles easily once one side of snaps is undone.
The fins rotate on pegs at the top and bottom, and are held in place with rails top and bottom that also keeps them pointed the same way.
Just like the storage bins, the plastic flexing is what they depend on. Once the rails break the fins can fall out of the holes from their pegs.
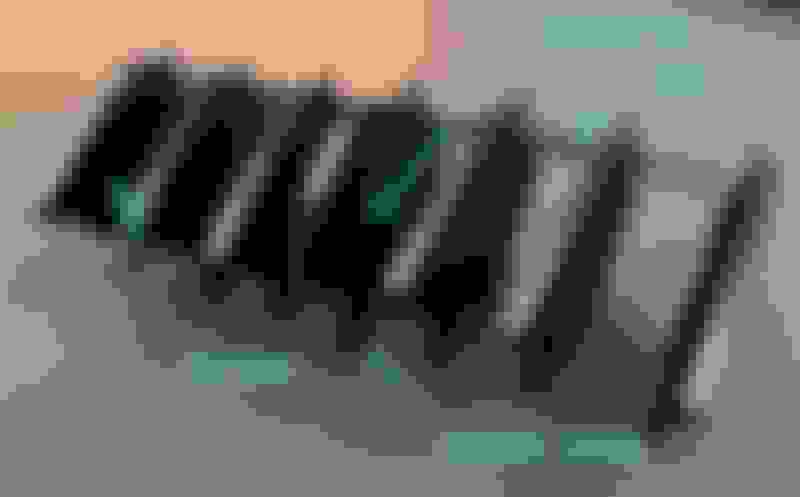
I just made new fins with the rail also on pegs instead of flexing plastic. The case for my vents has deformed over time so I made fins a little taller than was measured from stock.
There are 4 individual parts. The center fin doesn't have the horizontal tab and a separate collar at the bottom because it's designed to be printed flat. Files are on Printables if you want to mess with it.
Vent removal:
Photos were taken during installation, and the procedure may not work depending on how worn your car's dash is.
The vents are asymmetrical, the side towards the center has a round peg and the other is a peg with stops. The center at the dash is a simple slot with a catch and the other side a more secure hole.
Push the vent from the center side and it should pop out of the slot. Then push and pry gently on the other side until the vent is loose in the back of the opening.
Then grab a lower corner and pull it out sideways. It'll be a tight squeeze, maybe do it on a warm day.
Being in Australia & exposed to super high UV our vents transform to dust. These look awesome are you considering selling them or the STL file? I have a MSLA 3D printer I could print it on.
Cheers
Thank you, I�ll take a look as doing these in asa as a couple of my original ones are missing.
Off topic, anyone know if a repository on here has been started to store stl�s of sa/fb parts? I have an s2 cup holder that fits a big gulp (specific request) that clips in reasonably well.
Very nice!
Once the project is final, it may be worth printing the parts with an HP Jet Fusion machine, selecting standard material and UV resistant Nylon PA12 (unless you are very well off and can afford one as your personal 350K USD printer, I suggest using an online printing service )
I have done hundreds of parts for other cars and the results have been excellent, even for parts that go under the hood.


 )
)