
1980 SA Ignition Removal w/PICS

Thread Starter
Senior Member
Joined: Jan 2004
Posts: 597
Likes: 0
From: las vegas
1980 SA Ignition Removal w/PICS
I am asking for help to remove ignition cleanly, without damaging anything with a cut-off tool or chisel. Is it possible? Before you reply take a look at the photos, I believe the ignition housing clamped onto the steering column is different than S2 and S3 models. Everything works I am removing, I am just painting the engine bay so I wanted to attempt keeping all the components OEM perfect -no cut or chidel marks....is it possible?
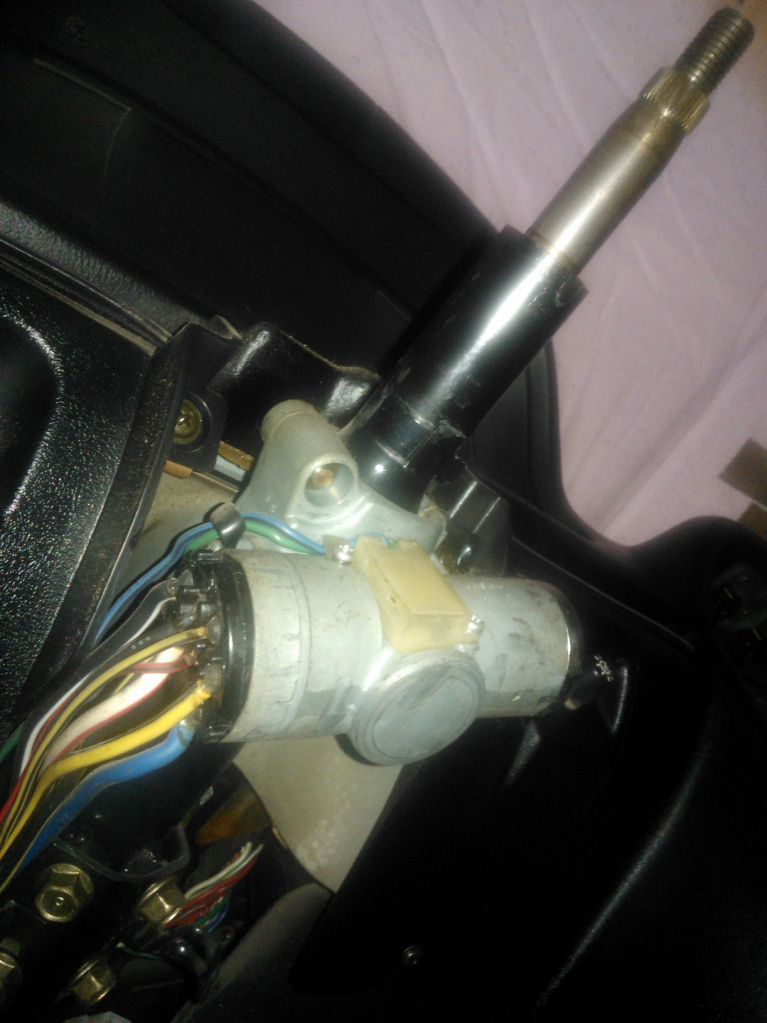


Are you wanting to remove the wiring from the Ign switch or the whole switch from the column? Both electrical leads disconnect and unplug from the ignition switch housing by a couple phillips head screws.
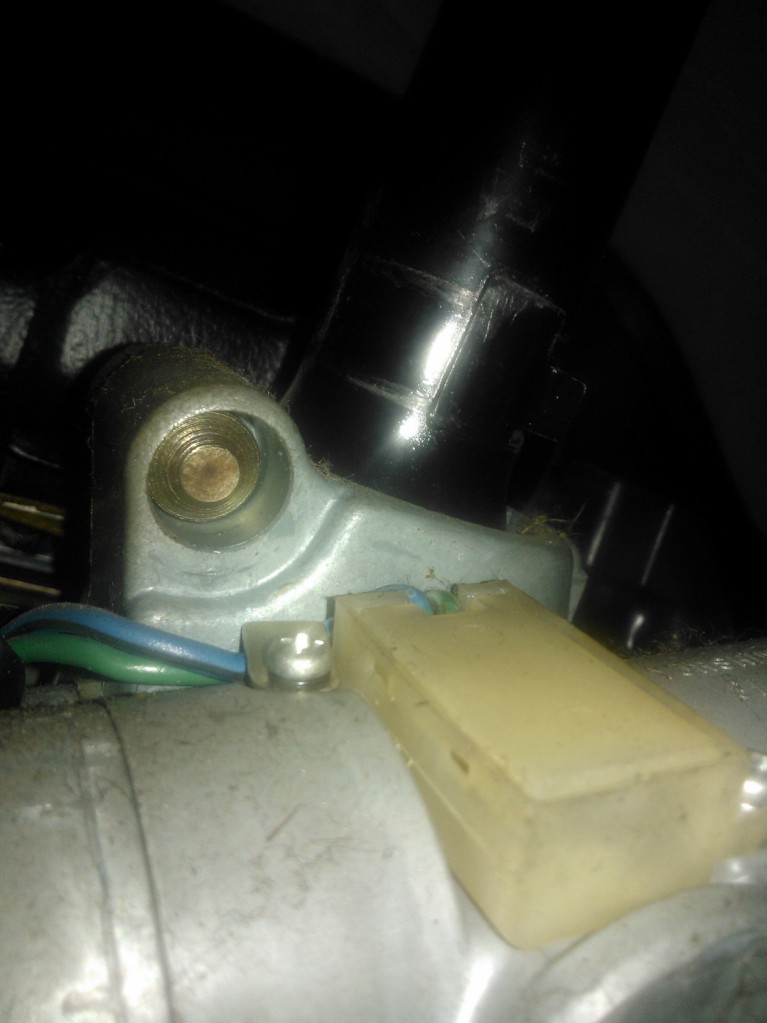
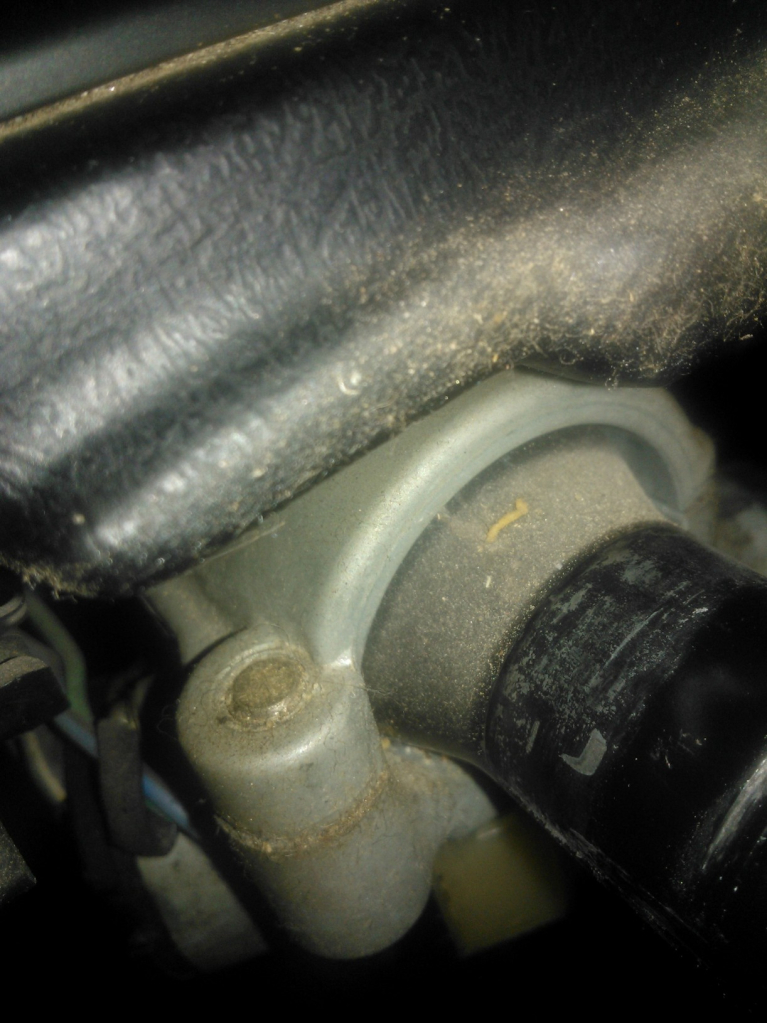
The switch housing itself is clamped to the column by those two bolts that are designed so that the heads shear off when tightened. Thats why there are no heads on the bottom, just the small diameter where it's necked down to shear. It's an anti-theft thing so that you can't easily drop the column and by pass the steering wheel lock.
I've removed them before like you would a broken bolt. A screw extractor or easy out type of tool. Drill a small hole, insert the ectractor and back them out. They are not extremely tight. Once out, you can slot them so that you can use a screw driver or just replace them with a socket head cap screw. Also, new ignition switch assemblies come with new intact bolts.
Joined: Jun 2008
Posts: 8,376
Likes: 30
From: Chino Hills, CA
I used a Dremel tool with a ball cutter tip to slot them in place, when I did my column refurb last year. Using due care (& a face sheild, as you are working up from underneath) it was a little tedious but otherwise straightforward. If you're careful, you can do it without any damage to surrounding parts.
Easy-outs would work too, as Banzai states.
Easy-outs would work too, as Banzai states.
Thread Starter
Senior Member
Joined: Jan 2004
Posts: 597
Likes: 0
From: las vegas
Thanks guys, I was a little hesitant to use an easy out because I have had them not work before. It was probably a tighter nut and bolt than these. I will look up the ball cutter tip also
Easy outs and screw extractors are heat treated to be harder than the fasteners. This also makes them brittle. You have to exercise a certin amount of finese and caution when using them. Choosing the right size and knowing when to back off goes a long way in not digging the hole any deeper. They are commonly found in tapered spiral fluted, cylindrical straight fluted and tapered square styles. The strongest most durable ones seem to be the square ones.
I've removed a ton of broken bolts over the years. You can also use left handed drills in certin circumstances or just drill off the head of the fastener completely, if it's not rusted in place. Once the head is gone, all the pressure (torque) is gone too and they just thread out with little effort.
I've removed a ton of broken bolts over the years. You can also use left handed drills in certin circumstances or just drill off the head of the fastener completely, if it's not rusted in place. Once the head is gone, all the pressure (torque) is gone too and they just thread out with little effort.
Full Member
Joined: Nov 2011
Posts: 242
Likes: 1
From: Sacramento
Be extra careful with the electrical parts
[QUOTE=boog;11232142]I am asking for help to remove ignition cleanly, without damaging anything with a cut-off tool or chisel. Is it possible? Before you reply take a look at the photos, I believe the ignition housing clamped onto the steering column is different than S2 and S3 models. Everything works I am removing, I am just painting the engine bay so I wanted to attempt keeping all the components OEM perfect -no cut or chidel marks....is it possible?
Be extra careful with the electrical parts. I had a brand new pigtail and I was working on the column and since the ignition wires are large and stiff which makes it possible to pop the plastic piece that goes into the metal part out along with all the pieces. I was PO'd big time. Luckily, I found all the contacts, springs and whatever else and put it back together very carefully and crimped the metal tabs that hold the plastic part in very tightly and am always careful around that area.
$140 for a simple switch with connectors, sheesh.
I used a chisel to removed the bolts but someone recommended an excellent idea. Drill as large as hole as possible and use the appropriate EZ-out to back out the bolt. I just used regular bolts to put it back.
Full Member
Joined: Nov 2011
Posts: 242
Likes: 1
From: Sacramento
Amen brother!
Easy outs and screw extractors are heat treated to be harder than the fasteners. This also makes them brittle. You have to exercise a certin amount of finese and caution when using them. Choosing the right size and knowing when to back off goes a long way in not digging the hole any deeper. They are commonly found in tapered spiral fluted, cylindrical straight fluted and tapered square styles. The strongest most durable ones seem to be the square ones.
I've removed a ton of broken bolts over the years. You can also use left handed drills in certin circumstances or just drill off the head of the fastener completely, if it's not rusted in place. Once the head is gone, all the pressure (torque) is gone too and they just thread out with little effort.
I've removed a ton of broken bolts over the years. You can also use left handed drills in certin circumstances or just drill off the head of the fastener completely, if it's not rusted in place. Once the head is gone, all the pressure (torque) is gone too and they just thread out with little effort.
Trending Topics
I hate using easyouts. Of course, sometime there the only option. I used a dremil and put slots in one I had to get outin a 1985. You might be able to use a demil and remove enough of the housing and then slot the bolt.

Junior Member
Joined: Sep 2012
Posts: 24
Likes: 0
From: San Francisco Bay Area
I removed *hundreds* of these over the years using a sharp pointed punch and a fairly heavy headed hammer for 'sudden impact' when setting my indentation.
The trick is to make an indentation on the cone side of the break off bolt head going straight in perpendicular to the surface. Next, angle the punch and tap it with the hammer to back it out. The first movement of the bolt is the tricky one, it takes a bit of practice.
BTW, counter-clockwise backs it out.
Choose your indentation spot wisely for best angle and purchase.
Good luck
Last edited by OldMazdaProfessional; Oct 2, 2012 at 01:56 PM. Reason: add the word 'pointed'

Thread
Thread Starter
Forum
Replies
Last Post
SakeBomb Garage
SakeBomb Garage
0
Sep 4, 2015 05:20 PM
SakeBomb Garage
Vendor Classifieds
0
Sep 4, 2015 05:19 PM