12a Porting questions


Thread Starter
Full Member
Joined: Jan 2010
Posts: 143
Likes: 0
From: indinapolis In
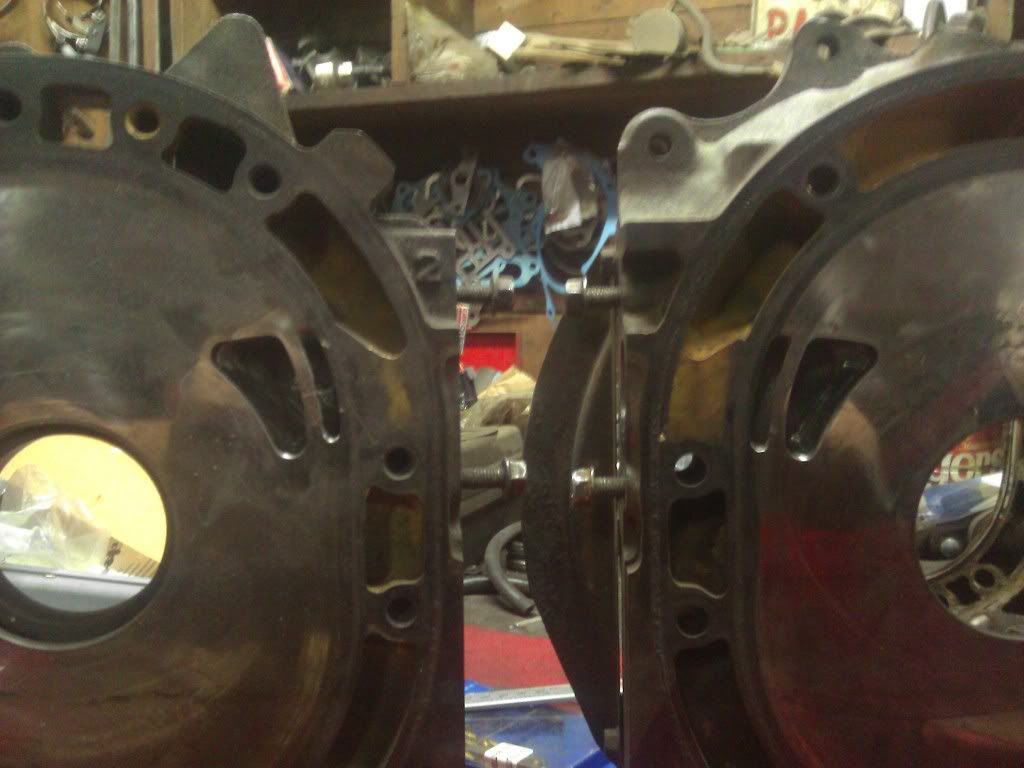
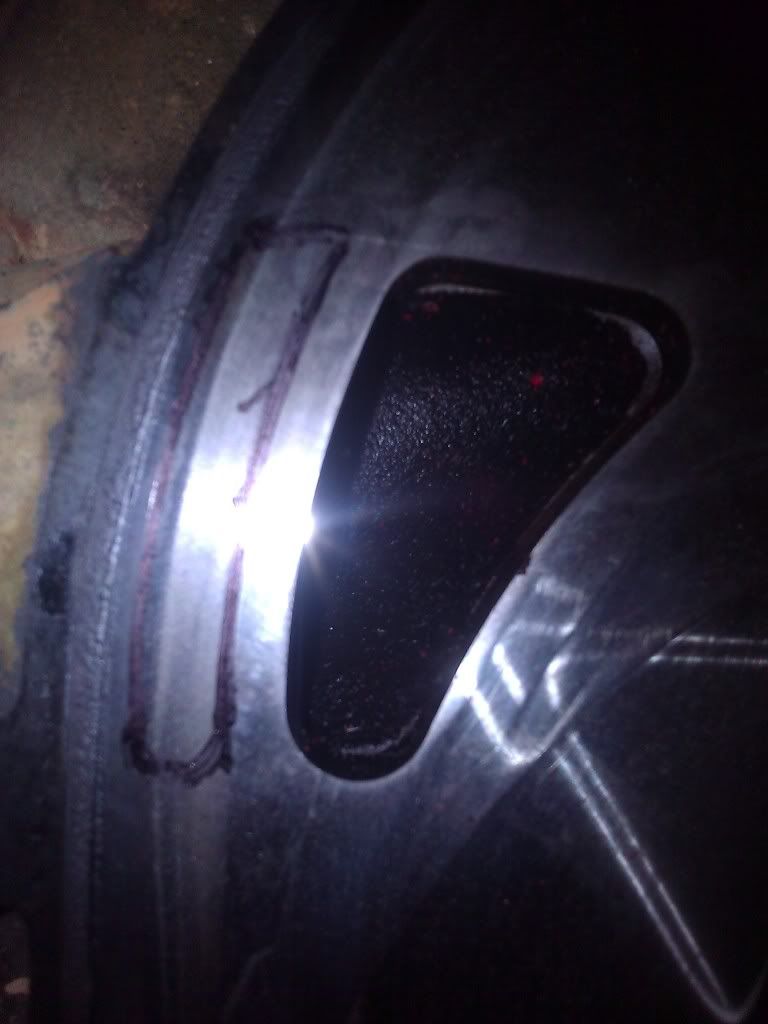
ok so im getting ready to port the secondarys, so im keeping opening and closing timing the same correct jeff? and adding a bridge the same length as the port? and smoothing it all out, going up about 5 mm on exhaust and shaping it to stock shape, what would be the downfall if i increased intake opening by say 3mm? sorry i know lots of question and getting closer starting to get really excited but alot of work left to do
Did you study all the pictures in my half BP 12A thread? I left my intake port opening and closing stock, yes. This lets the bridge be as thick as possible so there's less chance of breakage. The bridges were about 41mm tall, same as the ports when measured top to bottom. Do you have a digital caliper? It's an important tool to see how thick your bridges are.
Another good thing about leaving opening timing alone is it keeps the idle as strong as possible. As soon as you start opening intake ports sooner than stock, you degrade your idle. The problem with a half bridge is the idle becomes degraded just as just part of the package, it's unavoidable, so anything you can do to keep the idle as nice as possible, such as leaving the primary and secondary intake opening edges at stock timing, you really should do it. Otherwise after the newness wears off, you won't like it so much anymore.
I left my intake port closing edges stock because that's what matched the Nikki I was using. Since you've got a Holley 465, what does Racing Beat recommend for ports with that size of carb? Stock? Streetport? Mild like 74 spec? Do they give a number in closing degrees such as 40, 50 or 60? Any of those look familier? In case you're wondering, 40� is stock 12A intake port closing. 50� is 74 spec. 60� is a Racing Beat streetport.
I know RB sells a Holley 600 for a streetported 4 port 13B. Not sure about the 12As.
As for my exhaust ports, they were small and restrictive so I left opening timing stock because it opens at T2 spec, so early enough. I only went up 5mm or so, which seemed appropriate. I could have gone larger but read something trochoid said about a weird idle issue probably due to how big his exhaust ports were, creating more overlap than necessary. He also streetported his primaries, but had the twin carbs that are more adjustable than a Nikki I'd guess. Not sure on his port timings.
After you port the exhaust ports up, you have to remake the 2mm bevel to look like stock. This bevel is important for apex seal life. Study the exhaust ports before you begin and you'll see the bevel. A dremel with a sanding drum is perfect.
Thread Starter
Full Member
Joined: Jan 2010
Posts: 143
Likes: 0
From: indinapolis In
yea i studied the pictures, and the 465 is what rb offers for stock and street port not sure about the timing though, and everything else sounds like what i learned from ur thread and was planning on doing
That looks reasonable. How thick will the bridges be when you're done? How wide will your eyebrow ports be? I recommend no bigger tahn group B.
I may have made my eyebrows slightly taller than the actual port due to final smoothing and shaping to get good flow. I also noticed most others do not make their eyebrows as long as I did. Well, it was the very first time I ever did bridgeports and they worked really well. Fare enough.
I guess I could get out to the garage and see about doing up some bridges for my MG Midget's engine... You've inspired me to get busy.
I meant to say Group A. Sorry. Here's a quote from peejay with the relevant info.
Interesting: The port runner diameters and opening dimensions are spelled out. Group A RX-7s (12A engine) were bridge ported! And the paperwork has a dimensioned outline for the port. Far out.
Just to satisfy your curiosity, the homologated bridge port had a main opening that was 51mm high, the bridge was 4.5mm thick, and the eyebrow was 7.5mm wide and 41mm tall. Not very big, but decently sized. The eyebrow closed about 5-10 degrees before the main port did, going by the ol' eyeball gauge. The exhaust ports were 32mm by 38mm with 10mm radiuses in the corners. No specification as to *where* the exhaust ports are, while the intake port does seem to have a spec as to where it's put.
Just to satisfy your curiosity, the homologated bridge port had a main opening that was 51mm high, the bridge was 4.5mm thick, and the eyebrow was 7.5mm wide and 41mm tall. Not very big, but decently sized. The eyebrow closed about 5-10 degrees before the main port did, going by the ol' eyeball gauge. The exhaust ports were 32mm by 38mm with 10mm radiuses in the corners. No specification as to *where* the exhaust ports are, while the intake port does seem to have a spec as to where it's put.
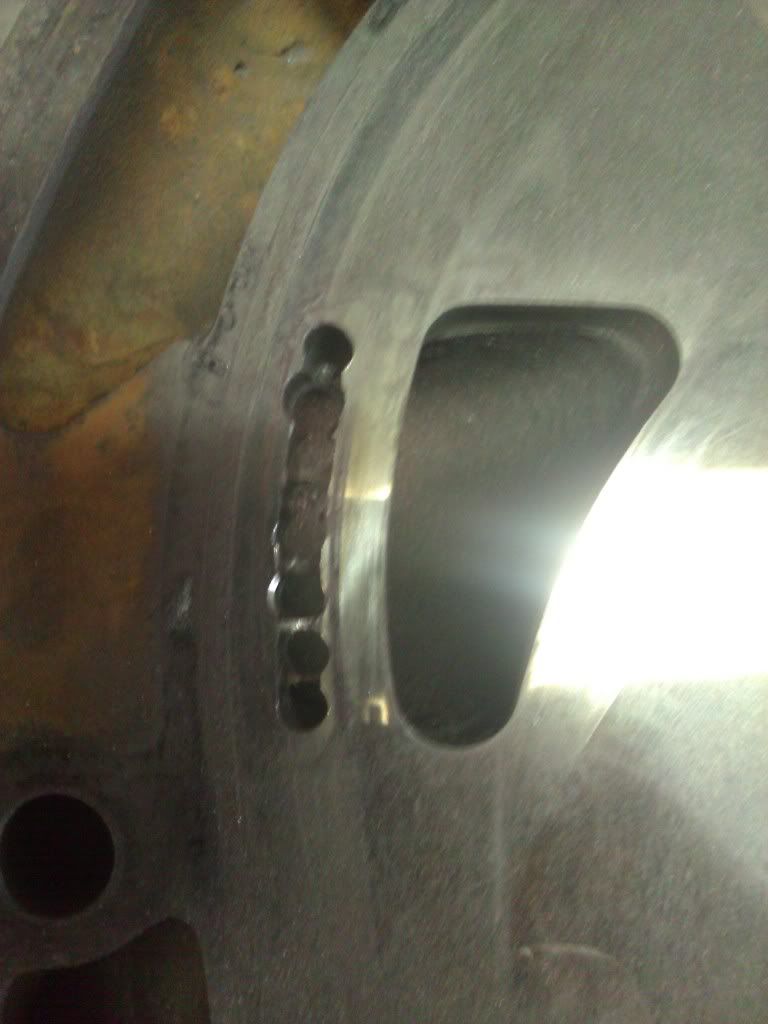
The way I drew up my bridges, I aimed for a 5mm thick bridge knowing full well that they might wind up slightly thinner simply due to having never done any before. The end result was more like 4.6mm to 4.9ish, so perfectly close enough. It's within half a milimeter.  I was happy about that.
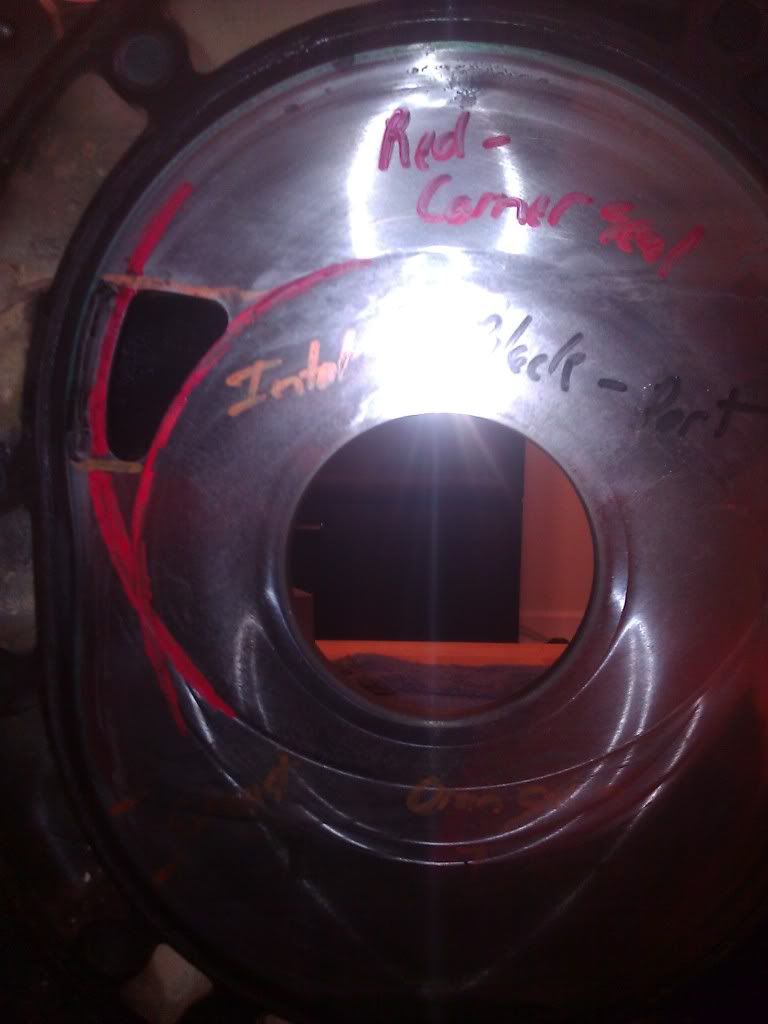
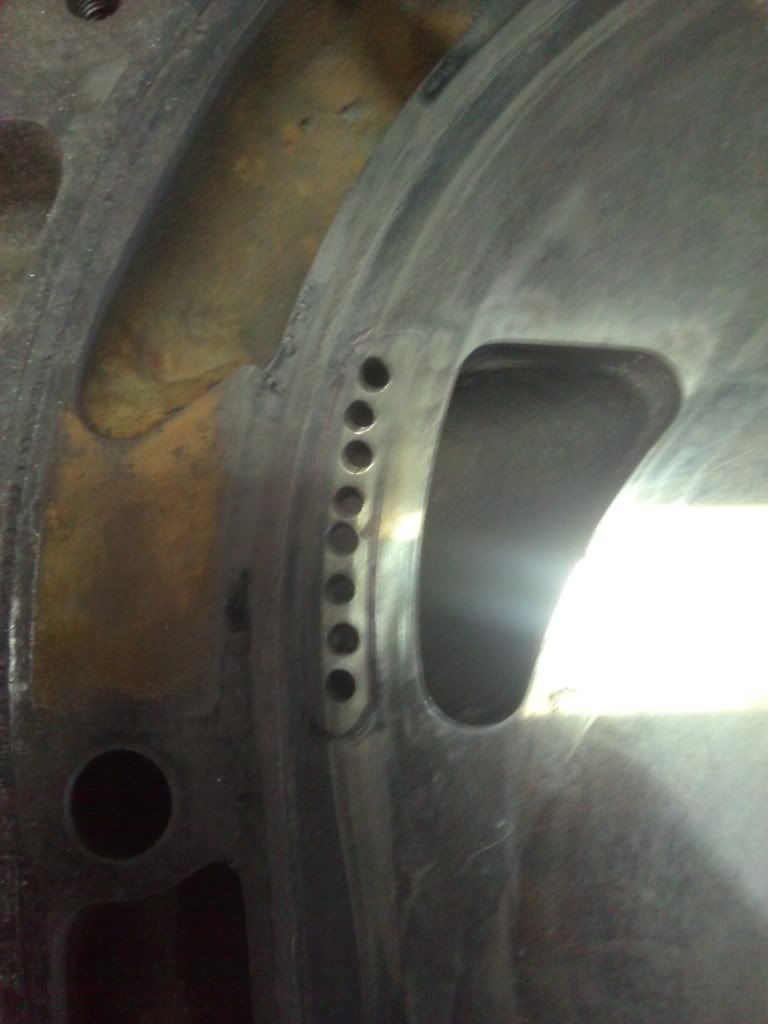
Whatever method you use to cut your eyebrows, keep the tool away from the lines until you've completed your rough cuts and are well into your final shaping.
Oh I think my eyebrows were around 7.0mm wide, but again ended up slightly wider in the end. I could have also gone closer to the coolant seal but figured the cutting process would be so rough it might happen on its own. I think they ended up around 7.2mm wide. Again, perfectly fine for what I was doing.
I was happy about that.Whatever method you use to cut your eyebrows, keep the tool away from the lines until you've completed your rough cuts and are well into your final shaping.
Oh I think my eyebrows were around 7.0mm wide, but again ended up slightly wider in the end. I could have also gone closer to the coolant seal but figured the cutting process would be so rough it might happen on its own. I think they ended up around 7.2mm wide. Again, perfectly fine for what I was doing.


Thread Starter
Full Member
Joined: Jan 2010
Posts: 143
Likes: 0
From: indinapolis In
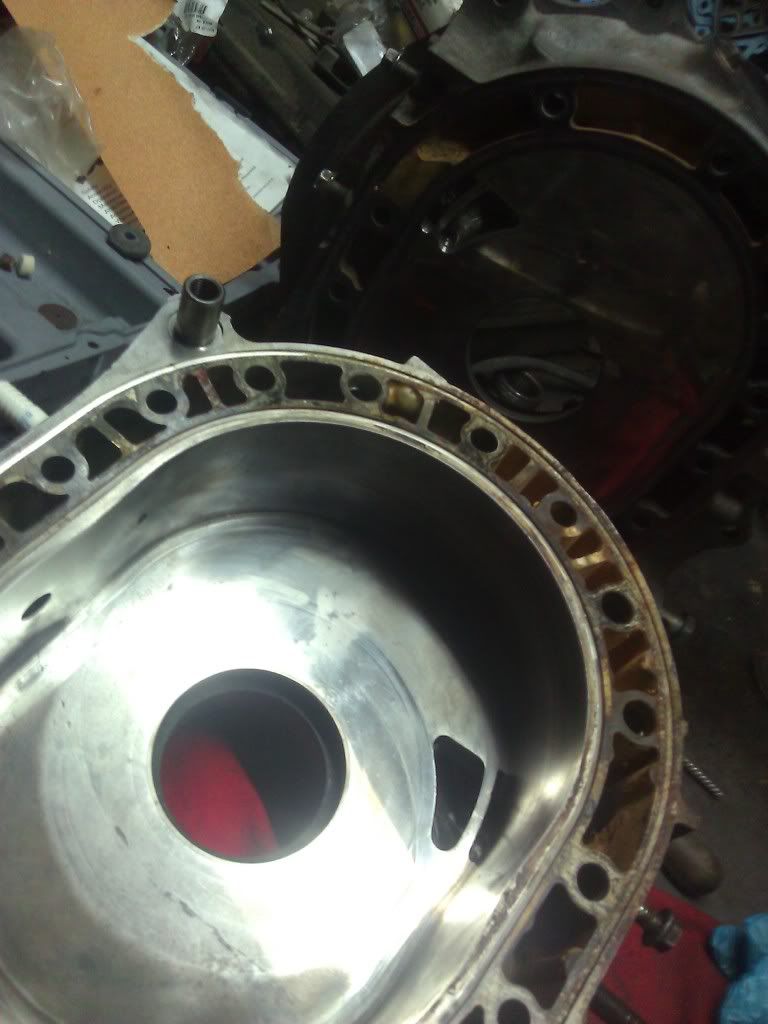
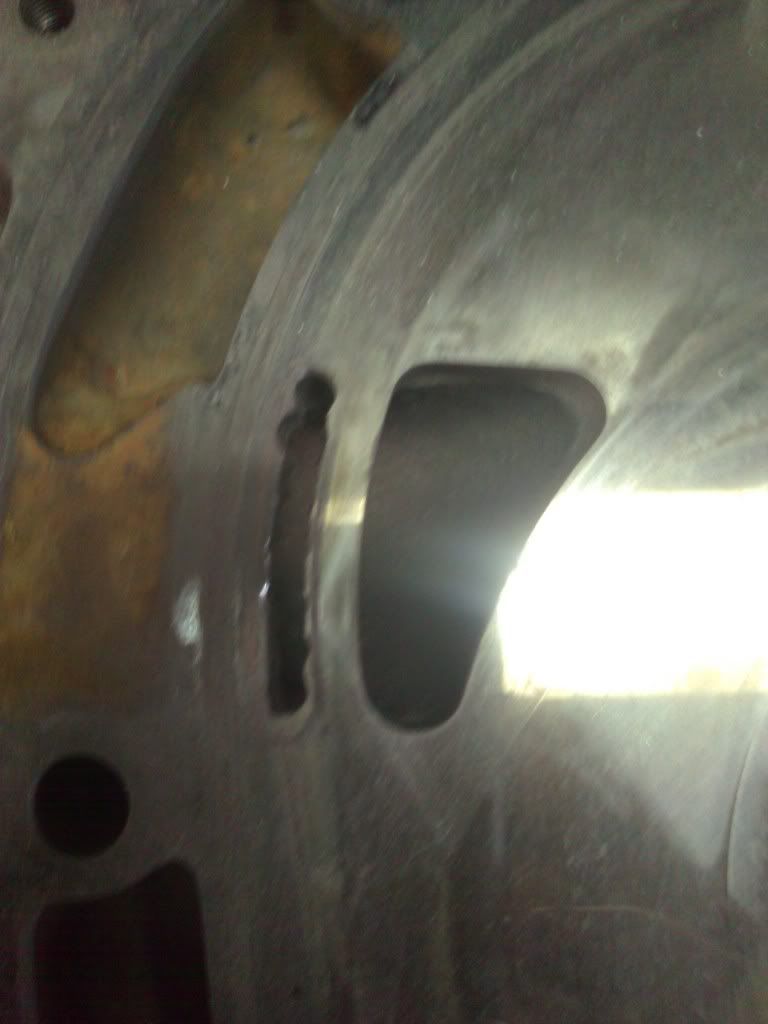
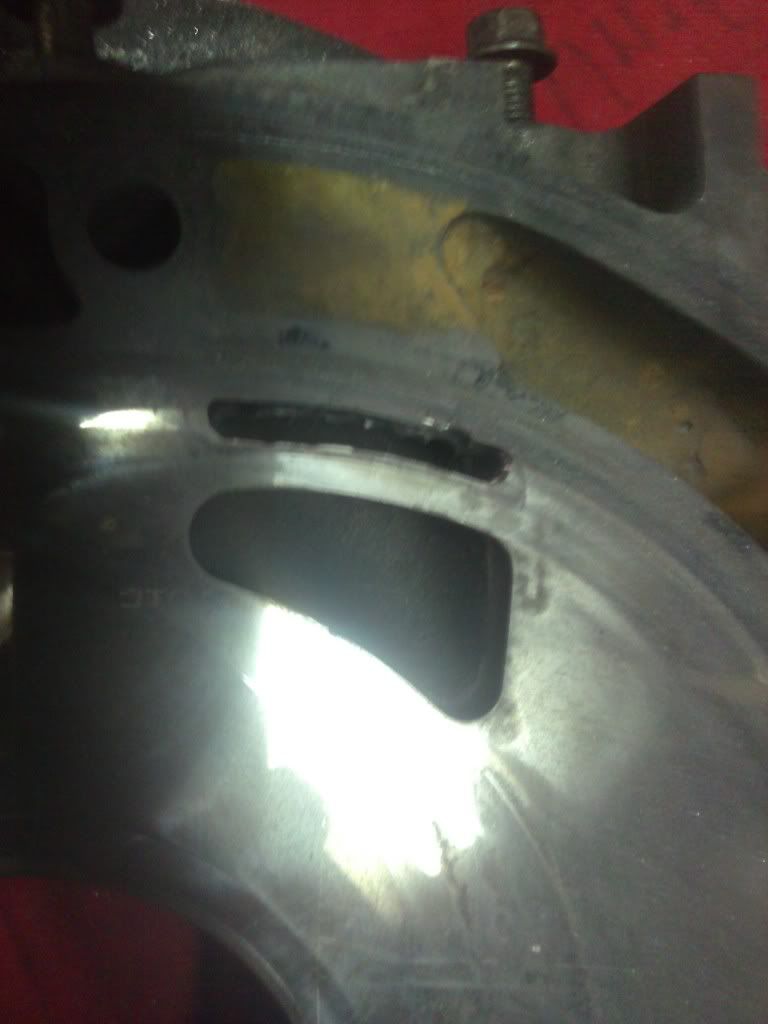
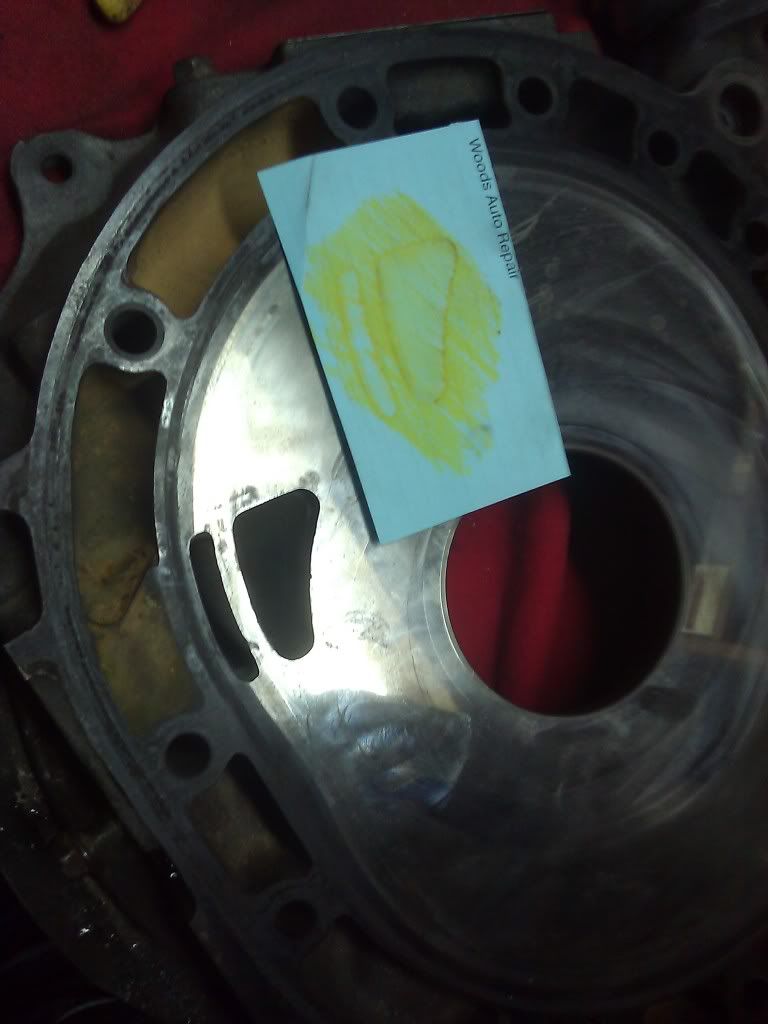
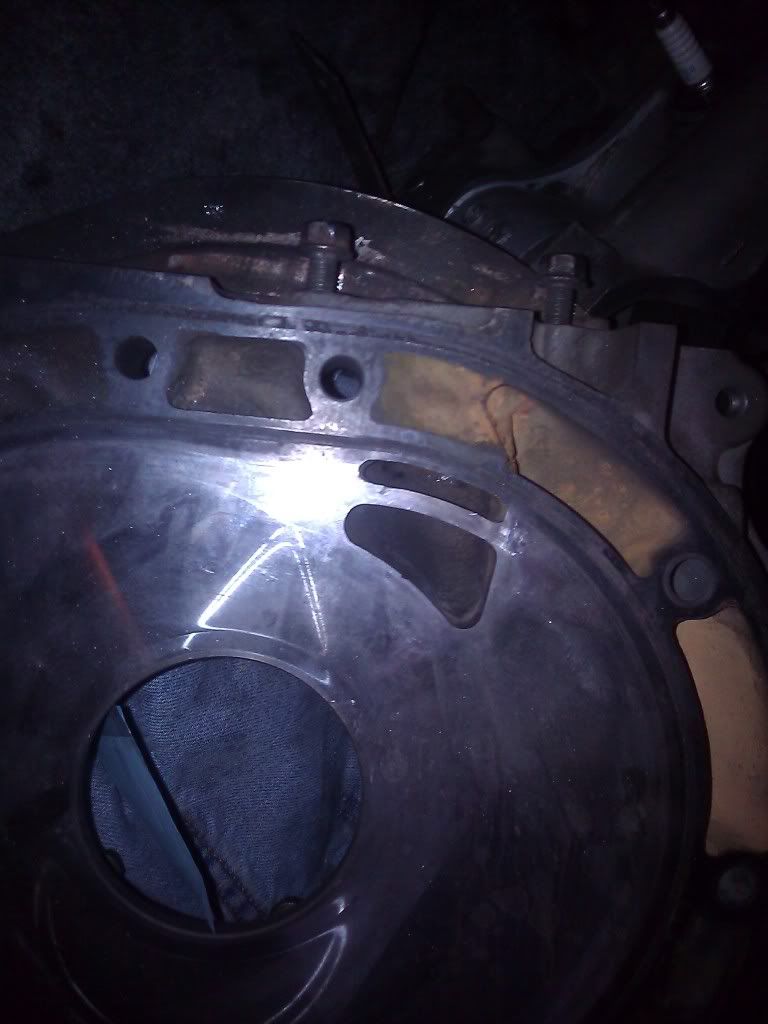
In the first pic where you have the red writing on the plate I had noticed the pitting. You can also see it in one of the later pics with the rotor housing. I think some guys use epoxy or jb weld to fill in and smooth out.
I hope no one uses JB weld on their side plates. 
There's not enough depth for the material to grab on to, and when it breaks off, which it will under normal engine conditions, it will mess things up.
I think it was Howard Coleman on this forum who had a broken engine caused by a piece of JB weld used in the intake tract, which broke off and really caused some problems.
So JB weld in contact with anything having to do with fuel, incoming air, or that will be stressed when side seals slide over it, is a big no-no.
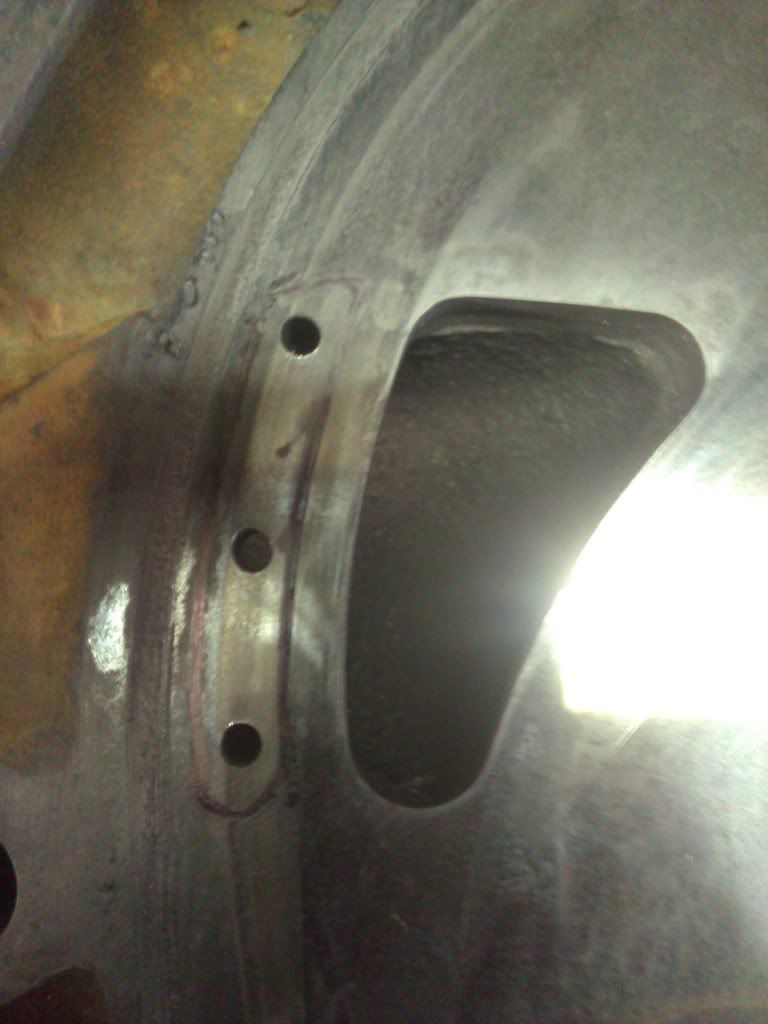
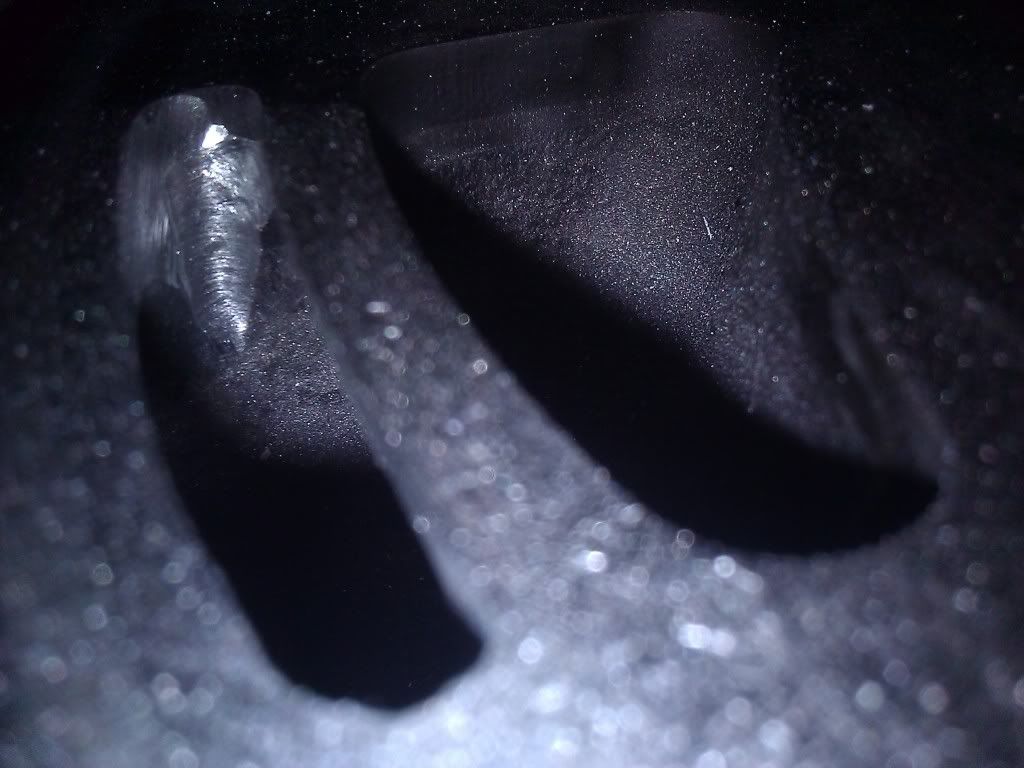
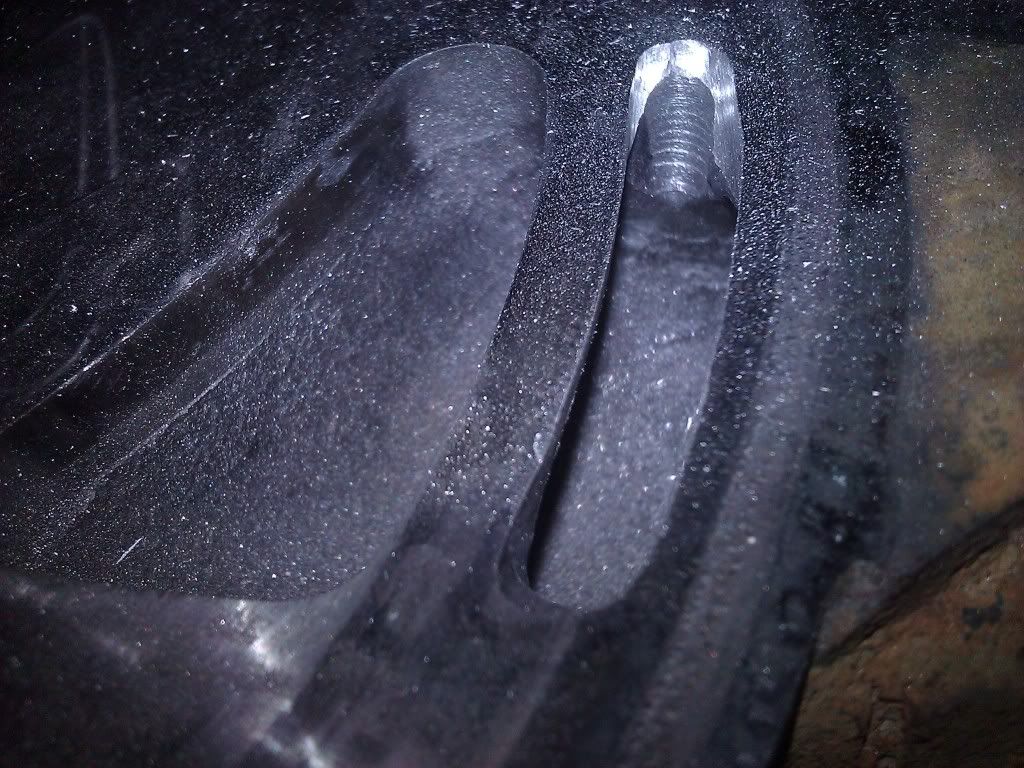
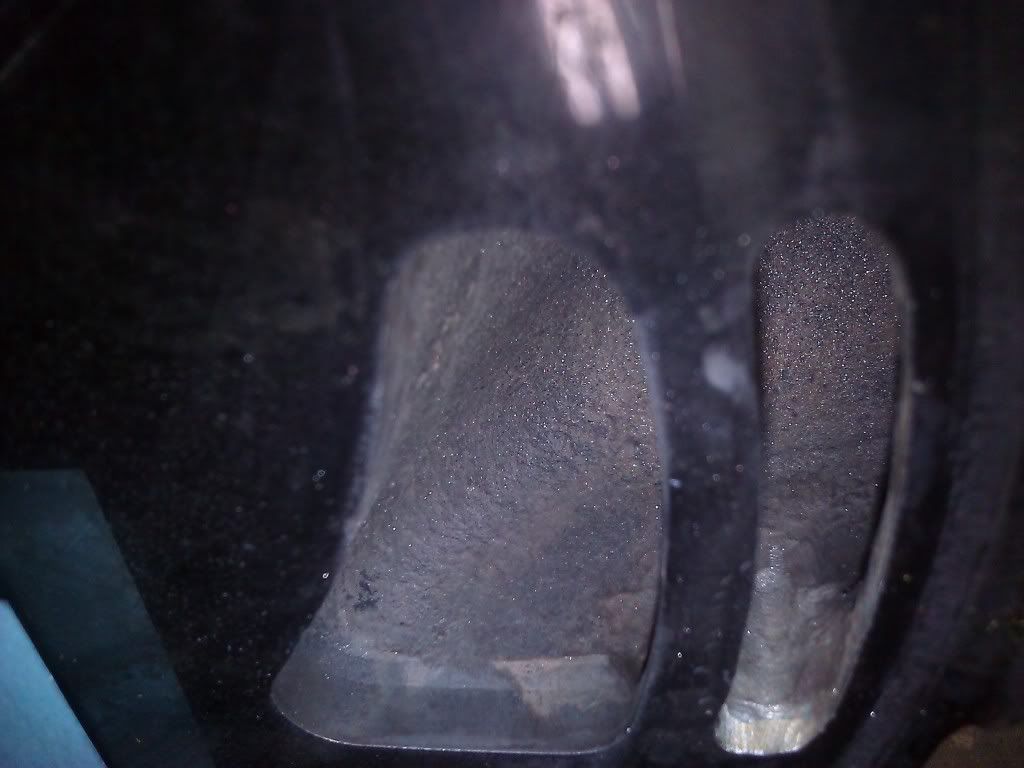
TS87FC3S, good job on that first bridge, man! Your measurements came out very accurate compared to what you were attempting. Nice! The next thing I'd do is clean up the inside of the main ports to get rid of any casting flash and sharp 90 degree edges from the port milling process.
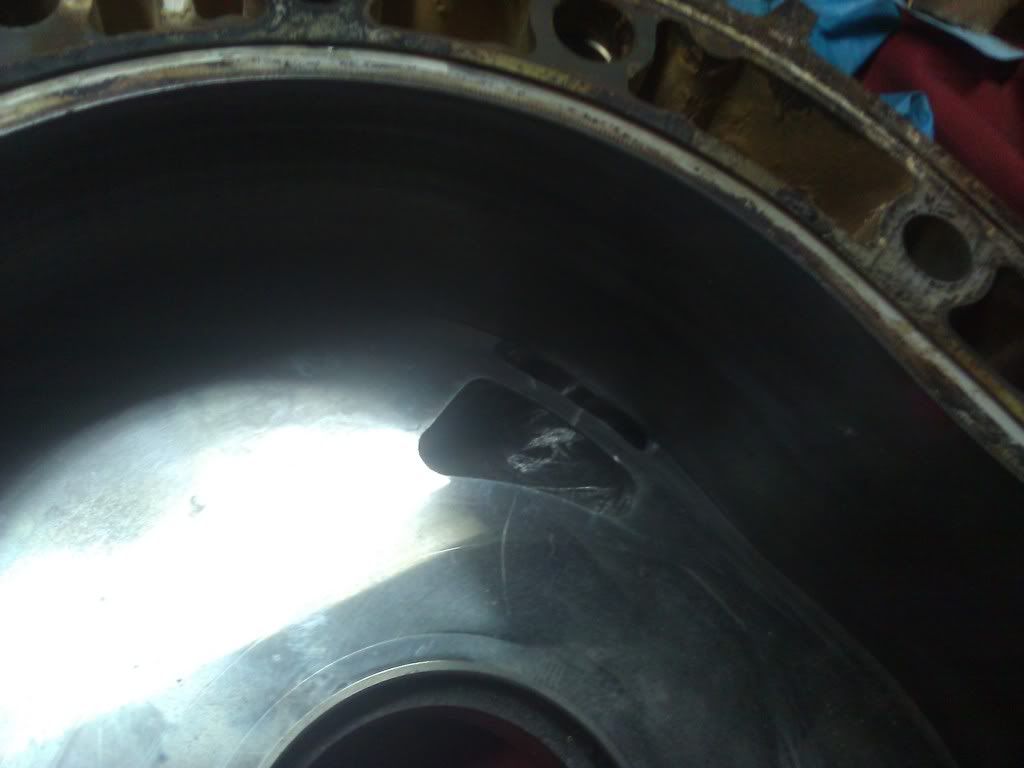
It also appears you may have gotten an answer about the little channels under your carb. It holds water so shouldn't have any active flow. It may only slighty affect your idle, and being on a half BP, your idle will be a bit affected by the ports anyway, so it shouldn't be a big deal. Go ahead and block them with something that's removeable. I'd say use a little RTV under there because for one thing it's easy to remove later with a screwdriver tip, and if a chunk, albeit a tiny chunk, breaks off, it will not cause damage because it's soft. Heck carbon, that routinely breaks off of a rotor face, is harder. Then once you've determined that blocking the tiny channels is ok on a carb like that, then consider blocking with something more permenant. Probably not JB weld though lol. You know, maybe RTV is a good choice. It's pretty stable and should last a long time under there. And if it does break off, it won't cause any damage.
Again good job on that bridge. It looks good.
It also appears you may have gotten an answer about the little channels under your carb. It holds water so shouldn't have any active flow. It may only slighty affect your idle, and being on a half BP, your idle will be a bit affected by the ports anyway, so it shouldn't be a big deal. Go ahead and block them with something that's removeable. I'd say use a little RTV under there because for one thing it's easy to remove later with a screwdriver tip, and if a chunk, albeit a tiny chunk, breaks off, it will not cause damage because it's soft. Heck carbon, that routinely breaks off of a rotor face, is harder.
Then once you've determined that blocking the tiny channels is ok on a carb like that, then consider blocking with something more permenant. Probably not JB weld though lol. You know, maybe RTV is a good choice. It's pretty stable and should last a long time under there. And if it does break off, it won't cause any damage.Again good job on that bridge. It looks good.
Thread Starter
Full Member
Joined: Jan 2010
Posts: 143
Likes: 0
From: indinapolis In


look at you! go boy ... that bridge looks healthy. looks good for the first time out the gate. i wish i could be of more assistance to you on that, but i still have wandered into bridge territory. i have (and am fulfilling) "other" big port aspirations. i'm fine with being a cheerleader though.
Thread Starter
Full Member
Joined: Jan 2010
Posts: 143
Likes: 0
From: indinapolis In
look at you! go boy ... that bridge looks healthy. looks good for the first time out the gate. i wish i could be of more assistance to you on that, but i still have wandered into bridge territory. i have (and am fulfilling) "other" big port aspirations. i'm fine with being a cheerleader though.