
My UK 1985 '7

Thread Starter
Senior Member
Joined: Oct 2010
Posts: 255
Likes: 1
From: England
Holy cow, I forgot how long it is since I popped in over here. What with the US election pretty much dominating the news the last few weeks it provoked me to wander by and see what's been going on....and it appears it's nearly a year since I last did  Gahhh. In my defence, I've been mad busy and life-type stuff has hit my internet time hard. But at least I've not been idle. To give you an idea of some of the stuff that's been going on the past year:


Bit of a tease going on there, sorry to be cryptic but not got time to do a proper update just now. I'll get on it in the next day or two, but hopefully those pics might whet your appetite
Gahhh. In my defence, I've been mad busy and life-type stuff has hit my internet time hard. But at least I've not been idle. To give you an idea of some of the stuff that's been going on the past year:Bit of a tease going on there, sorry to be cryptic but not got time to do a proper update just now. I'll get on it in the next day or two, but hopefully those pics might whet your appetite
Thread Starter
Senior Member
Joined: Oct 2010
Posts: 255
Likes: 1
From: England
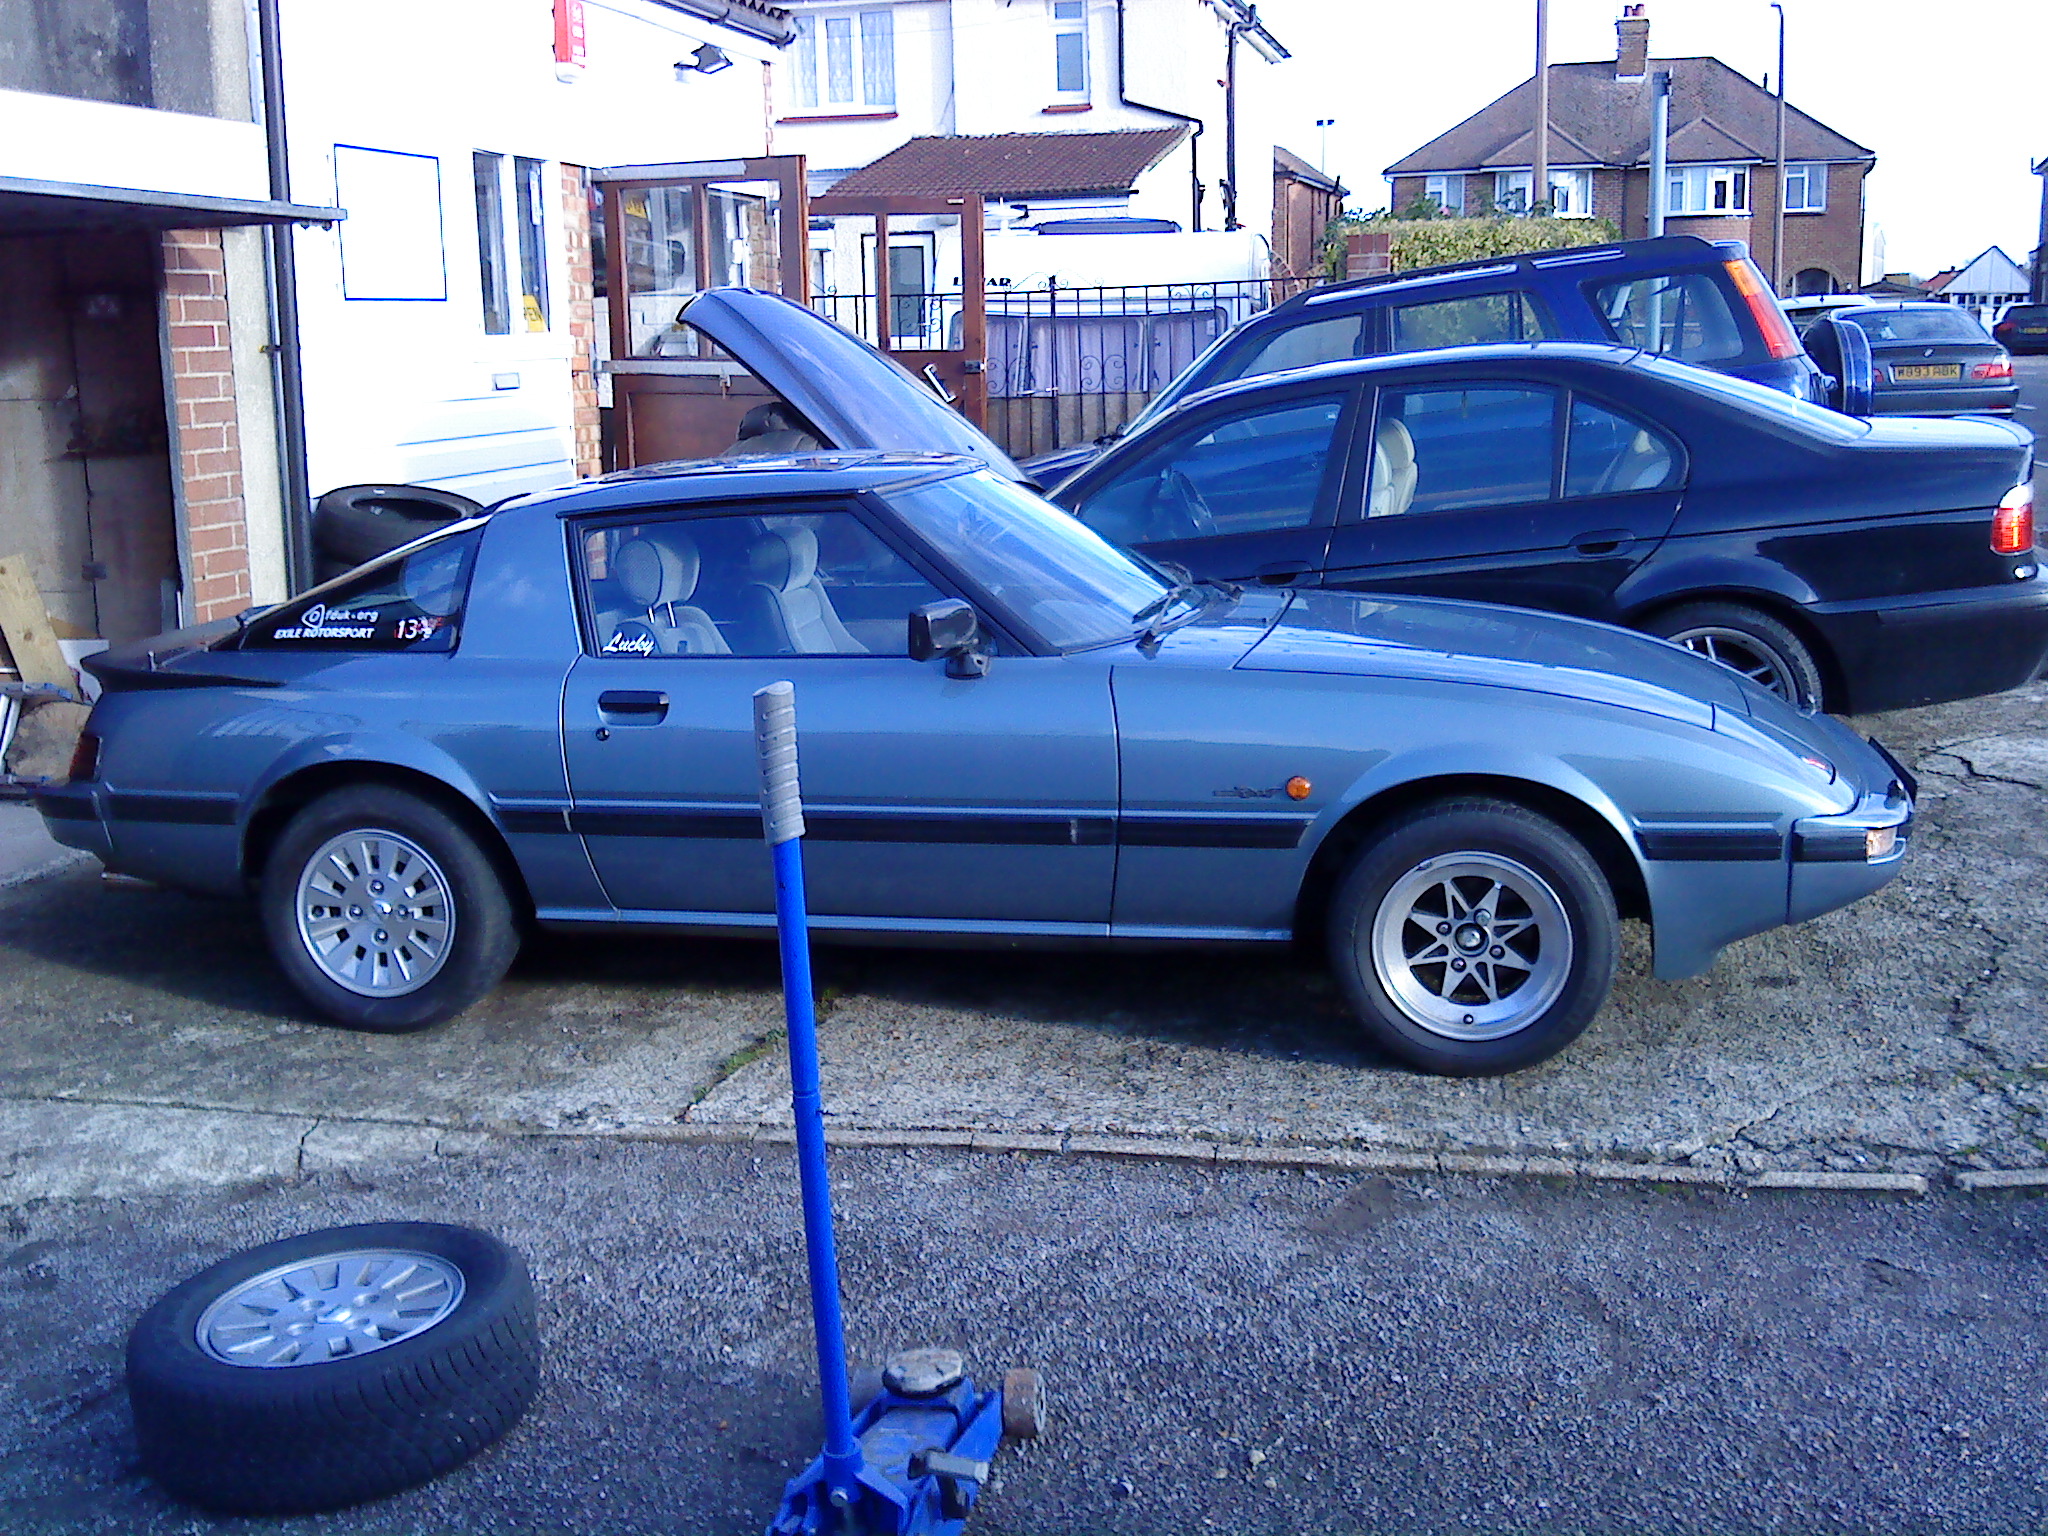
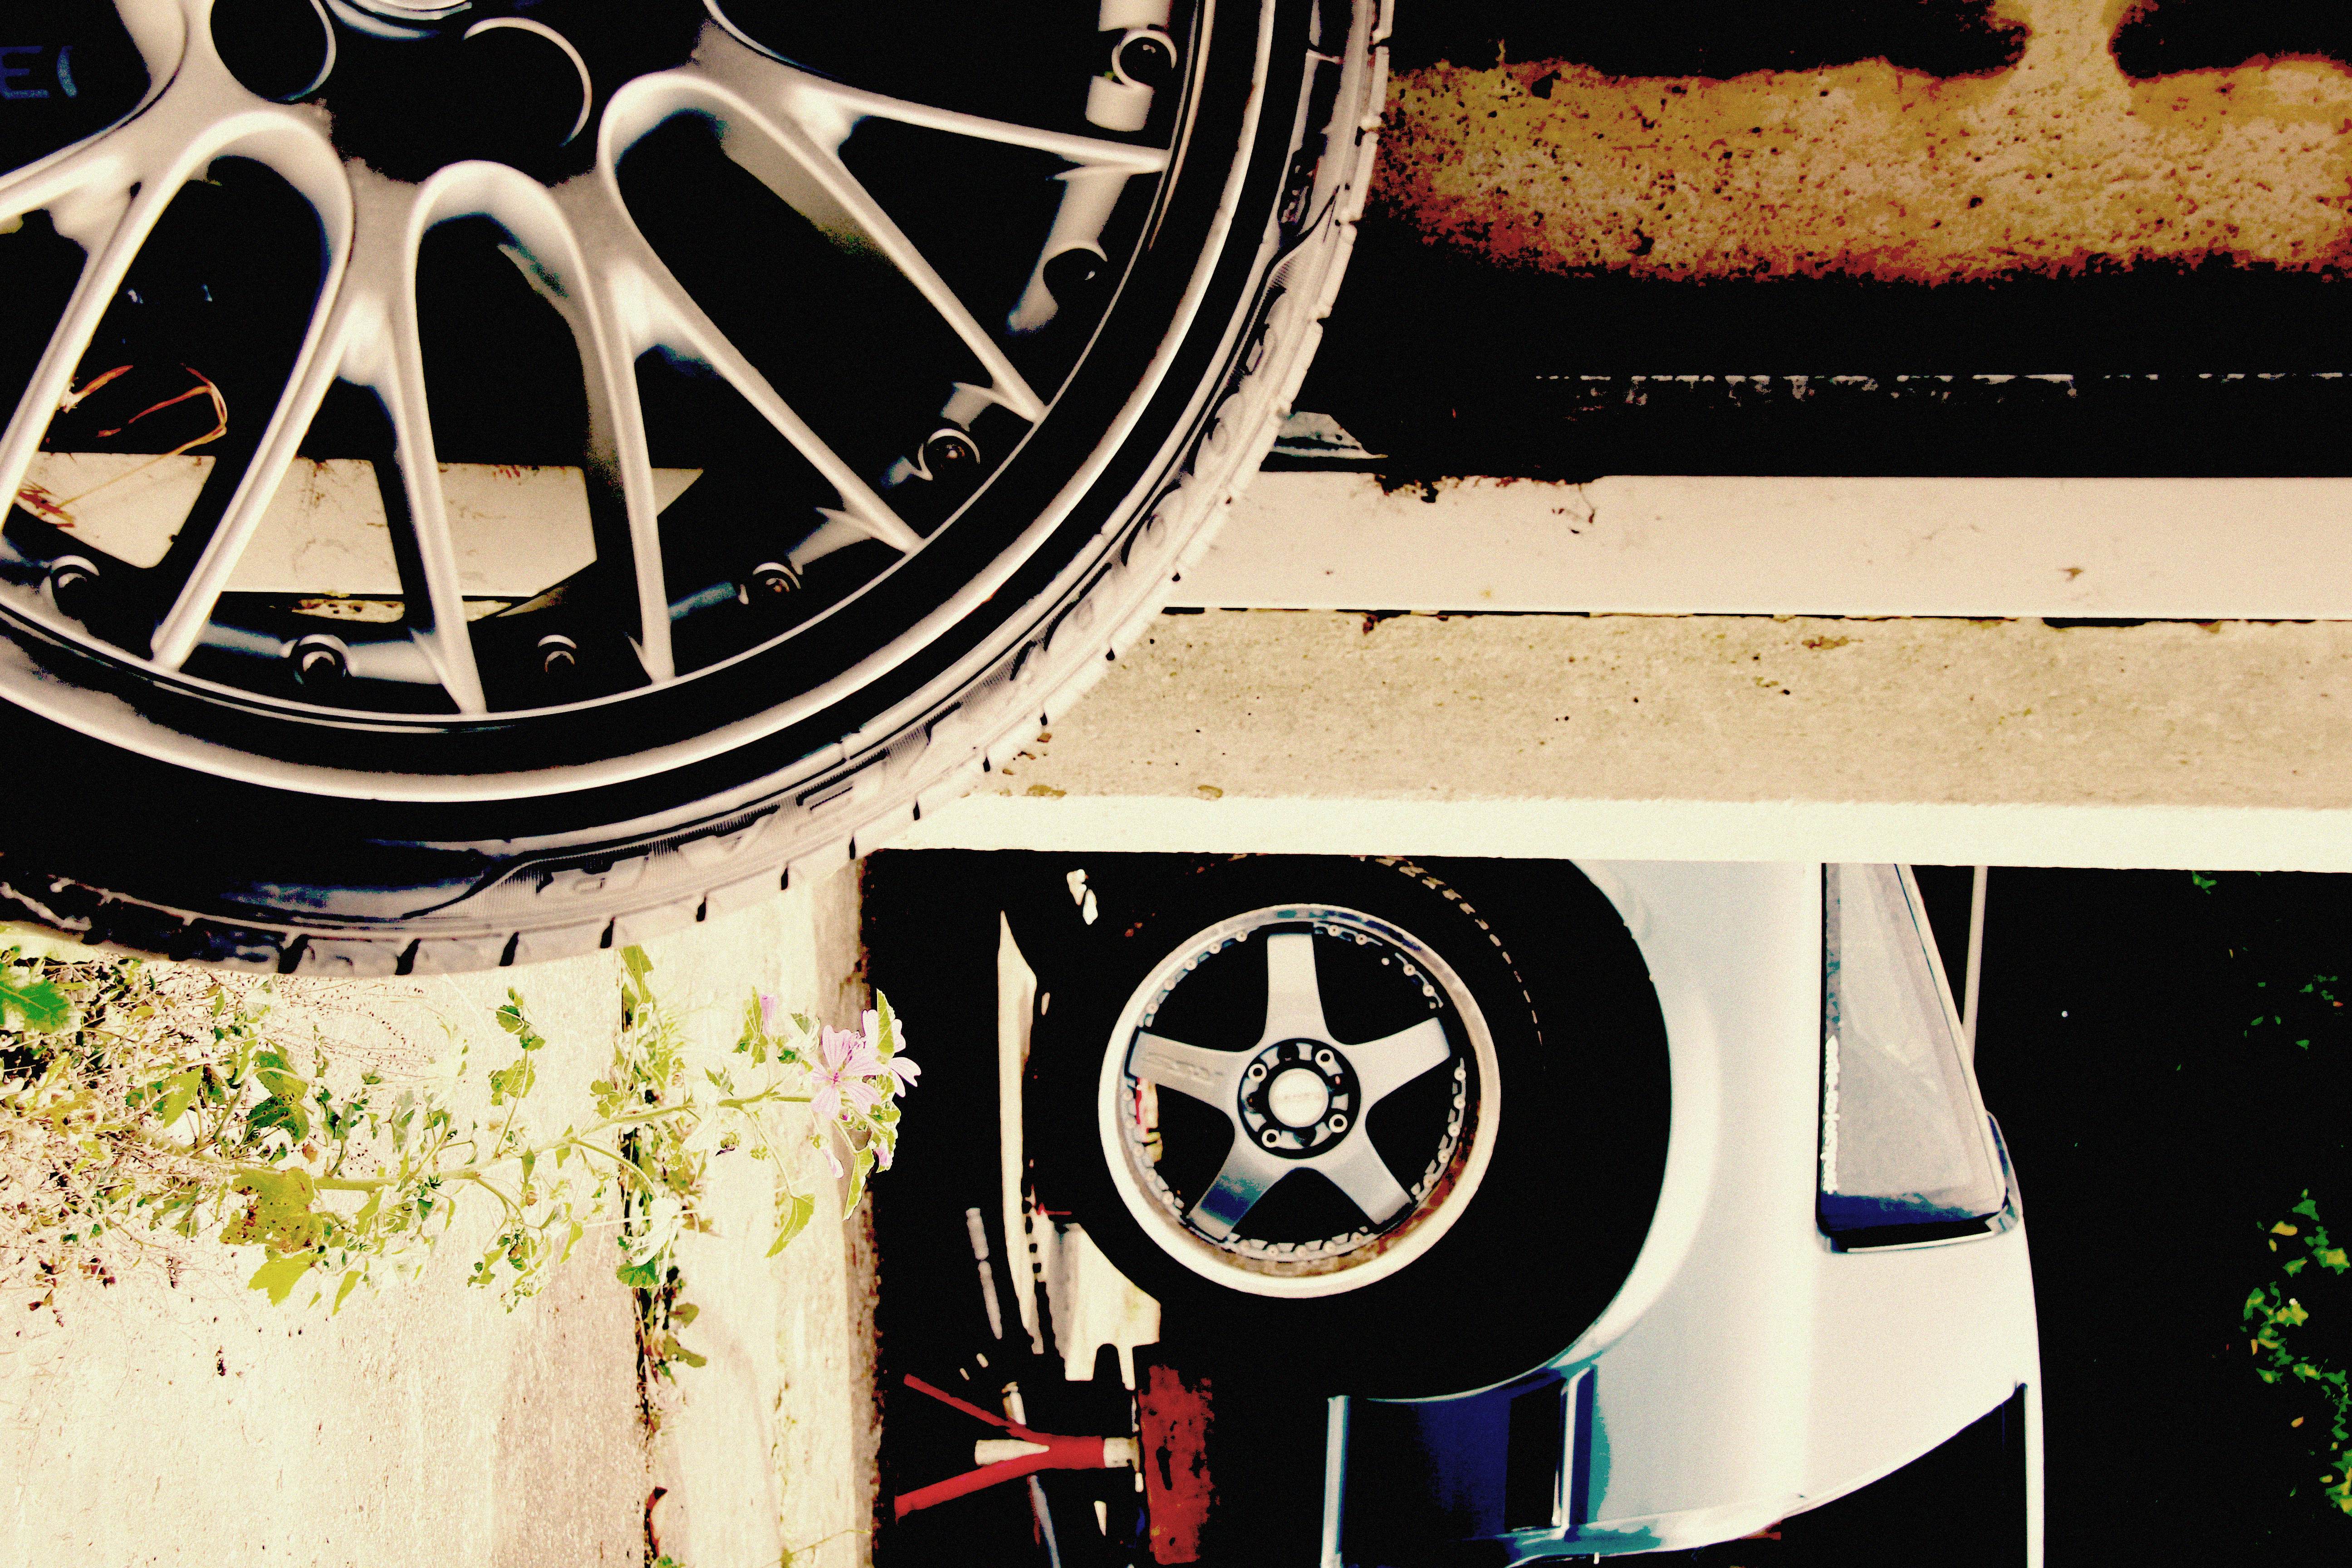
So, as per my last (proper) update I'd just scored a pair of rather nice Sharak JDM wheels. A bit of playing about with them revealed they'd only fit one way, if you know what I means... (sorry about the sketchy phone pics)
This is the stock offset fail...

..and this is the difference 30mm makes 8)
As far as rubbing and the need to roll or butcher arches, they were gonna be fine on the back
Though for some reason the car now looked like 4x4 stylee ride height. Strange when the tyre rolling diameter was the same as stock
On the front, sadly they failed epically. *****. The tread sticks out past the arch so I that'd be an MOT fail (the yearly UK roadworthiness test). Although they still didn't scrub, and lock was fine, I'd have to wide-arch the car and wasn't ready for that step yet!
This was a mild pisser. I was hoping to migrate them to the front eventually and get some wider ones on the rear when I found some properly nice ones. Bum. They look good up front too
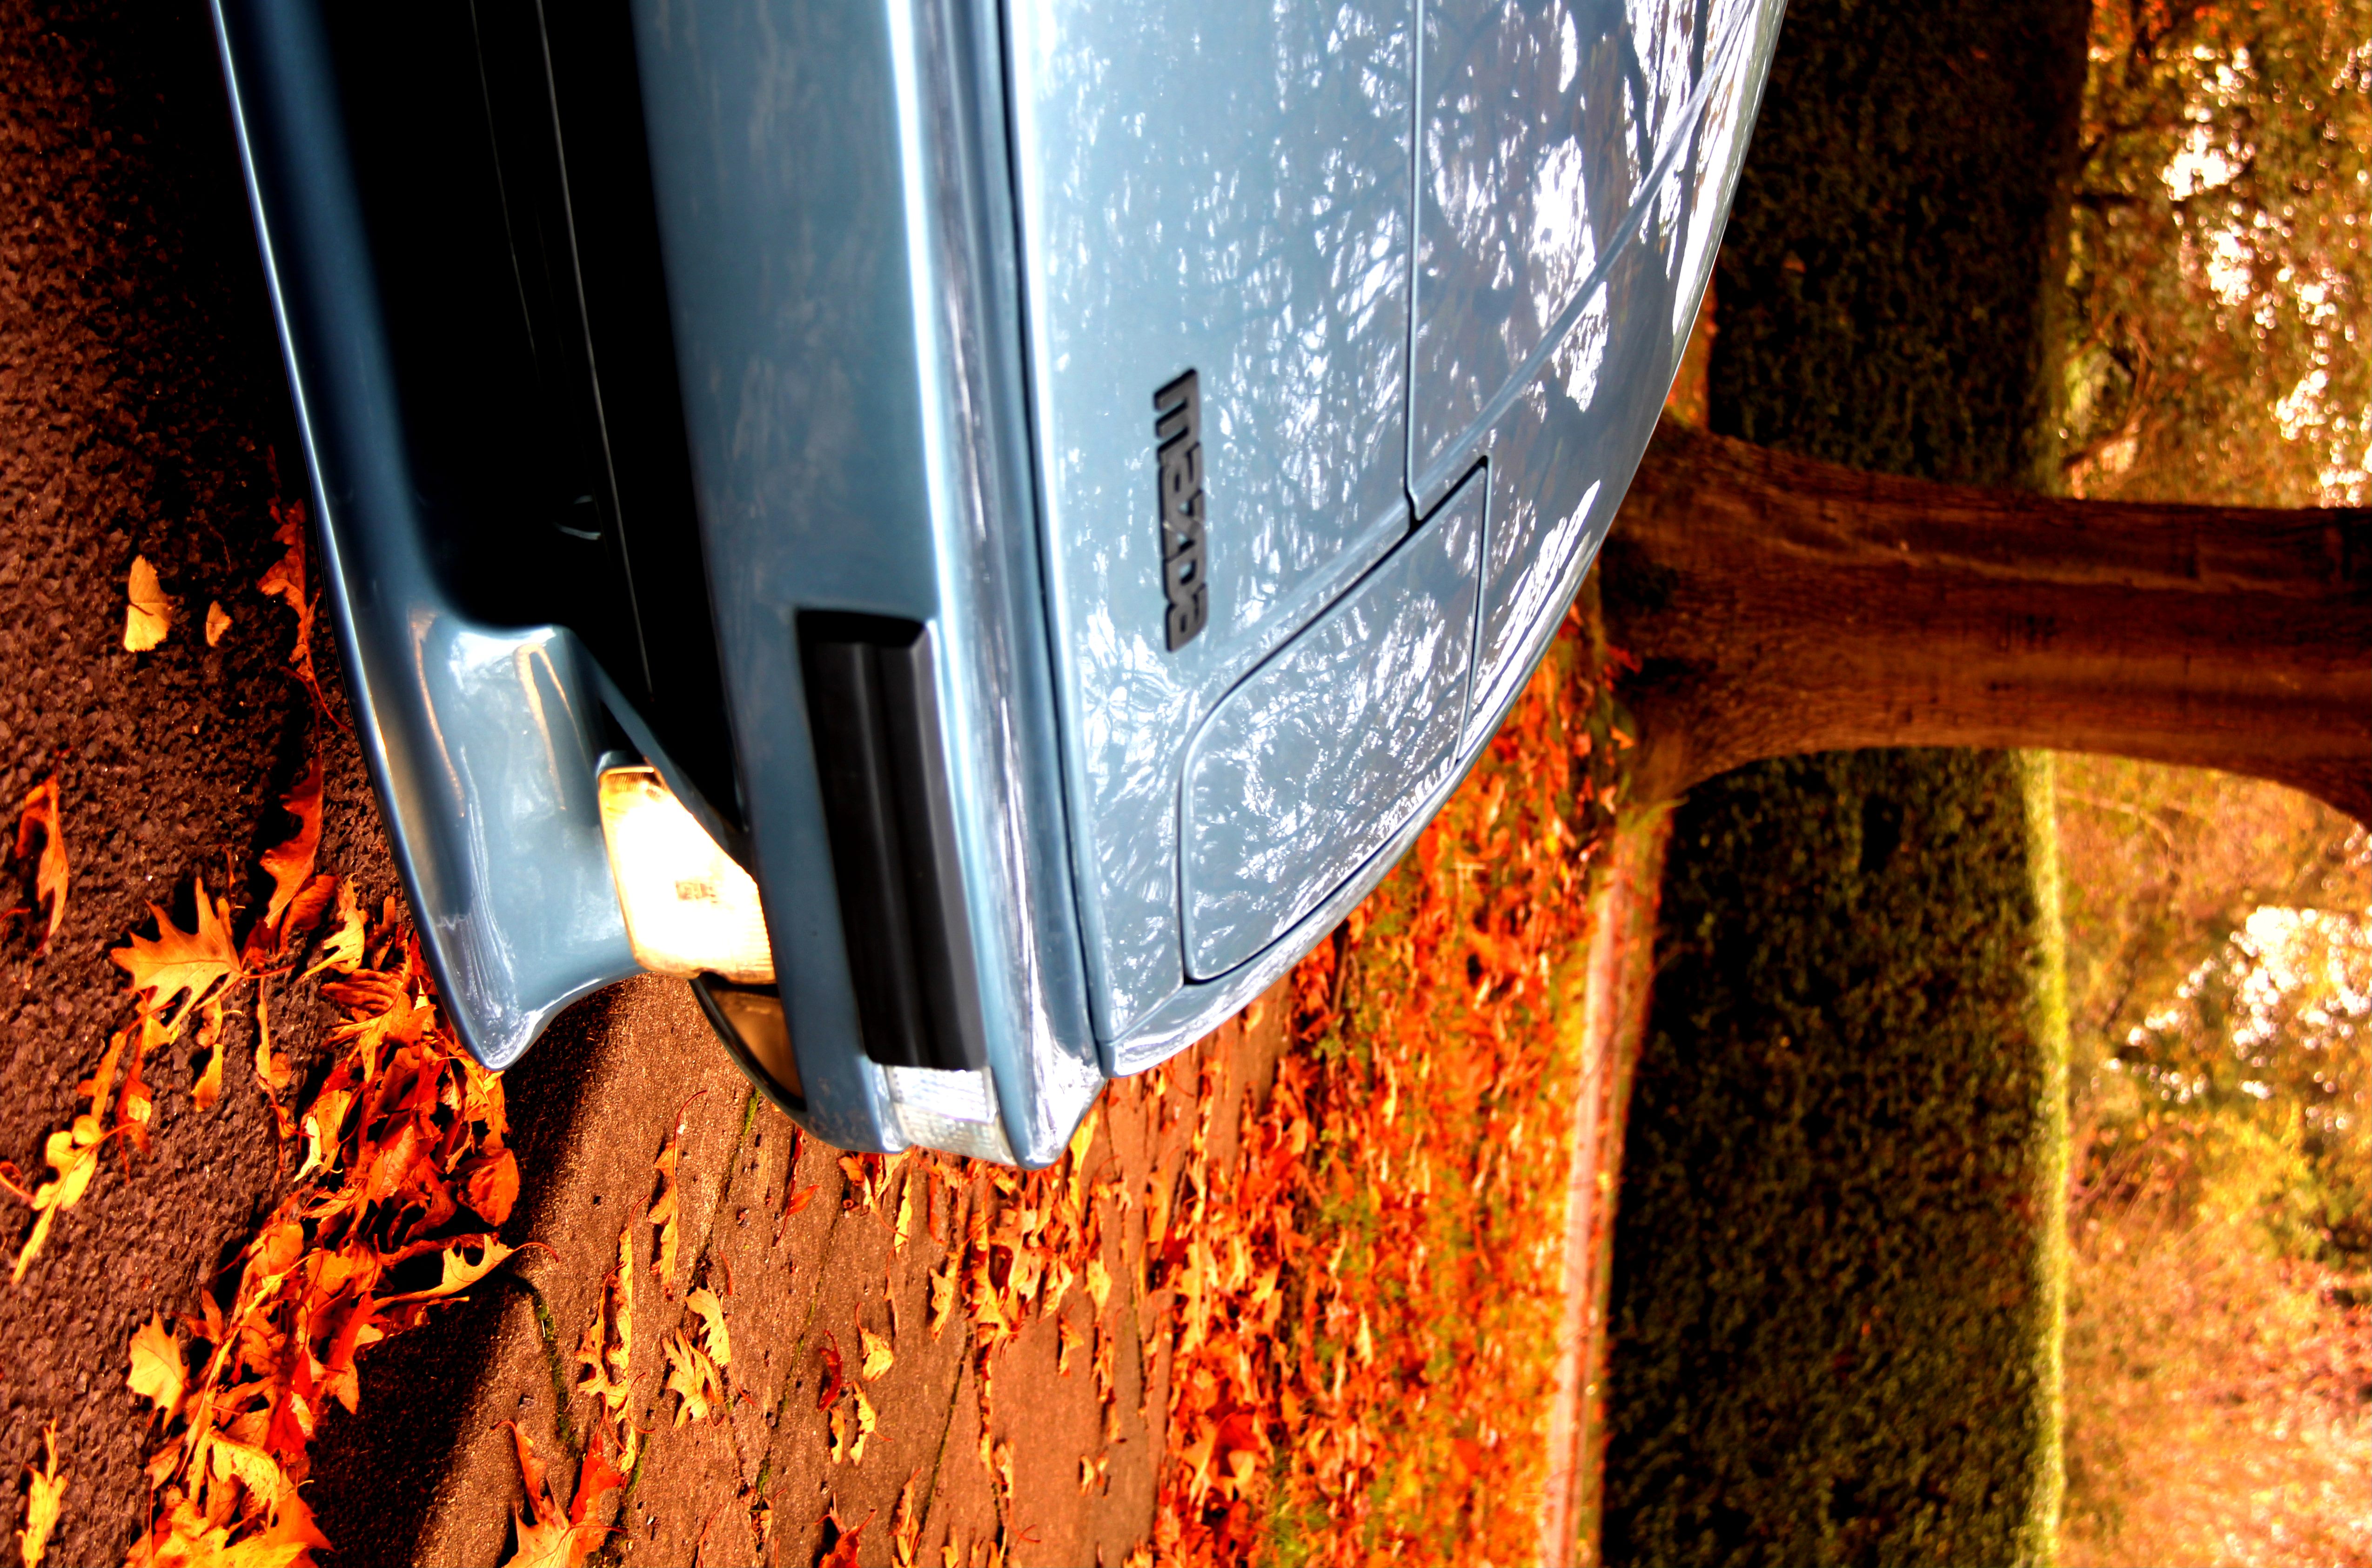
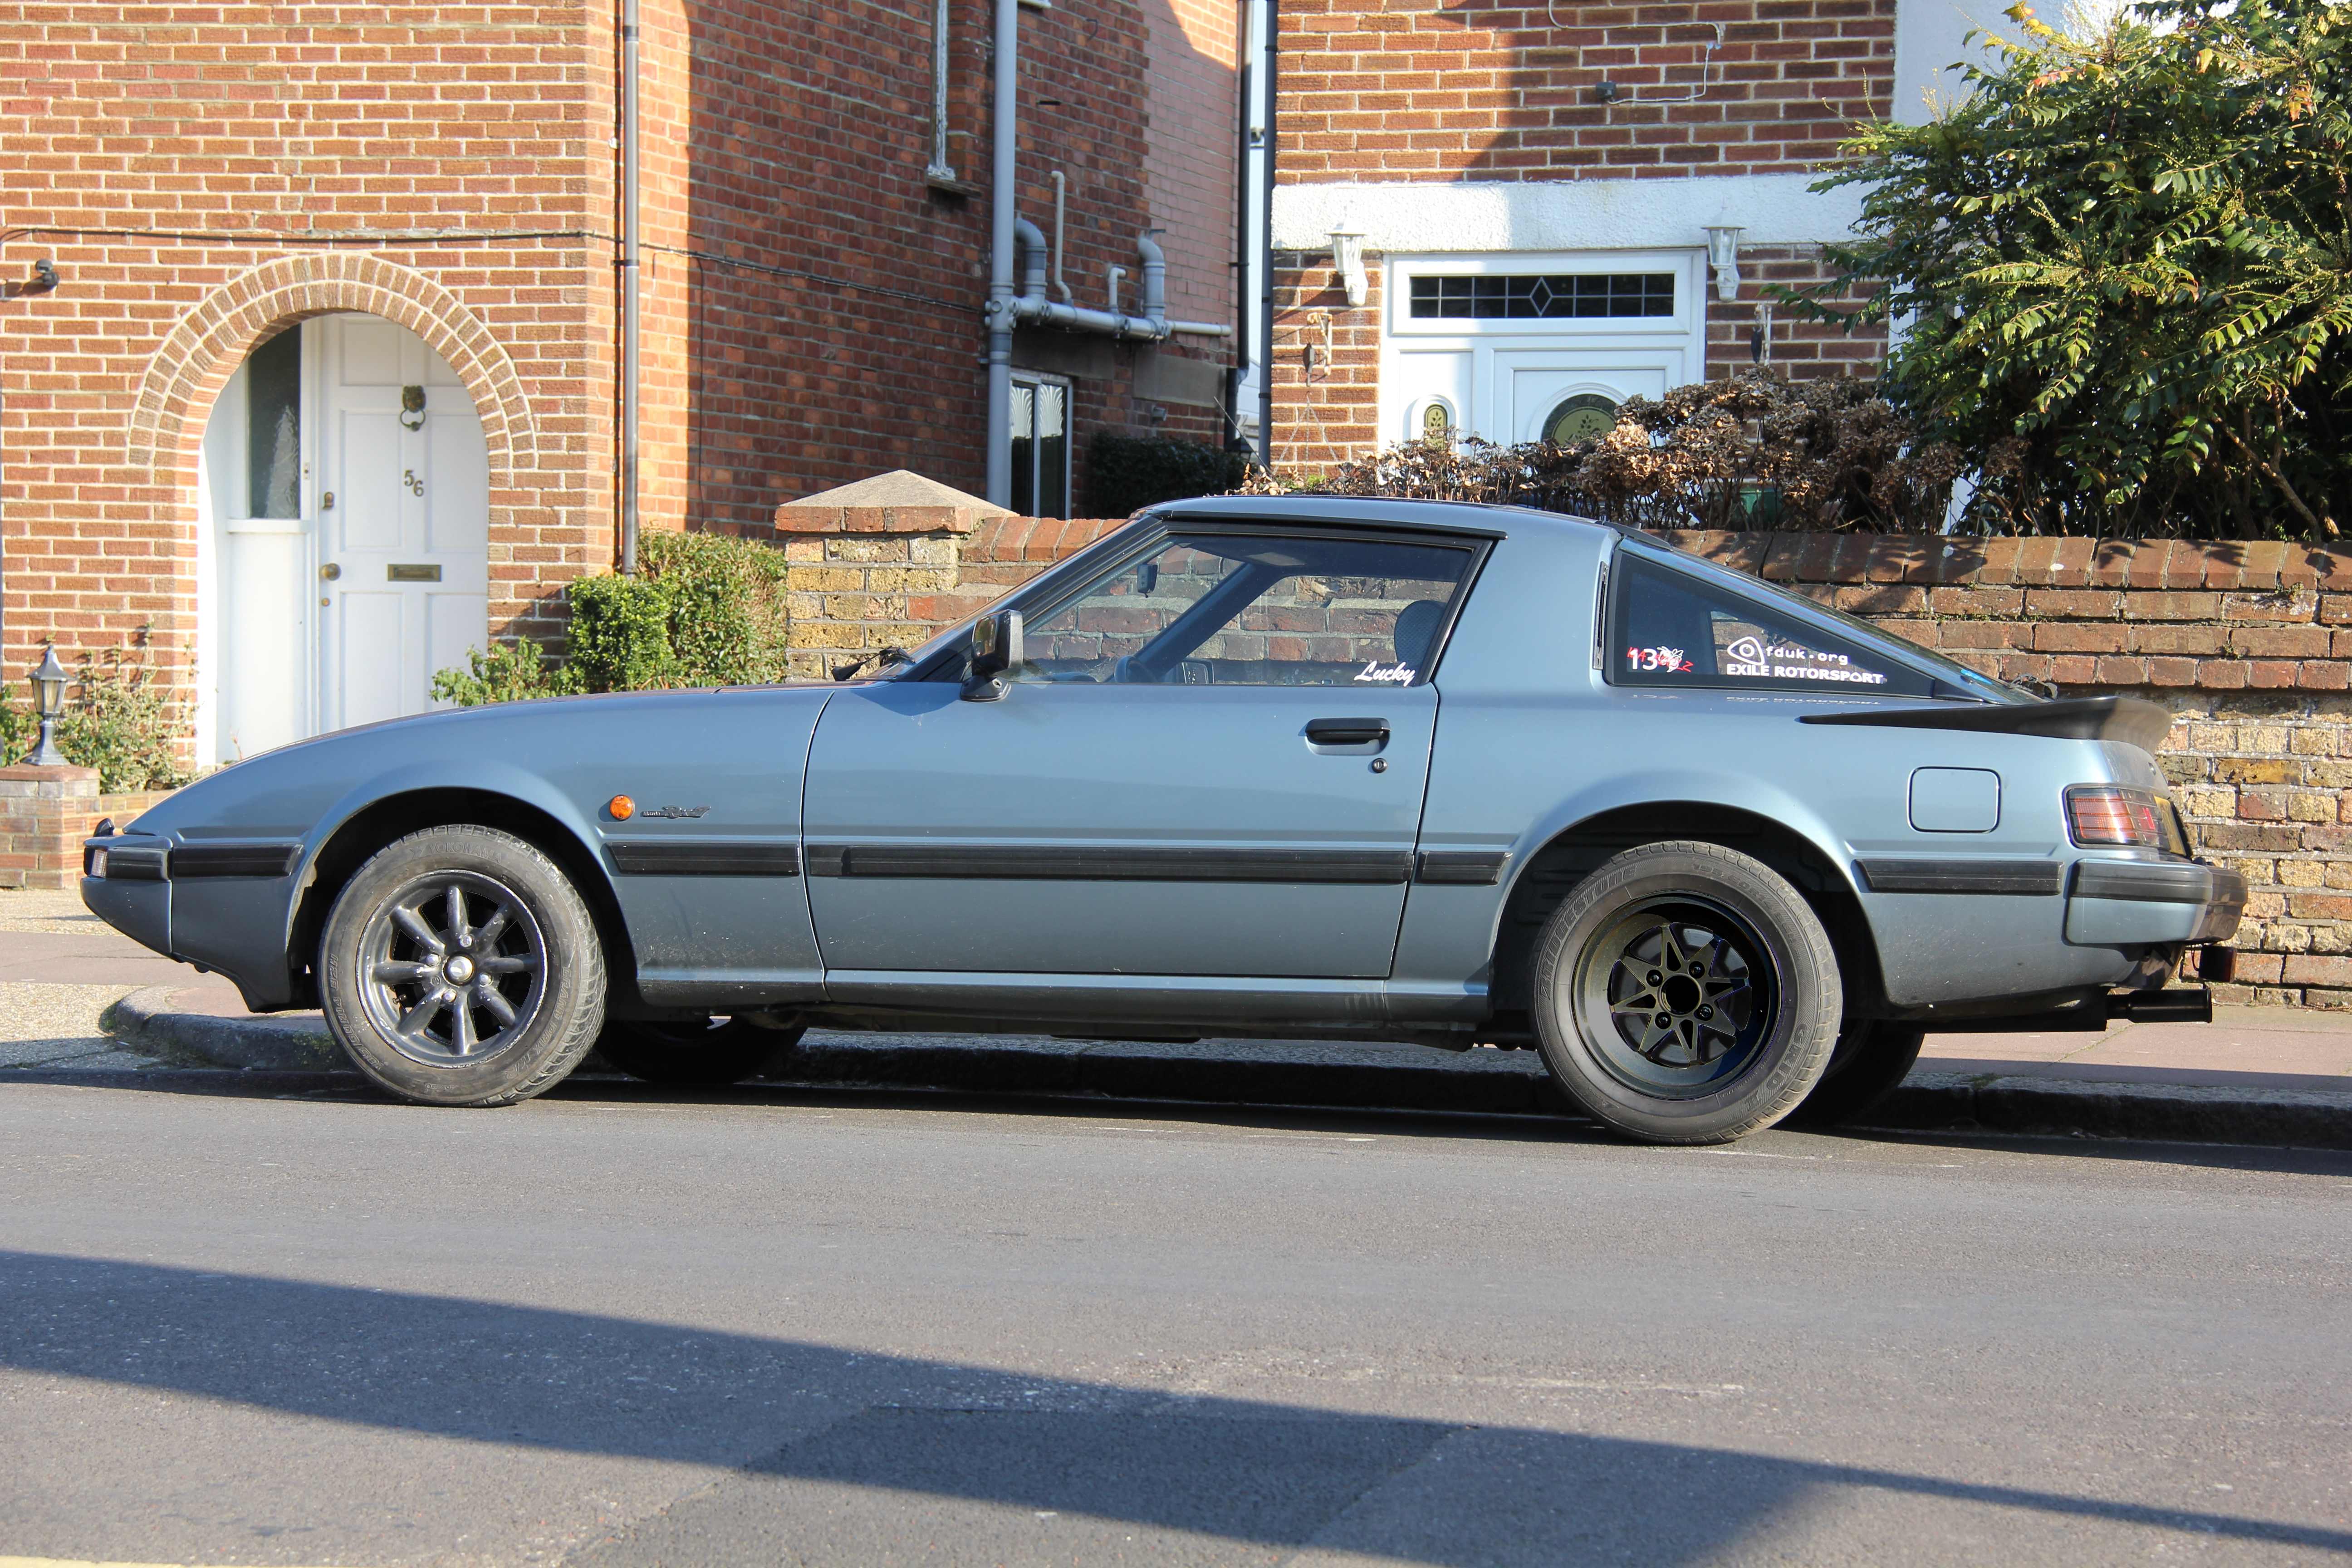
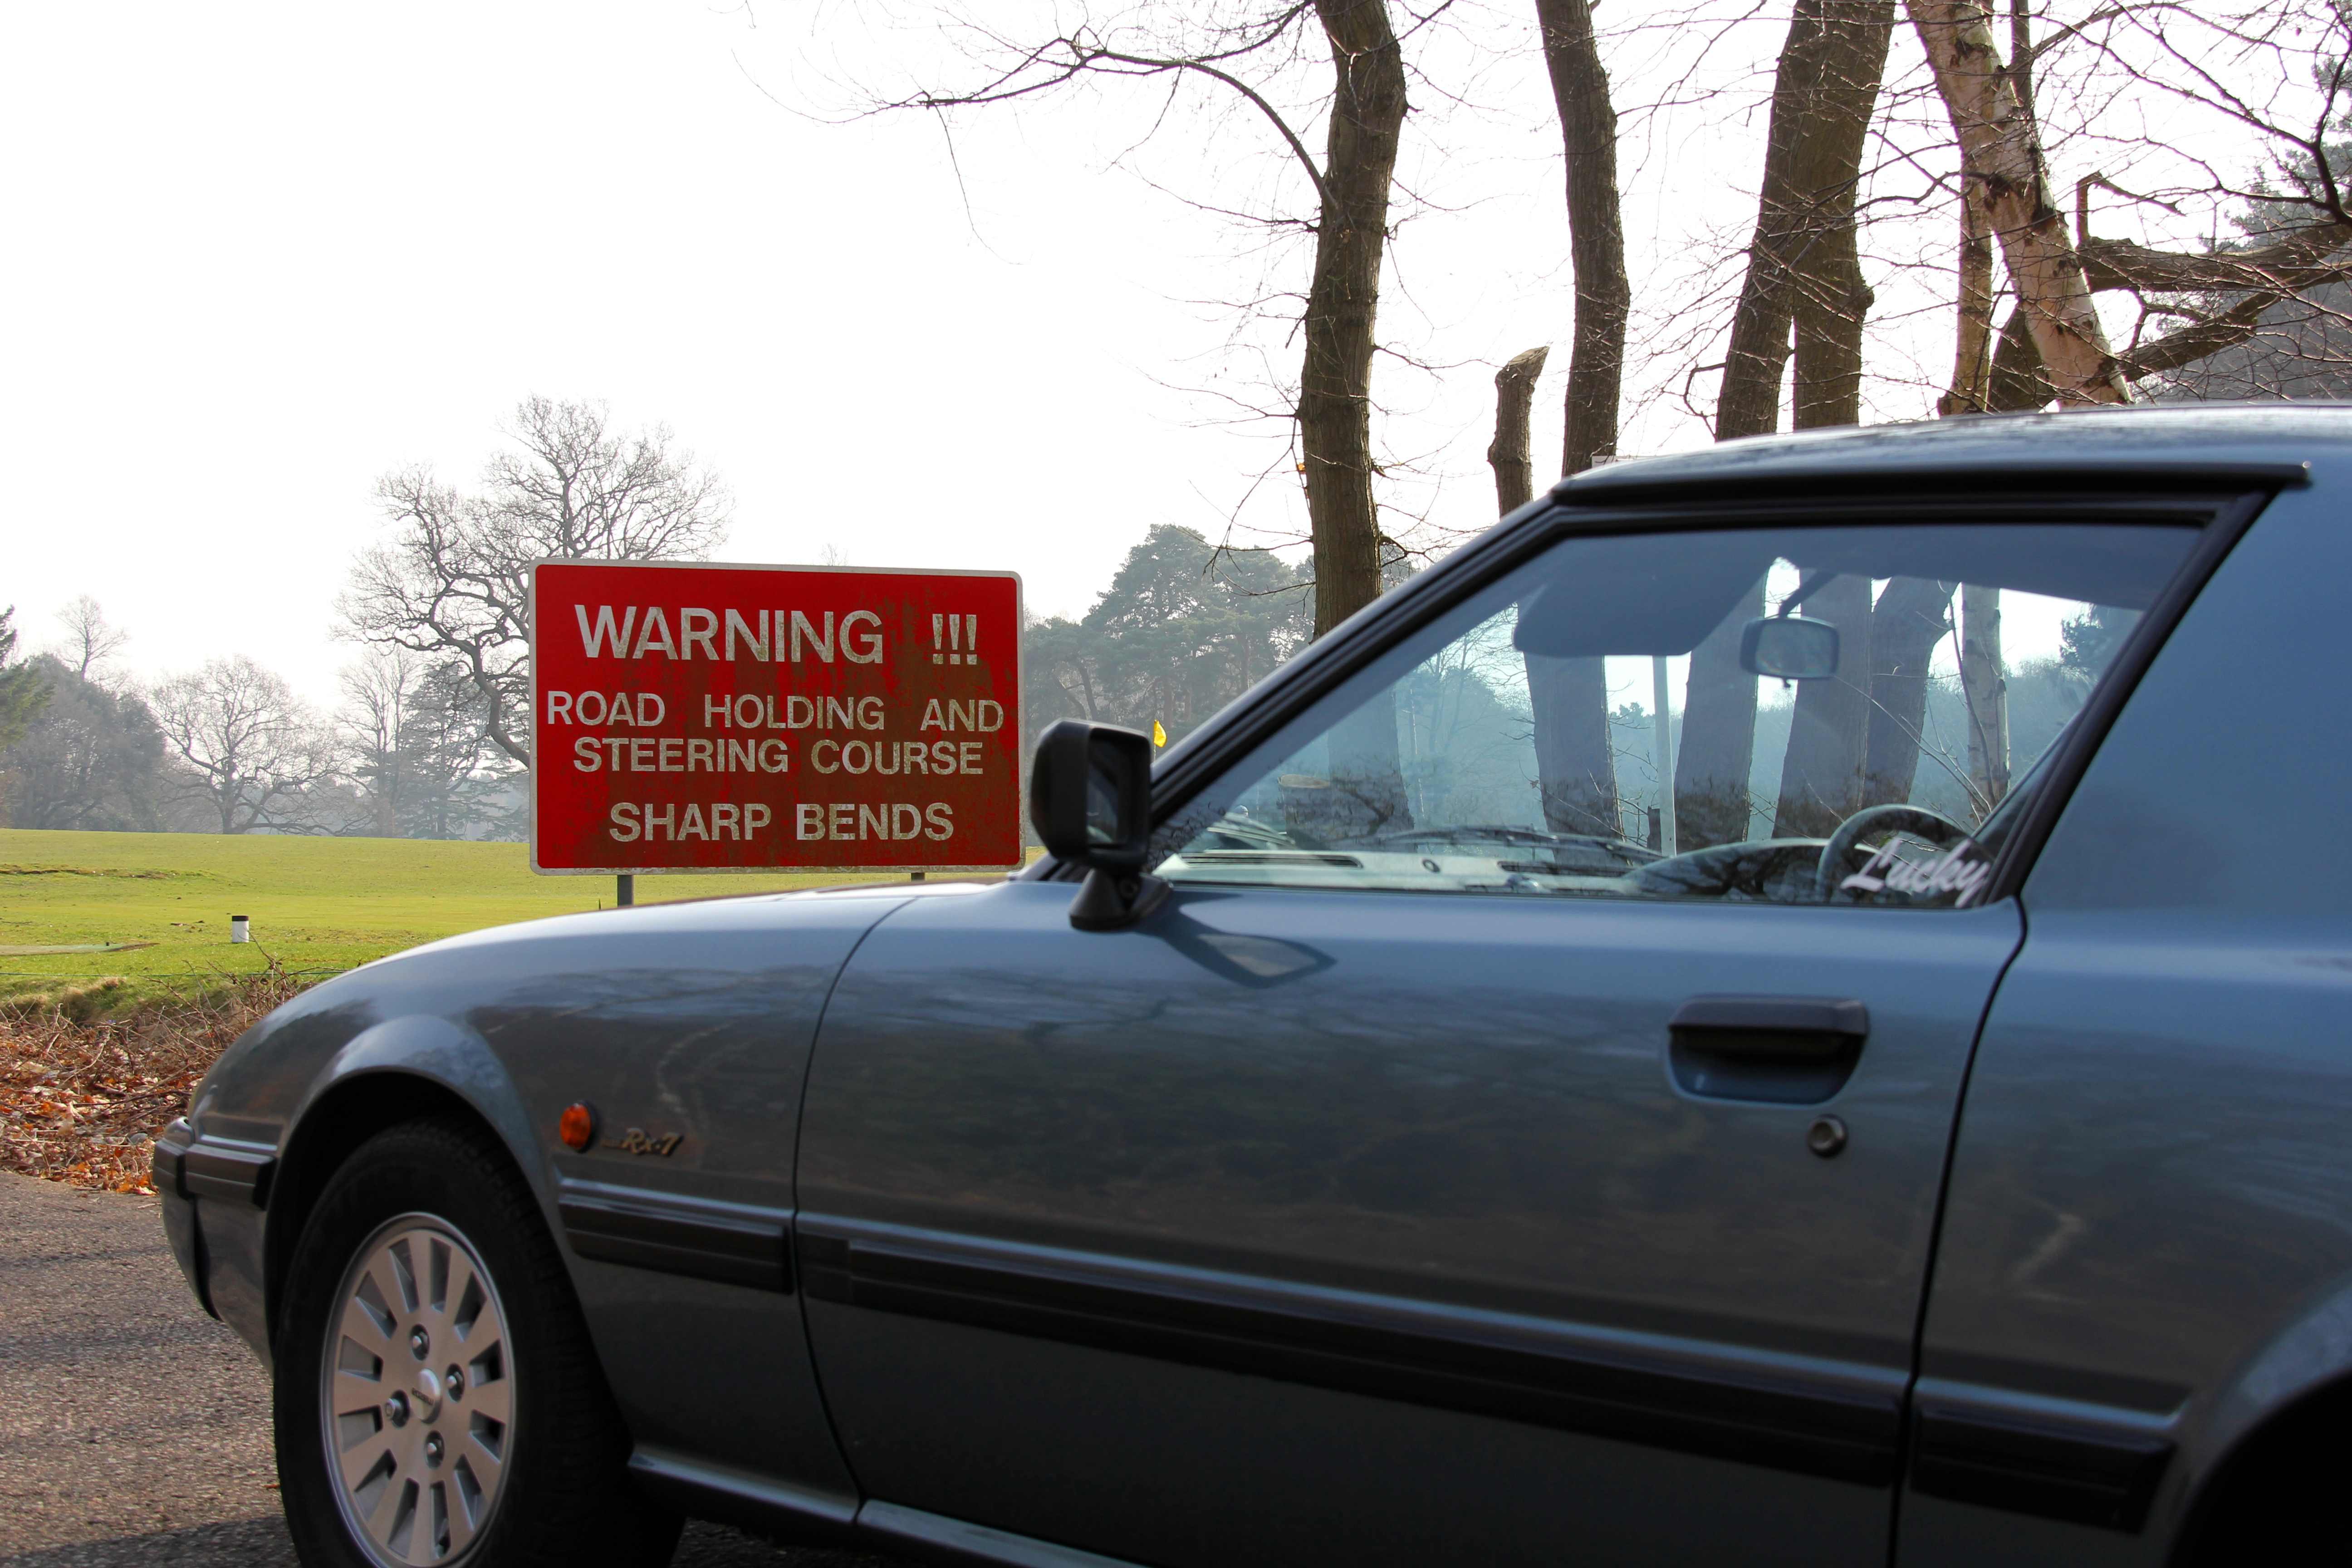
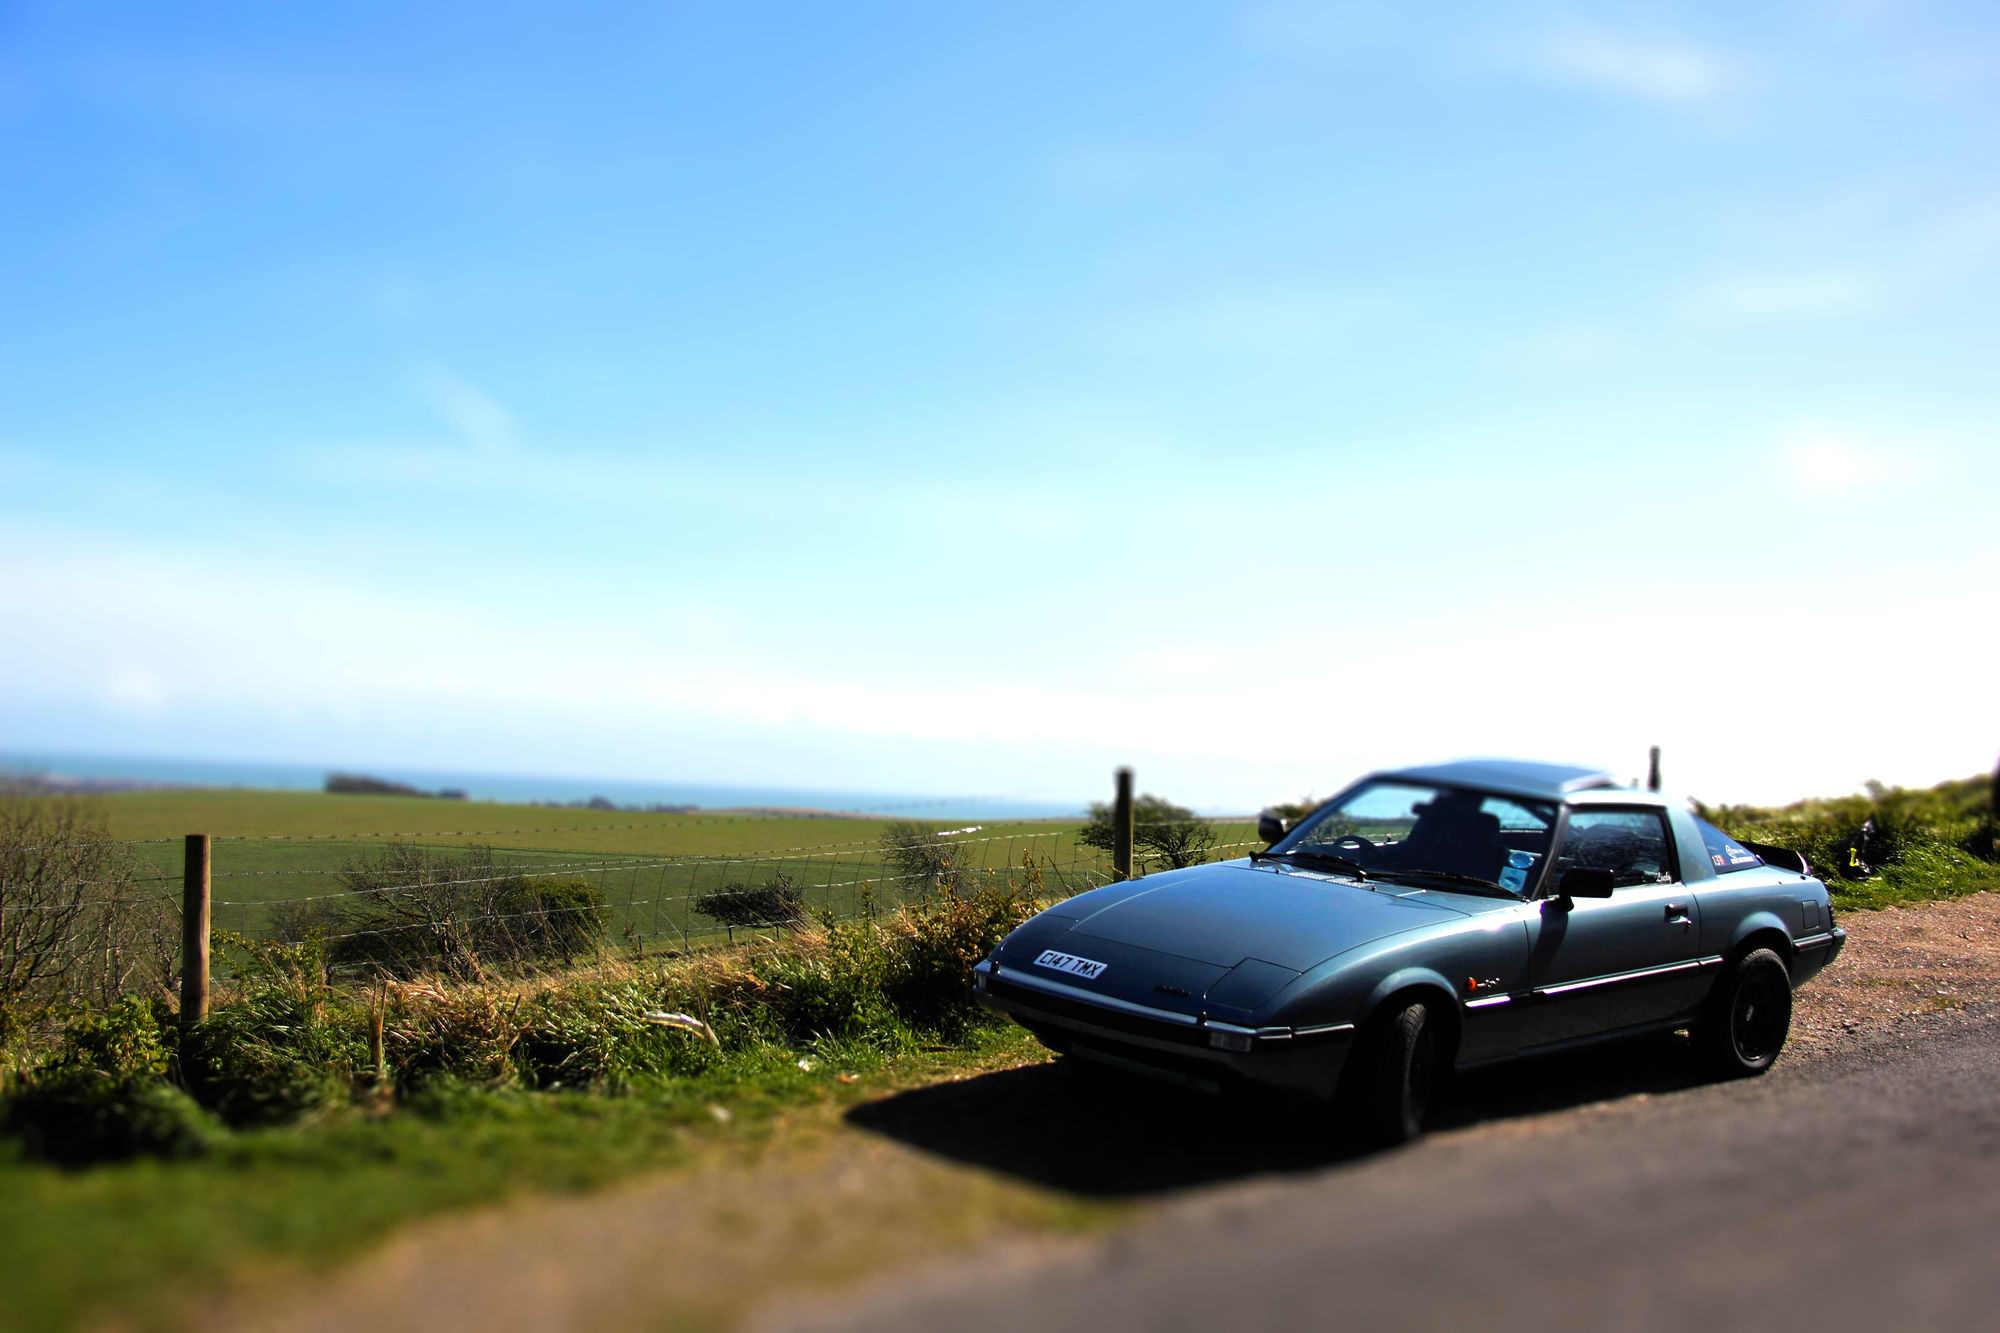
Anyway, since it was a grey drizzly English winter it seemed the perfect opportunity to ***** some monochrome stylee photos. This is what I remember the 70's looking like, everything was brown and grey then, like the inside of a betting shop that's gone all yellow from the years of *** smoke
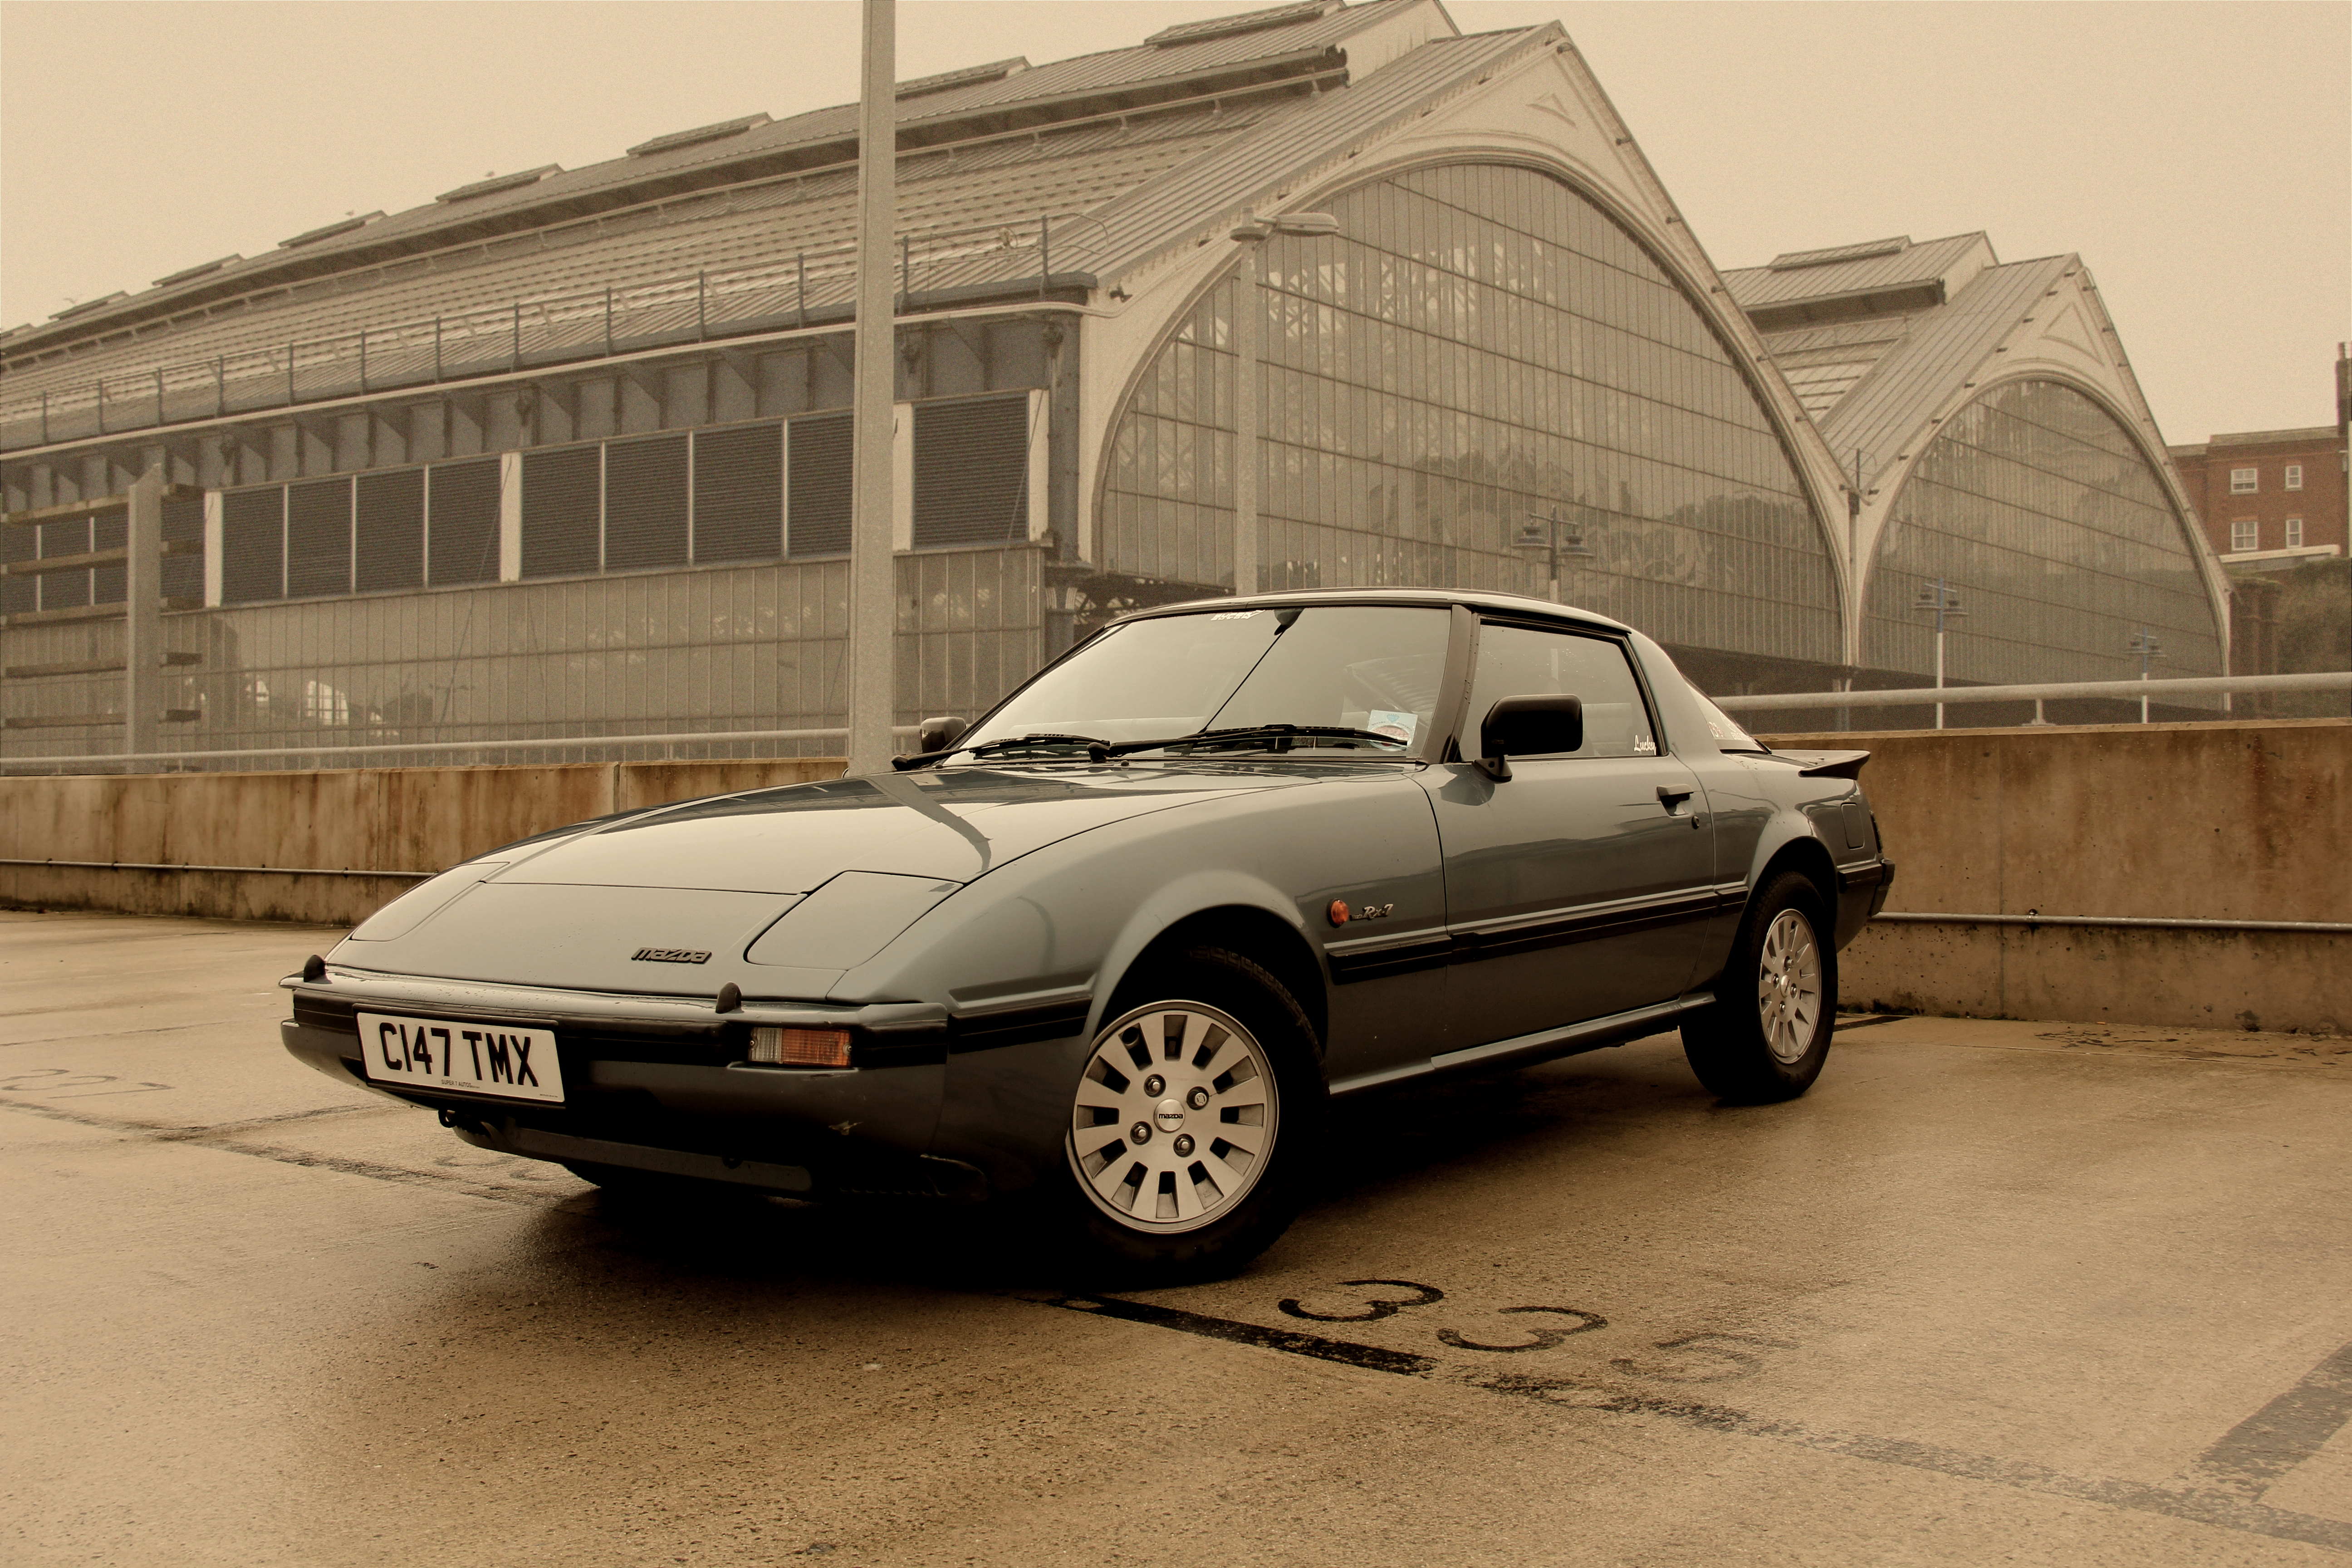
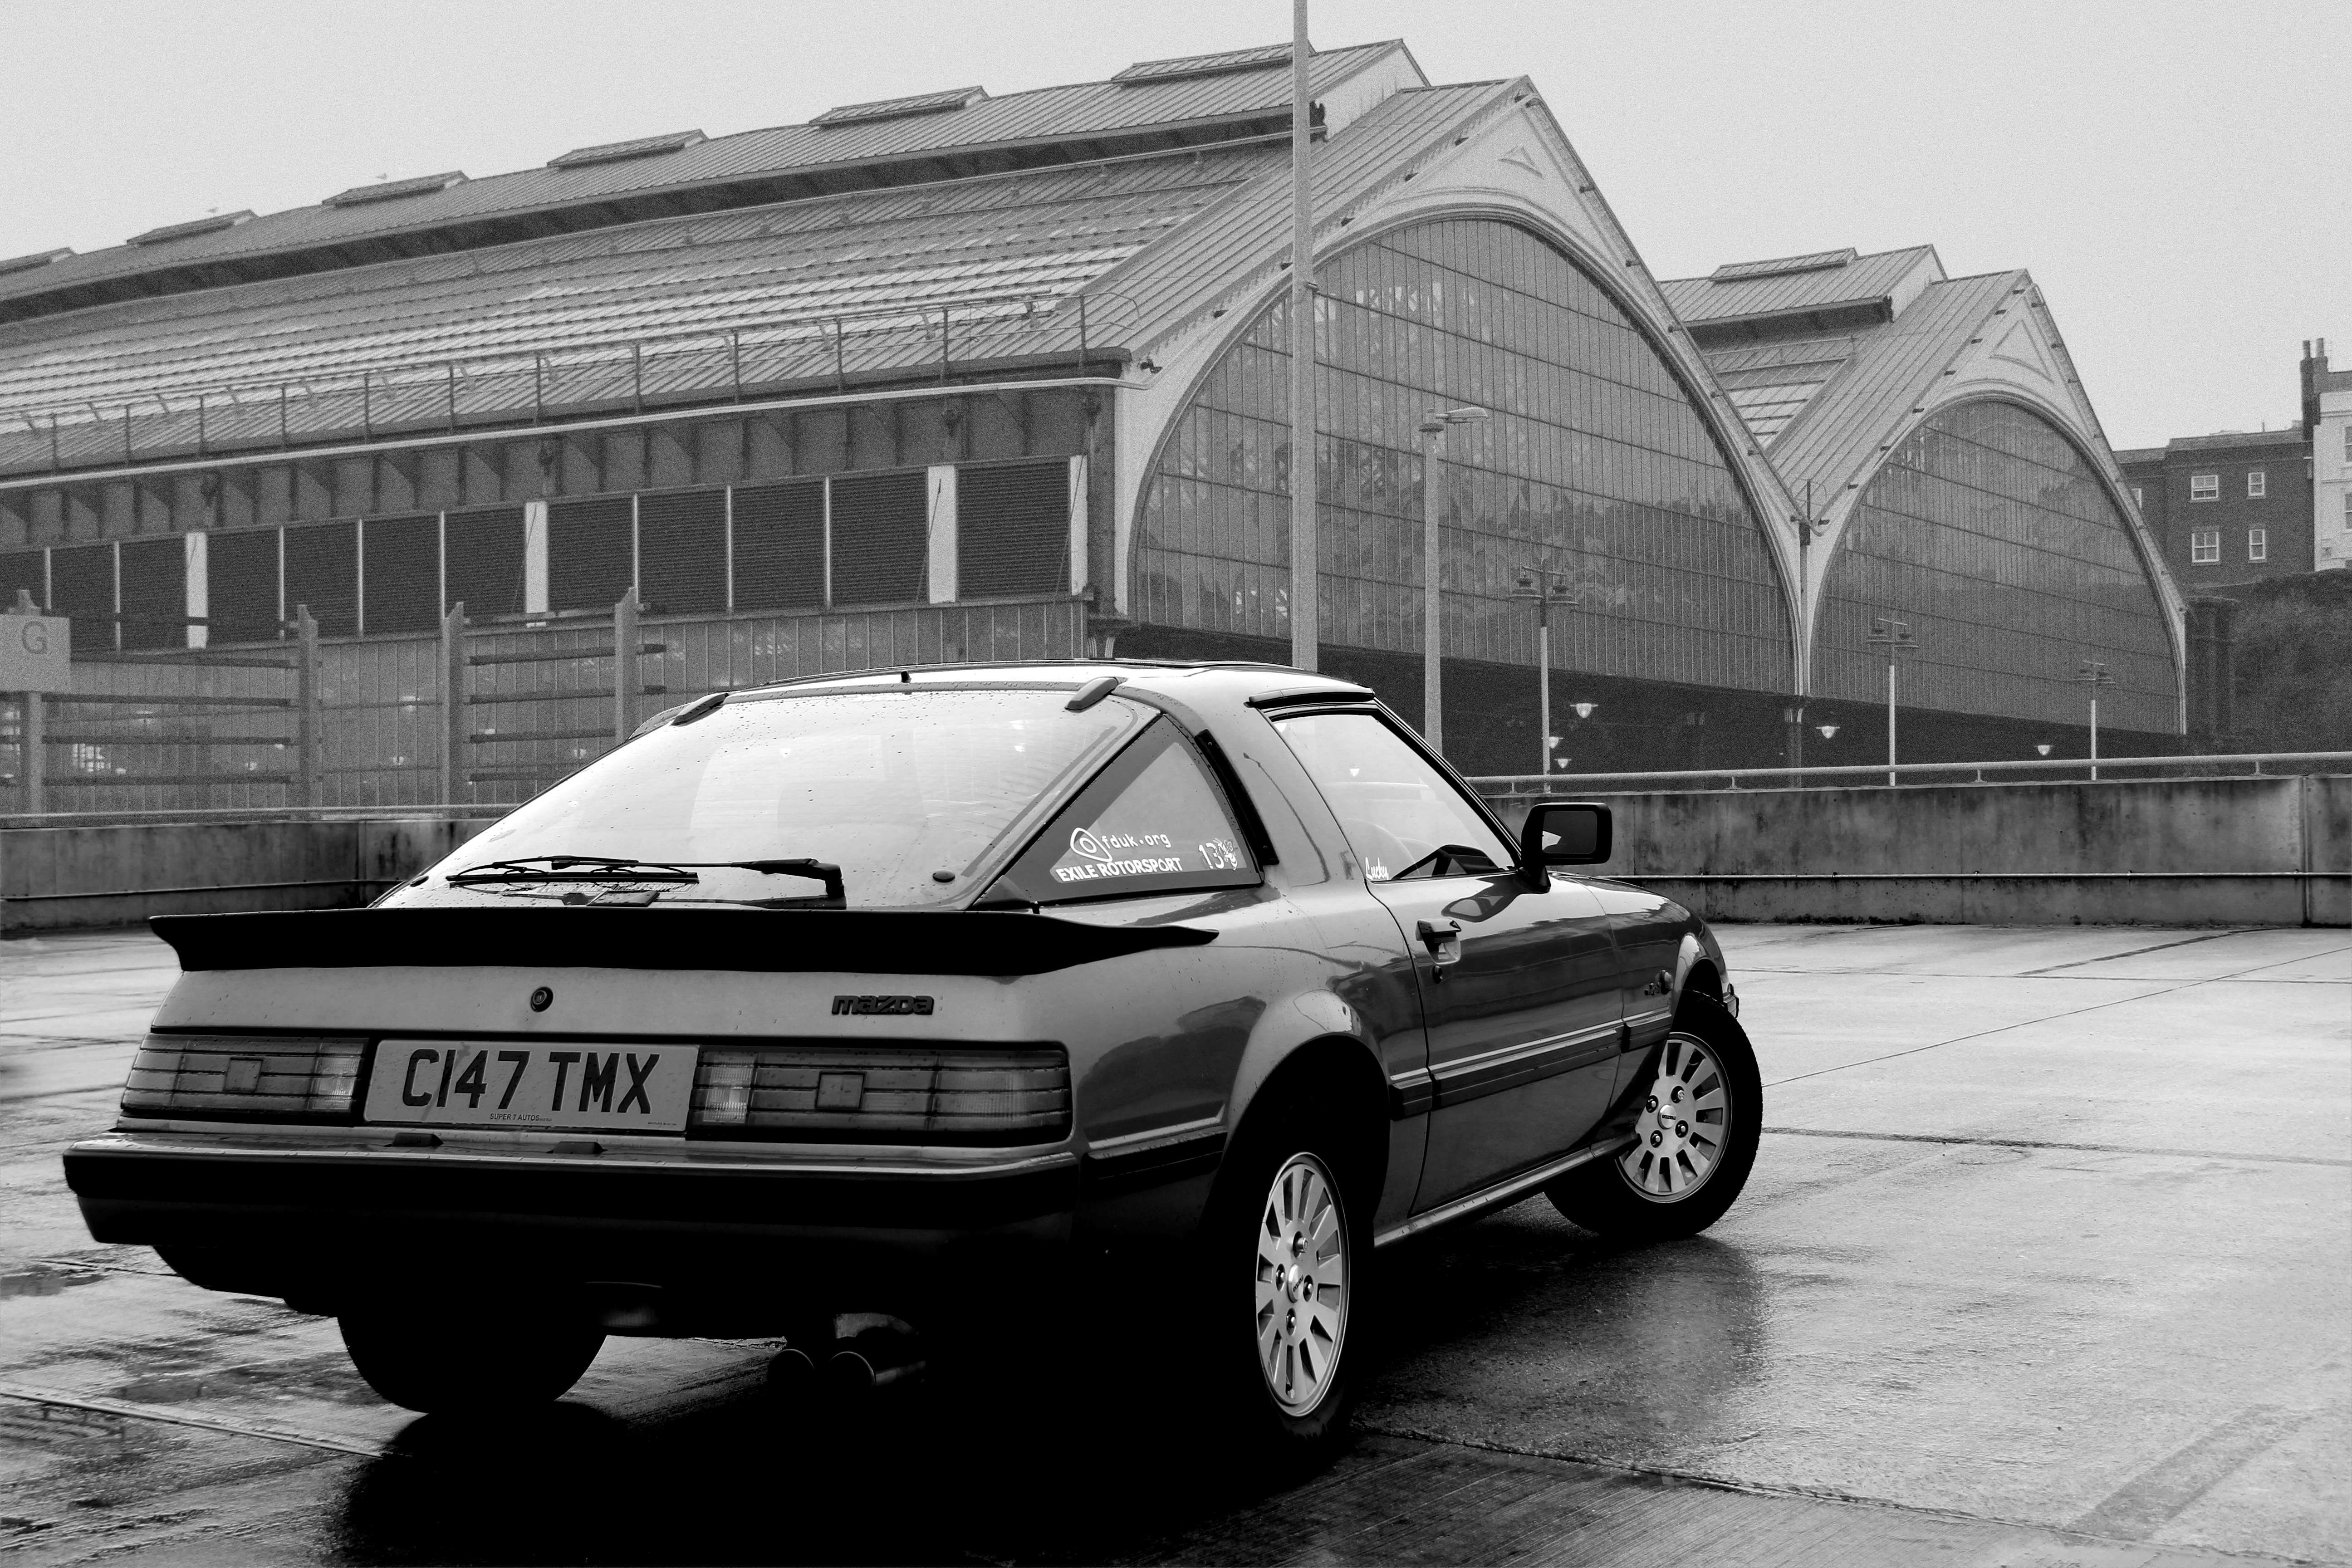
That's the car at work, Brighton train station from where I do my day (and night!) job driving trains. Seems to suit
This is the stock offset fail...
..and this is the difference 30mm makes 8)
As far as rubbing and the need to roll or butcher arches, they were gonna be fine on the back
Though for some reason the car now looked like 4x4 stylee ride height. Strange when the tyre rolling diameter was the same as stock
On the front, sadly they failed epically. *****. The tread sticks out past the arch so I that'd be an MOT fail (the yearly UK roadworthiness test). Although they still didn't scrub, and lock was fine, I'd have to wide-arch the car and wasn't ready for that step yet!
This was a mild pisser. I was hoping to migrate them to the front eventually and get some wider ones on the rear when I found some properly nice ones. Bum. They look good up front too
Anyway, since it was a grey drizzly English winter it seemed the perfect opportunity to ***** some monochrome stylee photos. This is what I remember the 70's looking like, everything was brown and grey then, like the inside of a betting shop that's gone all yellow from the years of *** smoke
That's the car at work, Brighton train station from where I do my day (and night!) job driving trains. Seems to suit
Thread Starter
Senior Member
Joined: Oct 2010
Posts: 255
Likes: 1
From: England
As if by some miracle of fate, the same eBay dude as I bought the Sharaks from was flogging off another pair of JDM wheels, probably my fave evar wheel style;
Anyway *ahem*. These is what we had, free from pretentious camera angles and that;
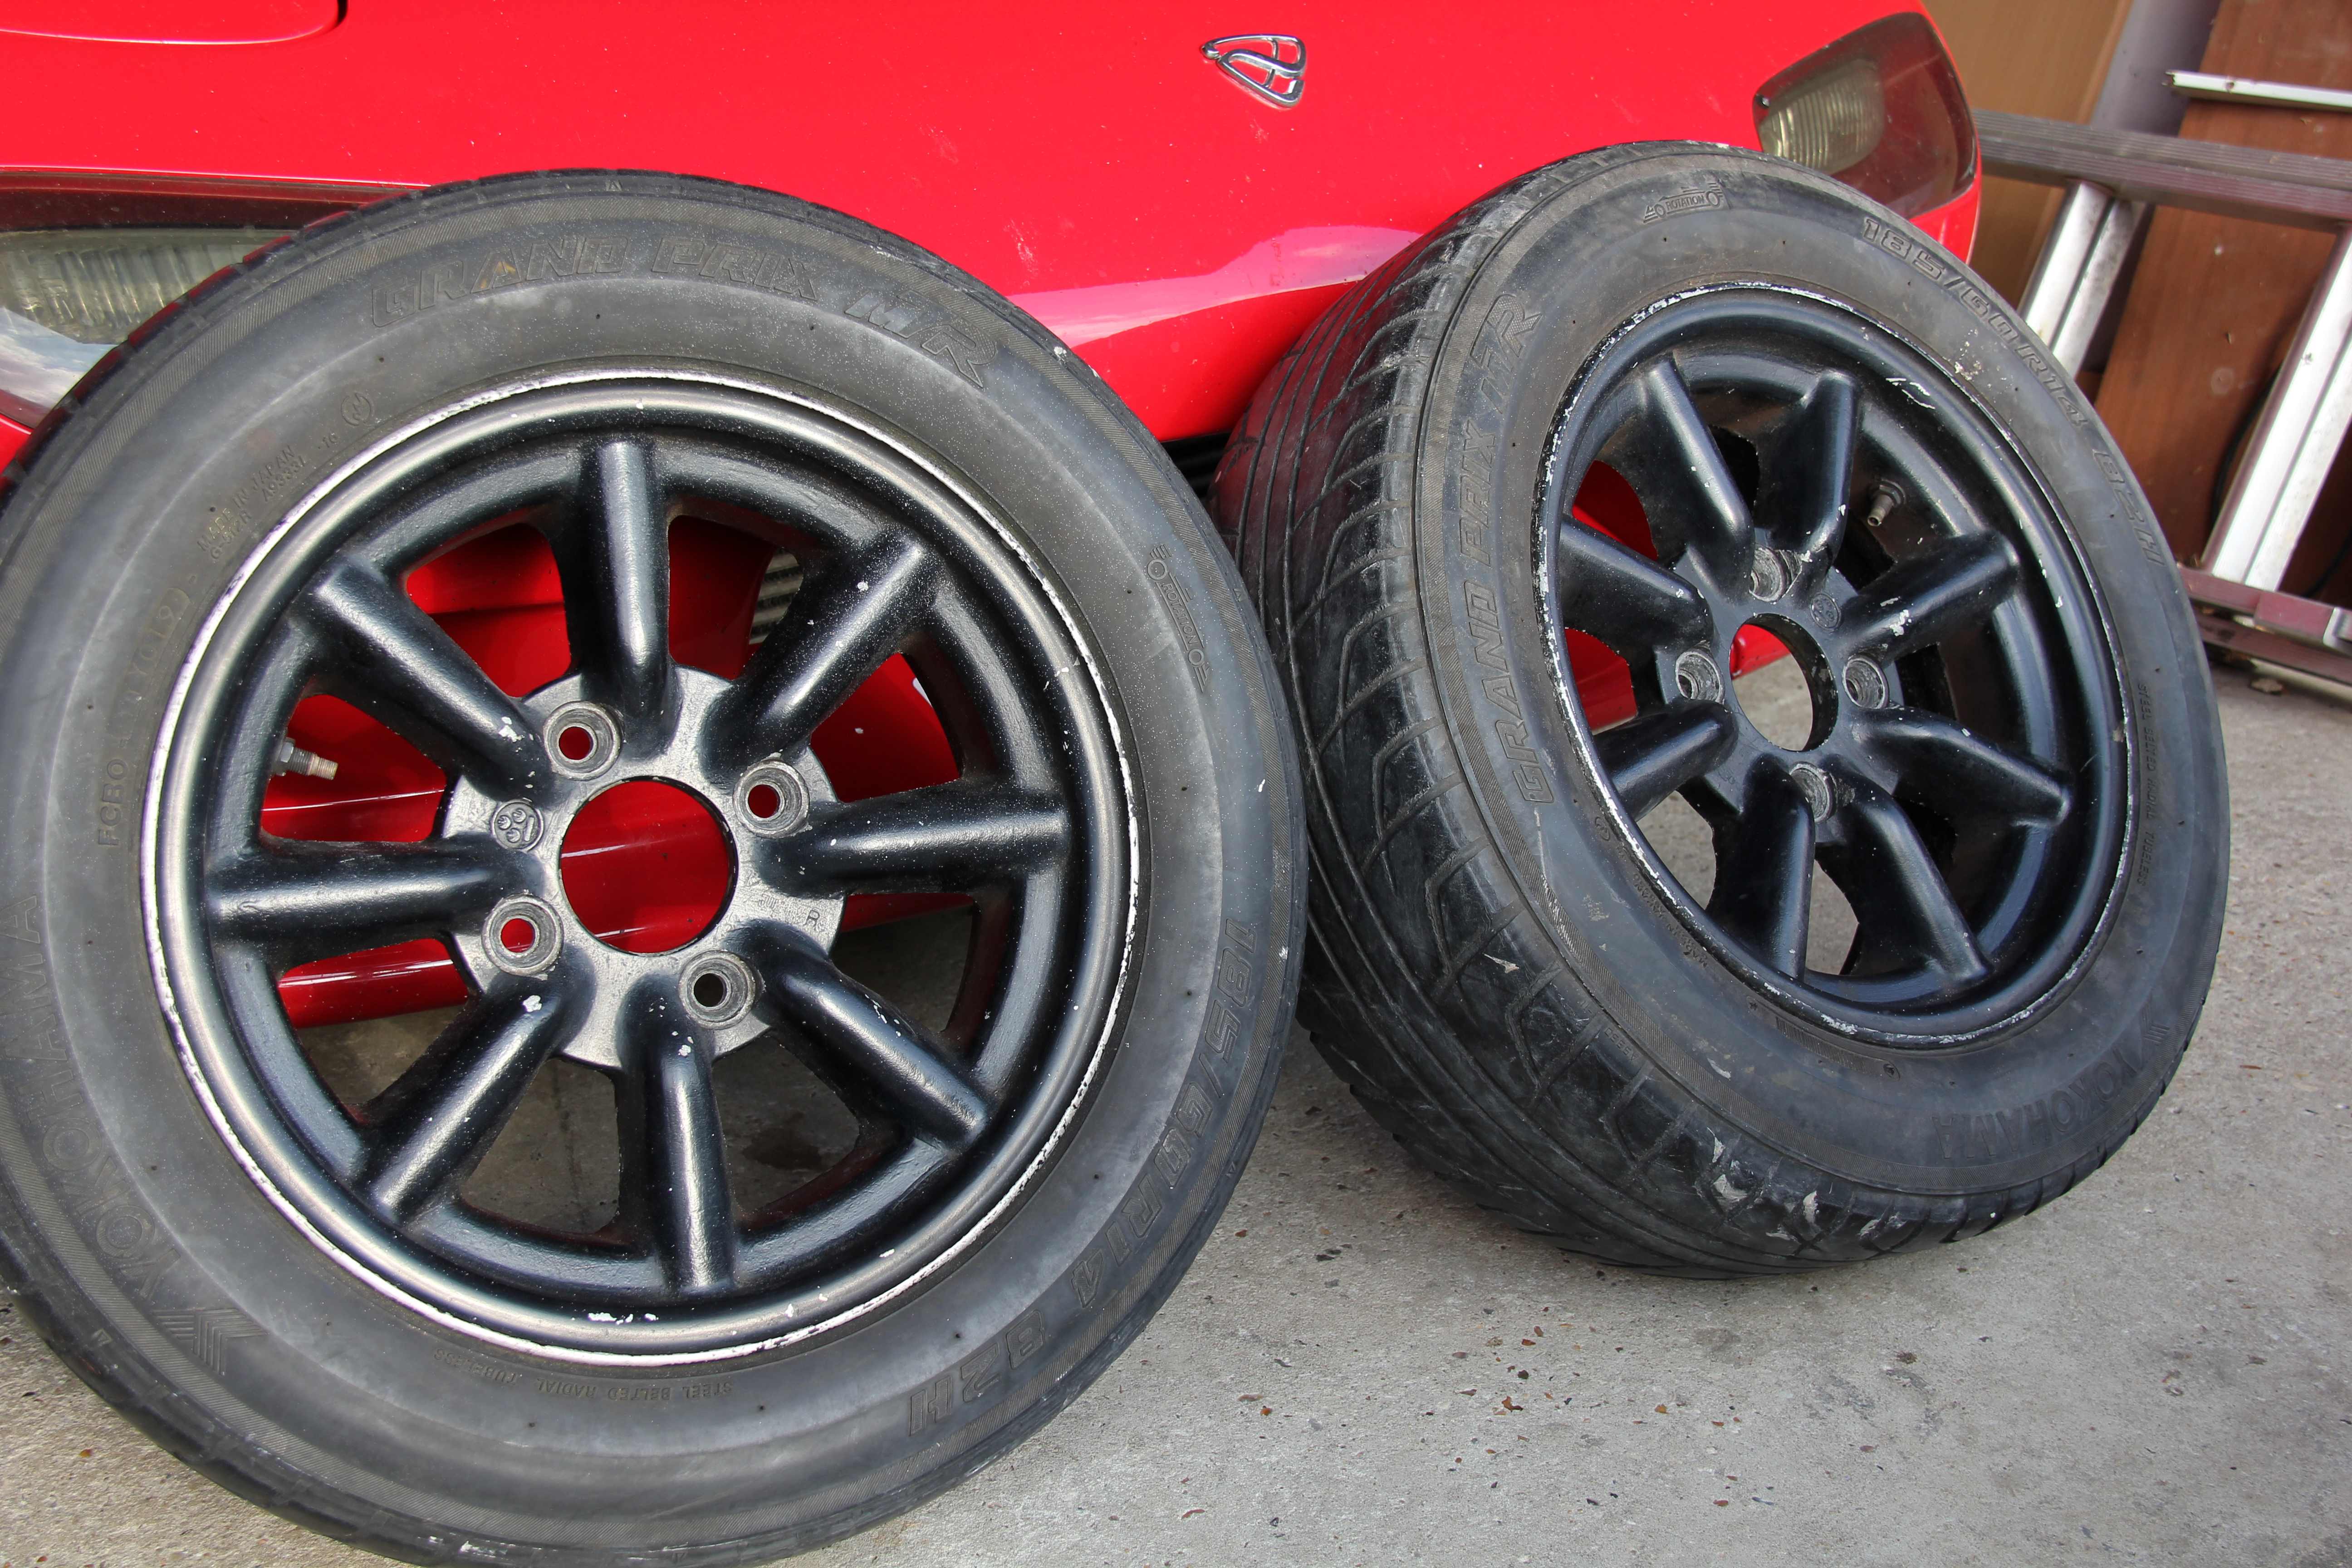
I took a punt on these as they were a bit of an unknown, except that they were genuine Watanabes. They're 14" diameter, but I had no idea as to offset, width, etc. I guess from looking how they fit between the stock wheels and the Sharaks they're about offset +20-ish. The tyres that were on there are 185 profile and it didn't seem that anything much wider would fit without bulging out. Maybe a 195 might go so I guess they're like 5 1/2" rim or so. De nada, what matttered is they fit, flush to the arch and look awesomes. Or will do with a refurb...
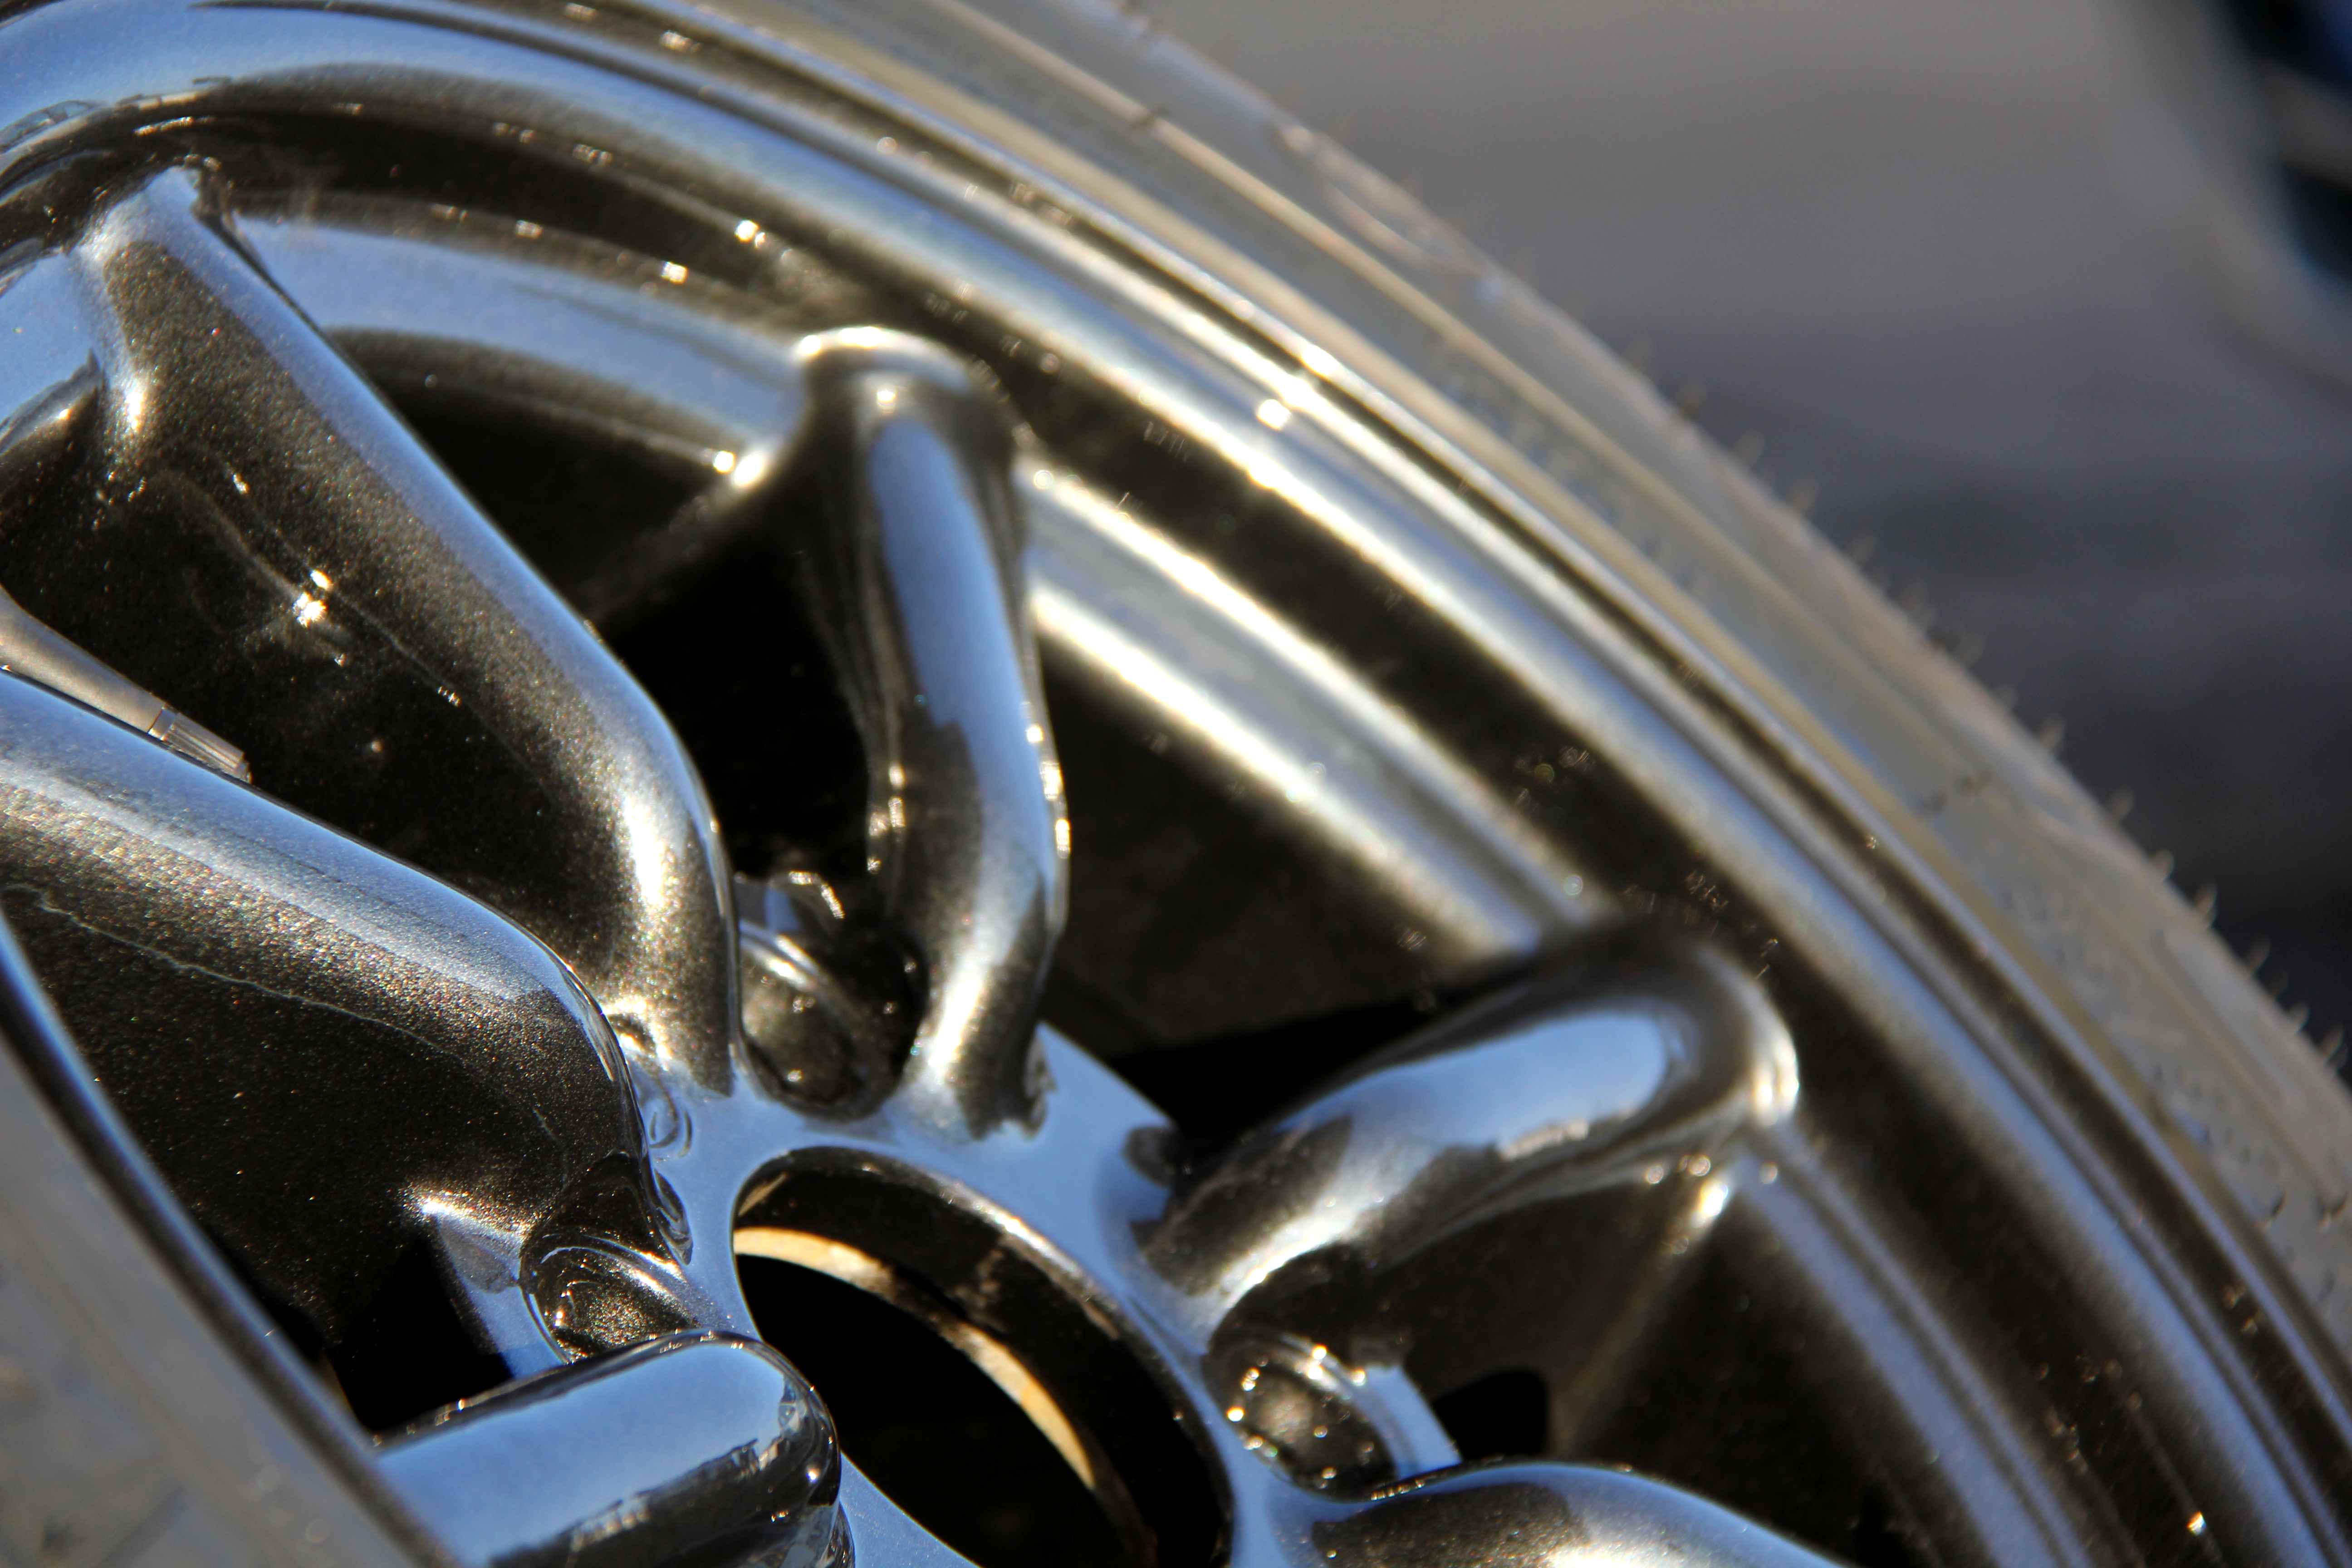
From this angle...
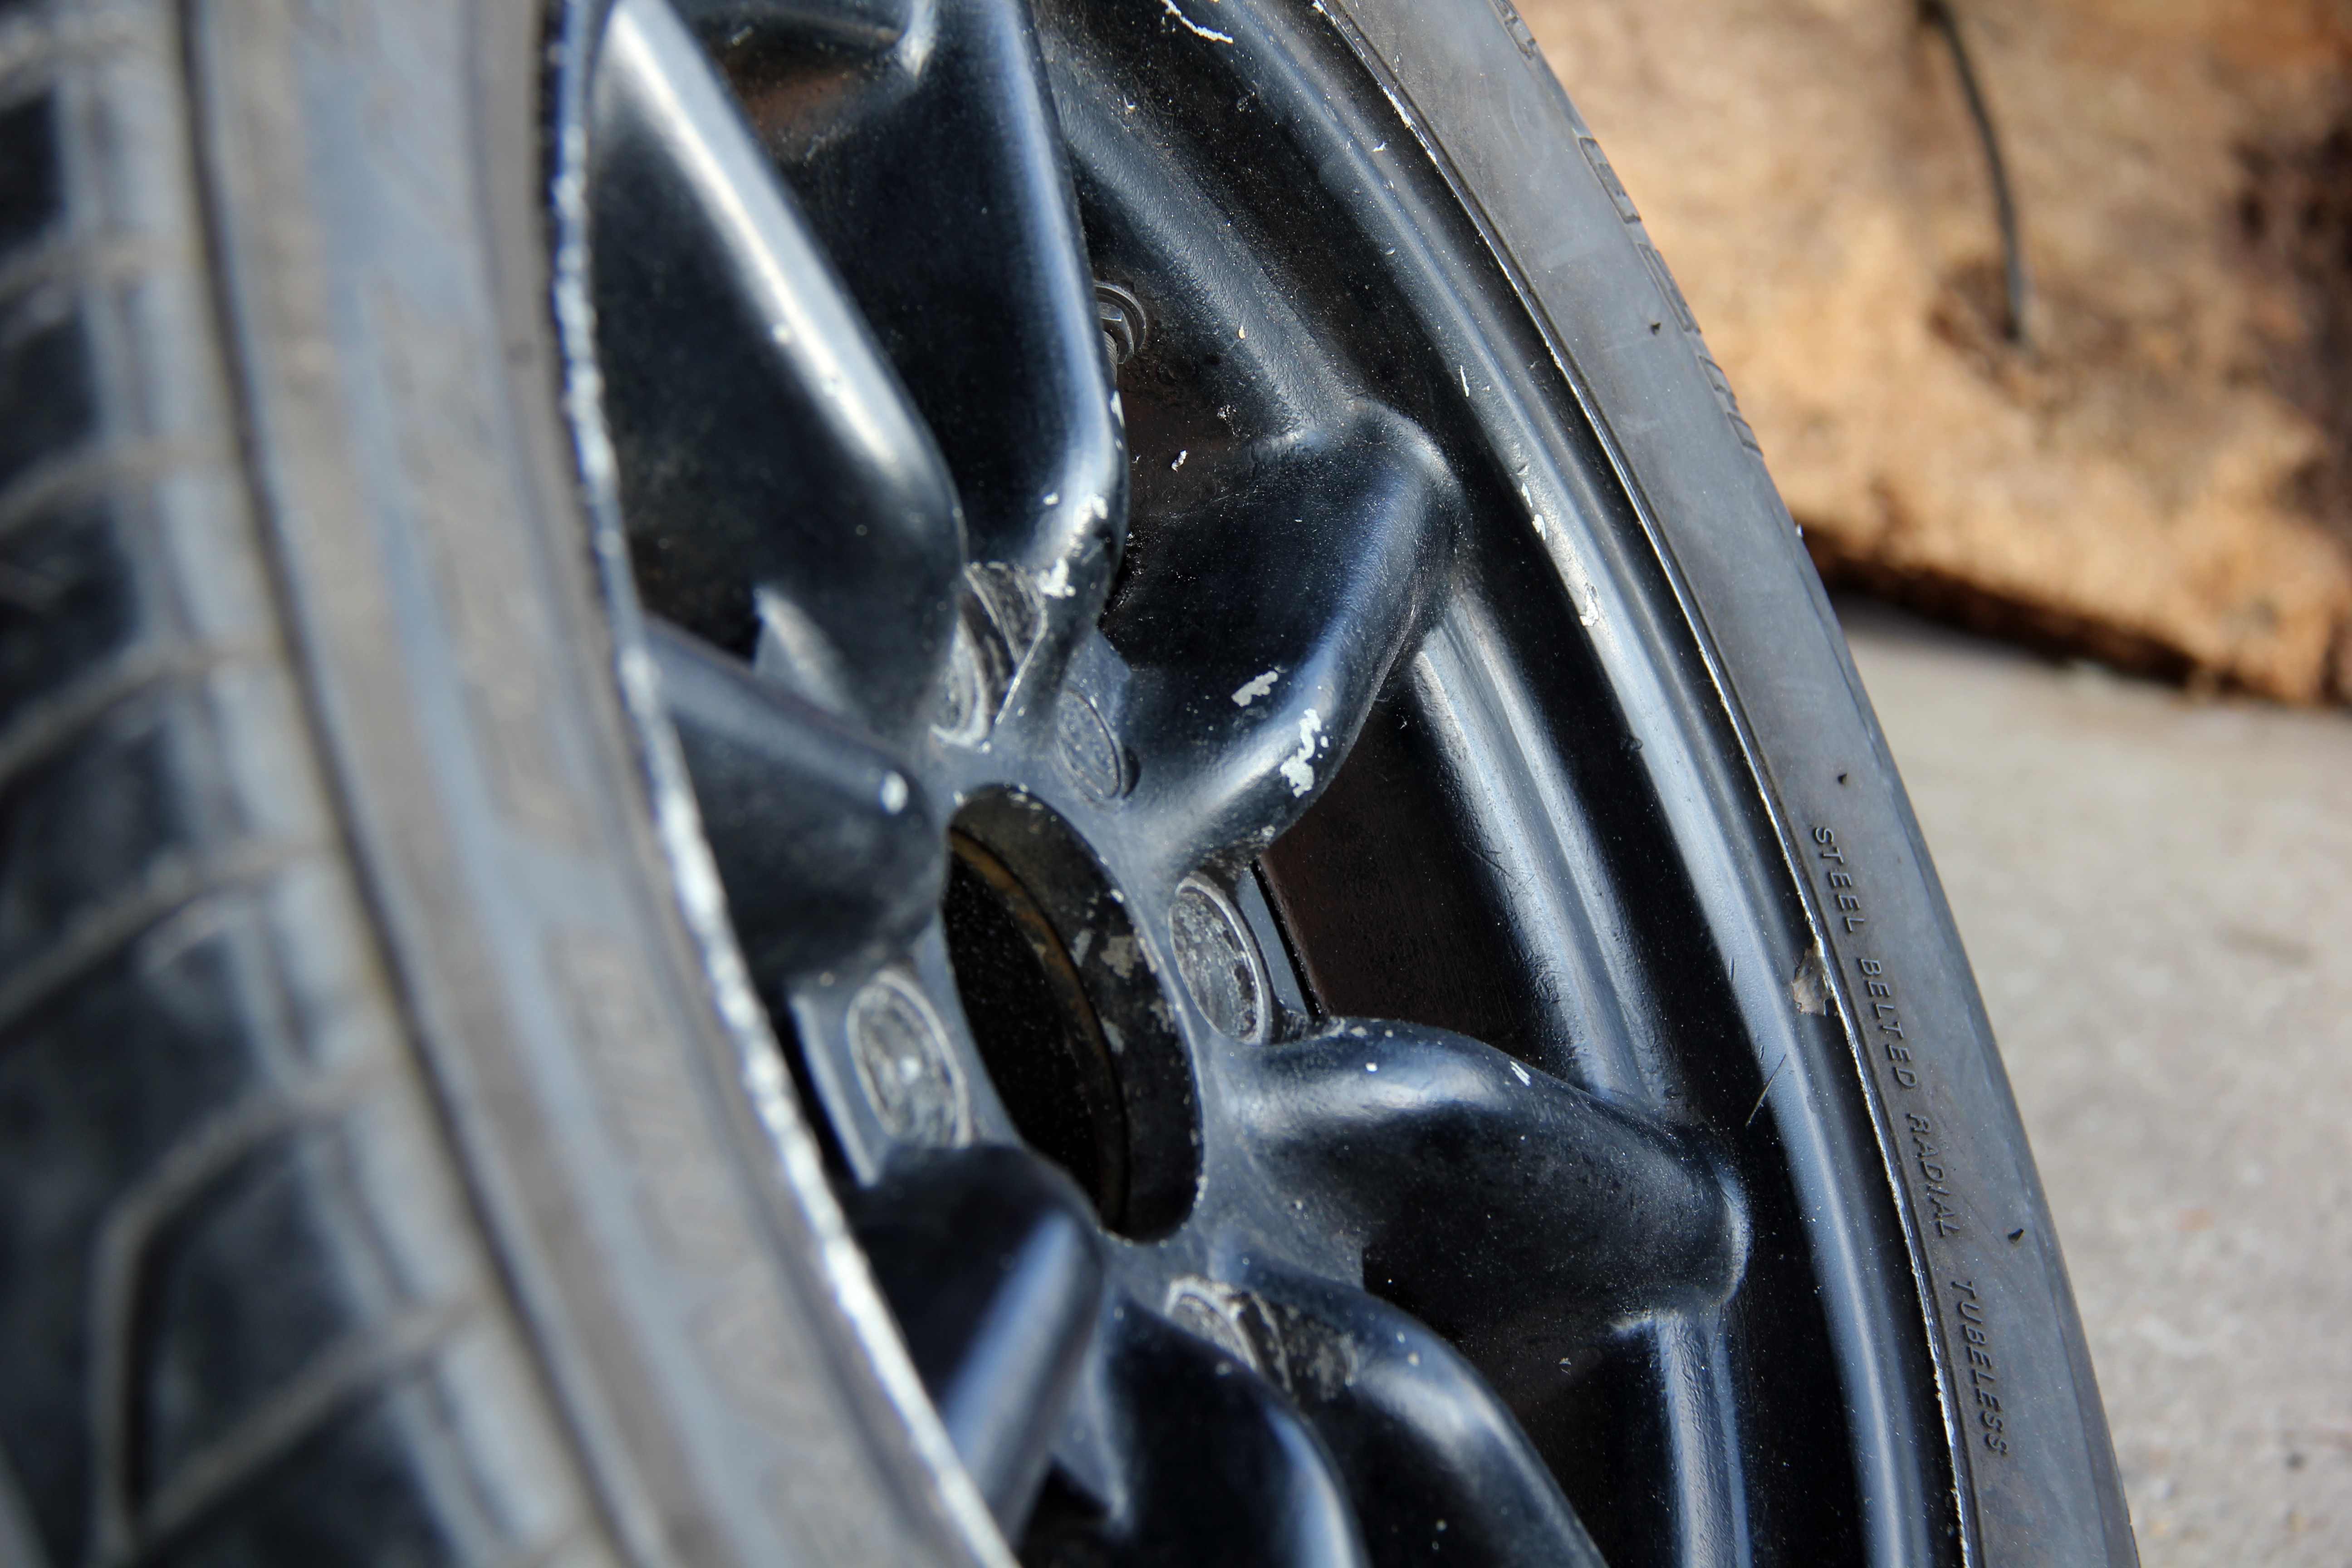
....they look like a gorgeous beautiful spider made from pure alloy sex jizoom. Well, in my world anyway :oops:
Can't resist a cheeky Generations pic
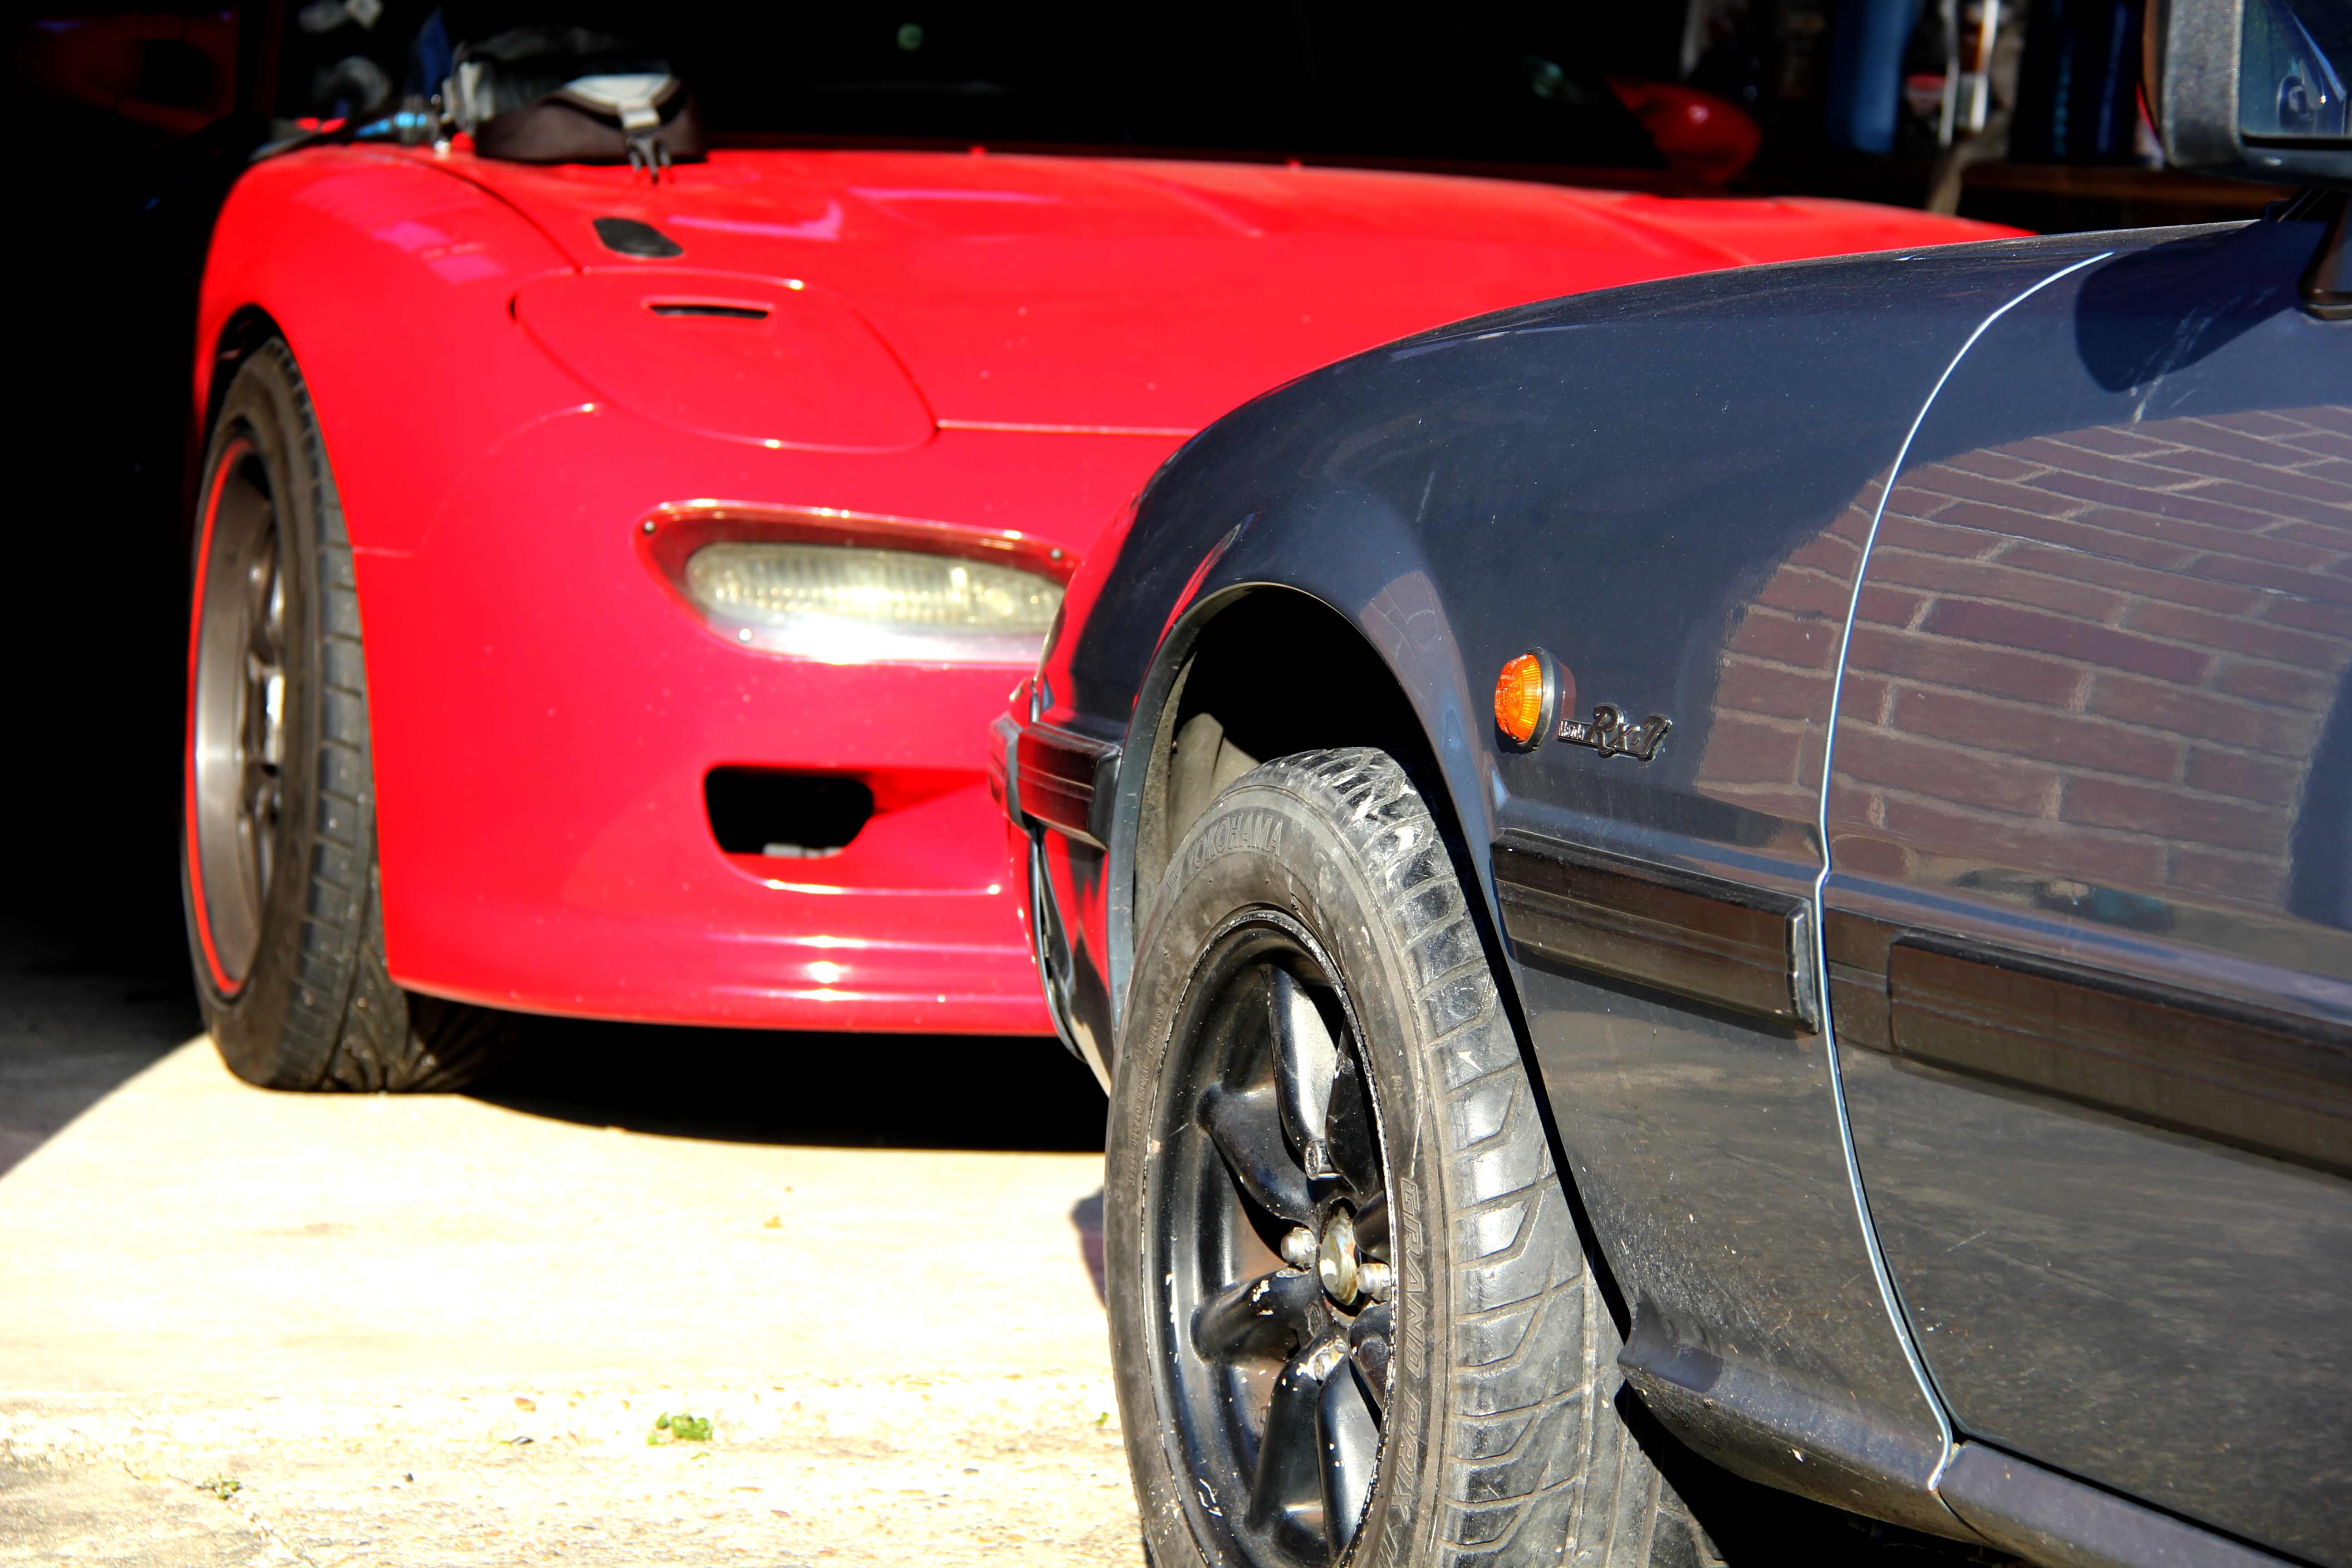
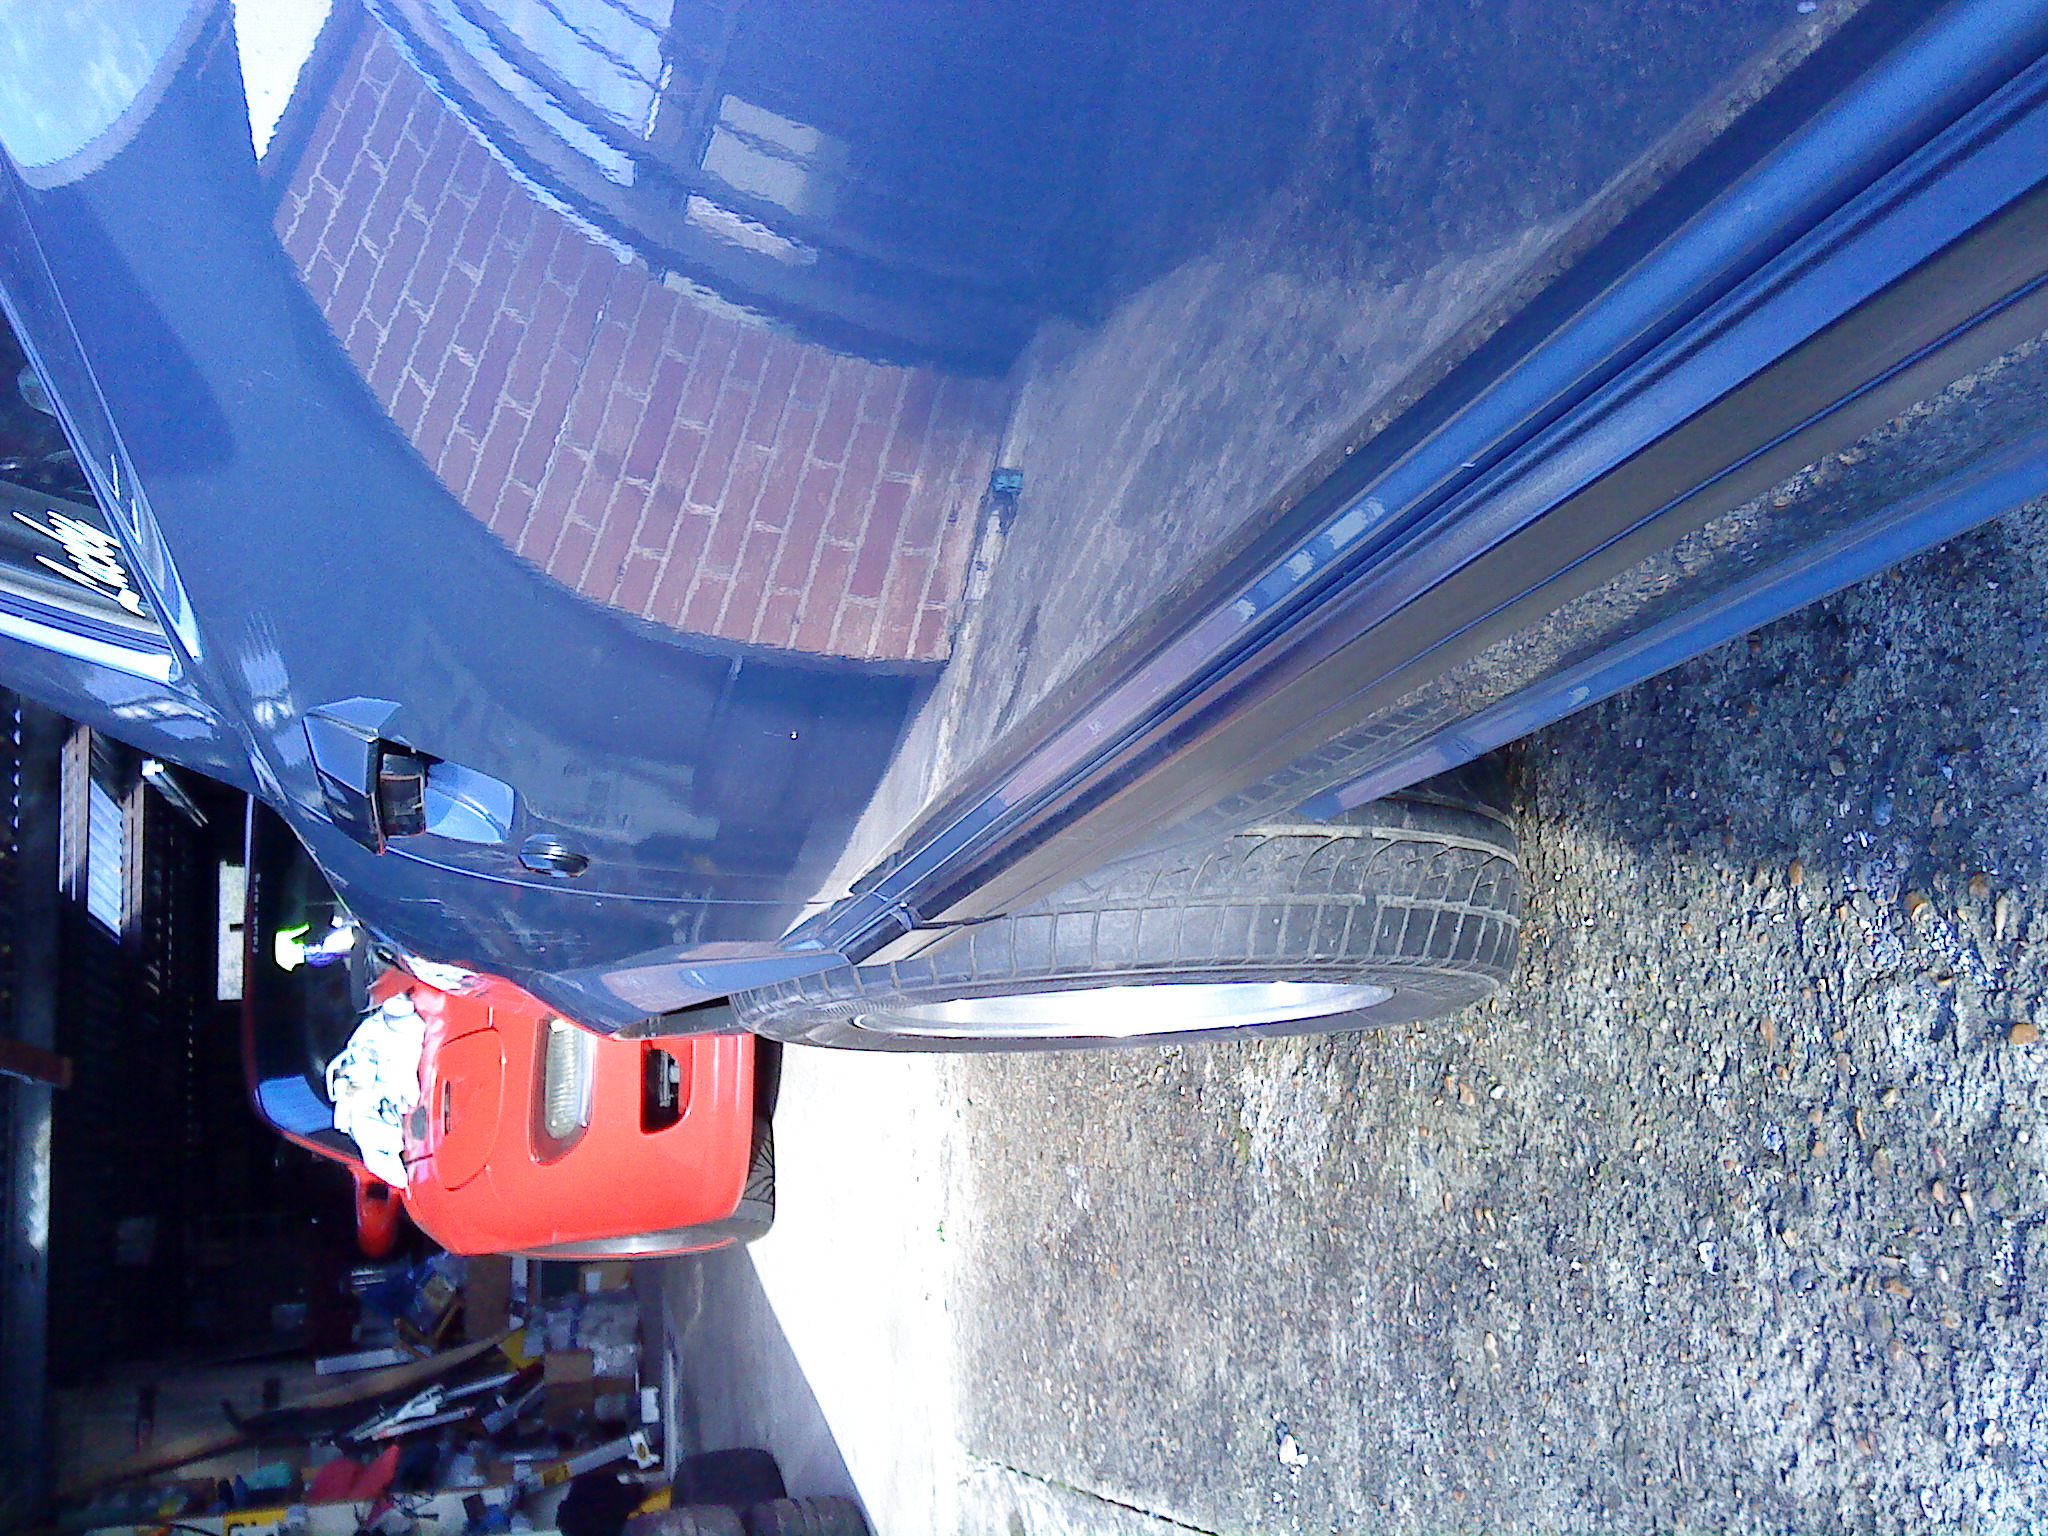
and this is what they fit like. I'd pretty much decided that trying to fit the Sharaks manly +10 offset under the front arches would take too much butchery, so they would be staying on the back. Which is good, cos the Watanabes fit the front perfectly...
....or would do once I got a less high-rise spring strategy sorted out
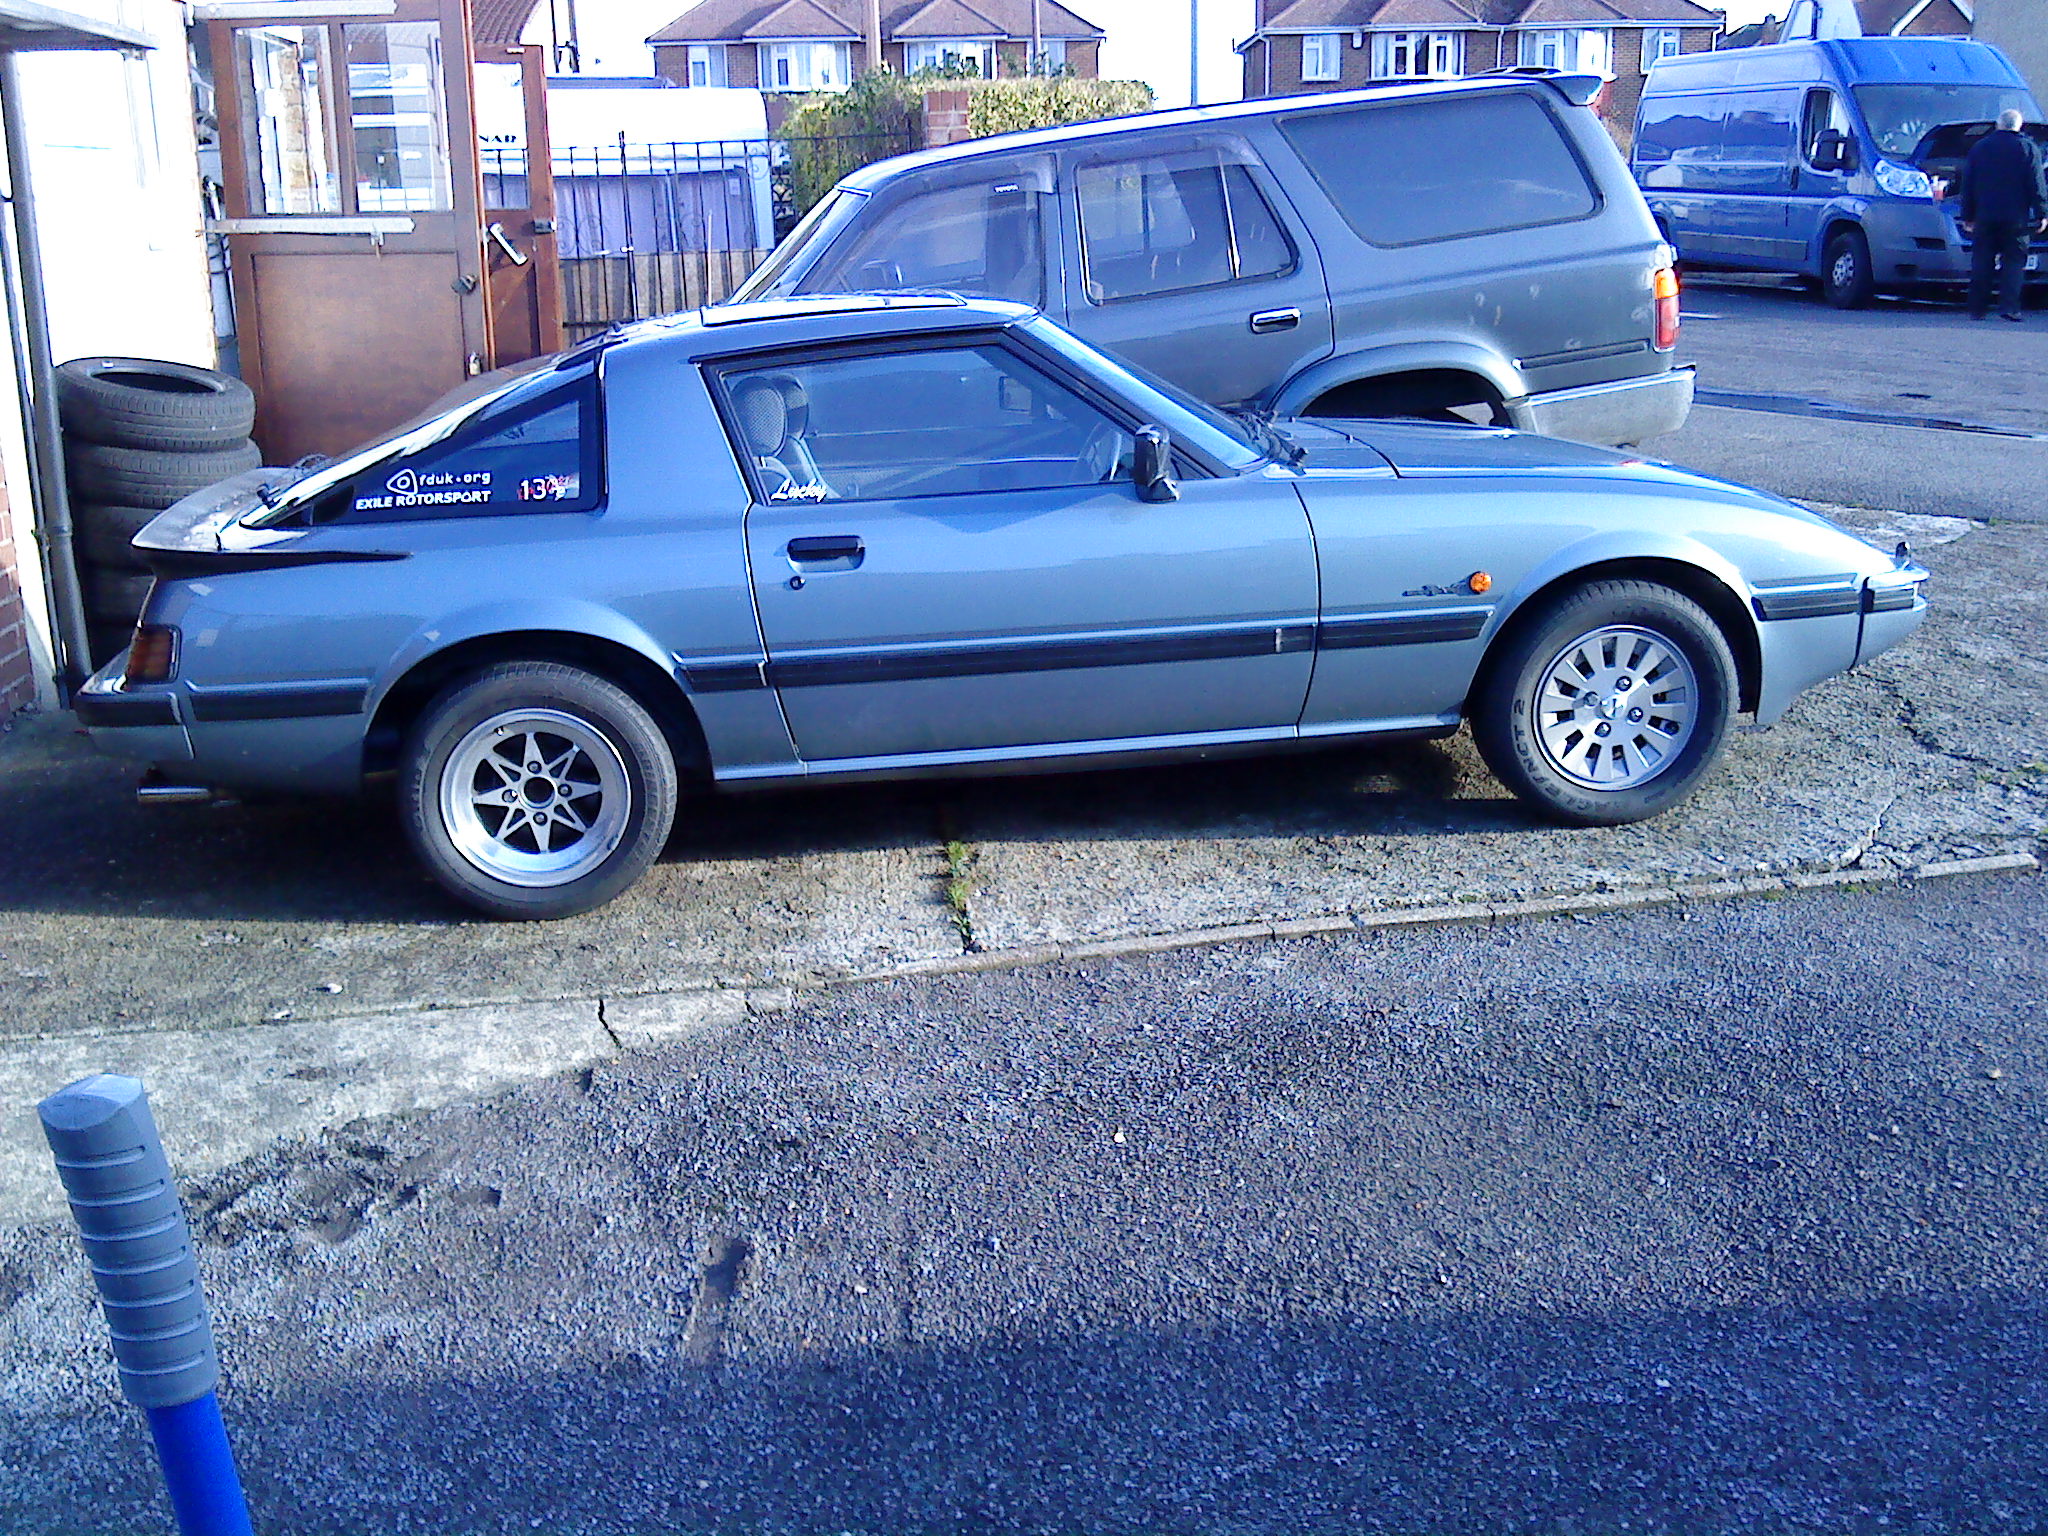
....and the money shot. This is what it's all about 8)
This raised a few issues. One is that having driven and let the springs settle a bit, the ride height was too ludicrous to bear. It'd definitely be better for lower, the sooner the better. The second was that polishing up the Sharaks and re-refurbing the Watanabes wasn't an option. I think they both have to be the same. Since I couldn't face the prospect of stripping back the Watanabes and polishing them all four were going to have to visit the powdercoaters.
The third issue was that the car drove sooooooo much better on these than on the stock wheels. Dunno whether that's down to the wider track, the slightly smaller rolling radius, the slightly narrower tyres, the fact the wheels are a LOT lighter than the stockers, or the dreadful state of the 15+year-old Bridgestone NCTs the car came with, but the steering was lighter at slow speeds, more responsive at higher speed, more direct, and it'd even lost a bit of the "driving-through-a Hollywood-movie" vagueness on-centre.
The next task was to decide on a colourscheme, so after much faffing about with appalling Photoshop *ahem* skills, I ended up with a few options;

Anyway *ahem*. These is what we had, free from pretentious camera angles and that;
I took a punt on these as they were a bit of an unknown, except that they were genuine Watanabes. They're 14" diameter, but I had no idea as to offset, width, etc. I guess from looking how they fit between the stock wheels and the Sharaks they're about offset +20-ish. The tyres that were on there are 185 profile and it didn't seem that anything much wider would fit without bulging out. Maybe a 195 might go so I guess they're like 5 1/2" rim or so. De nada, what matttered is they fit, flush to the arch and look awesomes. Or will do with a refurb...
From this angle...
....they look like a gorgeous beautiful spider made from pure alloy sex jizoom. Well, in my world anyway :oops:
Can't resist a cheeky Generations pic
and this is what they fit like. I'd pretty much decided that trying to fit the Sharaks manly +10 offset under the front arches would take too much butchery, so they would be staying on the back. Which is good, cos the Watanabes fit the front perfectly...
....or would do once I got a less high-rise spring strategy sorted out
....and the money shot. This is what it's all about 8)
This raised a few issues. One is that having driven and let the springs settle a bit, the ride height was too ludicrous to bear. It'd definitely be better for lower, the sooner the better. The second was that polishing up the Sharaks and re-refurbing the Watanabes wasn't an option. I think they both have to be the same. Since I couldn't face the prospect of stripping back the Watanabes and polishing them all four were going to have to visit the powdercoaters.
The third issue was that the car drove sooooooo much better on these than on the stock wheels. Dunno whether that's down to the wider track, the slightly smaller rolling radius, the slightly narrower tyres, the fact the wheels are a LOT lighter than the stockers, or the dreadful state of the 15+year-old Bridgestone NCTs the car came with, but the steering was lighter at slow speeds, more responsive at higher speed, more direct, and it'd even lost a bit of the "driving-through-a Hollywood-movie" vagueness on-centre.
The next task was to decide on a colourscheme, so after much faffing about with appalling Photoshop *ahem* skills, I ended up with a few options;
Thread Starter
Senior Member
Joined: Oct 2010
Posts: 255
Likes: 1
From: England
So, while I was saving some shekels to pay for a refurb, I plodded on with some lightweight modifications that I could do cheaps and easy at home. (Hmmm? Which colourscheme did I choose? Well, which would you choose, lol?)
First up was
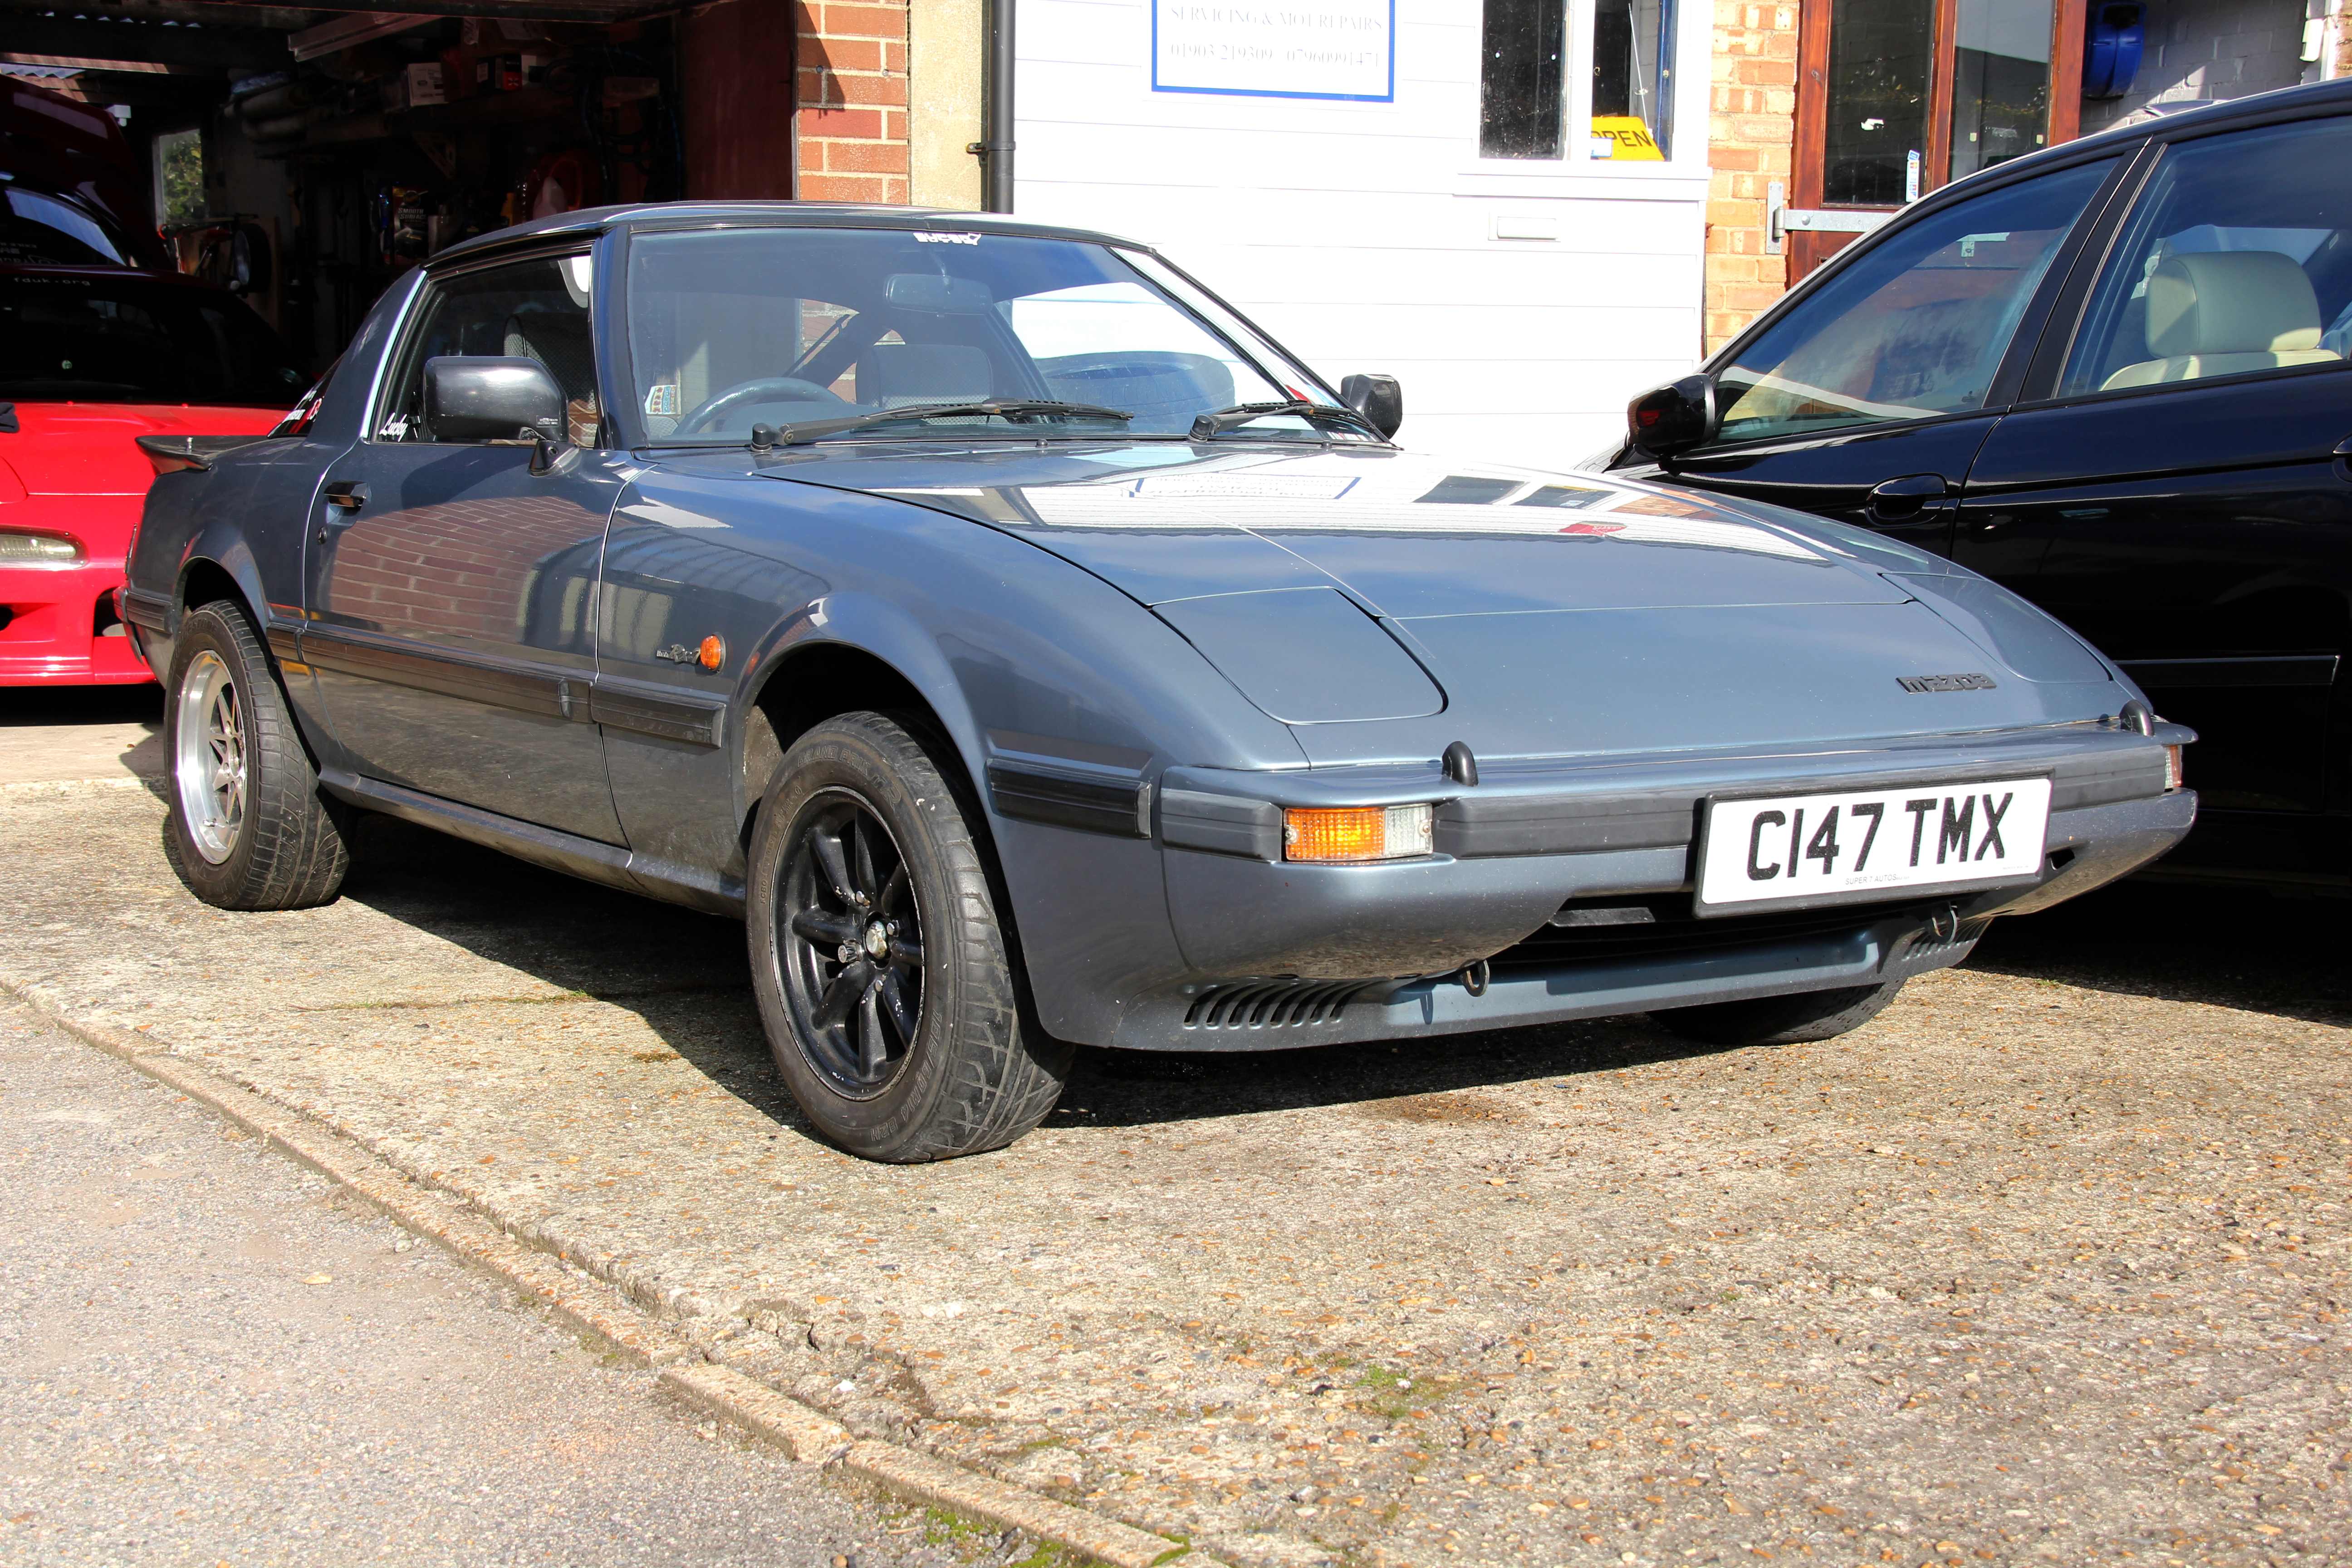
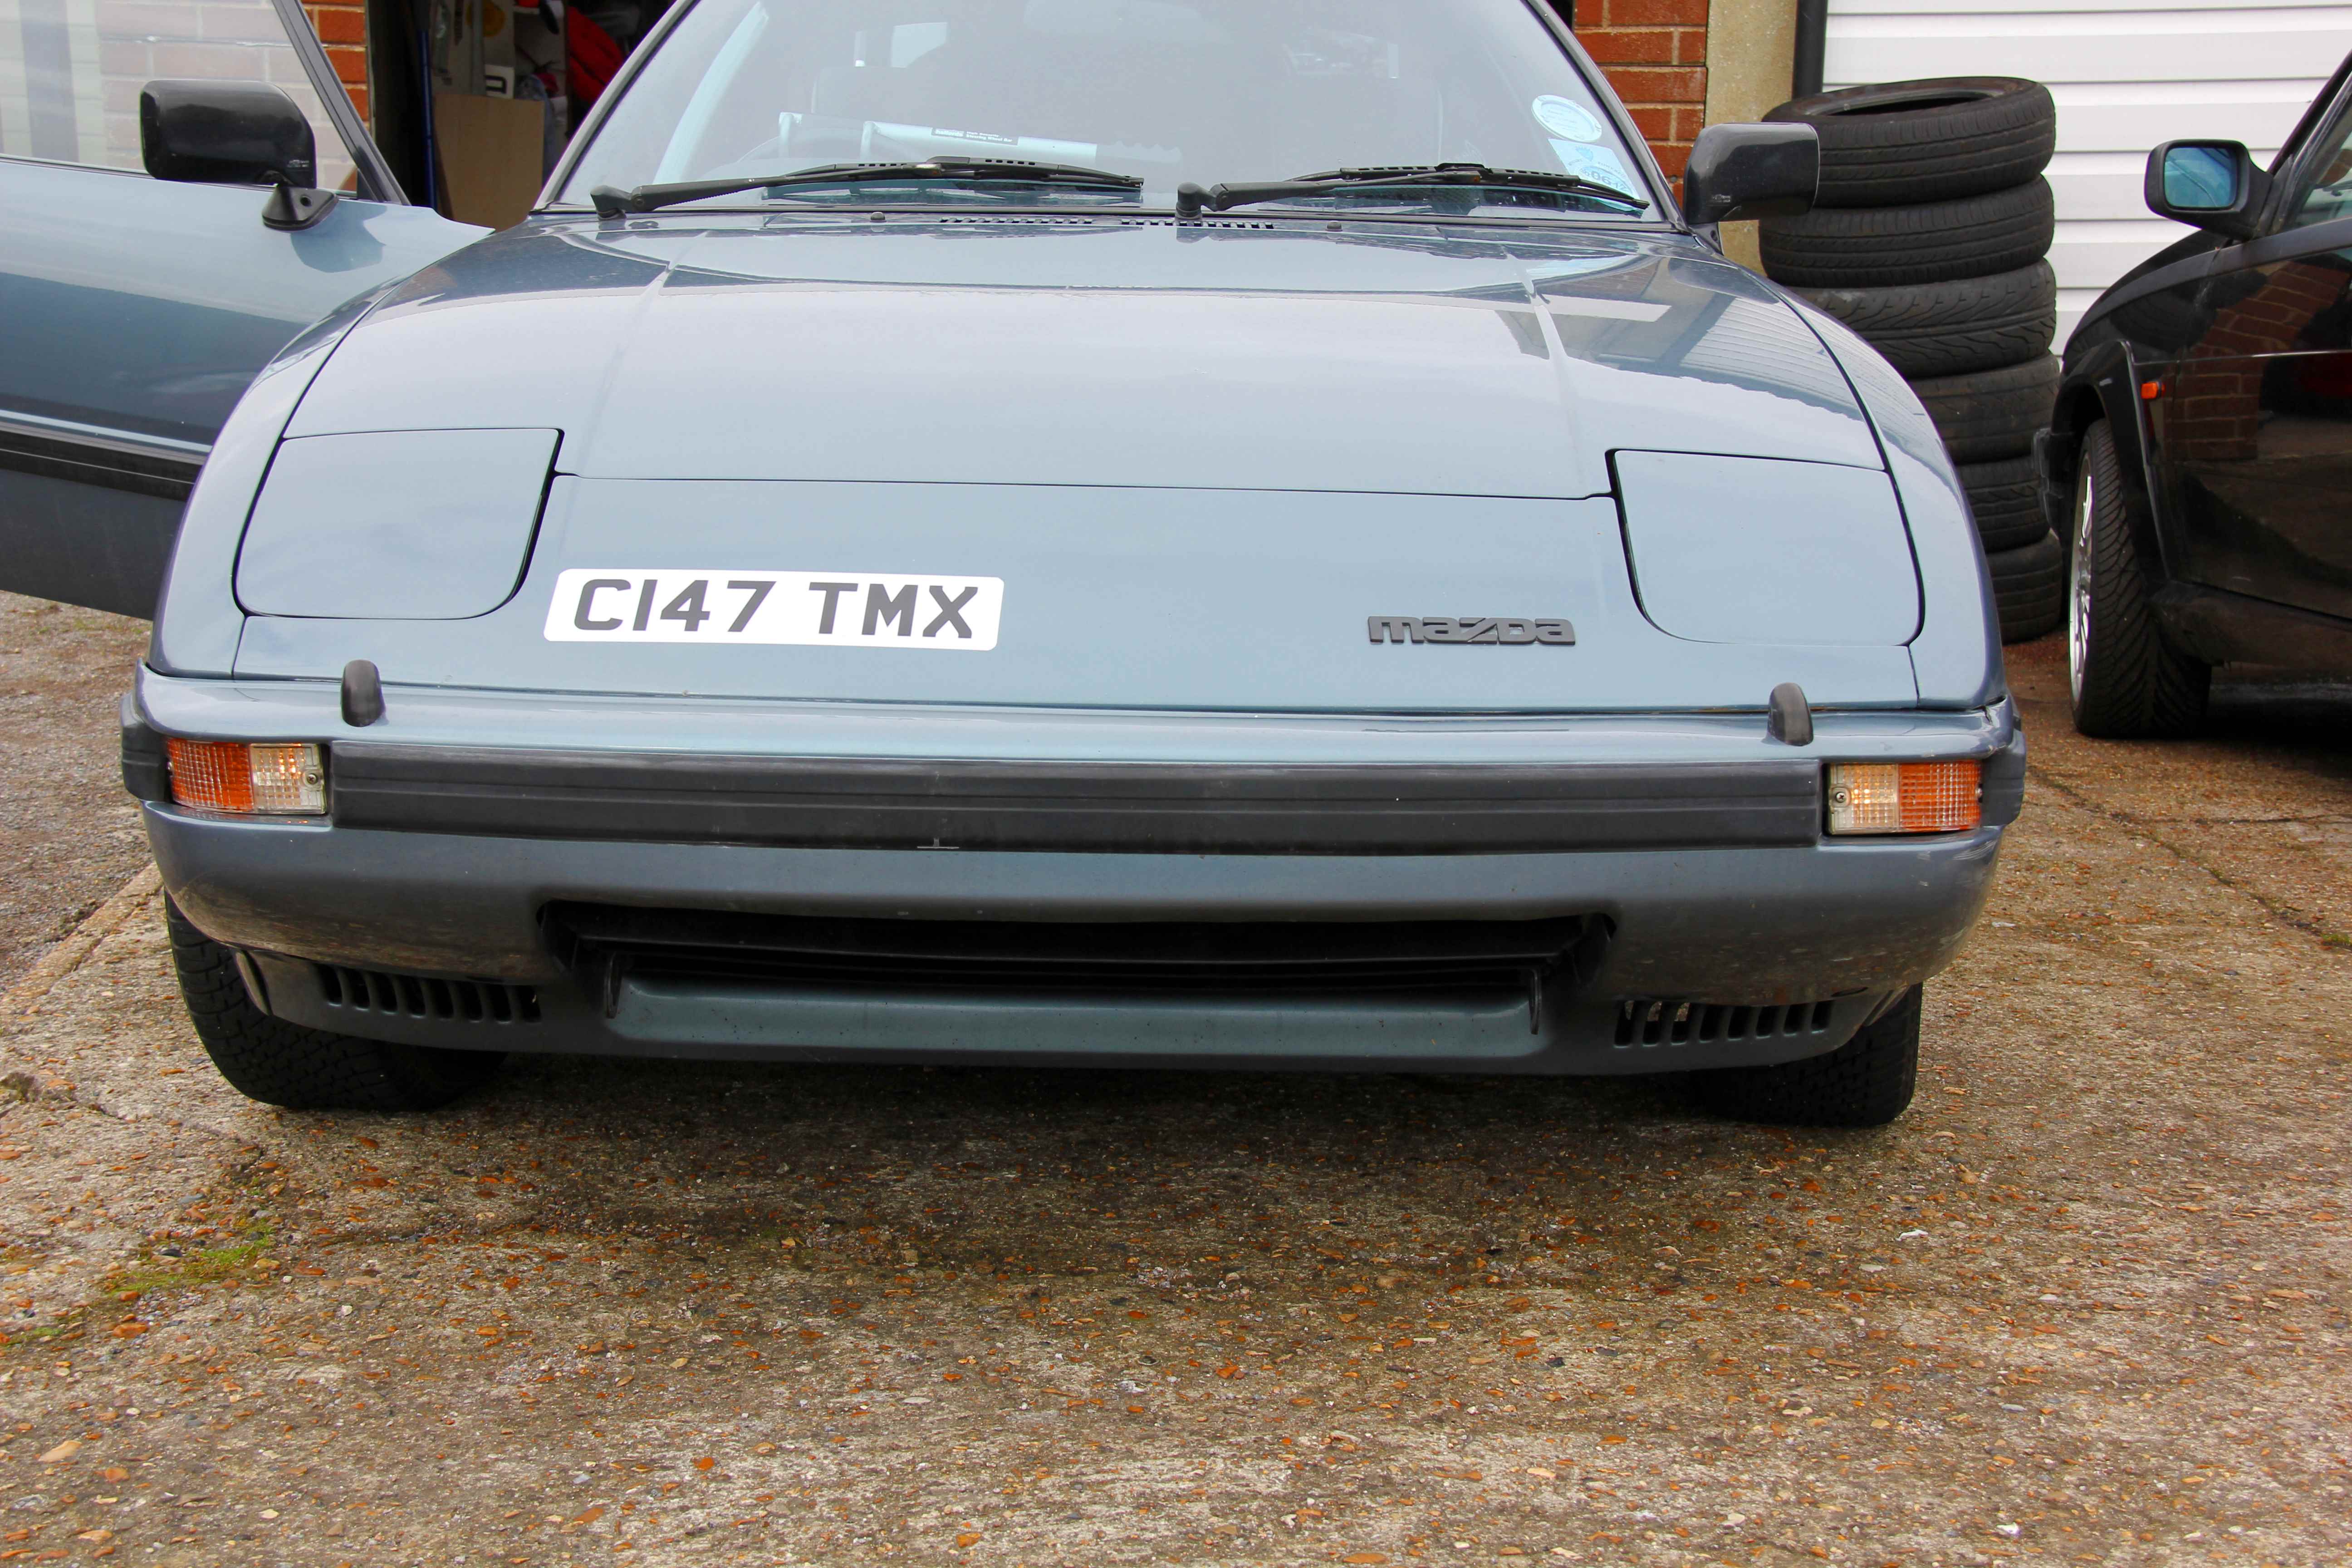
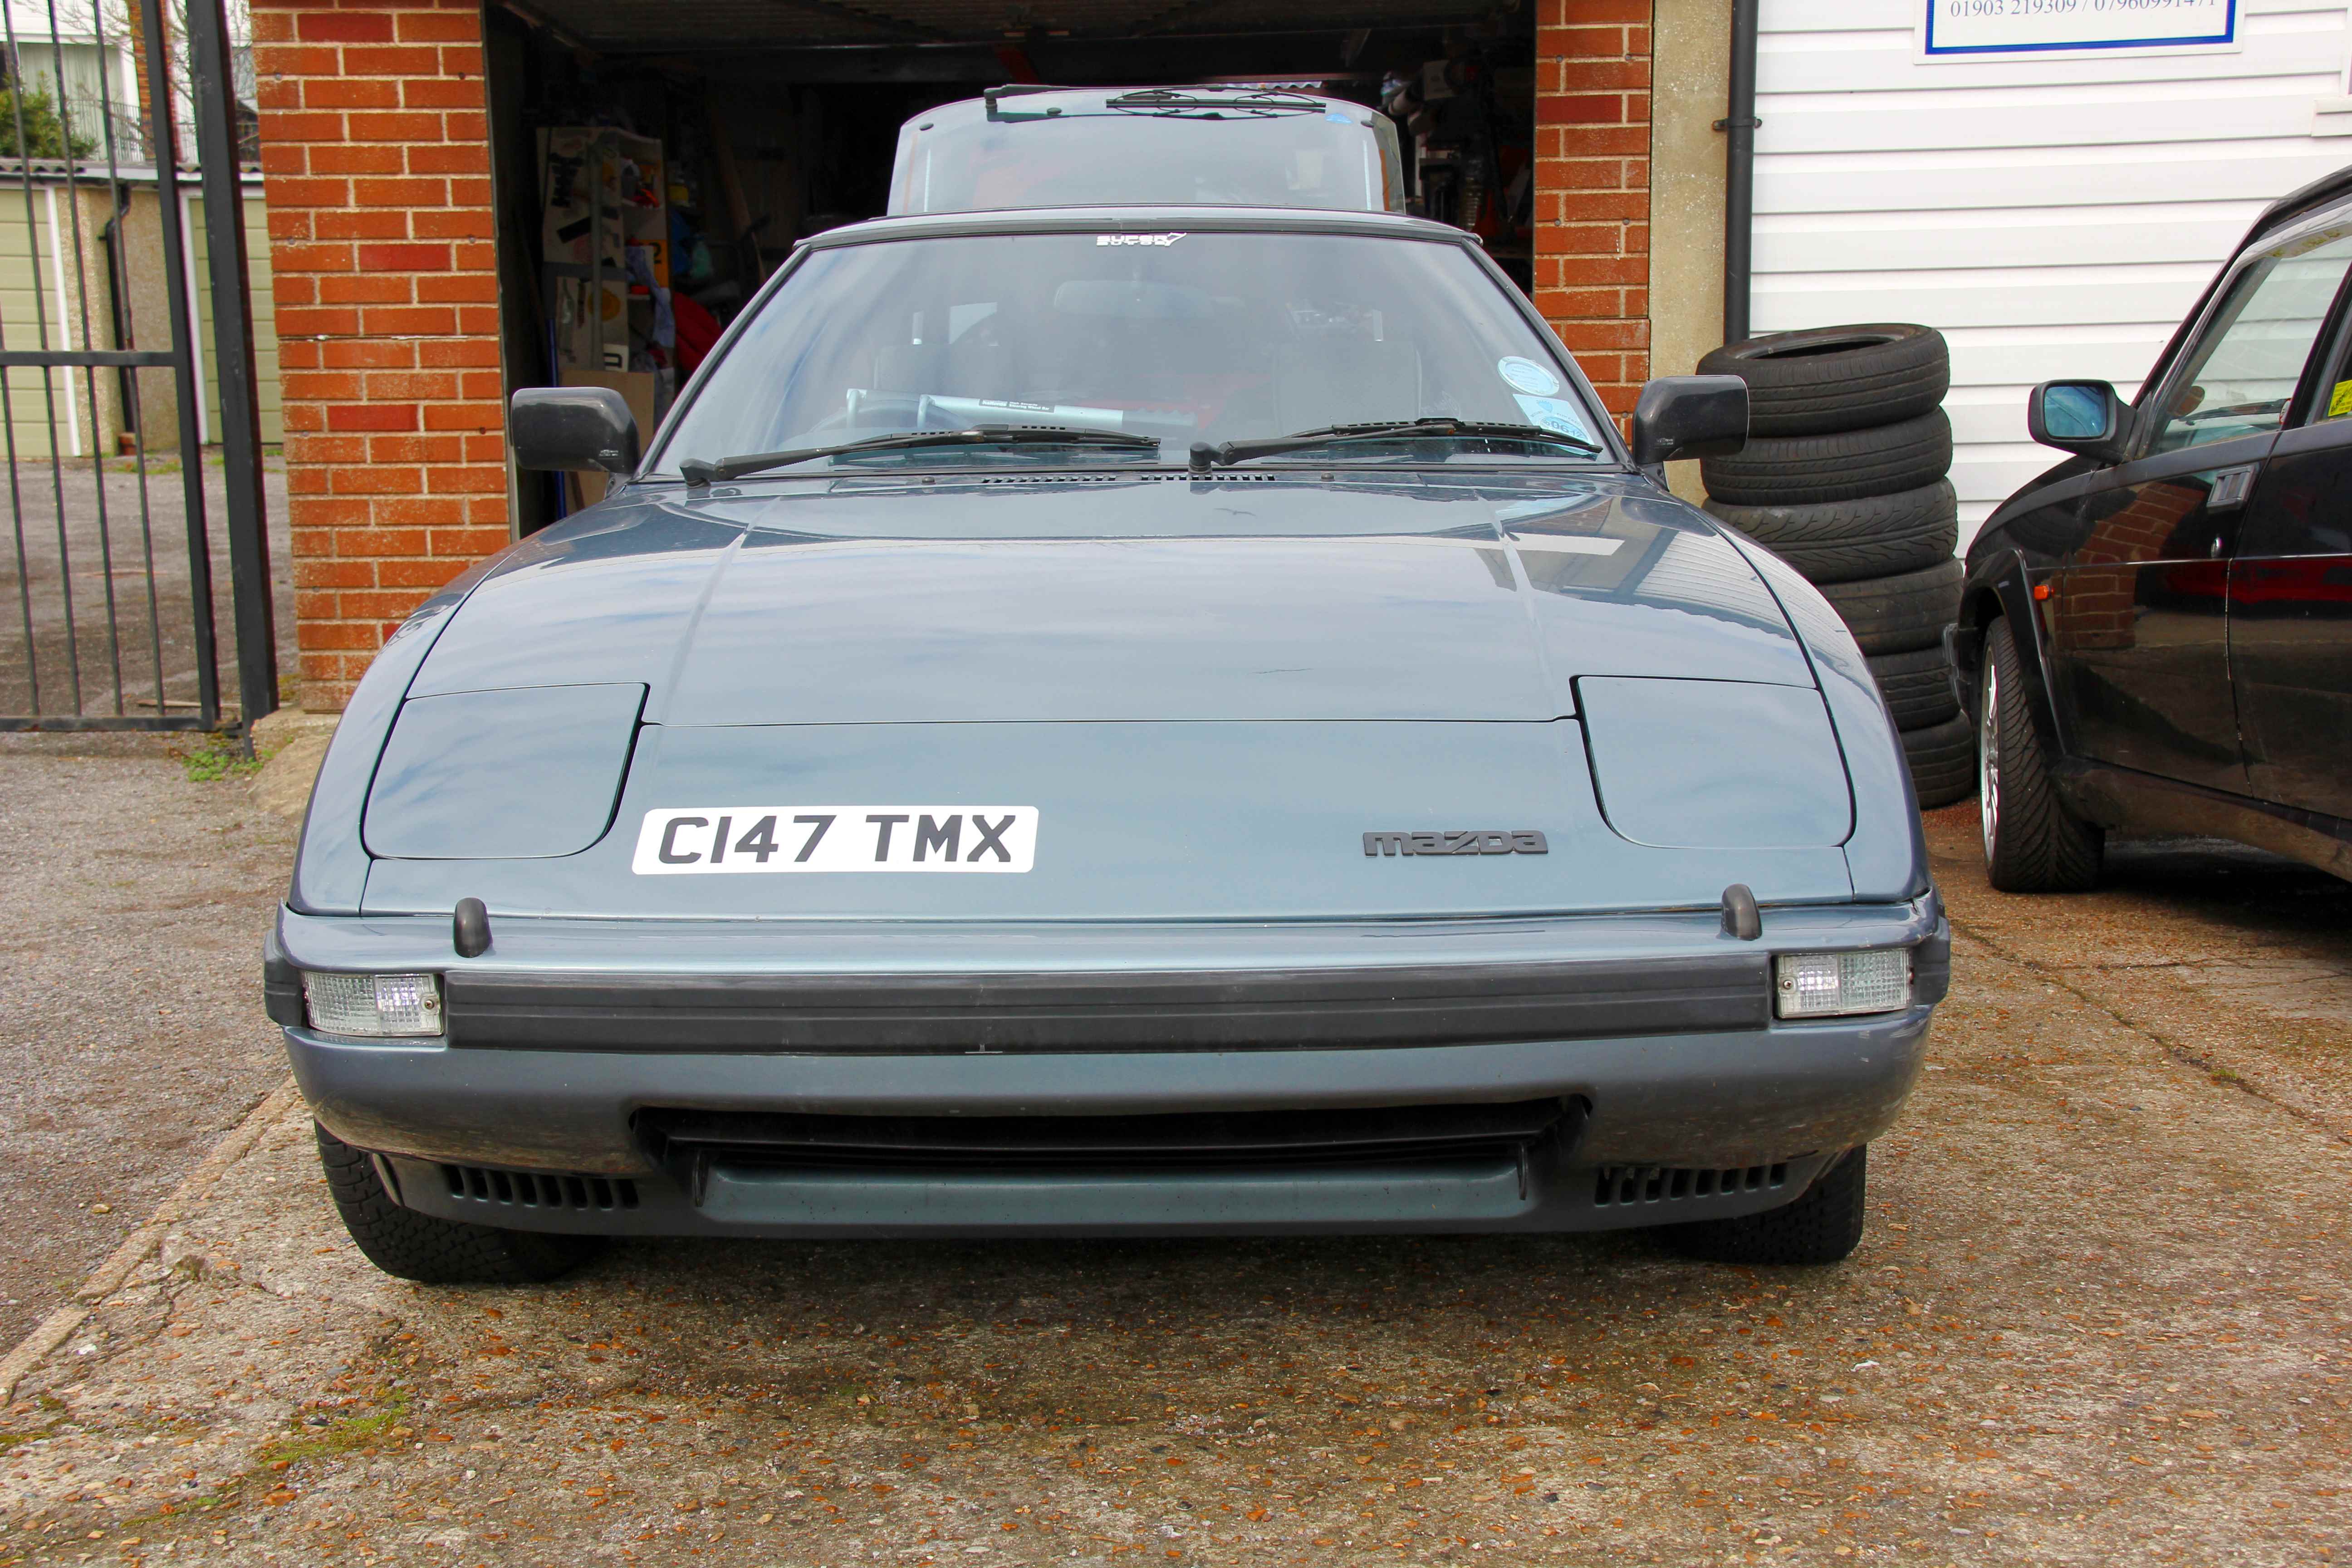
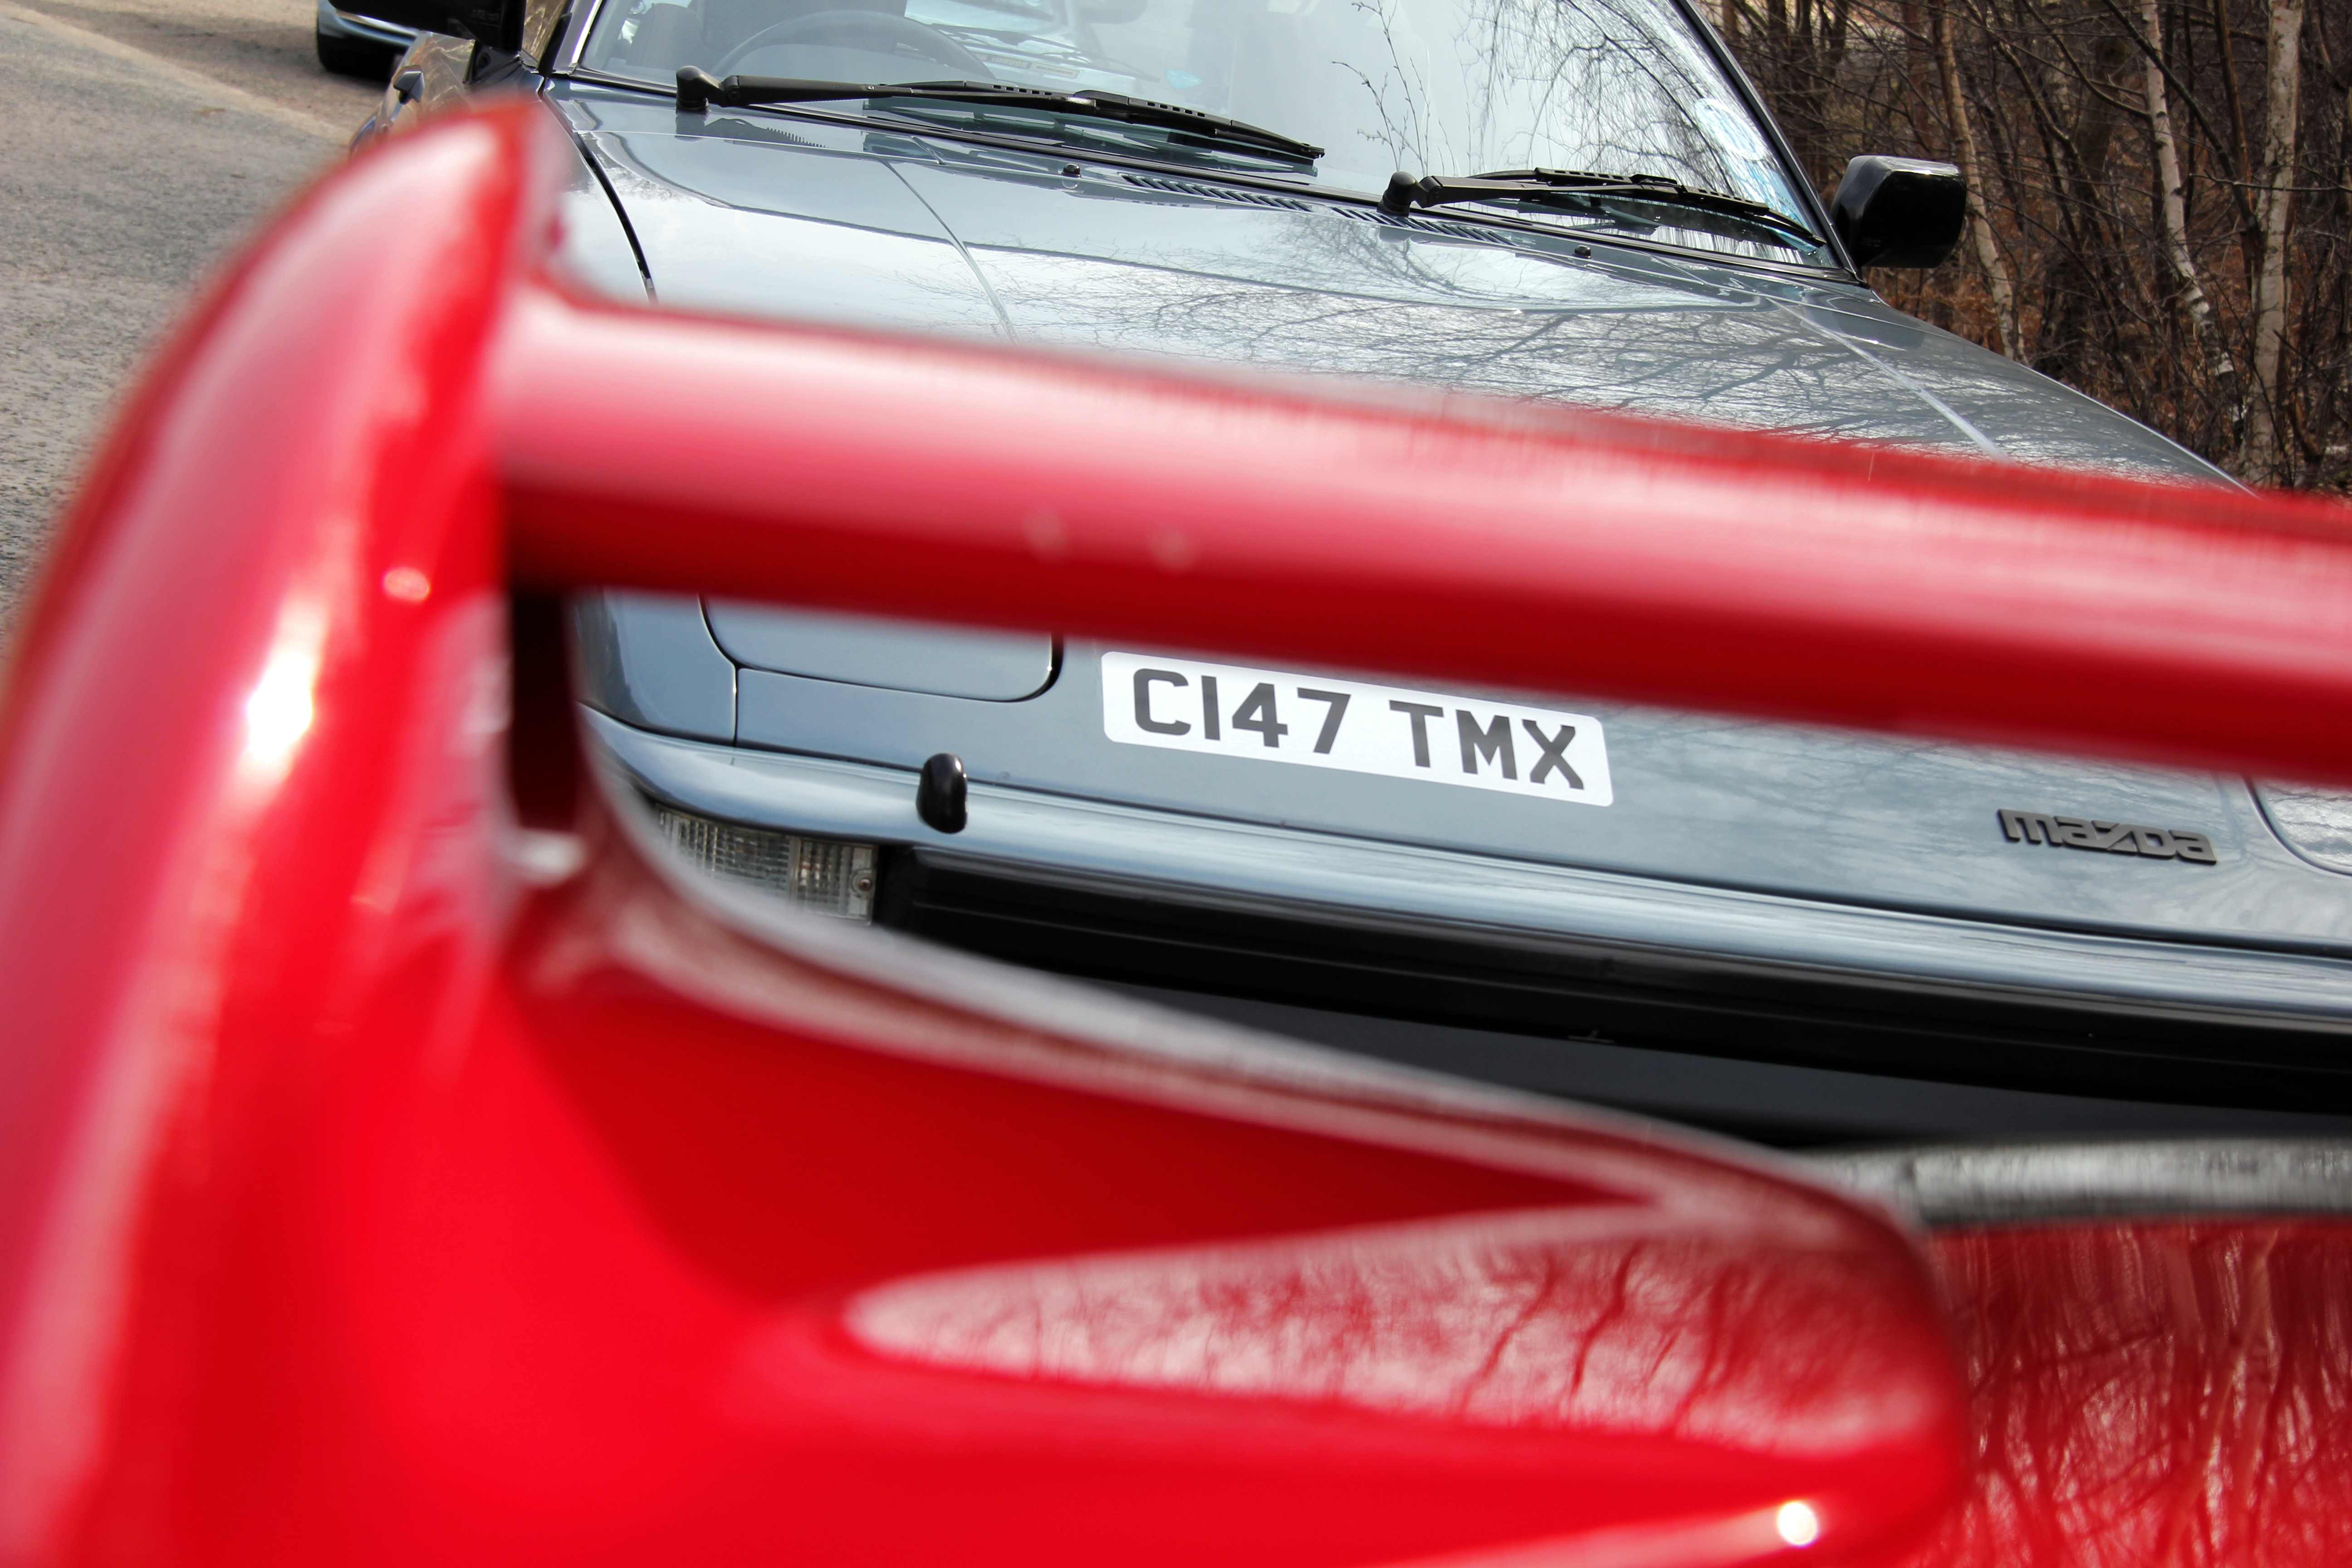
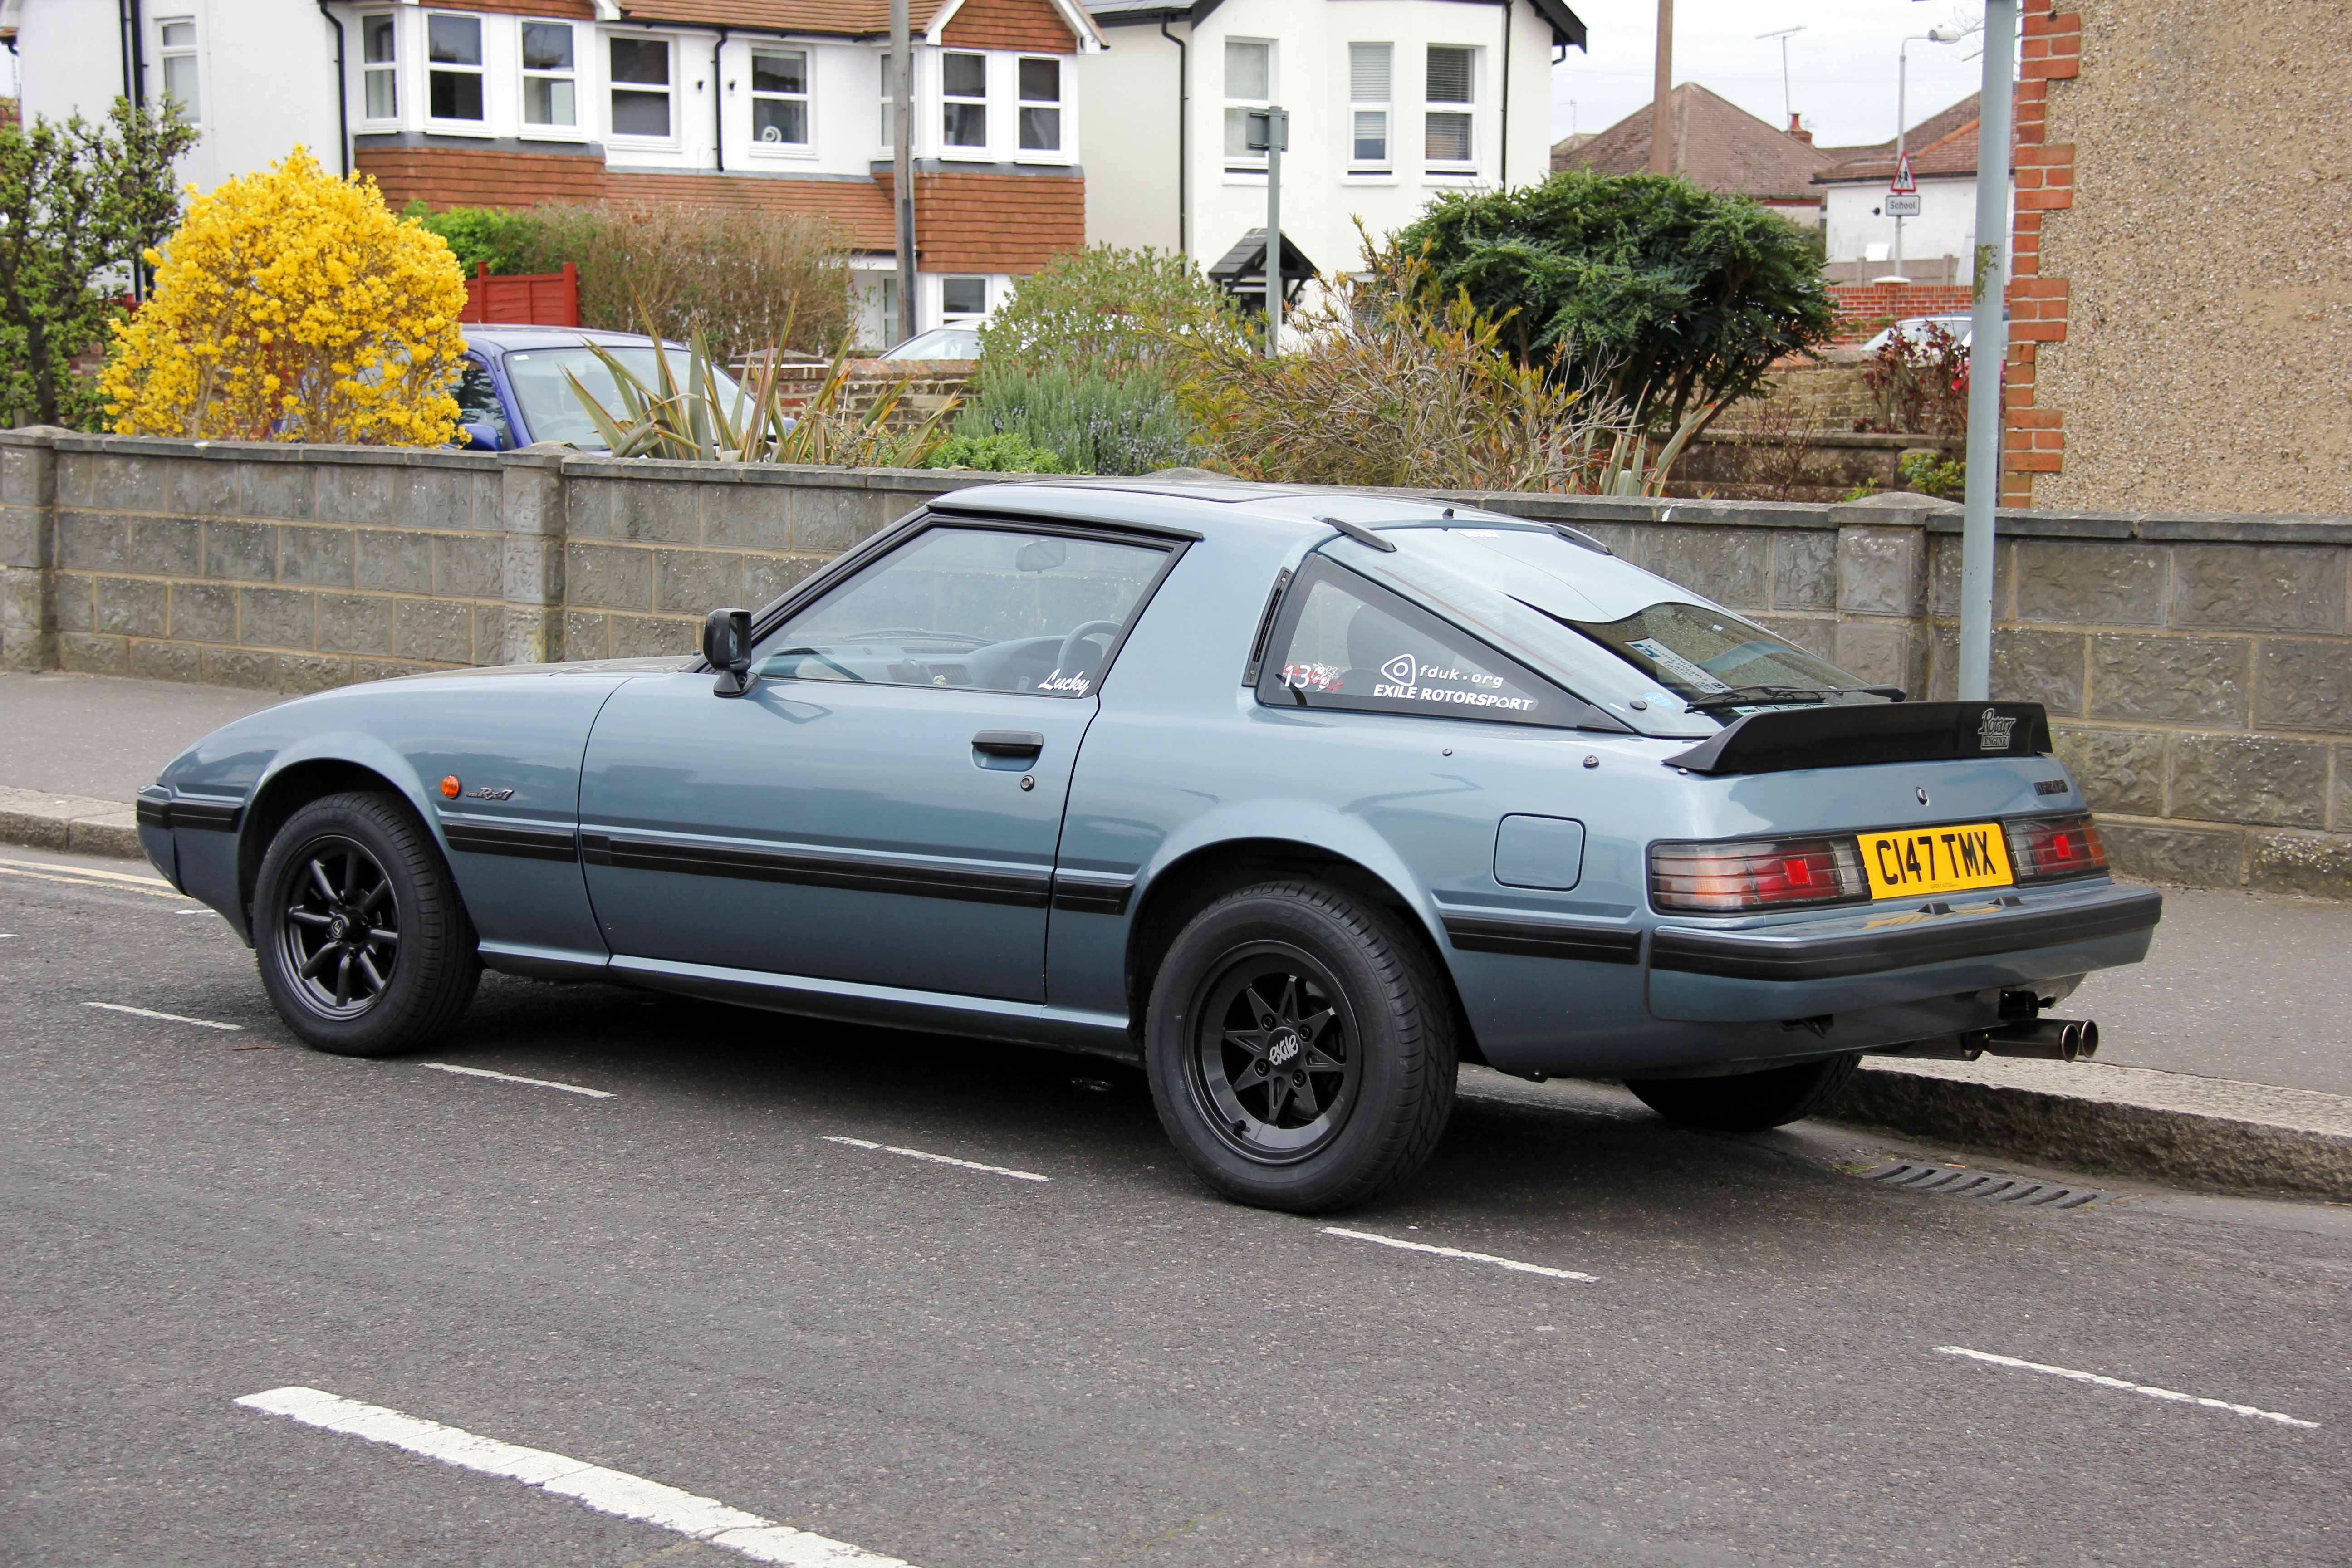
Binning the giant surfboard-sized number plate held onto the bumper with pig-iron architecture that would disgrace your average farm gate... in favour of a much moar discreet sticky one. Honestly, you guys over the Pond are properly lucky you don't have to blight the front of your cars with the bloody things as well as the back. (ahhhh, English number plate = American license plate, yeah?)
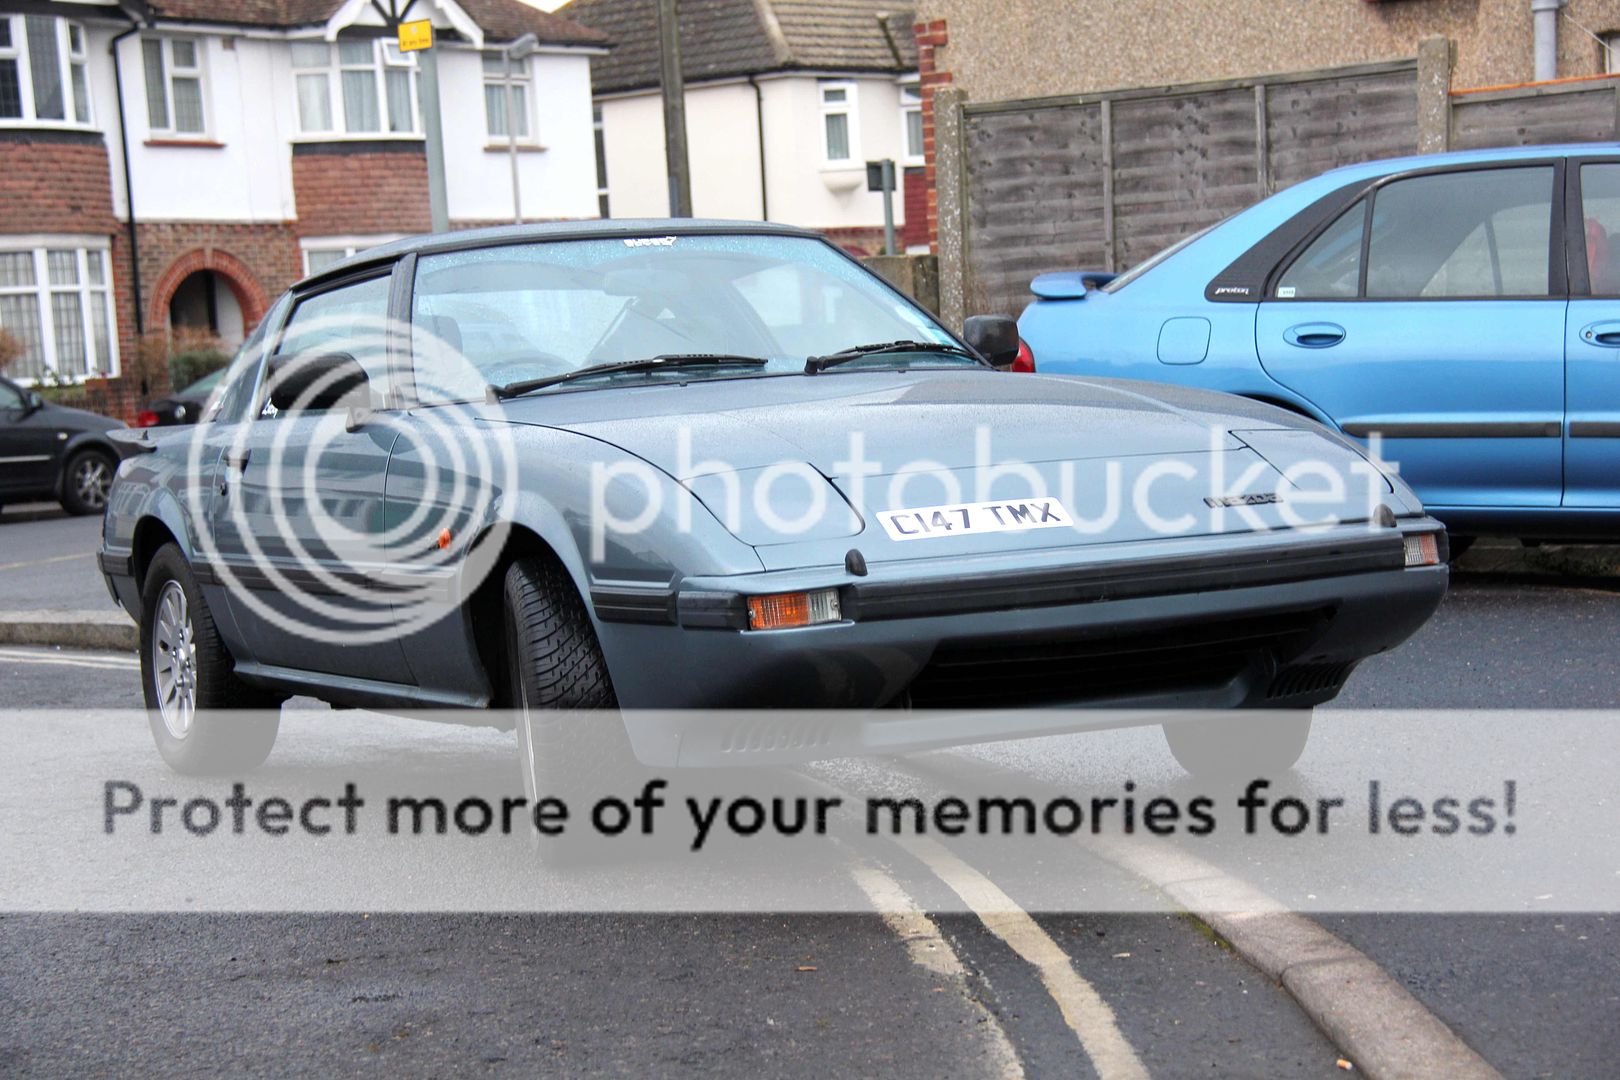
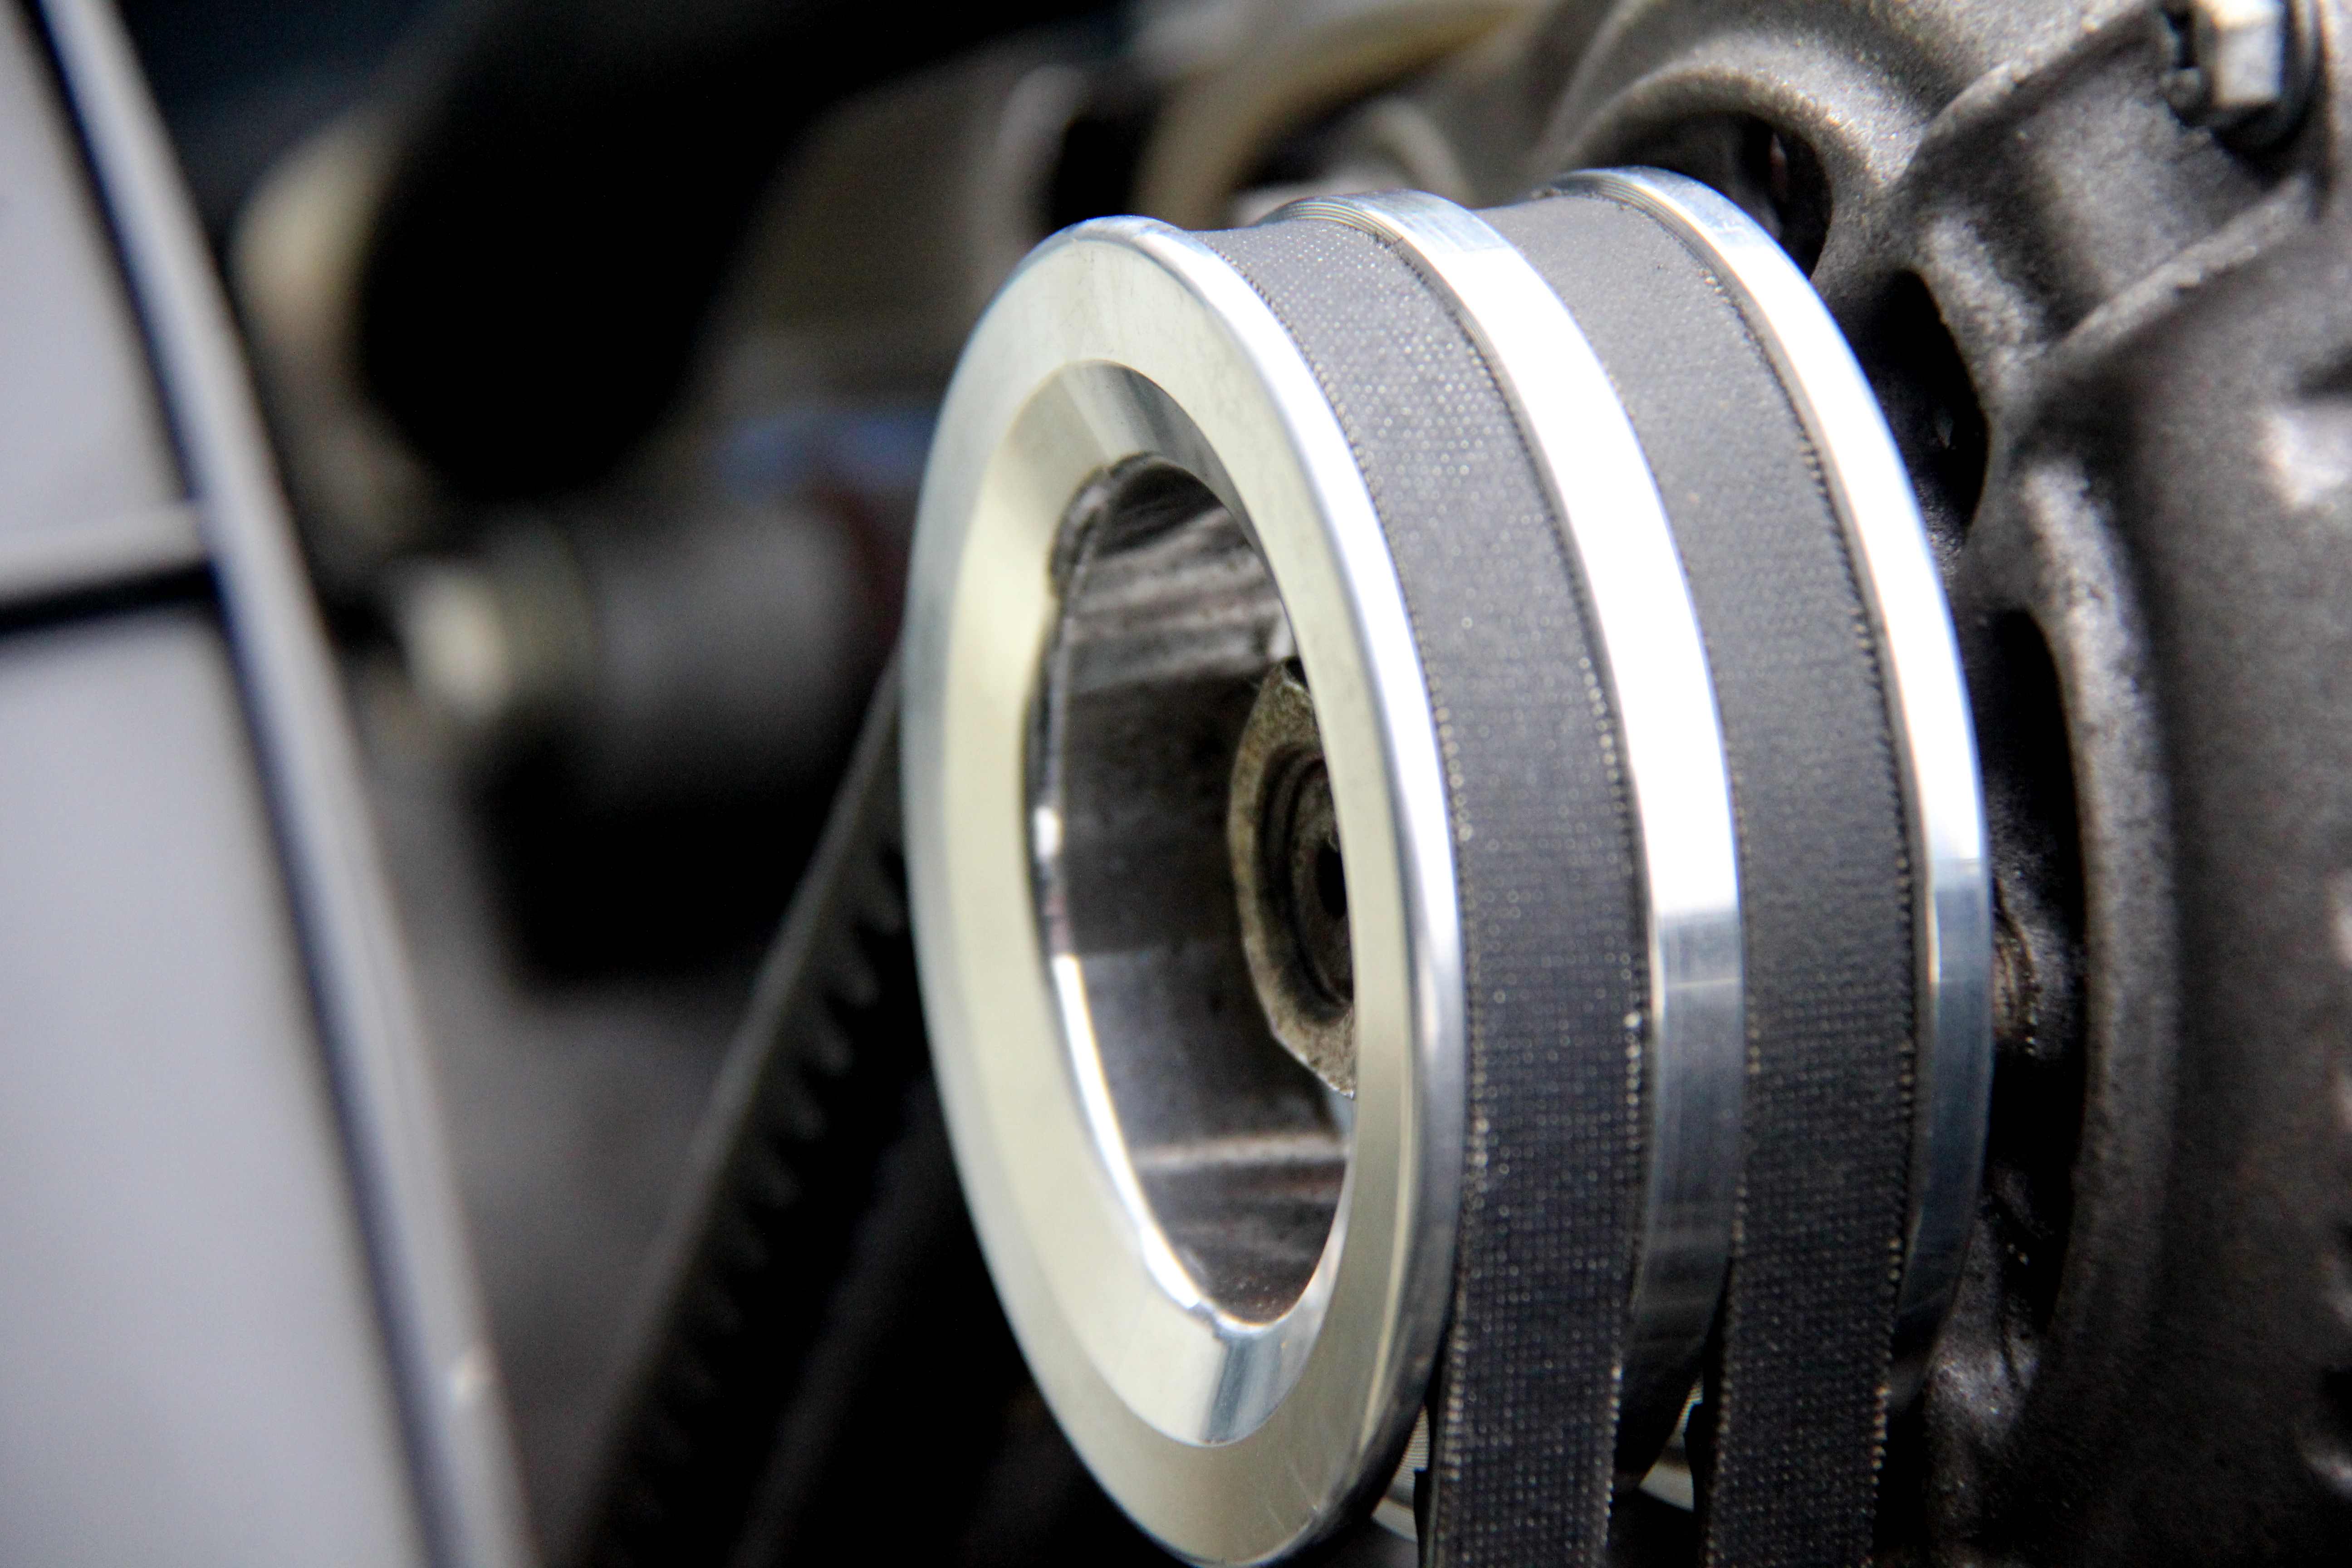
Next was to get a double-sheave alternator pulley from a guy in the FD club who makes art in billet

What a lovely piece of bling, and functional too! Winner. Only trouble was now I kept getting urges to polish the alternator and stuff to match... Then I remembered what an utter pig it was doing the FD one and had a lie down till the feeling wore off
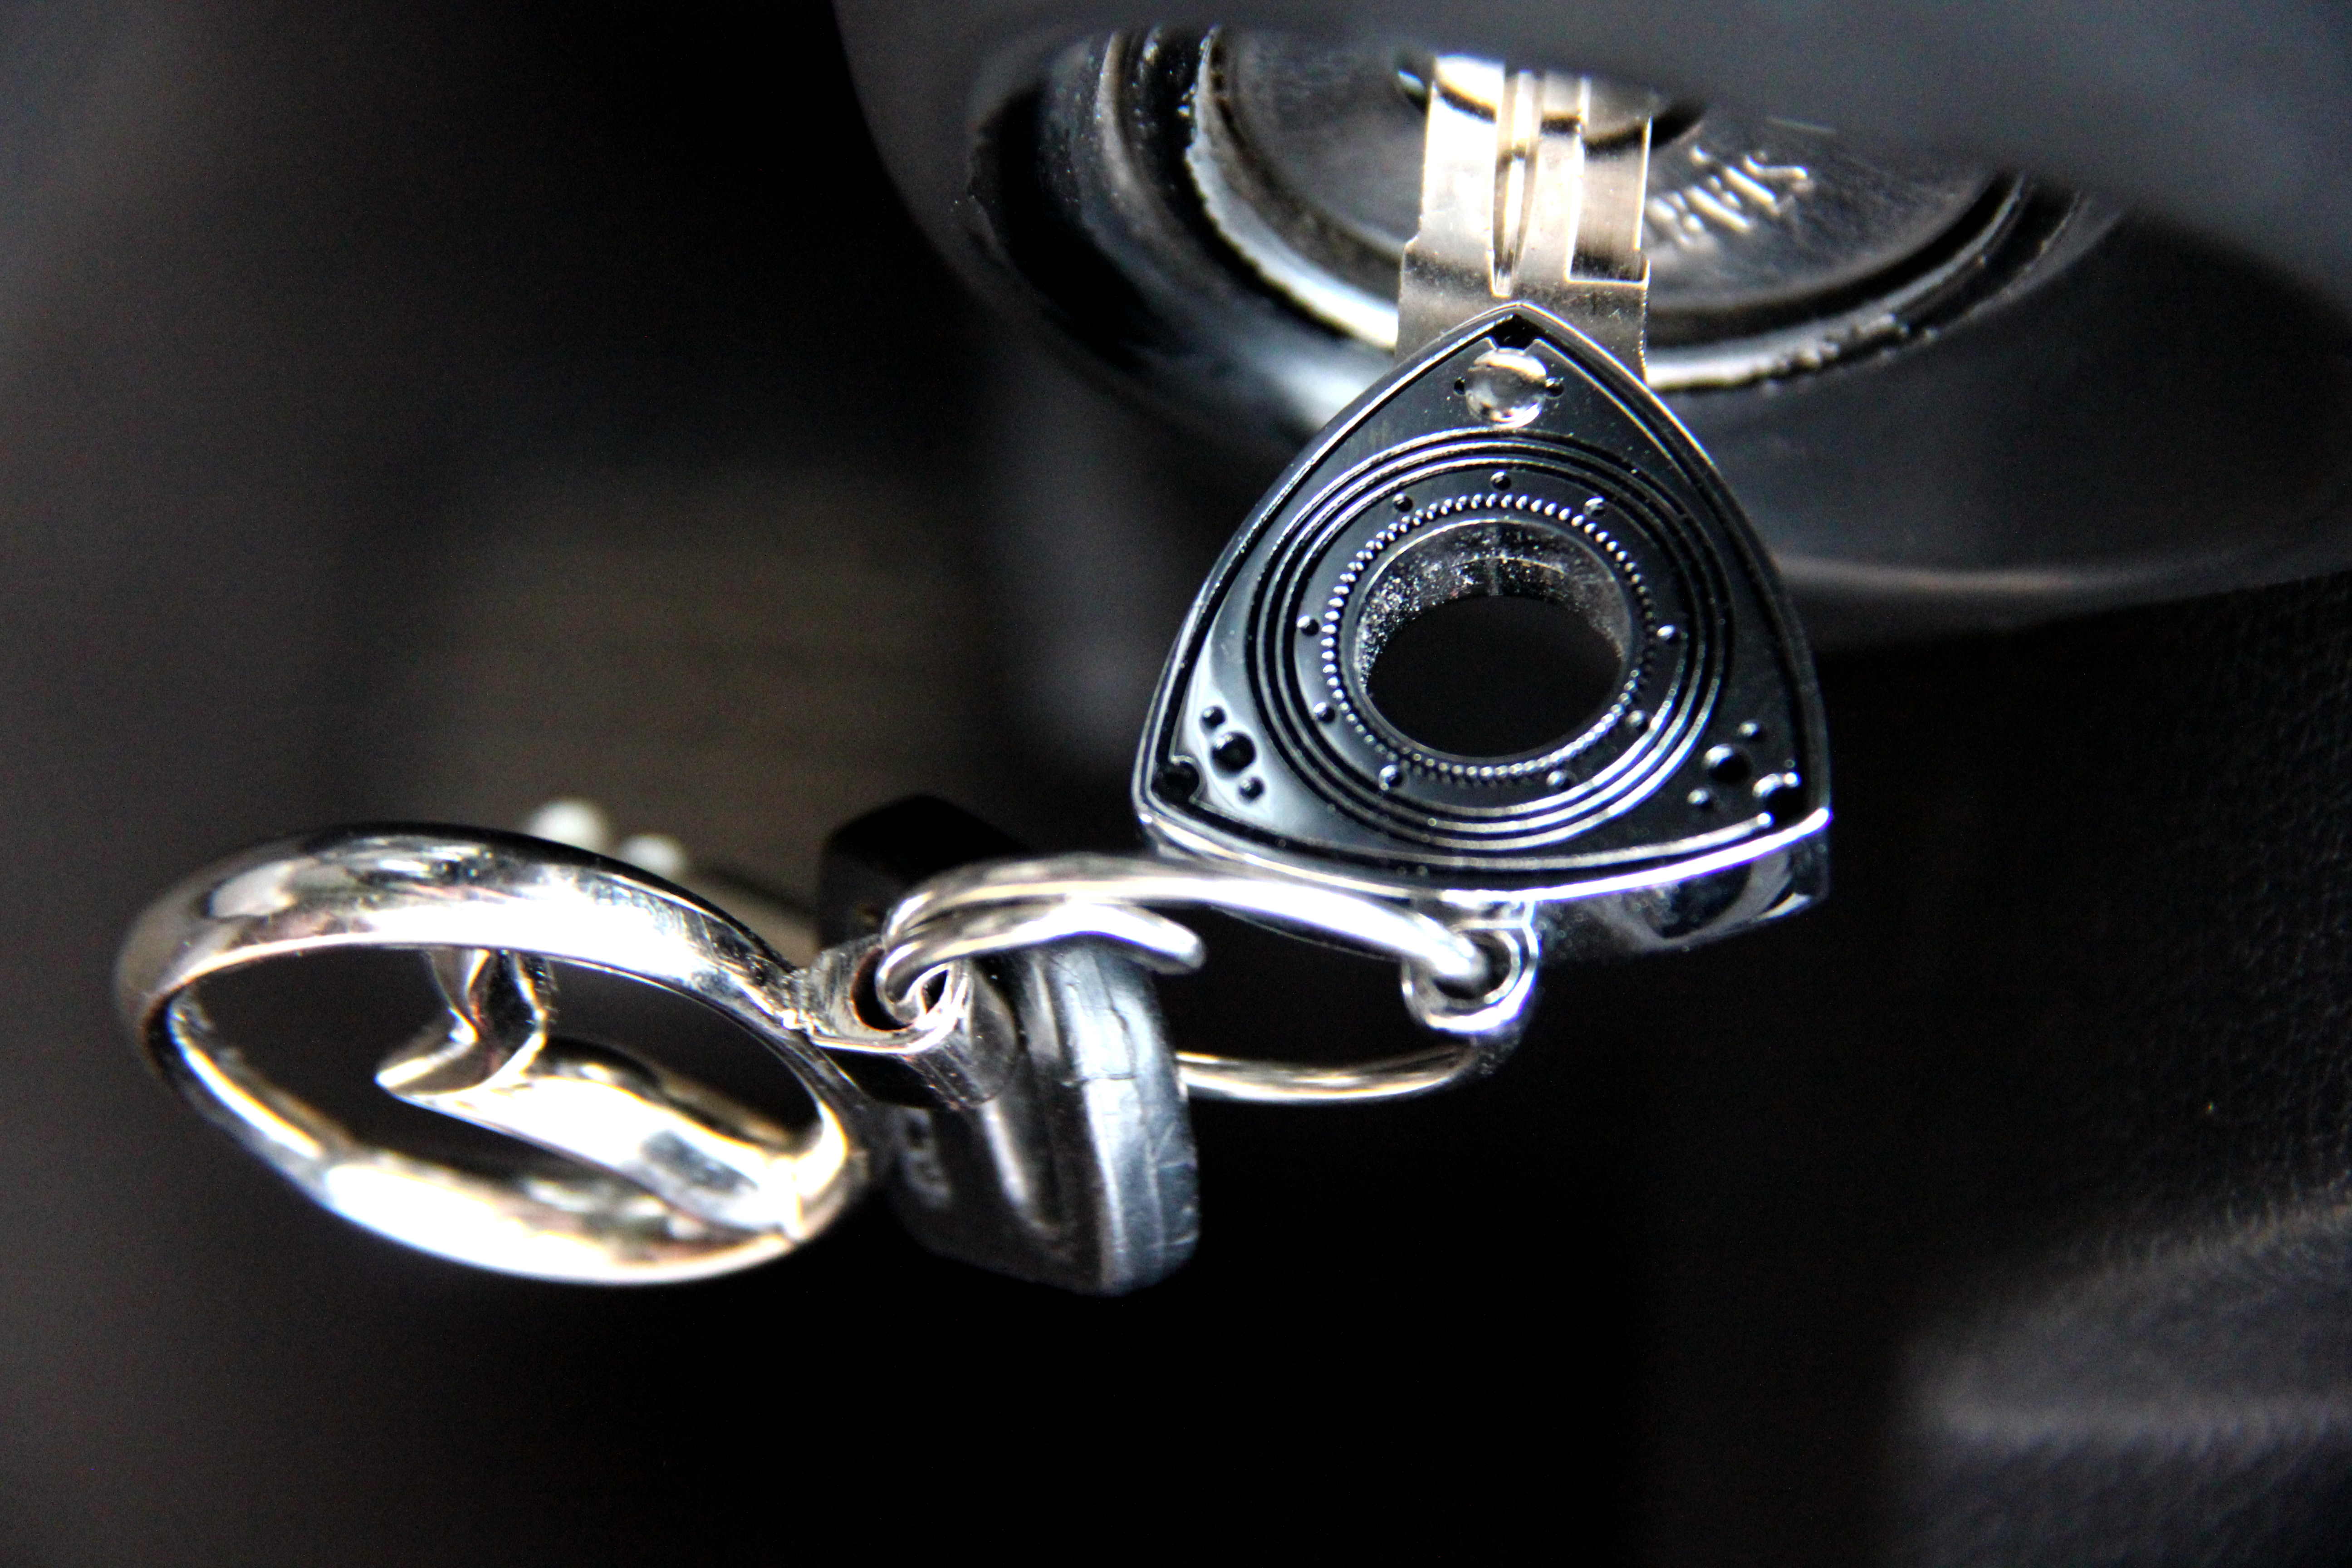
Also, I'd had a rotor FD key blank that had been in a drawer for years. Got the end cut for the FB, then spent a while filing away the extra wide shoulders on it, and it worked perfick. Hurrah, I now have more than one key for the next time I errr..... lock the door with the keys still in the car
EDIT: moar to come when I subdue the kids to bed
First up was
Binning the giant surfboard-sized number plate held onto the bumper with pig-iron architecture that would disgrace your average farm gate... in favour of a much moar discreet sticky one. Honestly, you guys over the Pond are properly lucky you don't have to blight the front of your cars with the bloody things as well as the back. (ahhhh, English number plate = American license plate, yeah?)
Next was to get a double-sheave alternator pulley from a guy in the FD club who makes art in billet
What a lovely piece of bling, and functional too! Winner. Only trouble was now I kept getting urges to polish the alternator and stuff to match... Then I remembered what an utter pig it was doing the FD one and had a lie down till the feeling wore off
Also, I'd had a rotor FD key blank that had been in a drawer for years. Got the end cut for the FB, then spent a while filing away the extra wide shoulders on it, and it worked perfick. Hurrah, I now have more than one key for the next time I errr..... lock the door with the keys still in the car
EDIT: moar to come when I subdue the kids to bed
Last edited by Nik da Greek; Nov 16, 2012 at 01:11 PM.
Thread Starter
Senior Member
Joined: Oct 2010
Posts: 255
Likes: 1
From: England
Amazingly versatile and spacious, these RX-7 things. When I tried this in the FD I was only 3/5ths as successful as in the FB  Which is to say you can only fit three wheels and tyres in
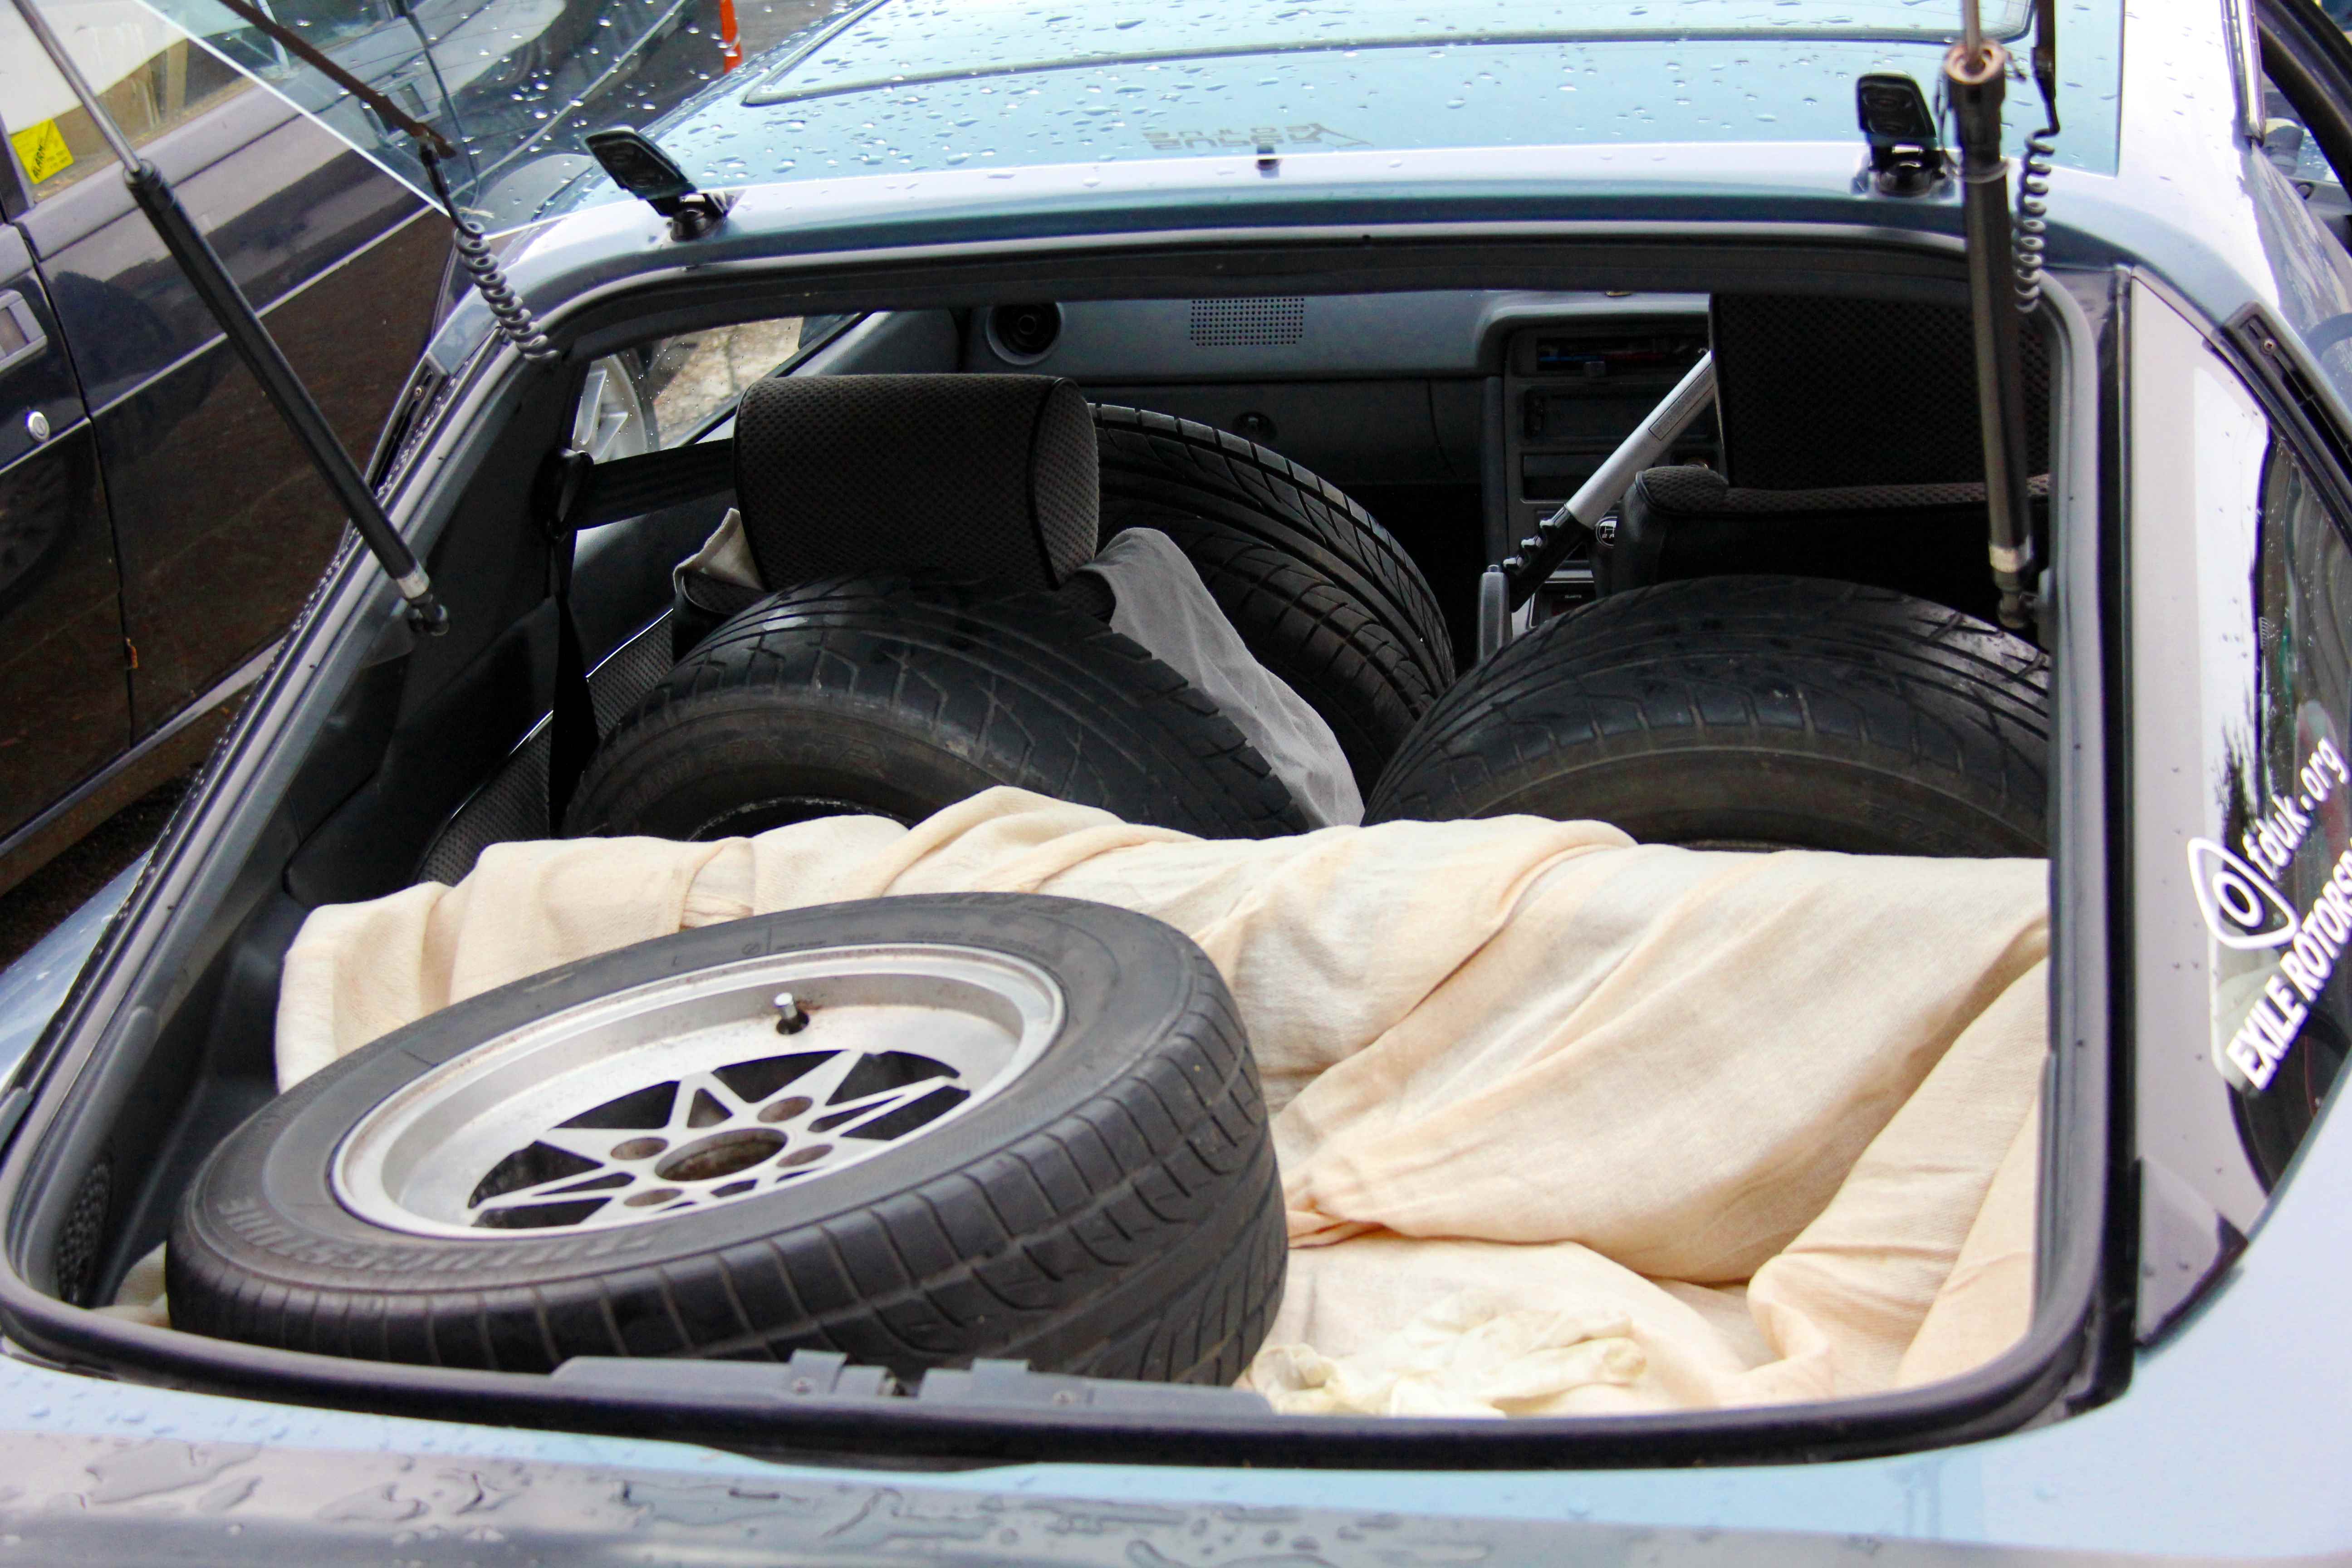
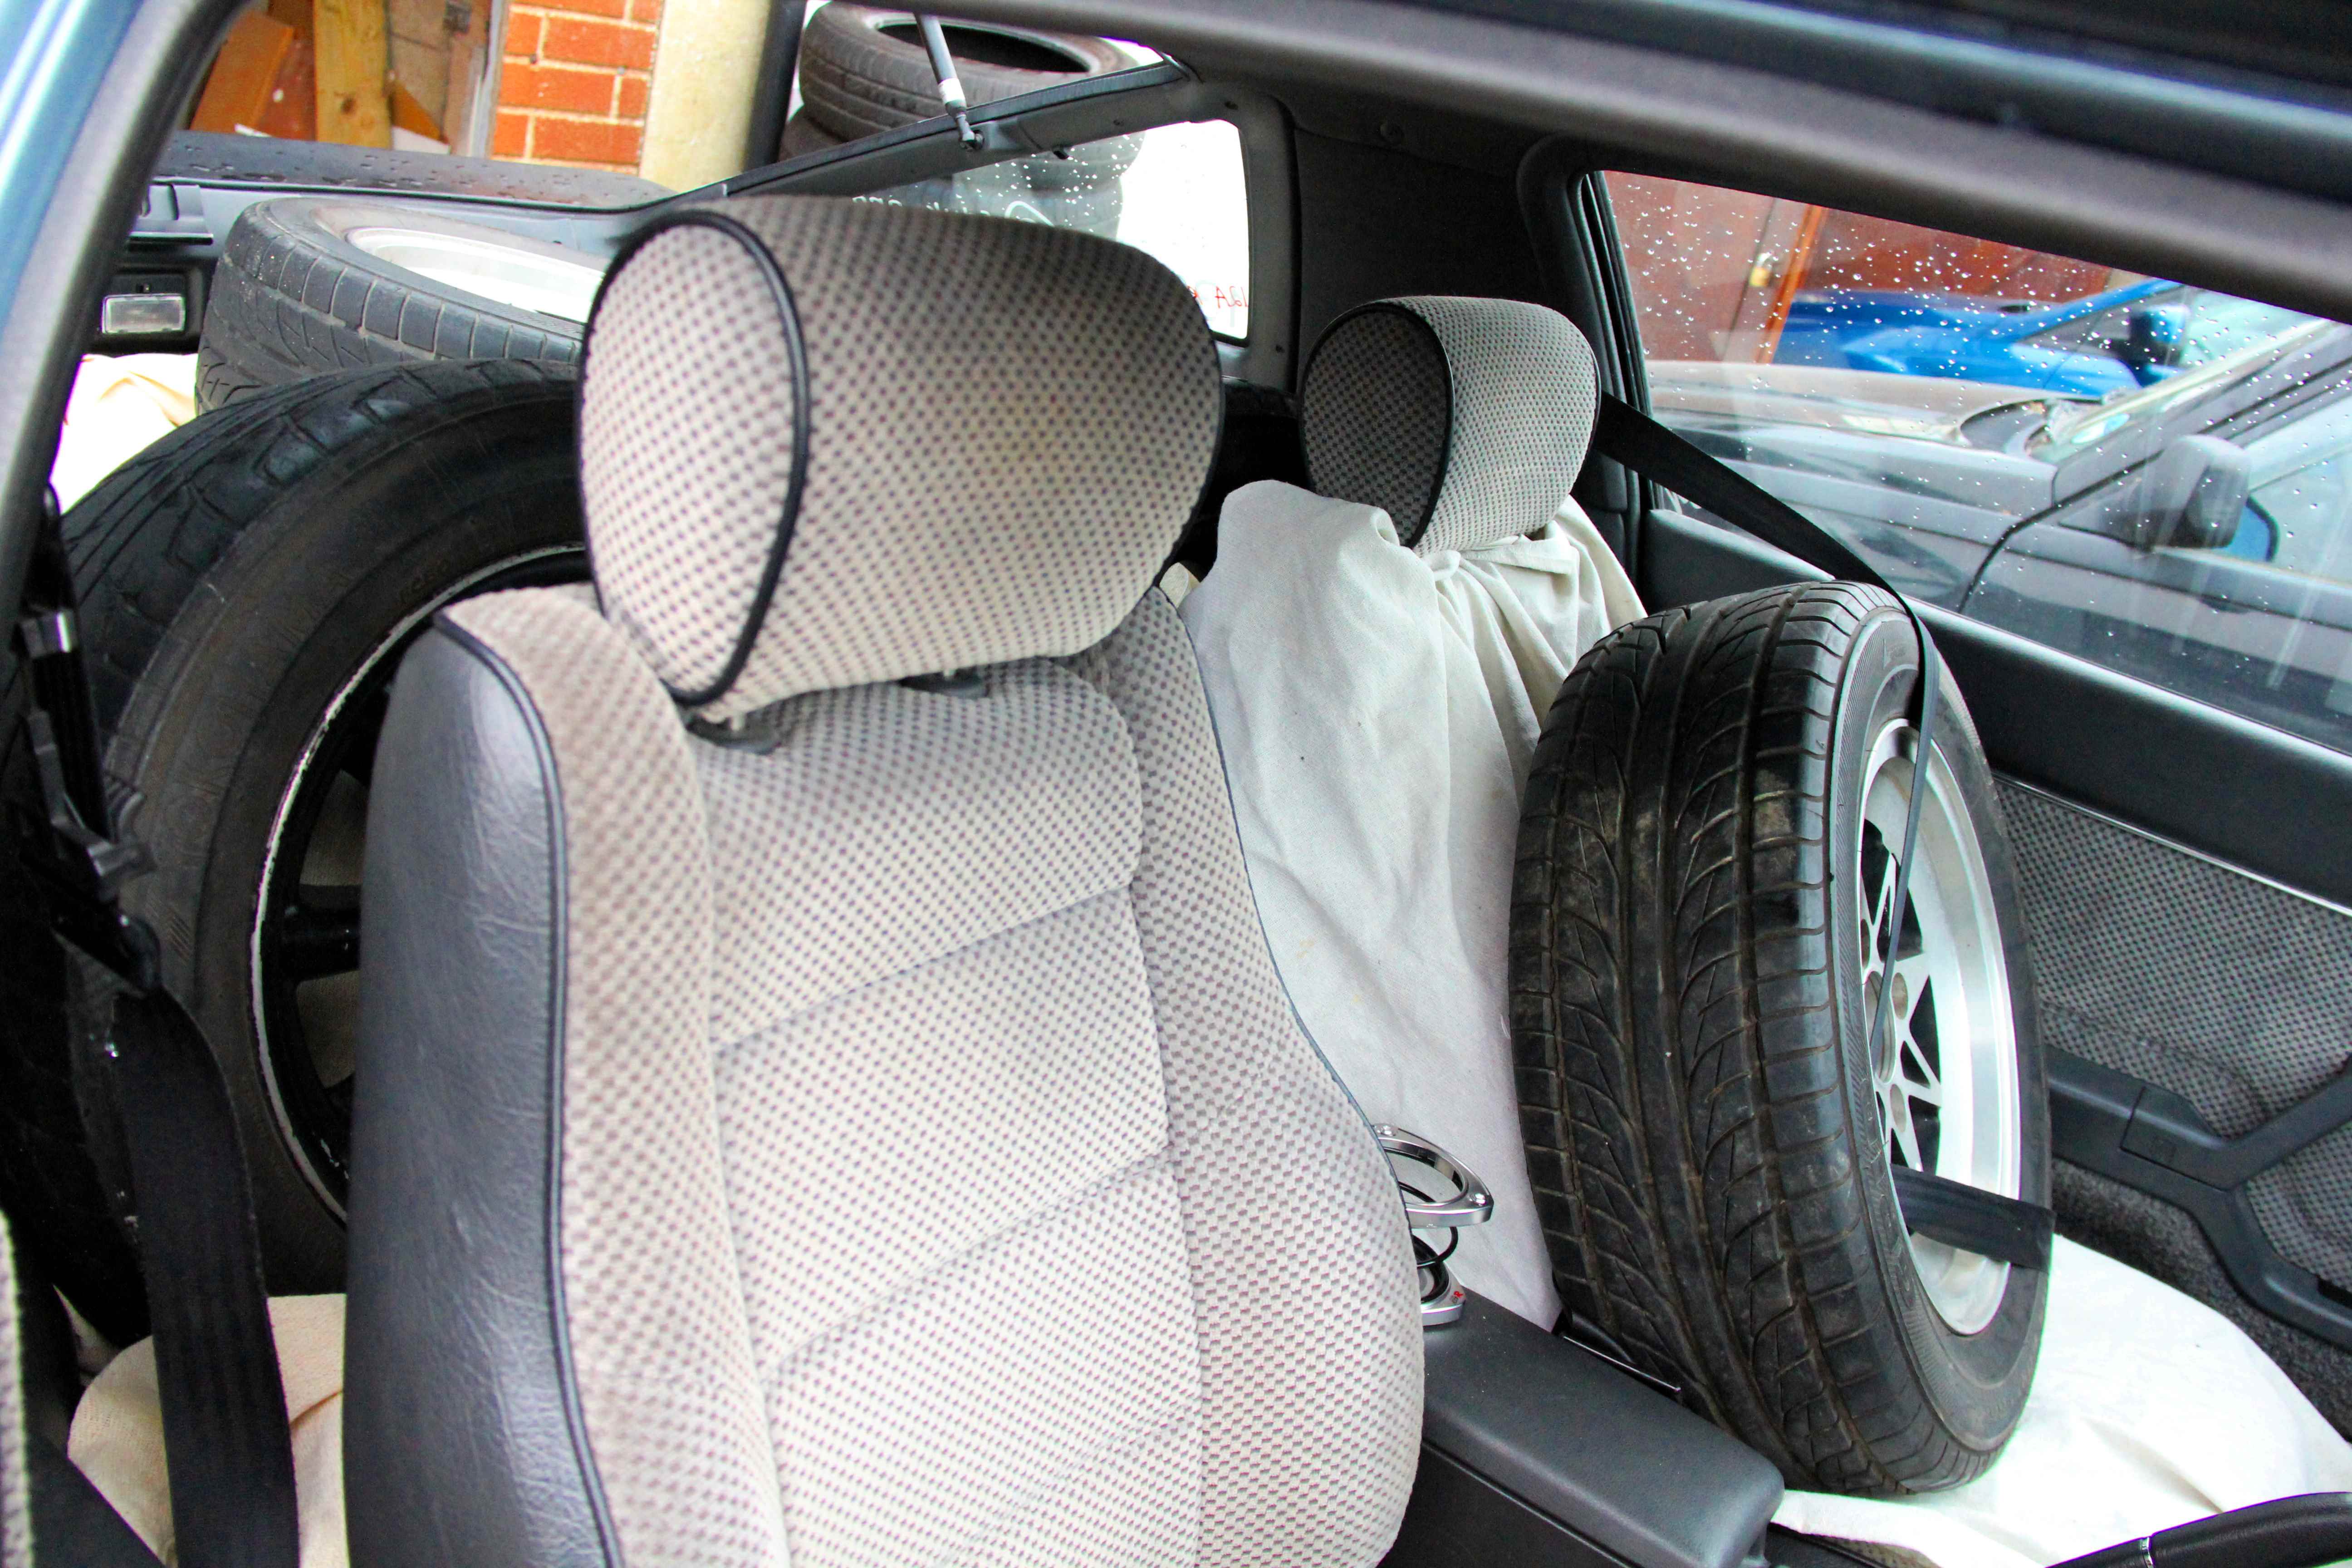
Five alloys, with tyres. Excellent 8-) I loaded them up and paid a visit to a delightfully grumpy fellow of the good ol' British artisan I'm-lowering-myself-to-serve-you stylee at a wheel refurbishers. He was OK, to be fair, he warmed to us. Sorta. After much discussion and teeth-sucking it was agreed that trying to polish the lips was asking for trouble, both in terms of longevity and actually performing the task, as the Watanabes have a radiused rim which would be near impossible to machine turn. So we agreed on them being Bentley Storm Grey. Which is nice! Posh, too lol
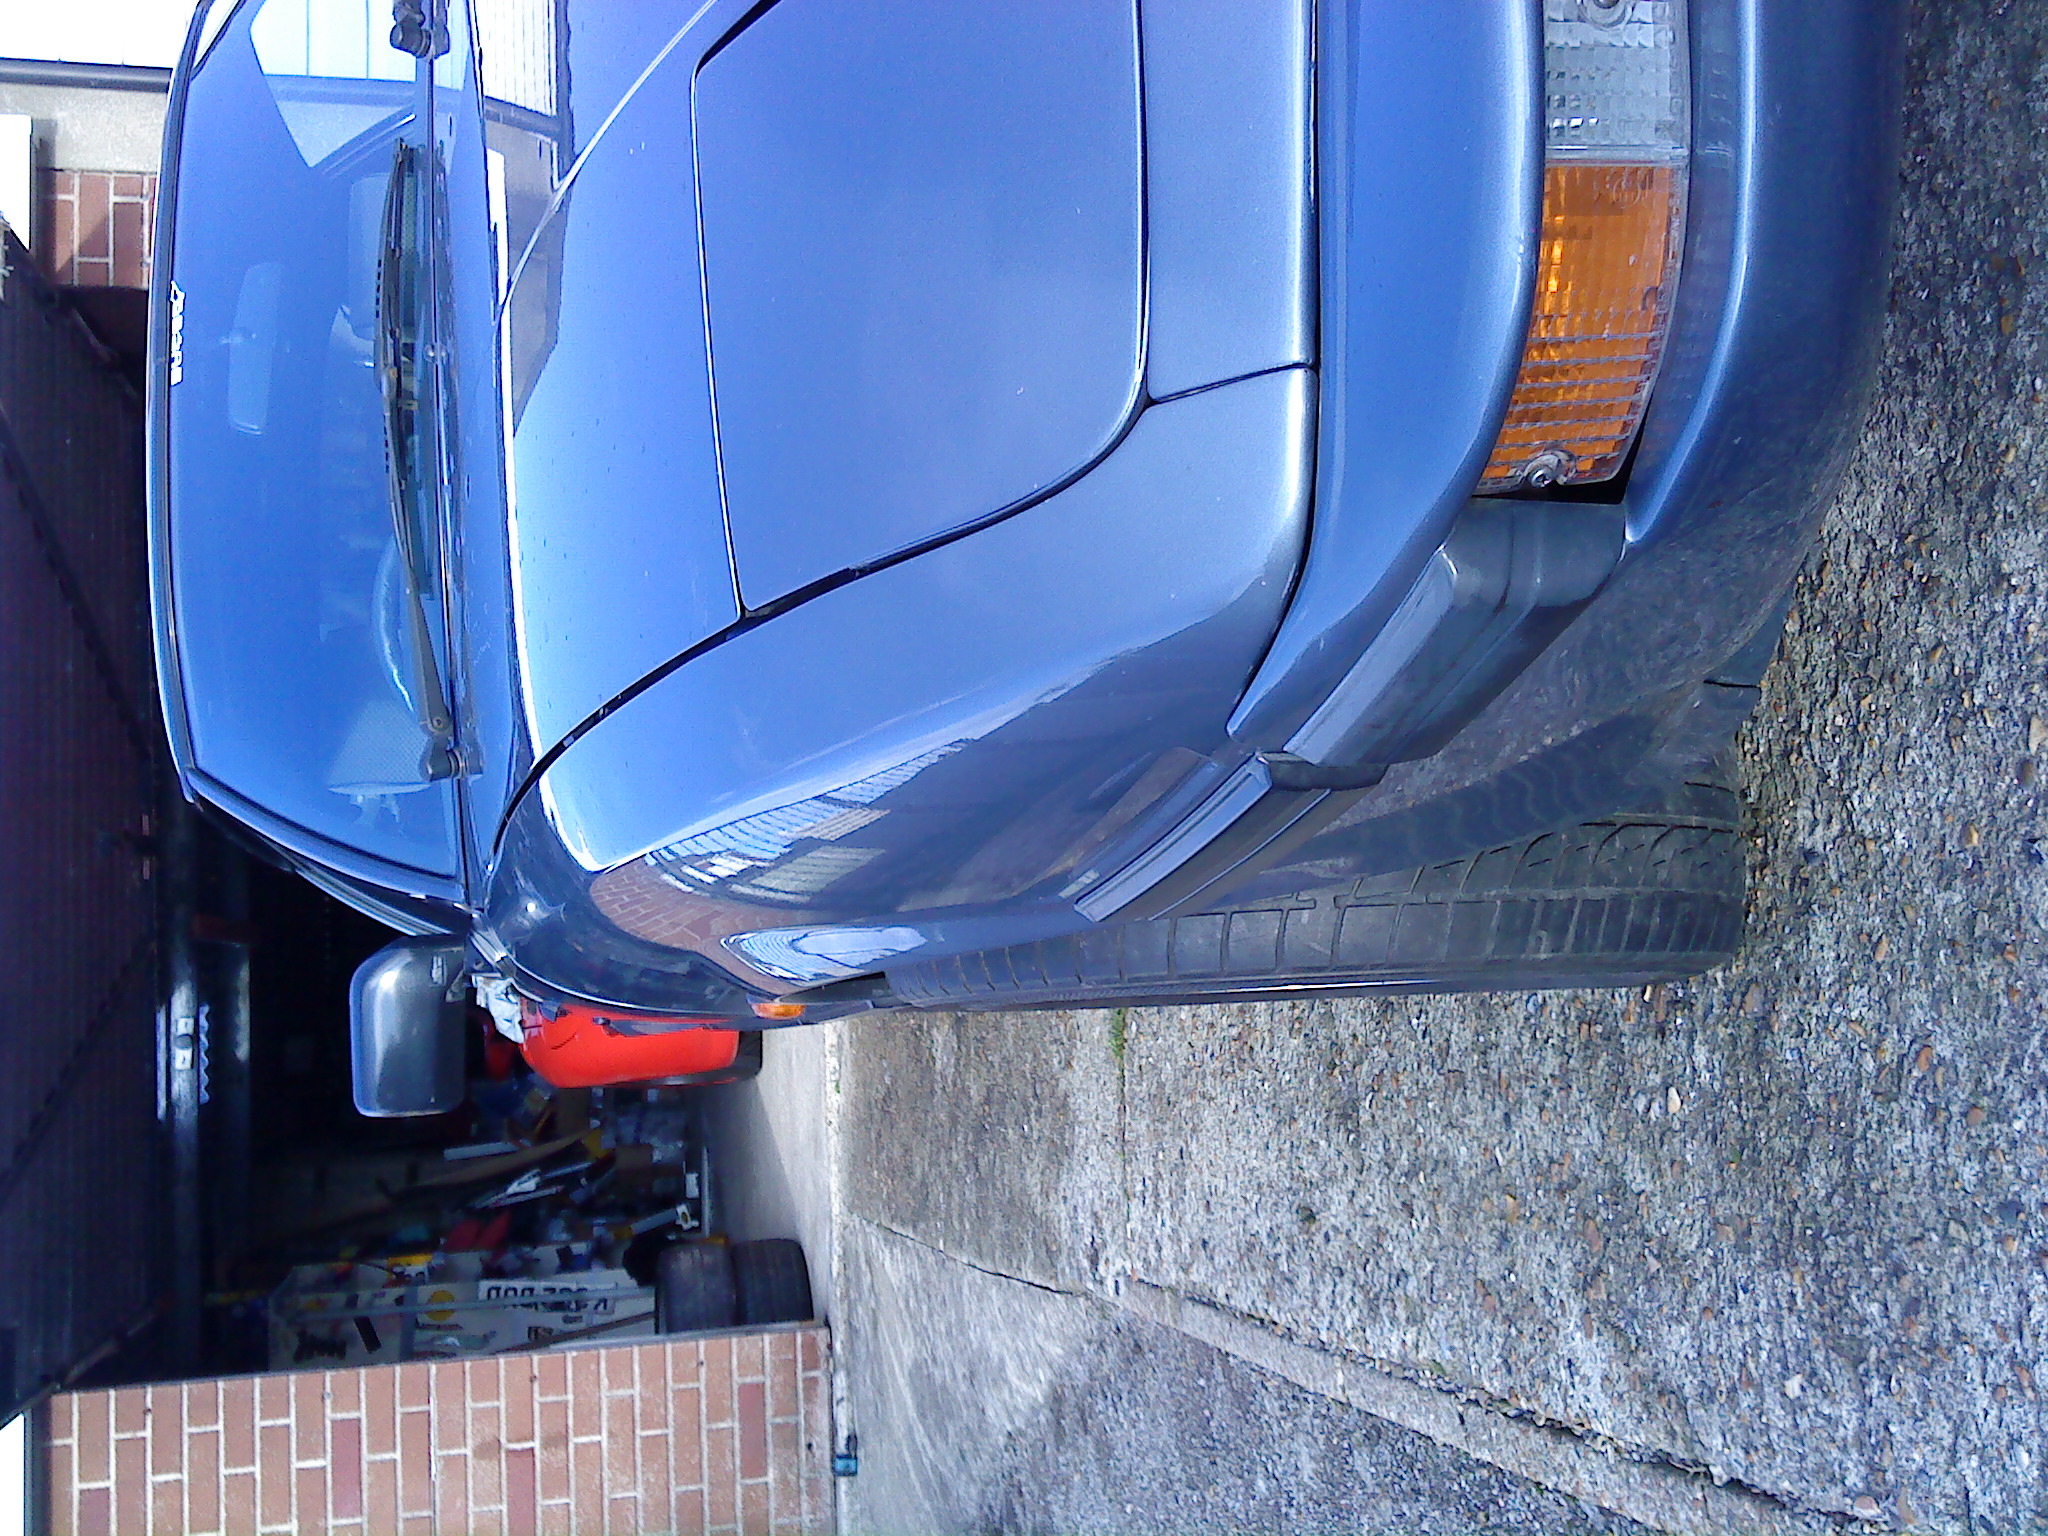
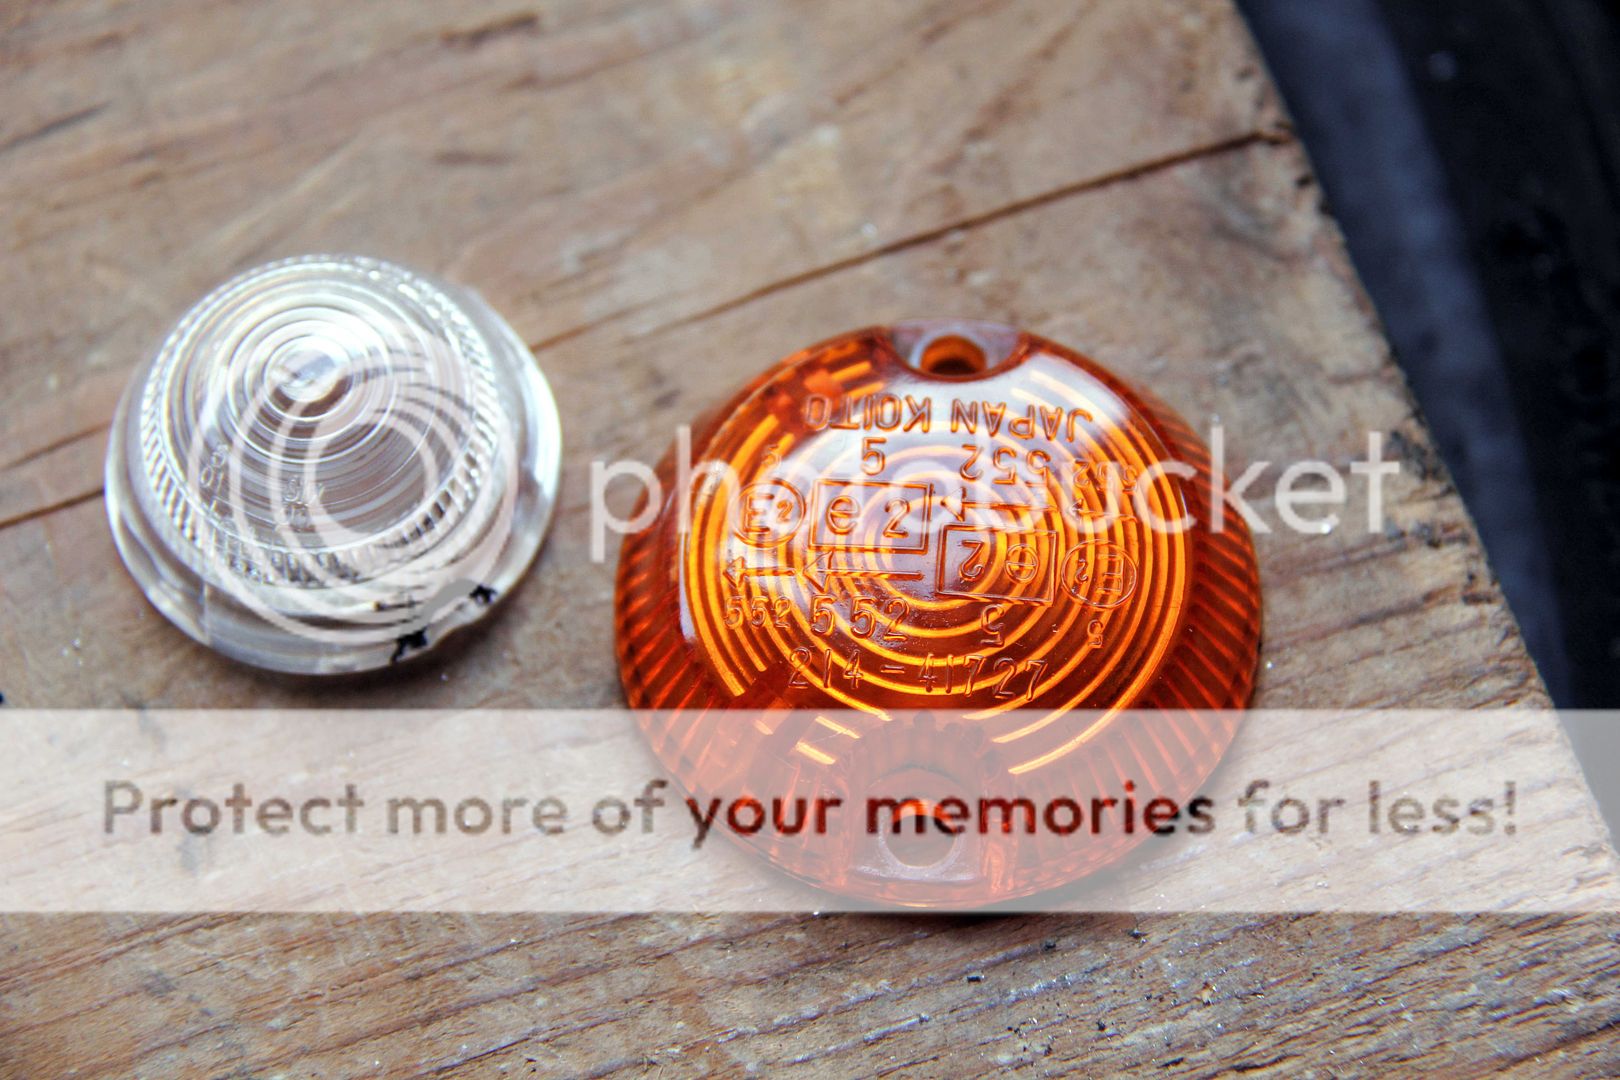
While the wheels were away I could get on with some other little jobs, such as de-fried eggifying the indicators. It's not a good look
Before;
After;
Much better. Mazda made the orange indicator inserts out of something that seemed to be recycled sweet wrappers :evil: Even with the heat gun, there was no way it was coming out intact, it just shattered into pieces even under gentle persuasion. Conversely, the glue they used to bond it would be good enough to glue the car to the side of a building, it's relentless. The only way I could get rid of the fragments of remaining lens and glue was to Dremel the unholy hell out of it :shock: Bit barbaric, but worth the time. Good job I only had one gin the night before, steady hand required.
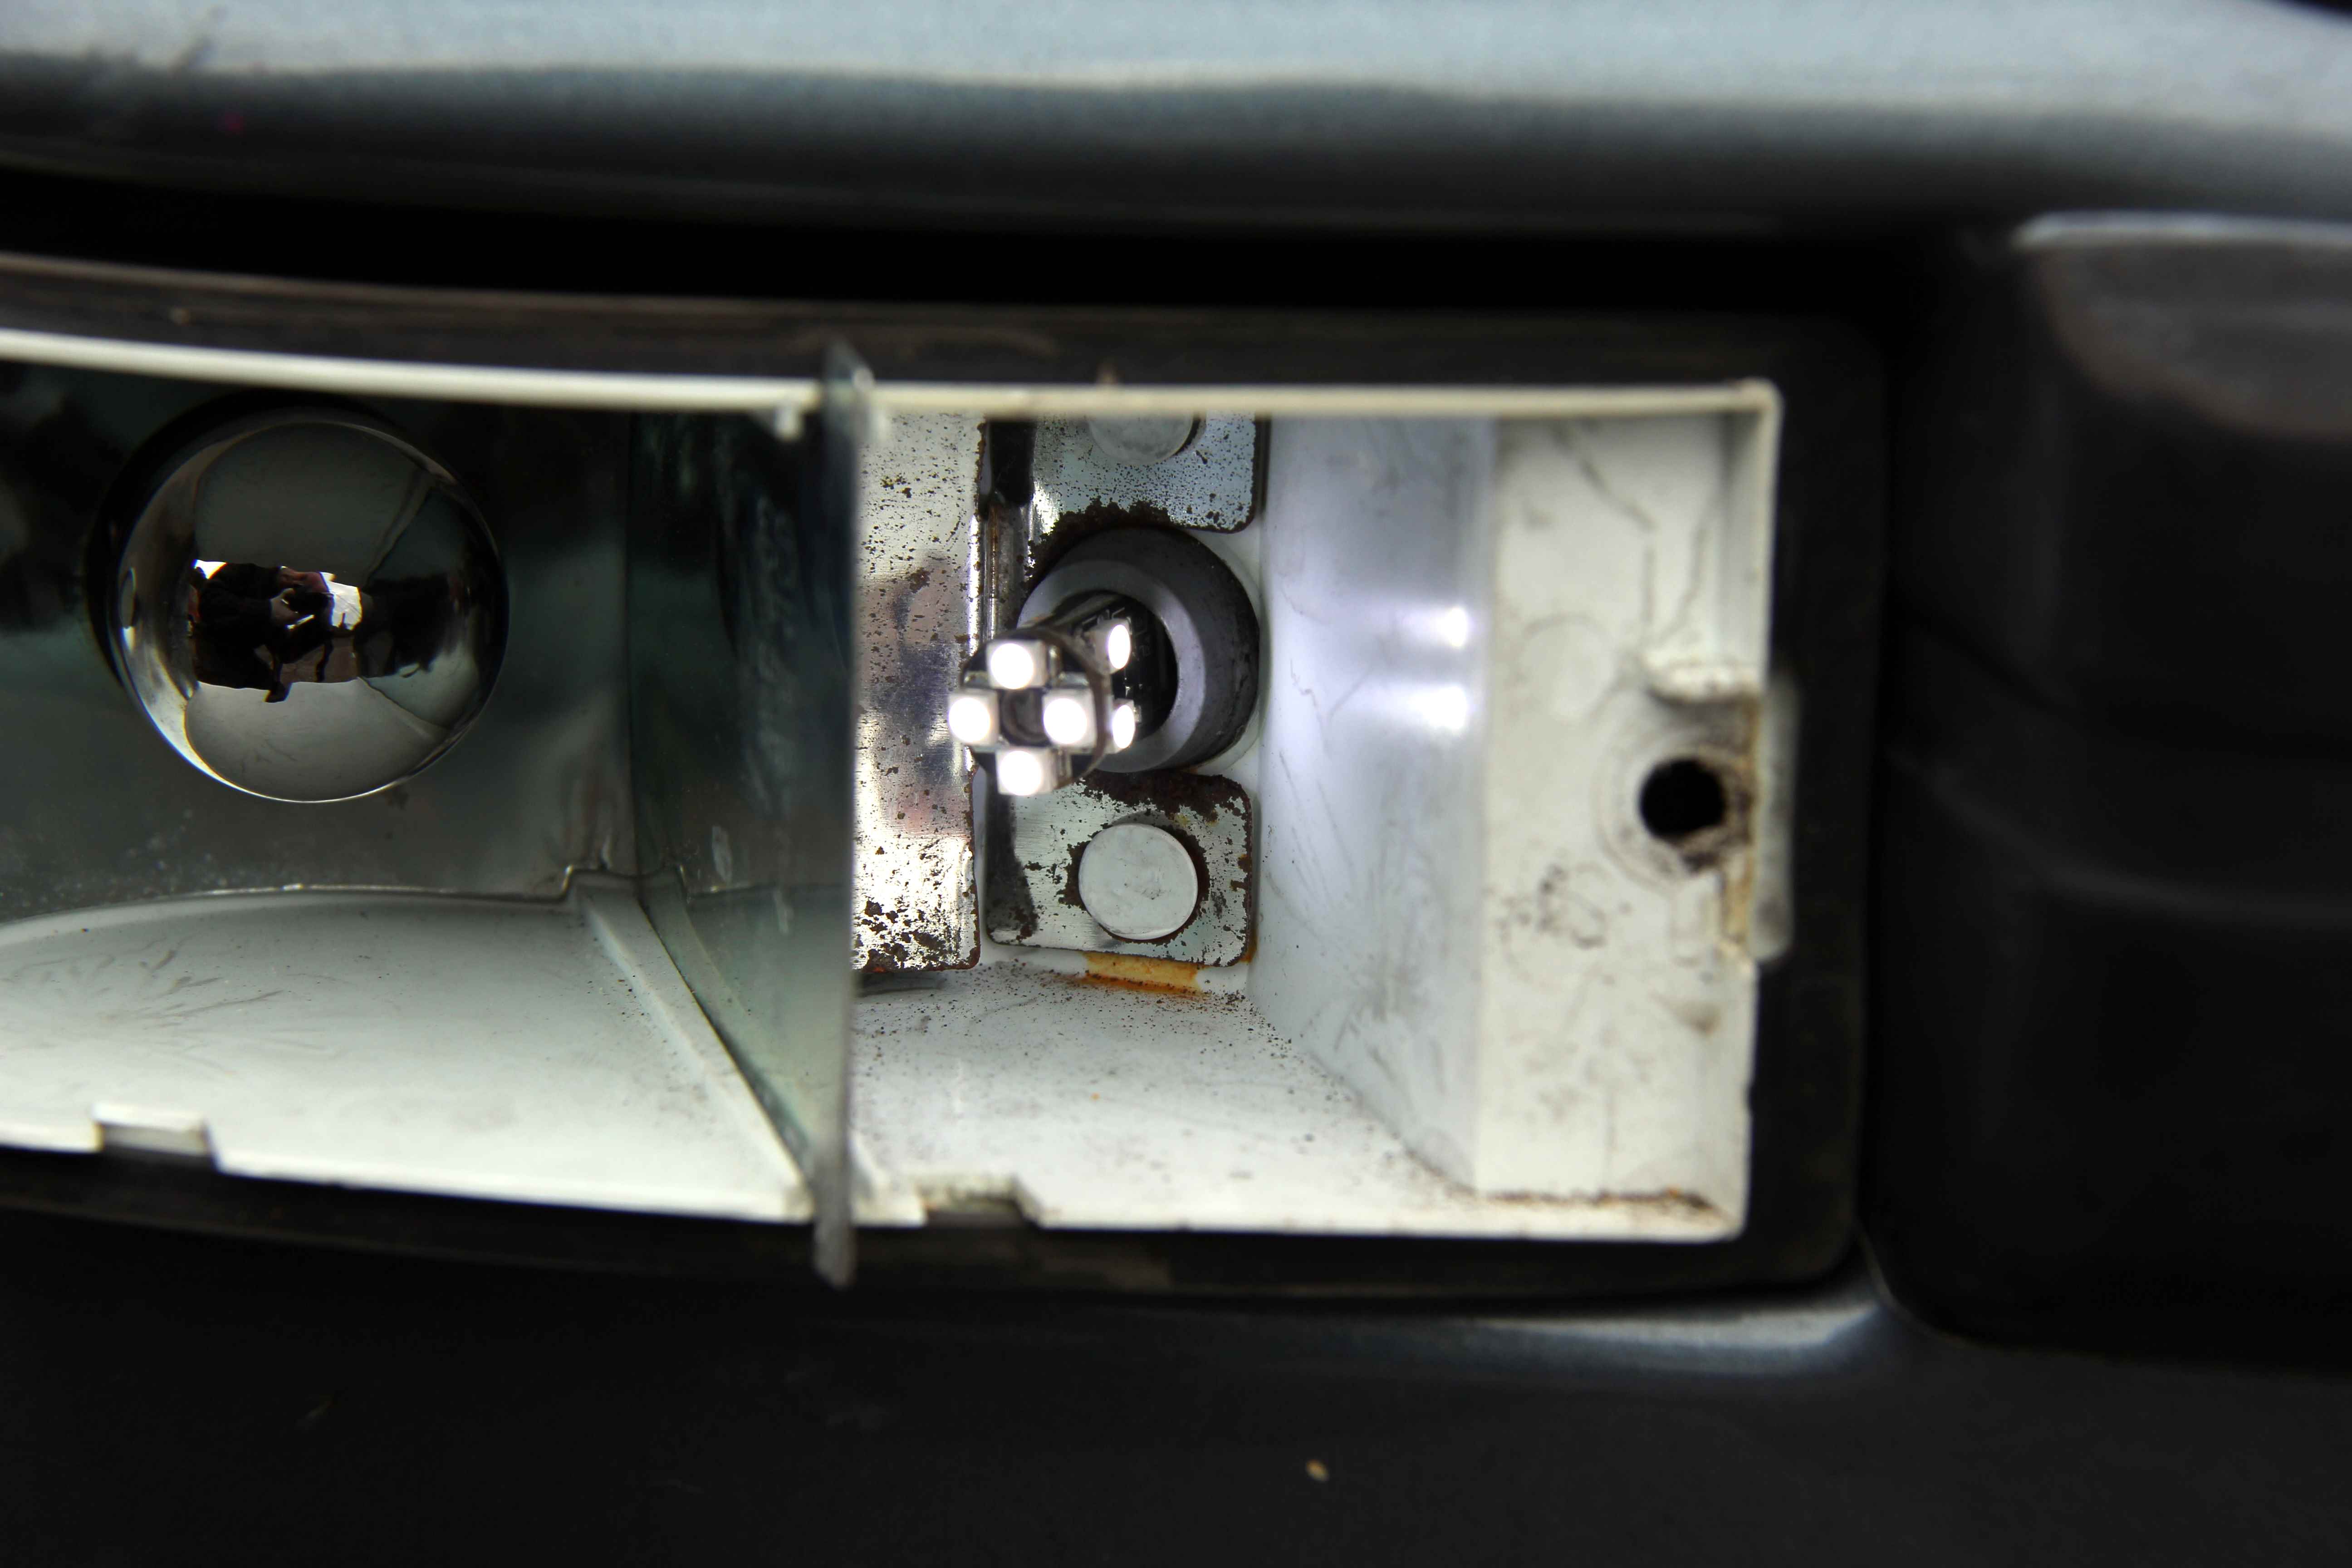
While I was in there changing the indicator bulbs to nice chrome ones that flash orange, I thought I'd swap out the feeble old sidelights that are a bit like the **** off an arthritic firefly. Only dimmer;

...in favour of some hyper-cyber-multi-directional-six-LED ones. Winner
...right, the bad news. Well, slightly bad. Partially. Okayyyy, let's start with this;
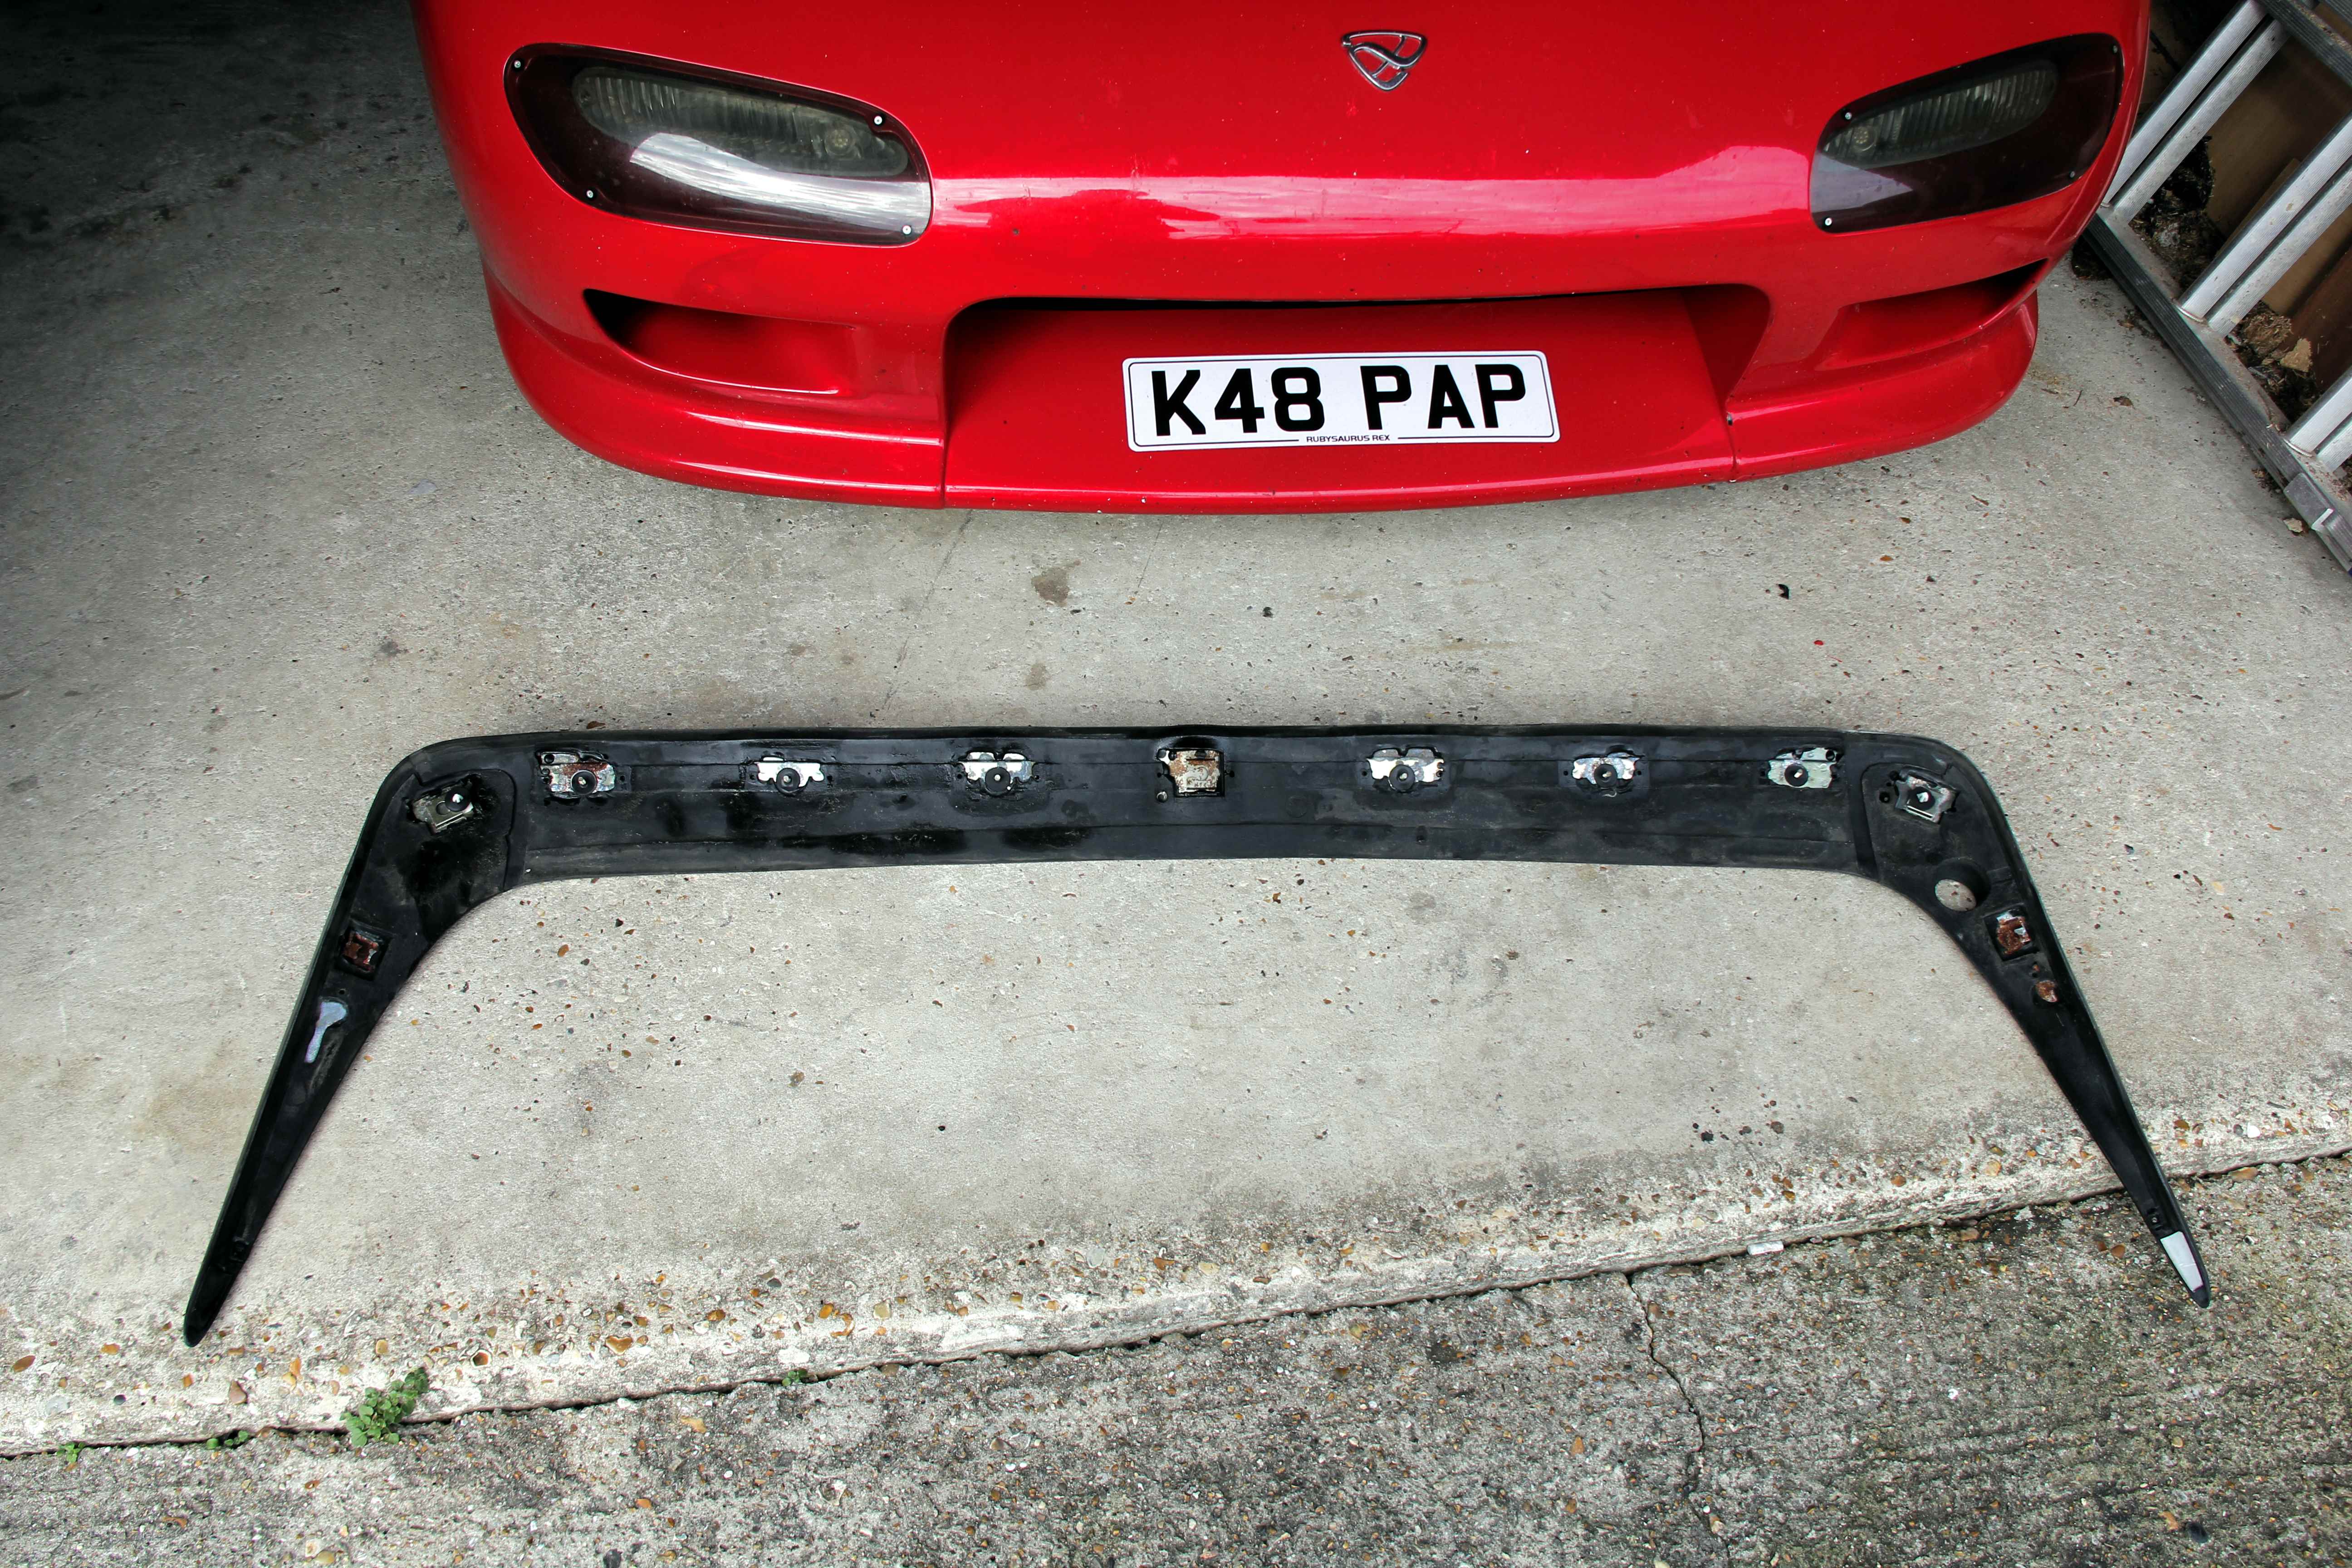
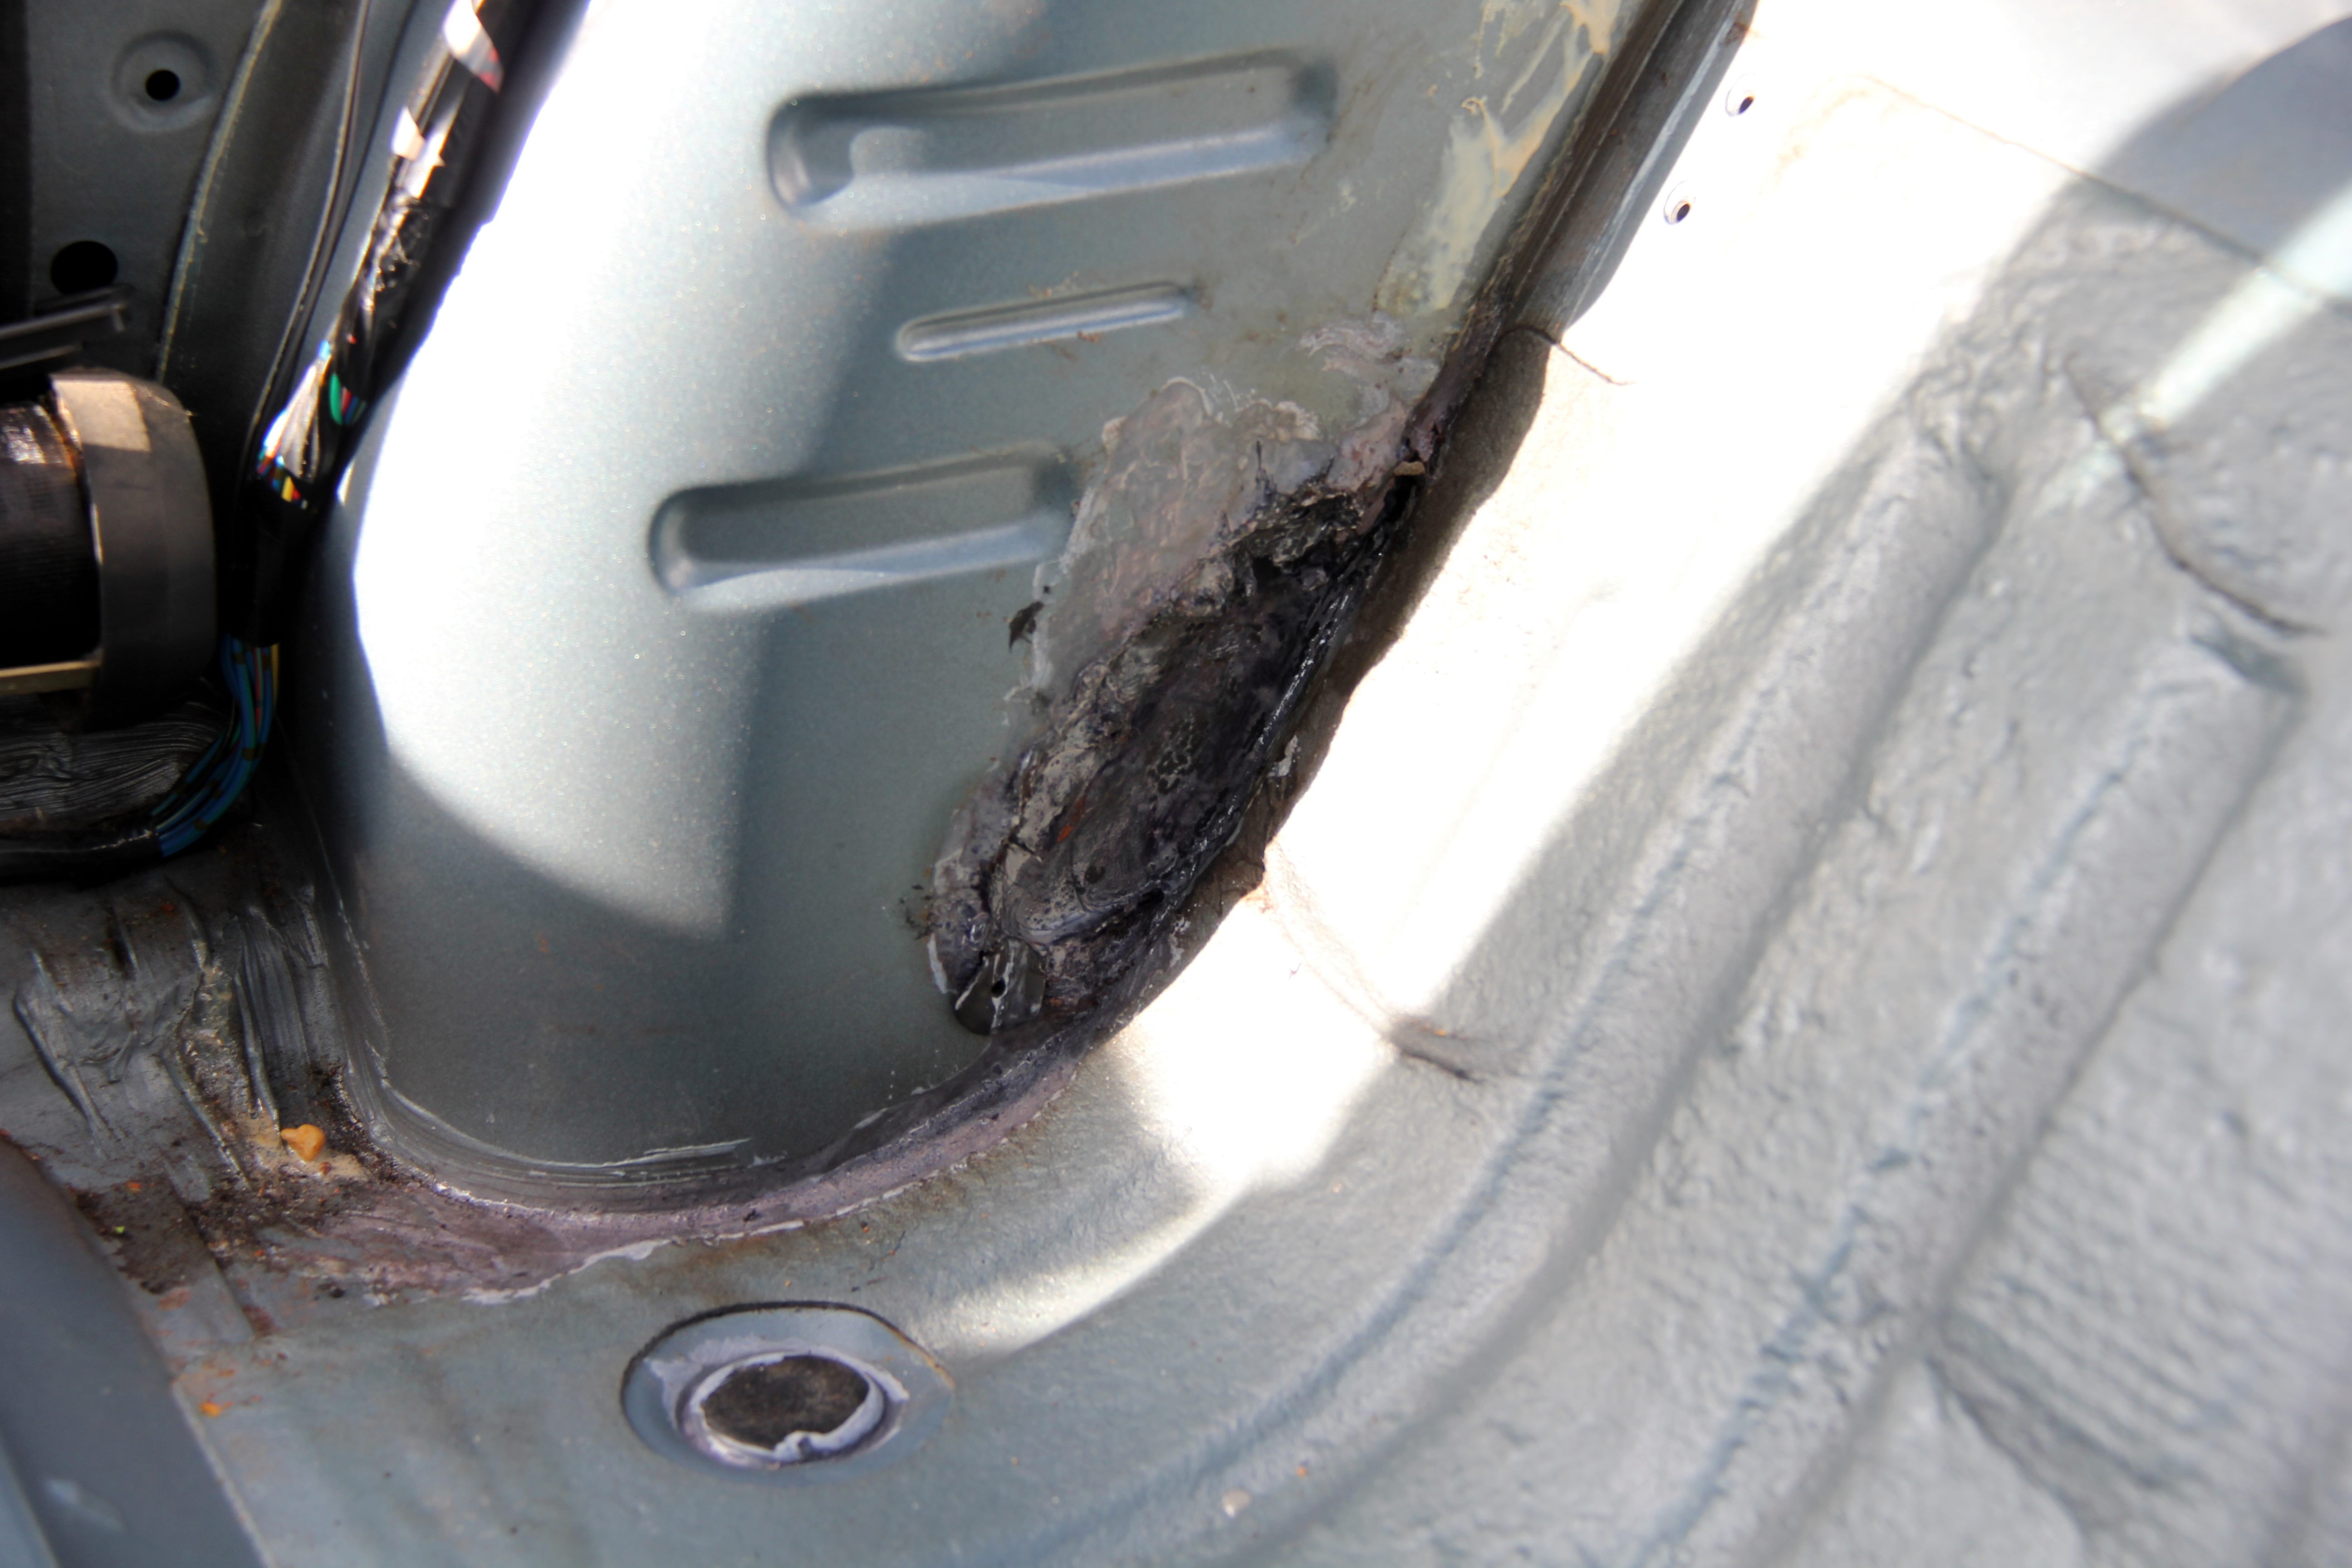
Nope, not an FD moustache, but the spoiler off the FB. I finally decided I couldn't live with it any longer, it's horrid. :evil: Consistency like a zombie's ****; cracked and rotting and soaking up water, plus it just ruins the lines on the back end of the car. I know the cars' slightly more aerodynamically efficient with it on, but I don't care. I hate it. It had to go.
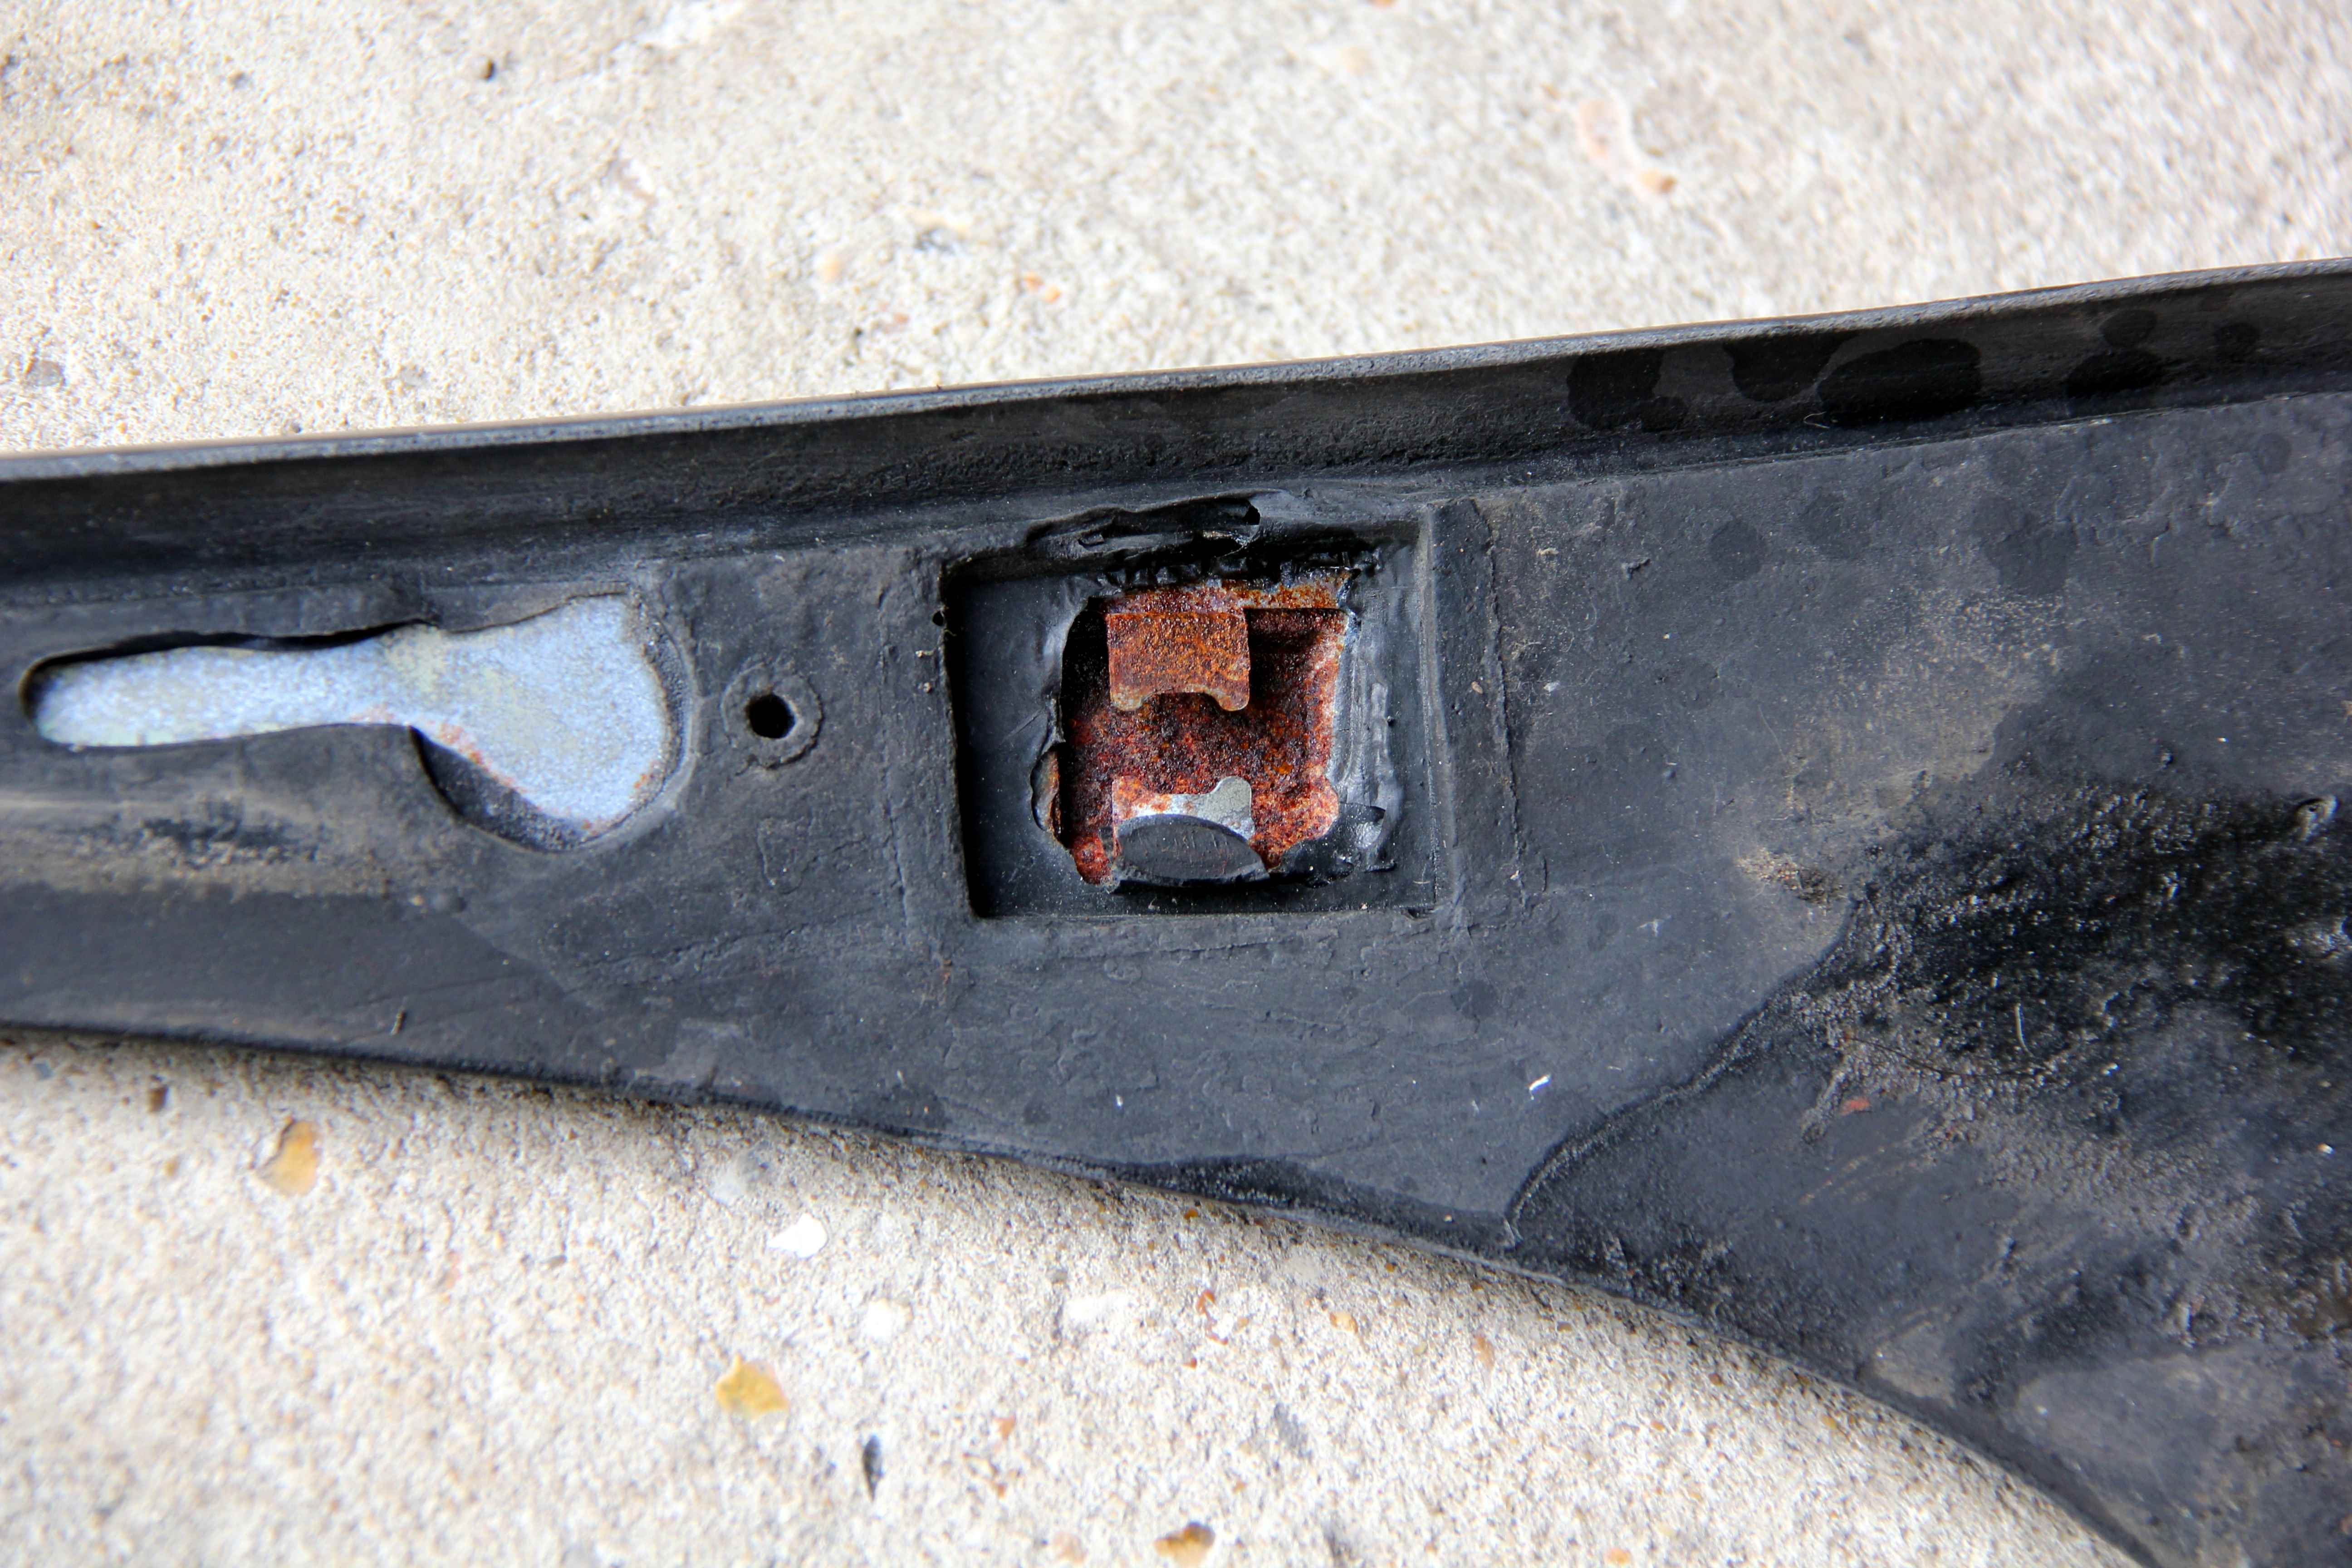
Considering it'd been there 27 years now, the fixings gave surprisingly little resistance. They were pleasingly un-corroded...
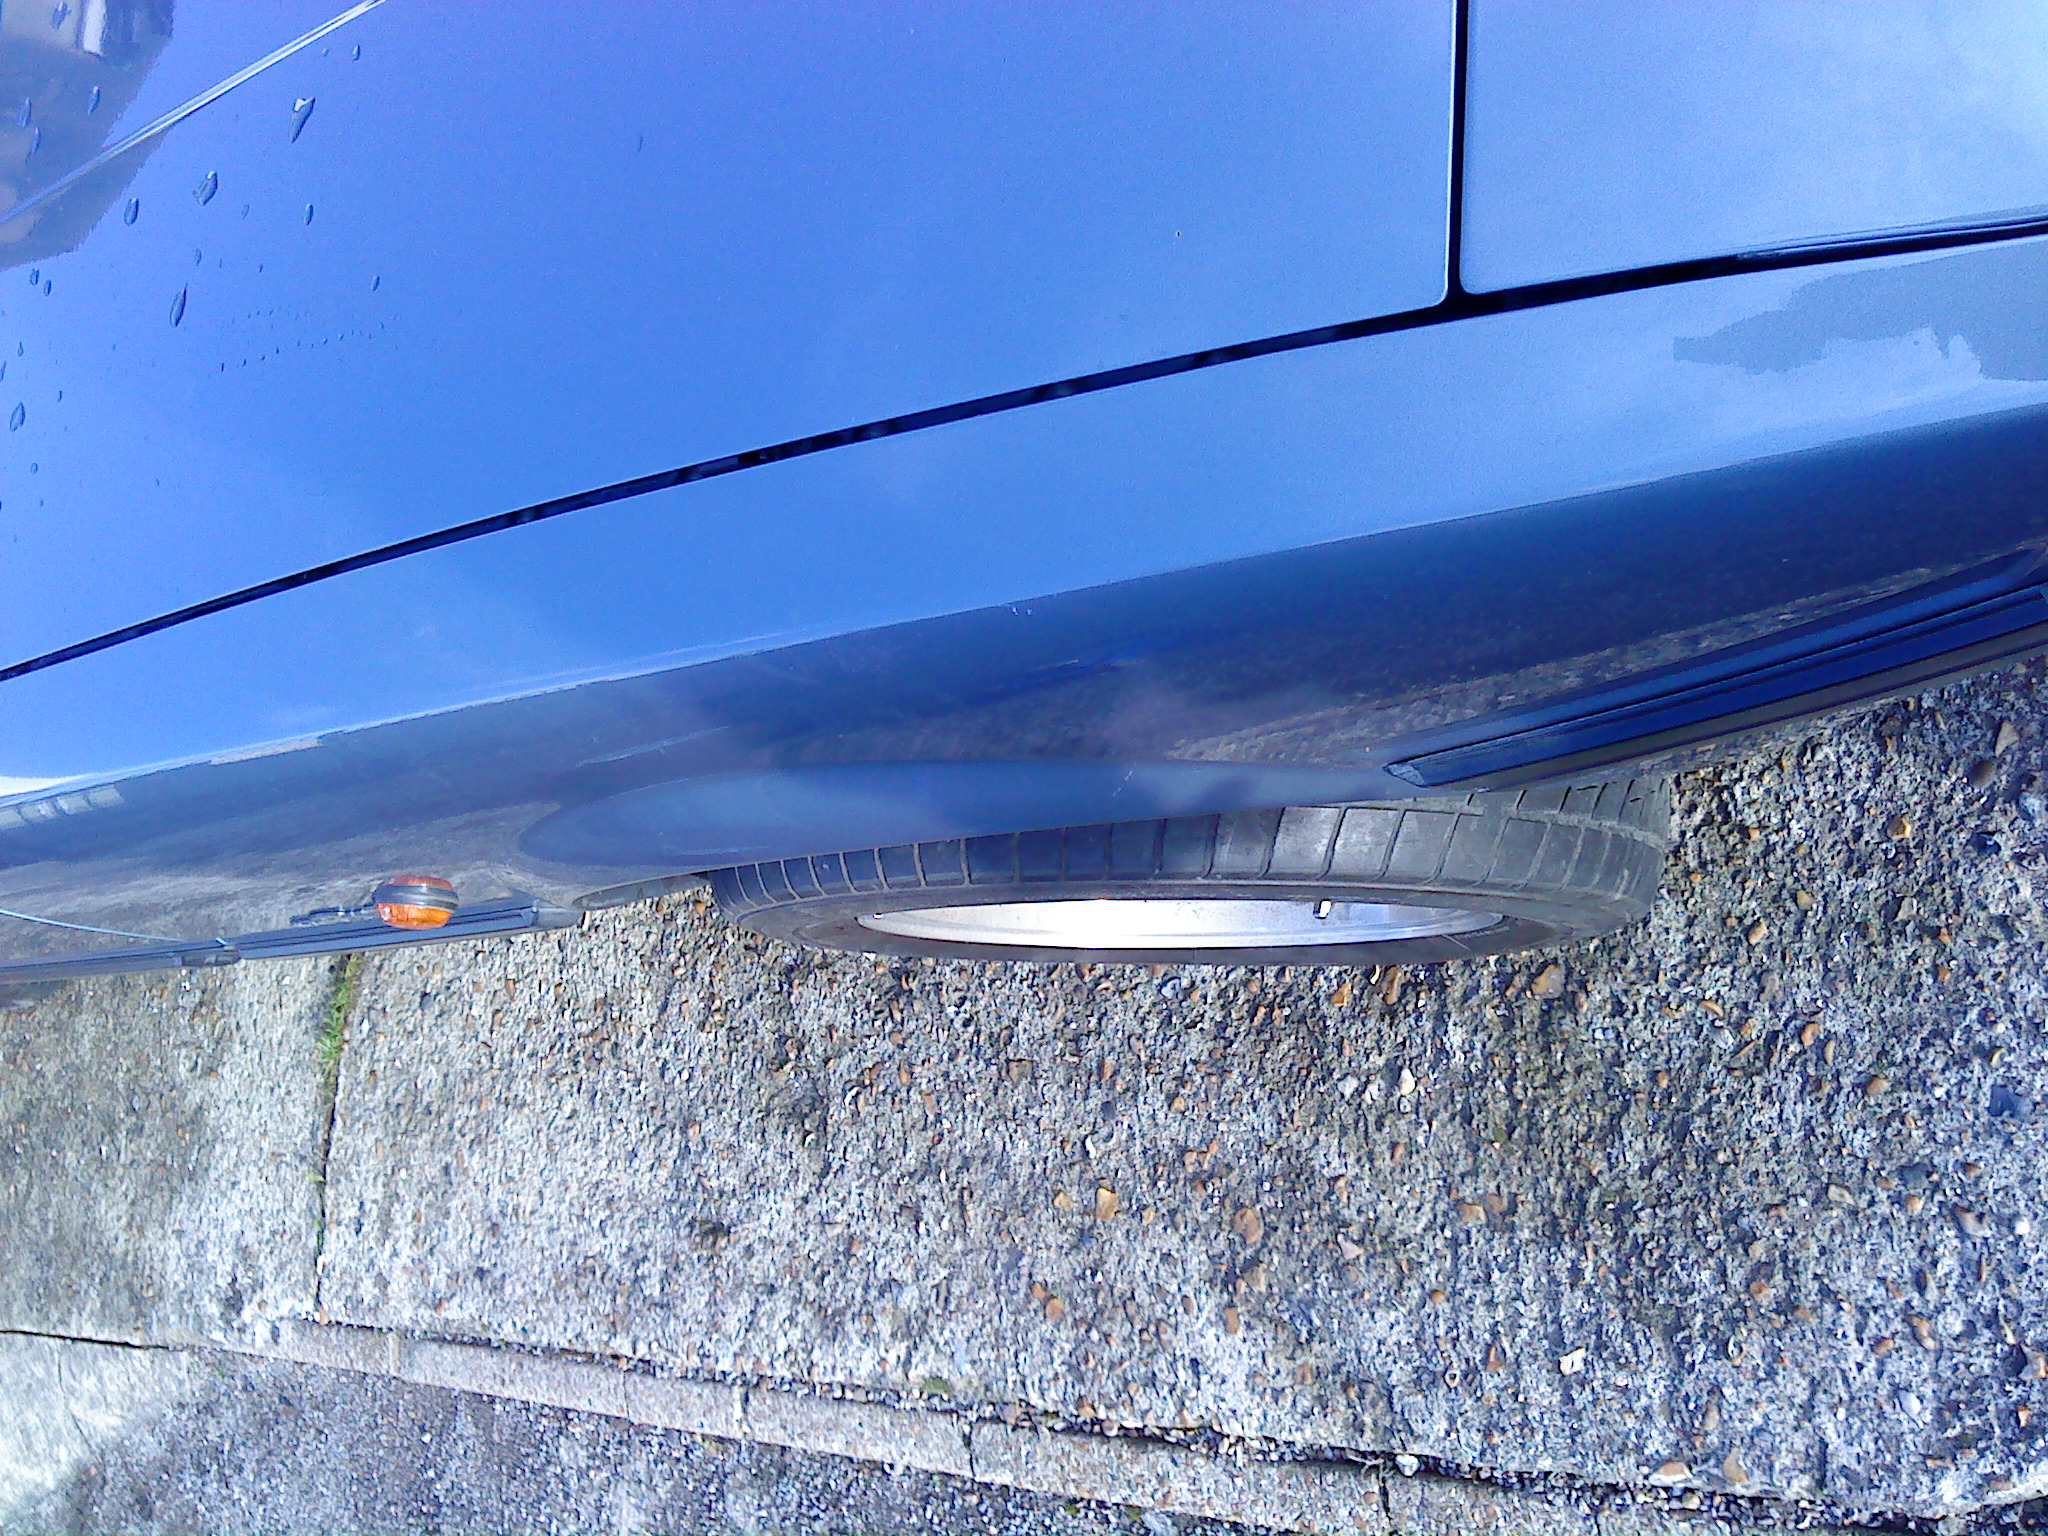
..though by no means easy to get at lol. With the abortion, sorry, spoiler off I think I got to it just in time. It's full of water, the tabs for the plastic flange fittings are rusty as hell and the damage it's started doing to the paint is worrying. Even though the stud and nut fasteners weren't rusty yet you can see in the above pic evidence of water ingress starting. This pic shows the state of how bad it was getting underneath;
Just check out the state it underneath though :shock:
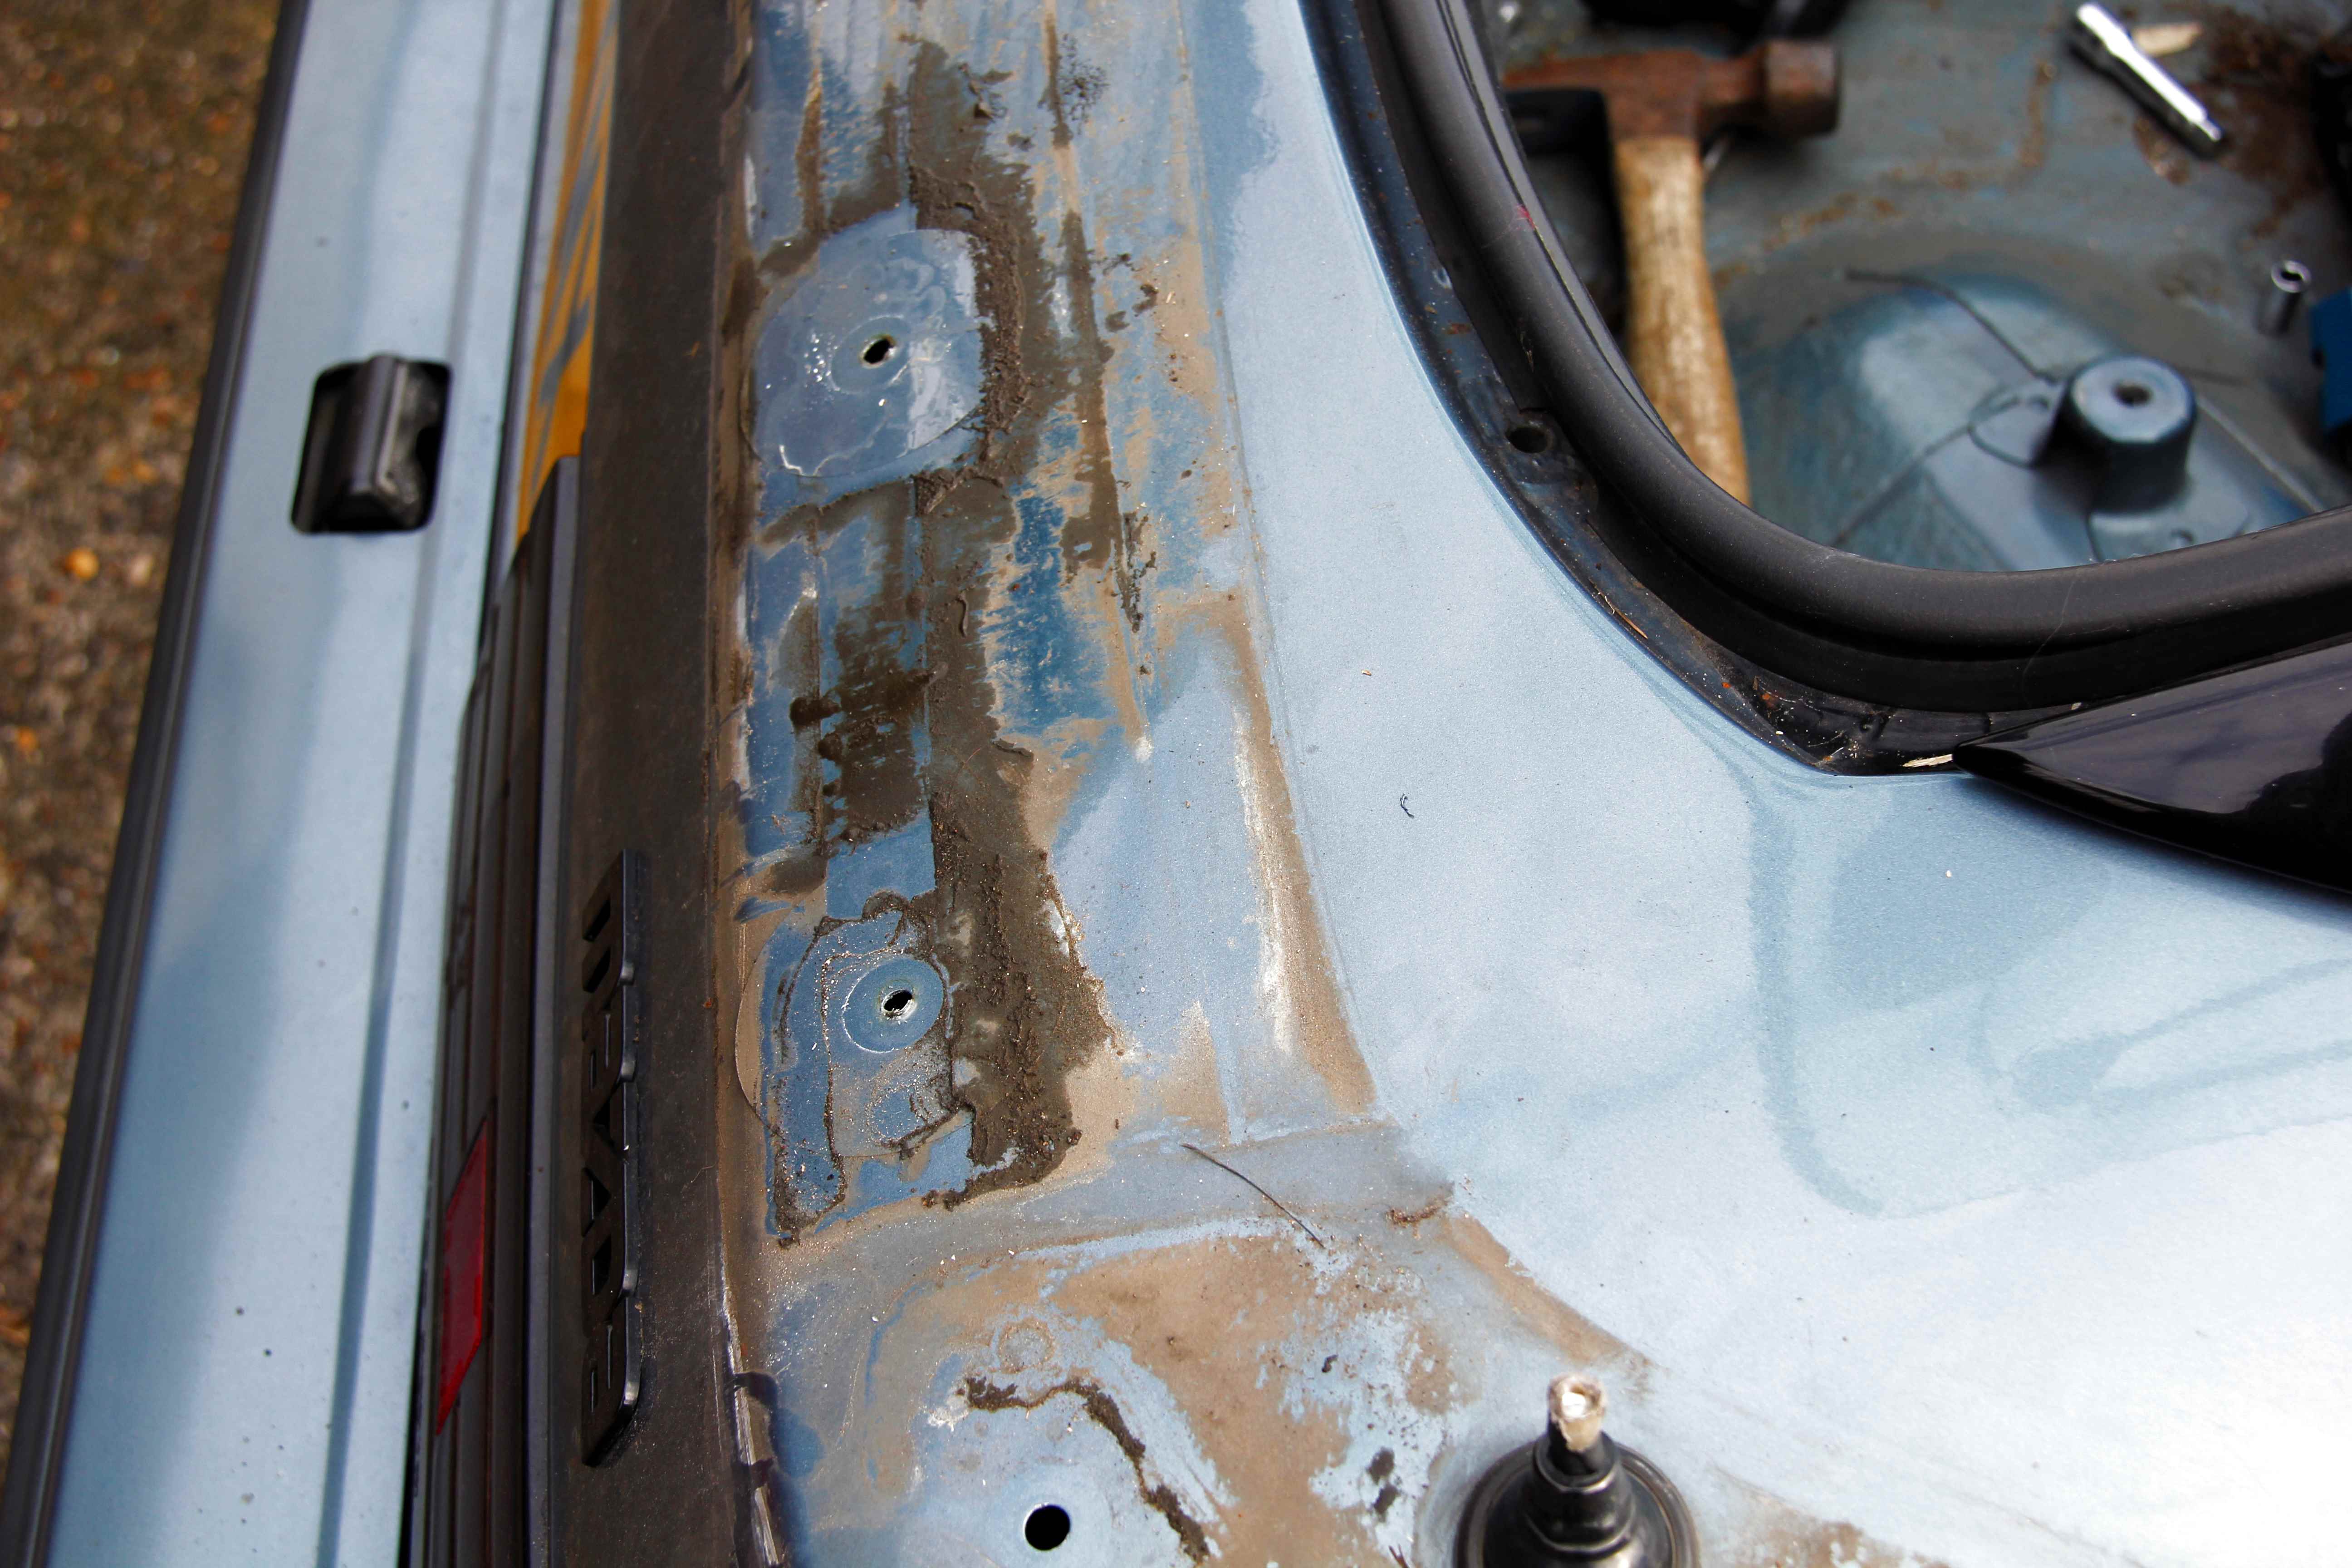
We all like a nice dirty council gritter (rhyming slang) but this is ridiculous, you could plant potatoes in the crud that had built up underneath
Which is to say you can only fit three wheels and tyres inFive alloys, with tyres. Excellent 8-) I loaded them up and paid a visit to a delightfully grumpy fellow of the good ol' British artisan I'm-lowering-myself-to-serve-you stylee at a wheel refurbishers. He was OK, to be fair, he warmed to us. Sorta. After much discussion and teeth-sucking it was agreed that trying to polish the lips was asking for trouble, both in terms of longevity and actually performing the task, as the Watanabes have a radiused rim which would be near impossible to machine turn. So we agreed on them being Bentley Storm Grey. Which is nice! Posh, too lol
While the wheels were away I could get on with some other little jobs, such as de-fried eggifying the indicators. It's not a good look
Before;
After;
Much better. Mazda made the orange indicator inserts out of something that seemed to be recycled sweet wrappers :evil: Even with the heat gun, there was no way it was coming out intact, it just shattered into pieces even under gentle persuasion. Conversely, the glue they used to bond it would be good enough to glue the car to the side of a building, it's relentless. The only way I could get rid of the fragments of remaining lens and glue was to Dremel the unholy hell out of it :shock: Bit barbaric, but worth the time. Good job I only had one gin the night before, steady hand required.
While I was in there changing the indicator bulbs to nice chrome ones that flash orange, I thought I'd swap out the feeble old sidelights that are a bit like the **** off an arthritic firefly. Only dimmer;
...in favour of some hyper-cyber-multi-directional-six-LED ones. Winner
...right, the bad news. Well, slightly bad. Partially. Okayyyy, let's start with this;
Nope, not an FD moustache, but the spoiler off the FB. I finally decided I couldn't live with it any longer, it's horrid. :evil: Consistency like a zombie's ****; cracked and rotting and soaking up water, plus it just ruins the lines on the back end of the car. I know the cars' slightly more aerodynamically efficient with it on, but I don't care. I hate it. It had to go.
Considering it'd been there 27 years now, the fixings gave surprisingly little resistance. They were pleasingly un-corroded...
..though by no means easy to get at lol. With the abortion, sorry, spoiler off I think I got to it just in time. It's full of water, the tabs for the plastic flange fittings are rusty as hell and the damage it's started doing to the paint is worrying. Even though the stud and nut fasteners weren't rusty yet you can see in the above pic evidence of water ingress starting. This pic shows the state of how bad it was getting underneath;
Just check out the state it underneath though :shock:
We all like a nice dirty council gritter (rhyming slang) but this is ridiculous, you could plant potatoes in the crud that had built up underneath

Thread Starter
Senior Member
Joined: Oct 2010
Posts: 255
Likes: 1
From: England
Still, it was fortunately mostly surface filth. Cleaned up pretty well, though there was a definite line where the leading edge of the spoiler rubbed through the paint and the rear valance had started rusting
And the paint bloom around the little discs Mazda stuck on (WHY didn't they do a whole strip of it, tight sods? Would have saved me so much aggro) was too far gone for T-cut alone to remove
So, that was the bad news. This left me the choice of re-spraying the back end (which would would at least mean the holes could be welded up and lost forever) ...or putting a different spoiler on and hoping it hid the damage. This seemed the best way forward; the paint was sound, just looked crap so hiding it would be fine. It also meant should I ever sell the car on it could be returned to standard. It was such a tidy stock example that at this stage I was still half-thinking I ought to be preserving it's originality. Needless to say, that wasn't going to last long
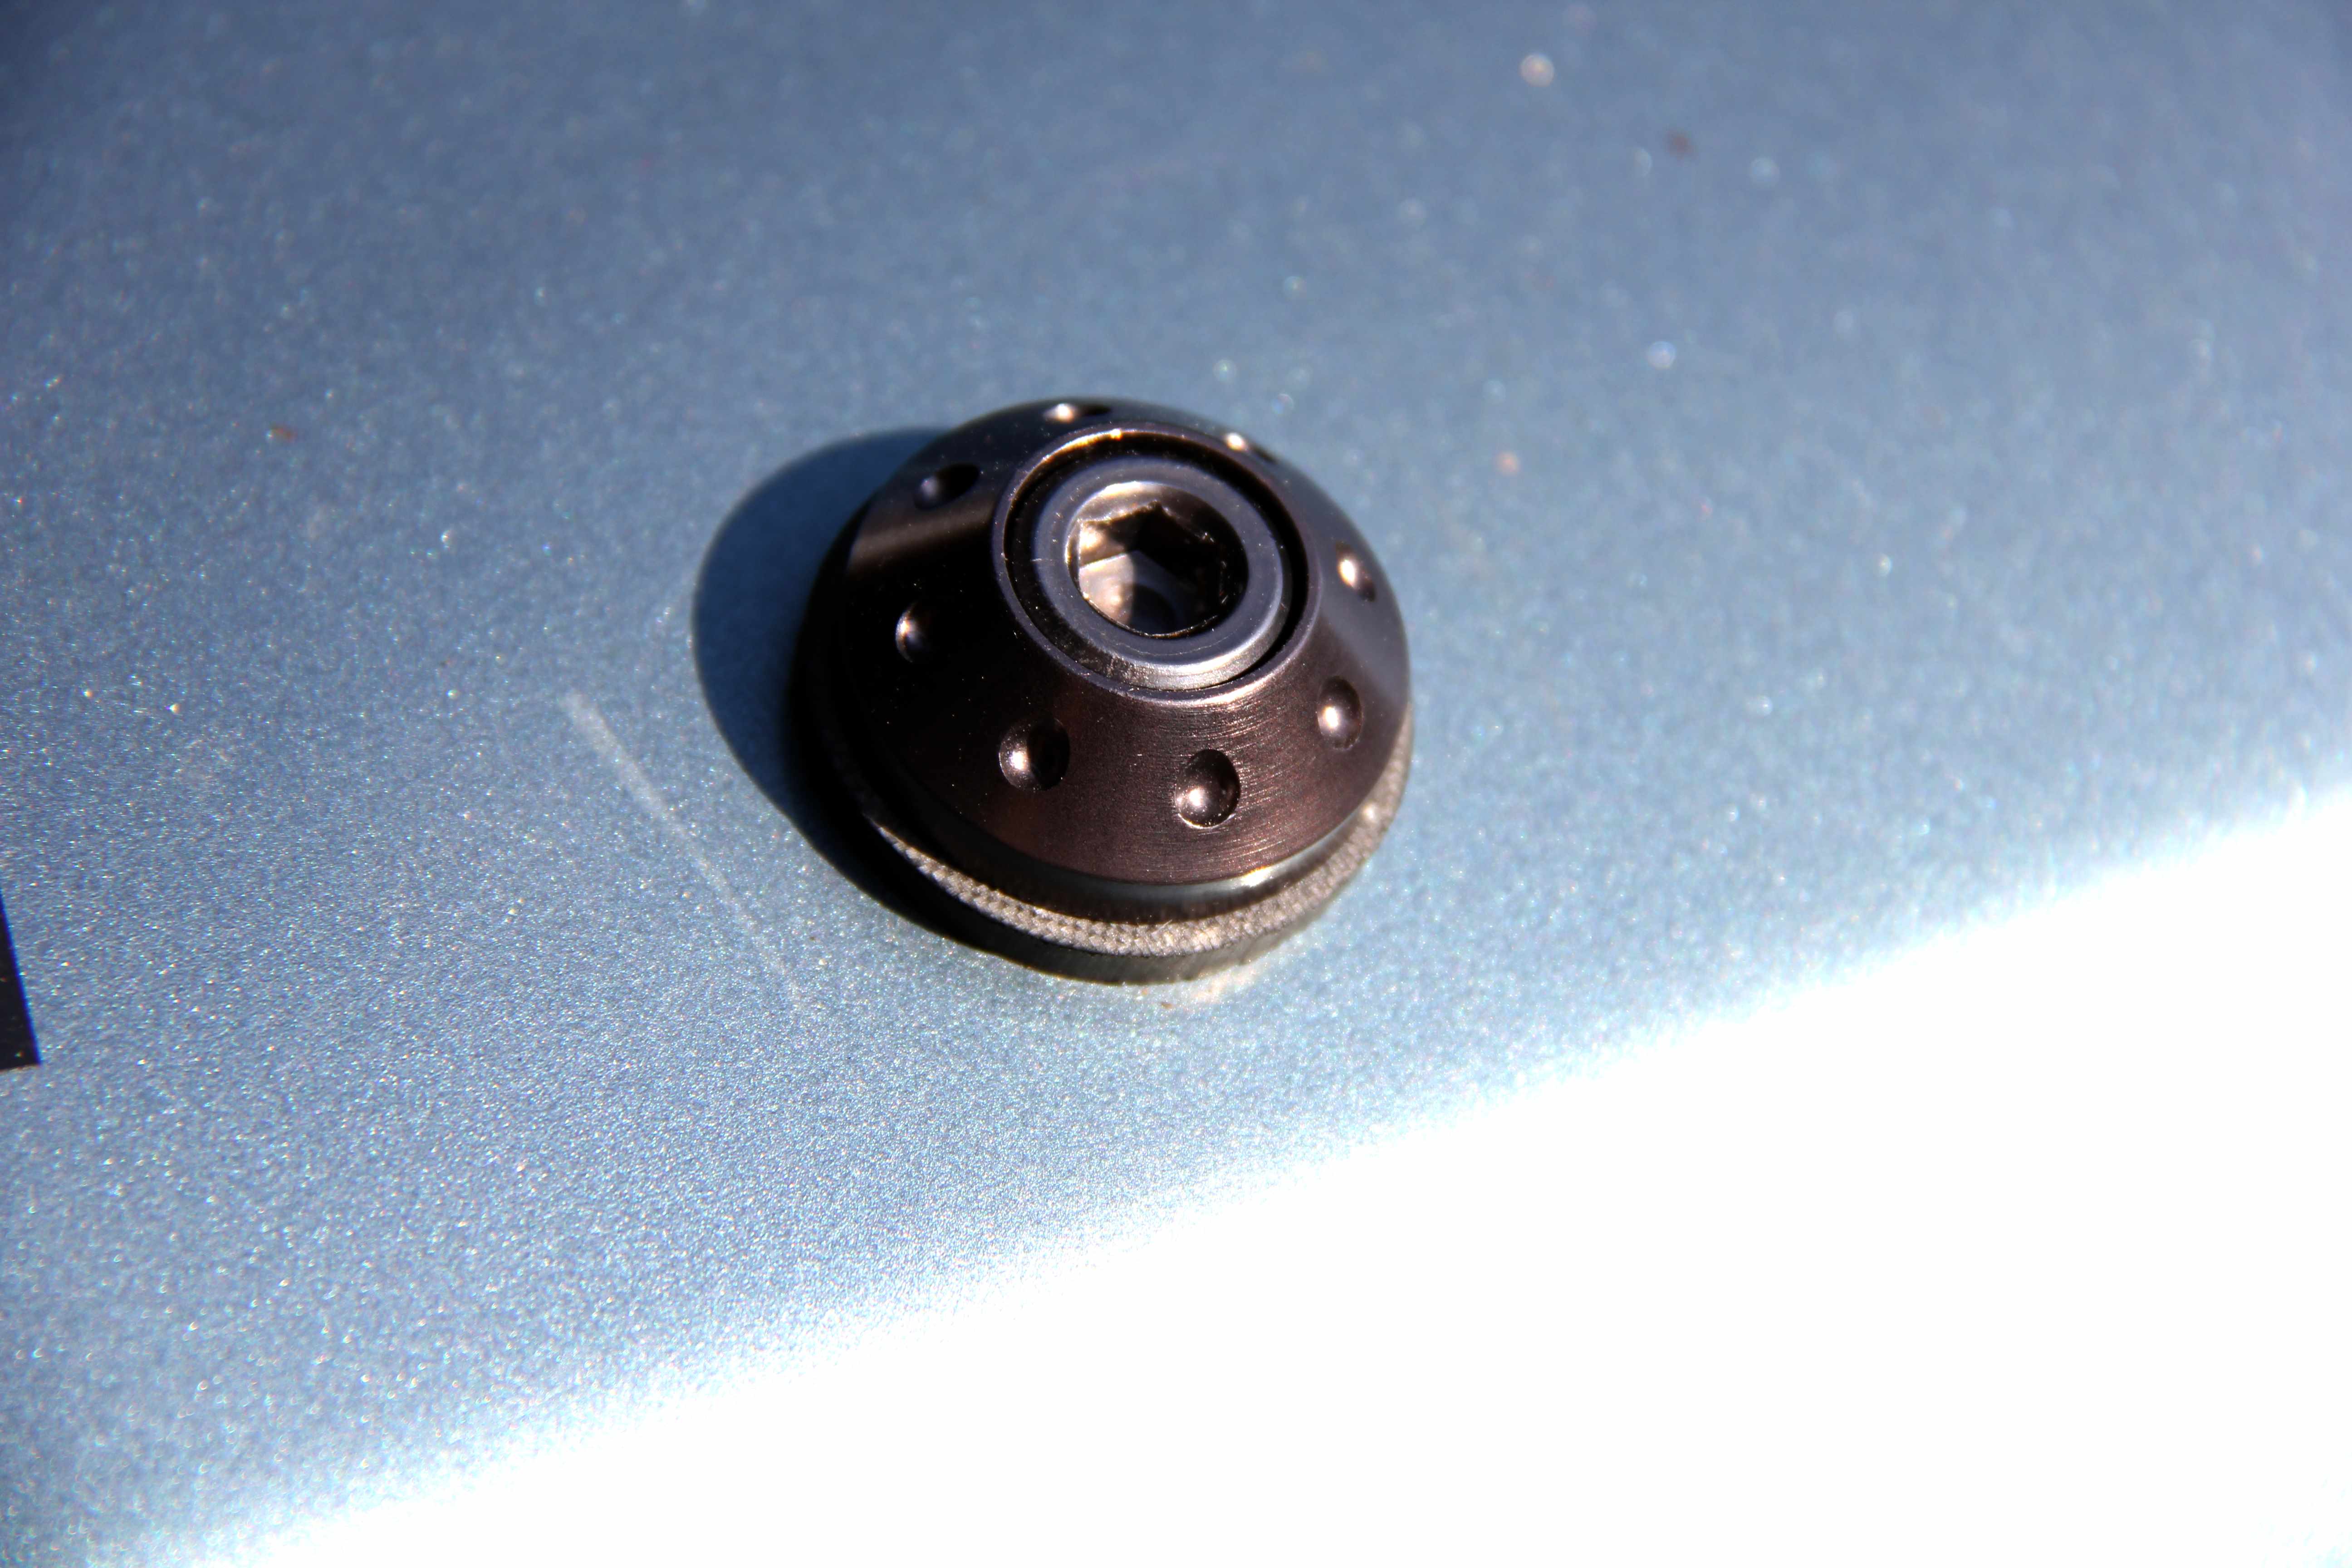
I bought a set of open-ended steel wheel nuts. Not the most exciting part of a car, I know, but I needed some slimline nuts for a few reasons; the holes on the Watanabes are too deeply recessed to let the socket grip on the short stock Mazda nuts, they're also too tight a fit for the wheelbrace so I have to have a socket to undo them. And most importantly, they're shiny chrome so look crap.
So, these are nicer to look at and longer so avoid those problems neatly
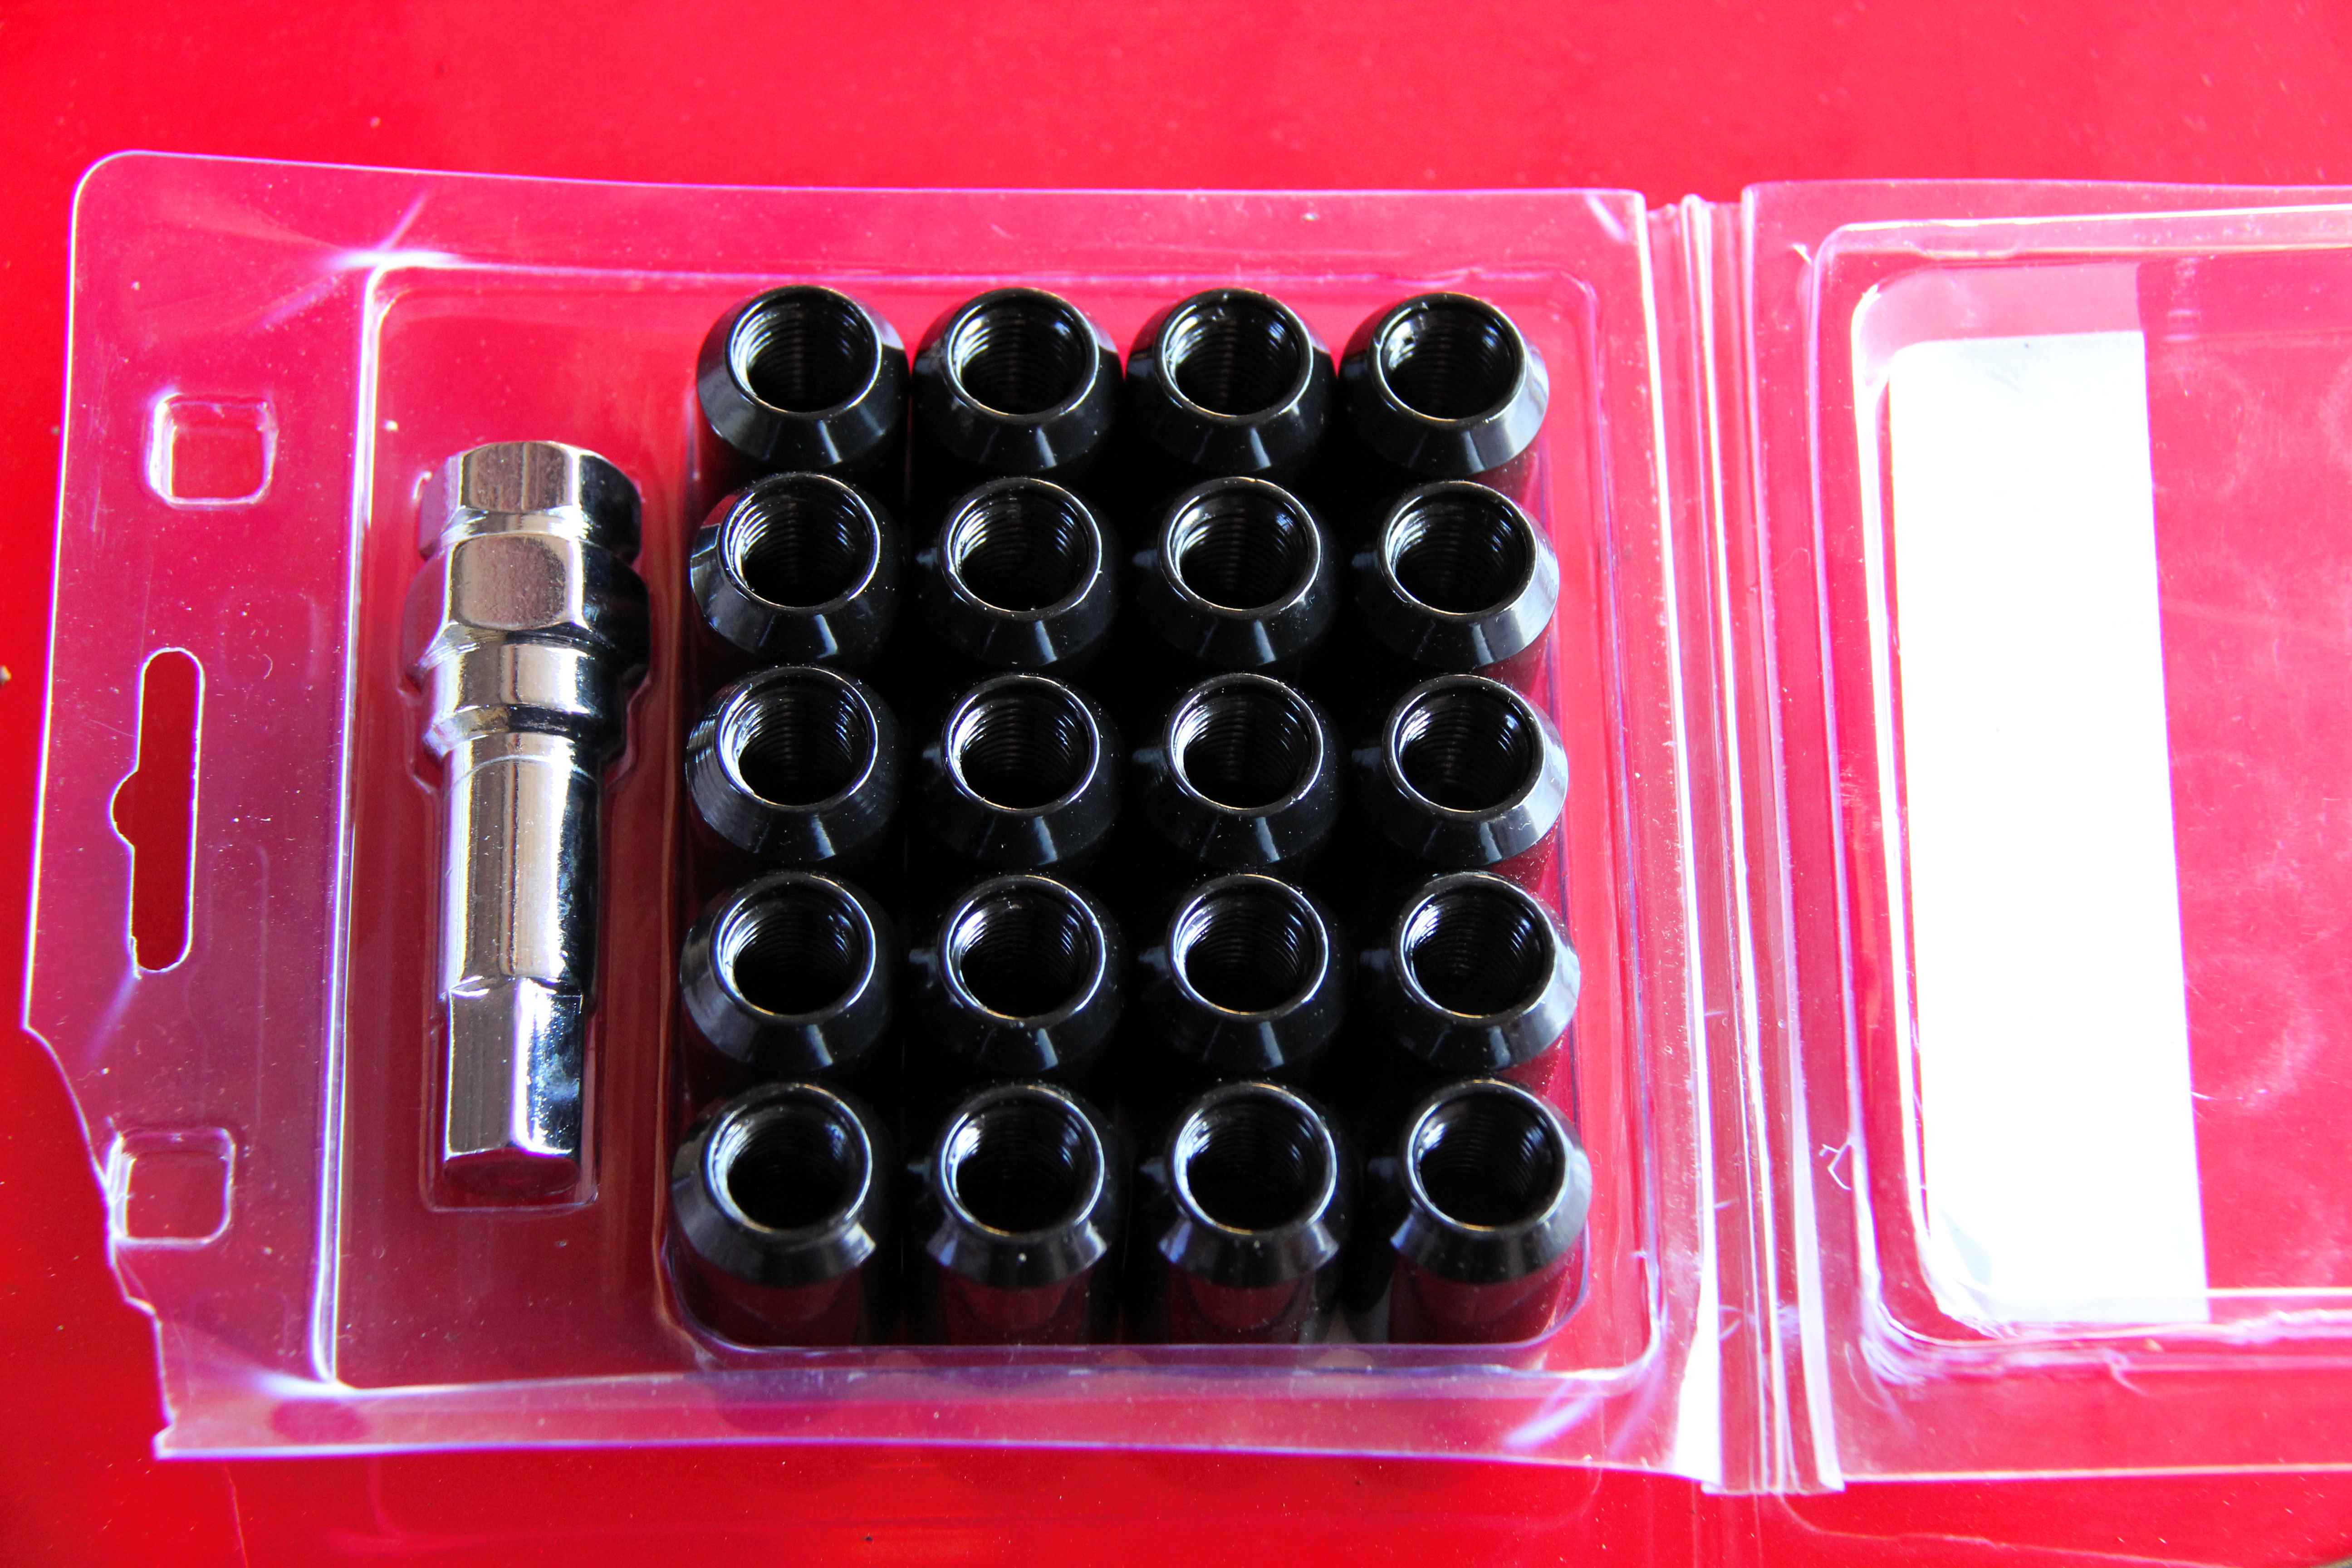
In additon, they're driven by a massive allen key so it should mean they're pretty theft proof and I can do without the locking nuts. This matters for a few reasons too, one being that the lockers are chrome and look crap lol. The other is this...
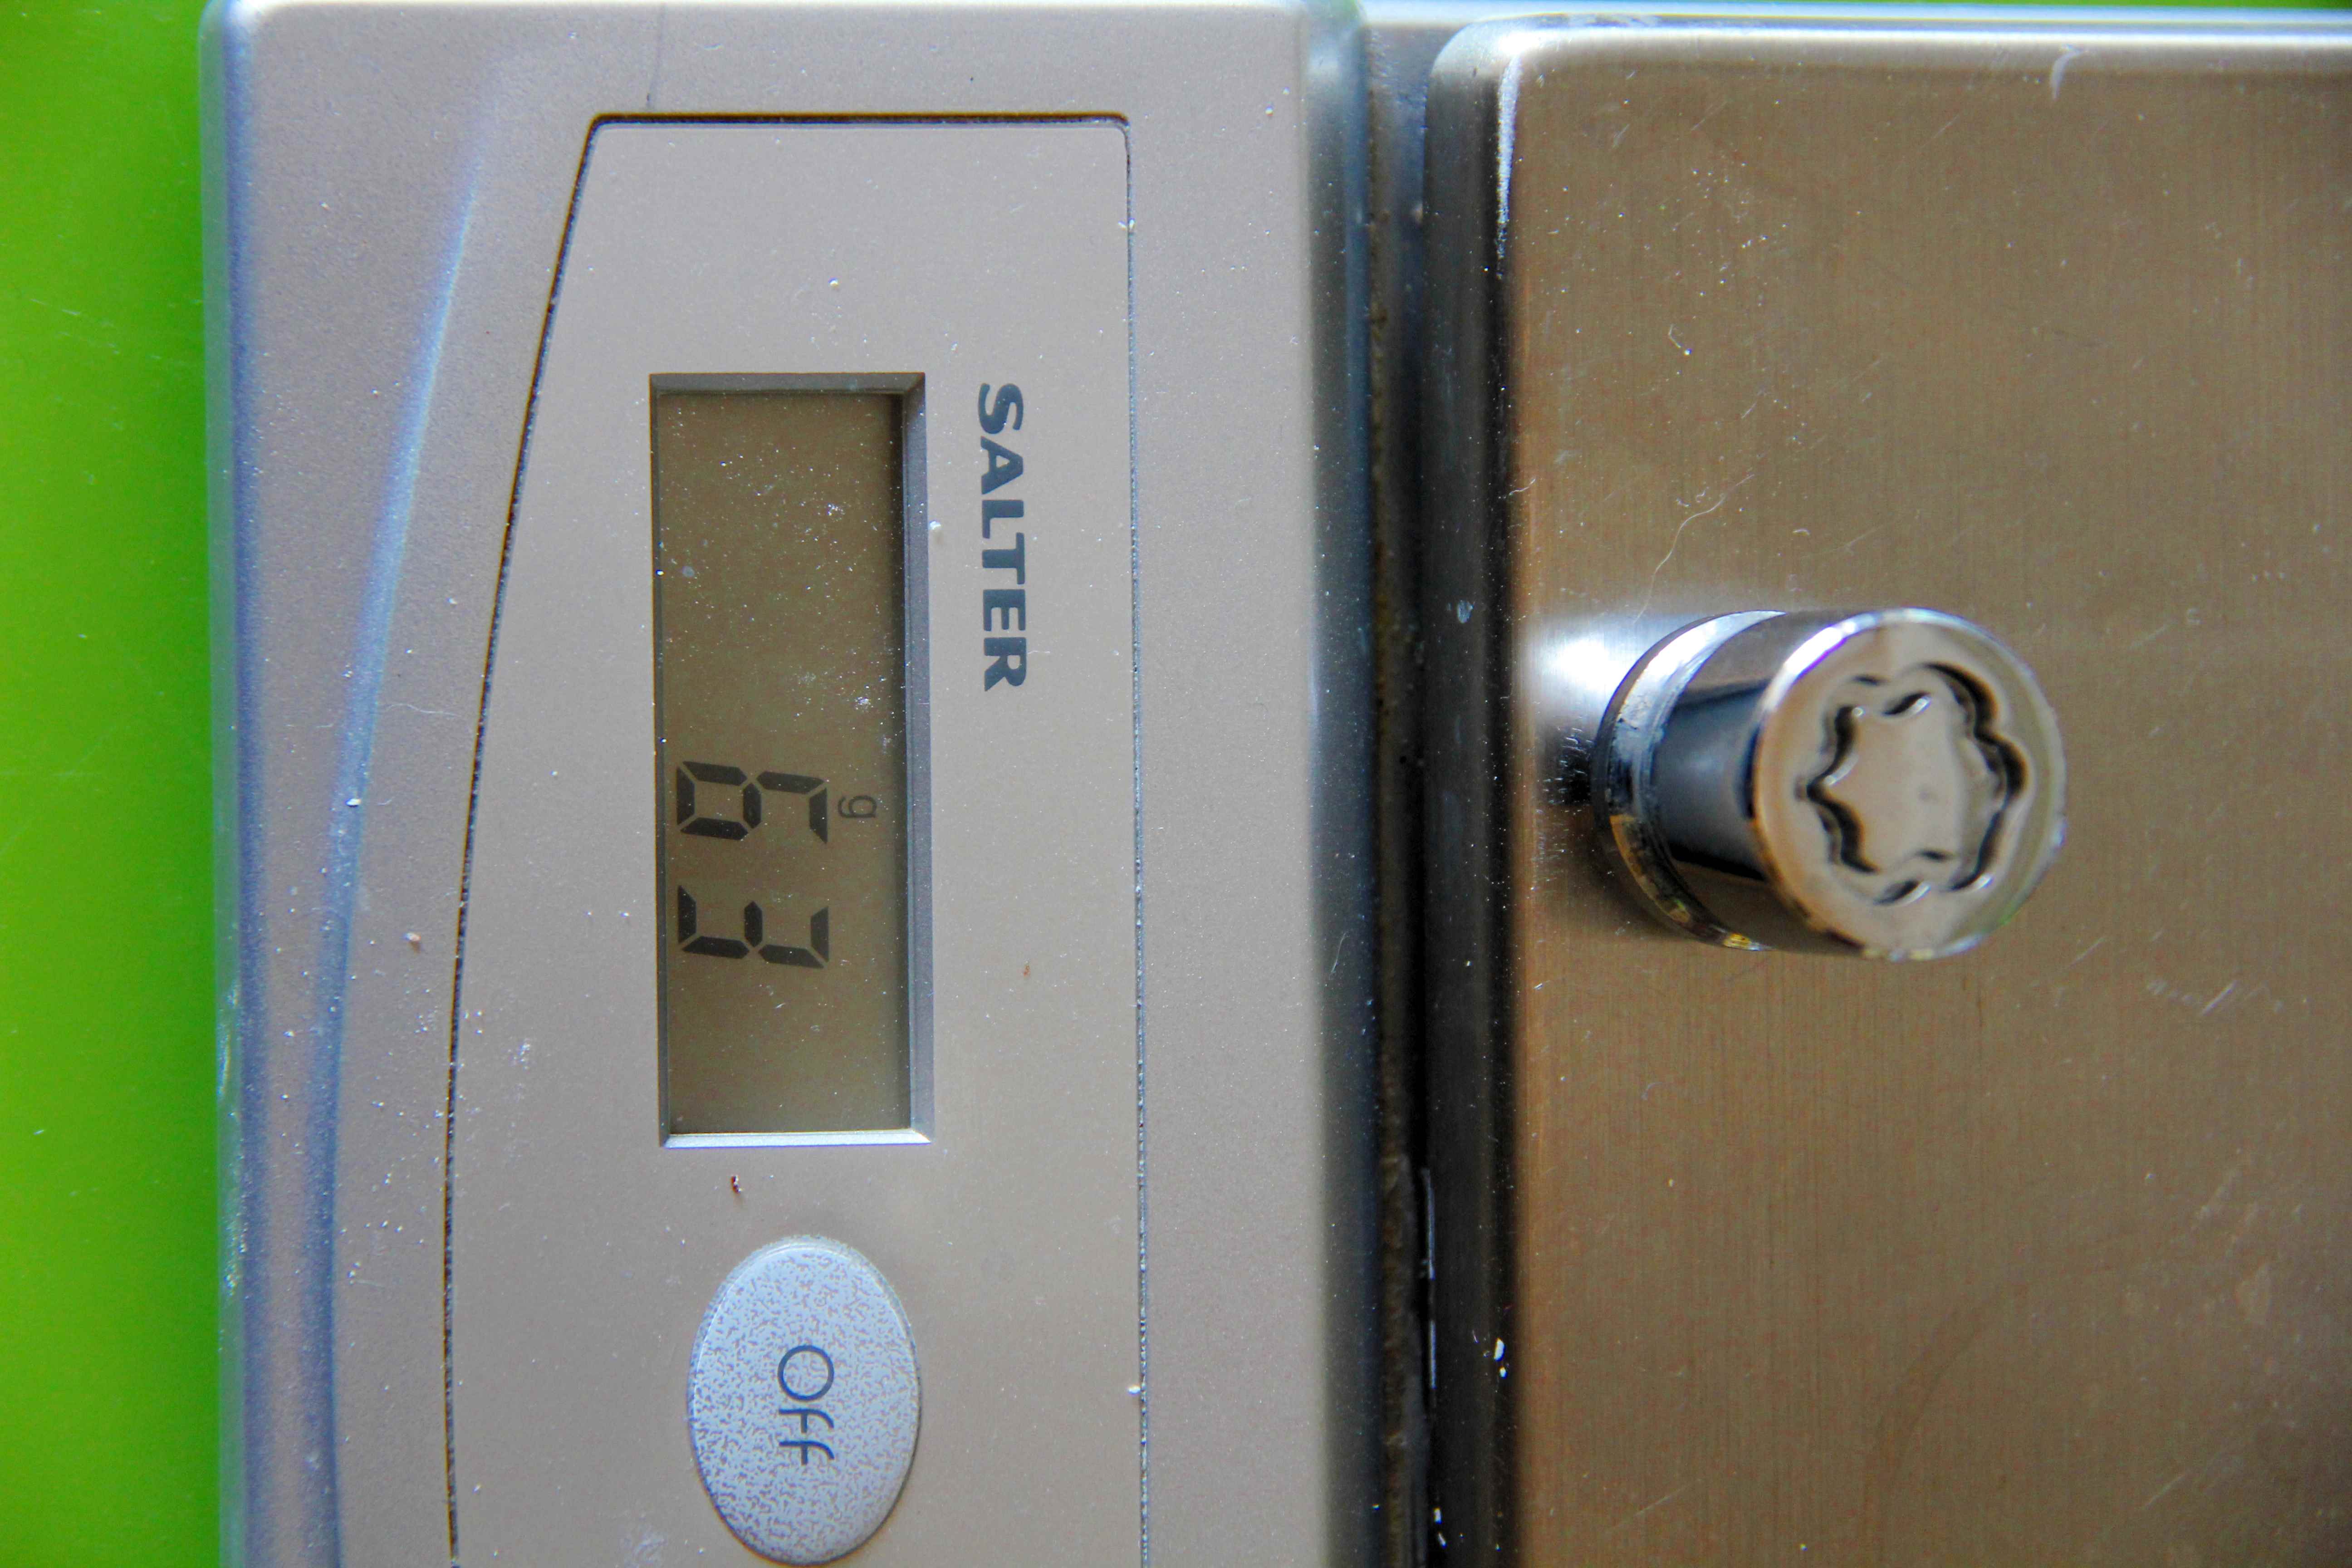
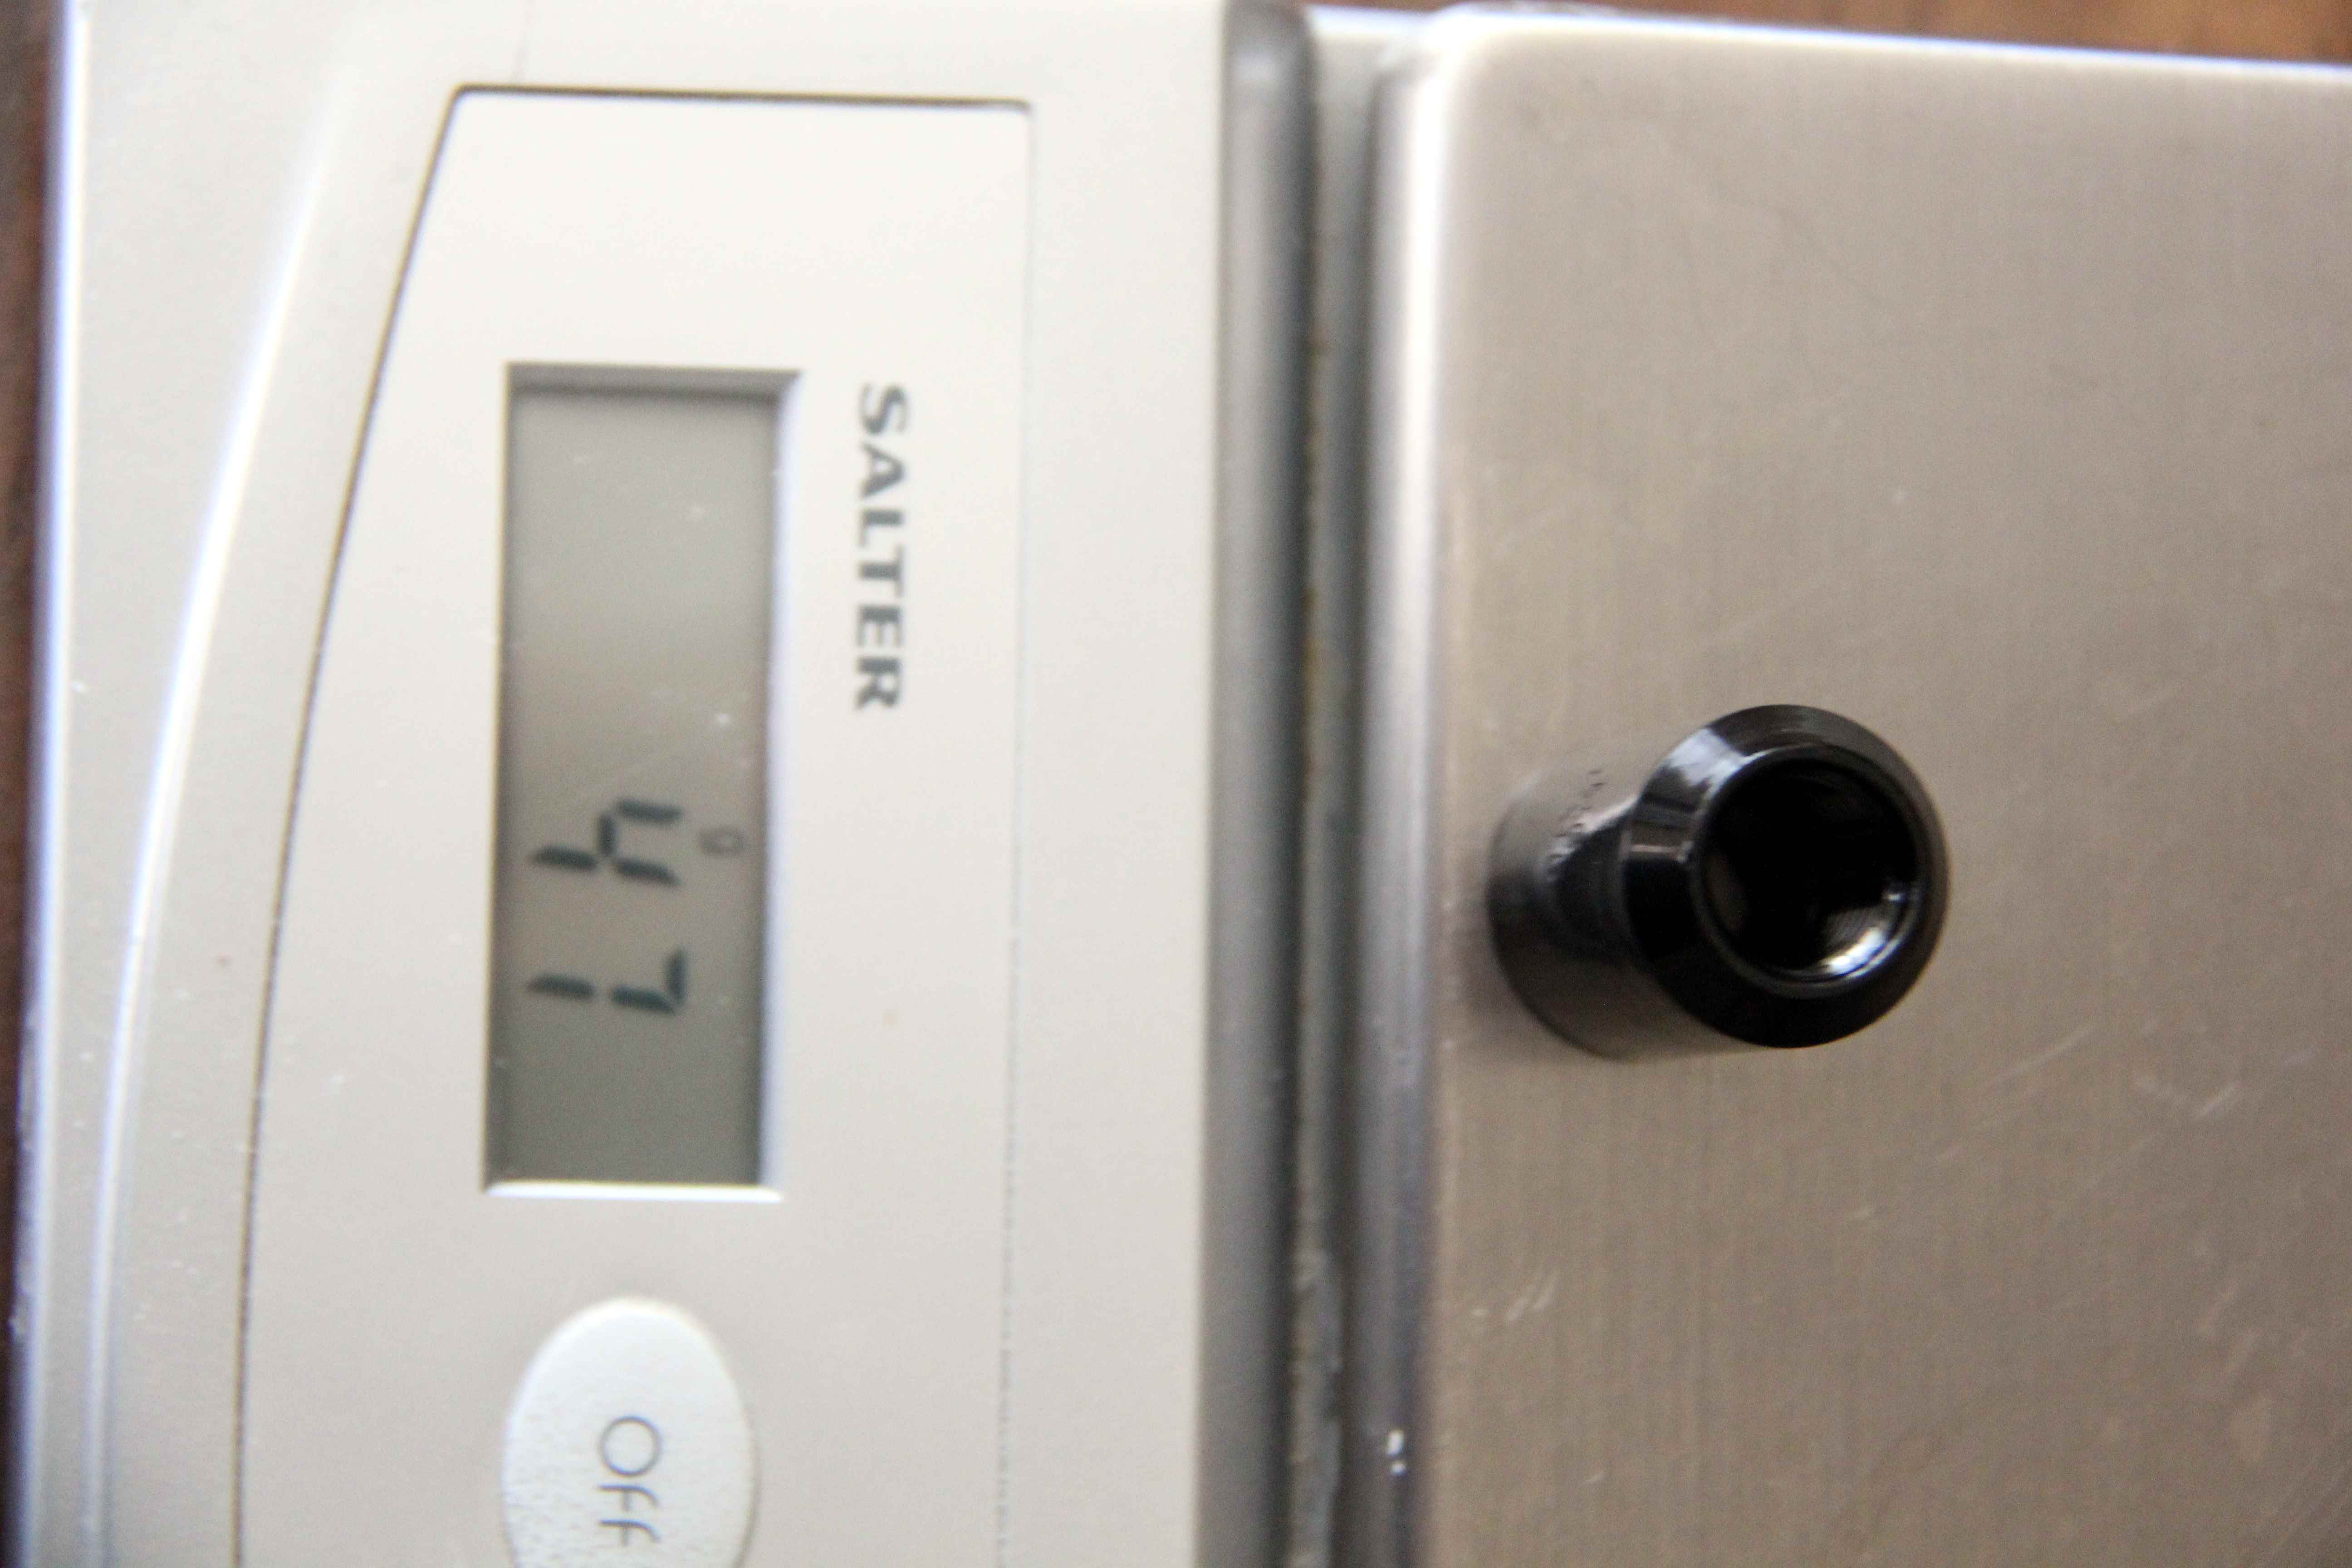
not that I'm advocating this produces racecar levels of weight saving and will transform the handling lol, BUT coming from the bike world, the common wisdom is that saving unsprung weight is three times as effective as sprung (anything supported by the suspension) so these are saving 48 grammes per corner. Wowsers. In addition, I guess there's not much point in having your wheels balanced and then having one wheel nut weigh half as much again as the other three. It may be a minute difference overall, but I'm a big believer in paying attention to small details. Why be lazy and let it make a difference if you don't have to?
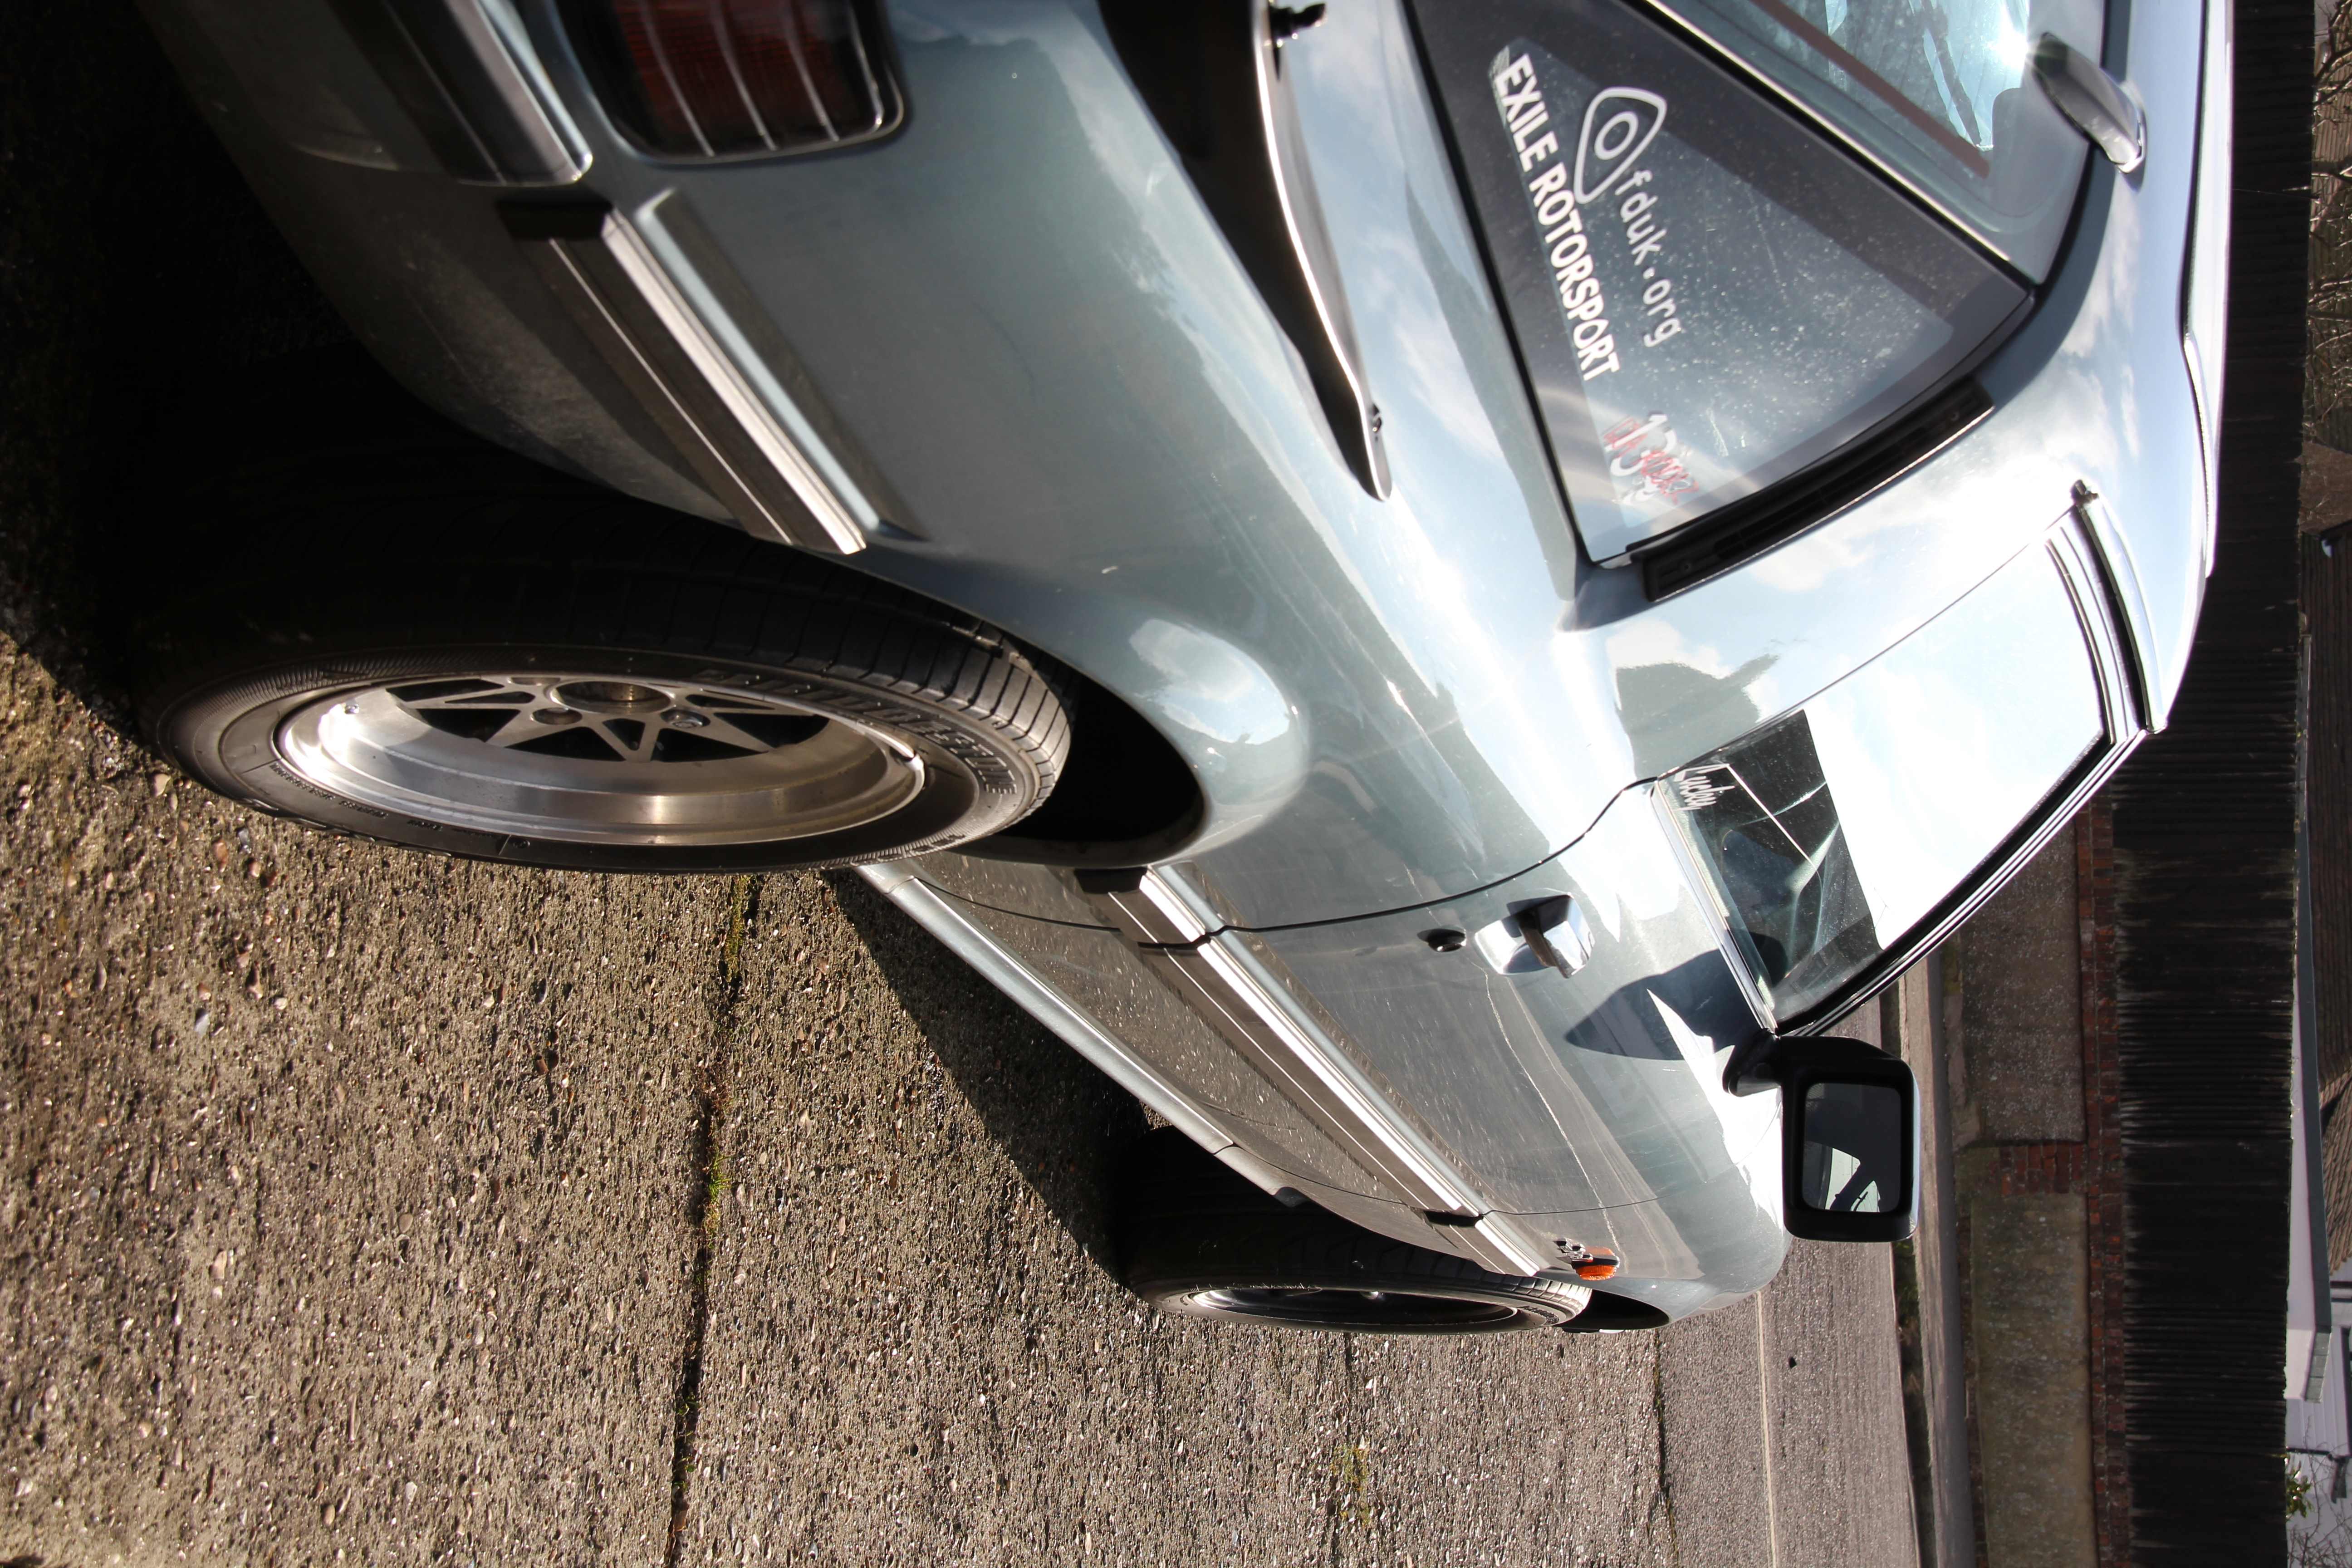
...and speaking of wheels, I finally got them back. I went to a firm called Wicked Wheels in Guildford because I'd heard good things about them, and because it's near to where a couple of mates live and I could keep being a pest and scrounging tea when I was up there. A delightfully grumpy gnome in the curmudgeonly British artisan mode did a lovely job of the refurb. They're acid stripped back, finegled nice and smooth and then painted in black with a very light blow-over of Bentley Storm Grey to keep them really dark, but they dunt arf pop in the light.
Then I dropped down the road to Chessington Tyres for some rubberage. The dude there runs an FD (in Vintage Red, the best colour) and he drifts the hell out of it so he knows about tyres lol. He did me a great price due to club associations. We went with Marangoni on the front and Firestone on the back, mostly because that was what Rob had that fitted! Even off the car they looked excellent, I was well pleased with the result;


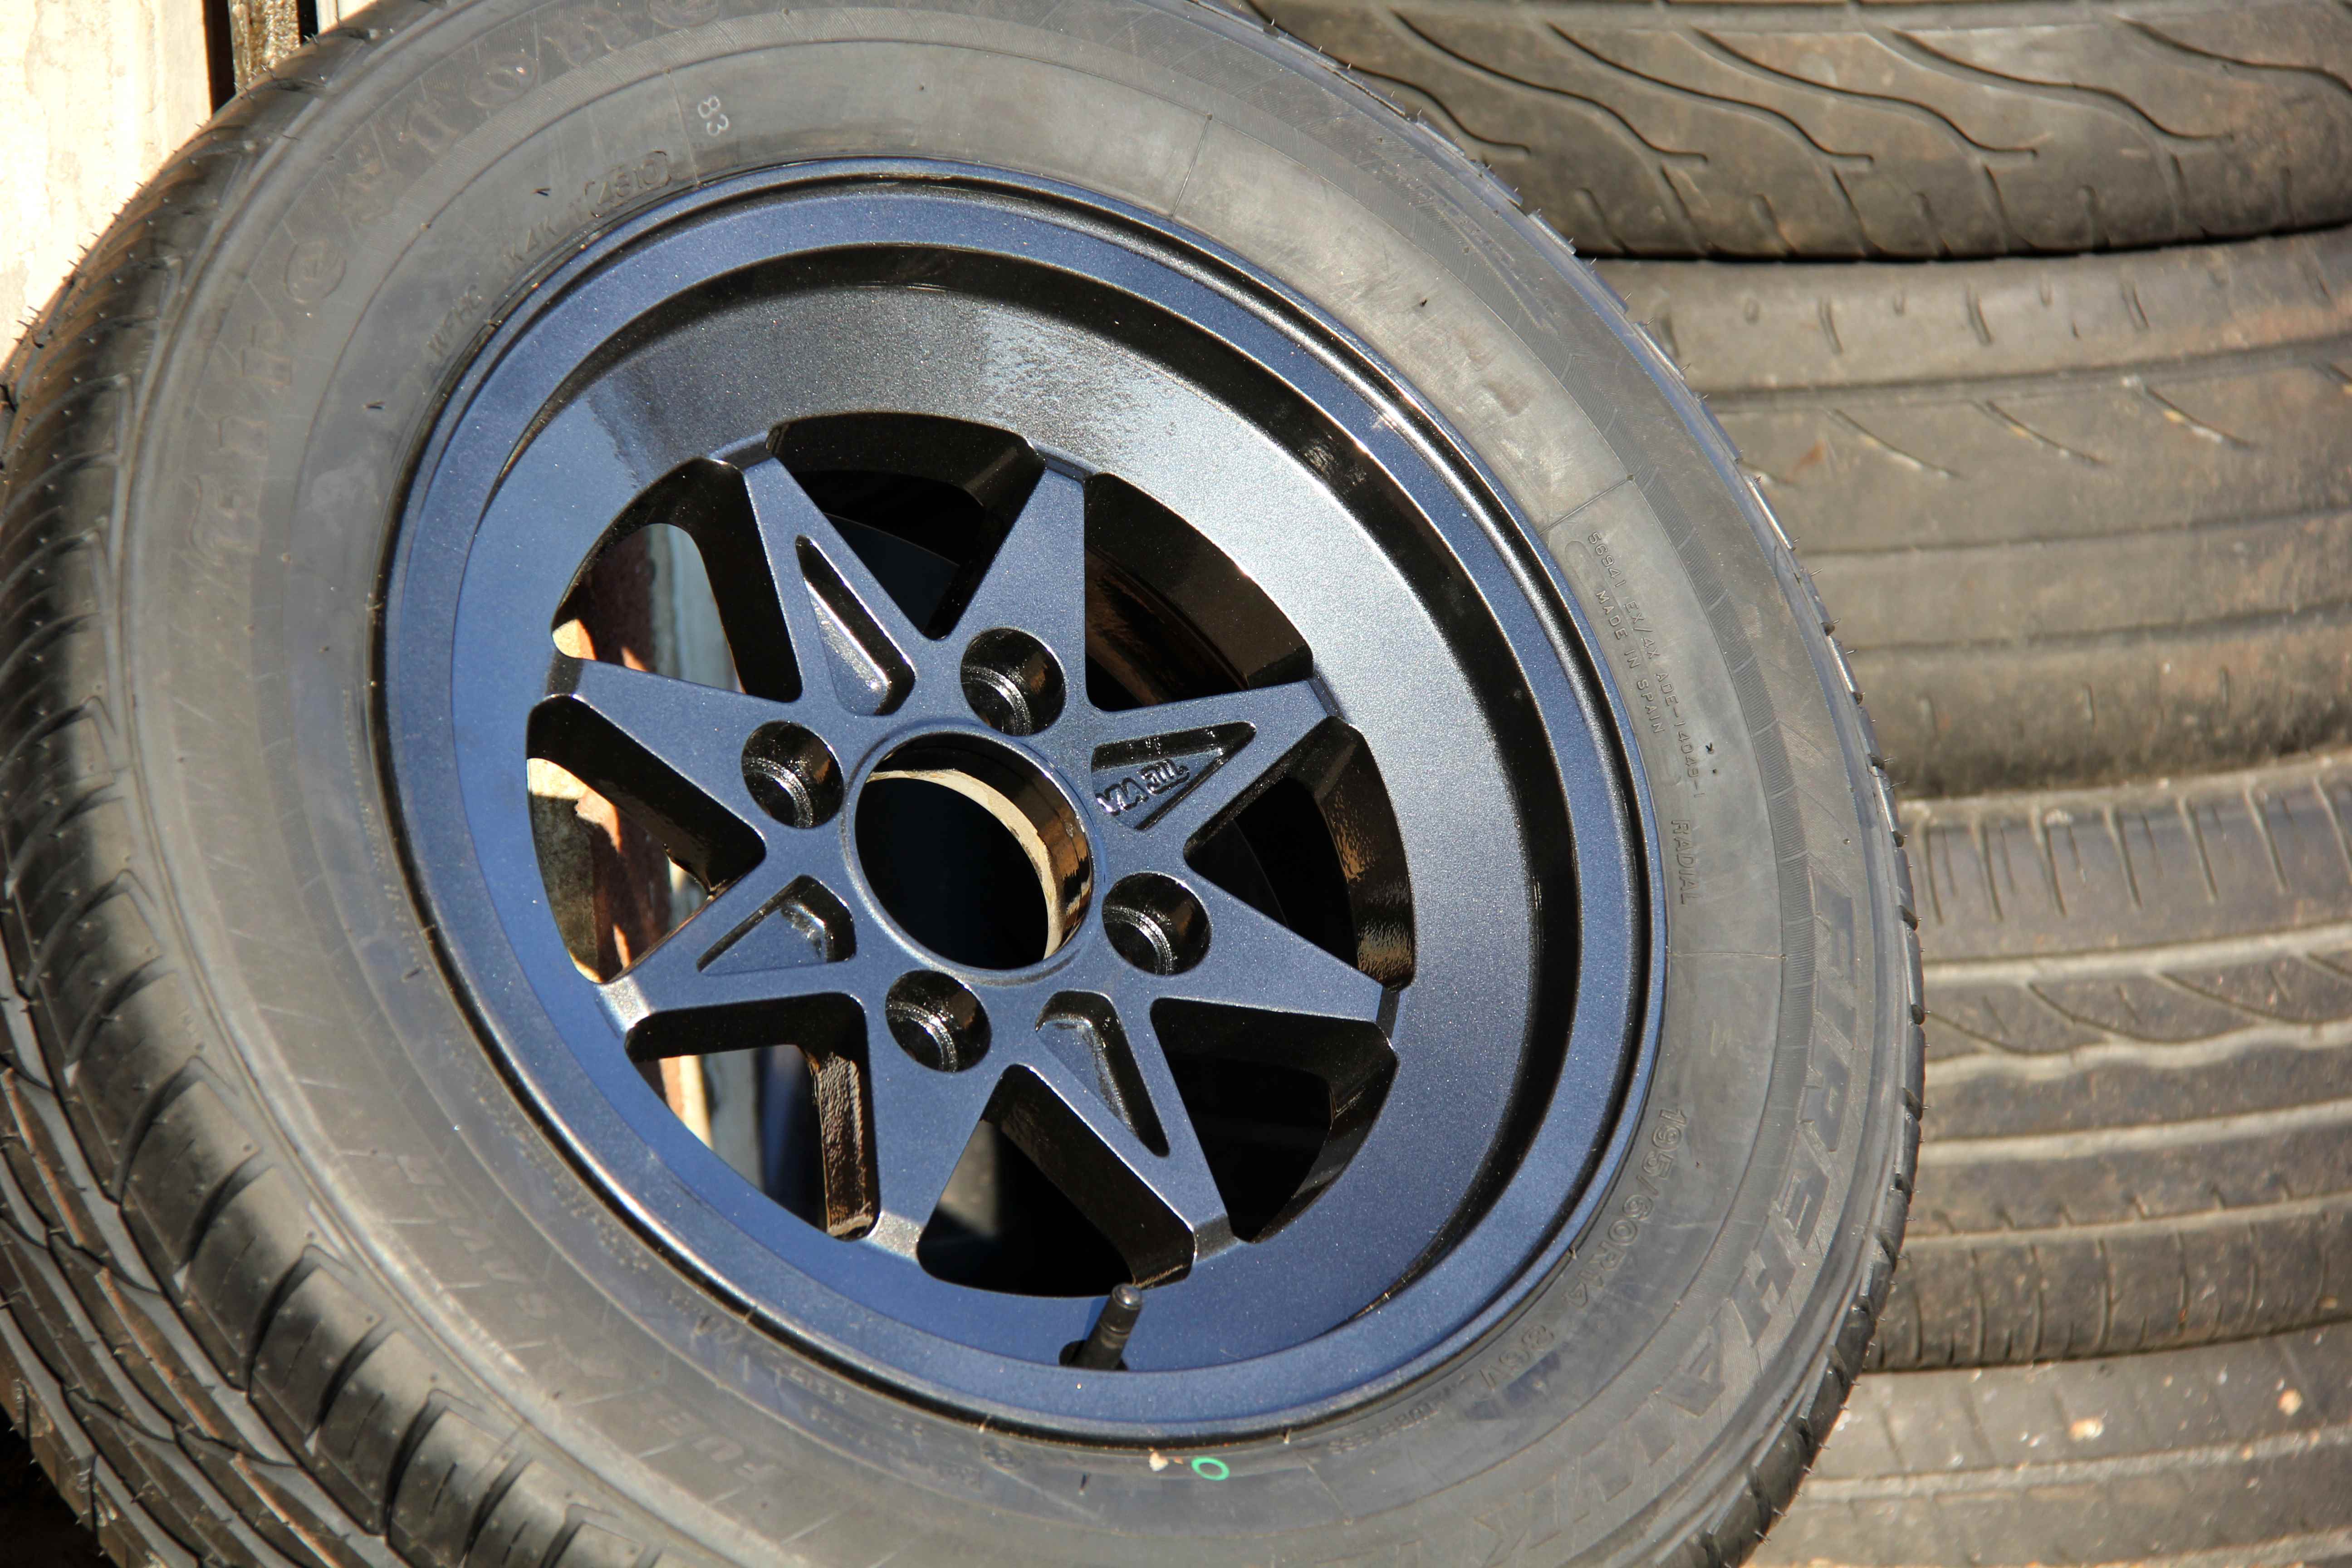
Mmmmmm...
And the paint bloom around the little discs Mazda stuck on (WHY didn't they do a whole strip of it, tight sods? Would have saved me so much aggro) was too far gone for T-cut alone to remove
So, that was the bad news. This left me the choice of re-spraying the back end (which would would at least mean the holes could be welded up and lost forever) ...or putting a different spoiler on and hoping it hid the damage. This seemed the best way forward; the paint was sound, just looked crap so hiding it would be fine. It also meant should I ever sell the car on it could be returned to standard. It was such a tidy stock example that at this stage I was still half-thinking I ought to be preserving it's originality. Needless to say, that wasn't going to last long
I bought a set of open-ended steel wheel nuts. Not the most exciting part of a car, I know, but I needed some slimline nuts for a few reasons; the holes on the Watanabes are too deeply recessed to let the socket grip on the short stock Mazda nuts, they're also too tight a fit for the wheelbrace so I have to have a socket to undo them. And most importantly, they're shiny chrome so look crap.
So, these are nicer to look at and longer so avoid those problems neatly
In additon, they're driven by a massive allen key so it should mean they're pretty theft proof and I can do without the locking nuts. This matters for a few reasons too, one being that the lockers are chrome and look crap lol. The other is this...
not that I'm advocating this produces racecar levels of weight saving and will transform the handling lol, BUT coming from the bike world, the common wisdom is that saving unsprung weight is three times as effective as sprung (anything supported by the suspension) so these are saving 48 grammes per corner. Wowsers. In addition, I guess there's not much point in having your wheels balanced and then having one wheel nut weigh half as much again as the other three. It may be a minute difference overall, but I'm a big believer in paying attention to small details. Why be lazy and let it make a difference if you don't have to?
...and speaking of wheels, I finally got them back. I went to a firm called Wicked Wheels in Guildford because I'd heard good things about them, and because it's near to where a couple of mates live and I could keep being a pest and scrounging tea when I was up there. A delightfully grumpy gnome in the curmudgeonly British artisan mode did a lovely job of the refurb. They're acid stripped back, finegled nice and smooth and then painted in black with a very light blow-over of Bentley Storm Grey to keep them really dark, but they dunt arf pop in the light.
Then I dropped down the road to Chessington Tyres for some rubberage. The dude there runs an FD (in Vintage Red, the best colour) and he drifts the hell out of it so he knows about tyres lol. He did me a great price due to club associations. We went with Marangoni on the front and Firestone on the back, mostly because that was what Rob had that fitted! Even off the car they looked excellent, I was well pleased with the result;
Mmmmmm...
Thread Starter
Senior Member
Joined: Oct 2010
Posts: 255
Likes: 1
From: England
Meanwhile, I took a punt on a spoiler I thought might work, both in terms of fitting the car, looking right and covering the dodgy paintwork. It needed a fair bit of work, though, so we'll get to that later. I also needed to source a few other bits. This was because of my leak. For some peculiar reason it appears Mazda decided to put waterways through the inlet manifold, seled between the block and mani by O-rings. When these fail, the inlet manifold gasket is nowhere near man enough to hold back the coolant, so I was getting regular leaks when the car warmed up, to the point where coolant was pooling in the recesses on top of the engine. The only way to cure it was to strip off all the intake apparatus and either blank the waterways or renew the O-rings. This wasn't necessarily a disaster because I needed to do some tidying up
With the aid of the fantastically knowledgeable guys on Exile and RX7FB.com clubs, I'd finally got my head around what had been done to the emissions gubbins by the previous owner;
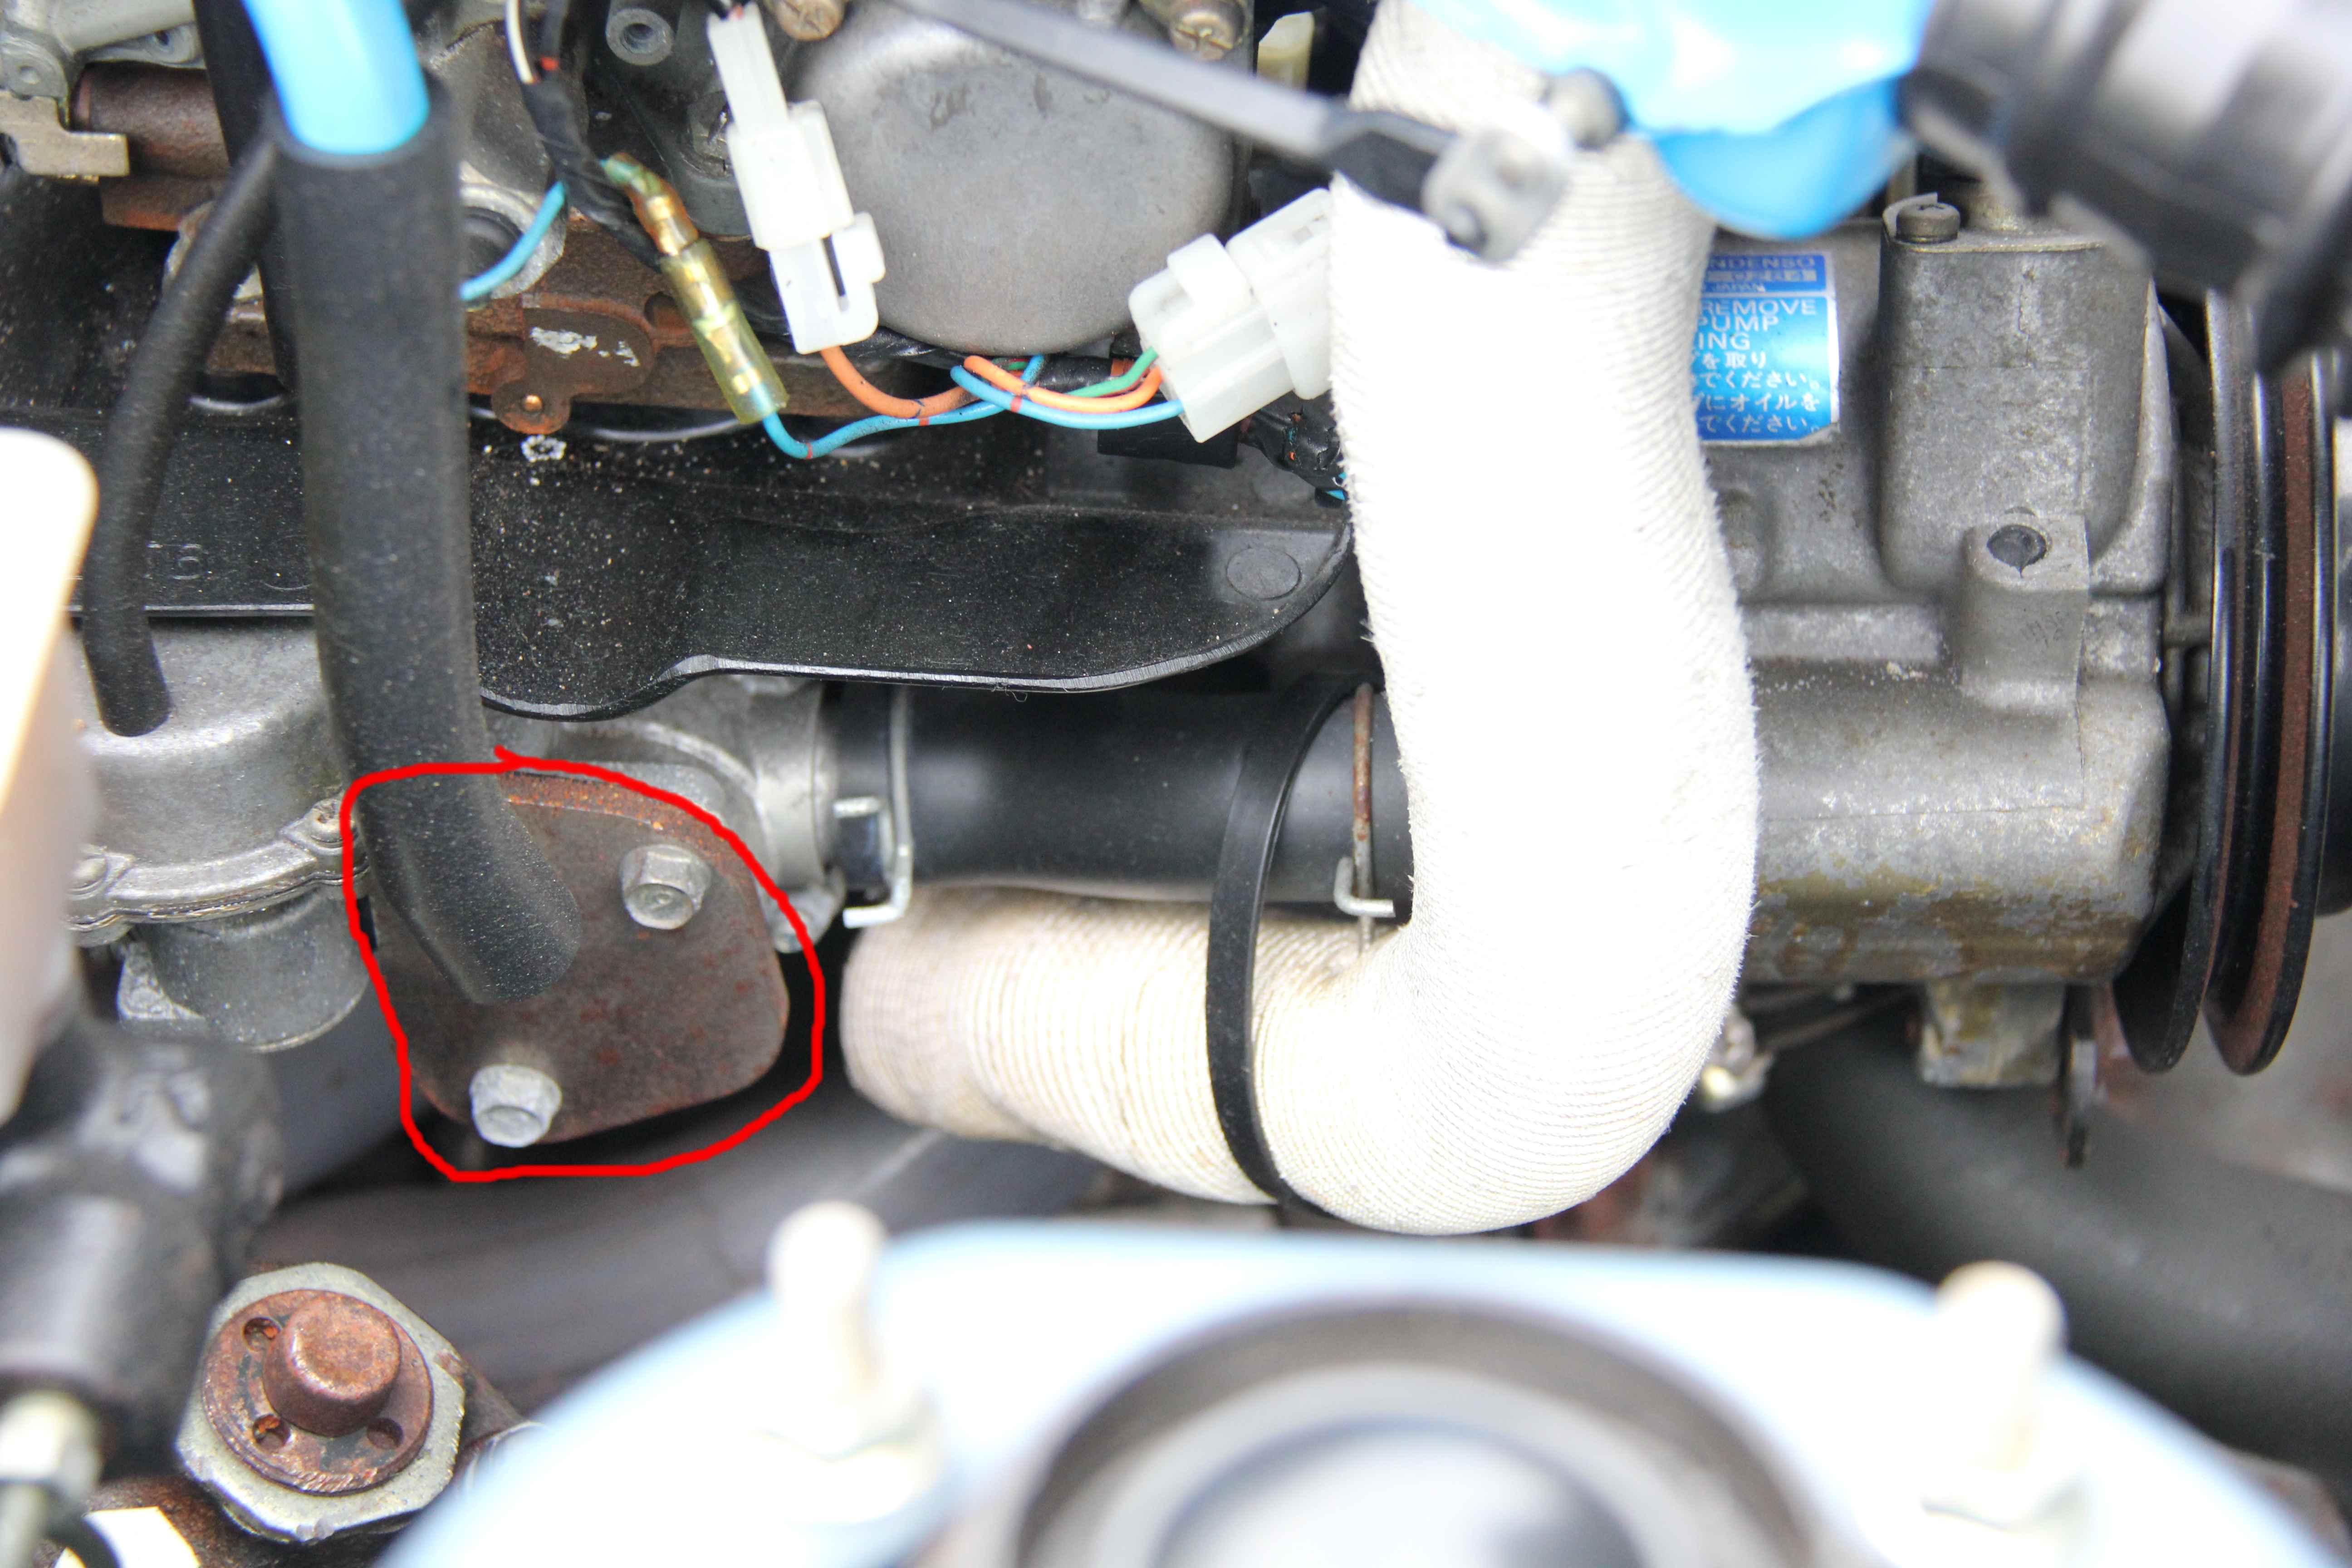
They'd removed the thermal reactor, clearly because the exhaust had been changed for headers, but as you can see circled in that pic, they'd only blanked off the top face of the emisssions ACV housing rather than delete it completely. This left various pipes and architecture that were completely obsolete and in fact could do more harm than good. For example
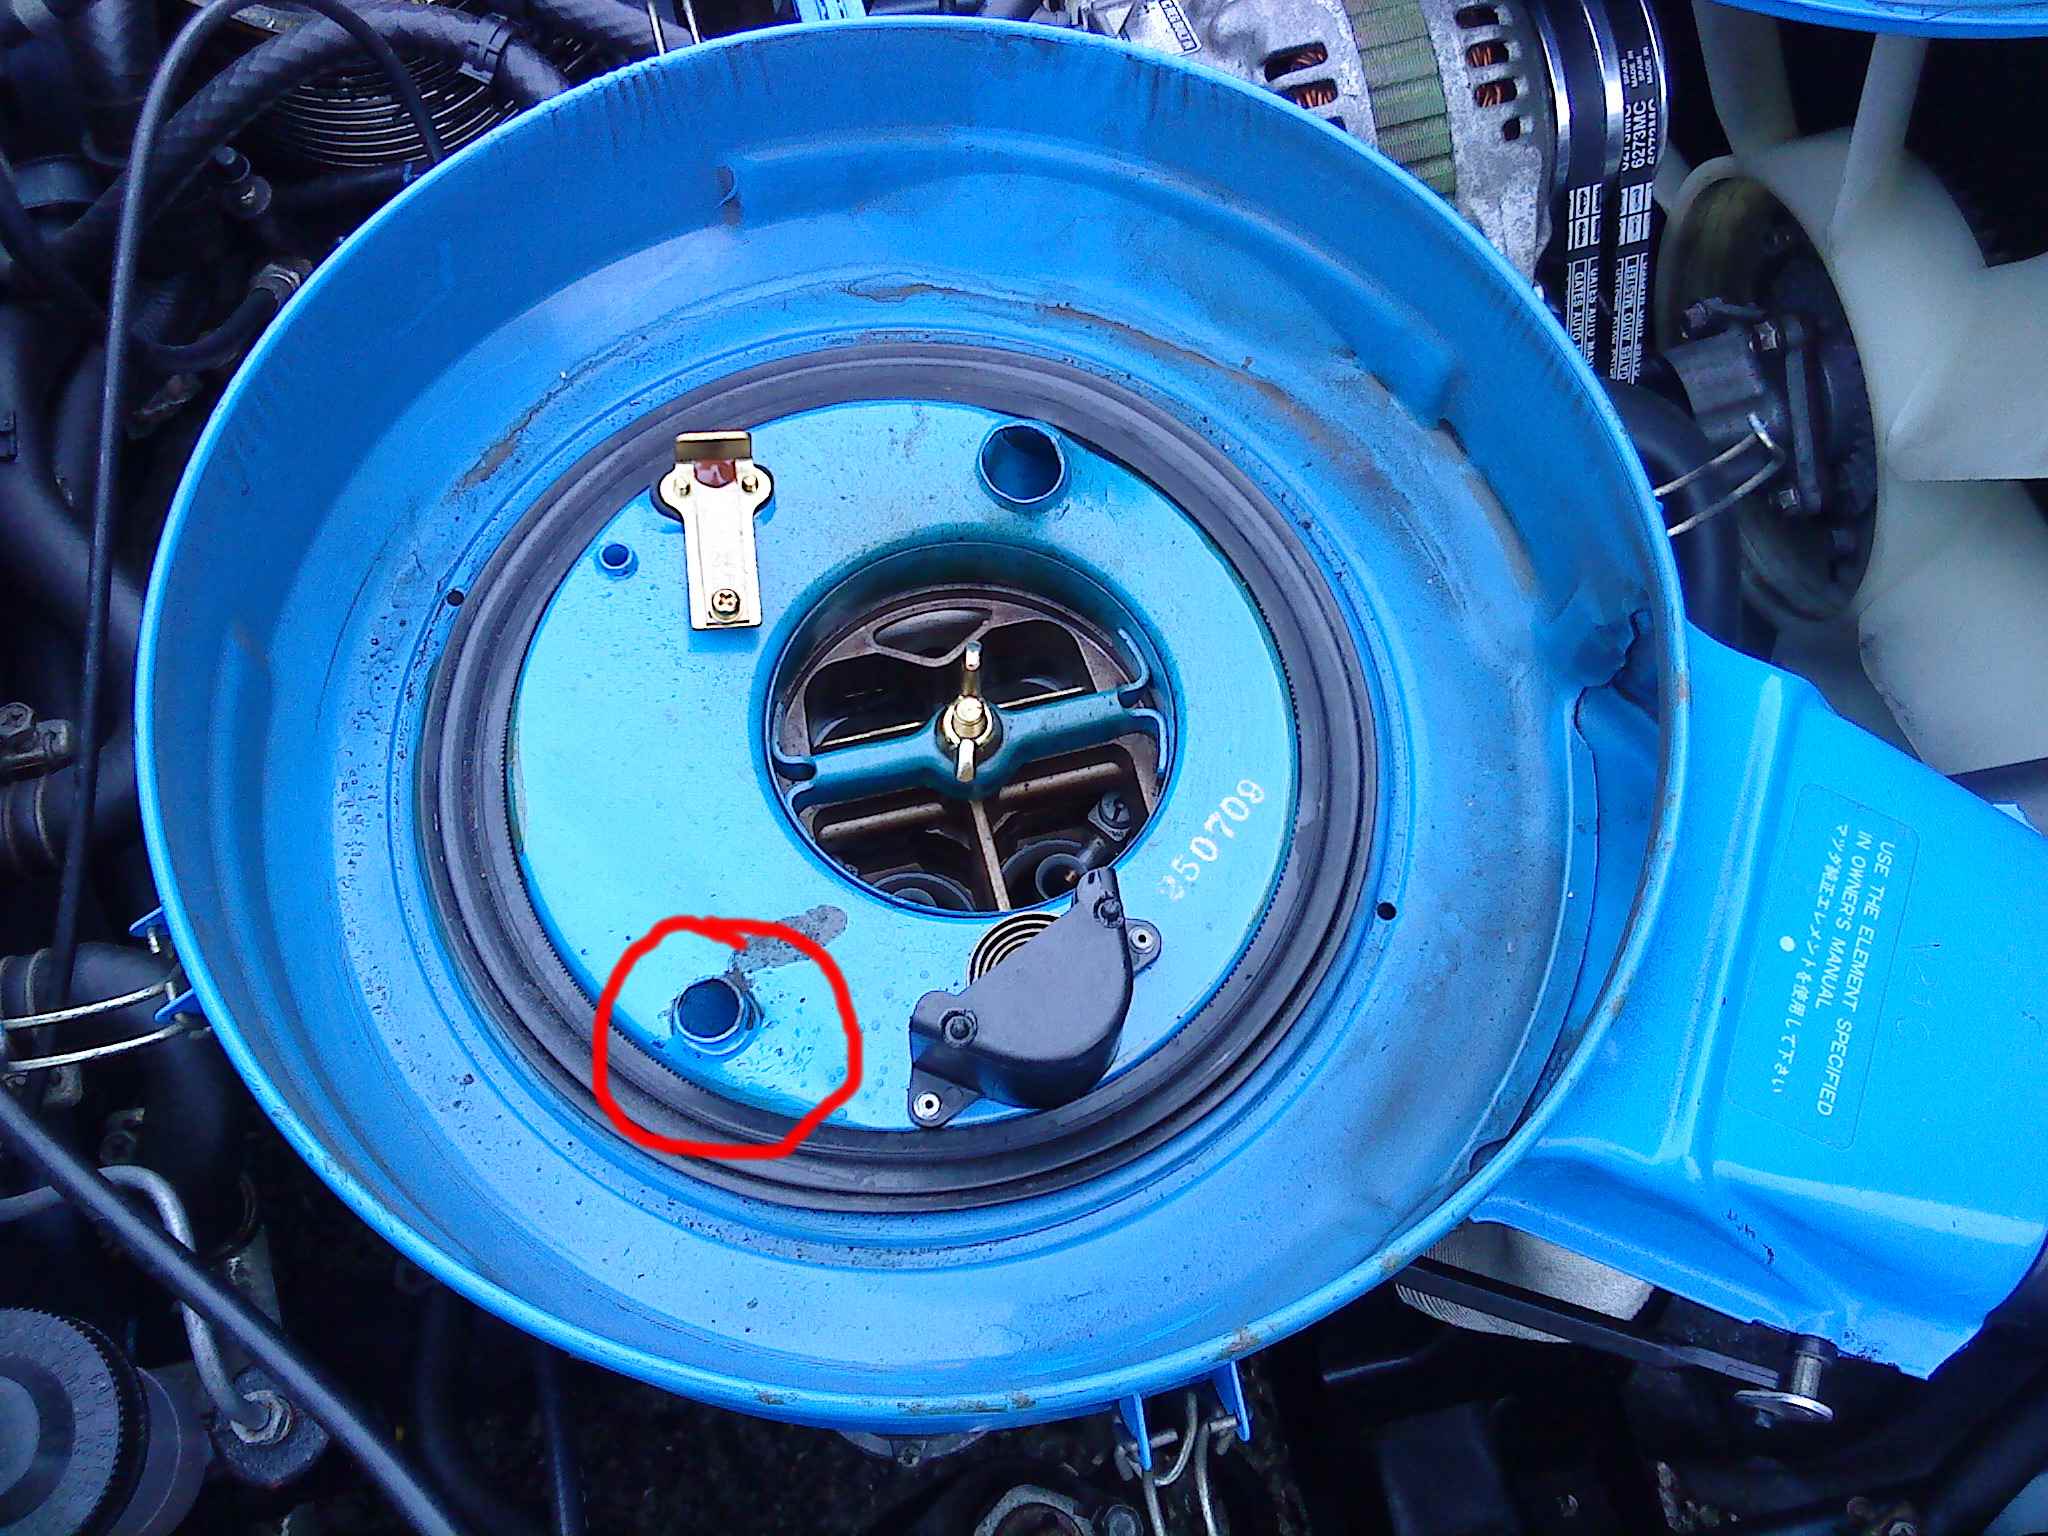
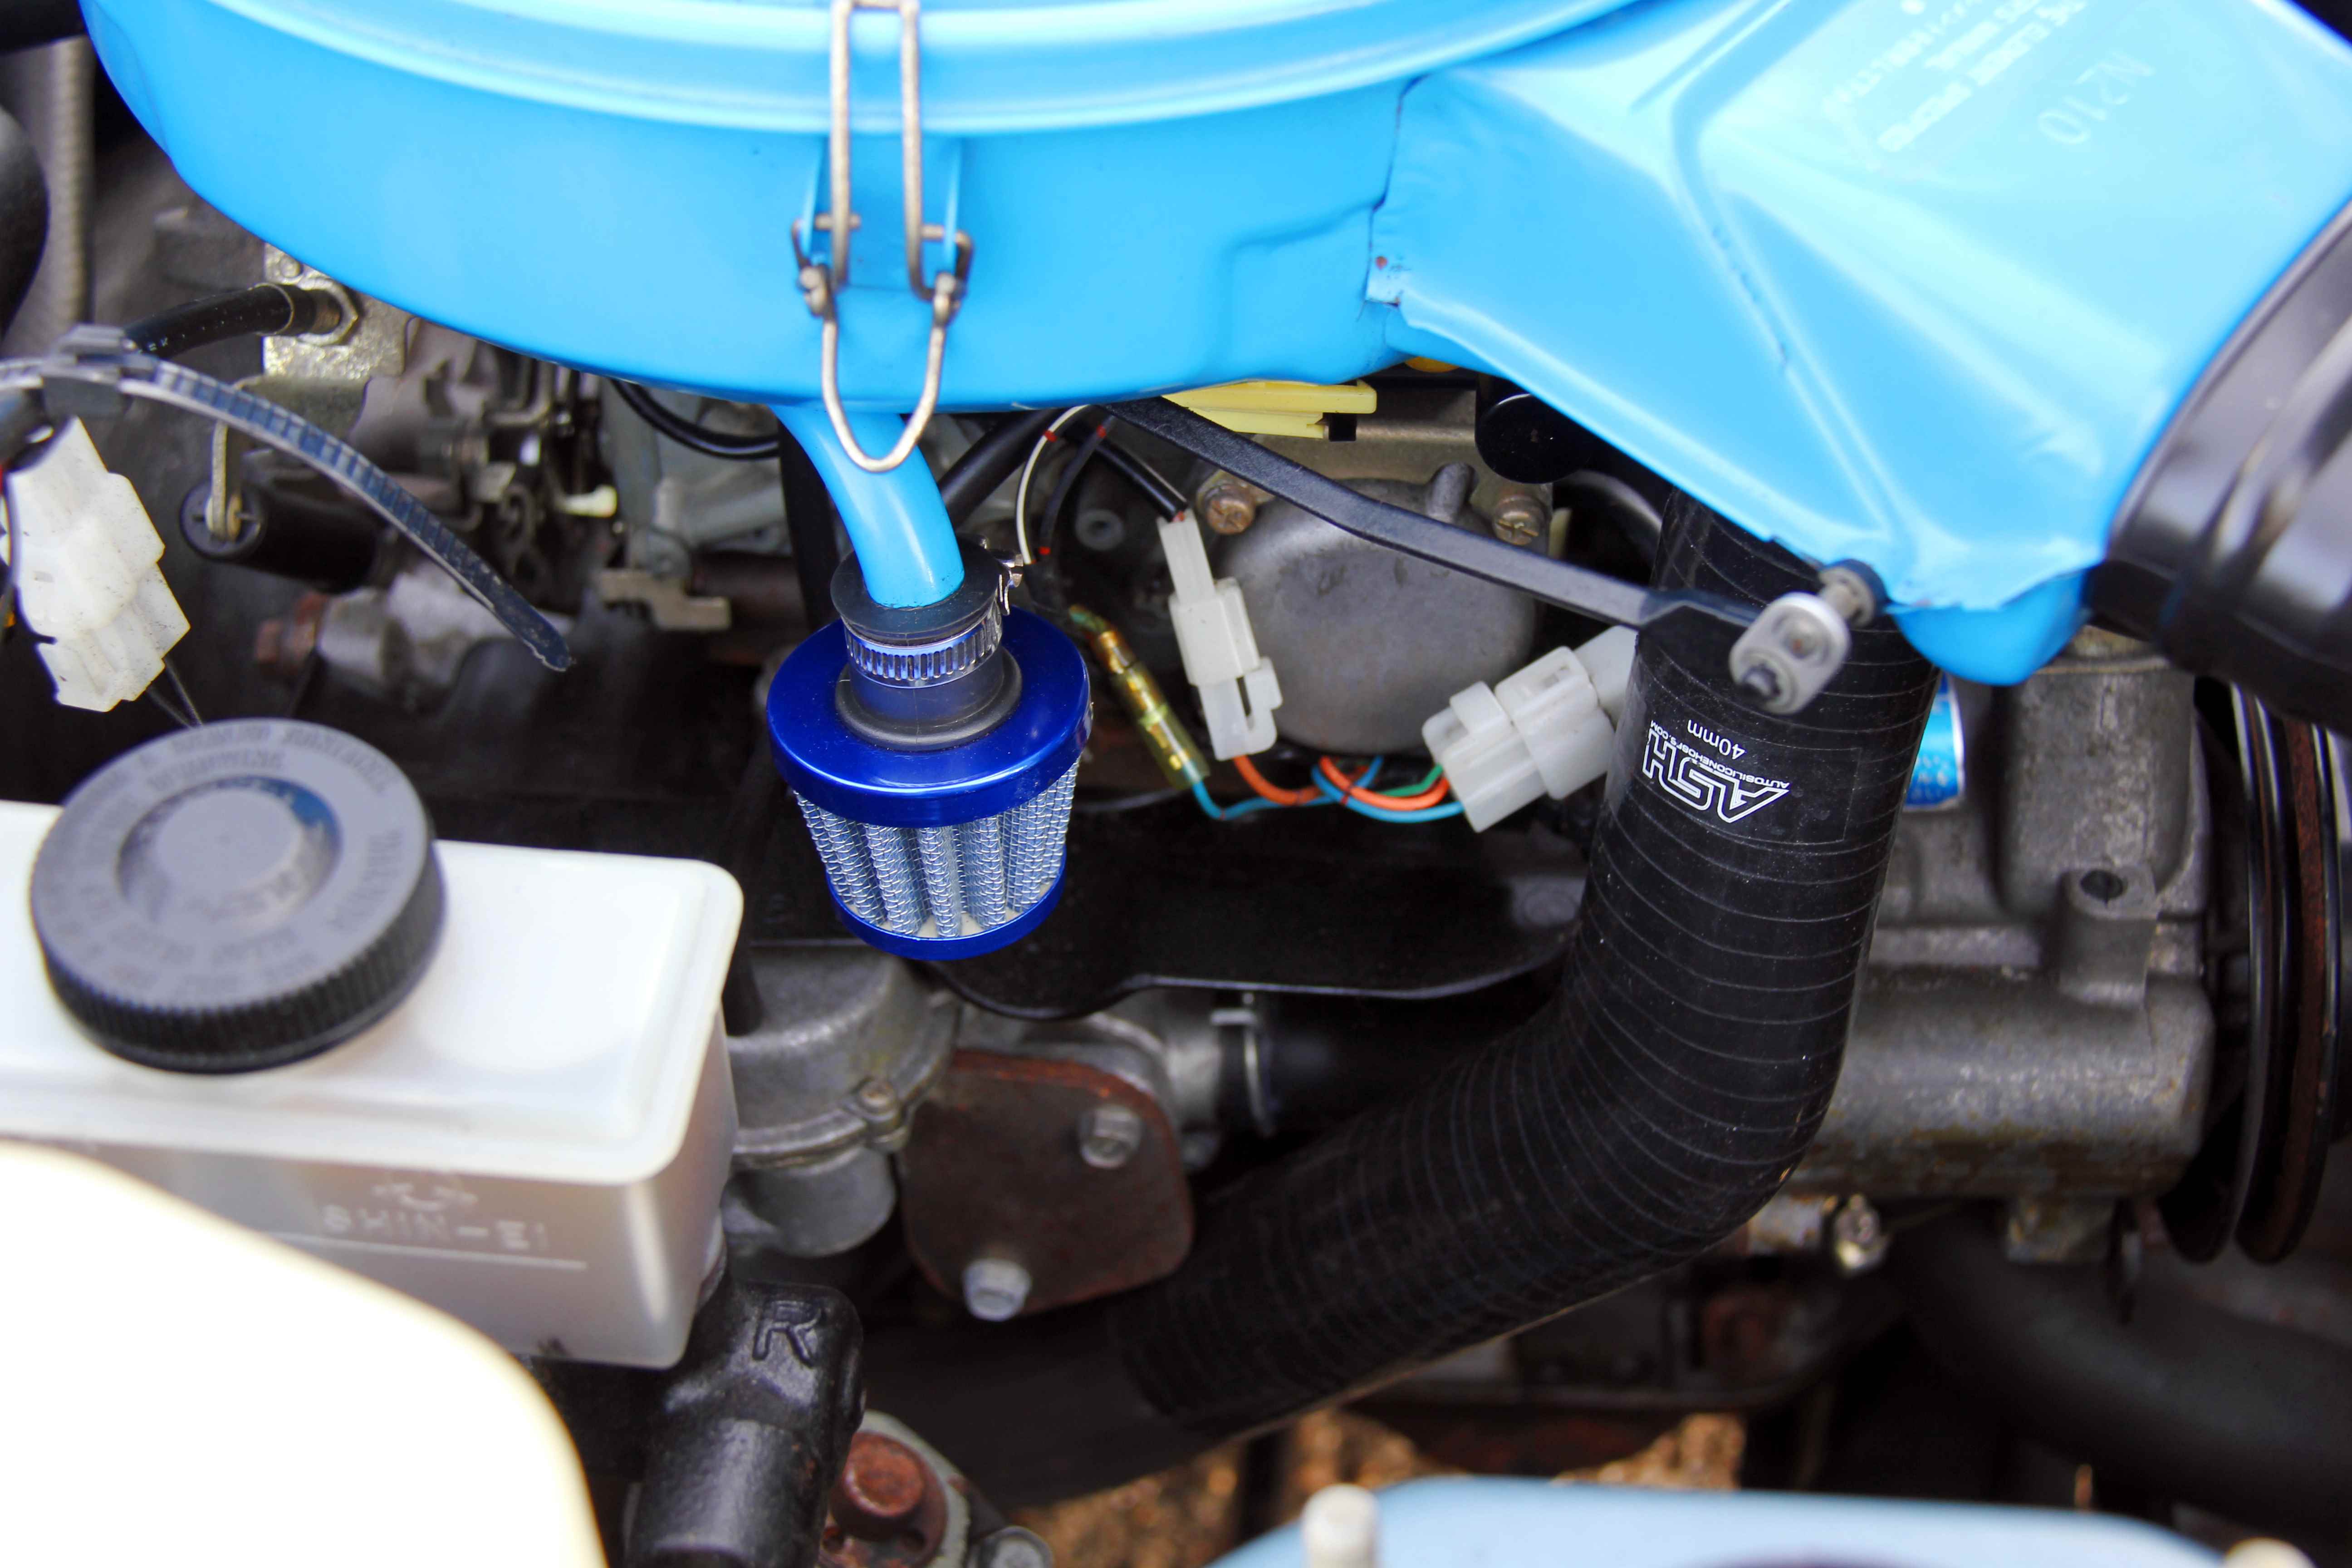
This union in the Blue Box of God was now just open to atmosphere, sucking in air and bypassing the filter element completely. As an interim I changed that stupid white paper hoover pipe because not only was it horribly ugly it was all torn and manked where the spring clips for the airpump hose had abraded it. Also got a breather filter to plug the hole
While I was collecting bits like
to do the emissions deletion properly. Oh, and most importantly
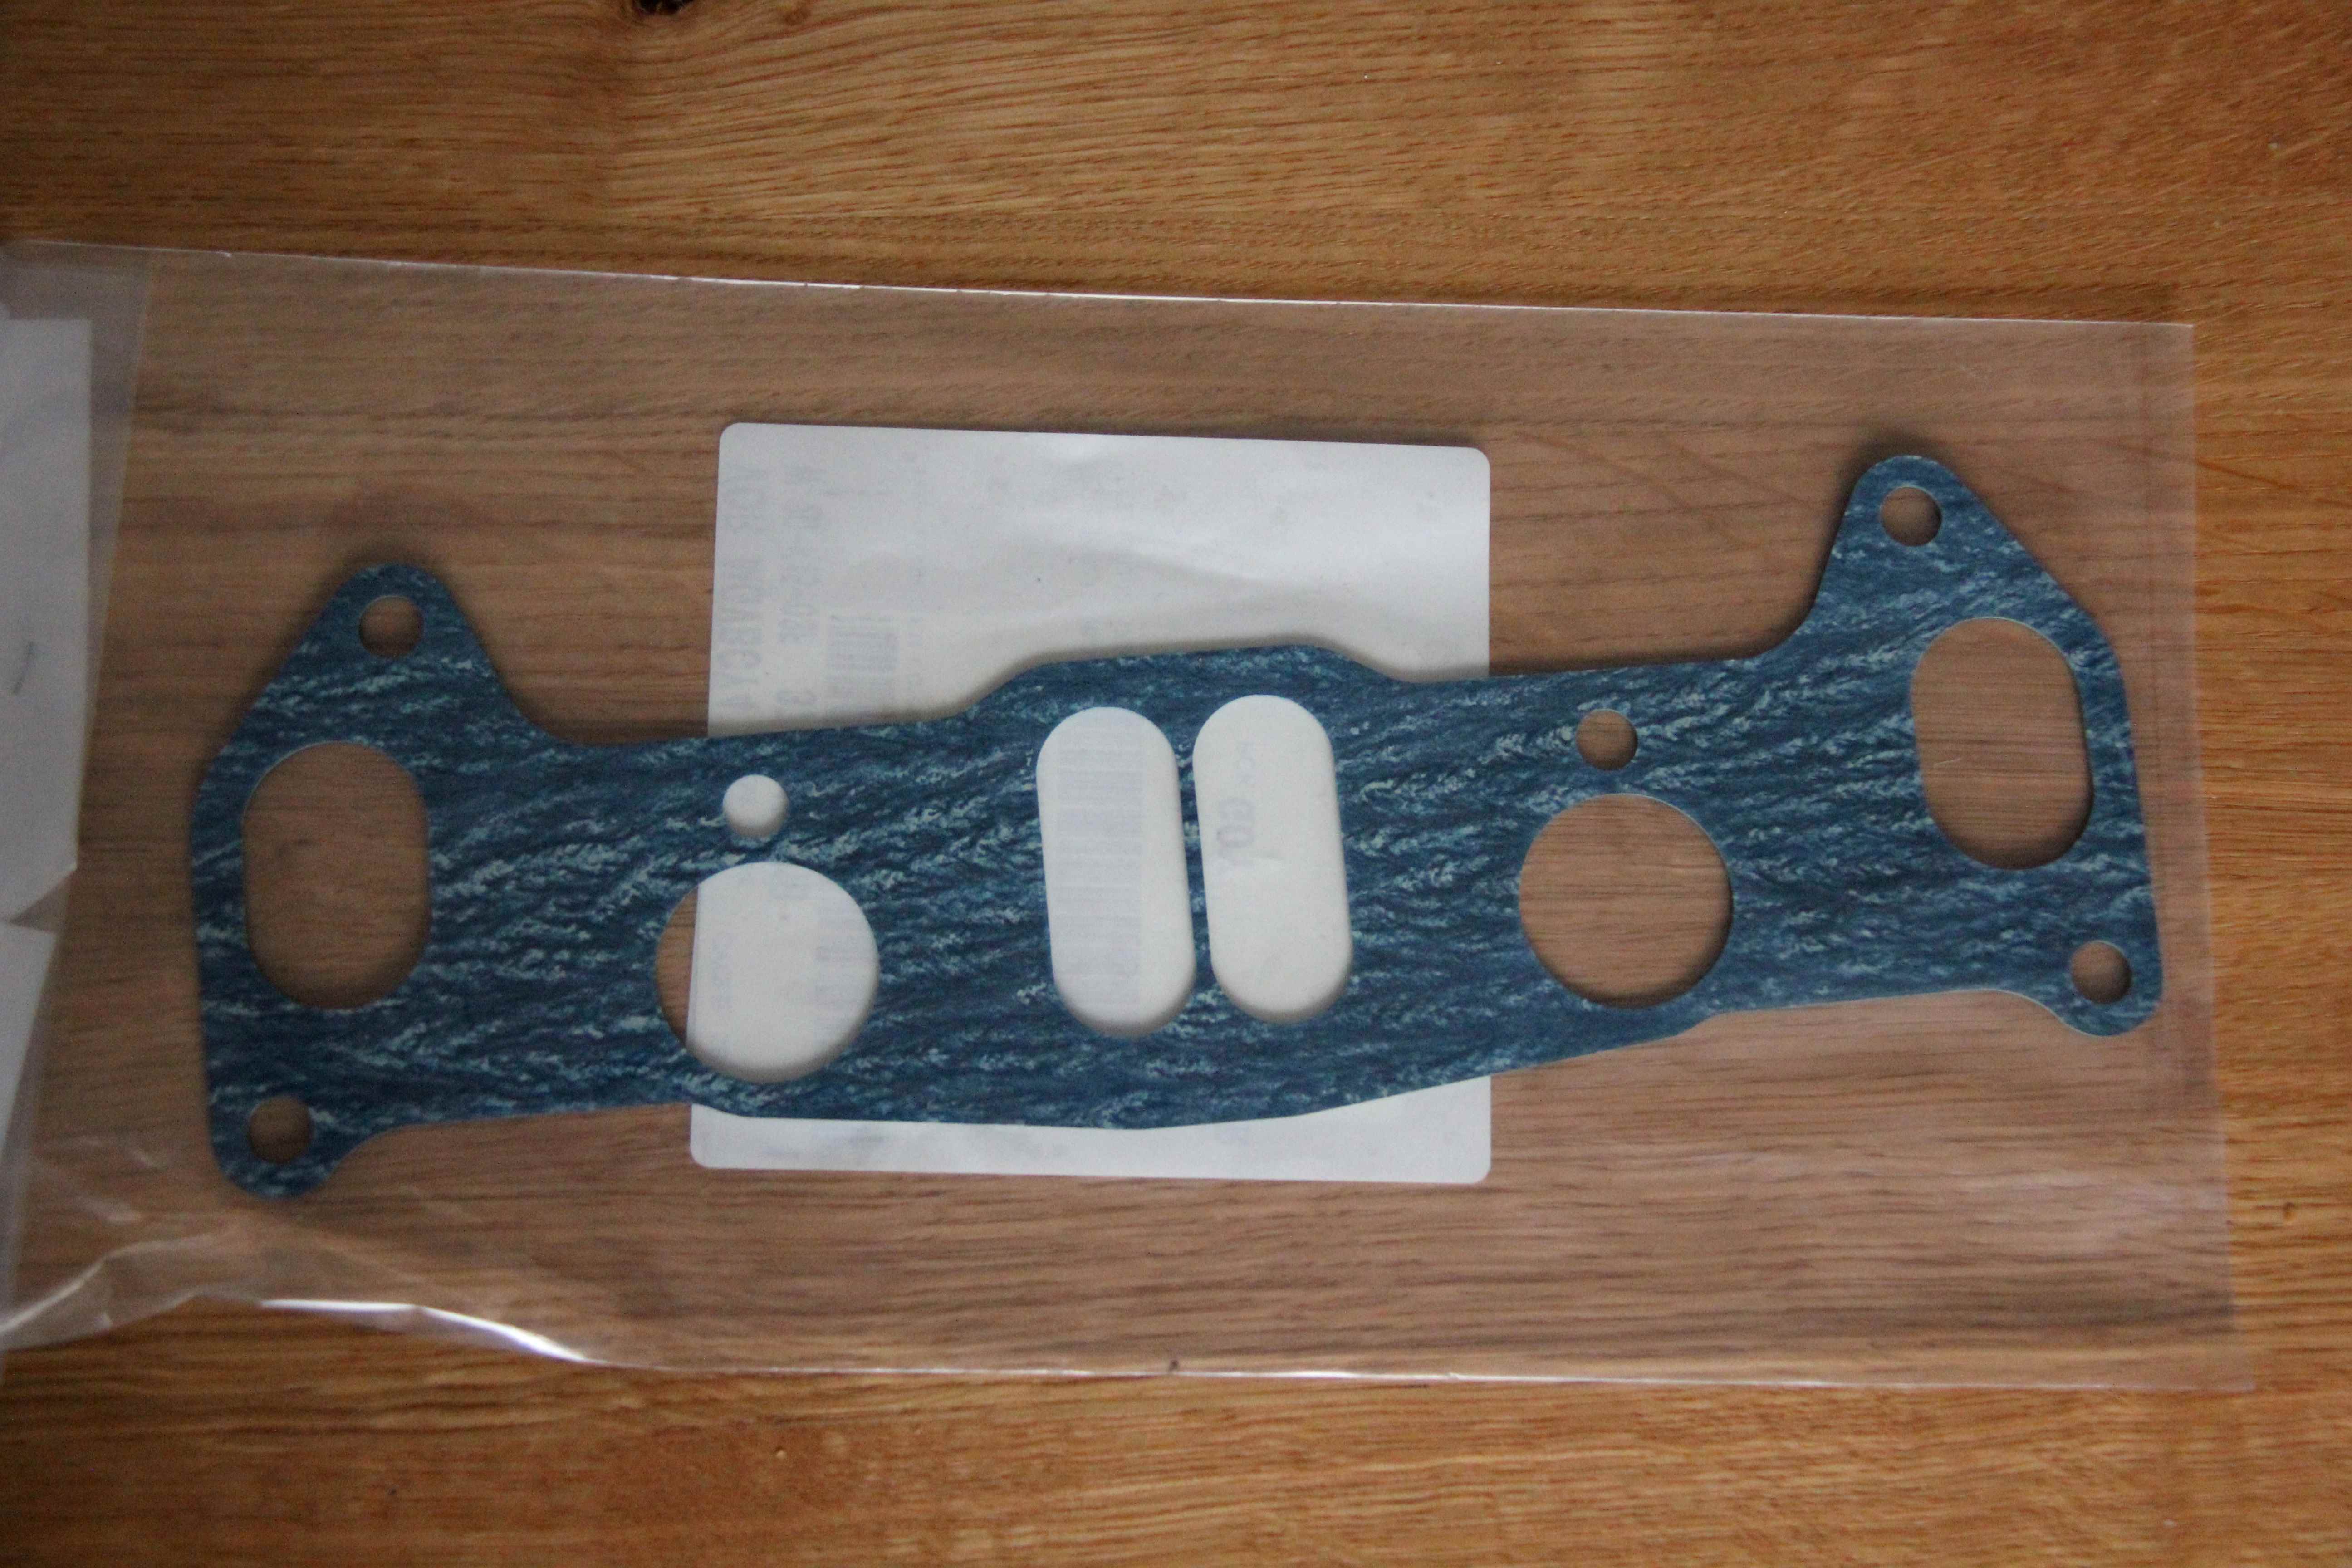
Five days to come from Belgium, oddly. It's funny, I dunno what Mazda dealers are like in the US but in England it's almost like they're embarassed by the rotary. Maybe it's because of all those RX-8 warranty claims. Parts counter guys are the rudest, most unhelpful ignoramuses anyway, so it was quite funny when I went to order the inlet gasket. I went to the counter and the bloke finally came to serve me with a marked lack of enthusiasm. "Help you?" he grunted in a tone that said quite clearly he couldn't care less.
"Yes, please," I said politely. "Could I get an inlet manifold gasket for a 12A, please?"
"What the hell's that, then?" he snarled
My five-year old, who was with me, rolled his eyes heavenwards and as if he was talking to someone of very low intelligence (which he was, after all), witheringly said; "It's a rotary engine, innit. Don't you know?"
Hahaha, owned by a five-year old. The parts guy was a bit more helpful after that, lol
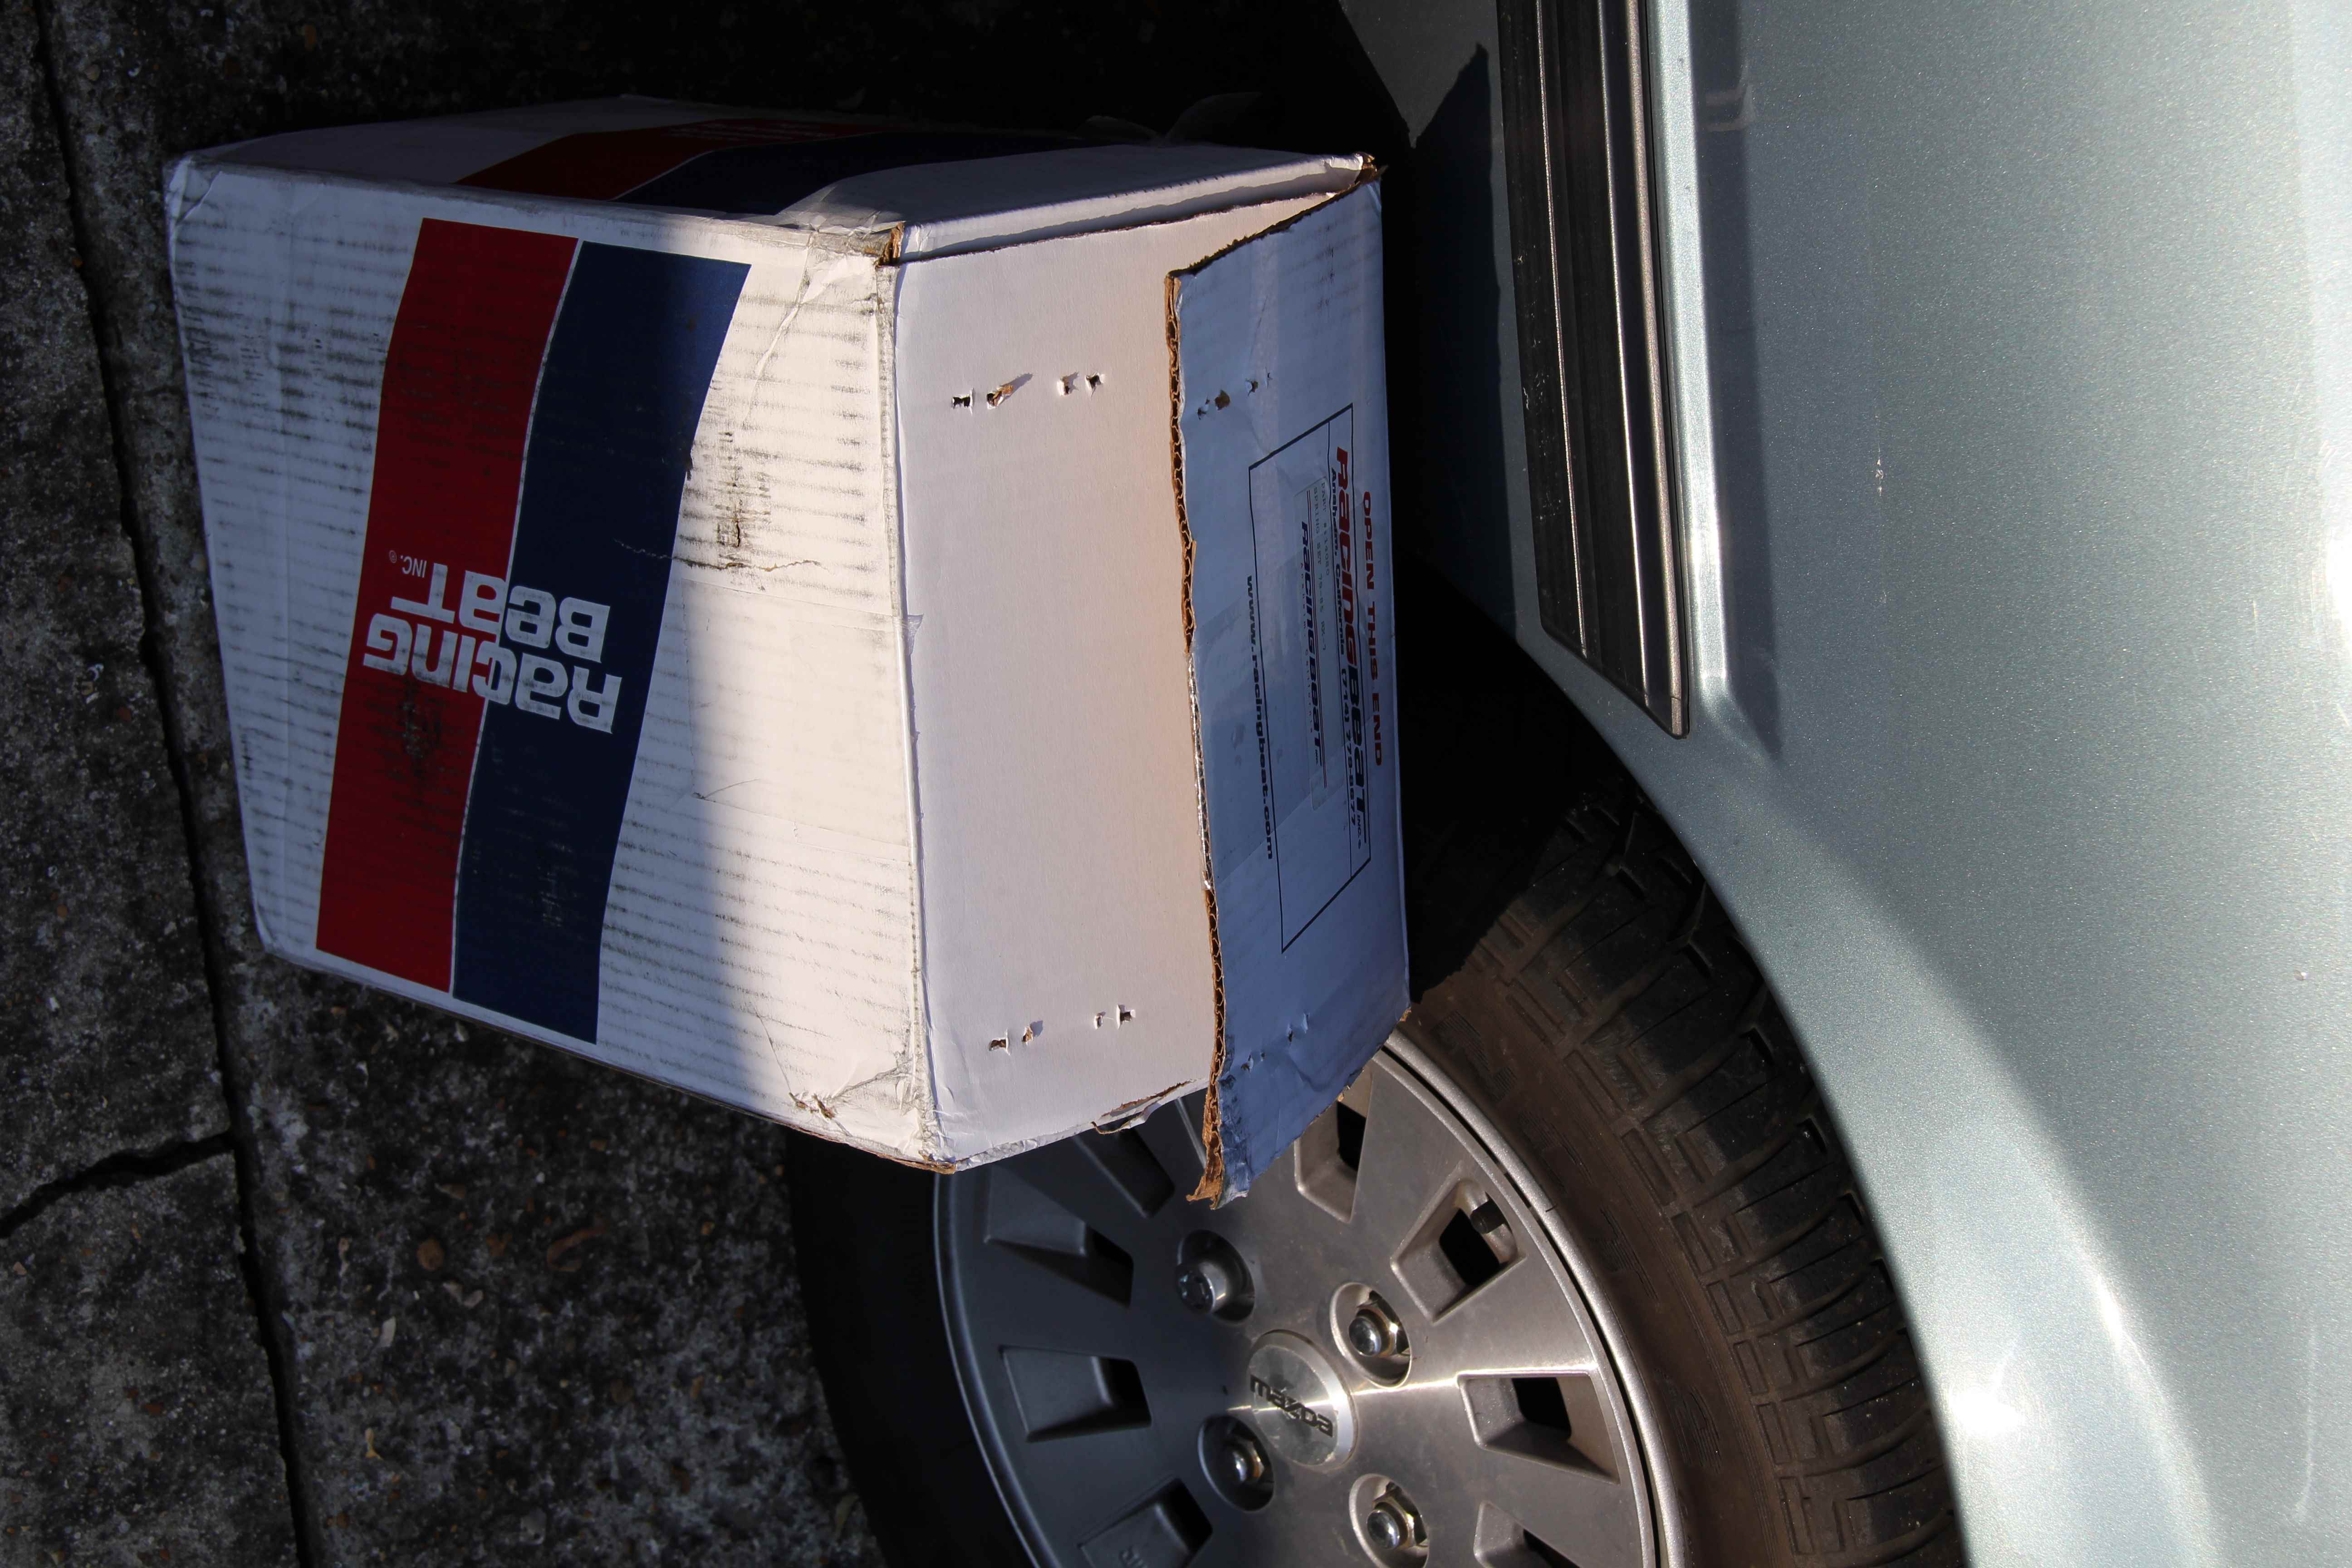
...oh yeah, there was this one other thing. I decided to give the pros a go and I can always step back to ghetto angle grinder stylee modification if that doesn't work out. So with that in mind this box arrived today...
Ooooh :oops: Is it wrong to get all excited over springs?
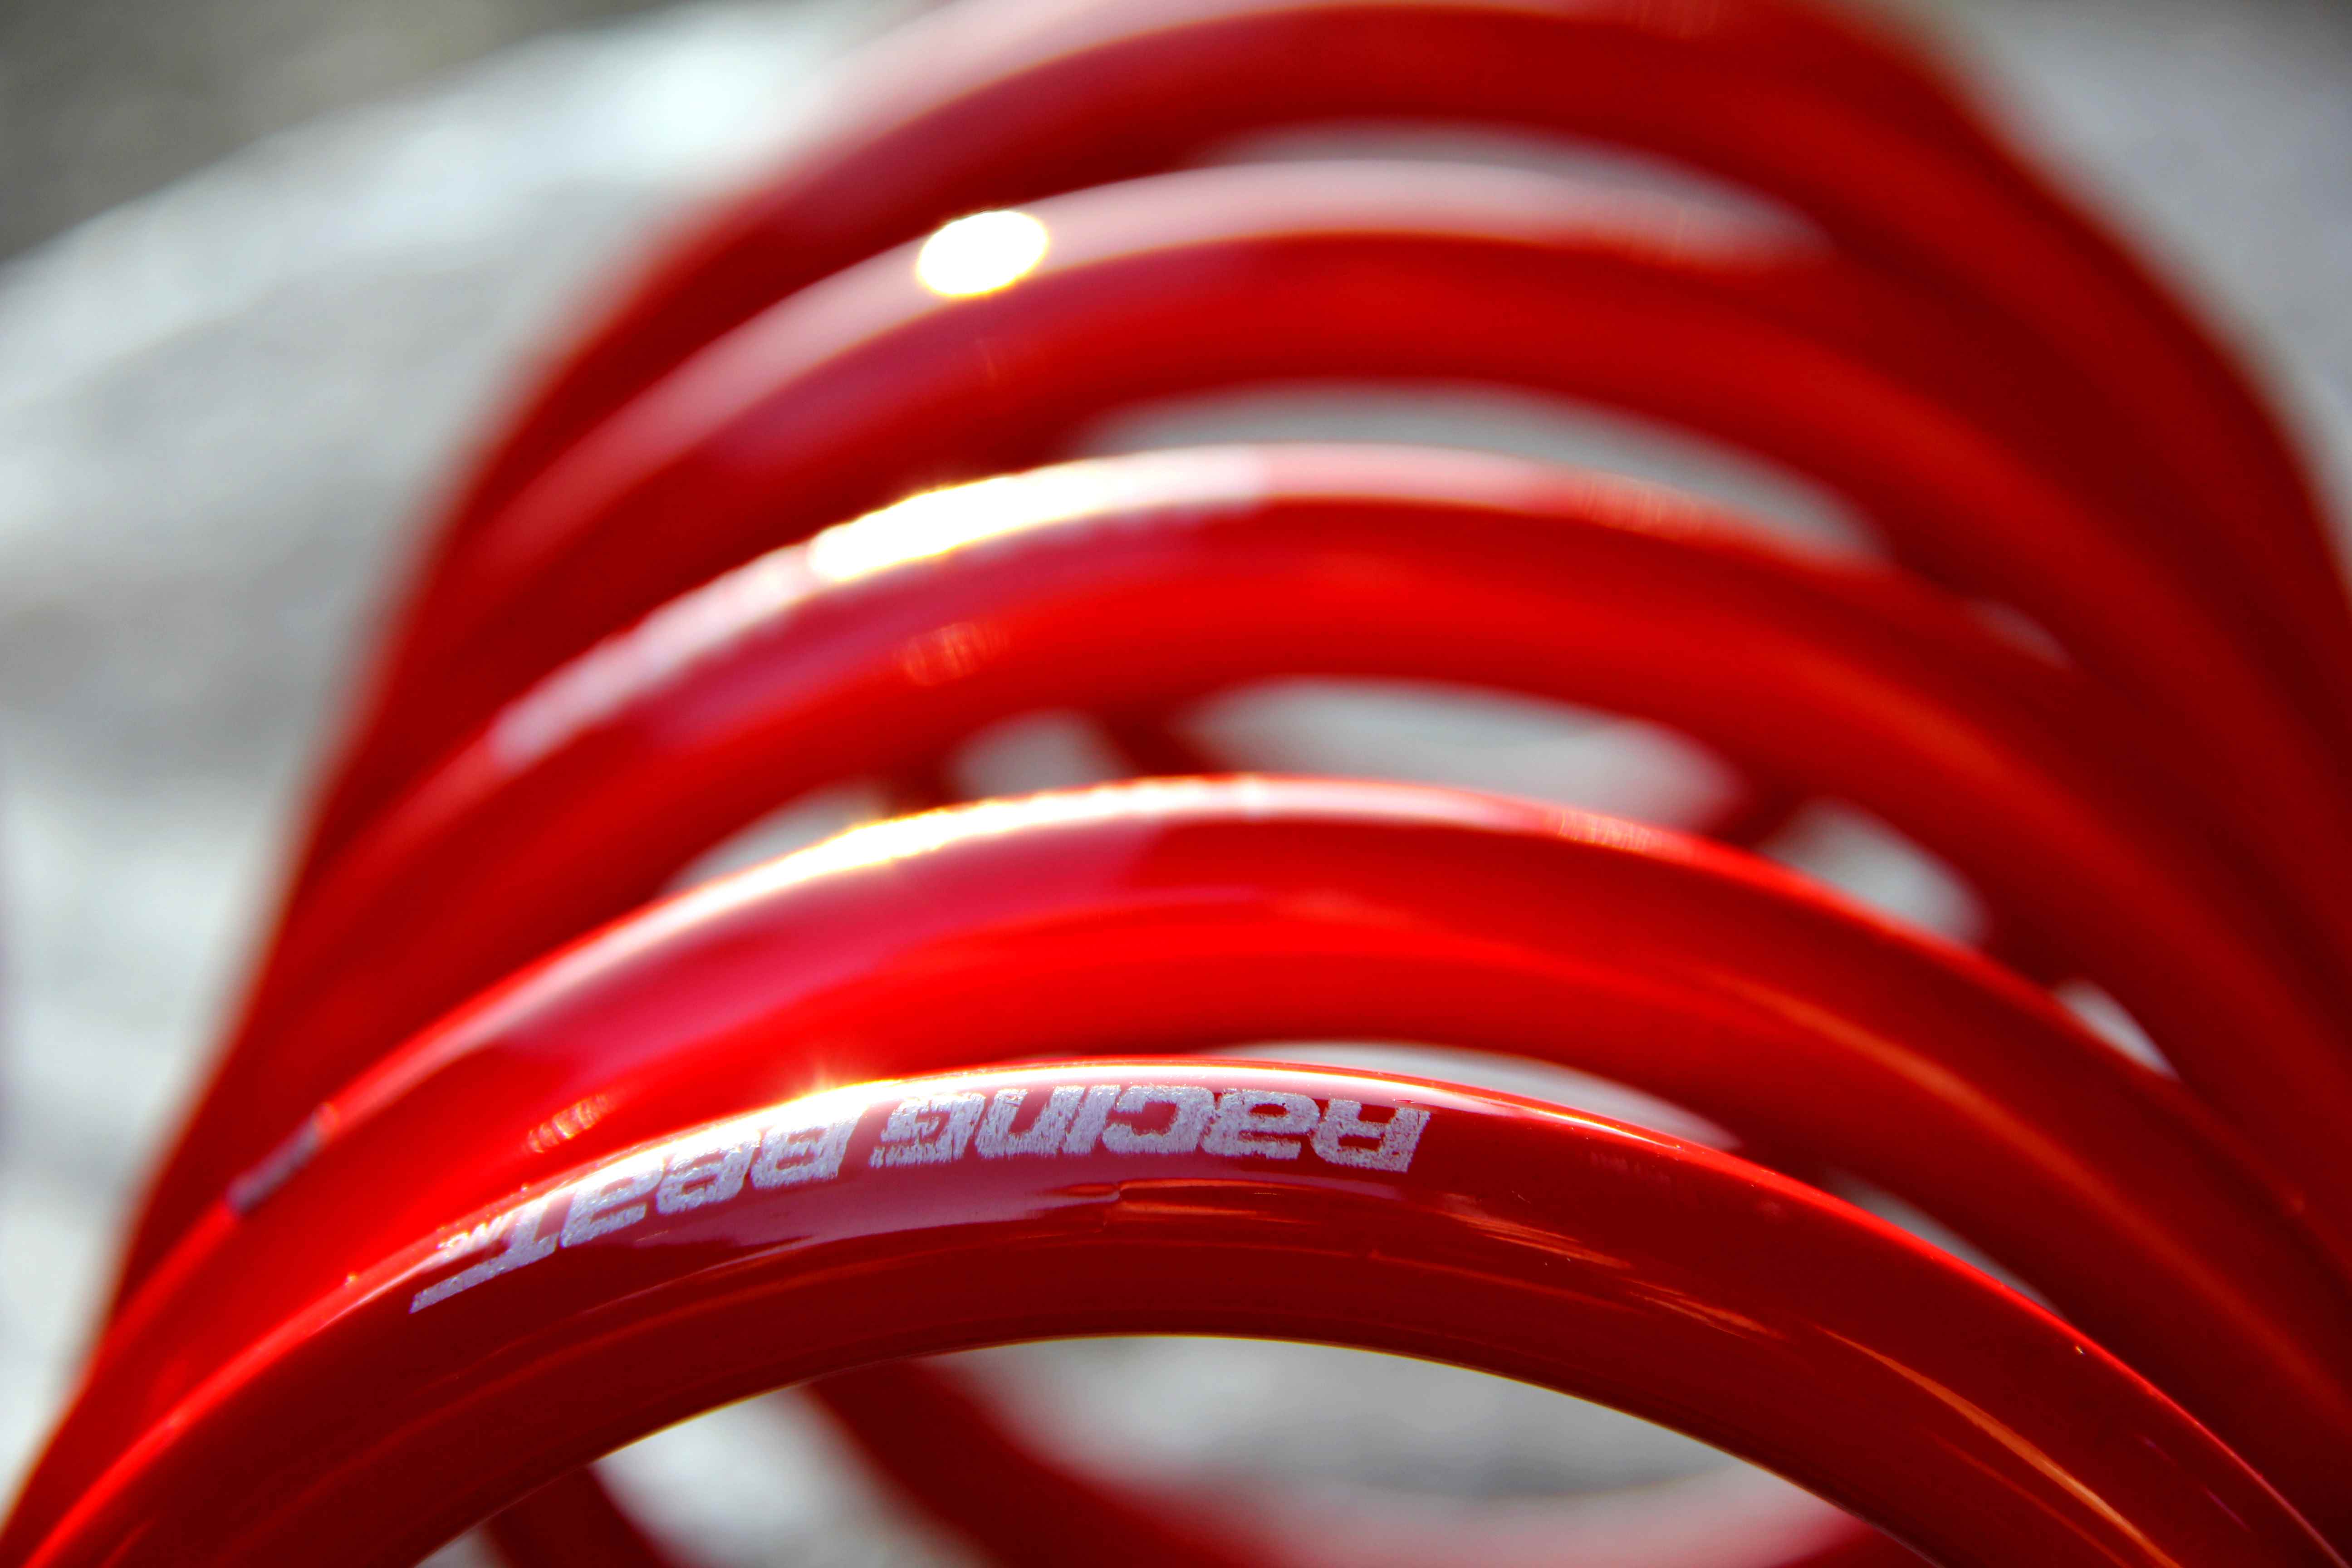
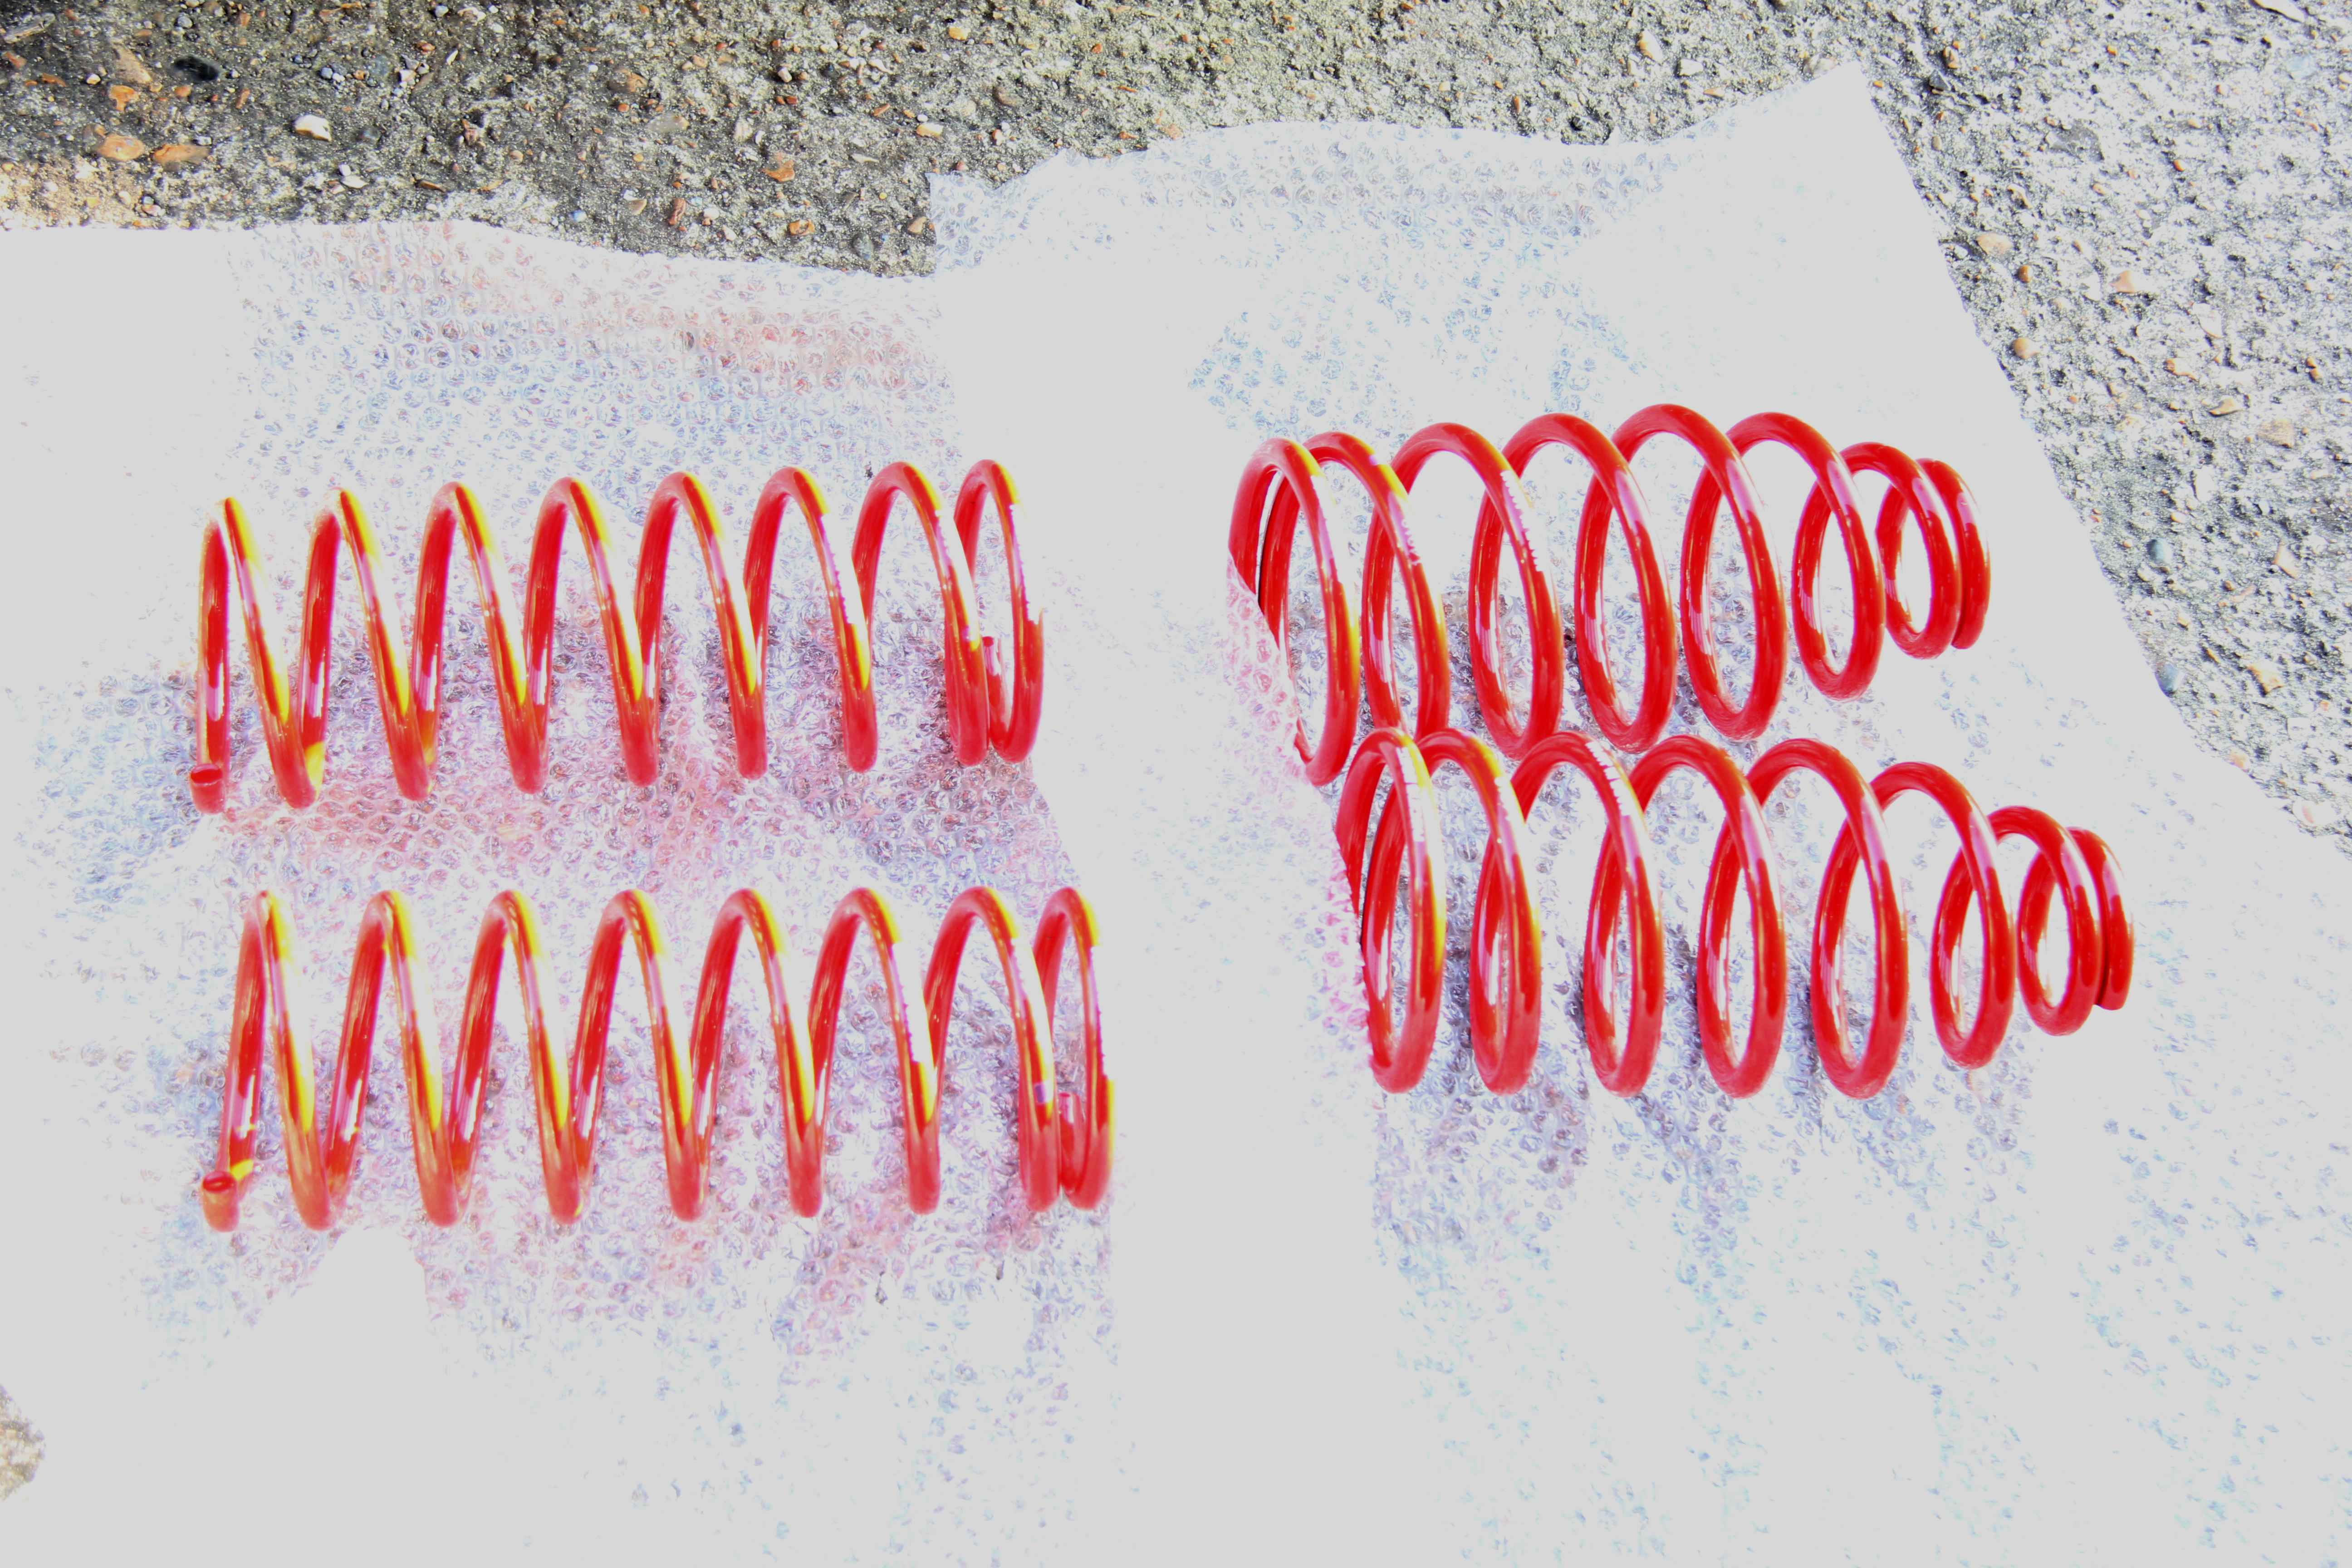
Mike Liao at Racing Beat was helpful as you like, took four working days to Fed-Ex them here in England from Anaheim, CA. And they cost me less even after paying import tax than buying the exact same set of springs from Racing Beat's UK distributor would have done. Like, what's all that about?
With the aid of the fantastically knowledgeable guys on Exile and RX7FB.com clubs, I'd finally got my head around what had been done to the emissions gubbins by the previous owner;
They'd removed the thermal reactor, clearly because the exhaust had been changed for headers, but as you can see circled in that pic, they'd only blanked off the top face of the emisssions ACV housing rather than delete it completely. This left various pipes and architecture that were completely obsolete and in fact could do more harm than good. For example
This union in the Blue Box of God was now just open to atmosphere, sucking in air and bypassing the filter element completely. As an interim I changed that stupid white paper hoover pipe because not only was it horribly ugly it was all torn and manked where the spring clips for the airpump hose had abraded it. Also got a breather filter to plug the hole
While I was collecting bits like
to do the emissions deletion properly. Oh, and most importantly
Five days to come from Belgium, oddly. It's funny, I dunno what Mazda dealers are like in the US but in England it's almost like they're embarassed by the rotary. Maybe it's because of all those RX-8 warranty claims. Parts counter guys are the rudest, most unhelpful ignoramuses anyway, so it was quite funny when I went to order the inlet gasket. I went to the counter and the bloke finally came to serve me with a marked lack of enthusiasm. "Help you?" he grunted in a tone that said quite clearly he couldn't care less.
"Yes, please," I said politely. "Could I get an inlet manifold gasket for a 12A, please?"
"What the hell's that, then?" he snarled
My five-year old, who was with me, rolled his eyes heavenwards and as if he was talking to someone of very low intelligence (which he was, after all), witheringly said; "It's a rotary engine, innit. Don't you know?"
Hahaha, owned by a five-year old. The parts guy was a bit more helpful after that, lol
...oh yeah, there was this one other thing. I decided to give the pros a go and I can always step back to ghetto angle grinder stylee modification if that doesn't work out. So with that in mind this box arrived today...
Ooooh :oops: Is it wrong to get all excited over springs?
Mike Liao at Racing Beat was helpful as you like, took four working days to Fed-Ex them here in England from Anaheim, CA. And they cost me less even after paying import tax than buying the exact same set of springs from Racing Beat's UK distributor would have done. Like, what's all that about?
Thread Starter
Senior Member
Joined: Oct 2010
Posts: 255
Likes: 1
From: England
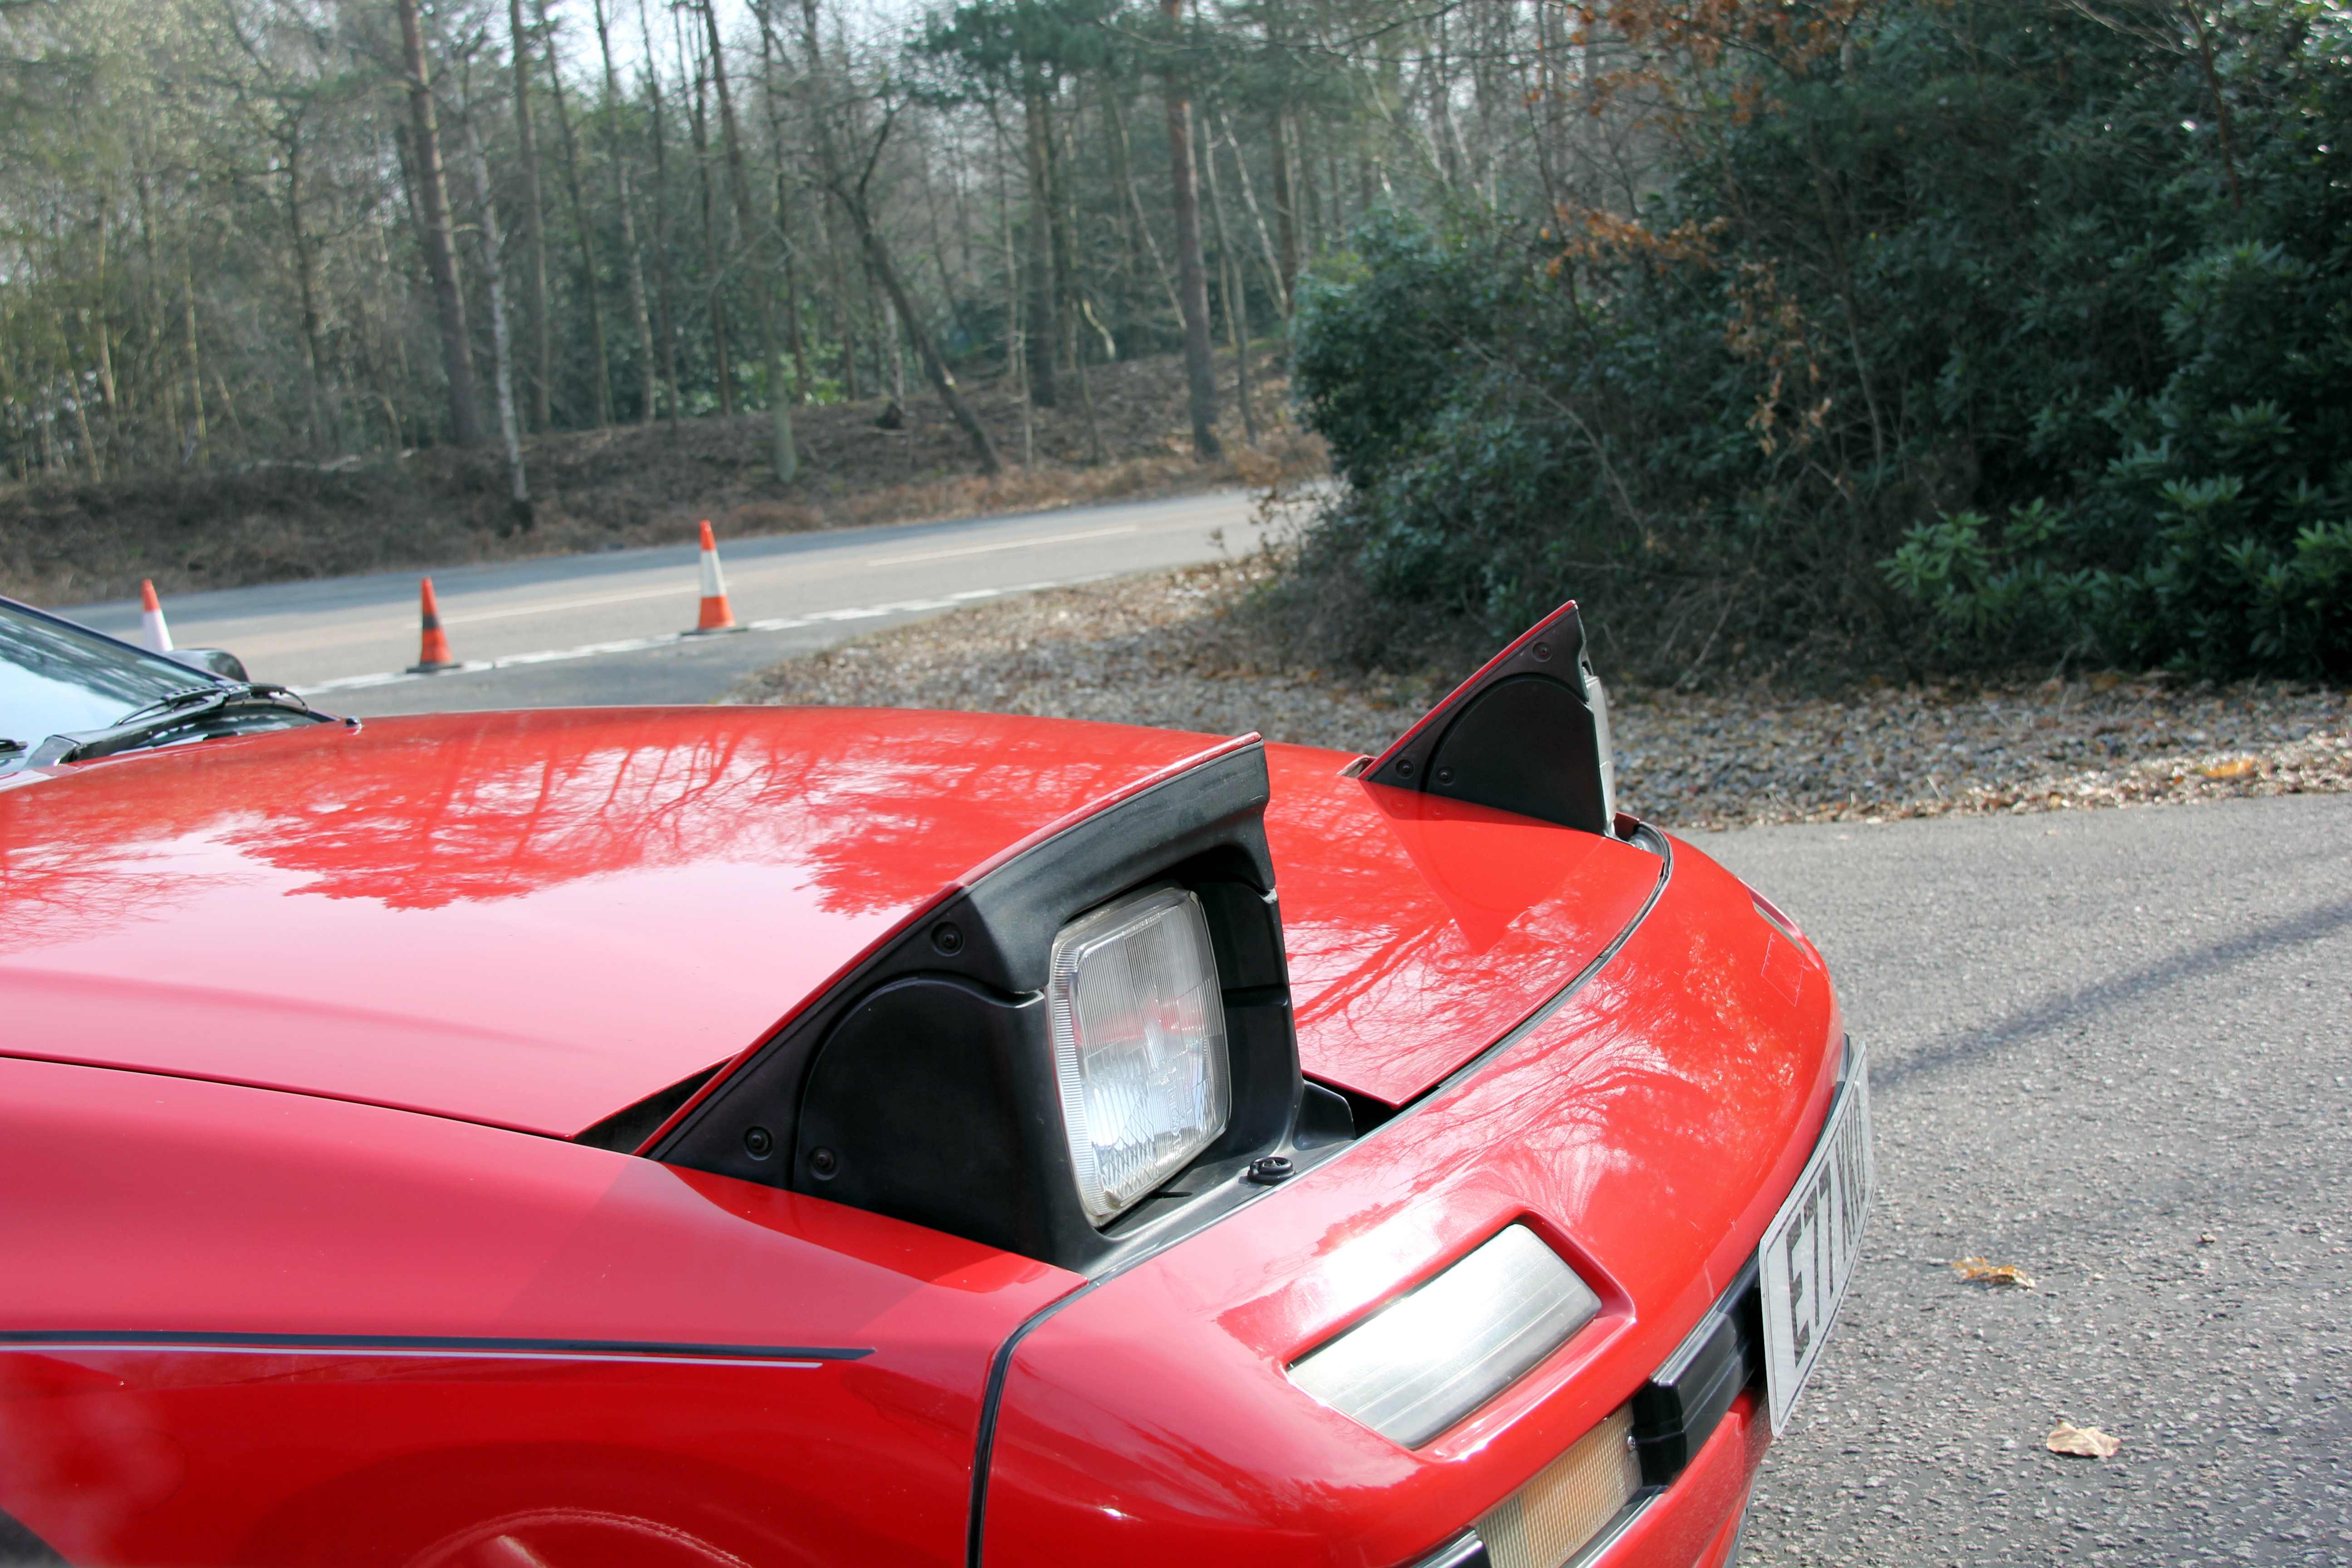
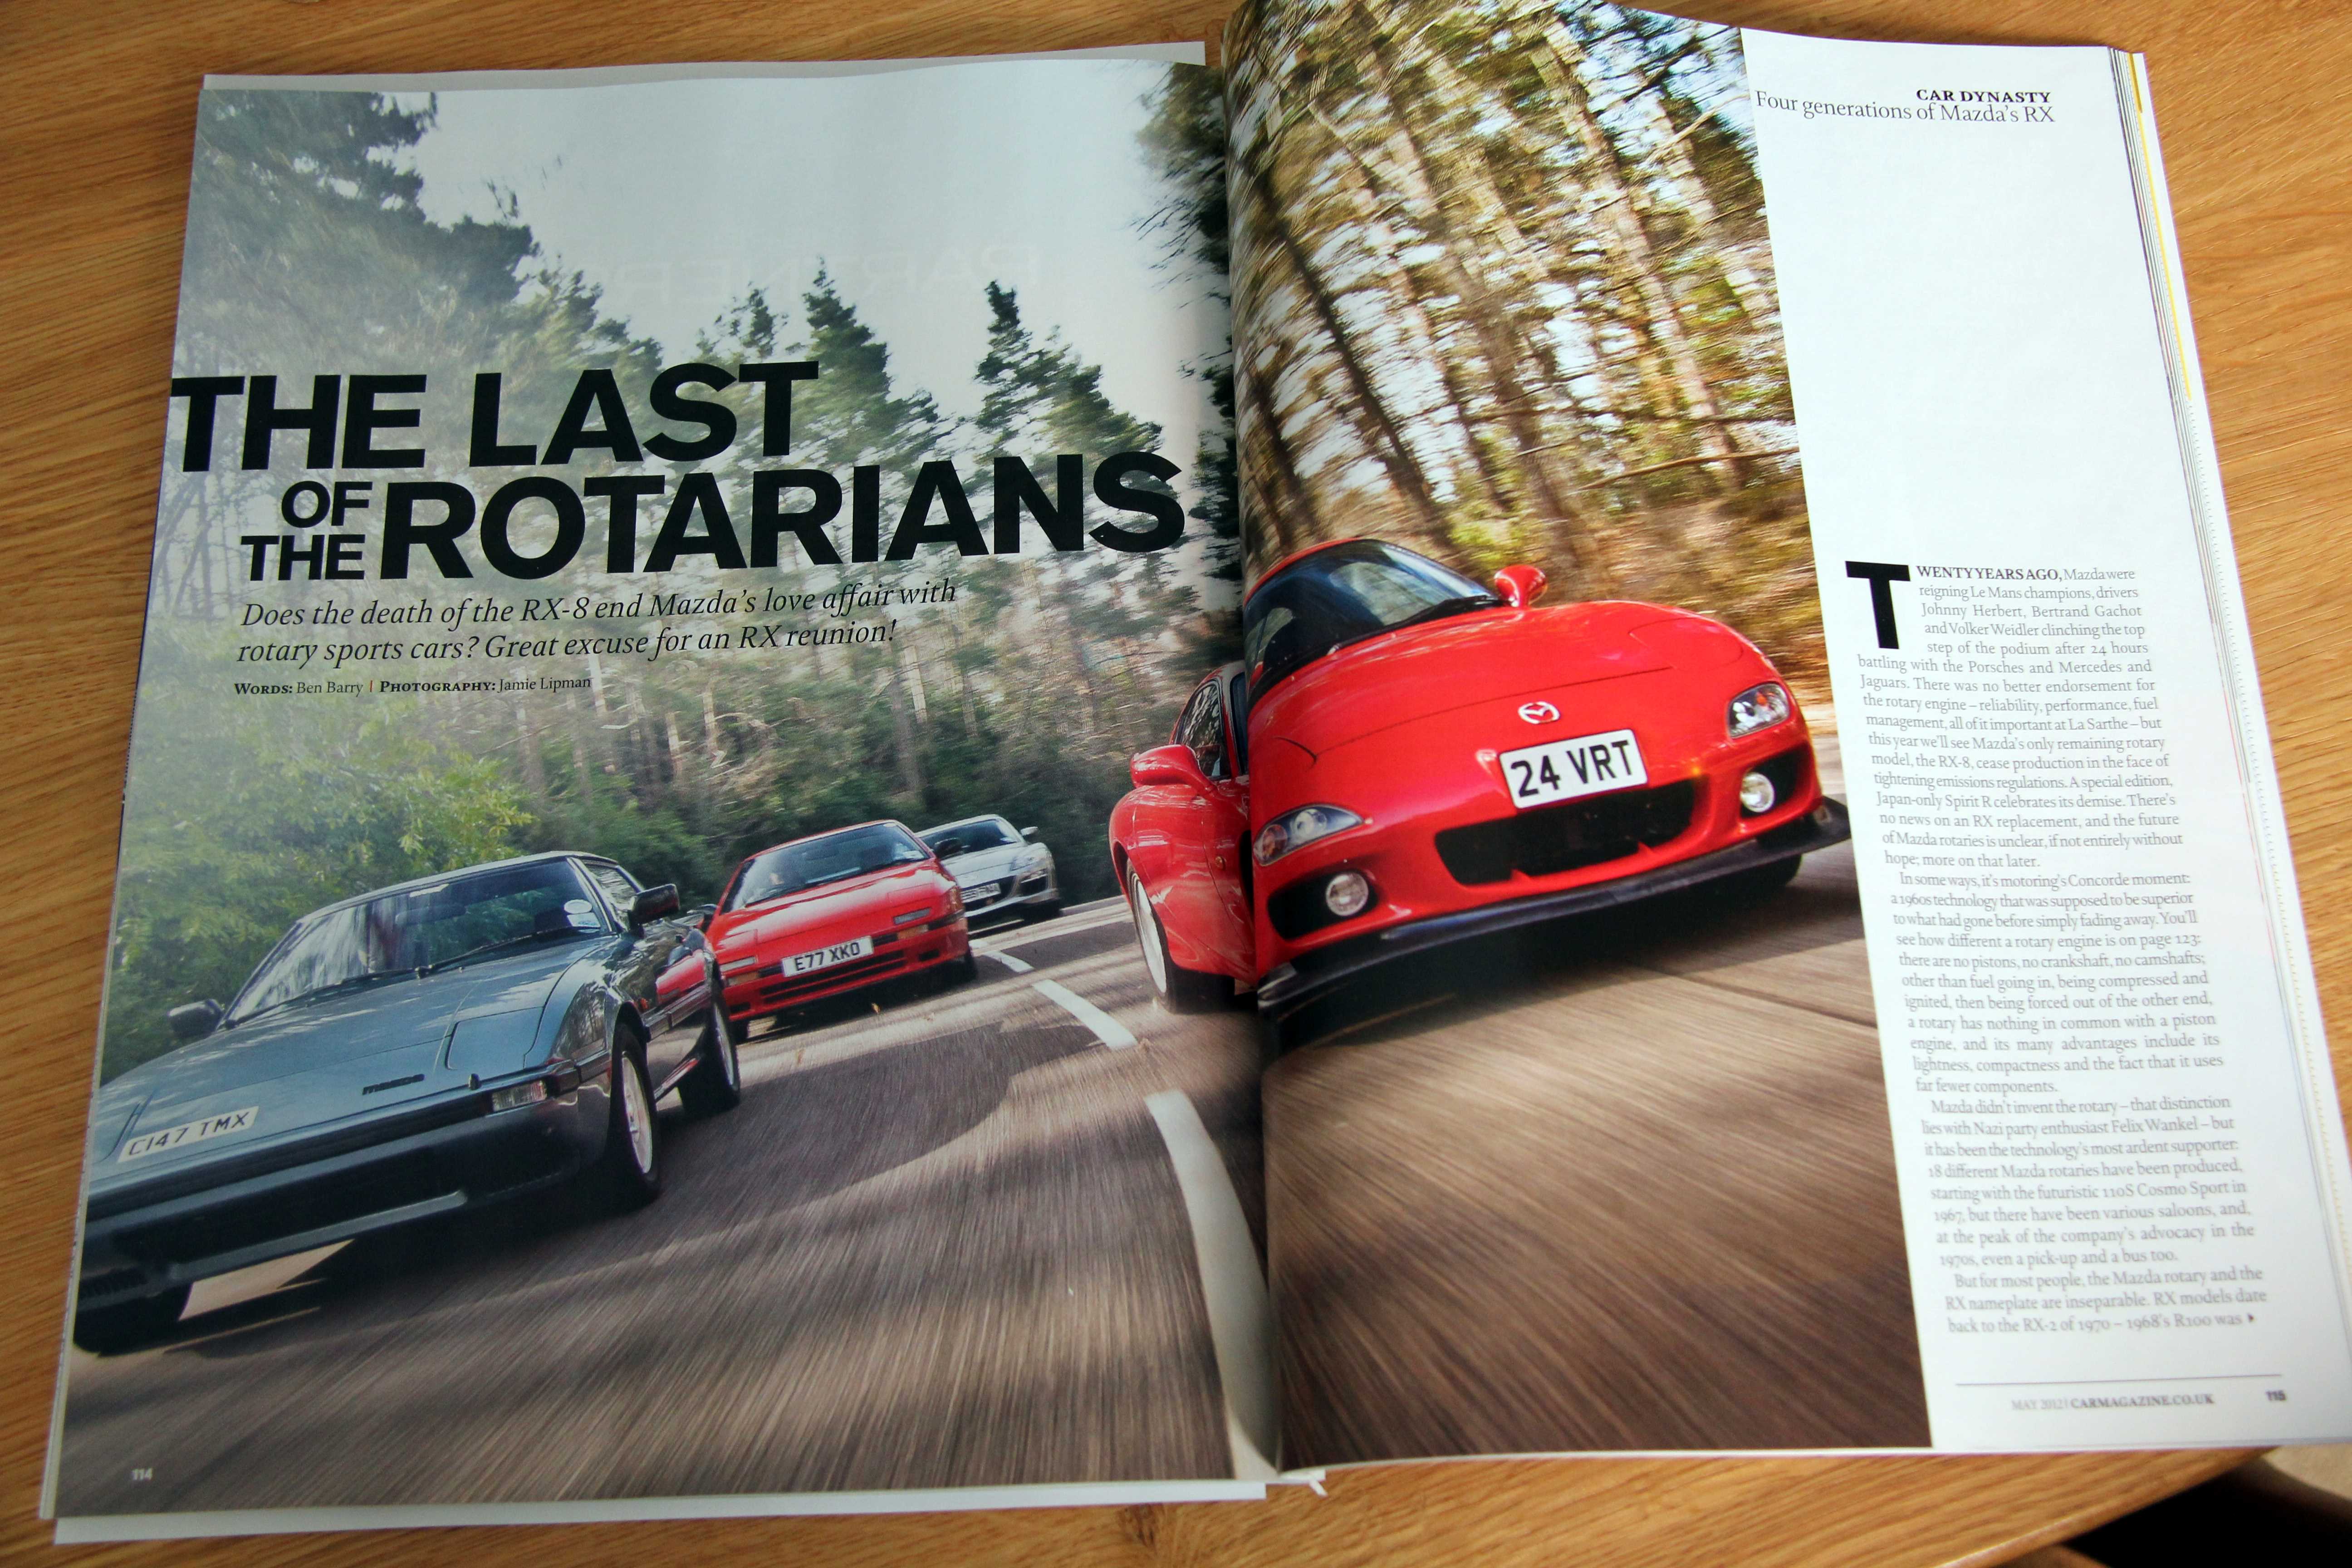
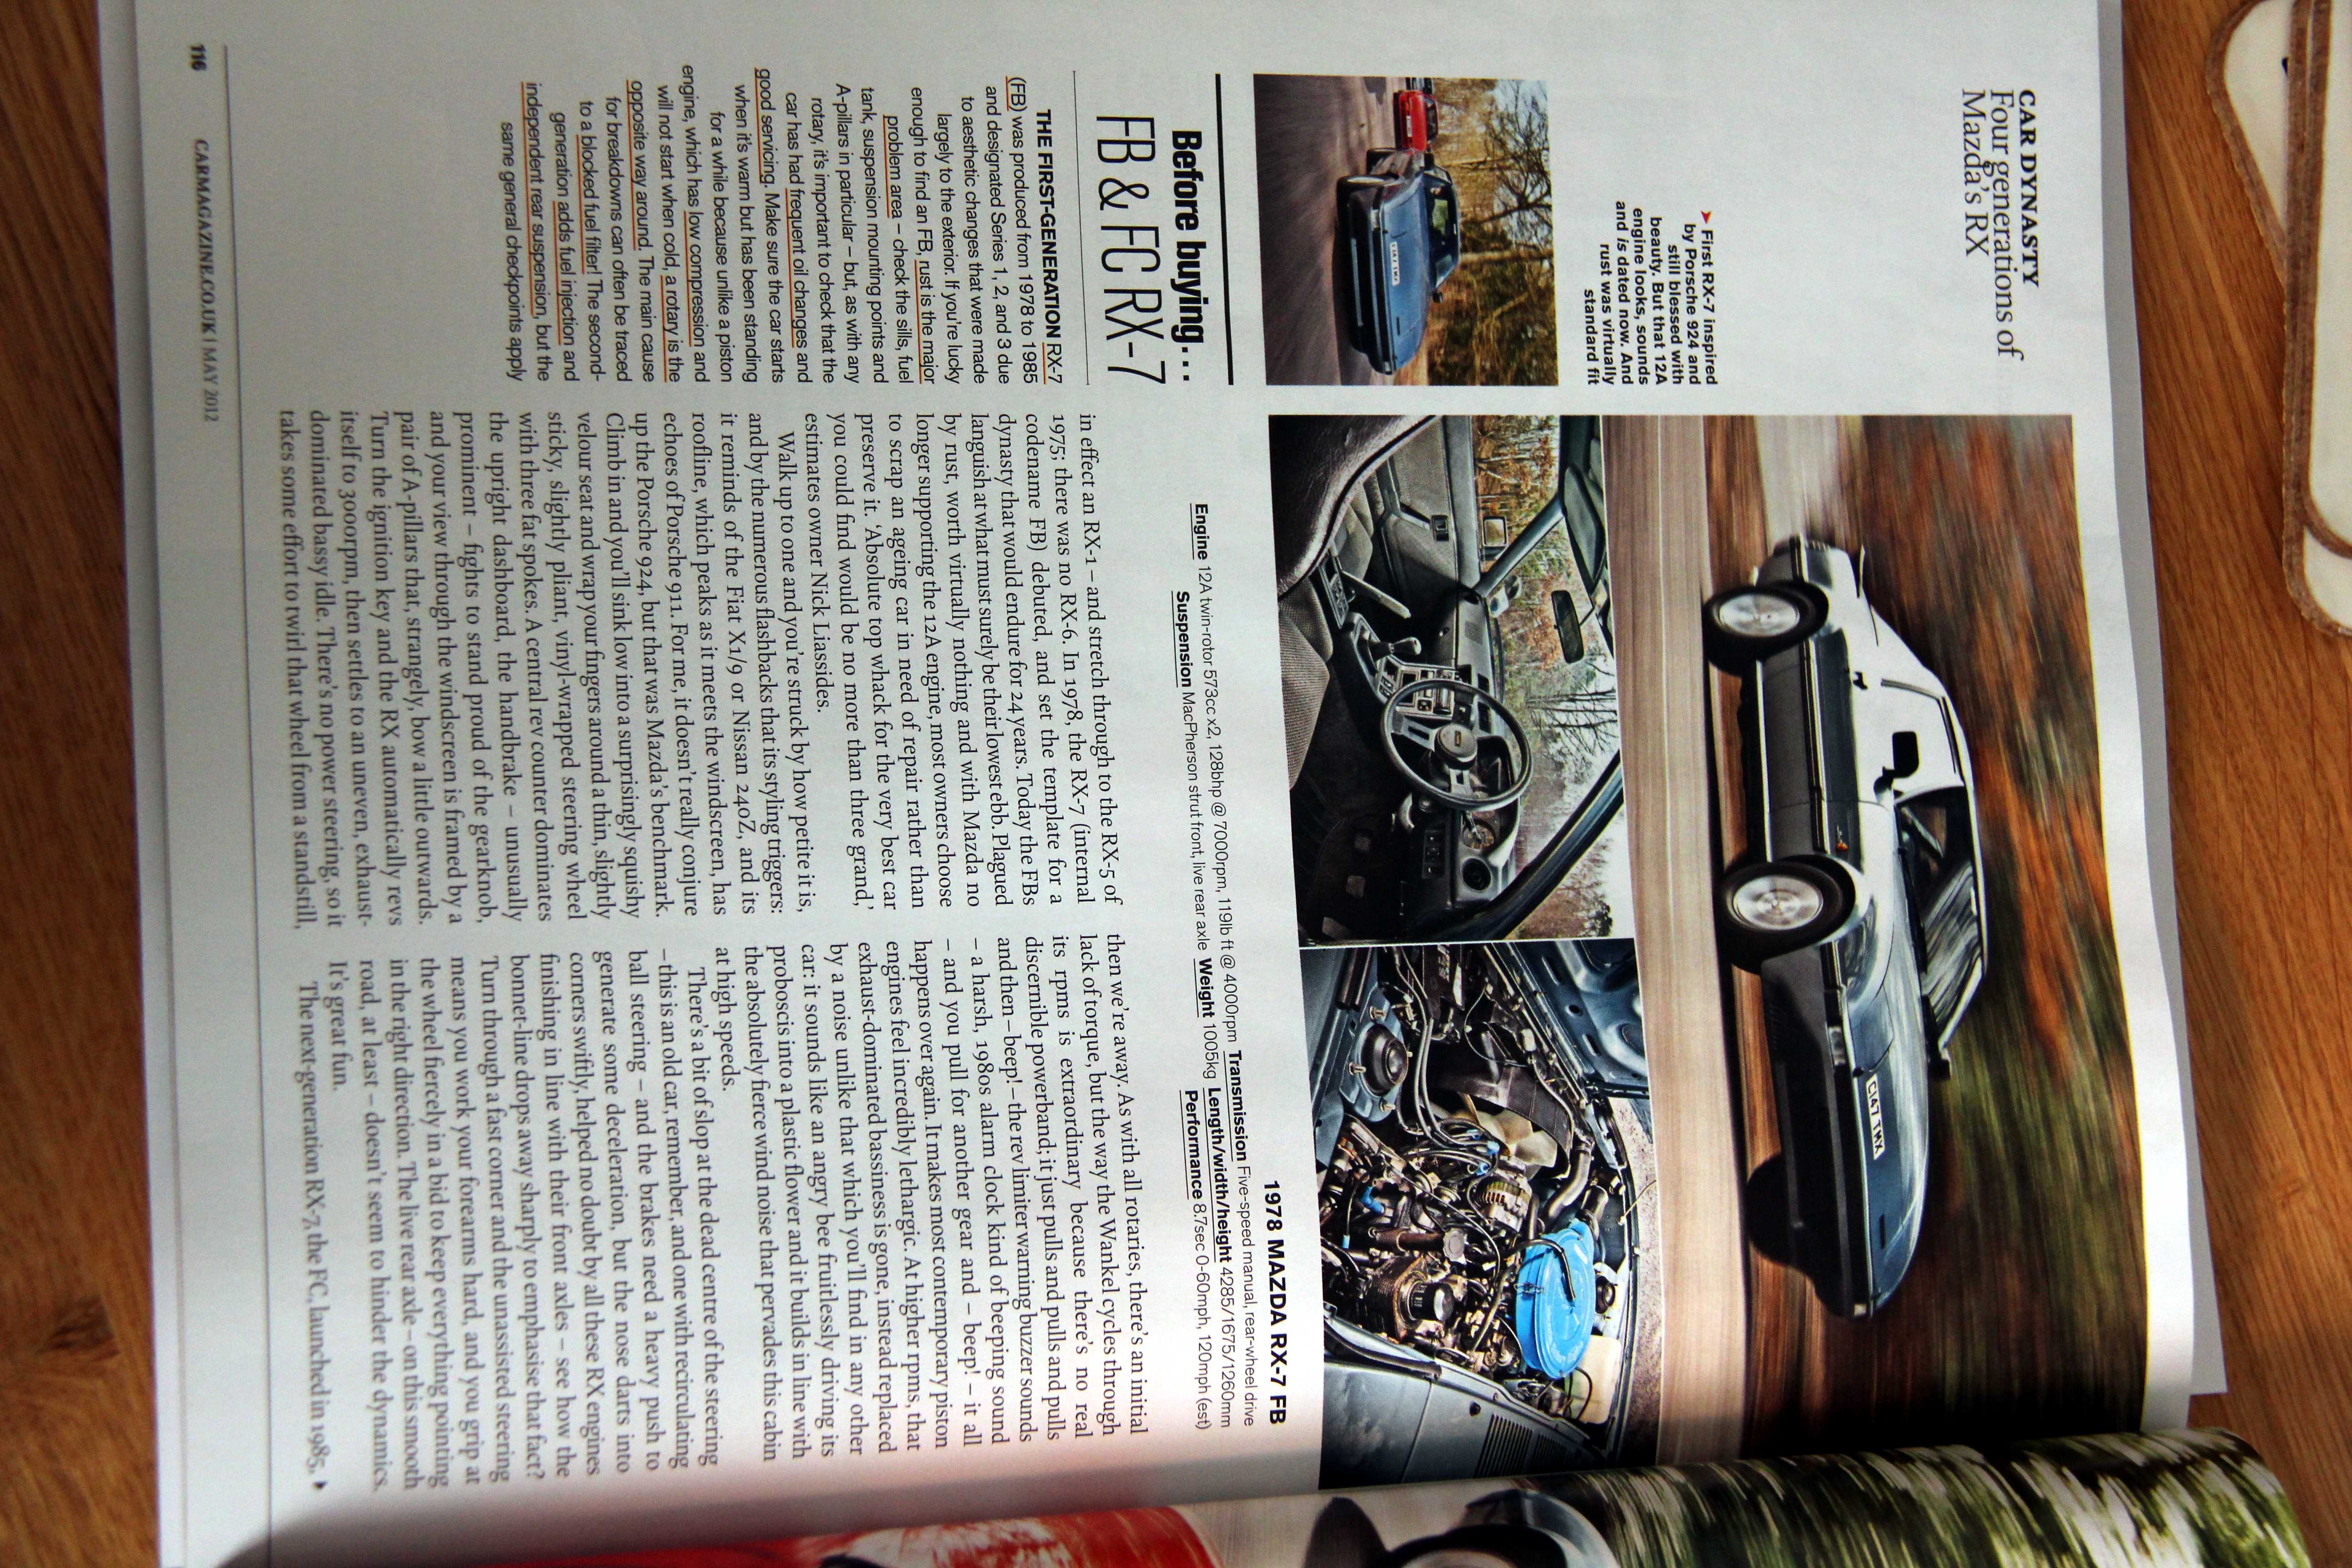
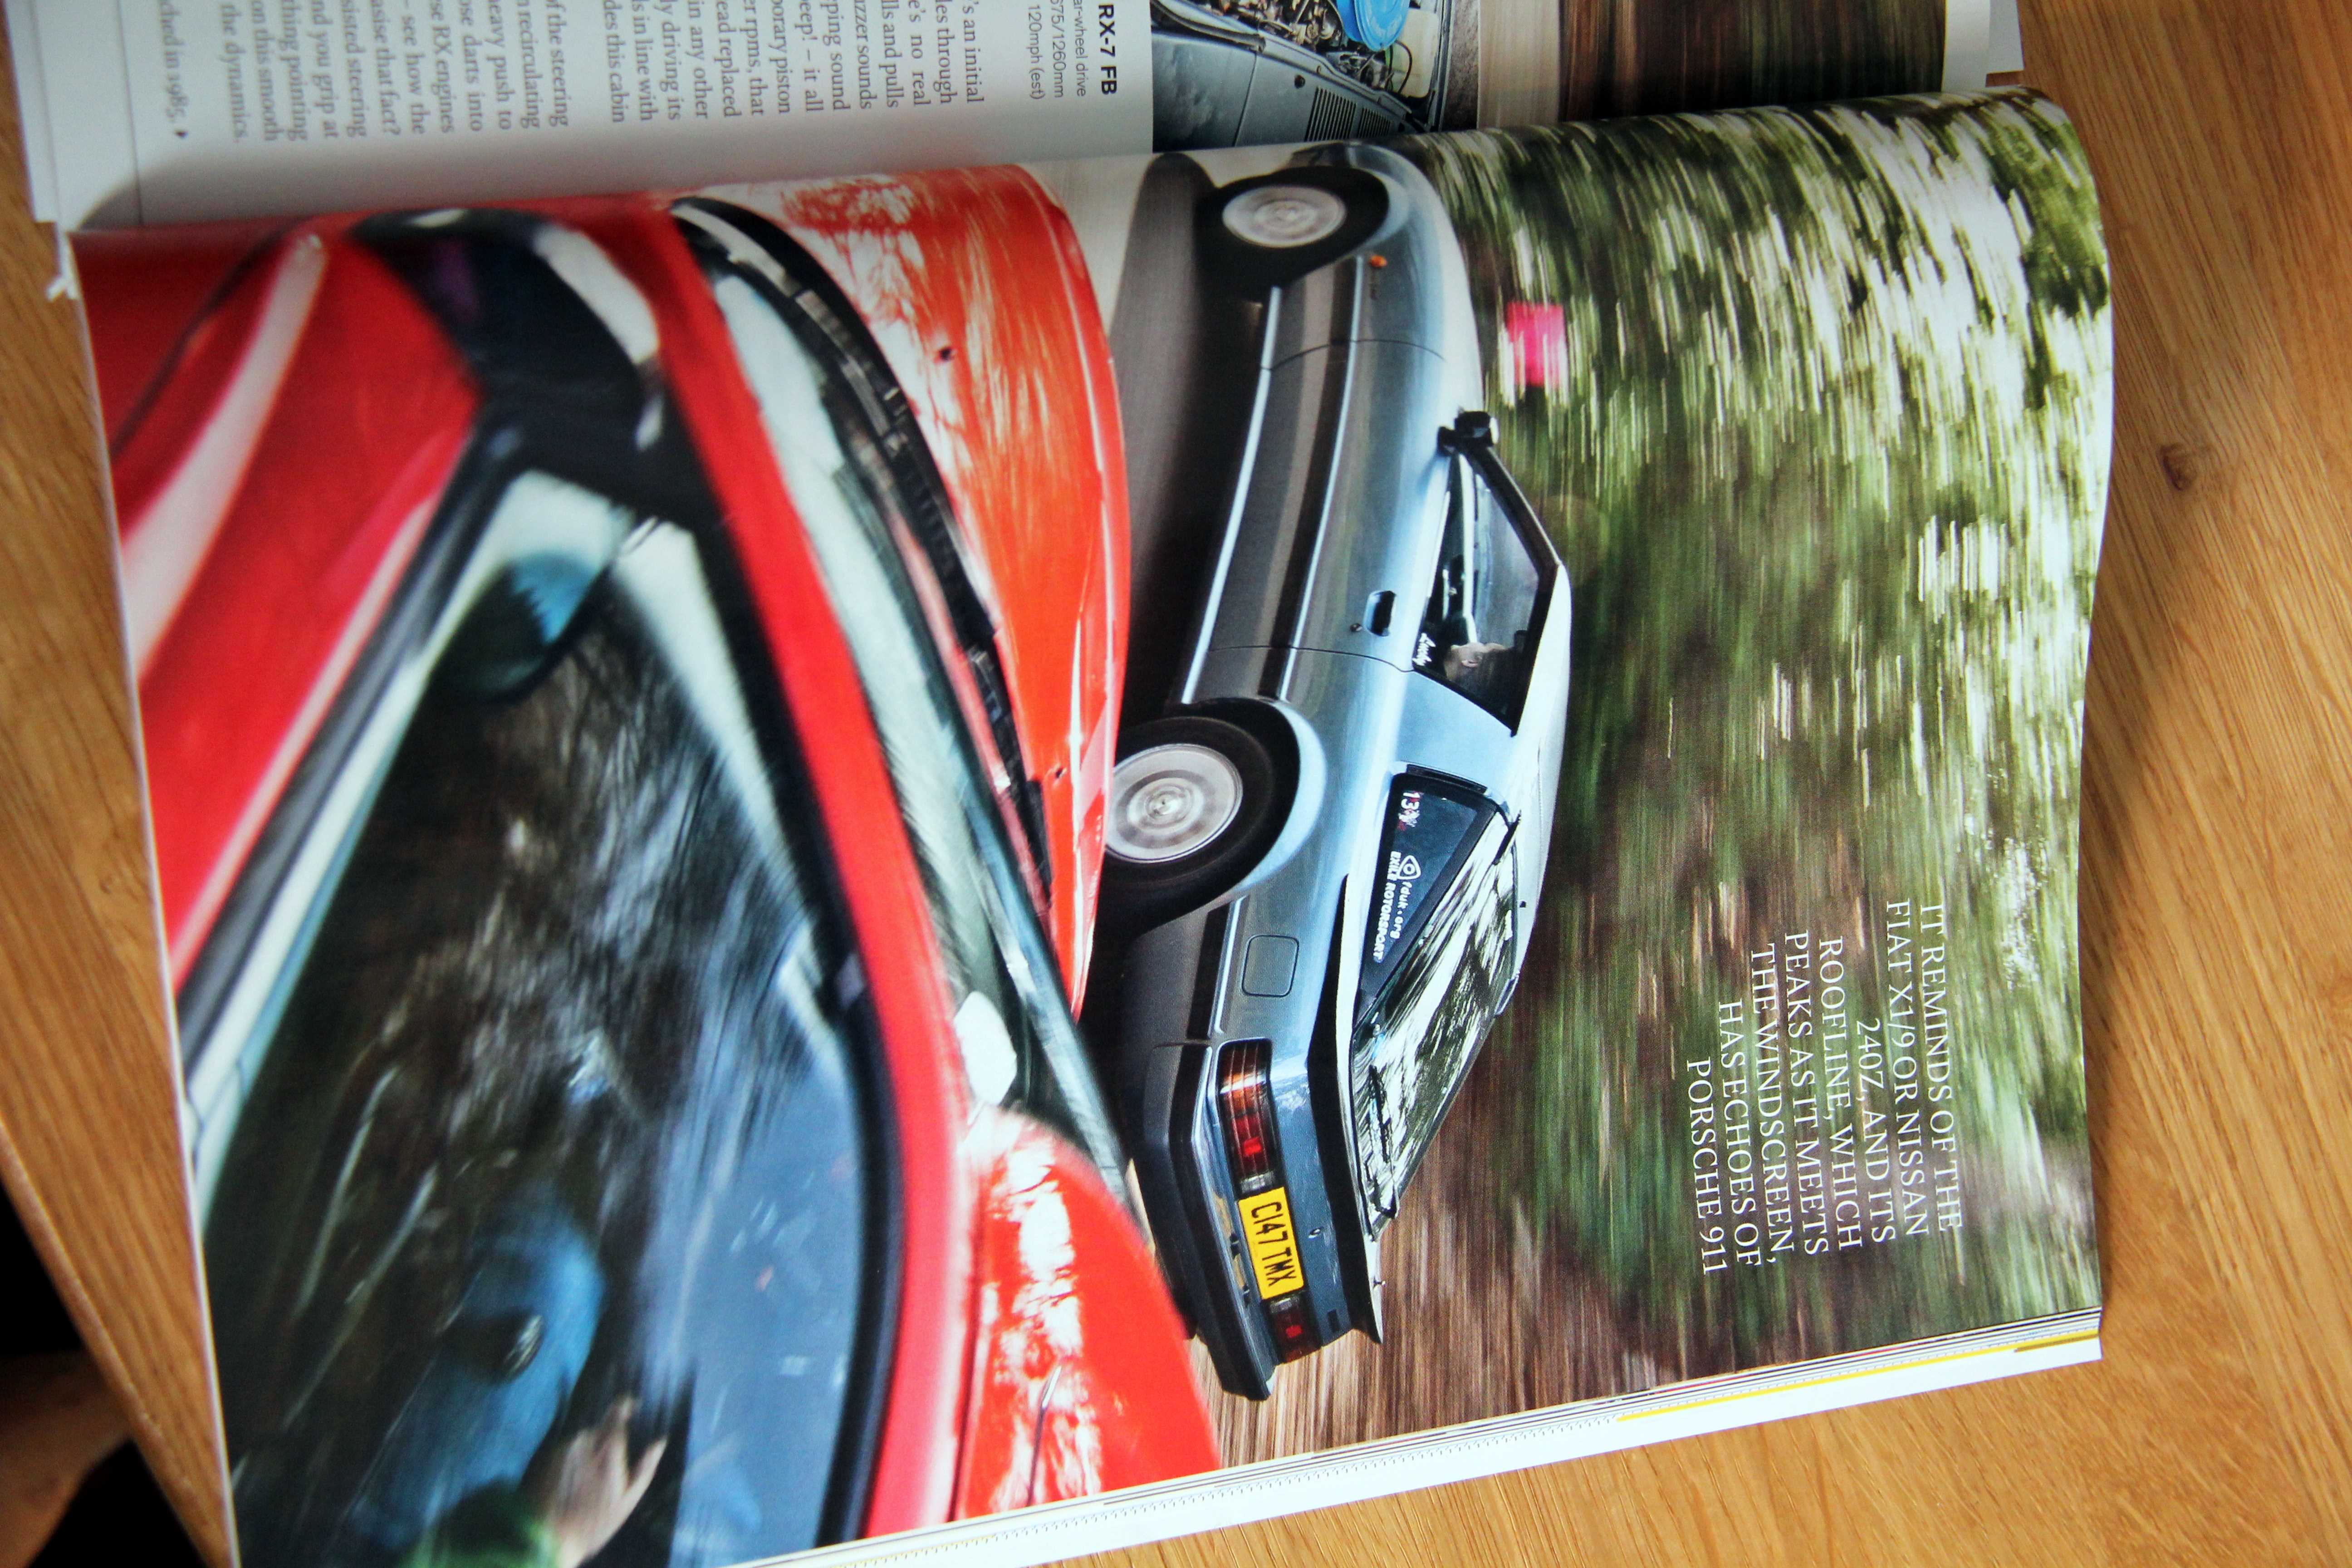
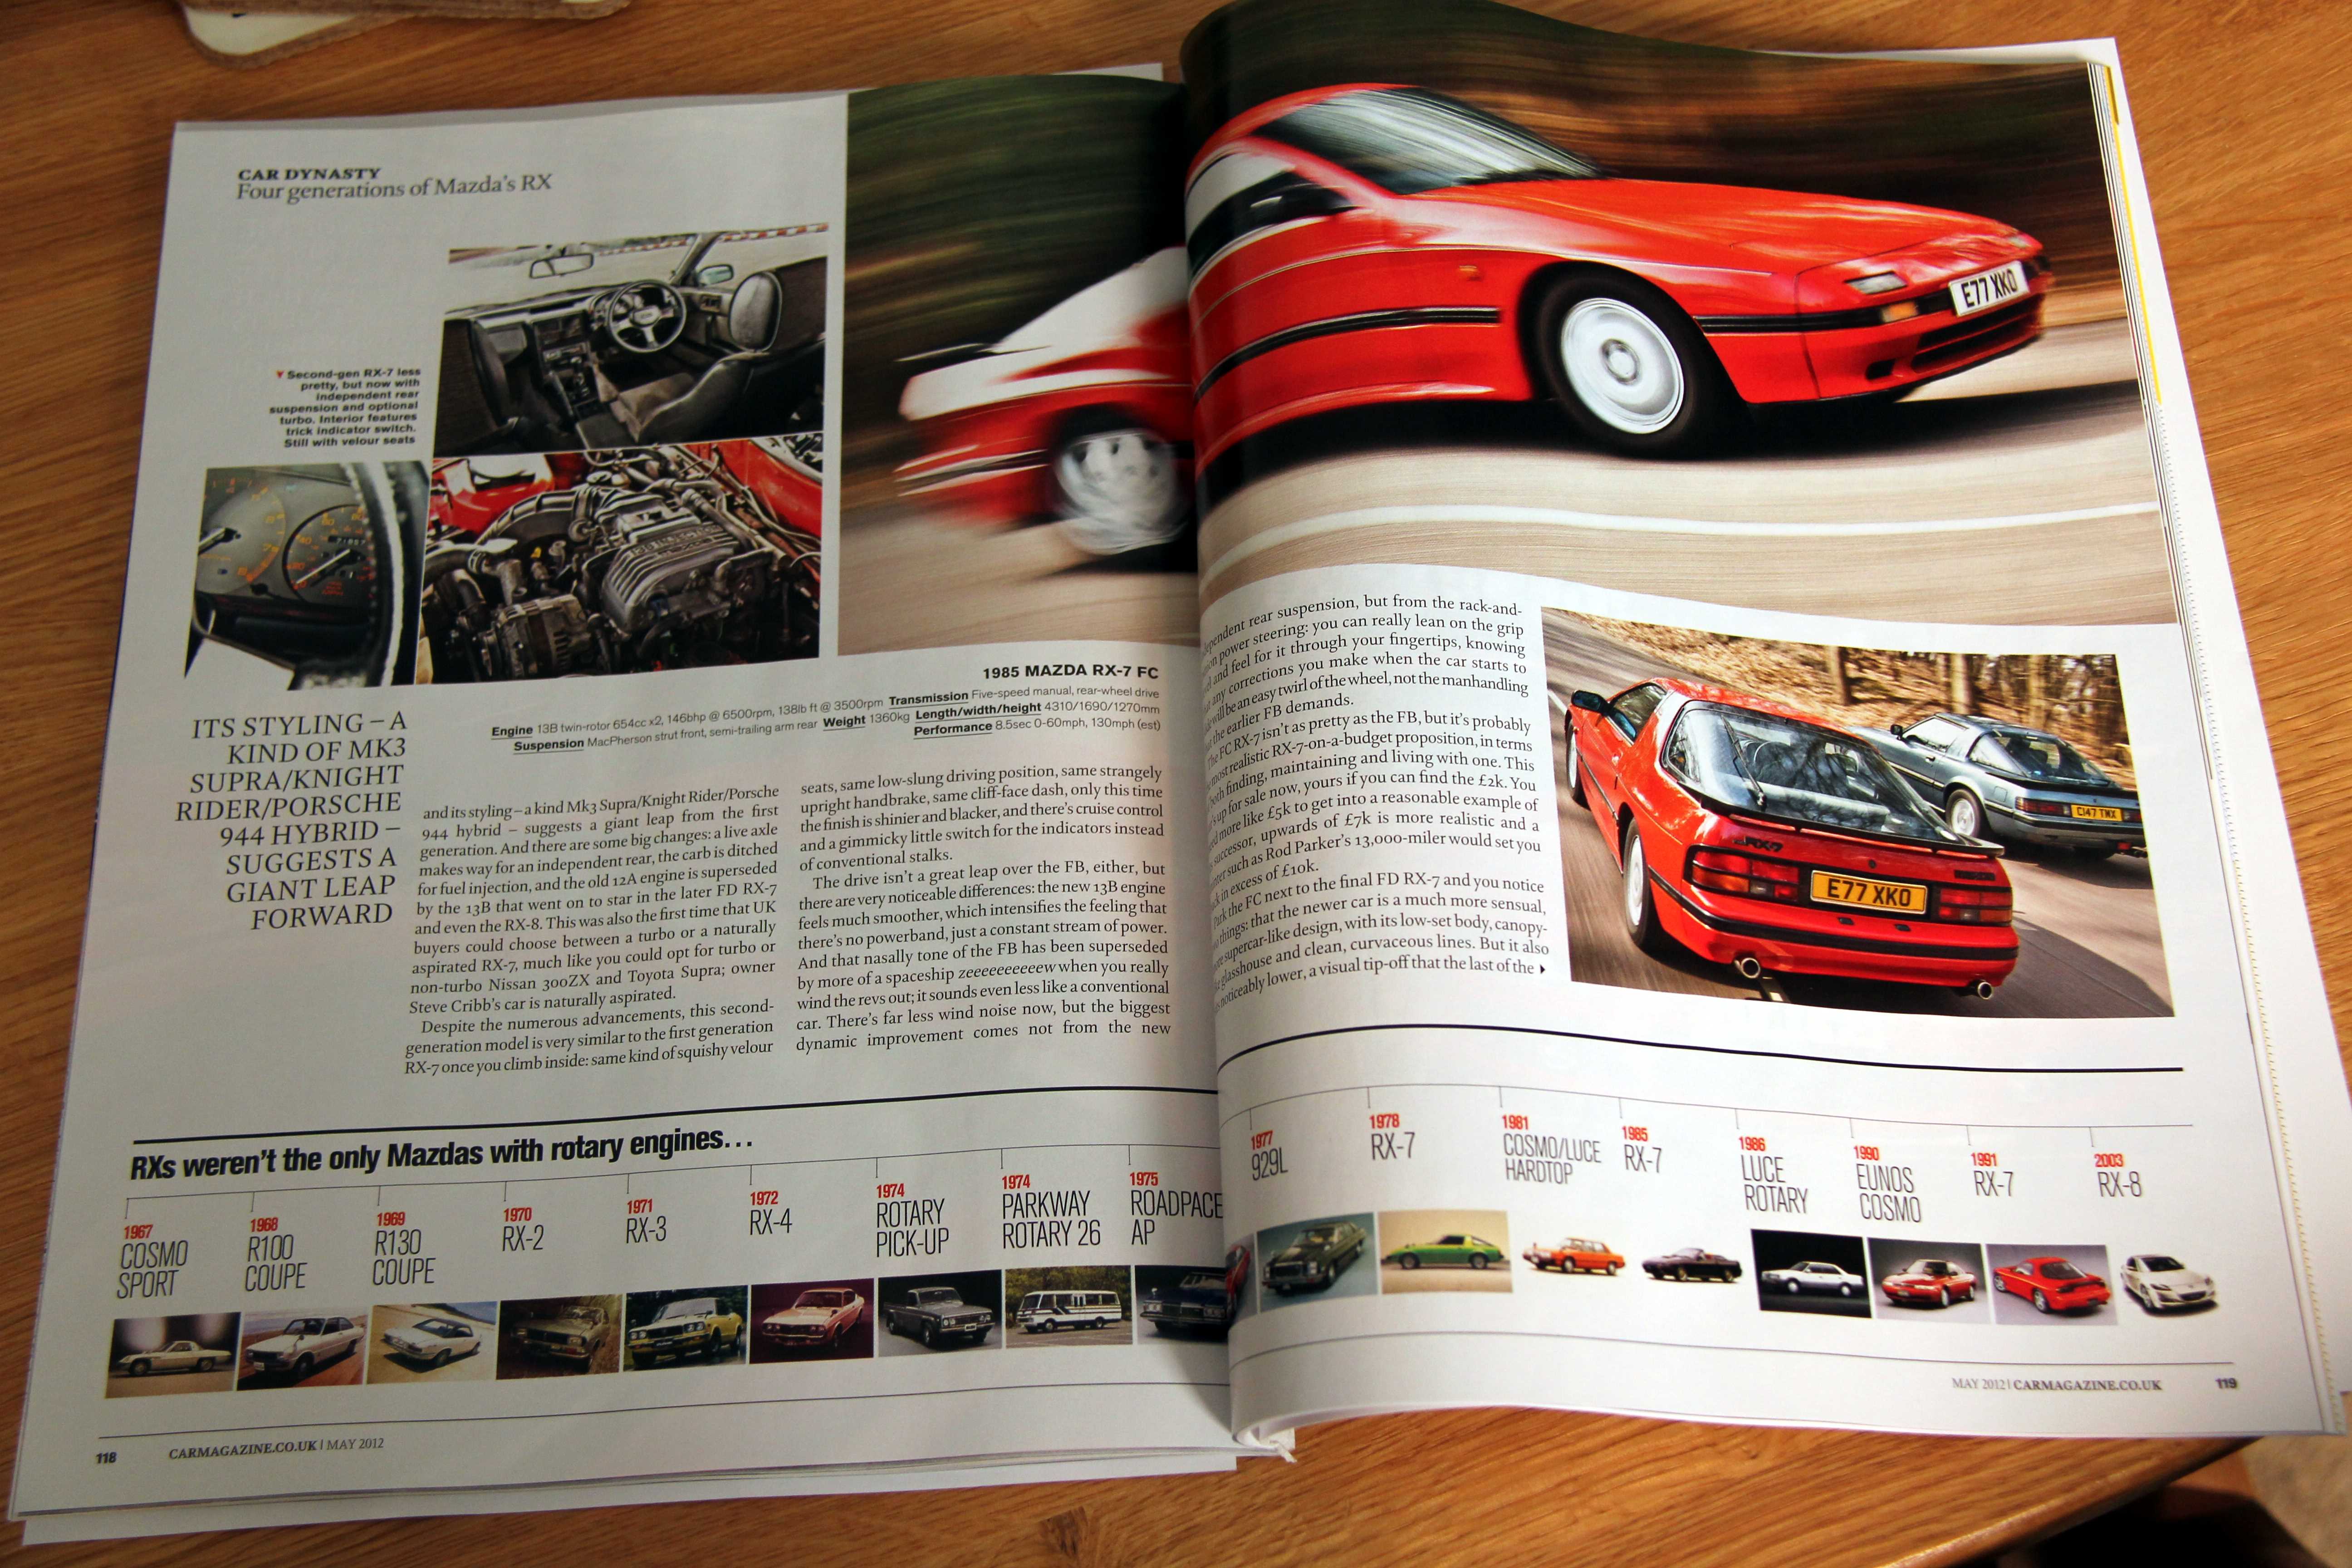
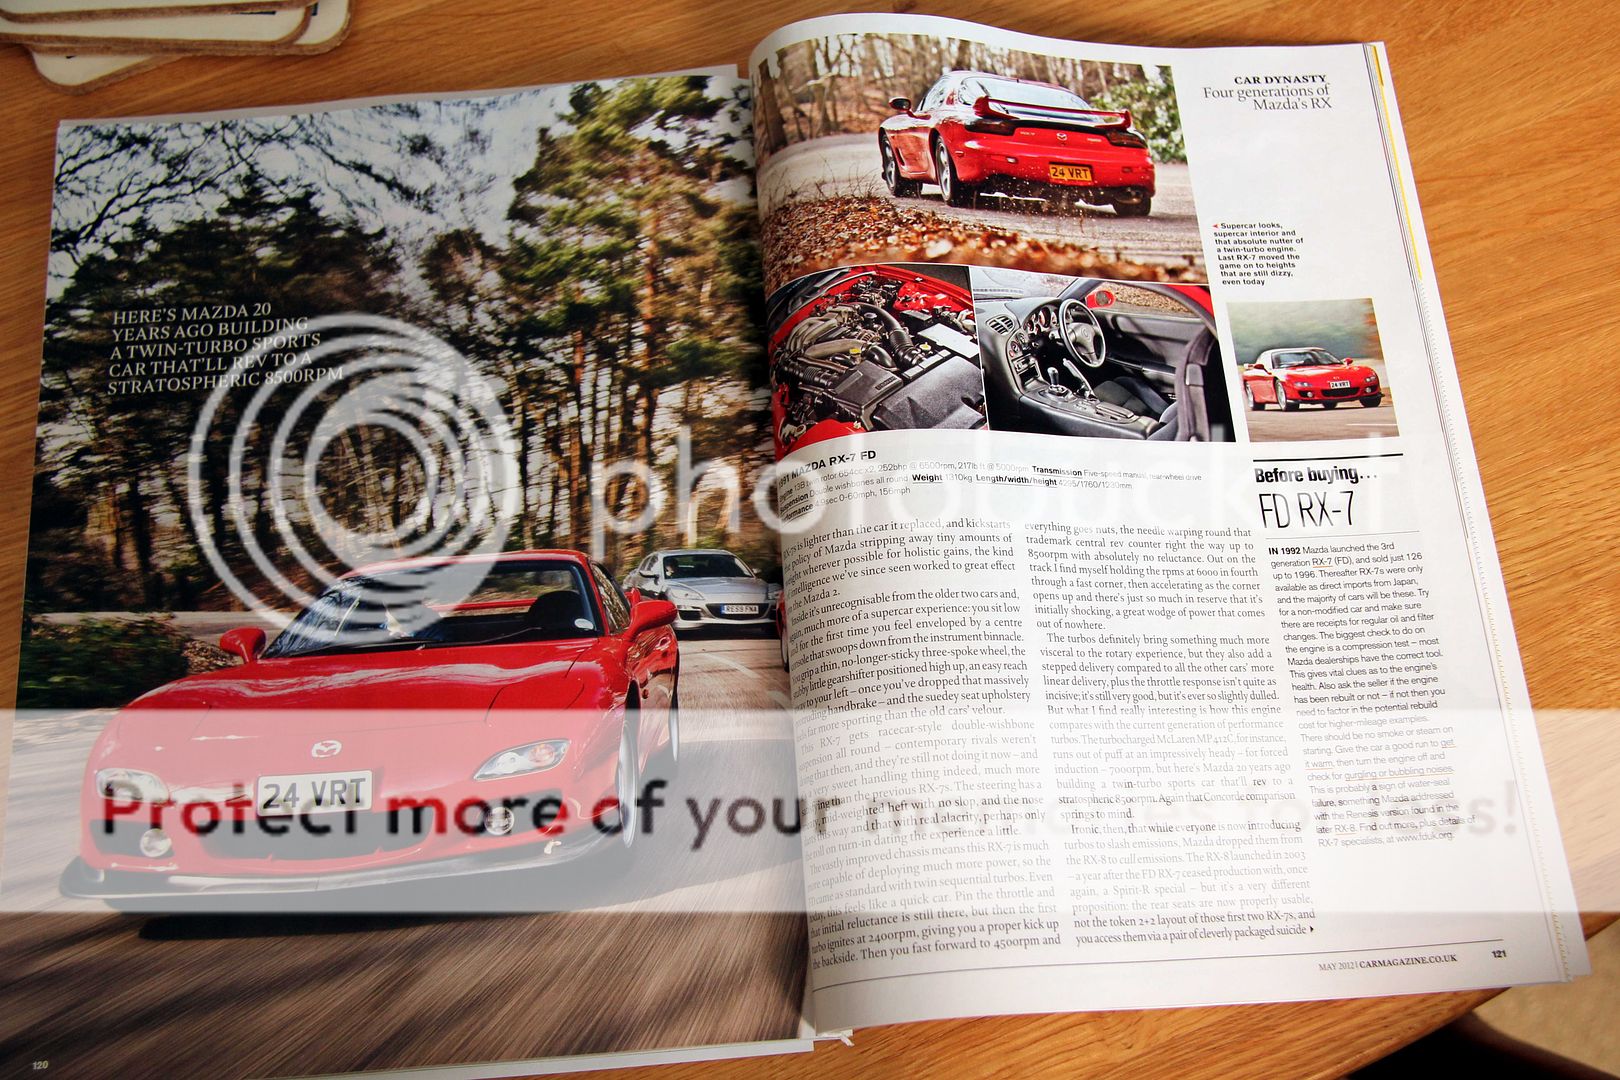
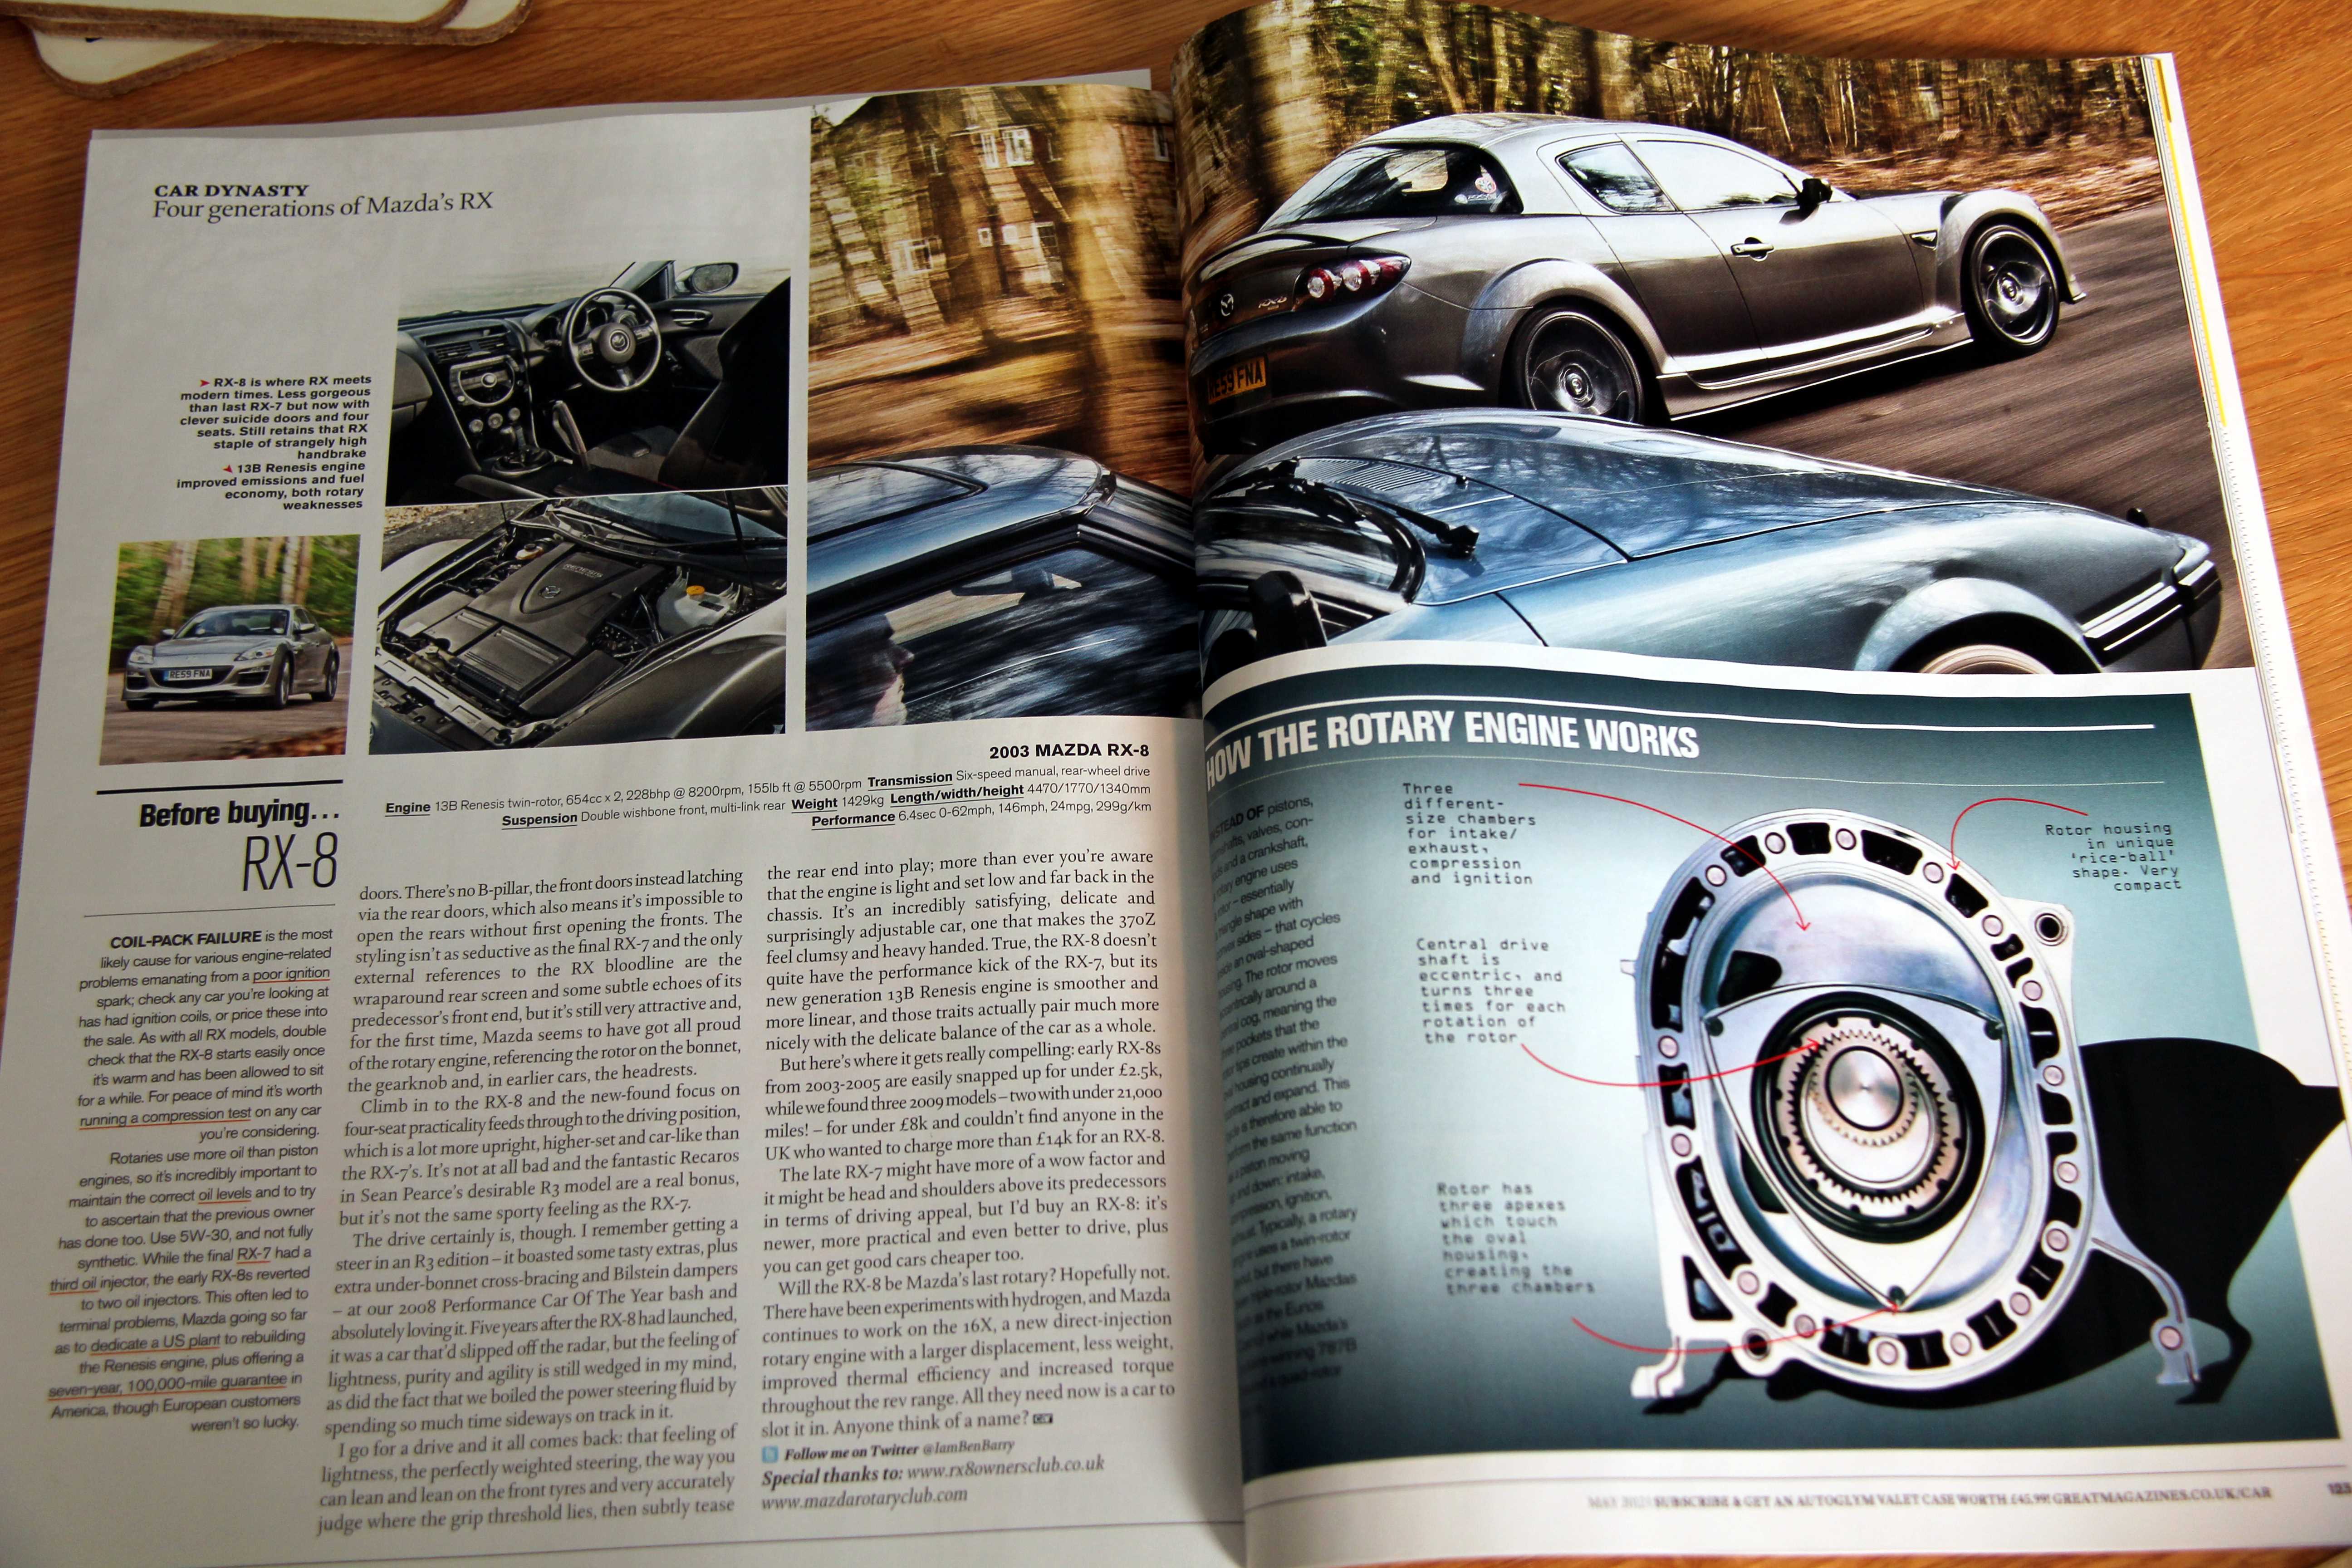
About this point something odd happened. One of the major mainstream UK car magazines (called CAR Magazine, appropriately) wanted stock, original RX-7s for an article they were planning. Because my car was (or had been, anyway) so original, I sorta got nominated by the clubs to go along and represent the honour of the FB. This was actually a bit of a pain, because I'd started the work of getting the spoiler fitted, put the wheels on, all that sort of thing, and now I had to return it all back to stock, including putting the horrid rubber spoiler back on. Ah, well...
The premise for the article was "Generations of RX-7" kinda thang, so they wanted one of each FB, FC, FD and RX-8. Not 100% sure why they wanted the RX-8 in, I think it was as the last current rotary model or something. To be fair to the editor dude, he was pretty enthusiastic about the cars, and said his motivation for the article was sorta "they've stopped making rotary cars, people are forgetting about them, and actually they're pretty damned good". He seemed to enjoy thrashing the cars too, and funnily enough kept coming back to sit in FB. He seemed to really like it out of all of them.
The venue was the Longcross test track near Chobham, which has been used in numerous car chases on telly or for shooting moving footage for car programmes. It's like a mini-Millbrook, with handling courses crammed inside a big banked speedbowl. The actual day was quite slow; there's a lot of standing around waiting while other cars get photographed, and a lot of driving around at 20mph trying to hold formation to make good composition for the pics. Thankfully, Jo (a friend who owns an RX-4 coupe) went along with me and I think we managed to pretty much keep each other sane and stave off the tedium in between.
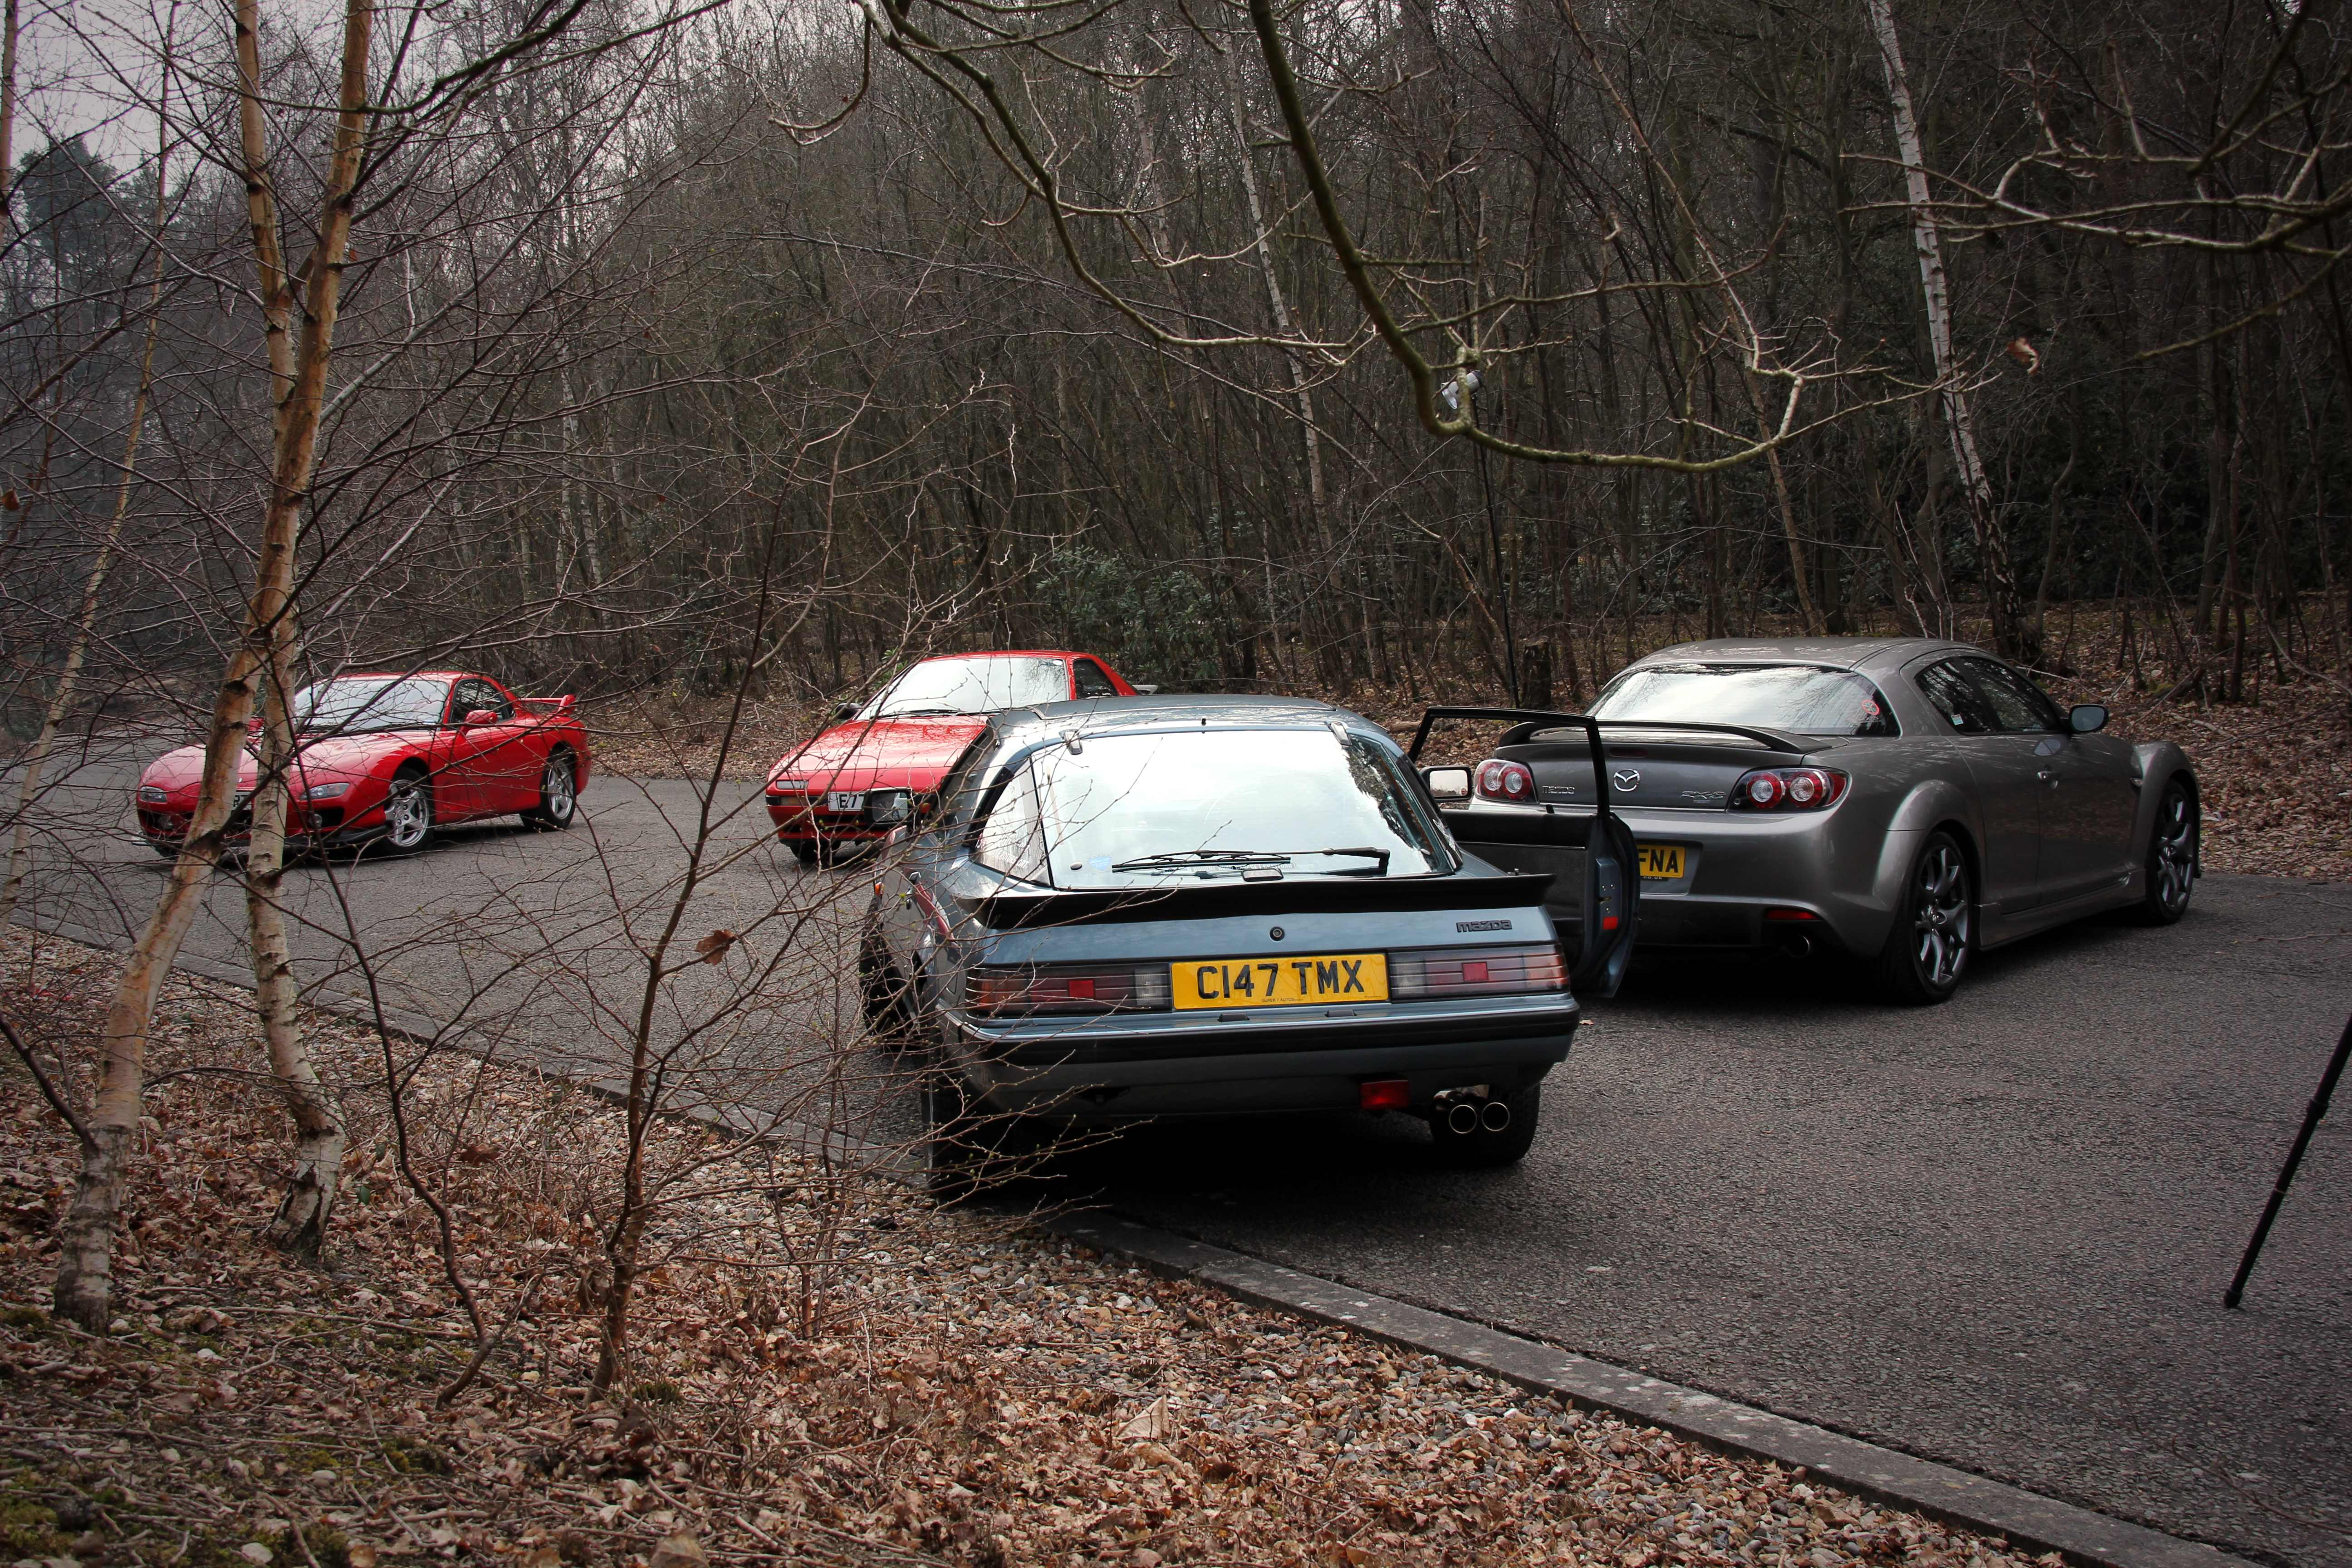
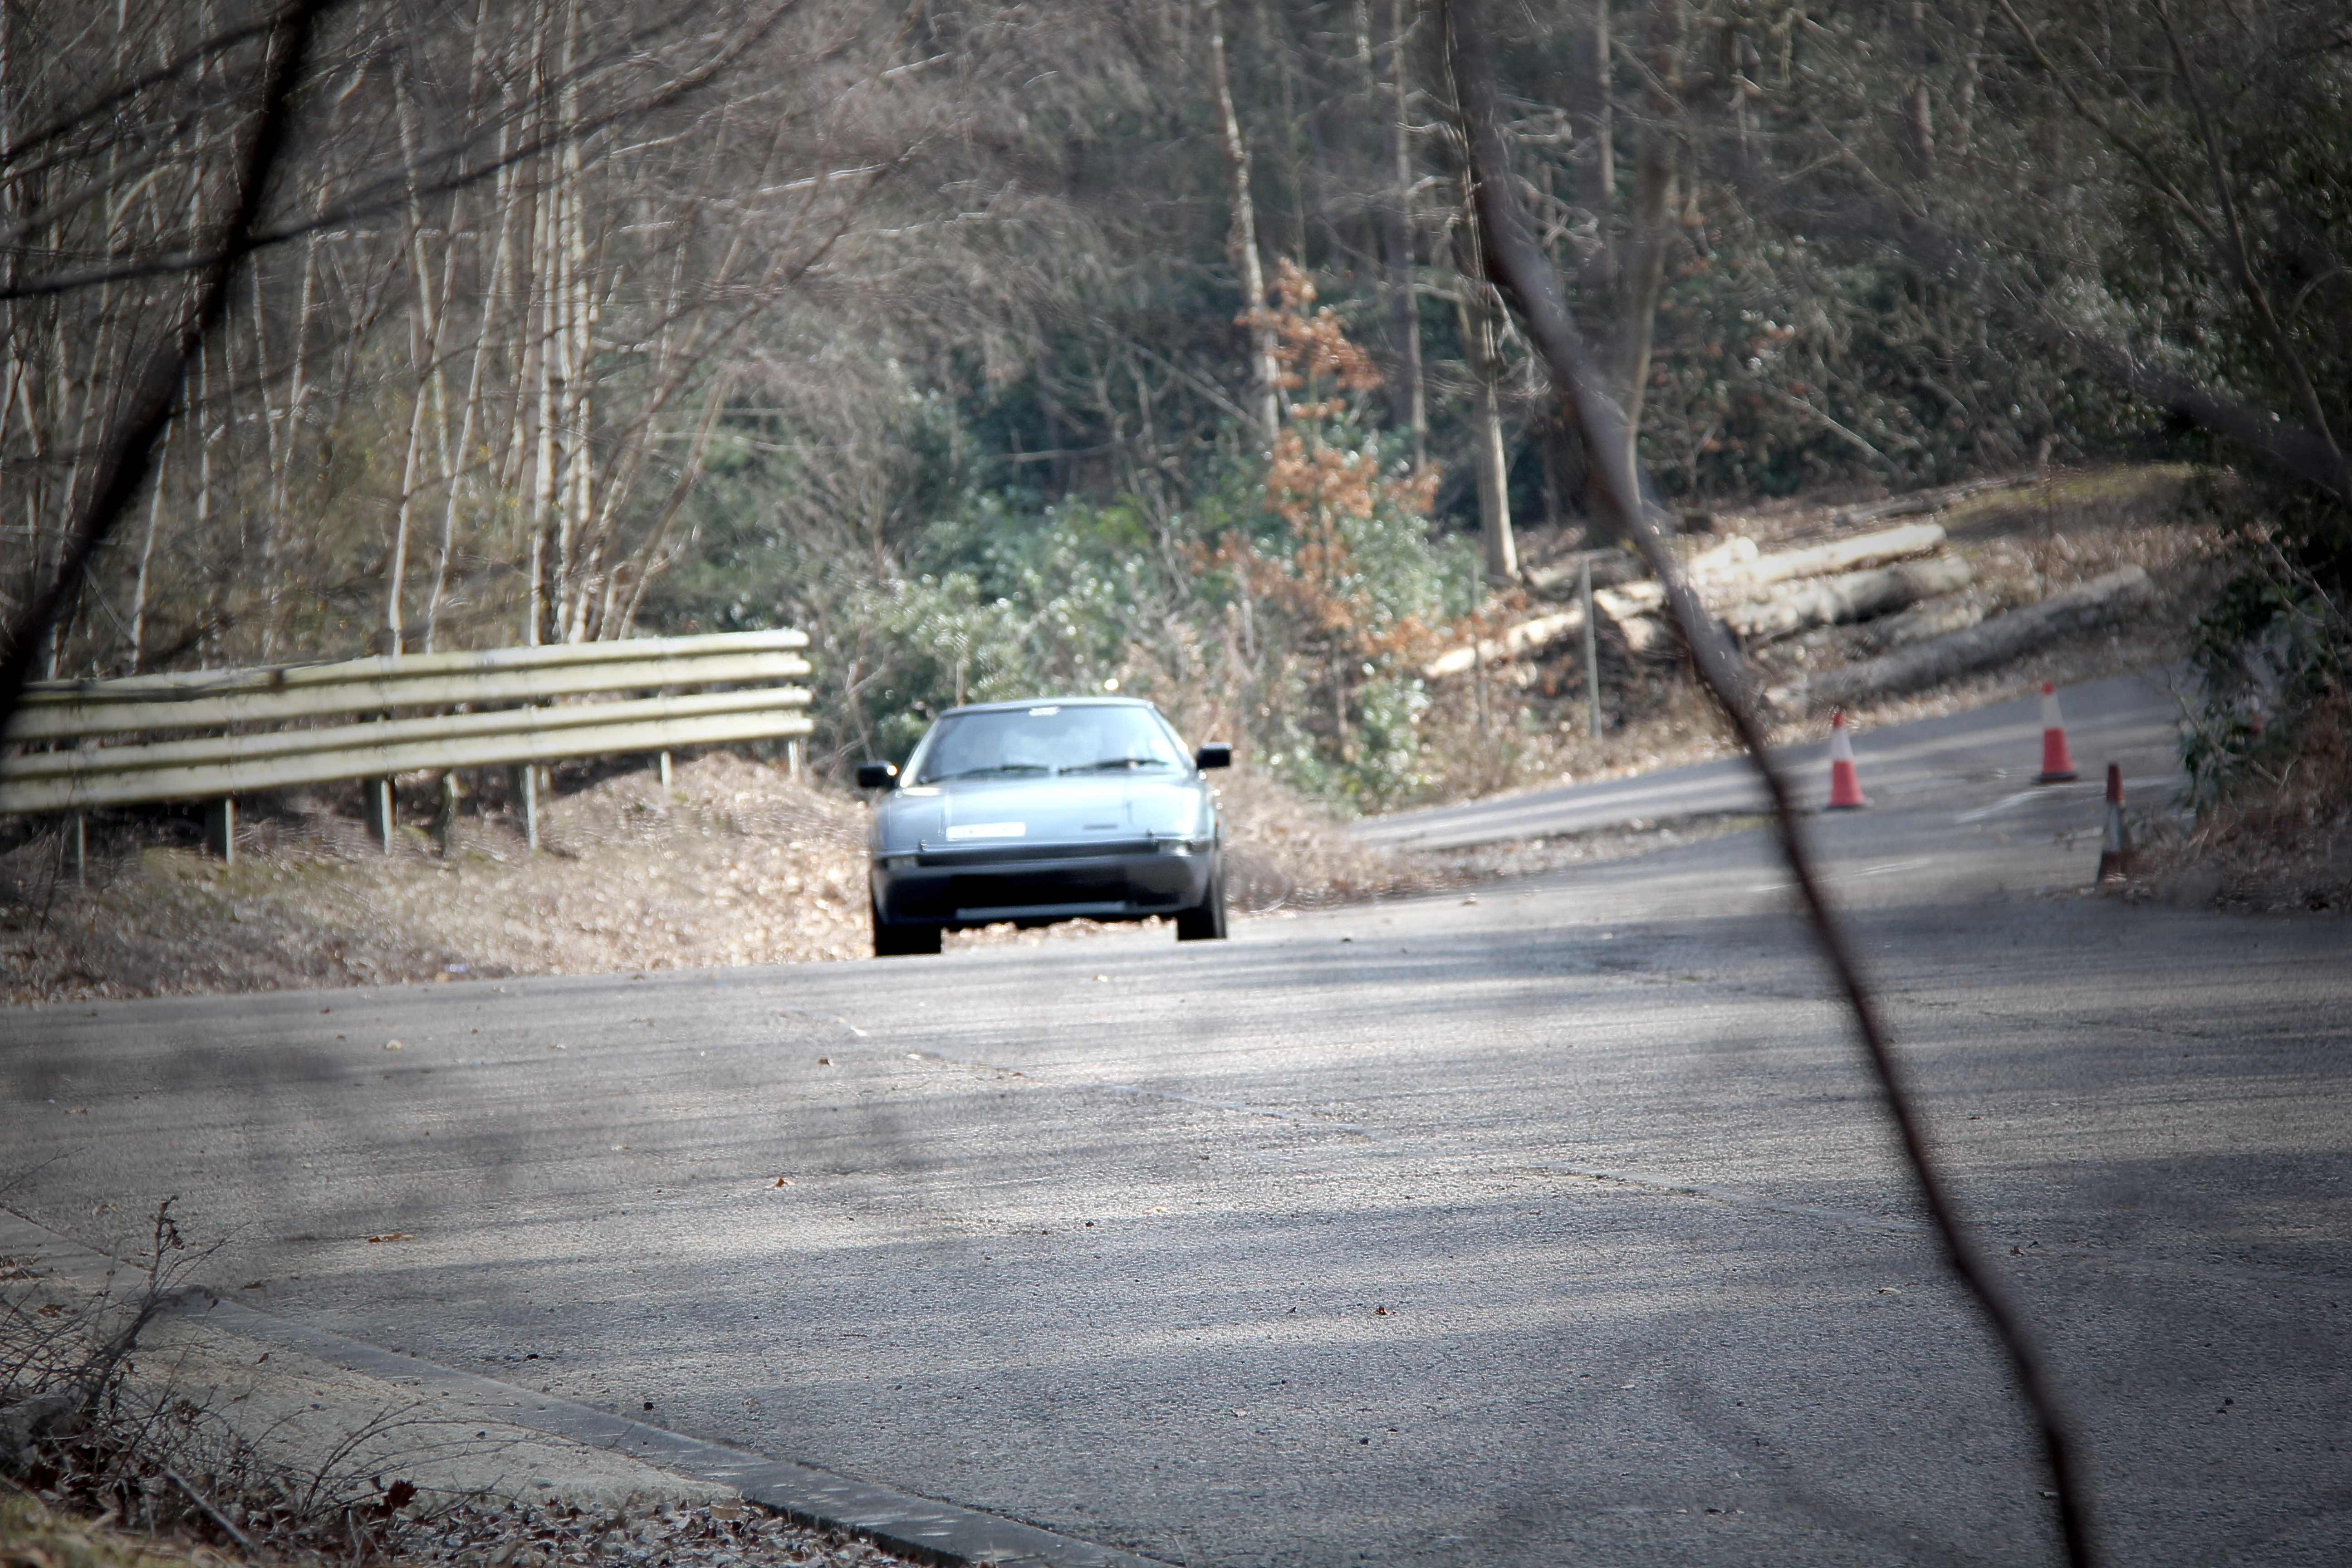
Anyway, some pics... of questionable excitement value but y'know, there were four cars, there's a limit to how sexy I can make it hahaha
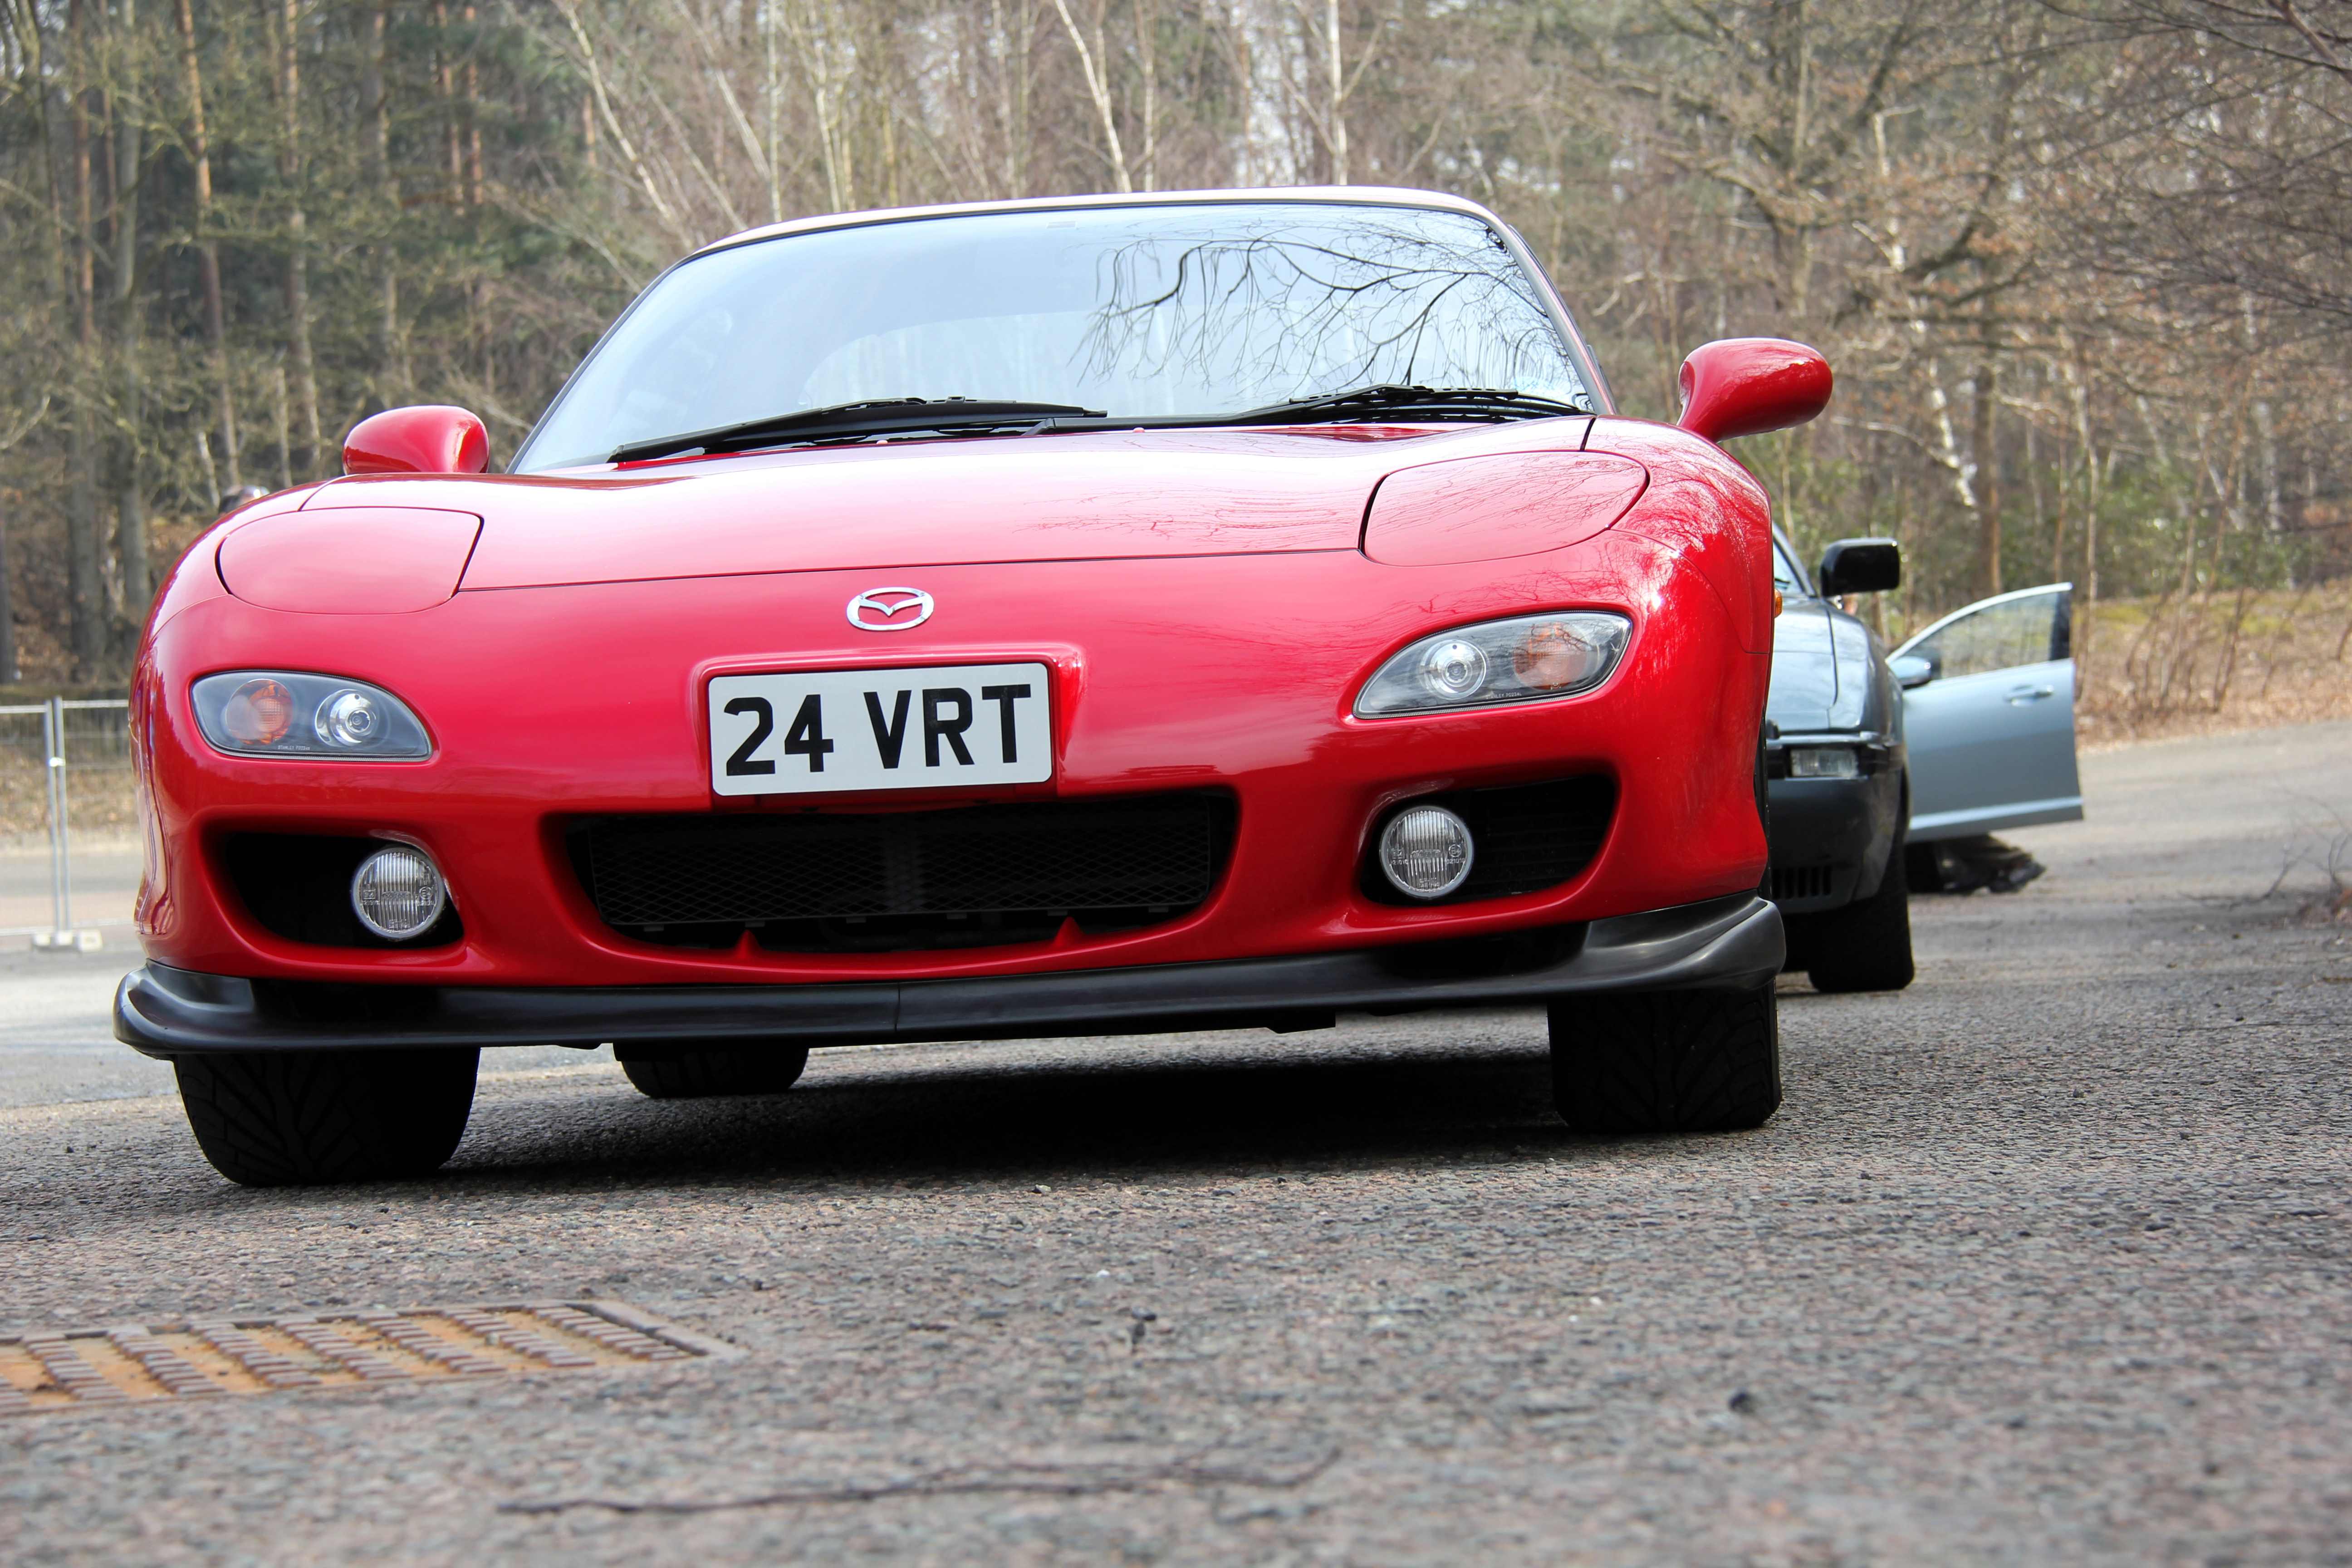
Ol' Safka menacing the FD (my car named herself Safka really, after Melanie Safka the singer/songwriter. Long and not very interesting story, but the first really long memorable drive I had in her was listening to Melanie on the stereo. Yeah, I'm an aging hippy romantic. Sorry)

The FD and the RX-8. The FD is one of the '99 spec ones imported into the UK by Tim White, a large English Mazda dealer. Which sorta makes it an official UK car in a way, even though no '99 spec cars were brought in by Mazda themselves. It's certainly immaculate, but it's not right an FD should be so quiet. As for the RX-8, you couldn't tell the engine was running unless you put your hand over the exhaust

Smiley face!
Angry face!

The FC, the forgotten RX-7 lol
Hmmm, maybe you can see why
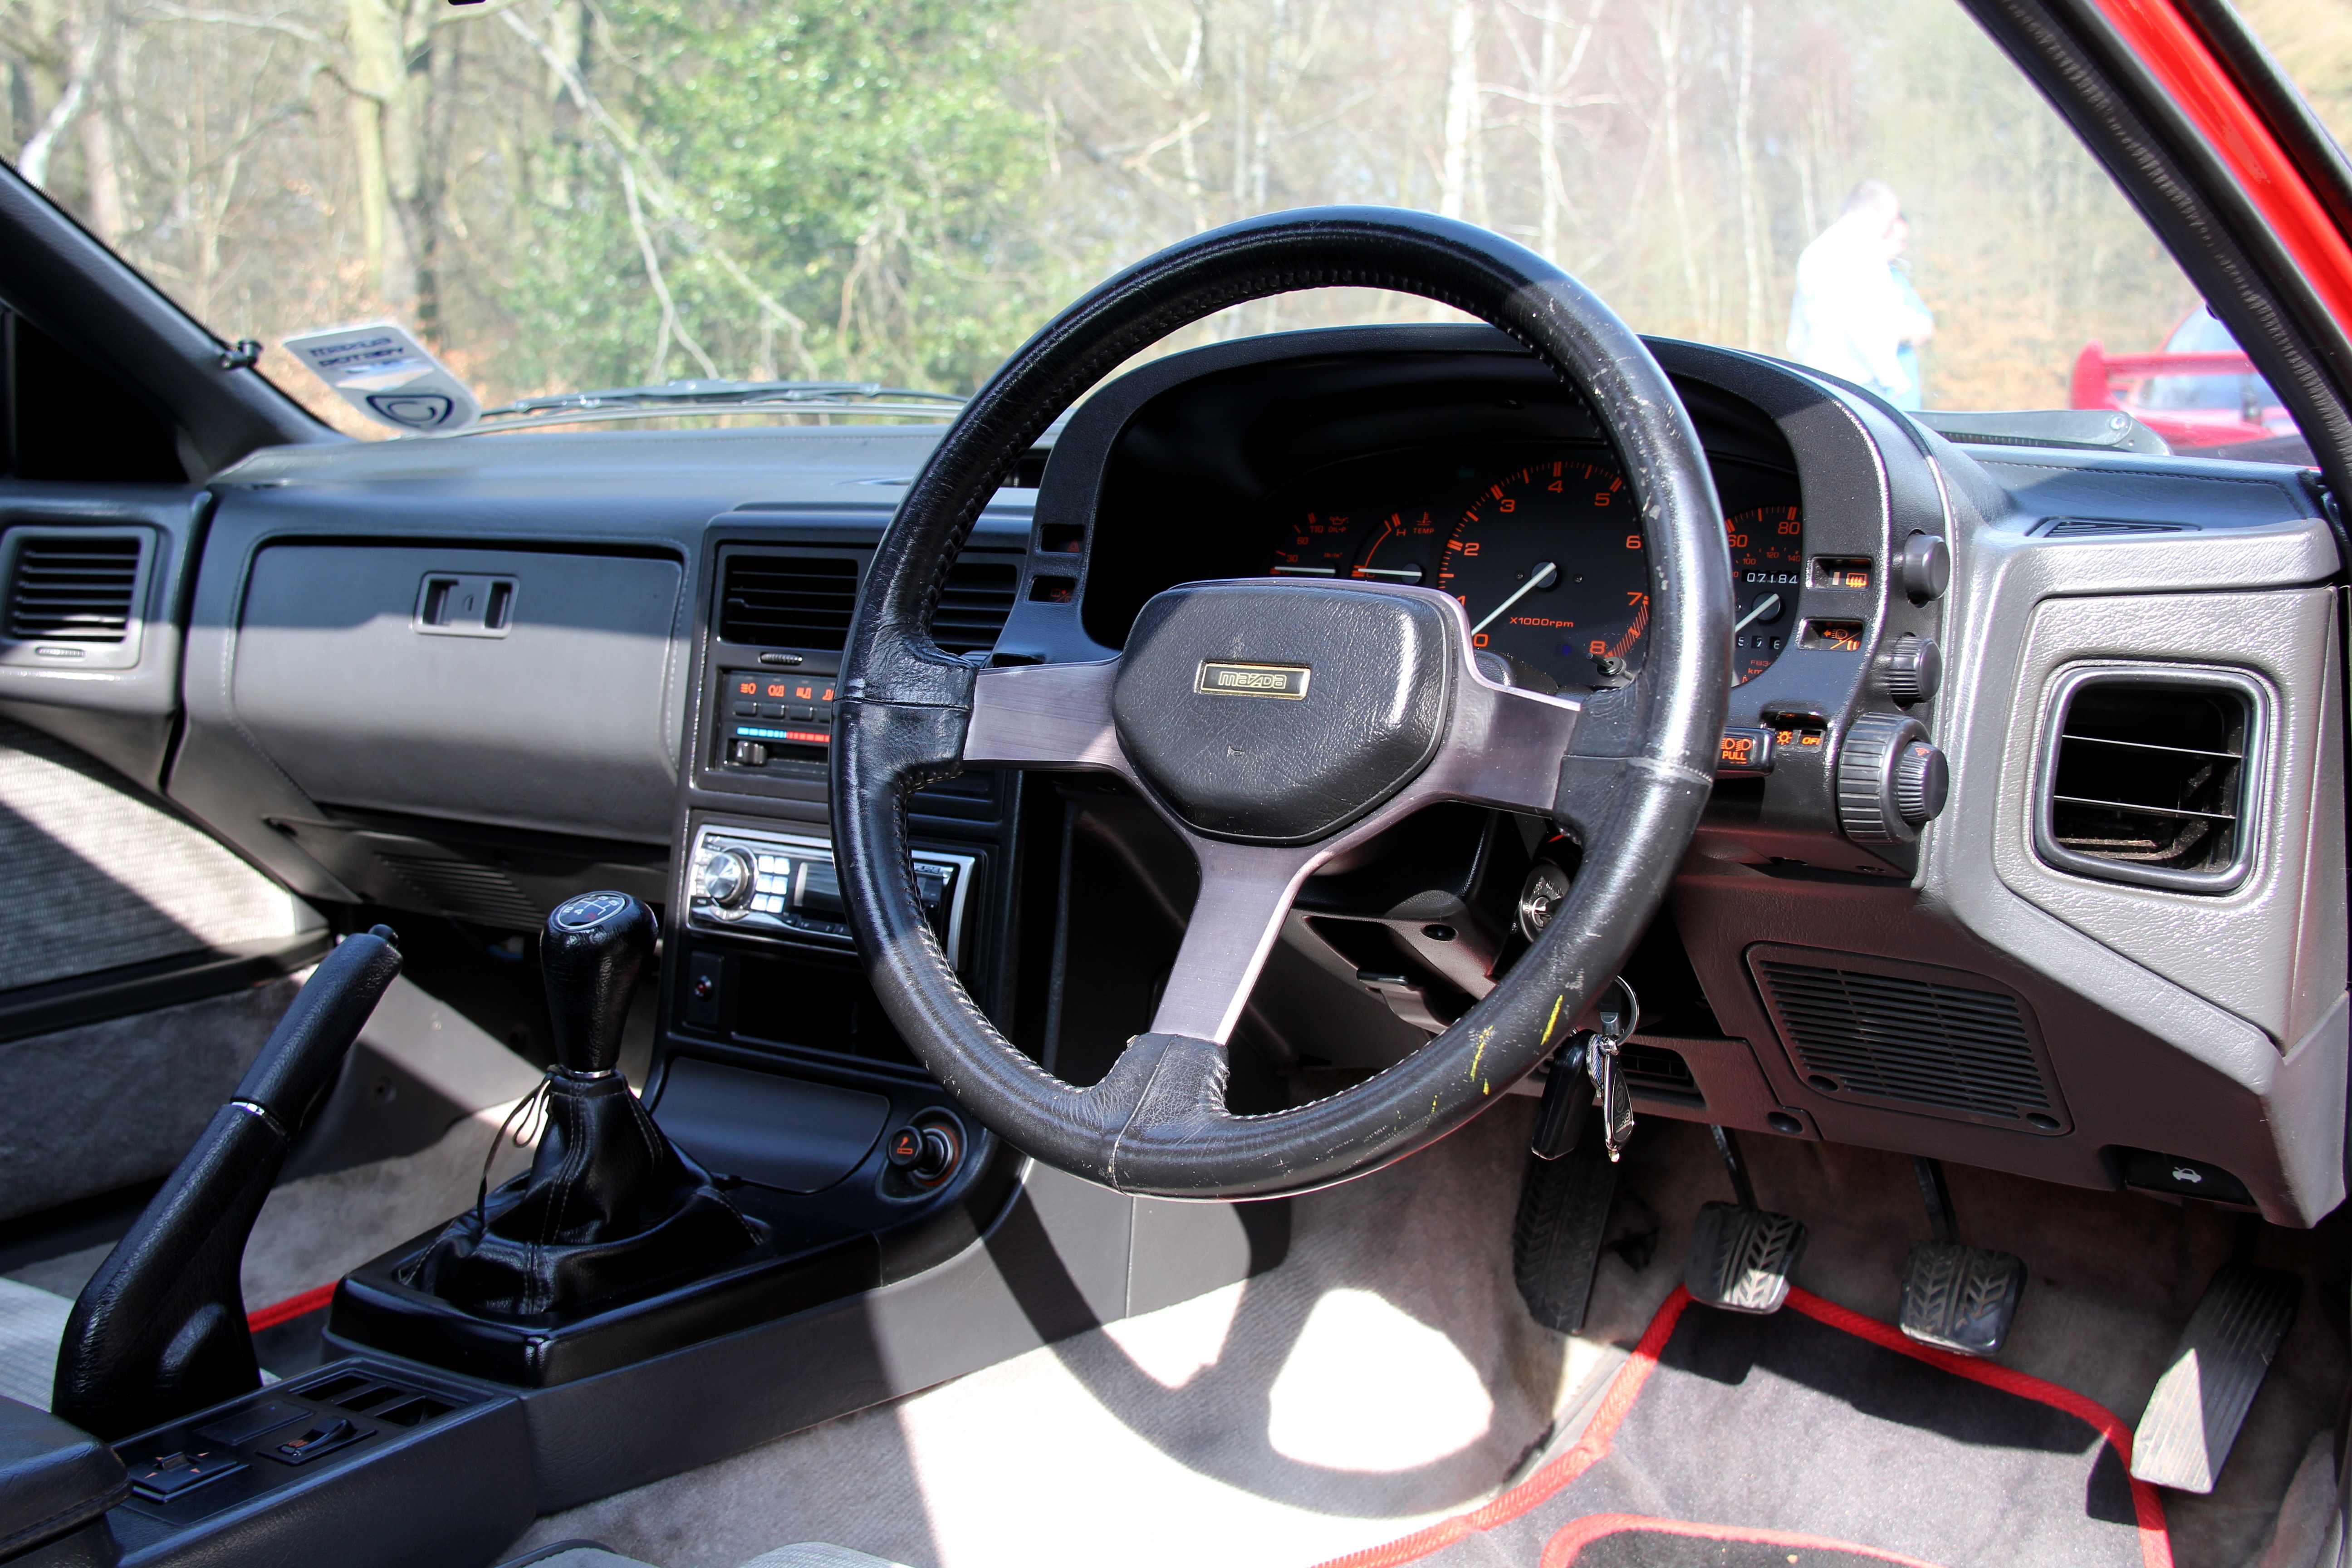
This is the second FC I've tried to fit in, and it just isn't possible. I dunno if it's because of the pedal height, but I can't get the clutch all the way up before my knee hits the steering wheel. Those funky weirdo rotary switches in full...
That fat bloated RX-8 **** in full.
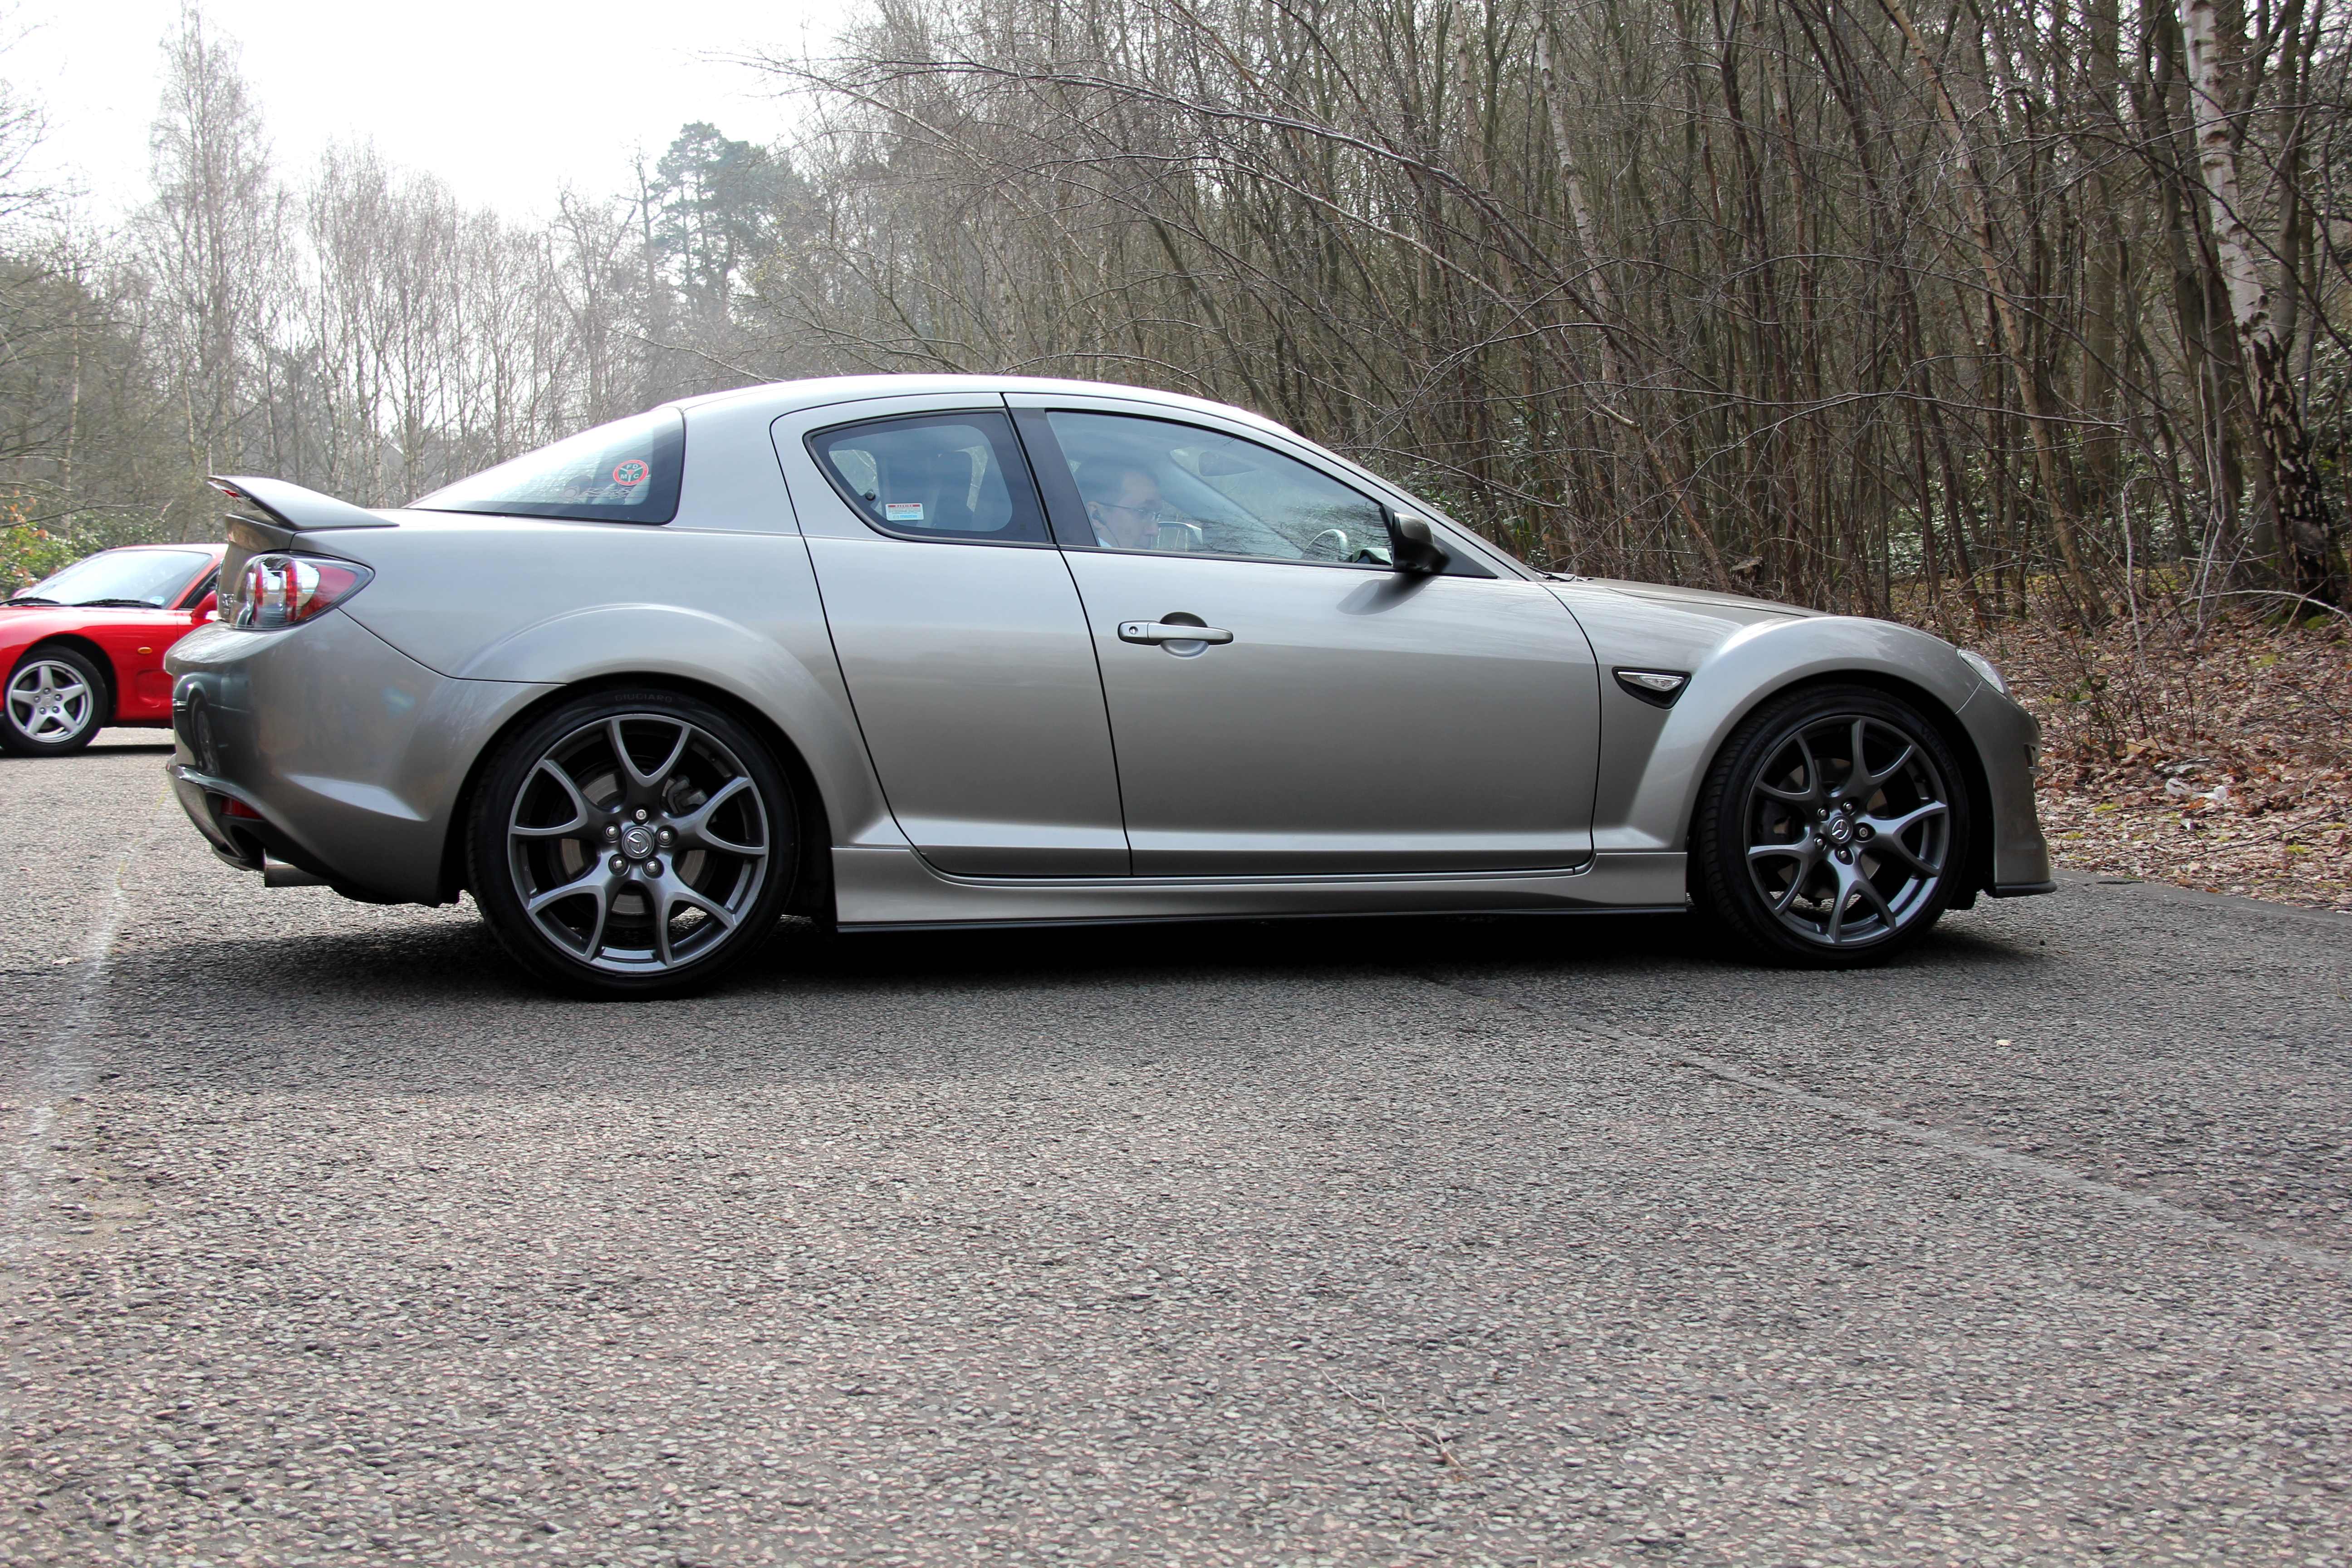
It's an R3 model, so has the LED lights that look awesome at night, like Skyline twin rings, but look horrid and chavvy and cheap otherwise
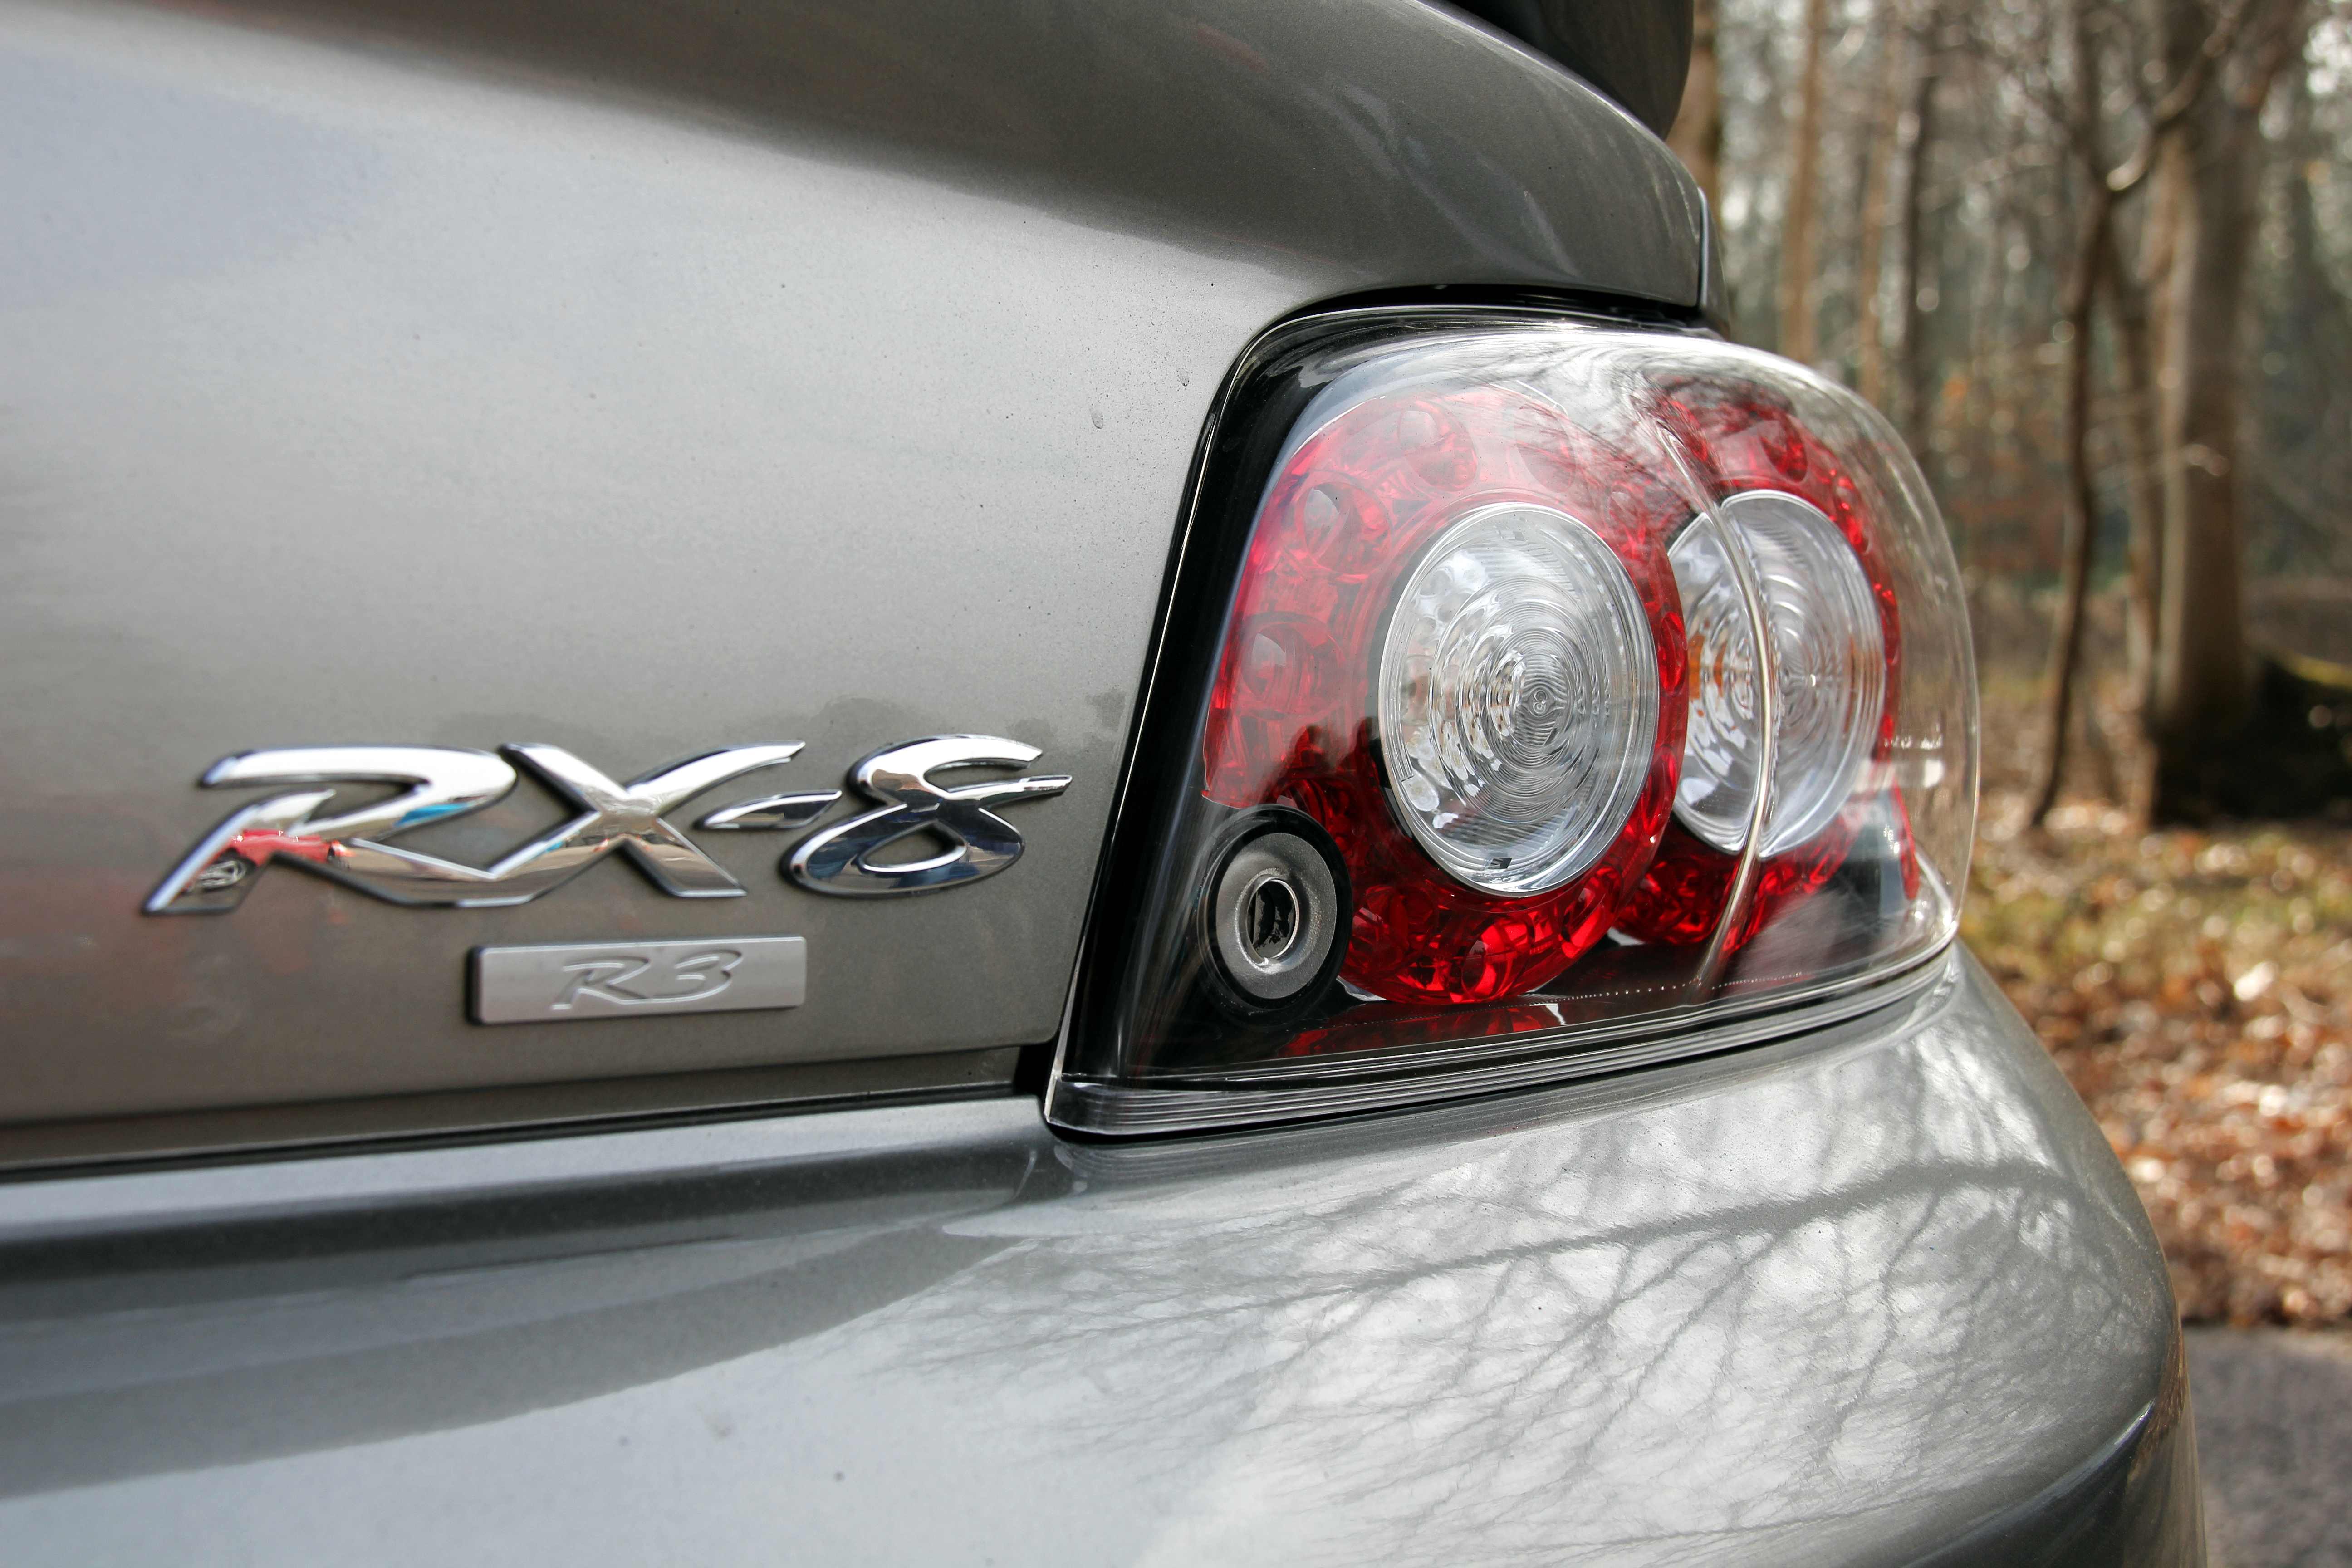
Like the rotor-motif wheels though, much better than the horse-and-cart ones they used to have


The premise for the article was "Generations of RX-7" kinda thang, so they wanted one of each FB, FC, FD and RX-8. Not 100% sure why they wanted the RX-8 in, I think it was as the last current rotary model or something. To be fair to the editor dude, he was pretty enthusiastic about the cars, and said his motivation for the article was sorta "they've stopped making rotary cars, people are forgetting about them, and actually they're pretty damned good". He seemed to enjoy thrashing the cars too, and funnily enough kept coming back to sit in FB. He seemed to really like it out of all of them.
The venue was the Longcross test track near Chobham, which has been used in numerous car chases on telly or for shooting moving footage for car programmes. It's like a mini-Millbrook, with handling courses crammed inside a big banked speedbowl. The actual day was quite slow; there's a lot of standing around waiting while other cars get photographed, and a lot of driving around at 20mph trying to hold formation to make good composition for the pics. Thankfully, Jo (a friend who owns an RX-4 coupe) went along with me and I think we managed to pretty much keep each other sane and stave off the tedium in between.
Anyway, some pics... of questionable excitement value but y'know, there were four cars, there's a limit to how sexy I can make it hahaha
Ol' Safka menacing the FD (my car named herself Safka really, after Melanie Safka the singer/songwriter. Long and not very interesting story, but the first really long memorable drive I had in her was listening to Melanie on the stereo. Yeah, I'm an aging hippy romantic. Sorry)
The FD and the RX-8. The FD is one of the '99 spec ones imported into the UK by Tim White, a large English Mazda dealer. Which sorta makes it an official UK car in a way, even though no '99 spec cars were brought in by Mazda themselves. It's certainly immaculate, but it's not right an FD should be so quiet. As for the RX-8, you couldn't tell the engine was running unless you put your hand over the exhaust
Smiley face!
Angry face!
The FC, the forgotten RX-7 lol
Hmmm, maybe you can see why
This is the second FC I've tried to fit in, and it just isn't possible. I dunno if it's because of the pedal height, but I can't get the clutch all the way up before my knee hits the steering wheel. Those funky weirdo rotary switches in full...
That fat bloated RX-8 **** in full.
It's an R3 model, so has the LED lights that look awesome at night, like Skyline twin rings, but look horrid and chavvy and cheap otherwise
Like the rotor-motif wheels though, much better than the horse-and-cart ones they used to have
Thread Starter
Senior Member
Joined: Oct 2010
Posts: 255
Likes: 1
From: England
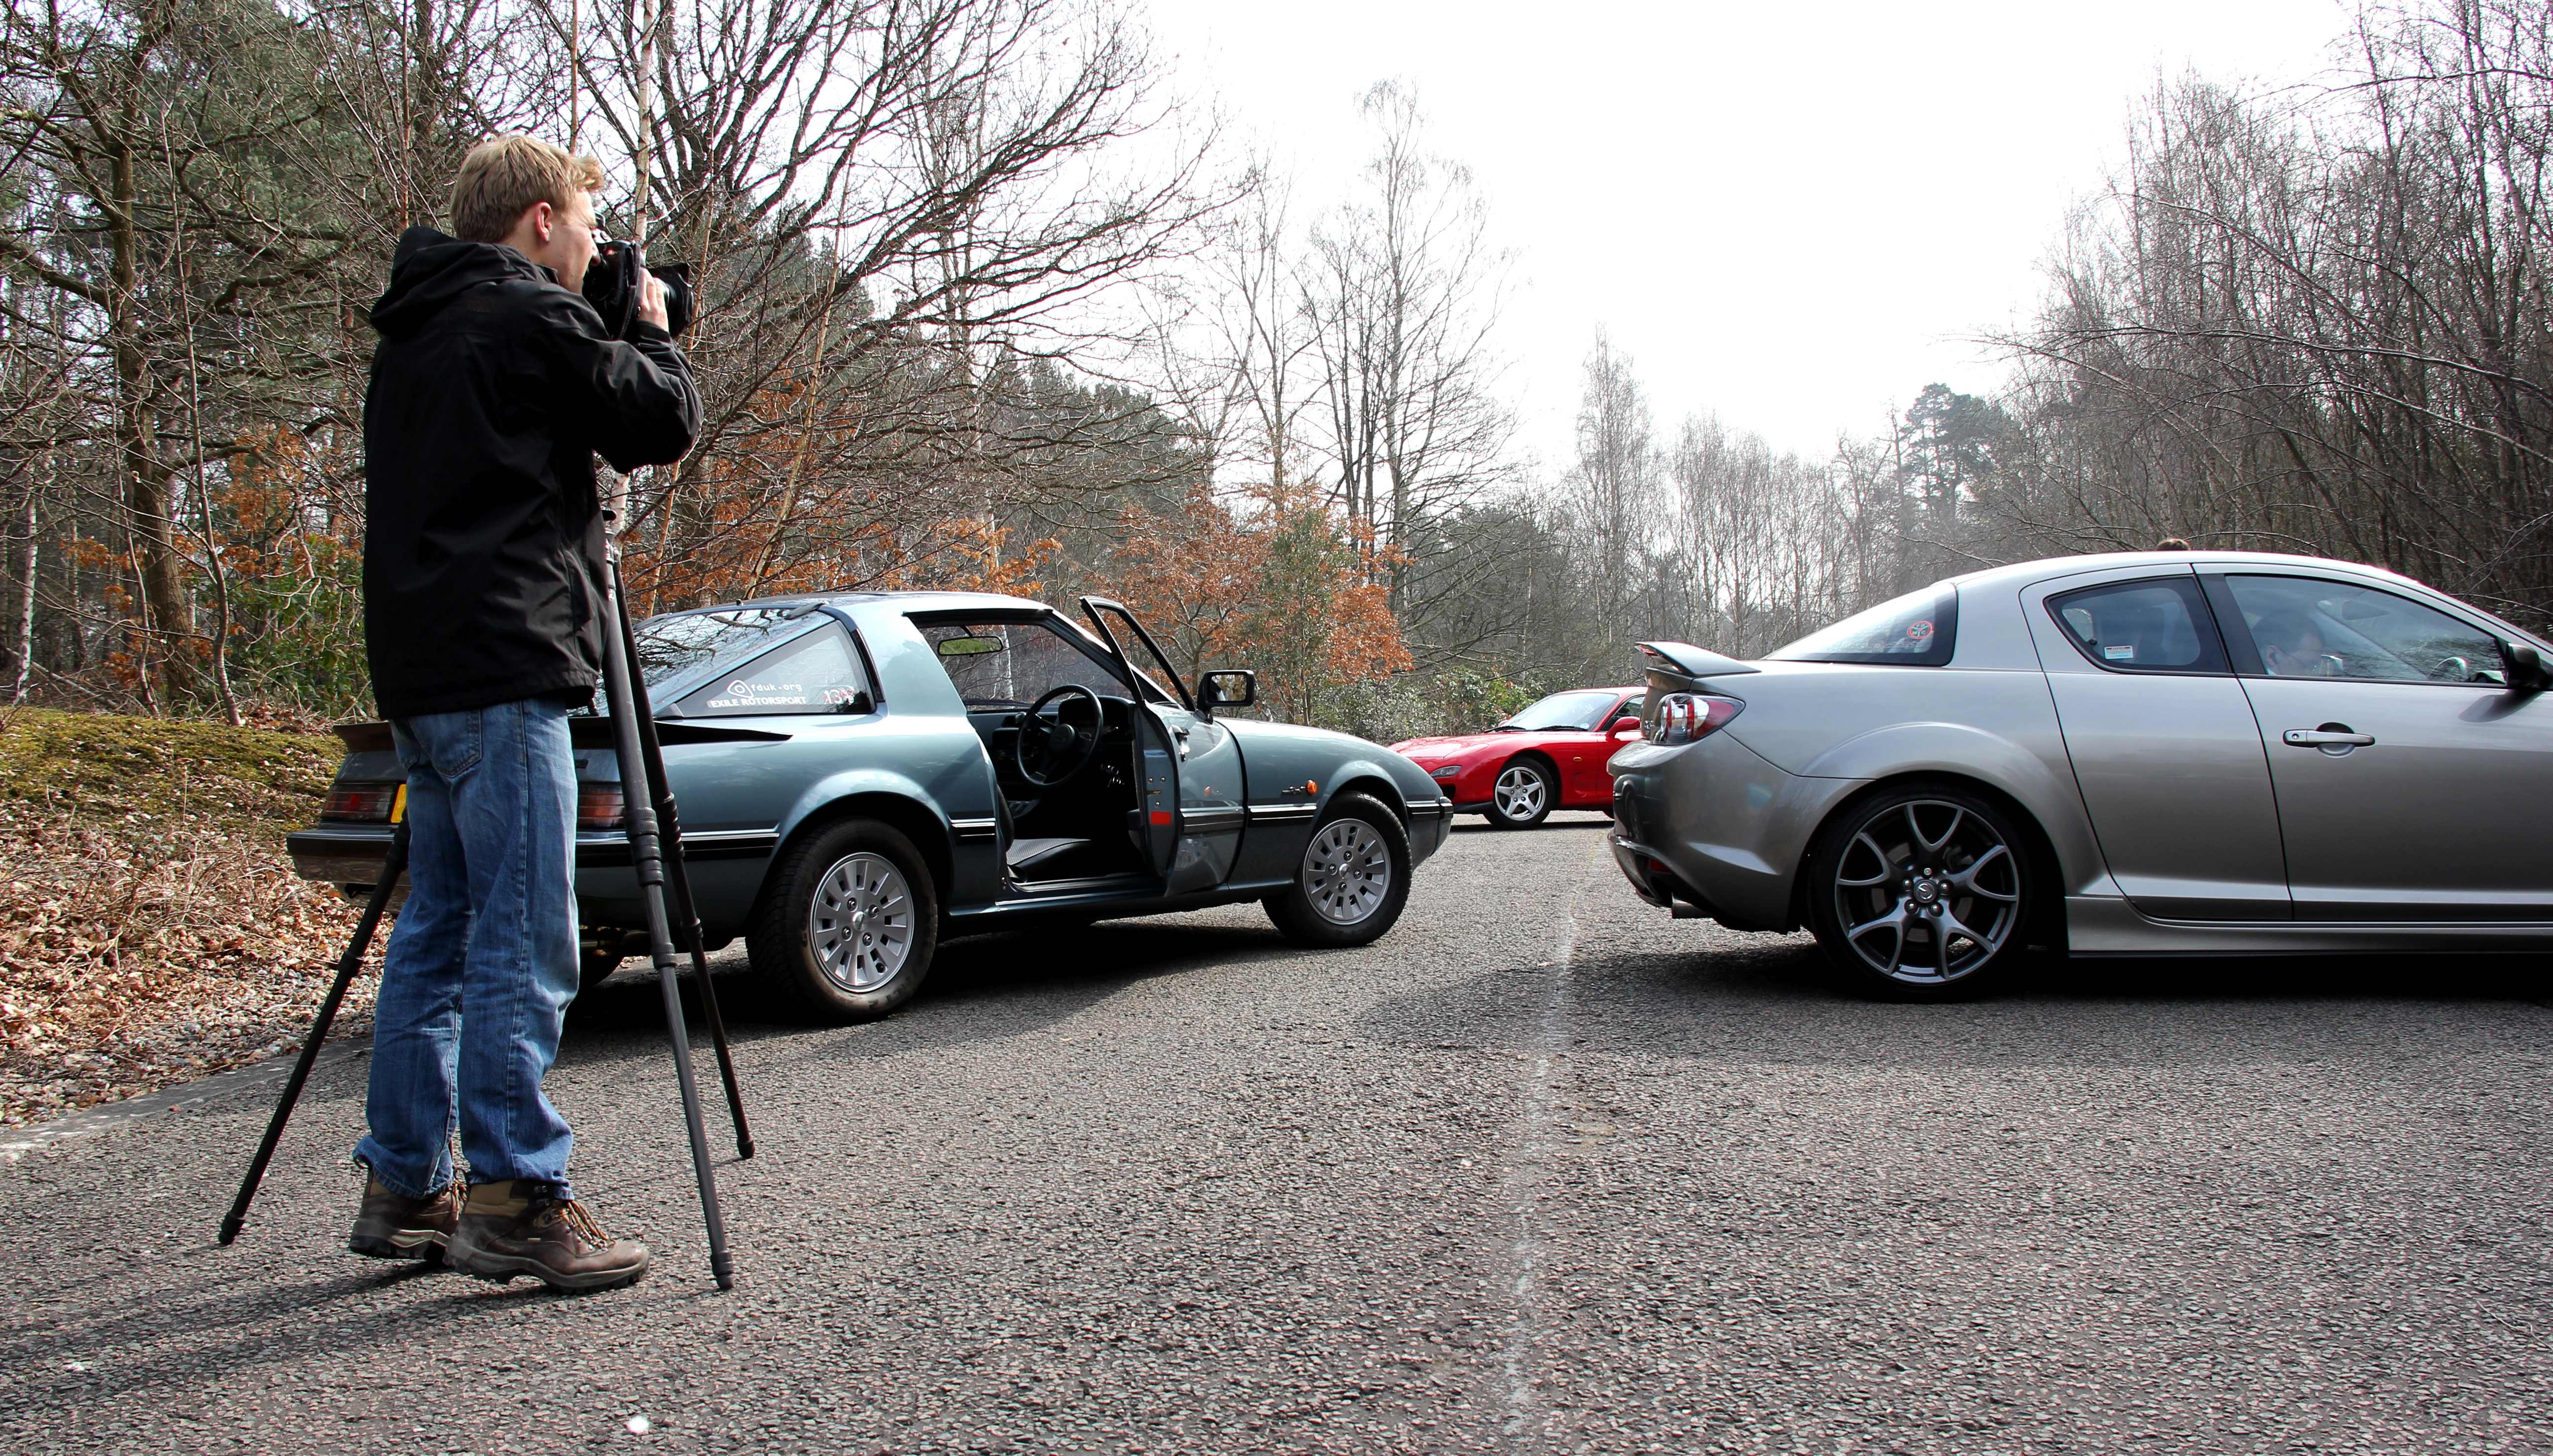
Taking the group static shots...
Quite a strange venue, it's all nice and tree-lined and quiet, with deer and squirrels and stuff and then suddenly a brand-new trio of McLarens go blasting past on the speedbowl. We were asked to not post any pics of them because they're there testing supposedly in secret (McLaren are just down the road in Woking) but in all honestly I can't cos this is the only one I got anyway... damn you, autofocus lol!
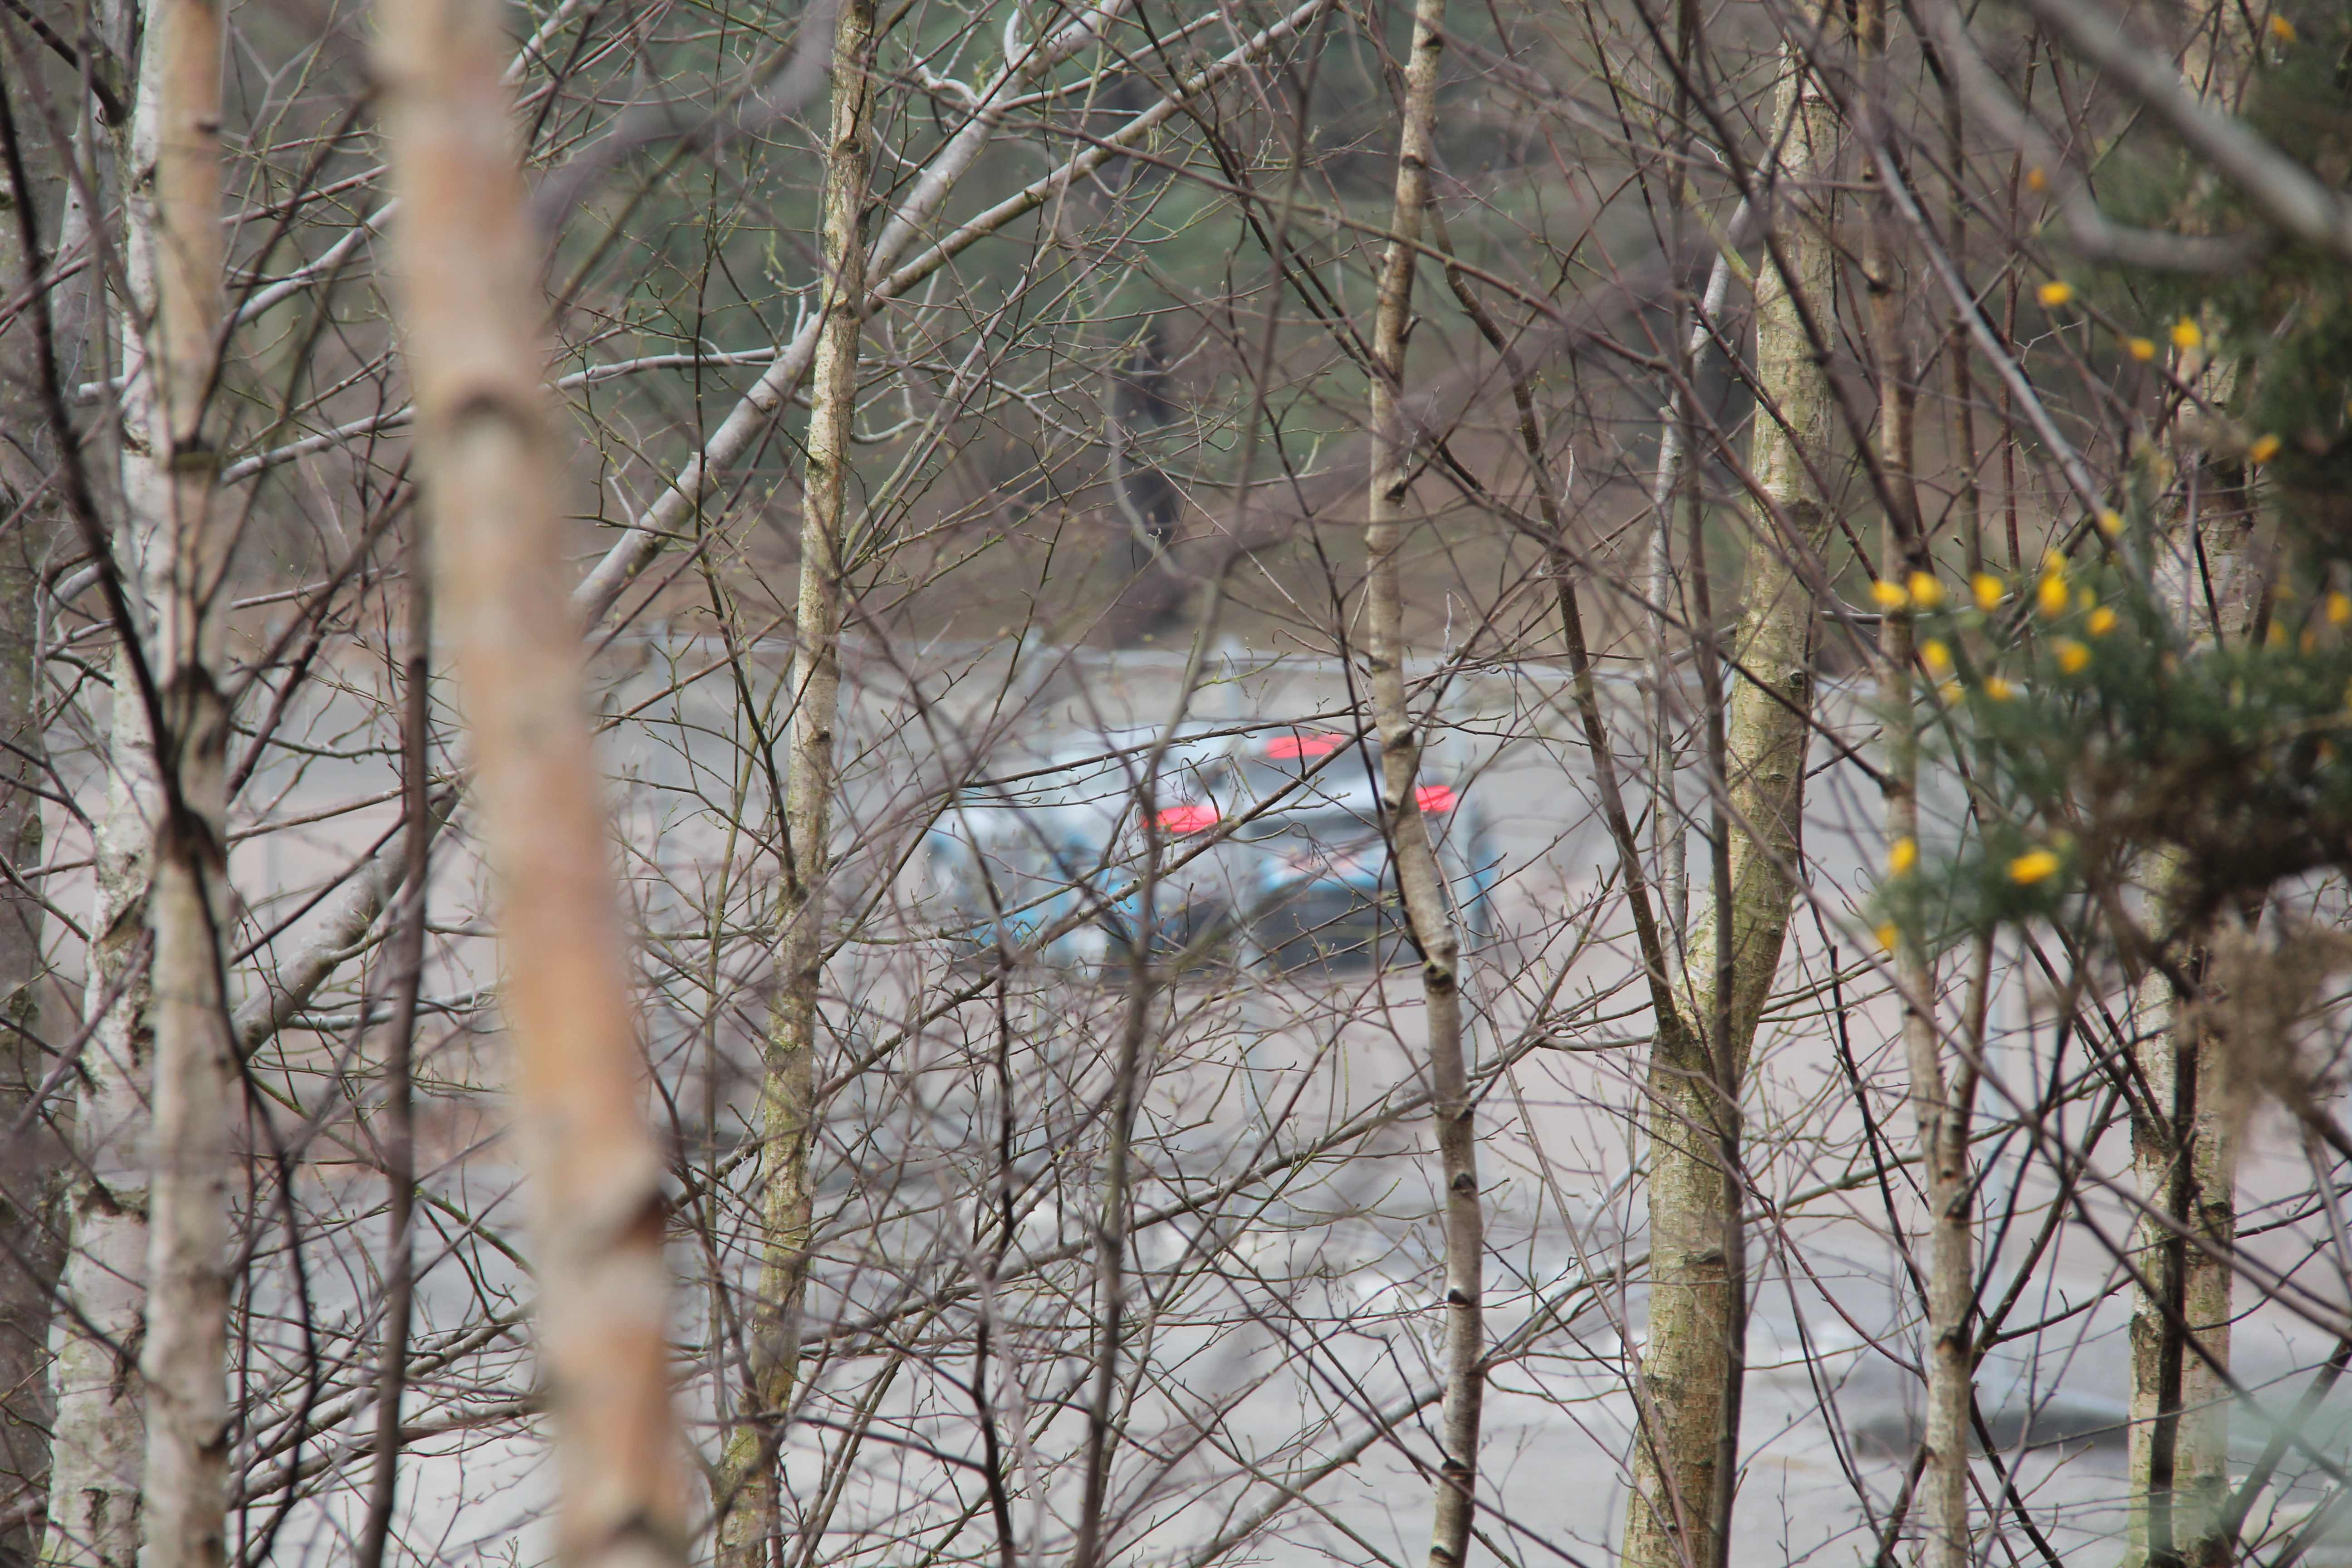
Uh-oh! We might be in trouble, then :shock:
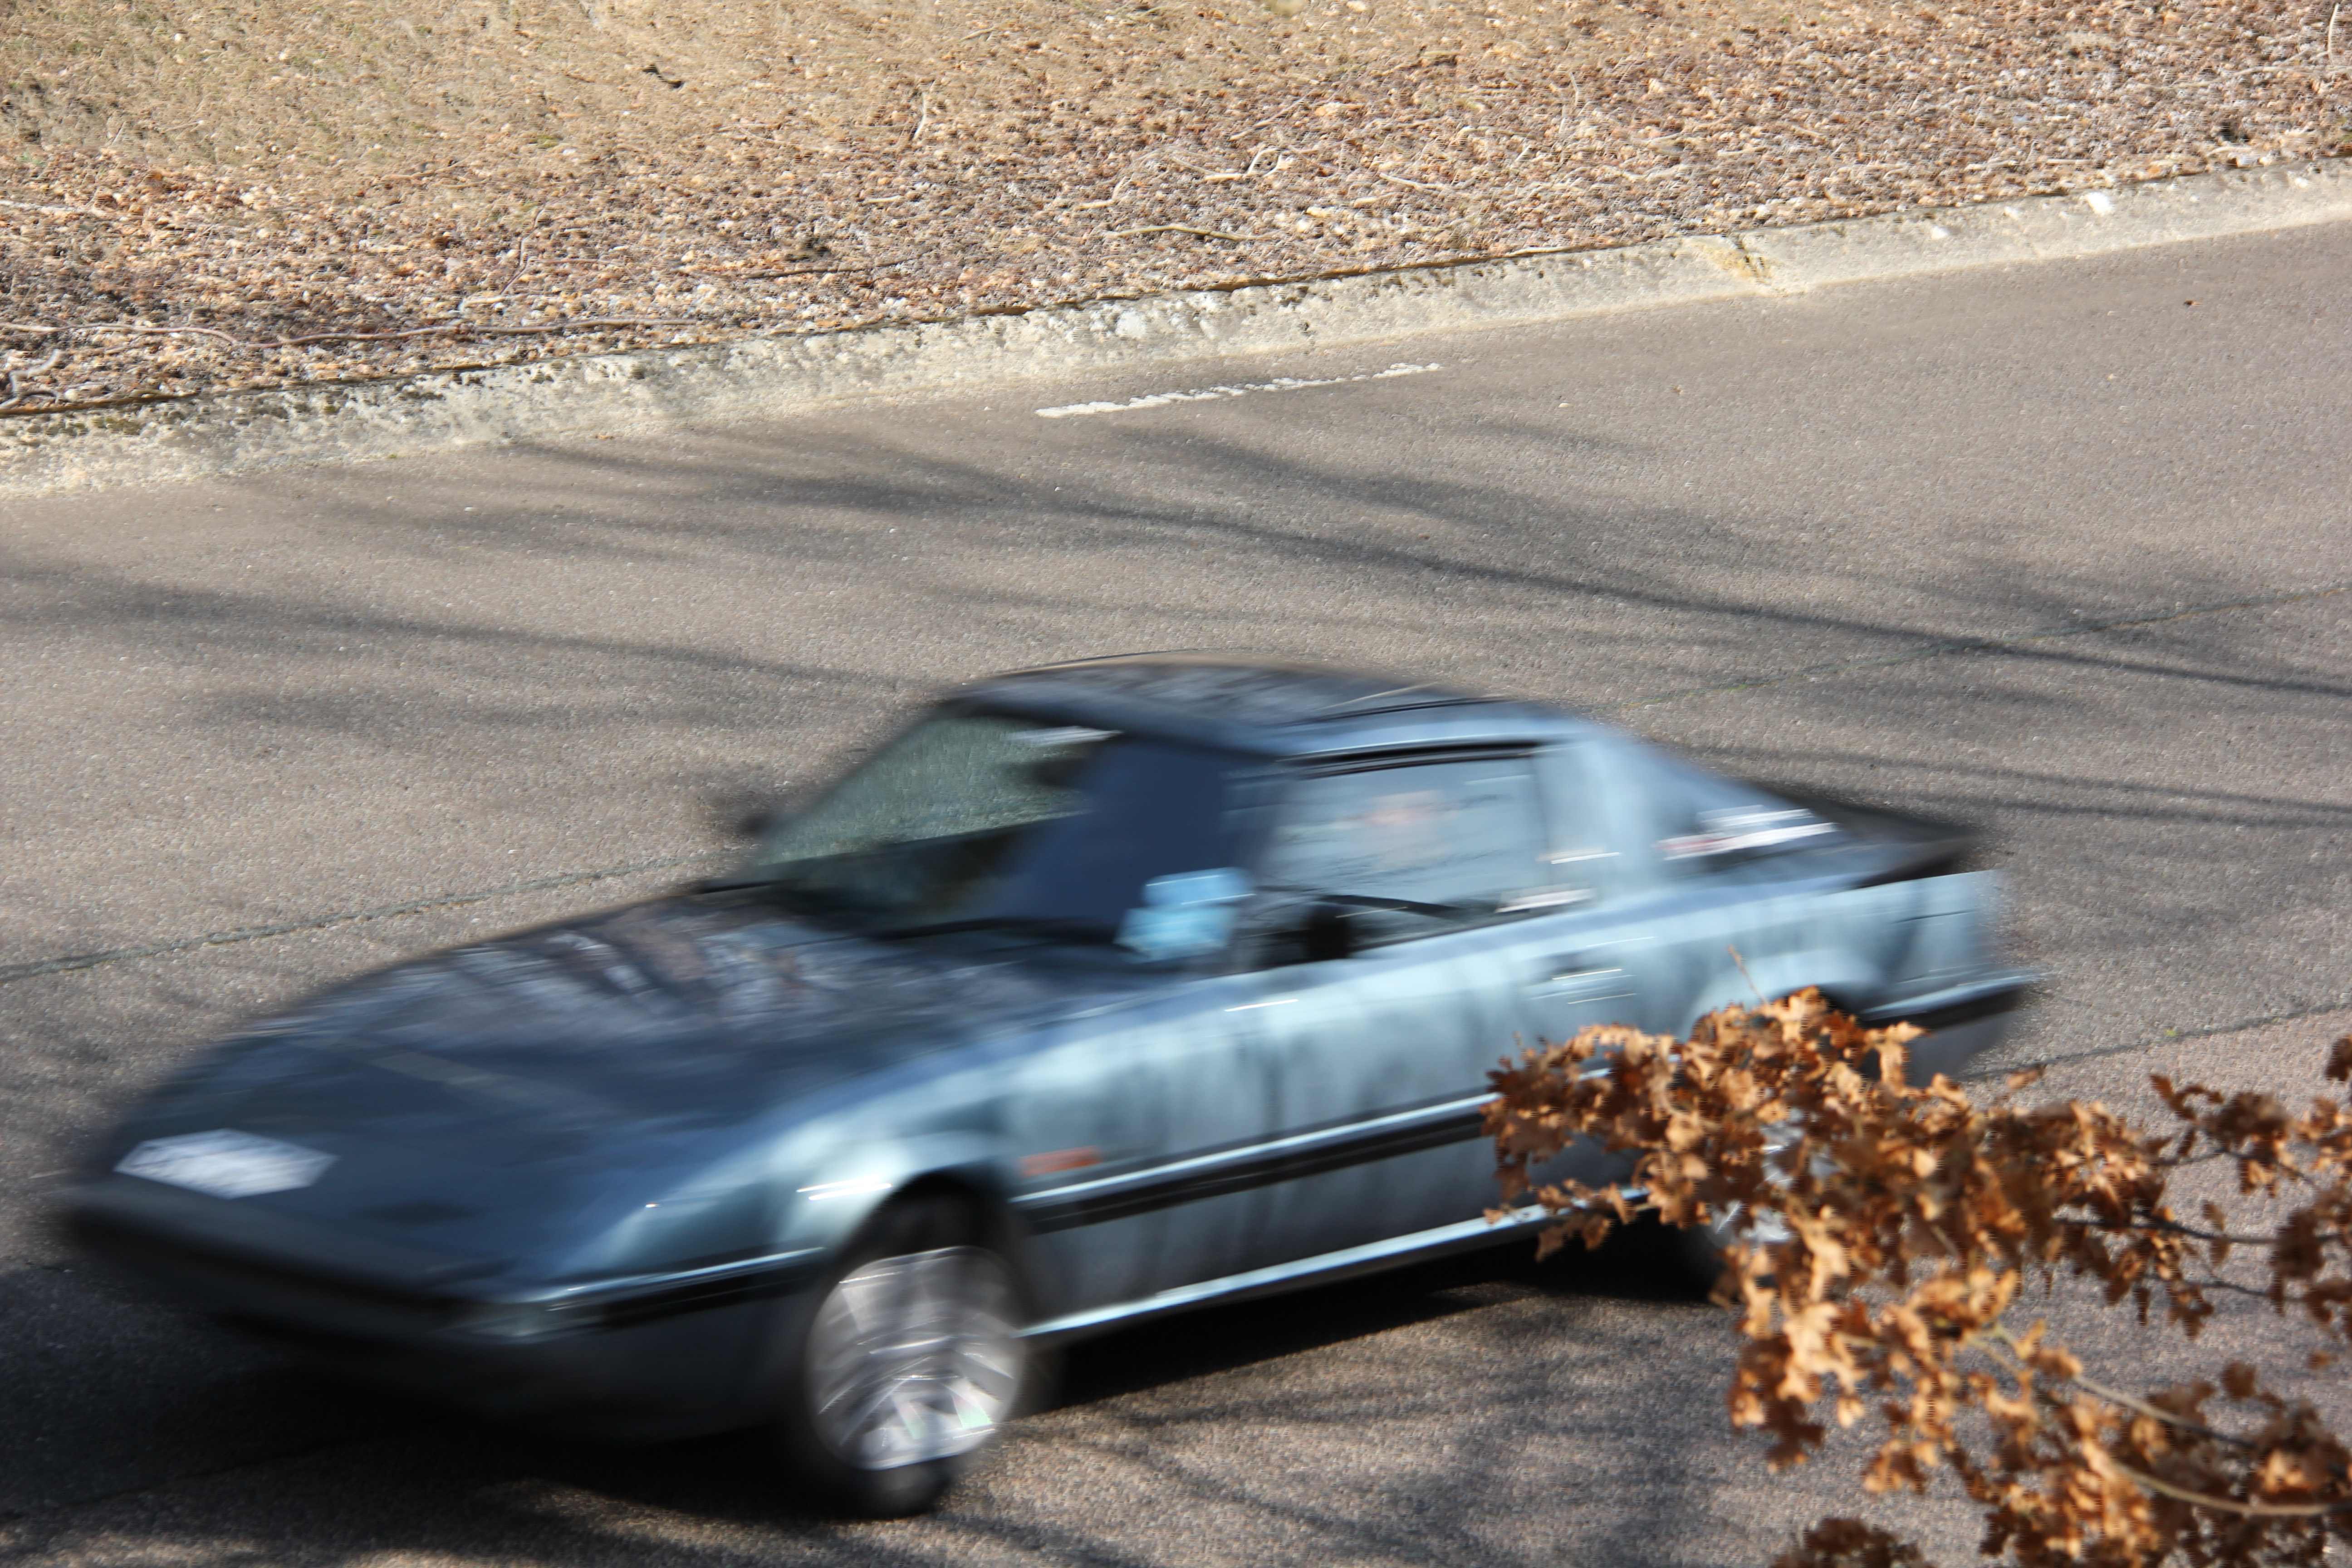
Safka's close-up beauty shots
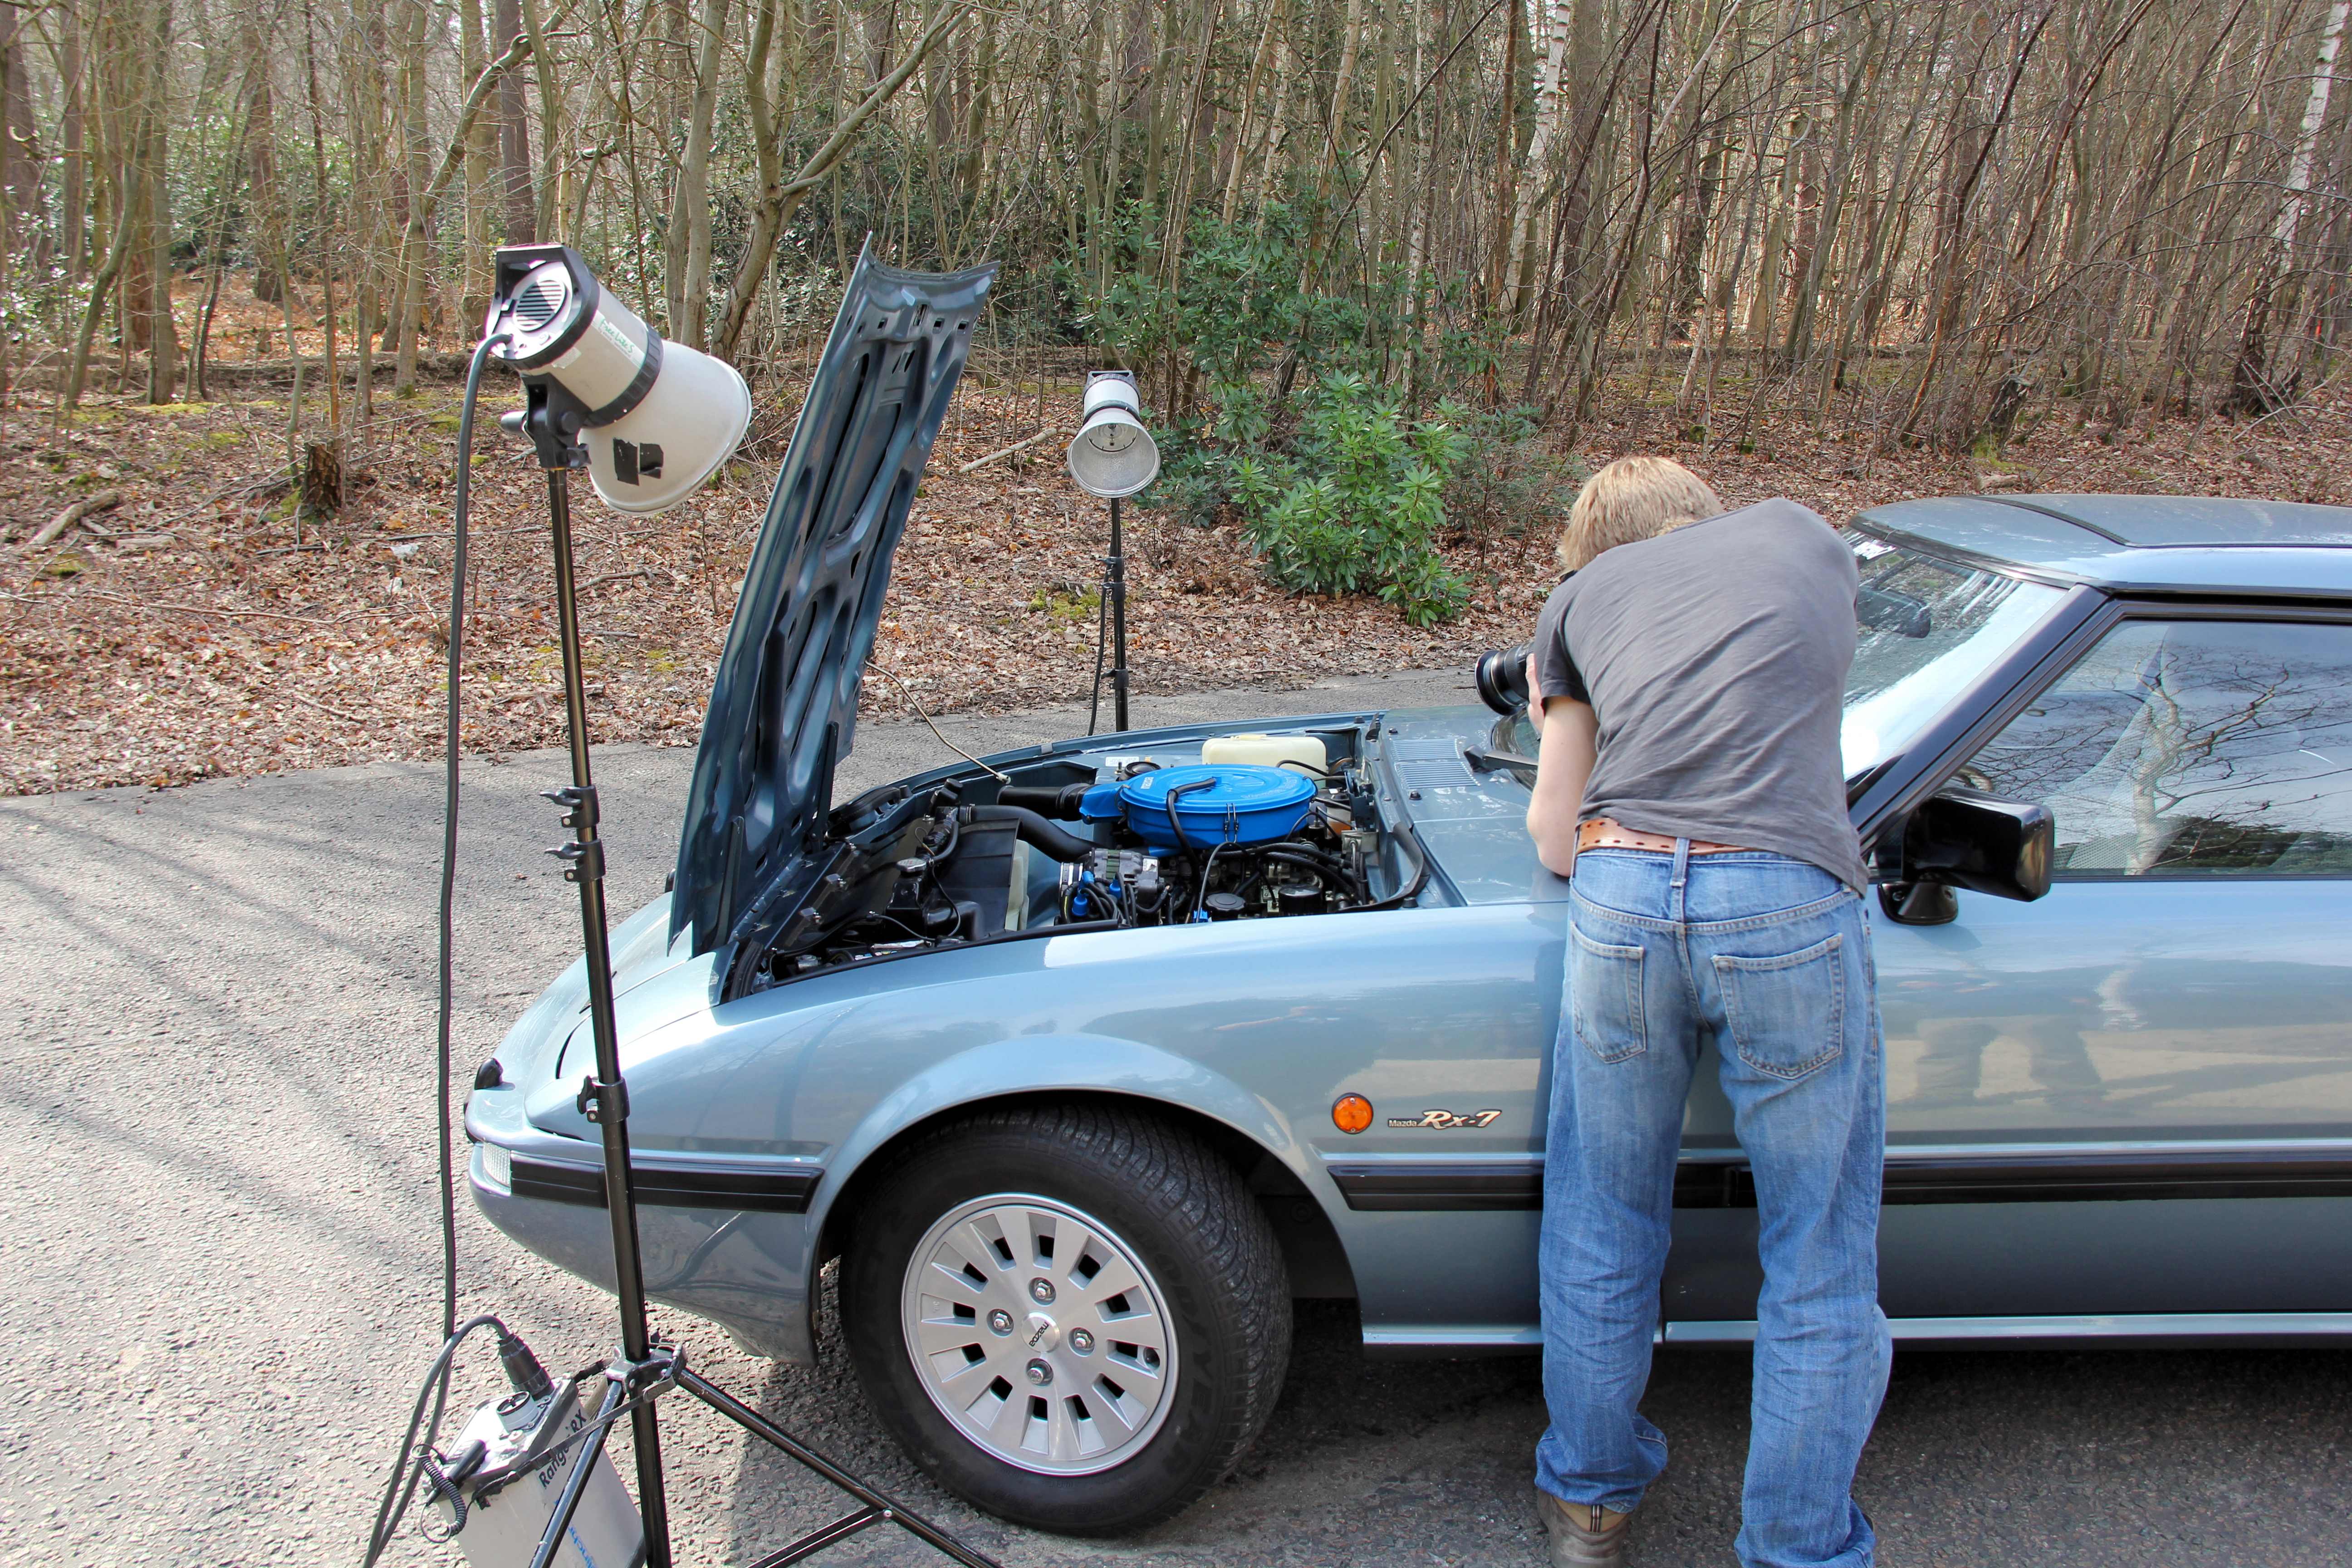
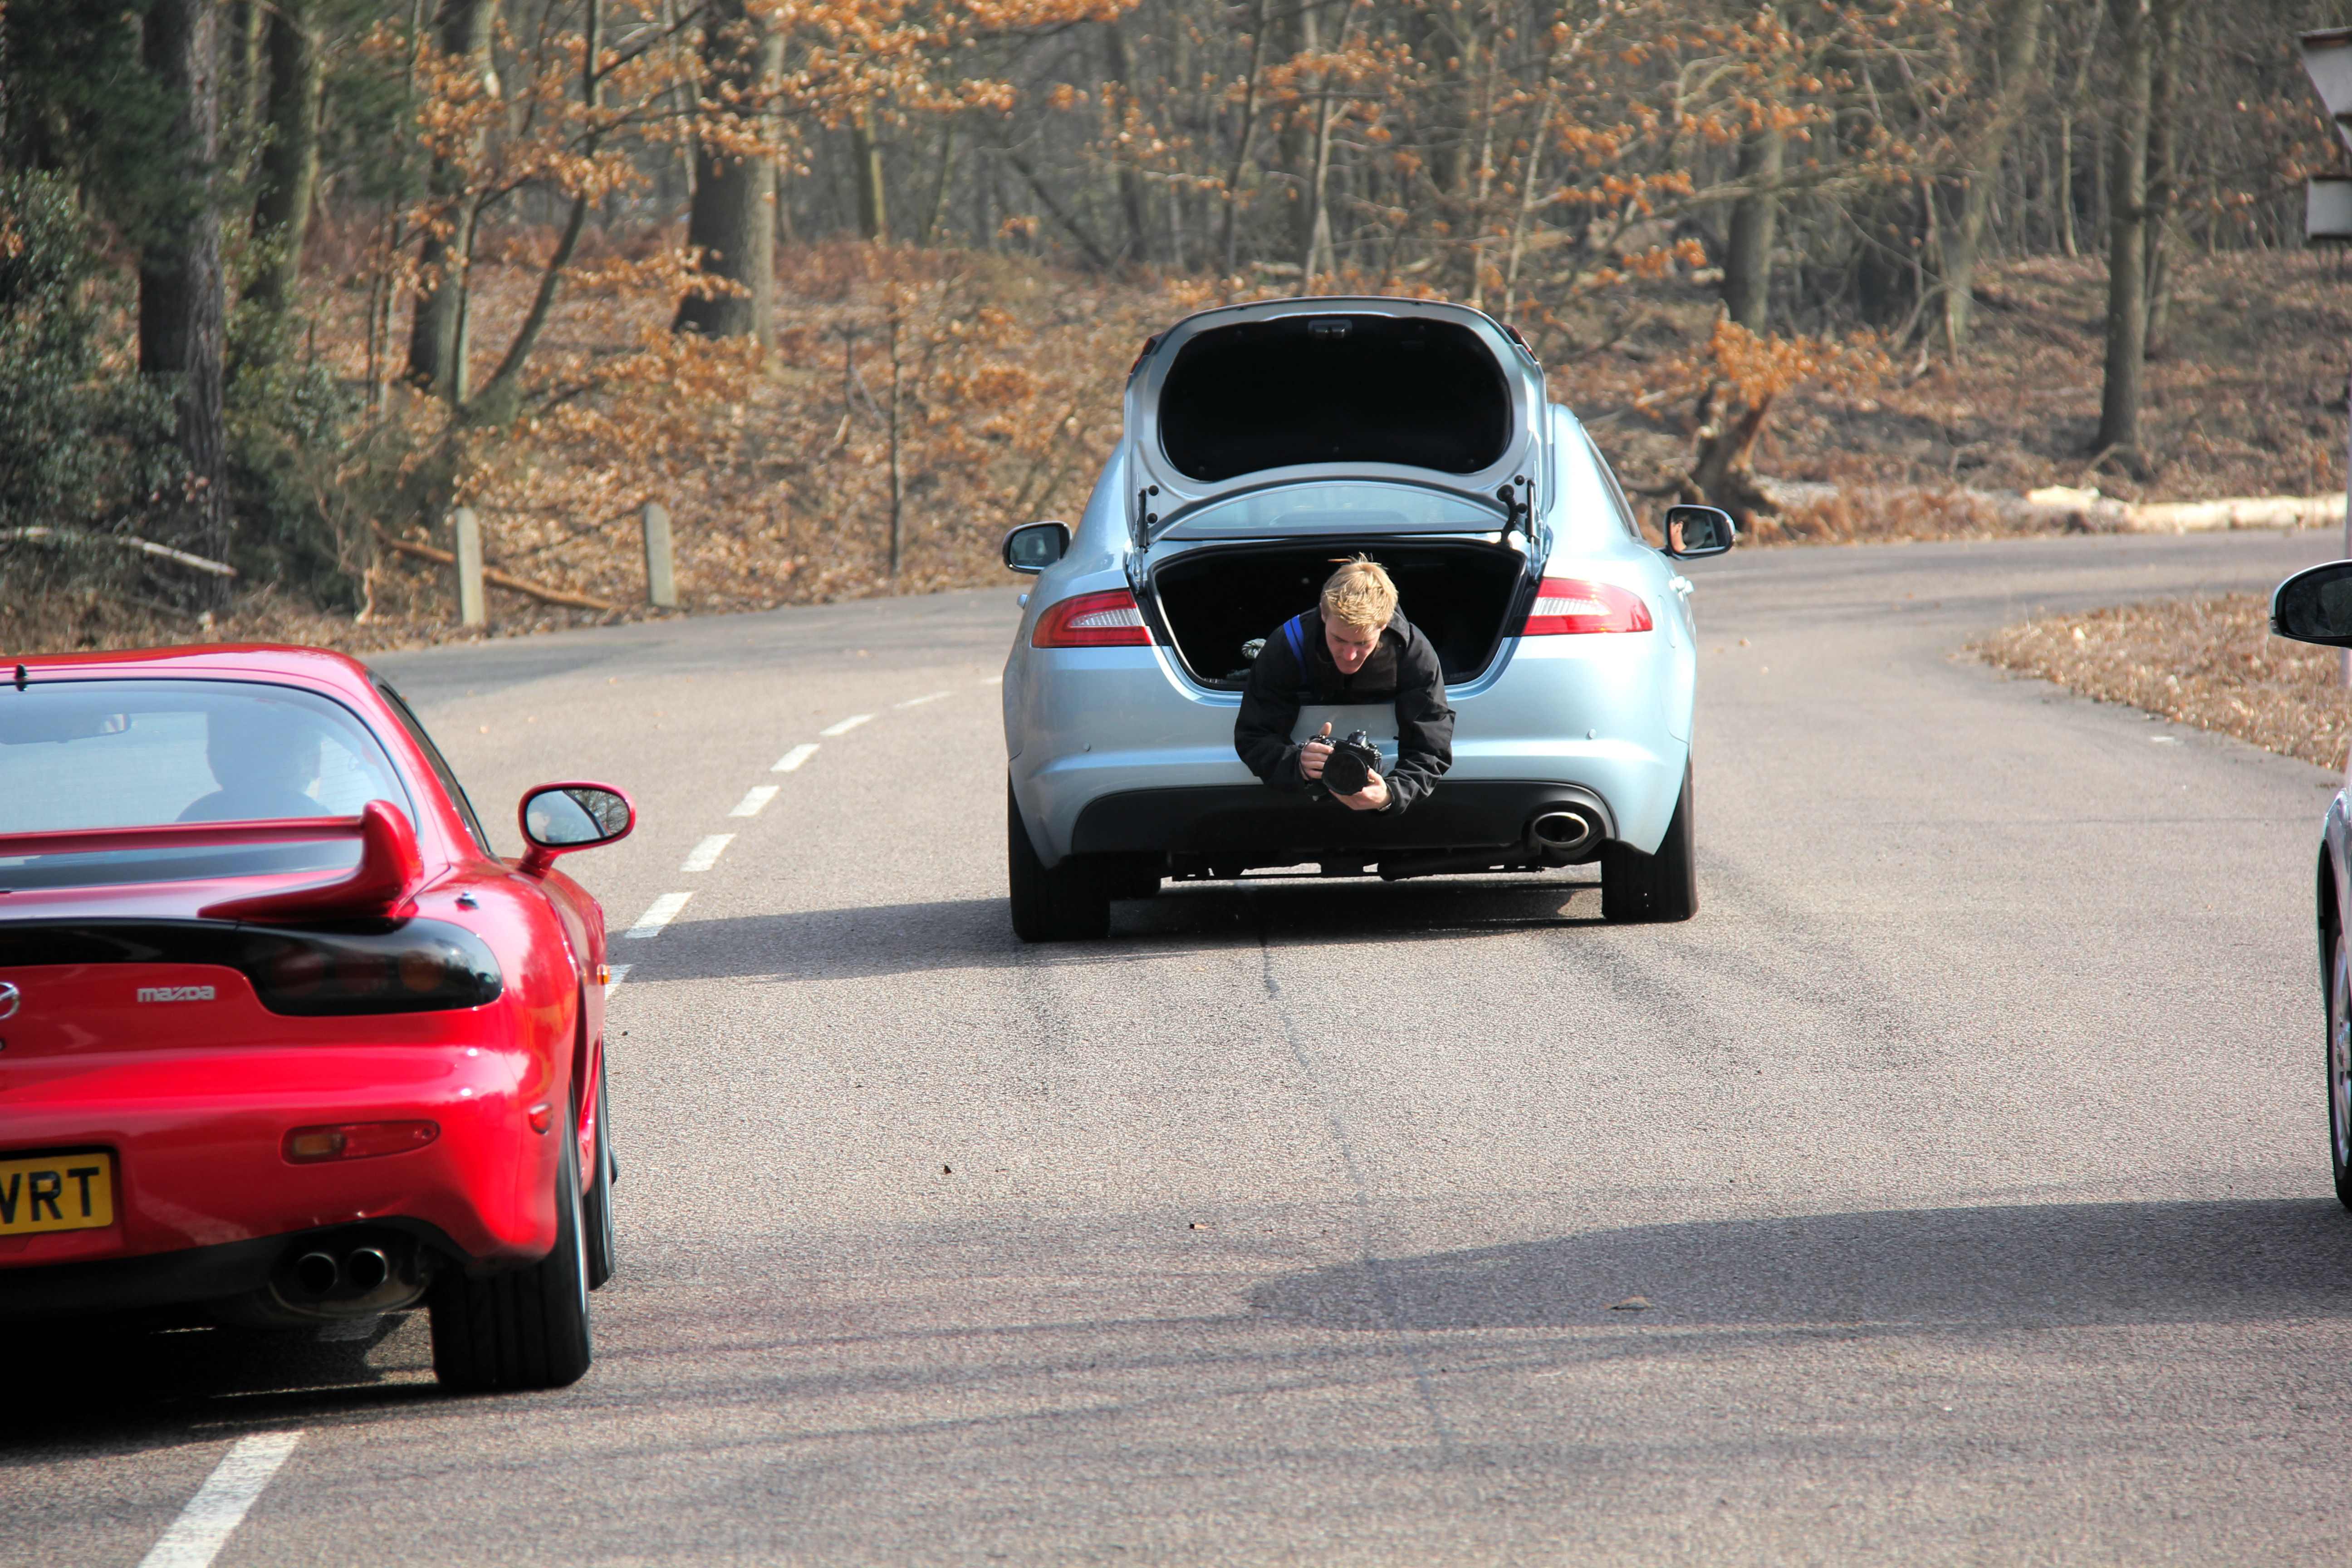
I tell you, these mag photographers earn their pay, hanging out of the boot of moving cars trying to take pics
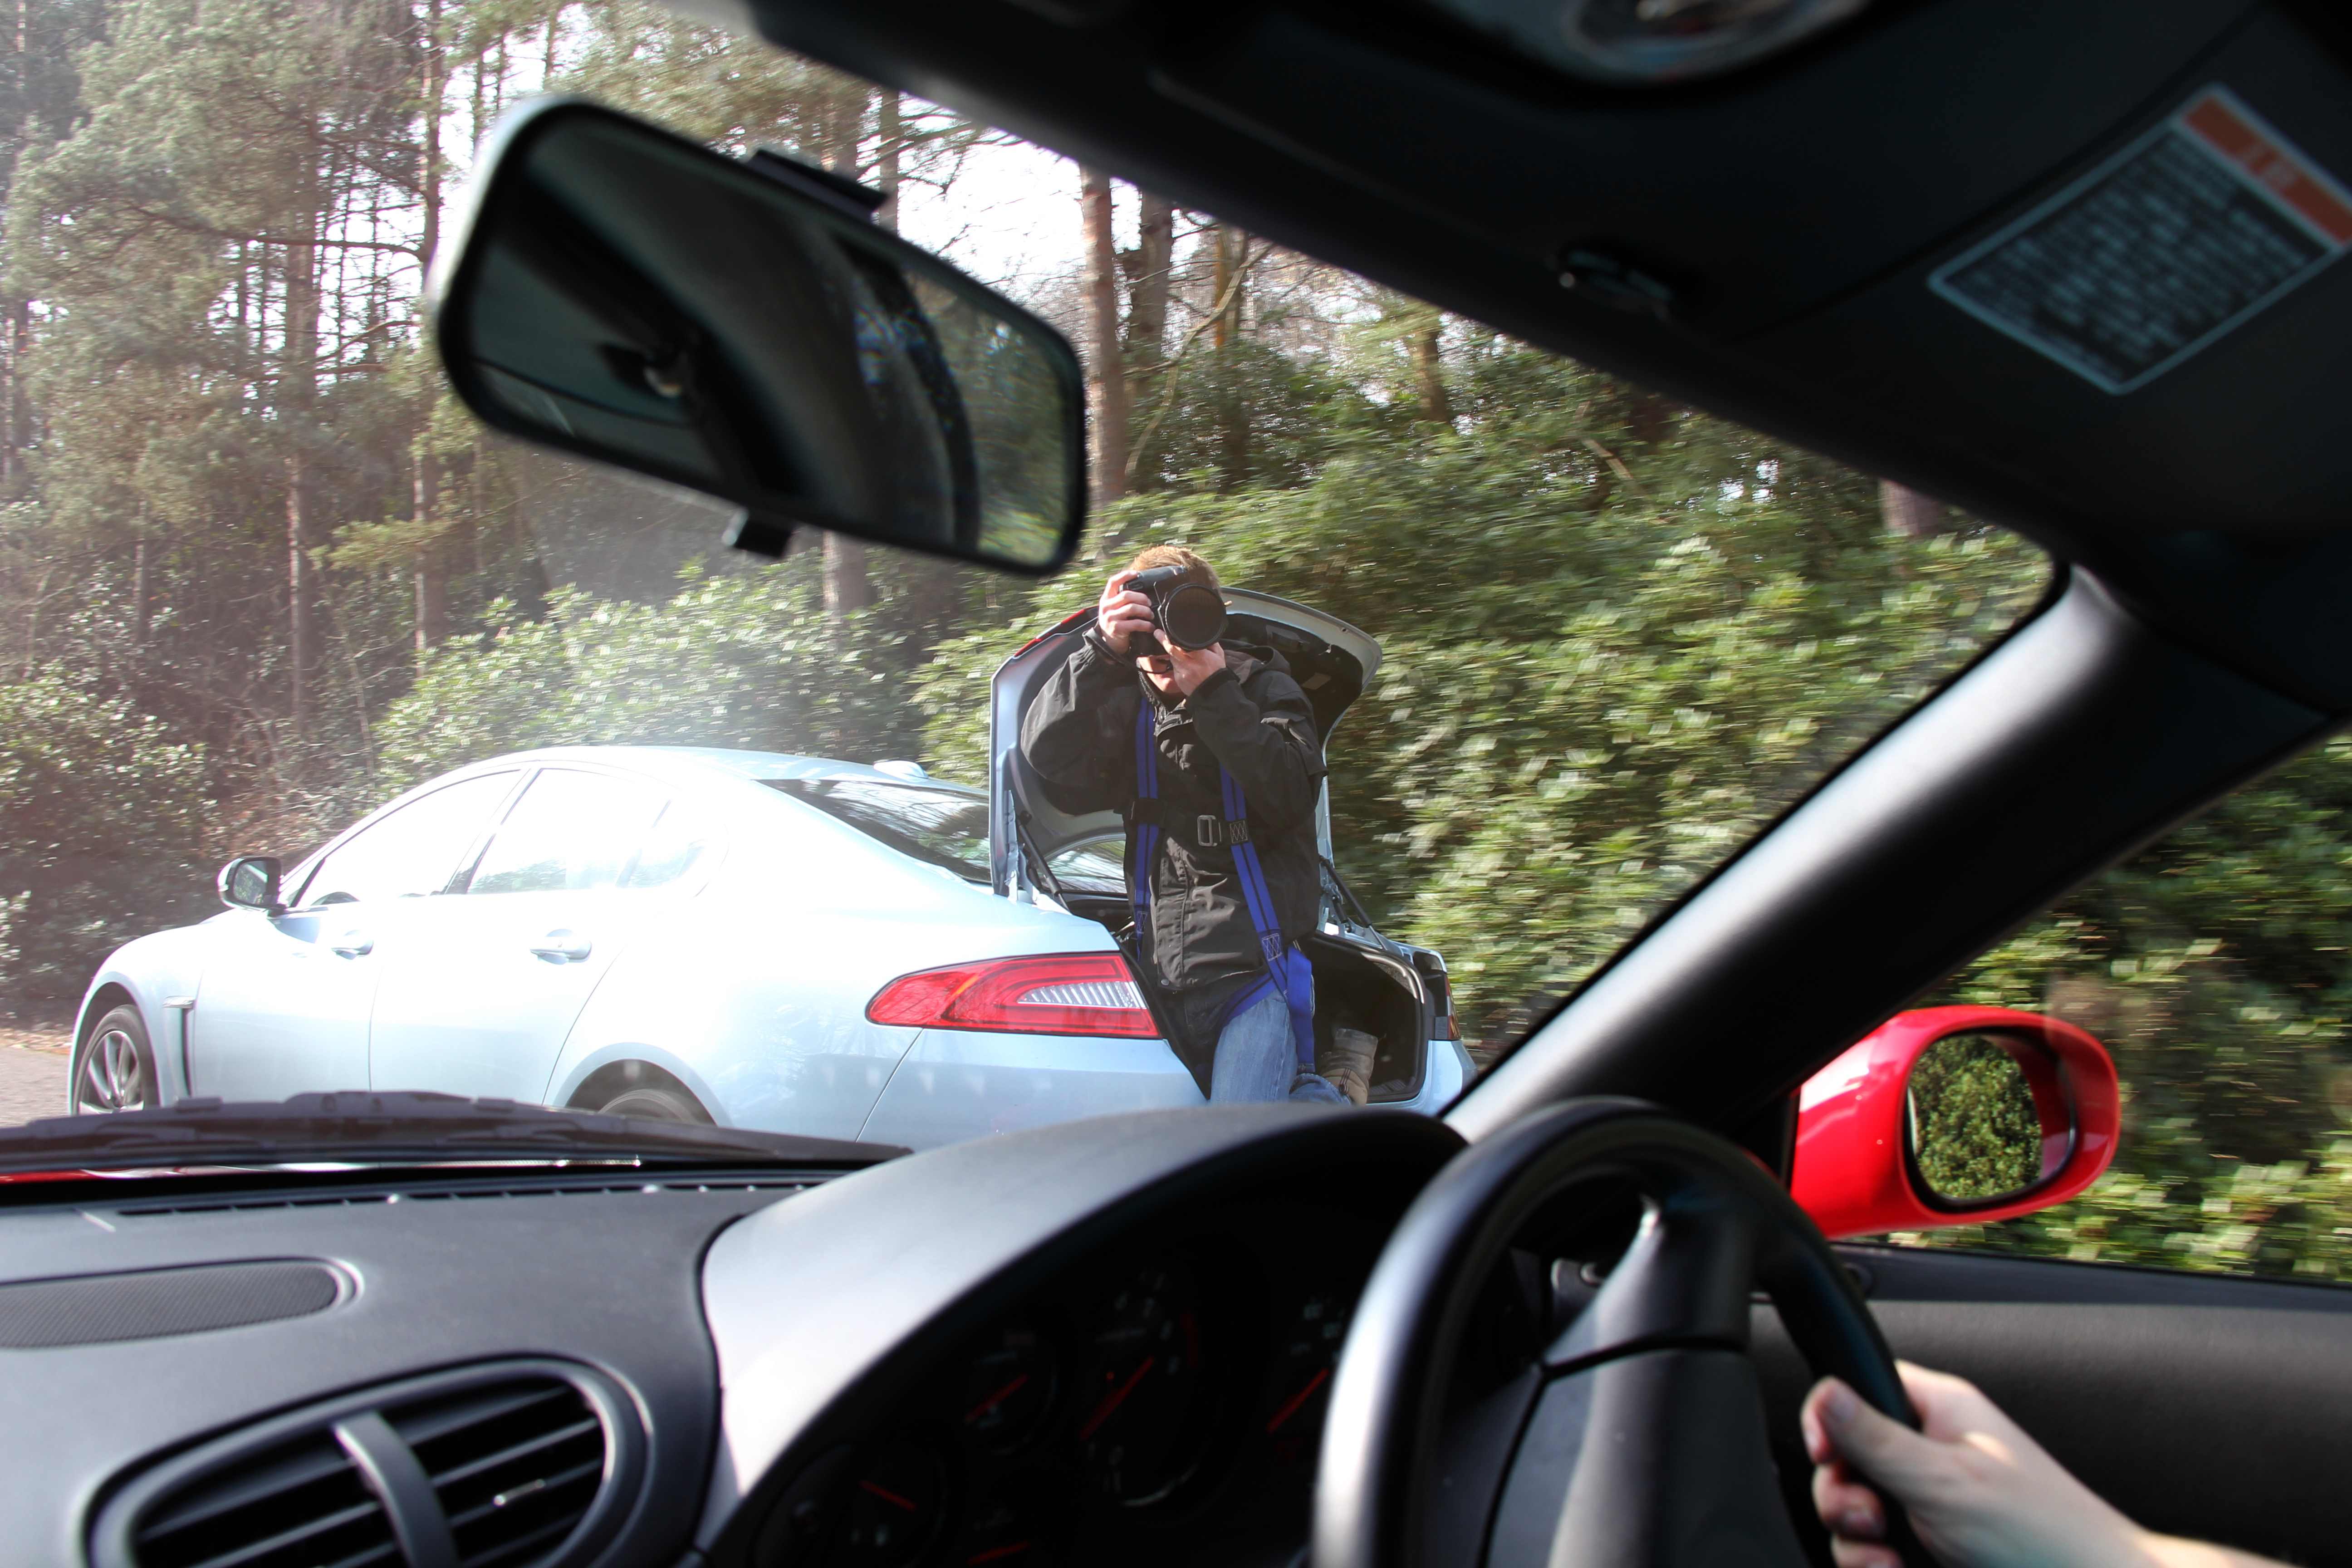
The editor fella took all the cars out for a spin around the speedbowl, which was slightly scary when I went passenger with him. We were barrelling into the first banked turn at around 120 in the clock (so approximately terminal velocity on the poor ol' FB) when he said "I suppose I'd better try out the brakes, then?" I said "Uh, yeah, I would" and I think even he had a bit of a "see God, then back off moment" as realised how they really weren't very much like the FD he'd been driving before :shock:
Thanks to Madame le Jo for the pics
Feel the Speeeeeeeeeed lol
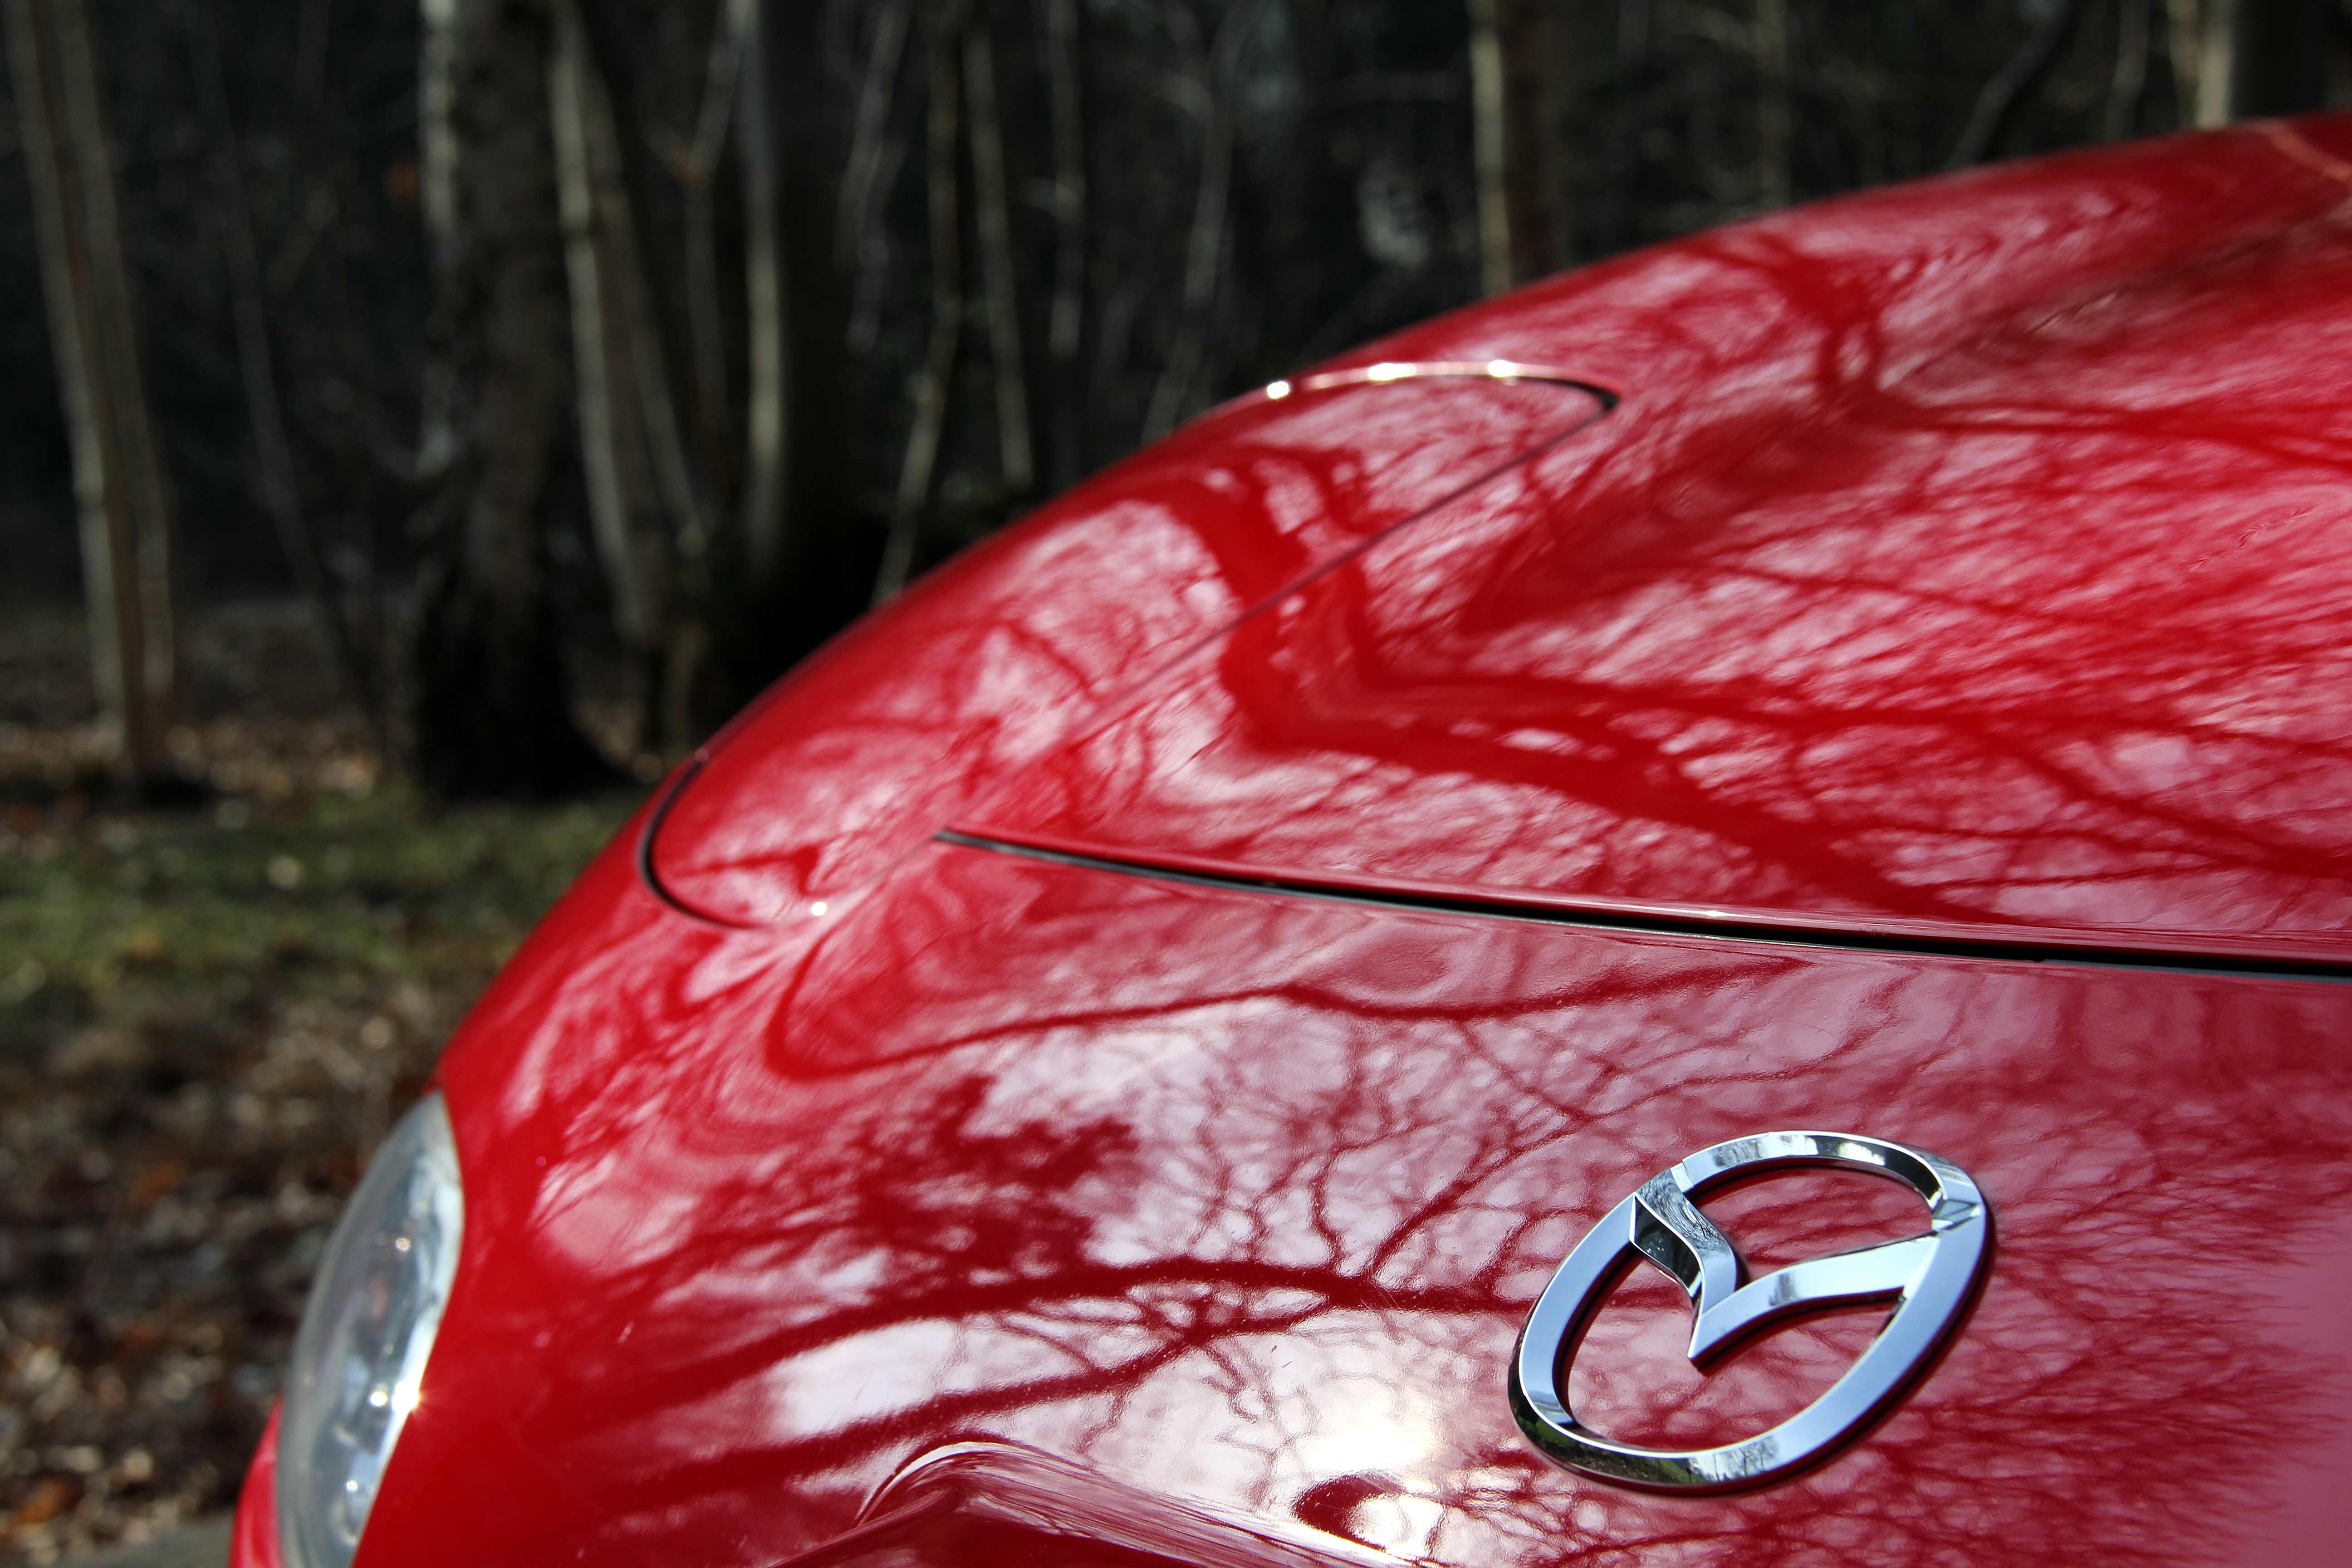
Arty FD badge to end...
Thread Starter
Senior Member
Joined: Oct 2010
Posts: 255
Likes: 1
From: England
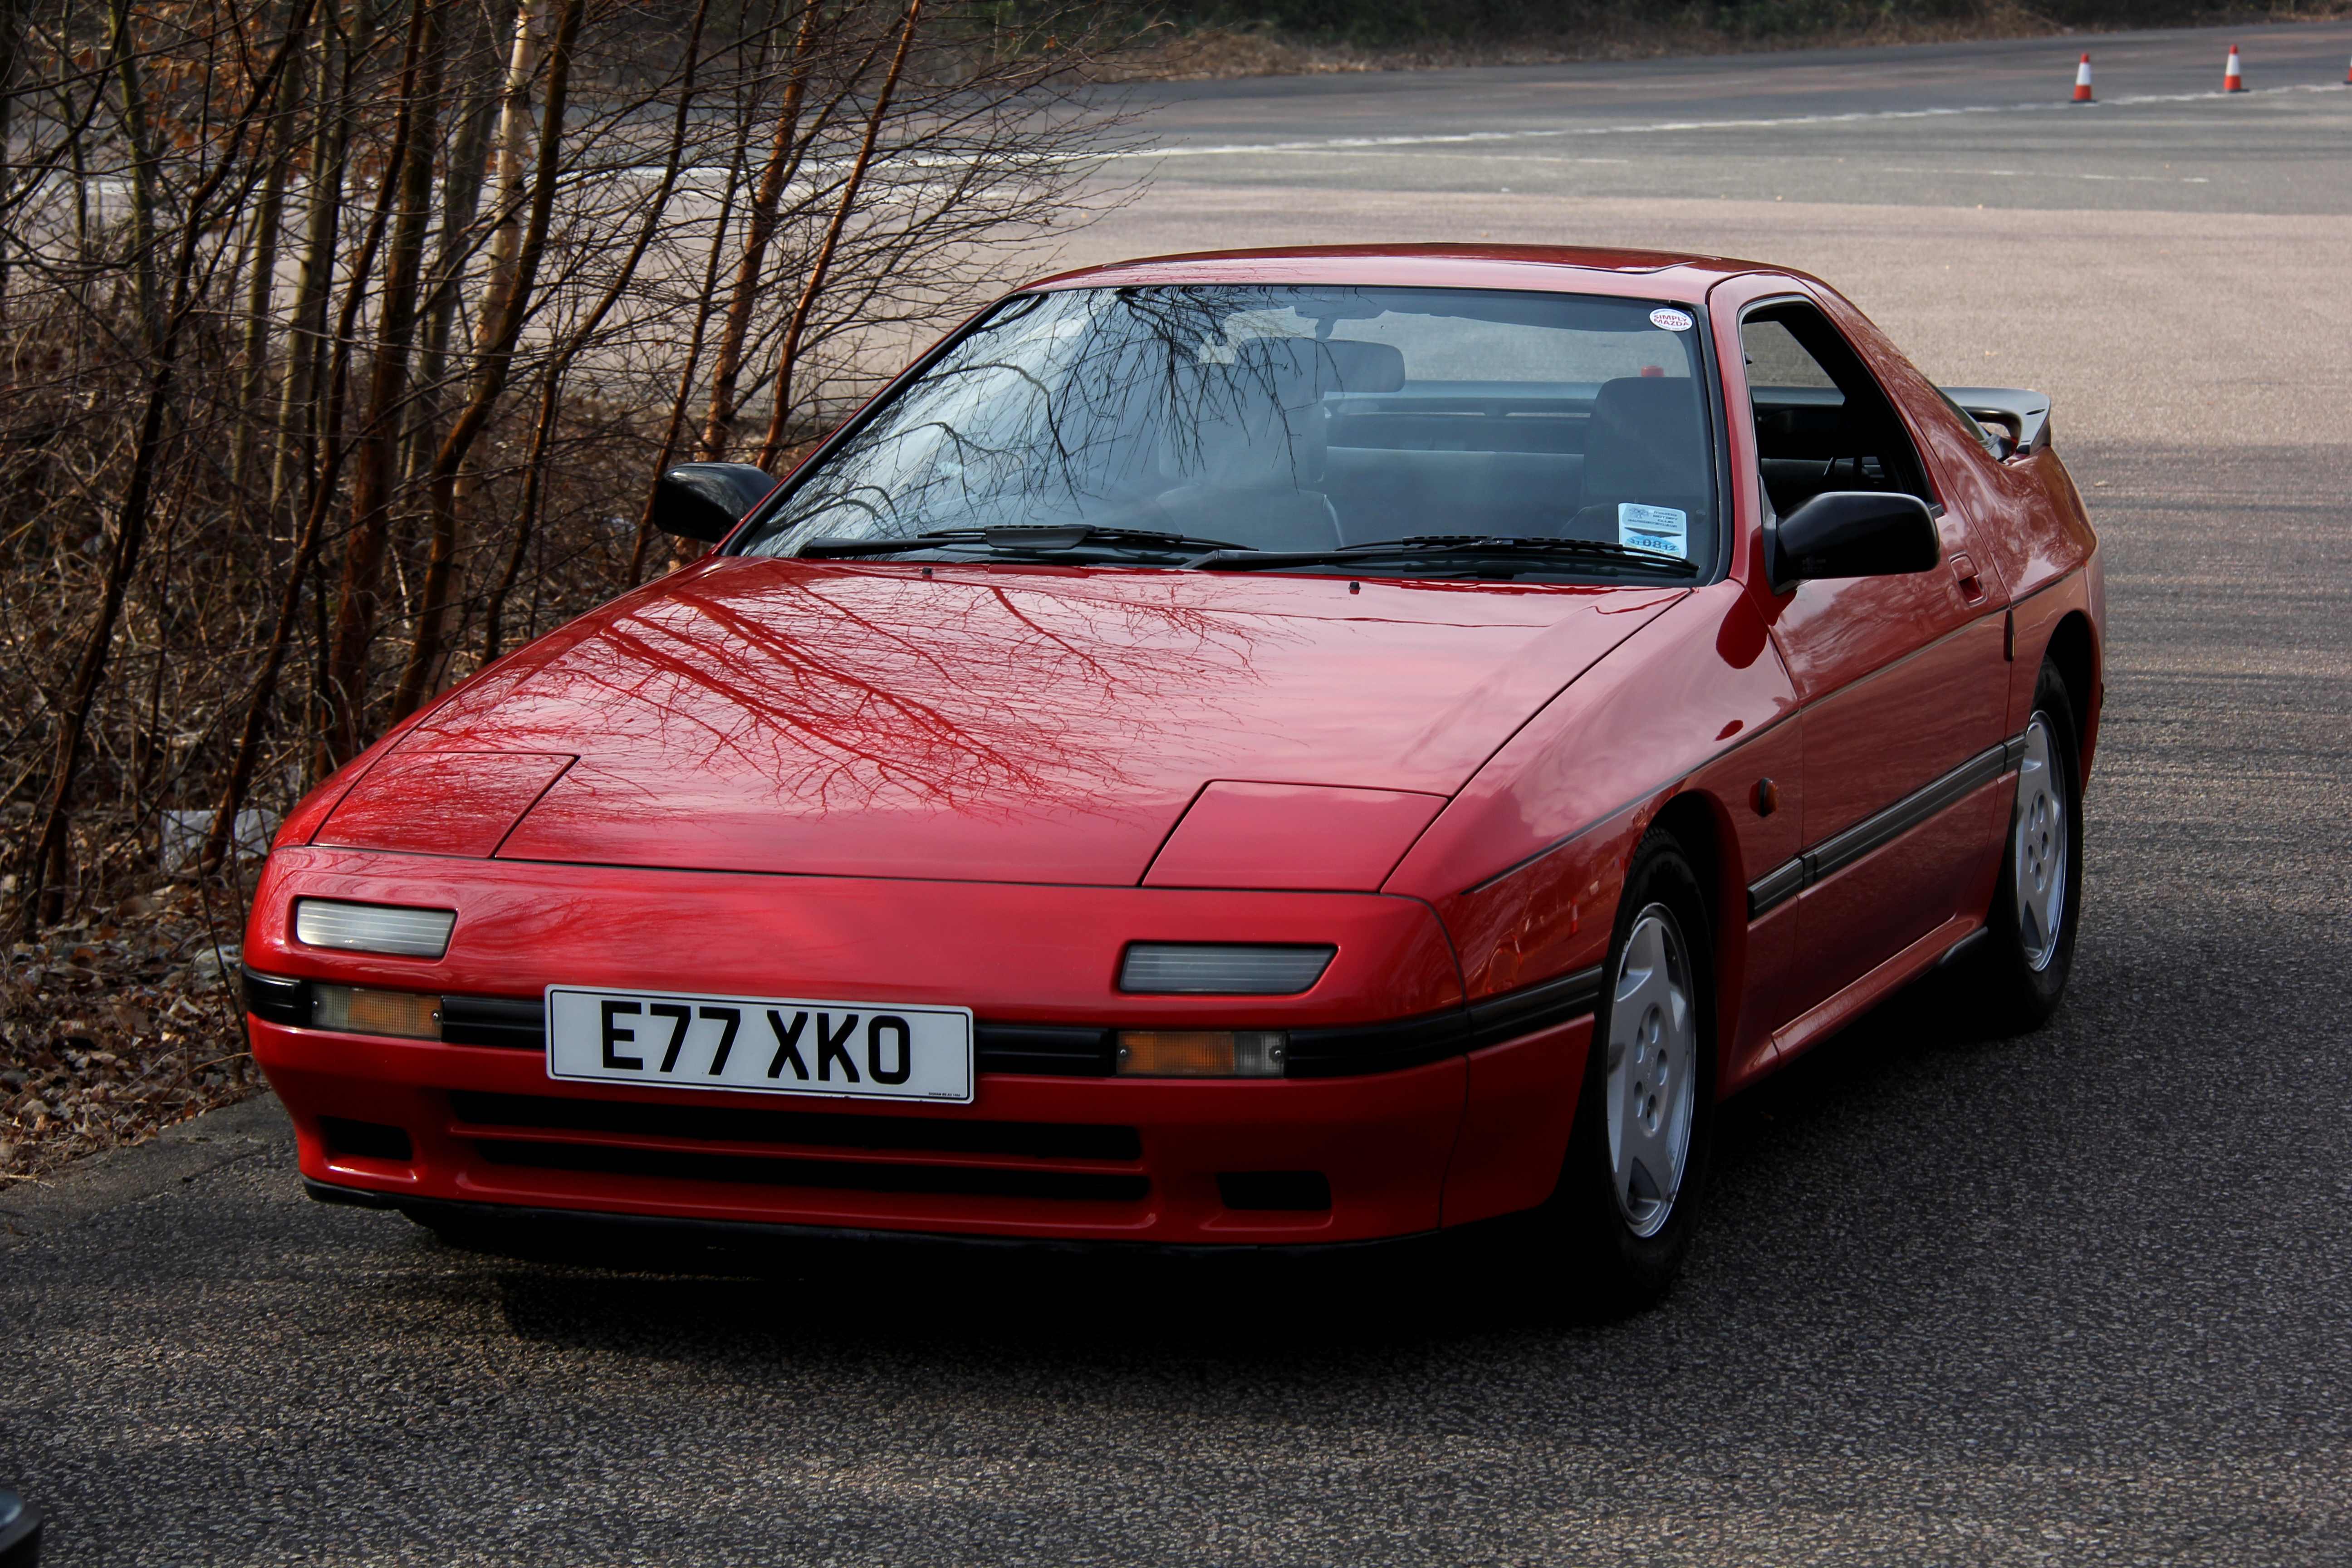
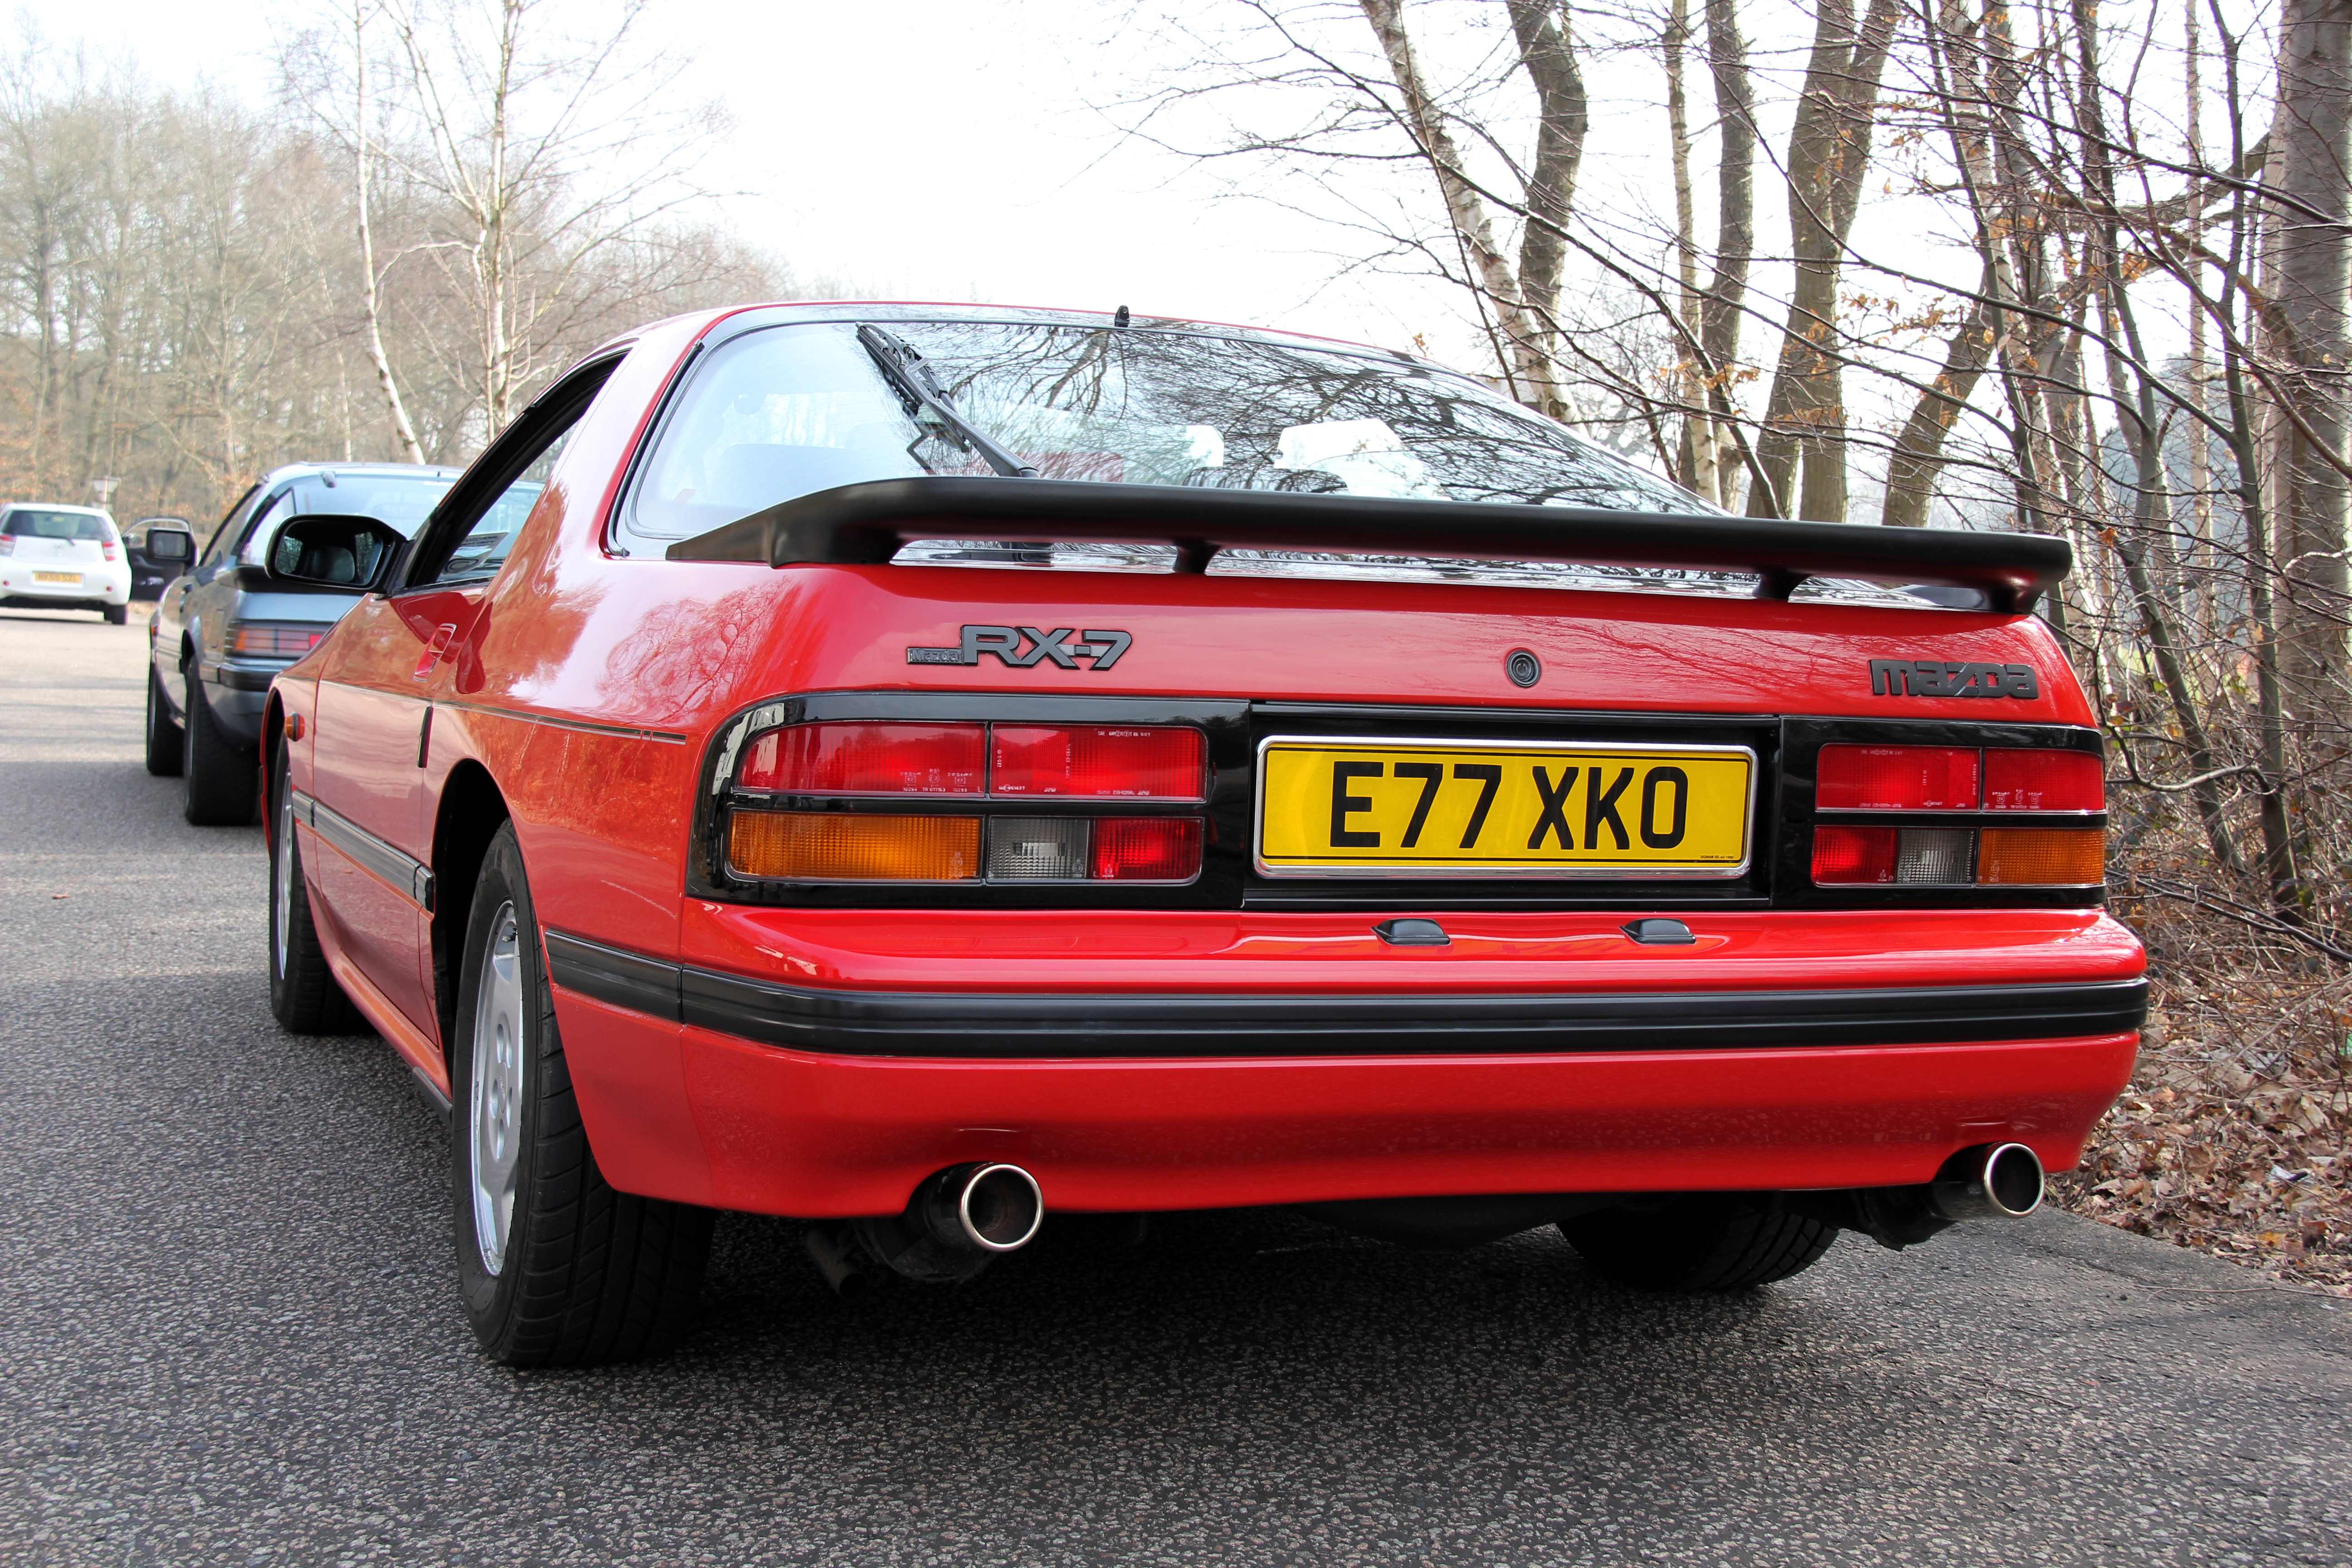
And here is the finished article as it appeared in the mag. Fame at last, haha;
Just to end this particular chapter, I stopped en route to take this one pic, since the background was too good to resist. Old skool cool, lol
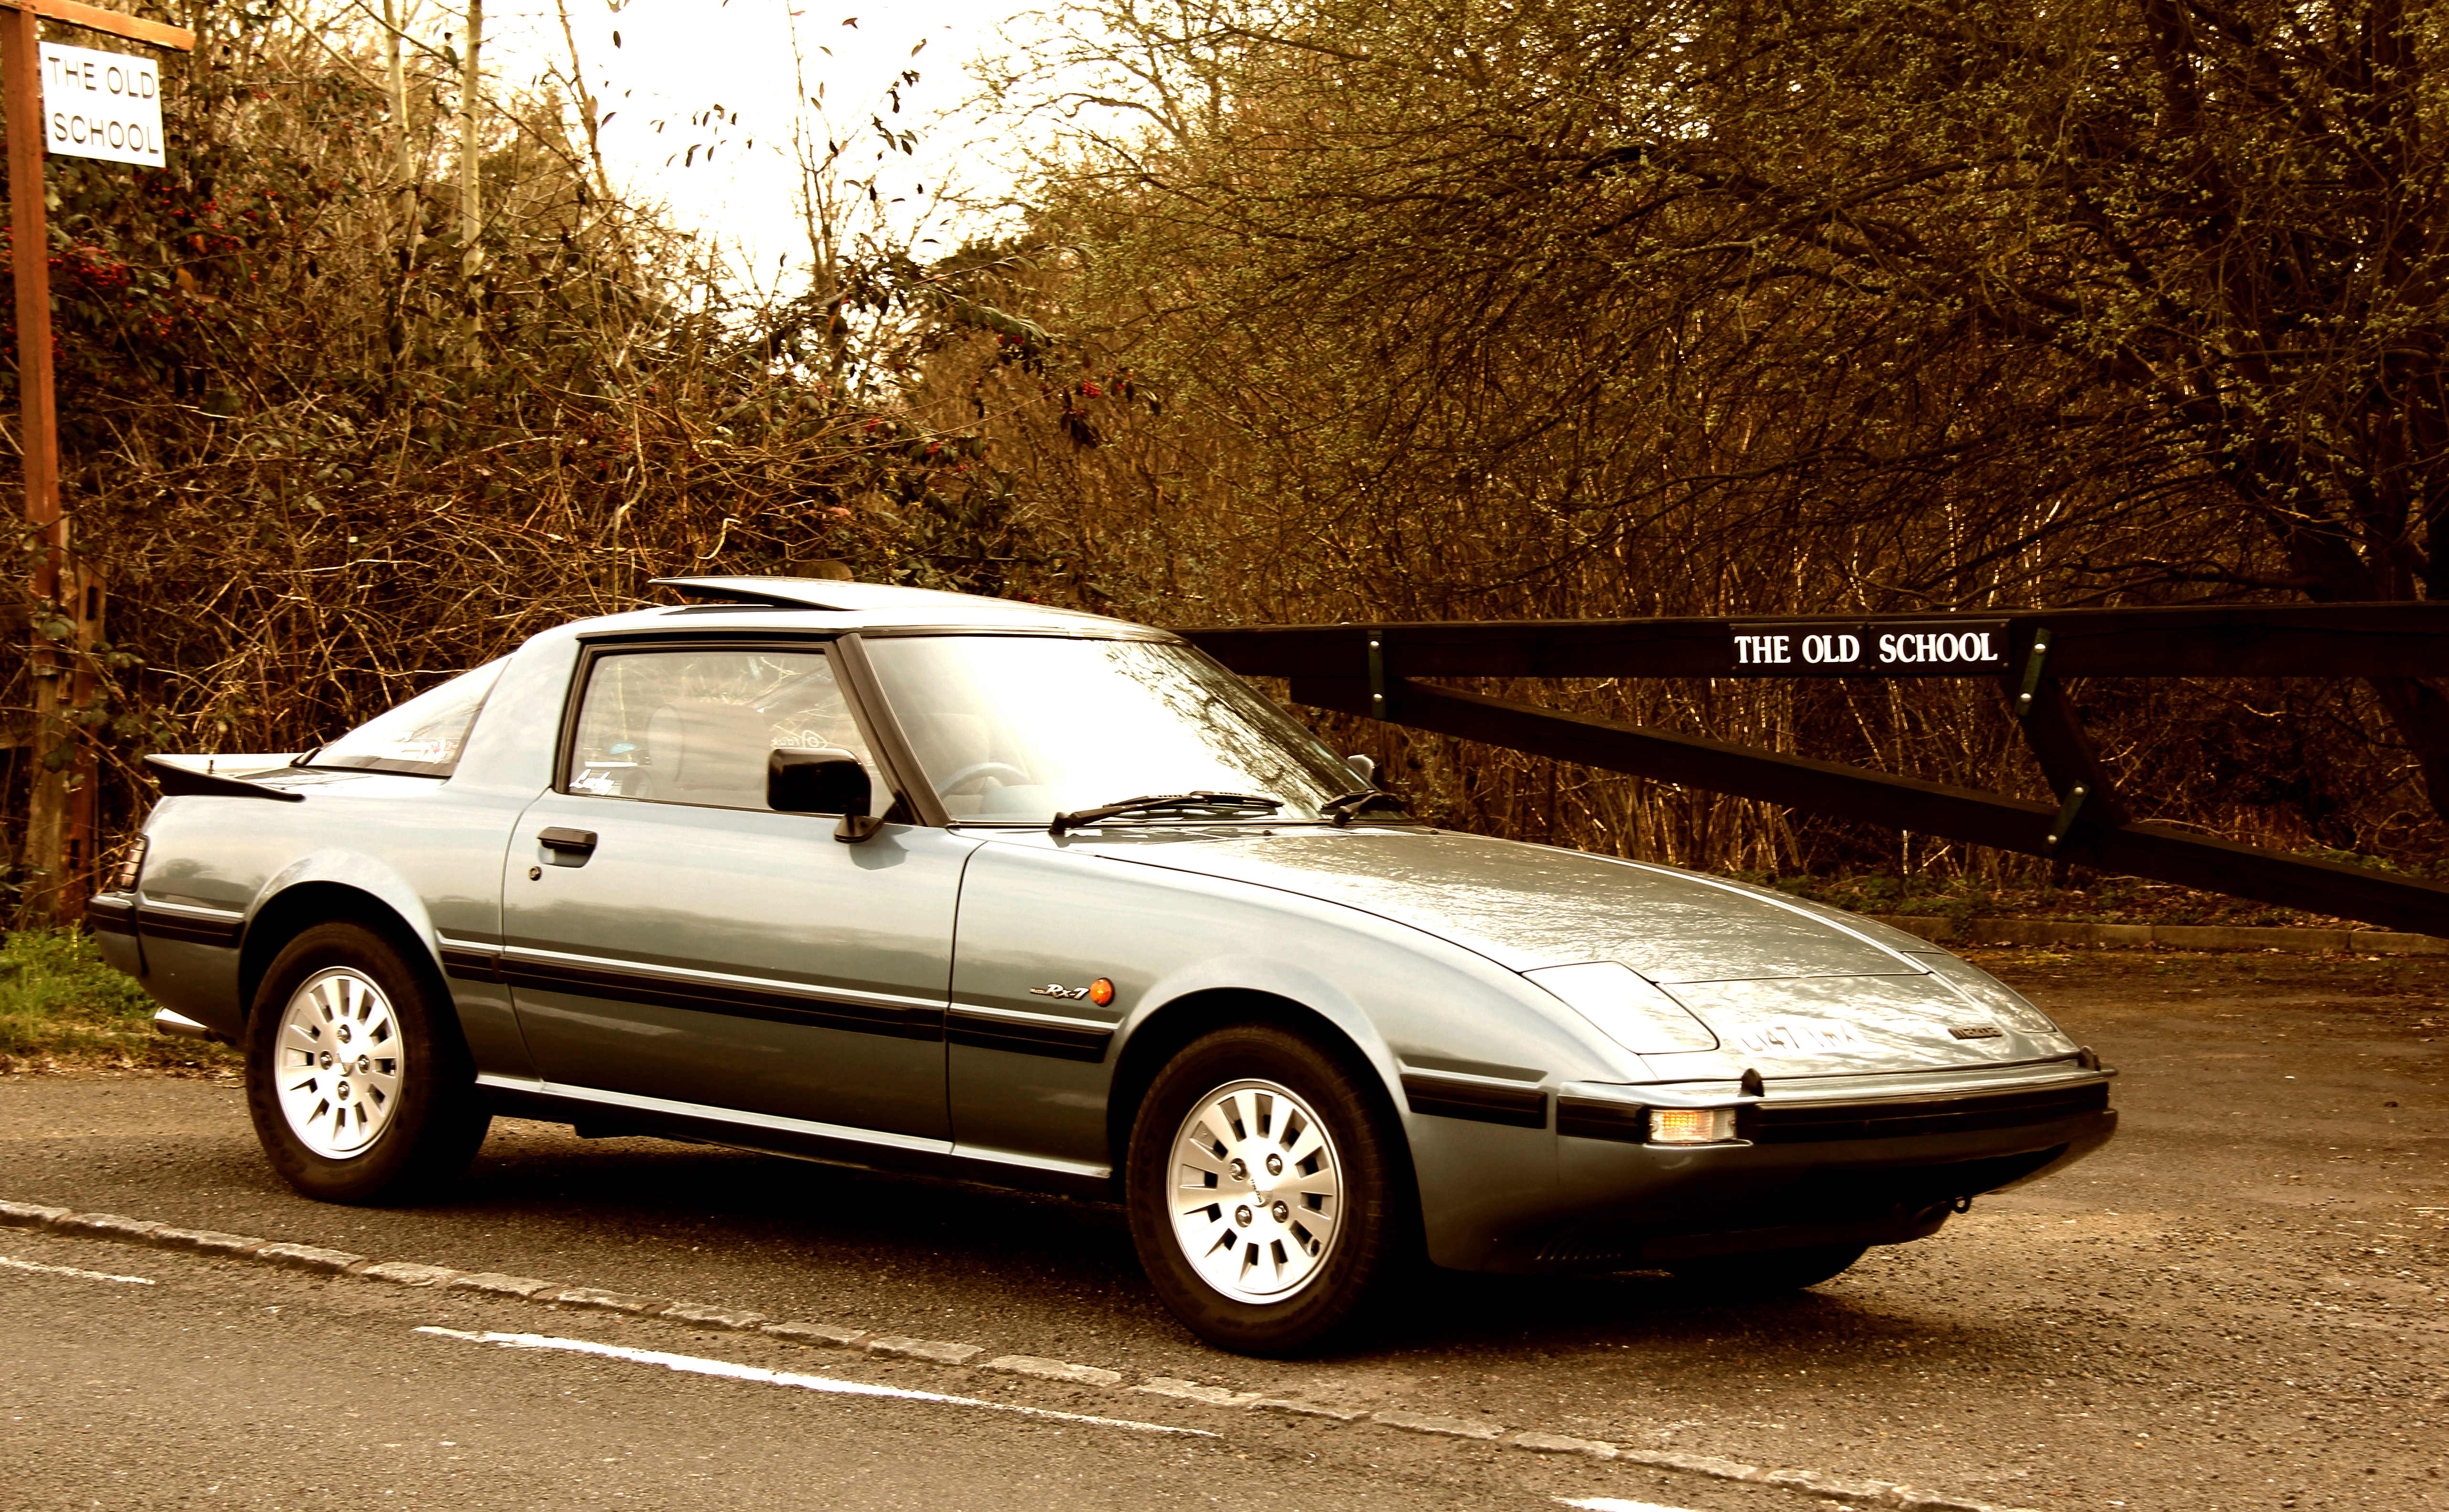
Just to end this particular chapter, I stopped en route to take this one pic, since the background was too good to resist. Old skool cool, lol
Thread Starter
Senior Member
Joined: Oct 2010
Posts: 255
Likes: 1
From: England
Wow, whole heap of disinterest going on in here then lol.
Oh well, plodding on in case anyone's still awake out there....With the photoshoot over I could get back on with the job of de-stocking the car again. First thing was to sort the wheels finishing touches out. The centres looked rubbish. Where they had no centre caps the end of the stubs were manky and rusty and cack, and would look pony even if I painted them up. So, I hit the 'Bay in search of centre caps. This proved problematic, the Sharaks have a centre bore of 75mm and the only cars to use this are Mercs and VWs, both of which have logo'd-up caps, the Merc ones being worst because they generally have an embossed tristar on them too. Eventually I scored some from a caravan supplier, strangely Hey, whatever works lol
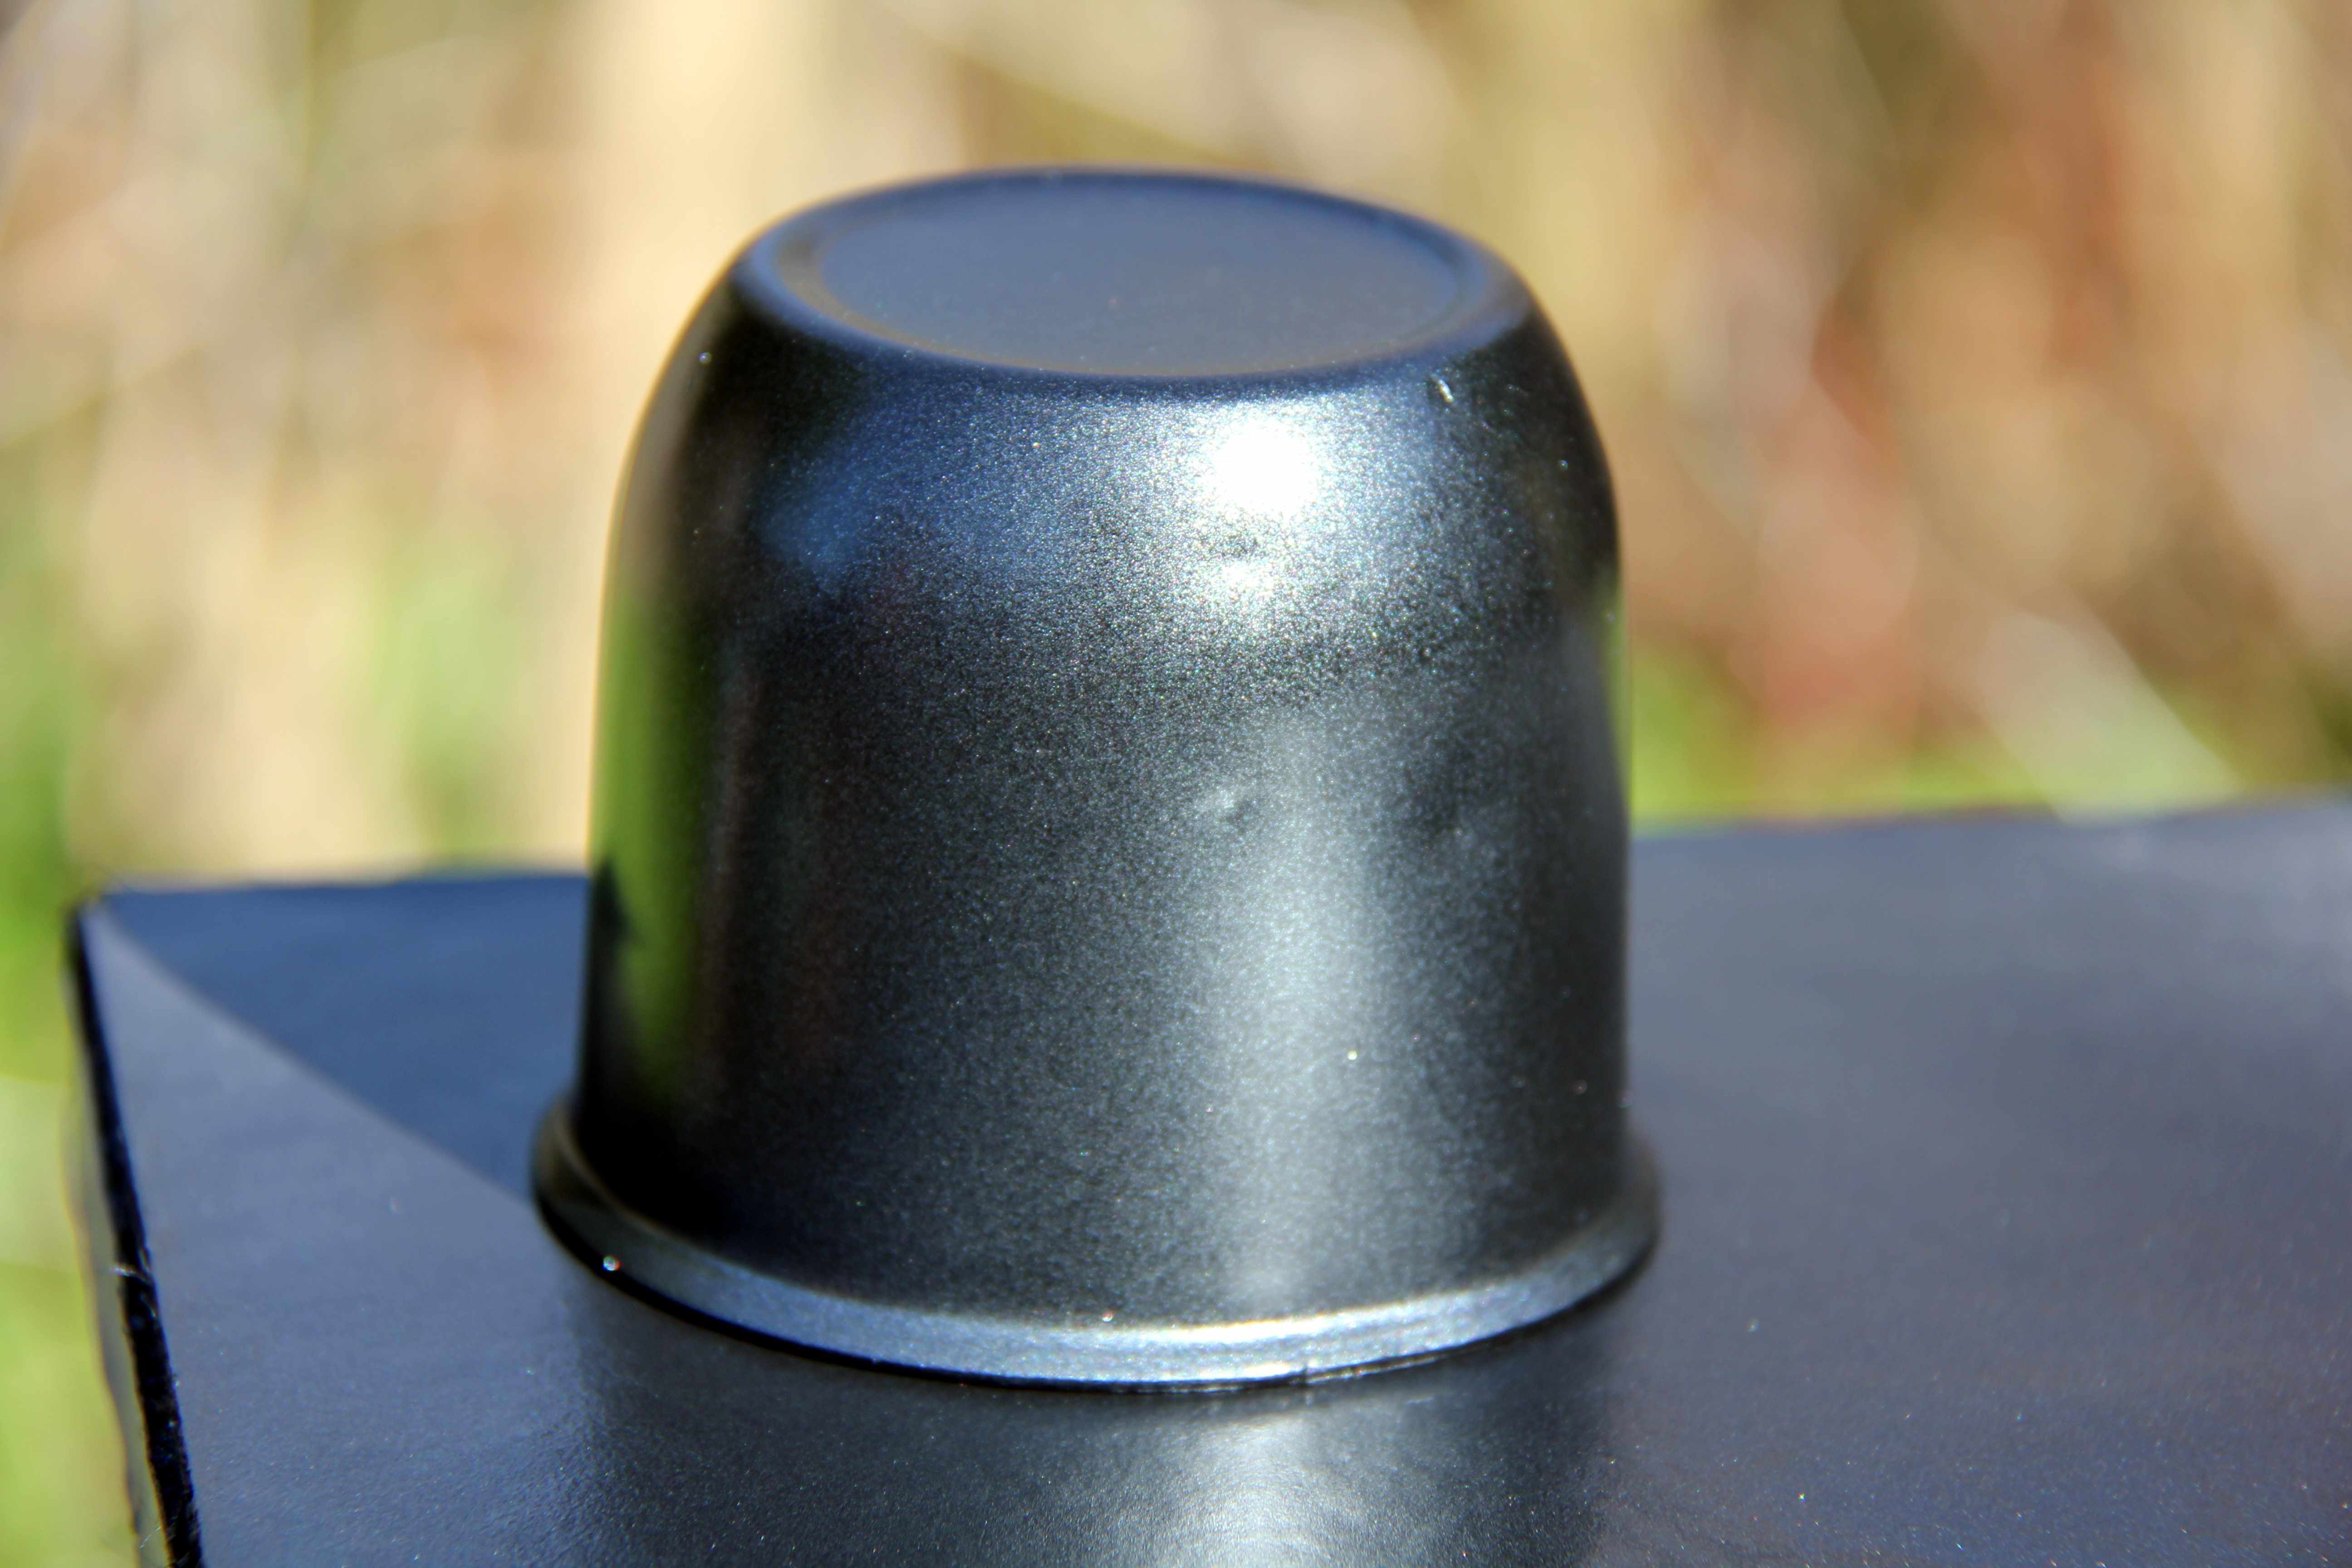
The Watanabes were even trickier. I didn't think they'd work with flat centre caps, it would have just looked wrong. Again, the Bay of E rescued me, scored three shop soiled old skool slotmag alloy dome caps for dirty cheaps. I found out why when they got here;
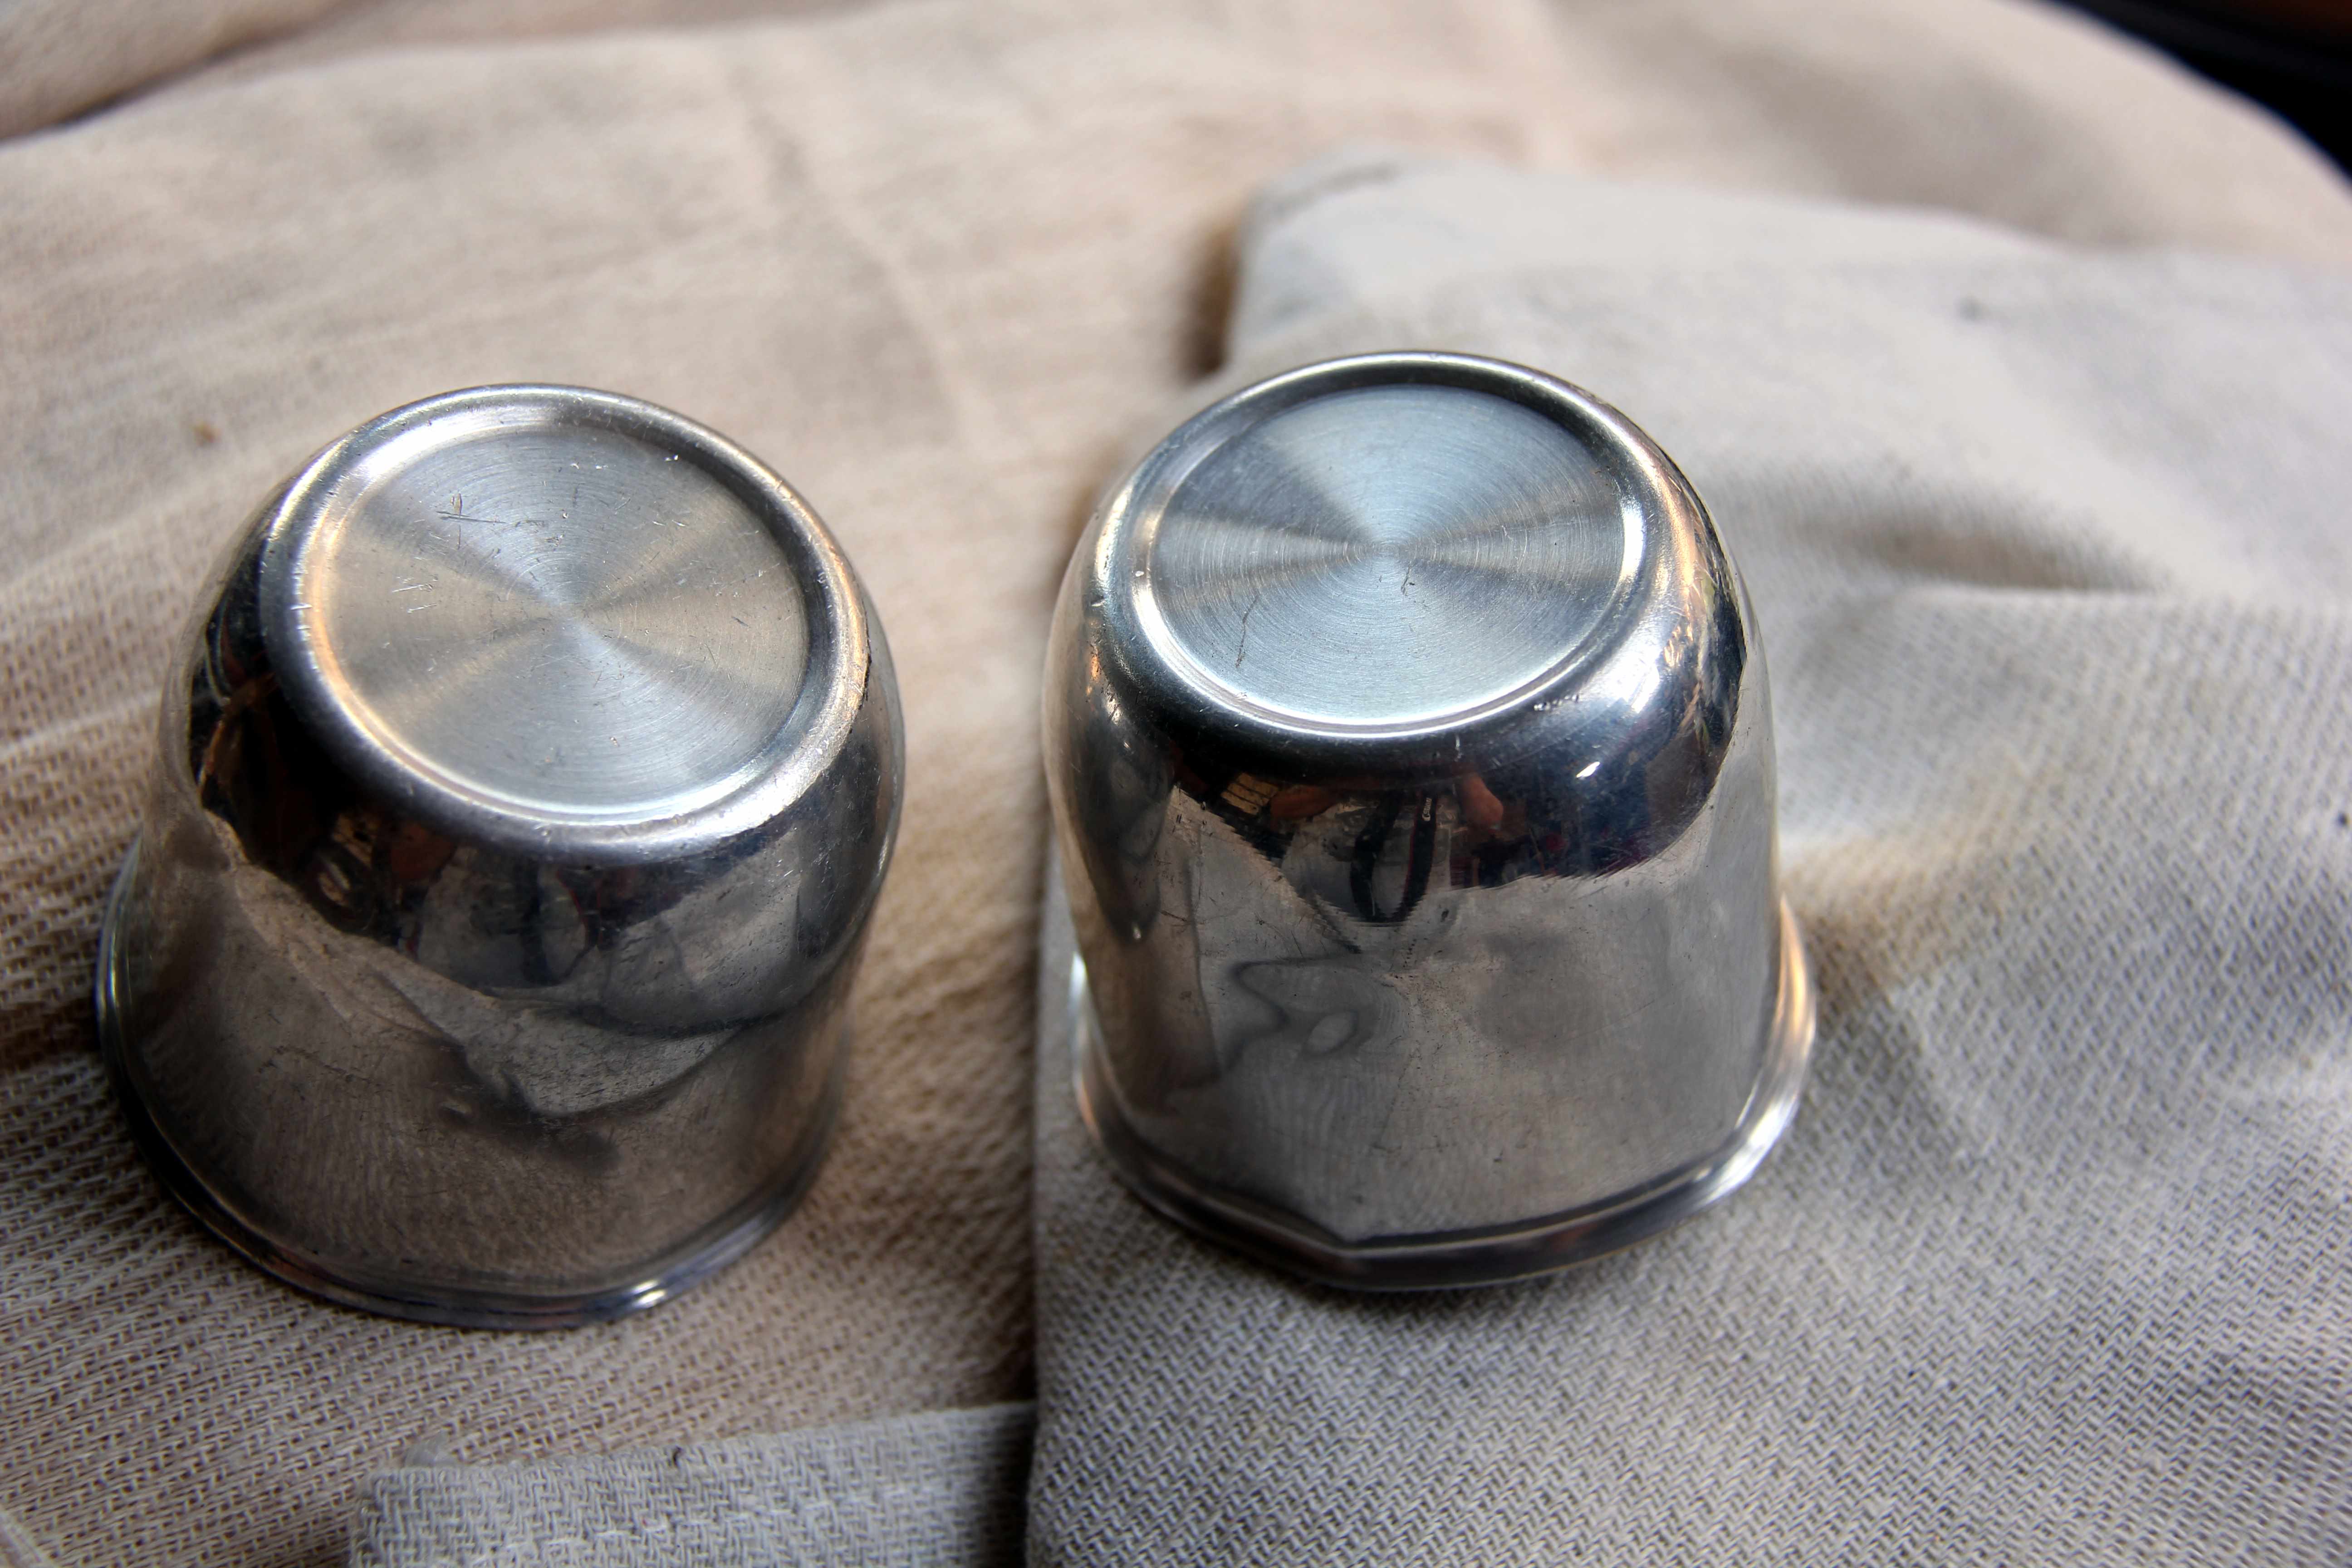
"shop soiled" clearly means "mullered" hahaha. To be fair, the guy was upfront that they were mutilated, no point grizzling about it. I got to work on the worst dents and roughing the surface up for paint. Clearly they couldn't stay alloy, that'd look poor with the dark wheels
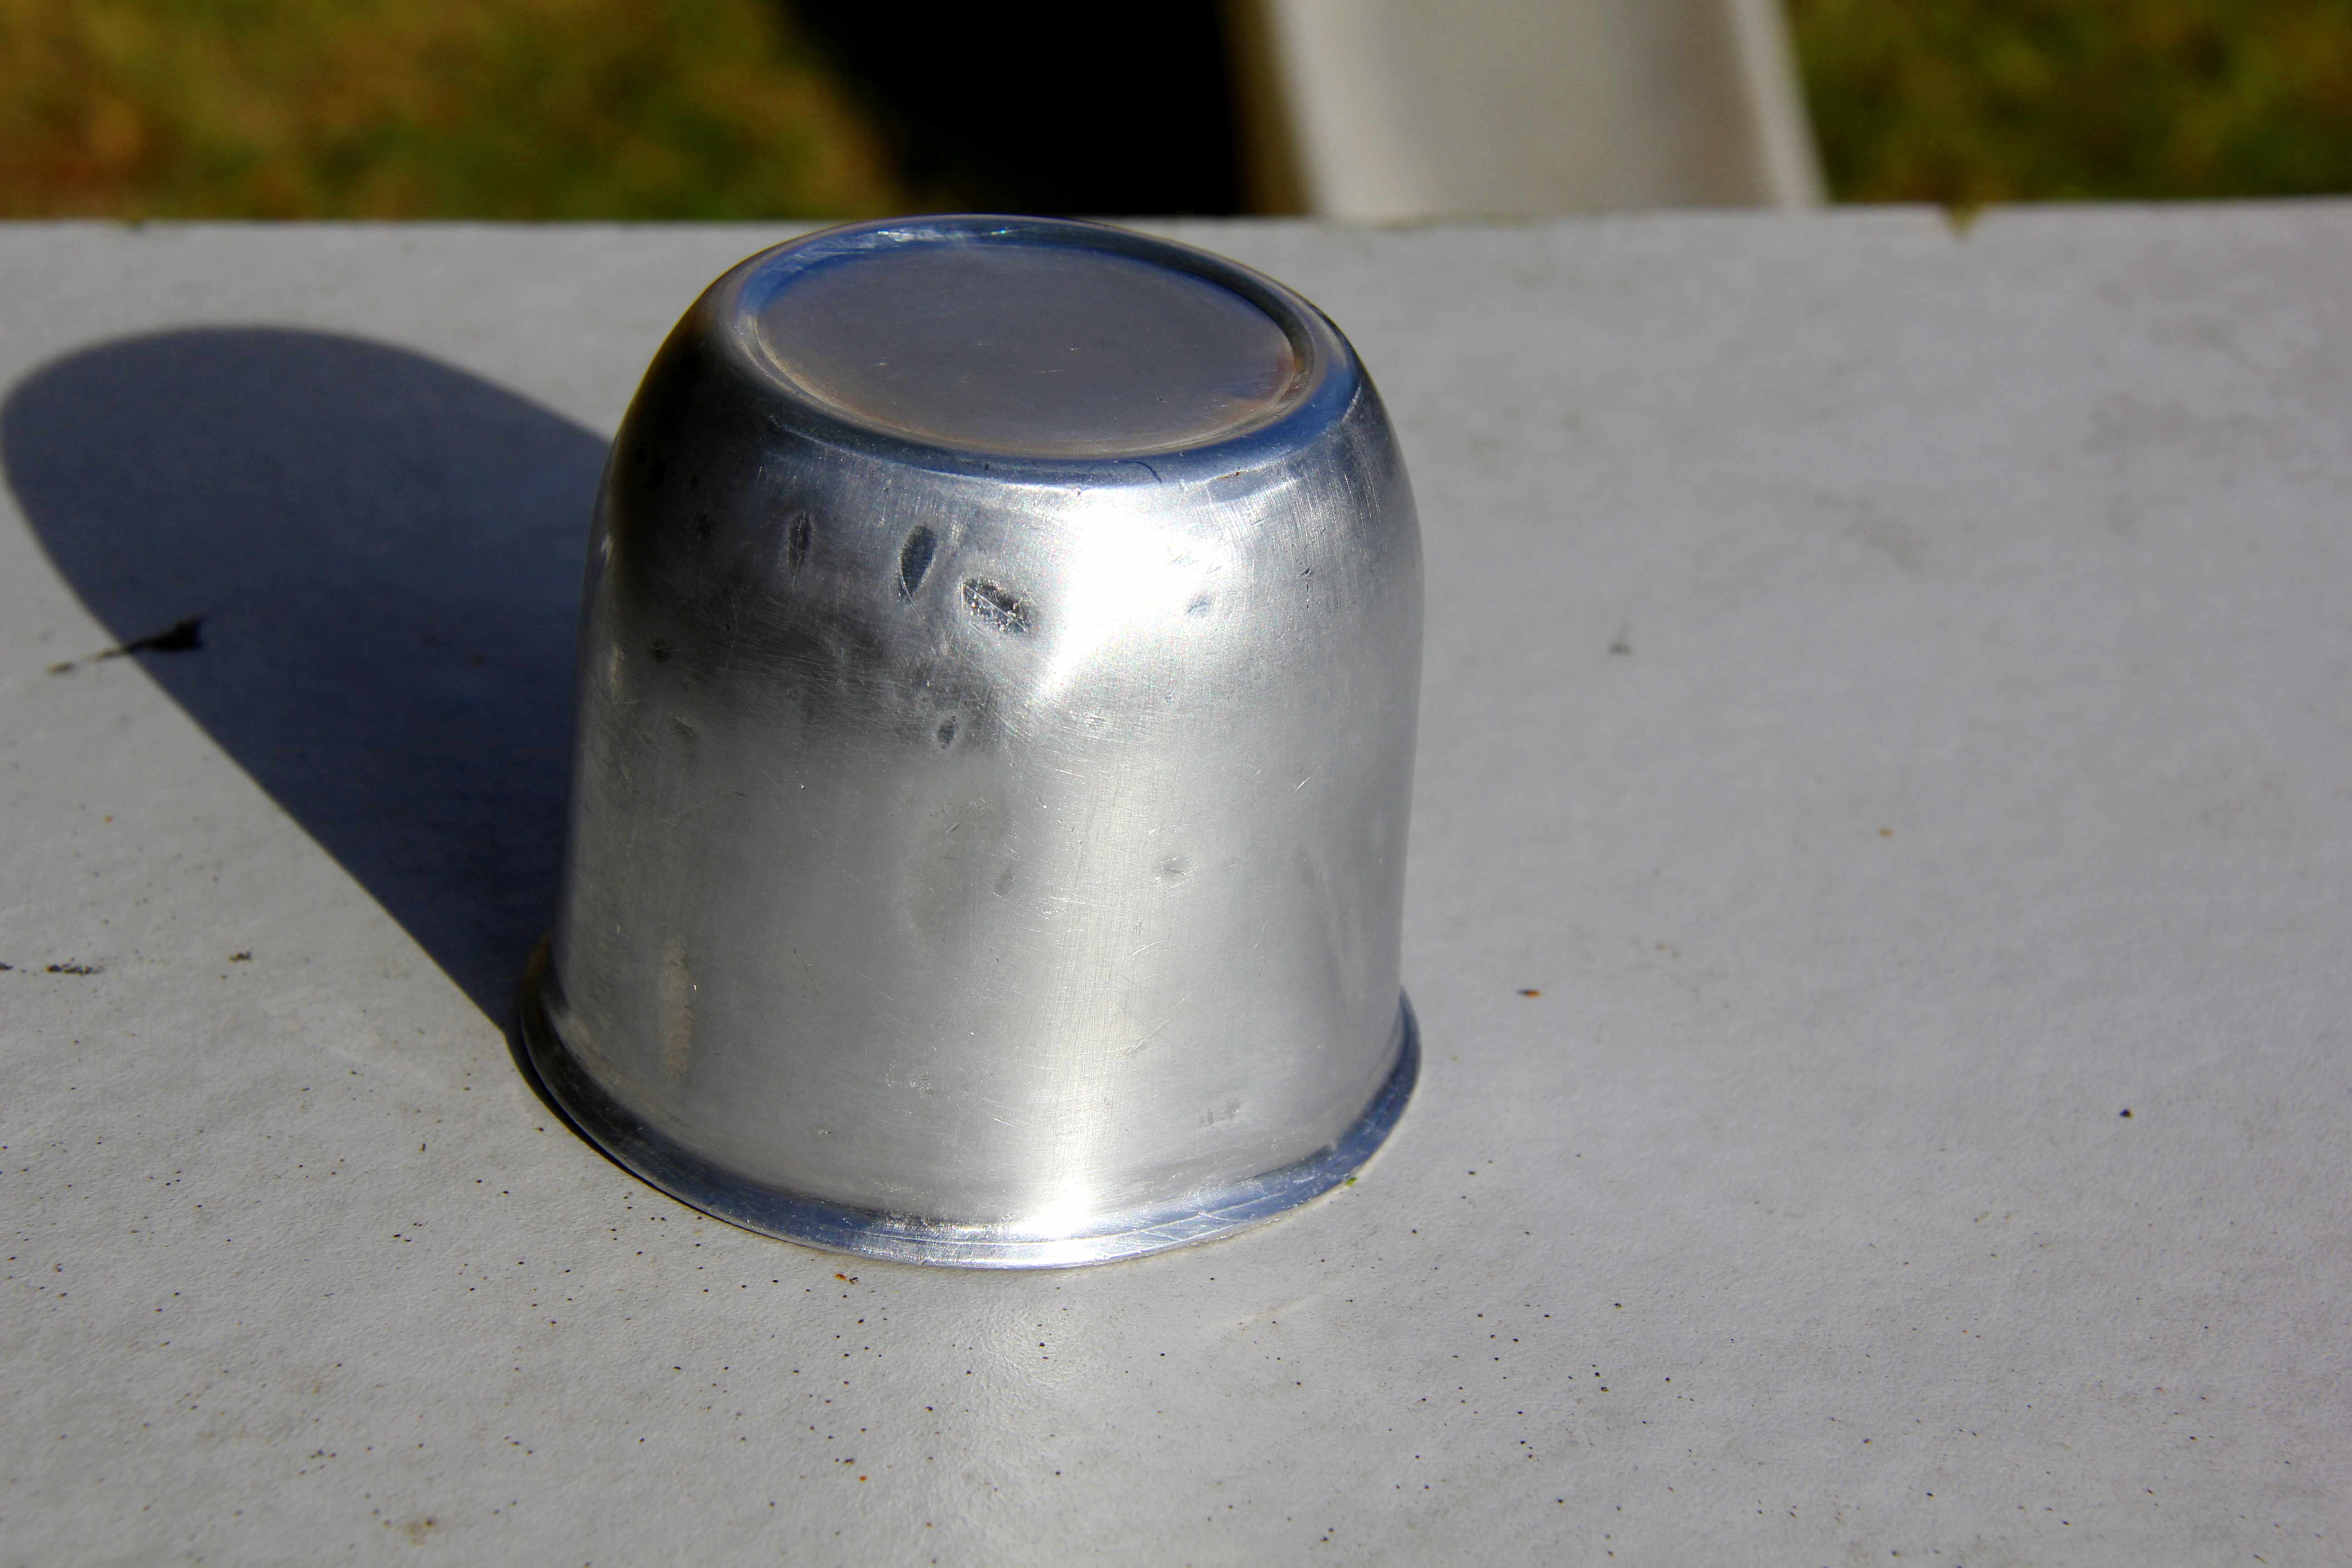
Got the worst of the dents out, but some I just left. I quite like the used and abused look. What wouldn't do was the profile;
Bent . A bit more panel beating had them fitting sweet
Then on to the fun stuff... primer;
Shiny black in best Halfrauds' rattle can stylee
then the tricky part, trying to colour-match to the refurbed alloys. I went for a gentle blow-over with Ford Graphite Grey. Couldn't find the Bentley one in rattle cans, not surprisingly. This is close enough, slight miss-match, but it'll do. Shame I didn't have the caps to give the refurbishing dude in the first place really, would have been easier lol
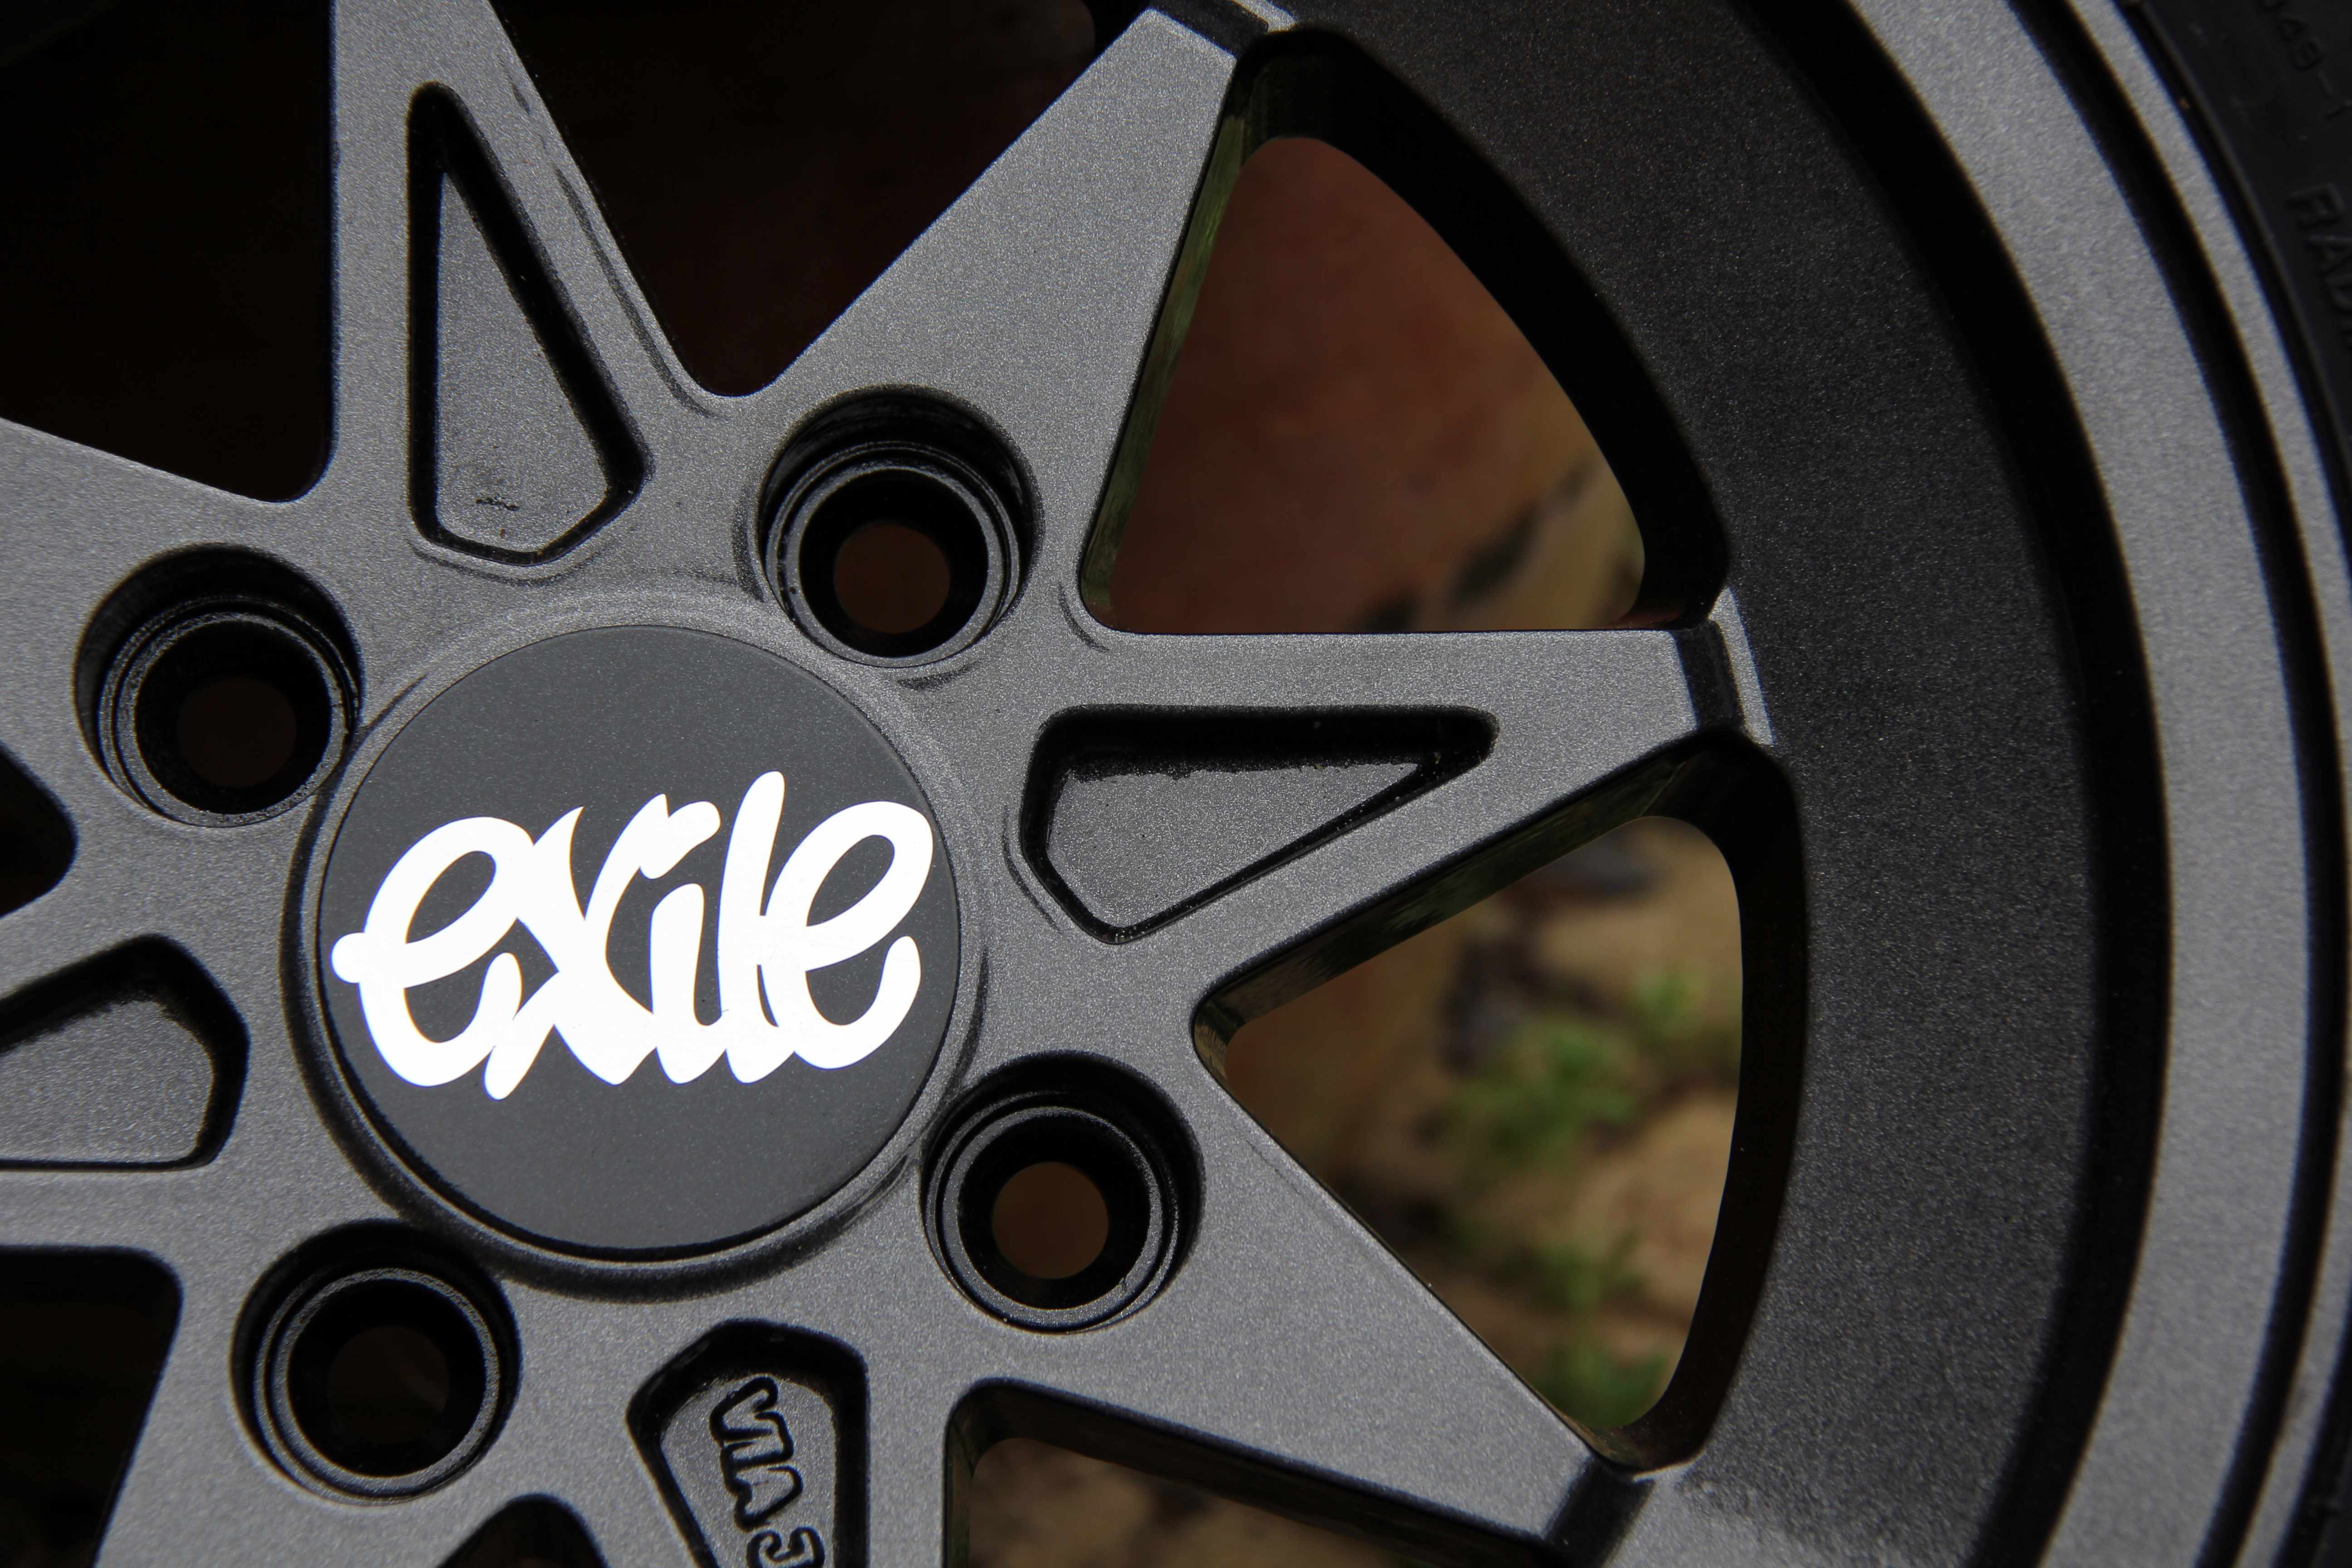
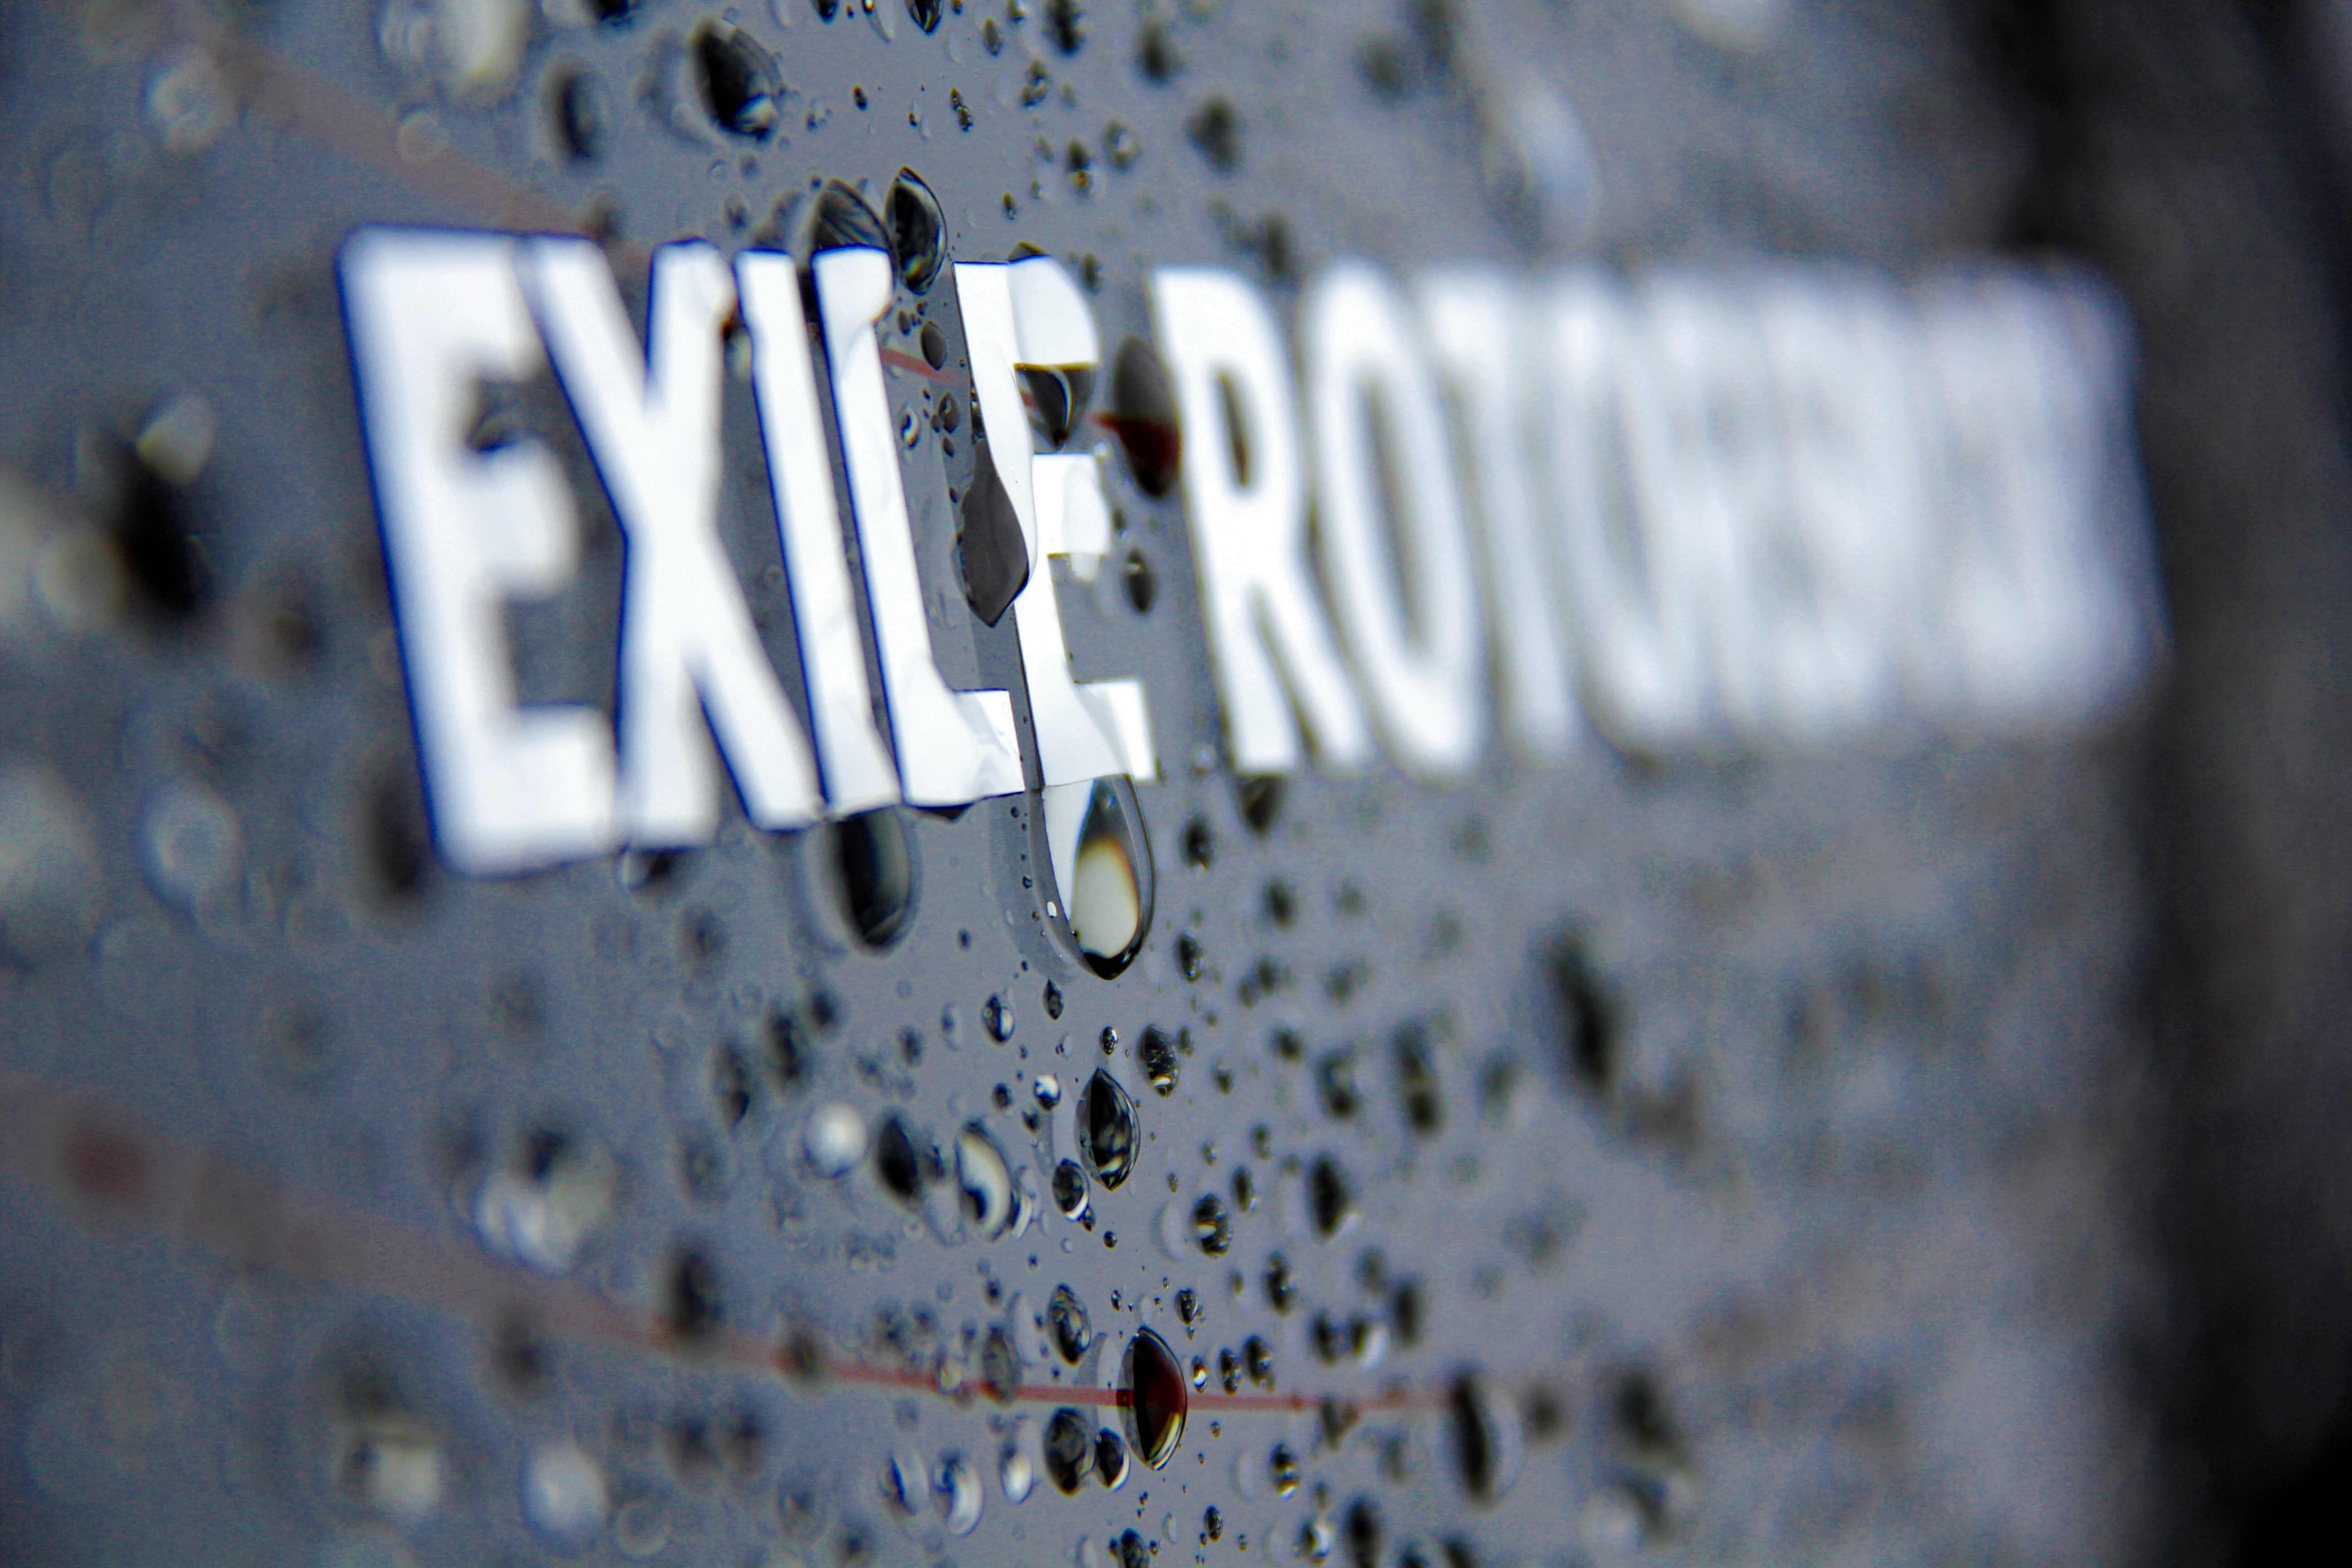
The same process for the flat Sharak centres, and a few coats of lacquer. Now for the finishing touch. I got onto a mate, Pete at Purple Panda graphics and he was superb, did exactly what I asked and always got back to my stupid irritating emails same day. Incomparable service, the guy's a legend. So, my bespoke one-only centre caps now look like....

BOOM! 8-) Exile-Rotorsport, my club here in England. They're shiny chrome vinyl though that doesn't really show up in the pics

I felt a bit chuffed with how they turned out
Oh well, plodding on in case anyone's still awake out there....With the photoshoot over I could get back on with the job of de-stocking the car again. First thing was to sort the wheels finishing touches out. The centres looked rubbish. Where they had no centre caps the end of the stubs were manky and rusty and cack, and would look pony even if I painted them up. So, I hit the 'Bay in search of centre caps. This proved problematic, the Sharaks have a centre bore of 75mm and the only cars to use this are Mercs and VWs, both of which have logo'd-up caps, the Merc ones being worst because they generally have an embossed tristar on them too. Eventually I scored some from a caravan supplier, strangely Hey, whatever works lol
The Watanabes were even trickier. I didn't think they'd work with flat centre caps, it would have just looked wrong. Again, the Bay of E rescued me, scored three shop soiled old skool slotmag alloy dome caps for dirty cheaps. I found out why when they got here;
"shop soiled" clearly means "mullered" hahaha. To be fair, the guy was upfront that they were mutilated, no point grizzling about it. I got to work on the worst dents and roughing the surface up for paint. Clearly they couldn't stay alloy, that'd look poor with the dark wheels
Got the worst of the dents out, but some I just left. I quite like the used and abused look. What wouldn't do was the profile;
Bent . A bit more panel beating had them fitting sweet
Then on to the fun stuff... primer;
Shiny black in best Halfrauds' rattle can stylee
then the tricky part, trying to colour-match to the refurbed alloys. I went for a gentle blow-over with Ford Graphite Grey. Couldn't find the Bentley one in rattle cans, not surprisingly. This is close enough, slight miss-match, but it'll do. Shame I didn't have the caps to give the refurbishing dude in the first place really, would have been easier lol
The same process for the flat Sharak centres, and a few coats of lacquer. Now for the finishing touch. I got onto a mate, Pete at Purple Panda graphics and he was superb, did exactly what I asked and always got back to my stupid irritating emails same day. Incomparable service, the guy's a legend. So, my bespoke one-only centre caps now look like....
BOOM! 8-) Exile-Rotorsport, my club here in England. They're shiny chrome vinyl though that doesn't really show up in the pics
I felt a bit chuffed with how they turned out
Thread Starter
Senior Member
Joined: Oct 2010
Posts: 255
Likes: 1
From: England
While I was titting about with wheels I took the opportunity to steal the wife's bathroom scales and weigh them, just out of curiosity  The stock wheels;
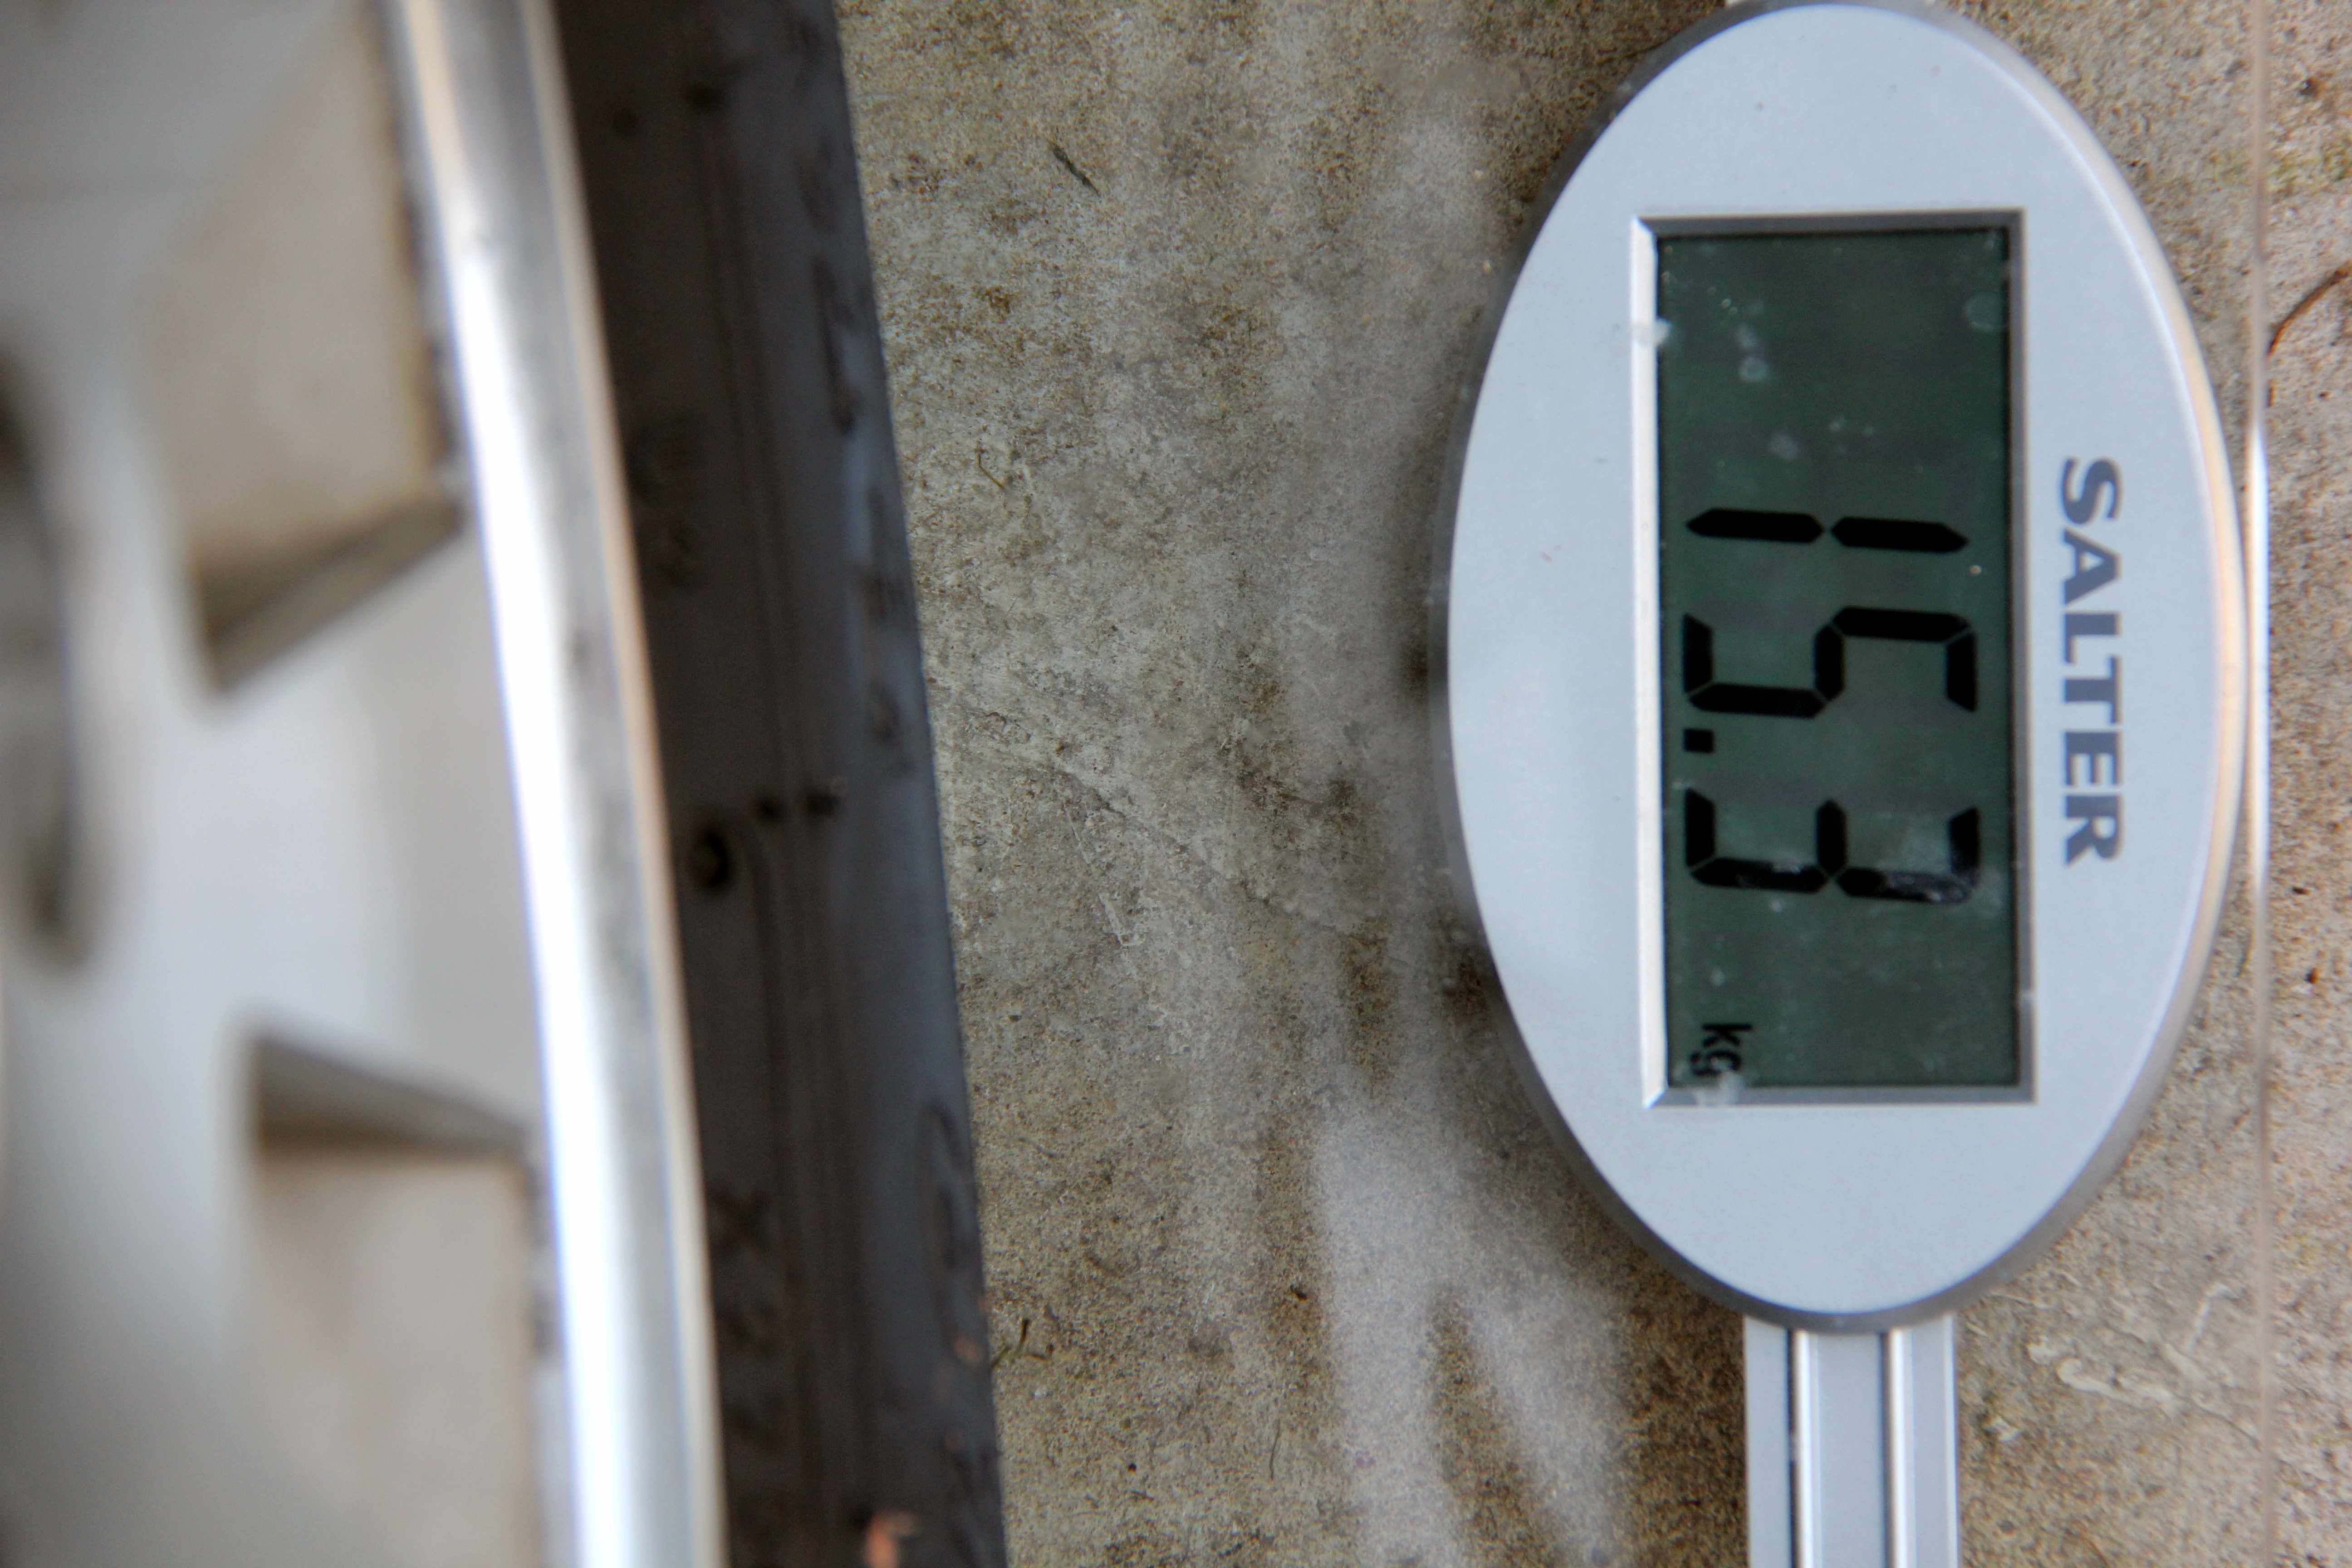
The Sharaks are almost exactly the same weight;
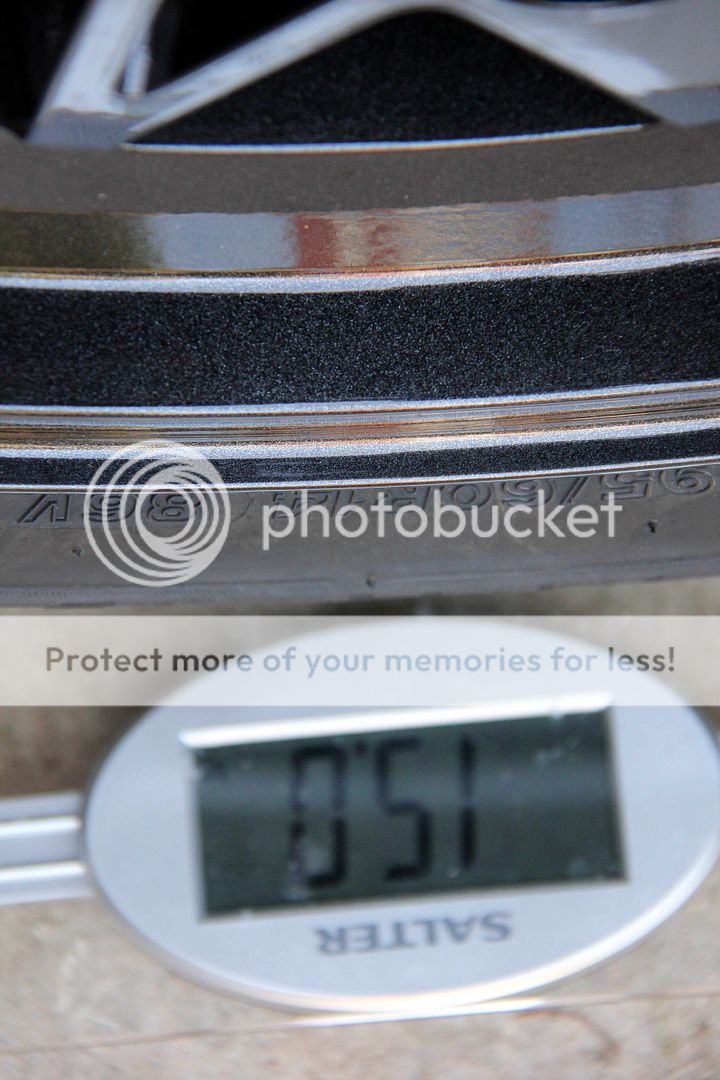
third of a kilo lighter. The Watanabes...
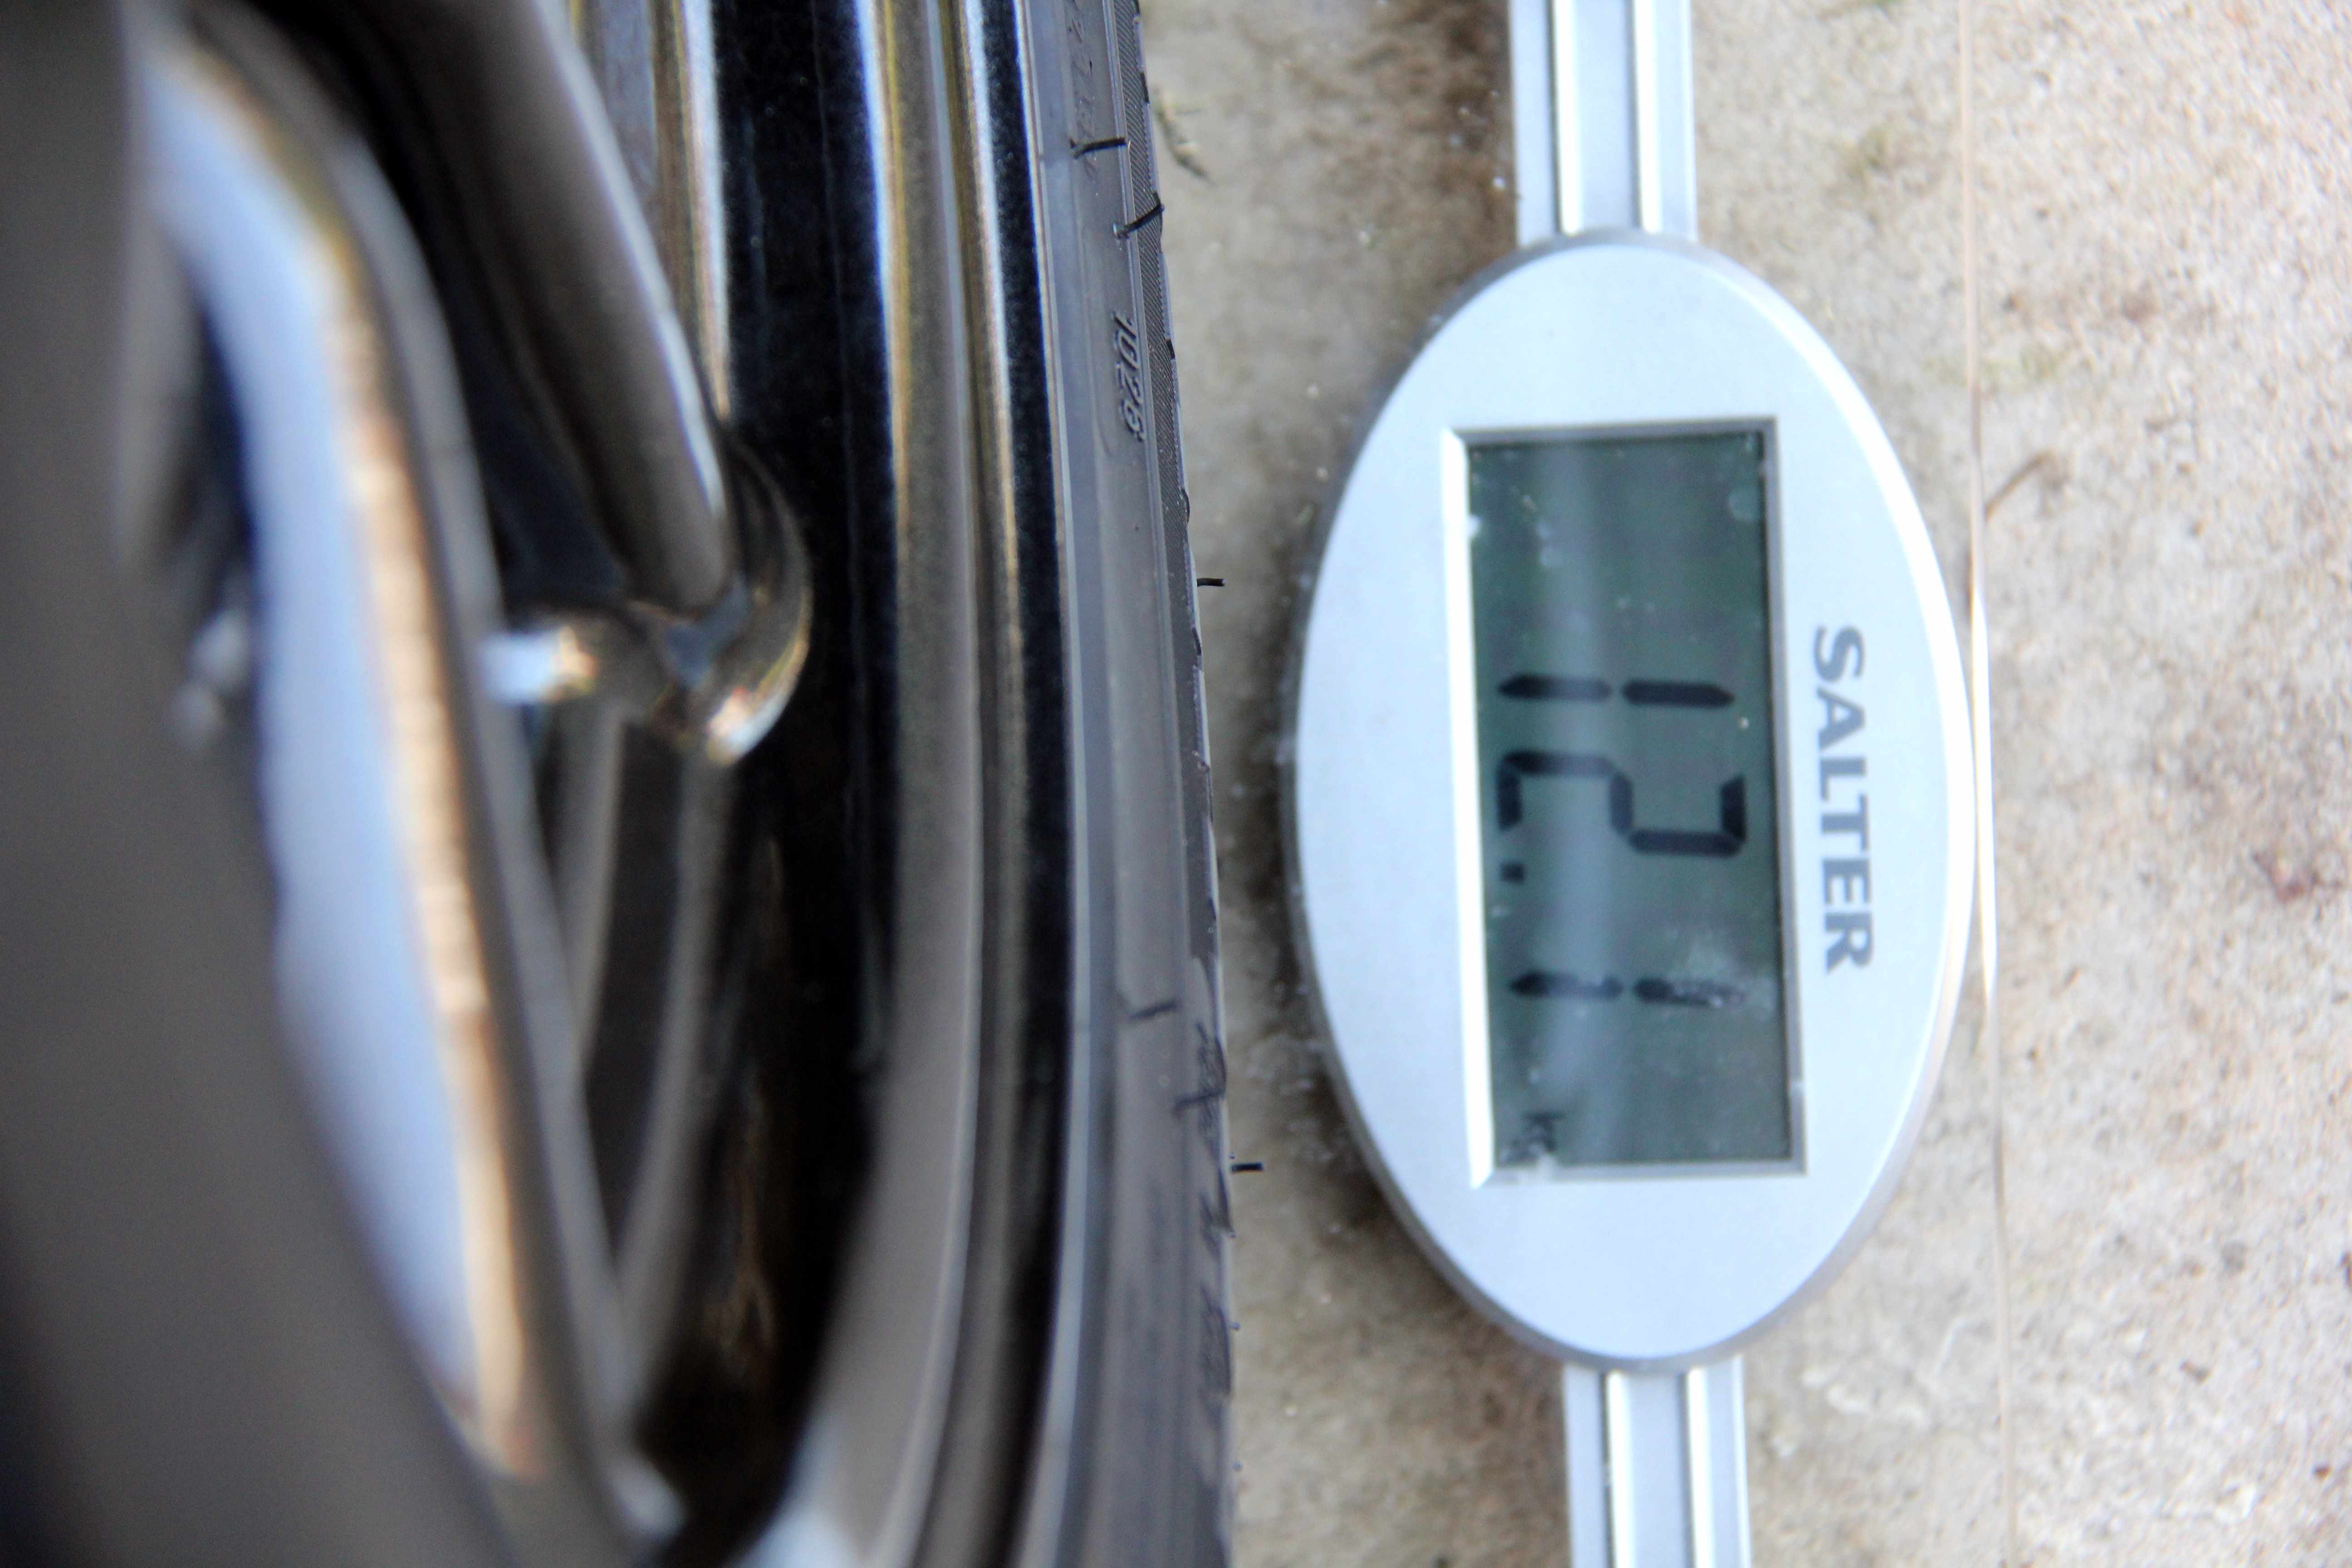
...would float away if it wasn't for the tyres weighing them down 8-) I reckon this is a god thing, not only have I ended up with substantially better-looking (and unique) wheels but they fit the arches better as well, and with the lightweight wheelnuts, they save a fair portion of unsprung weight. Happy days
The stock wheels;The Sharaks are almost exactly the same weight;
third of a kilo lighter. The Watanabes...
...would float away if it wasn't for the tyres weighing them down 8-) I reckon this is a god thing, not only have I ended up with substantially better-looking (and unique) wheels but they fit the arches better as well, and with the lightweight wheelnuts, they save a fair portion of unsprung weight. Happy days
Thread Starter
Senior Member
Joined: Oct 2010
Posts: 255
Likes: 1
From: England
One minor detail that had been annoying me was the stock foglight. Which looks anything but stock, it looks like an aftermarket five quid bodge job. I don't think you guys in the U.S. have to have a foglight, but it's the law here in England. Your car would fail the yearly MOT roadwrthiness test without one, and that'd be that.. so gotta have one, but not like that, I decided it had to go.
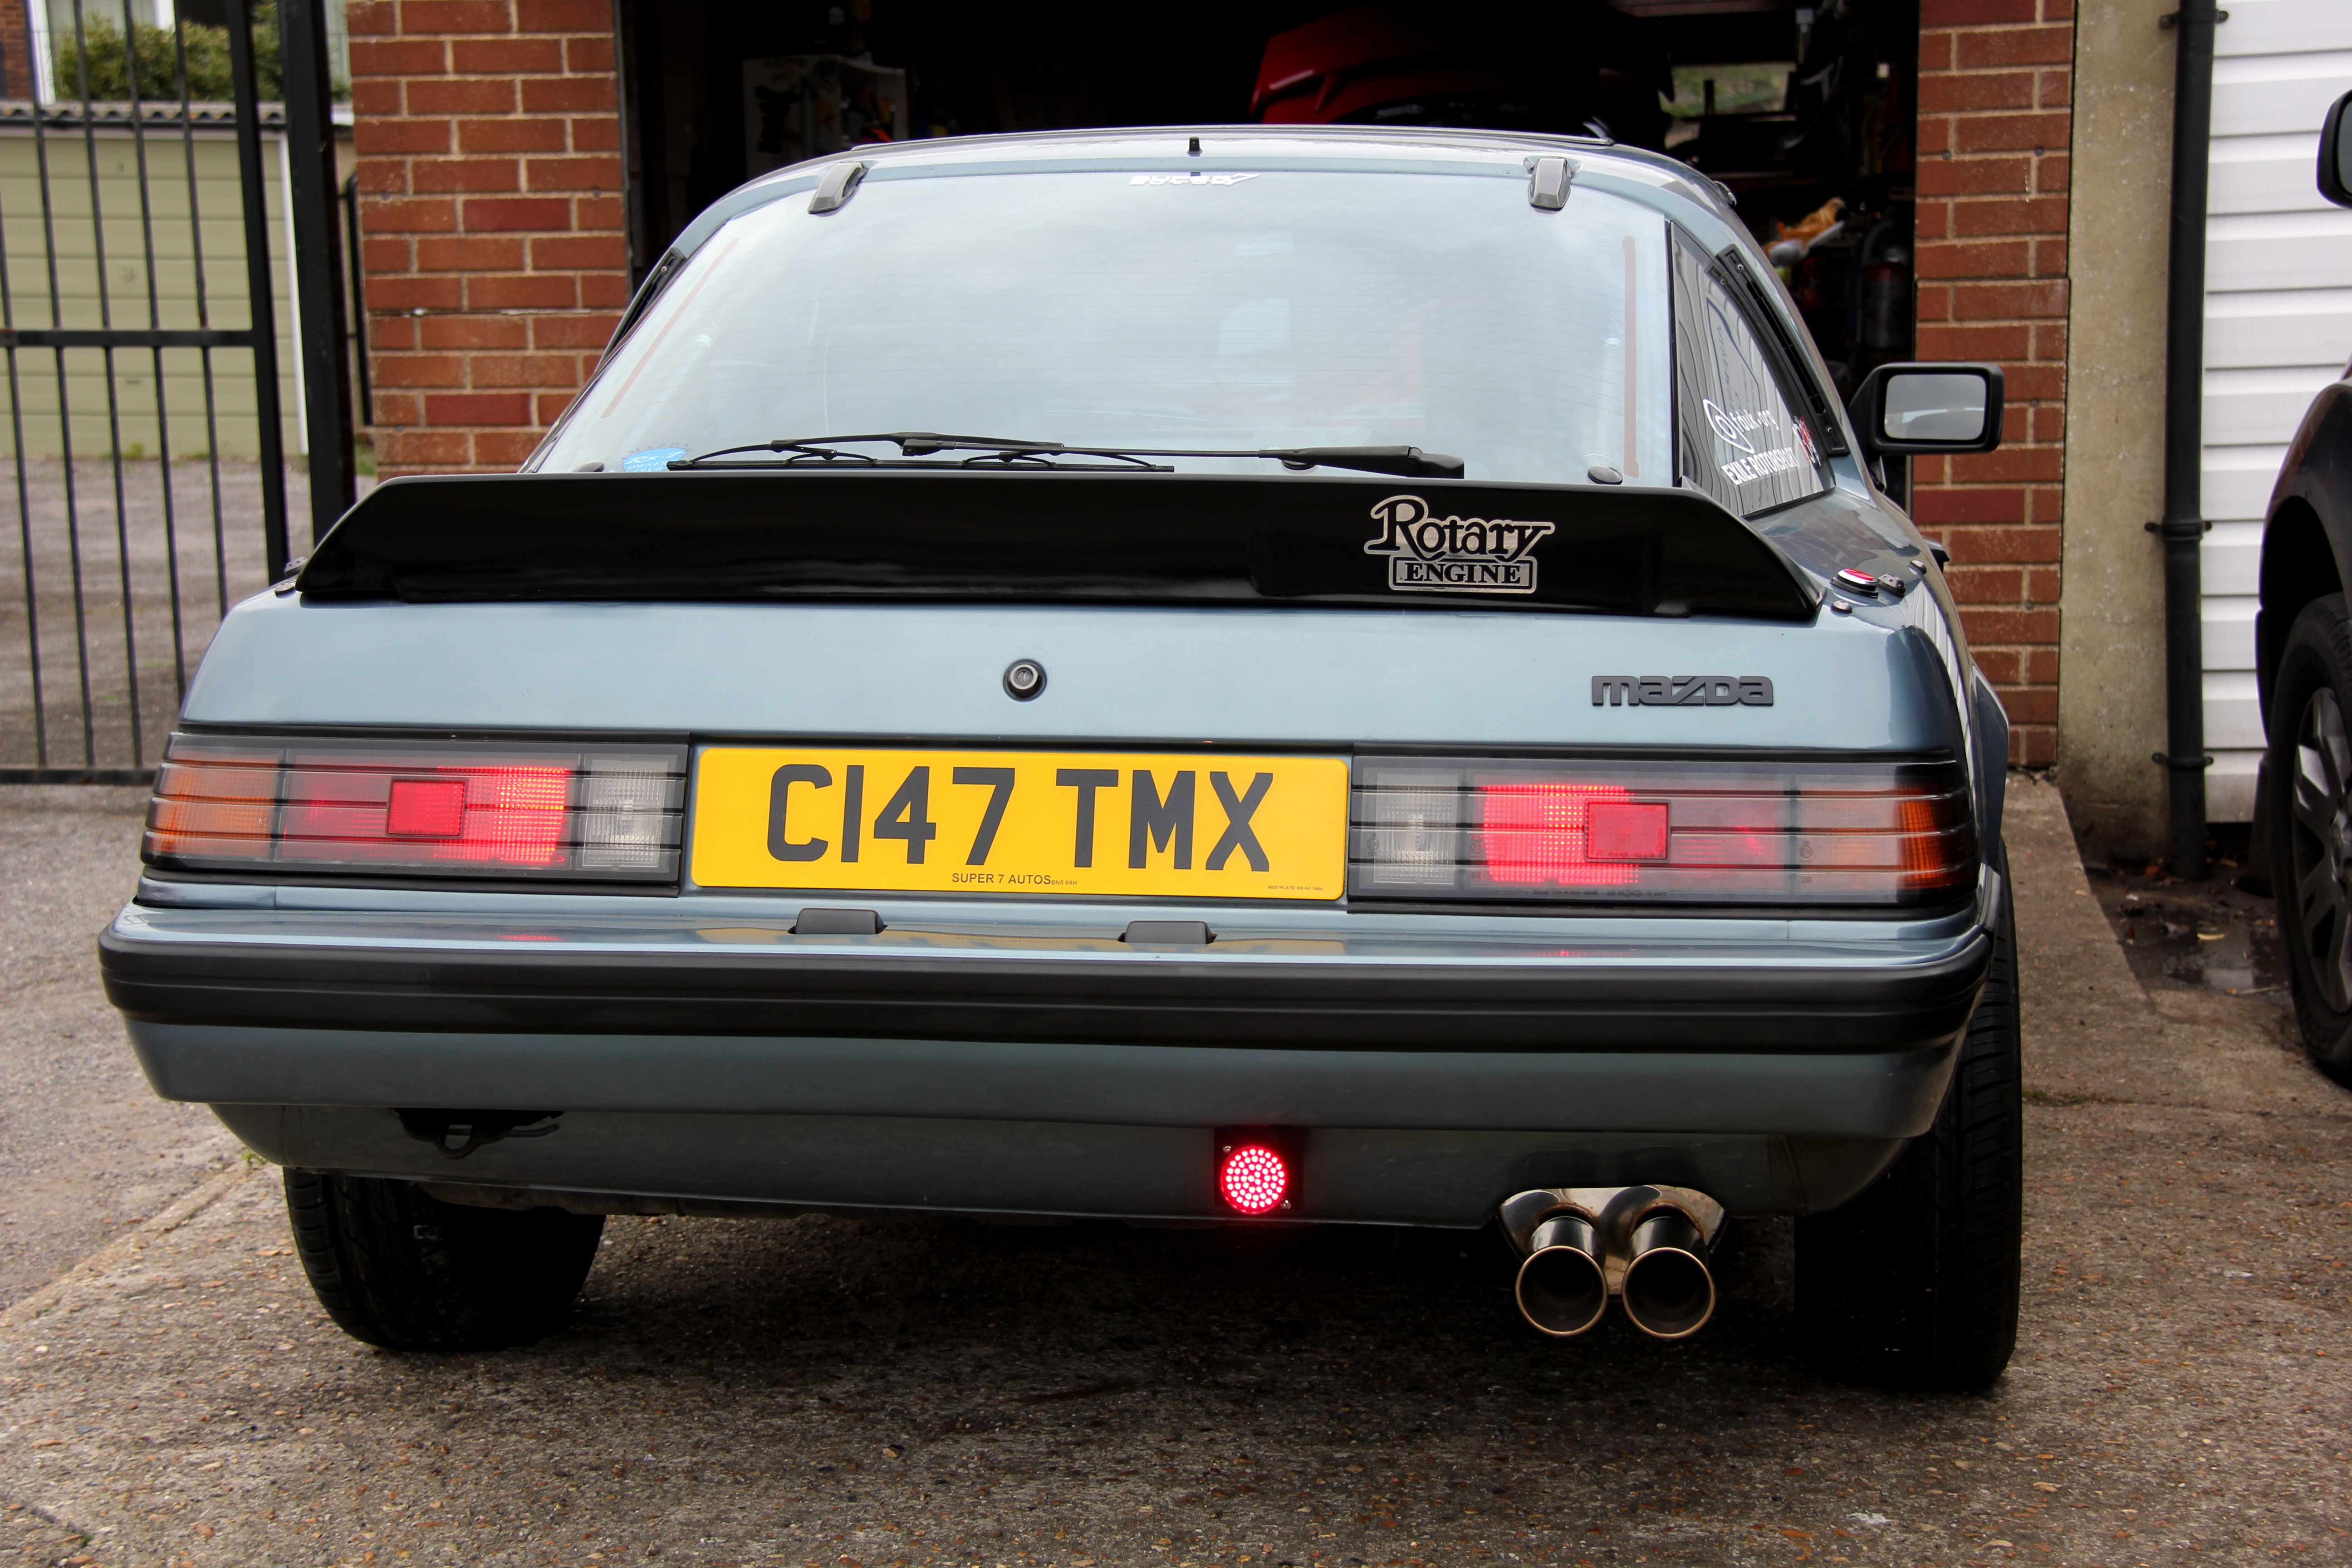
I don't like the idea of sacrificing a reverse light by putting in a red bulb, so went for the tried and tested method of a racing LED rainlight. I'd had one of these on the FD for ages and they're retina-searing bright but small and unobtrusive. They'd changed (read "cheapened") the design since I bought the FD one, where they used to have water-proof connectors with built-in resistors you now get no connectors at all and two resistors floating around loose to solder in yourself.
So, after some faffing about with wiring and insulting tape, I ended up with this;
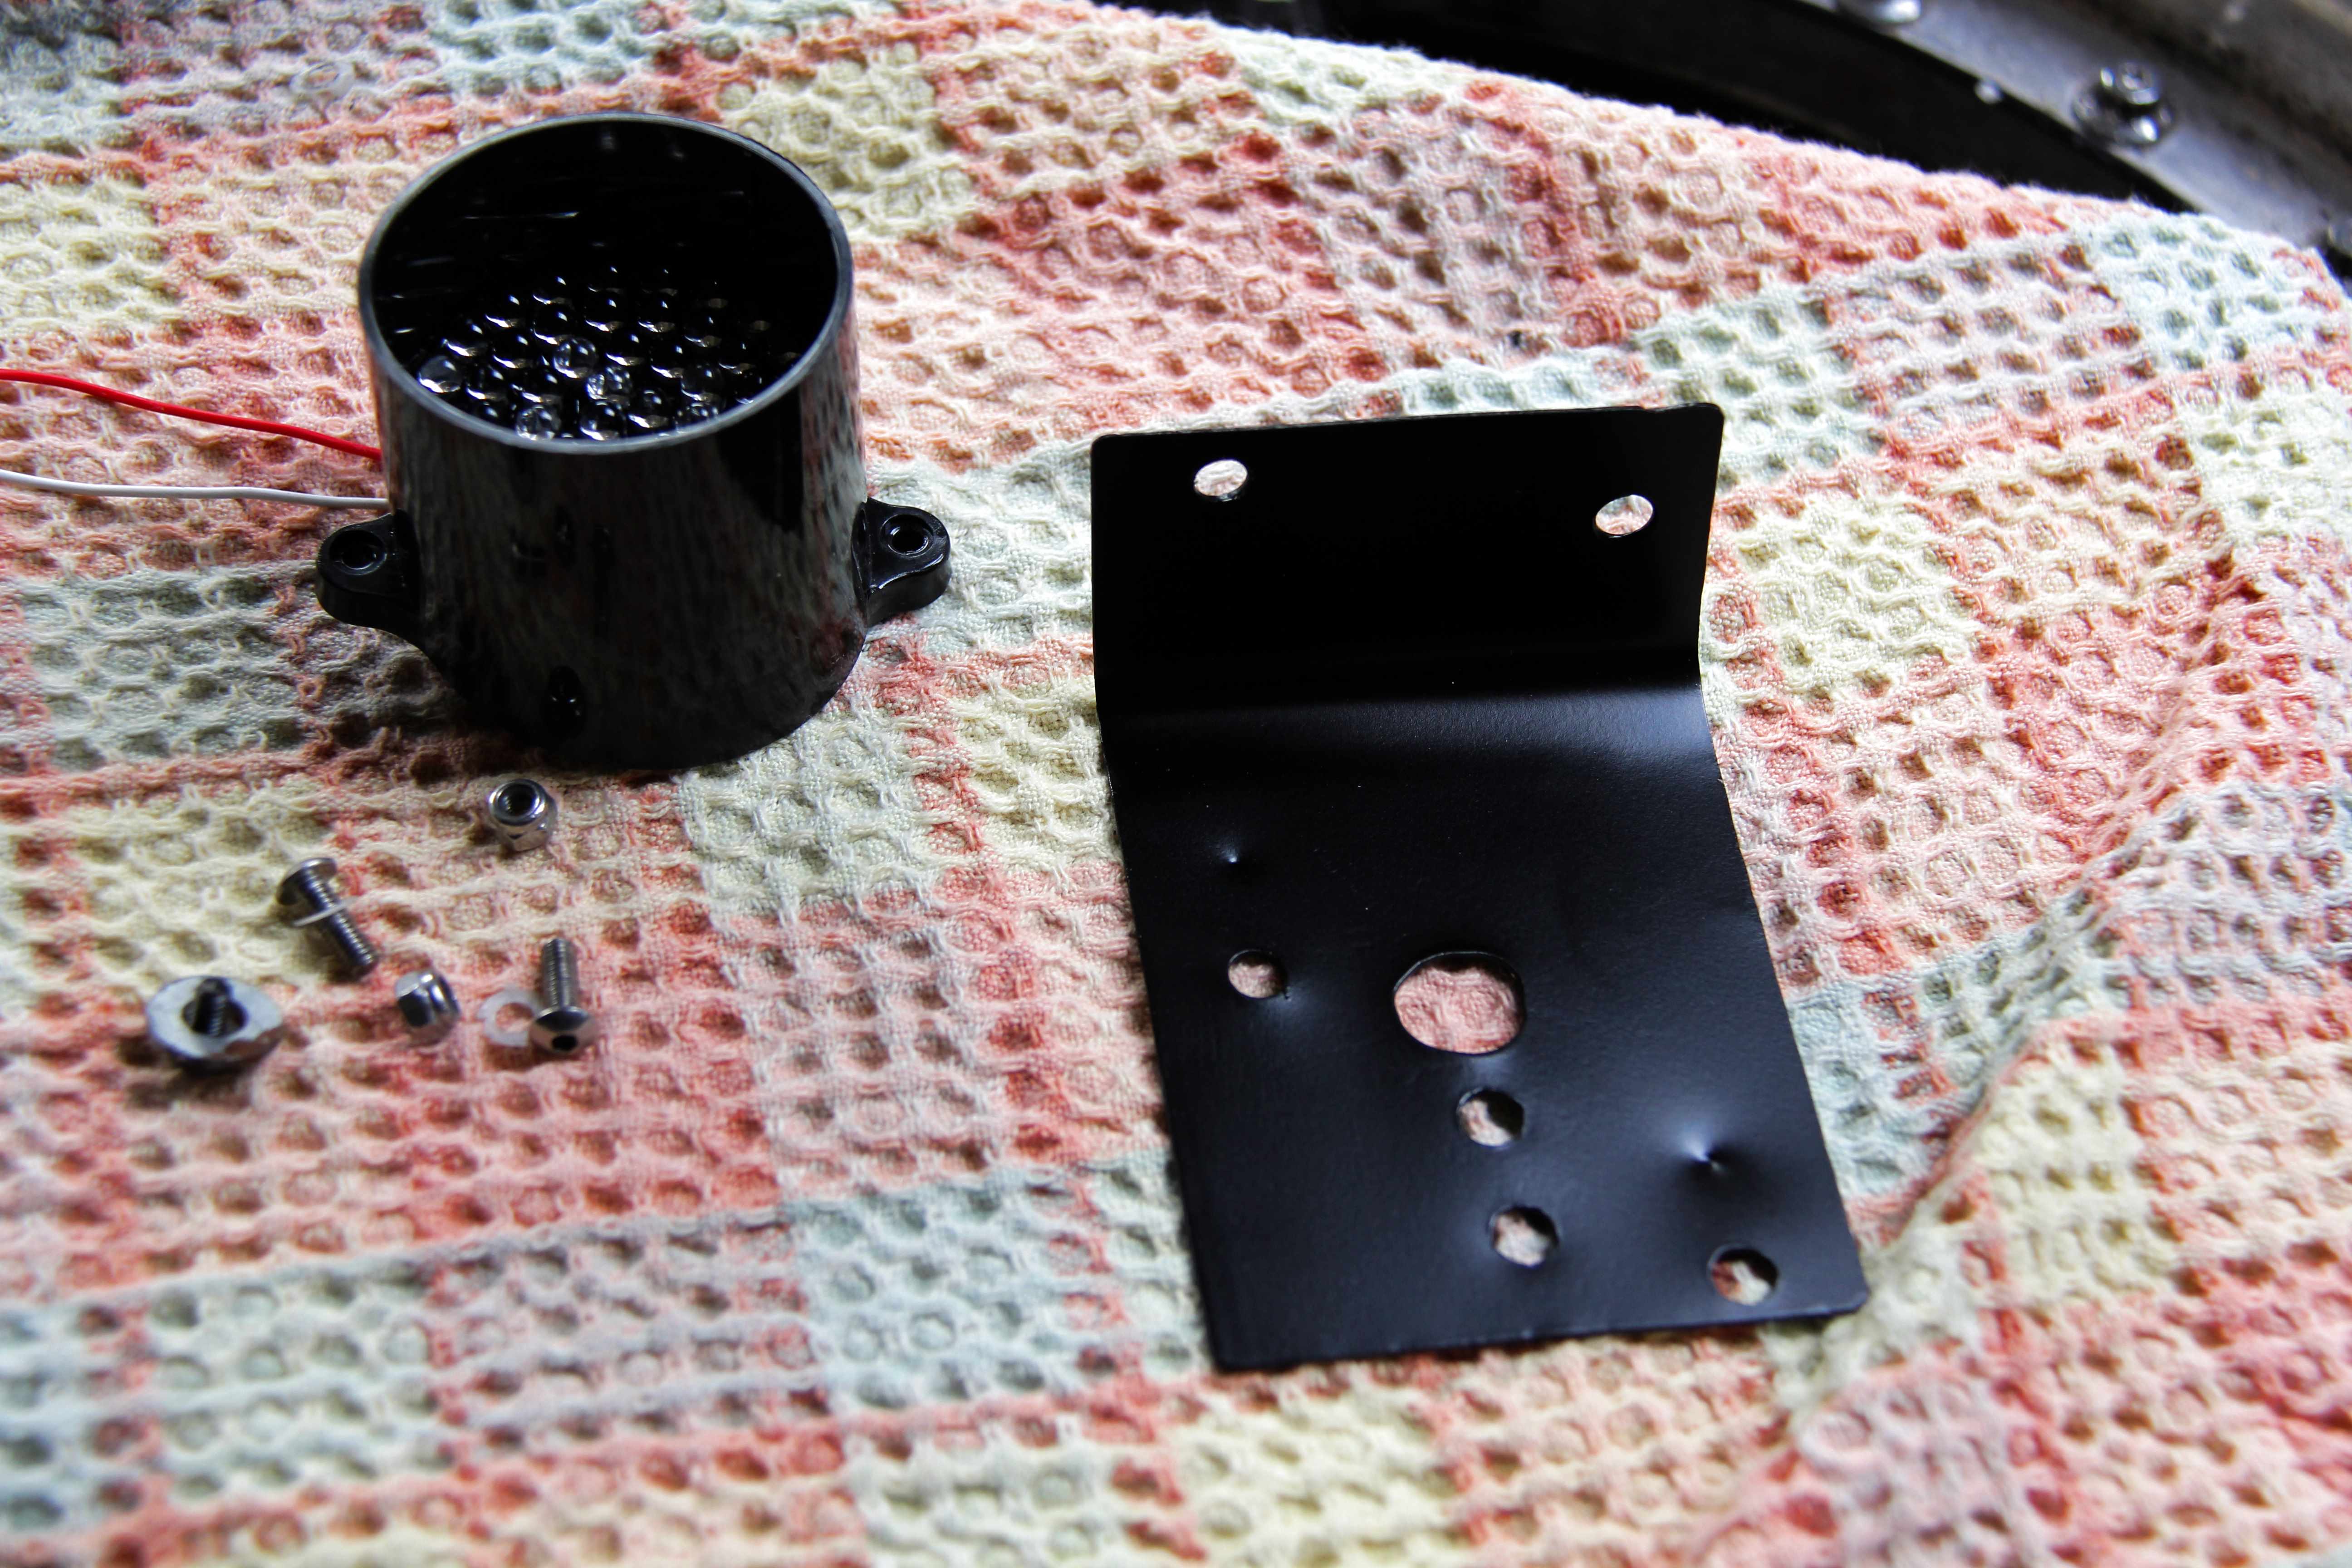
Light all voltage regulated and a nice stainless bracket (so it won't rust like the rest of the car) sprayed up enamel black (so it won't show up too much). I love LEDs, dunno why, there's something about them that's just... trippy

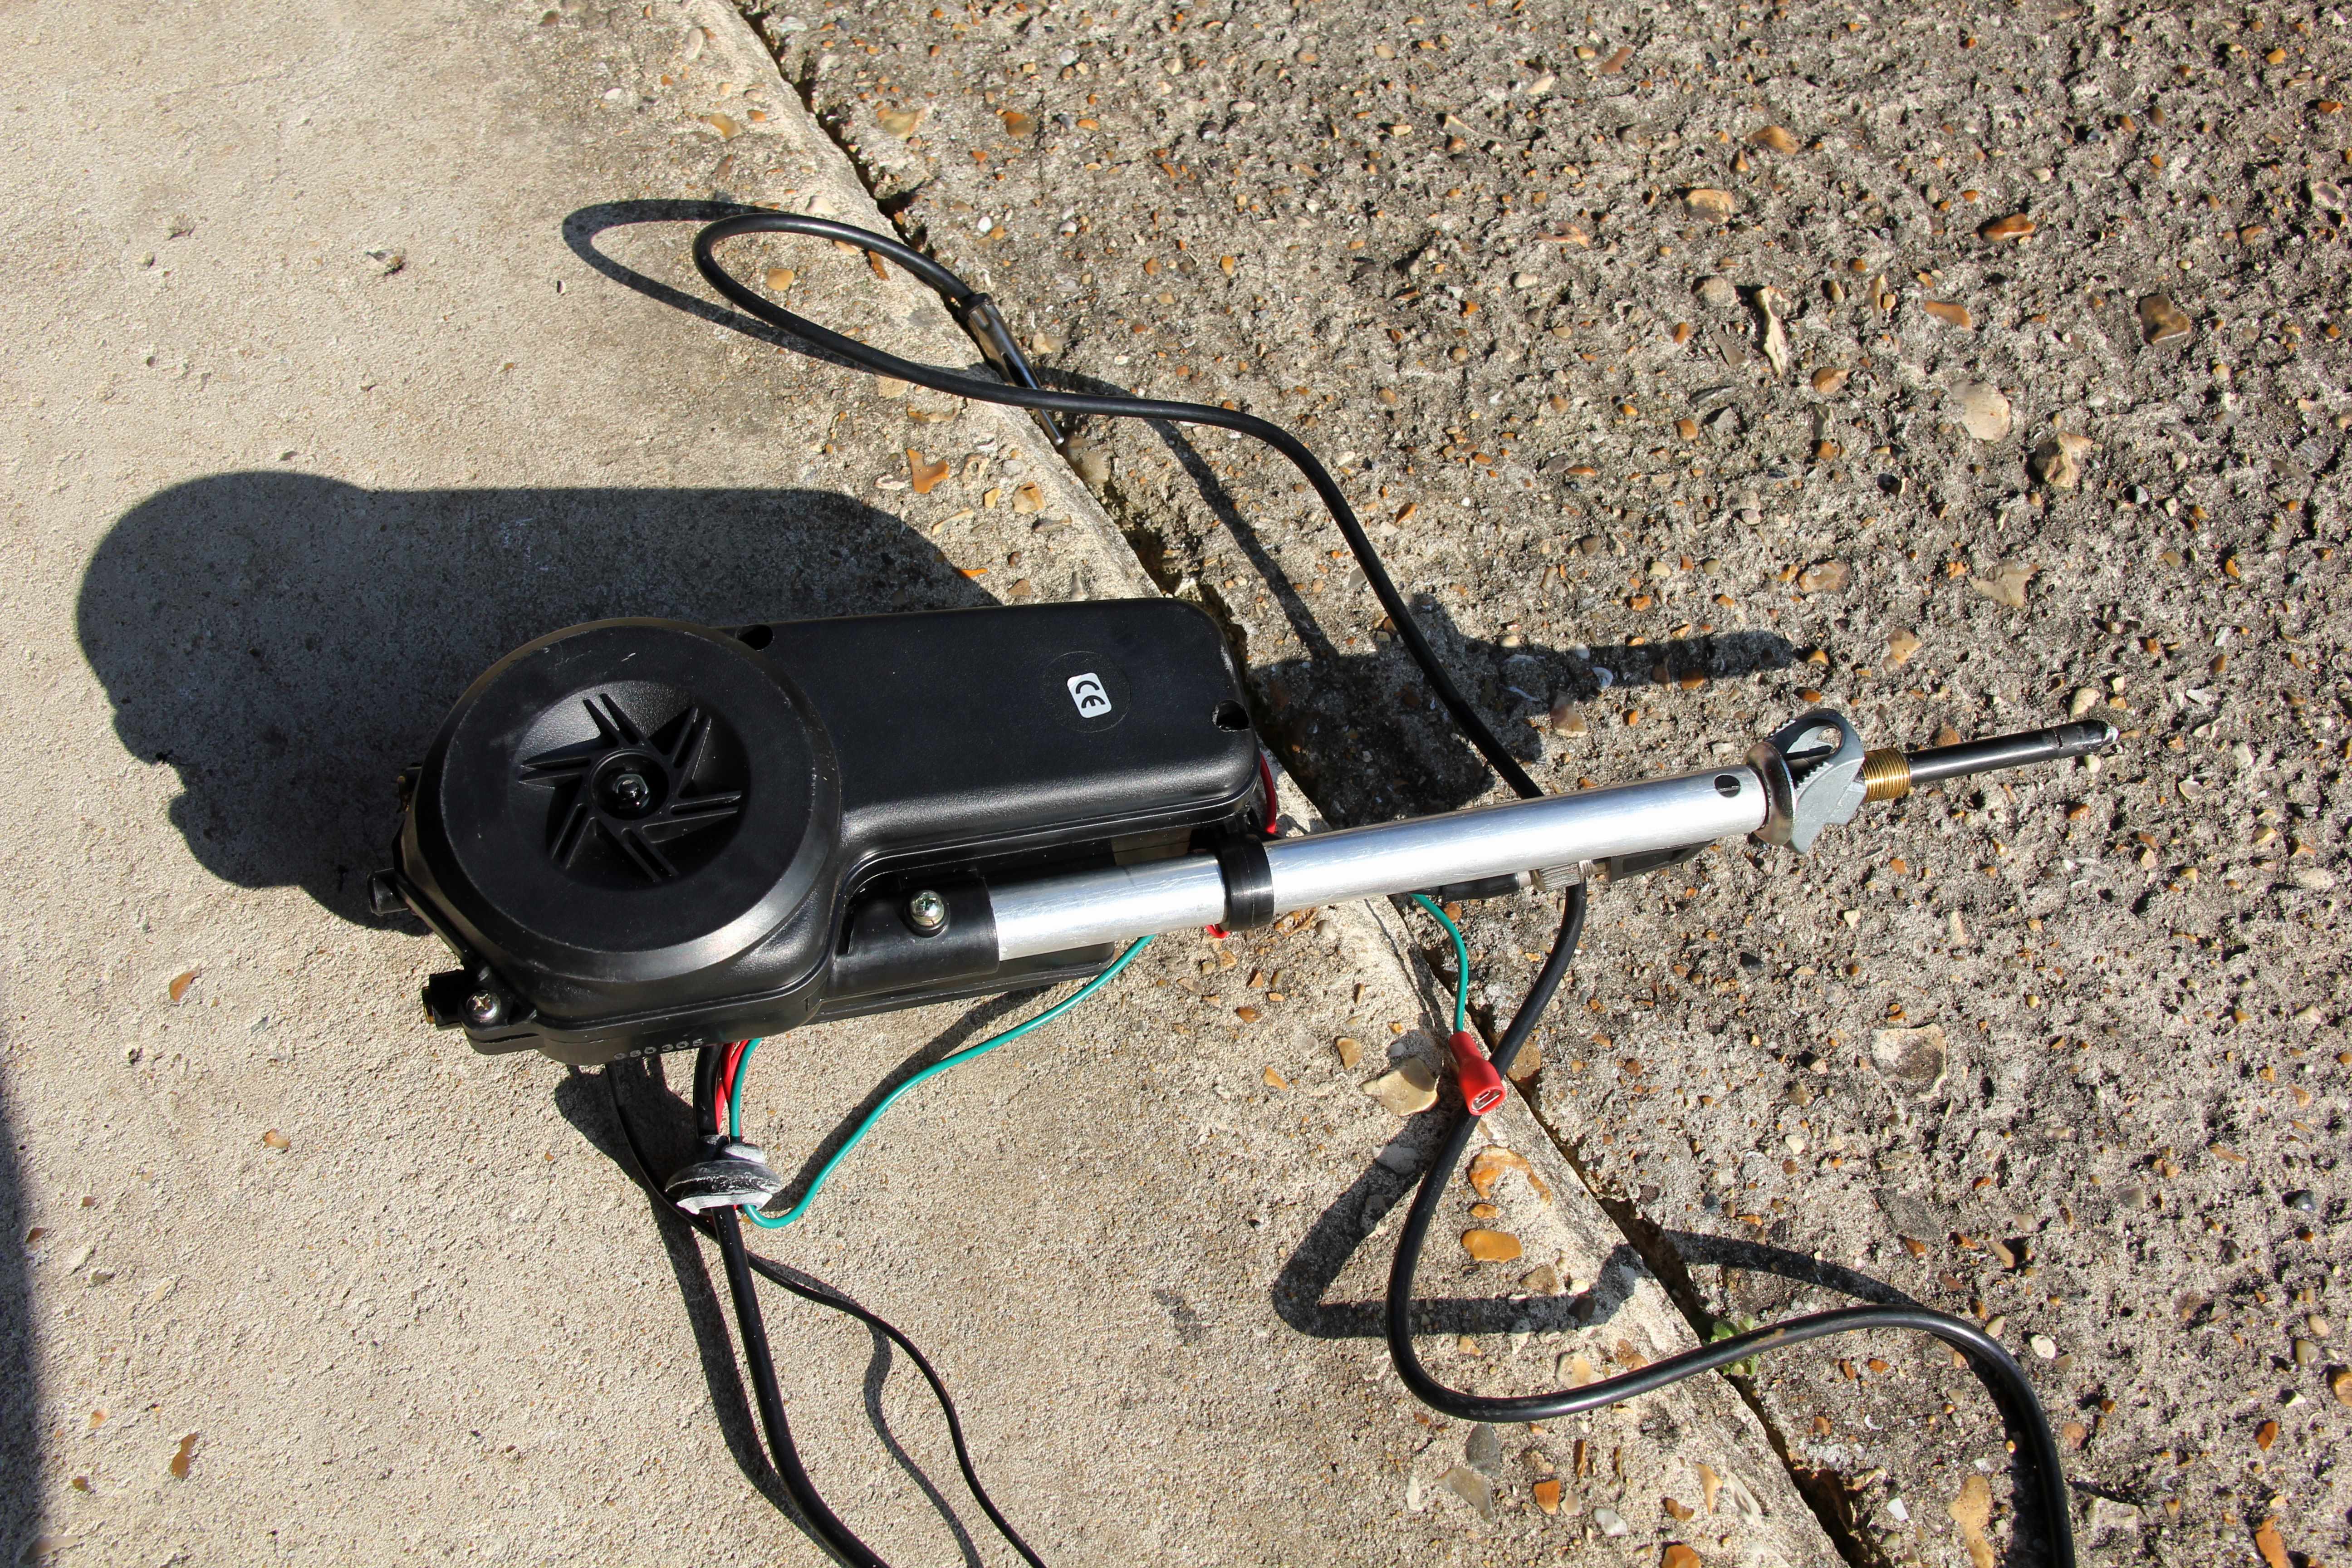
Whilst rooting around the boot I felt motivated to investigate the aerial, which had never worked since I got the car. As suspected, it was an electric one, but as also suspected, it was borked. No workuuu. It transpired it wasn't a proper FB one anyway, but some wretched aftermarket cheapness. It was held in only by the top nut on the aerial mast and two cable-ties (zip ties?) threaded through the holes in the inner fender flitch! Shameful bodgery!
I never listen to the radio anyway, not in the car, so it didn't break my heart to lose it. But what to plug the massive hole with? In fact, there were three additional holes left each side by the original spoiler mounts that wouldn't be covered by the new spoiler. What to plug them up with? The obvious thing would be get them welded but I didn't want that for two reasons. One being I'd then have to get the whole rear end sprayed up, which is time and money I didn't want to spend, and the other was that it'd then be impossible to put it back to stock should anyone want to.
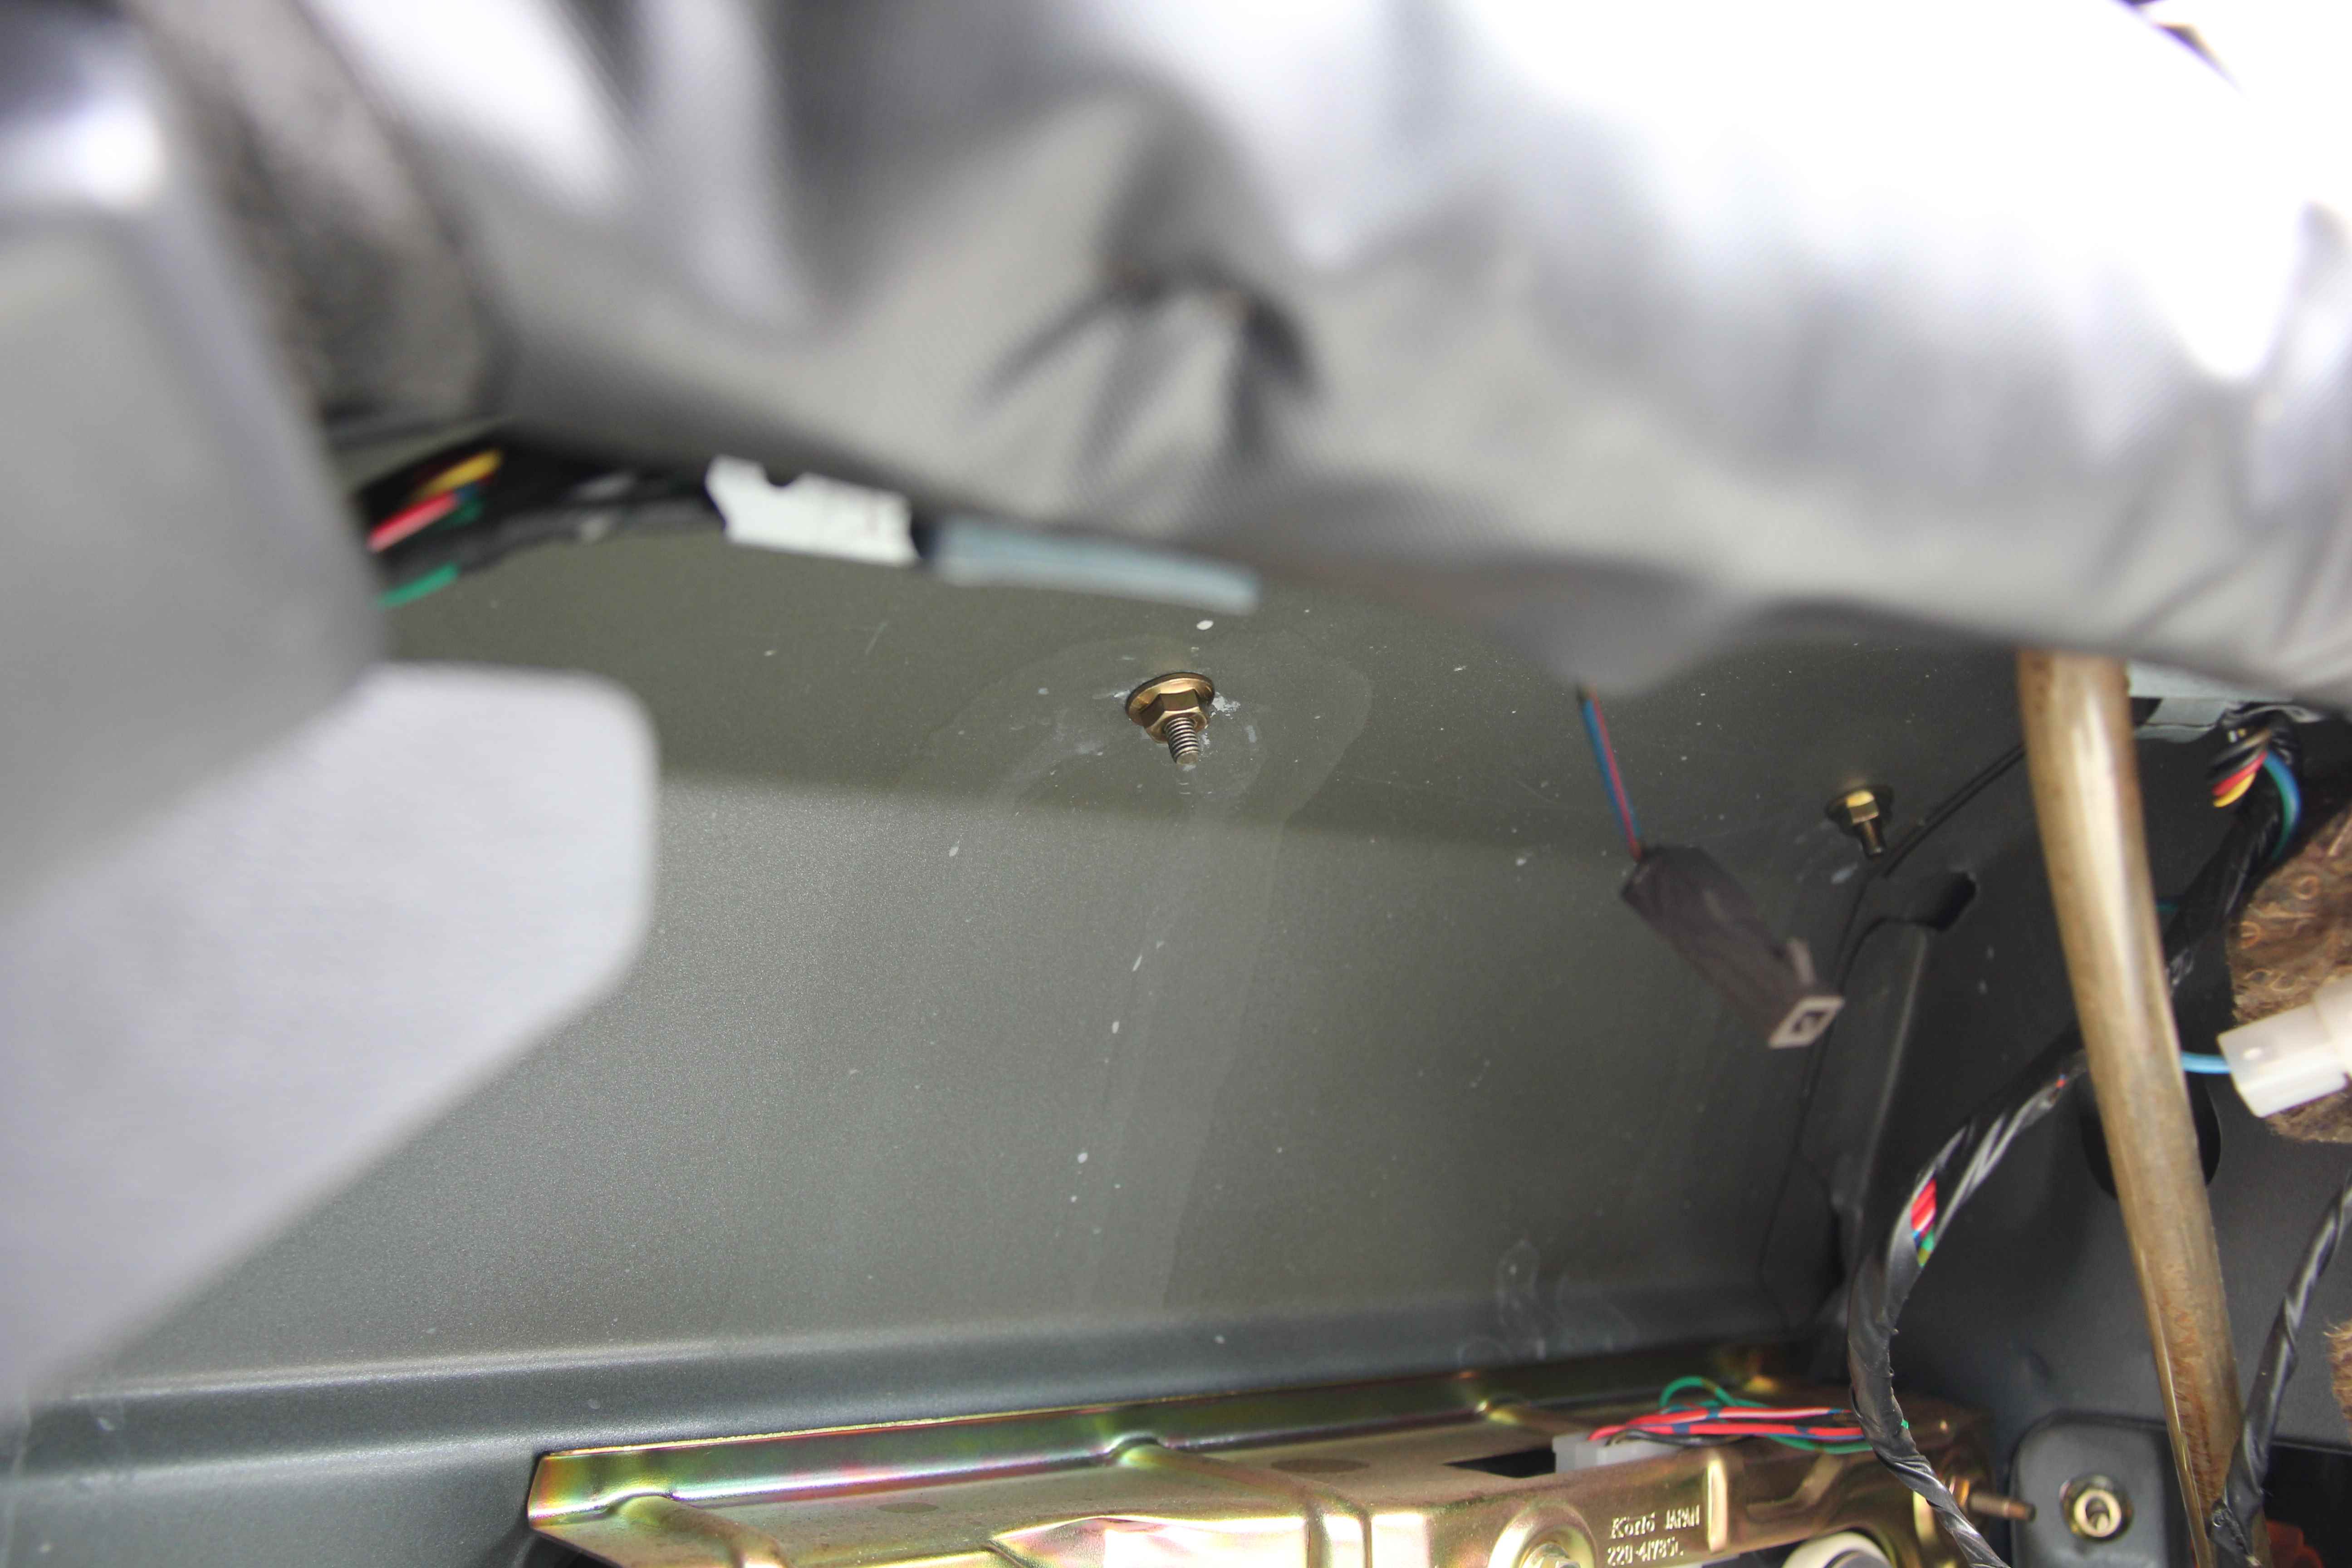
For the spoiler holes I went to Pro-Bolt Titanium, Stainless Steel, Aluminium Fasteners & Motorcycle Bolts | ProBolt who I've used for bike fasteners loads of times, and who make fasteners sexy enough to turn any amateur mechanic into a shameless onanist (look it up ). Some of their drilled cone washers and allen bolts for the bigger holes and simple dome head bolts for the smaller, in titanium grey anodised alloy, with rubber washers inside and out to keep it watertight solved the holes. Plus they look trick and maybe pass off as if they're supposed to be there.
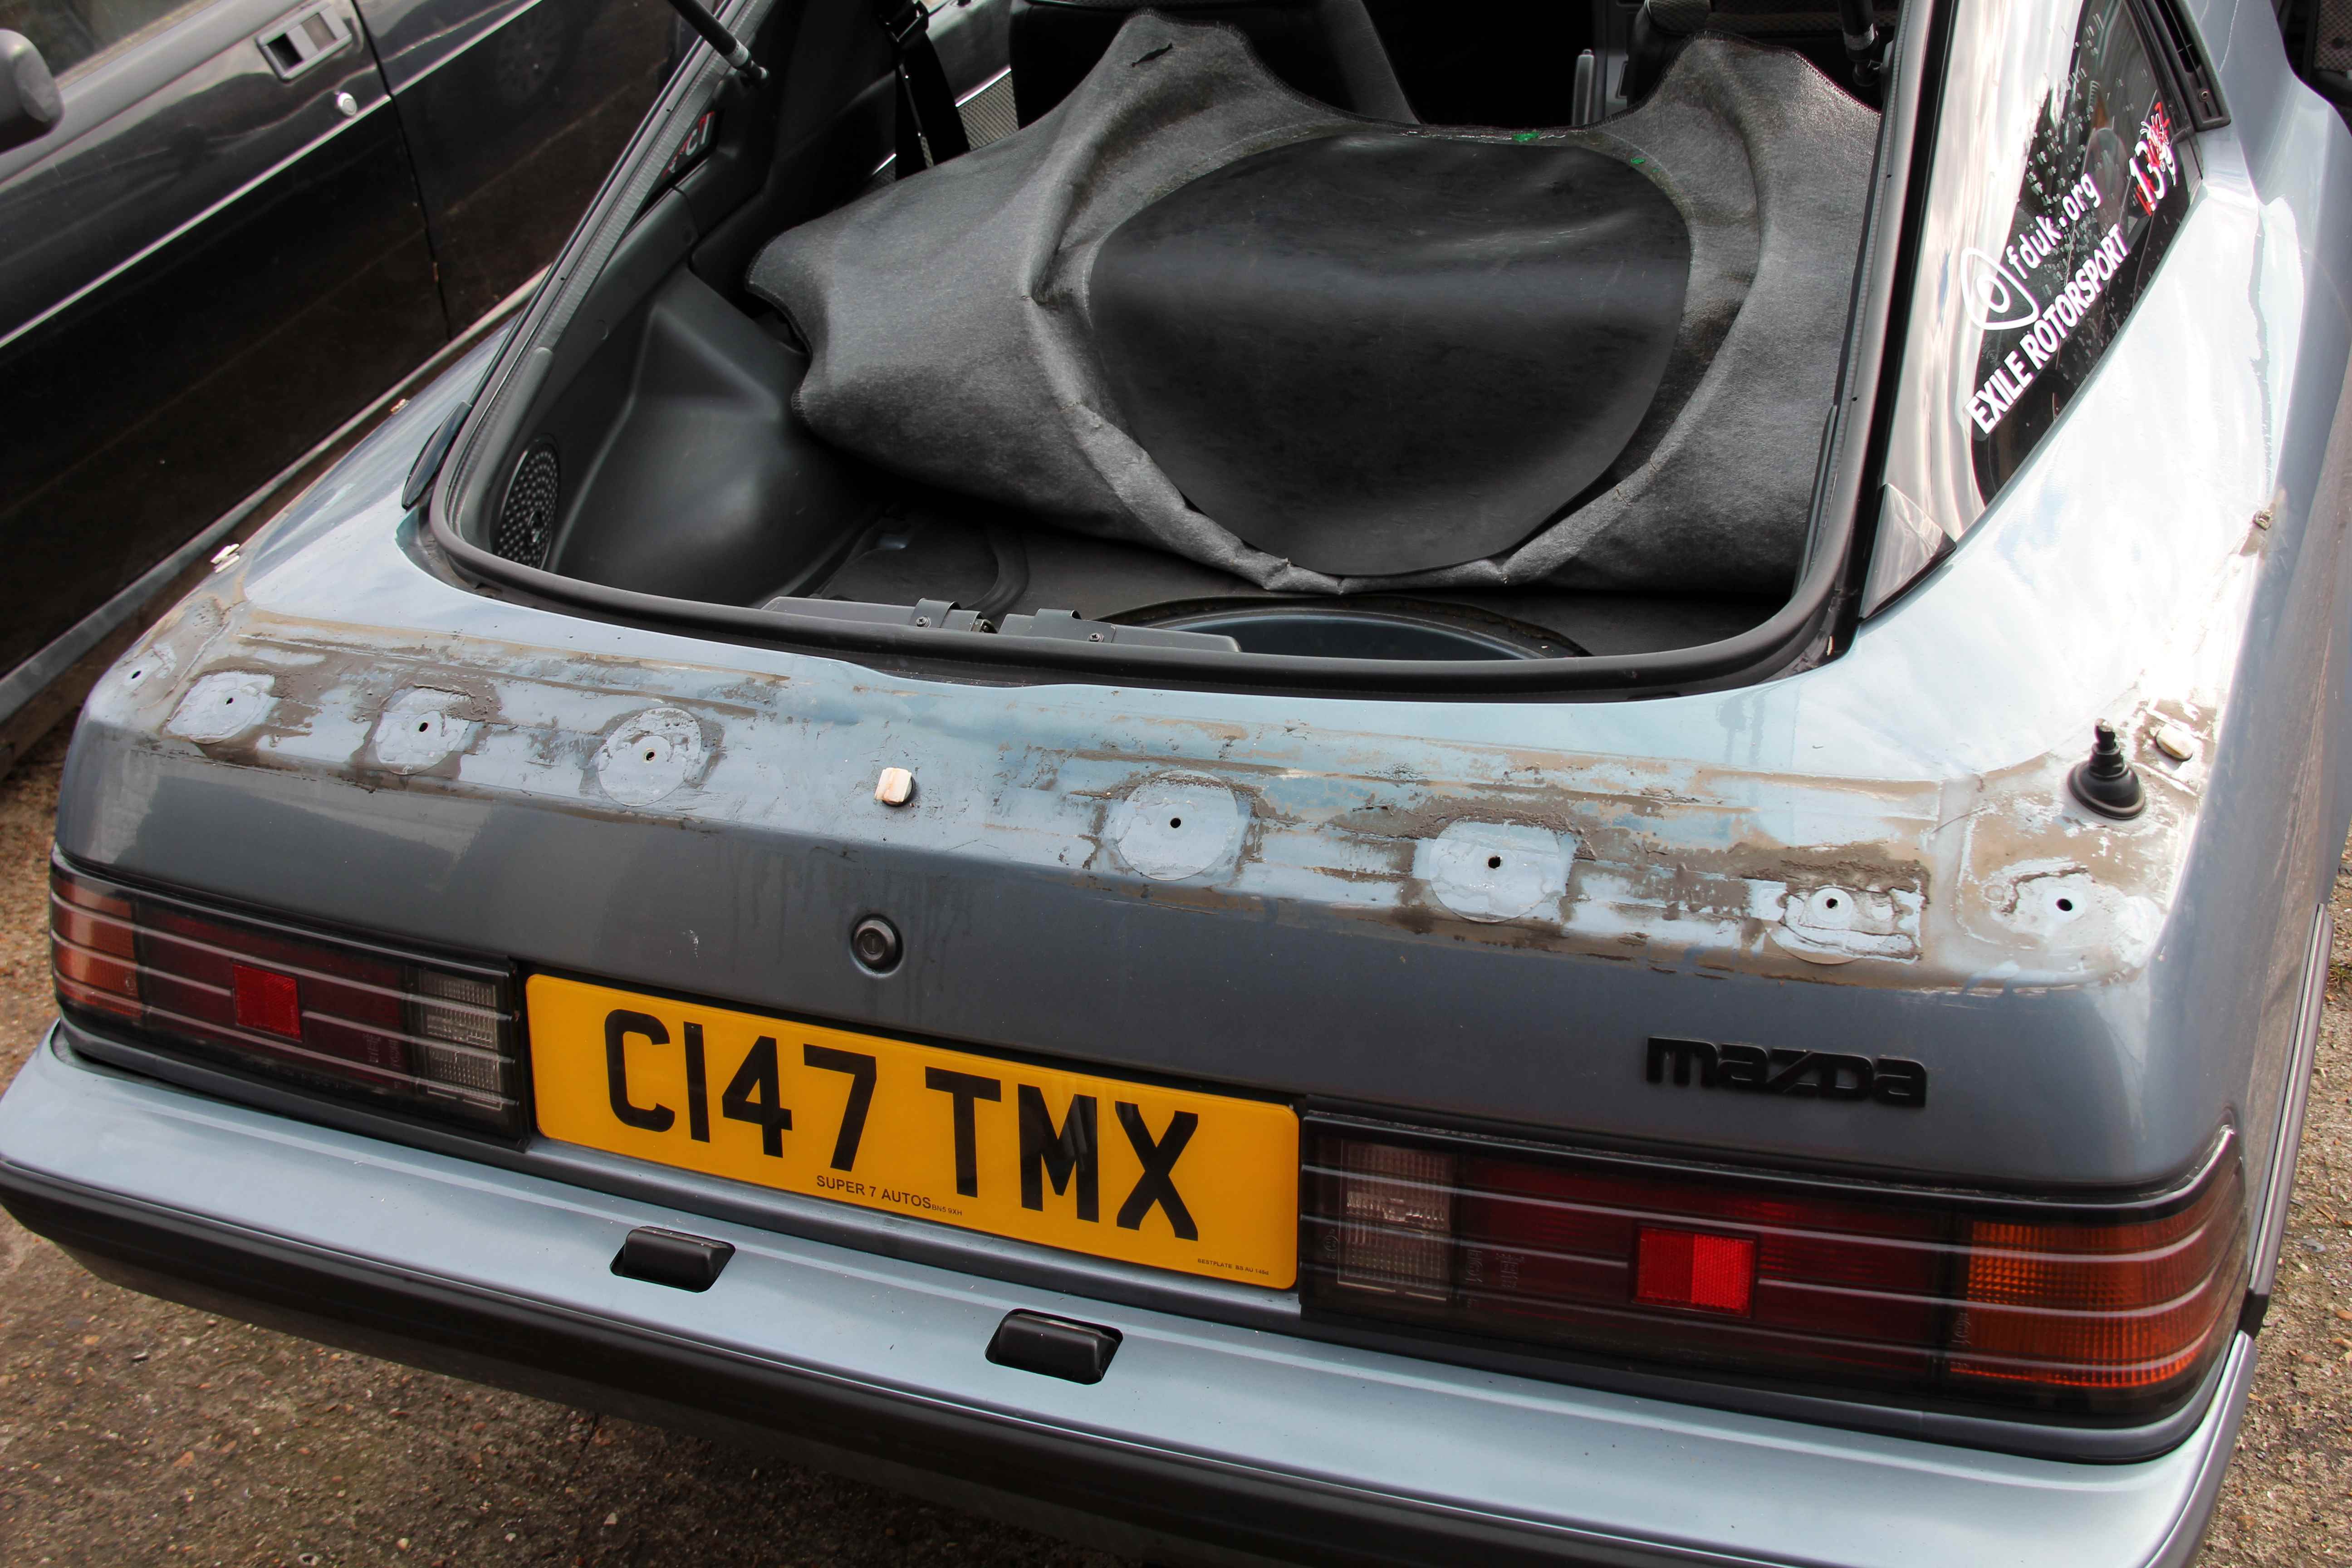
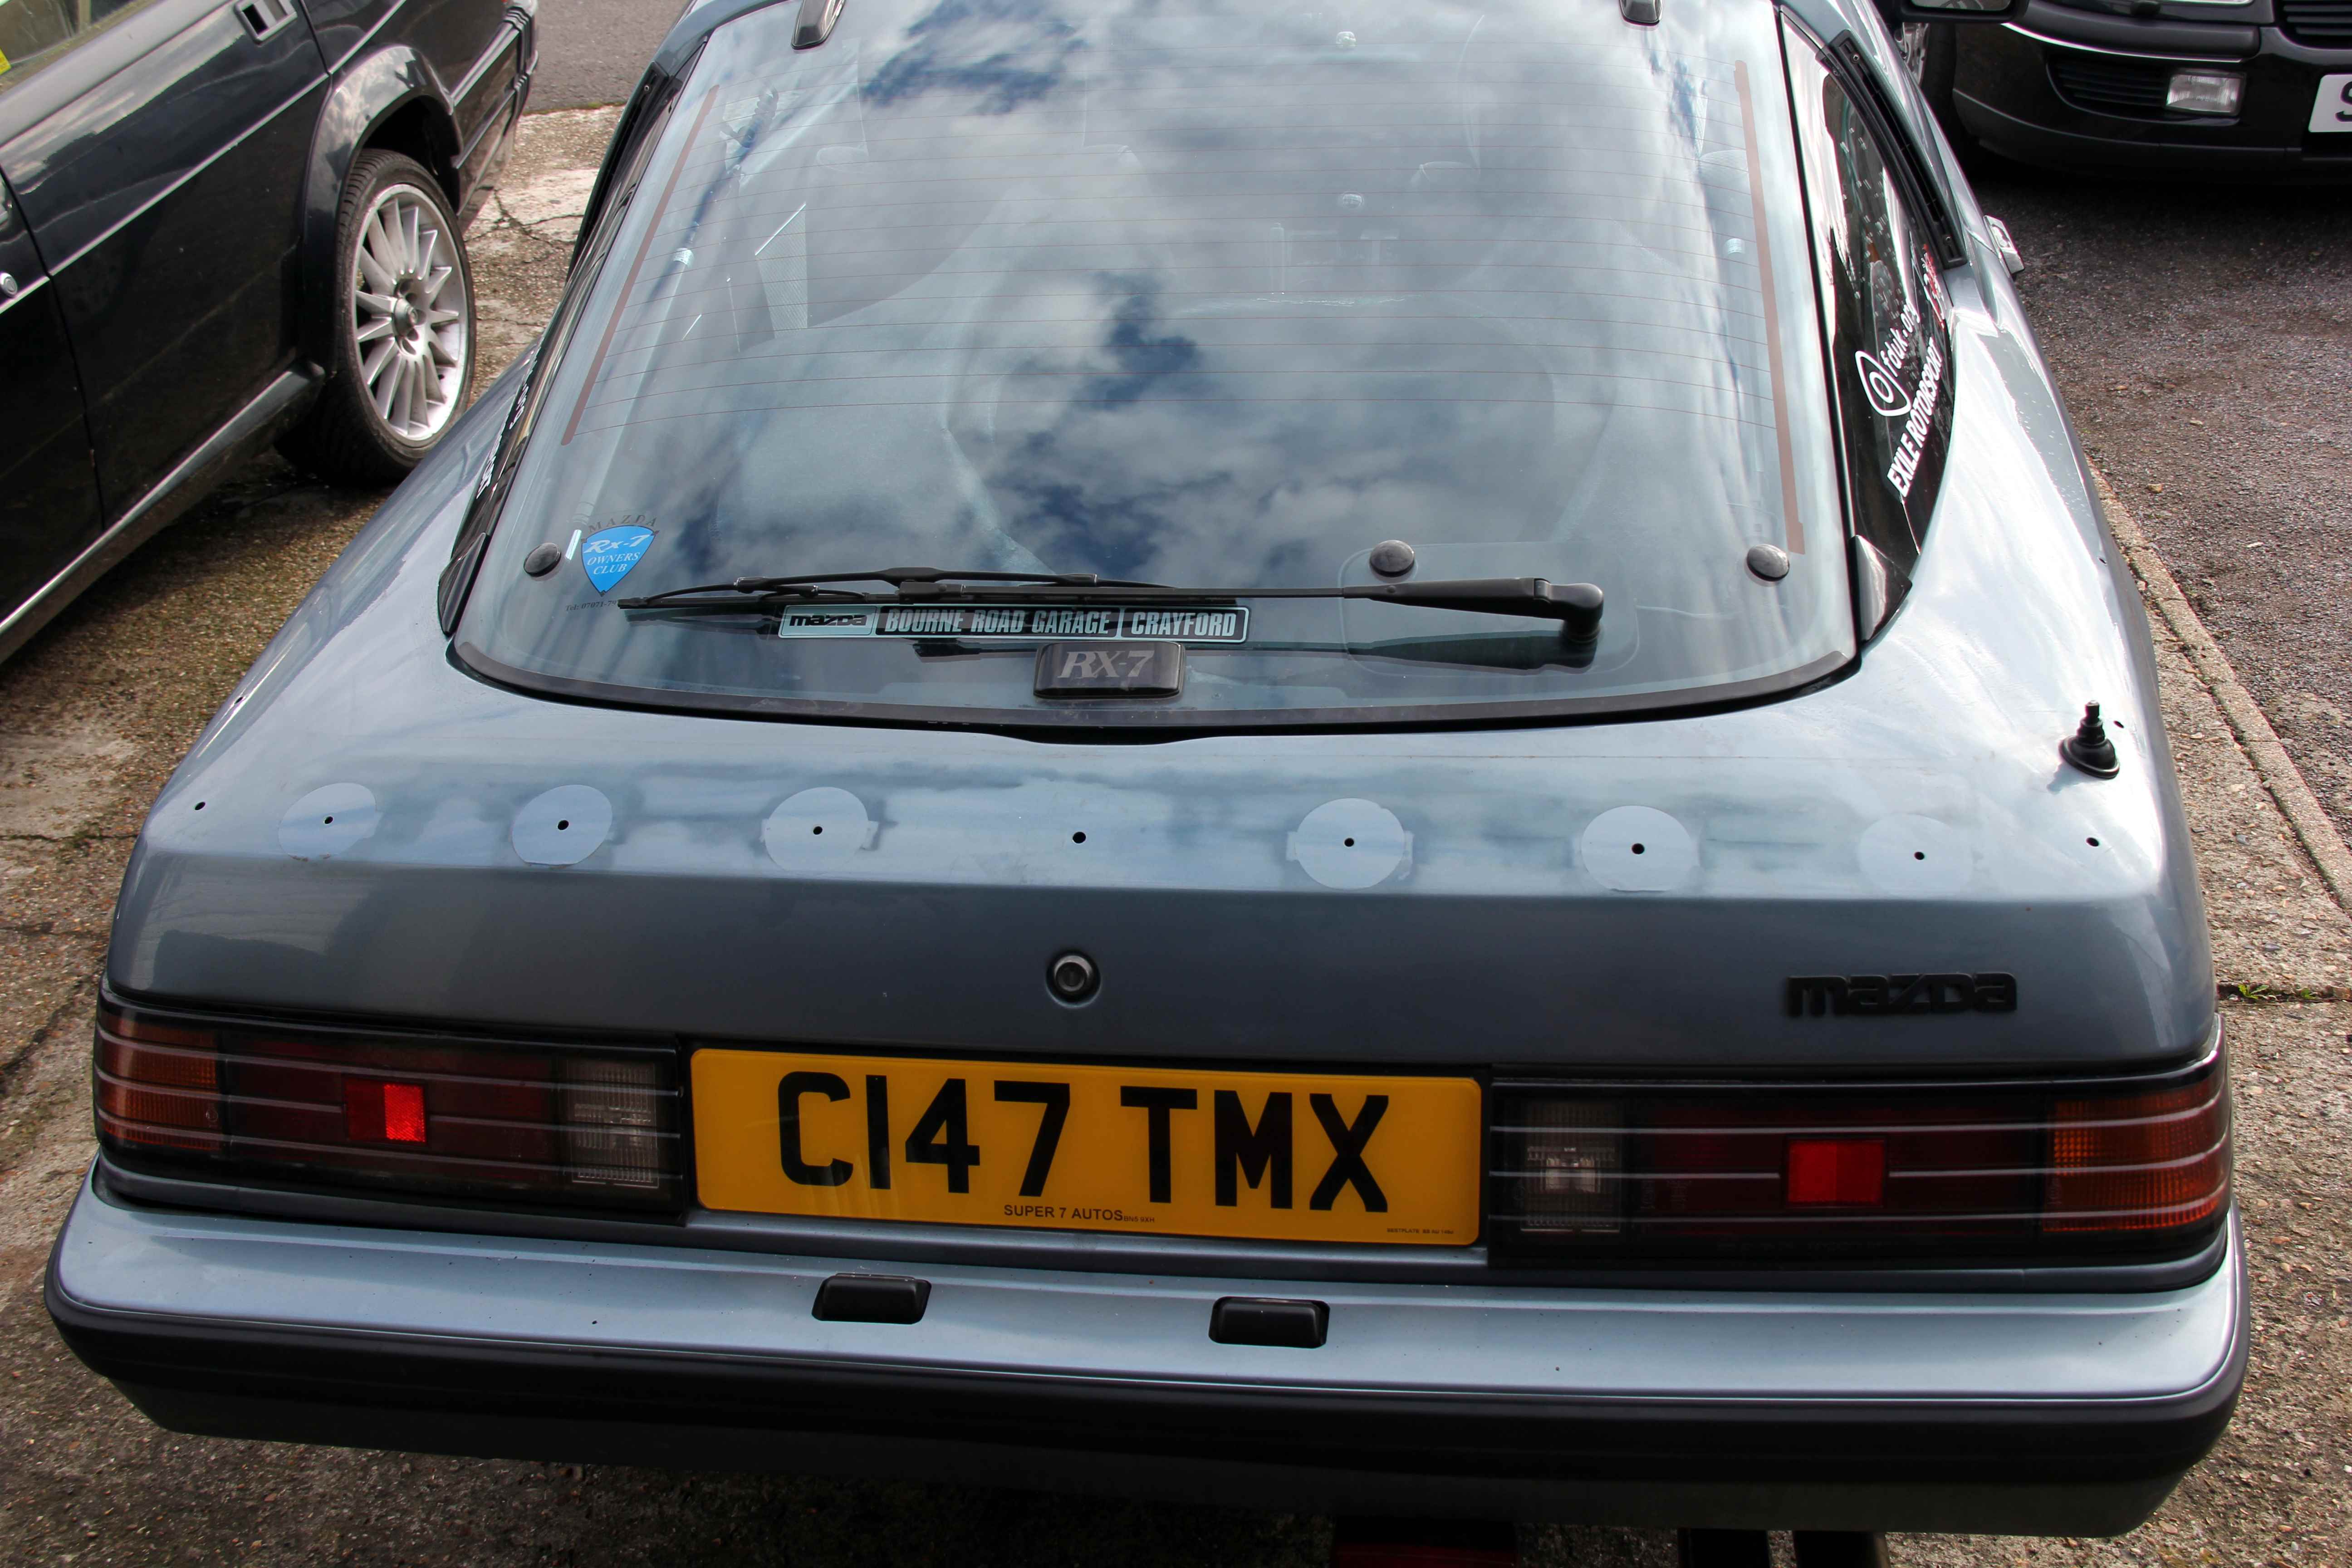
The rest of the holes I filled with Sikaflex sealant, which sticks like the proverbial **** to a blanket, covered with heavy-duty bike bodywork protective pads. It looks terrible, but no-one will see when the spoiler's on and it'll stop the boot acting like a seive
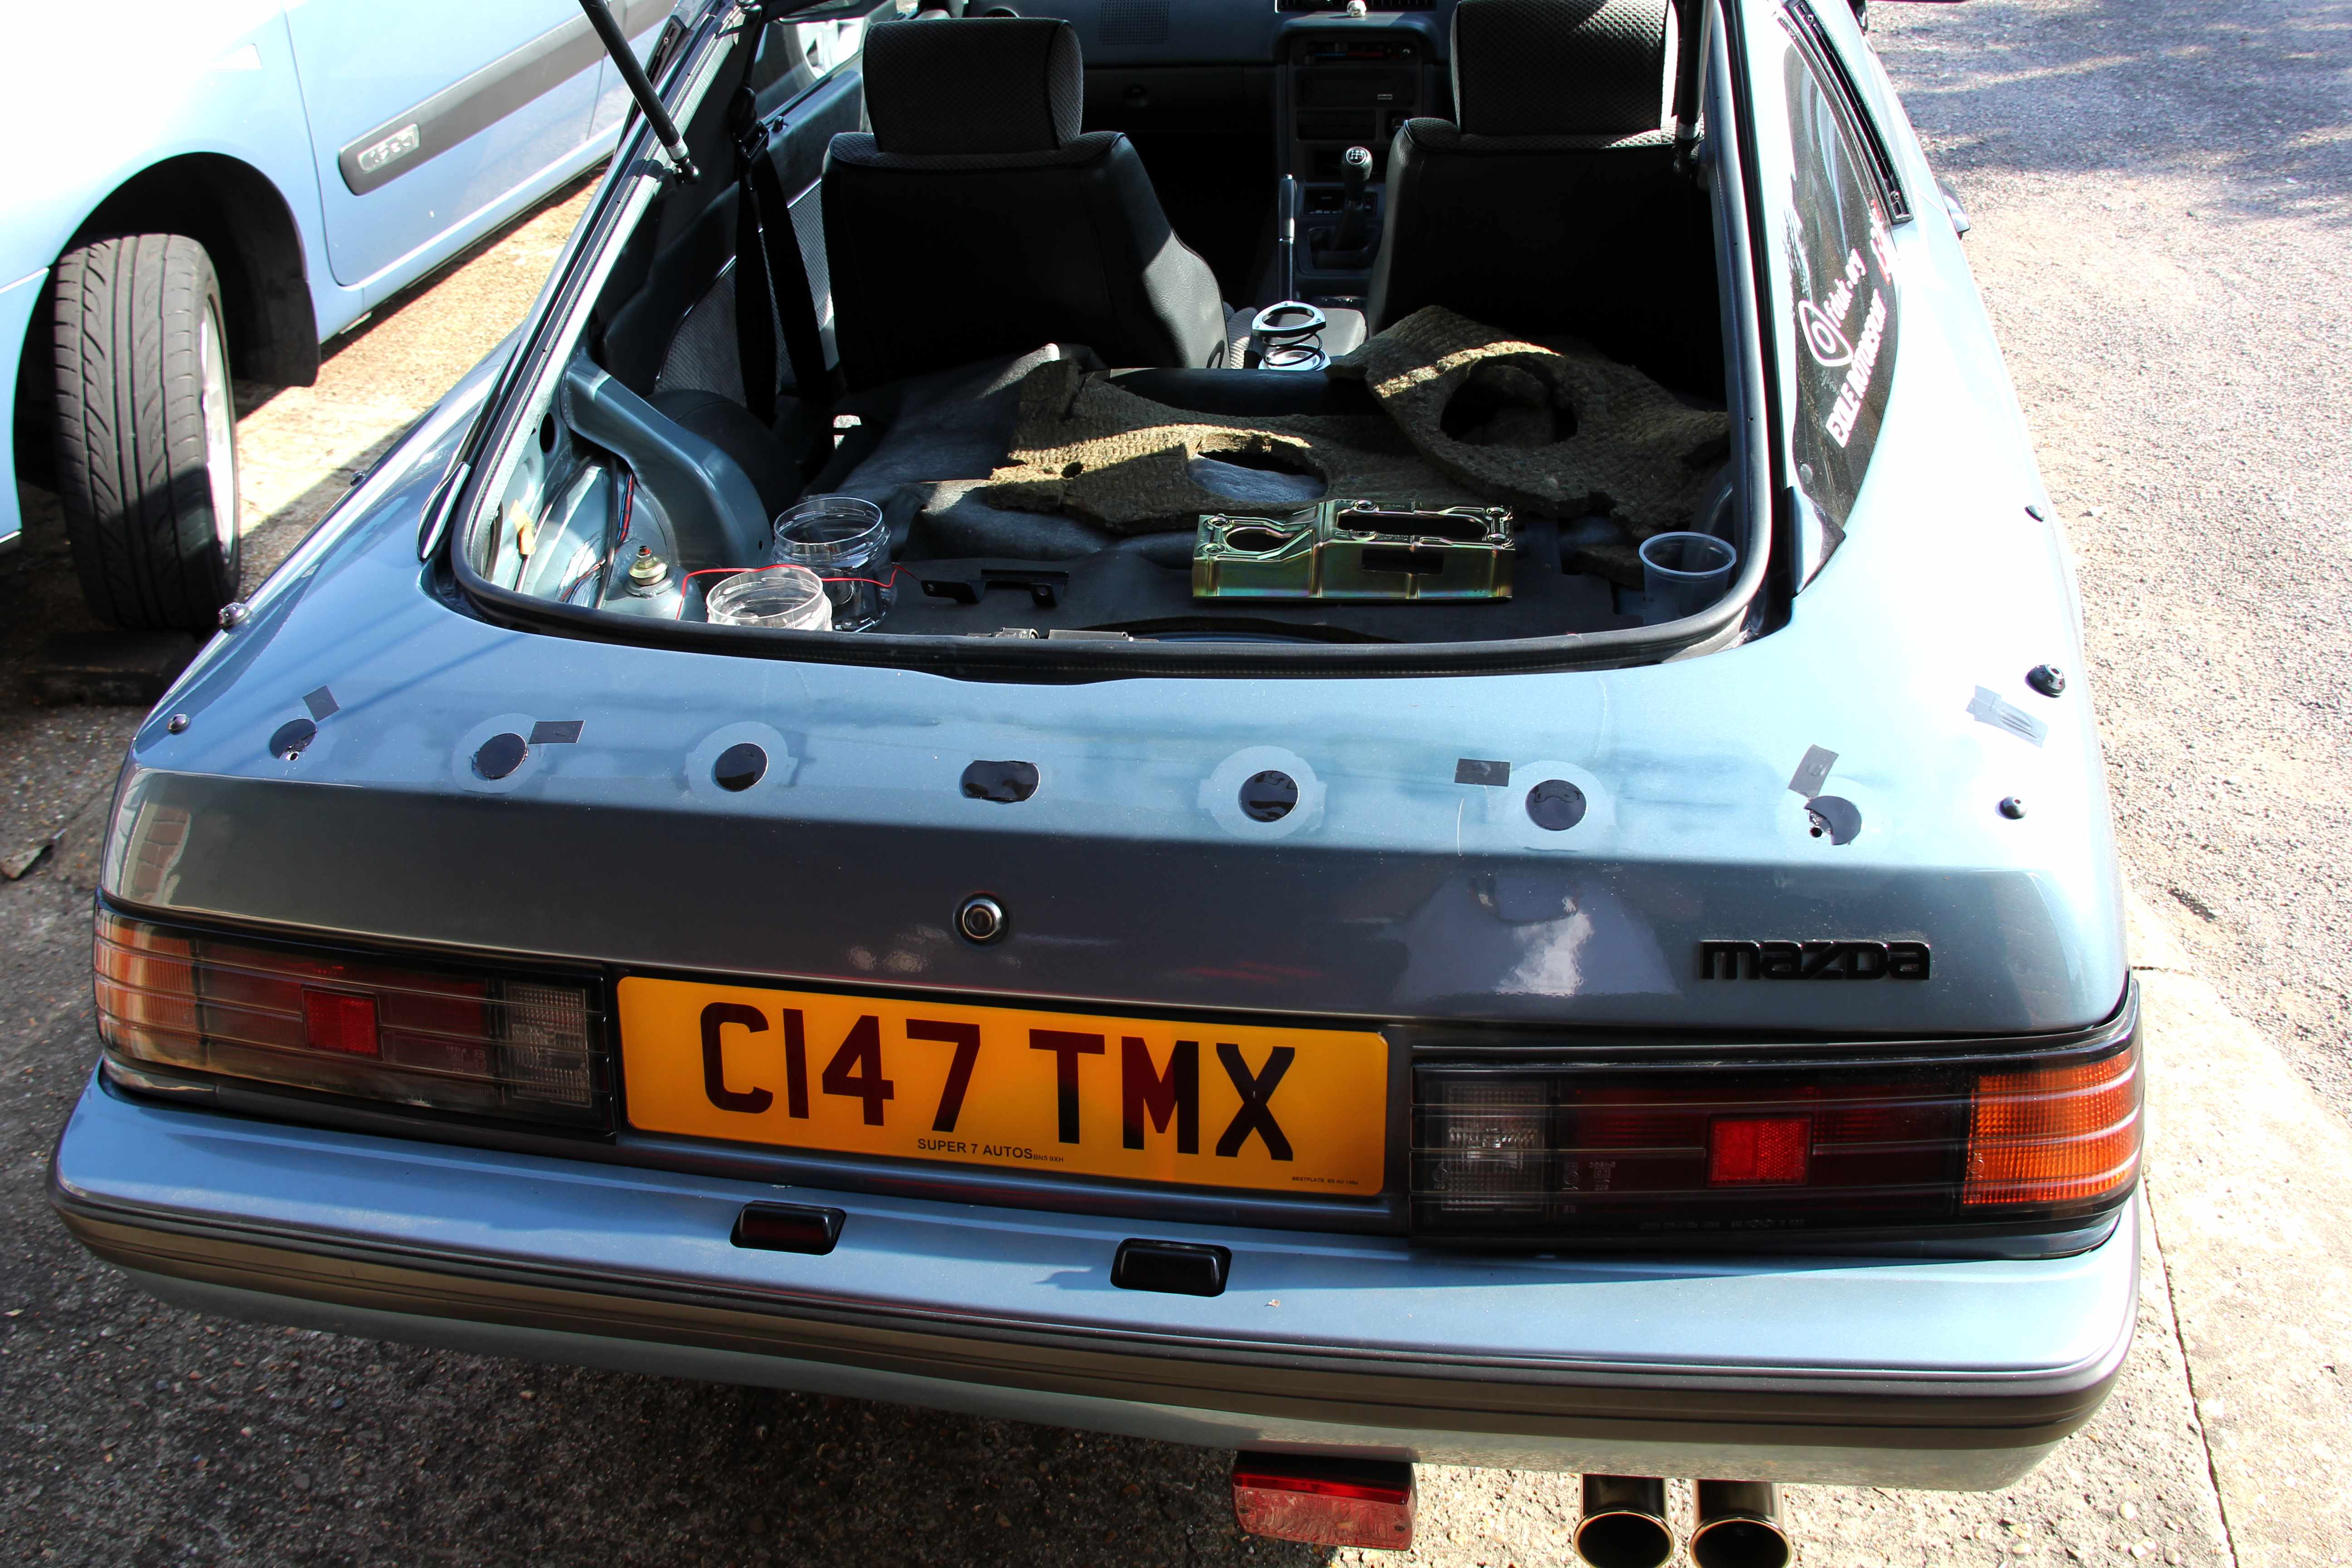
I ruminated over all kinds of solutions for what to plug the aerial hole with, including the perhaps obvious but very unimaginative option of errr.... another aerial. In the end there was only one possible logical and sensible solution
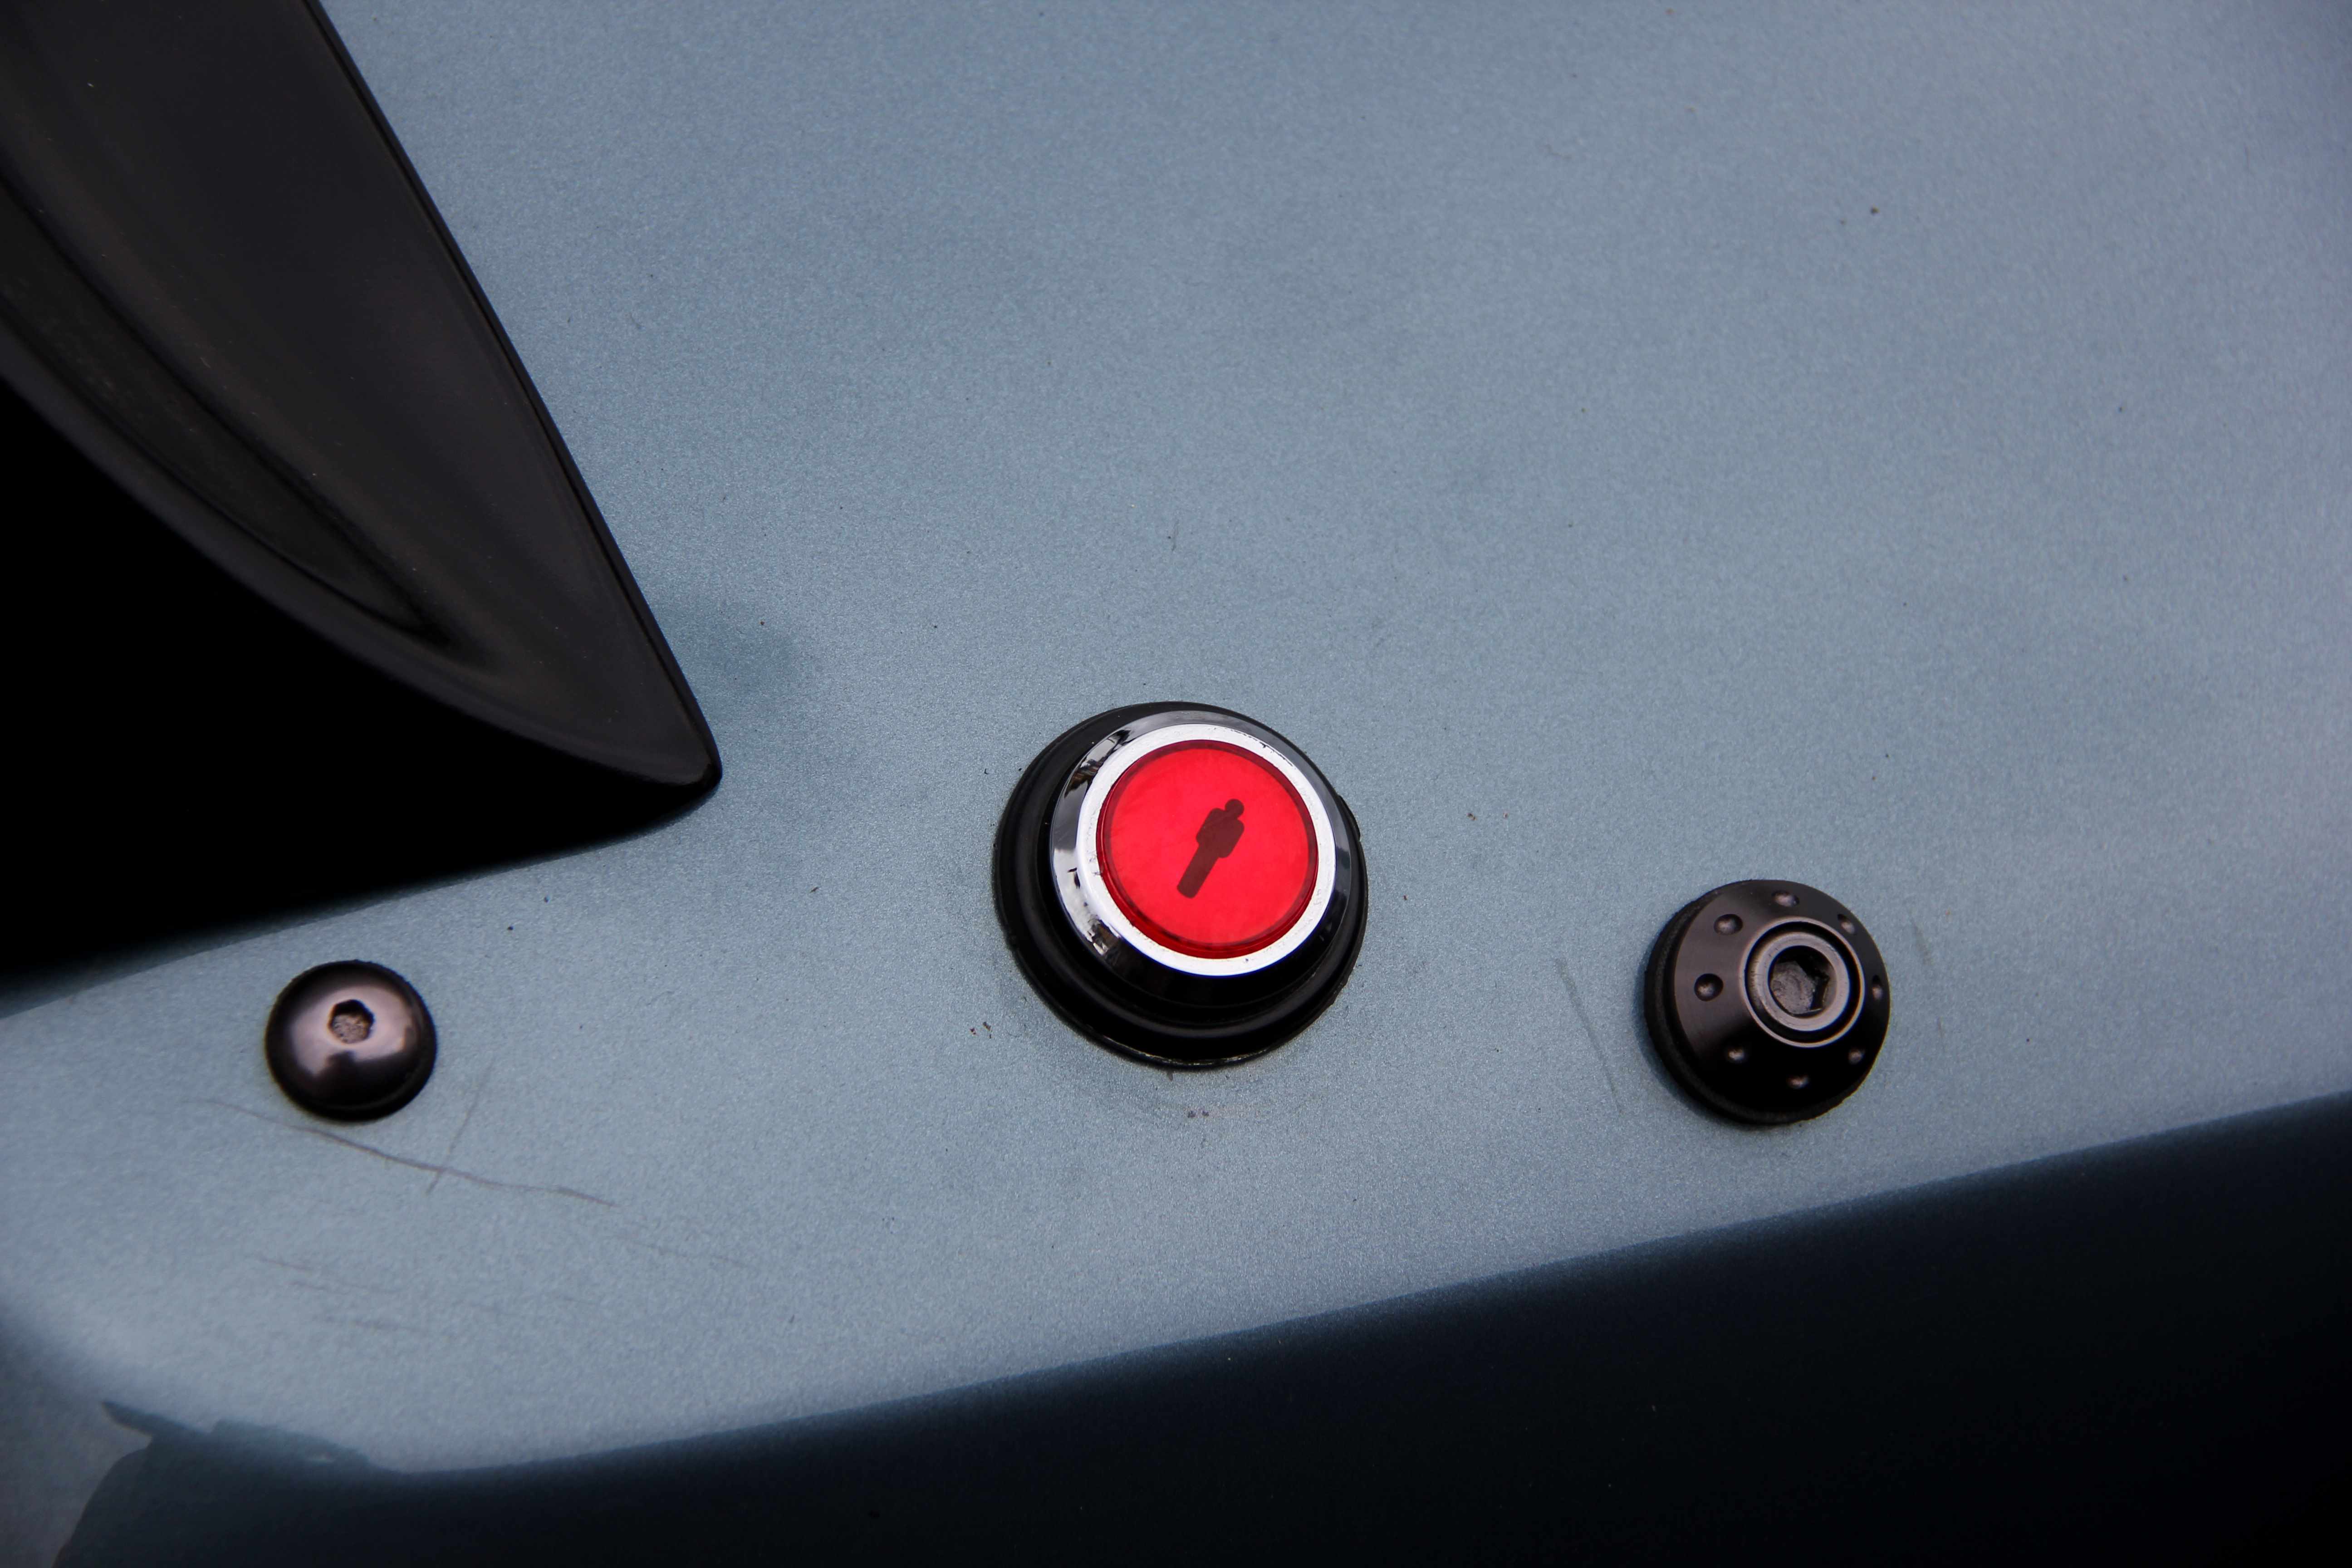
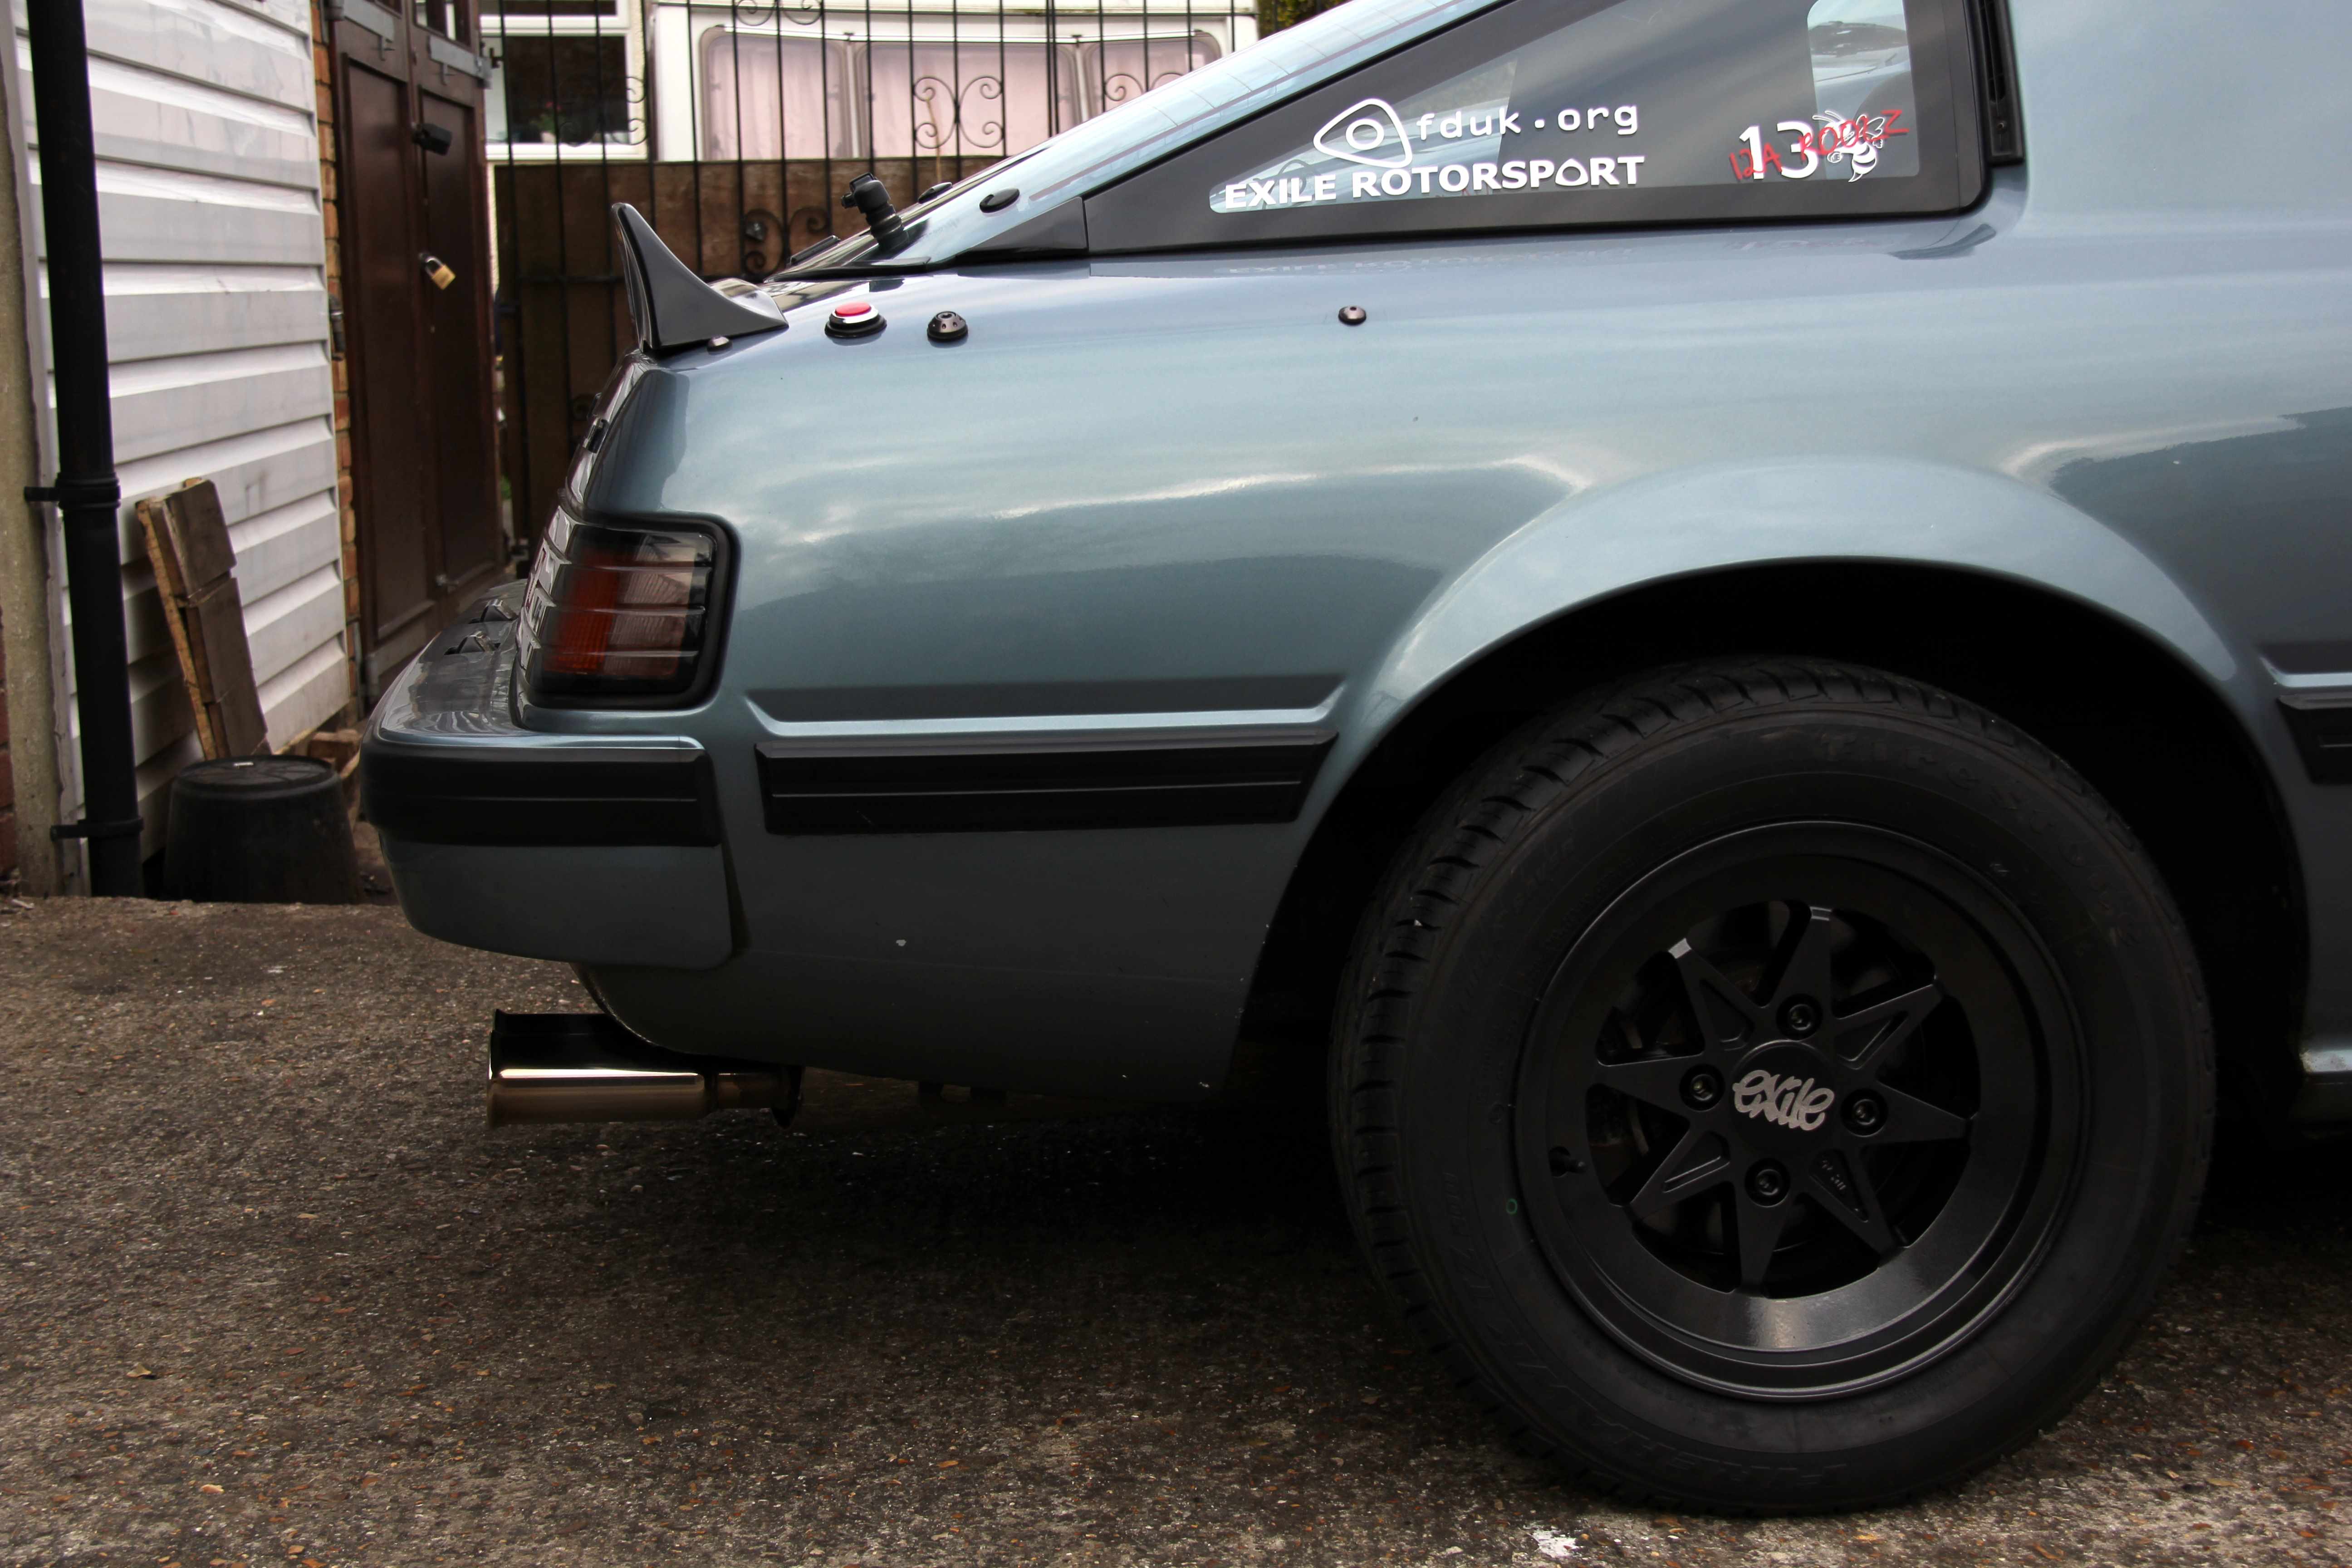
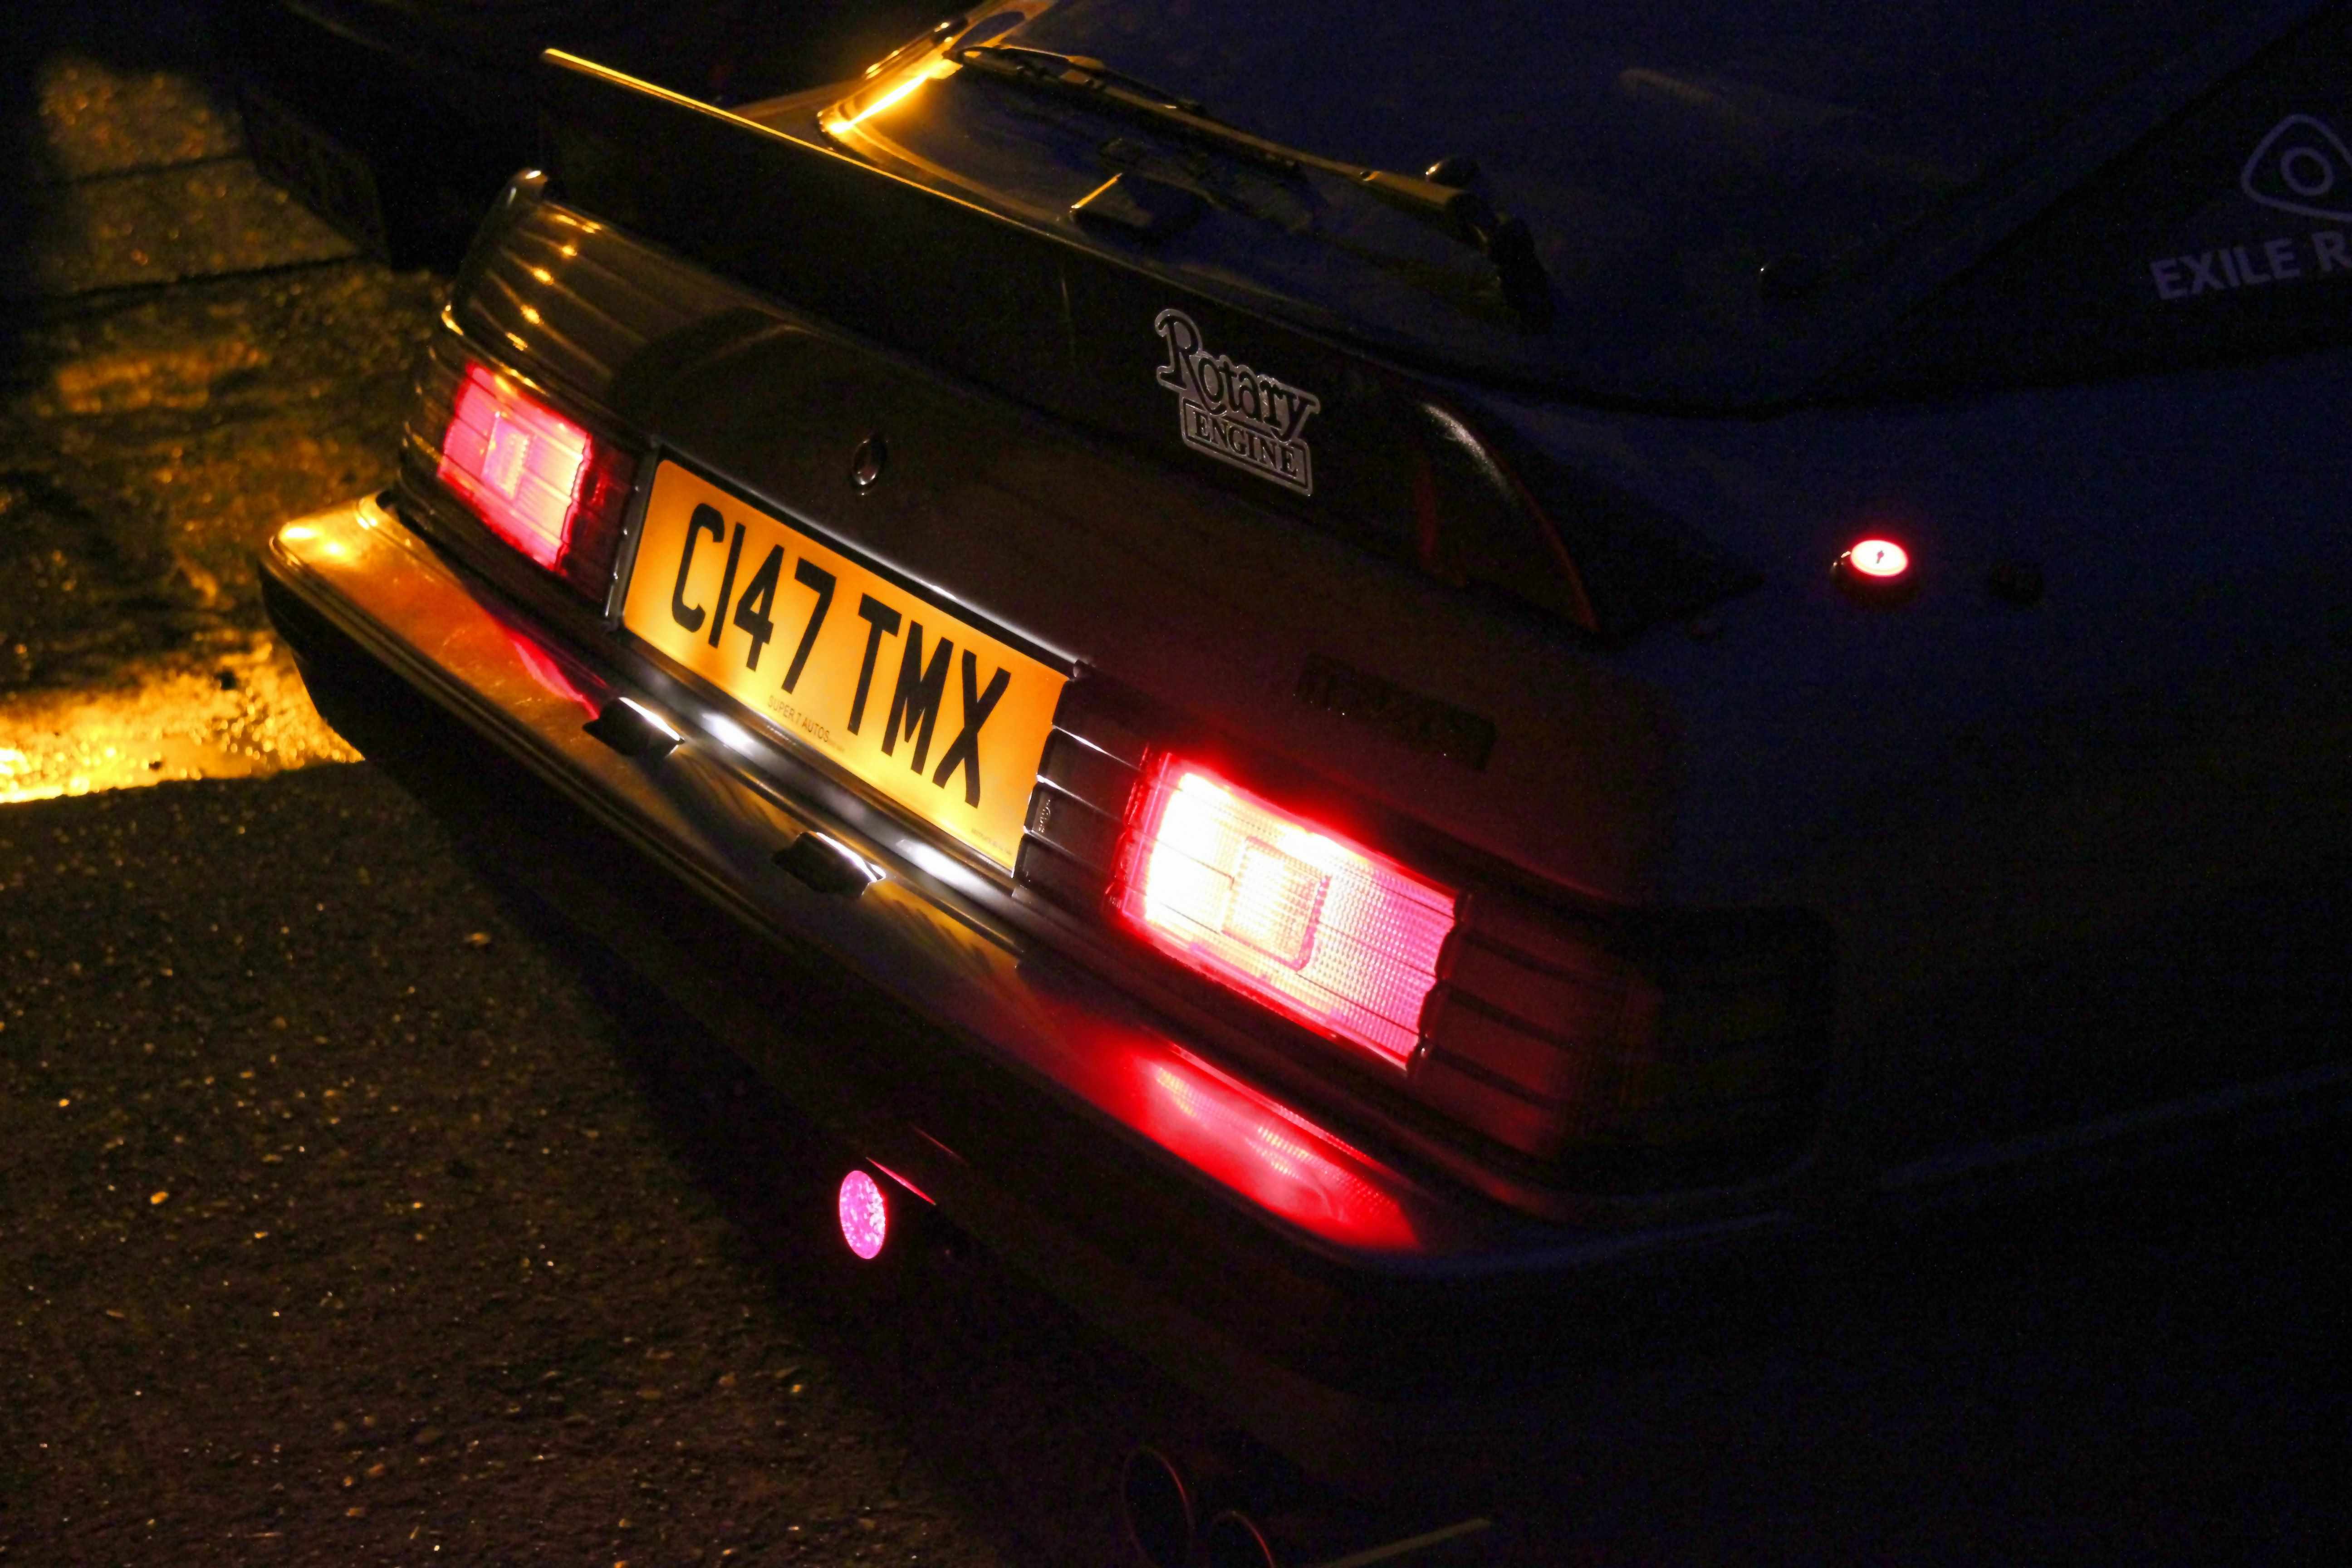
Player One ready..... Yeah, so it's silly, stupid, childish, but it makes me chuckle. It's a player start button from an arcade cabinet game, in case you didn't realise. And guess what? When you turn the foglight on...
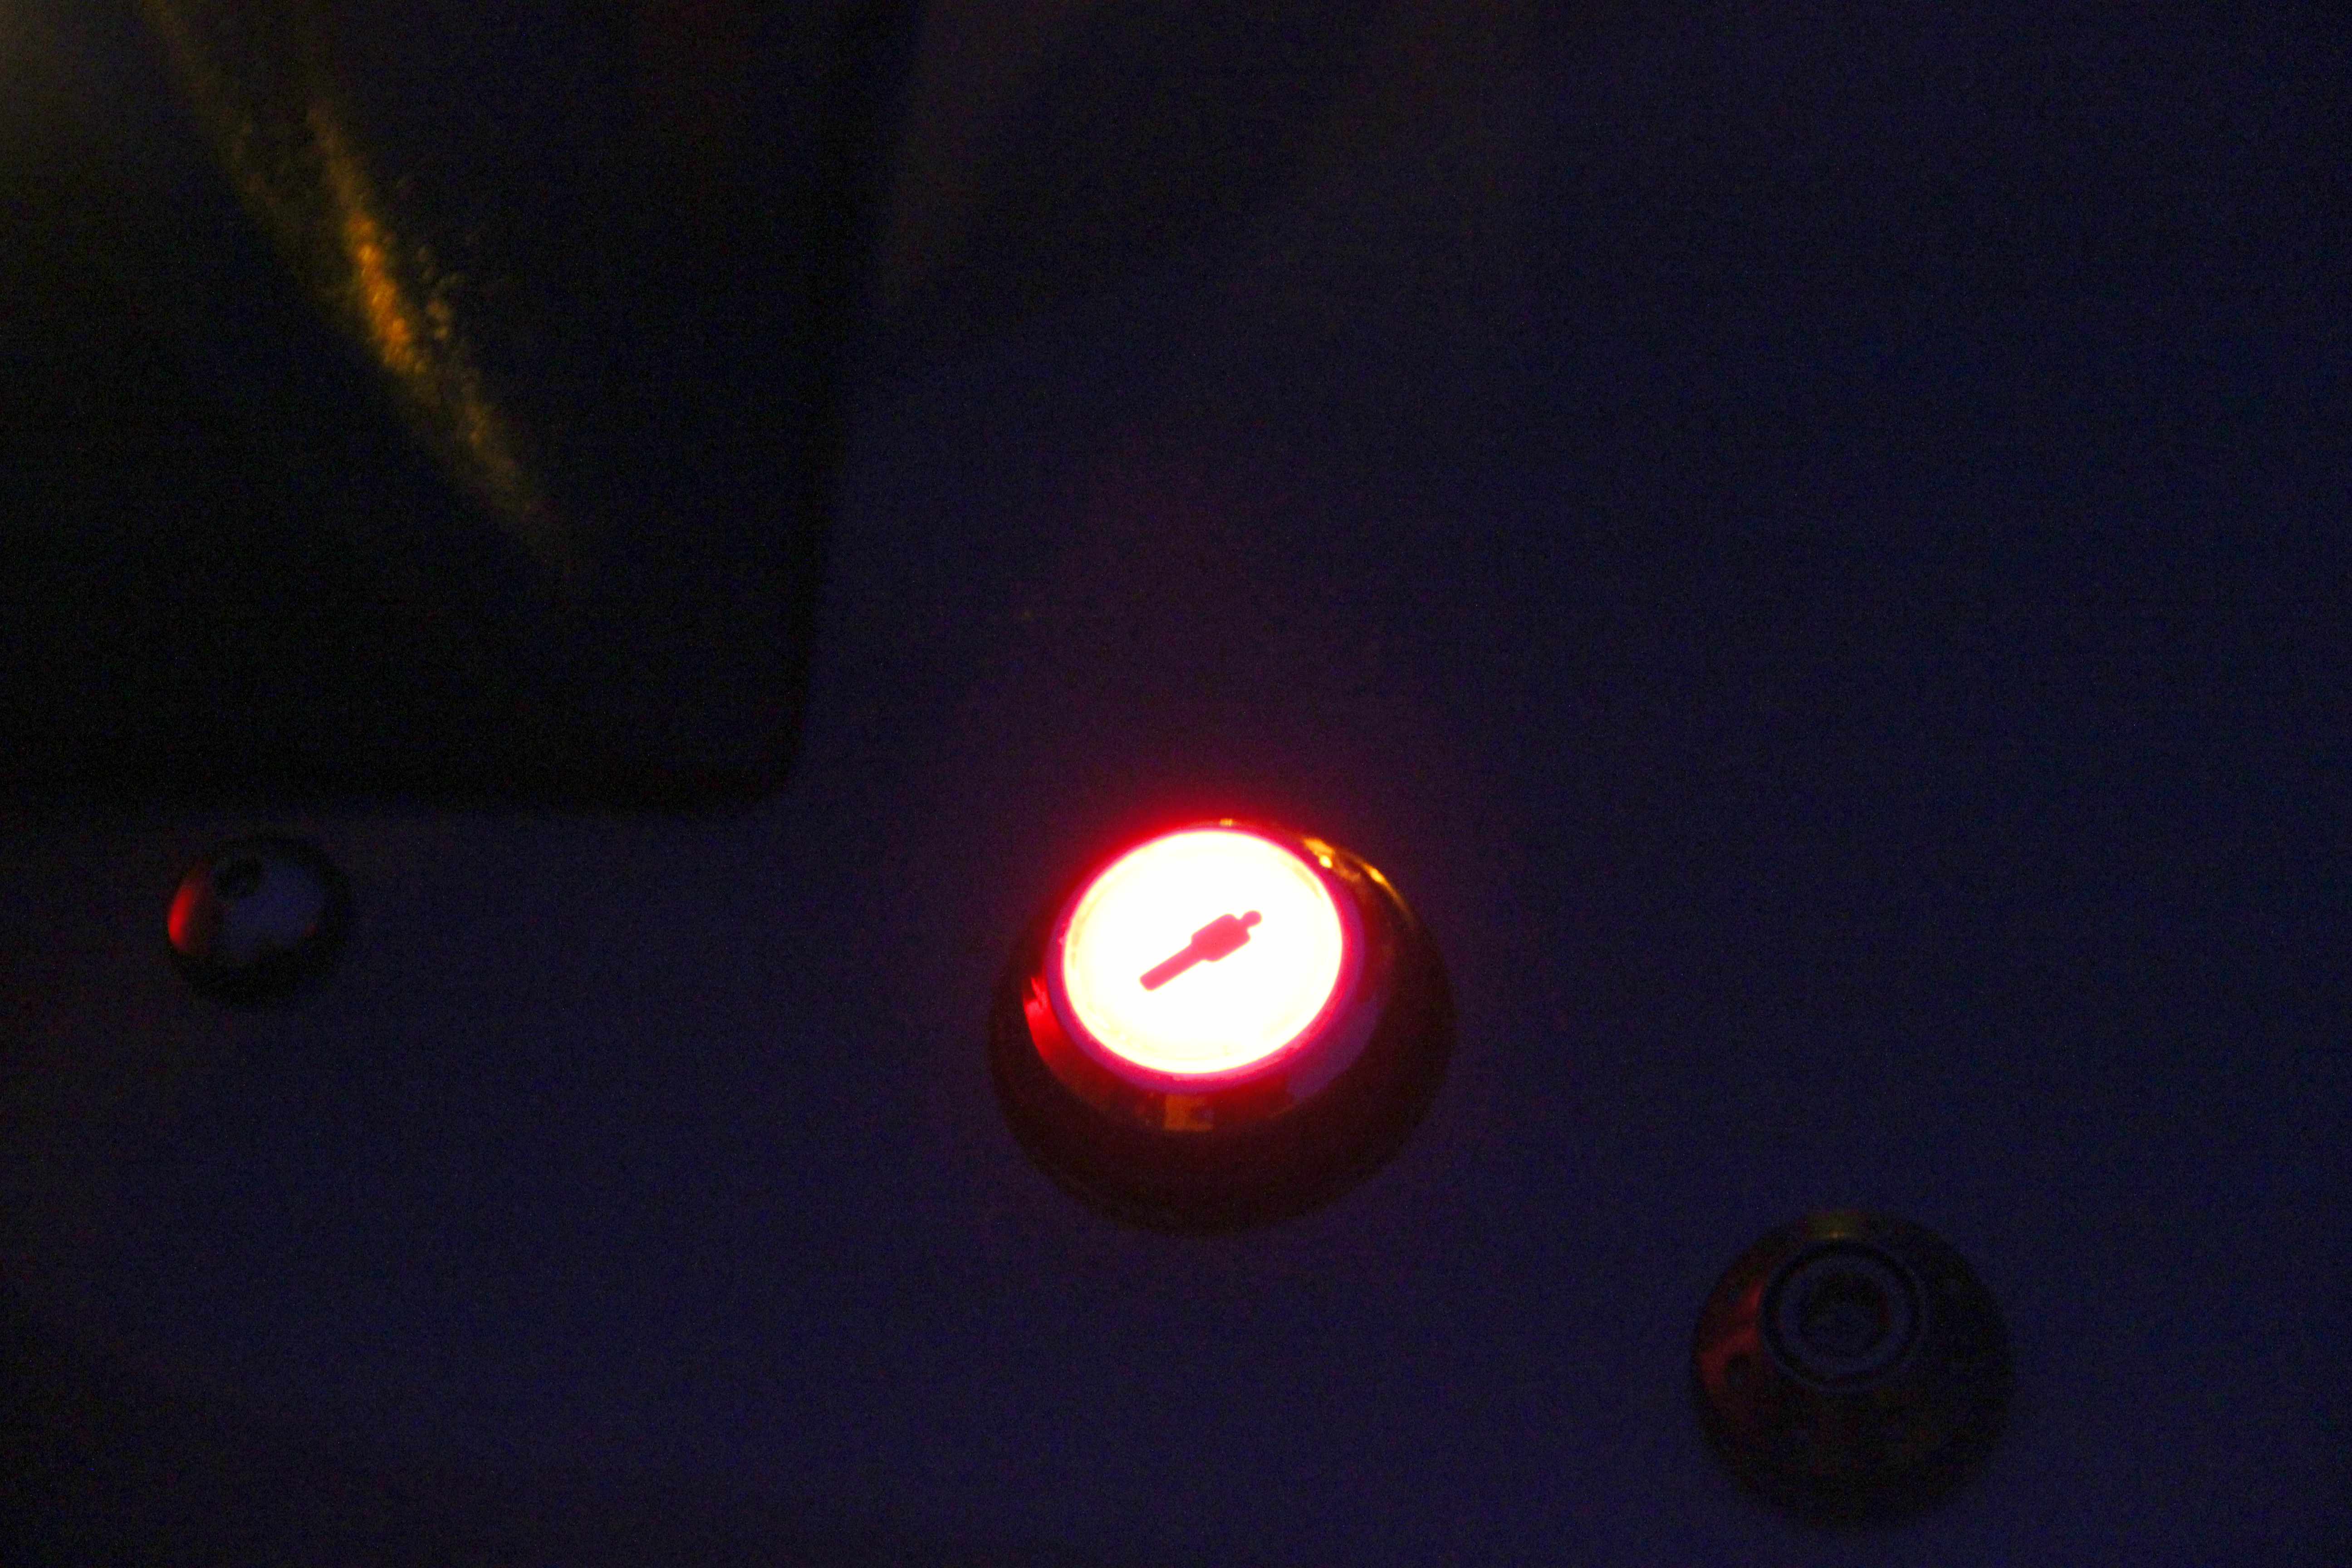
Oh yes 8) That's how hella cool I am. Pathetic, I know, but at shows and meets the number of people I find pressing it or ask about it and think it's great. I really wish I had the electronic skills to wire it up to a really loud klaxon that goes off when people press it.... or even better, a Hitch-Hiker's Guide To The Galaxy-style screen that lights up saying "please do not press this button again"
I don't like the idea of sacrificing a reverse light by putting in a red bulb, so went for the tried and tested method of a racing LED rainlight. I'd had one of these on the FD for ages and they're retina-searing bright but small and unobtrusive. They'd changed (read "cheapened") the design since I bought the FD one, where they used to have water-proof connectors with built-in resistors you now get no connectors at all and two resistors floating around loose to solder in yourself.
So, after some faffing about with wiring and insulting tape, I ended up with this;
Light all voltage regulated and a nice stainless bracket (so it won't rust like the rest of the car) sprayed up enamel black (so it won't show up too much). I love LEDs, dunno why, there's something about them that's just... trippy
Whilst rooting around the boot I felt motivated to investigate the aerial, which had never worked since I got the car. As suspected, it was an electric one, but as also suspected, it was borked. No workuuu. It transpired it wasn't a proper FB one anyway, but some wretched aftermarket cheapness. It was held in only by the top nut on the aerial mast and two cable-ties (zip ties?) threaded through the holes in the inner fender flitch! Shameful bodgery!
I never listen to the radio anyway, not in the car, so it didn't break my heart to lose it. But what to plug the massive hole with? In fact, there were three additional holes left each side by the original spoiler mounts that wouldn't be covered by the new spoiler. What to plug them up with? The obvious thing would be get them welded but I didn't want that for two reasons. One being I'd then have to get the whole rear end sprayed up, which is time and money I didn't want to spend, and the other was that it'd then be impossible to put it back to stock should anyone want to.
For the spoiler holes I went to Pro-Bolt Titanium, Stainless Steel, Aluminium Fasteners & Motorcycle Bolts | ProBolt who I've used for bike fasteners loads of times, and who make fasteners sexy enough to turn any amateur mechanic into a shameless onanist (look it up
). Some of their drilled cone washers and allen bolts for the bigger holes and simple dome head bolts for the smaller, in titanium grey anodised alloy, with rubber washers inside and out to keep it watertight solved the holes. Plus they look trick and maybe pass off as if they're supposed to be there.The rest of the holes I filled with Sikaflex sealant, which sticks like the proverbial **** to a blanket, covered with heavy-duty bike bodywork protective pads. It looks terrible, but no-one will see when the spoiler's on and it'll stop the boot acting like a seive
I ruminated over all kinds of solutions for what to plug the aerial hole with, including the perhaps obvious but very unimaginative option of errr.... another aerial. In the end there was only one possible logical and sensible solution
Player One ready.....
Yeah, so it's silly, stupid, childish, but it makes me chuckle. It's a player start button from an arcade cabinet game, in case you didn't realise. And guess what? When you turn the foglight on...Oh yes 8) That's how hella cool I am. Pathetic, I know, but at shows and meets the number of people I find pressing it or ask about it and think it's great. I really wish I had the electronic skills to wire it up to a really loud klaxon that goes off when people press it.... or even better, a Hitch-Hiker's Guide To The Galaxy-style screen that lights up saying "please do not press this button again"
Thread Starter
Senior Member
Joined: Oct 2010
Posts: 255
Likes: 1
From: England
Right, so the spoiler, I hear you cry
OK, OK. lol. I knew exactly what look I wanted. The stock spoiler's all very well.... actually, no it isn't, it's utterly hideous. The way it sticks out off the bootlid, the silly pointy bits that run up the fenders, the way no one part of it matches any other line on the car. It had to go.
I wanted a simple ducktail style spoiler, like the *whispers* Pontiac Firebird style thing. So that got me thinking... what's like an American muscle car but shrunk onto a Japanese scale? Answer was obvious, a Datsun 240Z of course... well, halfway between that and an E-type anyway. I became an internet expert, researched every pic I could find and pretty much convinced myself it'd fit. Then came the task of trying to find one. I've seen a rubber plant and a horse fly but I ain't never seen no mythical 240Z spoiler. I was going to give in and either spunk 200 notes on a Rocket Bunny 200SX one or (worse idea) try to make one myself when one came up on eBay. Good ol' eBay
Bidding war ensued, and I scored it for only 60 quid plus post, which I thought was awesome. It arrived and I breathlessly offered it up.... would it fit even close? Had I just made and **** out of myself? No. It fitted, just like I wanted it to. Winner
It was however, a fairly disreputable-looking thing. Long-suffering FD used as workbench shocker

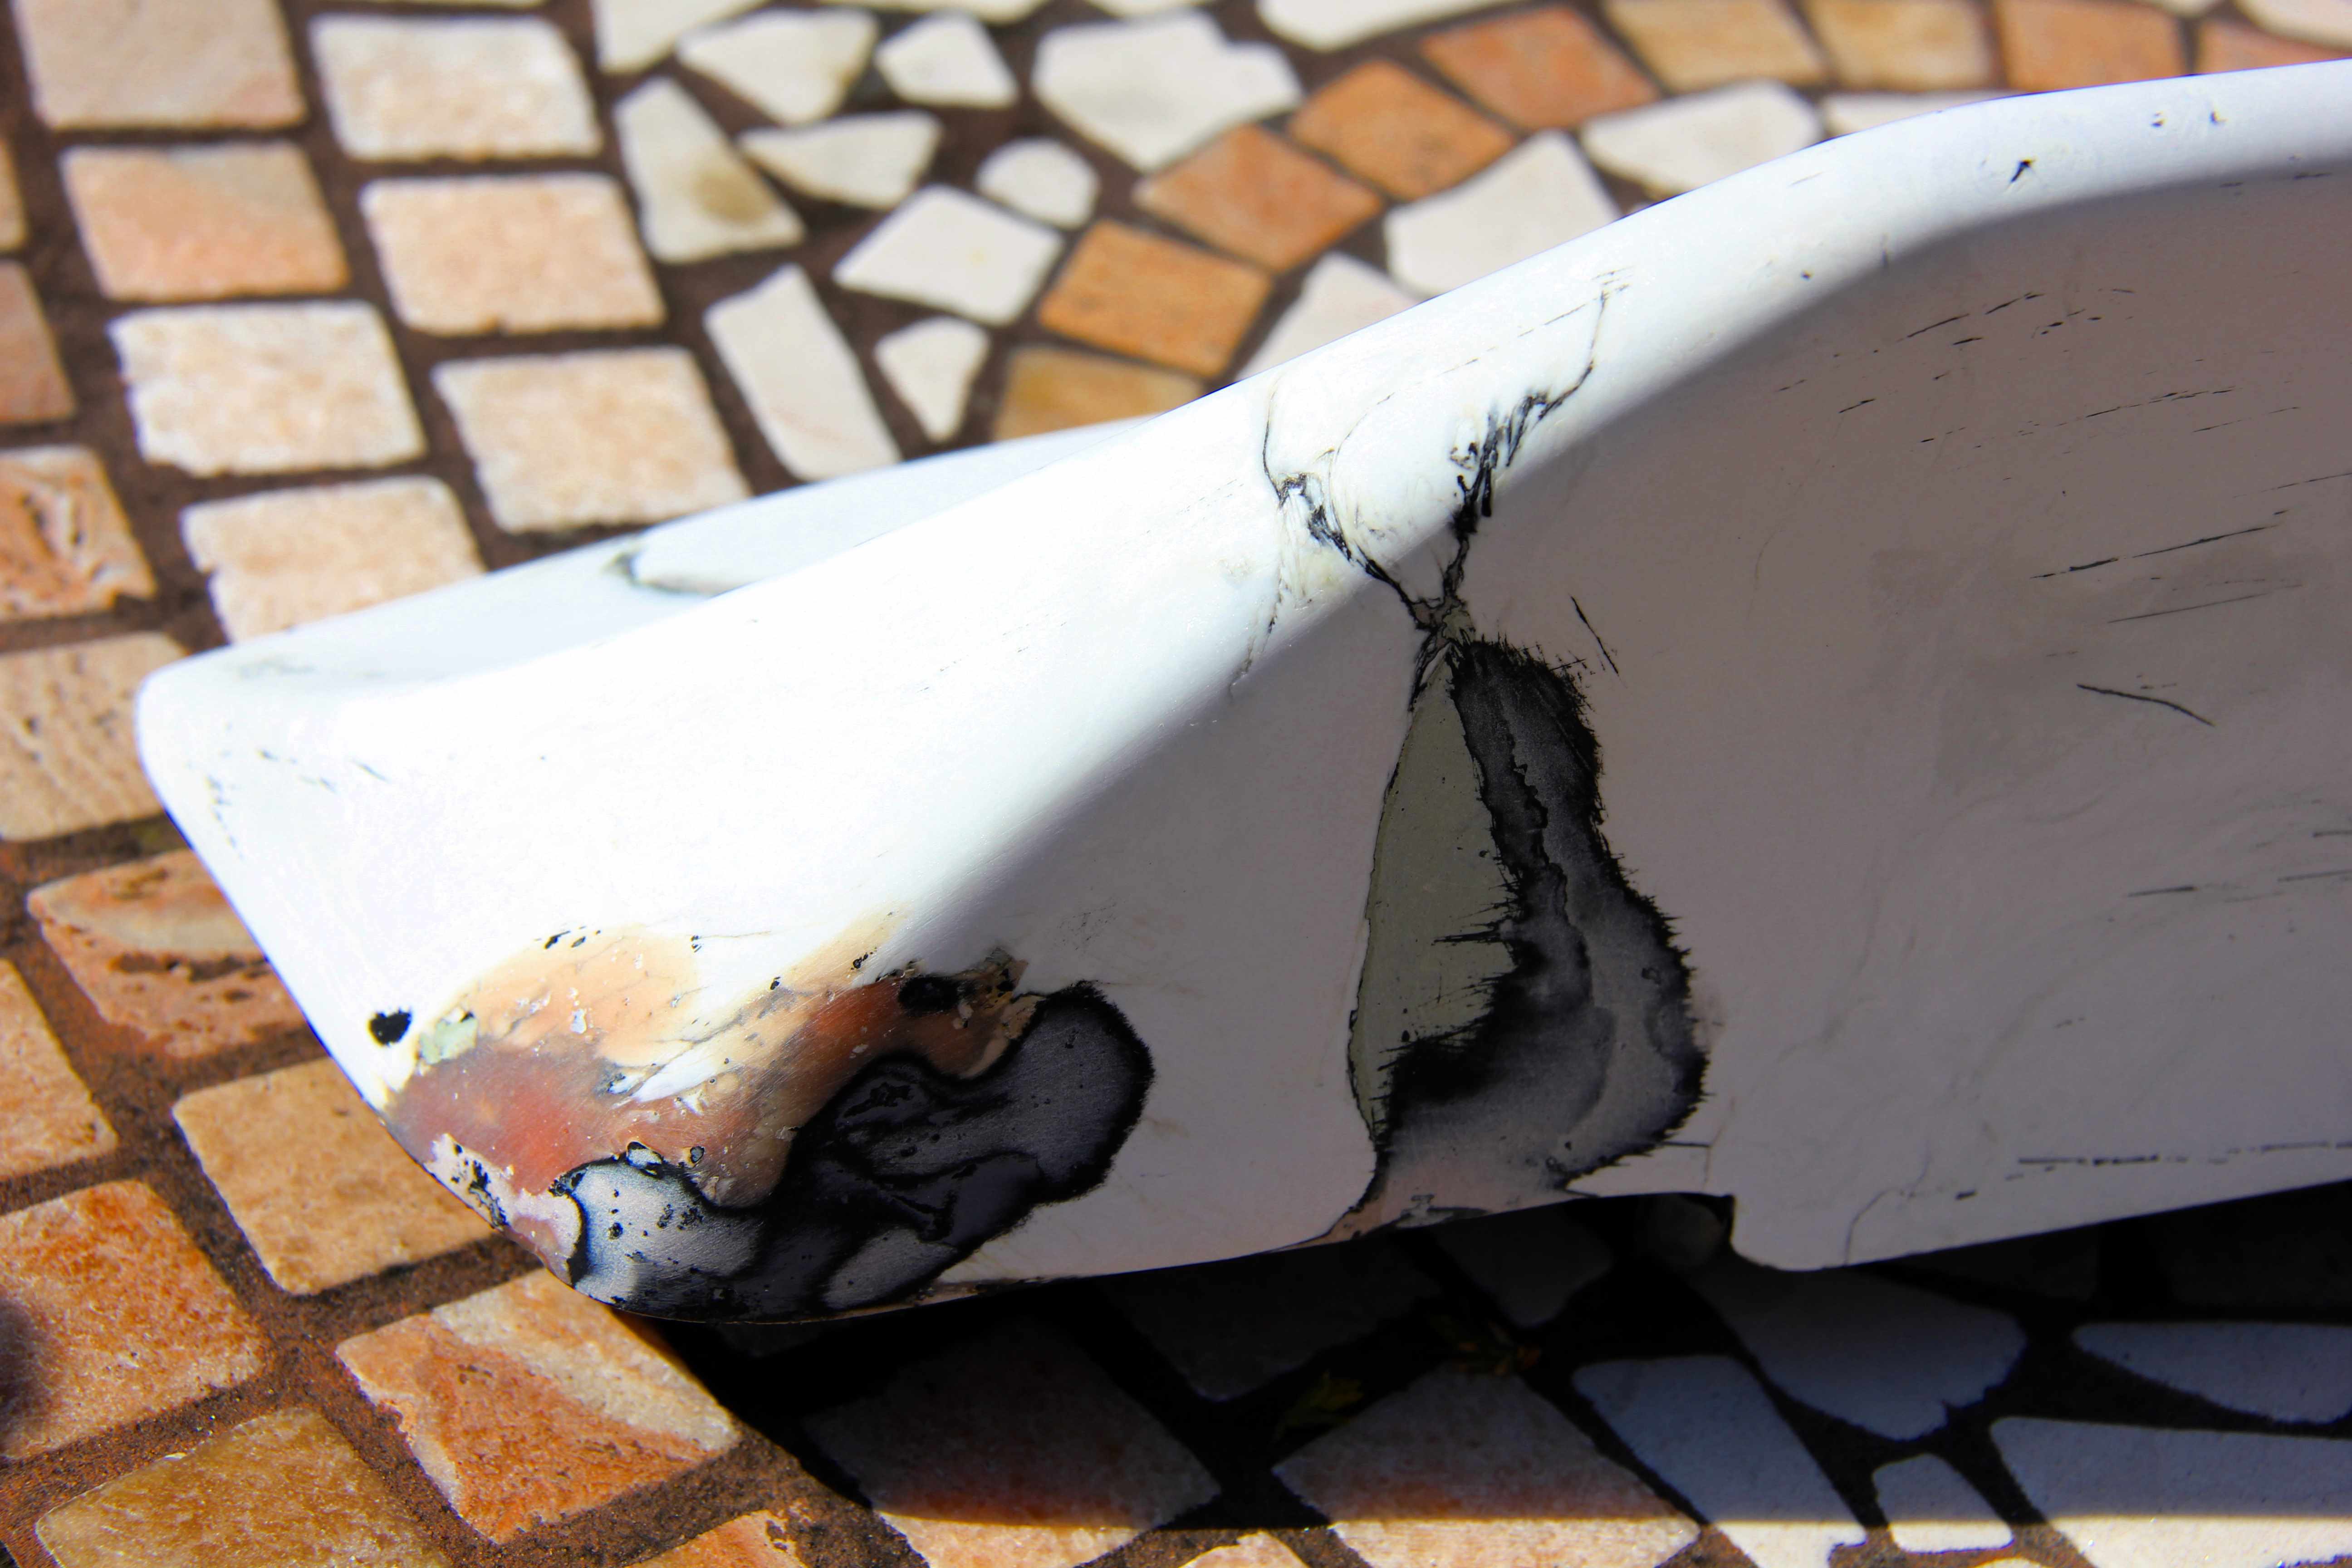
Plenty of cracks and chips showed it'd had a hard life, so it had to be stripped back and painted. The other problem was that three out of the six structural mounts had full-thickness cracks around them. One had gone right out and bulged the rear face of the spoiler blade out. First step was to fix them, or it'd all be a waste of time. So, holes drilled to stop the cracks spreading...
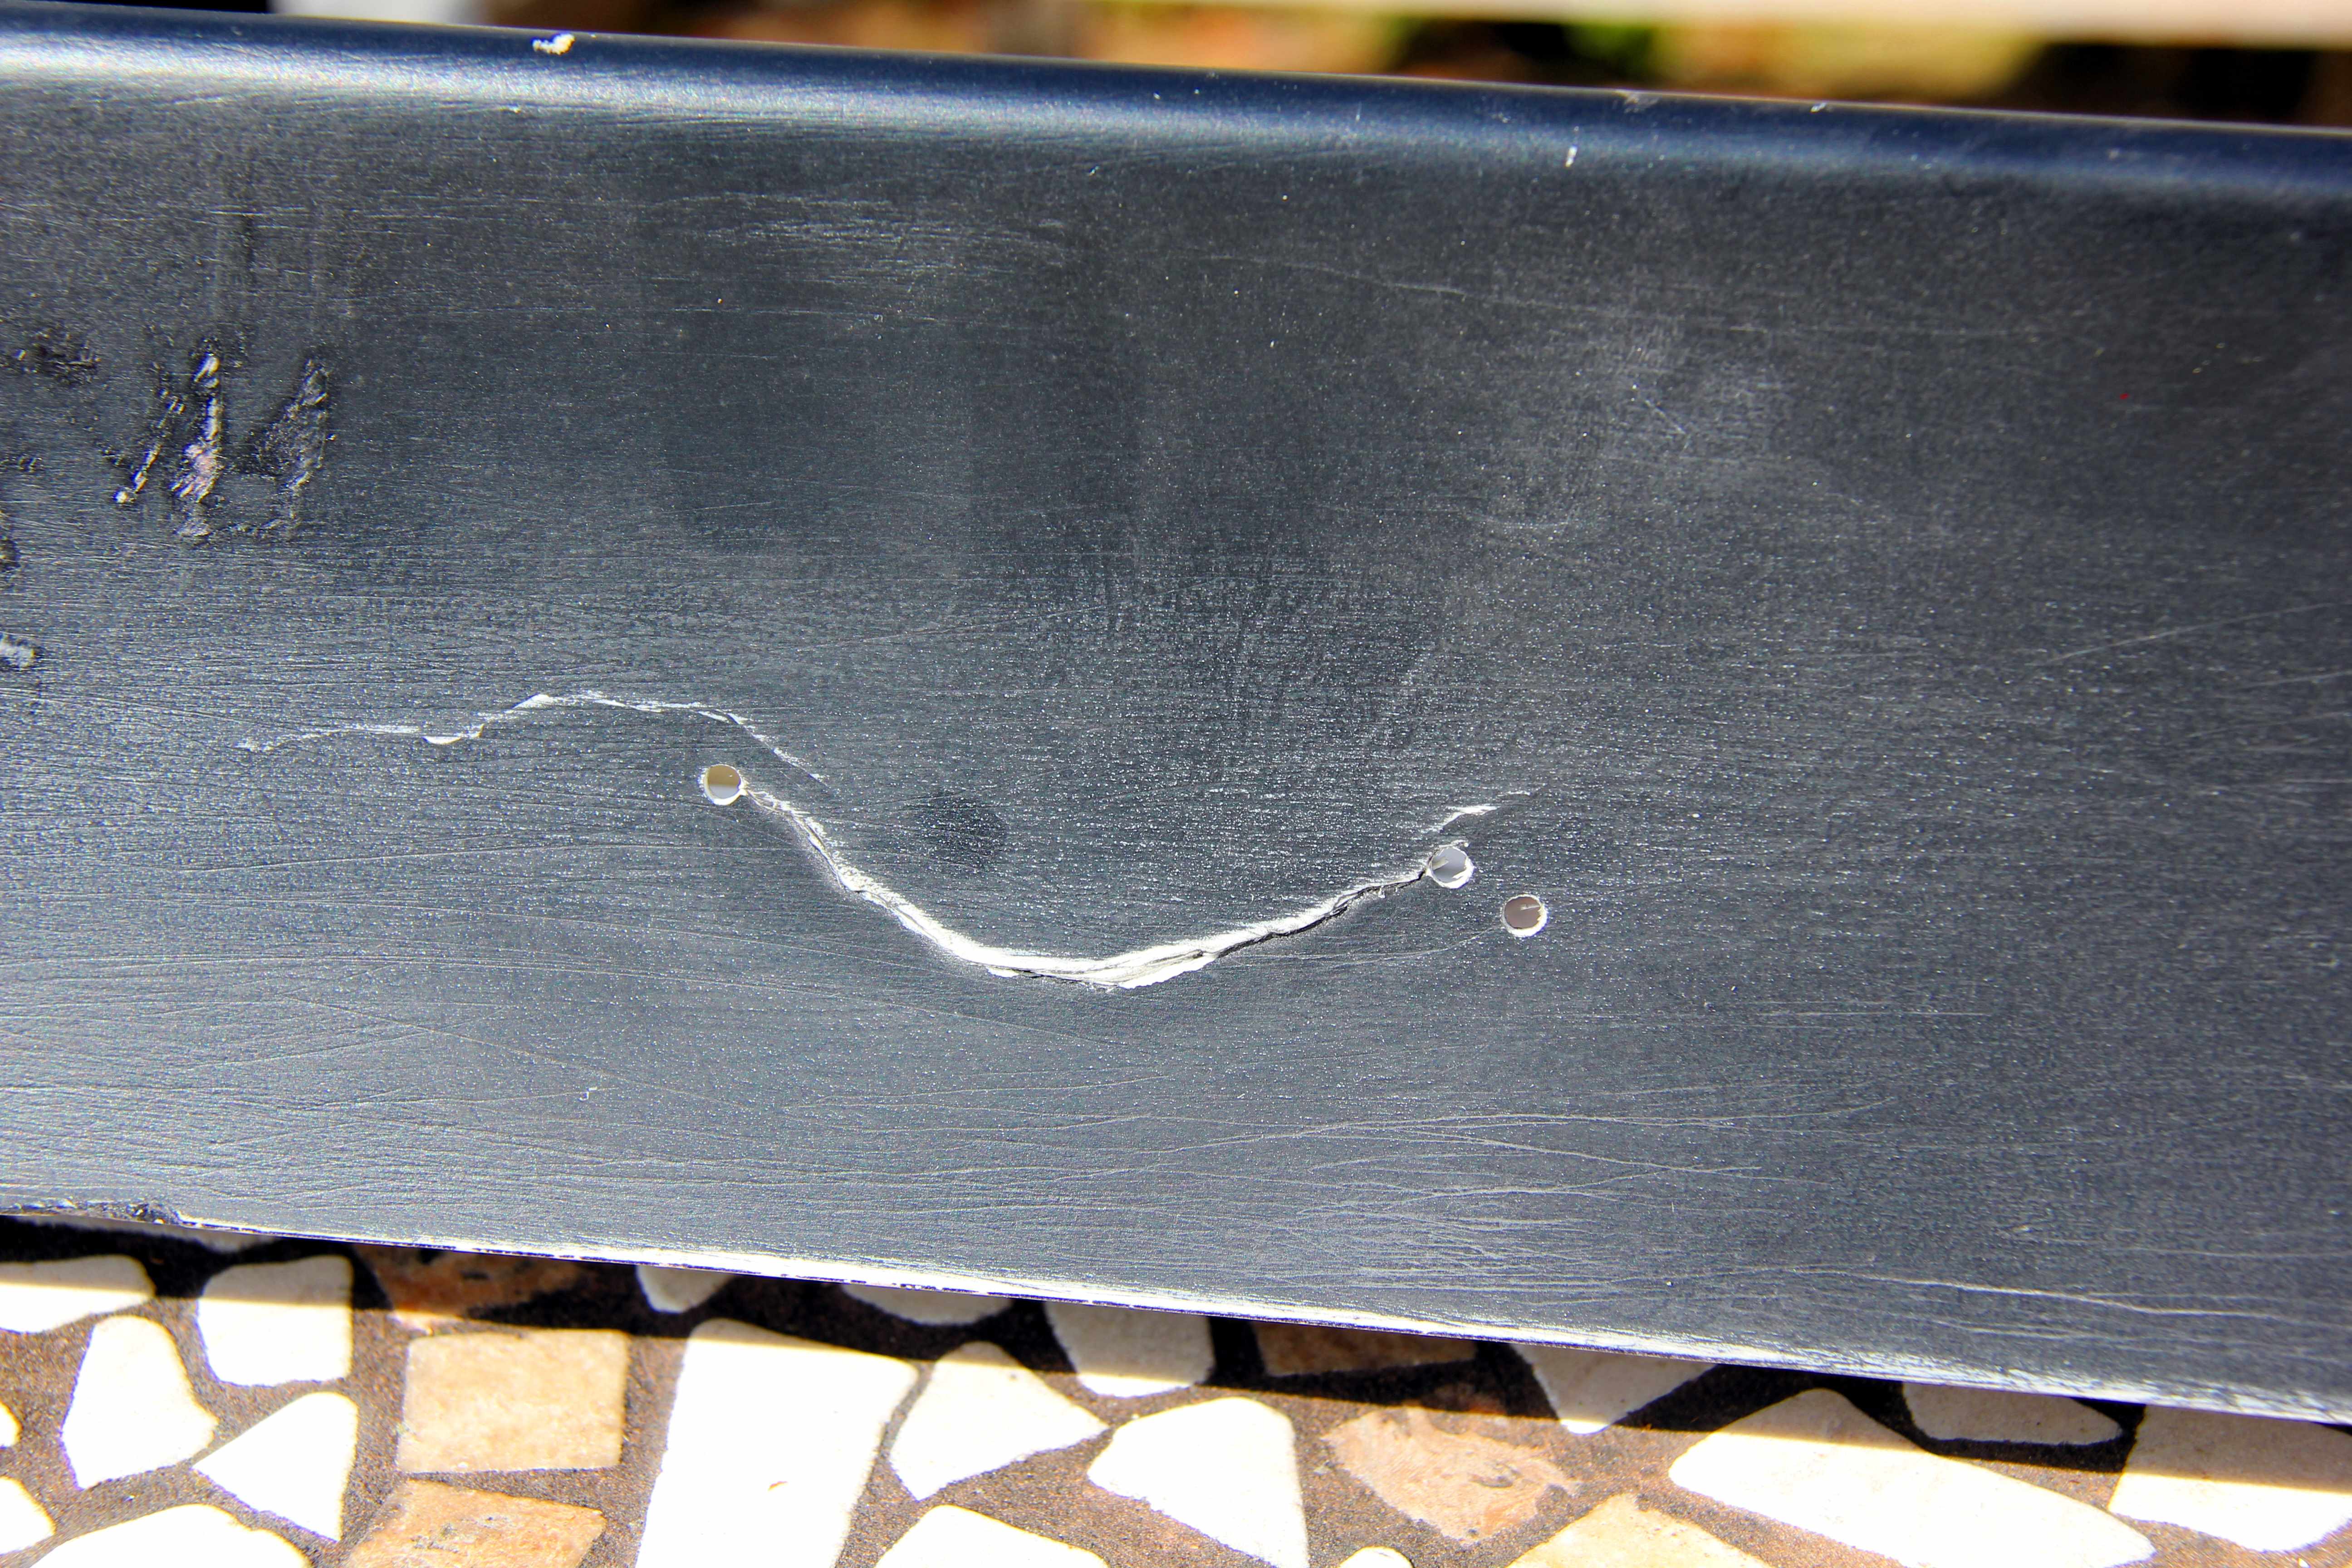

And then the repair proper. It became quickly apparent this had been dropped on one end at some point and it'd almost completely snapped off. I went for some strength and flexibility in the repair;
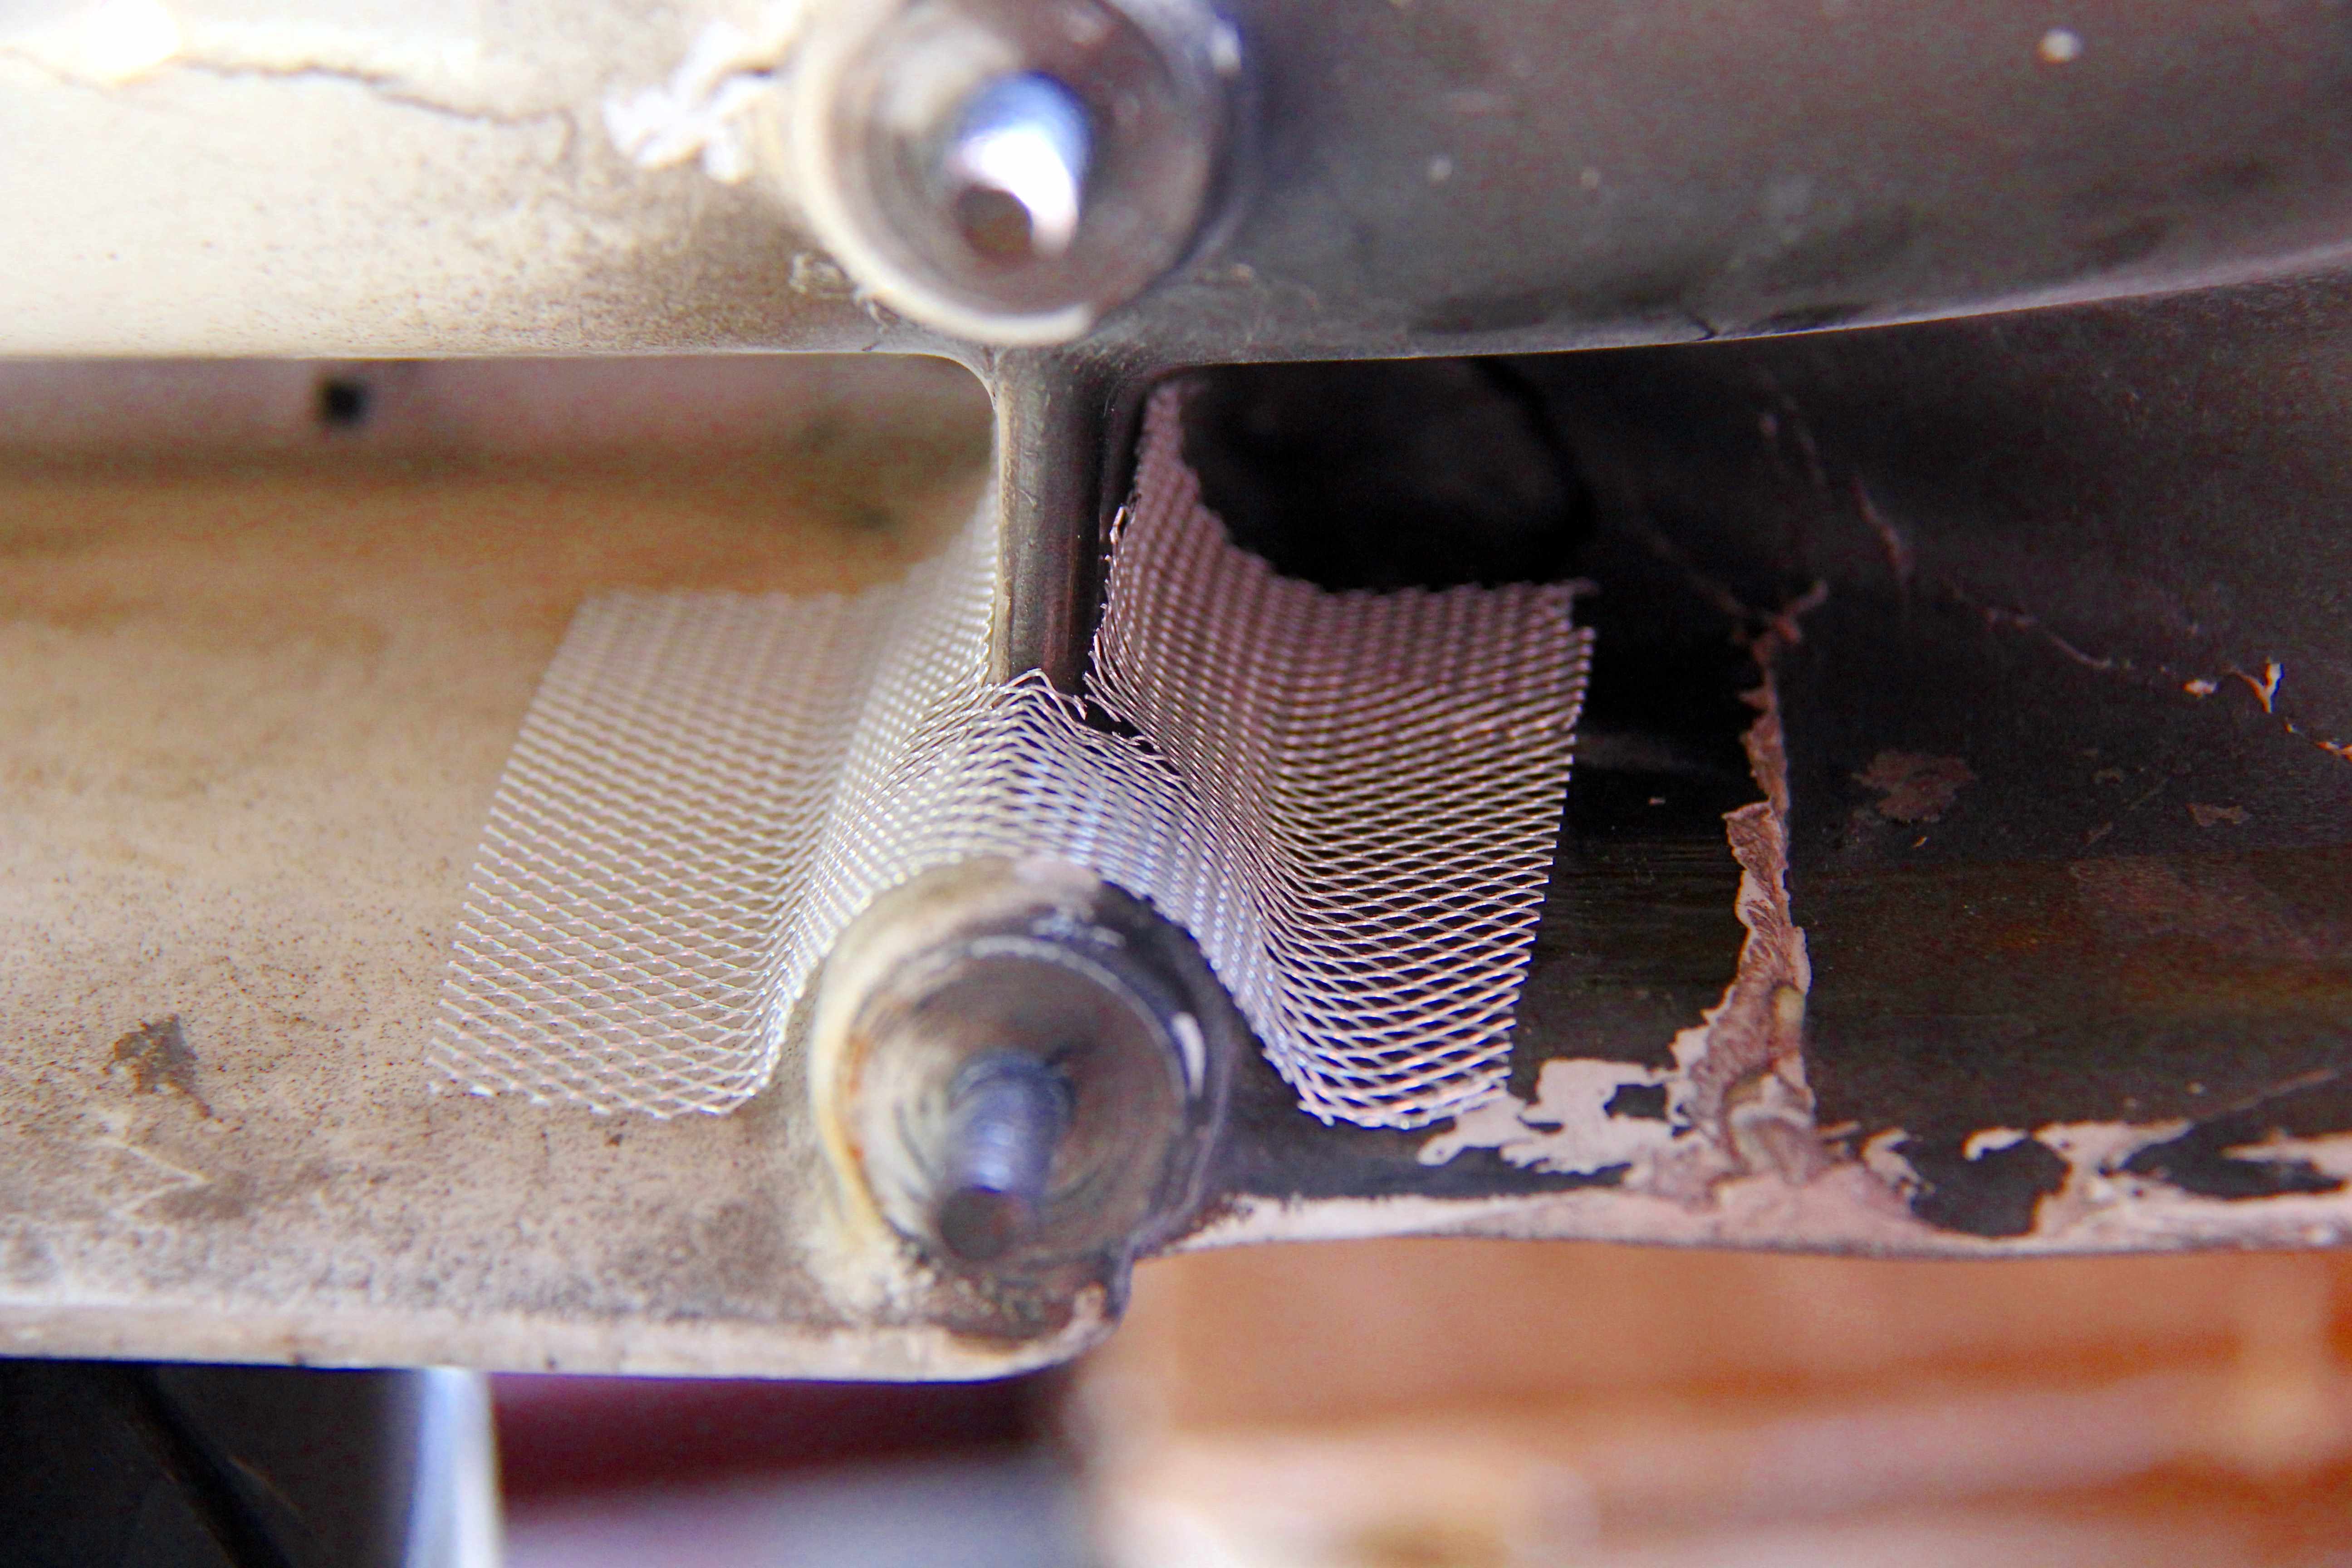
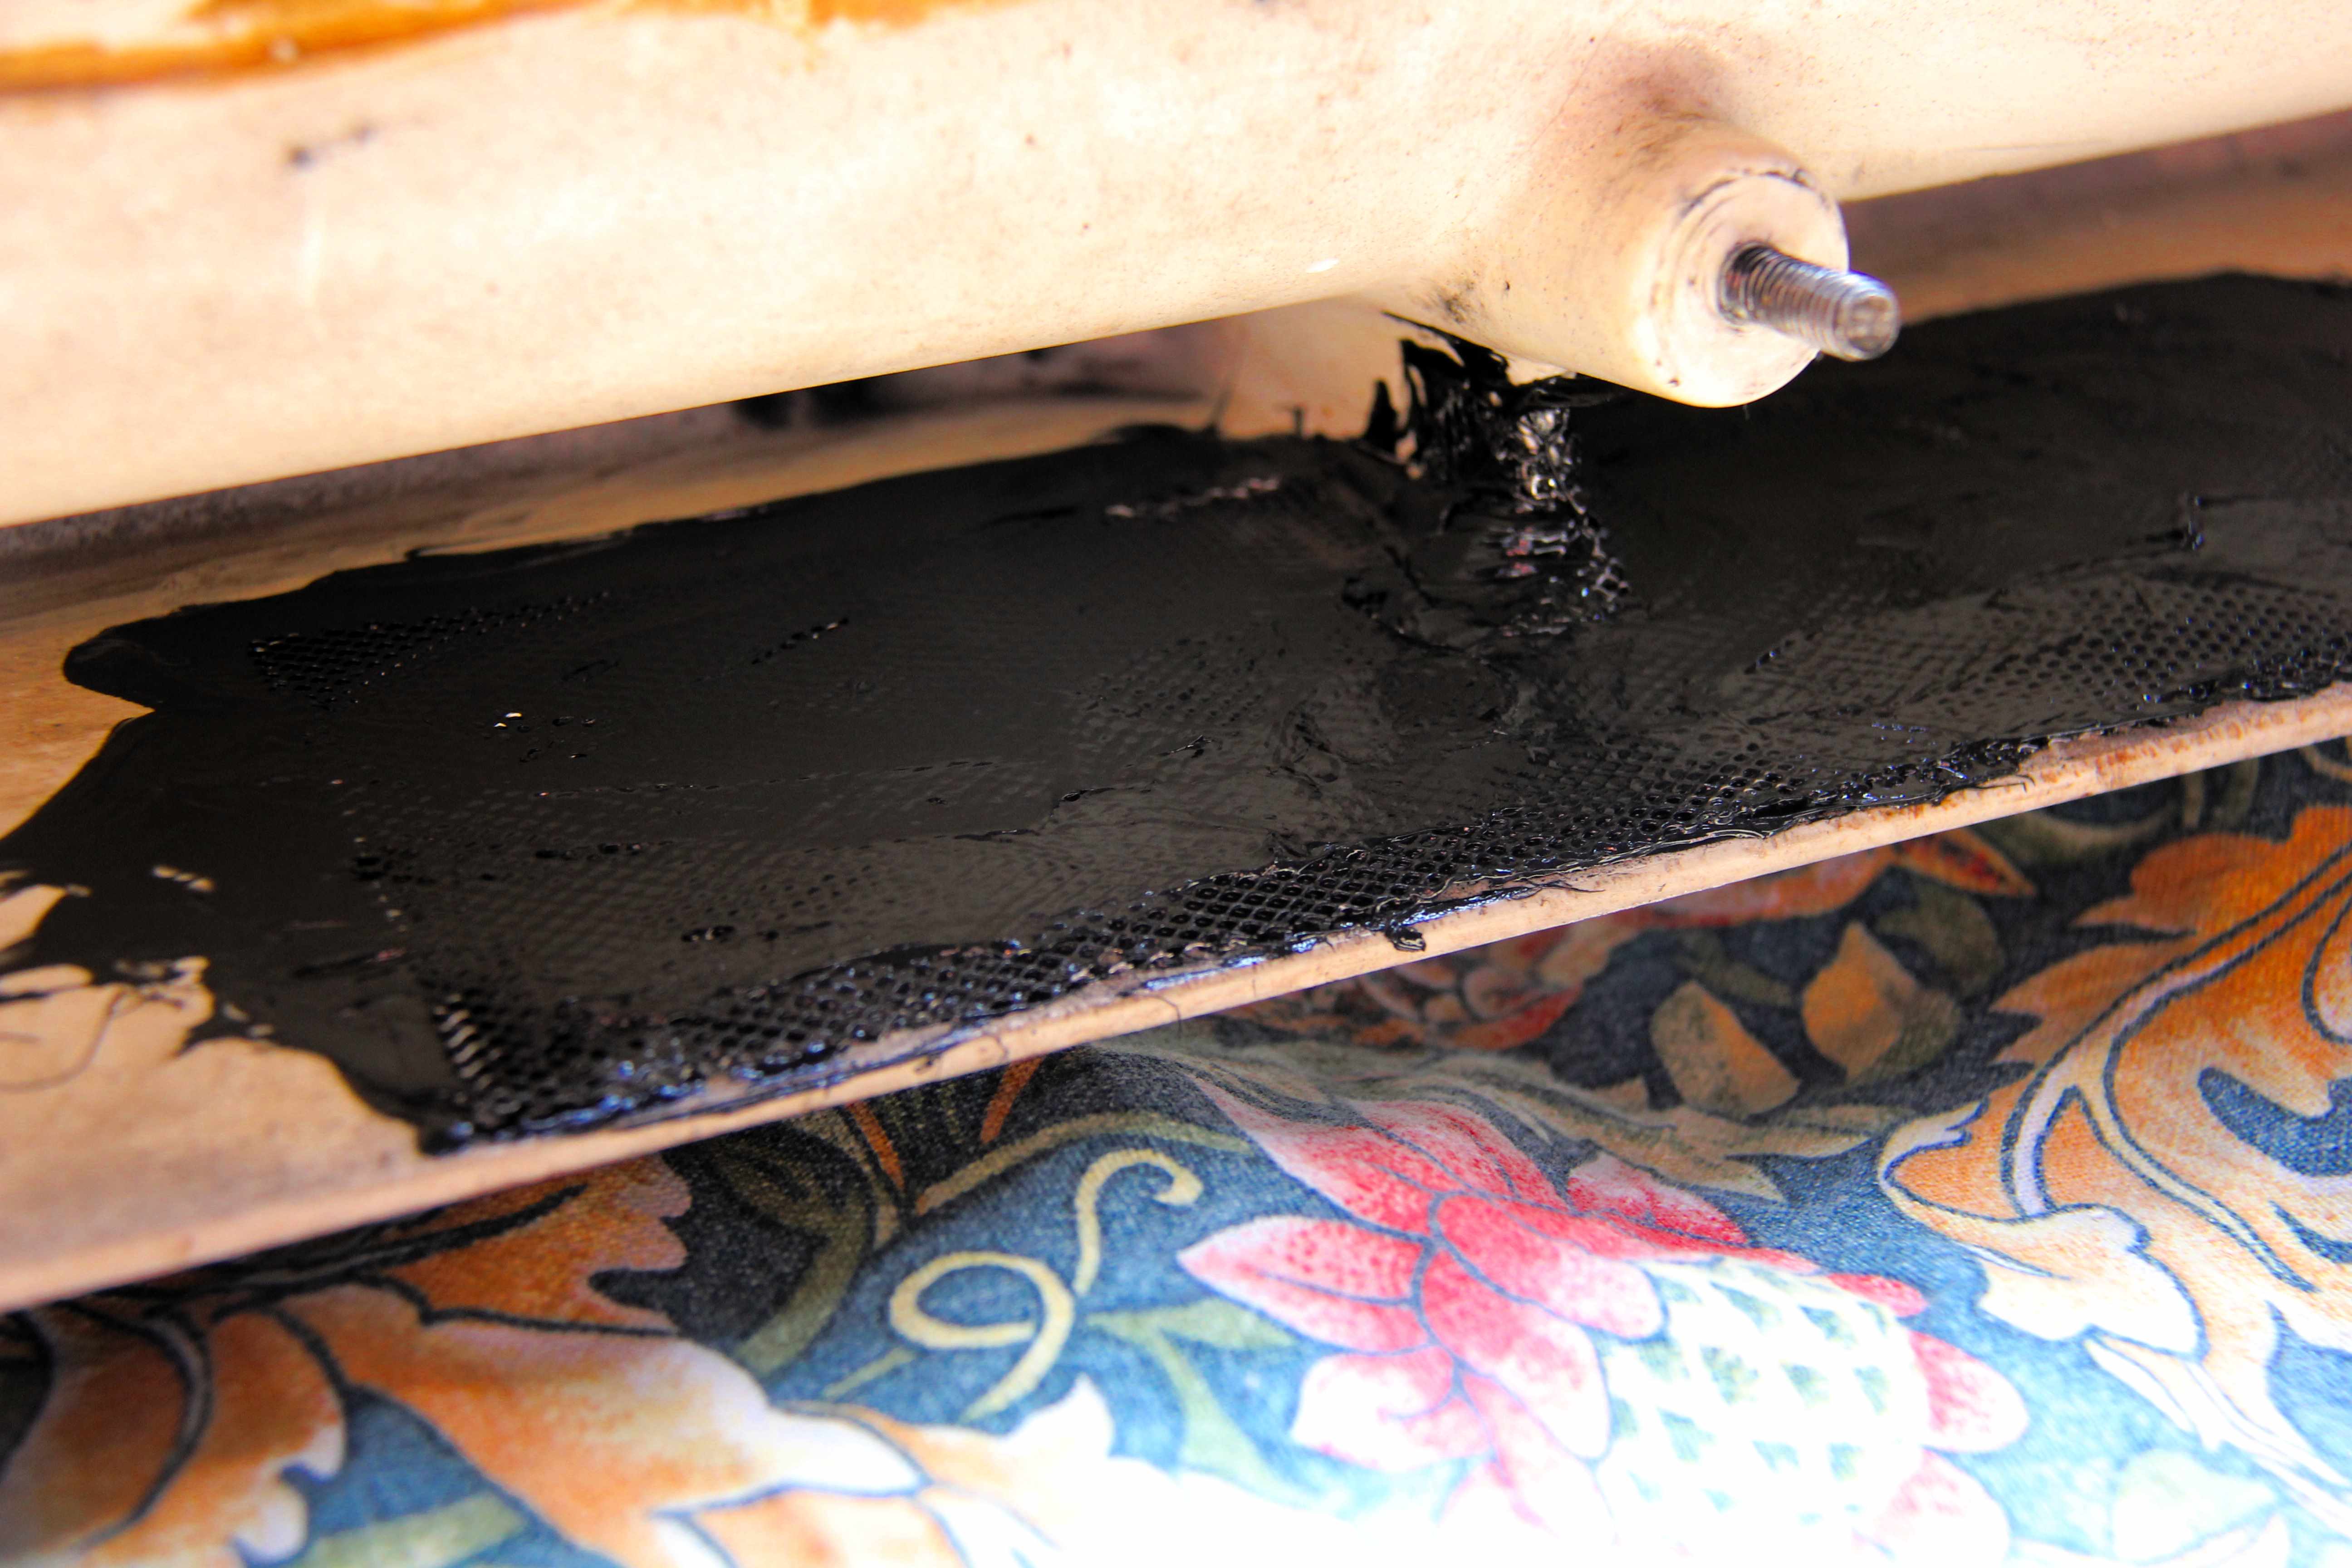
ally mesh to bind it all together, follwed by Sikaflex which is super-strong adhesive filler used to glue boats together. That ought to work then!

OK, OK. lol. I knew exactly what look I wanted. The stock spoiler's all very well.... actually, no it isn't, it's utterly hideous. The way it sticks out off the bootlid, the silly pointy bits that run up the fenders, the way no one part of it matches any other line on the car. It had to go.
I wanted a simple ducktail style spoiler, like the *whispers* Pontiac Firebird style thing. So that got me thinking... what's like an American muscle car but shrunk onto a Japanese scale? Answer was obvious, a Datsun 240Z of course... well, halfway between that and an E-type anyway. I became an internet expert, researched every pic I could find and pretty much convinced myself it'd fit. Then came the task of trying to find one. I've seen a rubber plant and a horse fly but I ain't never seen no mythical 240Z spoiler. I was going to give in and either spunk 200 notes on a Rocket Bunny 200SX one or (worse idea) try to make one myself when one came up on eBay. Good ol' eBay
Bidding war ensued, and I scored it for only 60 quid plus post, which I thought was awesome. It arrived and I breathlessly offered it up.... would it fit even close? Had I just made and **** out of myself? No. It fitted, just like I wanted it to. Winner
It was however, a fairly disreputable-looking thing. Long-suffering FD used as workbench shocker
Plenty of cracks and chips showed it'd had a hard life, so it had to be stripped back and painted. The other problem was that three out of the six structural mounts had full-thickness cracks around them. One had gone right out and bulged the rear face of the spoiler blade out. First step was to fix them, or it'd all be a waste of time. So, holes drilled to stop the cracks spreading...
And then the repair proper. It became quickly apparent this had been dropped on one end at some point and it'd almost completely snapped off. I went for some strength and flexibility in the repair;
ally mesh to bind it all together, follwed by Sikaflex which is super-strong adhesive filler used to glue boats together. That ought to work then!
Thread Starter
Senior Member
Joined: Oct 2010
Posts: 255
Likes: 1
From: England
Then it was sanding, sanding, sanding. Made all the worse by the fact Datsun had tried to give it some weird almost leather-like texture originally by putting loads of deep lines and scores in it, all of which had to be sanded out by hand. As you can see;
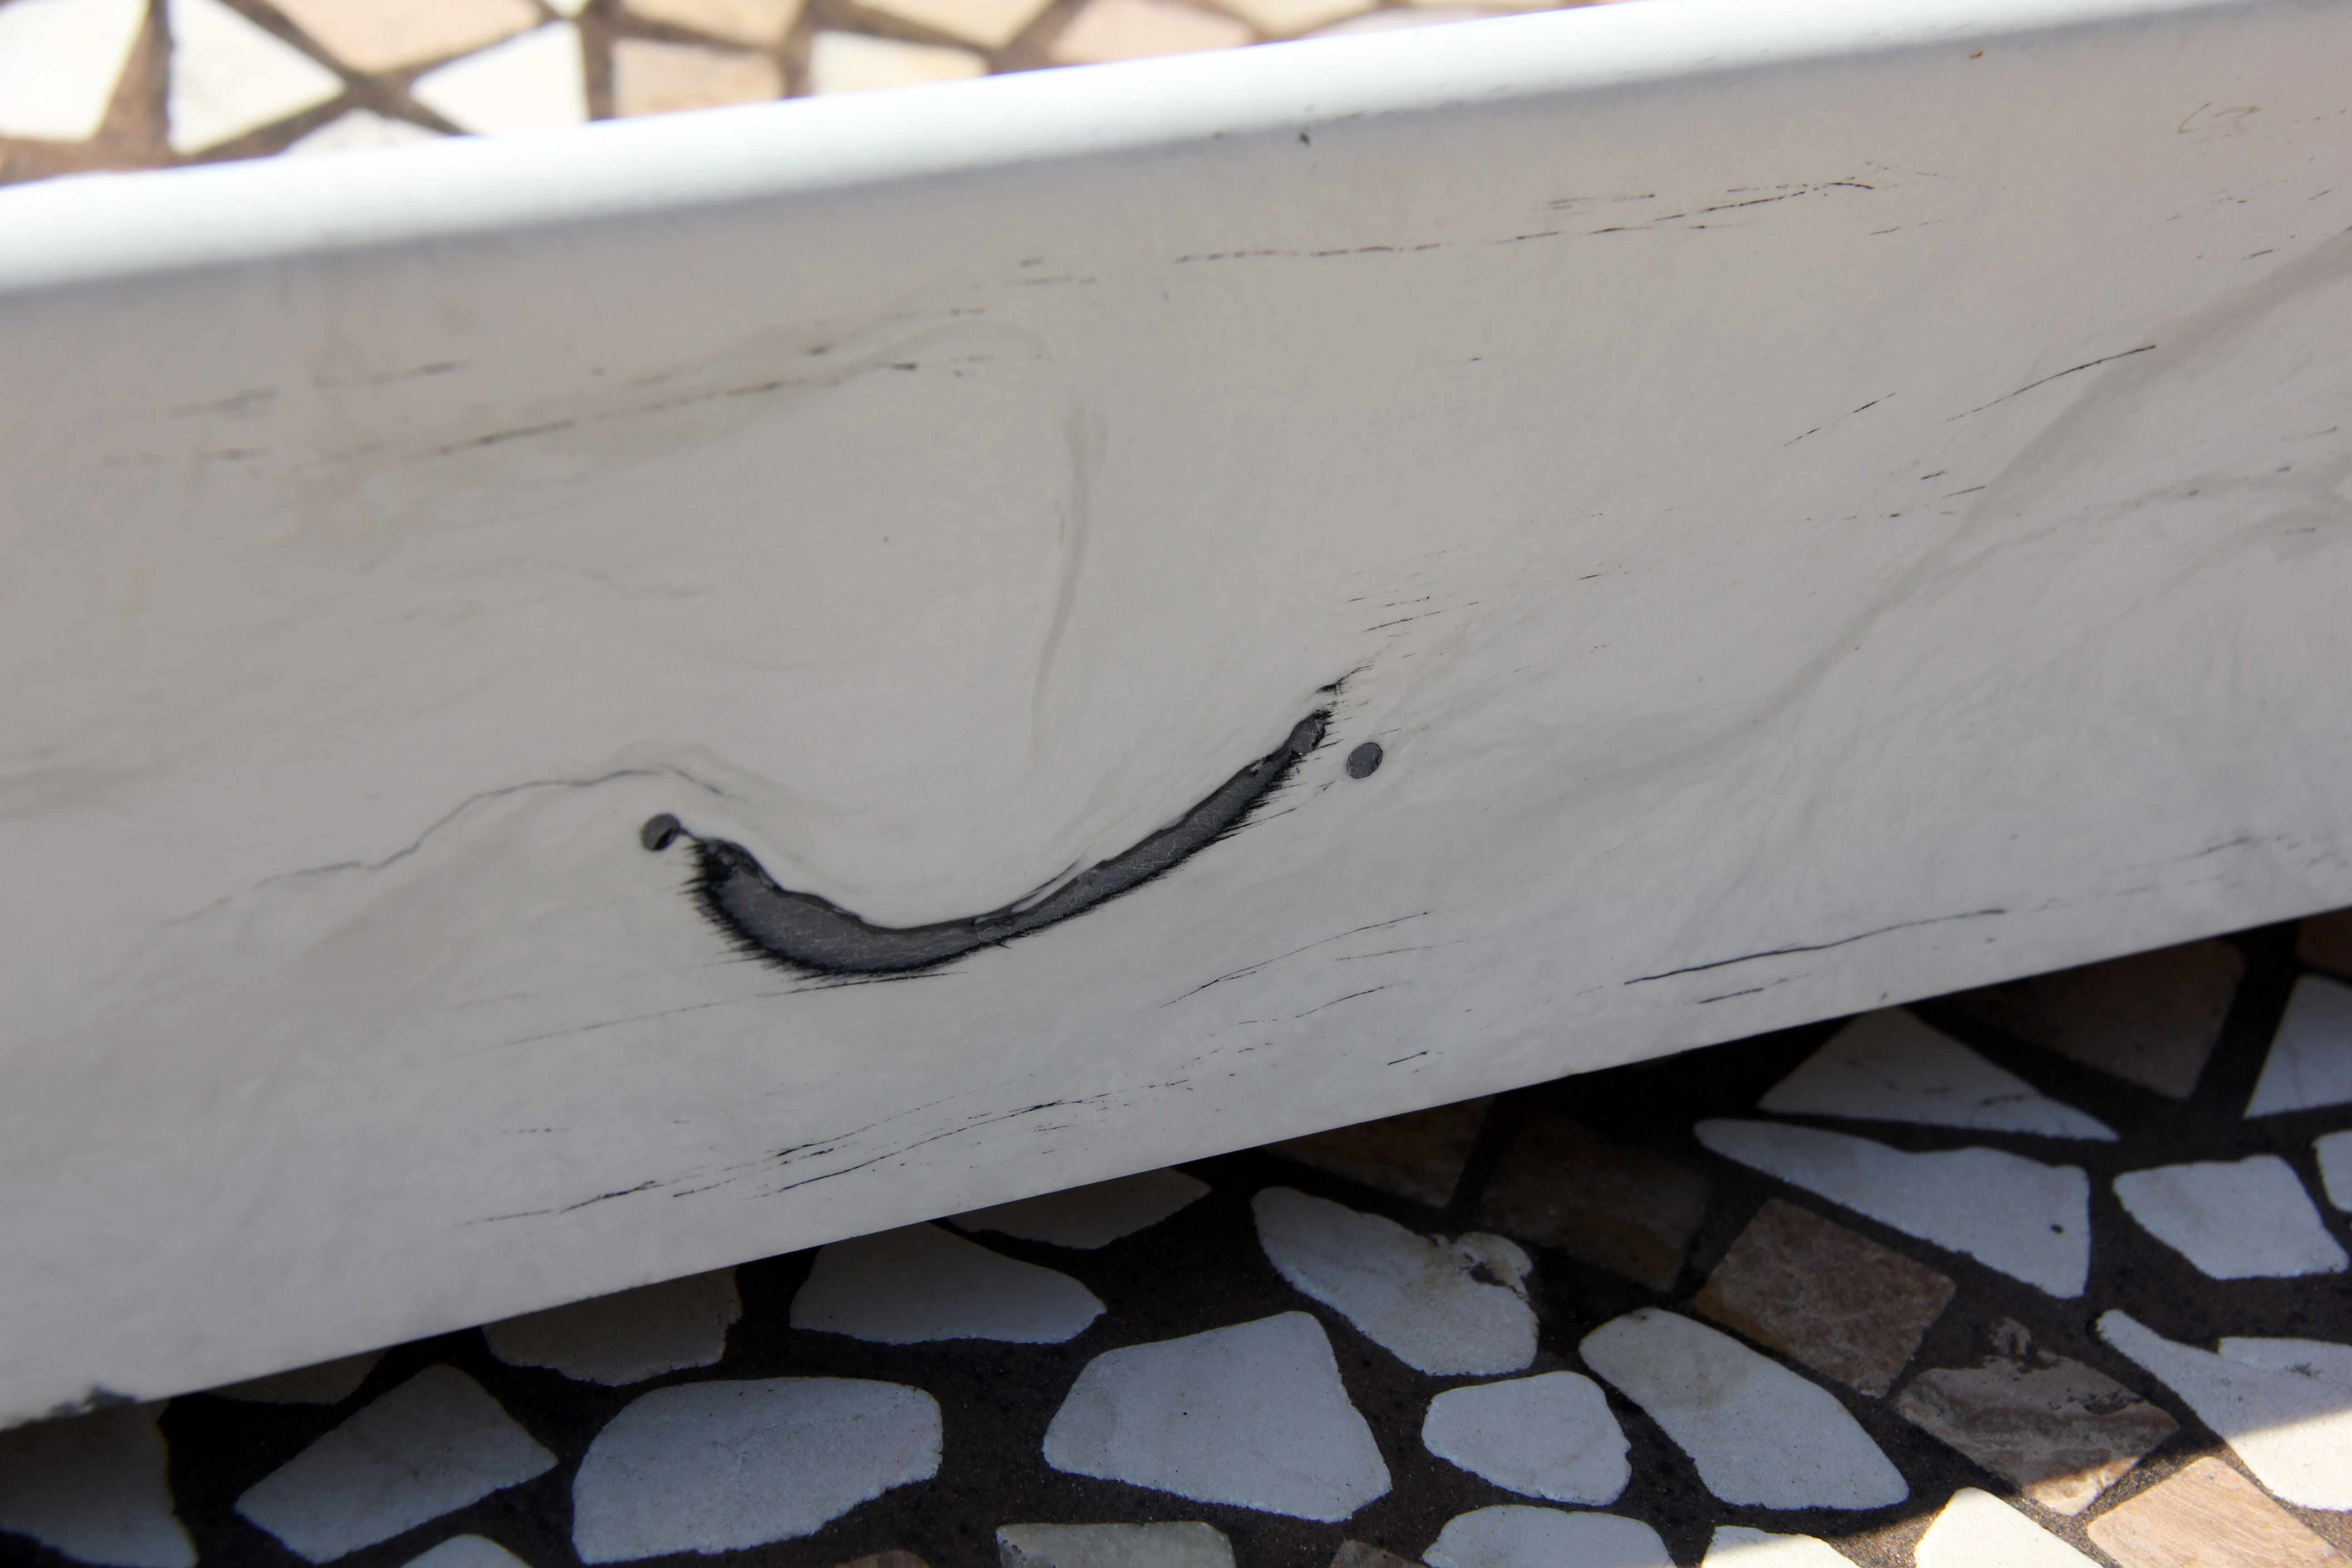
and the more the paint and cack came off, the more cracks I found that needed repair
In the end, every scrap of paint came off and the repairs looked ugly but at least were strong and once painted, hopefully invisible. Flexible plastic filler proved a godsend here.
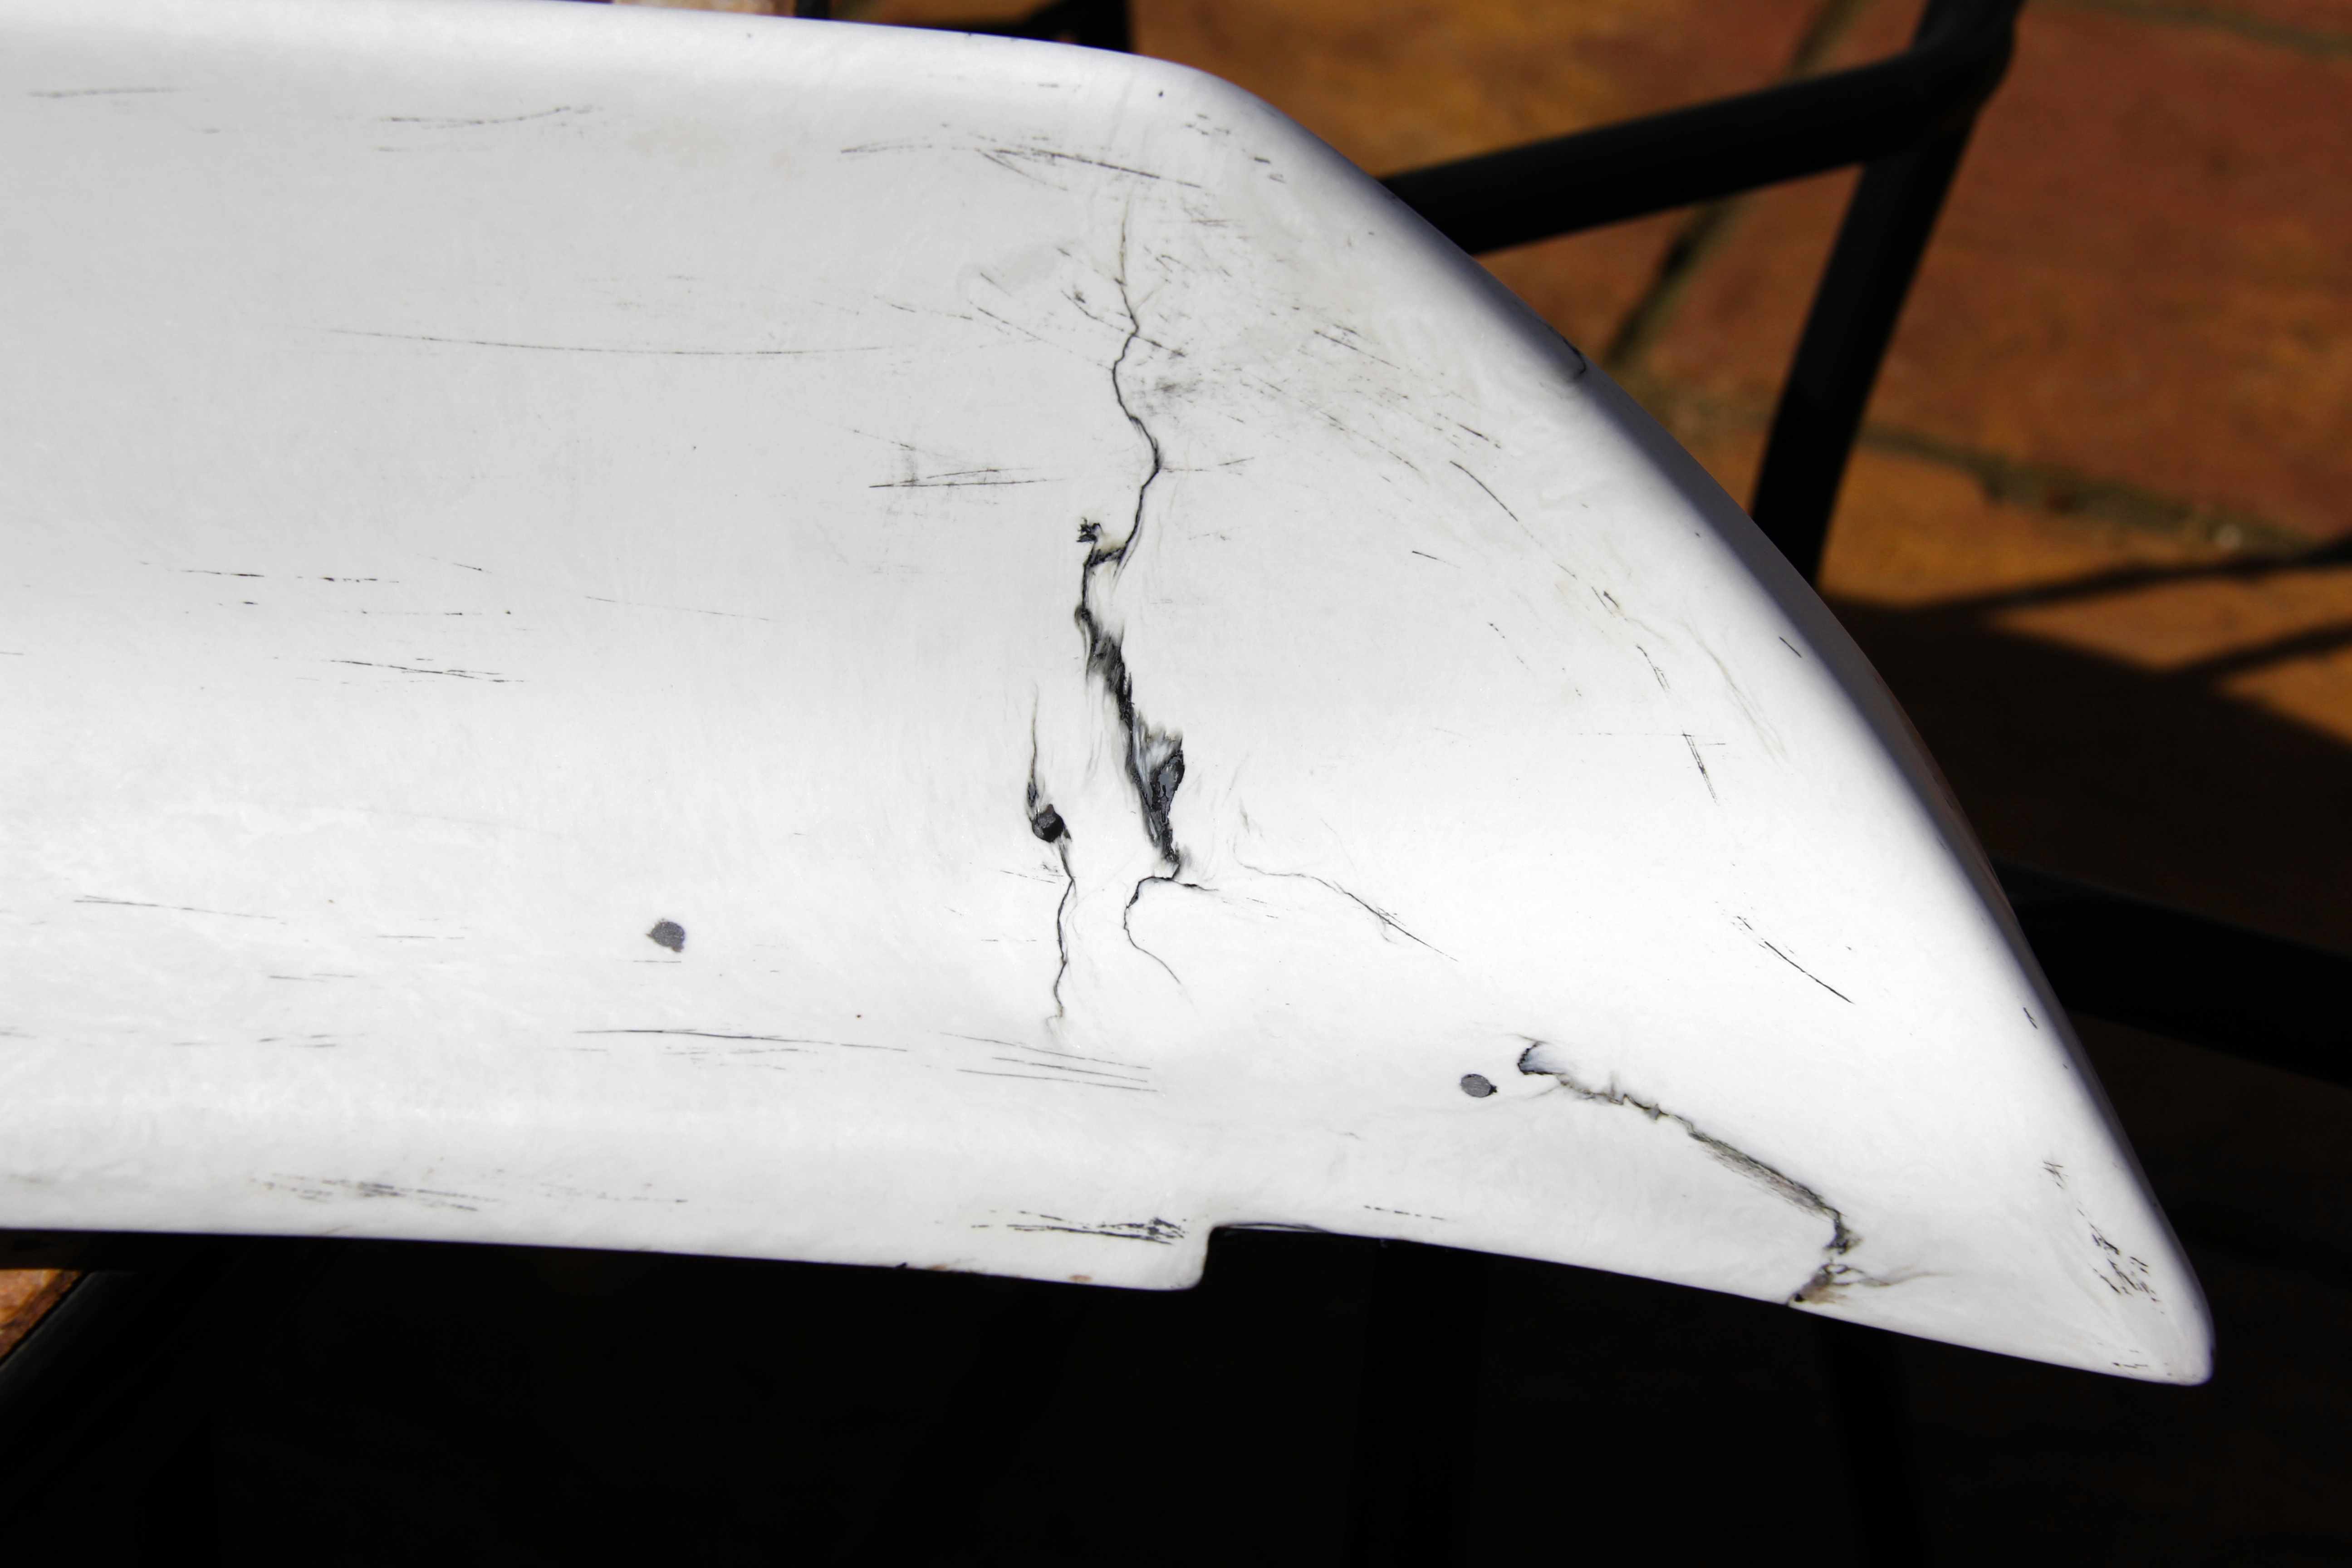
The big crack in the rear face defeated me, though. It got to the point where I was sanding it wafffer-thin to try and lose it completely, and in the end I accepted it was just going to always show. Hey ho, it's an old car. Waddya want?

The others I was pretty pleased with, they're not invisible, but a hell of a lot better than they were.

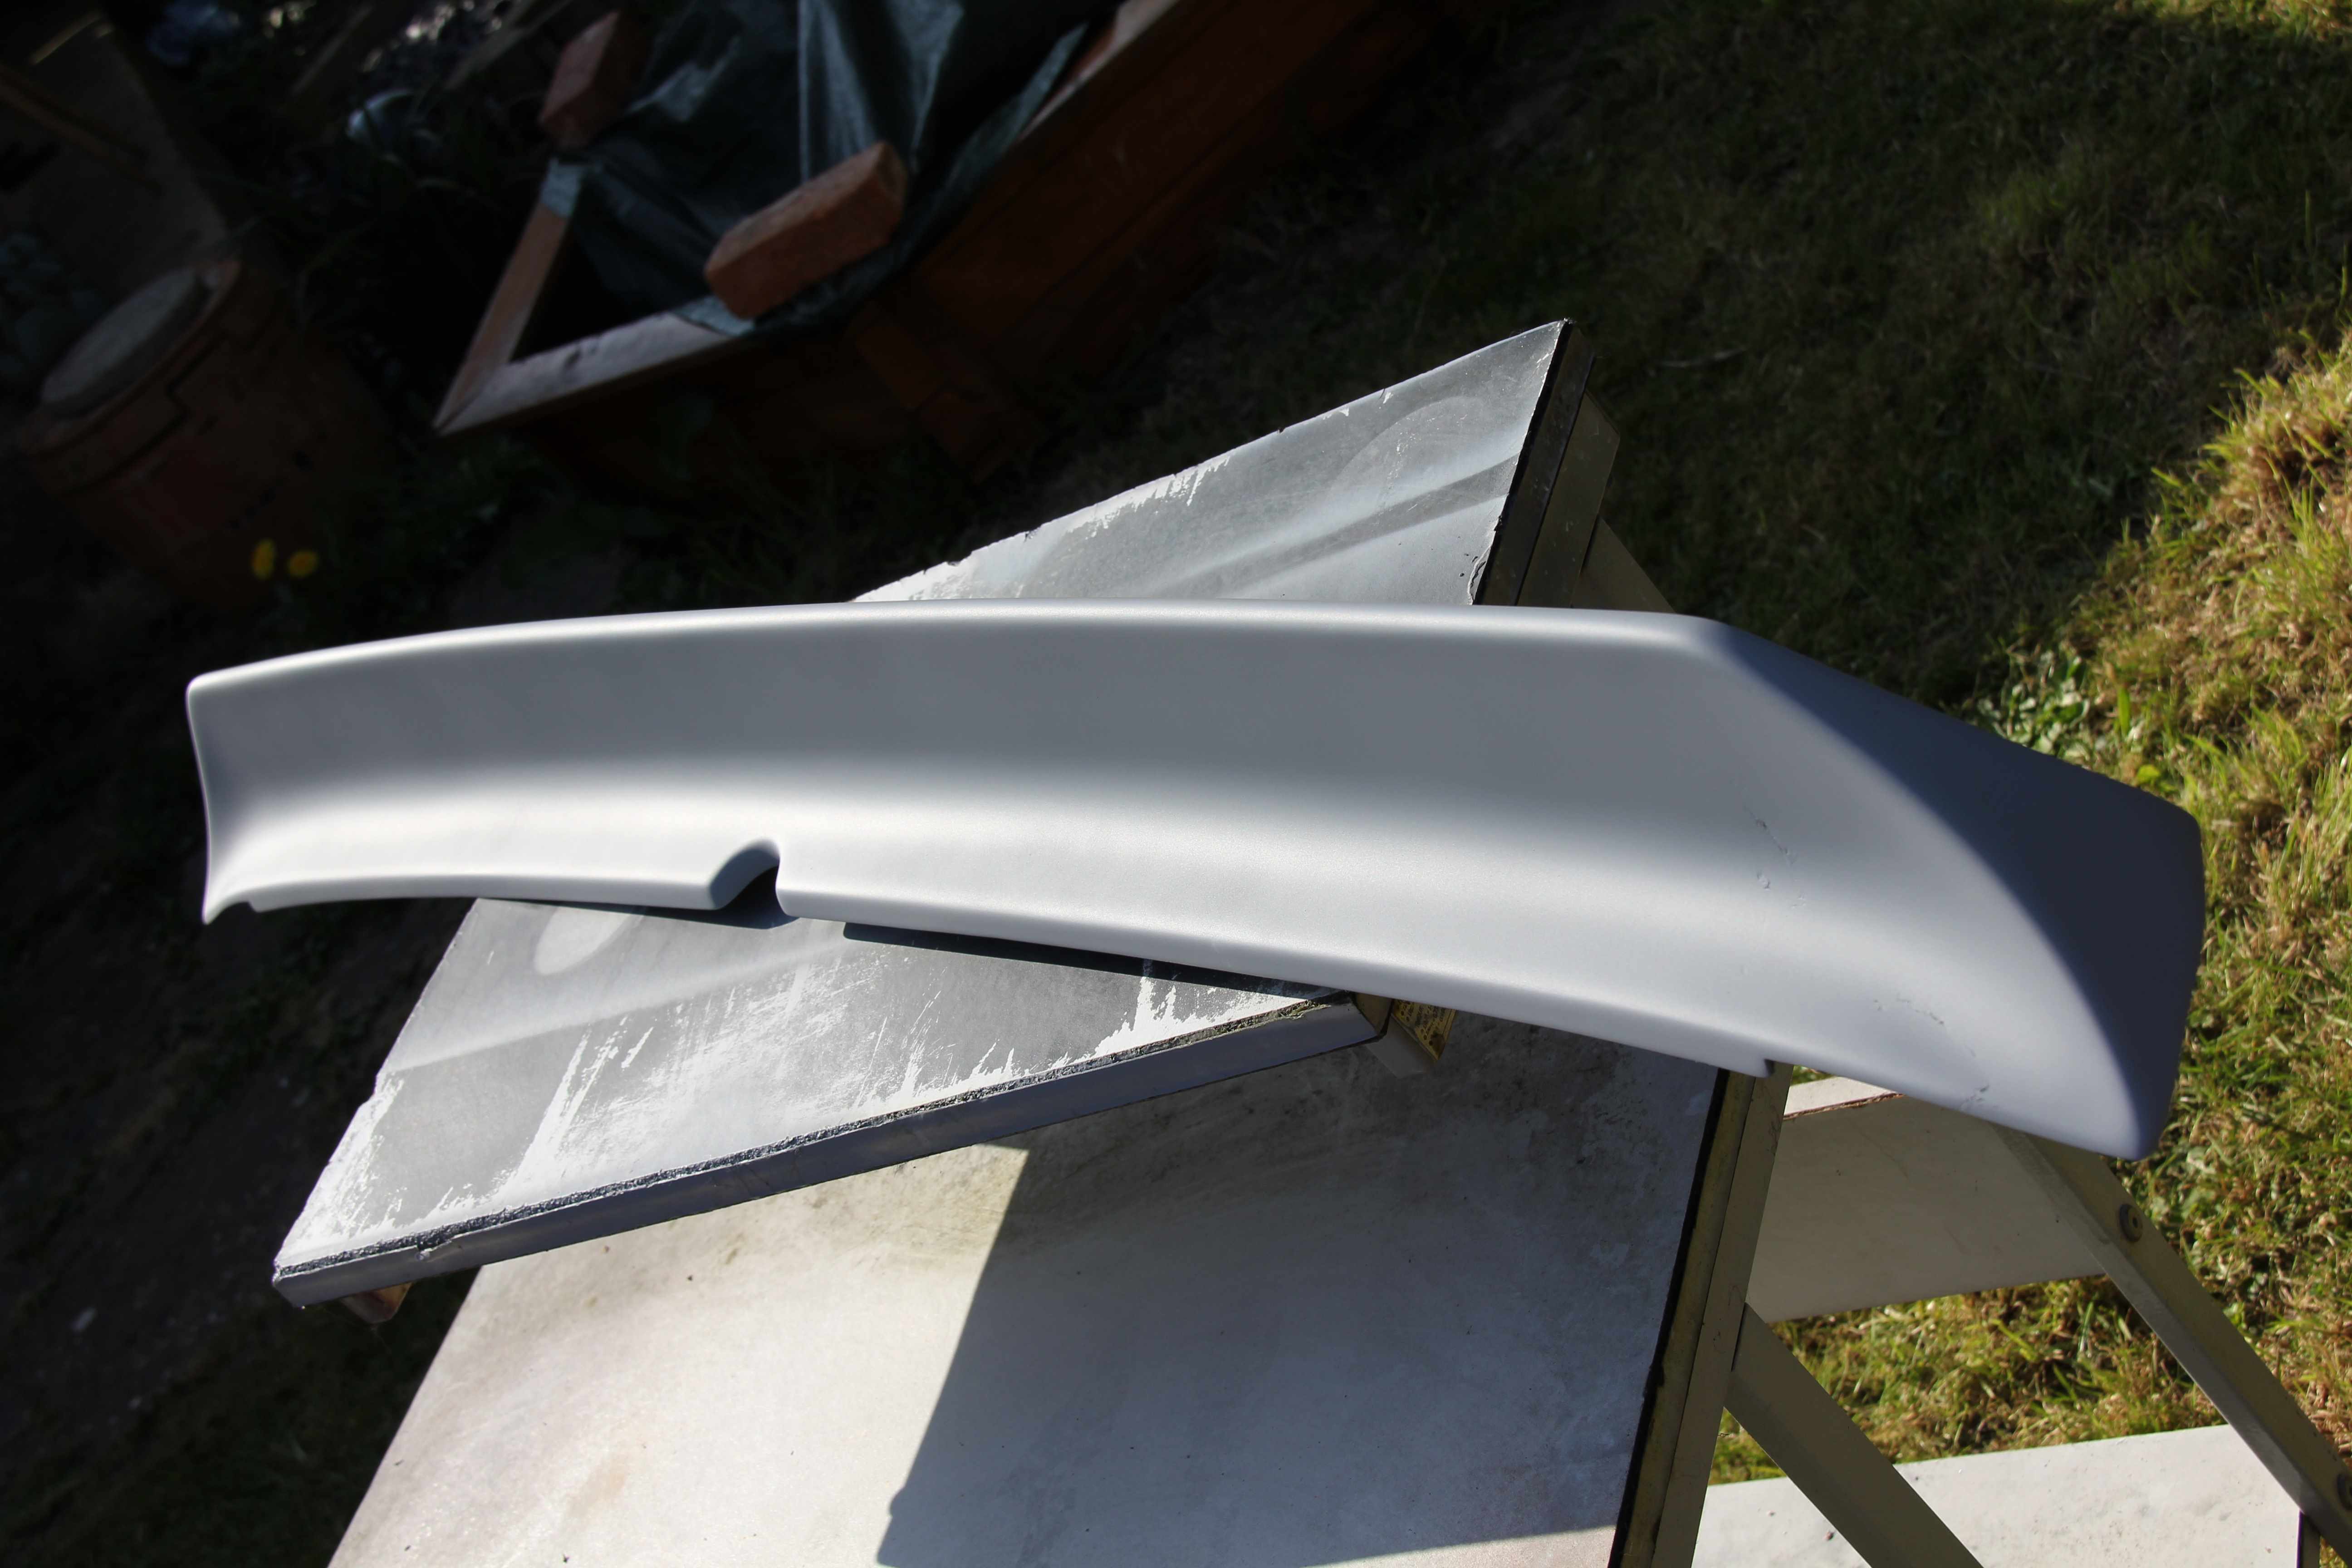
So that was it, a last coat of primer, then it was all ready for some nice shiny black... and I was ready for the bottle-job of taking a step drill to my perfectly good rear decklid
and the more the paint and cack came off, the more cracks I found that needed repair
In the end, every scrap of paint came off and the repairs looked ugly but at least were strong and once painted, hopefully invisible. Flexible plastic filler proved a godsend here.
The big crack in the rear face defeated me, though. It got to the point where I was sanding it wafffer-thin to try and lose it completely, and in the end I accepted it was just going to always show. Hey ho, it's an old car. Waddya want?
The others I was pretty pleased with, they're not invisible, but a hell of a lot better than they were.
So that was it, a last coat of primer, then it was all ready for some nice shiny black... and I was ready for the bottle-job of taking a step drill to my perfectly good rear decklid
Thread Starter
Senior Member
Joined: Oct 2010
Posts: 255
Likes: 1
From: England
This was one of those nice moments when it all seemed to come together; the last coats of lacquer on the centre caps, the wiring finished, the spoiler painted, the wheels built up at last, the arcade button arrived in the post, and the final touch, more Purple Panda decal righteousness. So you'd like to see what the end result of my bodging was, then?
OK
That foglight in full effect;
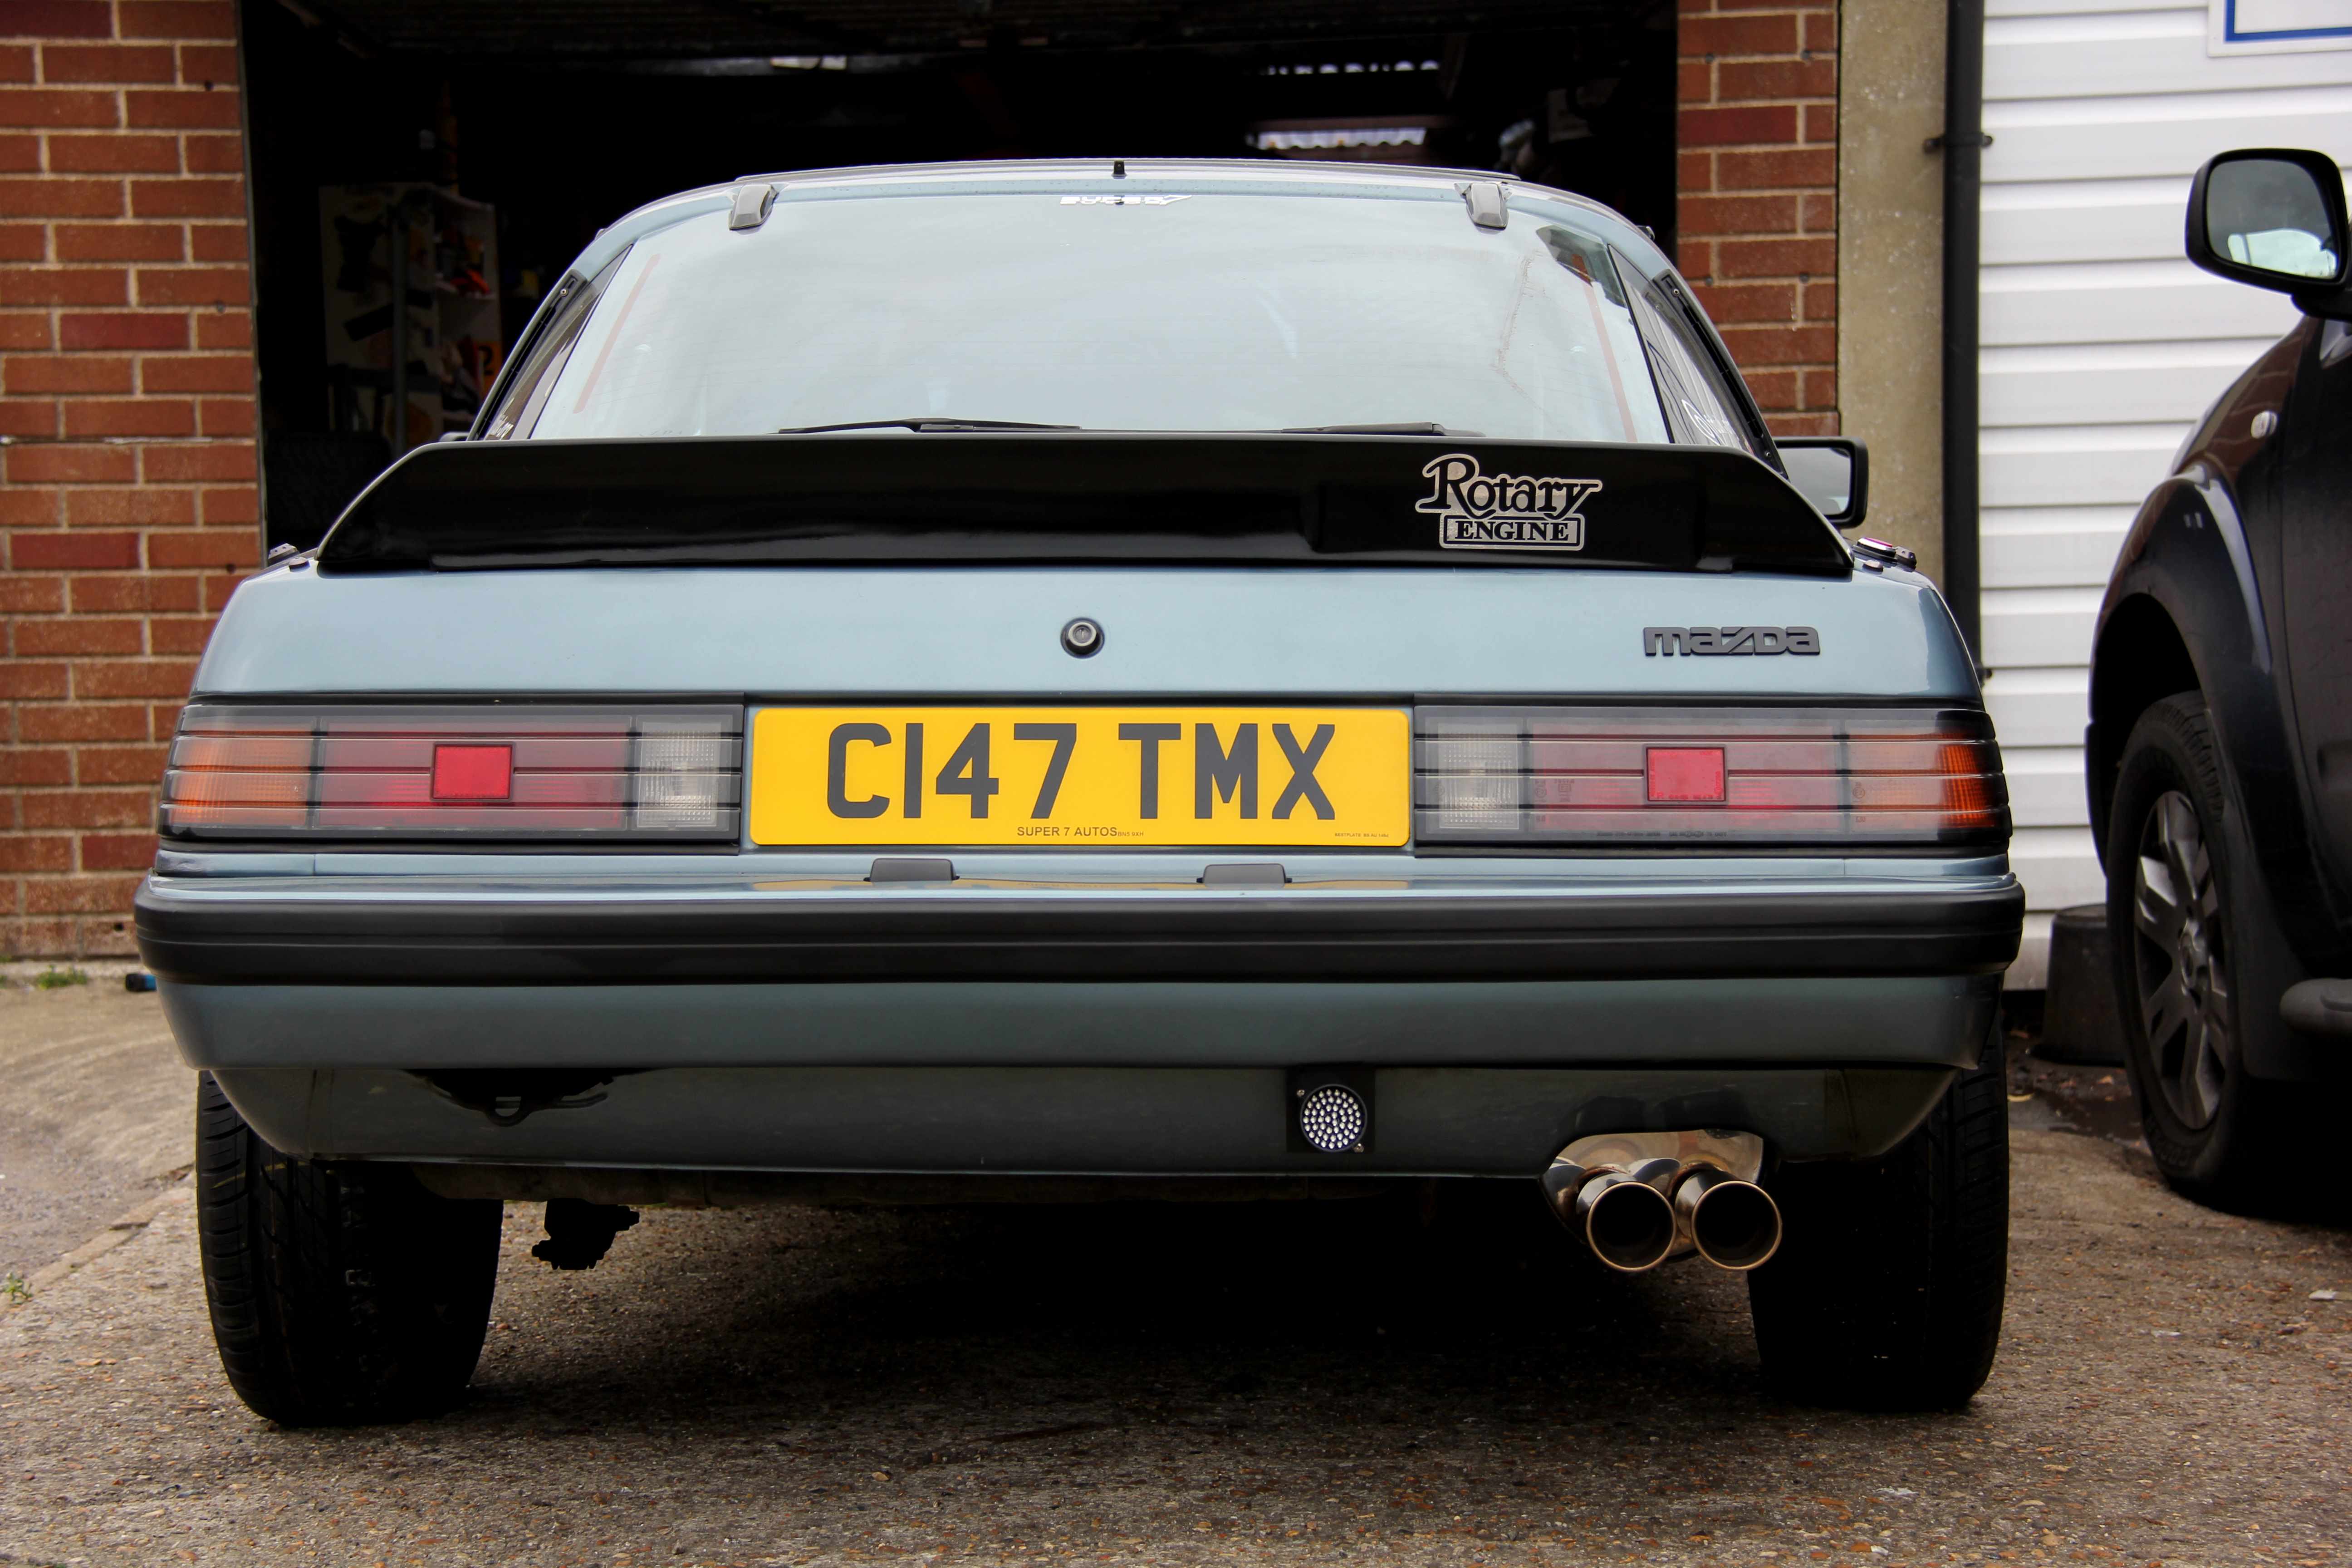
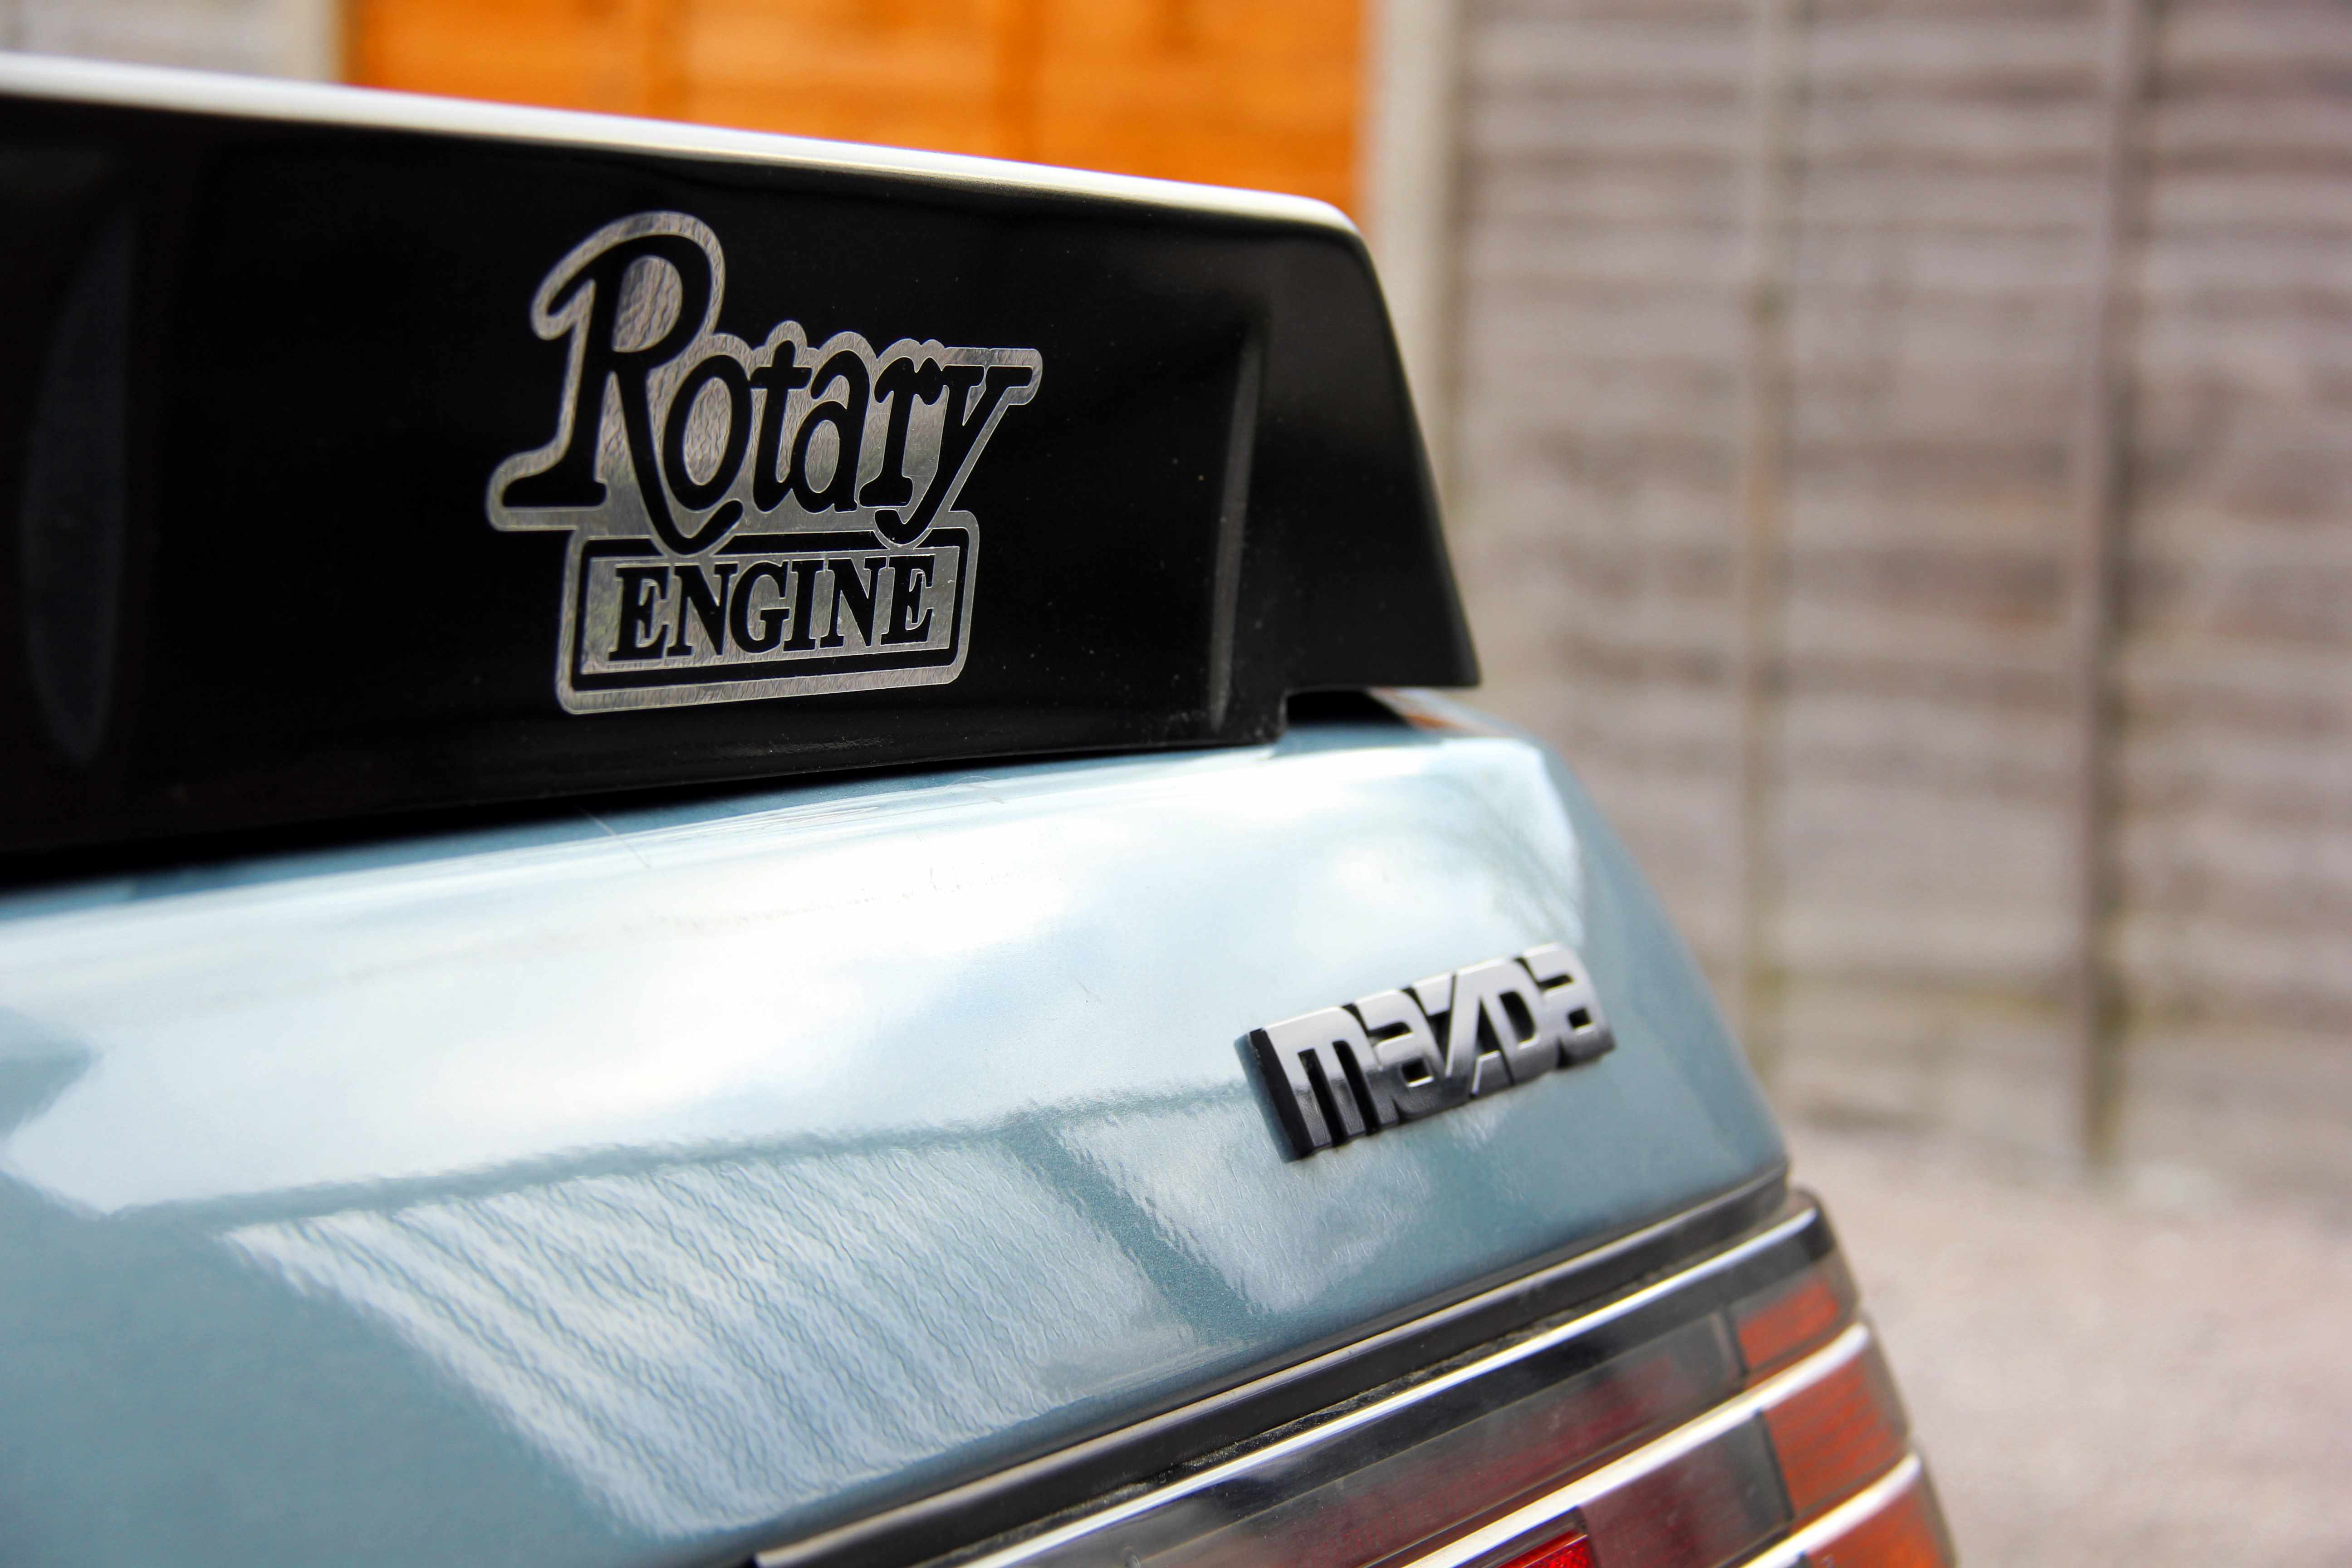
And the money shot. Purple Panda replica "Rotary" Engine sticker right where a filthy Datsun badge used to live 8-)
Now all I had to do was sort out the shocking 4x4 ride height issues....
OK
That foglight in full effect;
And the money shot. Purple Panda replica "Rotary" Engine sticker right where a filthy Datsun badge used to live 8-)
Now all I had to do was sort out the shocking 4x4 ride height issues....
Thread Starter
Senior Member
Joined: Oct 2010
Posts: 255
Likes: 1
From: England
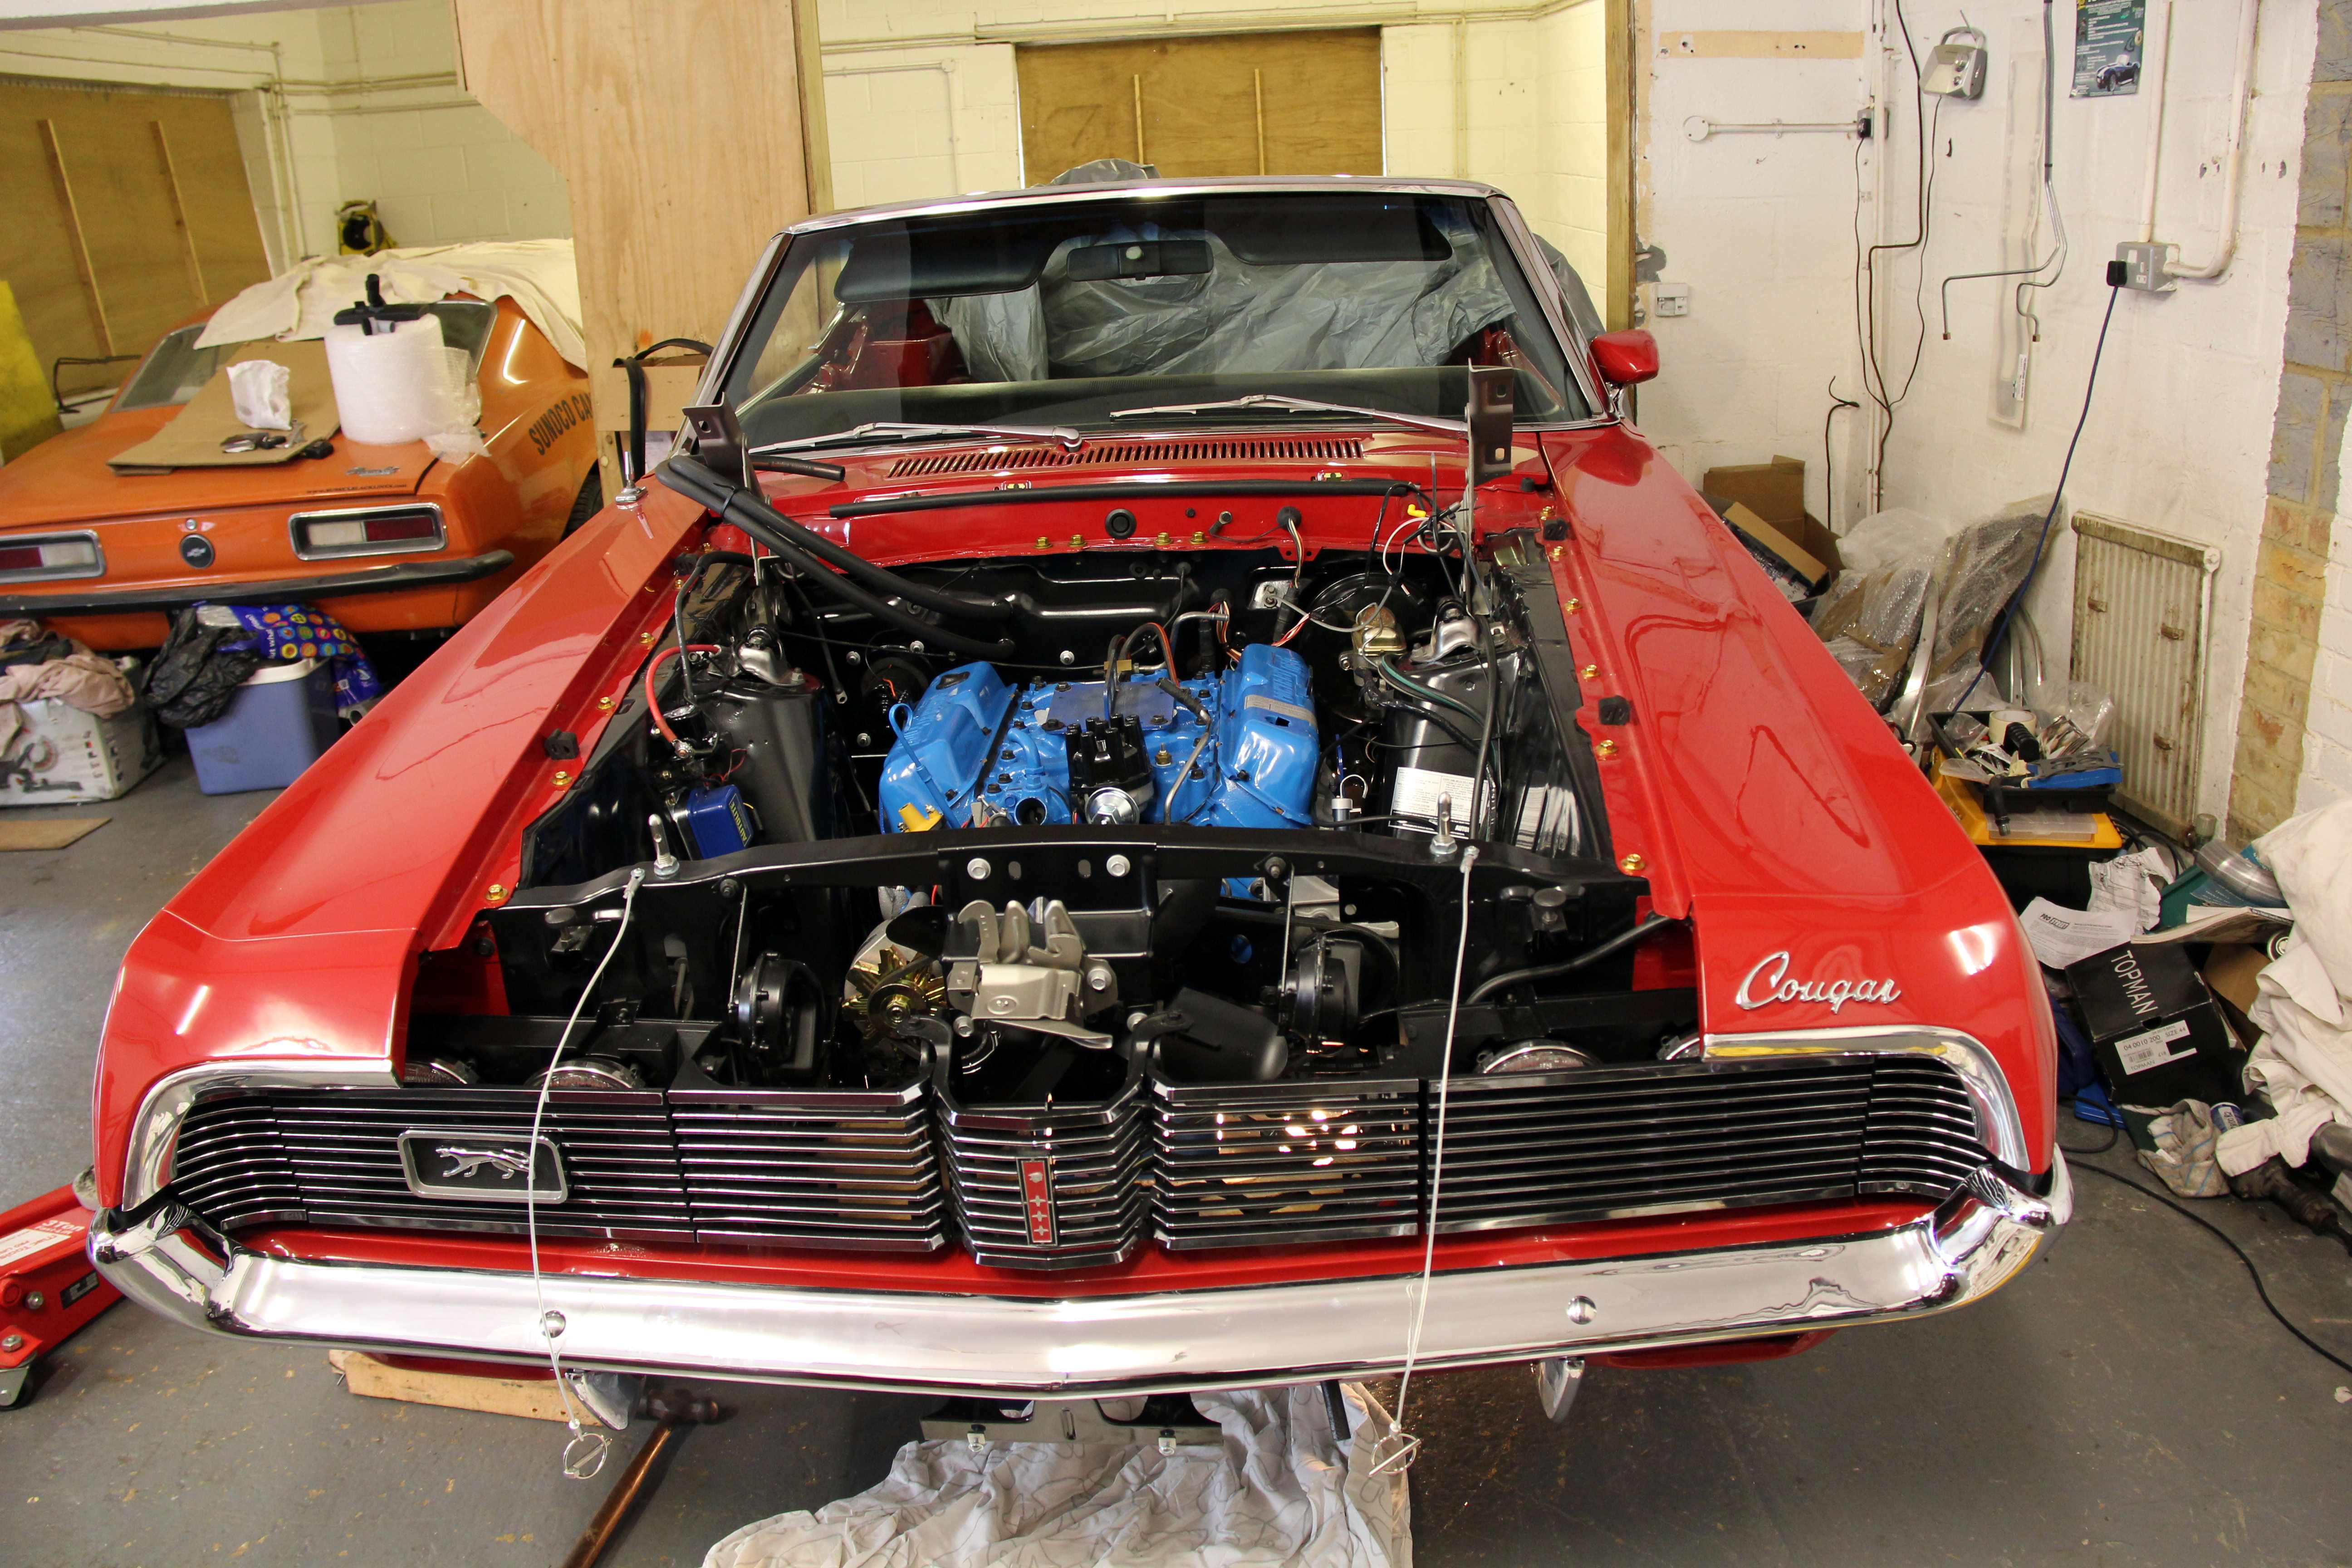
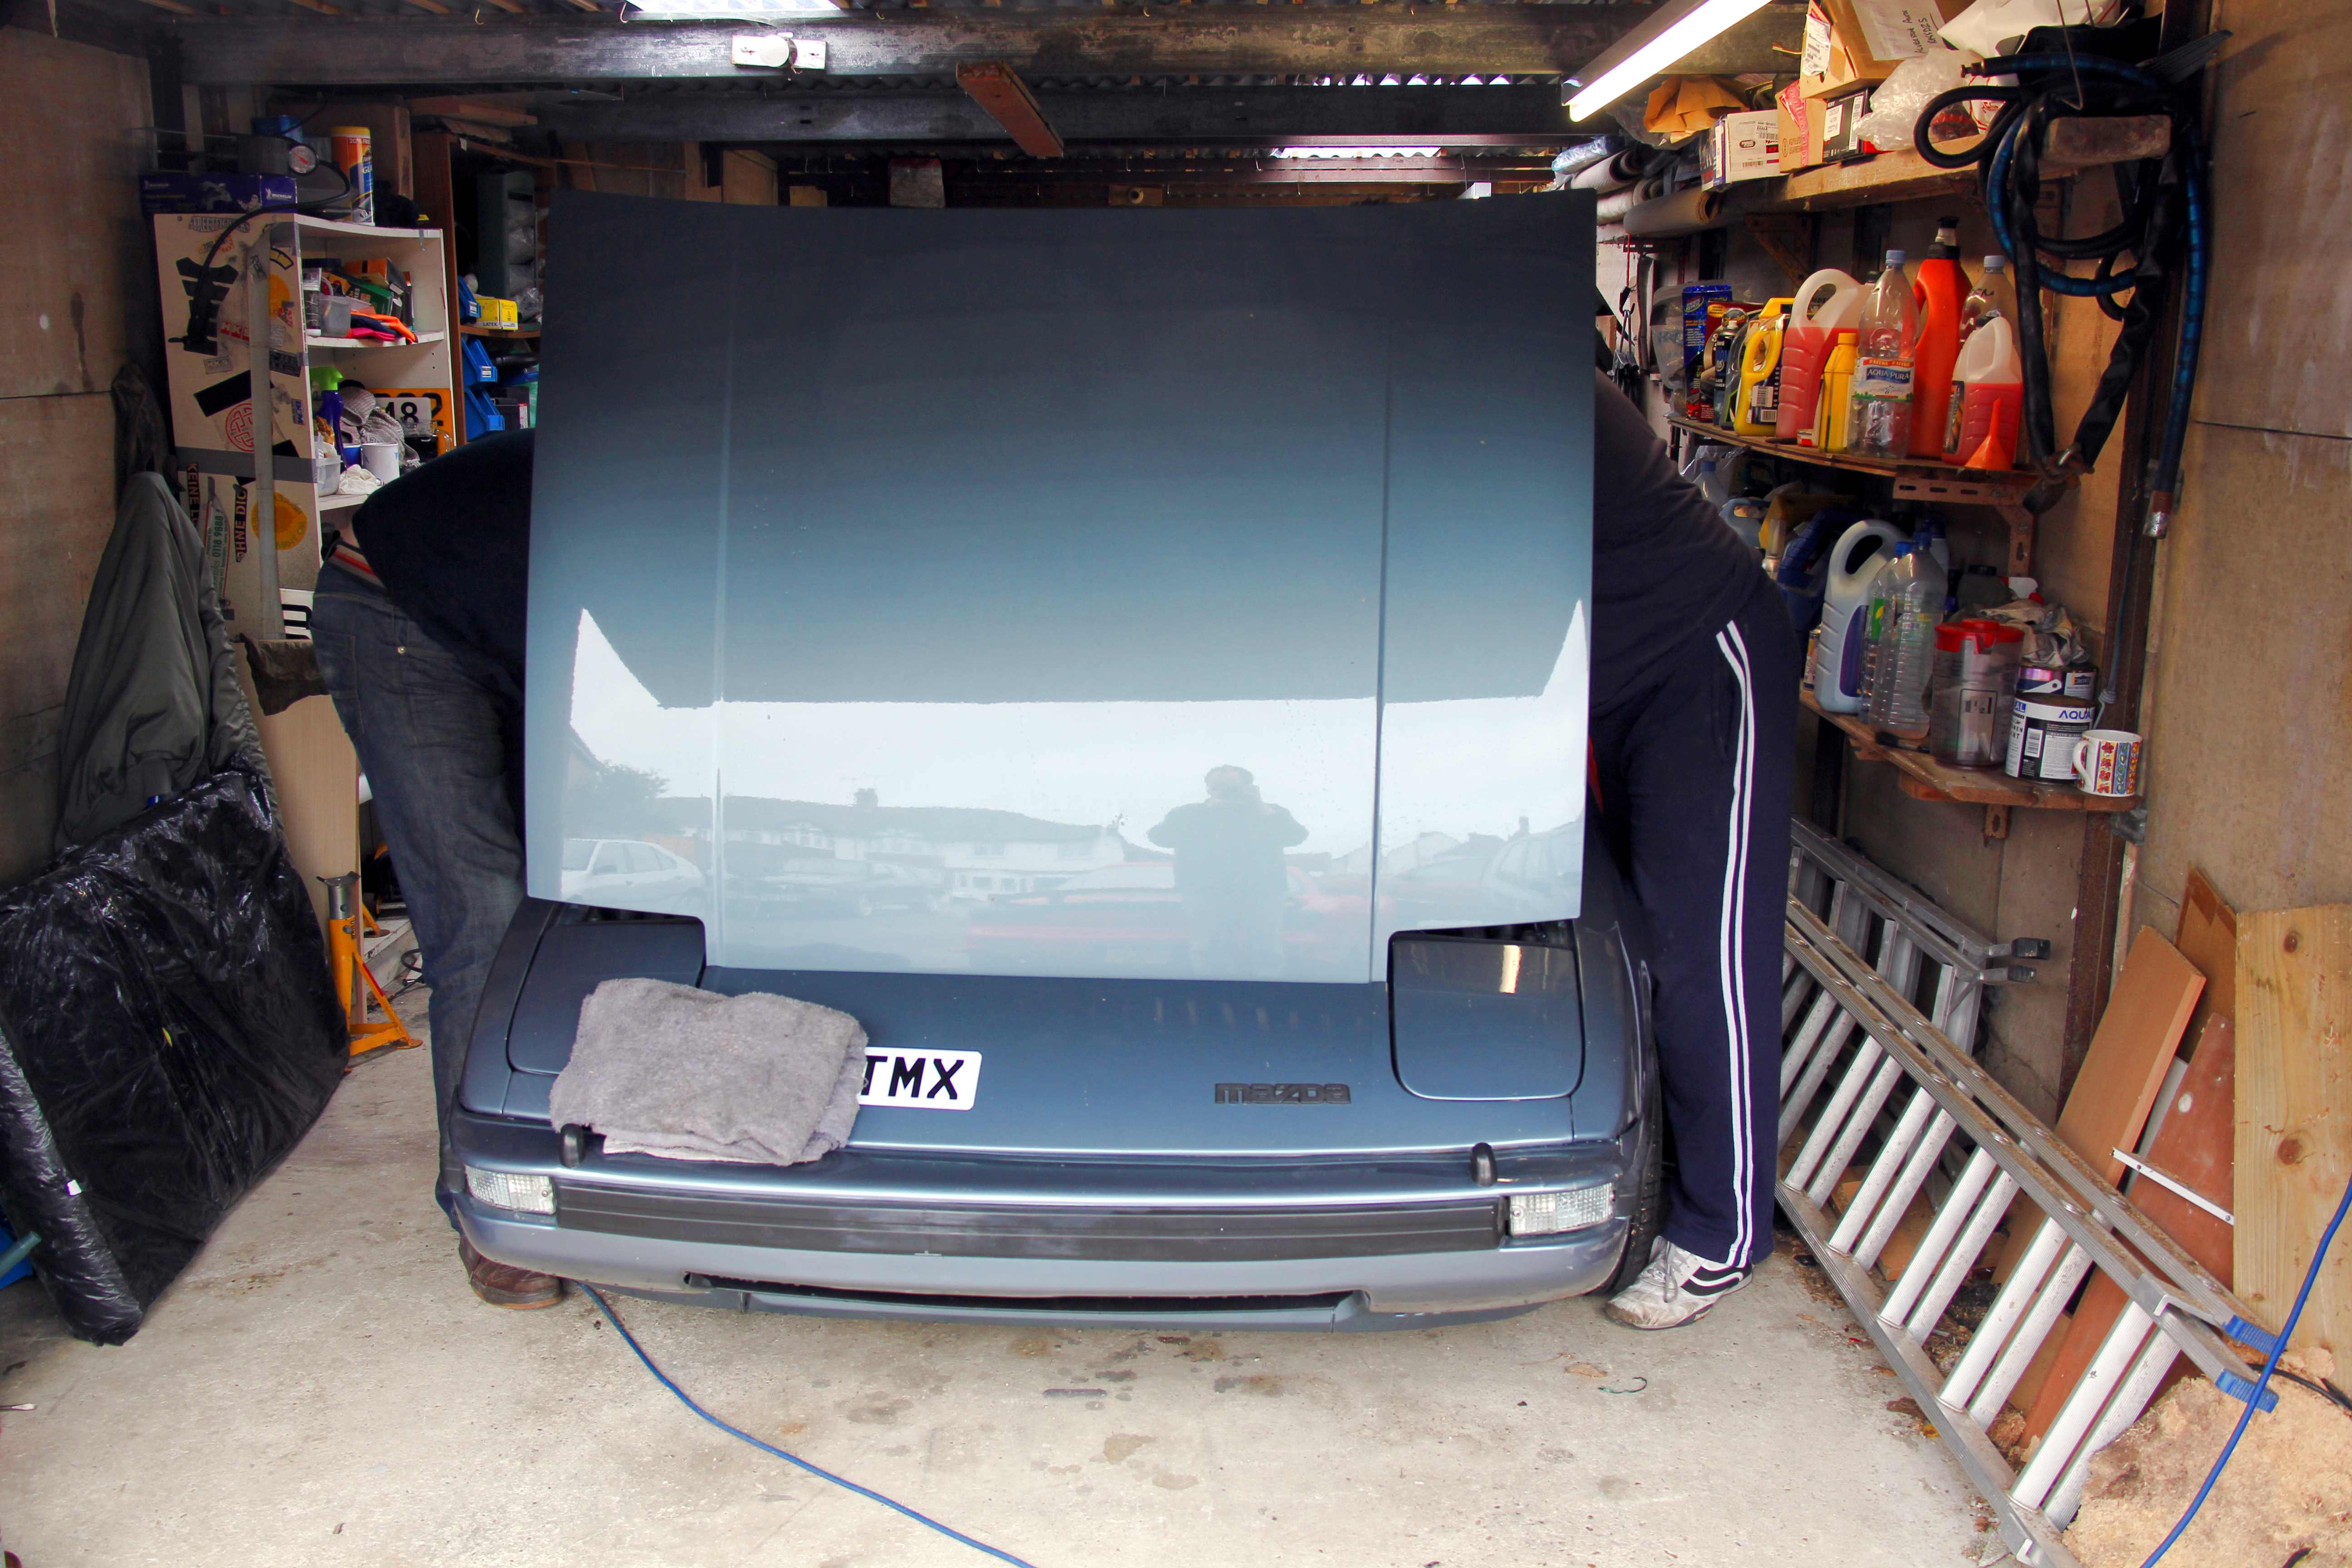
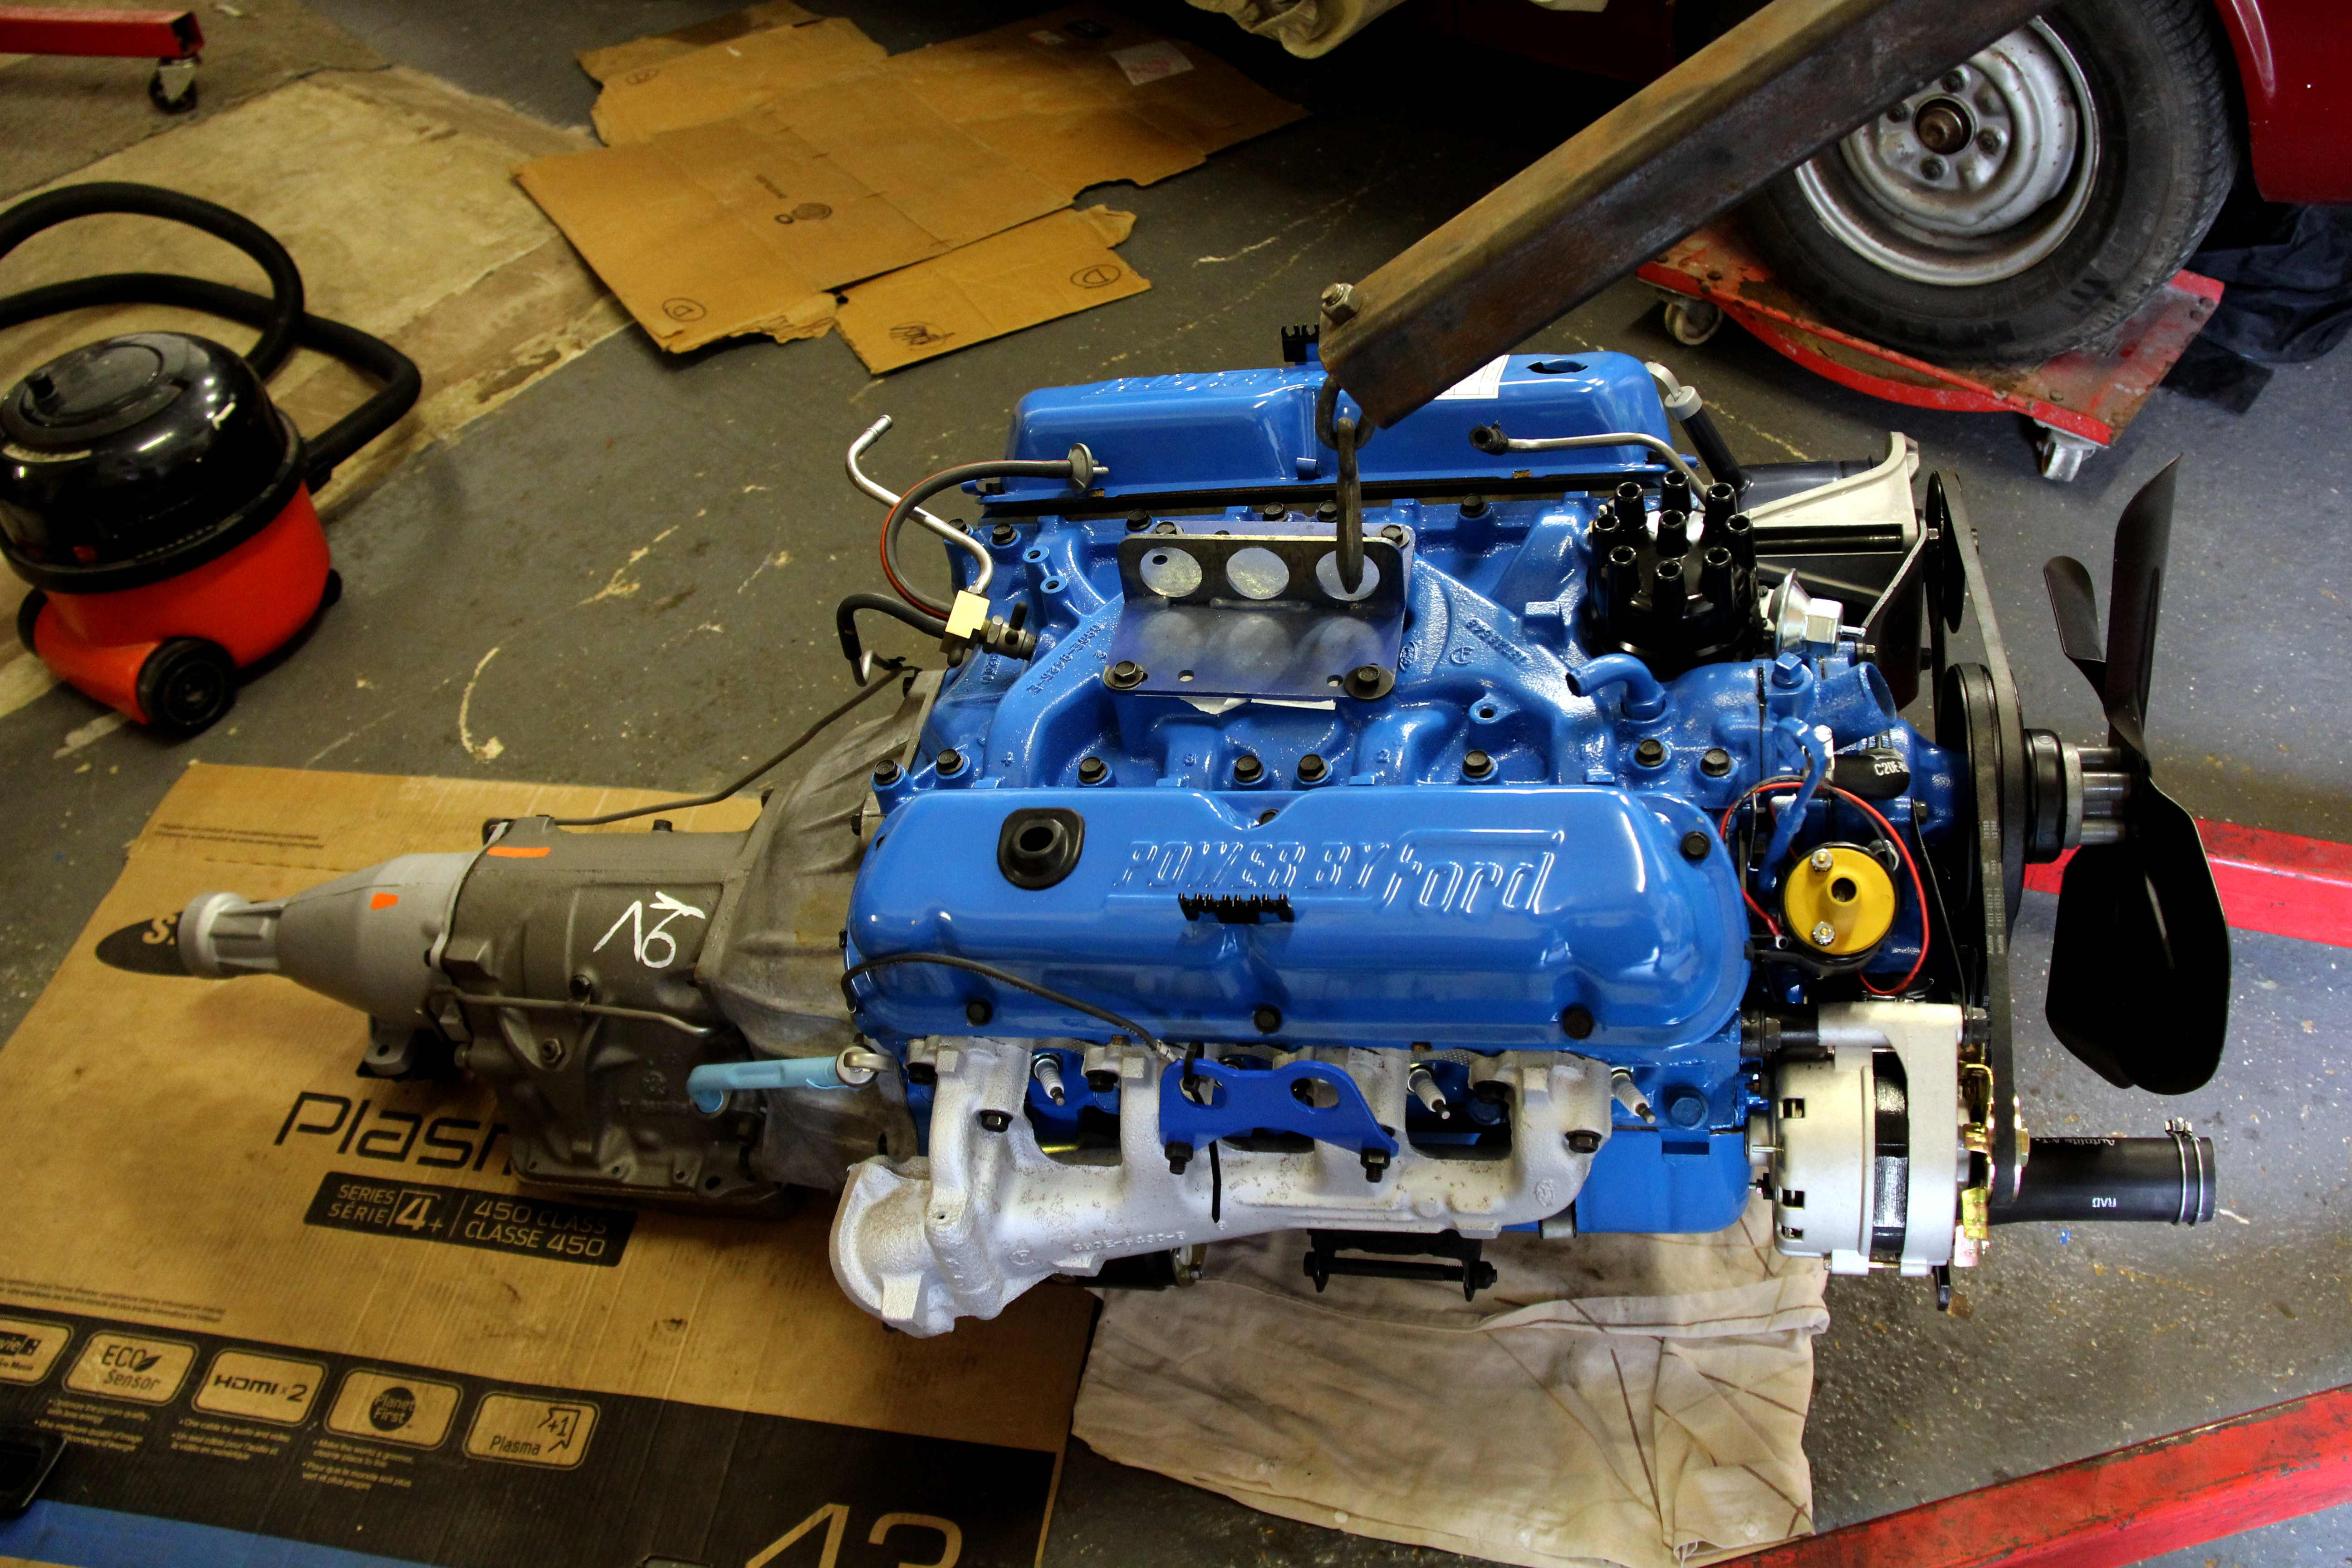
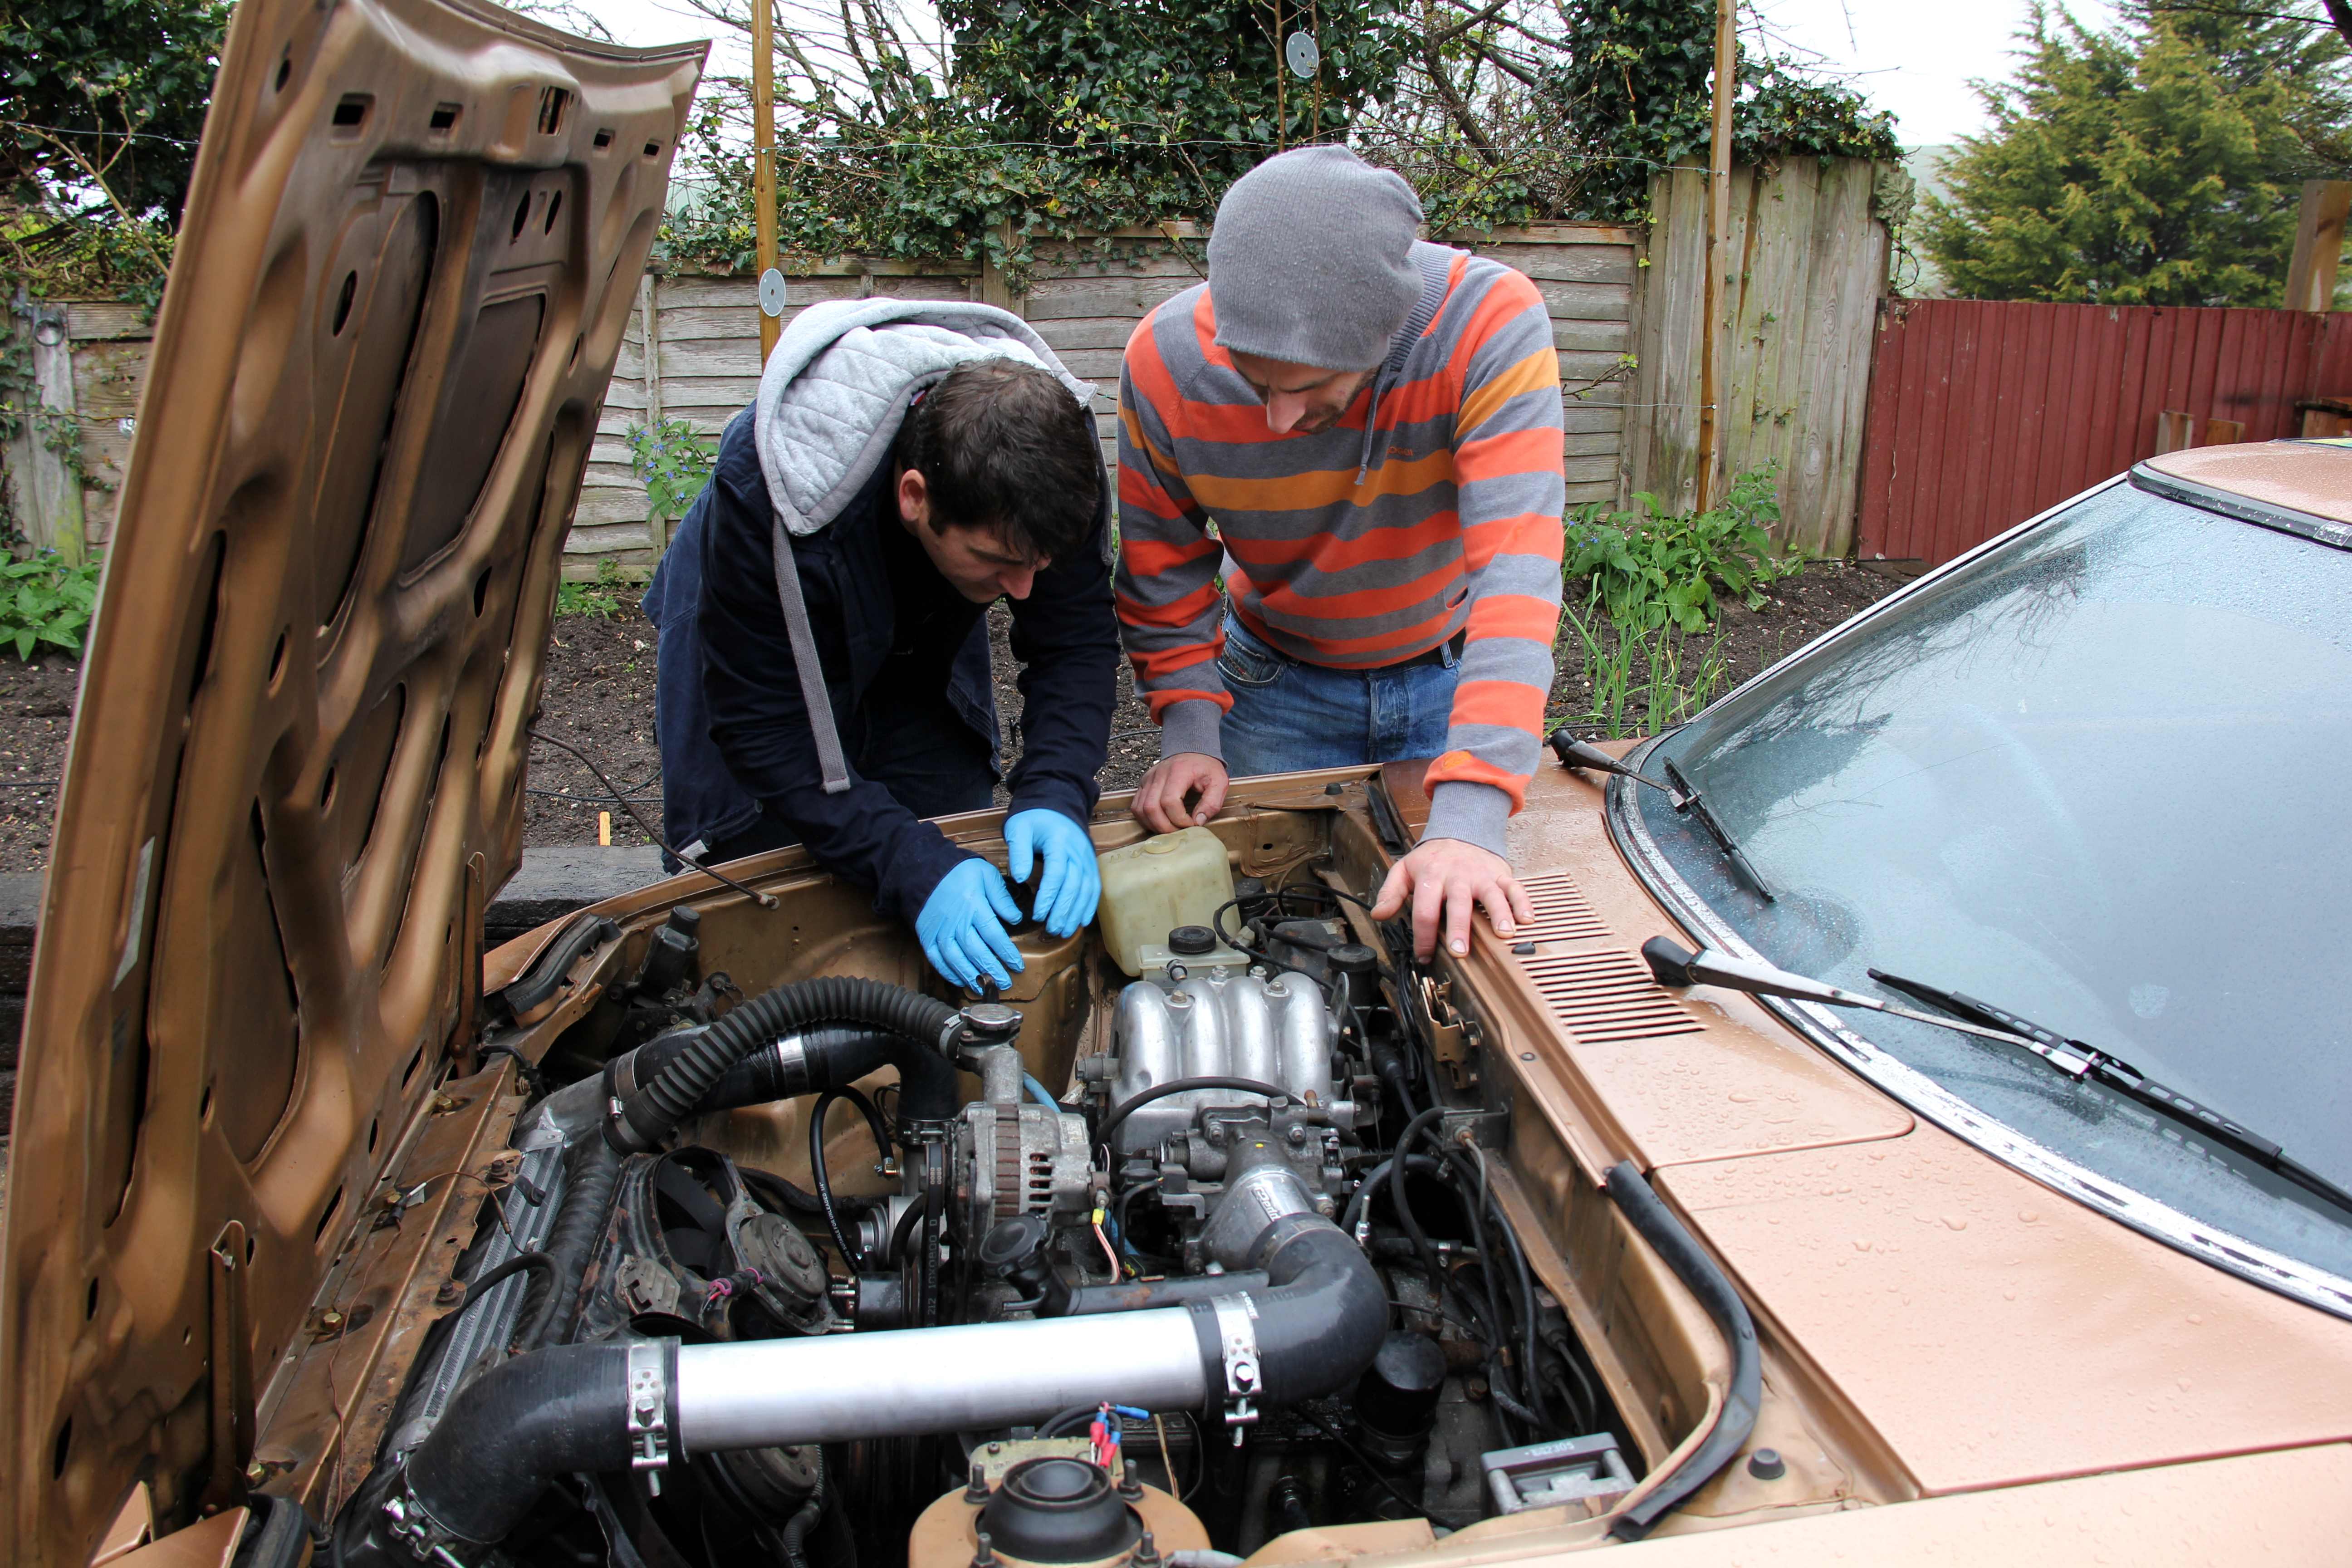
Right, so the next important thing was to fix the coolant leak, which was getting worse. I enlisted a couple of mates (as much for moral support as anything). My man Adam rarely needs much persuasion to lend a hand messing about with cars, especially since I've helped him with the engine extraction and install on his FD a couple of times! Rich tends to view Jap cars with a fair amount of suspicion, but since I'd spent the day helping him do this:
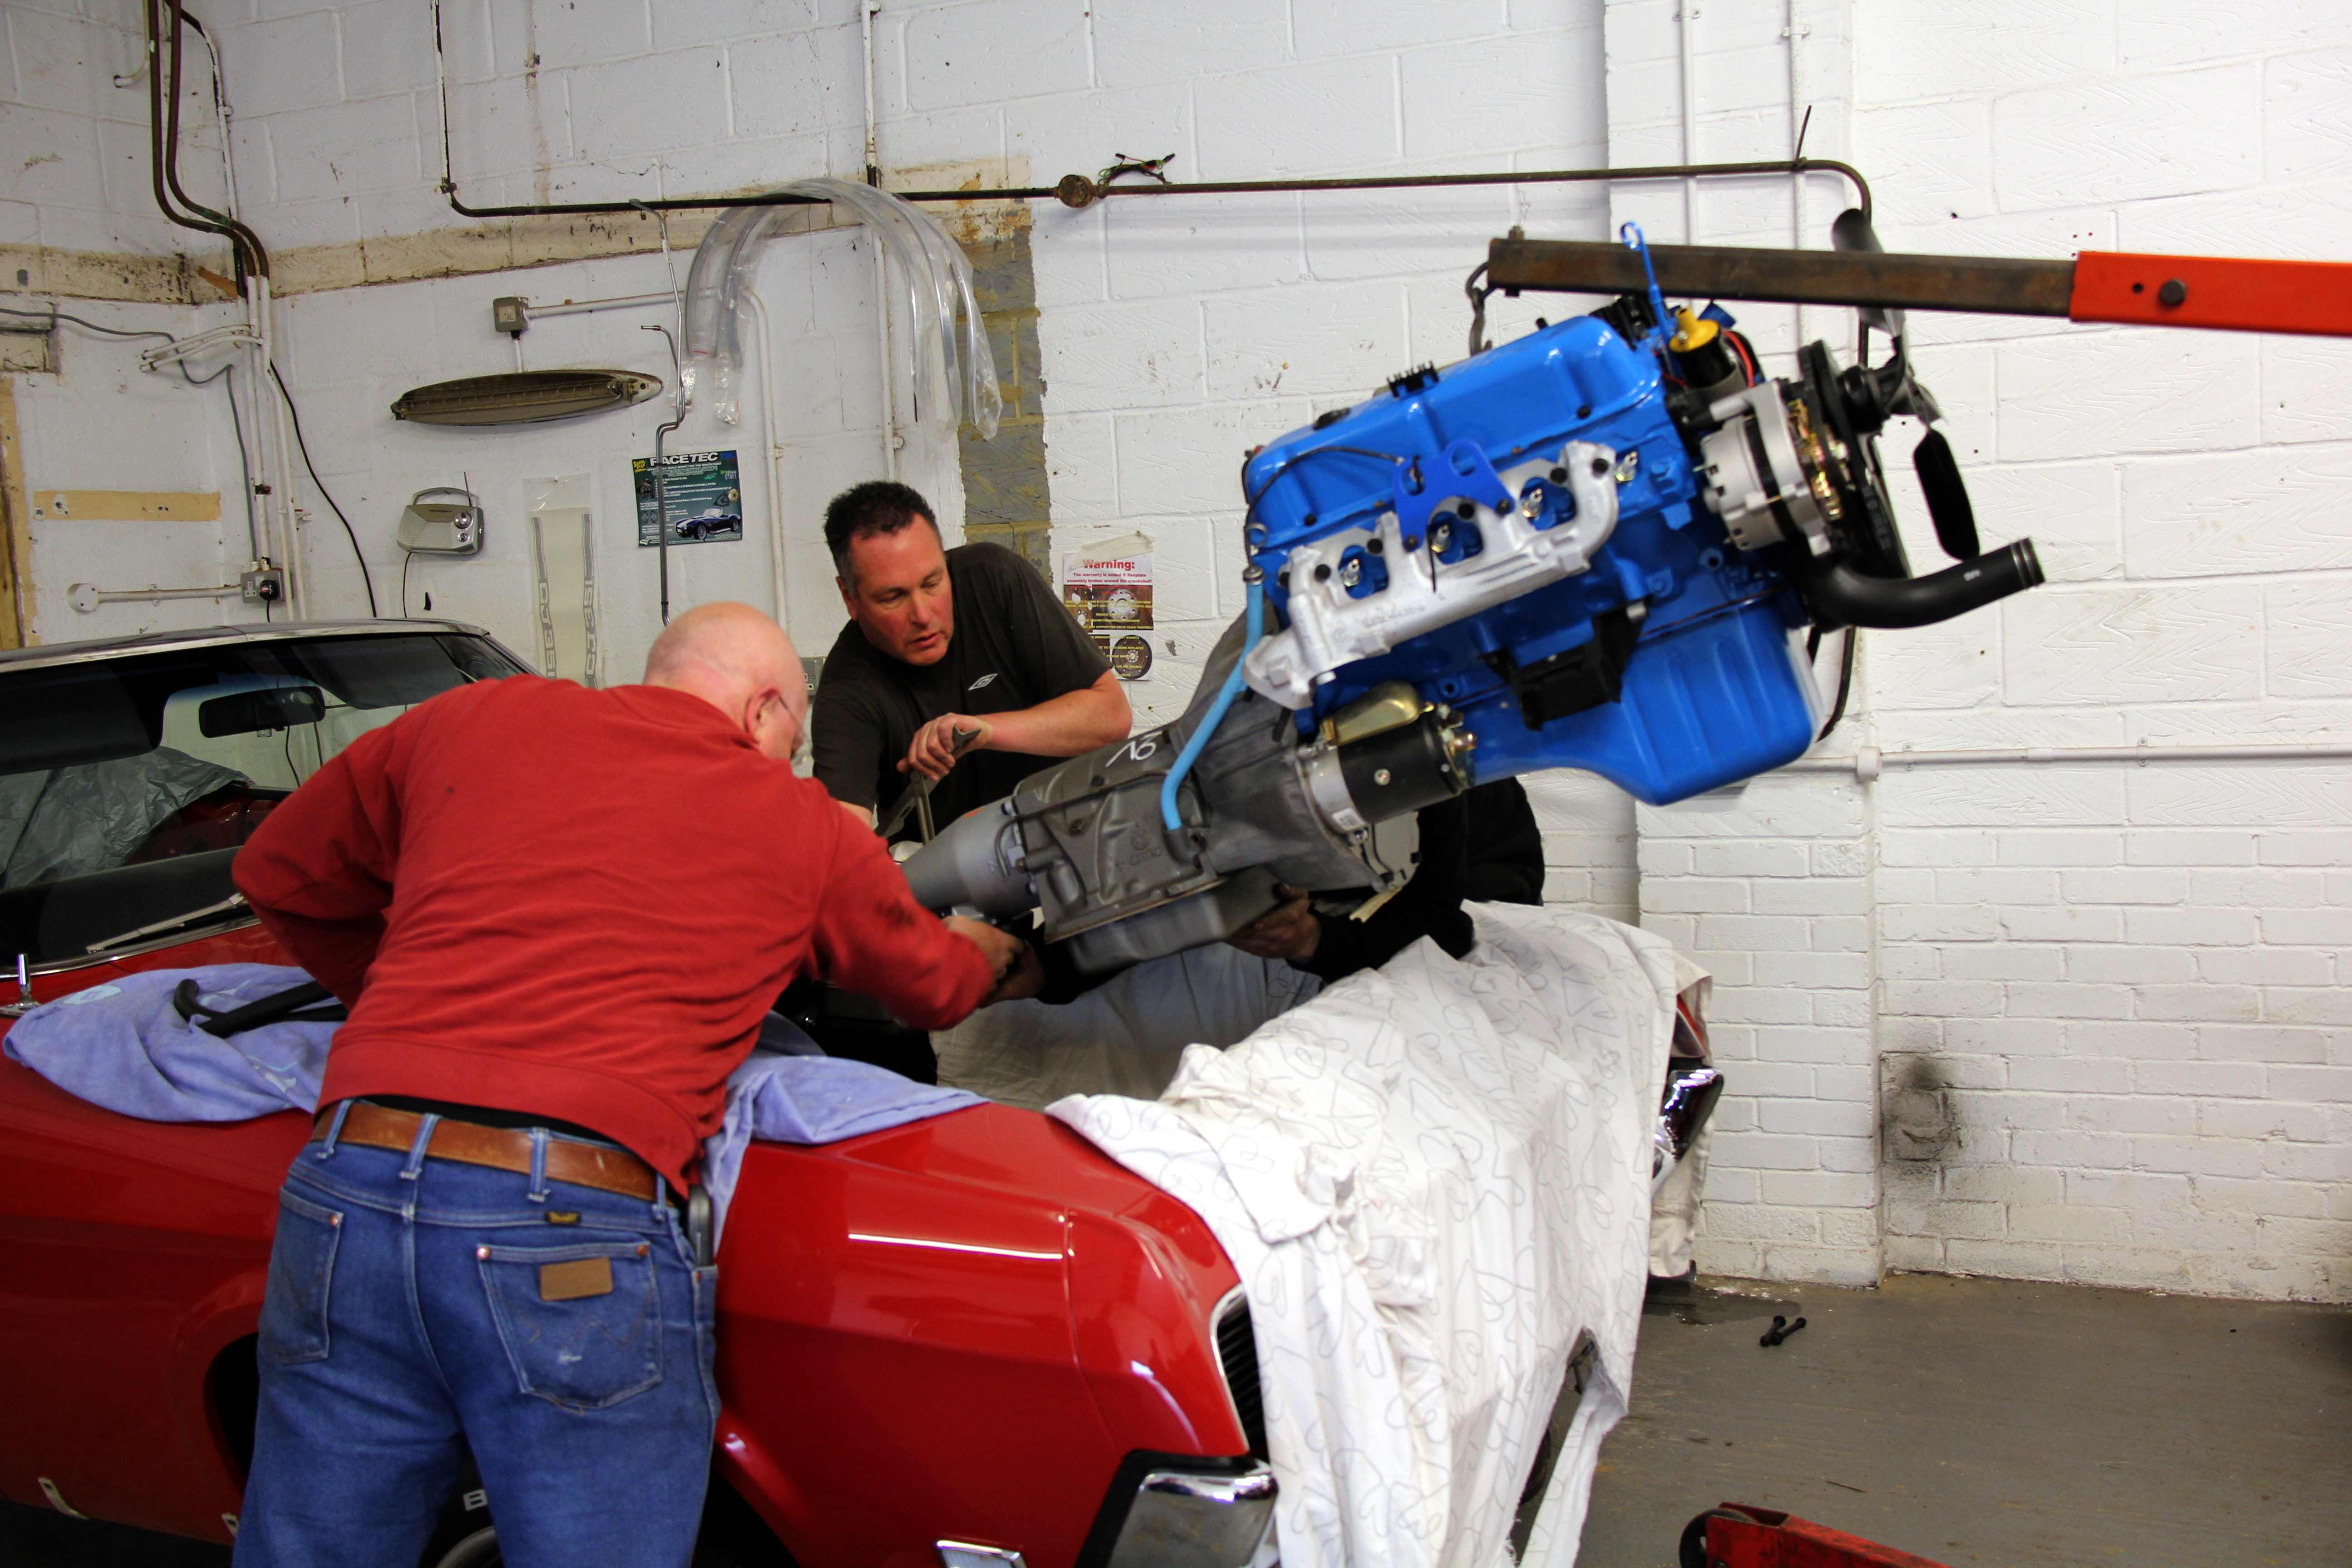
Just previously he couldn't really argue. That's us putting the lump back into his long-term '69 Mercury Cougar resto, BTW. Awesome car, full body-off restoration
Right, that's enough giant piston-engined stuff. You all know what it looks like under the Blue Box of God, but I didn't so we went cautious-ish and tried to label everything and make sure we knew how it came apart so we'd know how to put it back together
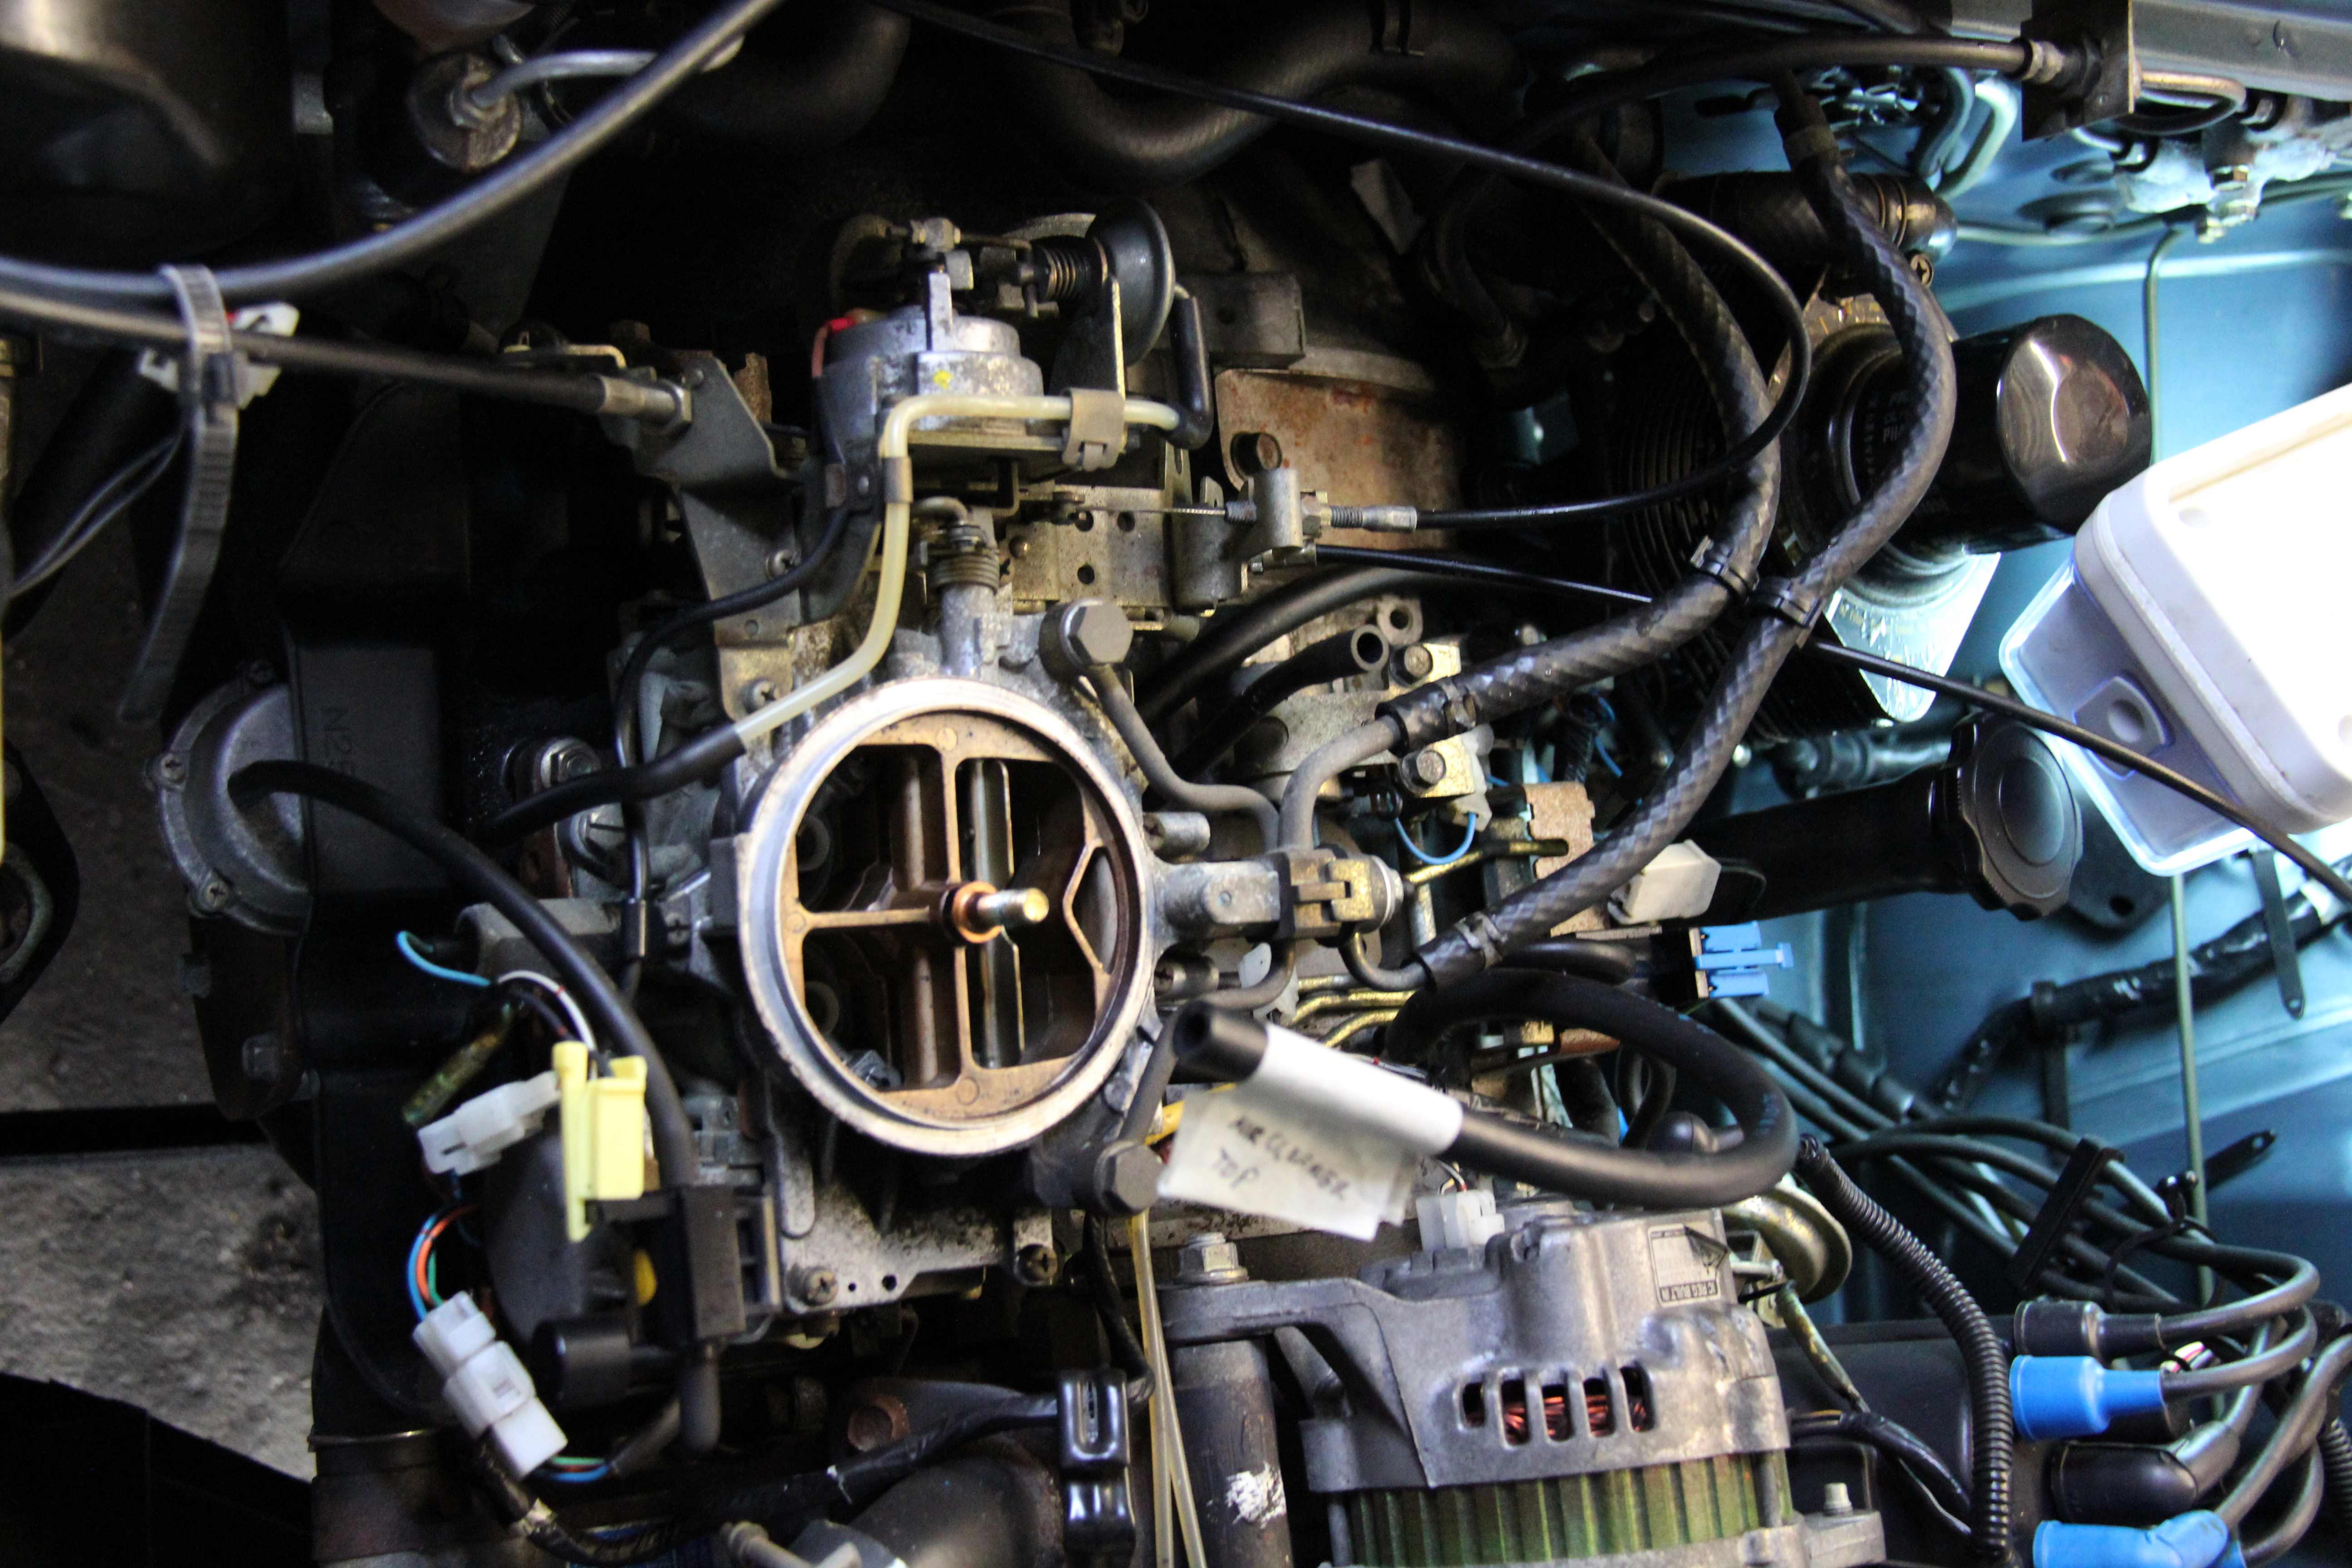
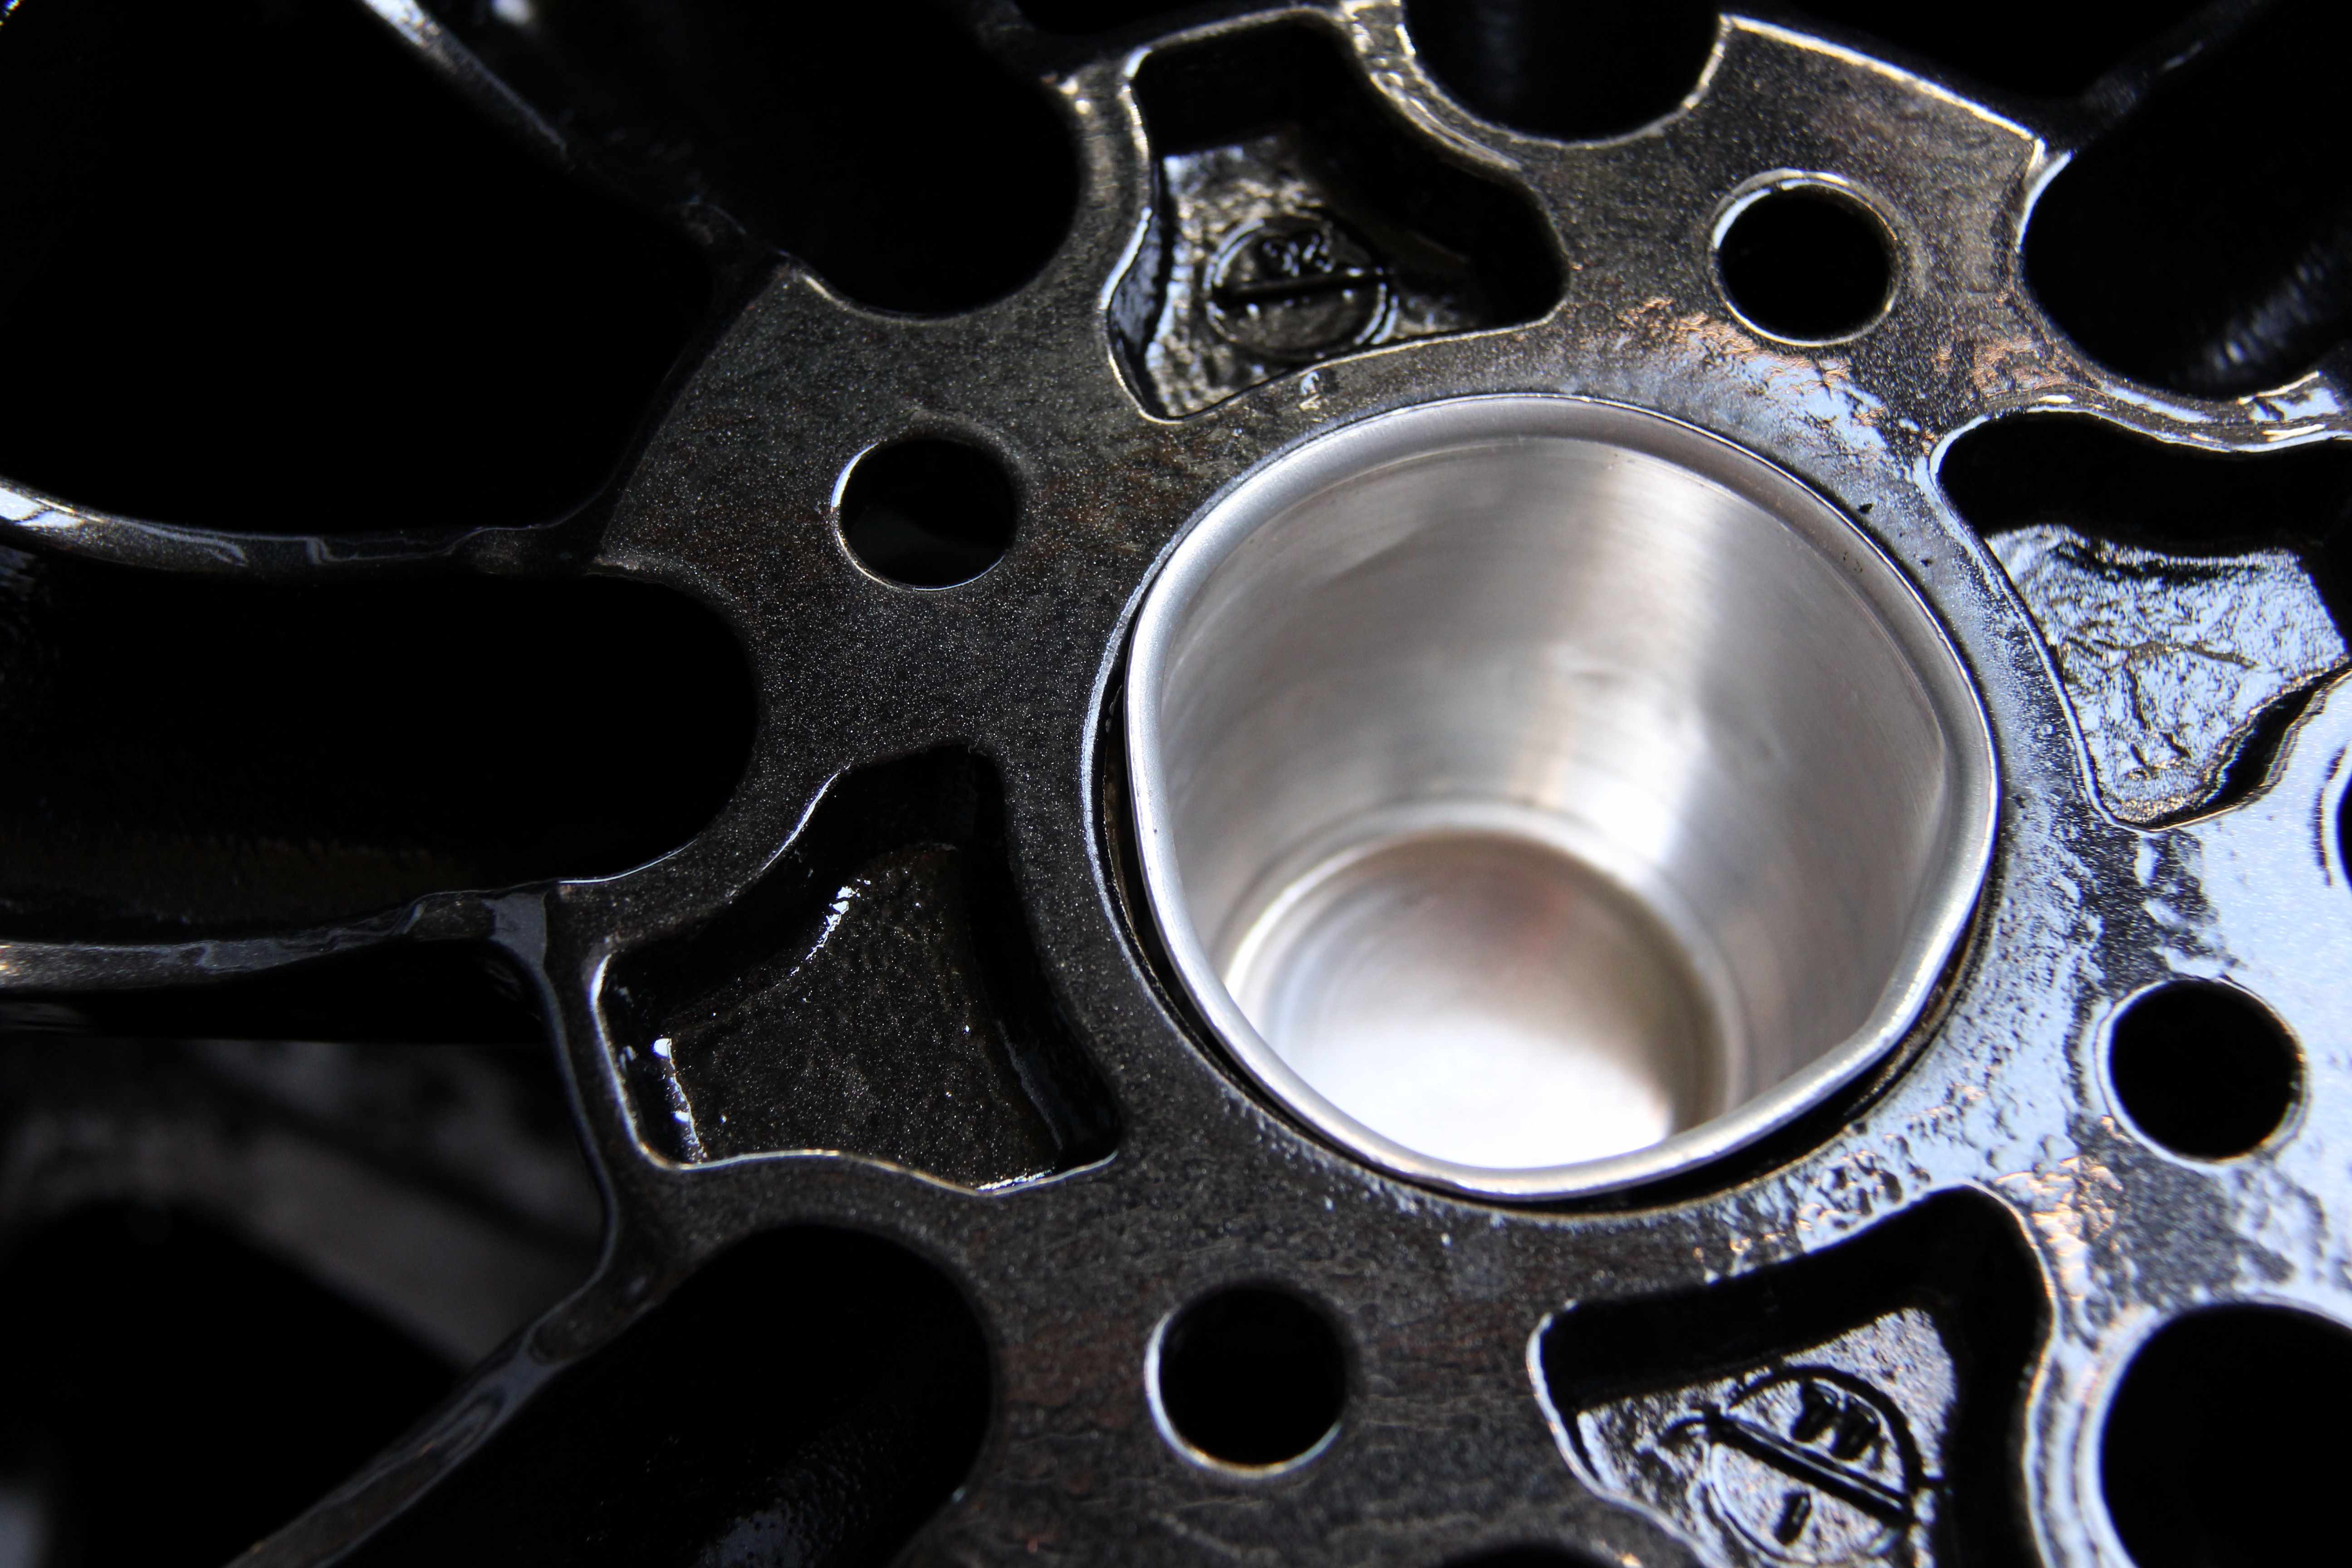
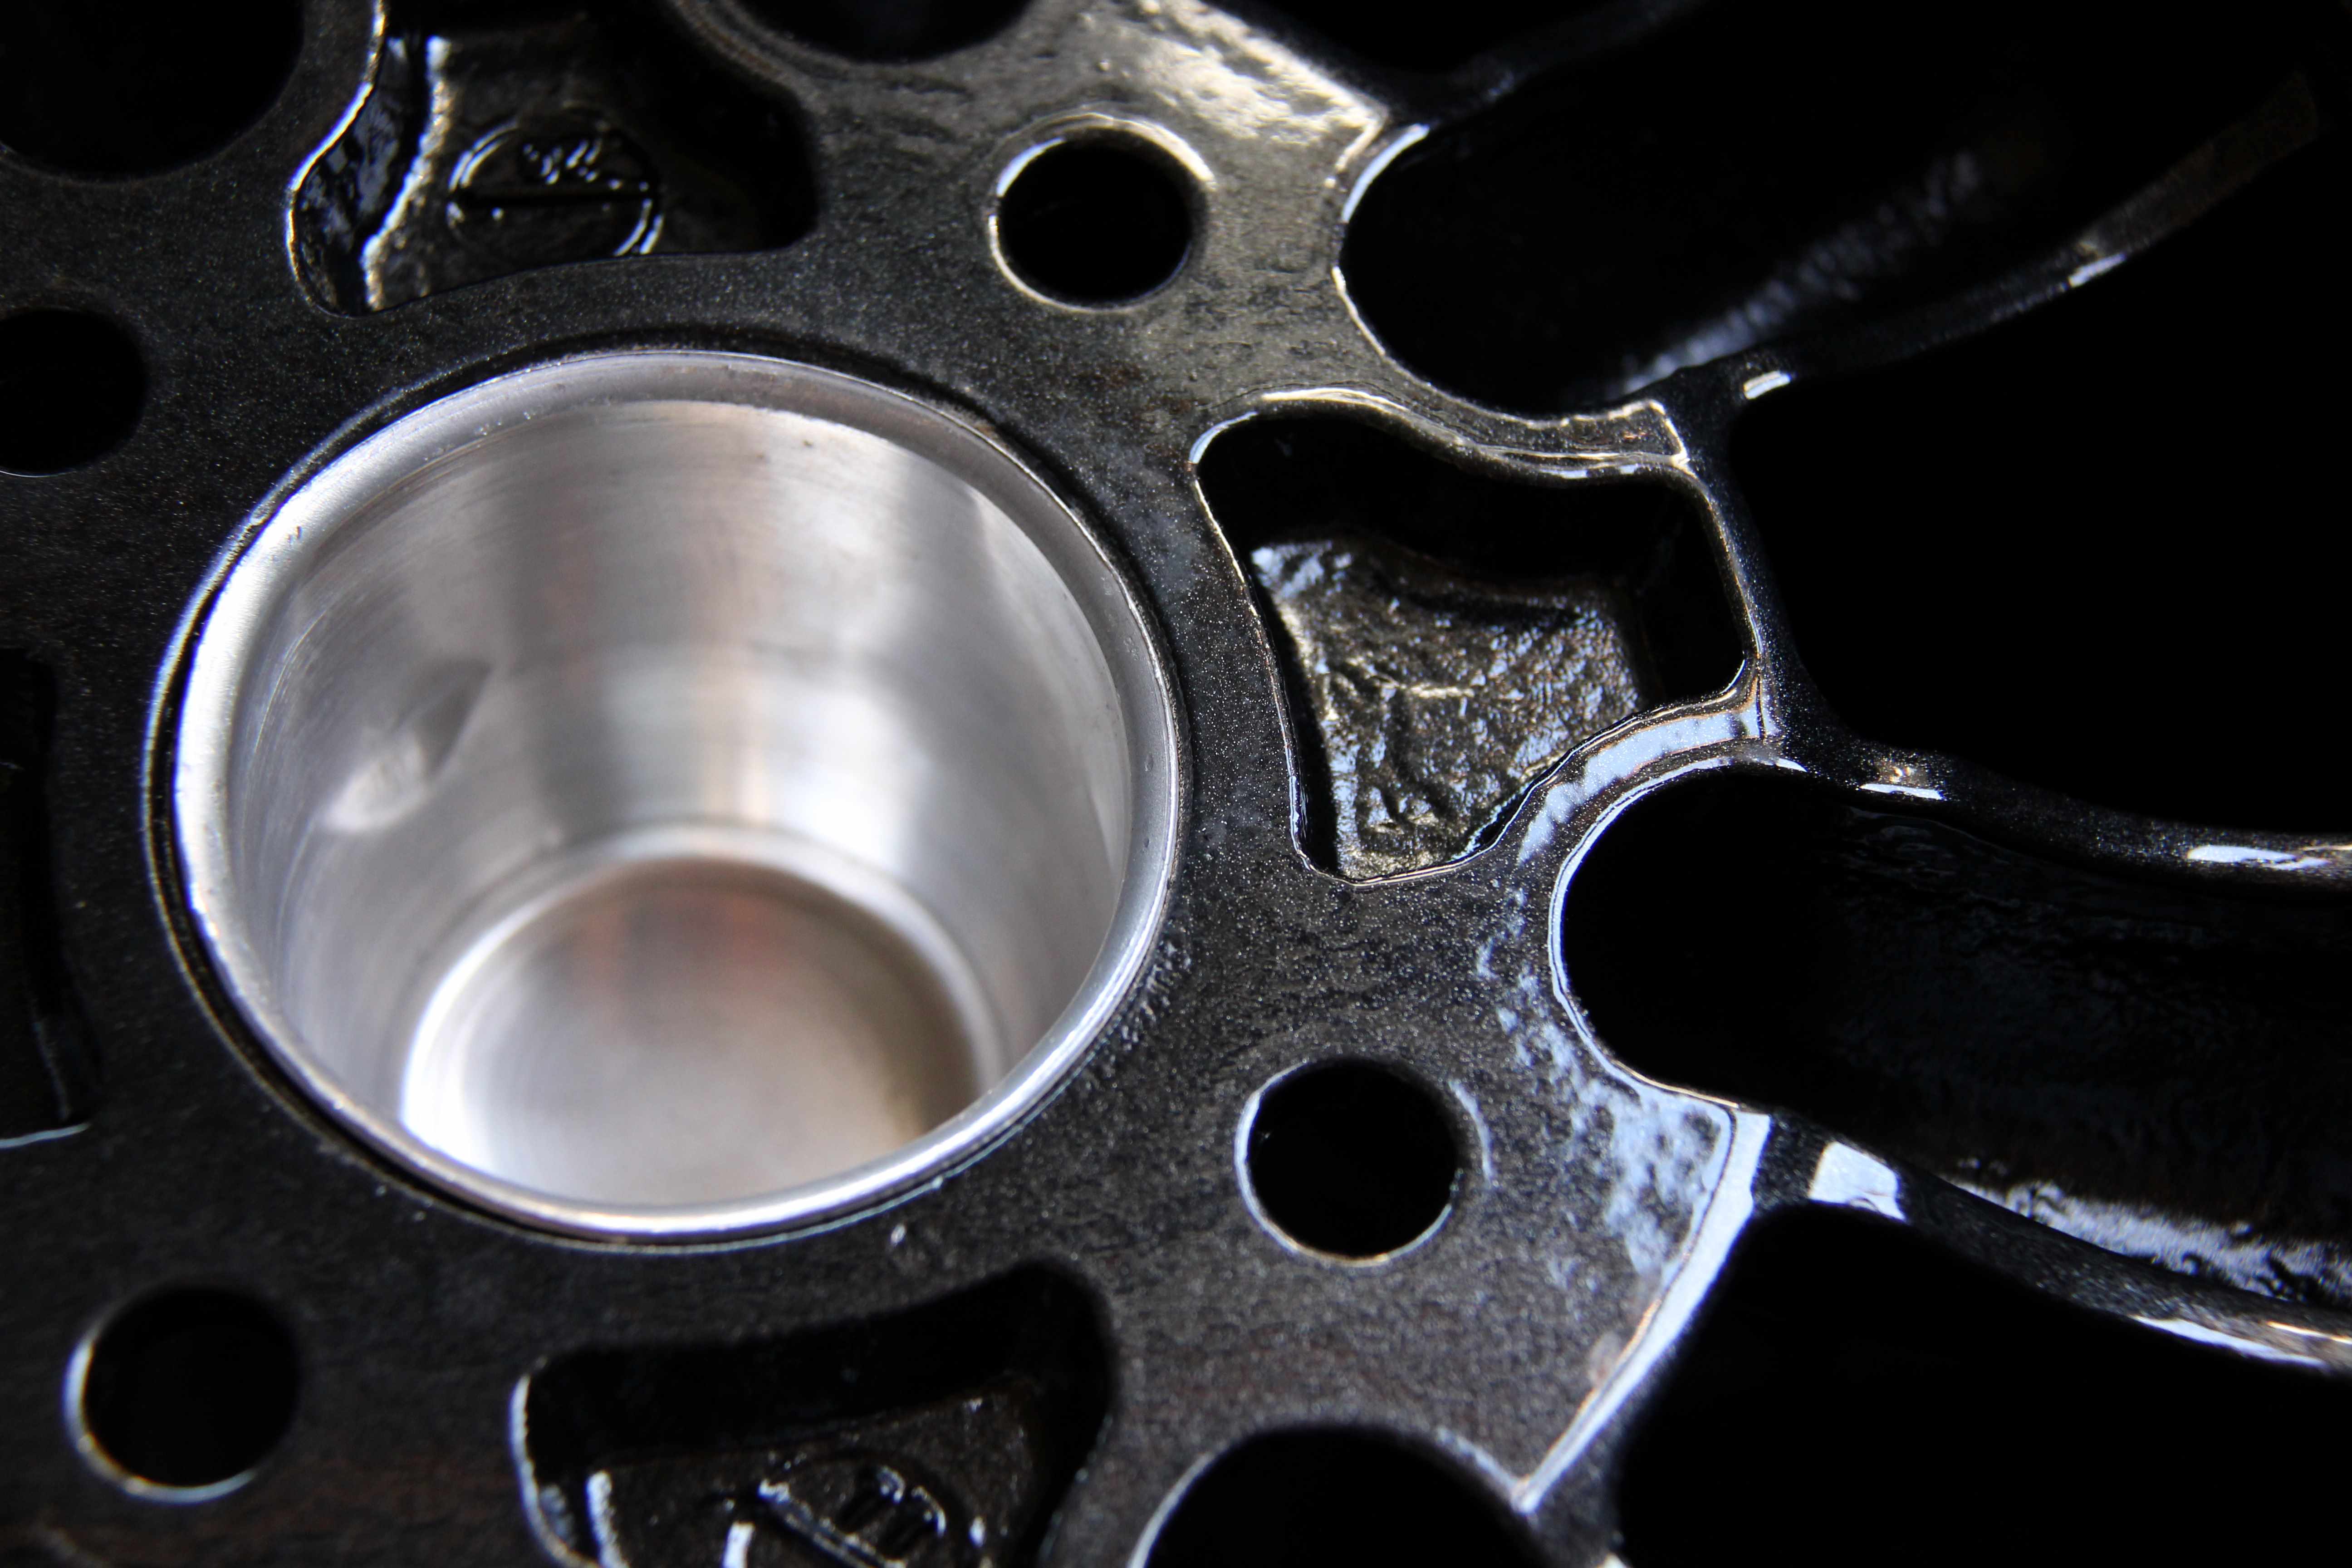
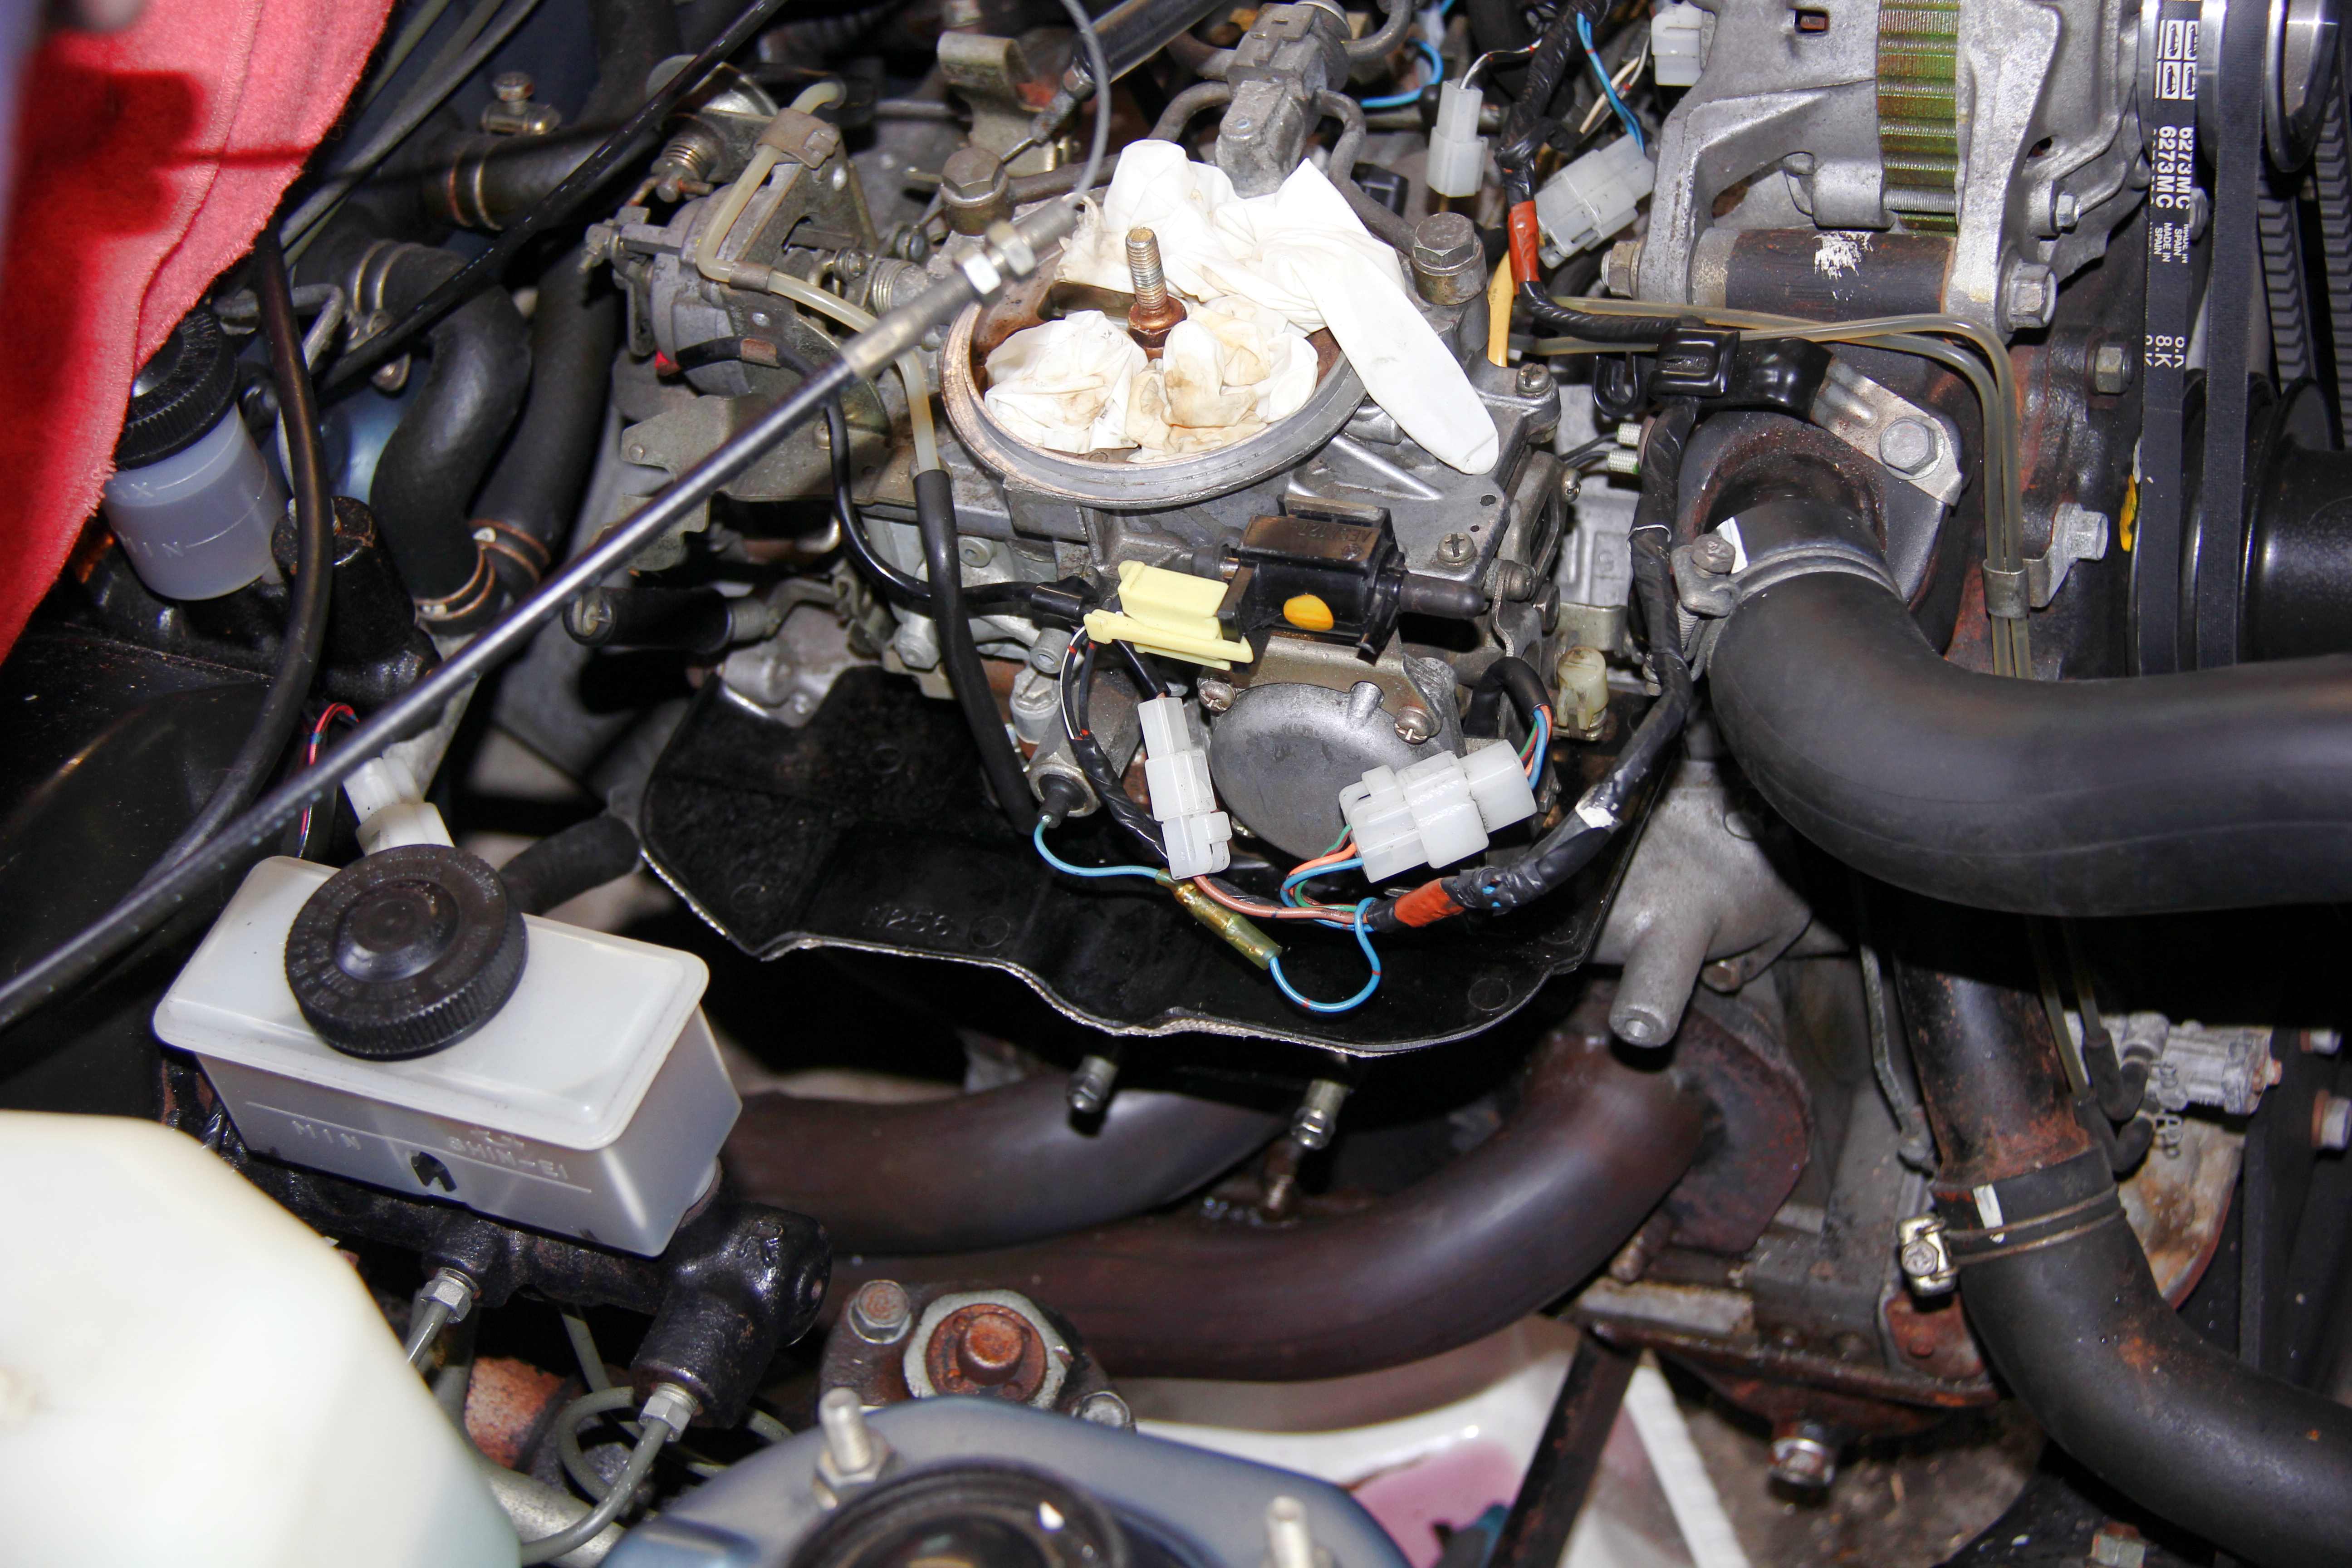
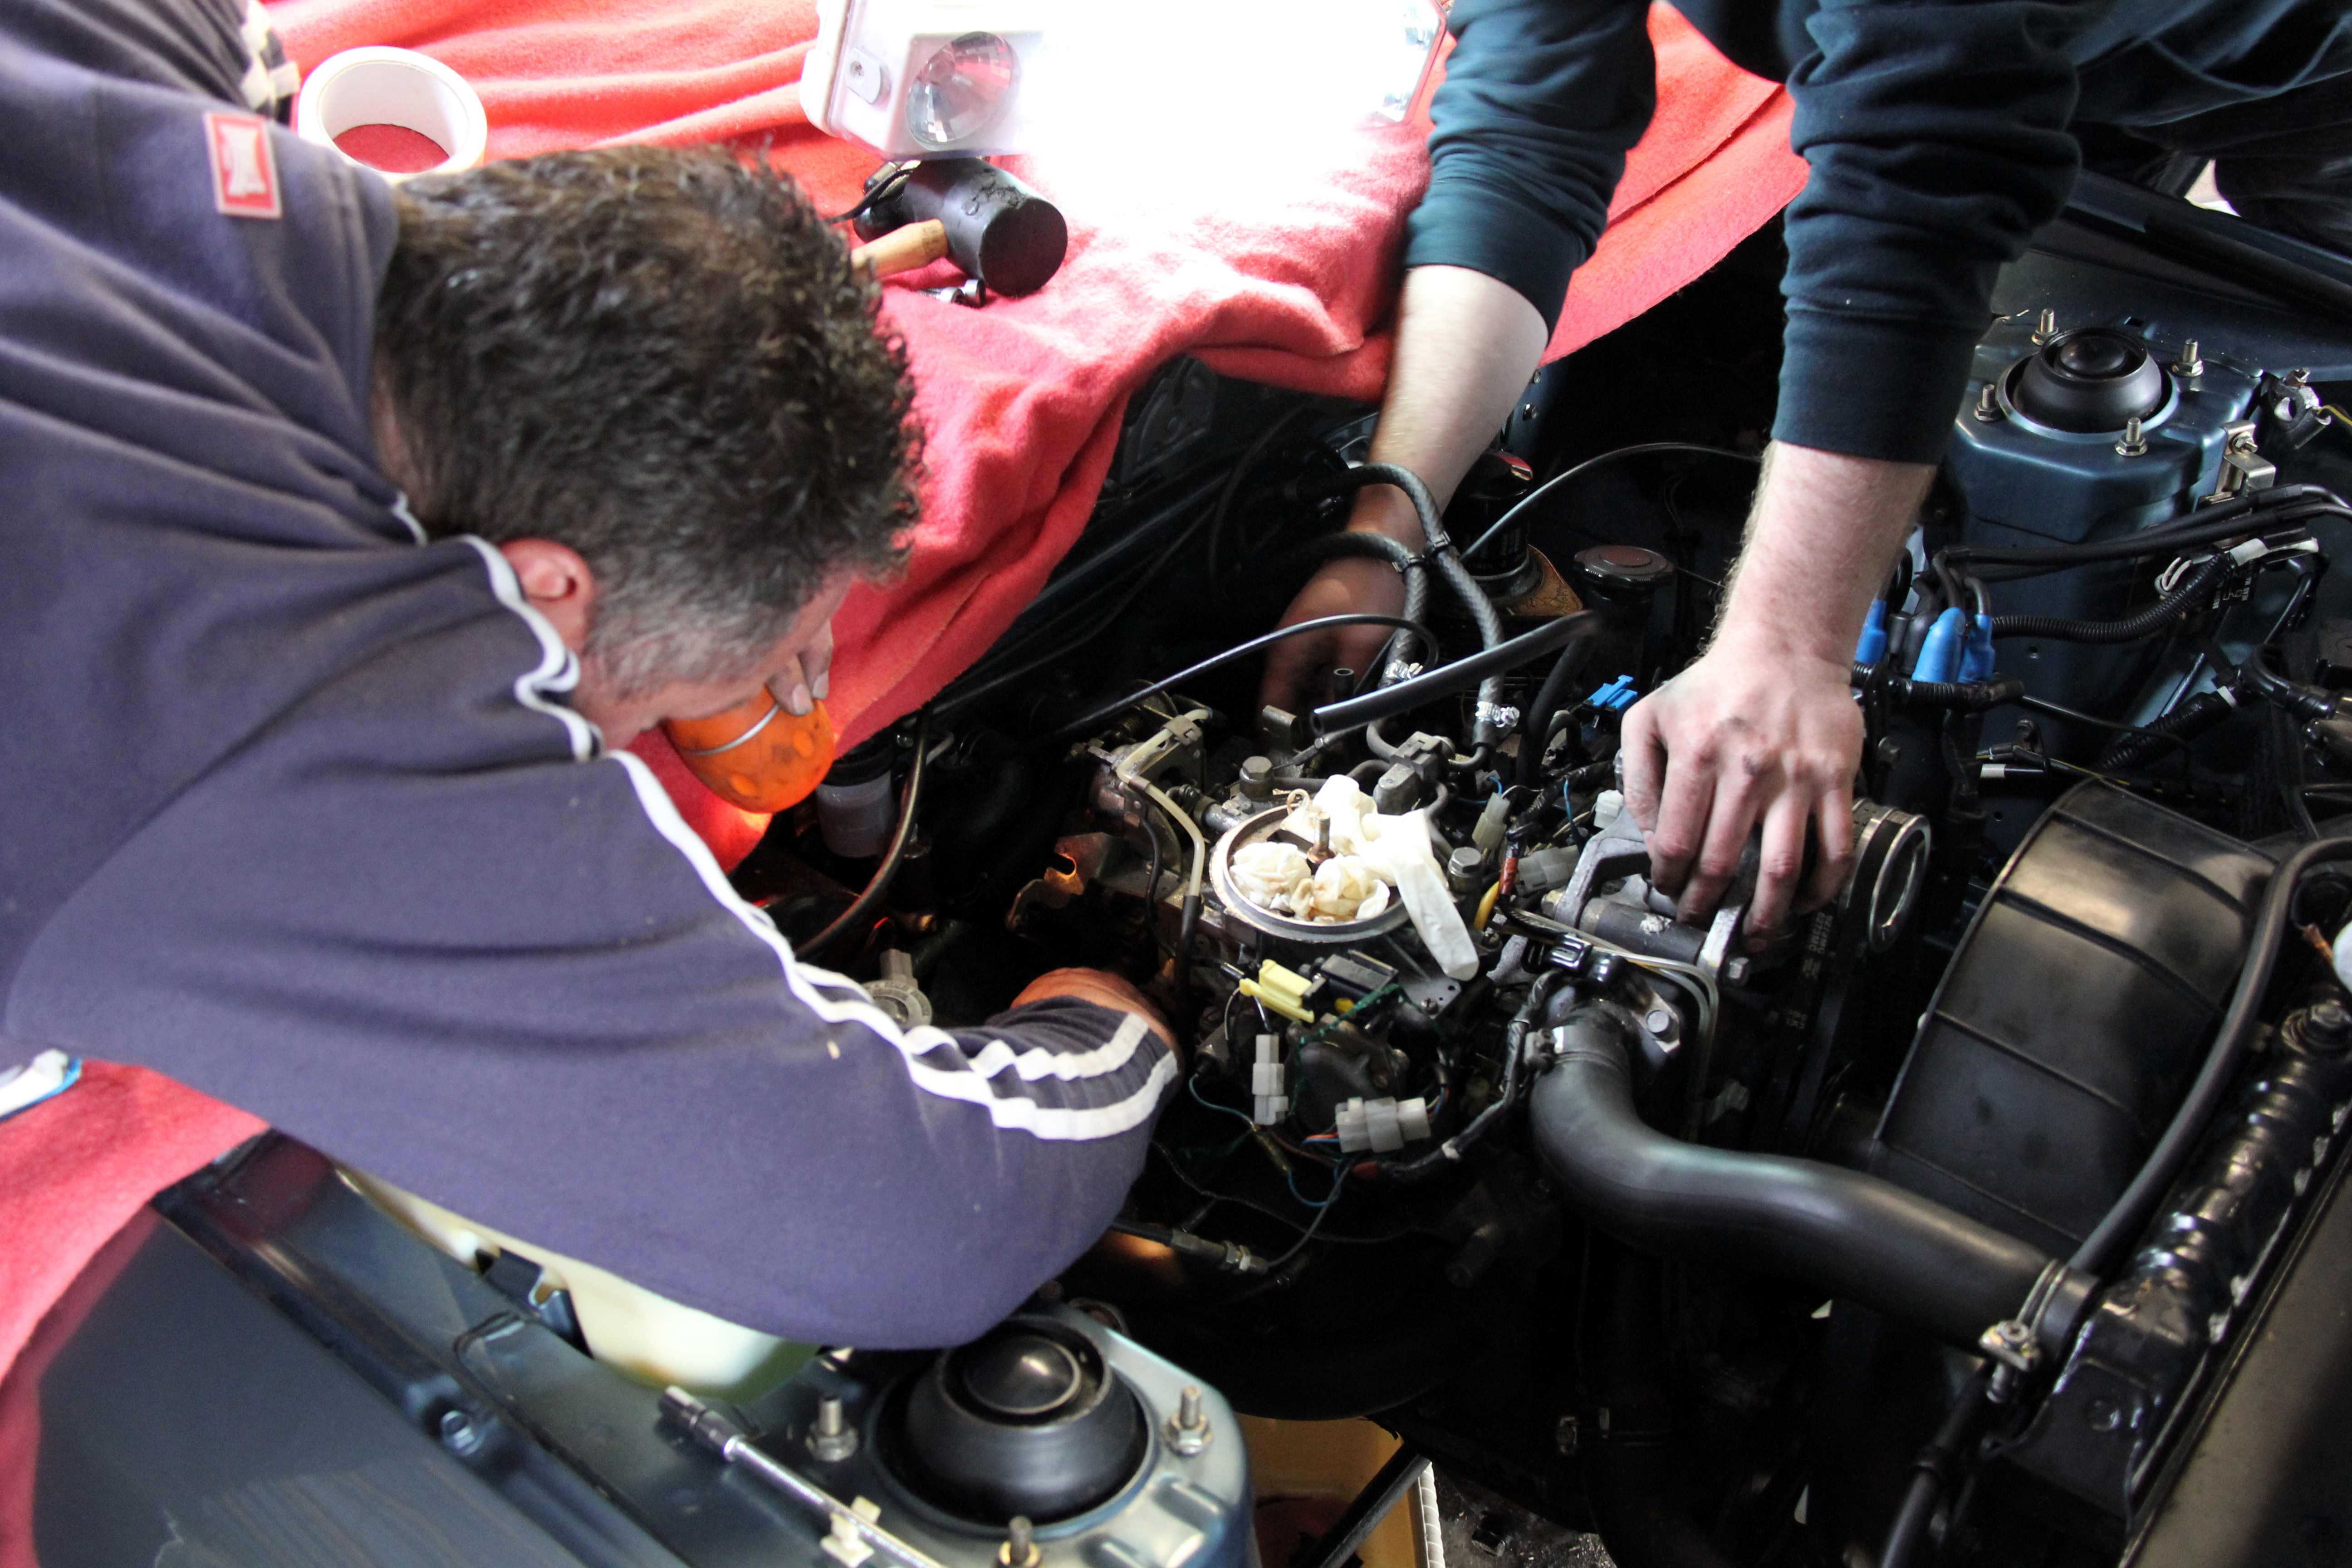
The good part is that it gave me the opportunity to finish the half-arsed airpump delete the previous owner had done. Here we are trying to persuade the pump off the 27-year old clag and gunge it had turned to something incredibly sticky. Took quite some abuse to finally remove
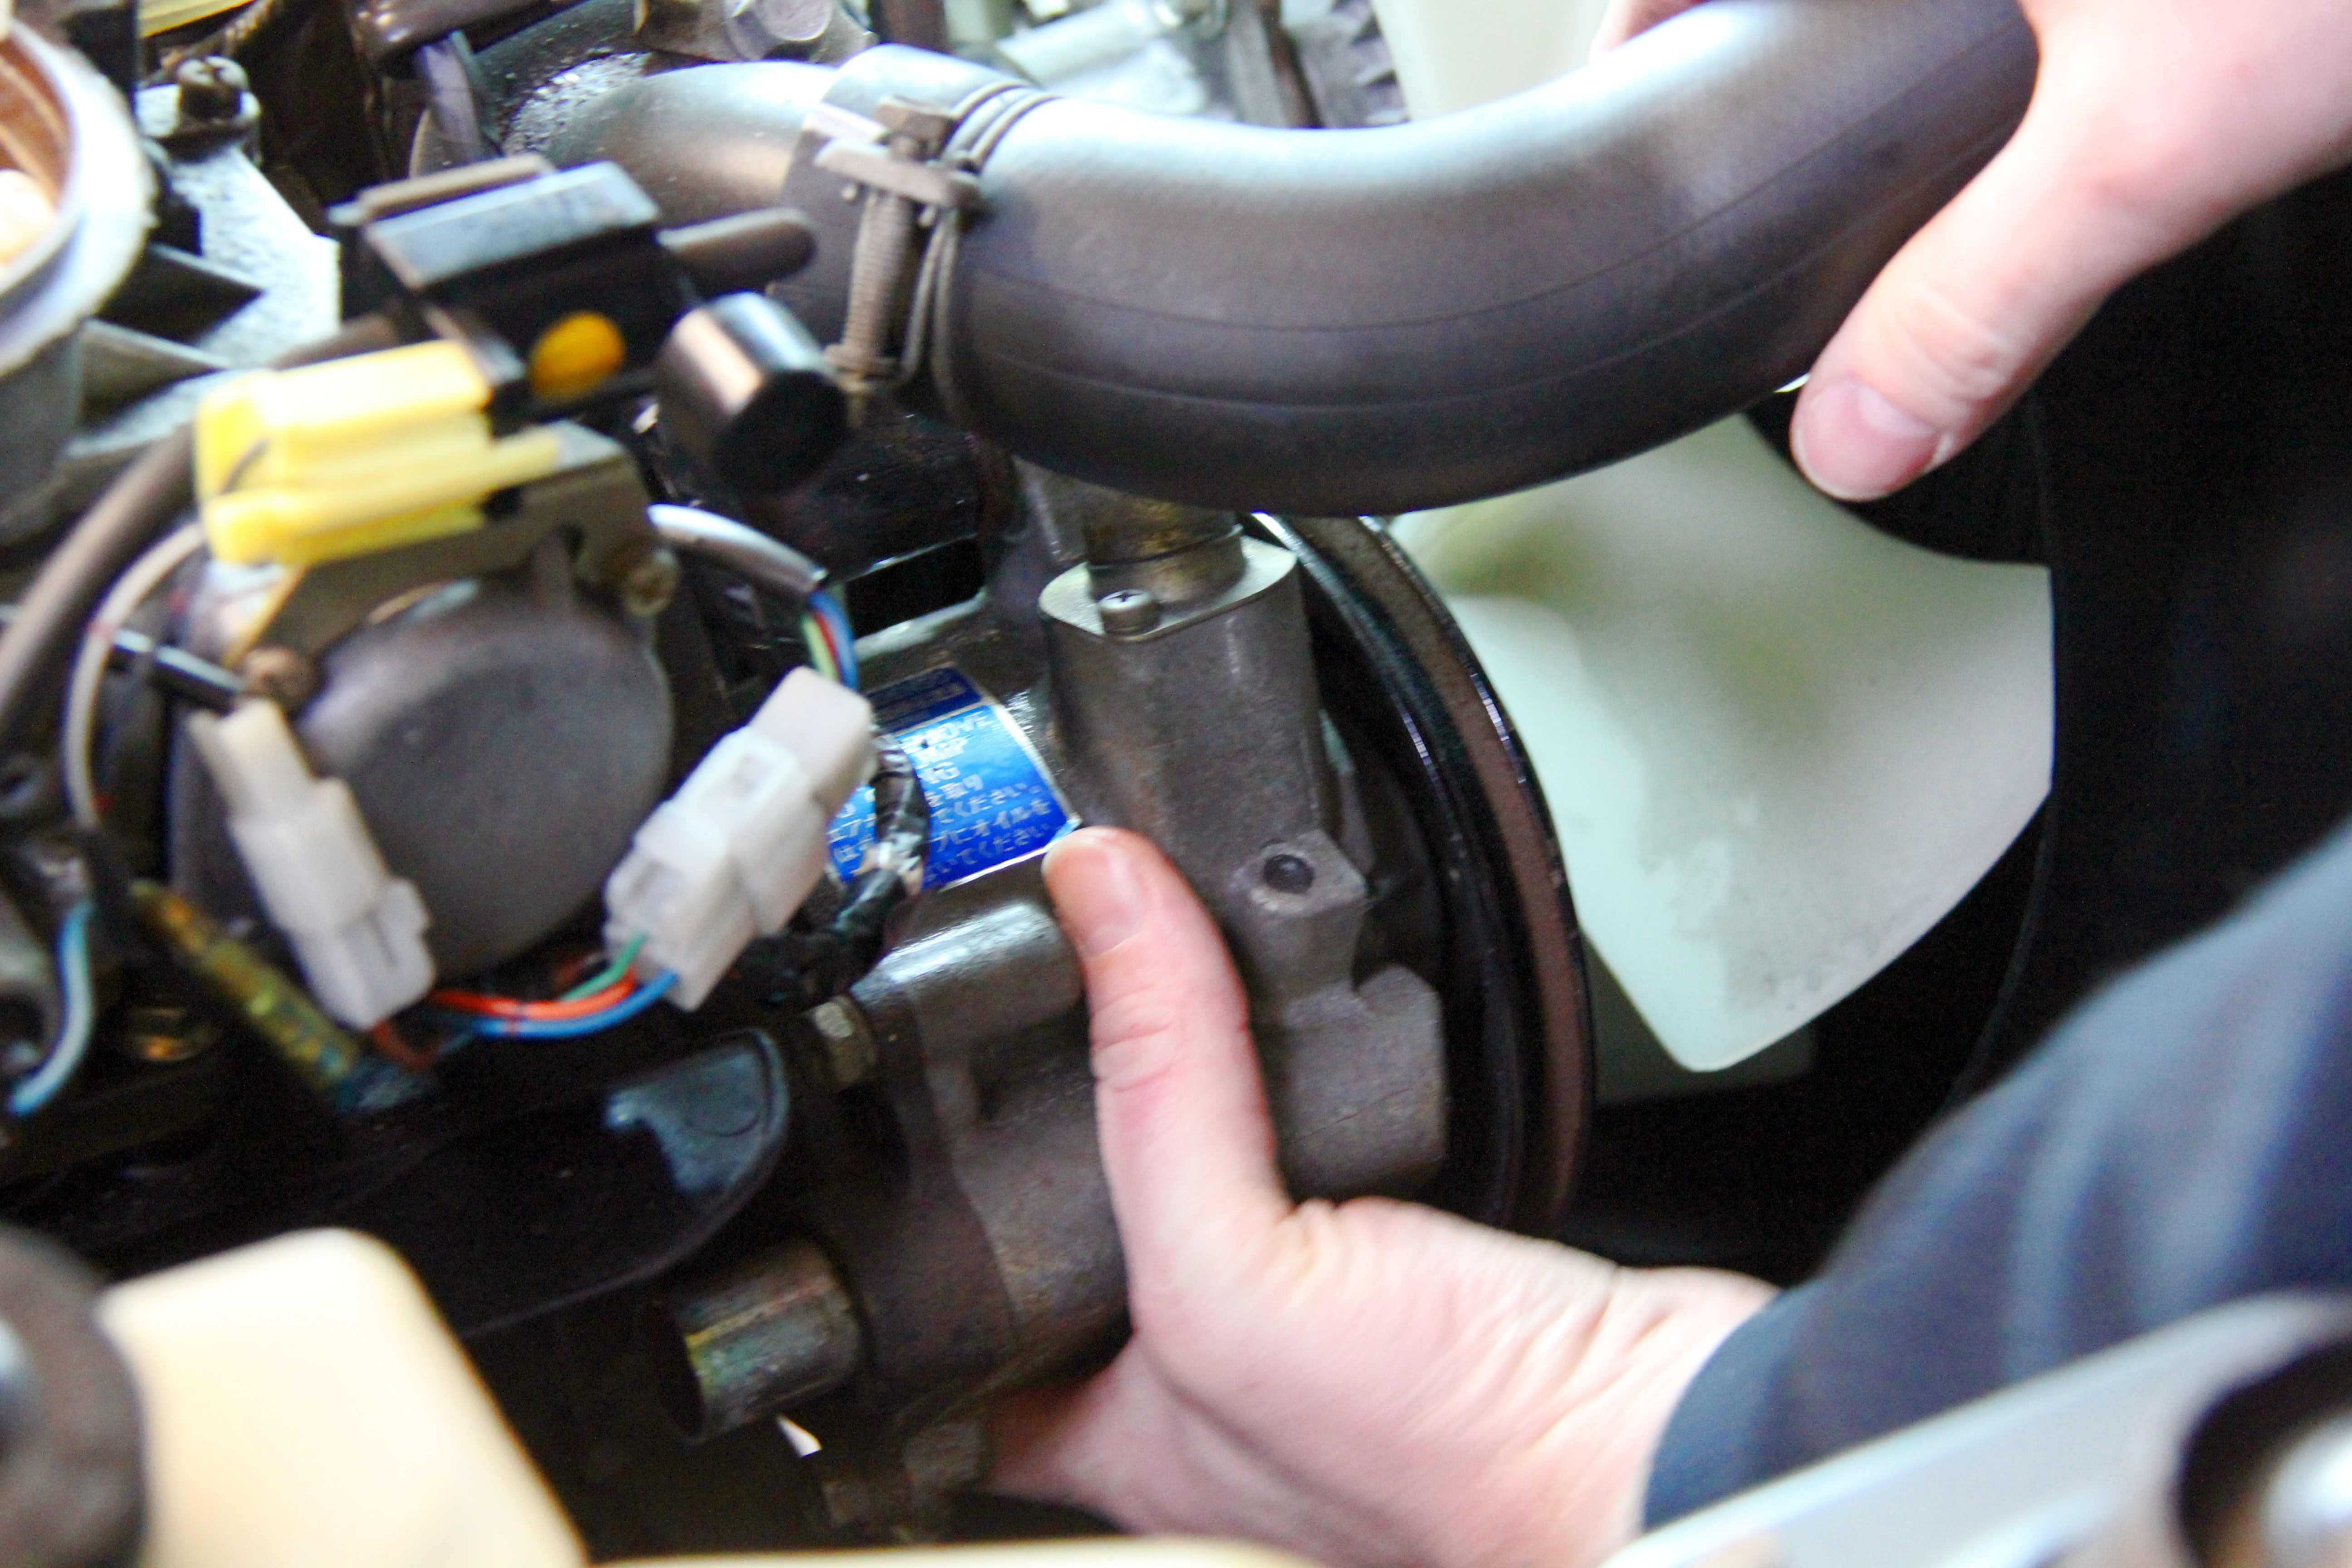
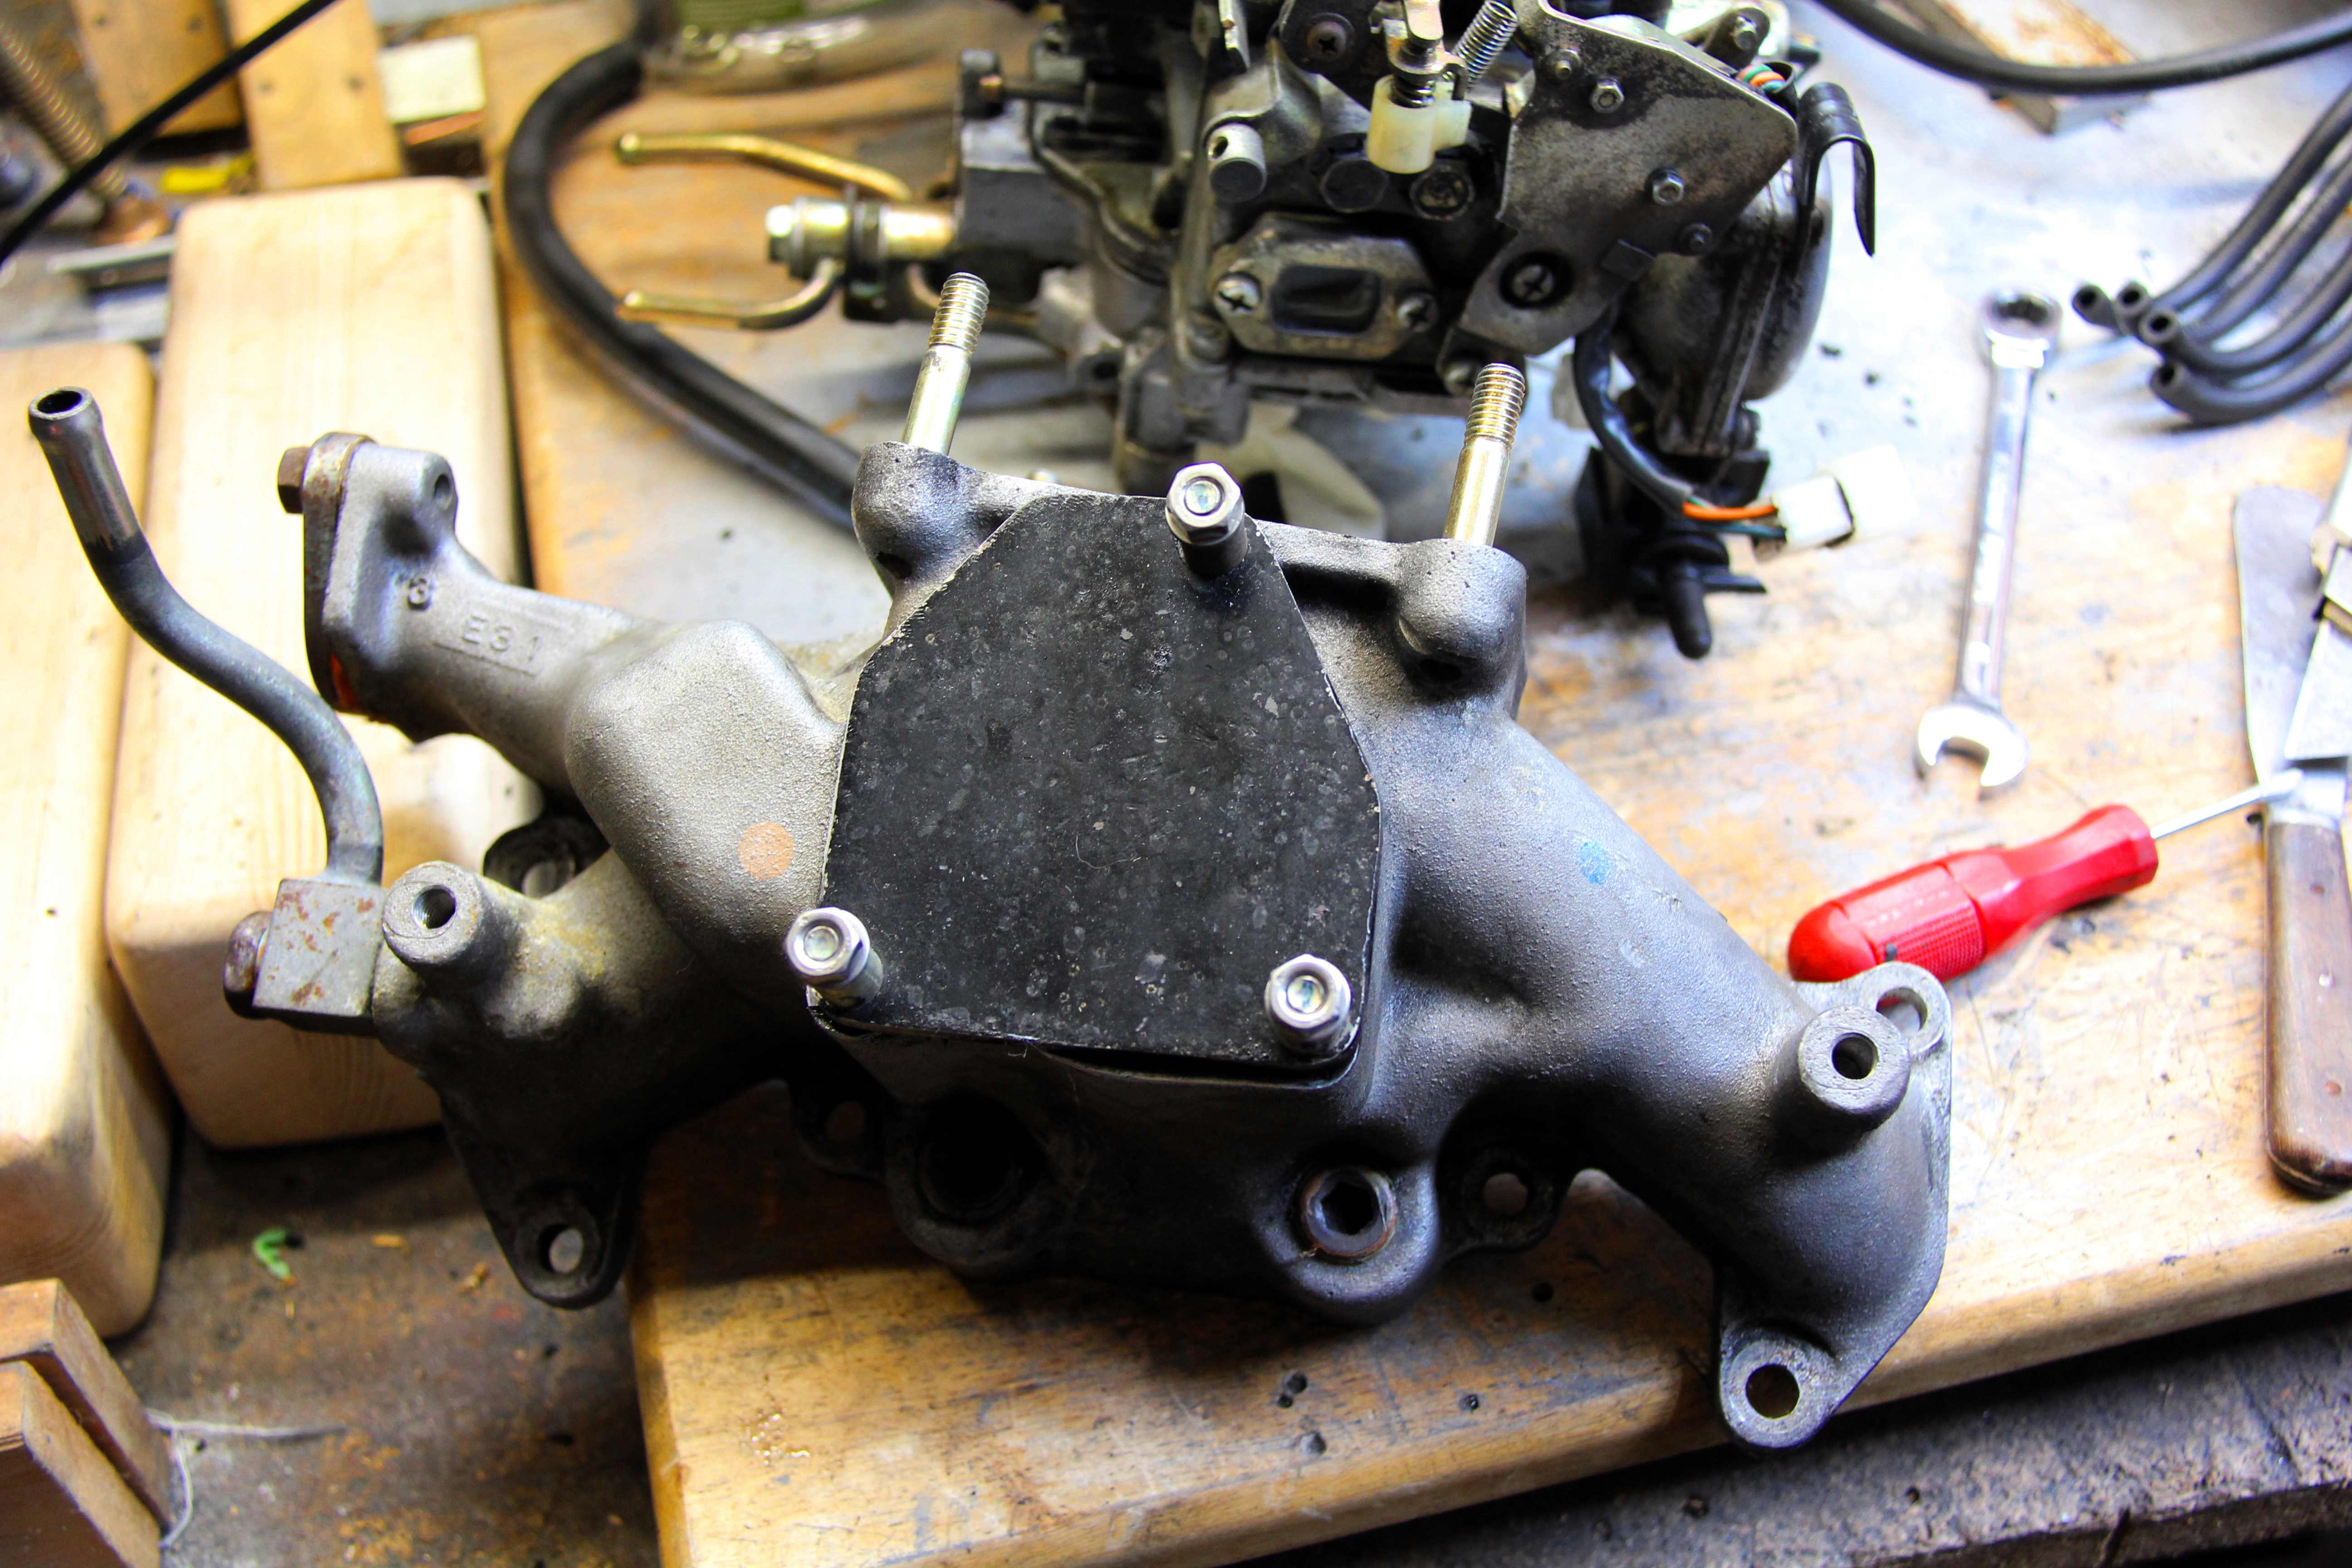
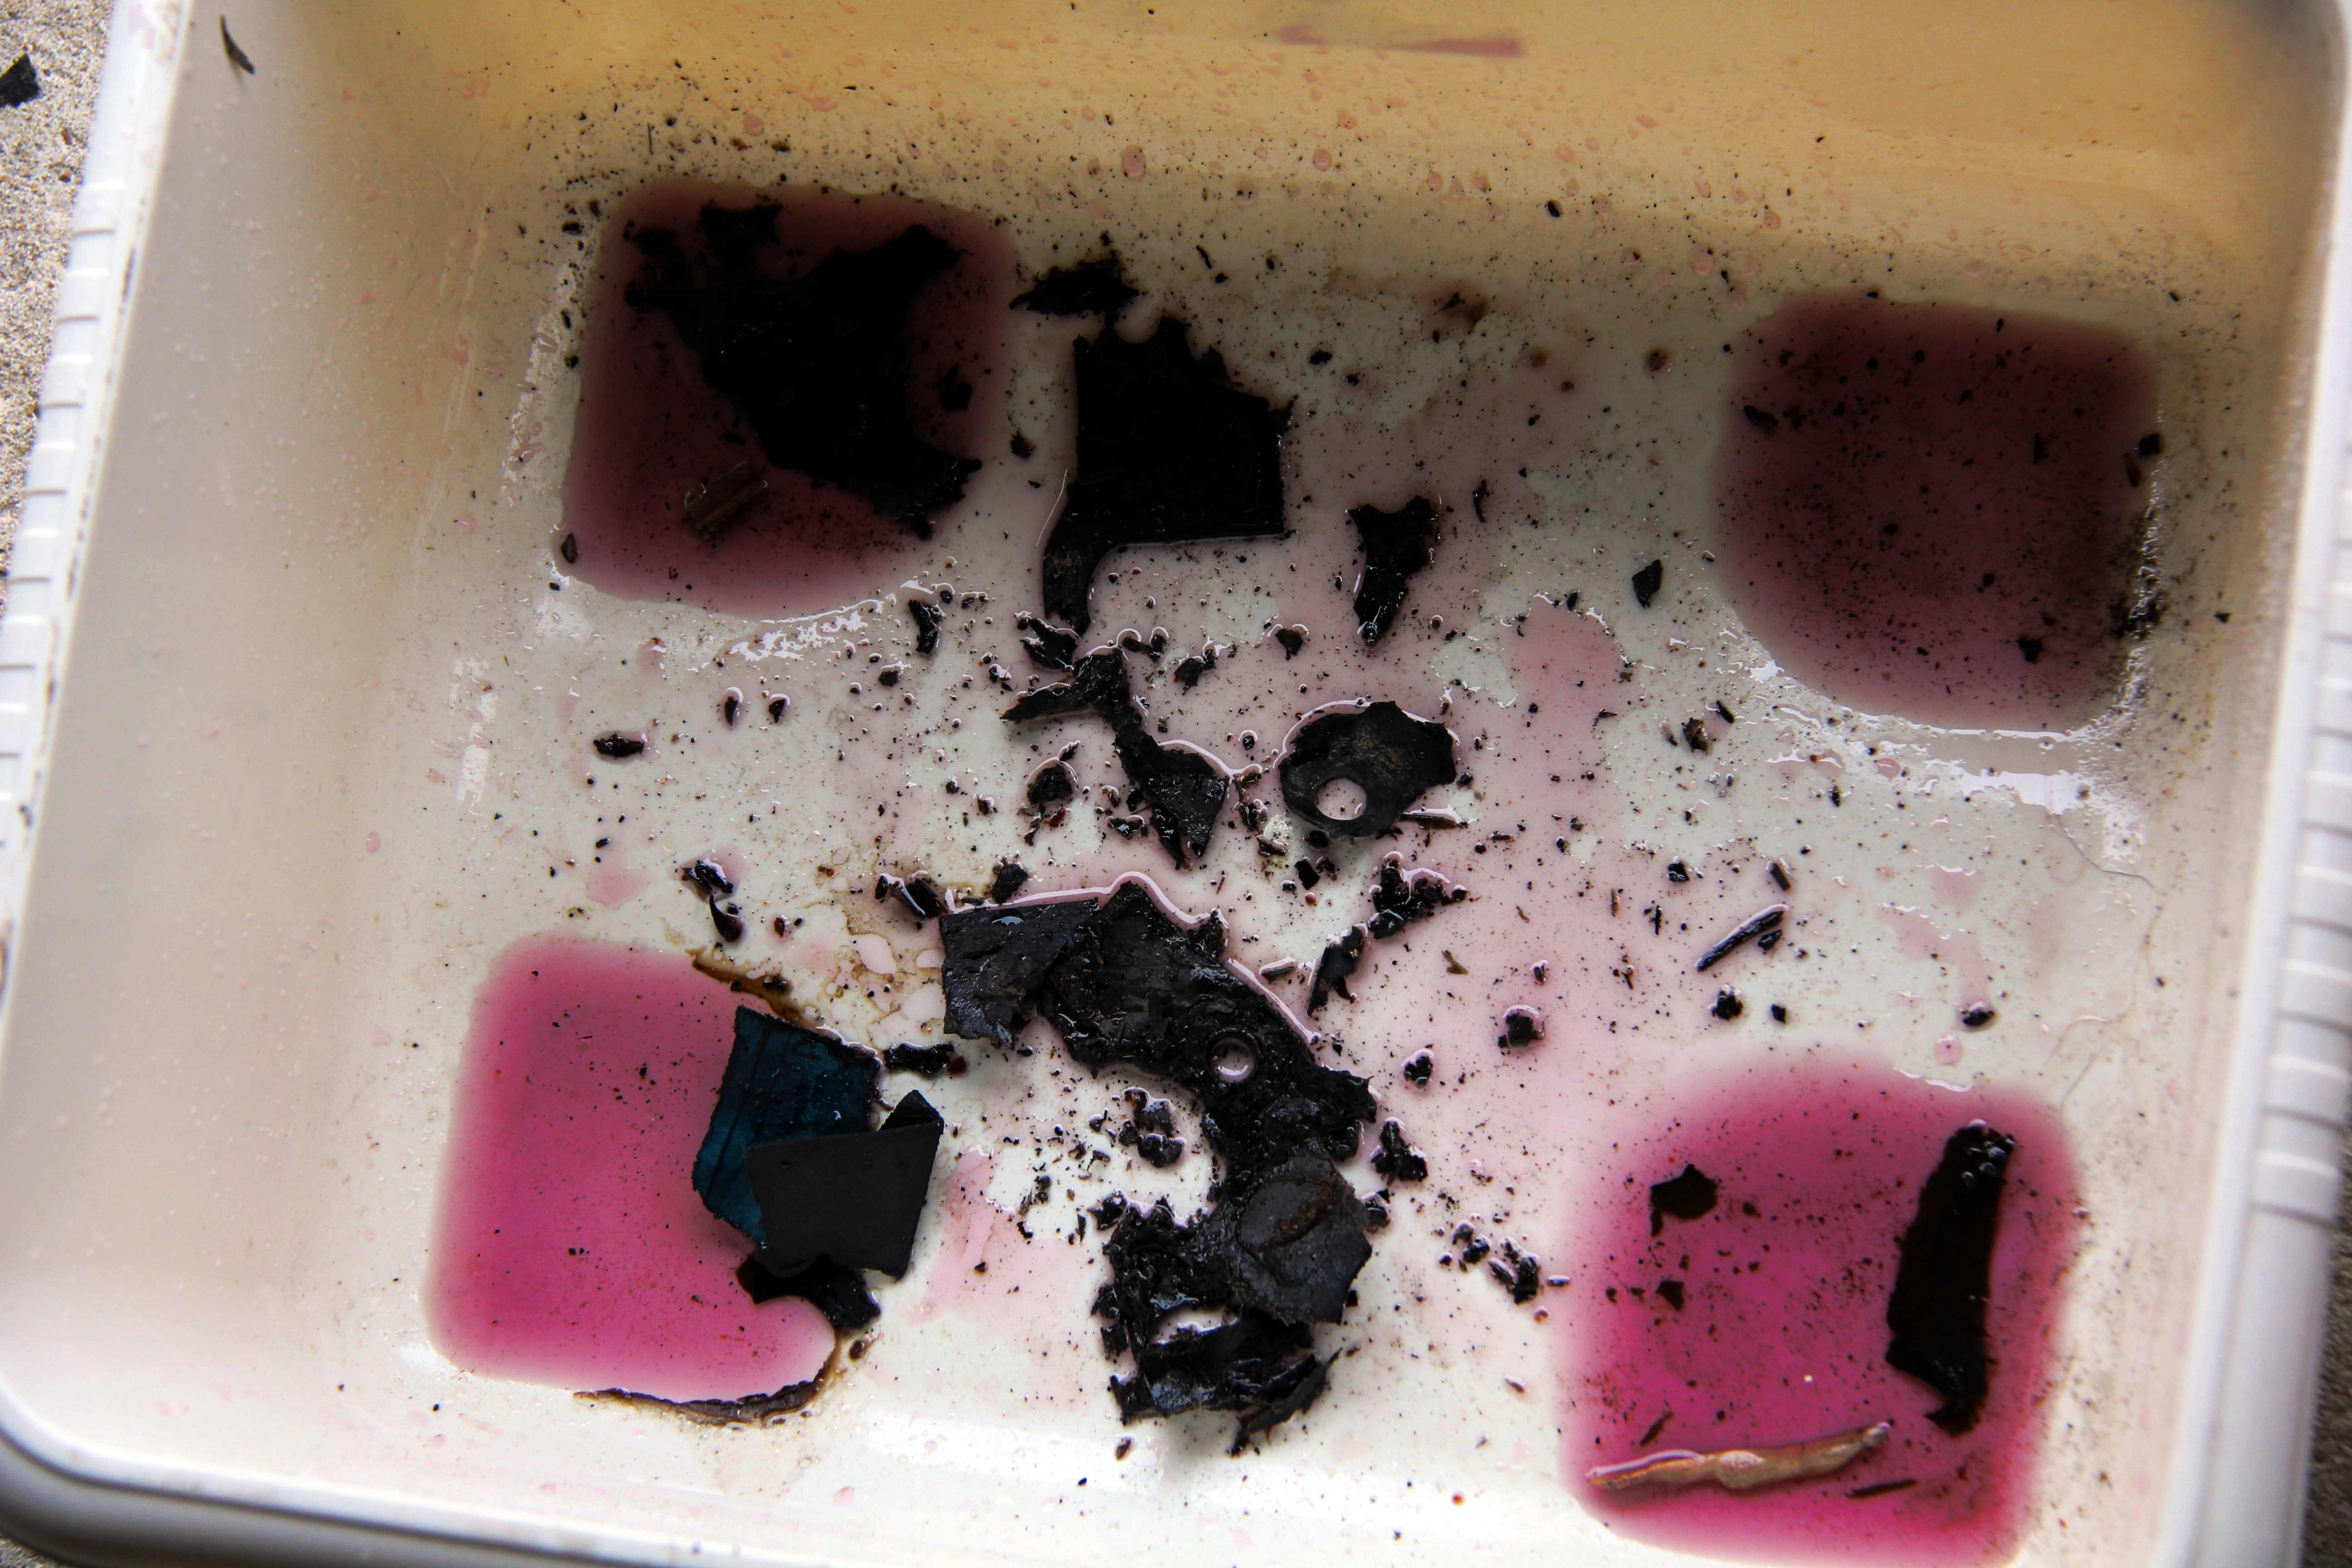
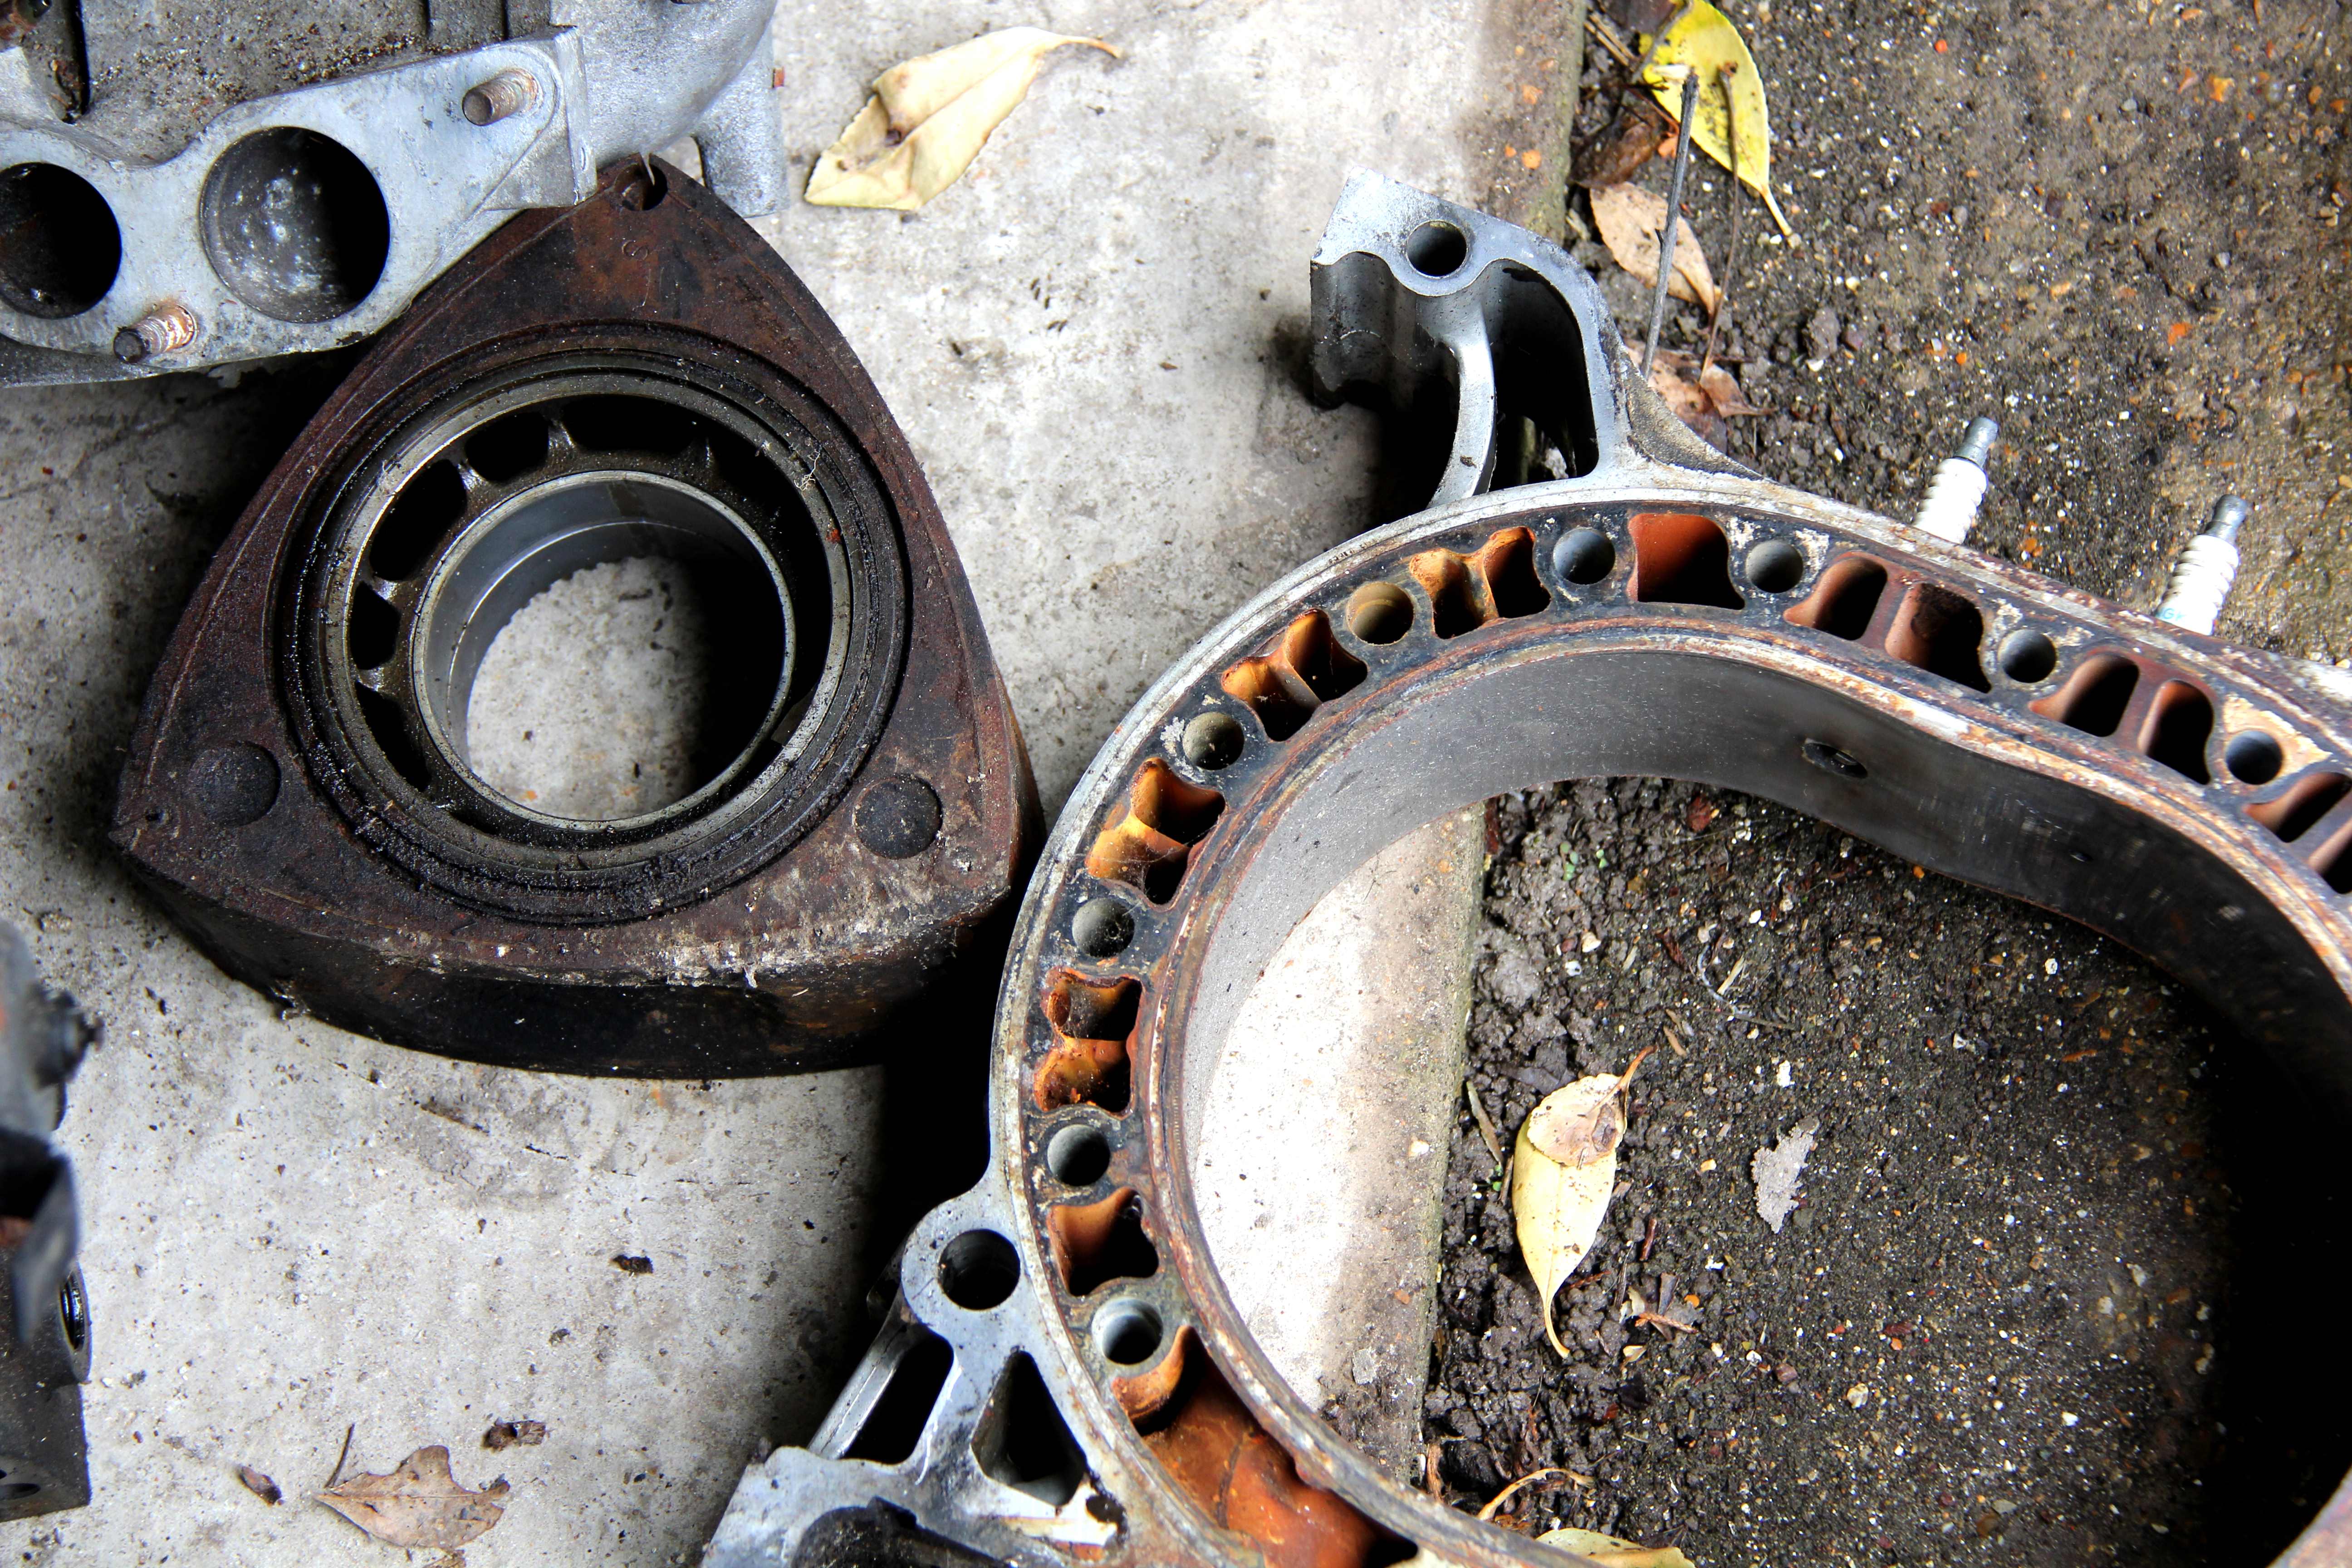
Finally got the carb and manifold off to find that suspicions were proved correct... the O-rings had not just failed, they'd totally obliterated themselves
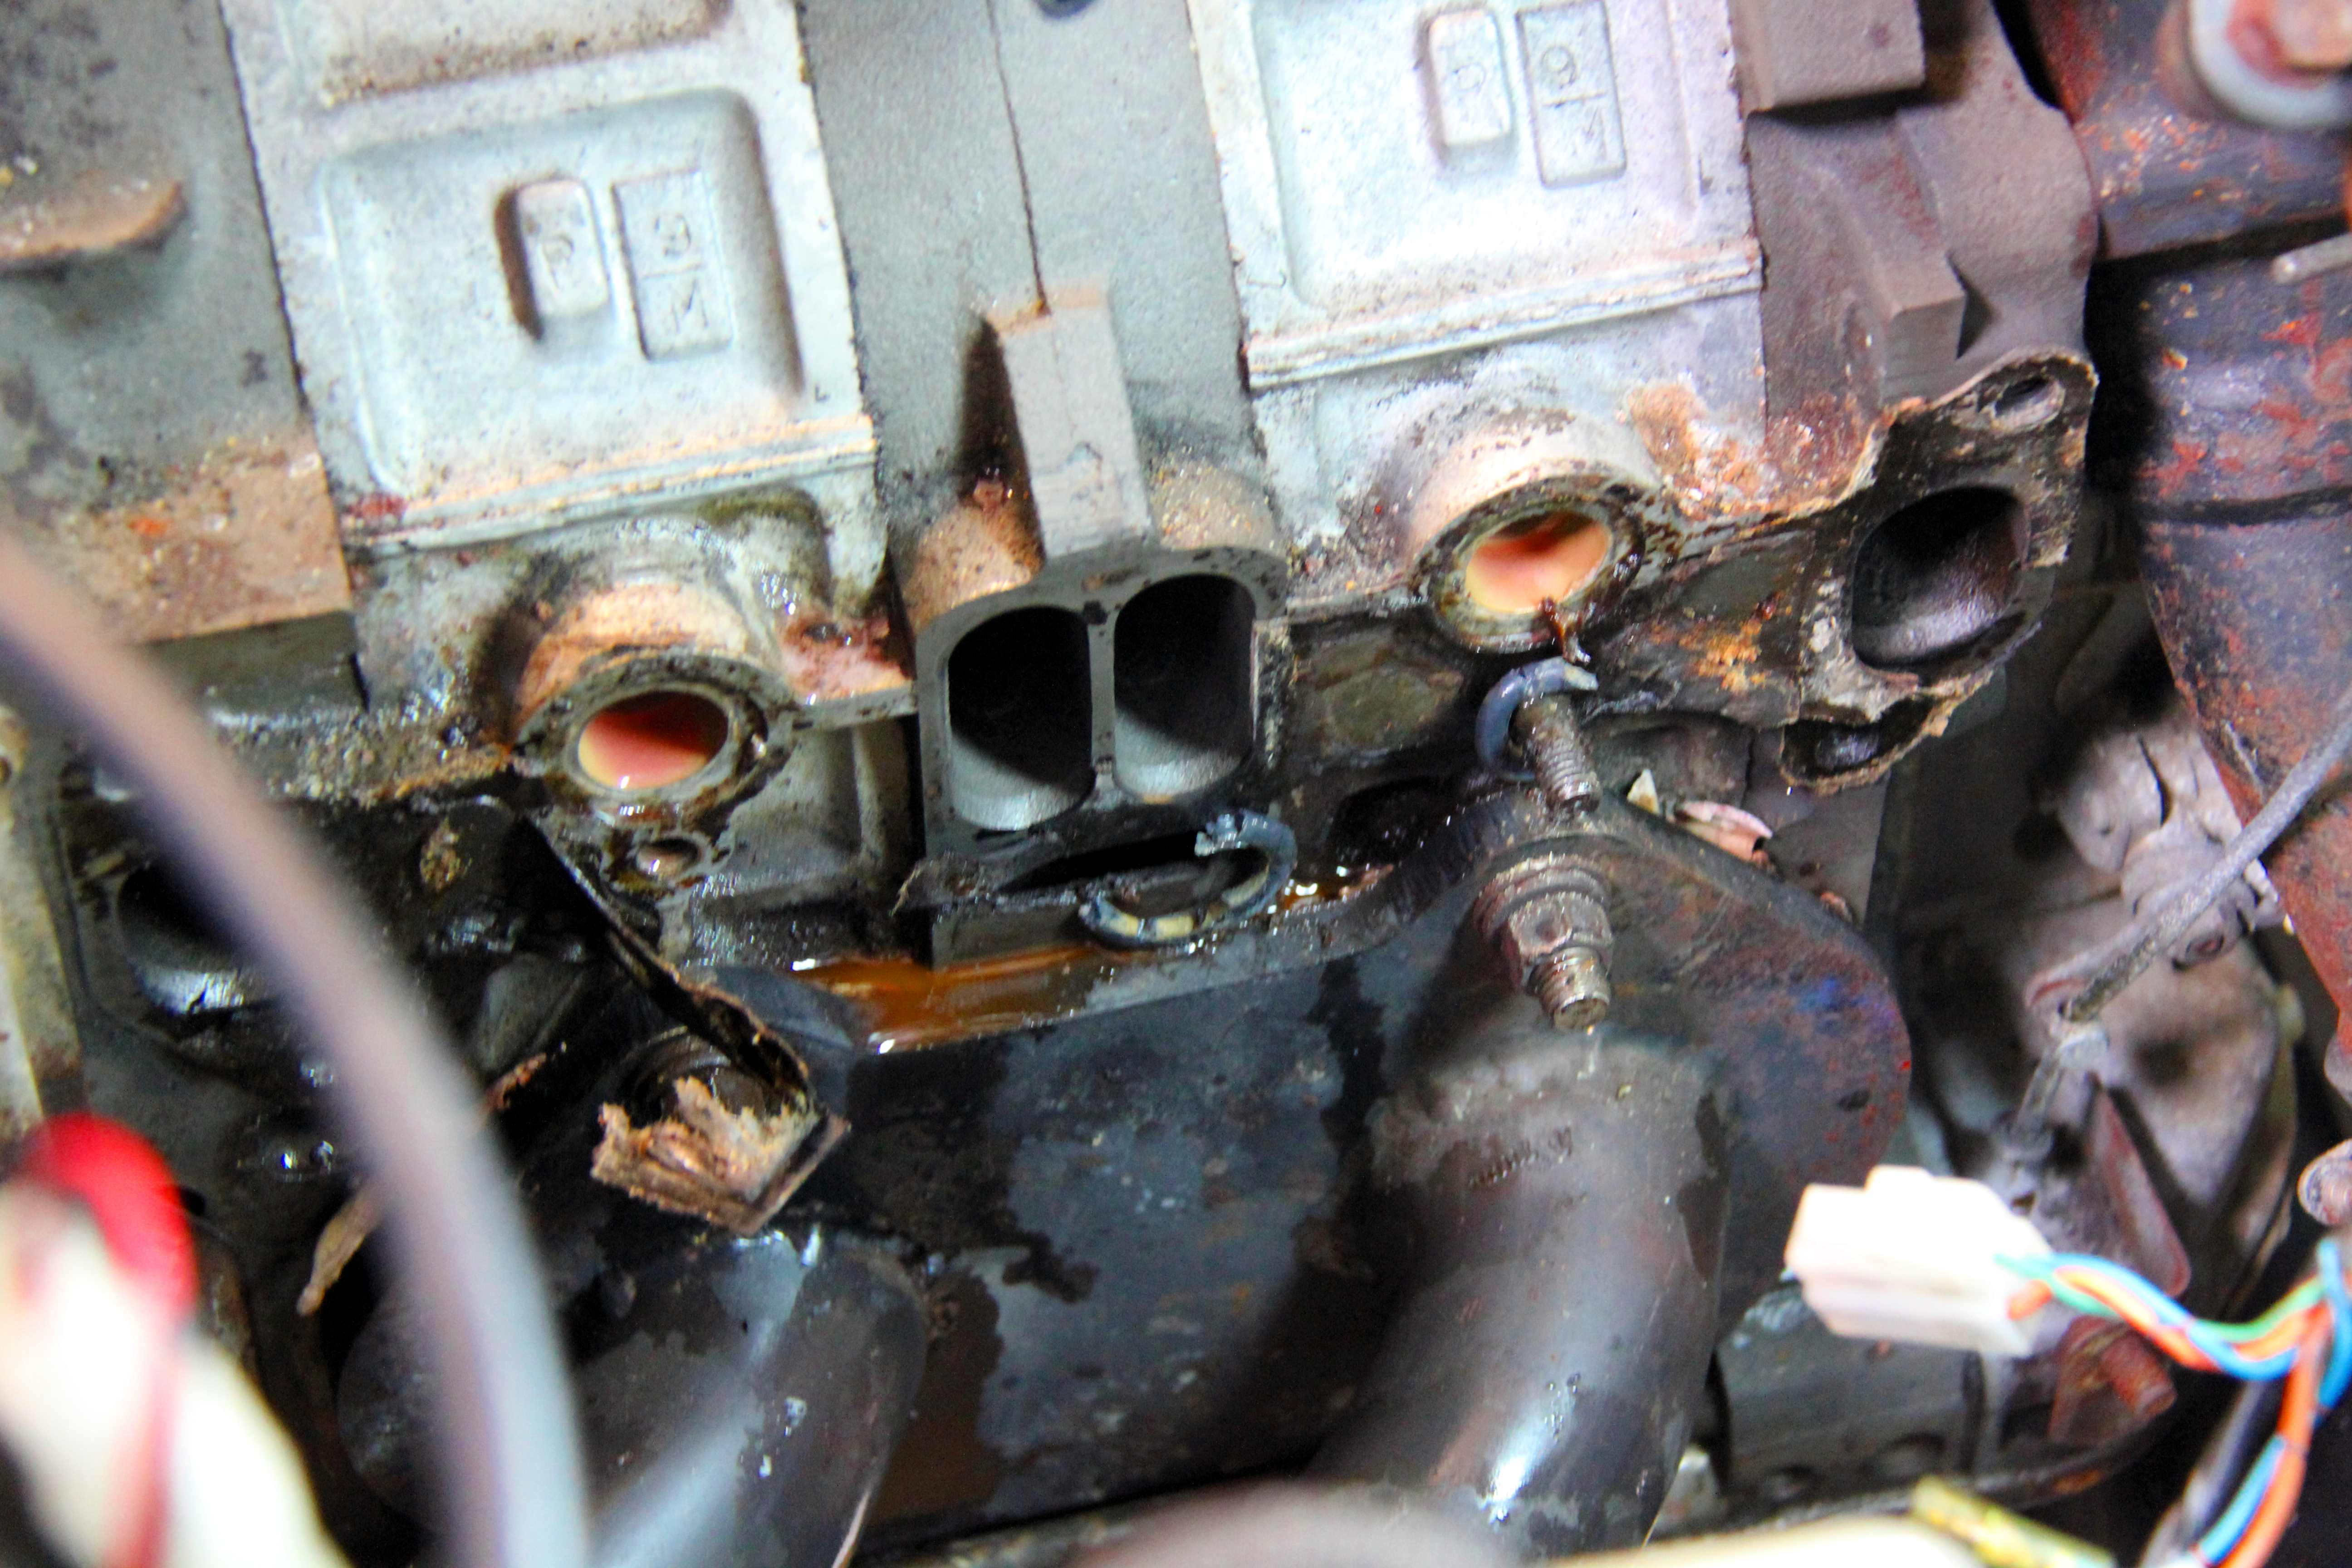
Then came the onerous task of cleaning all the surfaces The gasket was utterly FUBAR but what remained had turned itself into concrete in the time it'd been on the engine. It took ages of scraping, paring with a razor, wire-brush dremelling, sanding, and generally buggering around to clean it off
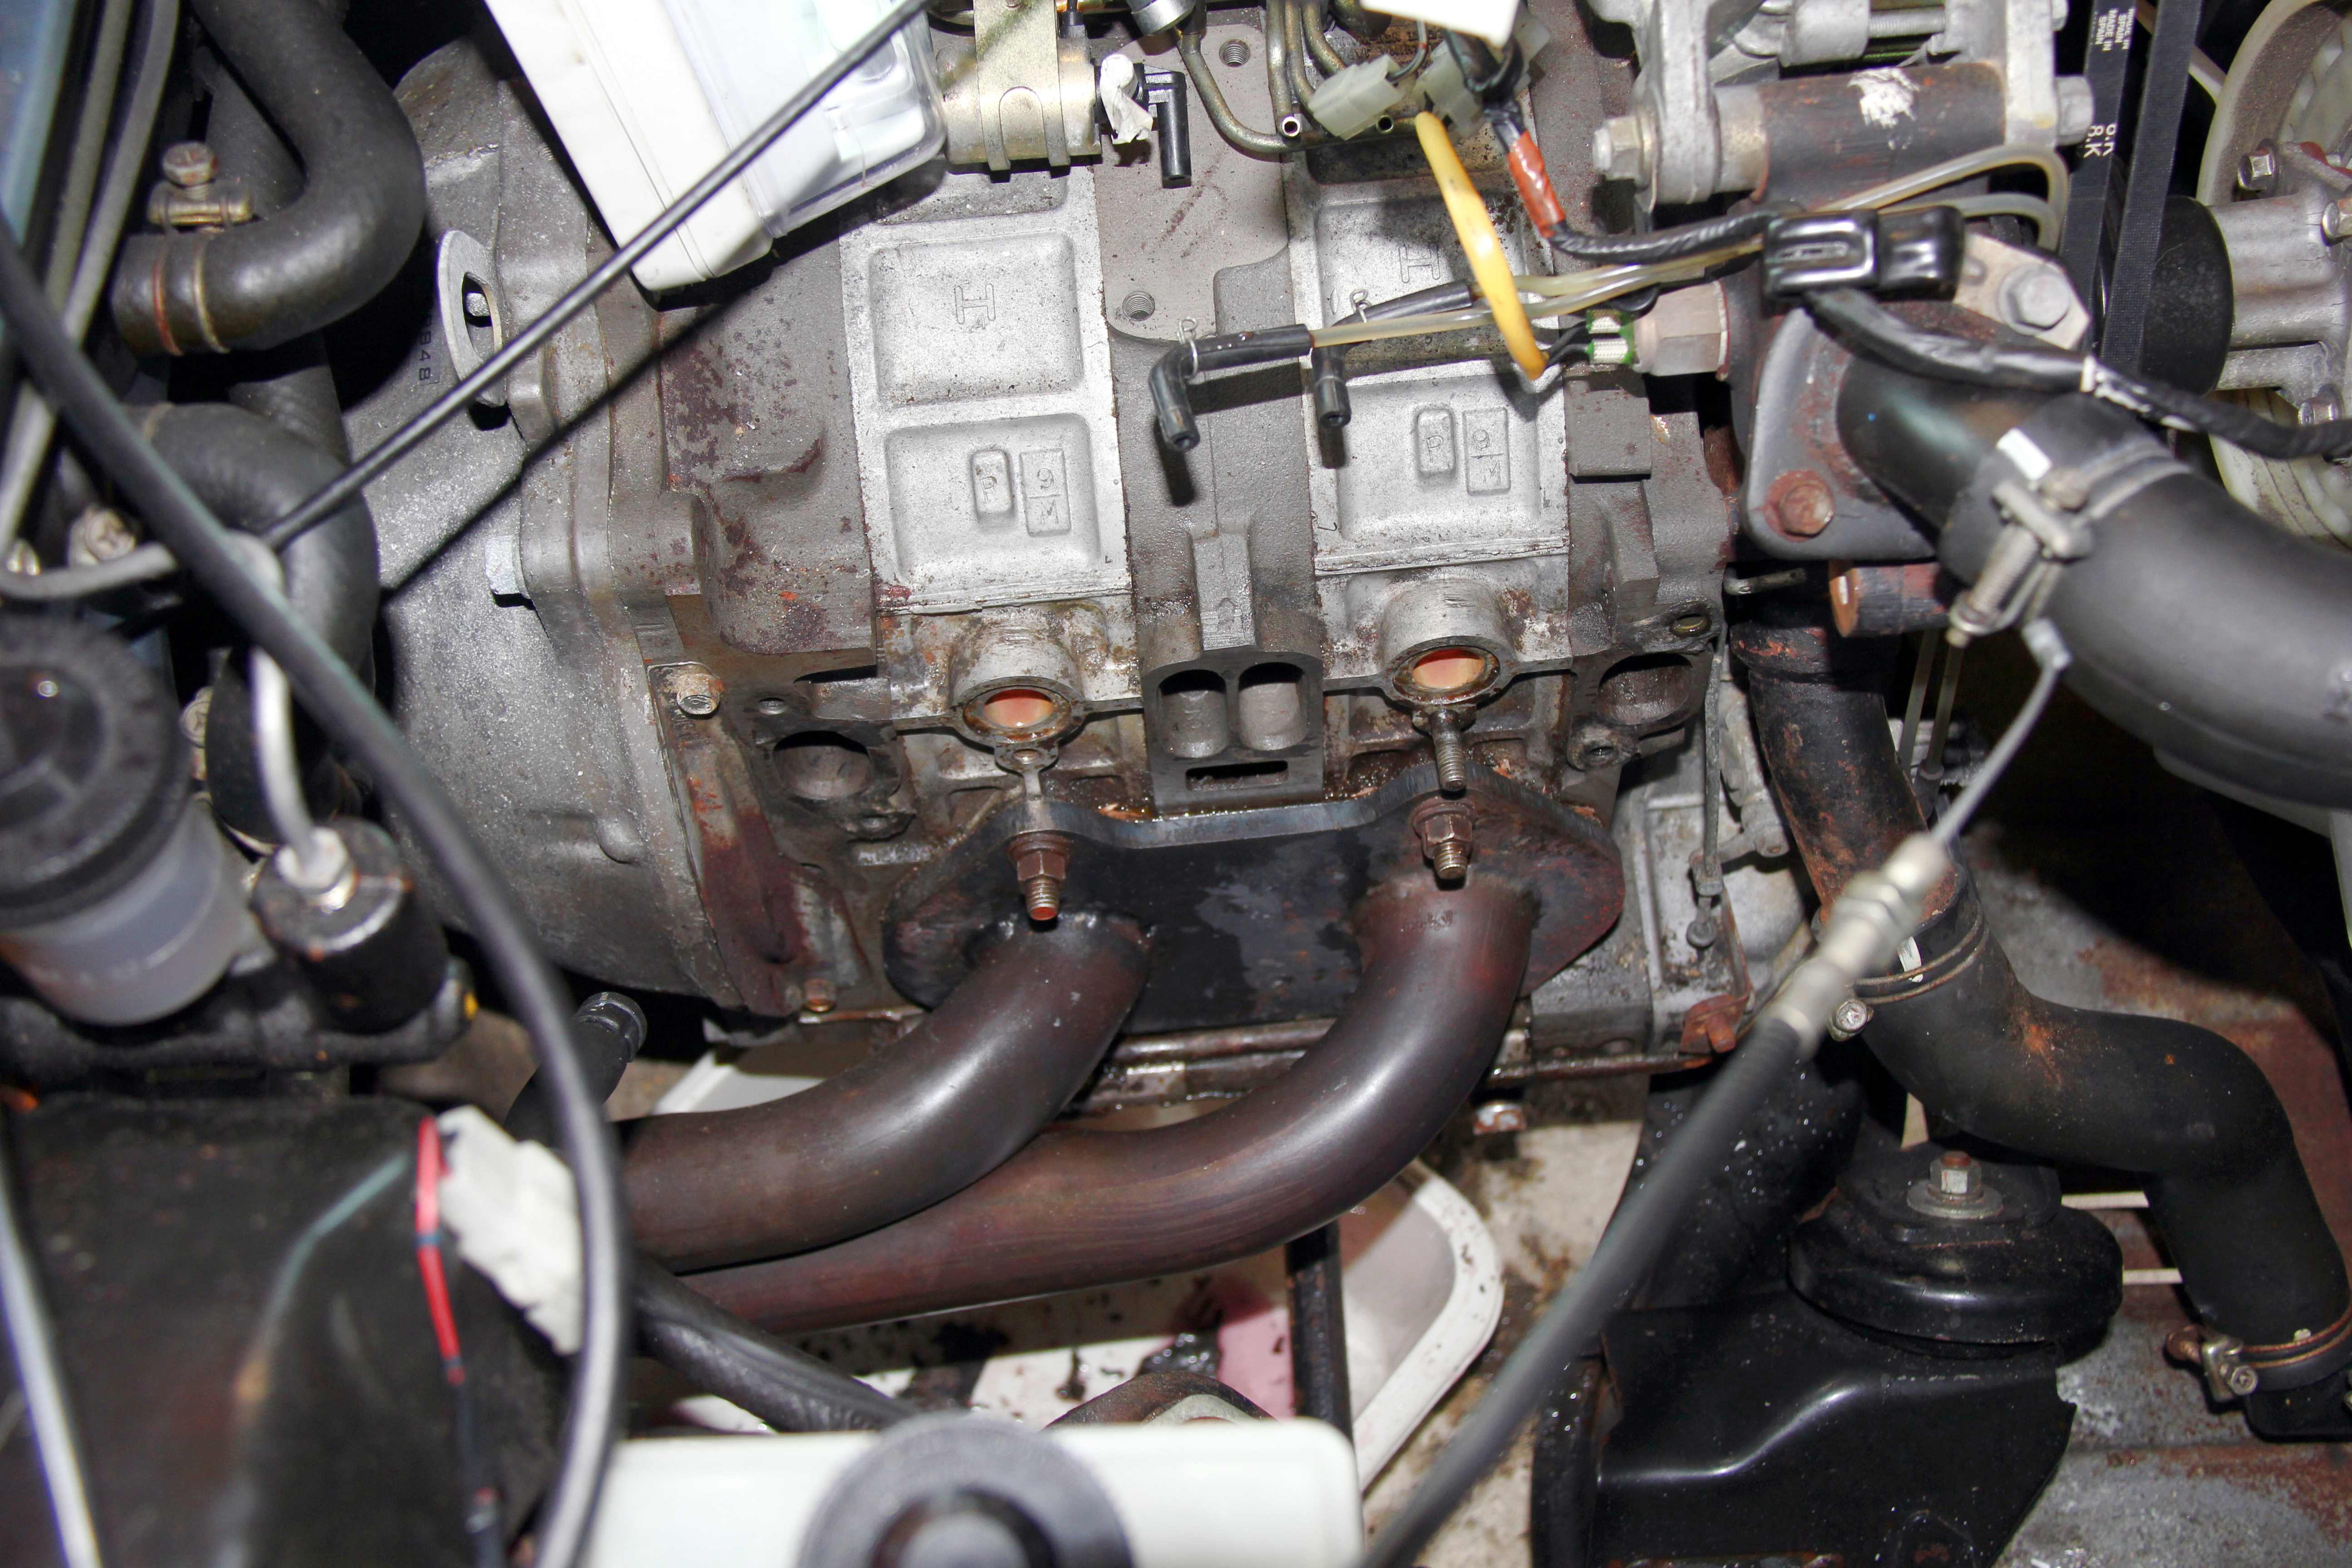
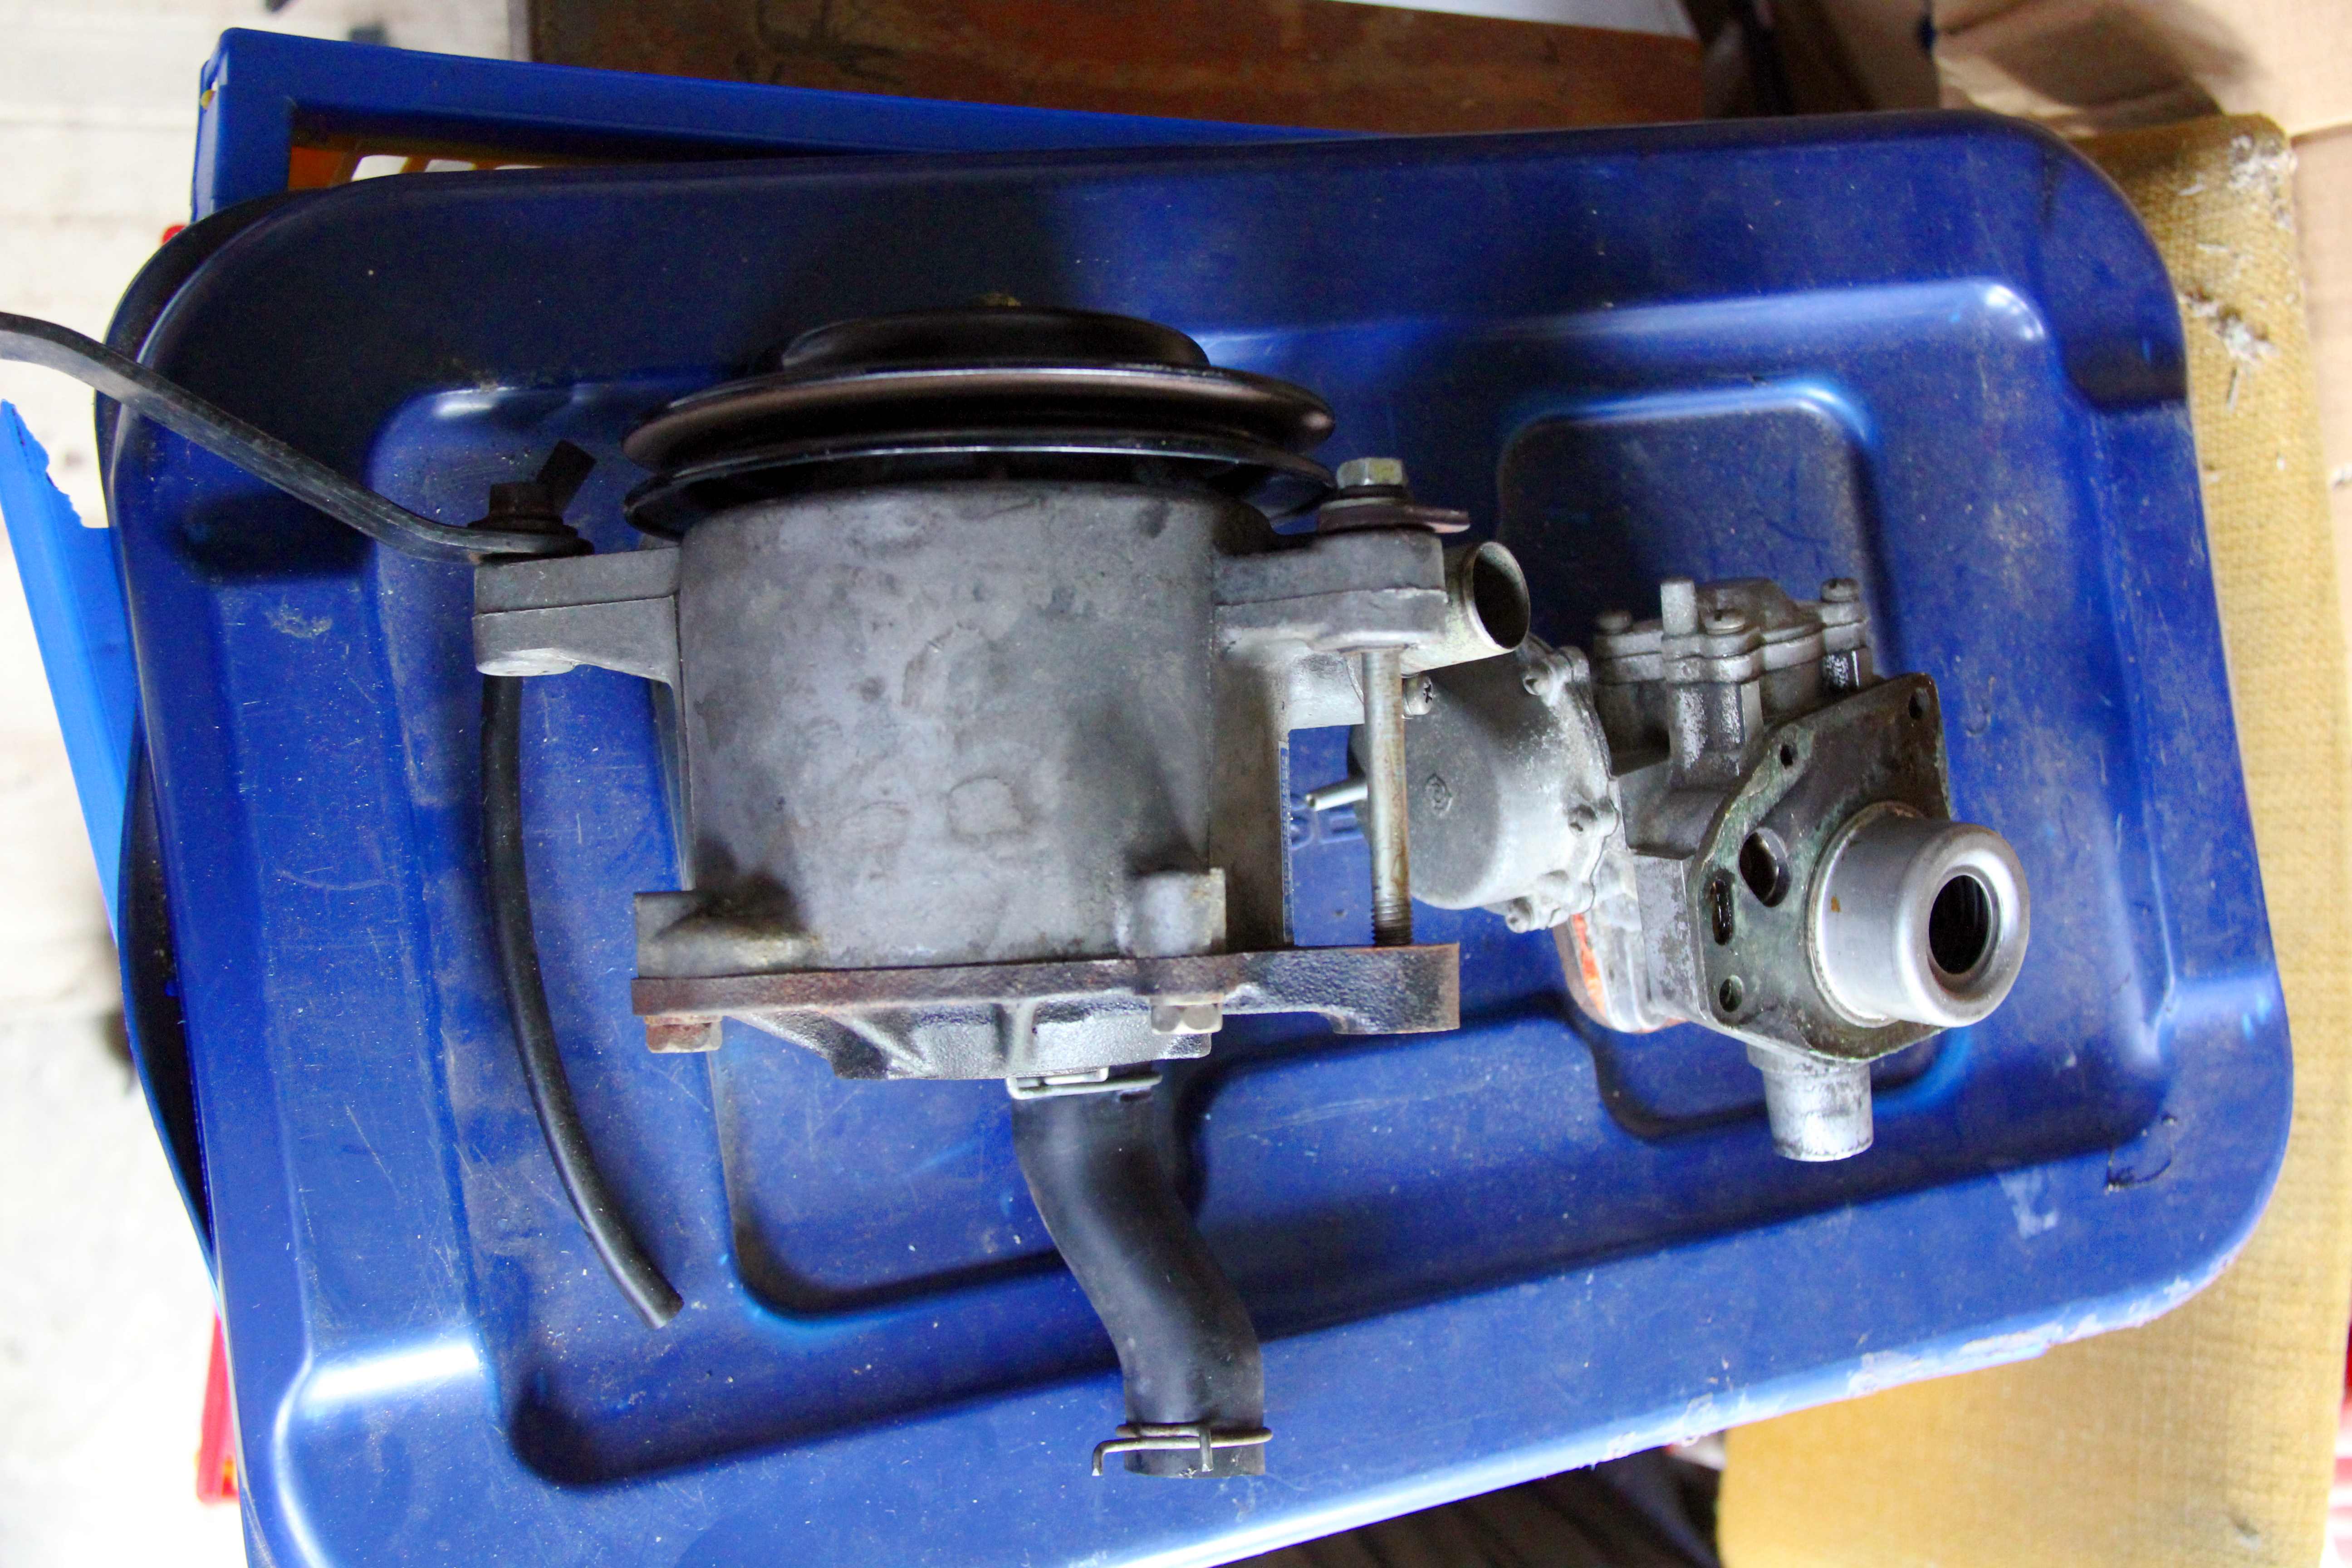
This is the engine lol. Never ceases to amaze me just how tiny and sweet they are when you clear all the gubbins off.
Since it was all apart we took the opportunity to clean everything else up as much as possible. Adam's handiwork putting aluminised heat barrier on the heat shield. It'll make precisely ten percent of f'kall difference to intake temps but hey, I had some lying around so why the hell not :?
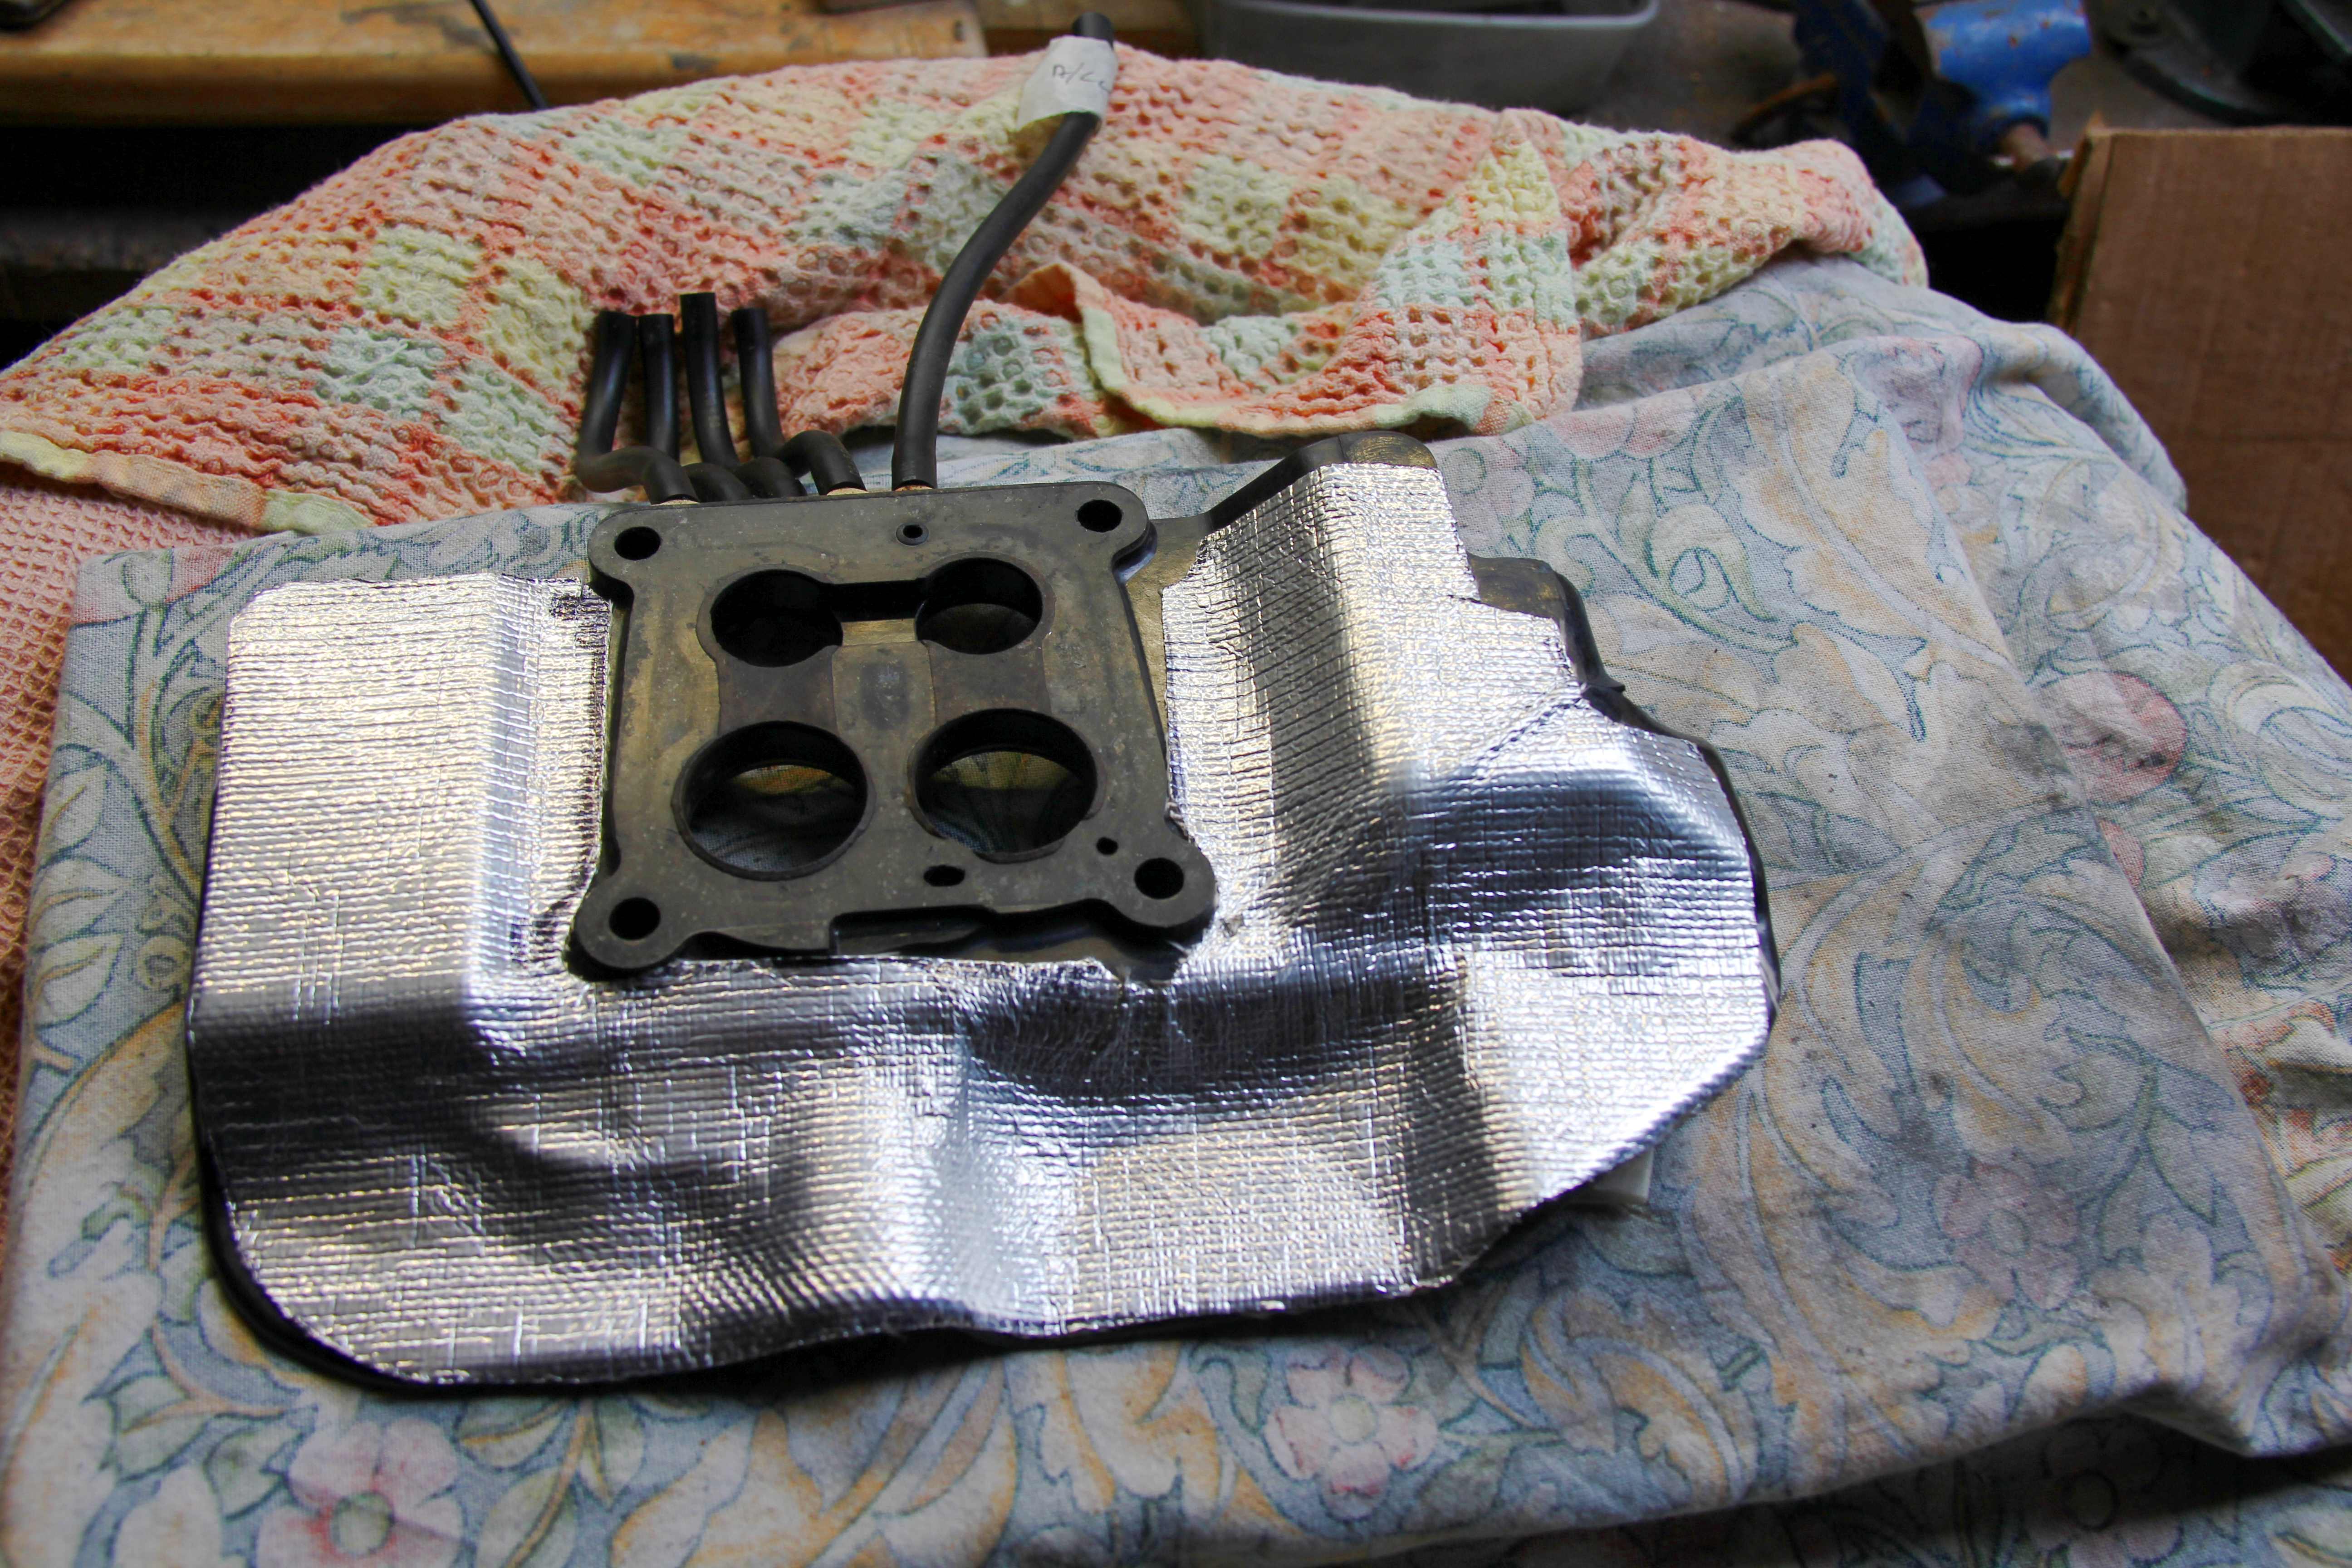
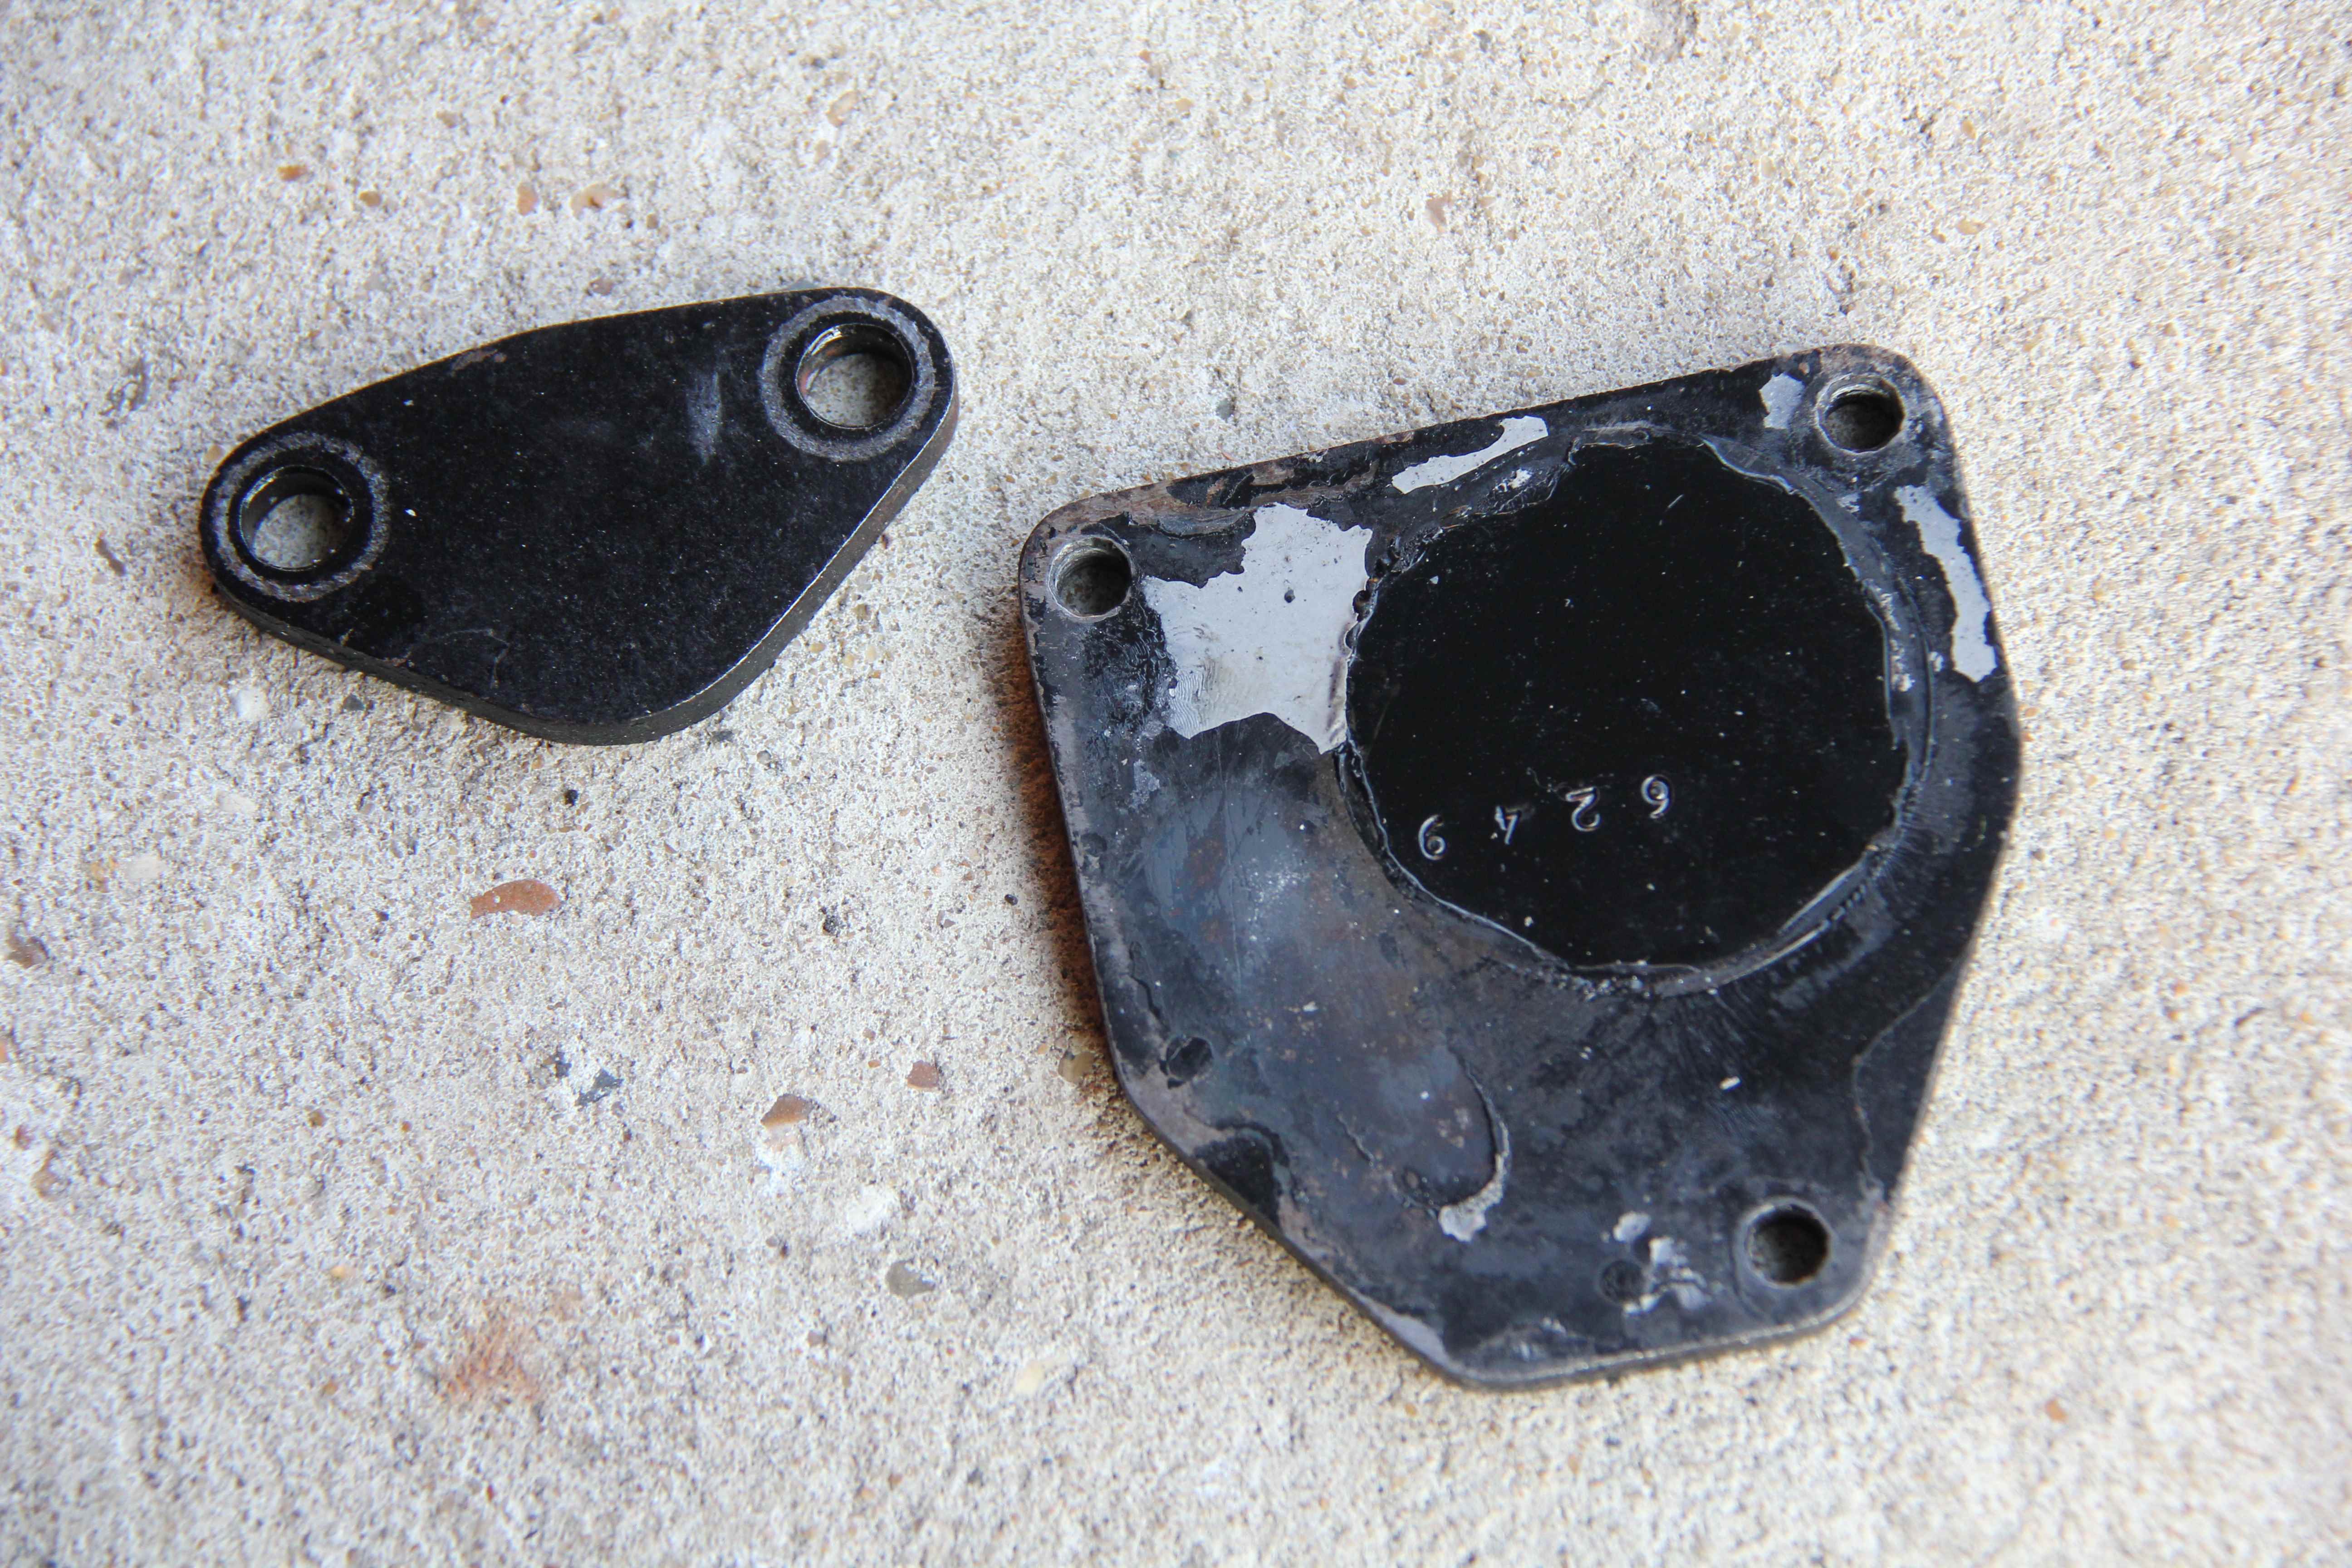
My very kindly donated blanking plate going on the face of the mani where the air bypass bollockery once sat. Galloooons of RTV sealant not pictured lol
A fool stands in the rain taking photos while his mates work and break their backs. Or something. Old Chinese proverb say...
To be honest, it was a terrible day for working on cars, Hurricane Barry was in full honk and I've never been so glad that we had the leaky old garage roof repaired last year and power put in. Nirvana. Here's the engine all going back together. Only broke the tip off the solenoid for the ACV, which presumably doesn't do anything any more anyway. Wowsers. A rotary, and we only broke one bit? :shock: Not so, actually, broke the clip that holds the bonnet stay as well. And lost the clip for the top line on the aircleaner housing. That's the three then
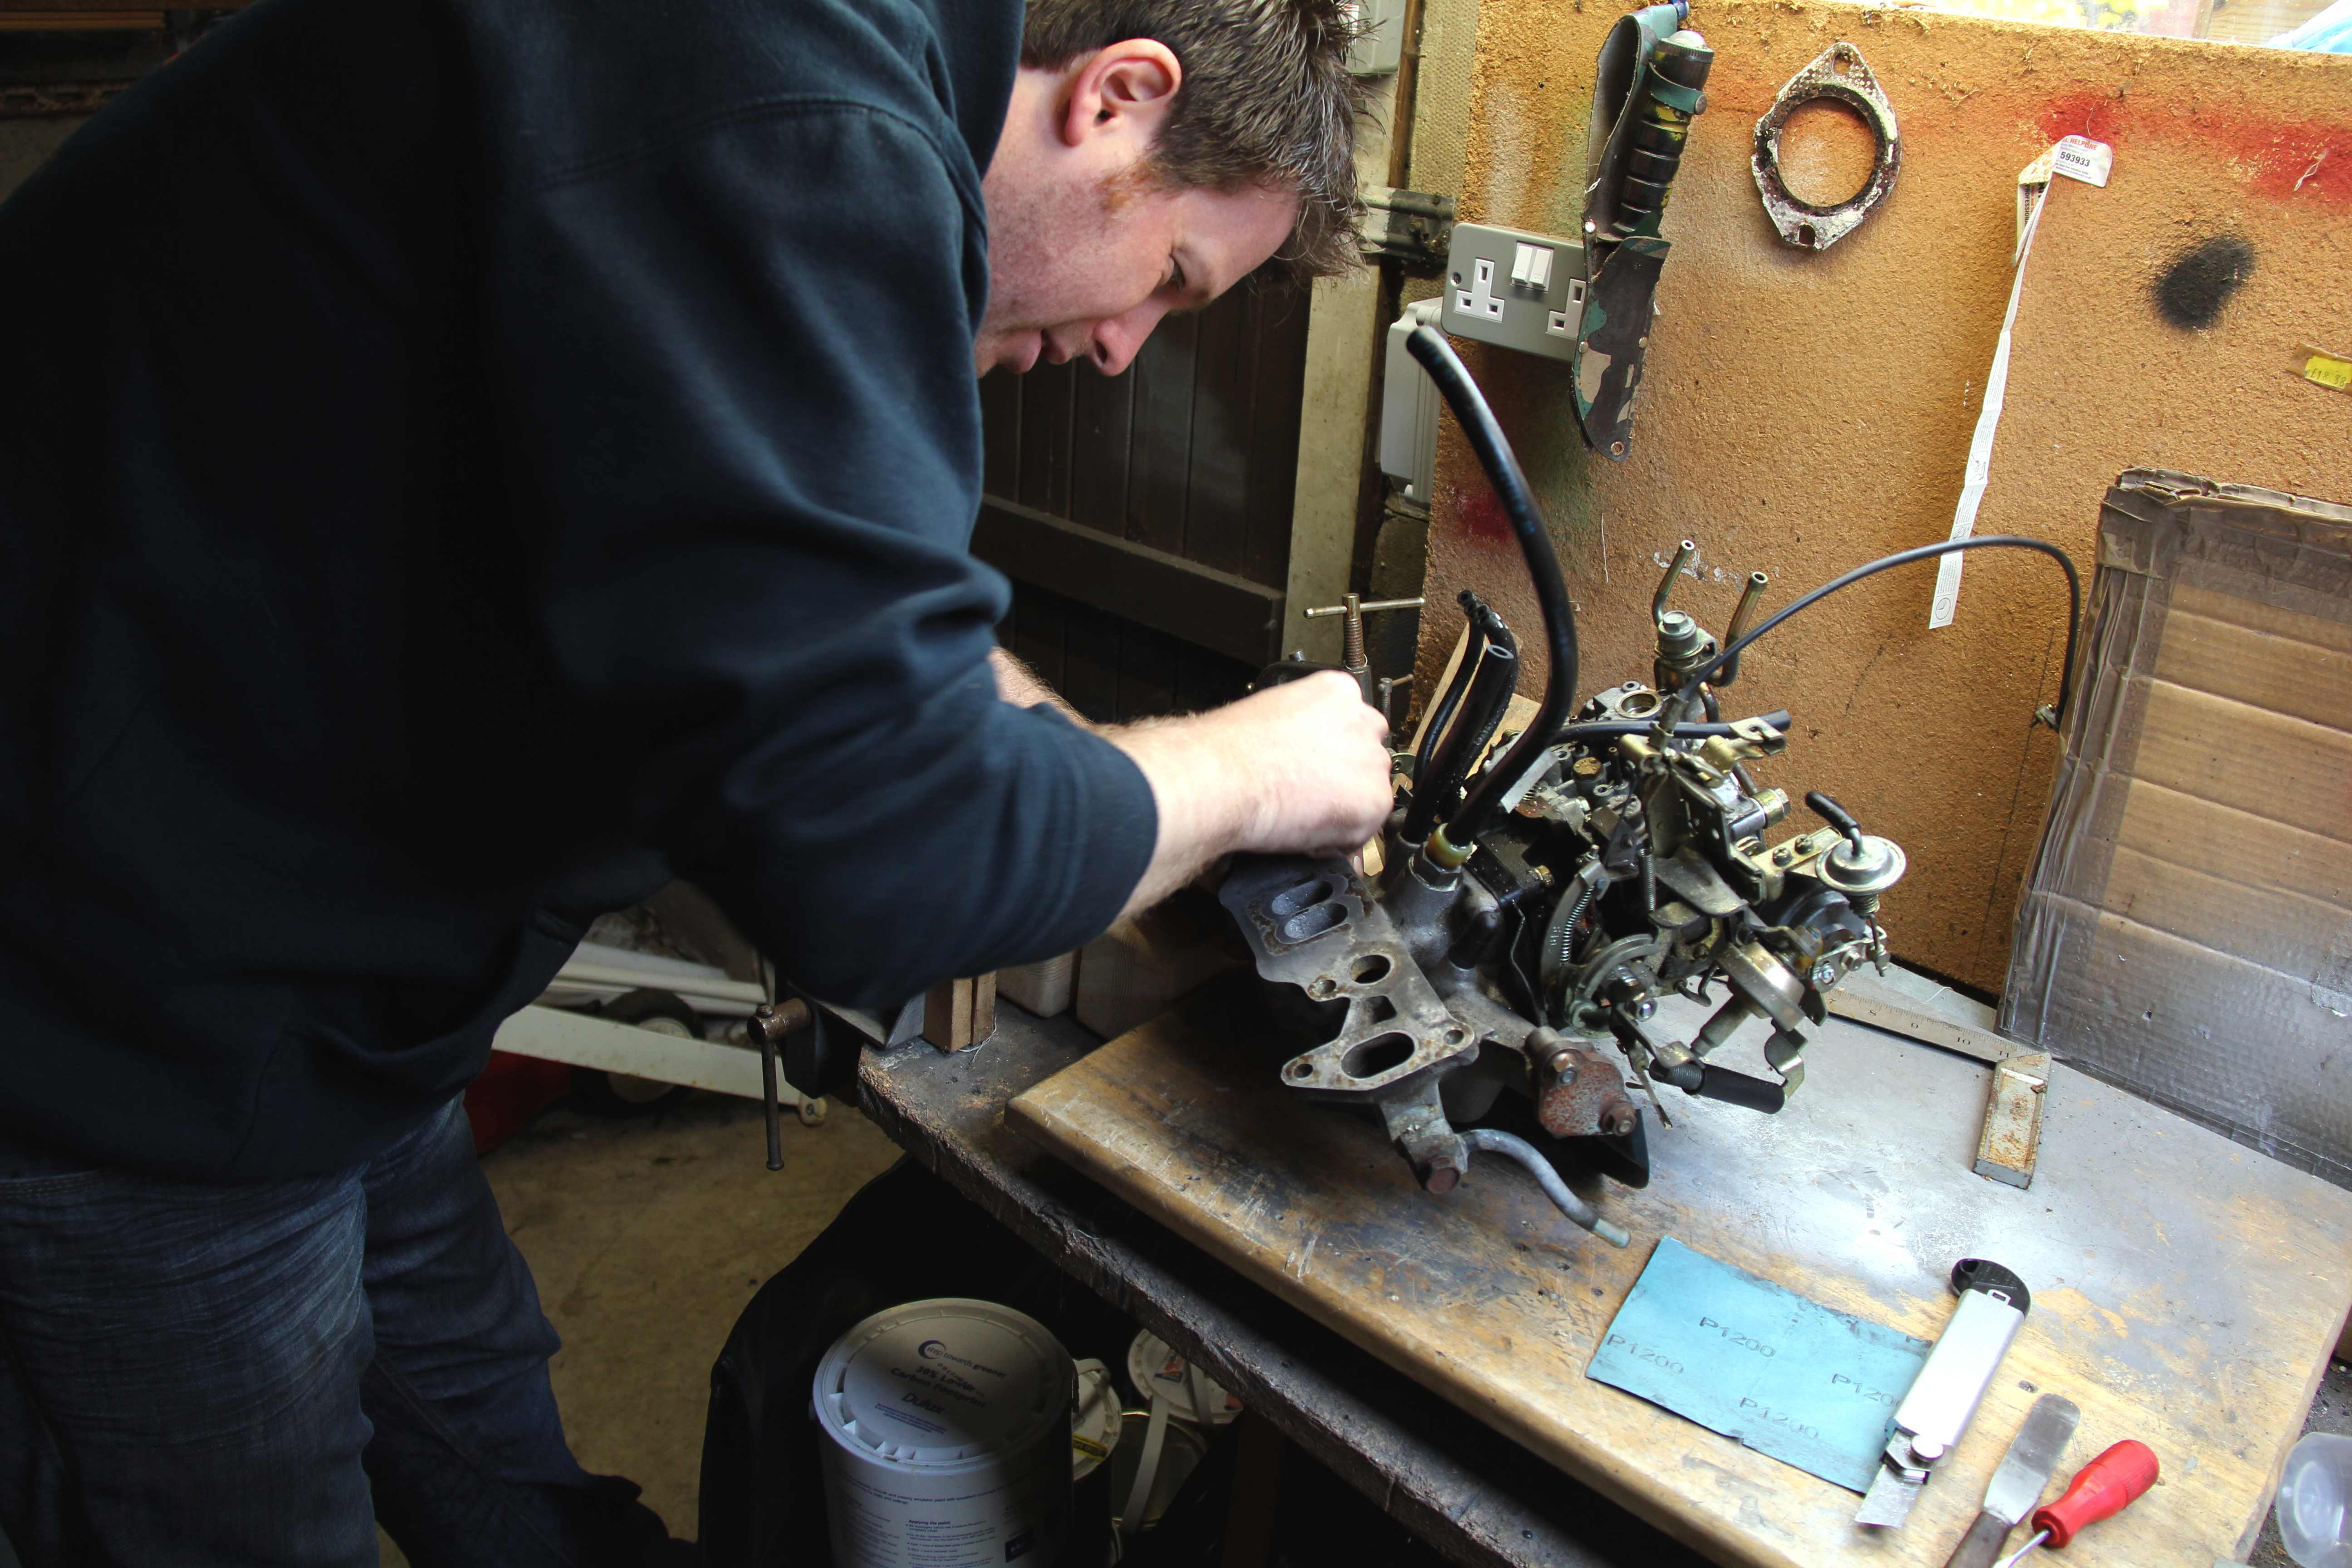
For some reason none of us could figure out how the hell to get the throttle cable back on with it all in situ, so the carb had to be loosened again to get it on. Surely you don't have to take the carb off every time the throttle cable needs removing? Maybe we is just thick lol
Just previously he couldn't really argue. That's us putting the lump back into his long-term '69 Mercury Cougar resto, BTW. Awesome car, full body-off restoration
Right, that's enough giant piston-engined stuff. You all know what it looks like under the Blue Box of God, but I didn't so we went cautious-ish and tried to label everything and make sure we knew how it came apart so we'd know how to put it back together
The good part is that it gave me the opportunity to finish the half-arsed airpump delete the previous owner had done. Here we are trying to persuade the pump off the 27-year old clag and gunge it had turned to something incredibly sticky. Took quite some abuse to finally remove
Finally got the carb and manifold off to find that suspicions were proved correct... the O-rings had not just failed, they'd totally obliterated themselves
Then came the onerous task of cleaning all the surfaces The gasket was utterly FUBAR but what remained had turned itself into concrete in the time it'd been on the engine. It took ages of scraping, paring with a razor, wire-brush dremelling, sanding, and generally buggering around to clean it off
This is the engine lol. Never ceases to amaze me just how tiny and sweet they are when you clear all the gubbins off.
Since it was all apart we took the opportunity to clean everything else up as much as possible. Adam's handiwork putting aluminised heat barrier on the heat shield. It'll make precisely ten percent of f'kall difference to intake temps but hey, I had some lying around so why the hell not :?
My very kindly donated blanking plate going on the face of the mani where the air bypass bollockery once sat. Galloooons of RTV sealant not pictured lol
A fool stands in the rain taking photos while his mates work and break their backs. Or something. Old Chinese proverb say...
To be honest, it was a terrible day for working on cars, Hurricane Barry was in full honk and I've never been so glad that we had the leaky old garage roof repaired last year and power put in. Nirvana. Here's the engine all going back together. Only broke the tip off the solenoid for the ACV, which presumably doesn't do anything any more anyway. Wowsers. A rotary, and we only broke one bit? :shock: Not so, actually, broke the clip that holds the bonnet stay as well. And lost the clip for the top line on the aircleaner housing. That's the three then
For some reason none of us could figure out how the hell to get the throttle cable back on with it all in situ, so the carb had to be loosened again to get it on. Surely you don't have to take the carb off every time the throttle cable needs removing? Maybe we is just thick lol
Thread Starter
Senior Member
Joined: Oct 2010
Posts: 255
Likes: 1
From: England
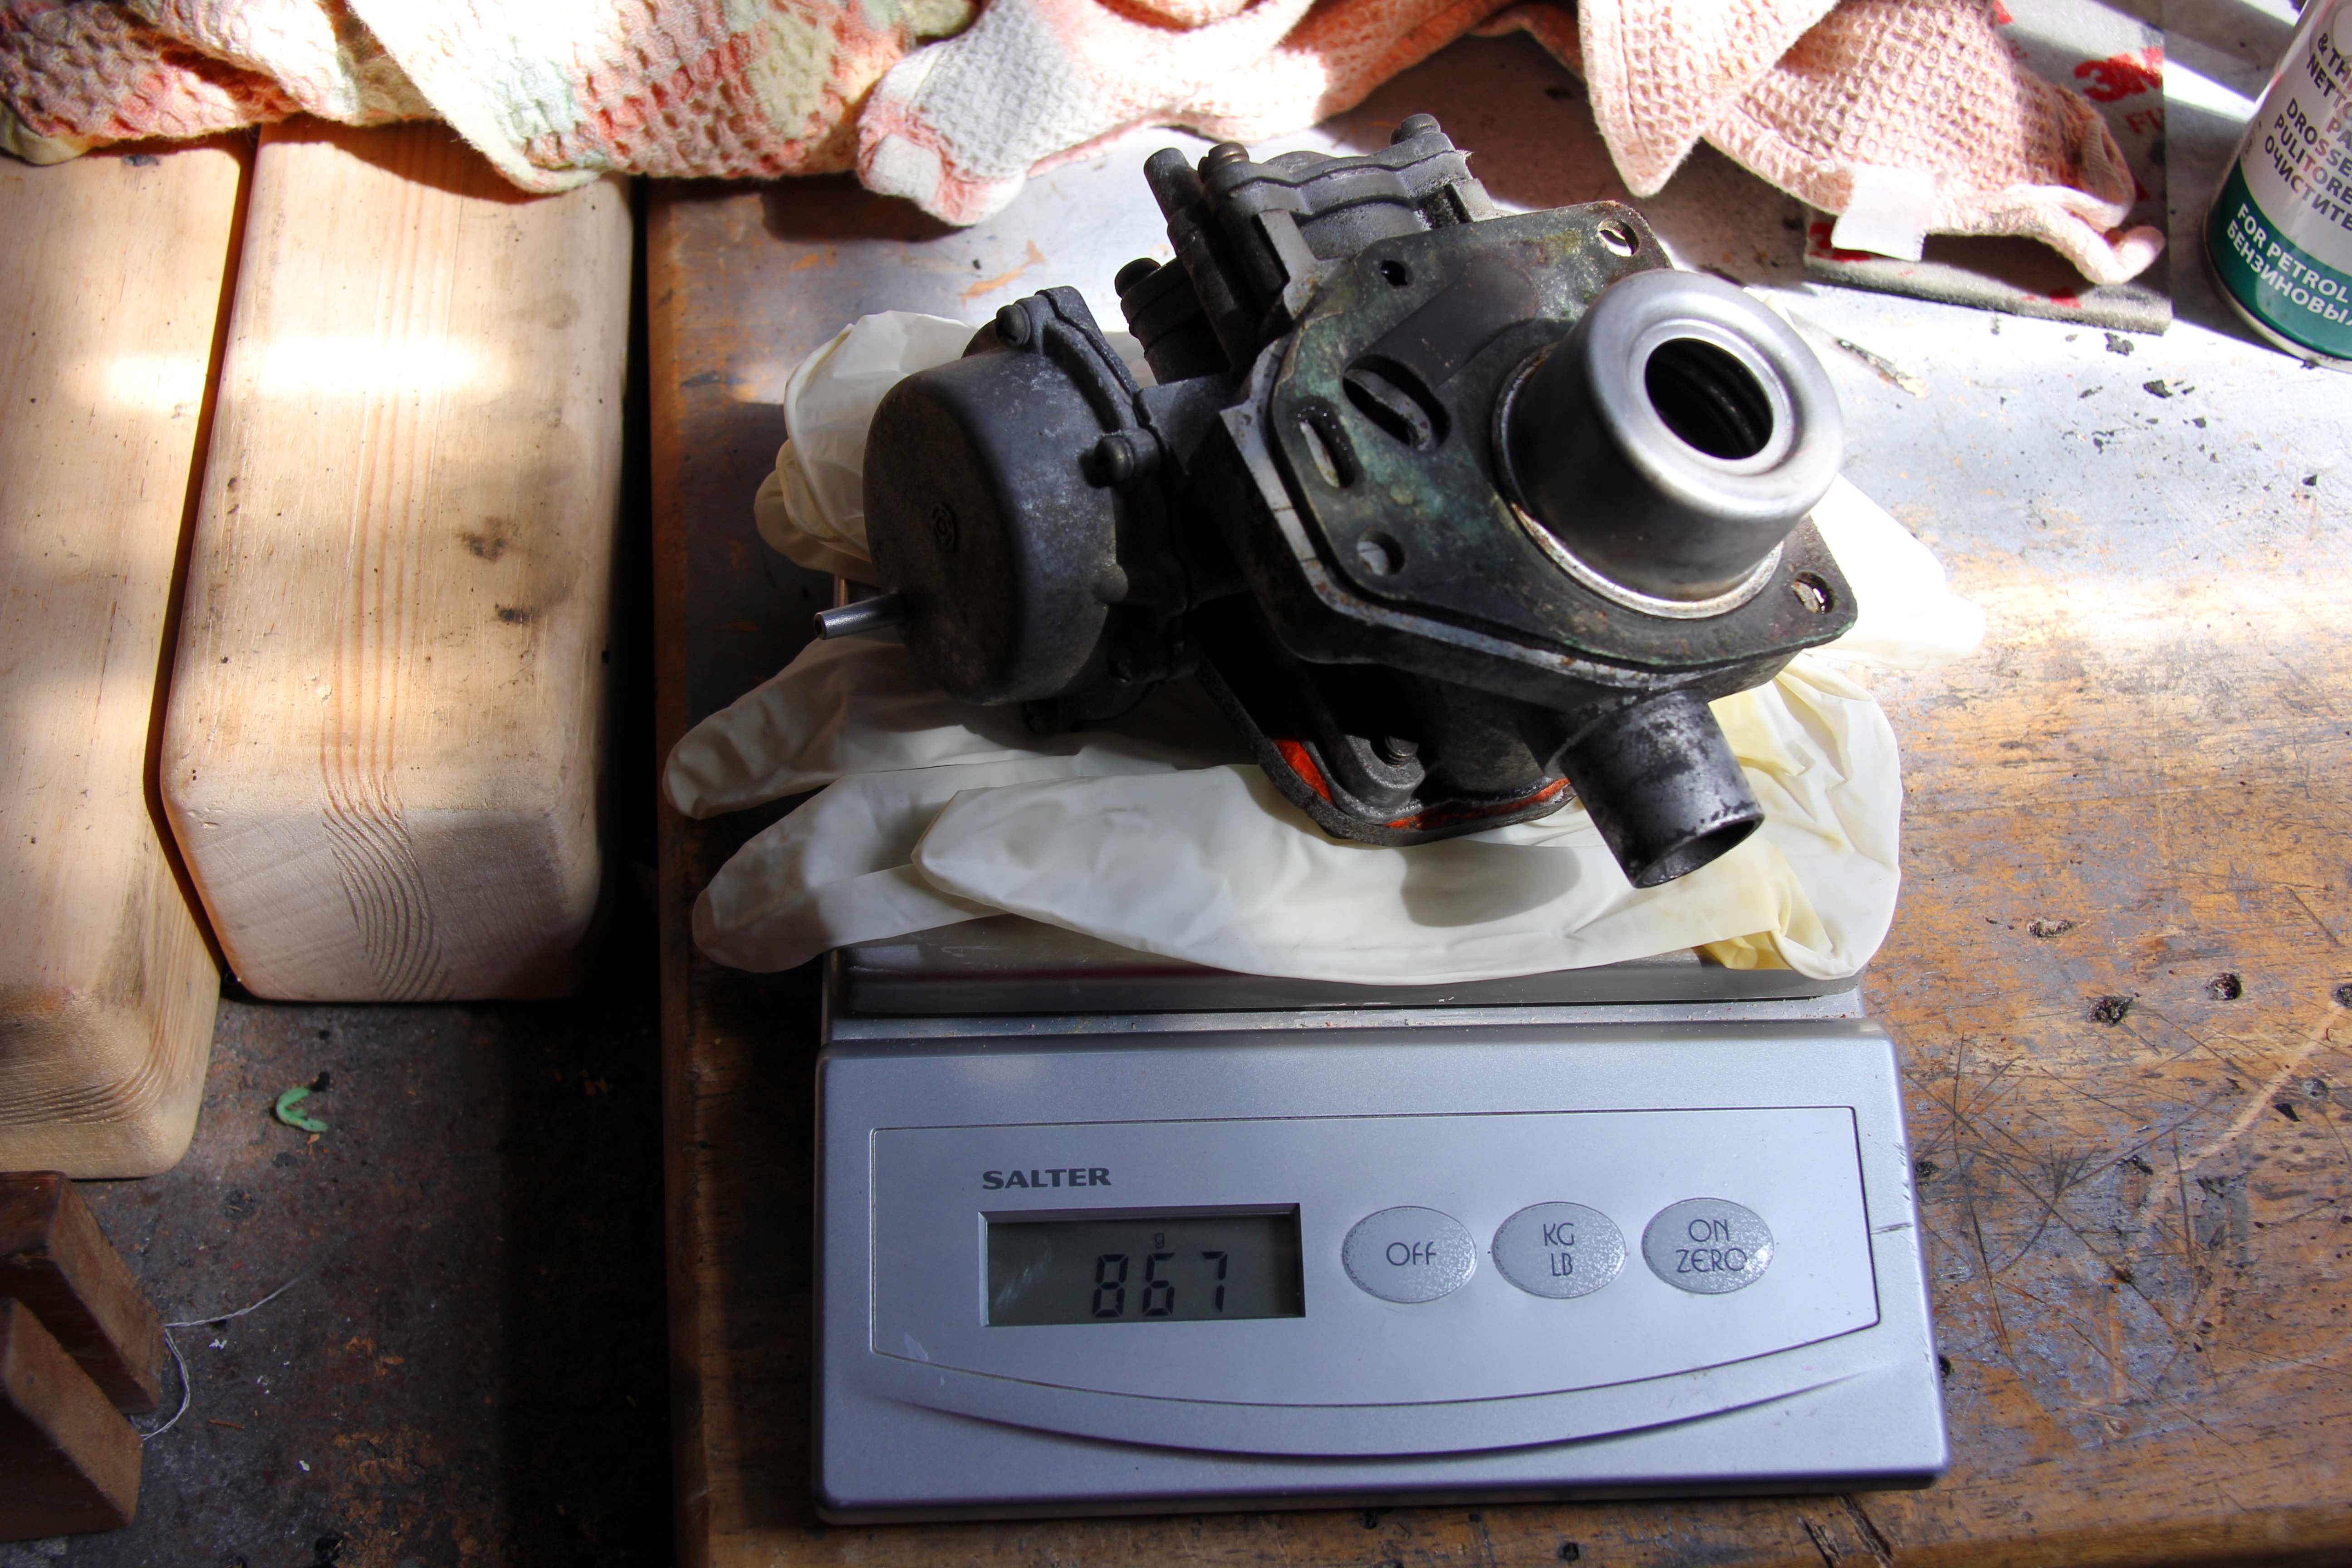
And this is the aftermath... gasket. No, really. This was a gasket once
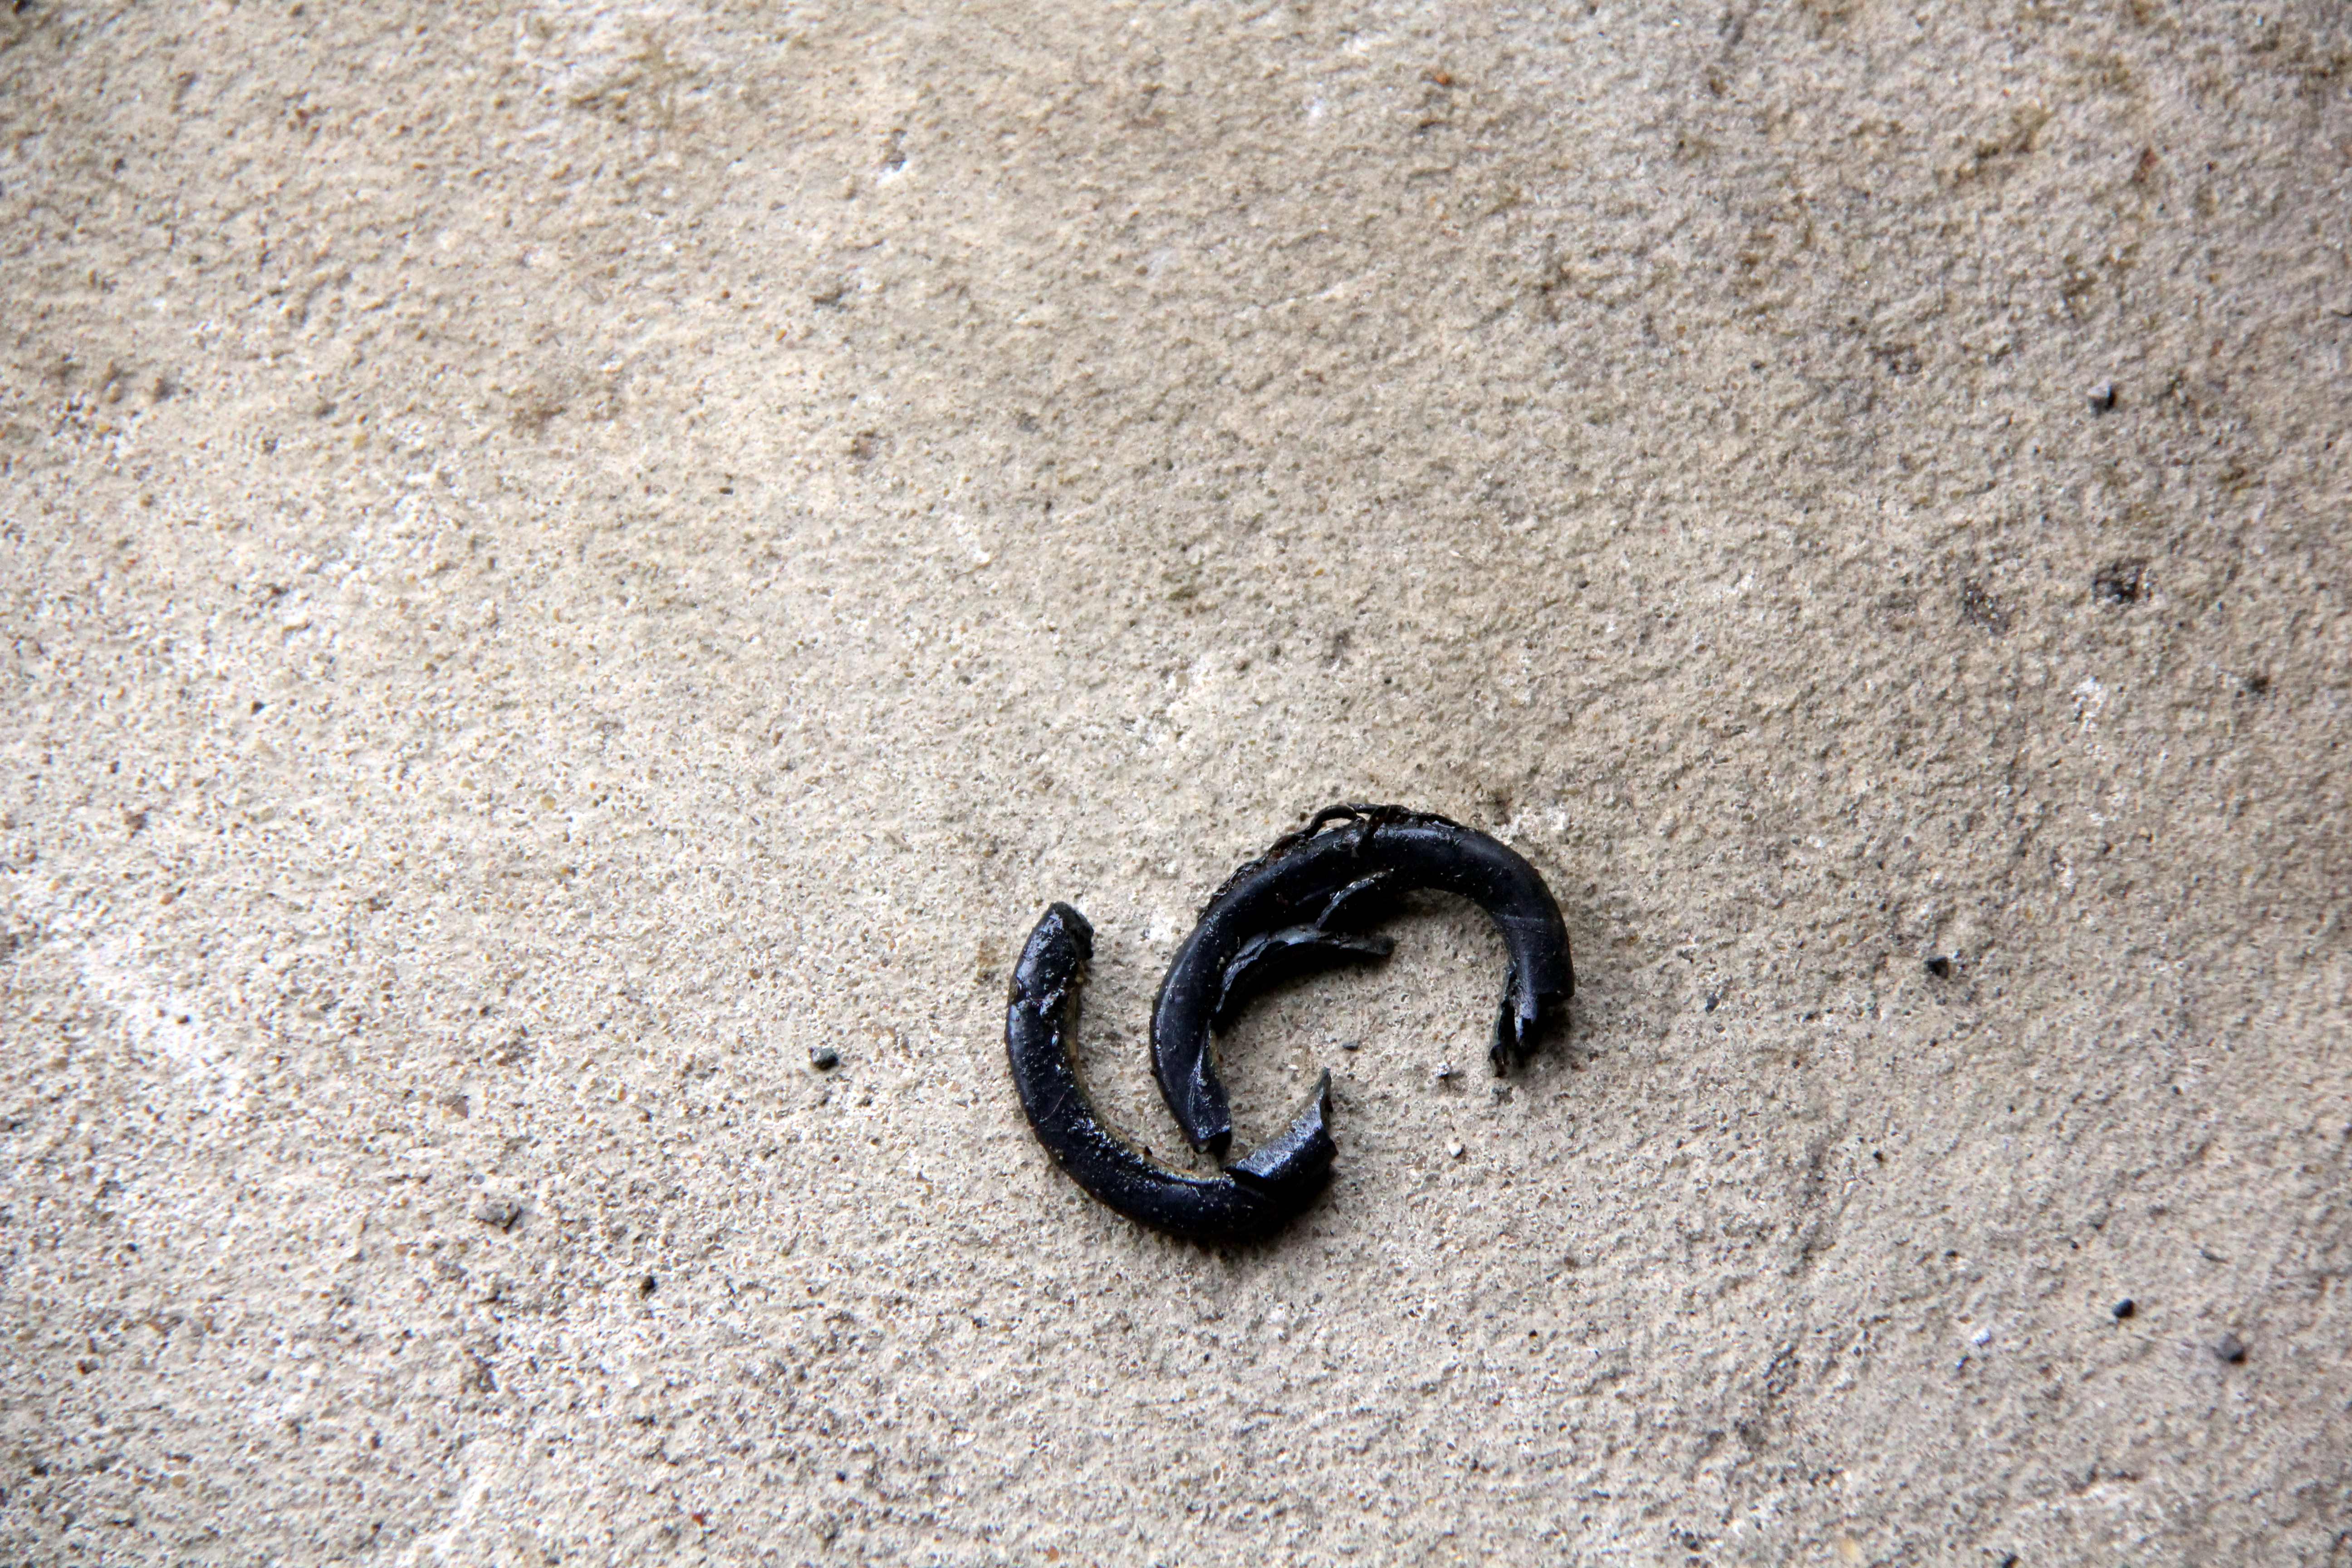
The culprit; seriously defunct O-ring
Several pounds of obsolete pigiron
So, she was all good. All back together, ran lovely, no apparent leaks. Top bombing!
So, what a top petrolhead weekend that was, then: Friday was fixing mutant electrical faults on the FD. Saturday was muscle car supersize-me daftness
Sunday was learning clever stuff about mapping on Tim's turbo 13B-engined series 2. We drive on the left in the UK, overtake on the right. Porsche boy was upset, hahaha

Nothing better than messing around with turbo rotaries and a couple of mates and some beers....
And Monday was fixing an on-going fault on ol' Safka and losing a load of extraneous crap from the engine. Happy days. Obligatory arty pics to leave on...

The culprit; seriously defunct O-ring
Several pounds of obsolete pigiron
So, she was all good. All back together, ran lovely, no apparent leaks. Top bombing!
So, what a top petrolhead weekend that was, then: Friday was fixing mutant electrical faults on the FD. Saturday was muscle car supersize-me daftness
Sunday was learning clever stuff about mapping on Tim's turbo 13B-engined series 2. We drive on the left in the UK, overtake on the right. Porsche boy was upset, hahaha
Nothing better than messing around with turbo rotaries and a couple of mates and some beers....
And Monday was fixing an on-going fault on ol' Safka and losing a load of extraneous crap from the engine. Happy days. Obligatory arty pics to leave on...
Thread Starter
Senior Member
Joined: Oct 2010
Posts: 255
Likes: 1
From: England
Hmmm, no-one got anything to say? Not even to tell me how ugly my spoiler is? Lol, I know you're out there, I can hear you breathing
Anyway, just out of interest I stole Beth's kitchen scales (it's the next best way of asserting your domestic dominance to cleaning parts in the dishwasher, I suppose) and investigated the weight saving we managed ditching the emissions rubbish
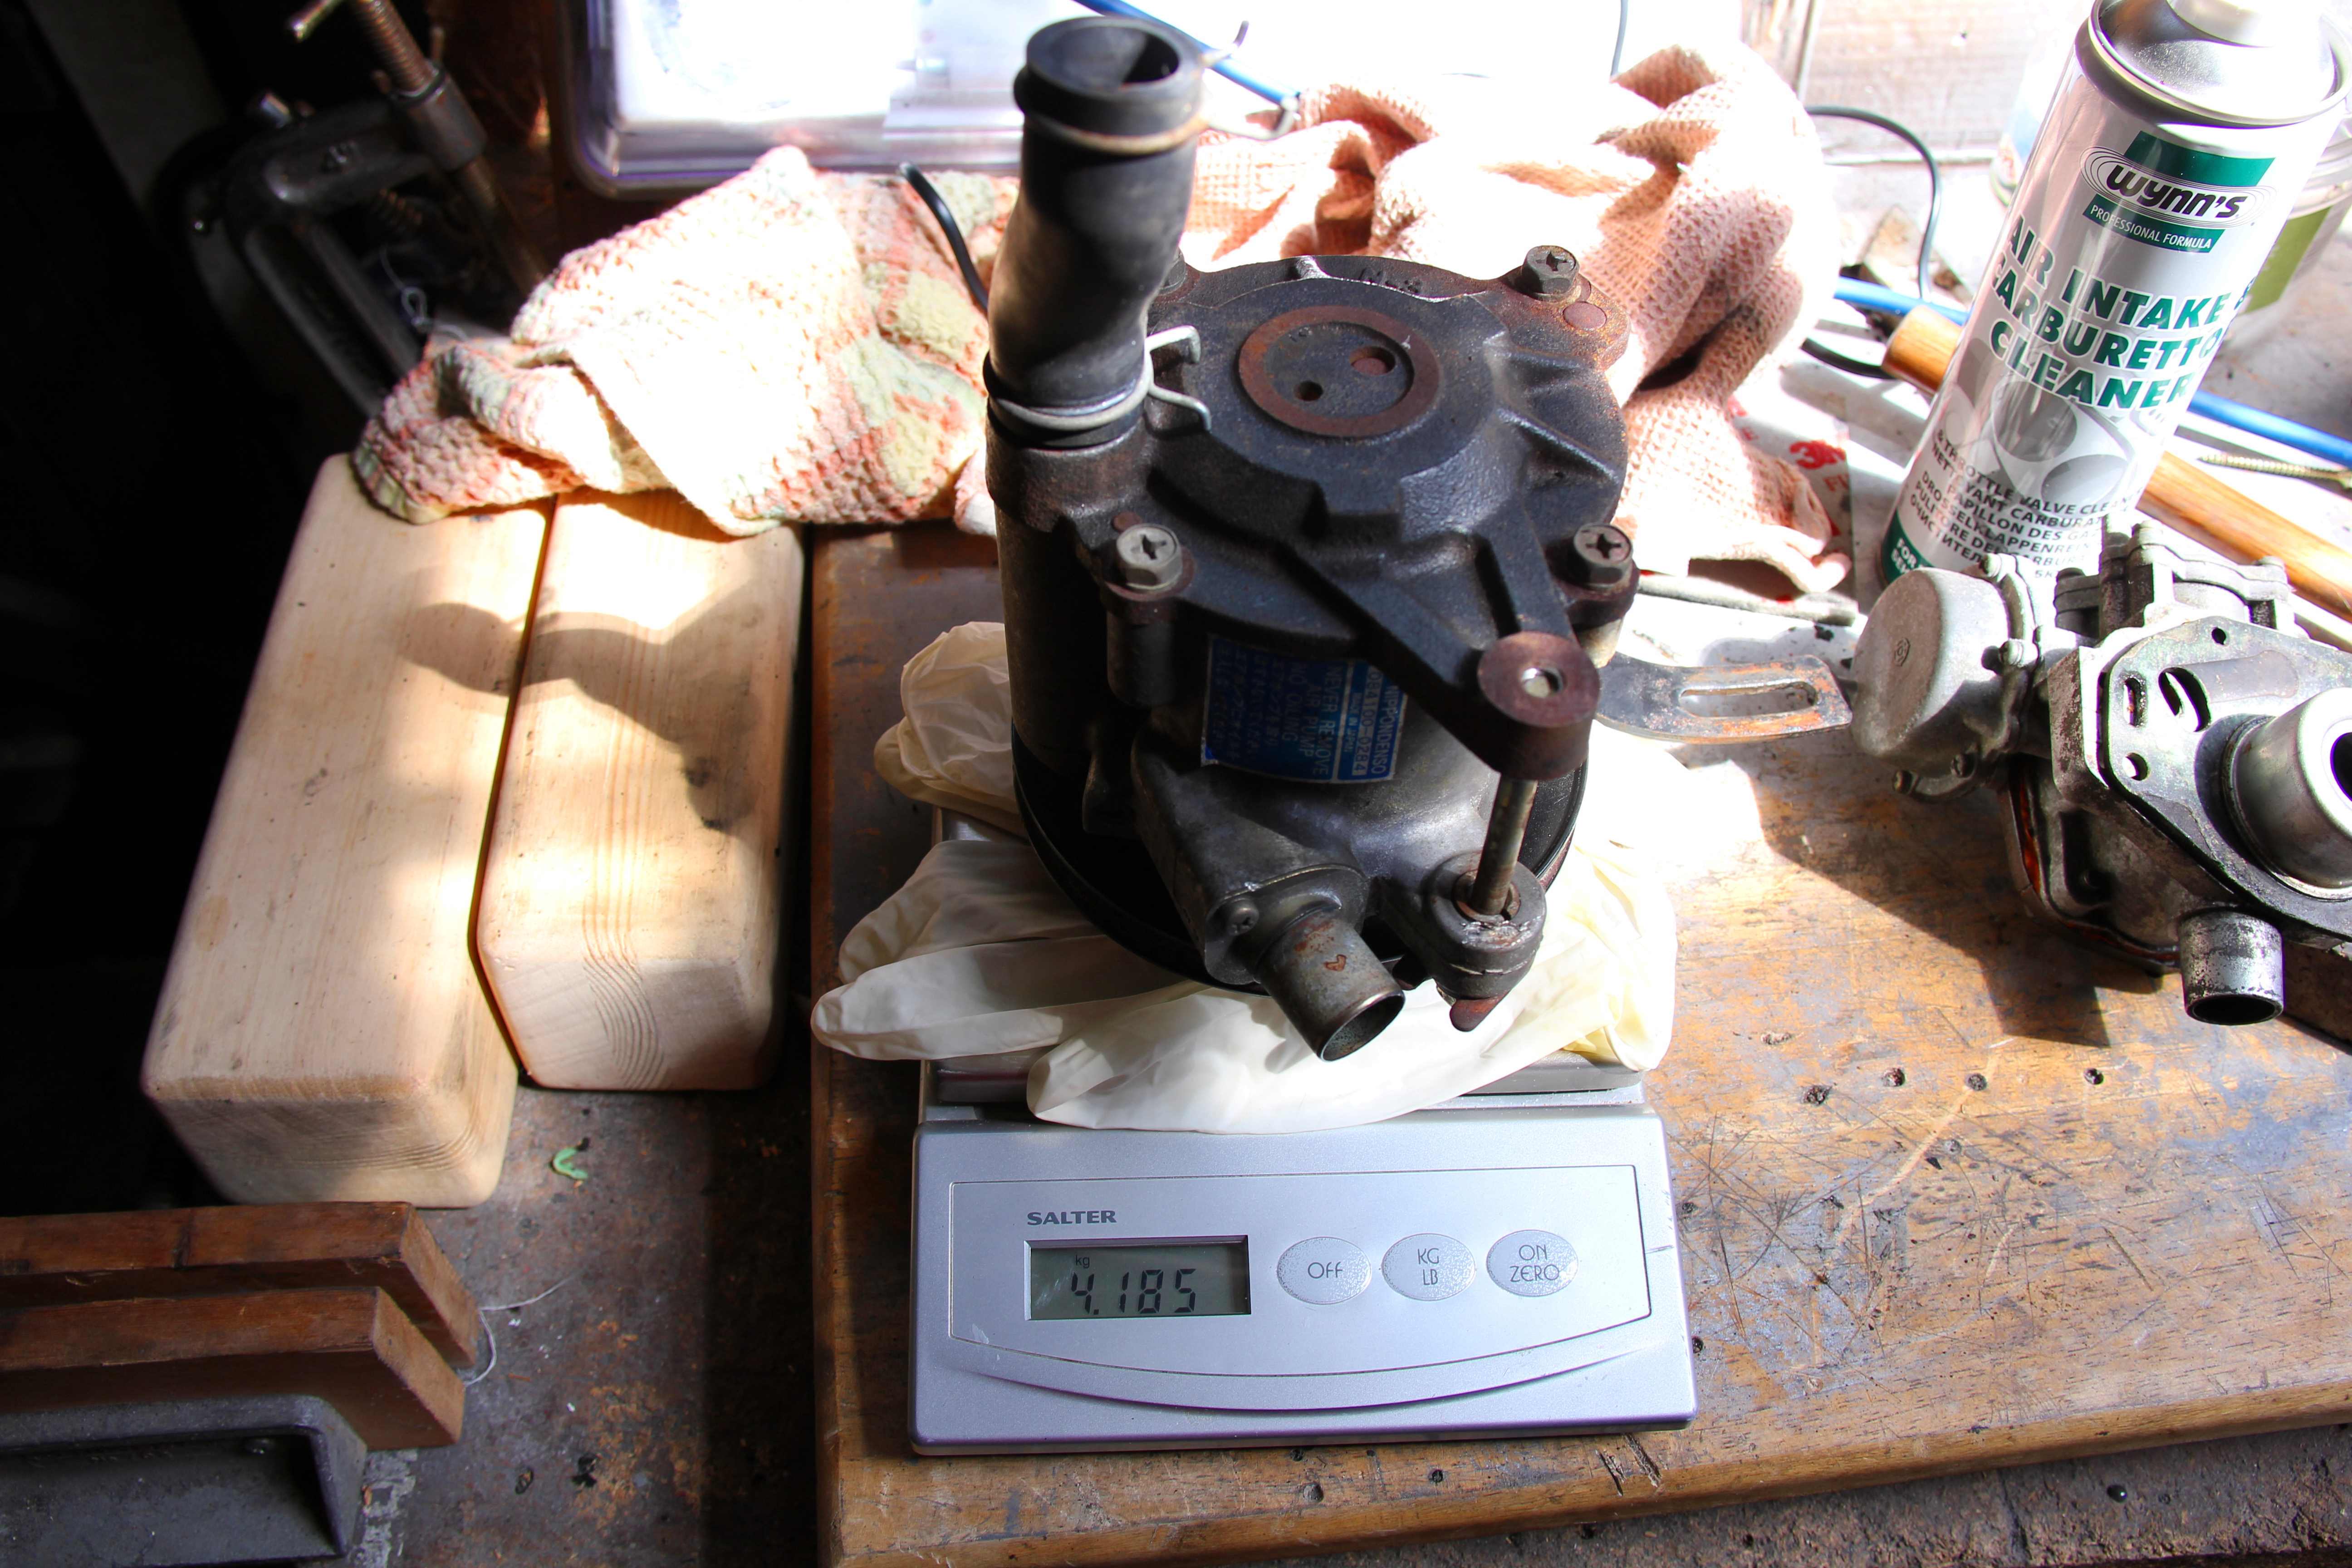
So that's a clear five kilos of redundant cack I didn't need to be dragging around with me everywhere lol. It'll be almost a featherweight racecar at this rate :roll: Not...
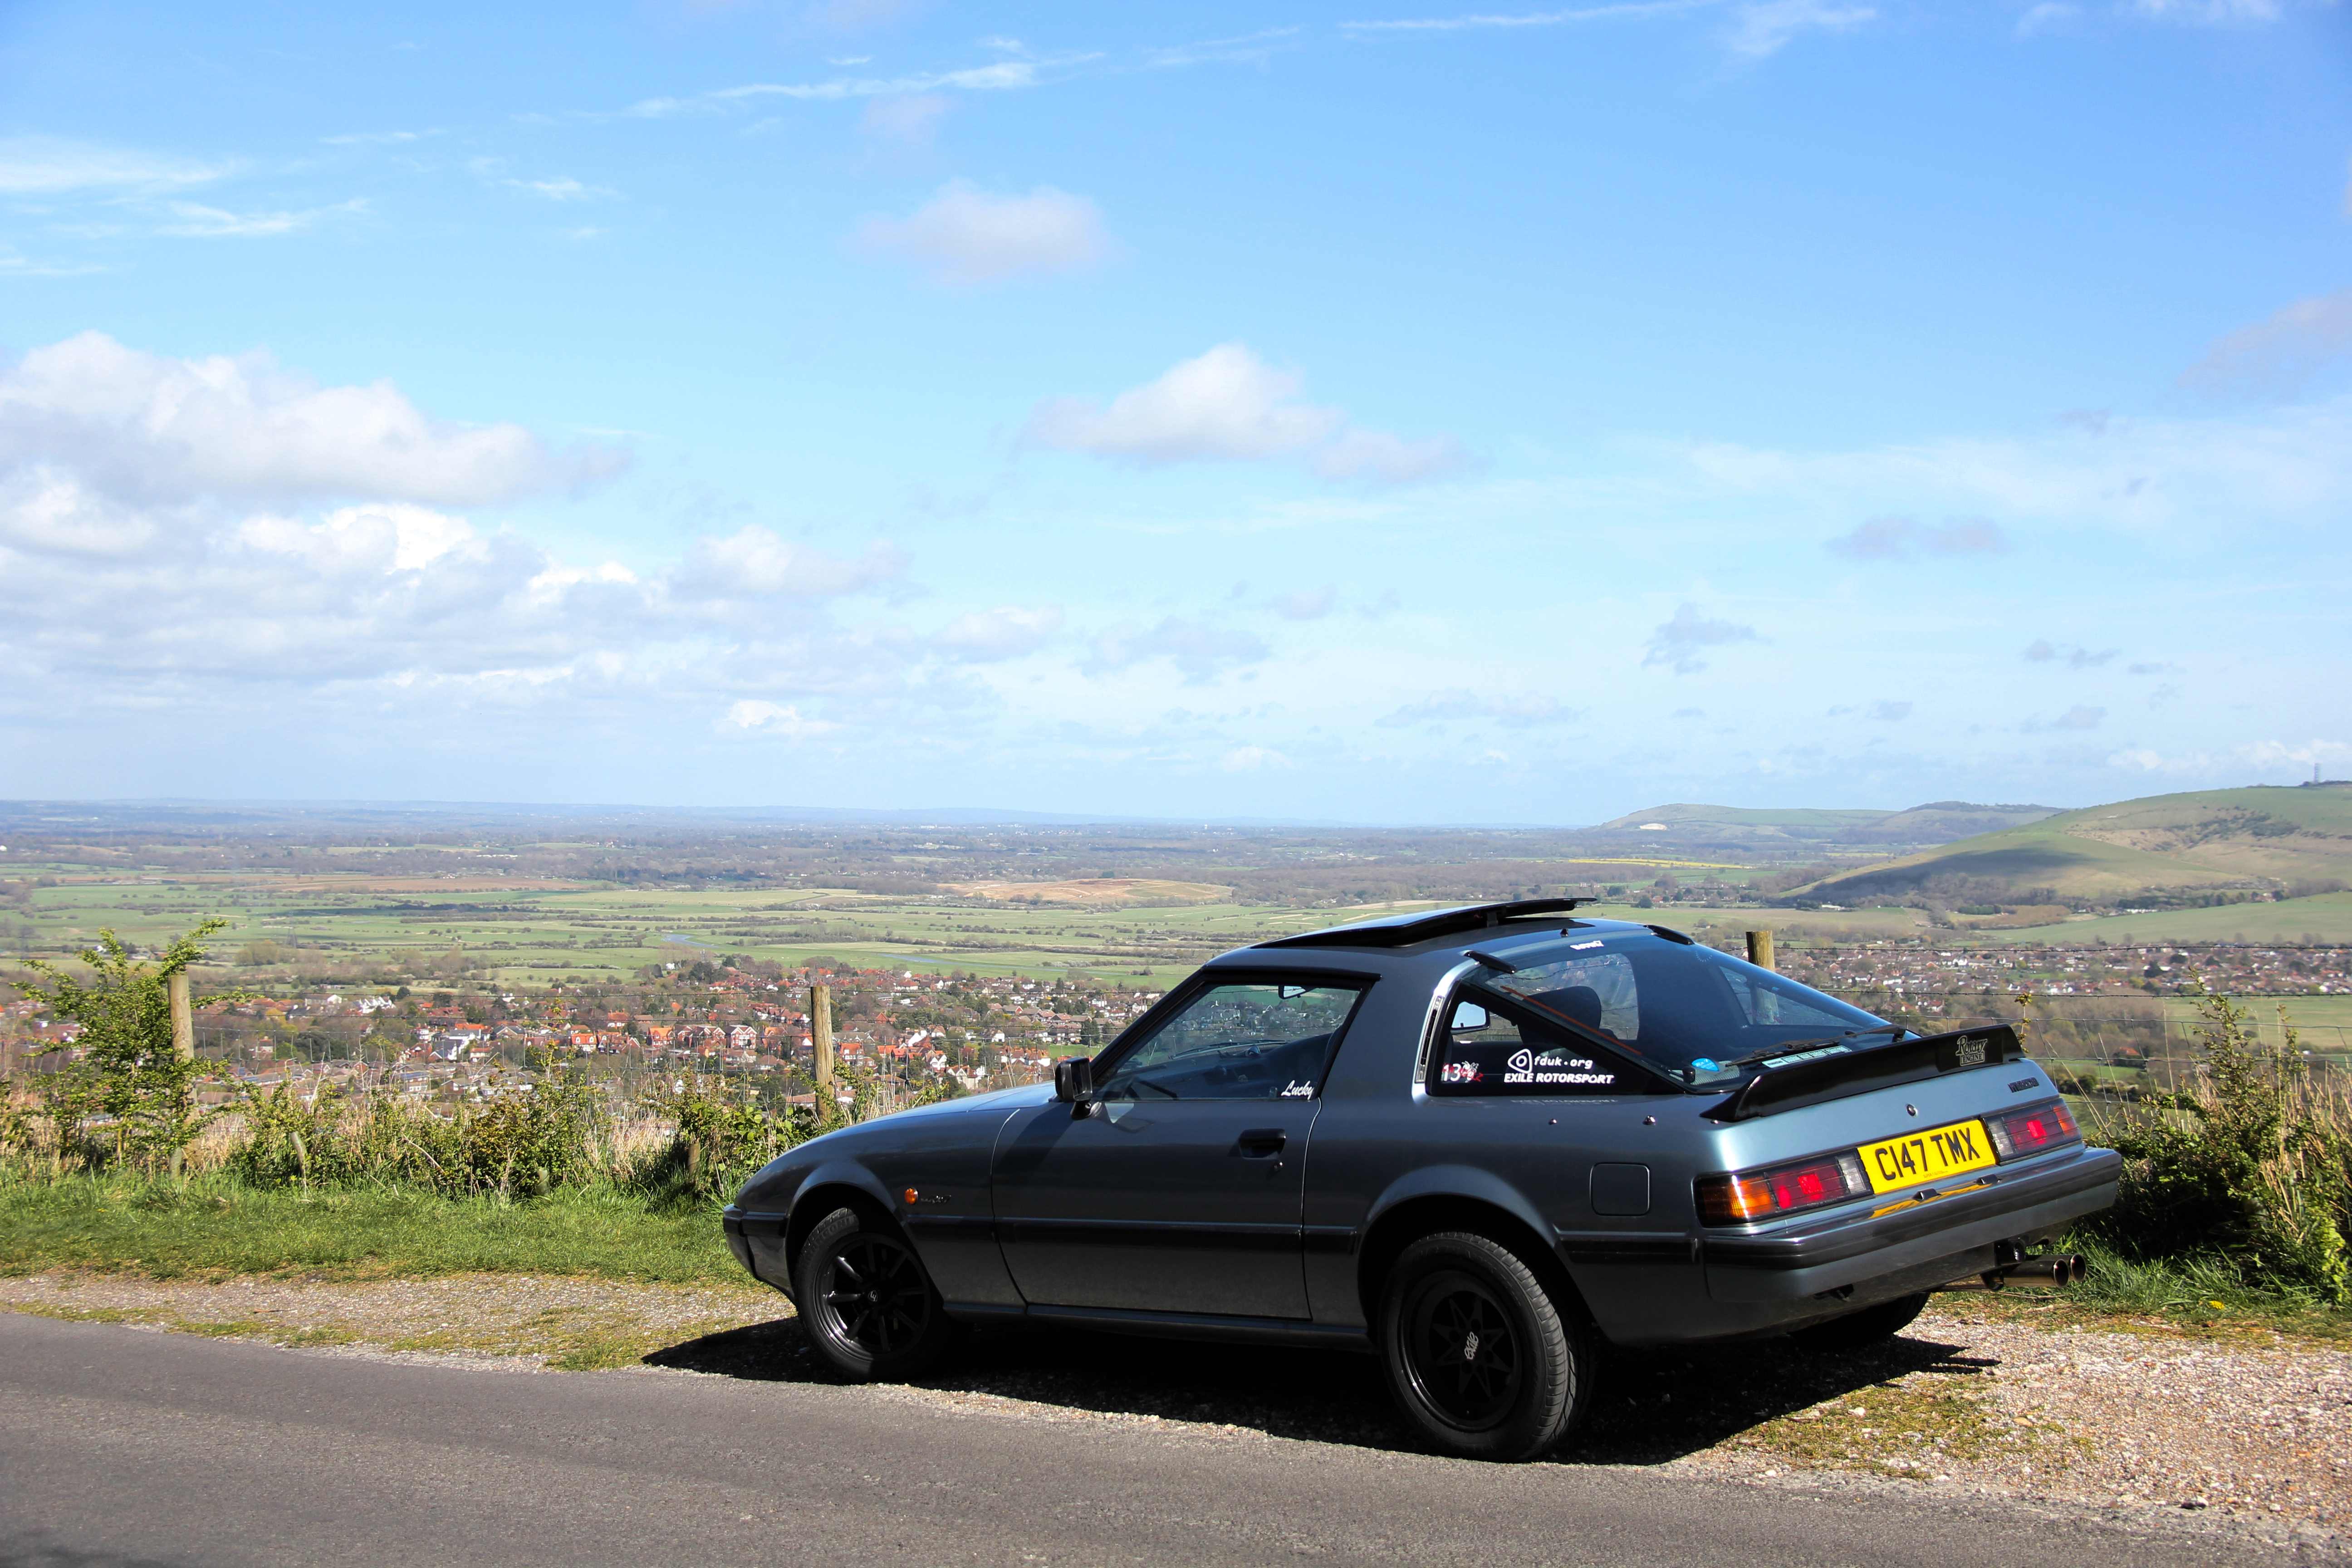
Went out for a good long drive to check we'd got it all back together properly and the coolant level didn't budge an inch, so it looks like three wise monkey can work on a car successfully. The sun was beautiful so I stopped for a bit of pic whoring on the top of Steyning Bowl. Just to prove it doesn't always rain in England, lol

The next job was a minor one but one that made quite a difference to the look of the car;
Spotted it? How about now?
Much better. Bit of a faff as the stockers use threaded captive inserts and the aftermarket ones use bolts through from inside. And none of the holes quite line up either...

I think I've a new career as a proctologist now I've mastered doing up invisible nuts through a 4" square hole upside-down and back to front. I also invented some new swear-words. What an utter PITA of a job. Ideally I'd source some of the "stock" Mazda aero-style door mirrors, the problem being we never got them in the UK. The American ones are LHD so they don't give the correct field of view on RHD cars. Looks like some Aussie or NZ ones will be my only hope there, but they don't come up at a sensible price too often.
Still, my little hotrod-style bullet mirrors are preferable to the horrible square UKDM "cricket bats" that were on there before
Anyway, just out of interest I stole Beth's kitchen scales (it's the next best way of asserting your domestic dominance to cleaning parts in the dishwasher, I suppose) and investigated the weight saving we managed ditching the emissions rubbish
So that's a clear five kilos of redundant cack I didn't need to be dragging around with me everywhere lol. It'll be almost a featherweight racecar at this rate :roll: Not...
Went out for a good long drive to check we'd got it all back together properly and the coolant level didn't budge an inch, so it looks like three wise monkey can work on a car successfully. The sun was beautiful so I stopped for a bit of pic whoring on the top of Steyning Bowl. Just to prove it doesn't always rain in England, lol
The next job was a minor one but one that made quite a difference to the look of the car;
Spotted it? How about now?
Much better. Bit of a faff as the stockers use threaded captive inserts and the aftermarket ones use bolts through from inside. And none of the holes quite line up either...
I think I've a new career as a proctologist now I've mastered doing up invisible nuts through a 4" square hole upside-down and back to front. I also invented some new swear-words. What an utter PITA of a job. Ideally I'd source some of the "stock" Mazda aero-style door mirrors, the problem being we never got them in the UK. The American ones are LHD so they don't give the correct field of view on RHD cars. Looks like some Aussie or NZ ones will be my only hope there, but they don't come up at a sensible price too often.
Still, my little hotrod-style bullet mirrors are preferable to the horrible square UKDM "cricket bats" that were on there before
Thread Starter
Senior Member
Joined: Oct 2010
Posts: 255
Likes: 1
From: England
Now, what I really wanted to be doing next was swapping out the perished fuel-supply hoses to and from the carb that we'd found while changing the inlet mani gasket. But it kept pissing down with rain every time I stuck my snout outside, which meant I had to find something to do in the dry of the garage instead. Annoying, but it hadn't caught fire yet, I guessed a few more days wouldn't hurt it!
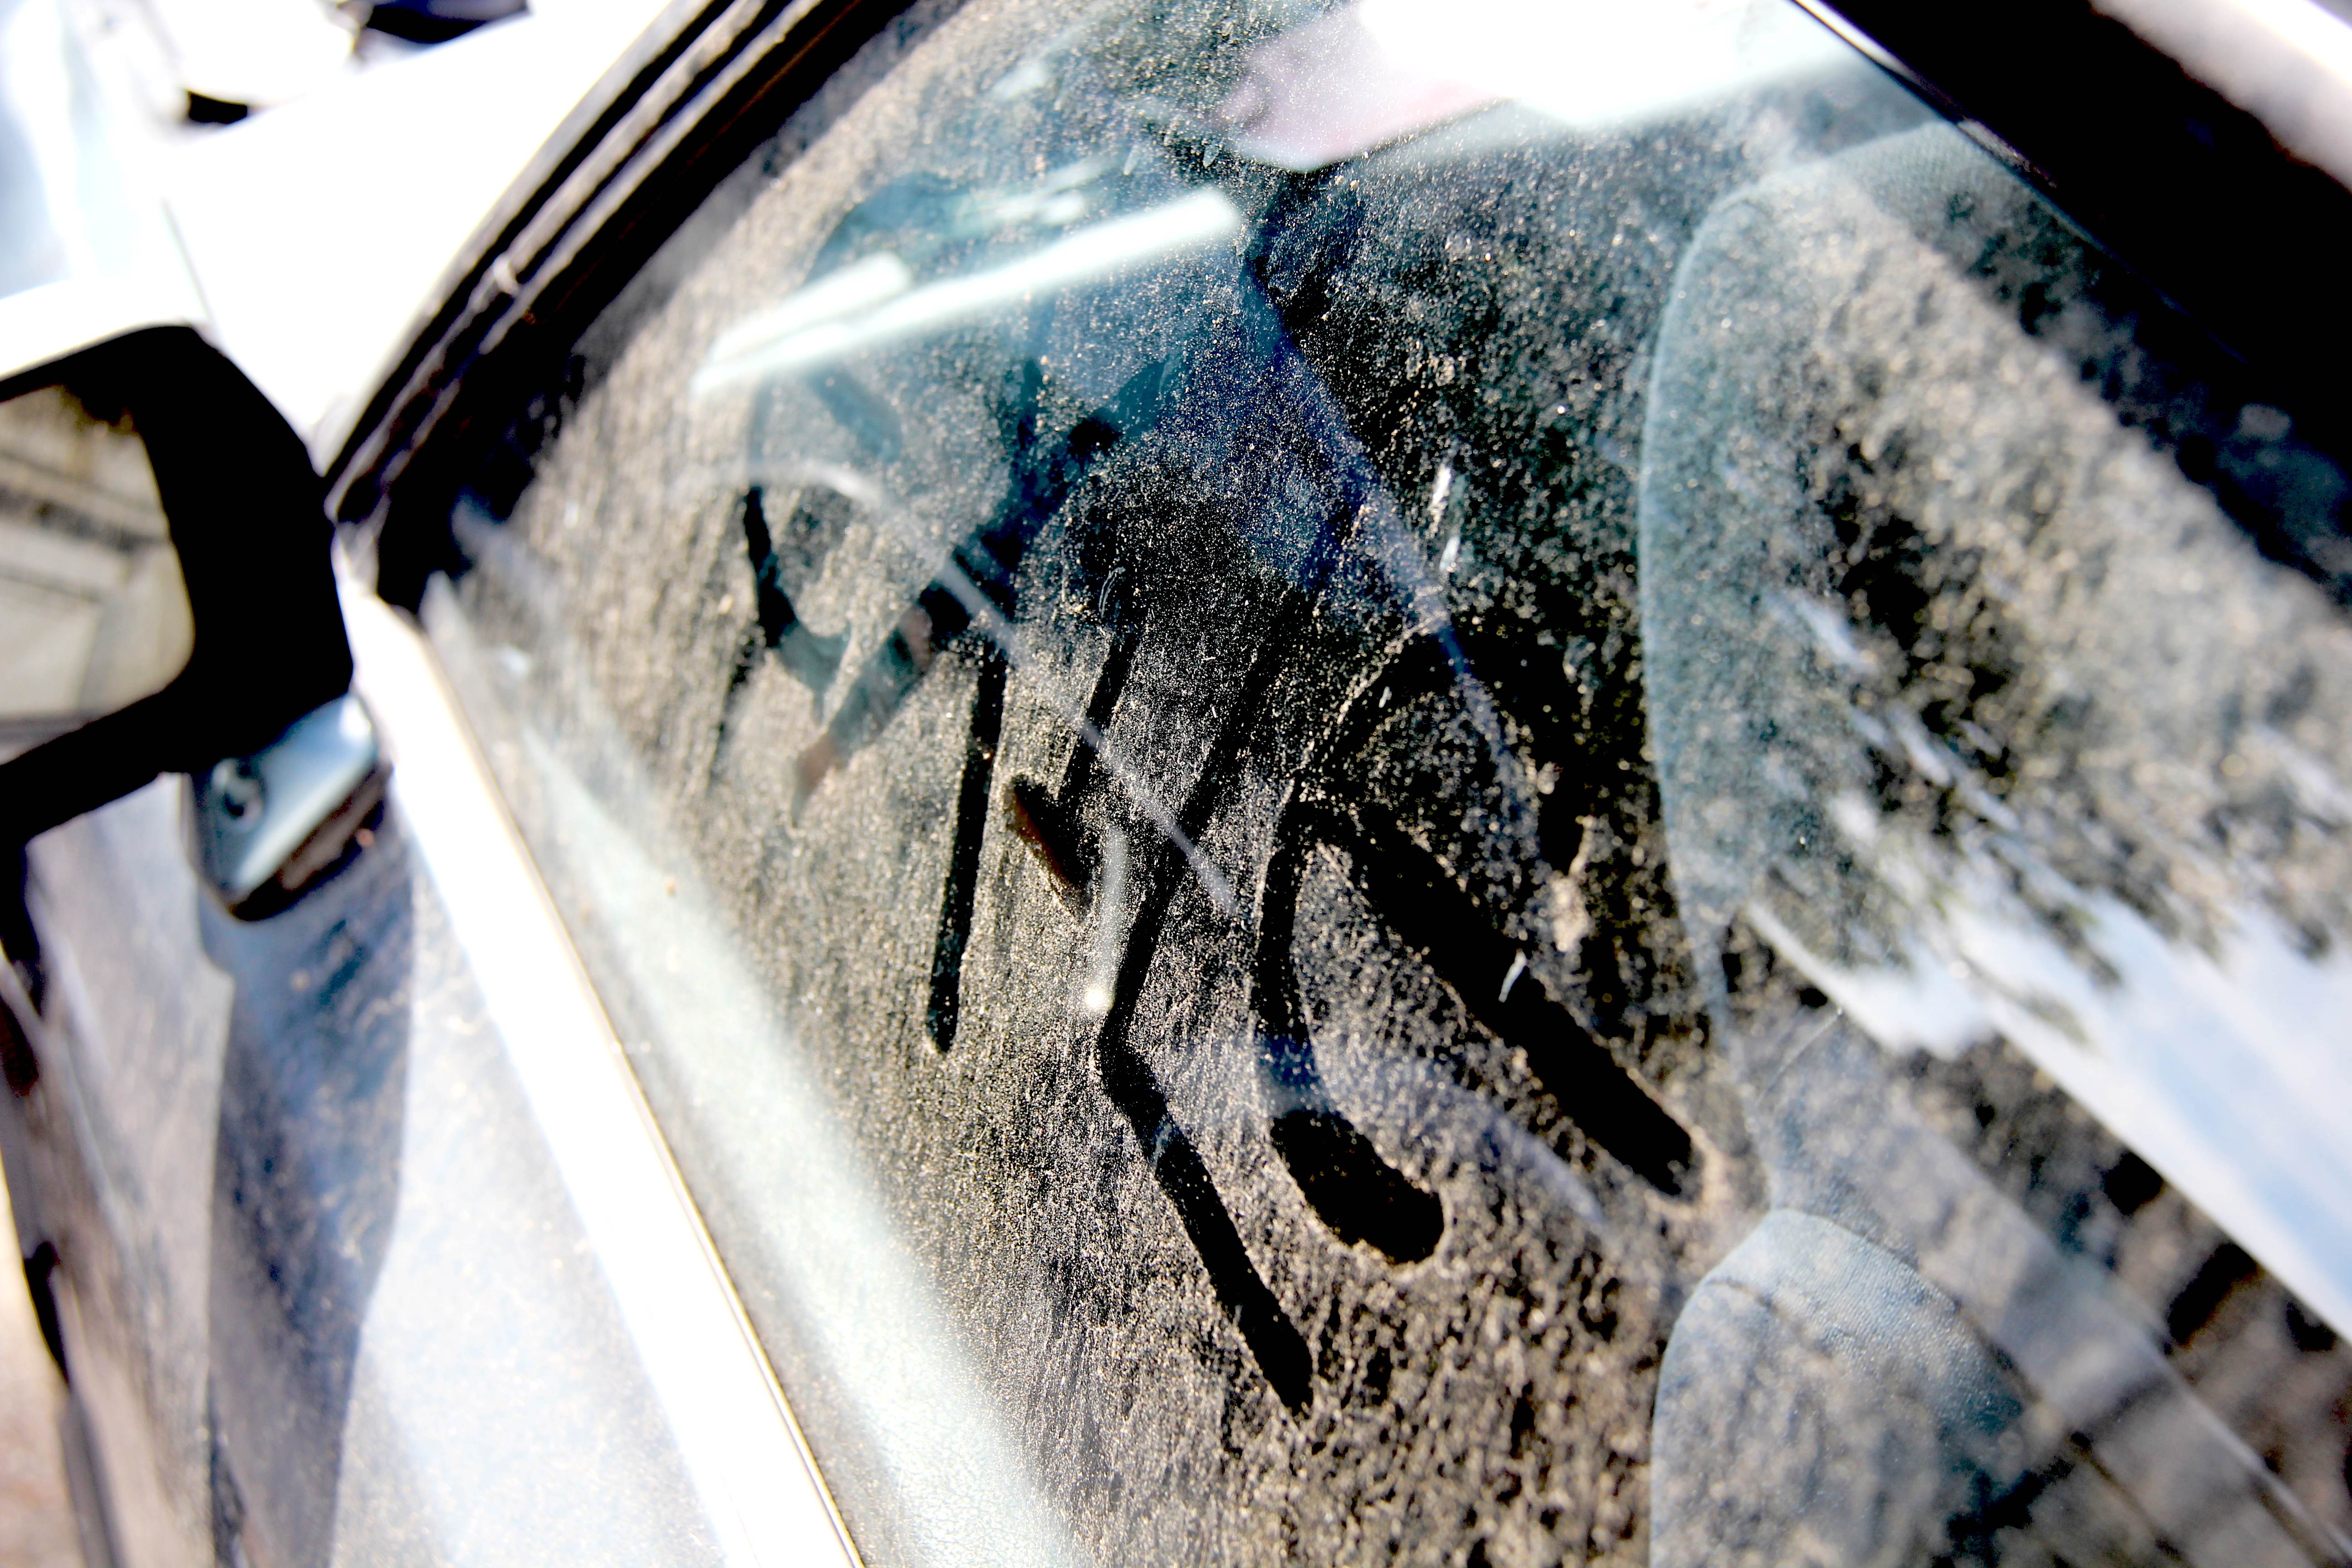
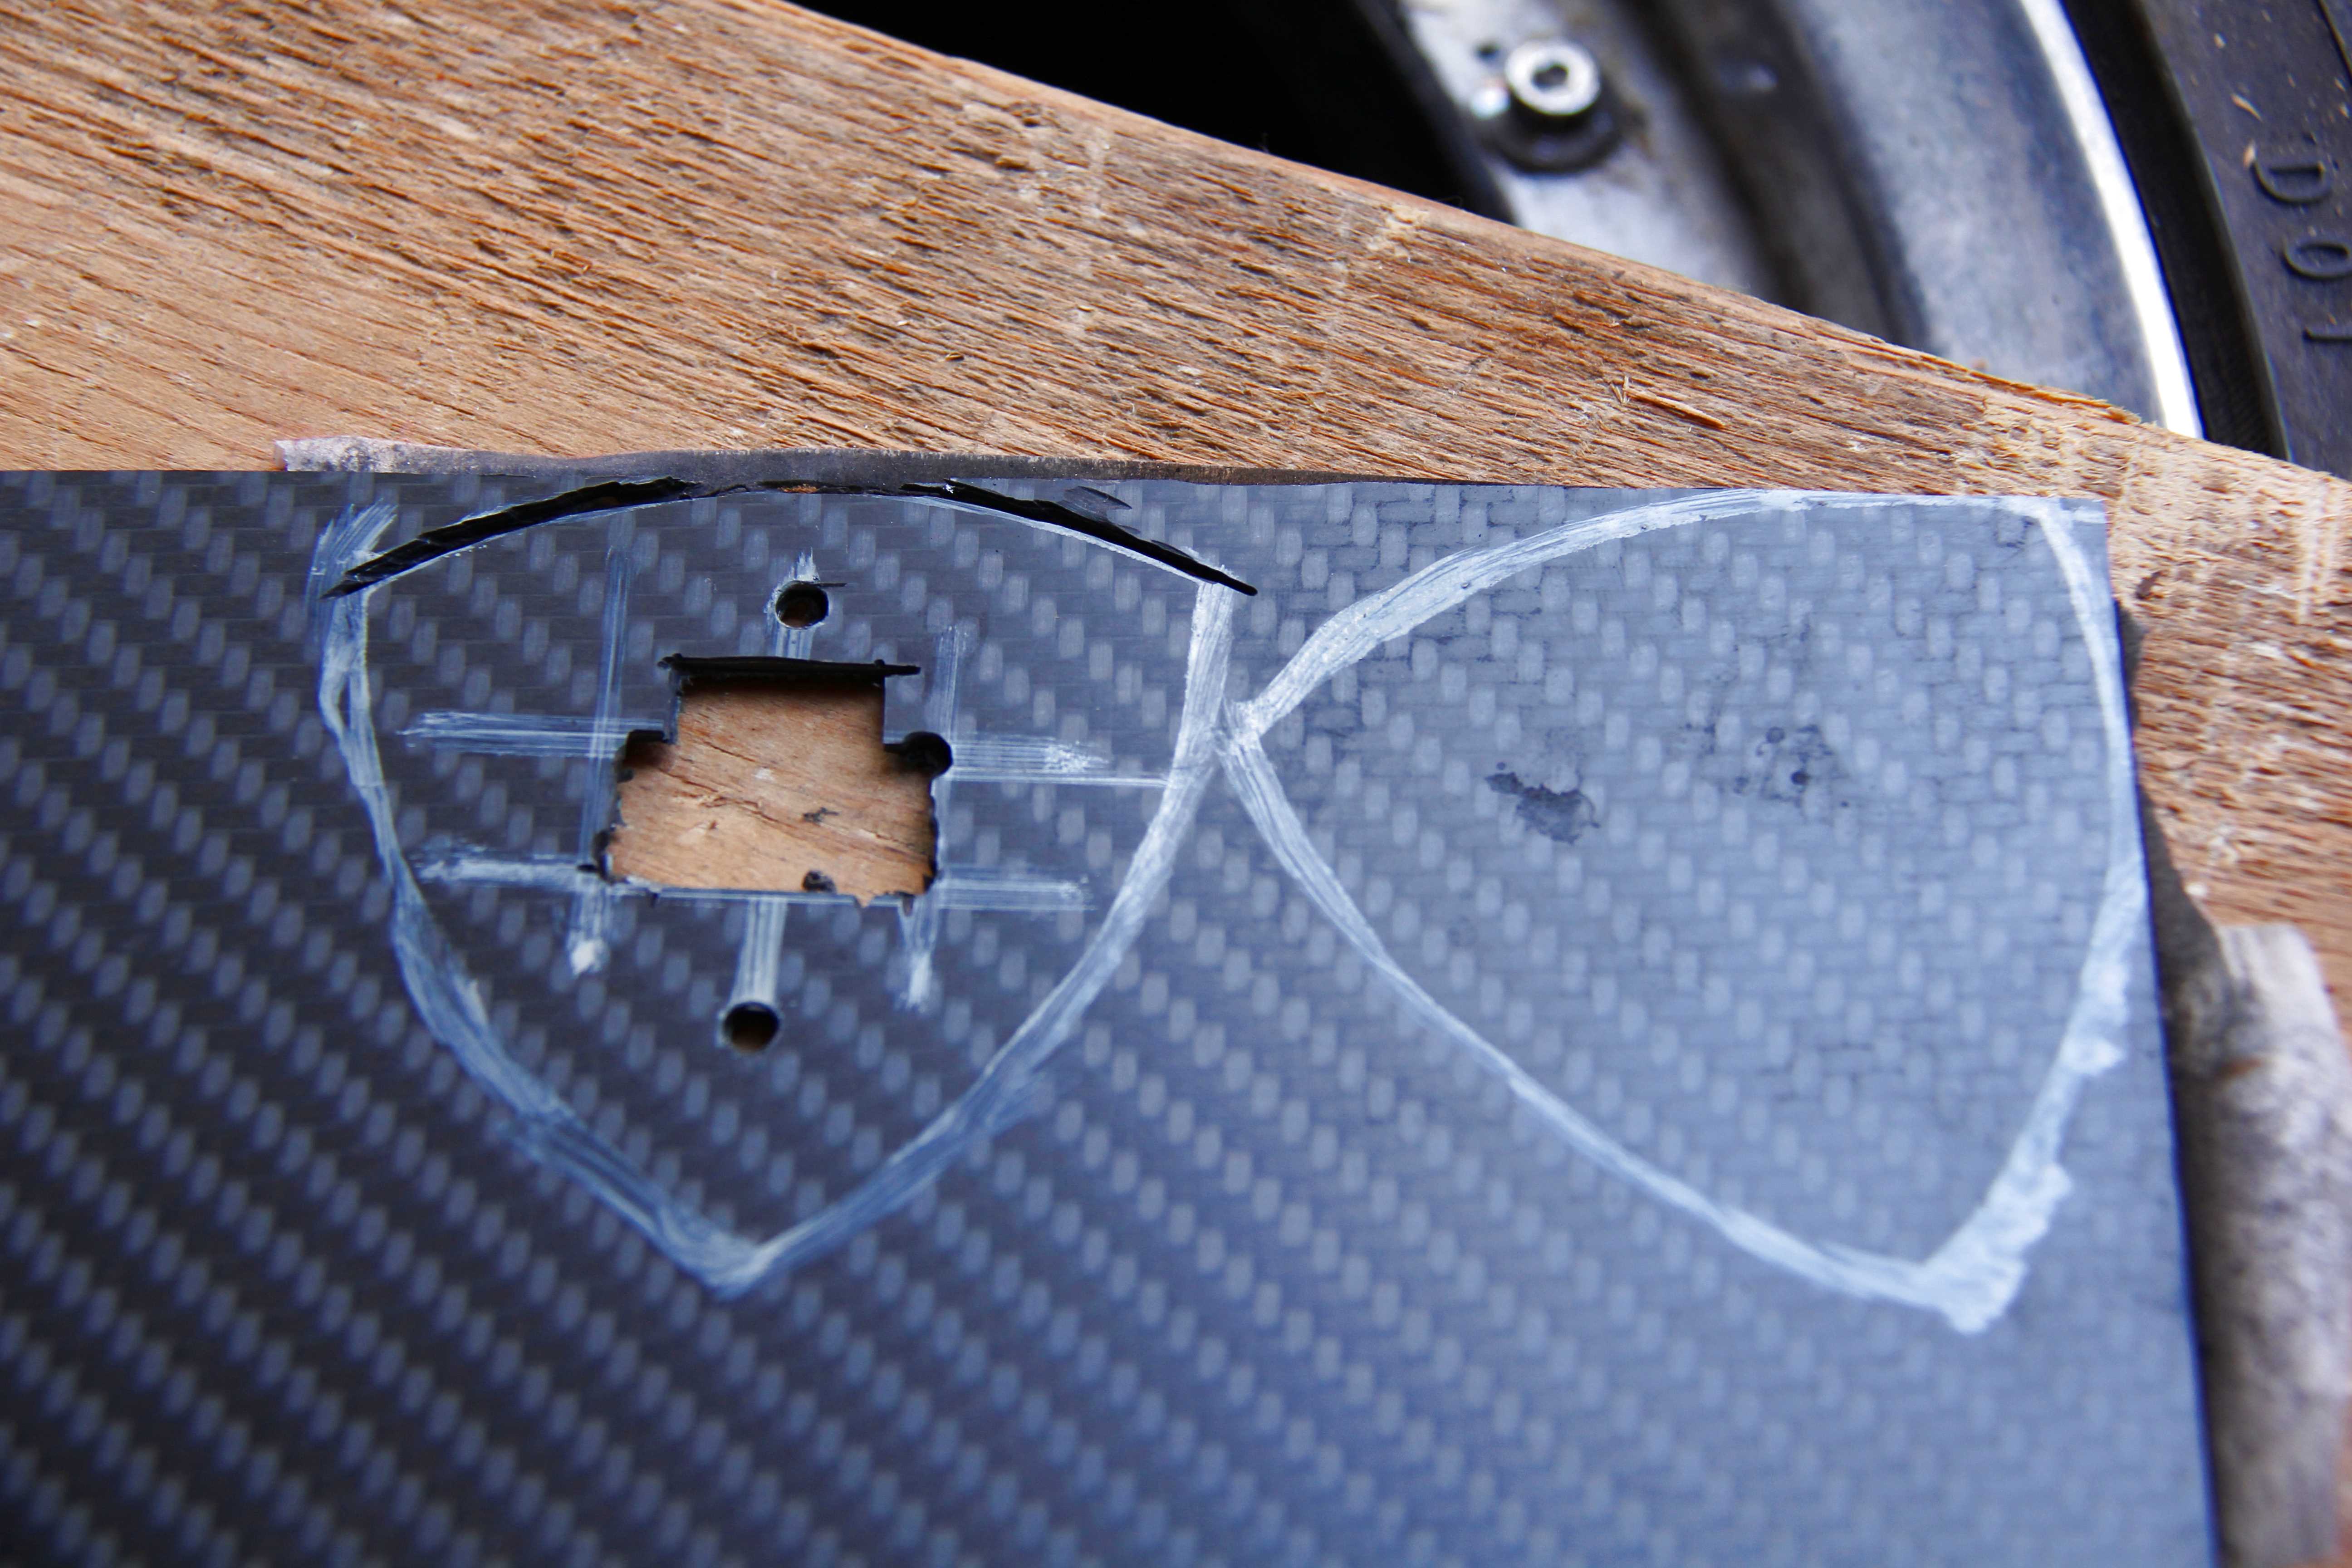
Anyway, side repeater turn signals. I became something of an authority on side repeaters in my quest to lose the giant satsuma-hued things. Trouble is, apart from UKDM FBs and FCs, no other car on the planet seems to have the same side repeaters, and I couldn't find anyone doing clear or smoked replacements. So the only option was to replace them with something else. Trouble with that is, once you remove the horrid stockers, you're left with this;
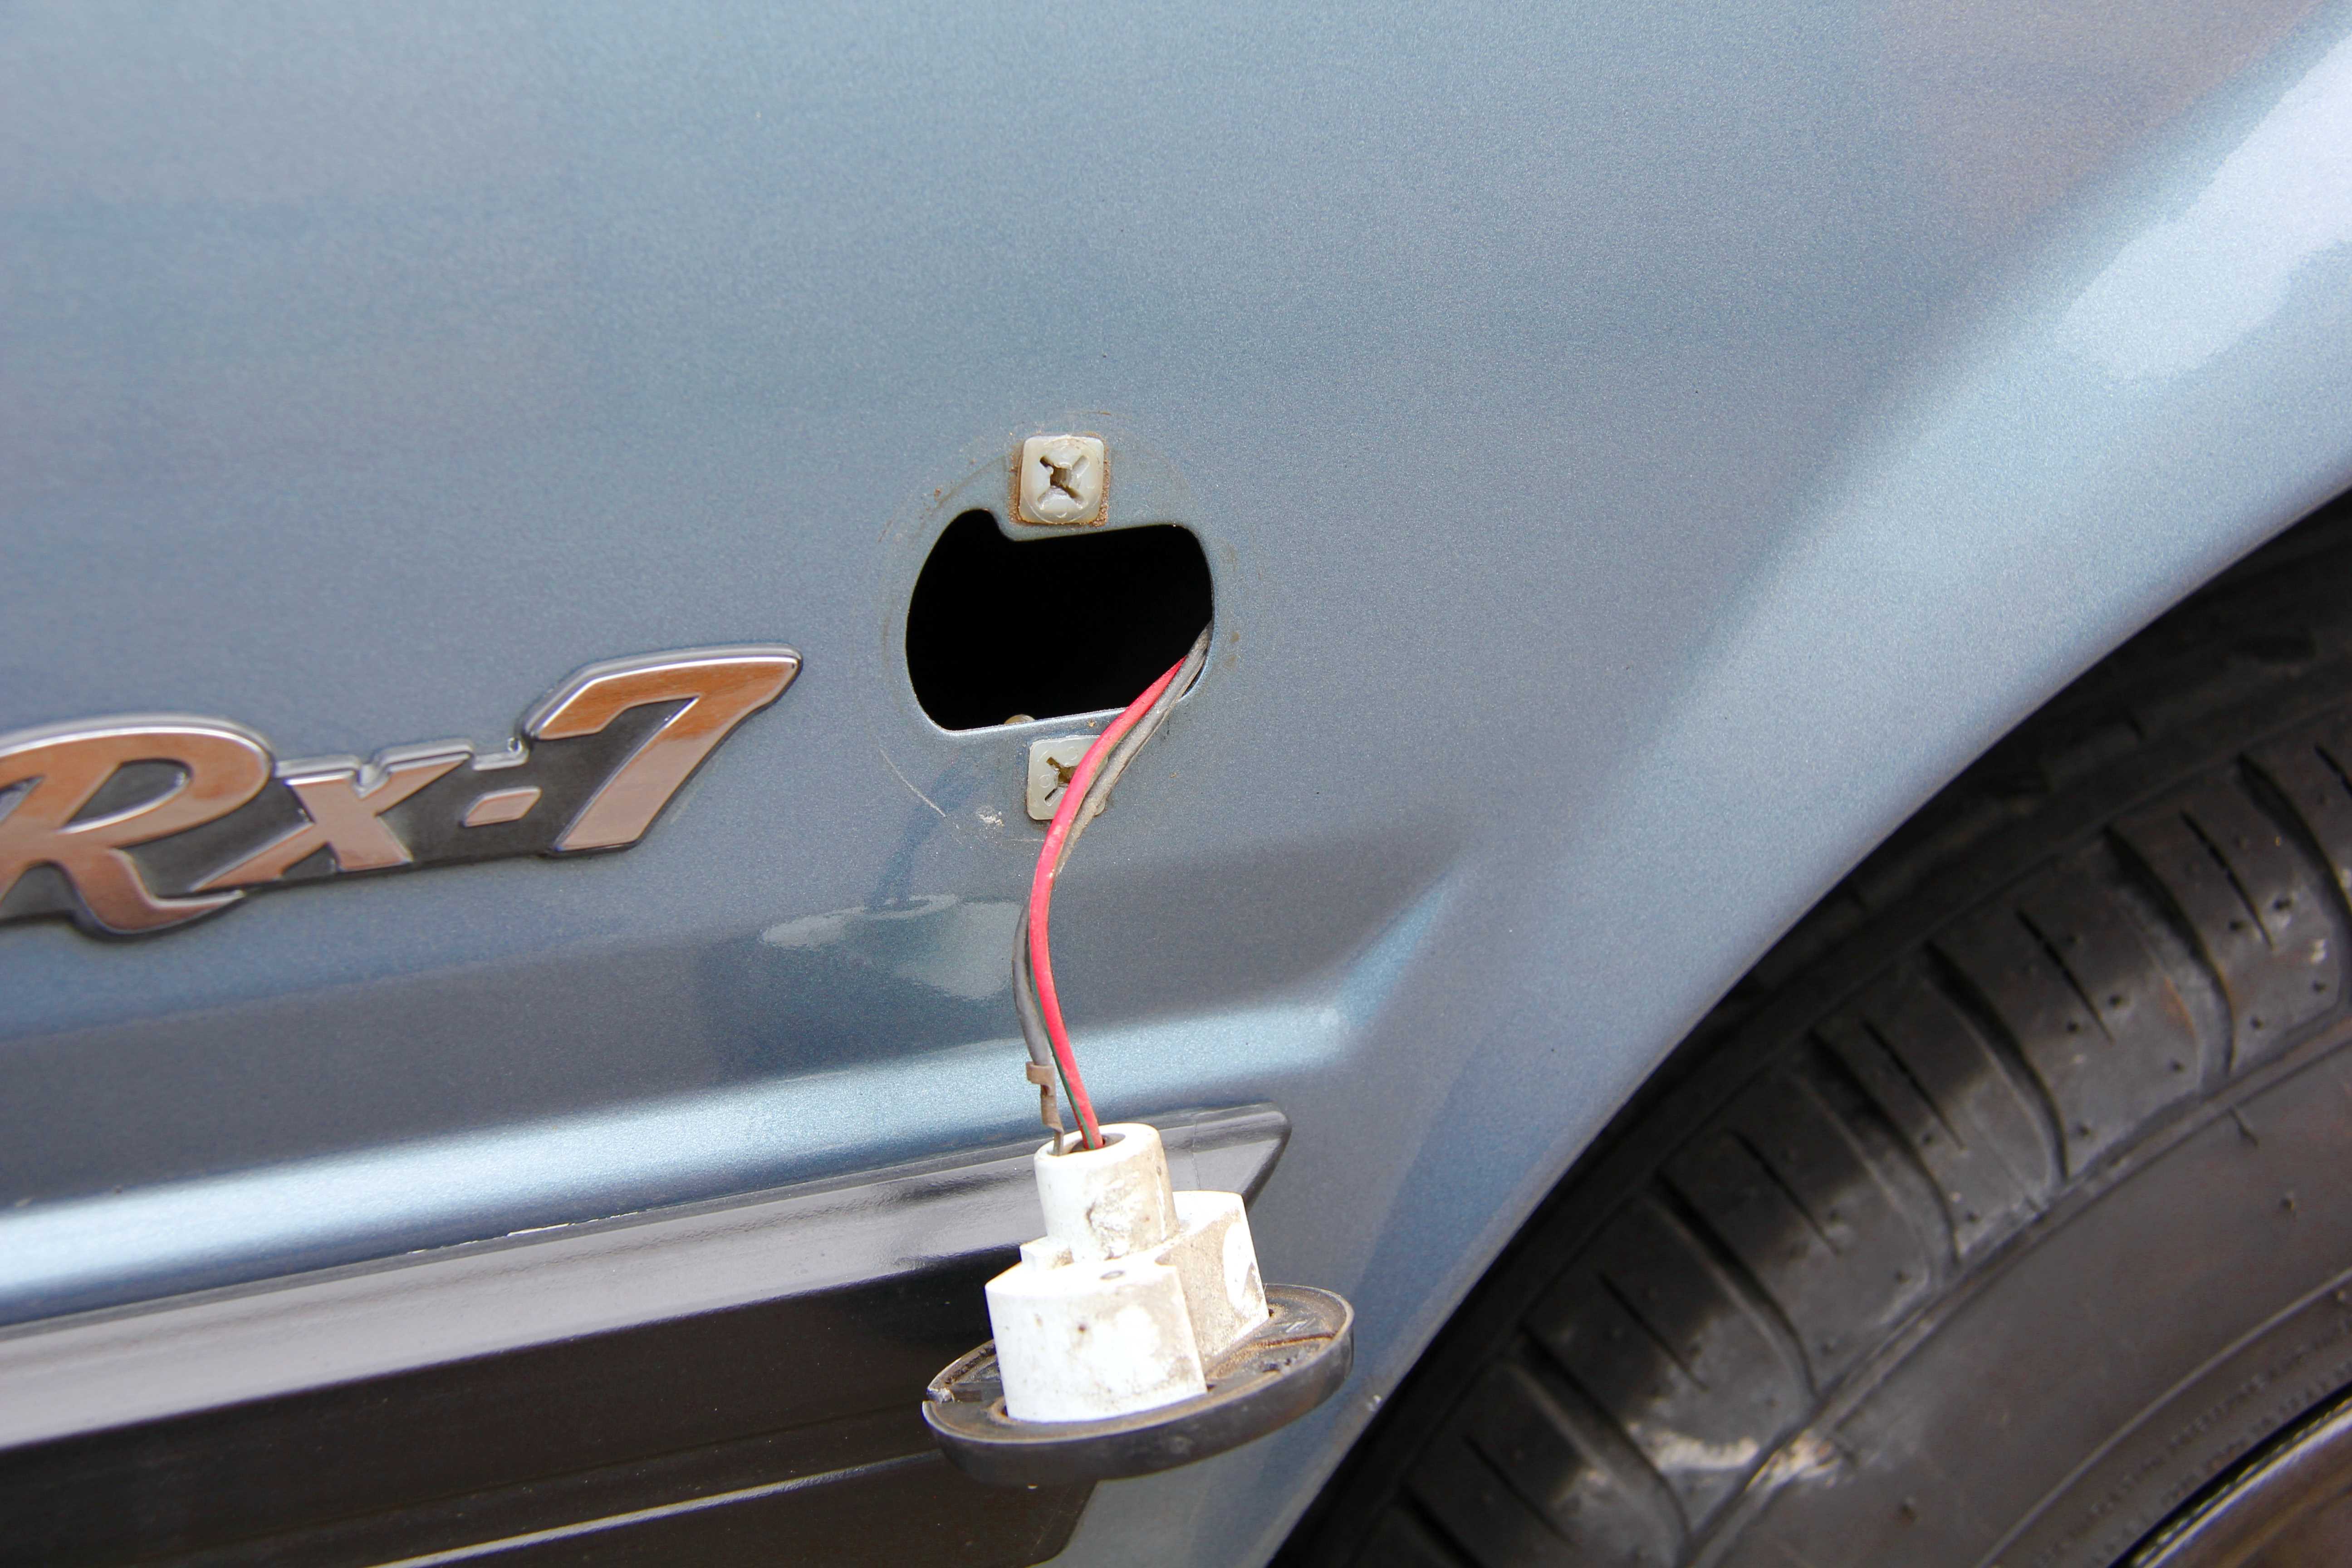
Which is hardly conducive to easy replacement; even if you could find a mounting that fitted in the cut-out you're left with the two screw holes. Welding a plate in and painting would be one option, but not for me; too overkill and as always, too hard to put back to stock if necessary. So, let me take you on a little journey into my world of borderline autistic levels of OCD and mania...
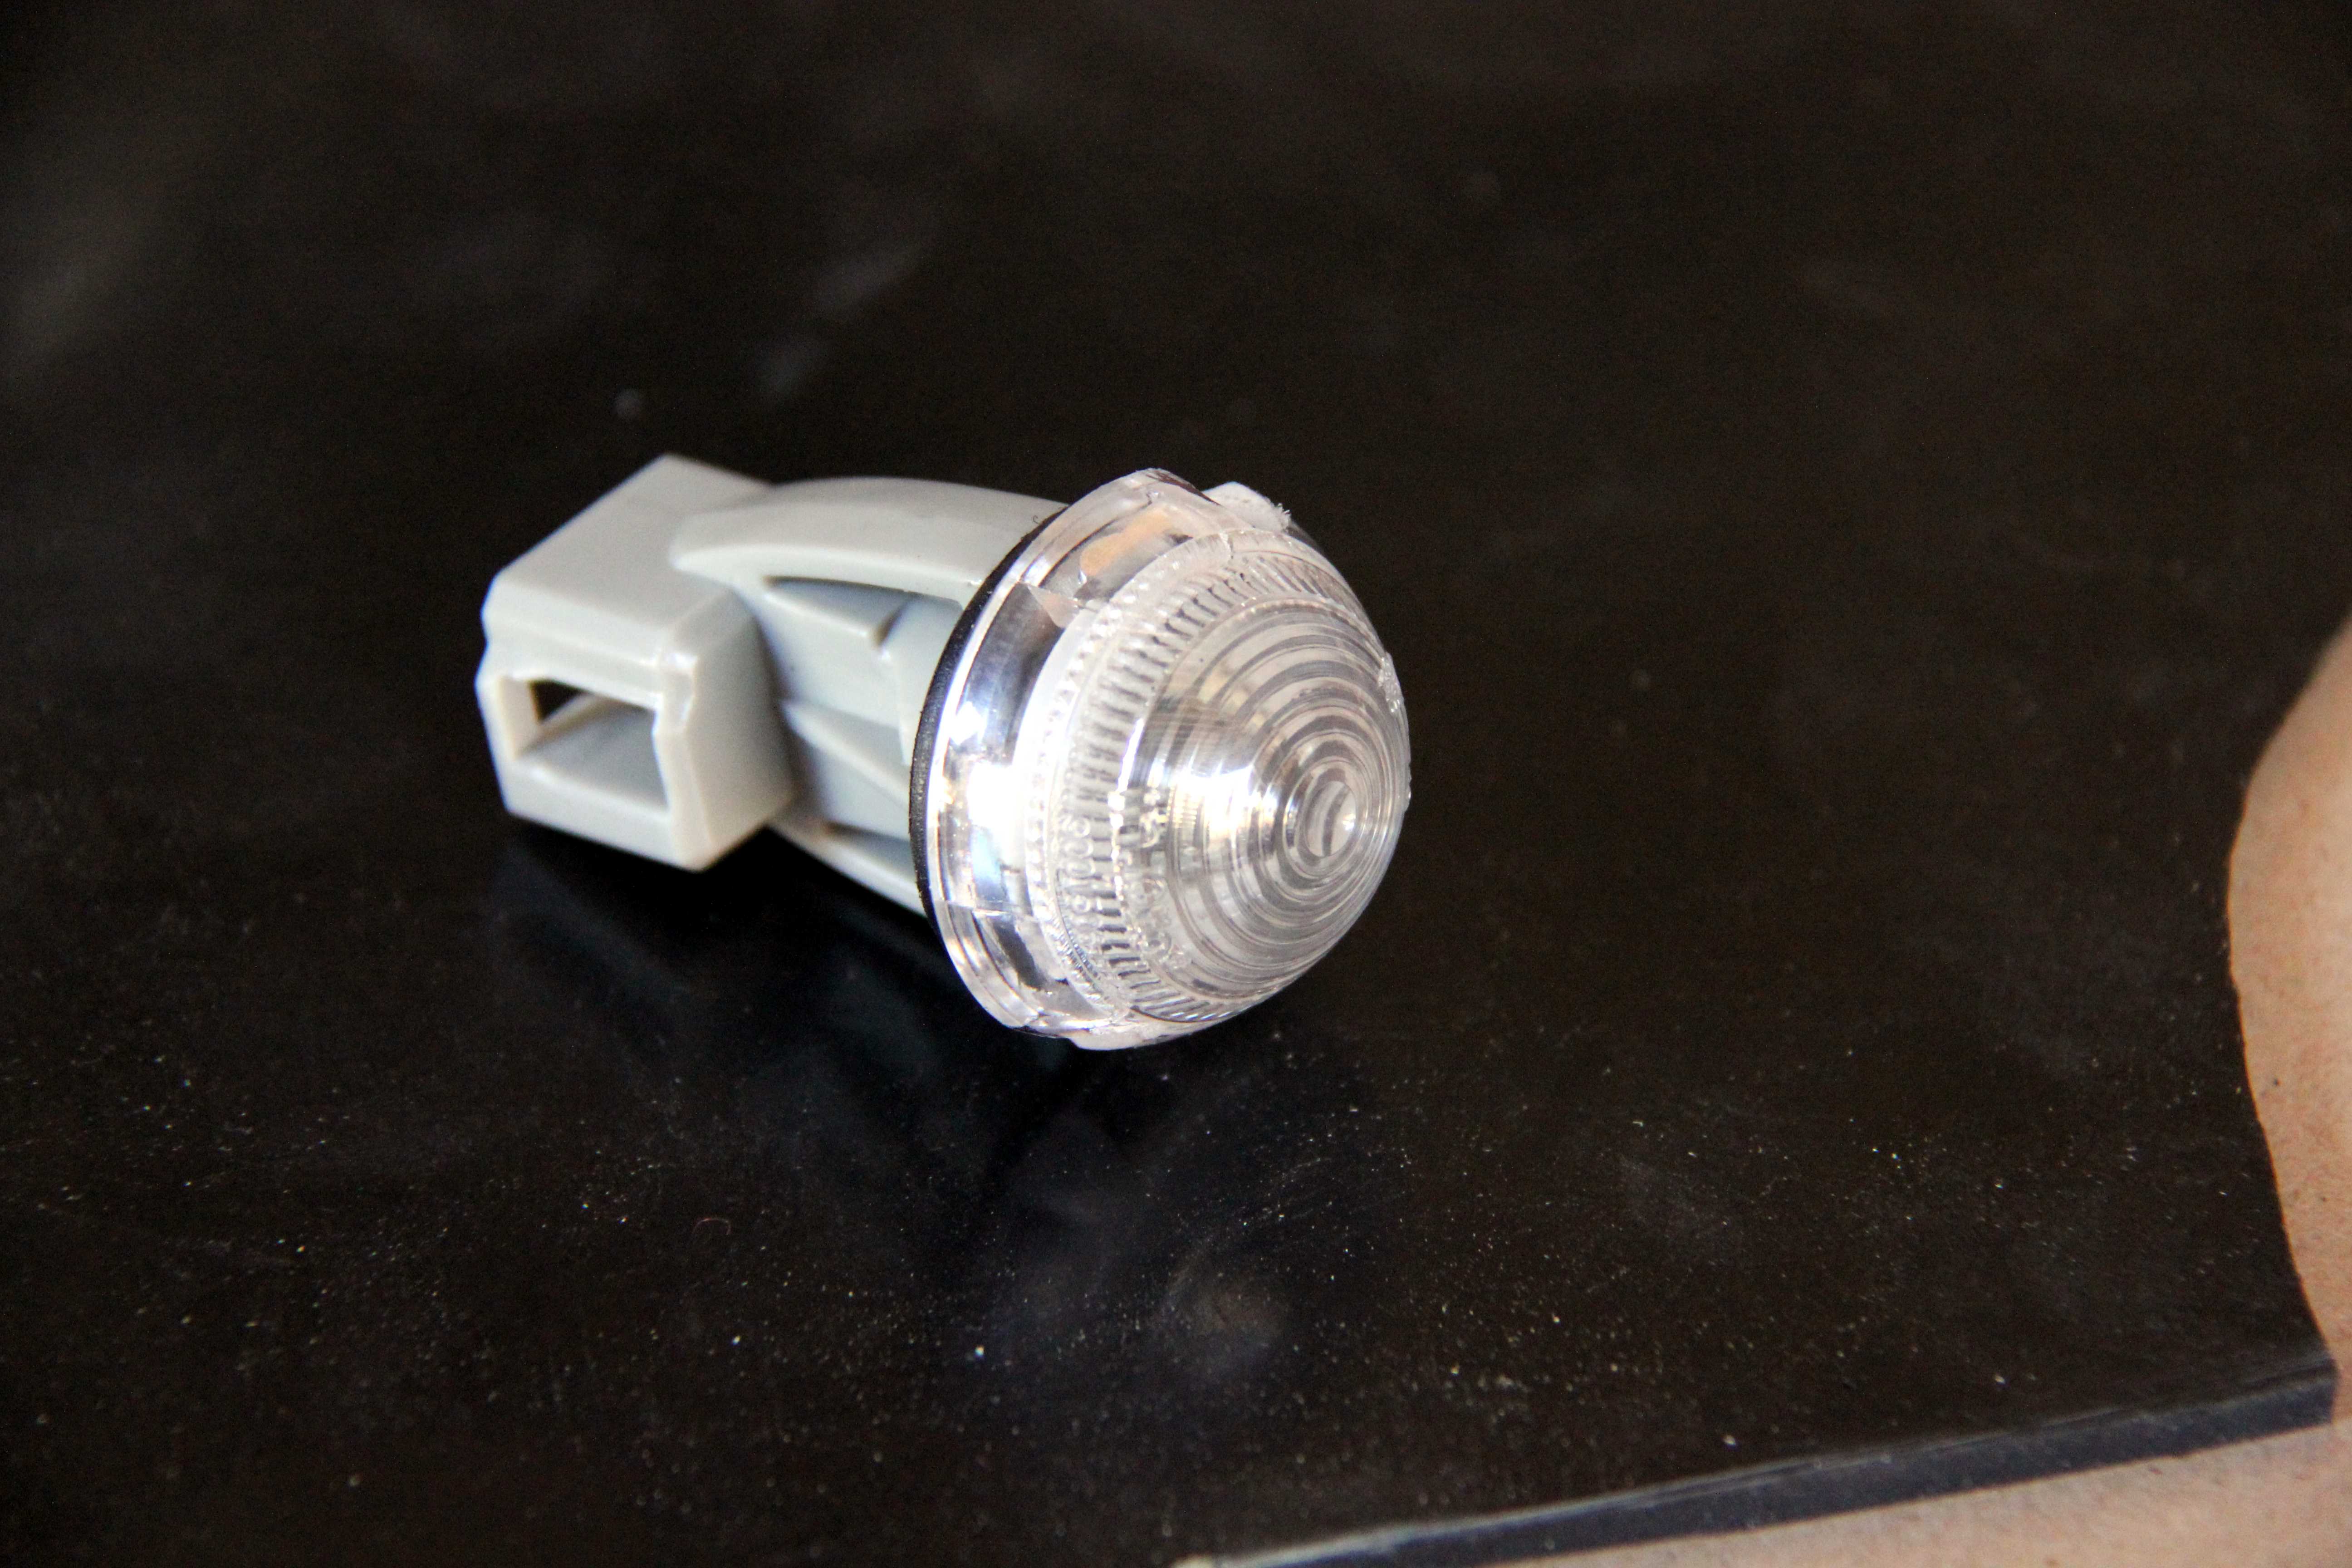
First thing was to source the smallest side repeaters I could find (round ones anyway, old-school Ford Escorts had little square ones, but that'd look pony). Eventually I came up with some Fiat Seicento ones. Only firm I could find doing clear ones was in Germany, so they're EU-approved, TUV approved and probably built to higher standard than anything else on the car lol. The ones on Cinquecentos are smaller, really tiny, but no-one does clear ones. Guess not many people customise Cinqs! So we have this to work with;
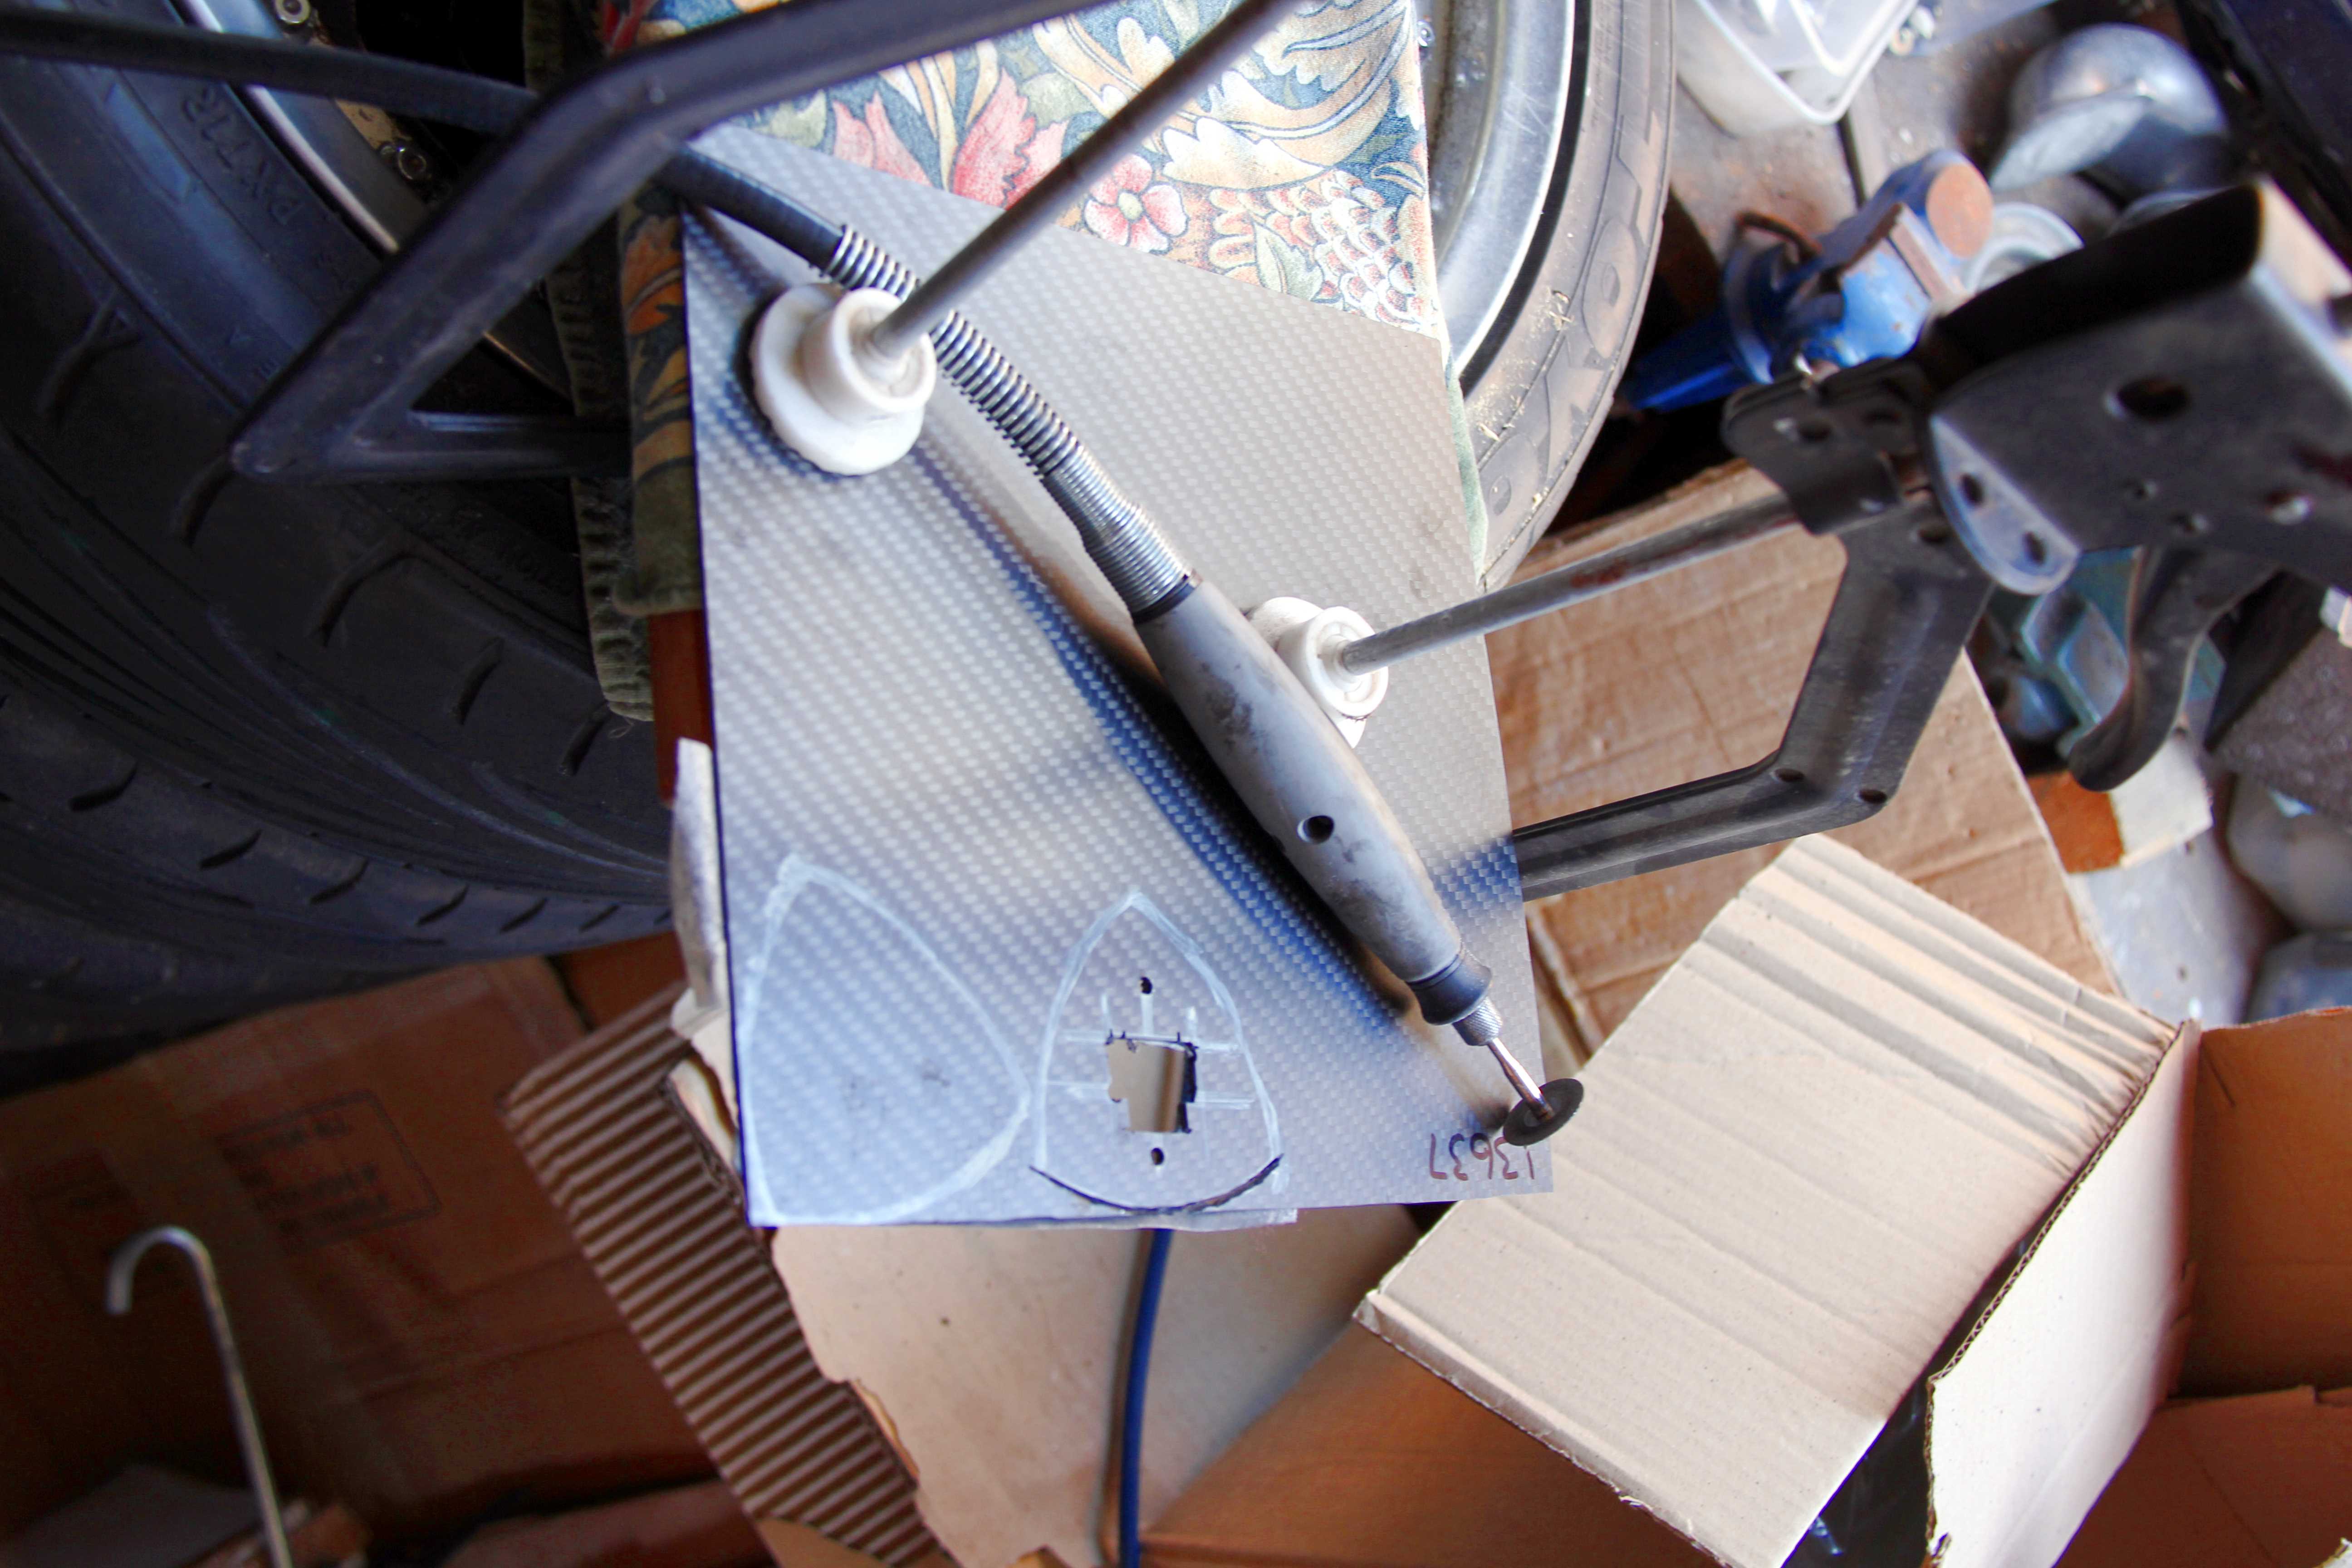
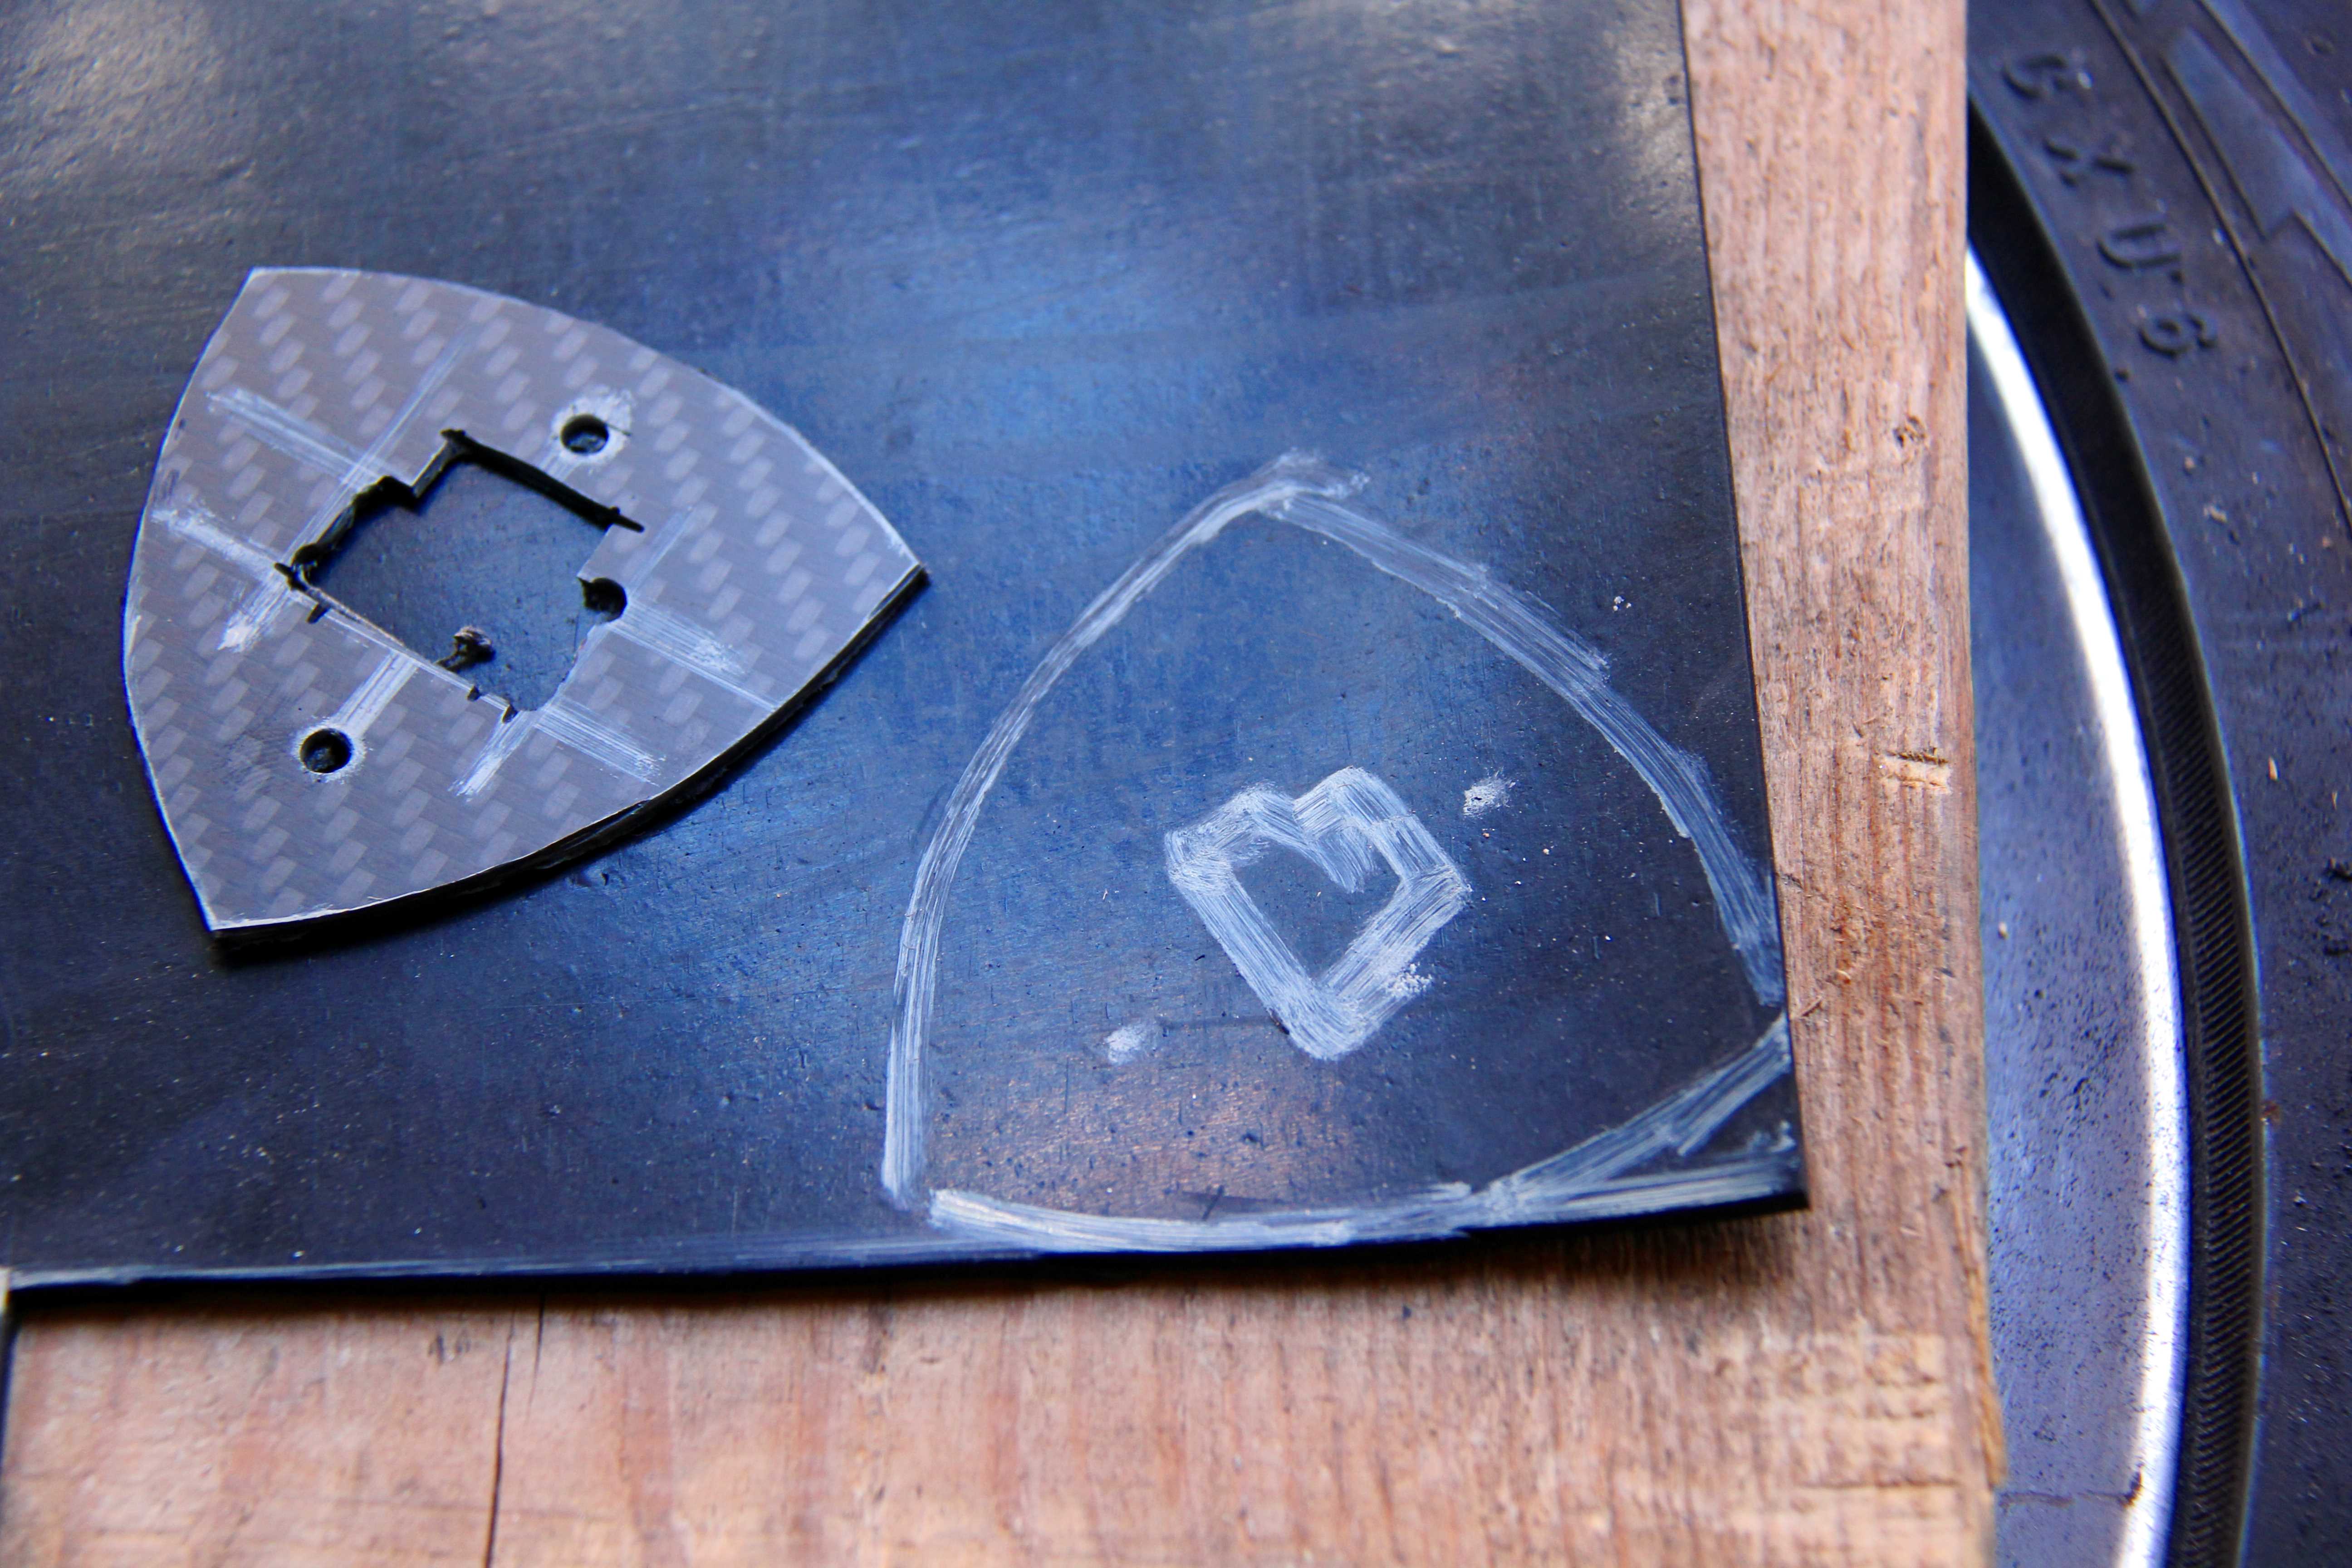
Obviosuly, a plate is now needed to mount them and cover the wreckage Mazda saw fit to drill through the wing. I was gonna do it in alloy cos it's easy to work with and light, but would look cack in sliver, so I'd have to paint it and then it'd scratch... and look more cack. Eventually settled on carbon fibre cos it's also easy to work, light, looks cool, etc. Genuine stuff, not Farbon (Fake Carbon), either
The shape was an obvious choice, really. Sorta homage to the Spirit R badge stylee and all that. Requires a steady hand cutting out...
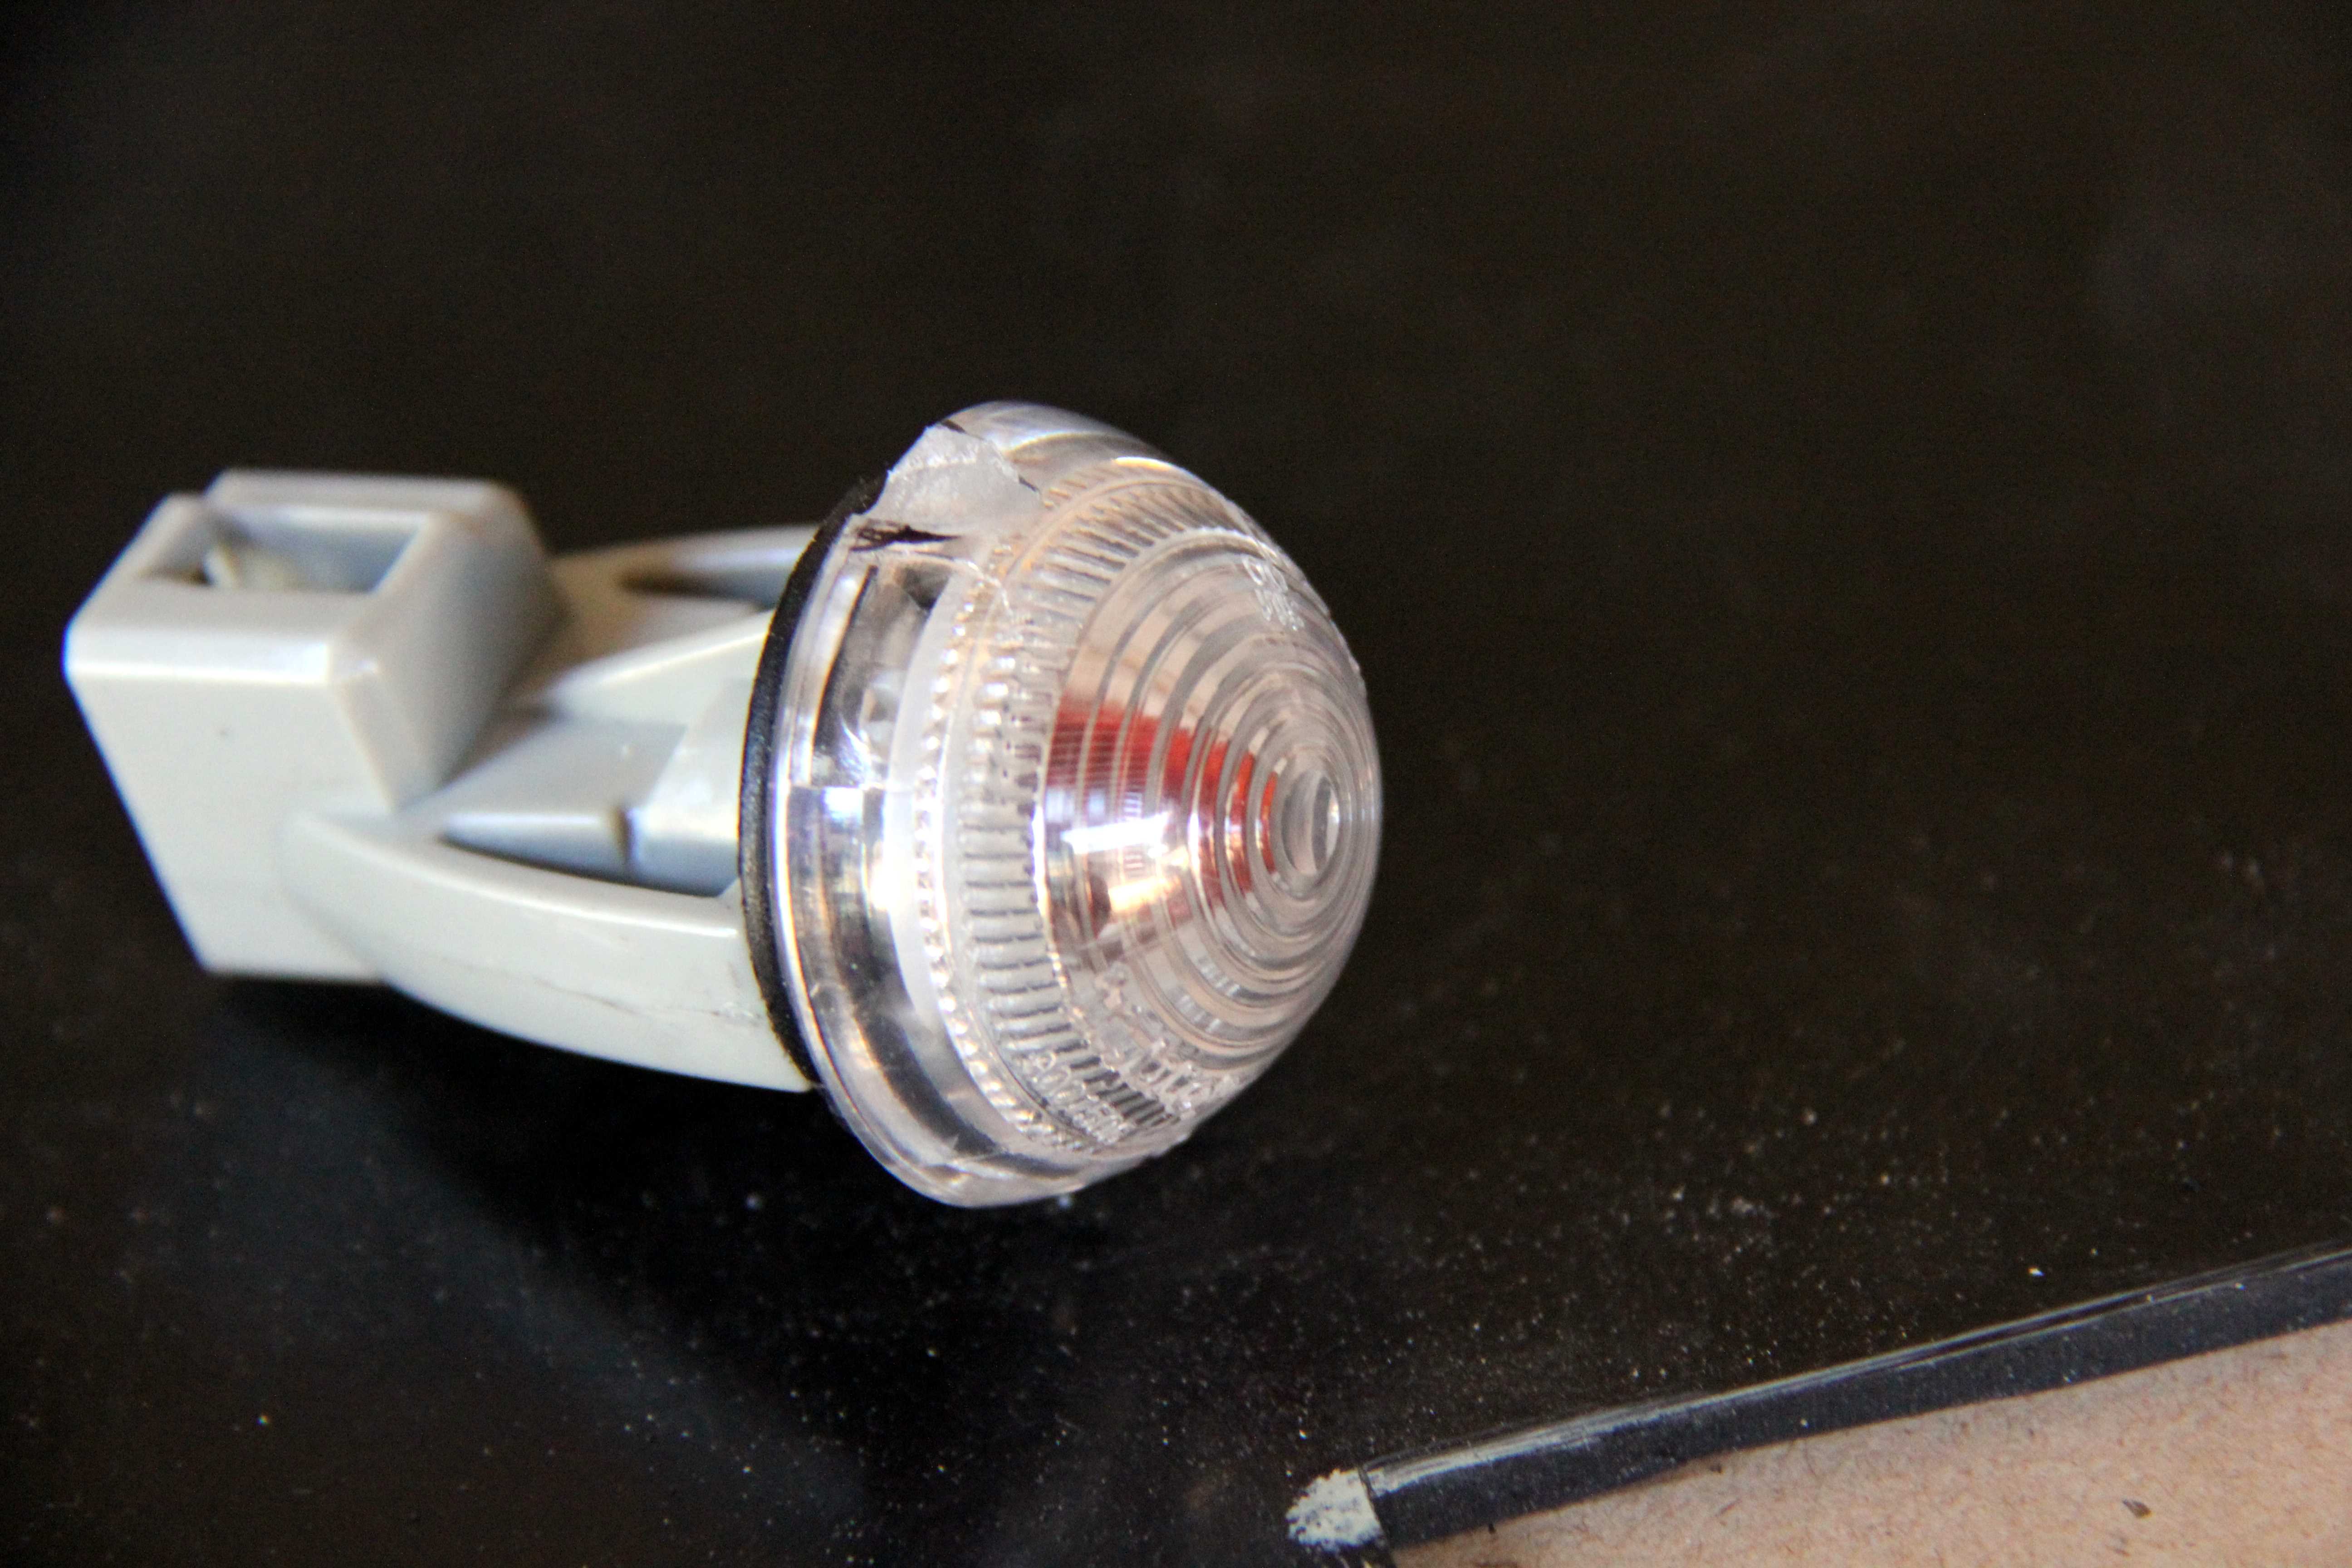
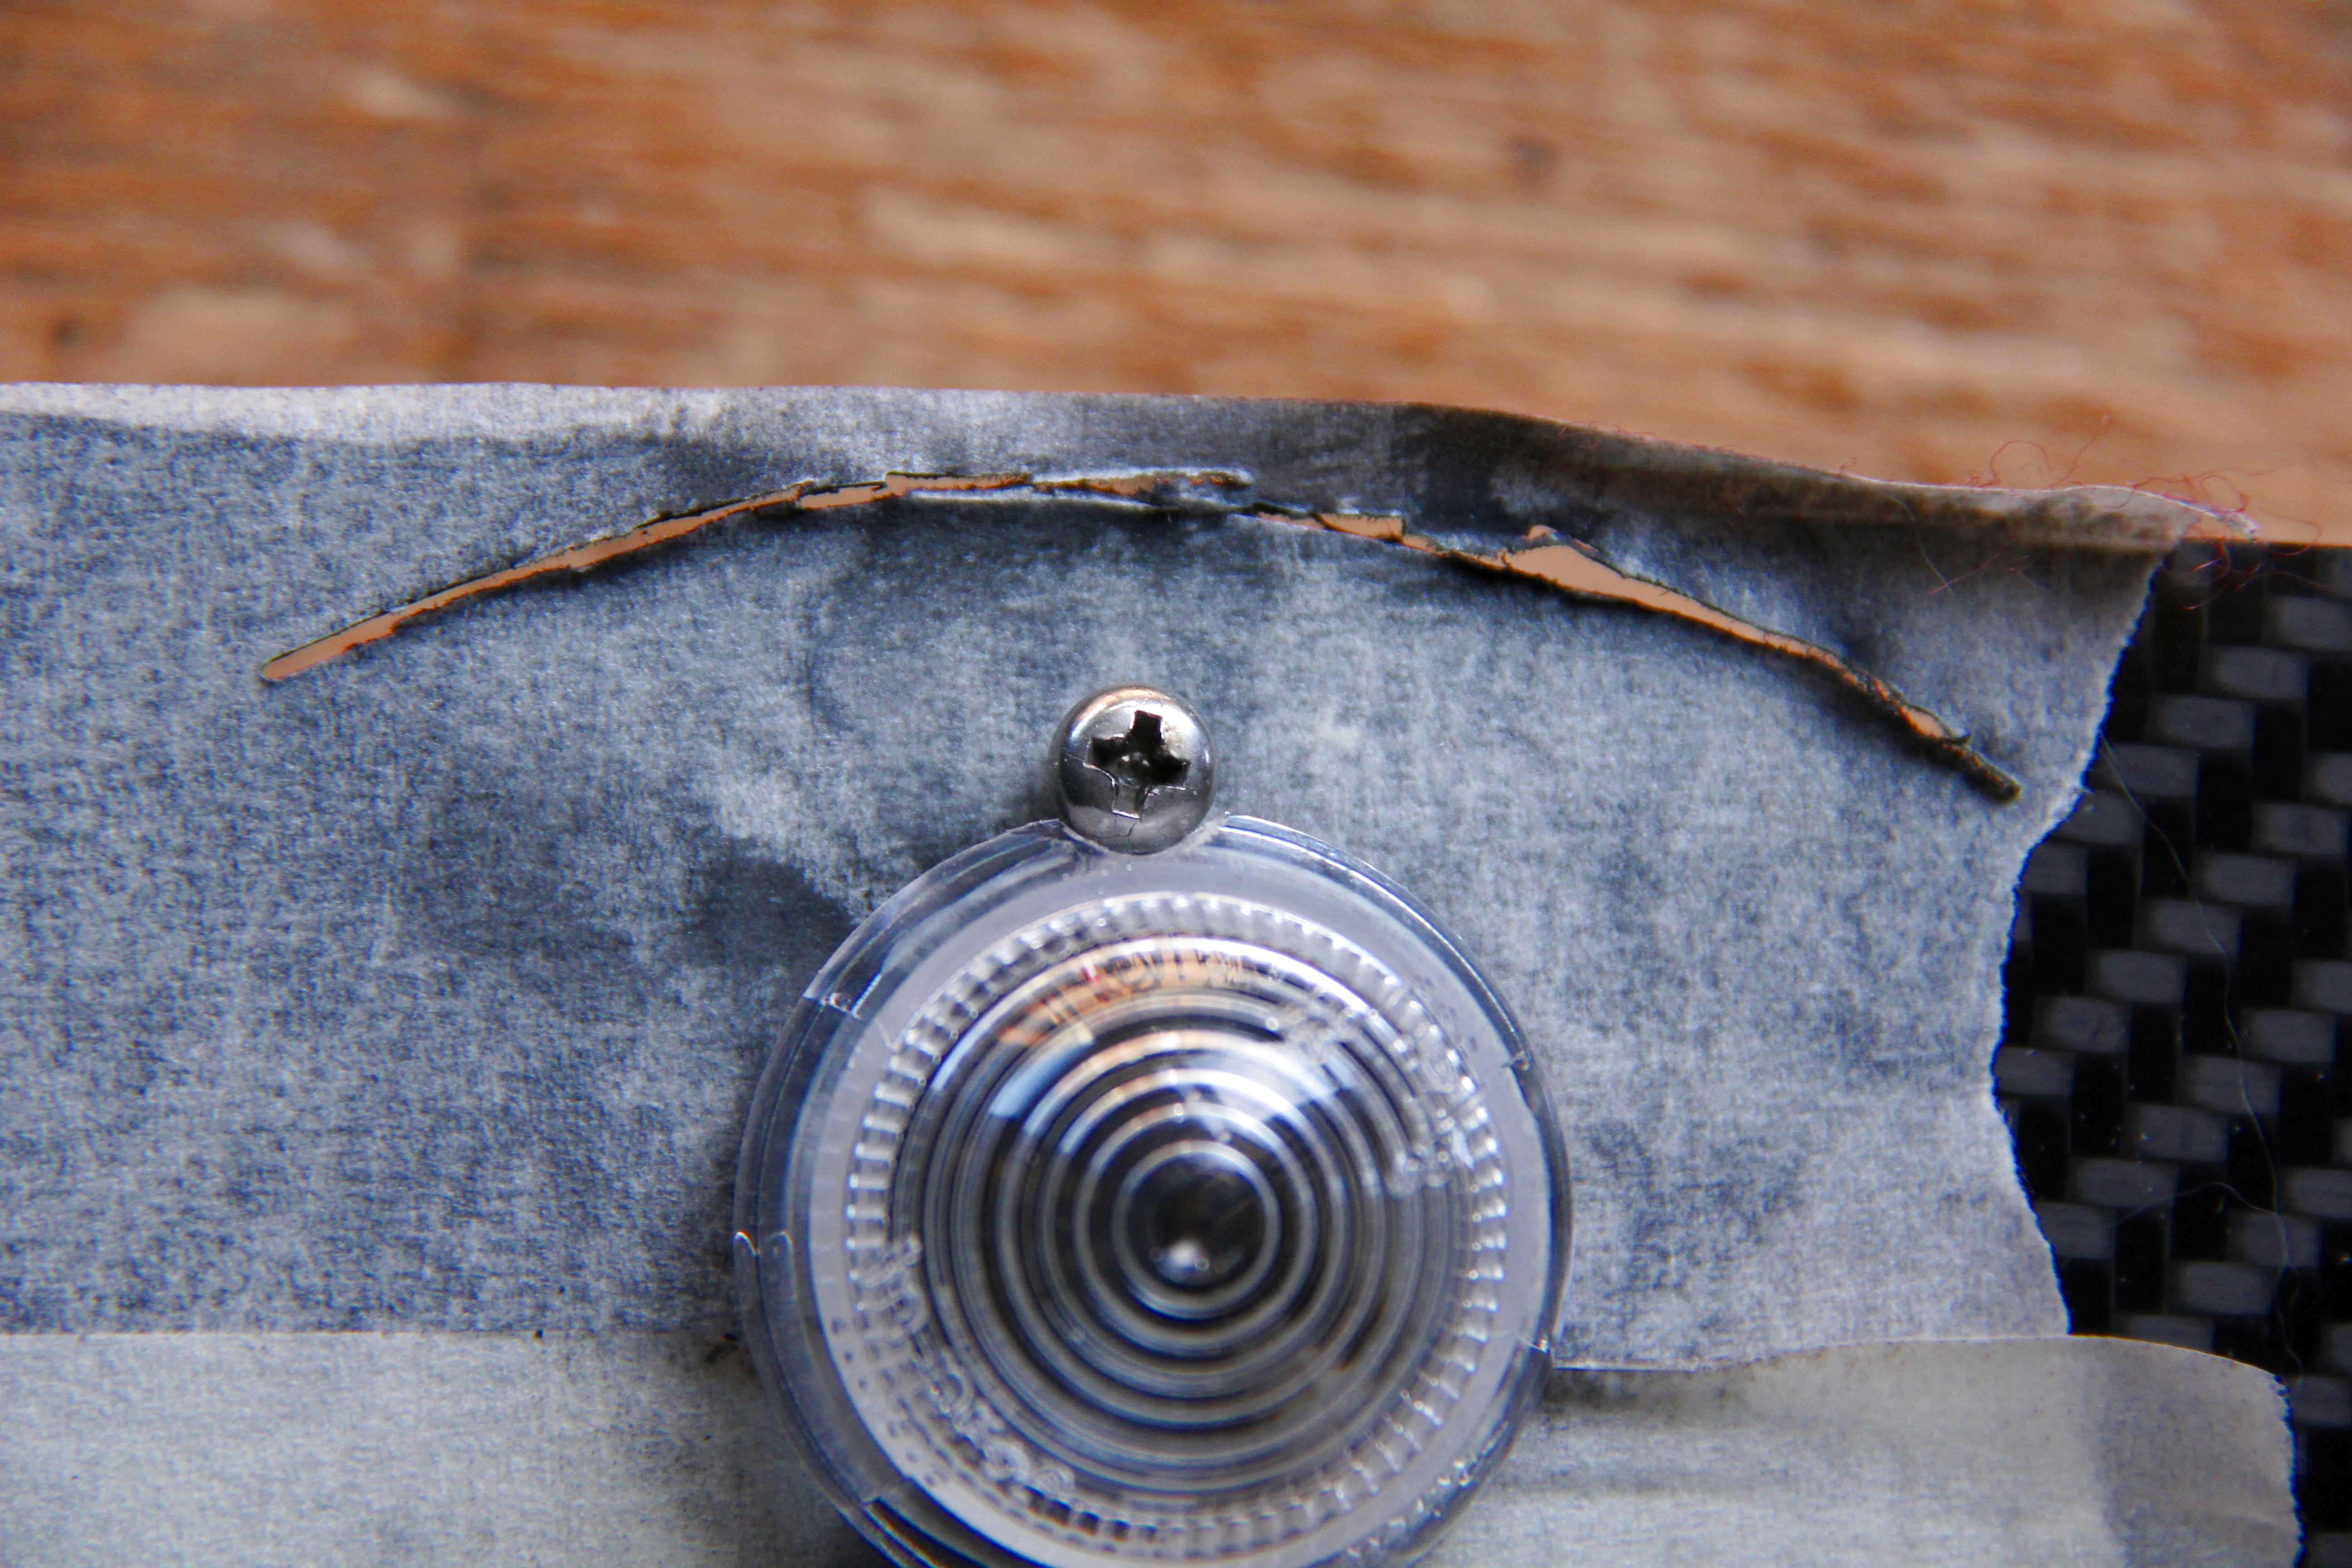
Next thing was to relieve the lenses to accommodate the screw-heads a little. They almost fitted between the screw holes for the originals, but not quite. Bugger!
God knows what the home enthusiast did before Dremels, lol. Actually, I remember perfectly well what we did and it involved a hella lot of faffing around with hacksaws and files. Still, a bit of Dremel action later...
Then of course the German-supplied orange bulbs had to be sacked out in favour of nice chrome ones in order to avoid the fried-egg look
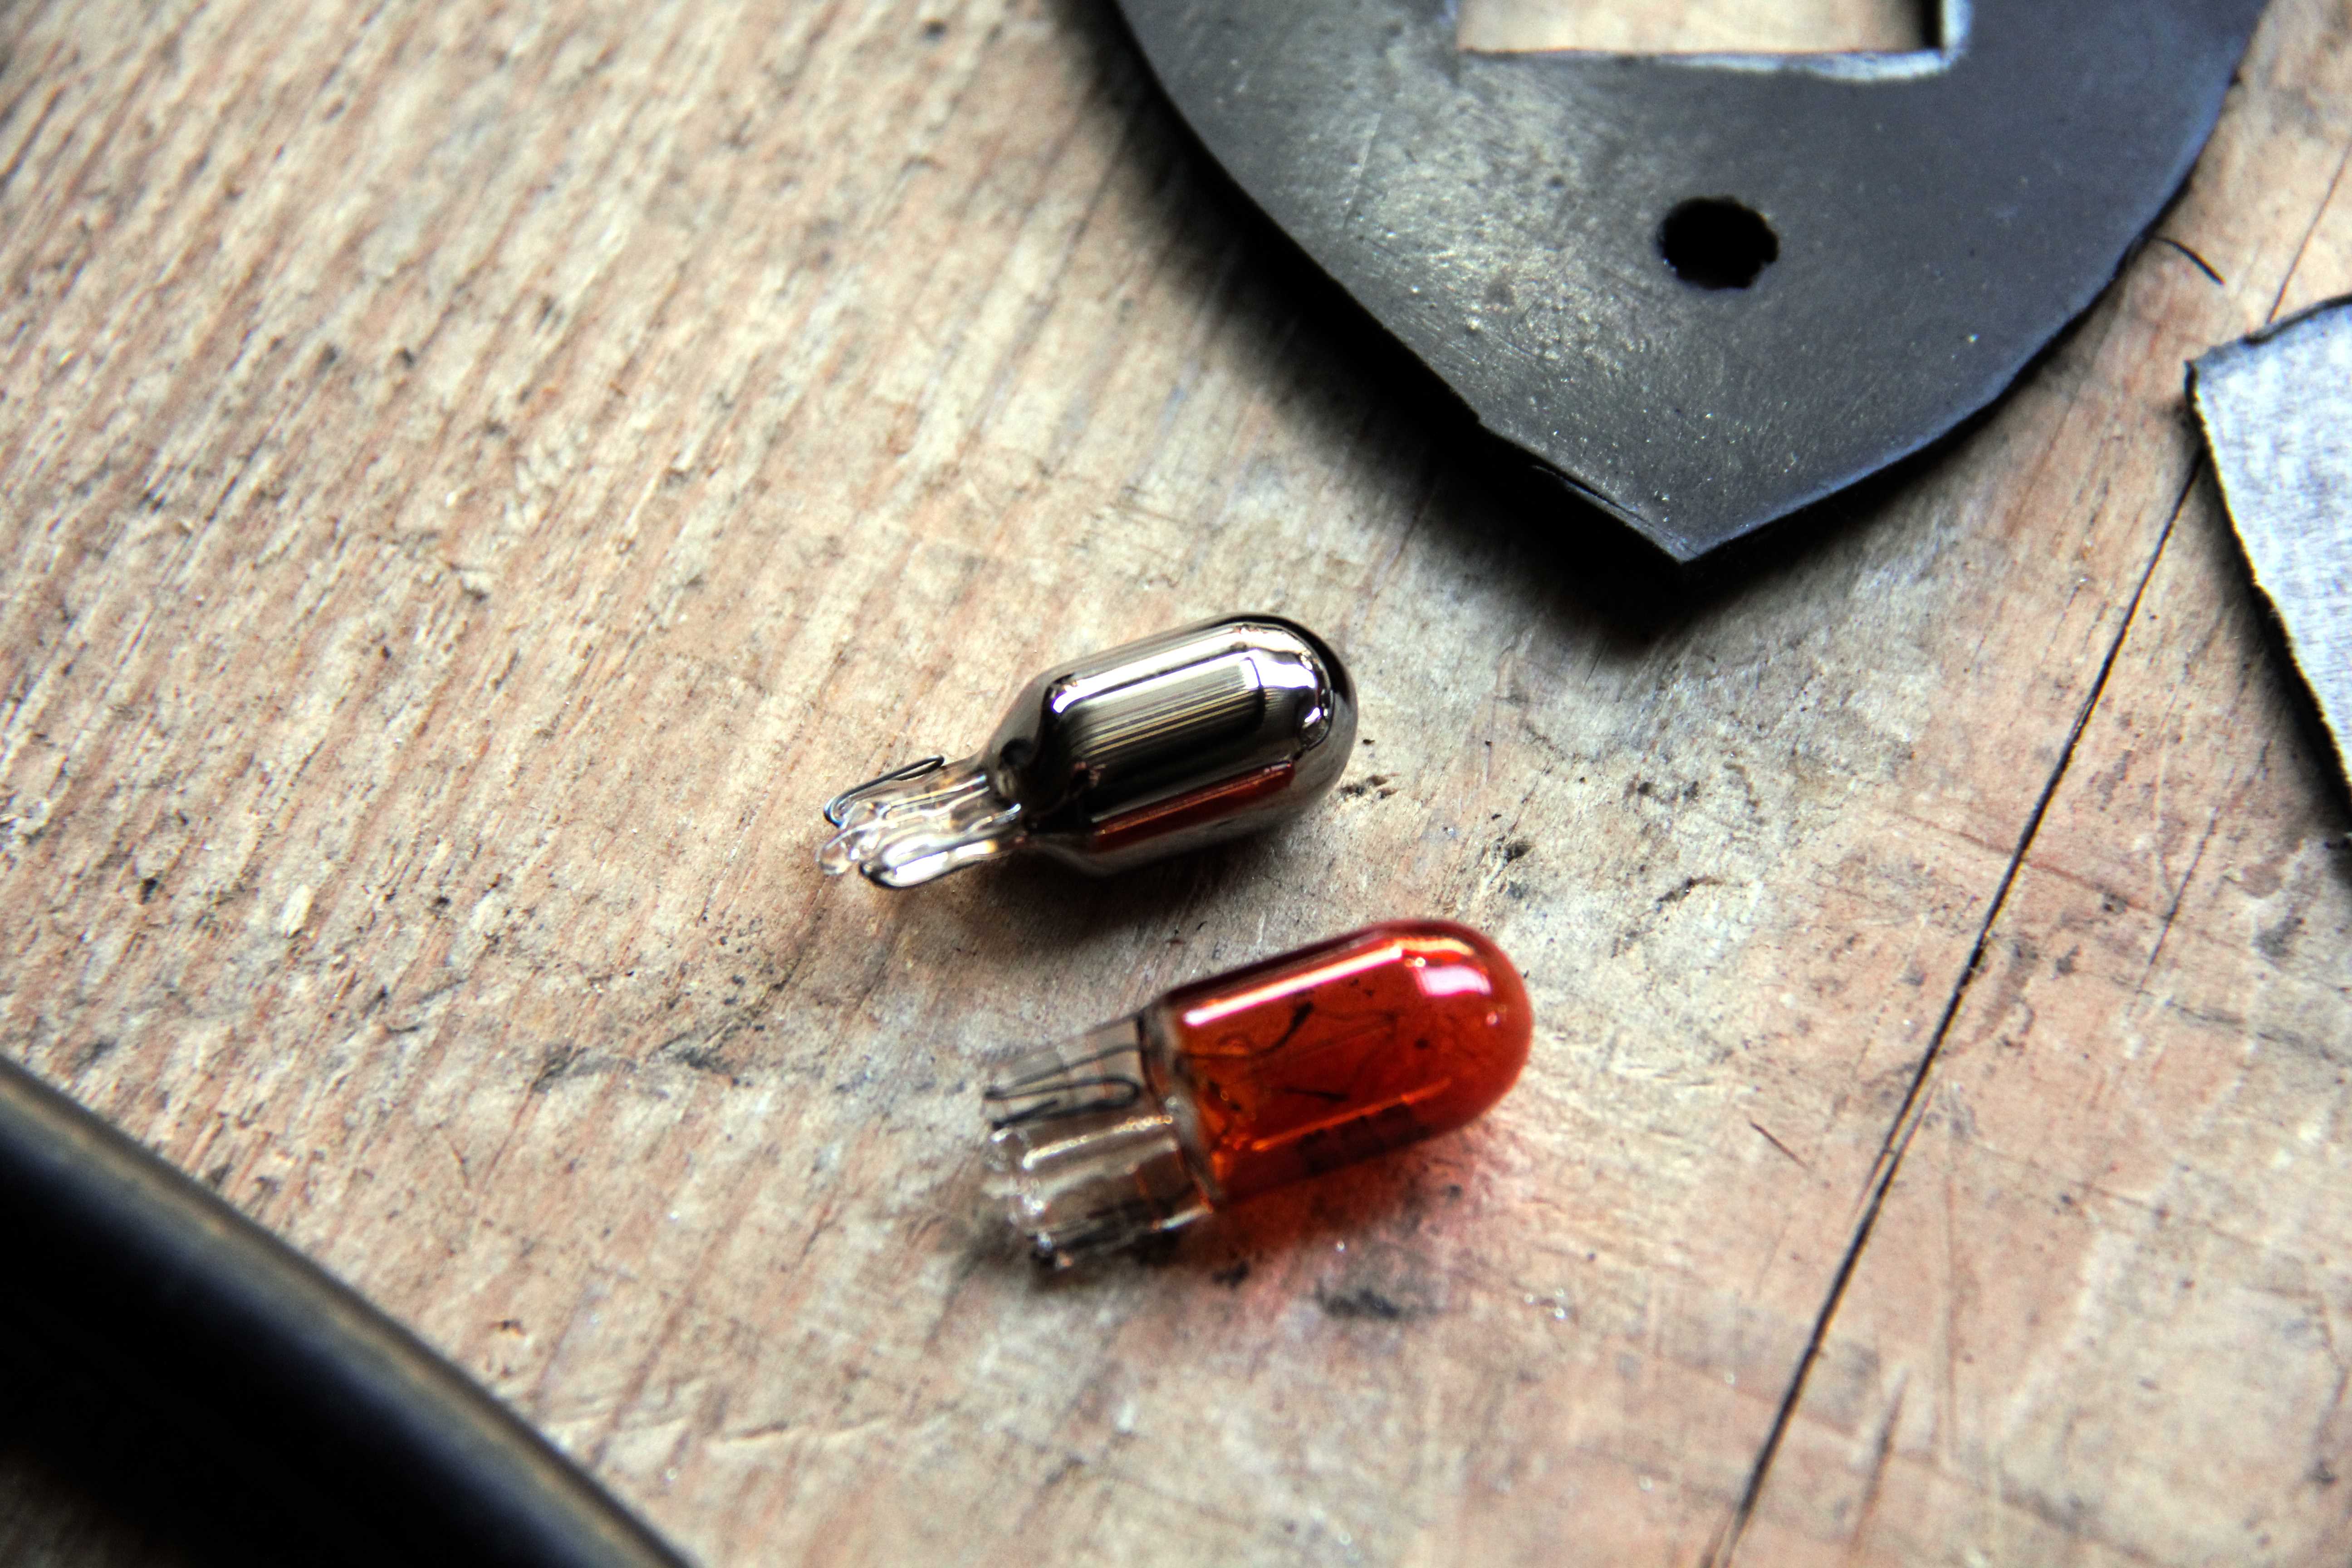
Much better
Then in order to keep the wing waterproof and stop rust getting in behind, a gasket was needed. Now I had one plate made up it was easy to use as a template for everything else. A good quality rubber sheet 3mm thick made for perfect gasket material. Hey, everyone should have rubber sheets easy to hand
Then the final touches; a spot of countersinking and some silver enamel, just to add a bit of detail and make it look like these were designed to be there, not just a random-shaped lump of carbon glued to the wing
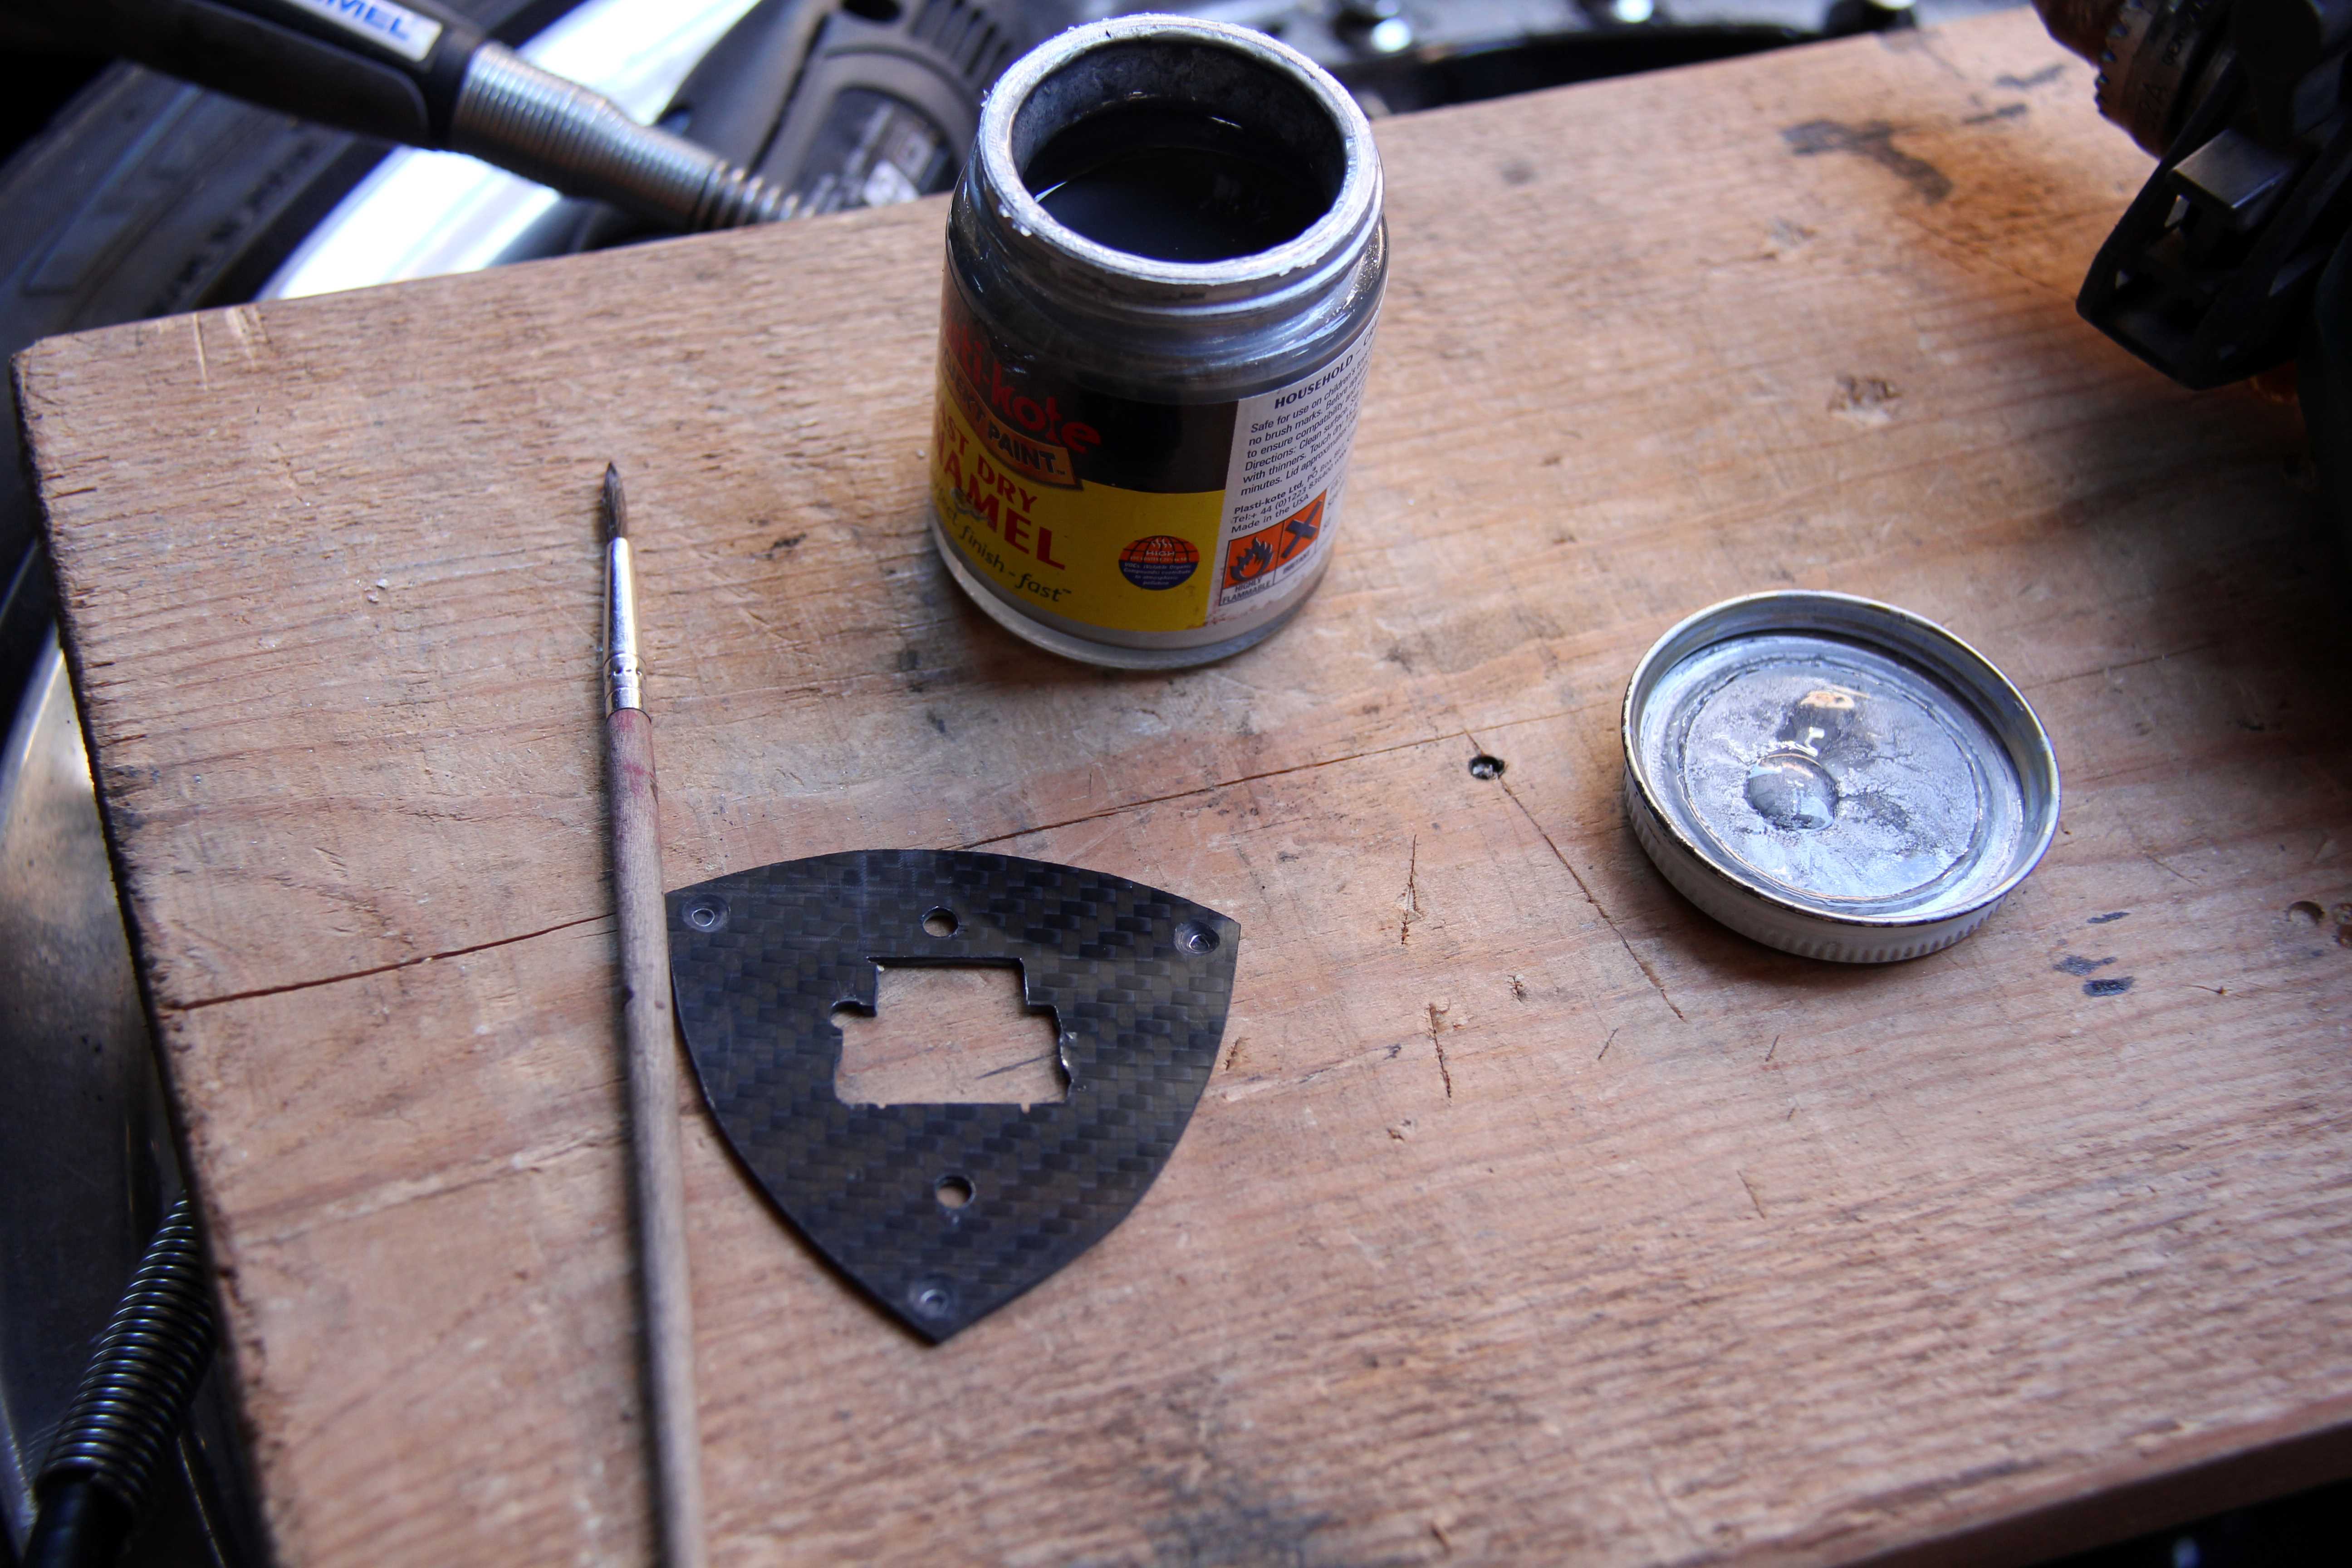
and some black on the screwheads to try and invisible-ise them and stop it getting too cluttered and busy ...and Boom!
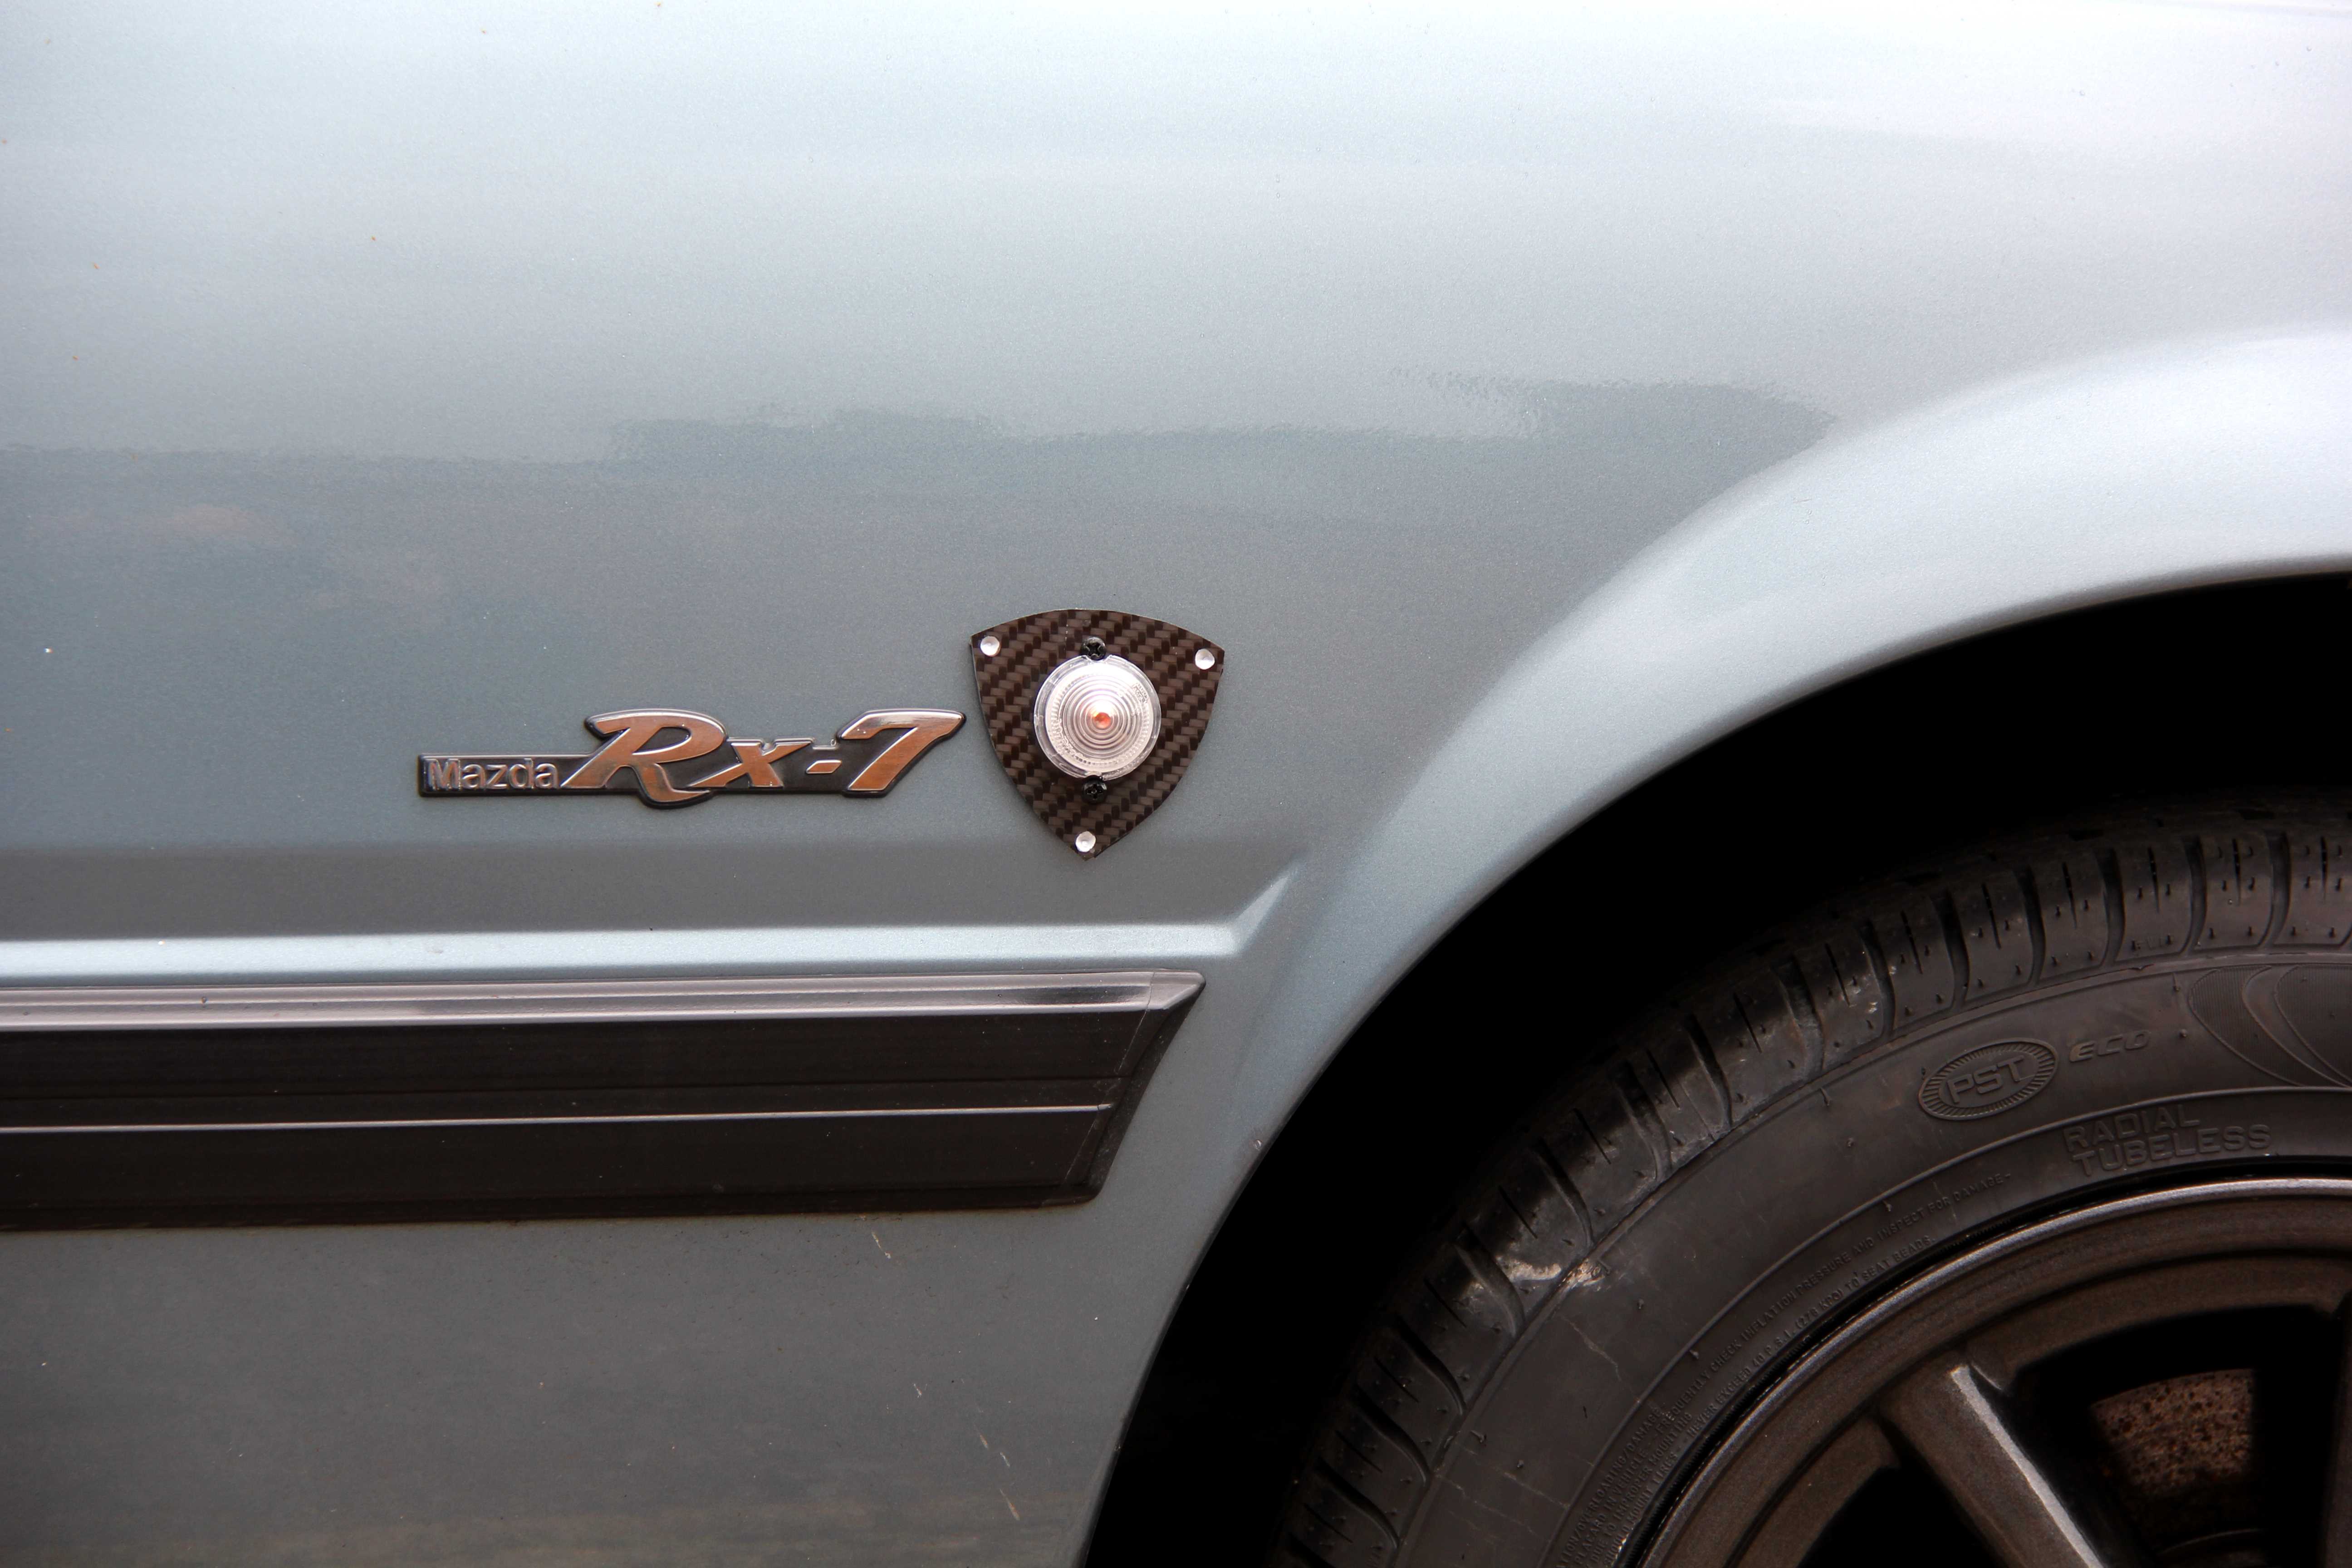
rotor-shaped bespoke side repeaters that (hopefully) look much better than the horrid stock orange ones, and more importantly, maybe look like they were meant to be there all along. Well, in my world, anyway...

Maybe it seems a slightly obsessive length to go to over such a little thing, but in actual fact it only took an afternoon and a lot of it was measuring carefully a few times before cutting the first template out. After that, it was easy. And I've got some carbon rotor side repeaters, and you haven't. So I win
[img]https://i668.photobucket.com/albums/vv43/Nik_da_Greek/FB%20RX-7%201985/Side%20repeater%20construction/threequarterview.jpg[/img
Anyway, side repeater turn signals. I became something of an authority on side repeaters in my quest to lose the giant satsuma-hued things. Trouble is, apart from UKDM FBs and FCs, no other car on the planet seems to have the same side repeaters, and I couldn't find anyone doing clear or smoked replacements. So the only option was to replace them with something else. Trouble with that is, once you remove the horrid stockers, you're left with this;
Which is hardly conducive to easy replacement; even if you could find a mounting that fitted in the cut-out you're left with the two screw holes. Welding a plate in and painting would be one option, but not for me; too overkill and as always, too hard to put back to stock if necessary. So, let me take you on a little journey into my world of borderline autistic levels of OCD and mania...
First thing was to source the smallest side repeaters I could find (round ones anyway, old-school Ford Escorts had little square ones, but that'd look pony). Eventually I came up with some Fiat Seicento ones. Only firm I could find doing clear ones was in Germany, so they're EU-approved, TUV approved and probably built to higher standard than anything else on the car lol. The ones on Cinquecentos are smaller, really tiny, but no-one does clear ones. Guess not many people customise Cinqs! So we have this to work with;
Obviosuly, a plate is now needed to mount them and cover the wreckage Mazda saw fit to drill through the wing. I was gonna do it in alloy cos it's easy to work with and light, but would look cack in sliver, so I'd have to paint it and then it'd scratch... and look more cack. Eventually settled on carbon fibre cos it's also easy to work, light, looks cool, etc. Genuine stuff, not Farbon (Fake Carbon), either
The shape was an obvious choice, really. Sorta homage to the Spirit R badge stylee and all that. Requires a steady hand cutting out...
Next thing was to relieve the lenses to accommodate the screw-heads a little. They almost fitted between the screw holes for the originals, but not quite. Bugger!
God knows what the home enthusiast did before Dremels, lol. Actually, I remember perfectly well what we did and it involved a hella lot of faffing around with hacksaws and files. Still, a bit of Dremel action later...
Then of course the German-supplied orange bulbs had to be sacked out in favour of nice chrome ones in order to avoid the fried-egg look
Much better
Then in order to keep the wing waterproof and stop rust getting in behind, a gasket was needed. Now I had one plate made up it was easy to use as a template for everything else. A good quality rubber sheet 3mm thick made for perfect gasket material. Hey, everyone should have rubber sheets easy to hand
Then the final touches; a spot of countersinking and some silver enamel, just to add a bit of detail and make it look like these were designed to be there, not just a random-shaped lump of carbon glued to the wing
and some black on the screwheads to try and invisible-ise them and stop it getting too cluttered and busy ...and Boom!
rotor-shaped bespoke side repeaters that (hopefully) look much better than the horrid stock orange ones, and more importantly, maybe look like they were meant to be there all along. Well, in my world, anyway...
Maybe it seems a slightly obsessive length to go to over such a little thing, but in actual fact it only took an afternoon and a lot of it was measuring carefully a few times before cutting the first template out. After that, it was easy. And I've got some carbon rotor side repeaters, and you haven't. So I win
[img]https://i668.photobucket.com/albums/vv43/Nik_da_Greek/FB%20RX-7%201985/Side%20repeater%20construction/threequarterview.jpg[/img
Thread Starter
Senior Member
Joined: Oct 2010
Posts: 255
Likes: 1
From: England
When I finally got a dry day I promptly changed the fuel lines for some nice new braided steel ones. Probably just as well, check out the state of the old ones;
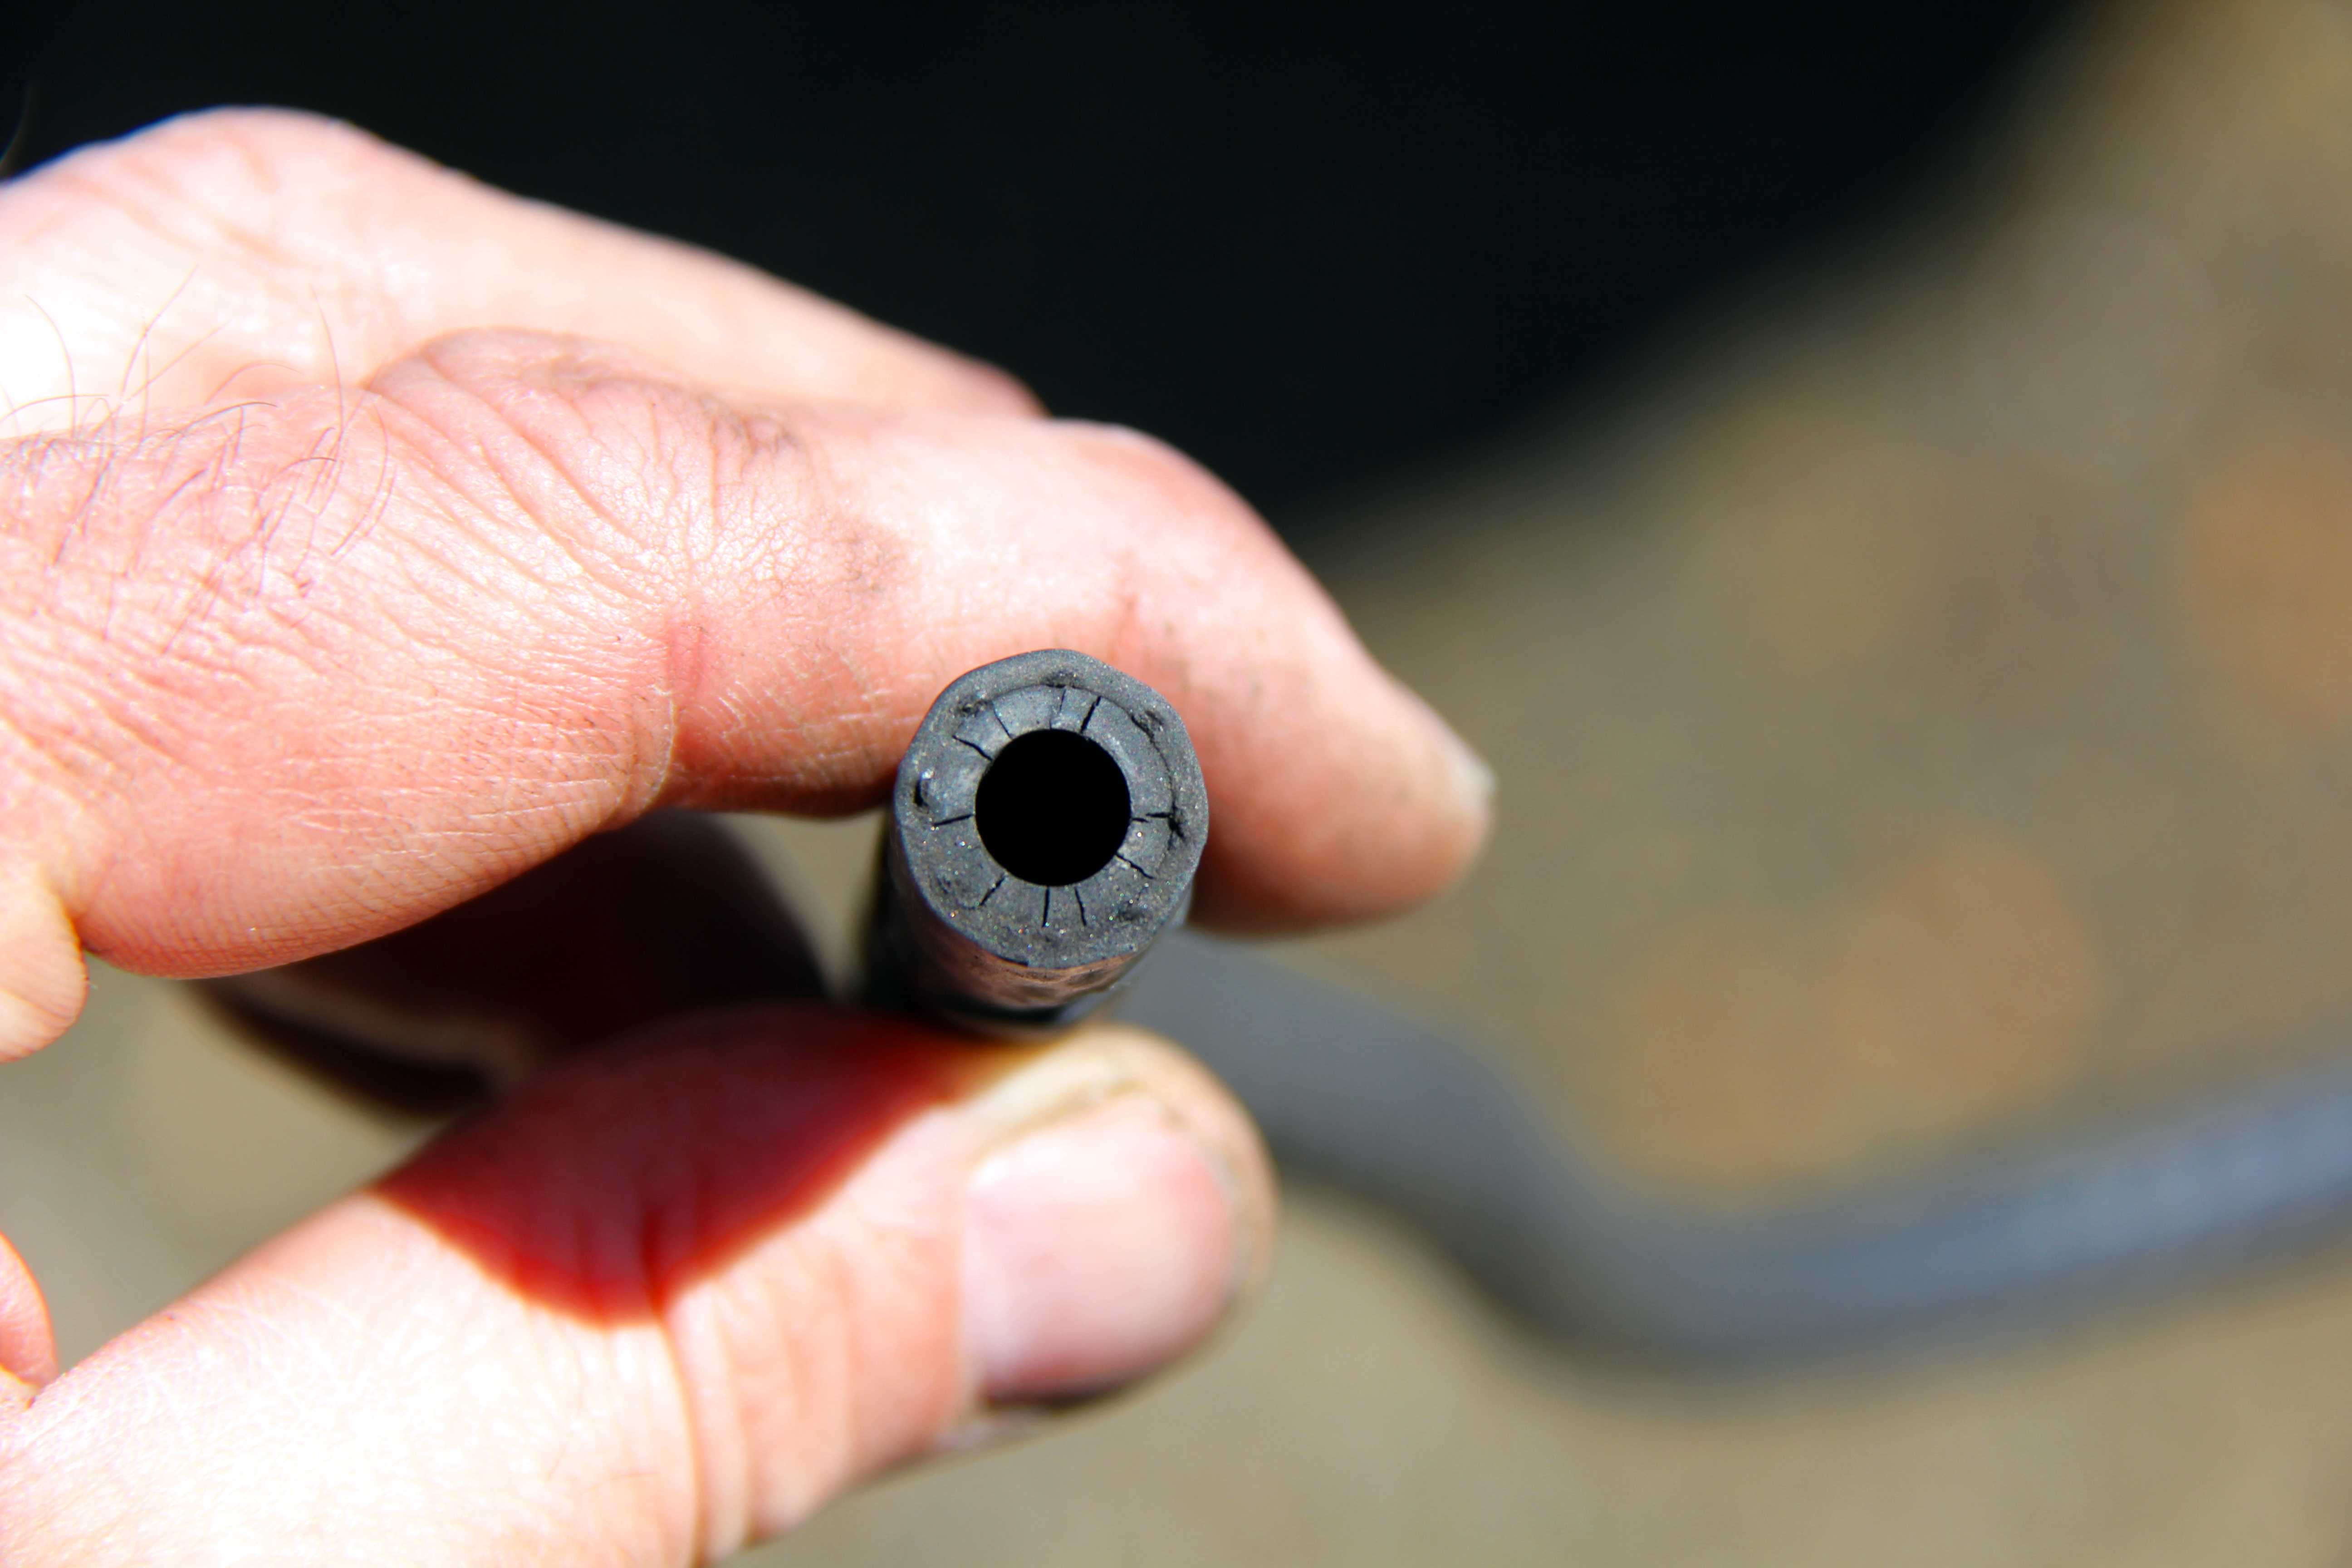
Gadzooks! When Noah plumbed in the diesels on the Ark he used some of this fuel line. Anyway, well shot of that and the new ones don't seem inclined to leak (yet) so hopefully my death in a blazing fireball is deferred for a while at least. Trouble with changing old crappy black stuff for new shiny bits is now I made a clean spot. Where will it end? Oh, I fitted a quality genuine imitation fake MazdaSpeed(ish) oil filler cap as well. Just because I can
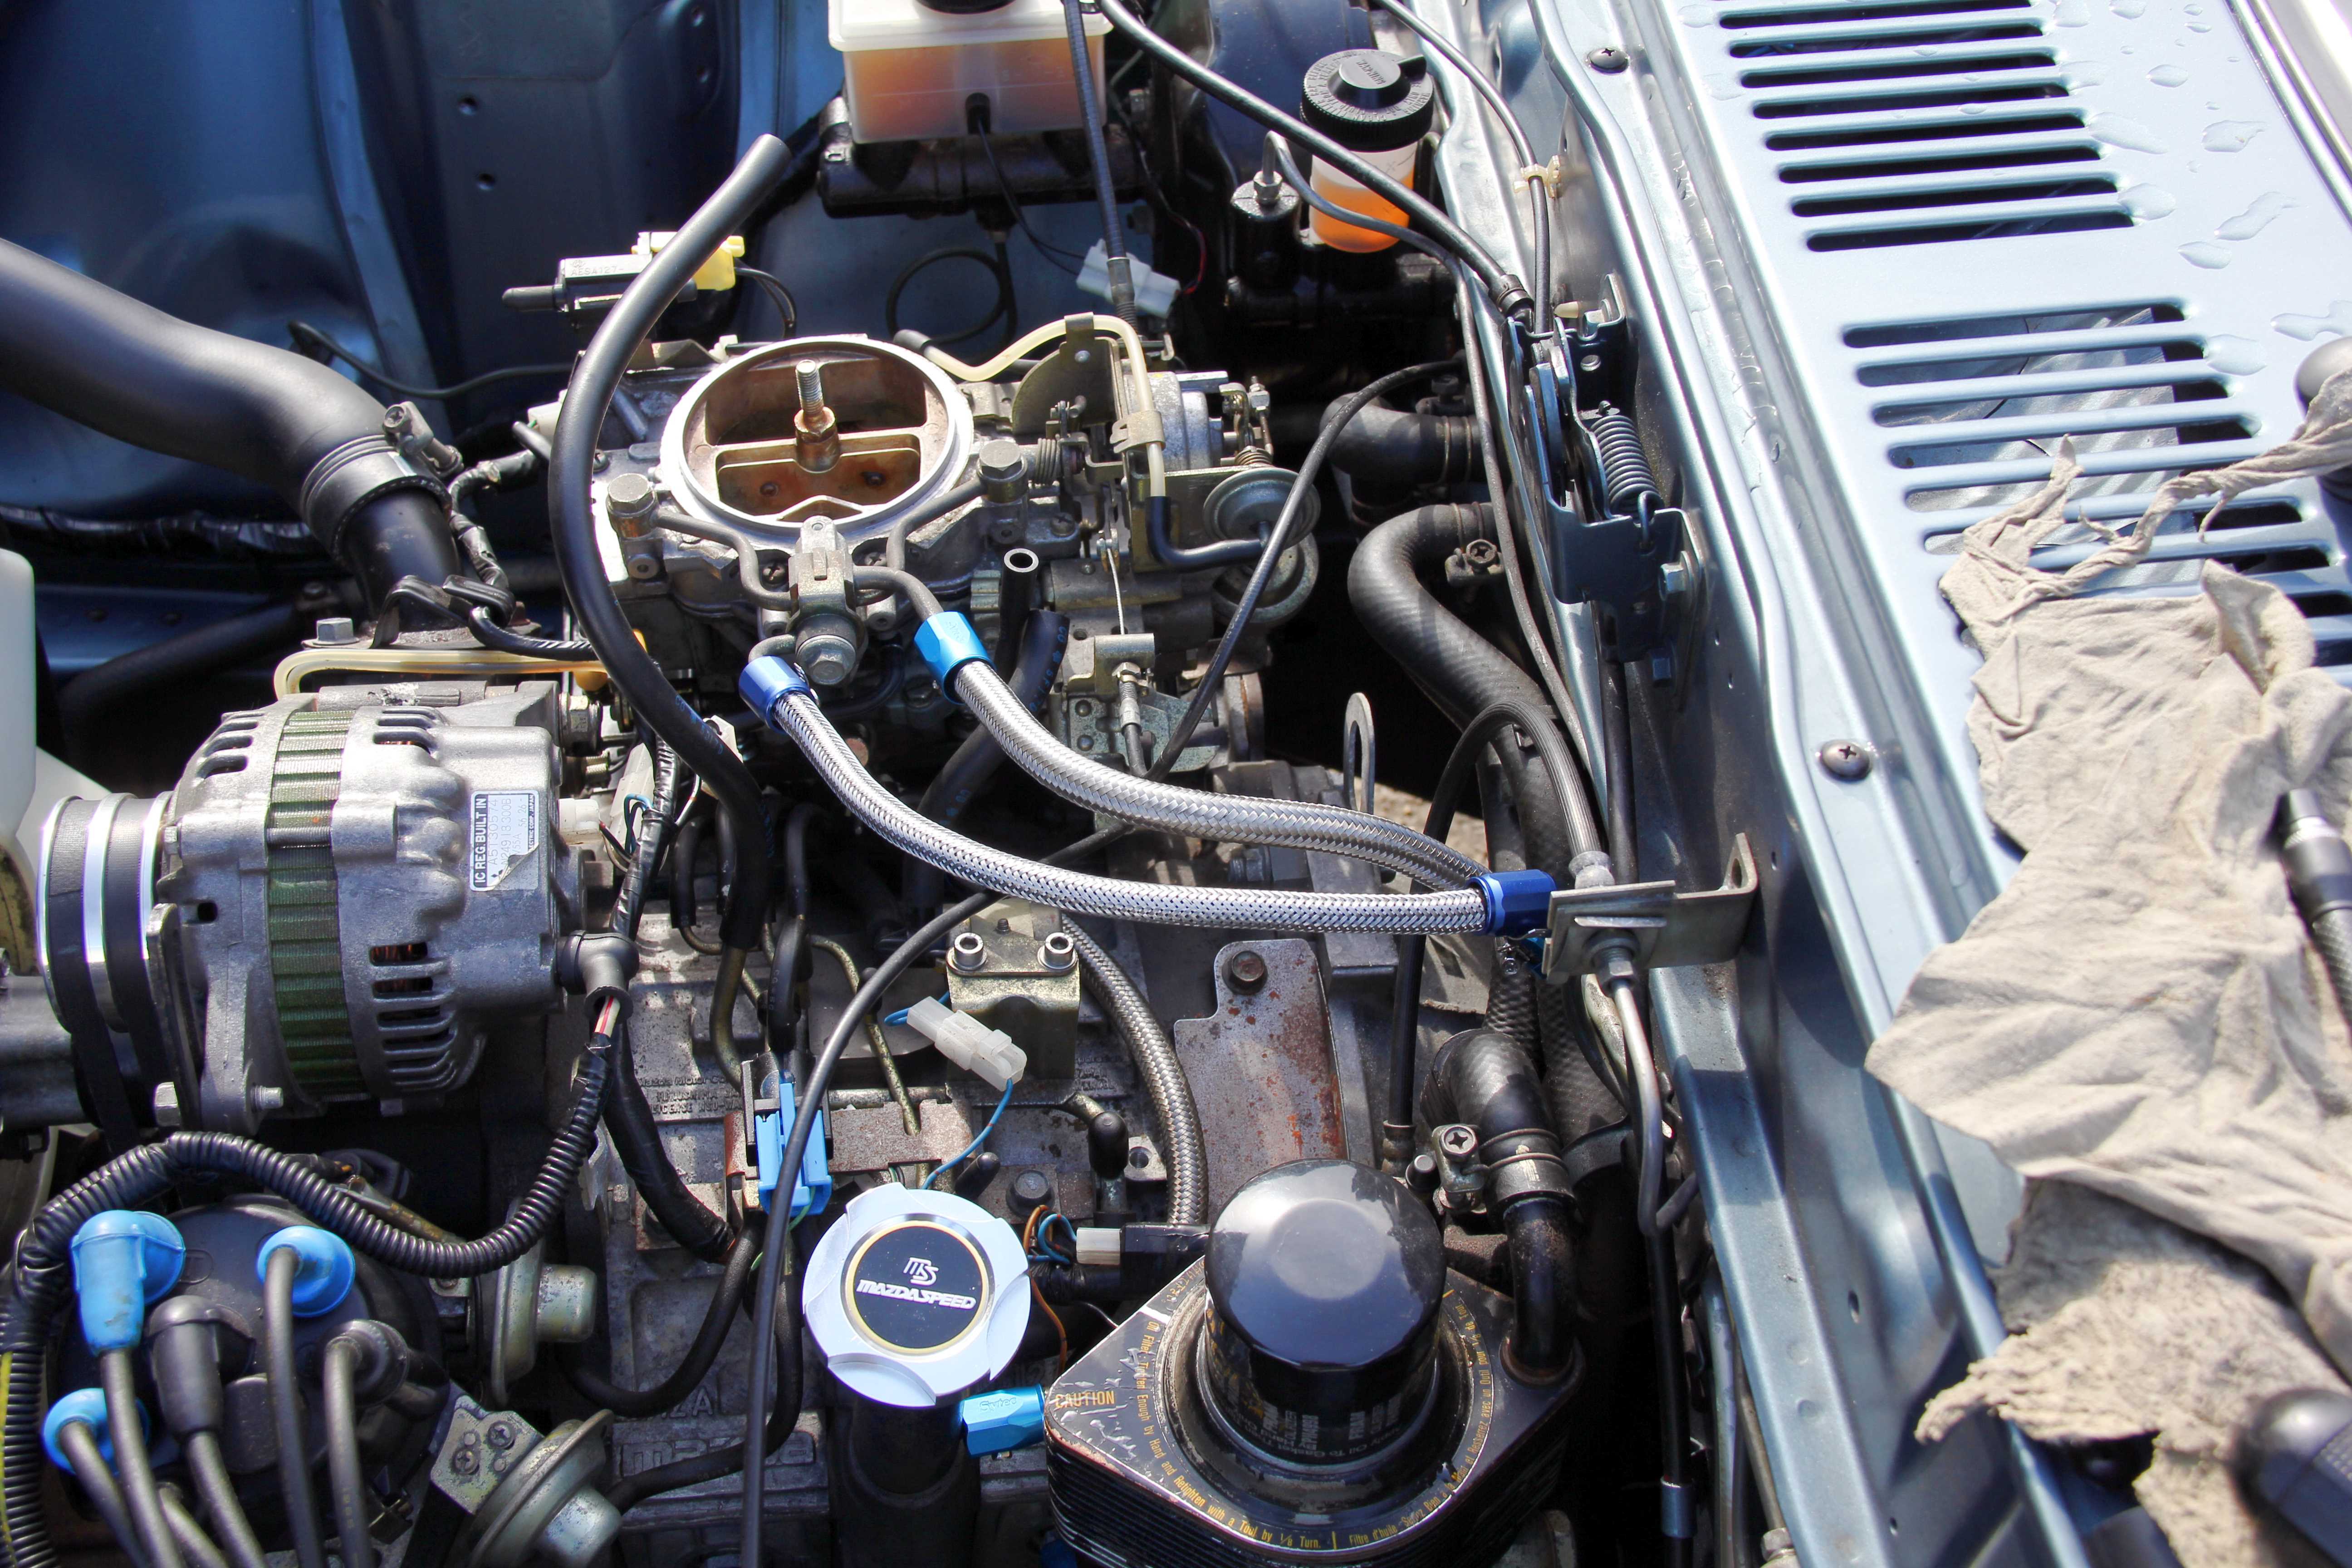
Gadzooks!
When Noah plumbed in the diesels on the Ark he used some of this fuel line. Anyway, well shot of that and the new ones don't seem inclined to leak (yet) so hopefully my death in a blazing fireball is deferred for a while at least. Trouble with changing old crappy black stuff for new shiny bits is now I made a clean spot. Where will it end? Oh, I fitted a quality genuine imitation fake MazdaSpeed(ish) oil filler cap as well. Just because I can
Thread Starter
Senior Member
Joined: Oct 2010
Posts: 255
Likes: 1
From: England
Ooooookay... maybe not then
Plodding on, I finally got the shocks ordered in to go with the RB springs, so booked the car in at a mate's garage to get it all swapped over. I know that's wimping out, but I thought like this; a) I really don't fancy lying on my drive in the torrential rain the "drought" had been treating us to trying to drop the rear axle while the car's on stands. b) I've got a really bad back at the moment. c) I didn't want to get to the point where one nut won't undo/I break something/a stud's welded itself to a bush insert with rust and then I can neither finish getting it apart nor put it back together and I'm trapped with the thing blocking my drive/garage. d) did I mention my bad back? e) haven't got any spring compressors for the front. f) my back, you see...
Thank God I took it to the garage. Just through Sod's law, every nut, bolt and stud came apart easily. The rear went together nice and sweet;
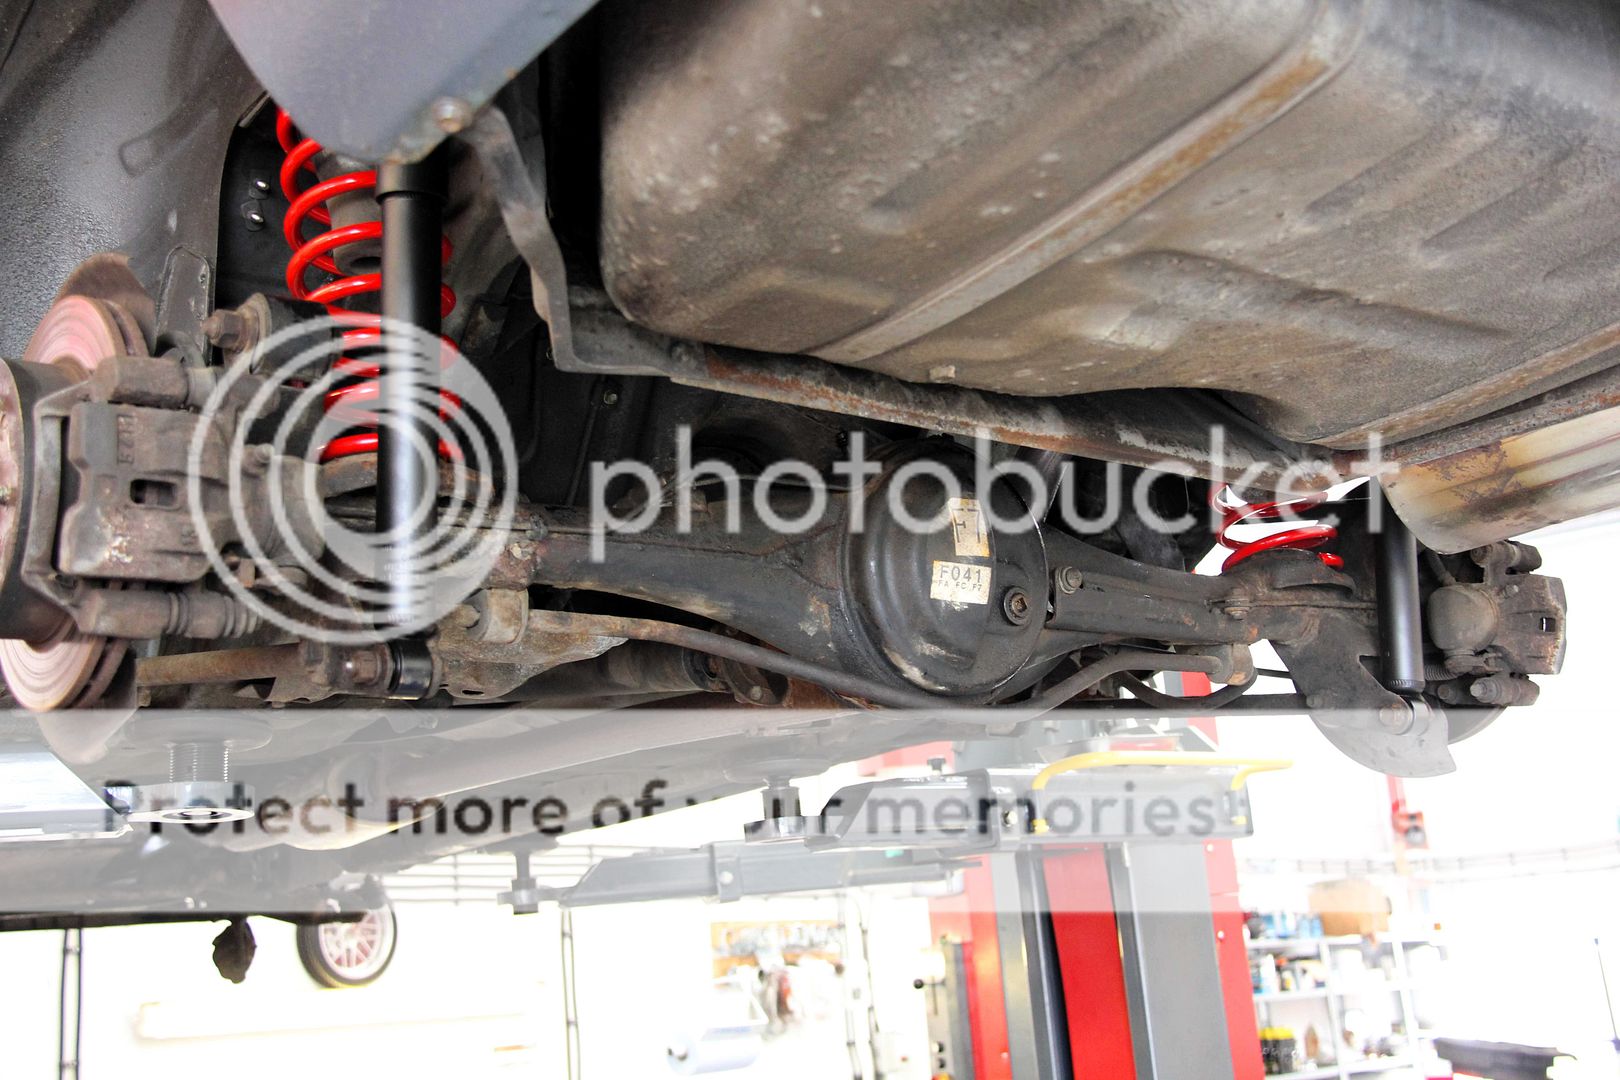
It was only when the guys got to the front it went Pete Tong. First thing they found was this;

Errrr, farrrrrrrrrrrrrk! Where the smegging hell has the other half of my brake pad gone? Jeez, no wonder the brakes were inconsistent! Things got worse from there on in, though for comparison the springs at least looked like they'd bang on do the job they're supposed to;
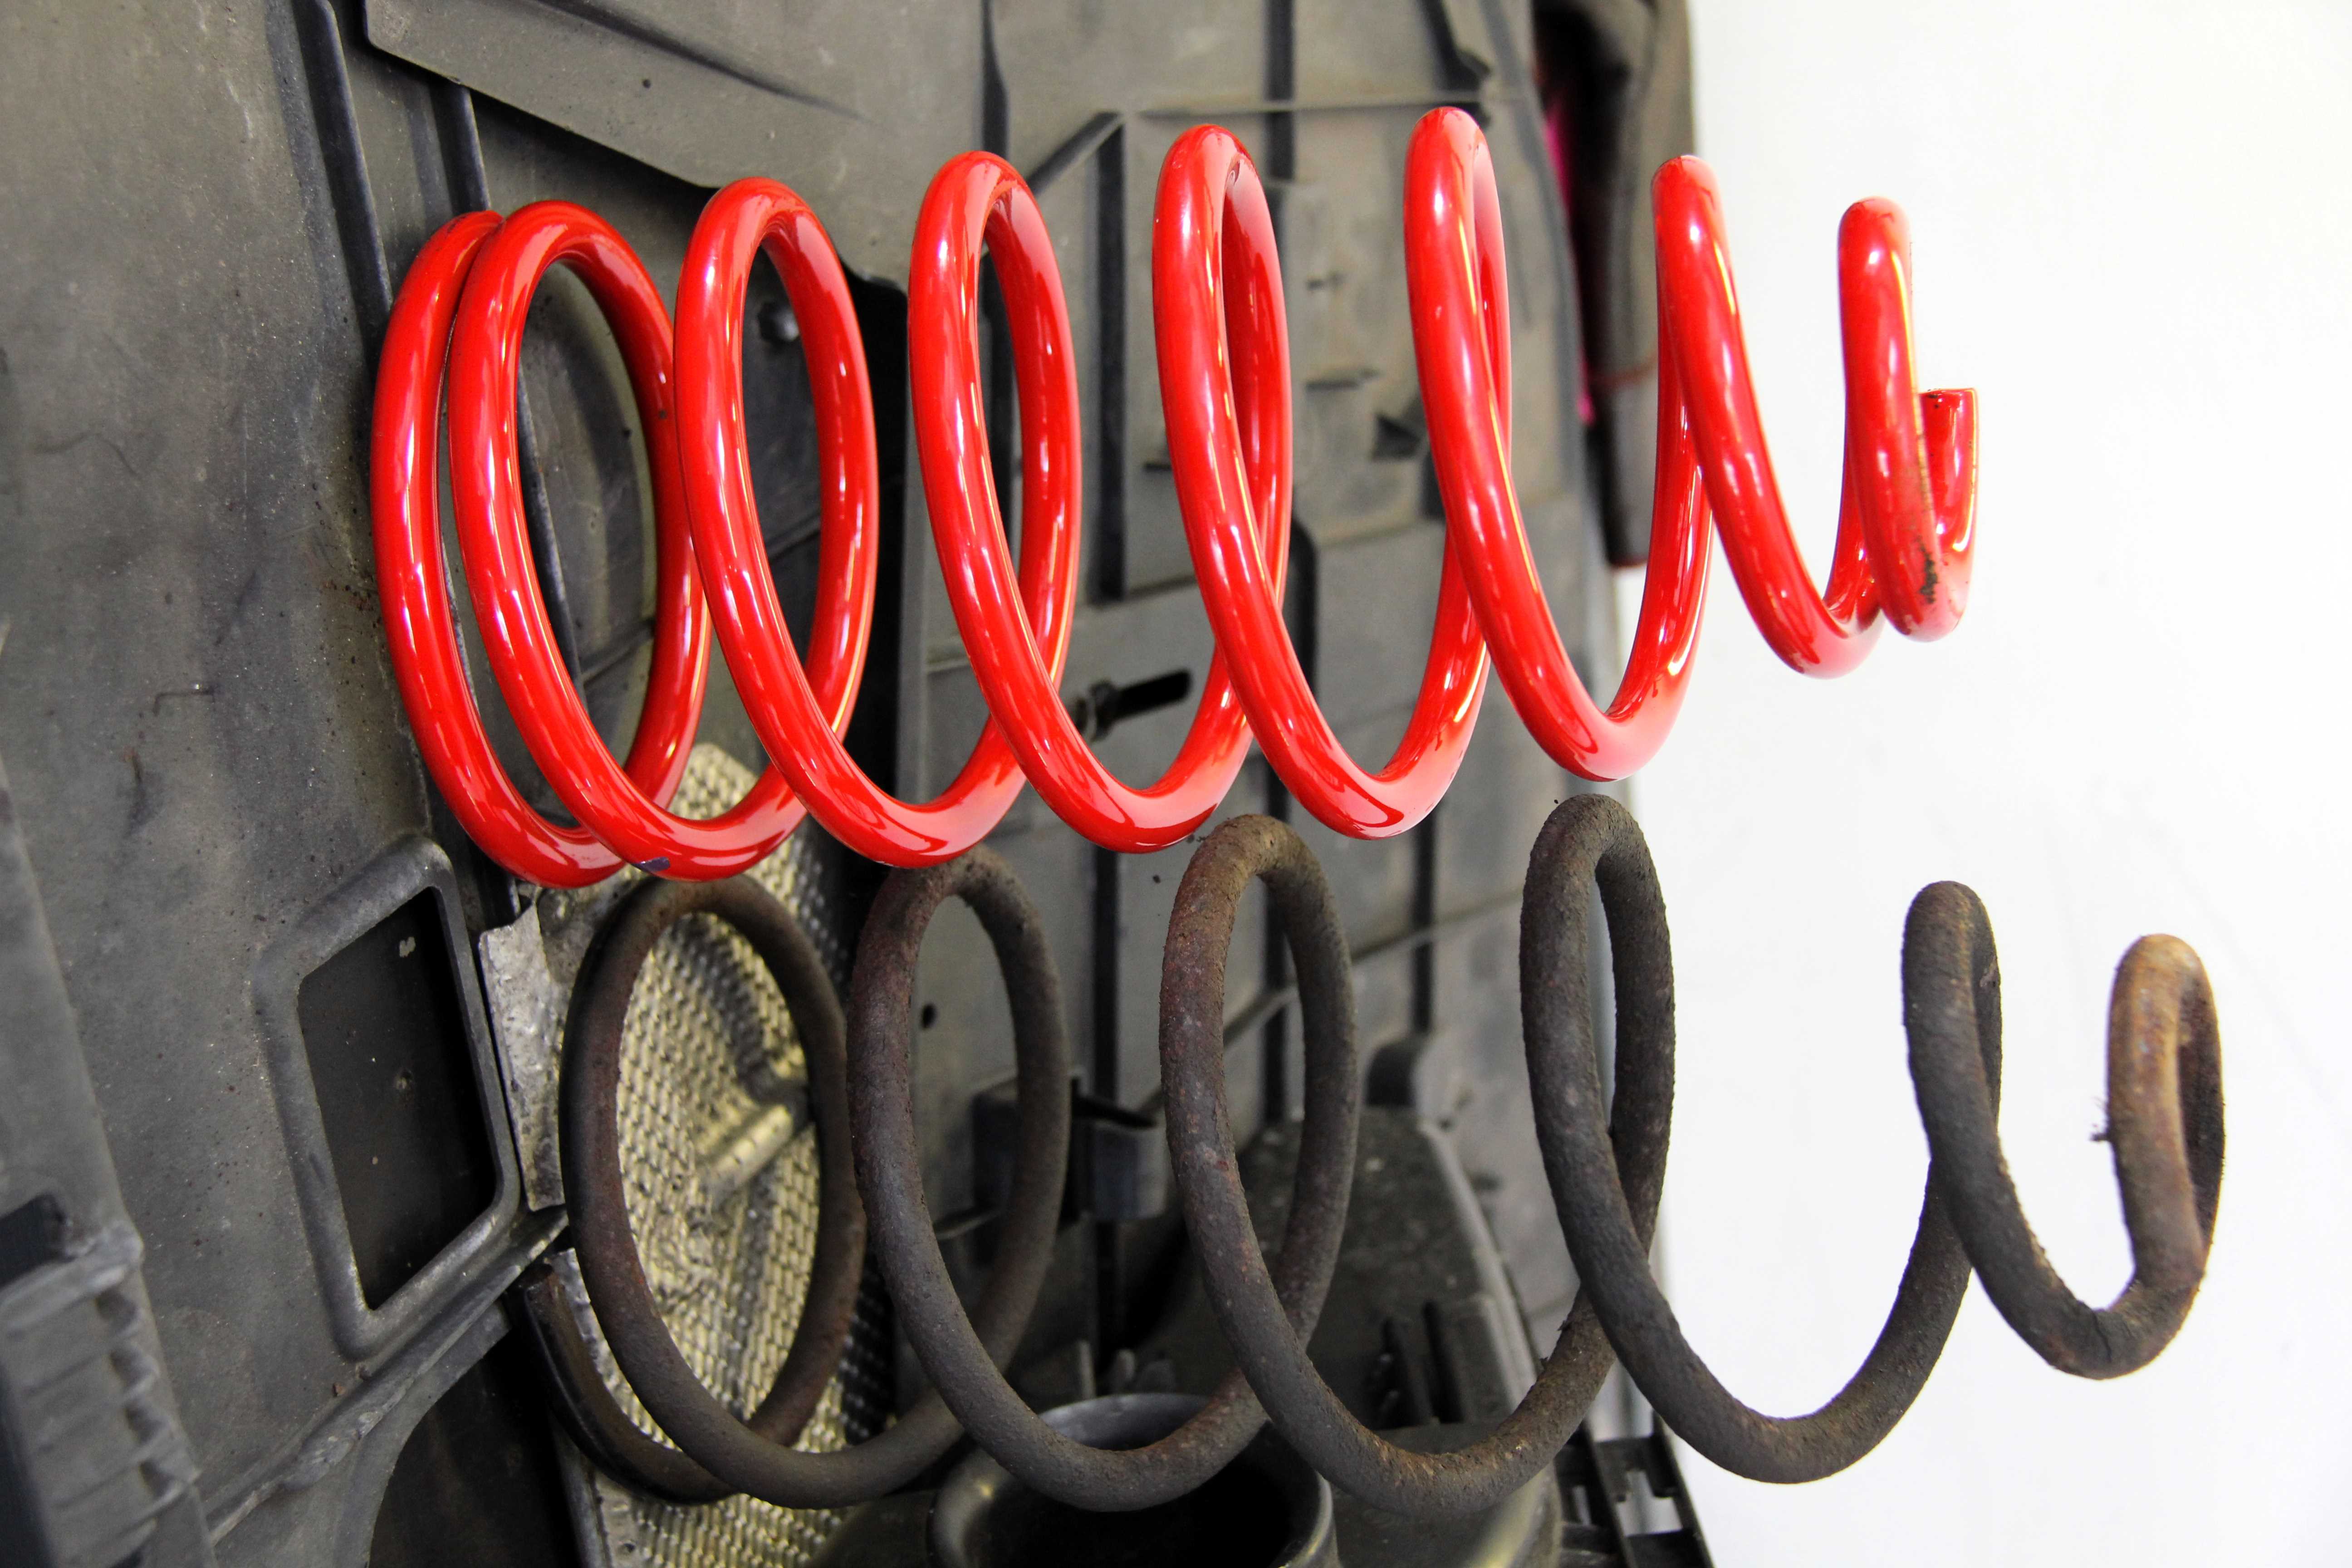
This was where it went really weird. The stock strut that came off the front appparently has never been changed. It has a KYB part number on it, and so does the shock insert within the strut assembly. The OE KYB shock was oil only, which helpfully pissed itself when it was taken off
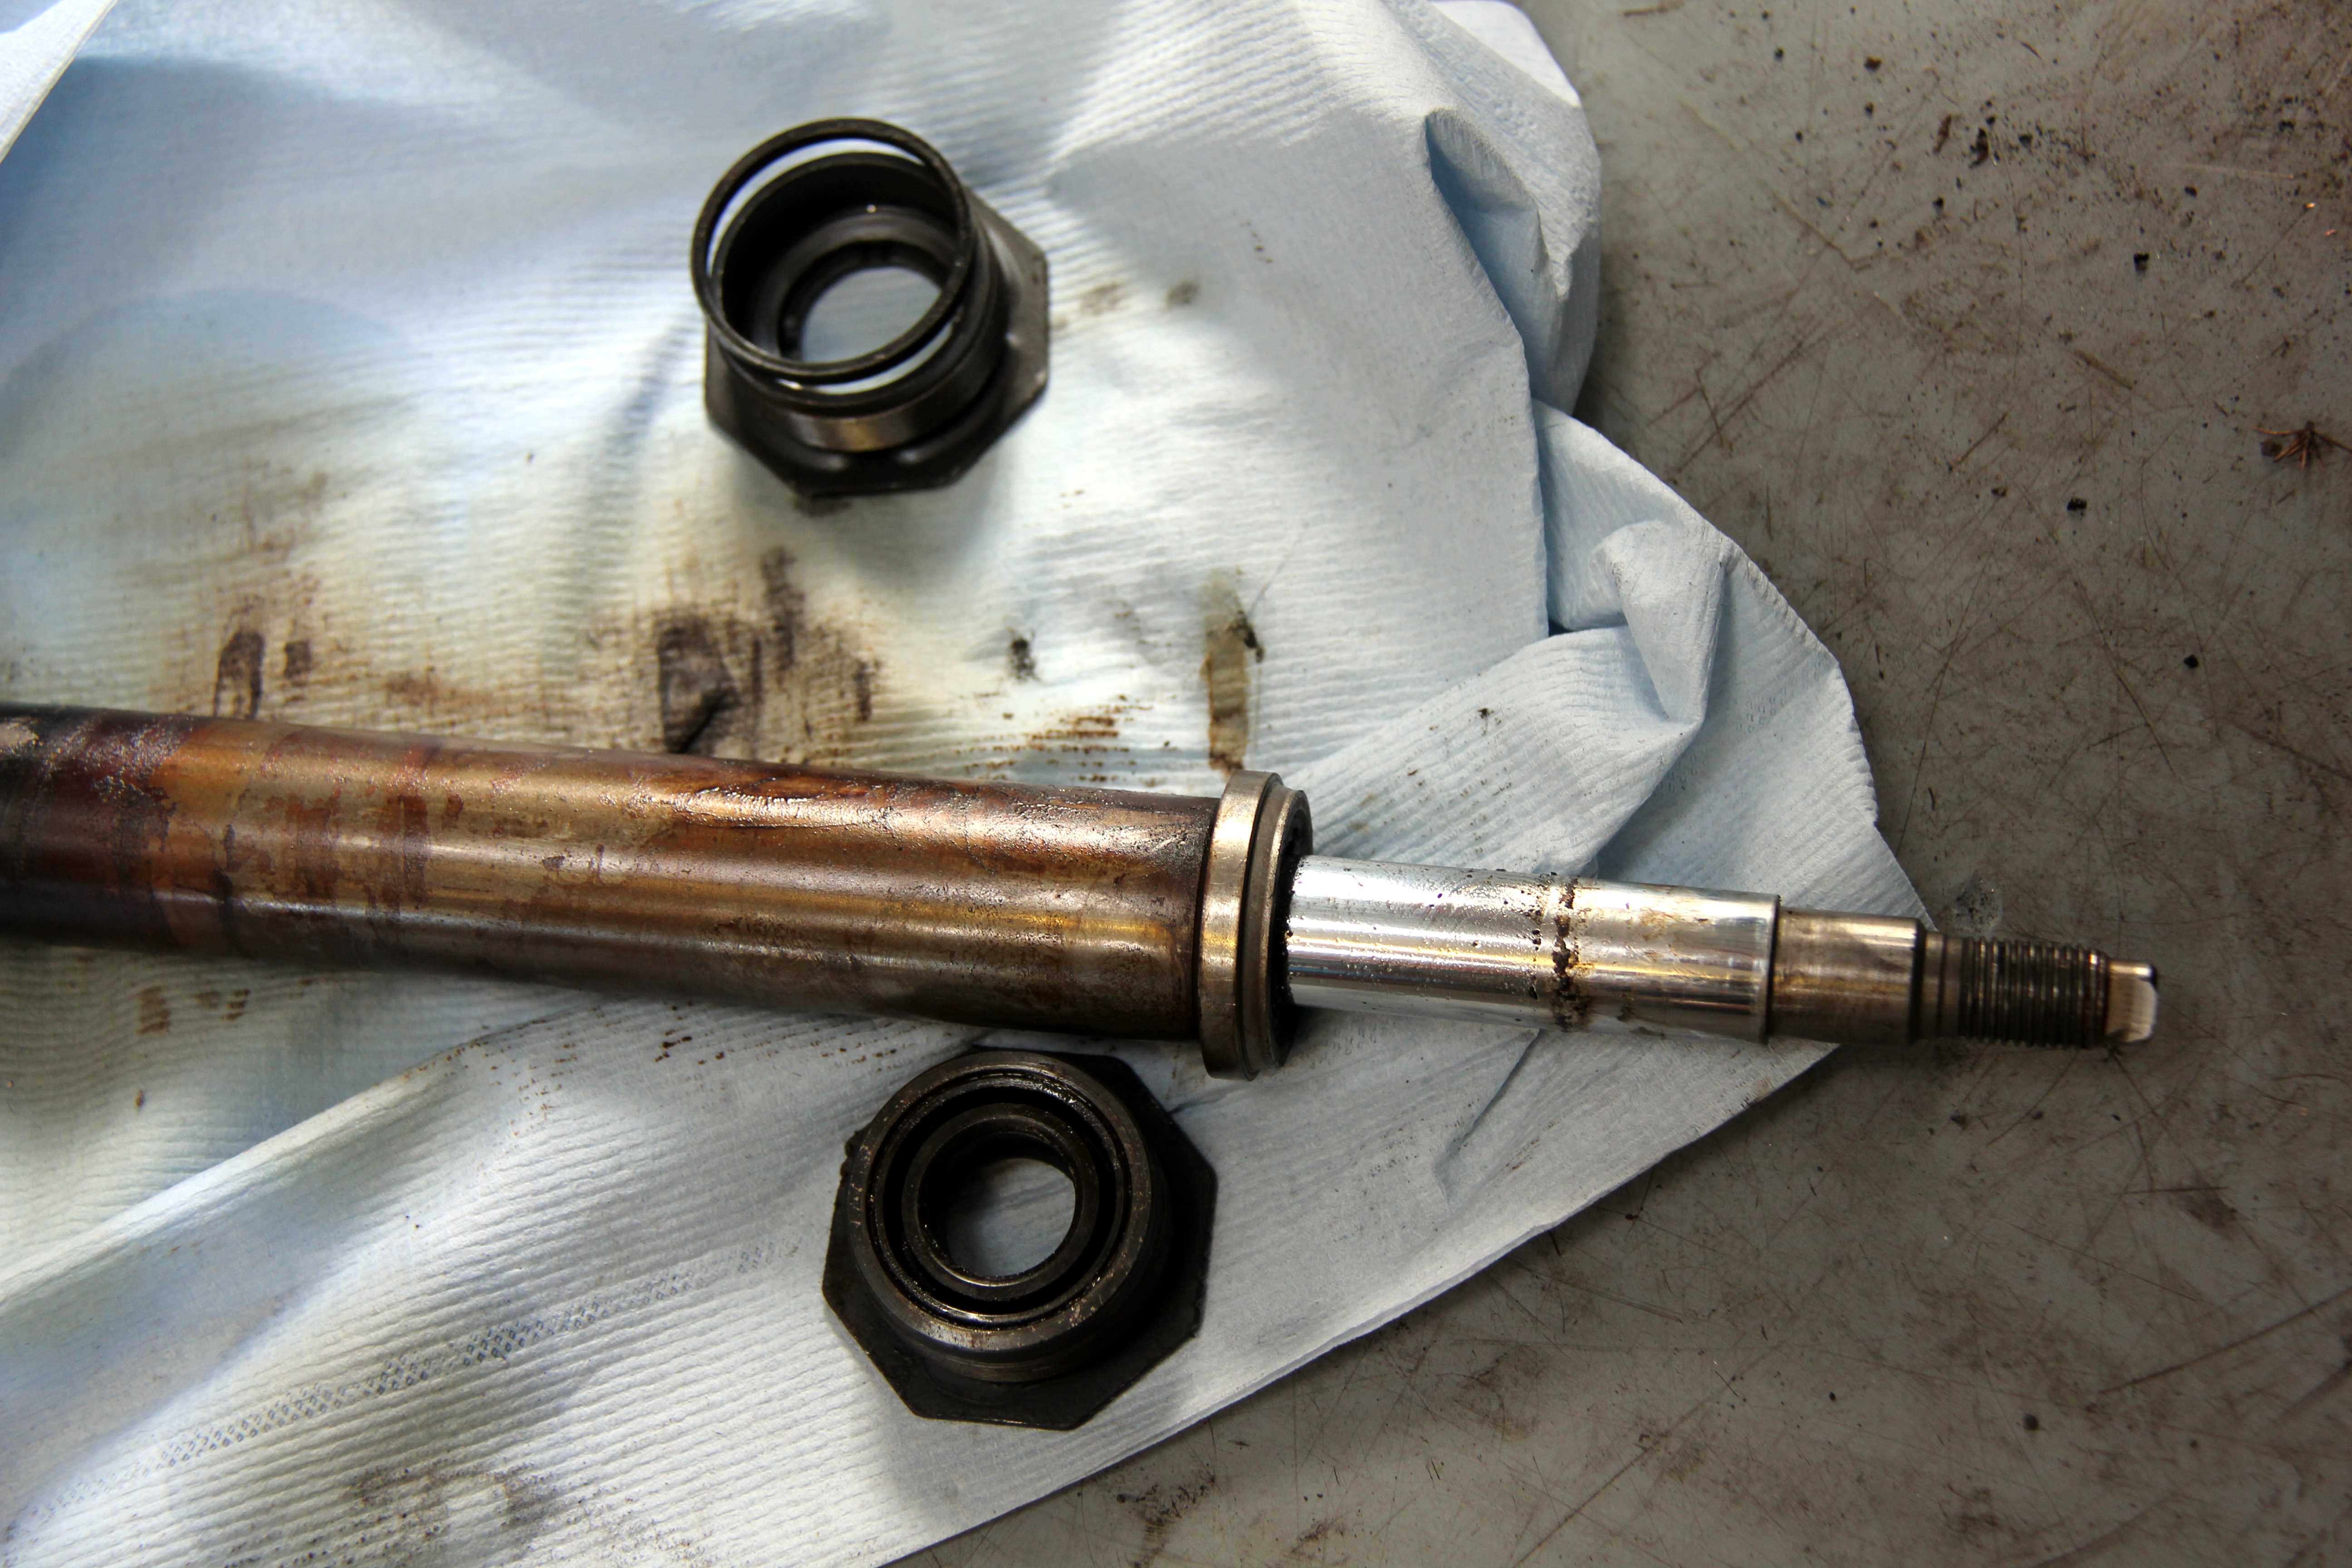
The ones I bought were cheapy ones, still KYB but now oil/gas, so essentially the same but slightly better. So far, so ordinary. Except the top of the shock is completely different. The "instructions" appear to show a special spacer that sits between the shock body and the large bottom nut, but this spacer wasn't in the kit I was sent
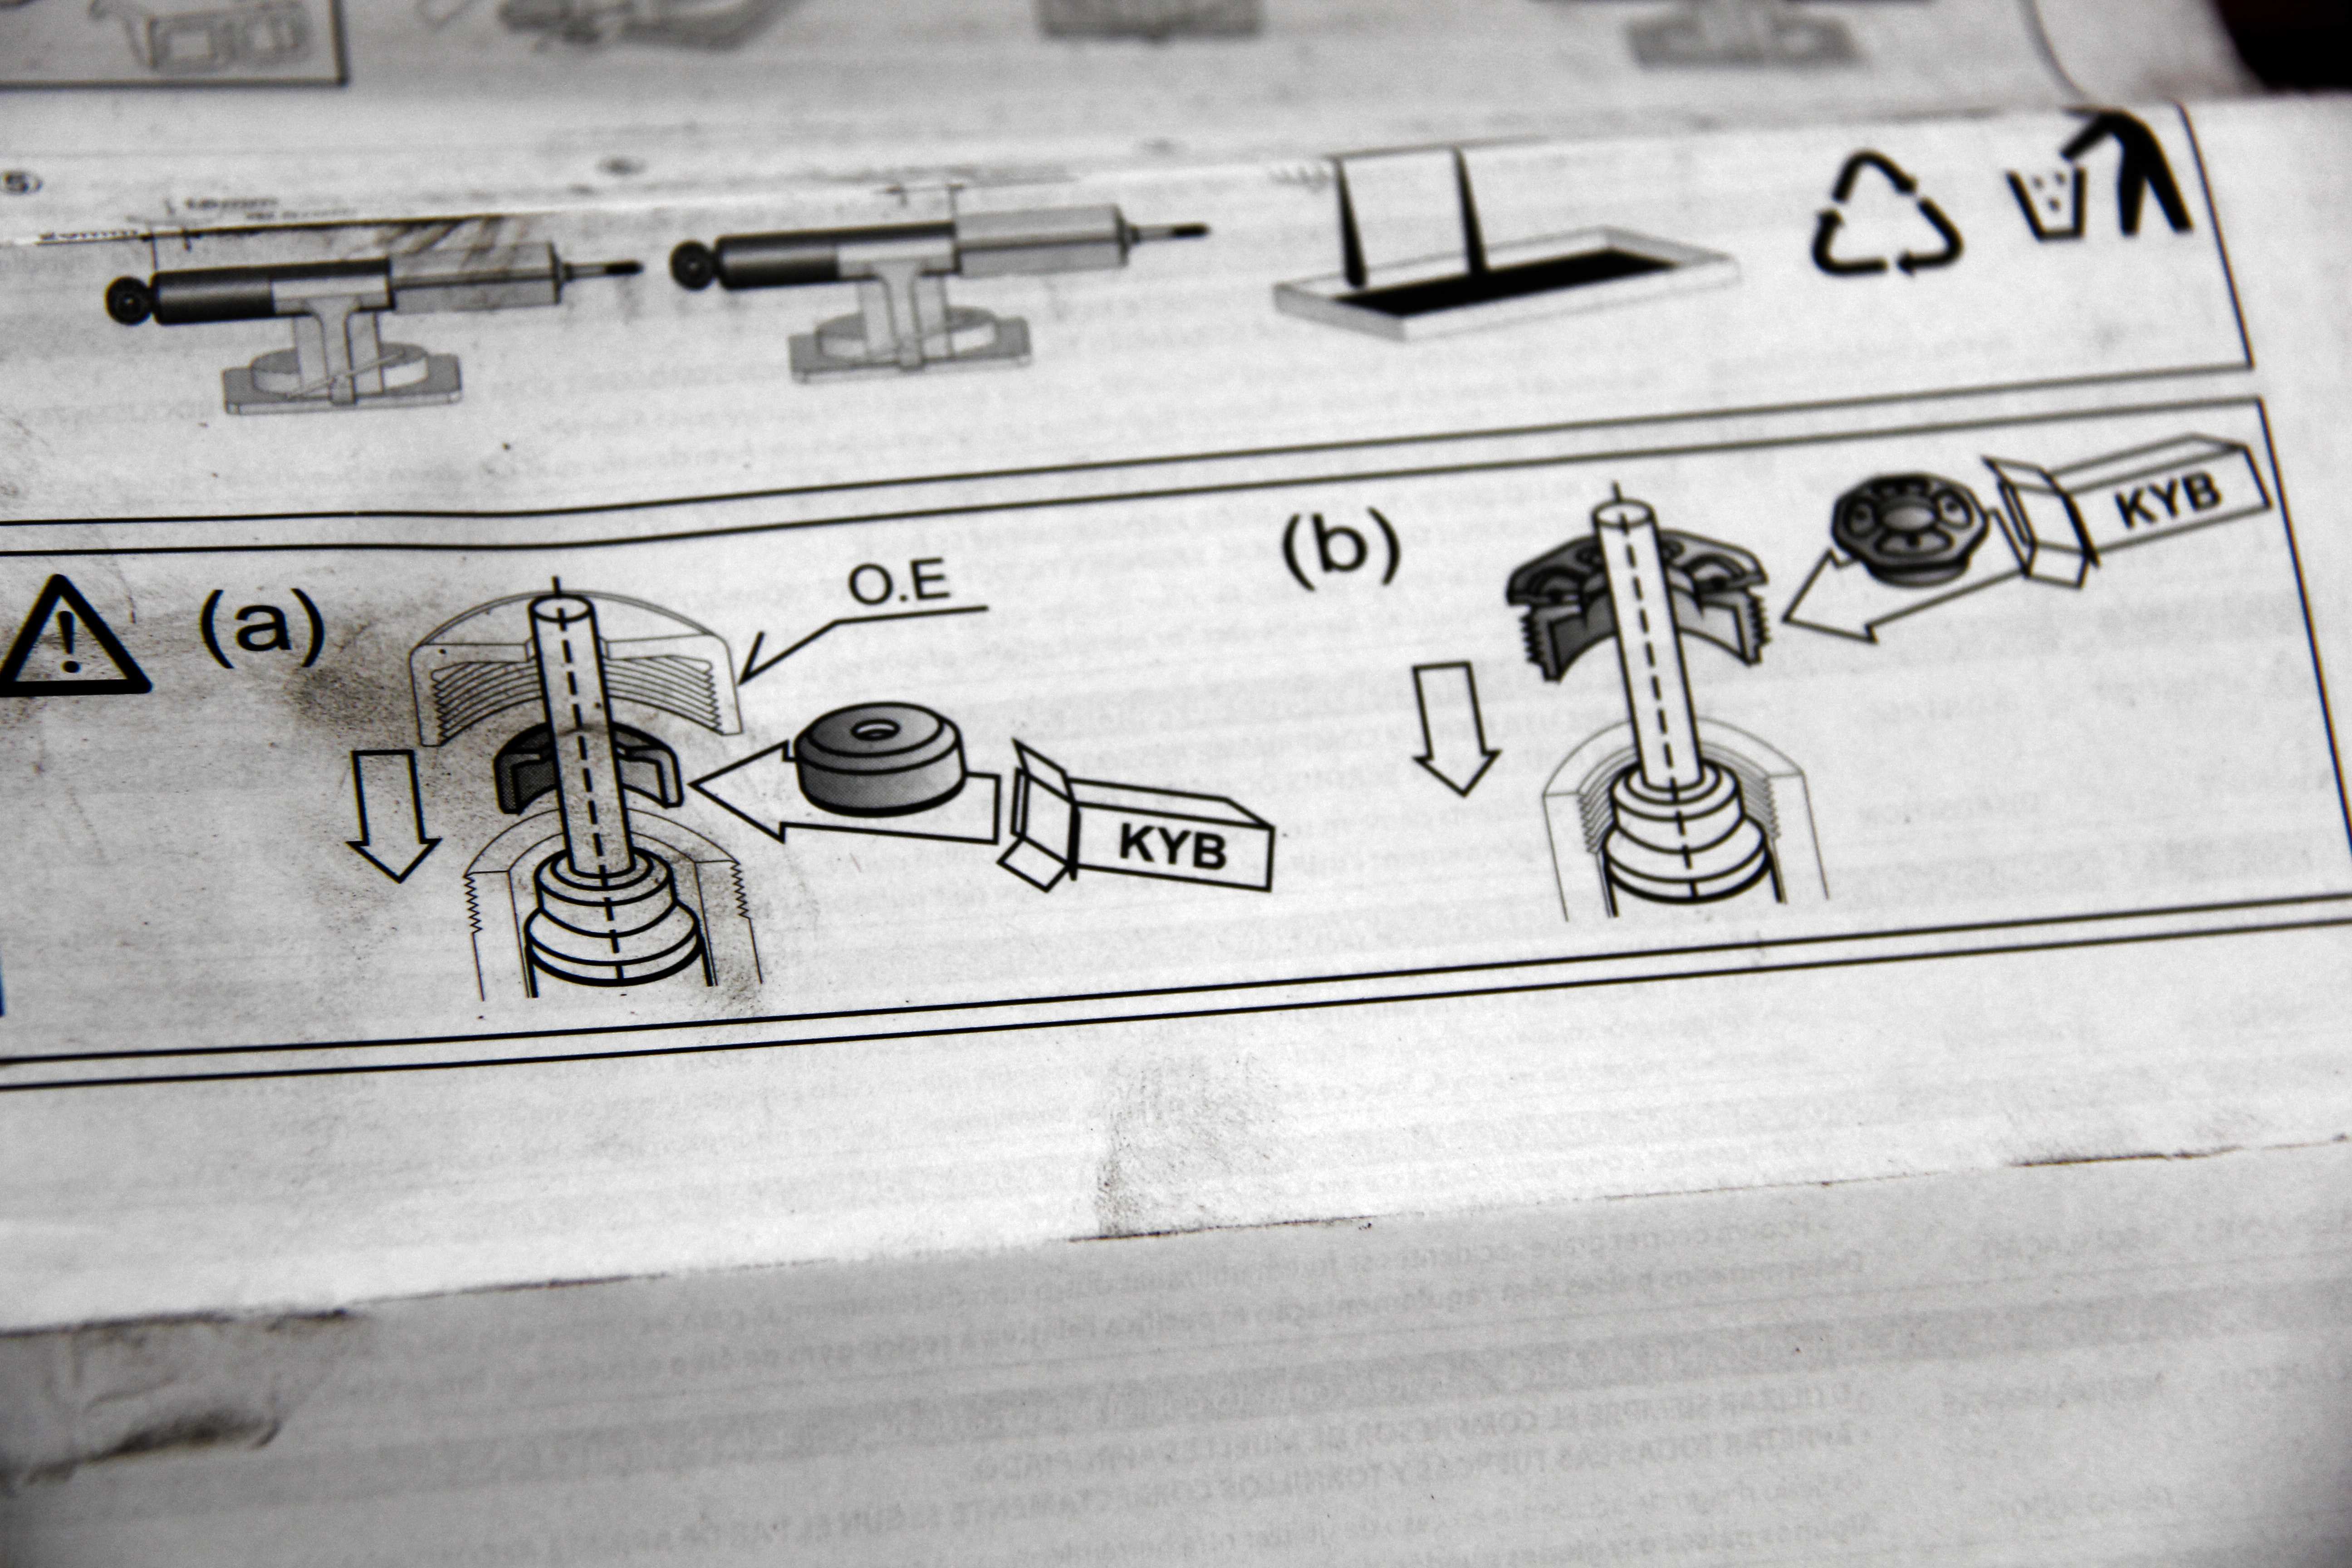
First diagram there. Without the spacer, the shock sat about 5mm too low in the strut, and rattled around, even when the spring and top mount were added. So, the garage rang KYB Europe to ask about htis. They were basically told that a) KYB don't approve of third parties selling their product, especially not on eBay and b) if there was a problem, it was down to me as customer to chase up the eBay firm I bought from, who should then contact KYB who would dispatch the missing parts to them, so they could send them to me. Even after I offered to buy the spacers direct from KYB just to get the car together and off the ramp, they refused point-blank.
So, I contacted the eBay firm, who fortunately actually have a phone number. They were good as gold, got hold of KYB and got straight back to me... with a completely different version. Apparently, the shocks were correct and didn't need a spacer. Once they were done up tight with spring and top mount they'd be fine and no movement would be possible. Ooooooo-kay. Back to the garage.
No, That's bollocks. Still rattled about.
By now I was incandescent with rage, but the shop manager calmed me down and said he'd try ringing around and see if he could make sense of it all. The local Mazda dealer were no use, they say that they treat all RX-7s as imports, even ones that were UKDM originally, and therefore don't have detailed part catalogues for them. Eventually we found a rather more tame (and useful) Mazda dealer up north and their parts guy did grudgingly say after much hassle that he could sell complete strut assemblies...�220 plus VAT per side, five days from Belgium. Errrr, no thanks then.
When quoted the original parts numbers from the strut and the OE shock...
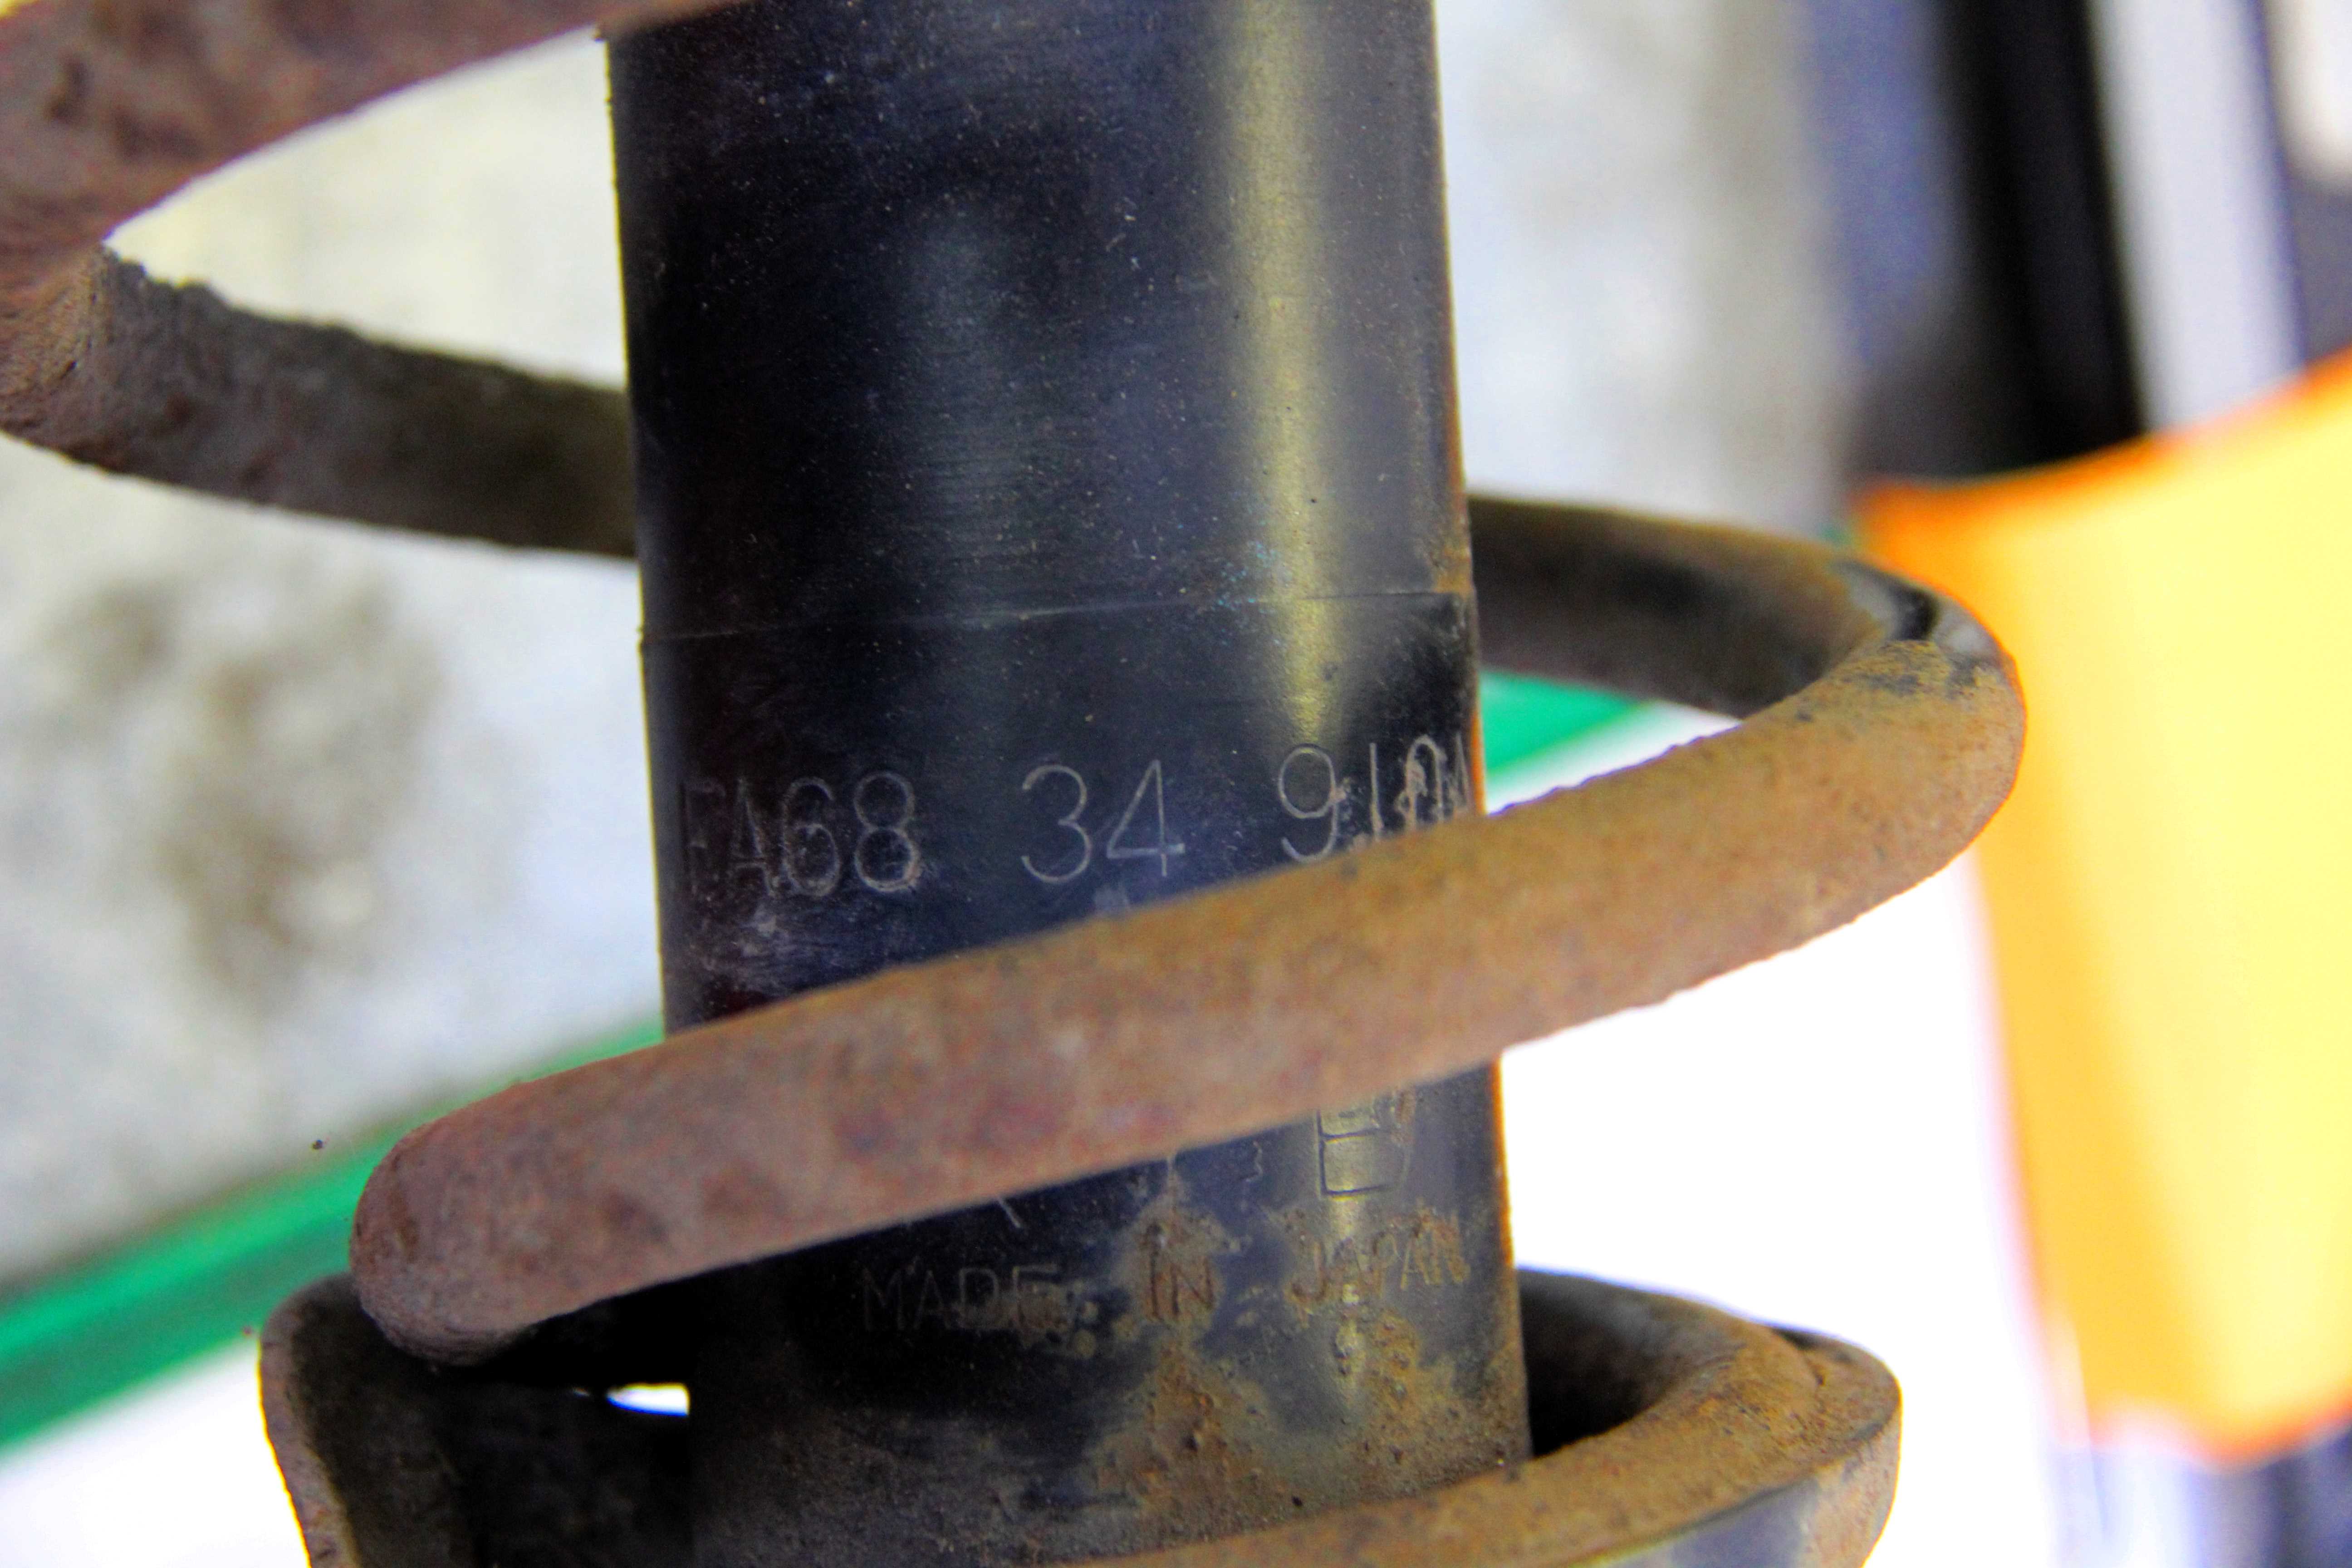
...which quite clearly state that they're KYB manufacture, he was unable to match it. KYB claimed there was no such part number, and it must be a mistake. They list one similar but essentially two digits different, and were not willing to supply one for comparison. Basically, their entire attitude is that "you must have made a mistake, it can't possibly be our fault and we ain't helping". Meanwhile, every single motor factor we could ring came up with the same part number as the eBay version that I had, spacer not included.
So, after much timewasting talking to surly, miserable, rude, obnoxious people over the phone, Dave the mechanic came up with this;
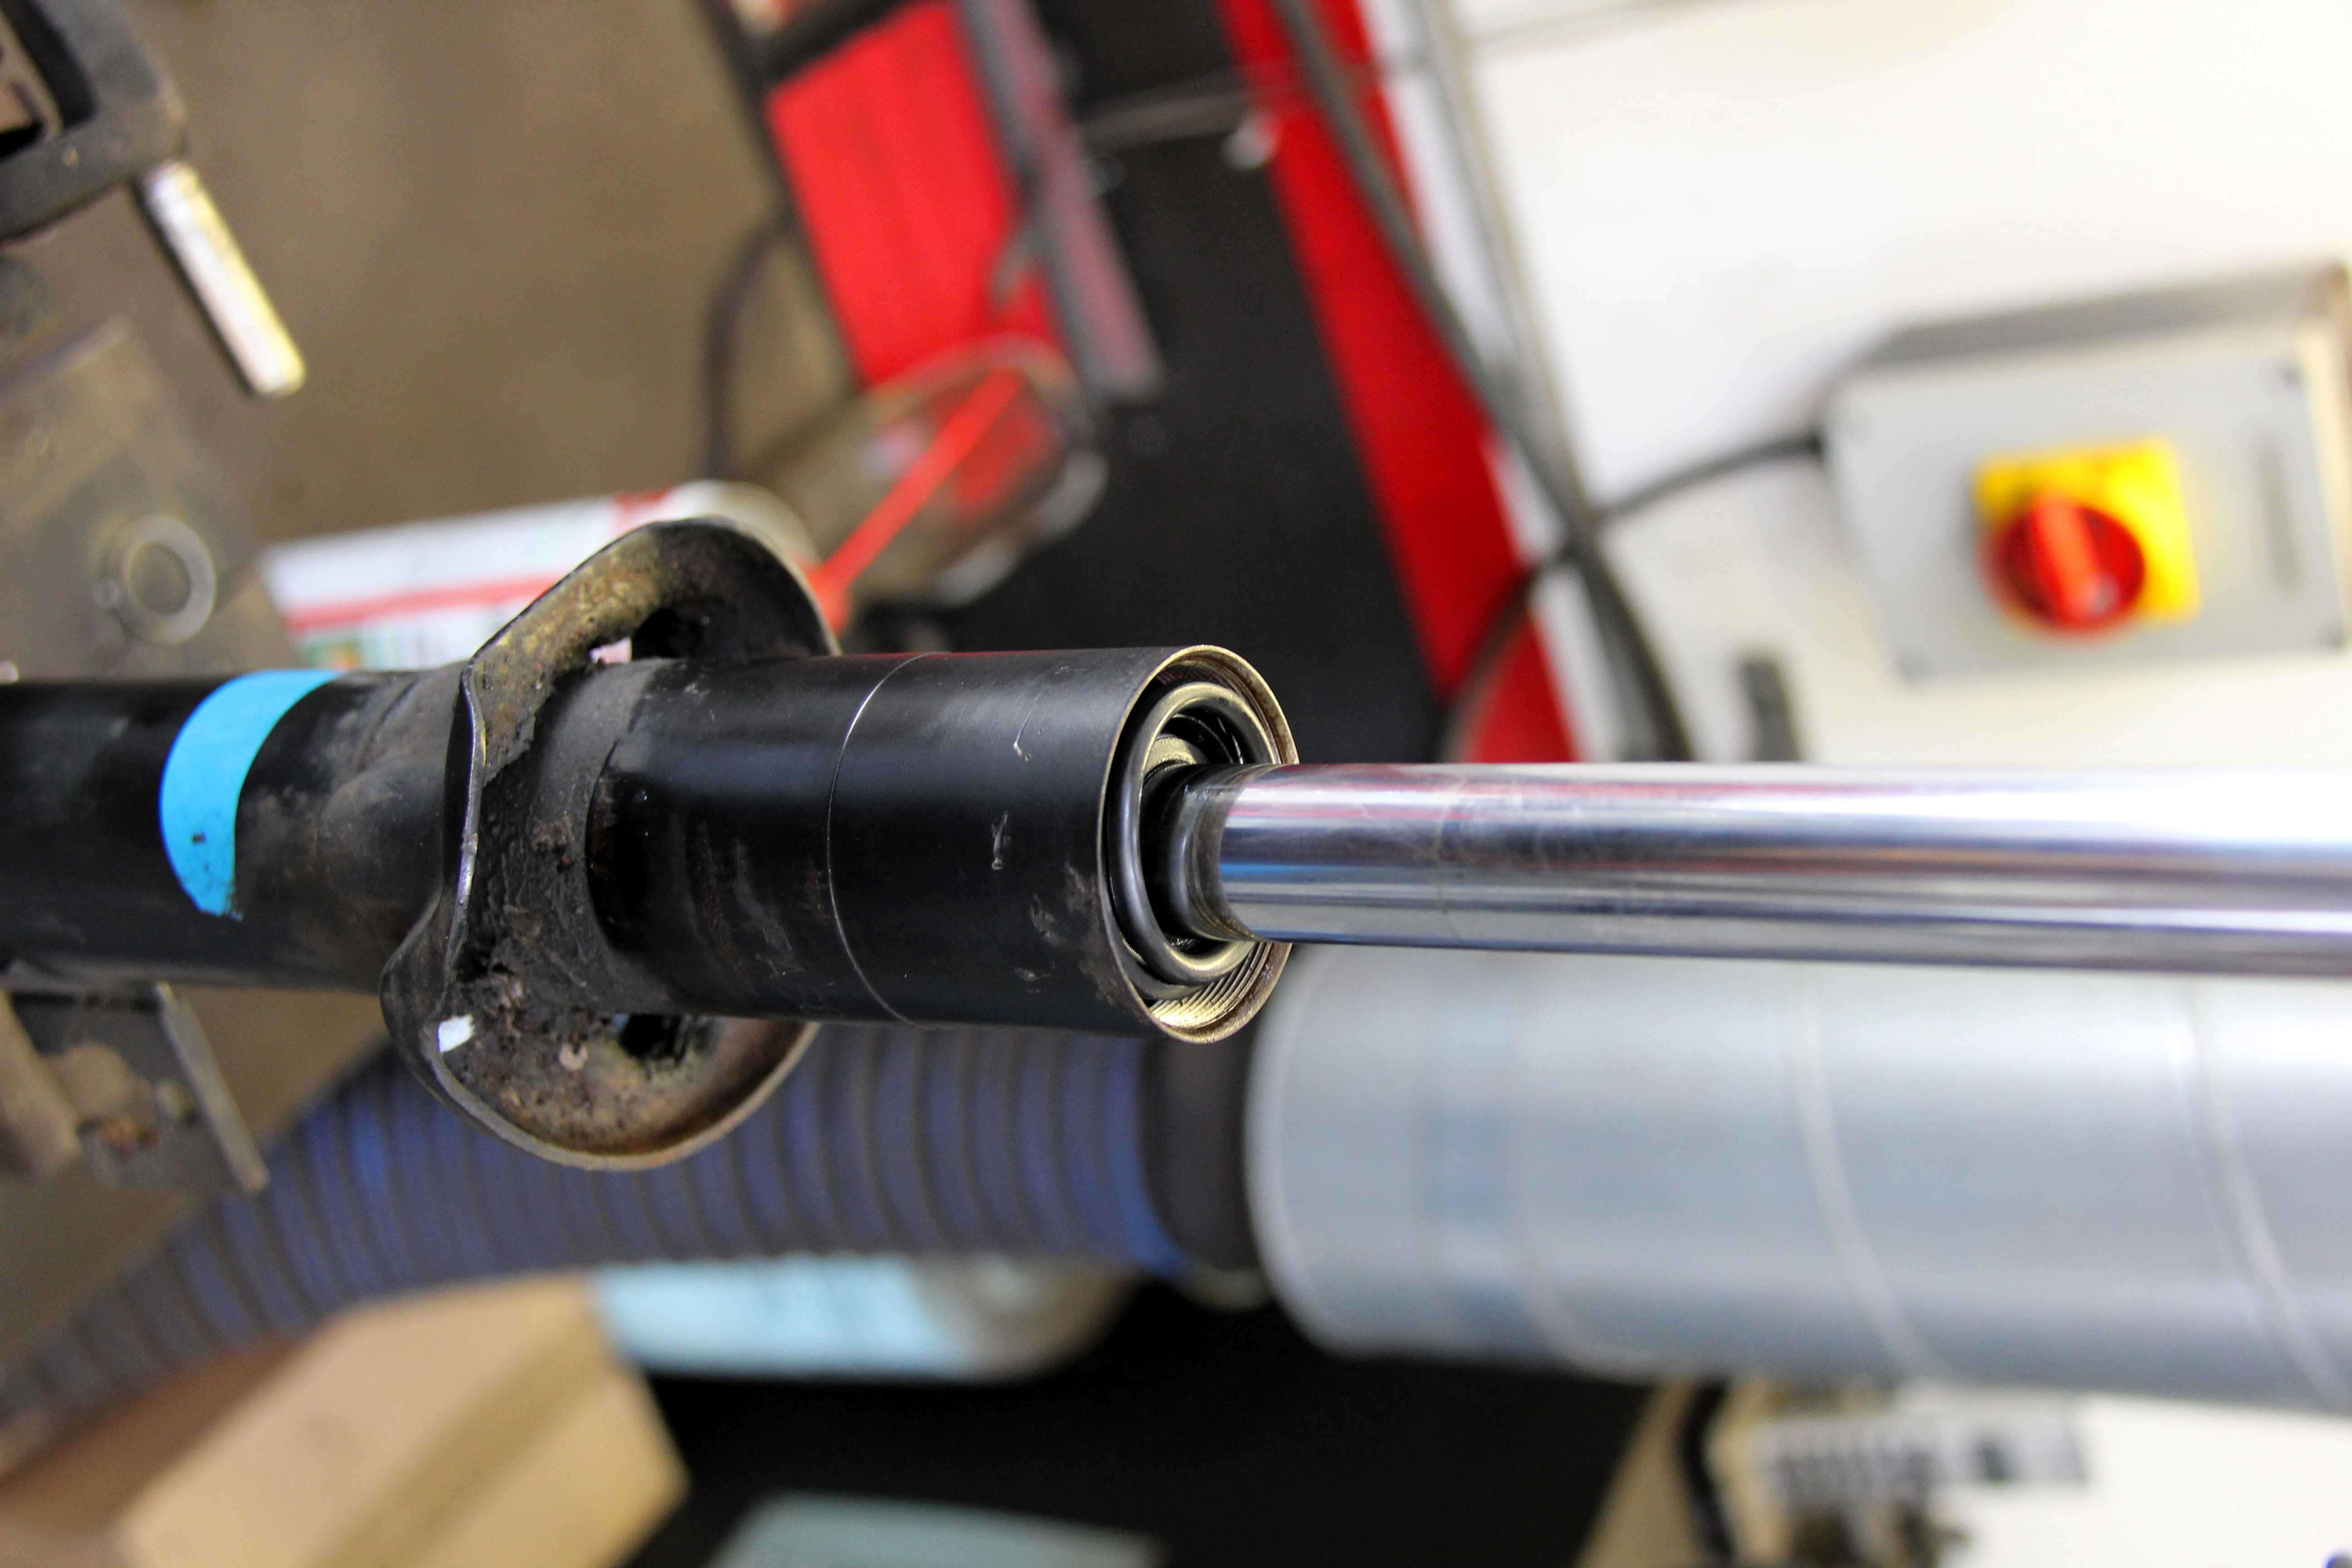
Yep, a humble O-ring around the threaded bottom nut is enough to seat the shock perfectly in the strut and stop it rattling. How long it lasts is moot, but at least the car was driveable and we can see how it holds up. It might be fine.
However, if I had an Uzi you'd be reading about a next spree killing mass murder at a certain huge suspension manufacturer. I can't remember being so angry nor having such shocking "service" in a very long time. To summarise, KYB's stance is;
1. we never manufactured an item of the part number on your car, even though it's clearly OE and has our logo and part number stamped in it
2. we refuse to offer any product support if you buy through a third party, even though you can't buy direct from us even if you wanted to
3. our kits for this car are wrong, or at best are missing an important spacer and we refuse to even acknowledge there's an issue at all.
4. we will be as obstructive and unhelpful as possible in any dealing with us, even to the lengths of telling two parties completely conflicting information on the same issue.
Yep, I think it's fair to say that KYB will not be getting my custom again!
Plodding on, I finally got the shocks ordered in to go with the RB springs, so booked the car in at a mate's garage to get it all swapped over. I know that's wimping out, but I thought like this; a) I really don't fancy lying on my drive in the torrential rain the "drought" had been treating us to trying to drop the rear axle while the car's on stands. b) I've got a really bad back at the moment. c) I didn't want to get to the point where one nut won't undo/I break something/a stud's welded itself to a bush insert with rust and then I can neither finish getting it apart nor put it back together and I'm trapped with the thing blocking my drive/garage. d) did I mention my bad back? e) haven't got any spring compressors for the front. f) my back, you see...
Thank God I took it to the garage. Just through Sod's law, every nut, bolt and stud came apart easily. The rear went together nice and sweet;
It was only when the guys got to the front it went Pete Tong. First thing they found was this;
Errrr, farrrrrrrrrrrrrk! Where the smegging hell has the other half of my brake pad gone? Jeez, no wonder the brakes were inconsistent! Things got worse from there on in, though for comparison the springs at least looked like they'd bang on do the job they're supposed to;
This was where it went really weird. The stock strut that came off the front appparently has never been changed. It has a KYB part number on it, and so does the shock insert within the strut assembly. The OE KYB shock was oil only, which helpfully pissed itself when it was taken off
The ones I bought were cheapy ones, still KYB but now oil/gas, so essentially the same but slightly better. So far, so ordinary. Except the top of the shock is completely different. The "instructions" appear to show a special spacer that sits between the shock body and the large bottom nut, but this spacer wasn't in the kit I was sent
First diagram there. Without the spacer, the shock sat about 5mm too low in the strut, and rattled around, even when the spring and top mount were added. So, the garage rang KYB Europe to ask about htis. They were basically told that a) KYB don't approve of third parties selling their product, especially not on eBay and b) if there was a problem, it was down to me as customer to chase up the eBay firm I bought from, who should then contact KYB who would dispatch the missing parts to them, so they could send them to me. Even after I offered to buy the spacers direct from KYB just to get the car together and off the ramp, they refused point-blank.
So, I contacted the eBay firm, who fortunately actually have a phone number. They were good as gold, got hold of KYB and got straight back to me... with a completely different version. Apparently, the shocks were correct and didn't need a spacer. Once they were done up tight with spring and top mount they'd be fine and no movement would be possible. Ooooooo-kay. Back to the garage.
No, That's bollocks. Still rattled about.
By now I was incandescent with rage, but the shop manager calmed me down and said he'd try ringing around and see if he could make sense of it all. The local Mazda dealer were no use, they say that they treat all RX-7s as imports, even ones that were UKDM originally, and therefore don't have detailed part catalogues for them. Eventually we found a rather more tame (and useful) Mazda dealer up north and their parts guy did grudgingly say after much hassle that he could sell complete strut assemblies...�220 plus VAT per side, five days from Belgium. Errrr, no thanks then.
When quoted the original parts numbers from the strut and the OE shock...
...which quite clearly state that they're KYB manufacture, he was unable to match it. KYB claimed there was no such part number, and it must be a mistake. They list one similar but essentially two digits different, and were not willing to supply one for comparison. Basically, their entire attitude is that "you must have made a mistake, it can't possibly be our fault and we ain't helping". Meanwhile, every single motor factor we could ring came up with the same part number as the eBay version that I had, spacer not included.
So, after much timewasting talking to surly, miserable, rude, obnoxious people over the phone, Dave the mechanic came up with this;
Yep, a humble O-ring around the threaded bottom nut is enough to seat the shock perfectly in the strut and stop it rattling. How long it lasts is moot, but at least the car was driveable and we can see how it holds up. It might be fine.
However, if I had an Uzi you'd be reading about a next spree killing mass murder at a certain huge suspension manufacturer. I can't remember being so angry nor having such shocking "service" in a very long time. To summarise, KYB's stance is;
1. we never manufactured an item of the part number on your car, even though it's clearly OE and has our logo and part number stamped in it
2. we refuse to offer any product support if you buy through a third party, even though you can't buy direct from us even if you wanted to
3. our kits for this car are wrong, or at best are missing an important spacer and we refuse to even acknowledge there's an issue at all.
4. we will be as obstructive and unhelpful as possible in any dealing with us, even to the lengths of telling two parties completely conflicting information on the same issue.
Yep, I think it's fair to say that KYB will not be getting my custom again!
Thread Starter
Senior Member
Joined: Oct 2010
Posts: 255
Likes: 1
From: England
Good news is that the O-ring bodge worked fine, no play in there at all, so that's groovy. The car now steers.
...yep, it actually steers! Full stop. Not like turn the steering wheel twenty degrees before the wheels wake up and start to turn, not sawing away on the freeplay just to go in a straight line, it actually steers! Like, awesome. The suspension is stiffer, but not hard as such; it's still a comfortable ride, but now you can really feel the weight transfer in corners and the suspension controlling it. It's become a really pointy car, especially in constant-radius corners like big roundabouts, just throw it in, and it grips and holds the line, none of the vagueness and wobbling course corrections of before. Short version: pleased wi' that
The brakes are wicked, too. I trawled through loads of pads trying to find some, and in the end thought why go for cheapy stuff when I could spend a little extra and get proper stopping power? So I went for some road-track carbonceramic Hawk pads in the end. Good job I didn't have these on the old suspension, it'd have been ploughing furrows with the front airdam every time I braked. Even the stiffer RB springs dive on the brakes quite a bit, and it just stops. Epic.
So, with it now steering and stopping like a proper sporstcar, It was time to upgrade my interface with the whole procedure. I've never liked the stock steering wheel much, it's too blocky and dull and grey rubber and well... eighties. A mate in the FBUk club, Marc very kindly said he had an S2 wheel I could have off him, and it's such a nicer looking wheel I couldn't wait to get it on. Getting the old one off was the hardest part, fortunately I remembered to leave the centre nut on loosely so the wheel didn't fly off when I whacked it with a mallet and I therefore have escaped having "ADZAM" embossed irrevocably on my forehead
So, some before and after shots...
Before;
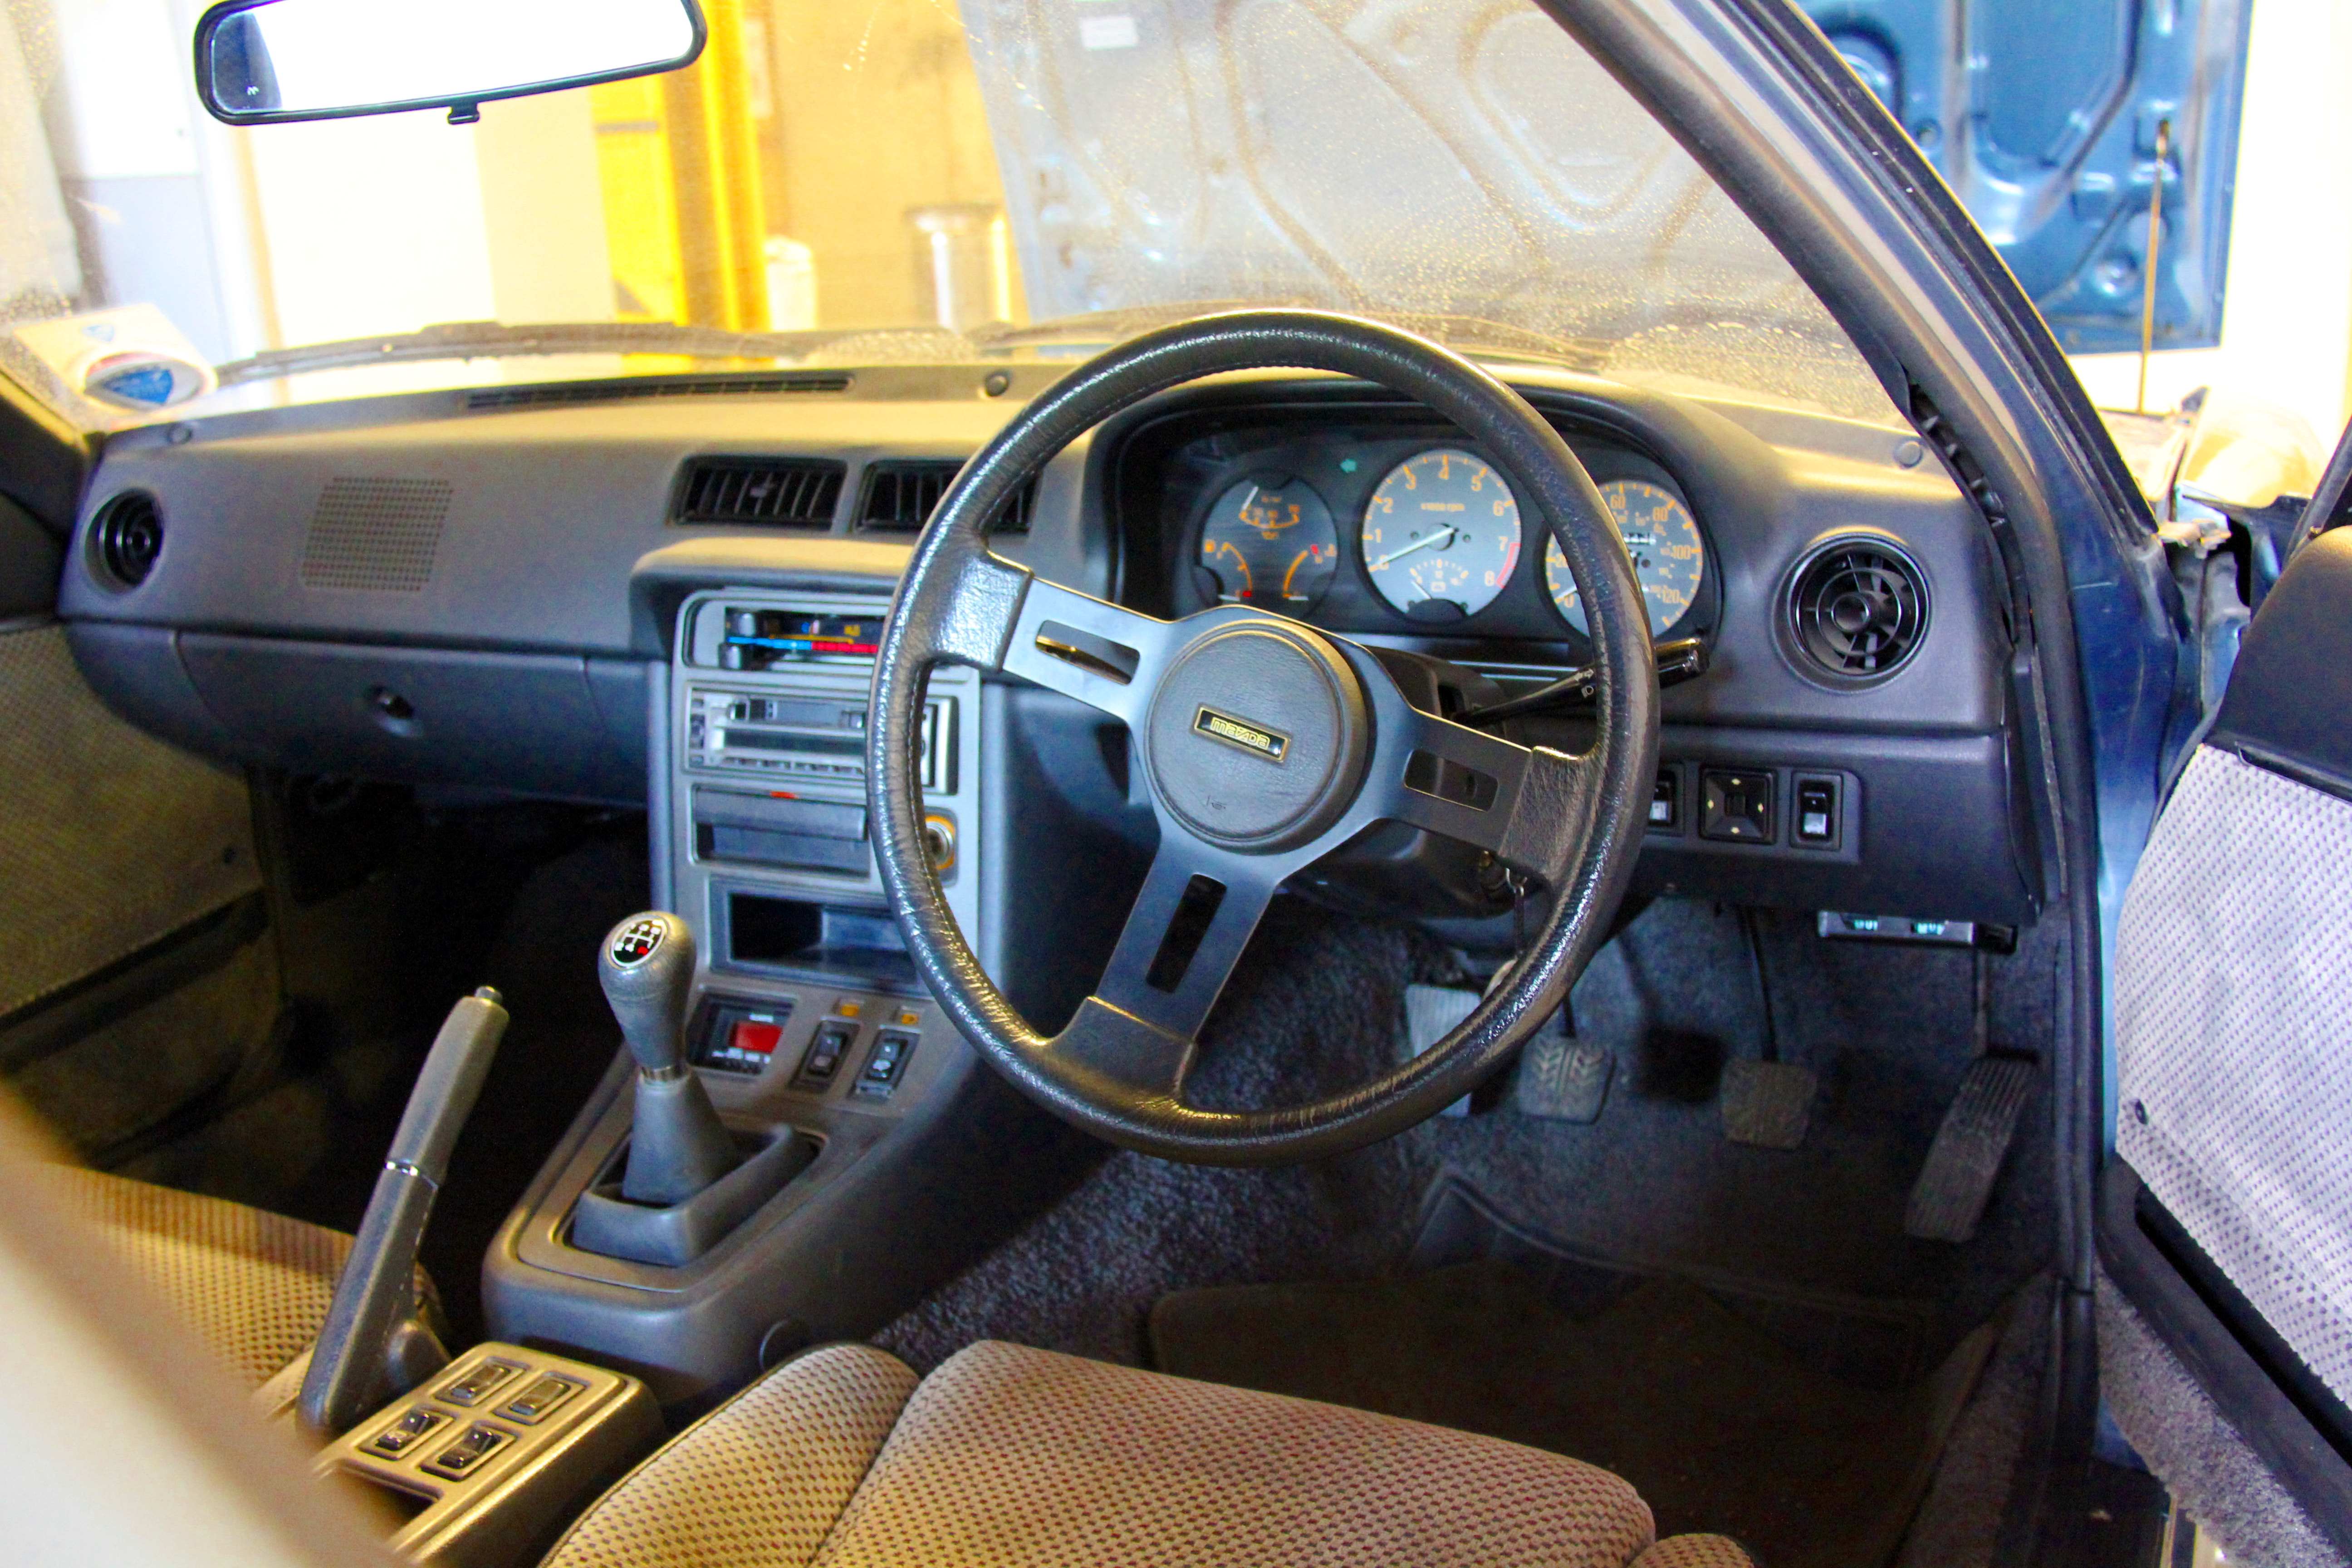
After:
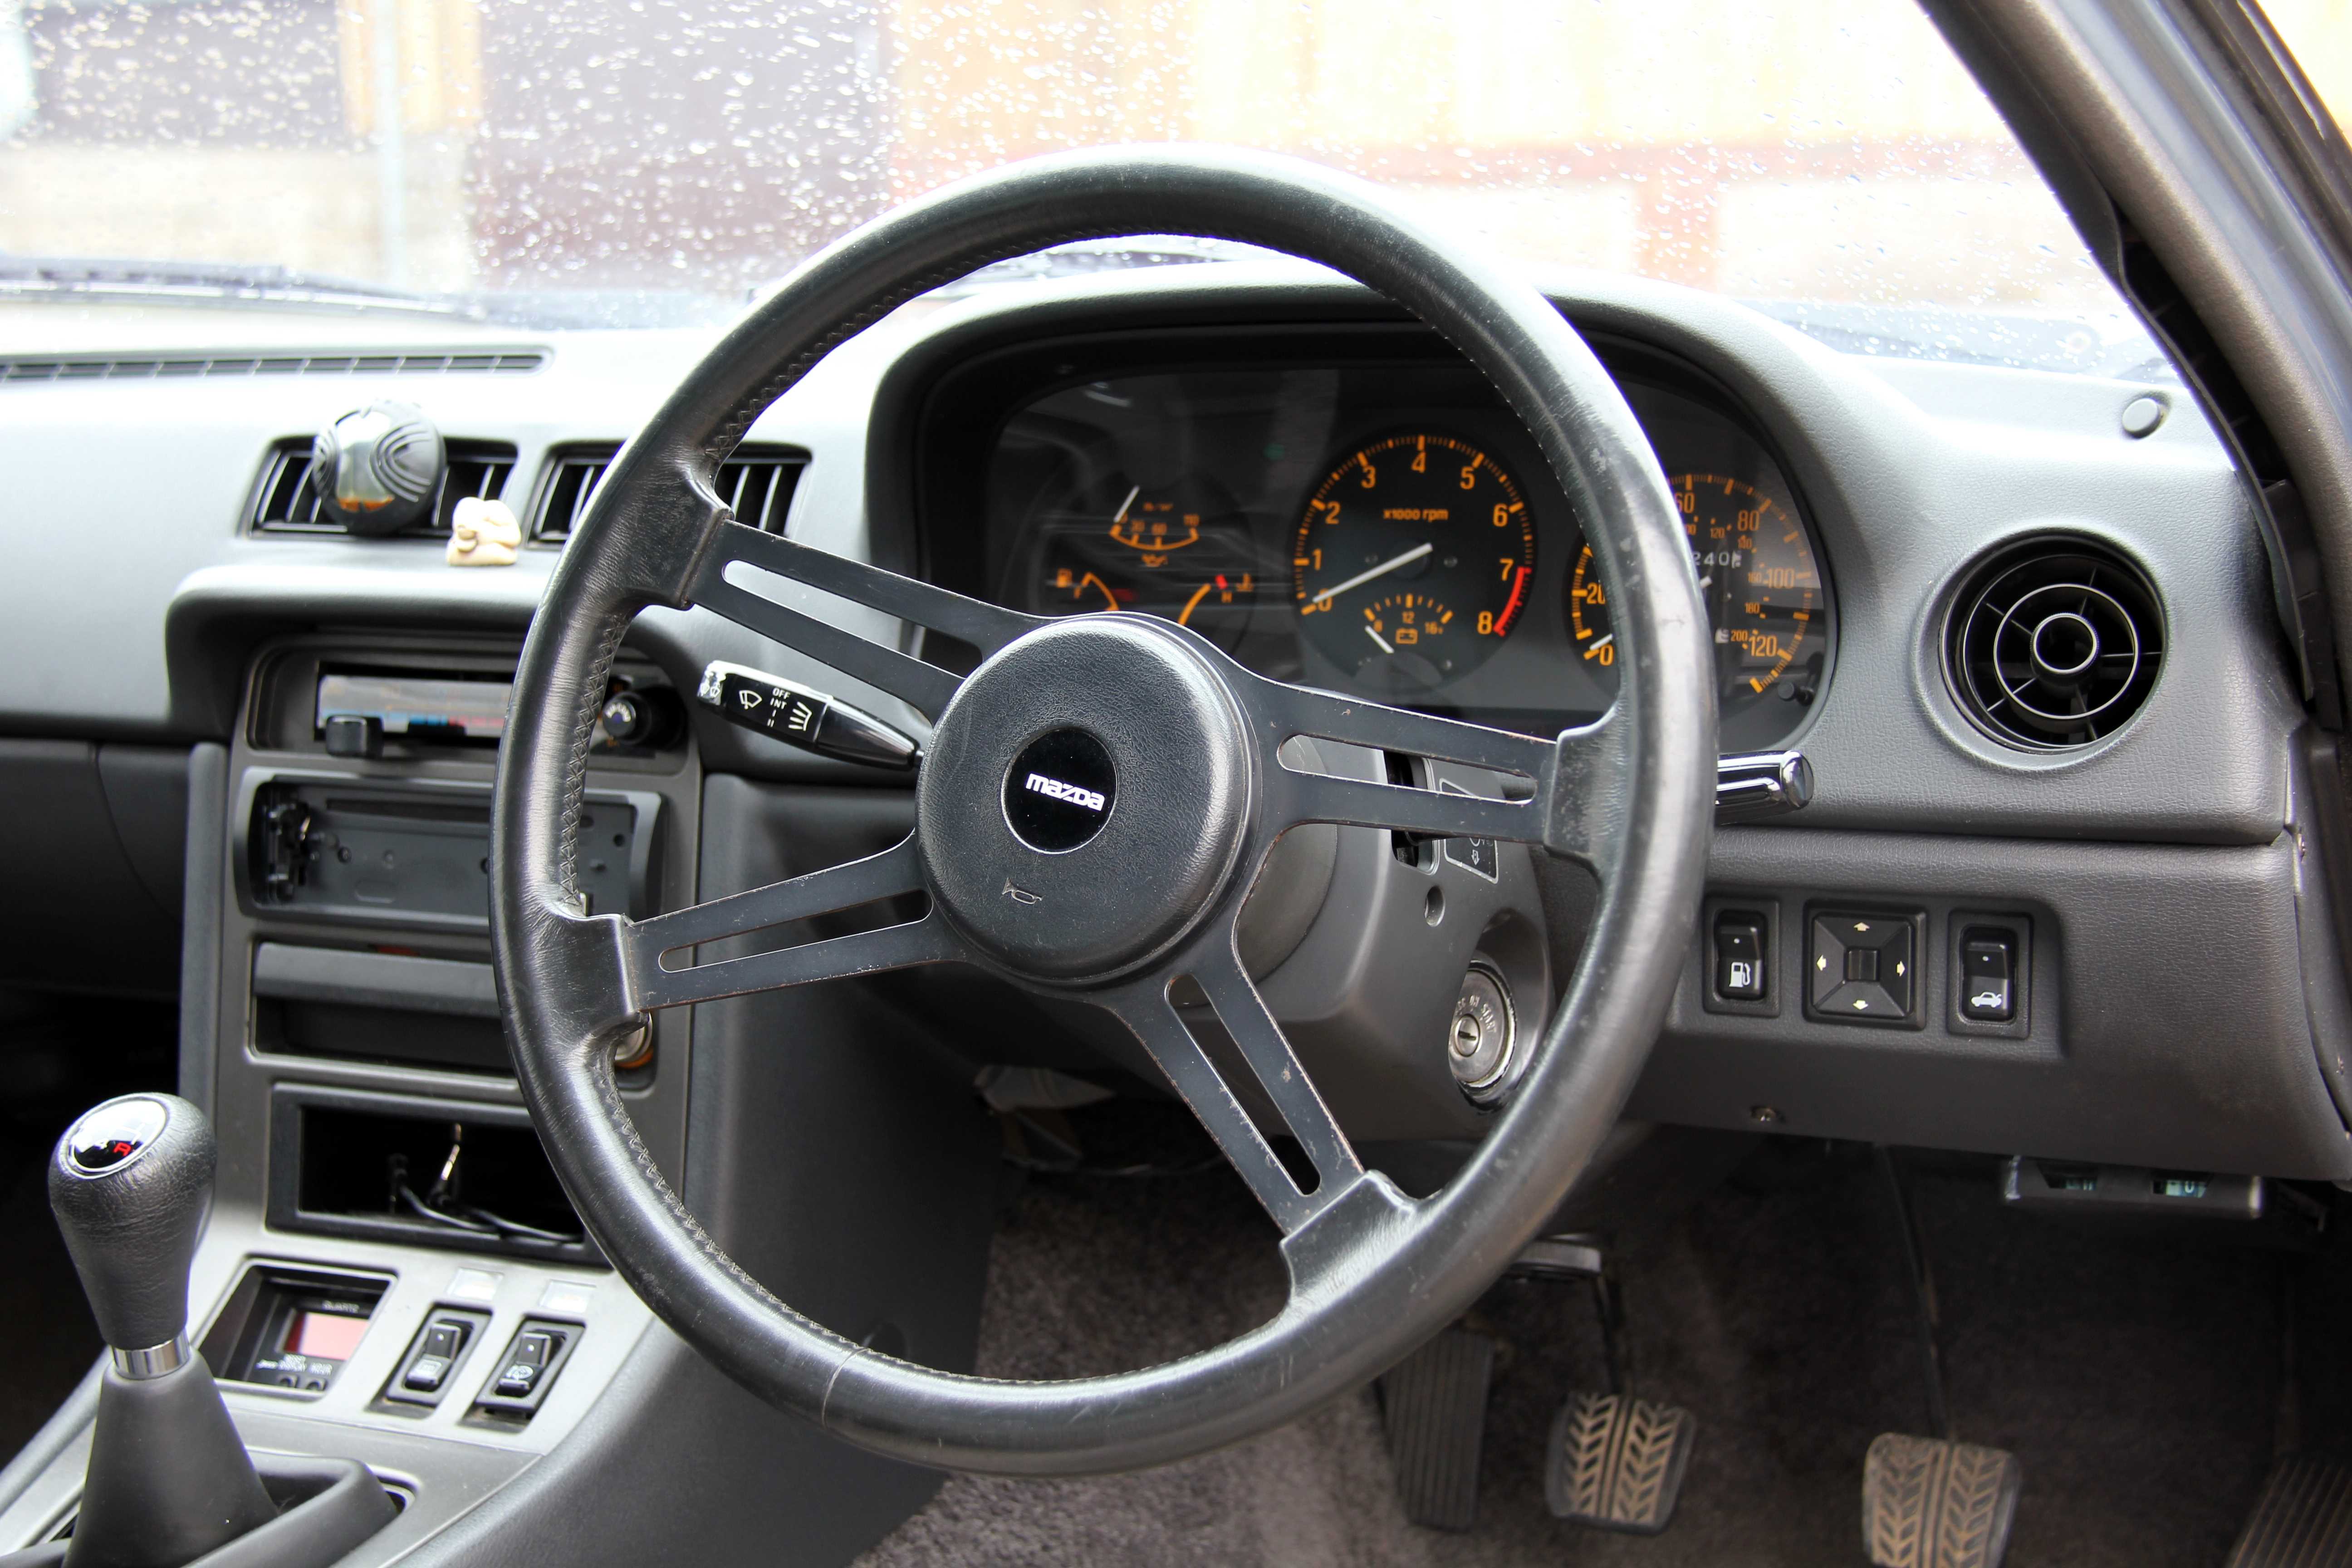
Brake pads before. Yikes!
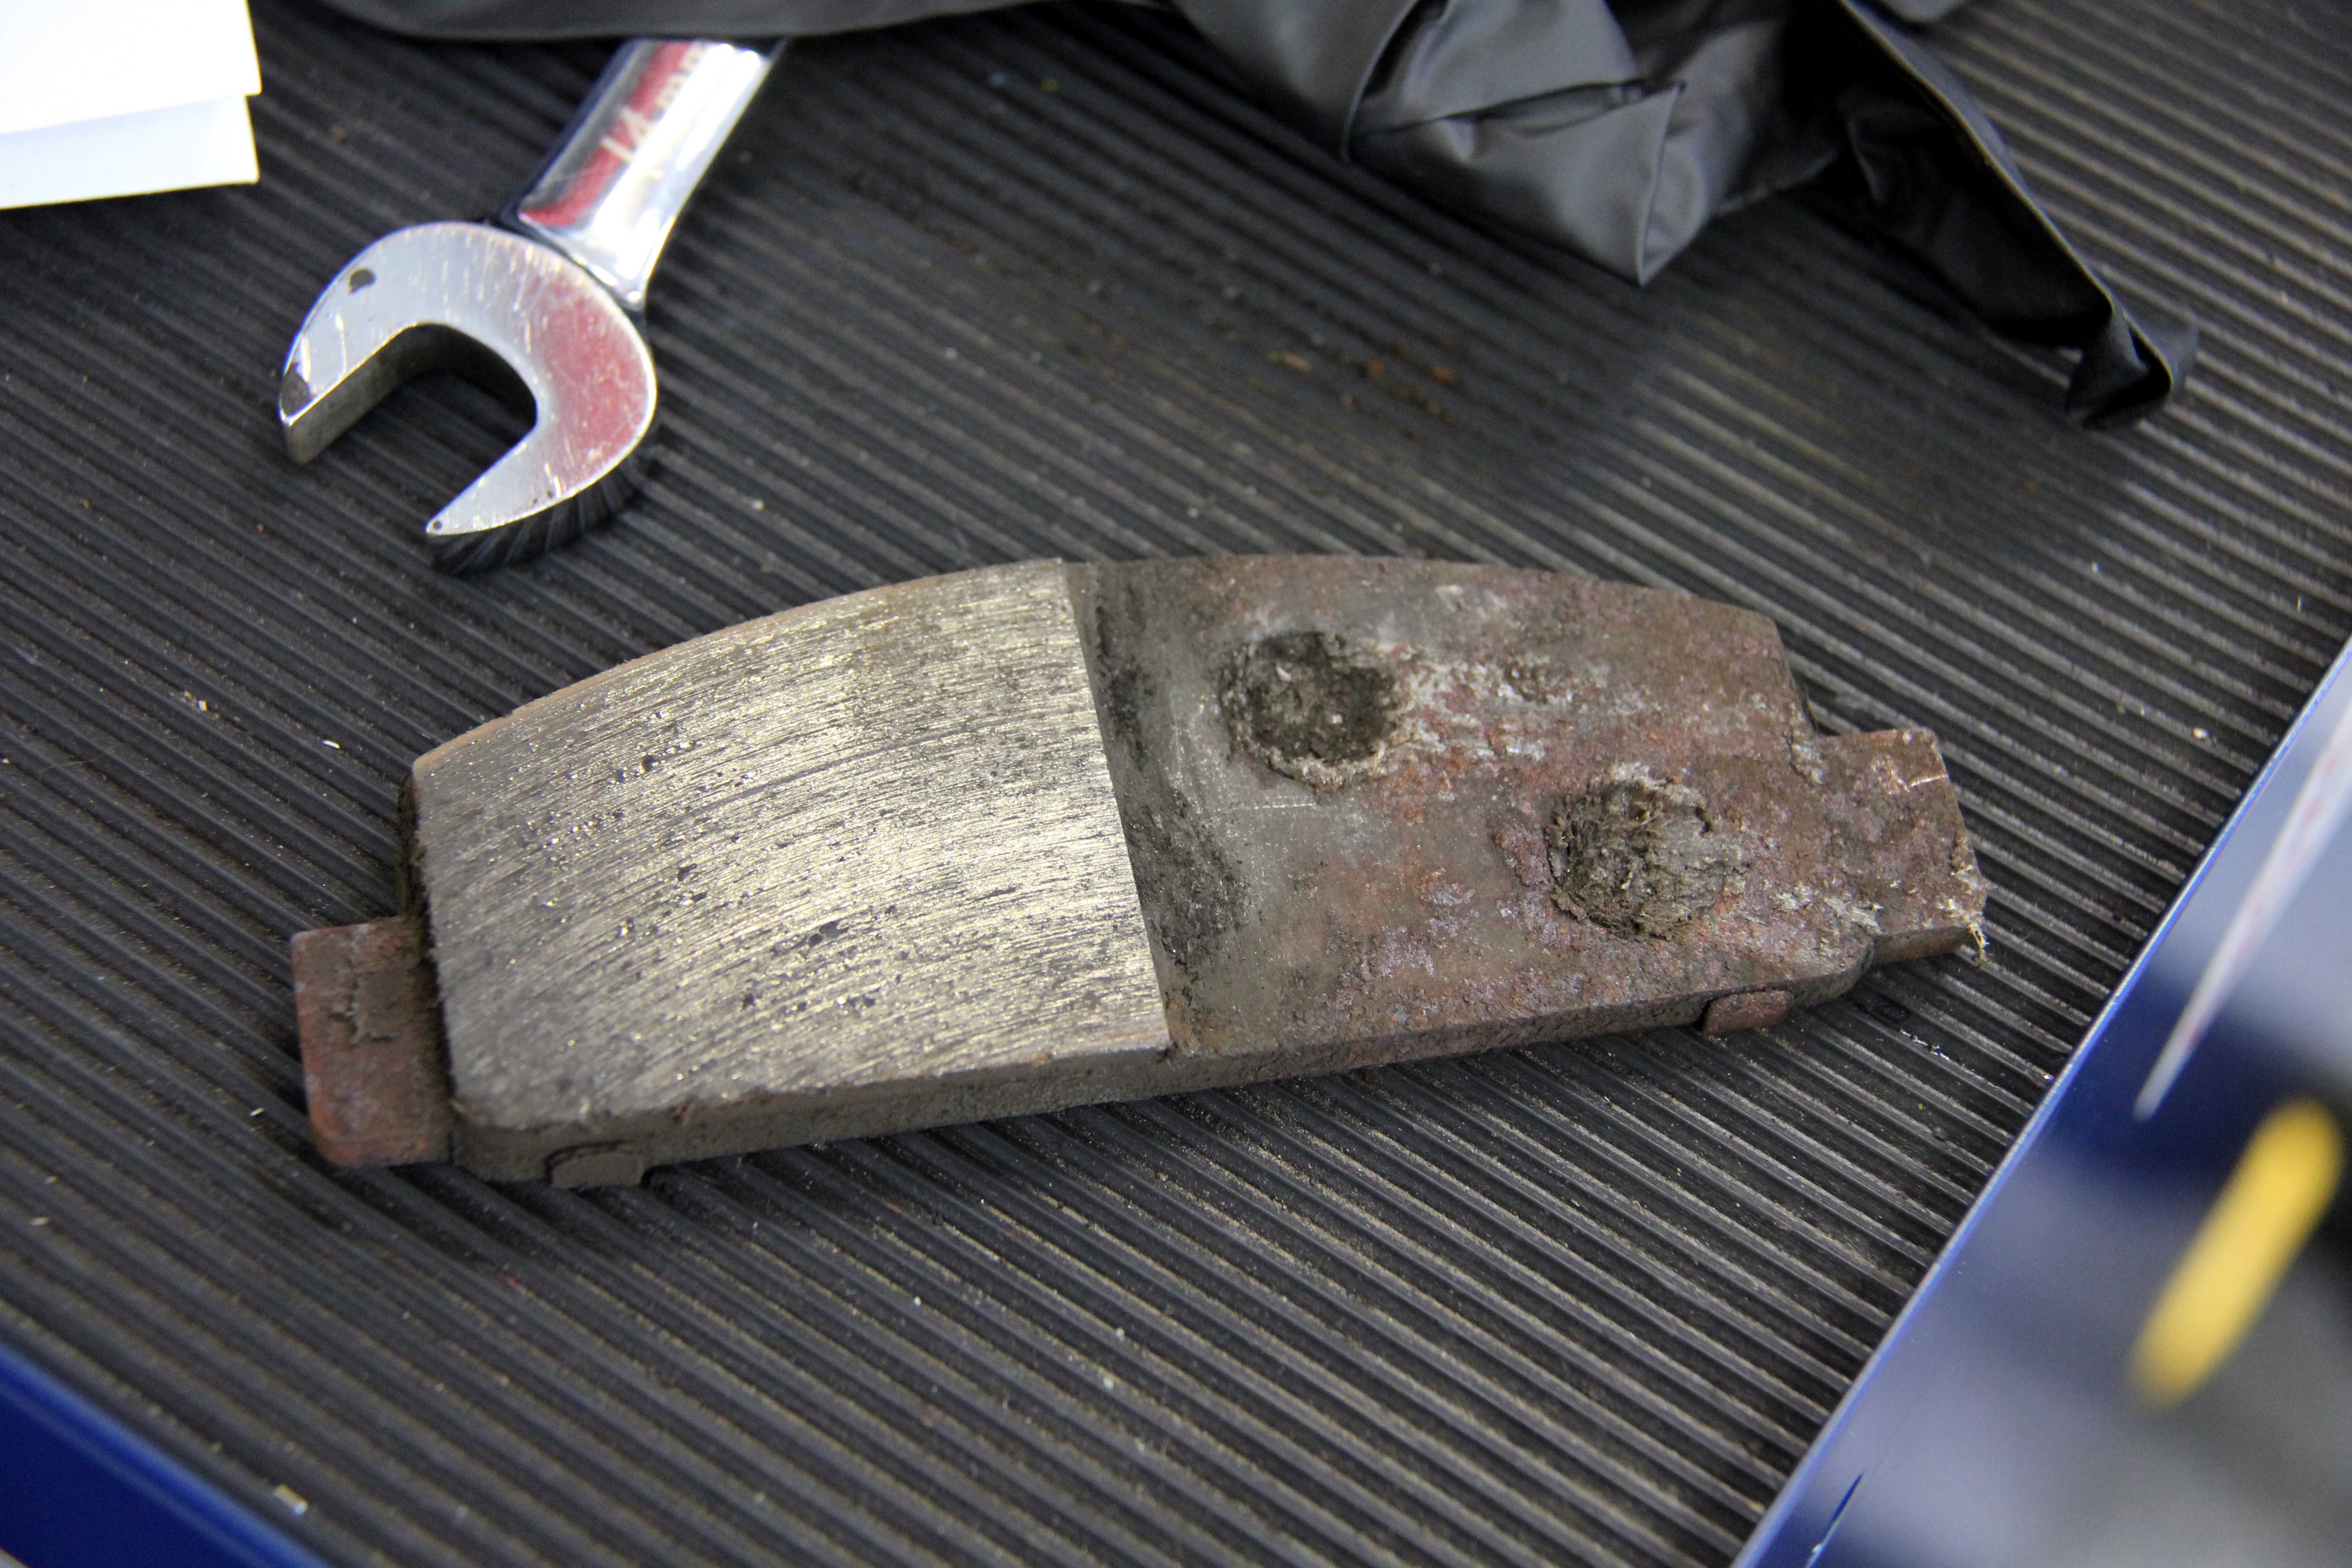
And after;
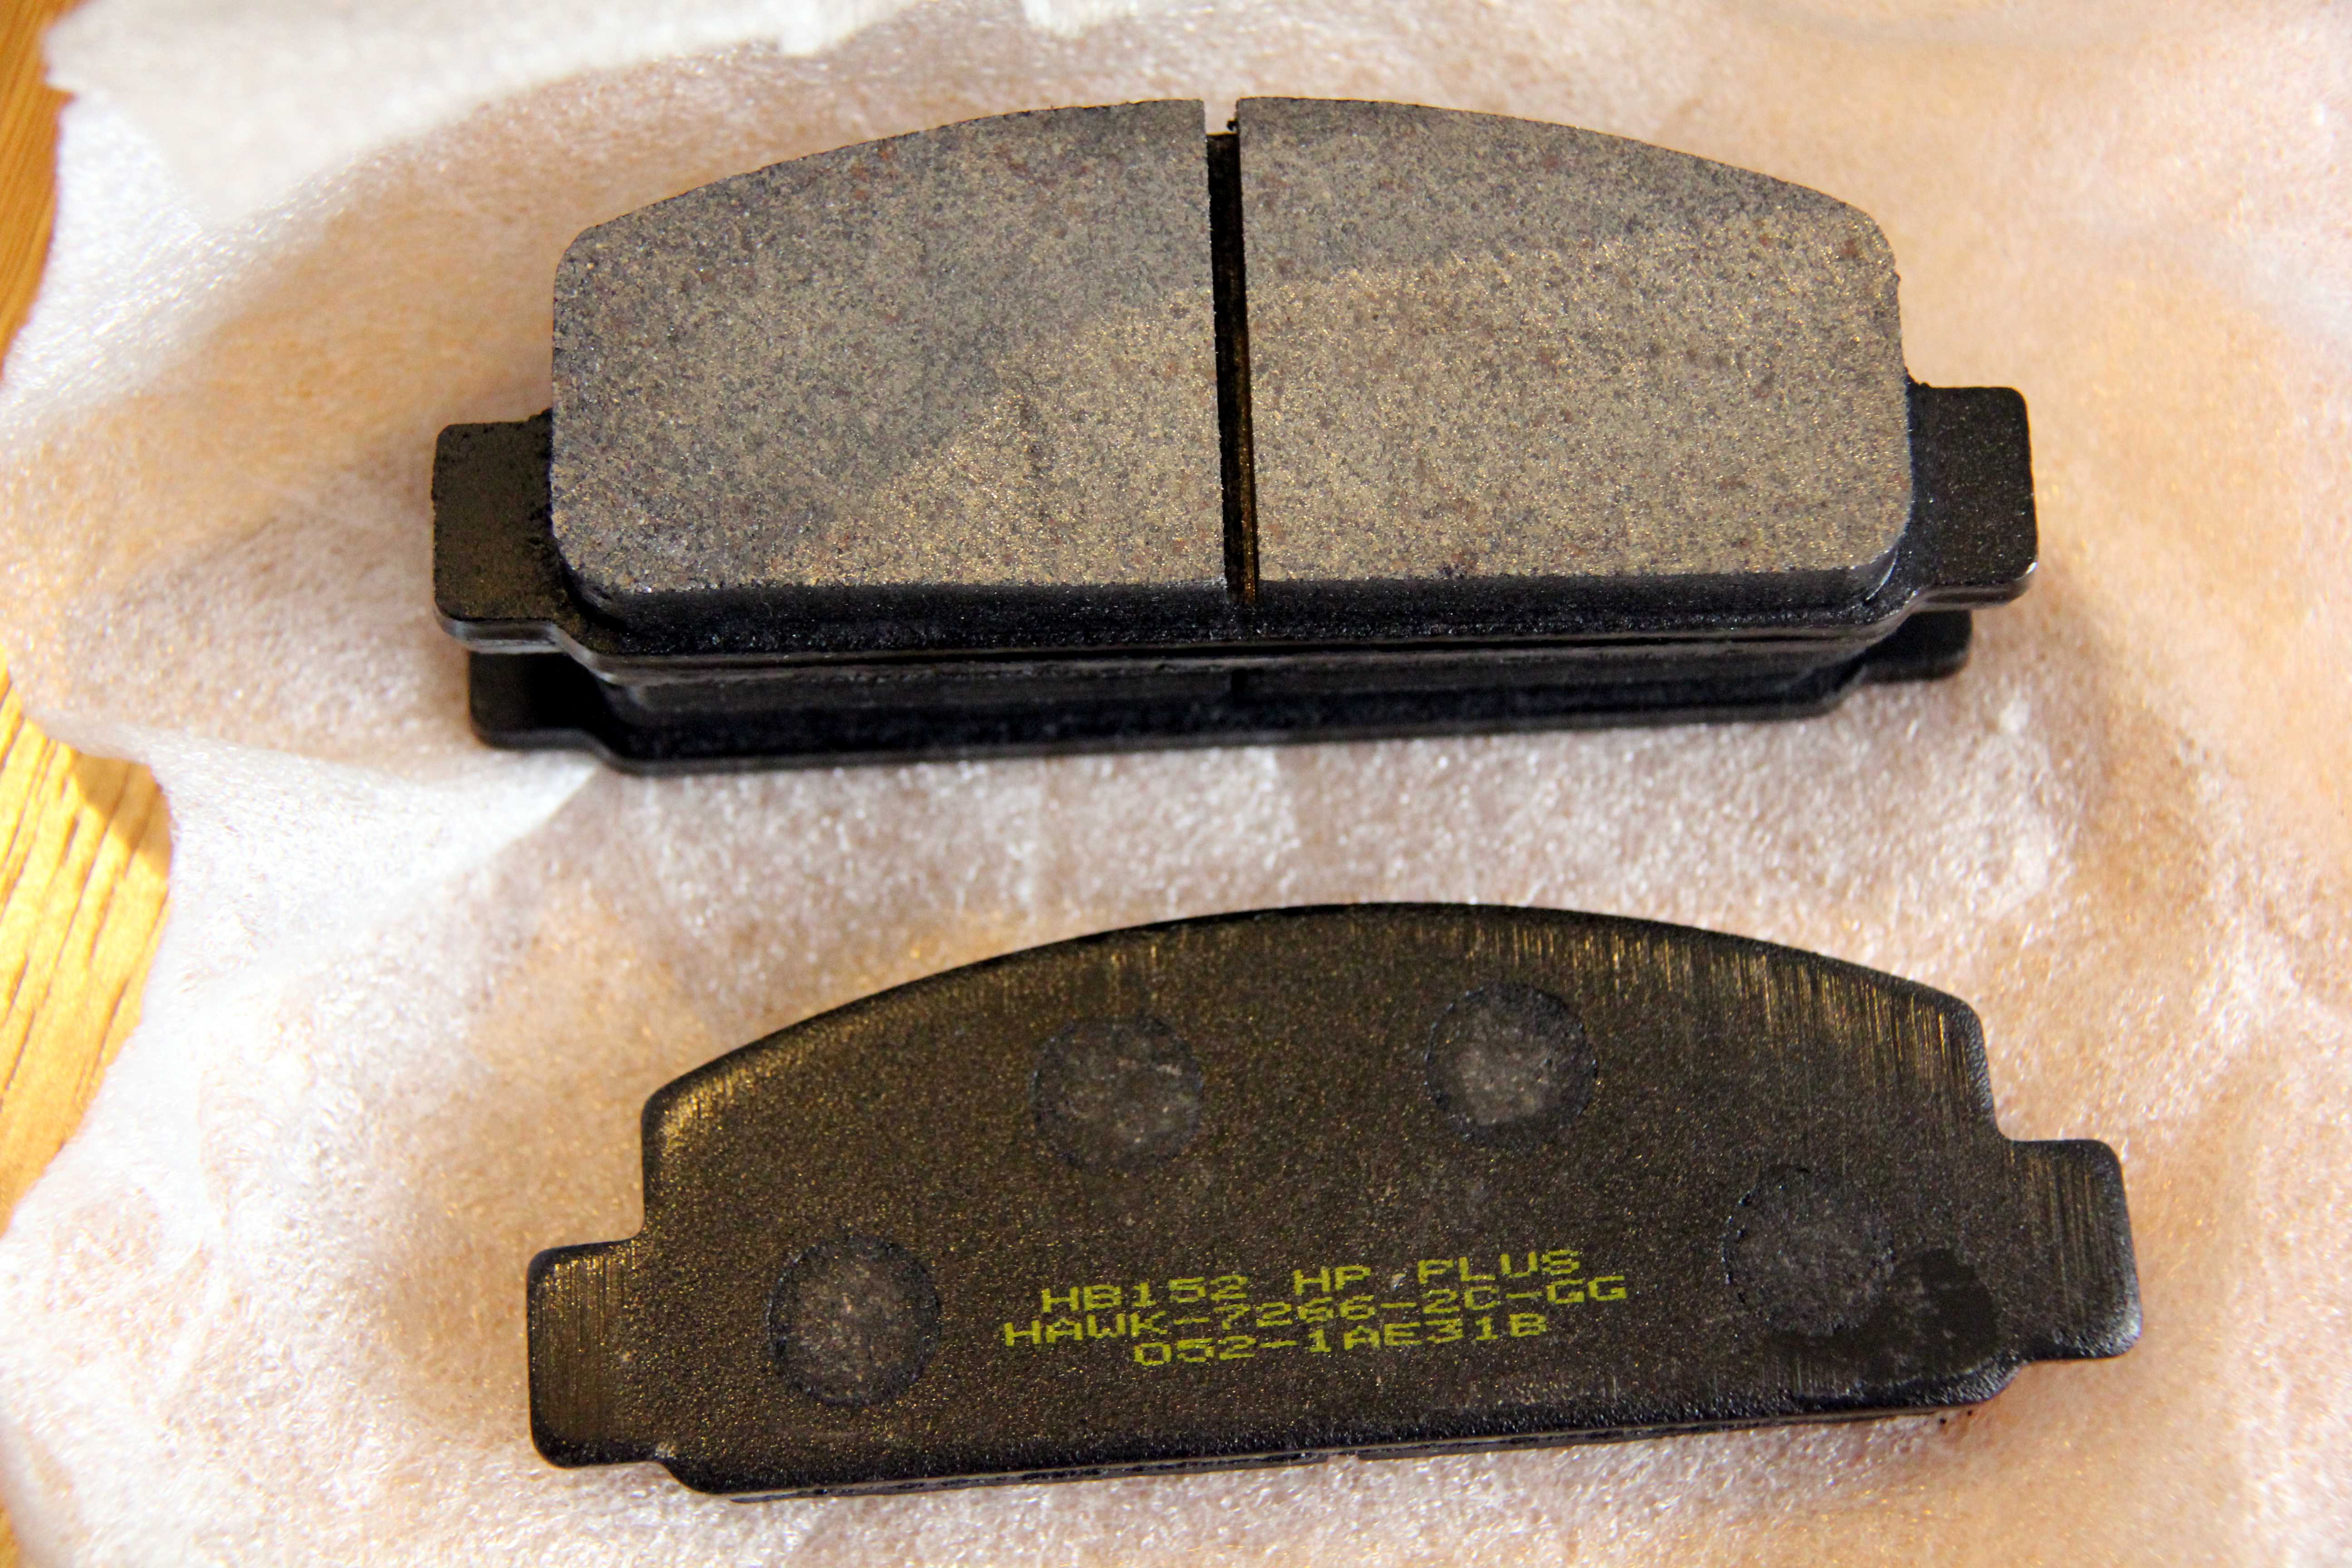
These Hawk pads are great, I was slightly worried being the road/track compound they'd take ages to warm up and squeal like a fat city boy in hillbilly country, but they work perfectly from cold and only squeak very slightly just as the car comes to a stop.
Suspension before;
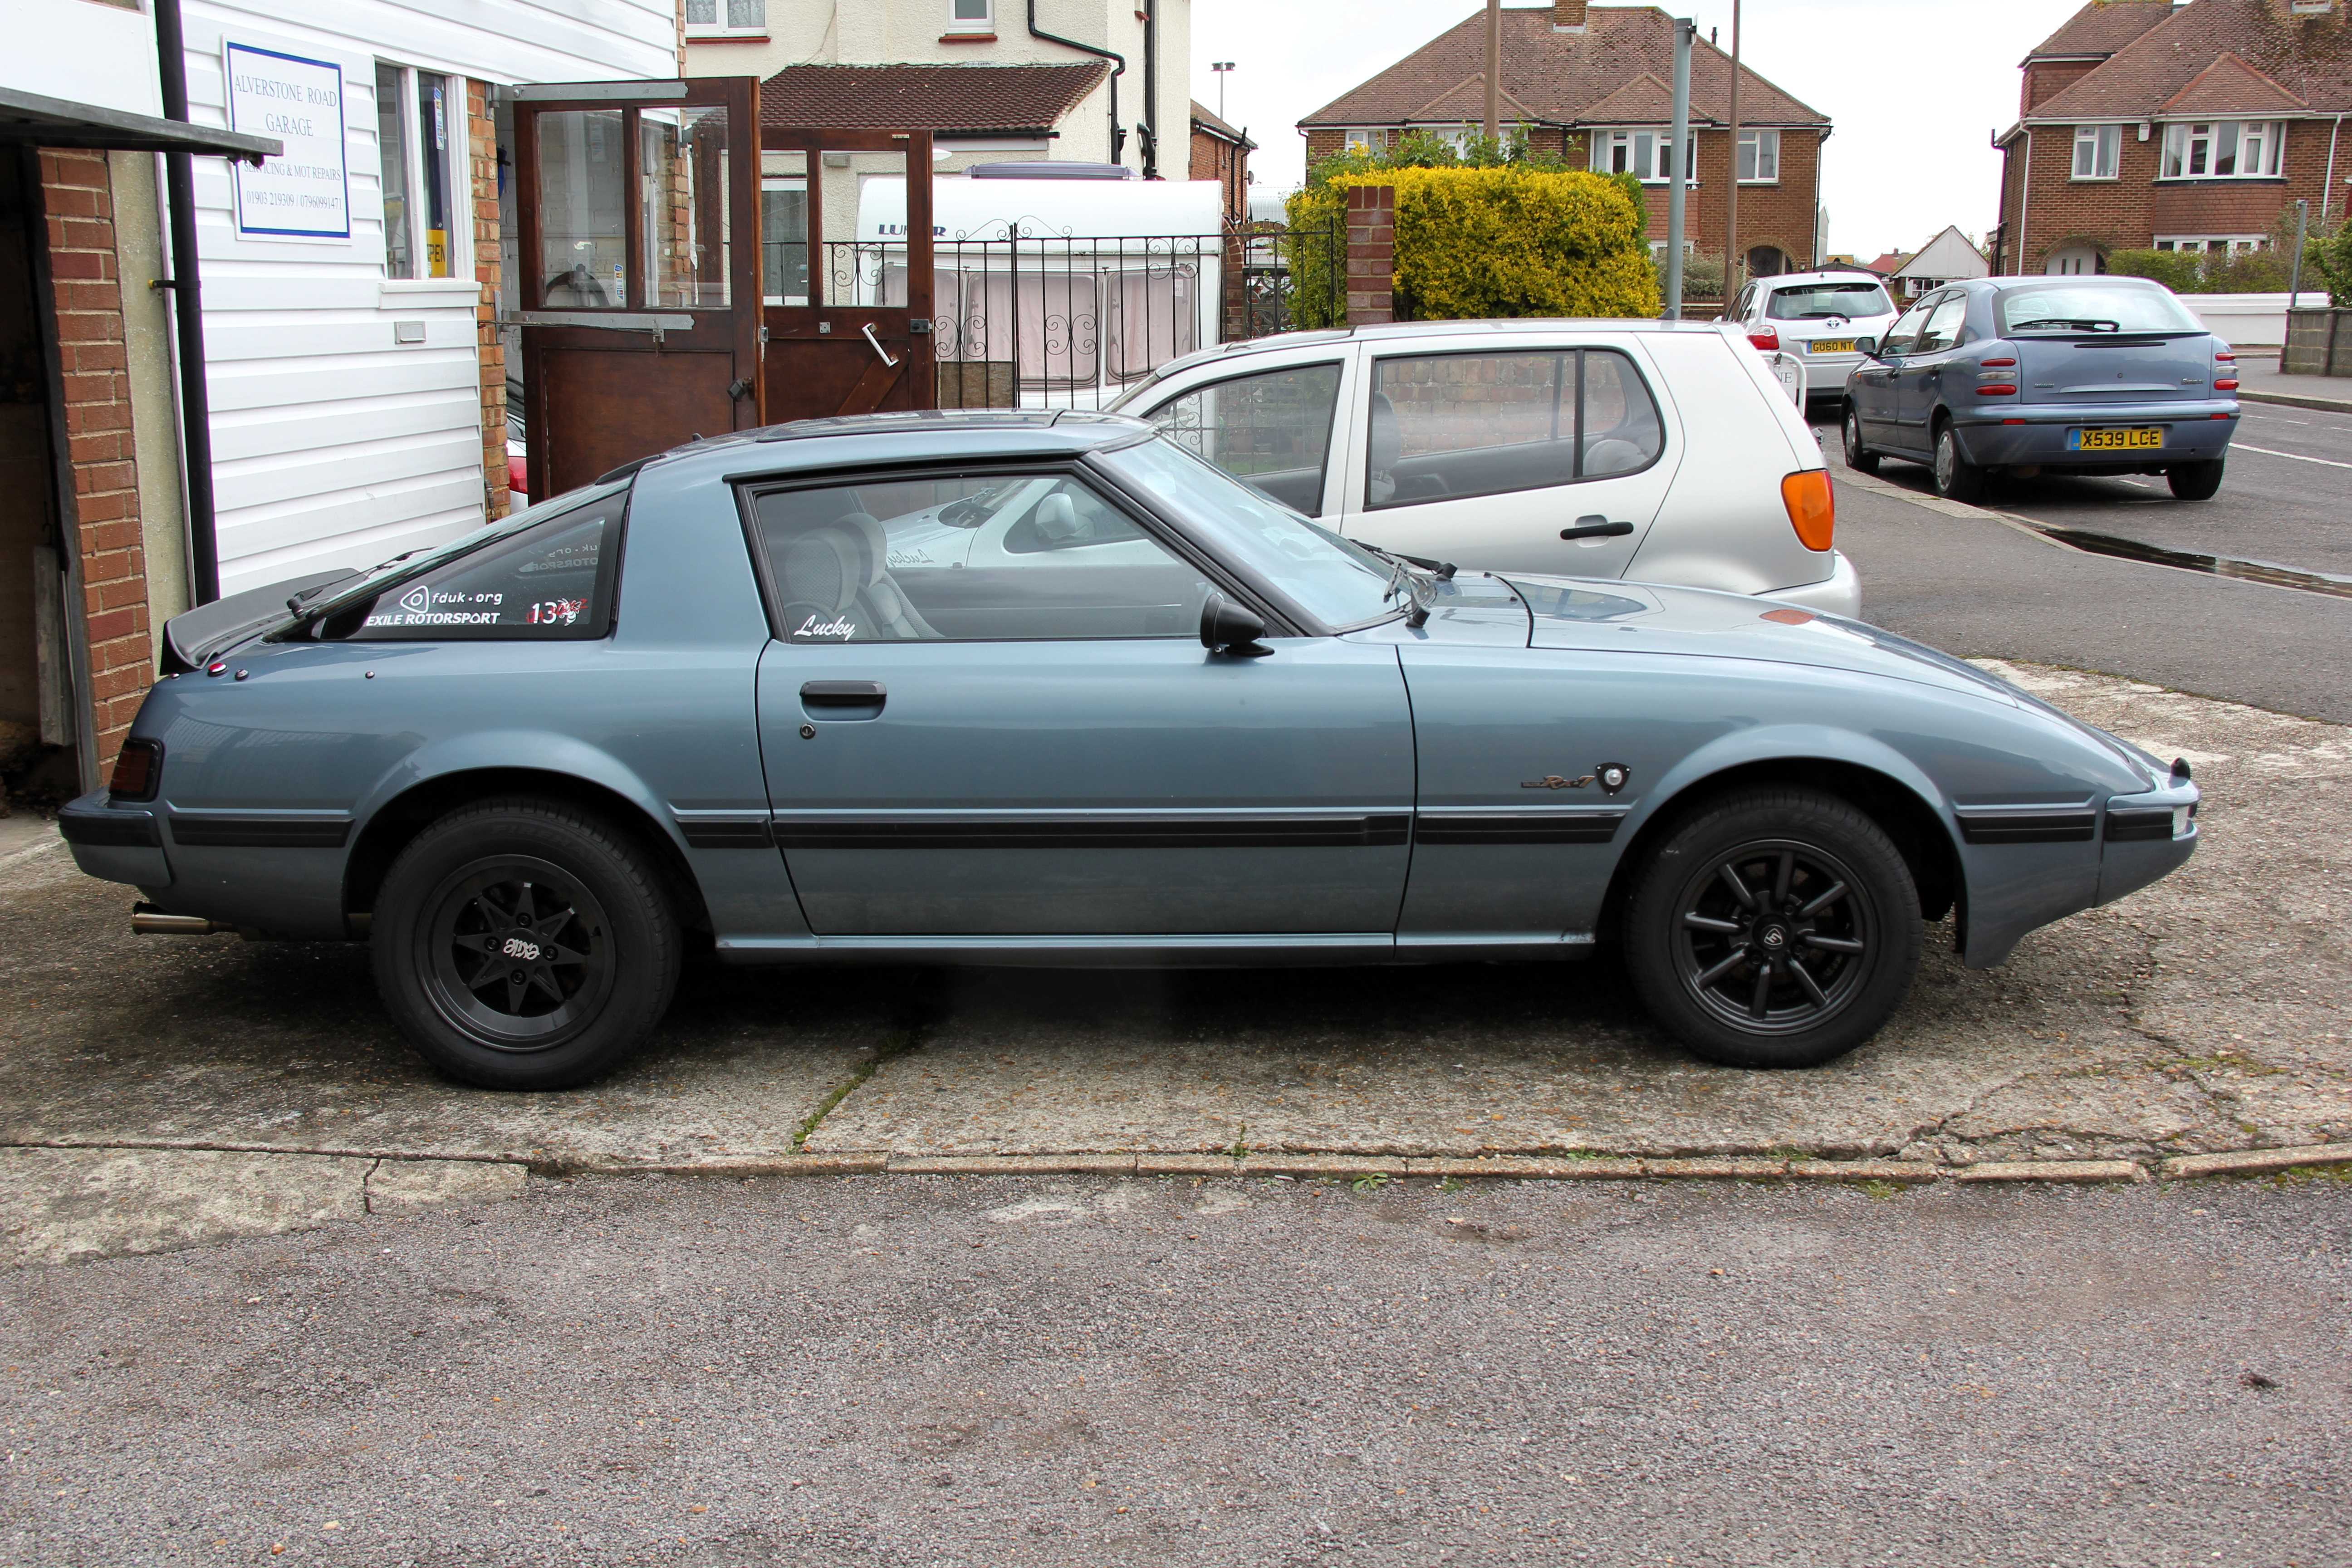
and after;

Hmmm. Is that an inch drop? It looks almost identical to me, but never mind. It's worth it just for the effect on the handling. I find myself wondering if uprating the swaybars would really finish it off or if it's end up getting too stiff and provoking the back end out too much. Hmmm, again. There's always something lol
Just a little hint of sexy red peeking out, like a glimpse of suspender! Oooh
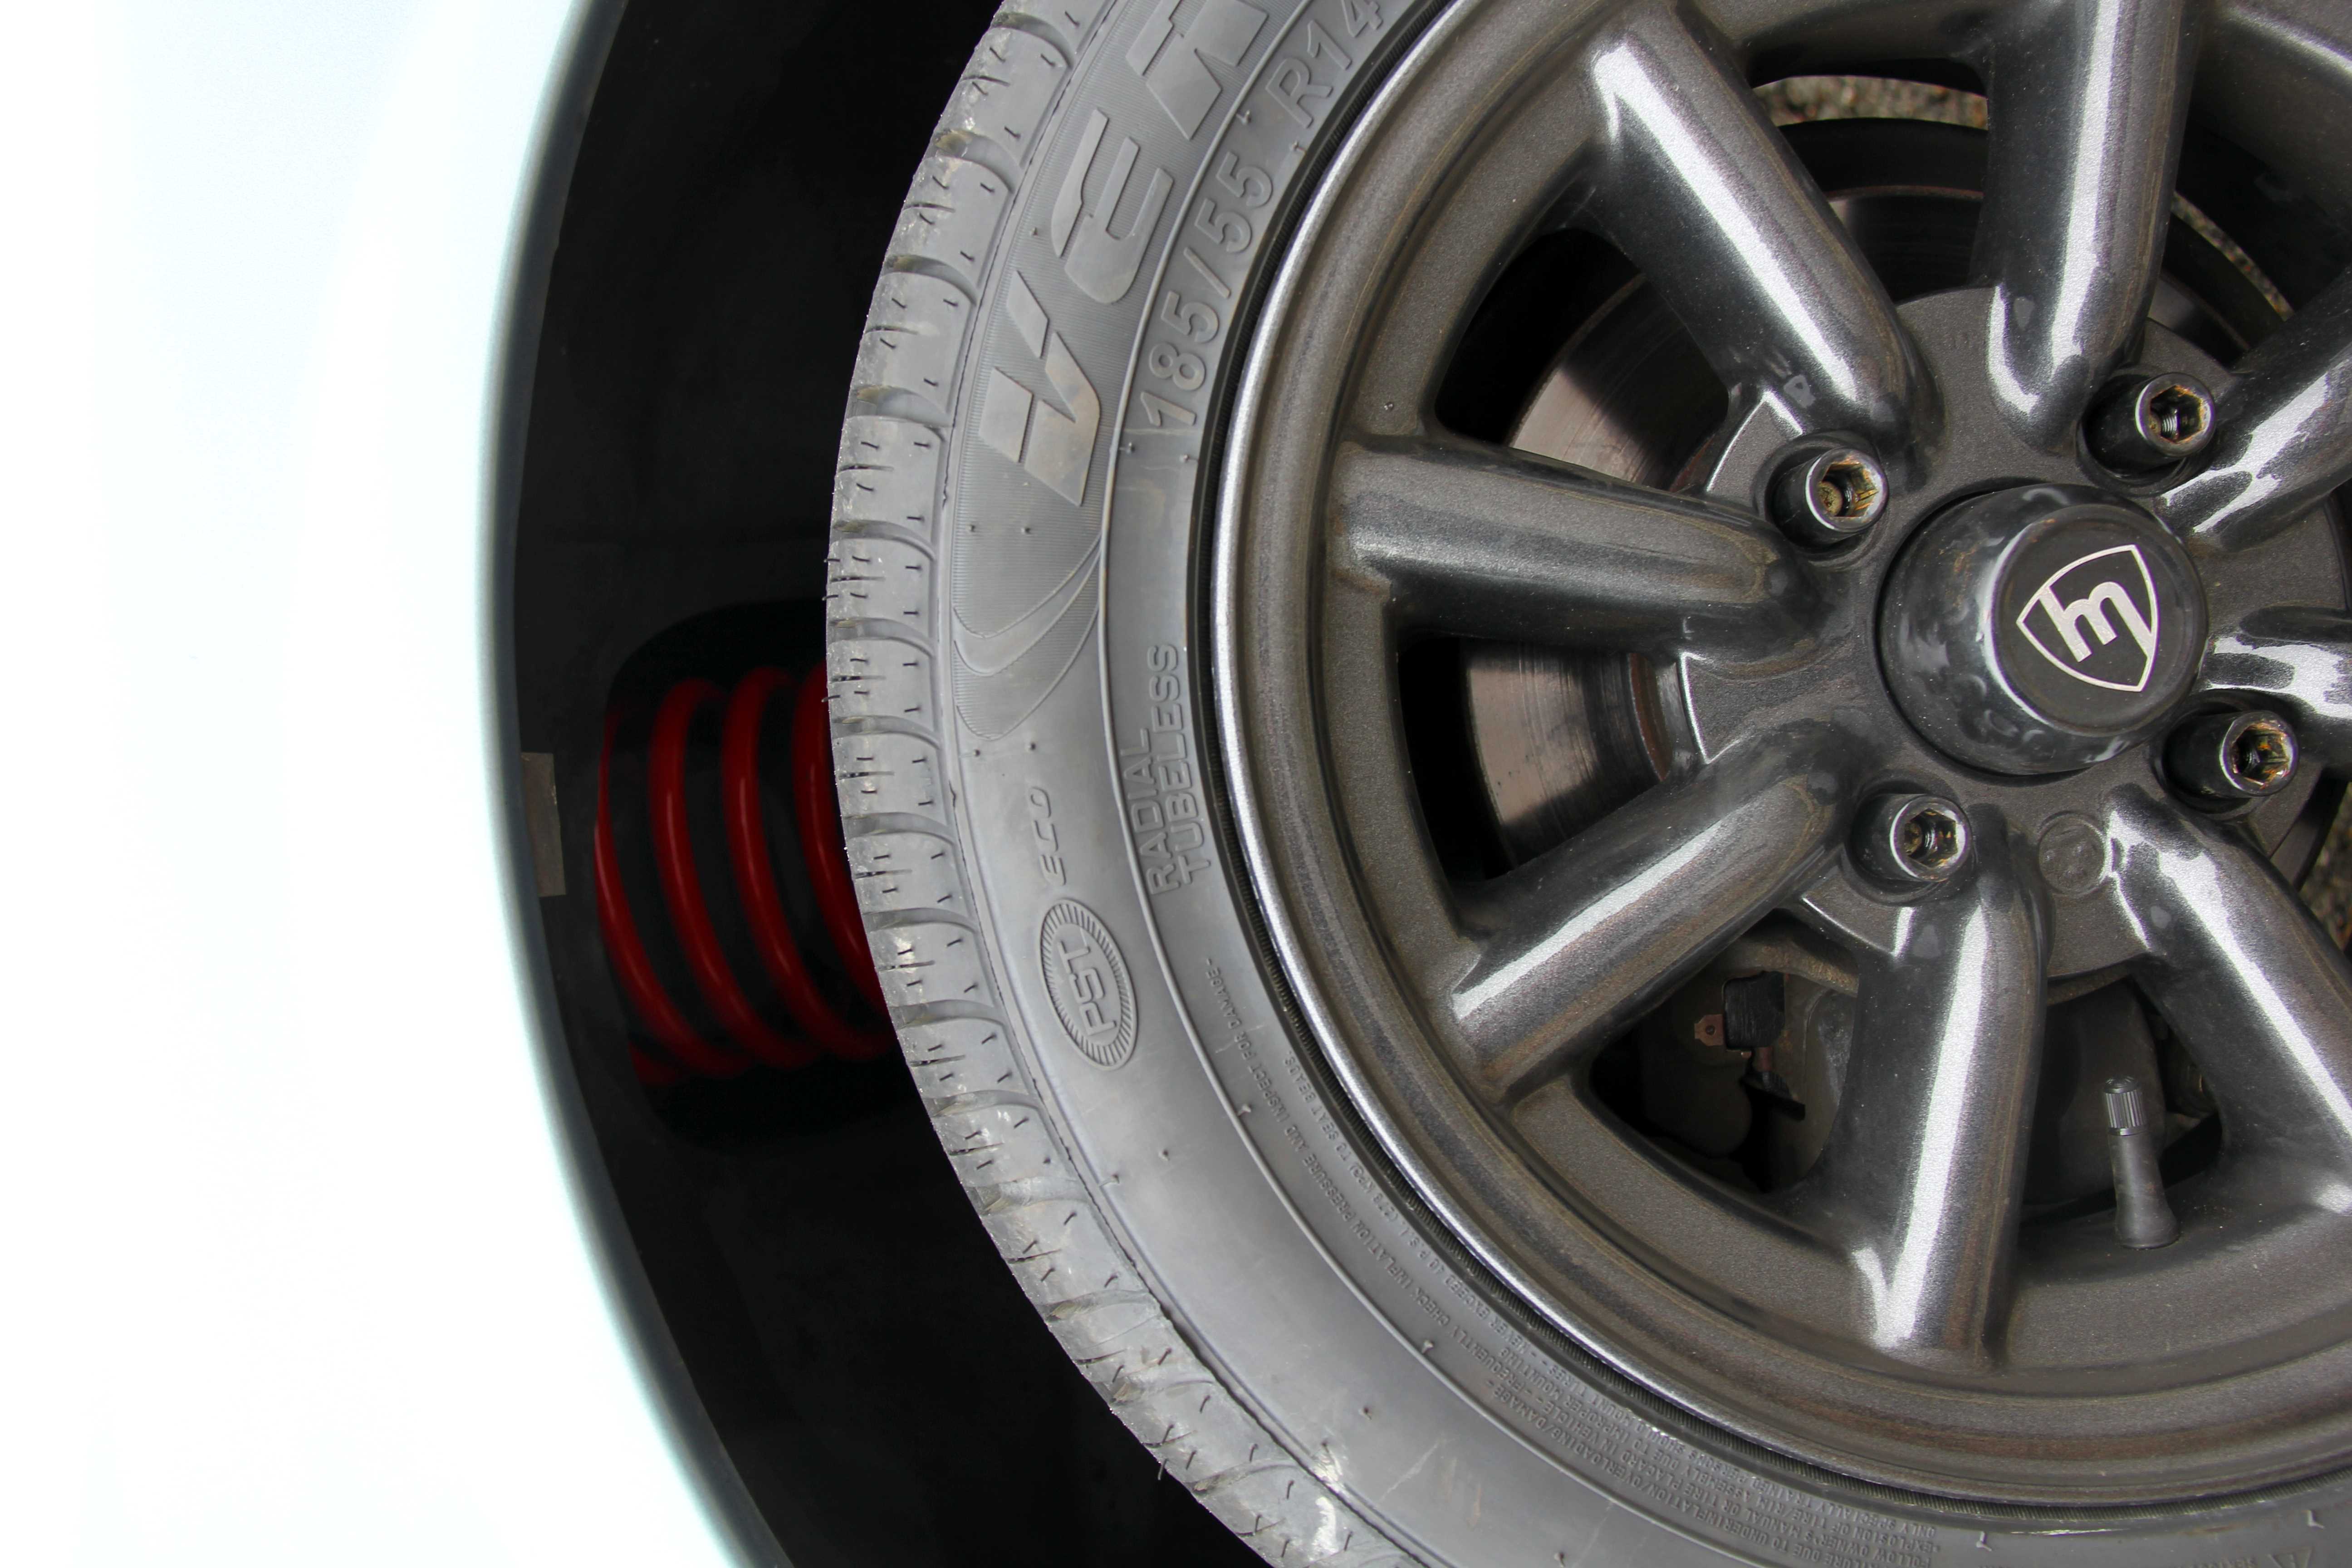
...yep, it actually steers! Full stop. Not like turn the steering wheel twenty degrees before the wheels wake up and start to turn, not sawing away on the freeplay just to go in a straight line, it actually steers! Like, awesome. The suspension is stiffer, but not hard as such; it's still a comfortable ride, but now you can really feel the weight transfer in corners and the suspension controlling it. It's become a really pointy car, especially in constant-radius corners like big roundabouts, just throw it in, and it grips and holds the line, none of the vagueness and wobbling course corrections of before. Short version: pleased wi' that
The brakes are wicked, too. I trawled through loads of pads trying to find some, and in the end thought why go for cheapy stuff when I could spend a little extra and get proper stopping power? So I went for some road-track carbonceramic Hawk pads in the end. Good job I didn't have these on the old suspension, it'd have been ploughing furrows with the front airdam every time I braked. Even the stiffer RB springs dive on the brakes quite a bit, and it just stops. Epic.
So, with it now steering and stopping like a proper sporstcar, It was time to upgrade my interface with the whole procedure. I've never liked the stock steering wheel much, it's too blocky and dull and grey rubber and well... eighties. A mate in the FBUk club, Marc very kindly said he had an S2 wheel I could have off him, and it's such a nicer looking wheel I couldn't wait to get it on. Getting the old one off was the hardest part, fortunately I remembered to leave the centre nut on loosely so the wheel didn't fly off when I whacked it with a mallet and I therefore have escaped having "ADZAM" embossed irrevocably on my forehead
So, some before and after shots...
Before;
After:
Brake pads before. Yikes!
And after;
These Hawk pads are great, I was slightly worried being the road/track compound they'd take ages to warm up and squeal like a fat city boy in hillbilly country, but they work perfectly from cold and only squeak very slightly just as the car comes to a stop.
Suspension before;
and after;
Hmmm. Is that an inch drop? It looks almost identical to me, but never mind. It's worth it just for the effect on the handling. I find myself wondering if uprating the swaybars would really finish it off or if it's end up getting too stiff and provoking the back end out too much. Hmmm, again. There's always something lol
Just a little hint of sexy red peeking out, like a glimpse of suspender! Oooh