
LED Custom Tail Light Idea W/Pics - Help Appreciated

Thread Starter
Joined: Aug 2011
Posts: 3,078
Likes: 42
From: Cambridge, Minnesota
Haha perfect timing guys. Who would like to see rotors for running lights and a LED bar for brake lights, or just line the outside for the running lights??
And I would change the position of the second rotor, probably so a flat side up and it would be pointing down. To simulate movement. Or i could change the position of them all so they seem to rotate through an entire cycle from right to left...
And I would change the position of the second rotor, probably so a flat side up and it would be pointing down. To simulate movement. Or i could change the position of them all so they seem to rotate through an entire cycle from right to left...
Joined: Jun 2008
Posts: 8,376
Likes: 28
From: Chino Hills, CA
Real challenge for you; For the turn signal, make the "rotating" rotor move across the lamp lens, sort of like the mustang 'strobe' brakes.
If you're gonna go cheesy, go Limburger, you know? Whole hawg, or none at all.
If you're gonna go cheesy, go Limburger, you know? Whole hawg, or none at all.
Thread Starter
Joined: Aug 2011
Posts: 3,078
Likes: 42
From: Cambridge, Minnesota
To do the rotating rotor I'd need a controller and an extremely experienced LED builder to help with it. And it would double the cost in my mind.
So I'll be sticking to some sort of pattern like an outline of the housing for running lights and a large block of LEDs in the middle for when I hit the brakes.
Just so you guys that I'm not just farting in the wind here with this project, I borrowed some soldering equiptment from the builder that will be helping me with this project. i practiced yesterday by soldering a pair of broken headphones and they turned out pretty good!
I have the white LEDs on the way right now and I will start with the marker lights I'm thinking, then graduate to the reverse lights after those 4 are done.
Only issue with that idea is that I want to remove the trim on my car because it is starting to peel off and it looks really worn. If i do this I will want to shave the markers down and I dont know if I will take away any space for LEDs or not by doing so... And in any case, the area available without modding the case is soooooo small I'll only be able to put about 3 in there anyways.
These are another style of tail lights that we use on regular road tractors http://www.gemplers.com/product/AX44...&ci_sku=AX44RL
Thread Starter
Joined: Aug 2011
Posts: 3,078
Likes: 42
From: Cambridge, Minnesota
These are another style of tail lights that we use on regular road tractors http://www.gemplers.com/product/AX44...&ci_sku=AX44RL
Thanks for the reference bad 83, these are pretty cool

For an update, I picked up 2 6x8" sheets of Perfboard to start cutting out for the project! Will hopefully get to the storage unit to get all the lights off and start on this bad boy soon.
Only issue I'm having now is, I plan on doing an FC alternator swap and a FC FMOC swap too... stupid forum with it's wealth of knowledge that makes me wanna constantly upgrade the car

With a new job and new funds, comes great responsibility.
Thread Starter
Joined: Aug 2011
Posts: 3,078
Likes: 42
From: Cambridge, Minnesota
Easy there SpiderMan  Also, thanks for the props. I've had my FB for 8 years, and I probably have between 8-10 grand in it. I know how you feel
I think the round style leds would look the best, but that's my opinion.
Also, thanks for the props. I've had my FB for 8 years, and I probably have between 8-10 grand in it. I know how you feel I think the round style leds would look the best, but that's my opinion.
Thread Starter
Joined: Aug 2011
Posts: 3,078
Likes: 42
From: Cambridge, Minnesota
Awesome bad 83, sounds good, thanks for the opinion - it's appreciated.
I'm plannin on going down and getting every light off my car except my headlights to start this project, should be fun!
I'm plannin on going down and getting every light off my car except my headlights to start this project, should be fun!
How about pulling the back off the mazda light units and mounting these in front of the colour sections of the tail light unit.
So one for the inicator, two for brake and one for reverse.
They are only 70mm in diameter and might fit inside the lens area?
LINK: http://www.aliexpress.com/store/2021...d-LED-DRL.html
Probably not going to give you the exact pattern you wanted though.......
So one for the inicator, two for brake and one for reverse.
They are only 70mm in diameter and might fit inside the lens area?
LINK: http://www.aliexpress.com/store/2021...d-LED-DRL.html
Probably not going to give you the exact pattern you wanted though.......
Thread Starter
Joined: Aug 2011
Posts: 3,078
Likes: 42
From: Cambridge, Minnesota
Hey 12A, those would look awesome. But with 4 lights per tail light, it would be like $78.00 + to get one light done, so like $156+ just for lights. I have it calculated at about $100 for a custom look so far. I will keep this in consideration though, thanks for the suggestion!
You're in the calendar if I'm not mistaken, in the middle somewhere... I don't have it on me, that's why I'm being vague. I'm January, that's why I'm asking..
You're in the calendar if I'm not mistaken, in the middle somewhere... I don't have it on me, that's why I'm being vague. I'm January, that's why I'm asking..
Thread Starter
Joined: Aug 2011
Posts: 3,078
Likes: 42
From: Cambridge, Minnesota
So yeah BrGreenSA, if you have an extra one that you would want to lend to this project I will be more than willing to mock up a set for the SA's.
I am going down to the storage unit tomorrow to find a coolant leak, look in a junkyard for a S4 FC FMOC and a S4 water pump housing (to trade my cast iron one out for aluminum), and I will be taking all my lights off to get her started!!!
Thread Starter
Joined: Aug 2011
Posts: 3,078
Likes: 42
From: Cambridge, Minnesota
Hahaha yeah, I need to get rid of that one DD
Here's how far I am today guys...
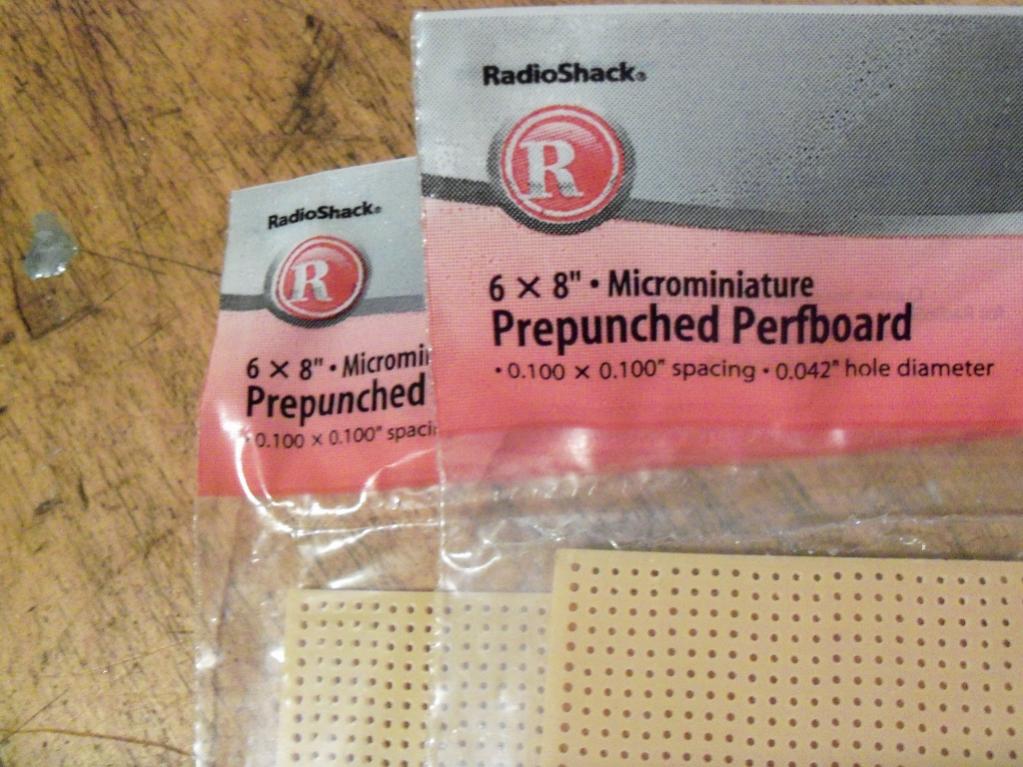
Here is the perfboard I got from RadioShack. Only $7.25 for the two of them.
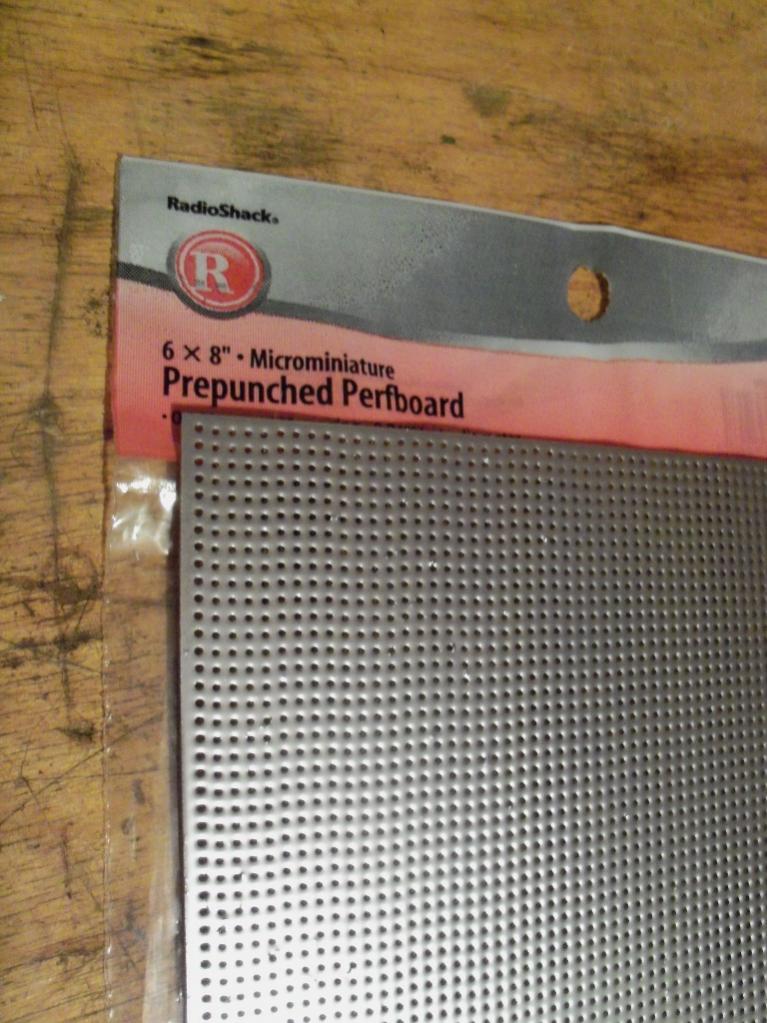
Painted perfboard. Just used some Rustoleum metallic finish spray paint.
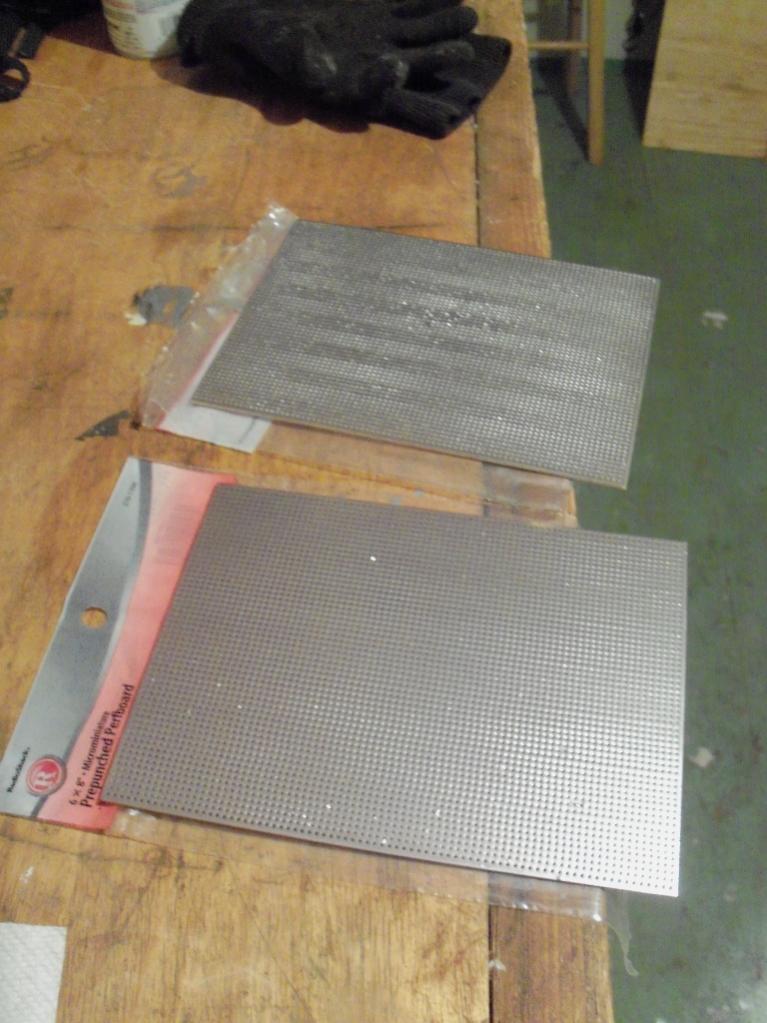
Both painted perfboards.
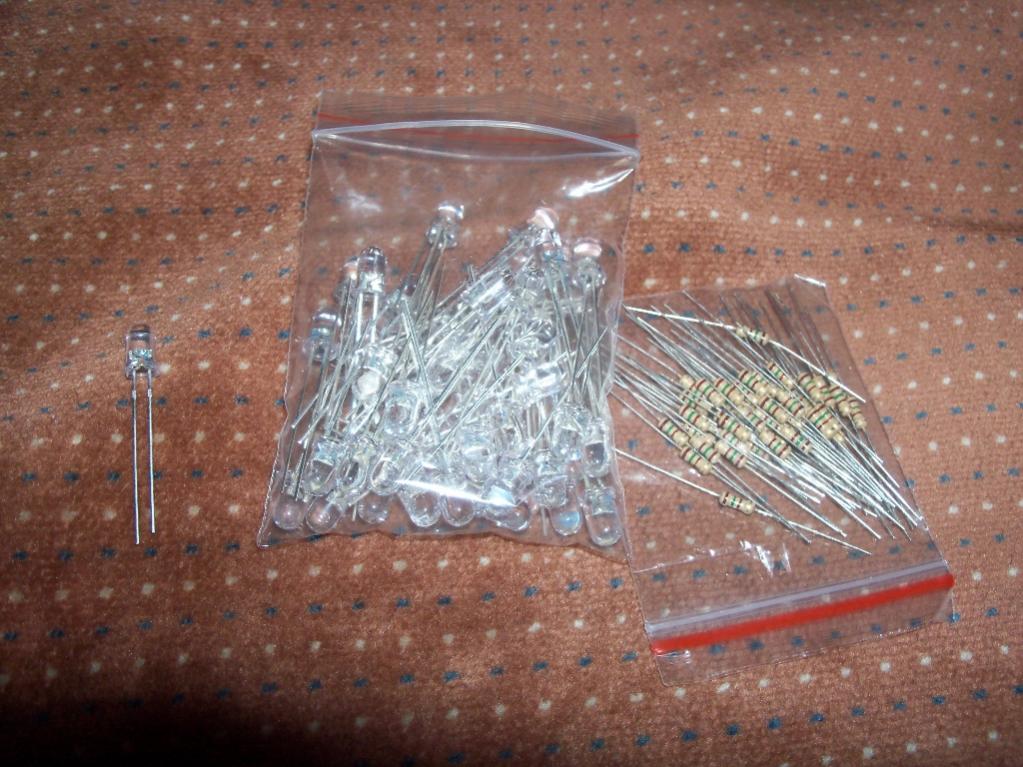
LED's with resisters.
Here's how far I am today guys...
Here is the perfboard I got from RadioShack. Only $7.25 for the two of them.
Painted perfboard. Just used some Rustoleum metallic finish spray paint.
Both painted perfboards.
LED's with resisters.
going to subscribe to this since I am working on a similar project on my SA until I can get a set of 2011 RX8 tails.
try these, I use them on my reef
http://ledsupply.com/creexml.php
try these, I use them on my reef
http://ledsupply.com/creexml.php
Thread Starter
Joined: Aug 2011
Posts: 3,078
Likes: 42
From: Cambridge, Minnesota
Yeah Chris, I am going to use the superflux piranha 5mm 10,000mcd lights when I do the tail lights. The ones I have pictured above are ones I got for cheap for experimenting. I will probably use these for my marker lights, just to try it out. Will post up more pics after tomorrow night!
Hey there, I would be extremely interested in building a set for SA guys. Especially since there's a cherry red SA in my area for $750 on CL that I'm looking at getting
So yeah BrGreenSA, if you have an extra one that you would want to lend to this project I will be more than willing to mock up a set for the SA's.
I am going down to the storage unit tomorrow to find a coolant leak, look in a junkyard for a S4 FC FMOC and a S4 water pump housing (to trade my cast iron one out for aluminum), and I will be taking all my lights off to get her started!!!
Thread Starter
Joined: Aug 2011
Posts: 3,078
Likes: 42
From: Cambridge, Minnesota
OOOOK, let�s down to business guys.
THIS IS THE OFFICIAL FIRST POST OF THIS BUILD, EVERYTHING WILL STEM FROM THIS POST FORWARD
Rear of my 1984 Mazda GS RX7

I got all my lights off the FB, and I need some advice from all of you with rotary experience. Here are pictures that I edited off of the Electrical FSM I downloaded from here on the forum for my year (1984). These are the 12a pictures (my engine) and I have heavily erased and edited portions to make it clearer for myself and you guys.
This is the pic for the running lights. All marker lights are on, turn signal running light on, and tail running light on. There would be a total of 8 housings (markers, turn signals, and tail lights), and 10 bulbs running (1 light x 4 marker bulbs, 1 light x 2 turn light bulbs, and 2 x 2 tail light bulbs = 10 bulbs).

Here is the setup for the brake, turn, and reverse lights. Where it gets hairy.

So let�s discuss this. There are 3 wires that run to each of the turn signals up front, and 3 wires that run to the tail/brake lights in the back. Here�s a crazy test I decided to do, and it has really confused me as to the function of these 3 wires. I know the Black wires are a ground, which is clear on the FSM.
Front Turn Signals Original Wiring
(Left+Right)Black = Ground
(Left+Right)Red/Green = Running Light Power in 8W bulb filament
(Right)Green/Orange and (Left)Green/Red = Turn Signal Power in 27W bulb filament
If I all 3 of the Black, Green/Orange and Red/Green wires are connected in the left front blinker assembly, the unit functions as it should and has a running light and a bright turn signal. Following is a test of the different wire combinations and what they do to the car and the bulb, quite interesting to study. It was done with the turn signal on, because that is where I knew I would have the issue.
Blk + Gr/Or + Red/Gr = Bright turn signal, regular blinking
Blk + Gr/Or = Bright turn signal, regular blinking
Blk + Red/Gr = Bright solid light with no blinking in front, fast blink in the back like the front bulb is burnt out.
Red/Gr + Gr/Or = Weak turn signal in front, fast blink in the back like the front bulb is burnt out.
Should be correct, after doing extensive homework with the wiring diagram I believe that I have the concept right. So the wiring on the front turn signals will be as follows:
Black + Red/Green will be the combo for one row of LEDs that serve as my running lights.
Black + Green/Orange will be the combo for 2 rows of LEDs that serve as my turn signals.
I will leave them all plugged in for when they are operational so that I do not have to do anything silly. I will probably arrange the LEDs in this fashion so that the middle is running lights and the top and bottom rows will be blinking turning signal lights:
(o)(o)(o)Turning(o)(o)(o)
(o)(o)(o)Running(o)(o)(o)
(o)(o)(o)Turning(o)(o)(o)
================================================== ========
Now For The Rear
================================================== ========
Rear Tail Lights Wiring
(L+R)Black = Ground
(L+R)Red/White = Reverse Light in both 27W reverse light bulbs
(L)Green/Red and (R)Green/Orange = Turn Signal Light in 27W turn signal bulbs
(L+R)Red/Green = Running Light in 8W tail/stop bulb filament
(L+R)Green = Stop Light in 27W tail/stop light bulb filaments
This will probably be my setup for the rear LED pattern, due to simplicity and functionality. I think it will work best and be the easiest to complete and figure out:
(o)(o)(o)Running(o)(o)(o)
(o)(o)(o)Stopping(o)(o)(o)
(o)(o)(o)Stopping(o)(o)(o)
(o)(o)(o)Stopping(o)(o)(o)
(o)(o)(o)Running(o)(o)(o)
This is to the best of my knowledge and going off of the FSM, please let me know if there is an issue due to me building on these wiring diagrams I have here. Any input is highly appreciated, thanks for the help and the feedback guys!
Thread Starter
Joined: Aug 2011
Posts: 3,078
Likes: 42
From: Cambridge, Minnesota
Rear tail light housing.

Back of rear tail light housing.

Brake/Tail light bulb connection.

Turn light on rear housing.

Brake/Tail Light bulb mounted.

Back of rear tail light connector.

Turn light.

Turn light without cover.

Back of turn light.

Back of rear tail light housing.
Brake/Tail light bulb connection.
Turn light on rear housing.
Brake/Tail Light bulb mounted.
Back of rear tail light connector.
Turn light.
Turn light without cover.
Back of turn light.
Joined: Jun 2008
Posts: 8,376
Likes: 28
From: Chino Hills, CA
Might be a bit late with this notice, as I'm just now catching up on the thread... but you might want to take an ohmmeter to your painted perfboard before you get too far along.
Many metallic paints are partially conductive. If the one you used is, you'll have some serious shorting issues. Better check it before you invest a ton of build time!
Many metallic paints are partially conductive. If the one you used is, you'll have some serious shorting issues. Better check it before you invest a ton of build time!