
RENESISFD's Robust Build: Powered by Pepperoni Pizza and Chikken Nuggets

Thread Starter
Joined: Feb 2008
Posts: 2,979
Likes: 9
From: Long Island NY 11746
Thats the plan  .
.
Thanks I bought a new SLR.
I am excited for Deals as well, Let me know what trac events you are going to. I will try to tag along.
Thanks Bryan.
Yes it will.
I believe it is a replica mazdaspeed spoiler made by Shine Auto Project.
Thank you.
Ordered some parts last night hopefuly they arrive by the end of the week.
John
 .
.Thanks I bought a new SLR.
Thanks Bryan.
I believe it is a replica mazdaspeed spoiler made by Shine Auto Project.
Thank you.
Ordered some parts last night hopefuly they arrive by the end of the week.
John
^^ Thanks Ryan, the clutch is one of the things I am most excited about. Unfortunately no one will be able to see once it is installed . I am anxious to see how it performs. I definitely want to go with you guys down to deals gap. Maybe we can have a little fun since I now have a PFC and the car will be tuned by me
 .
.
.
Thanks for the comments.
John
. I am anxious to see how it performs. I definitely want to go with you guys down to deals gap. Maybe we can have a little fun since I now have a PFC and the car will be tuned by me..
Thanks for the comments.
John

Thread Starter
Joined: Feb 2008
Posts: 2,979
Likes: 9
From: Long Island NY 11746
UPDATE!
Today I ended up removing the LIM again so I could install some stainless steel braded OMP lines. I decided last week after the LIM was installed to order them.
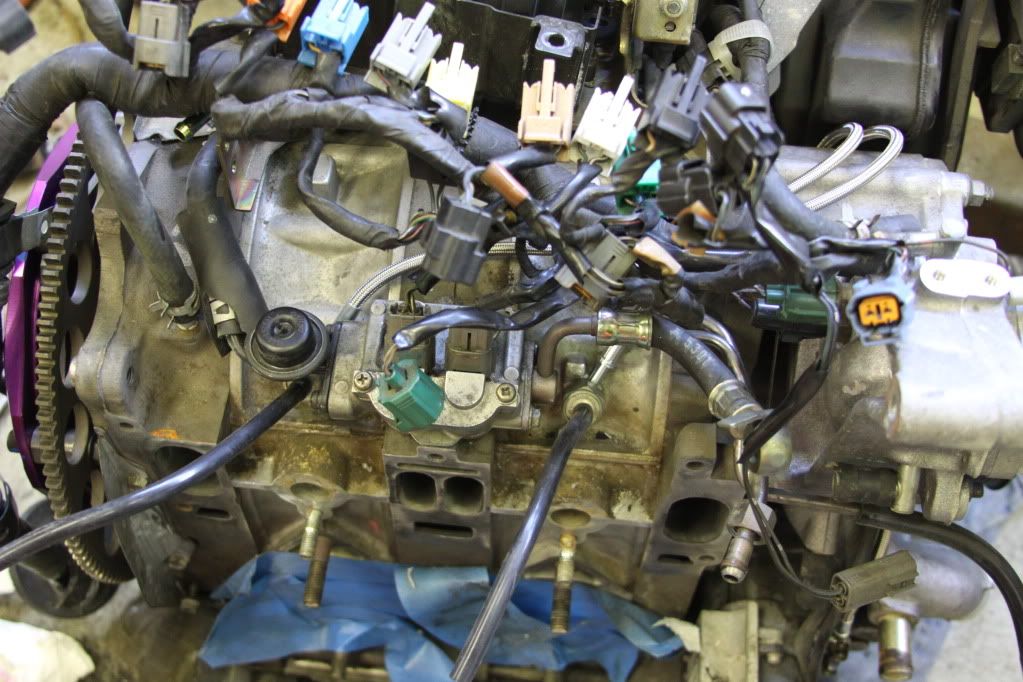
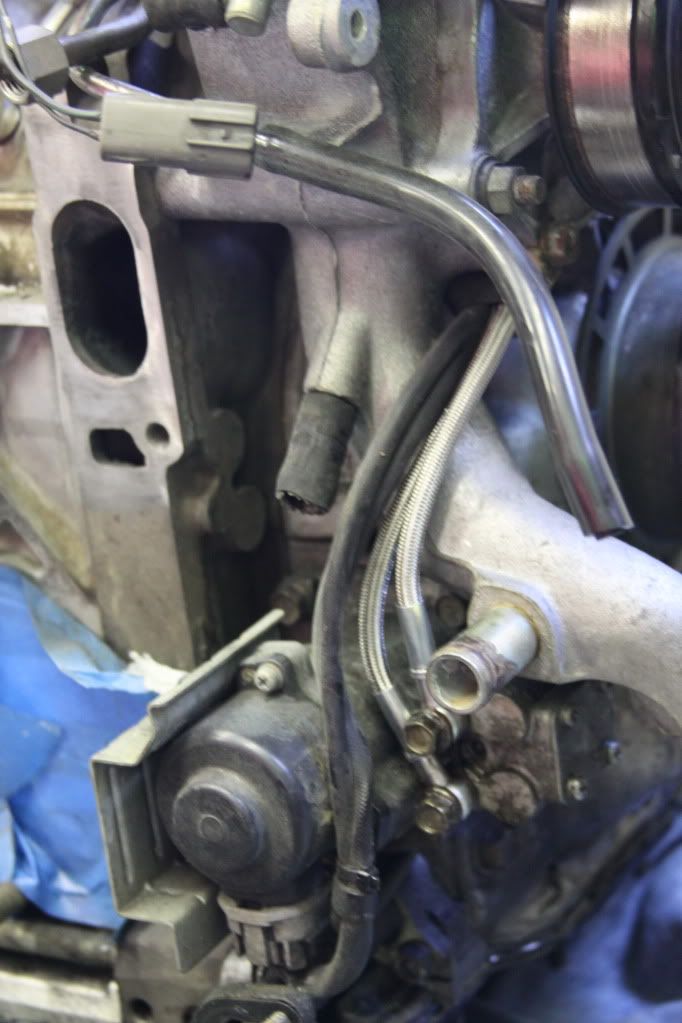
Once the OMP lines were installed I reinstalled the LIM and the UIM as well as the throttle body Hopefully for the last time .
.

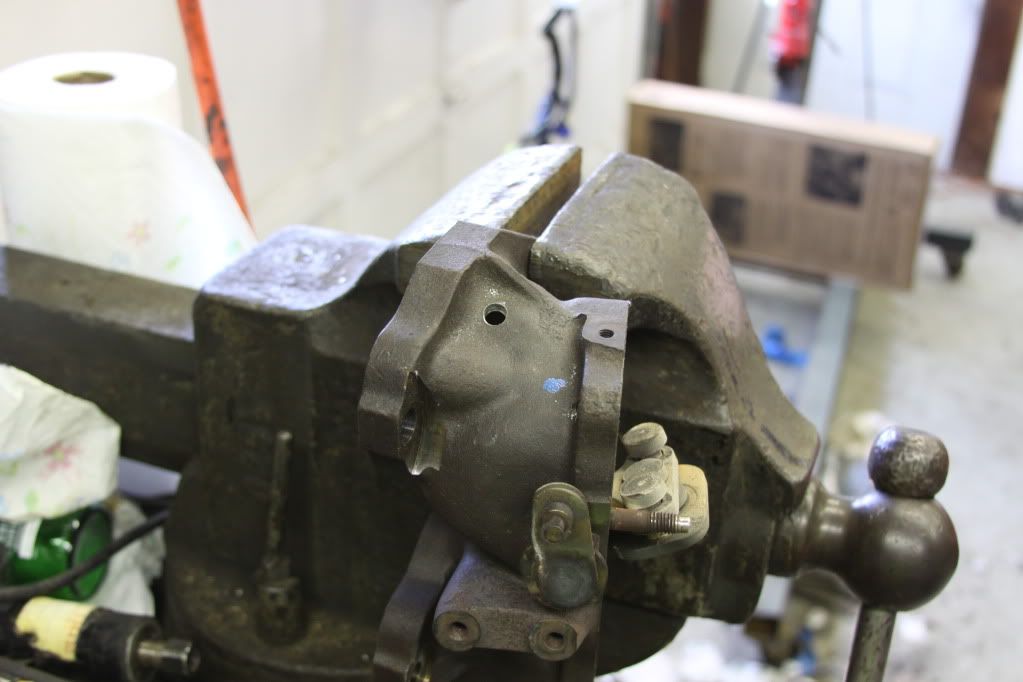
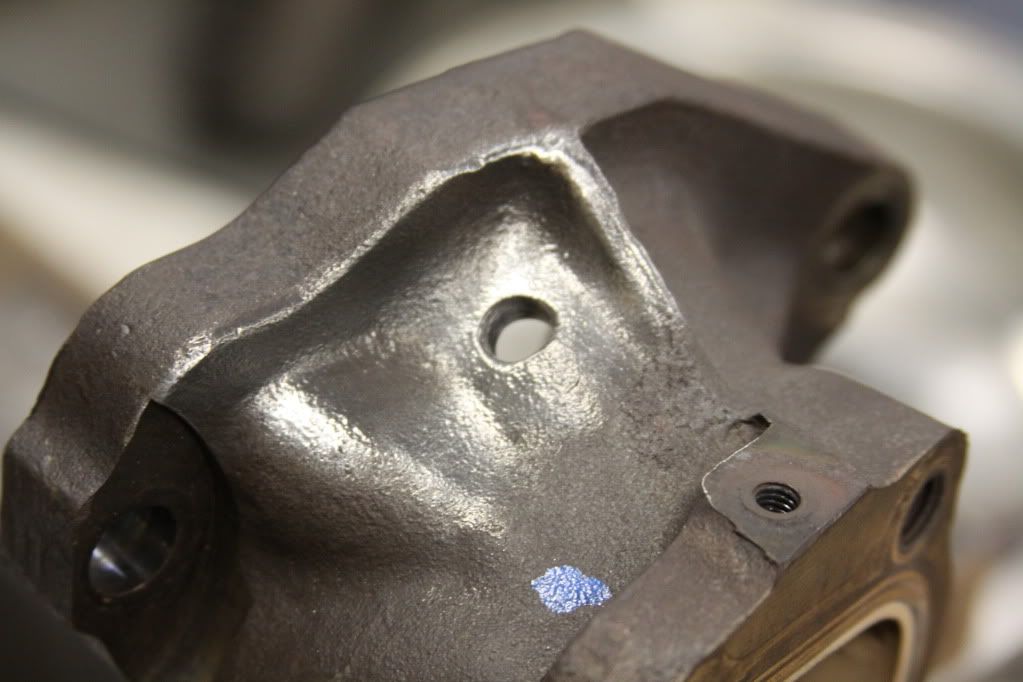
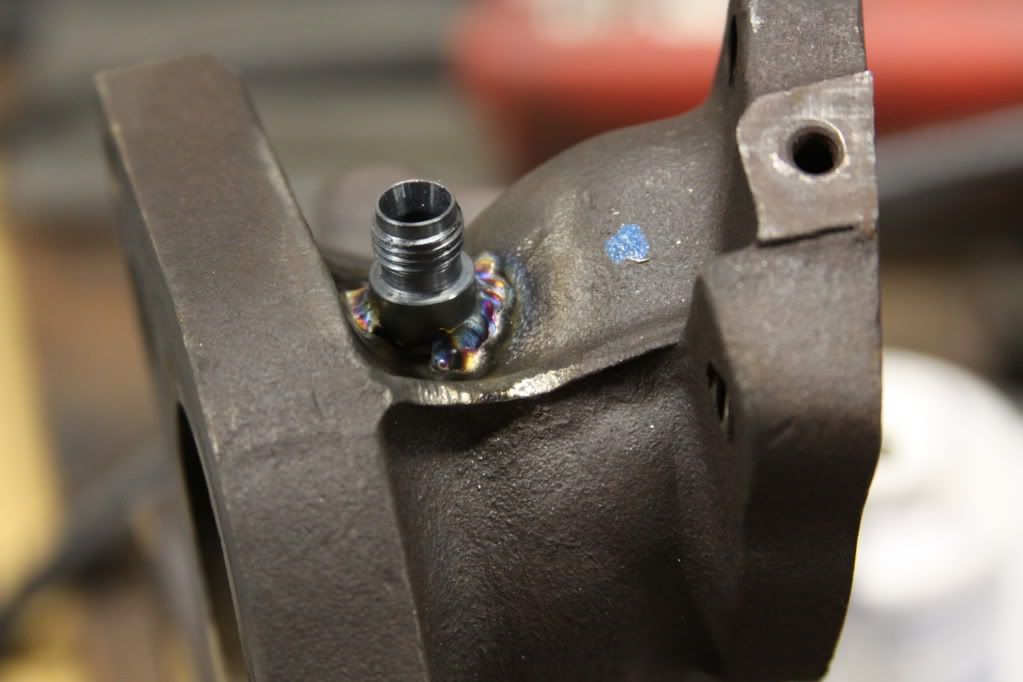
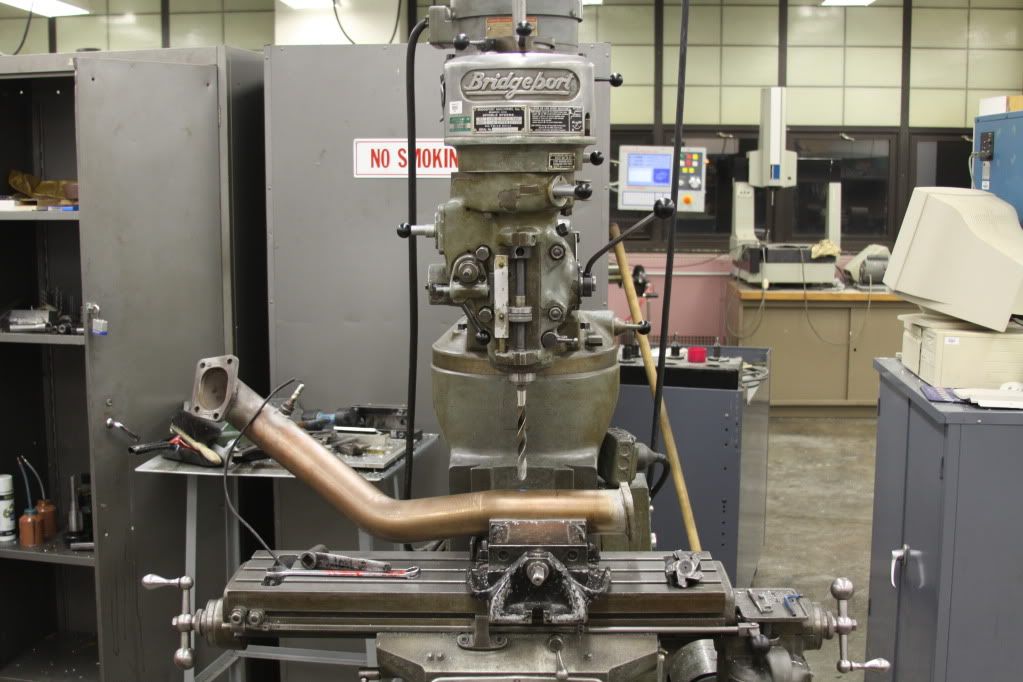
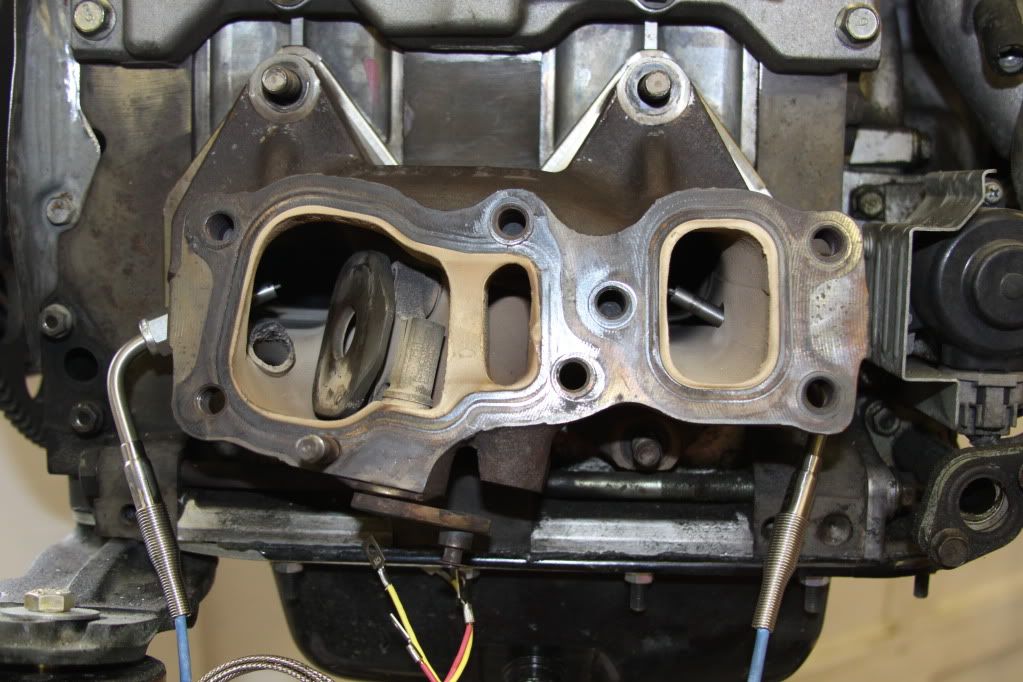
After that I marked and drilled my exhaust manifold for my dual digital egt's
Disregard the blue dot.
The box on the left is the 0-5v signal converter so I can log the EGT's
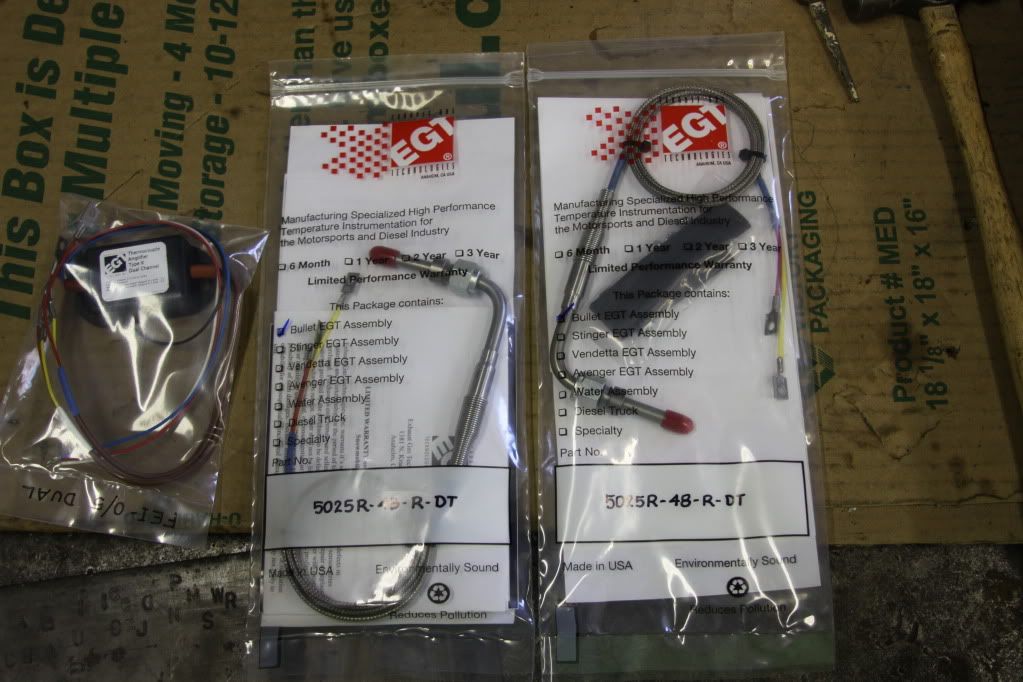
I will have the threaded bungs tig welded tomorrow I also have to drill the hole in the downpipe and have that bung welded as well for my zietronix wideband .
.
Will be updating throughout the week as I will be doing some work on my brakes tomorrow.
John
Today I ended up removing the LIM again so I could install some stainless steel braded OMP lines. I decided last week after the LIM was installed to order them.
Once the OMP lines were installed I reinstalled the LIM and the UIM as well as the throttle body Hopefully for the last time
.After that I marked and drilled my exhaust manifold for my dual digital egt's
Disregard the blue dot.
The box on the left is the 0-5v signal converter so I can log the EGT's
I will have the threaded bungs tig welded tomorrow I also have to drill the hole in the downpipe and have that bung welded as well for my zietronix wideband
Will be updating throughout the week as I will be doing some work on my brakes tomorrow.
John
Thread Starter
Joined: Feb 2008
Posts: 2,979
Likes: 9
From: Long Island NY 11746
^ Thanks
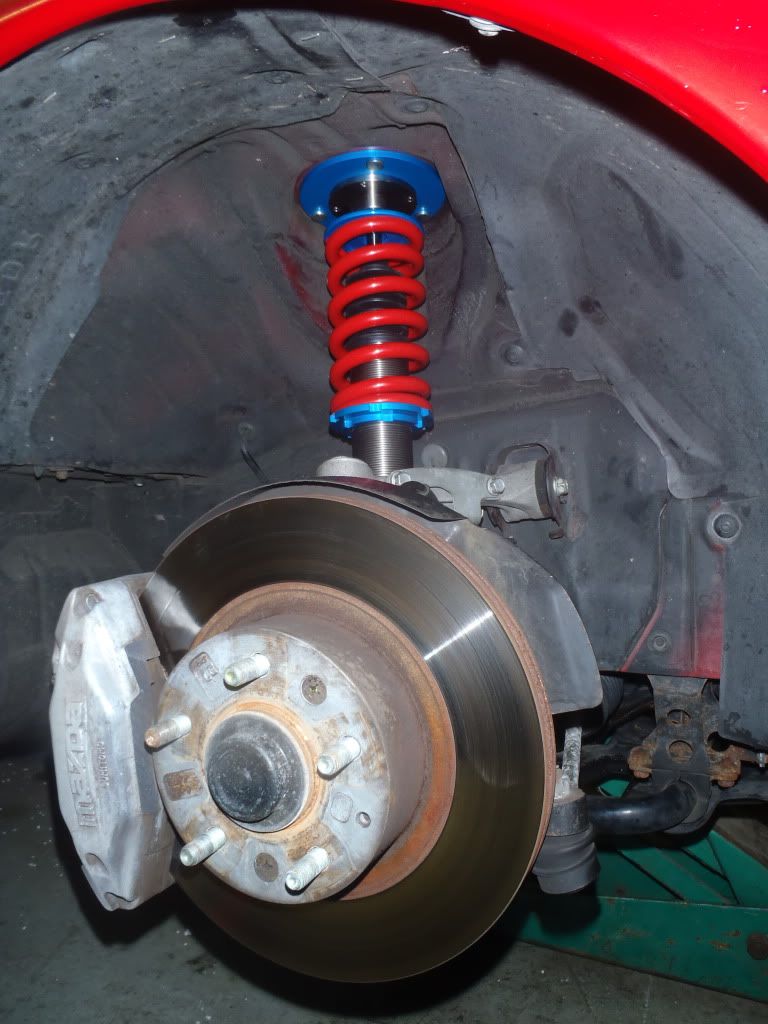
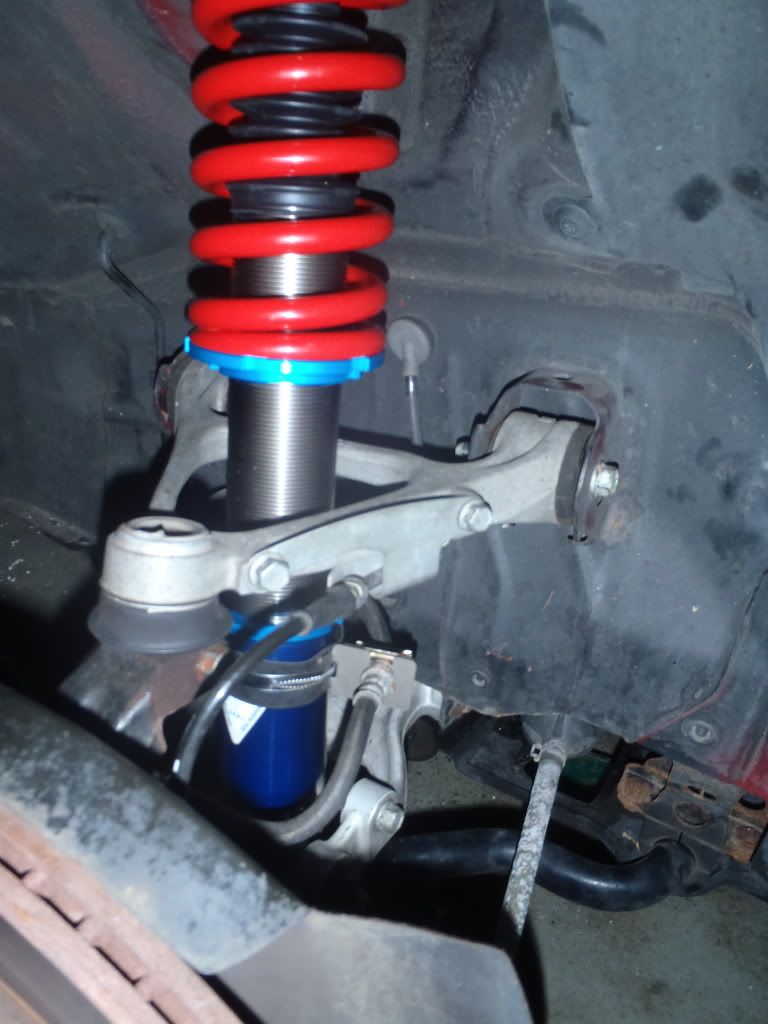
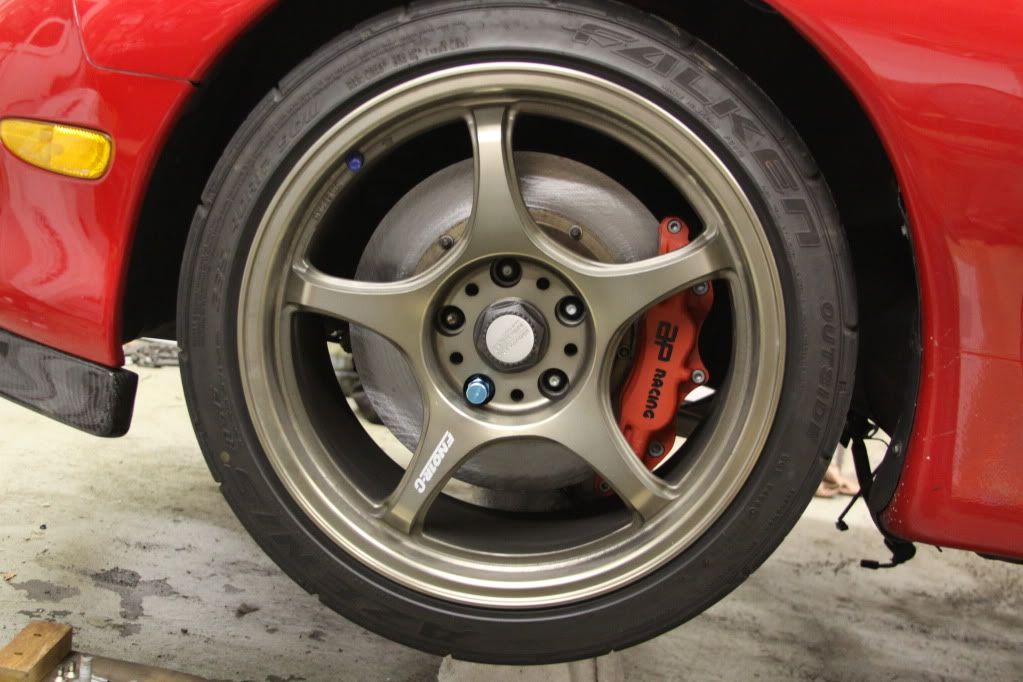
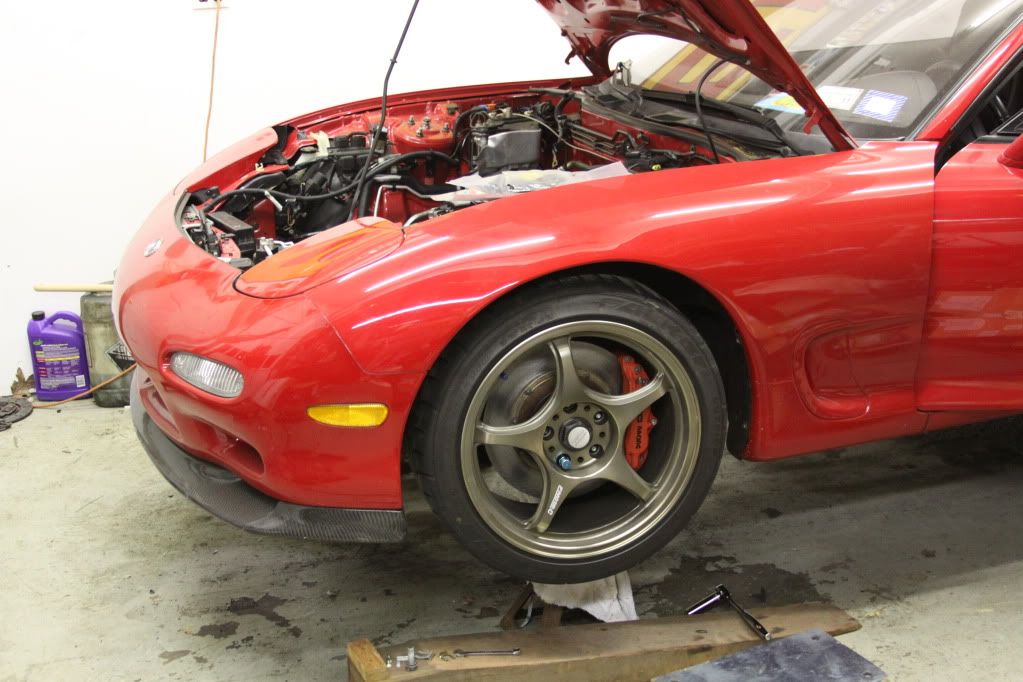
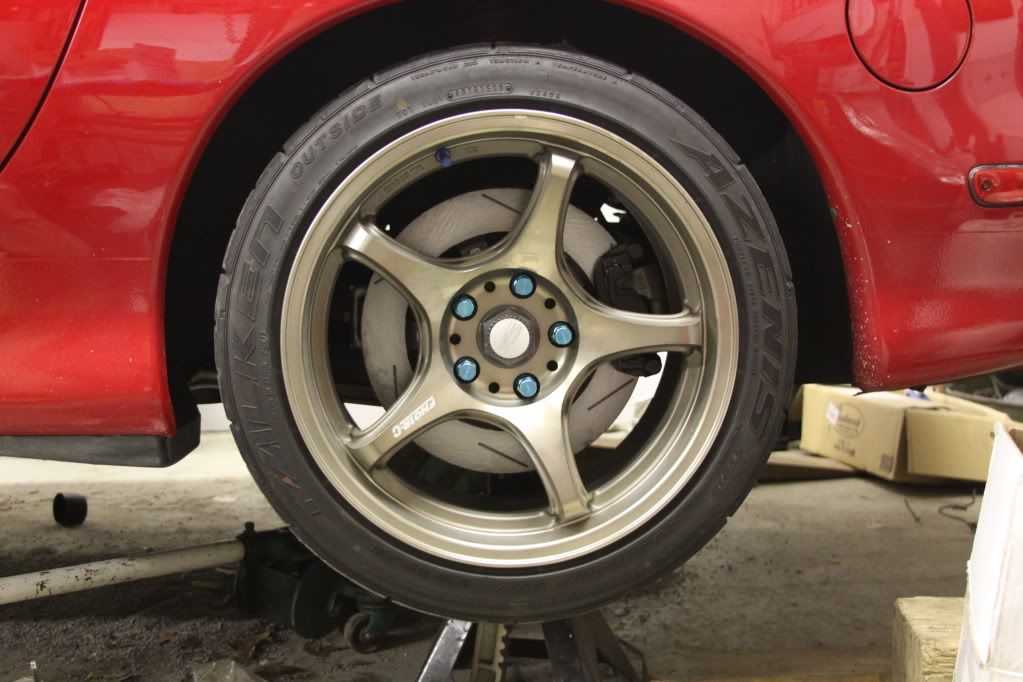
I Figured i would post up some pics of my coilovers since this is a track build thread. They are Zeal Fuction Xs The spring rates are 13kg/13kg with x coil type R springs. Have pillow ball upper mounts. And aluminum shock bodies. I purchased these from Miata_mx5 . Thank you Ganesh. The spring rates are high but the ride is not bad. I am very happy with them, here are some install pics from last year.
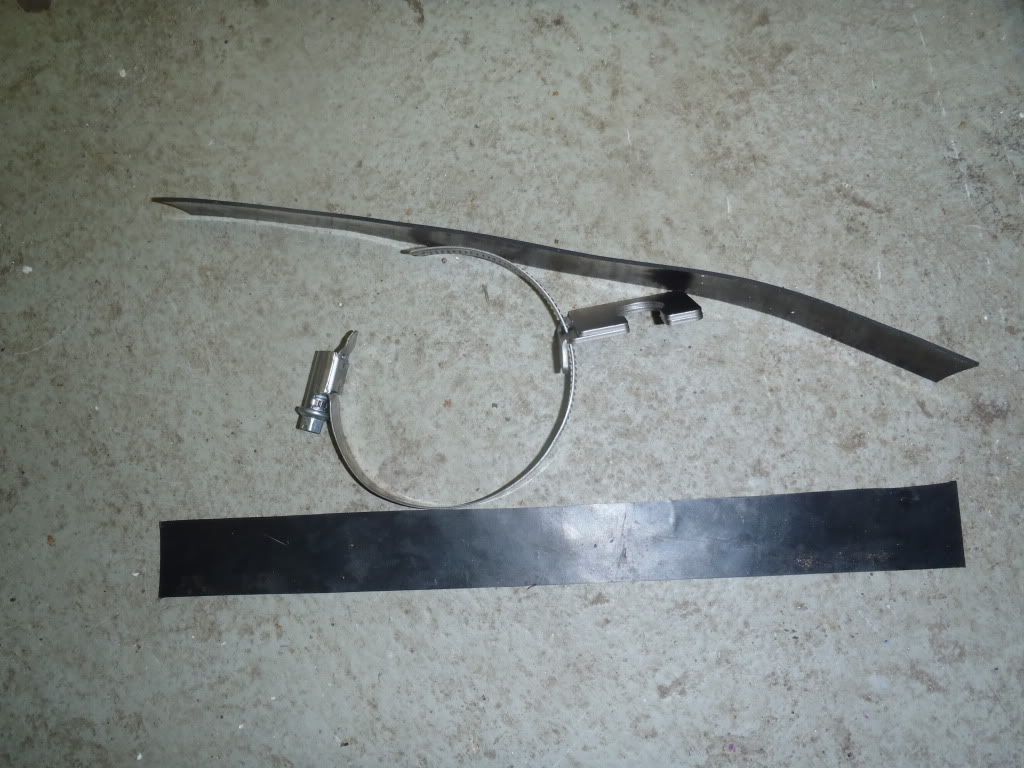
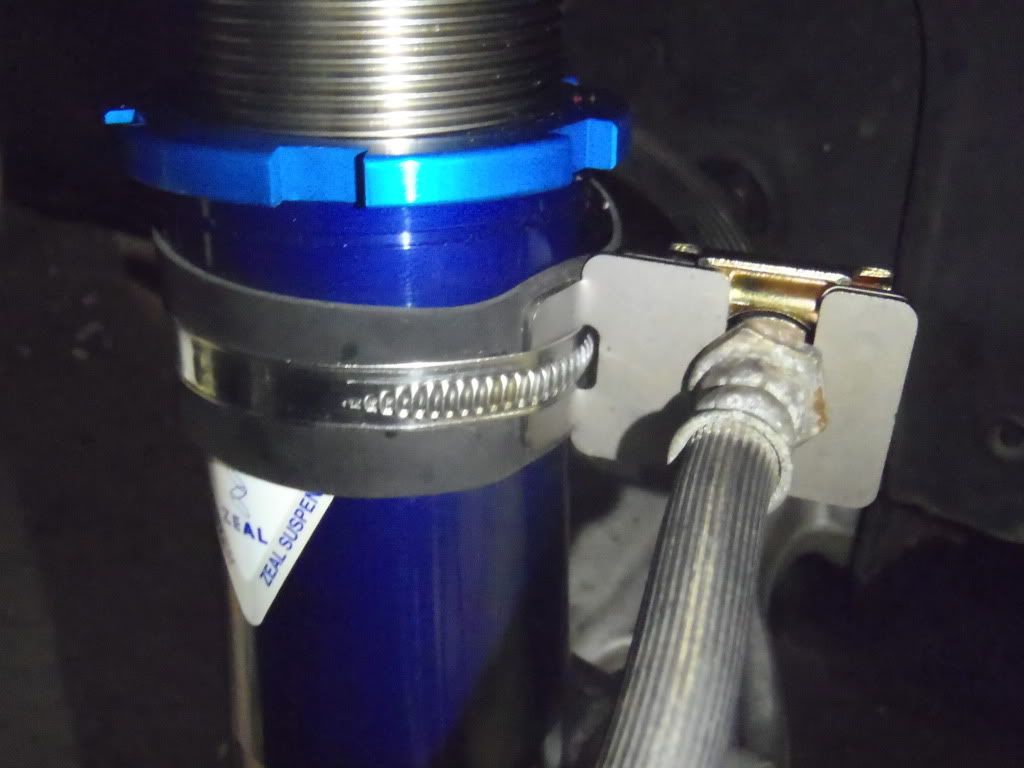
Here is a rubber isolater I made so the clamp does not scratch the shock body
And installed
I used new brake line retainer clips as well the part number below

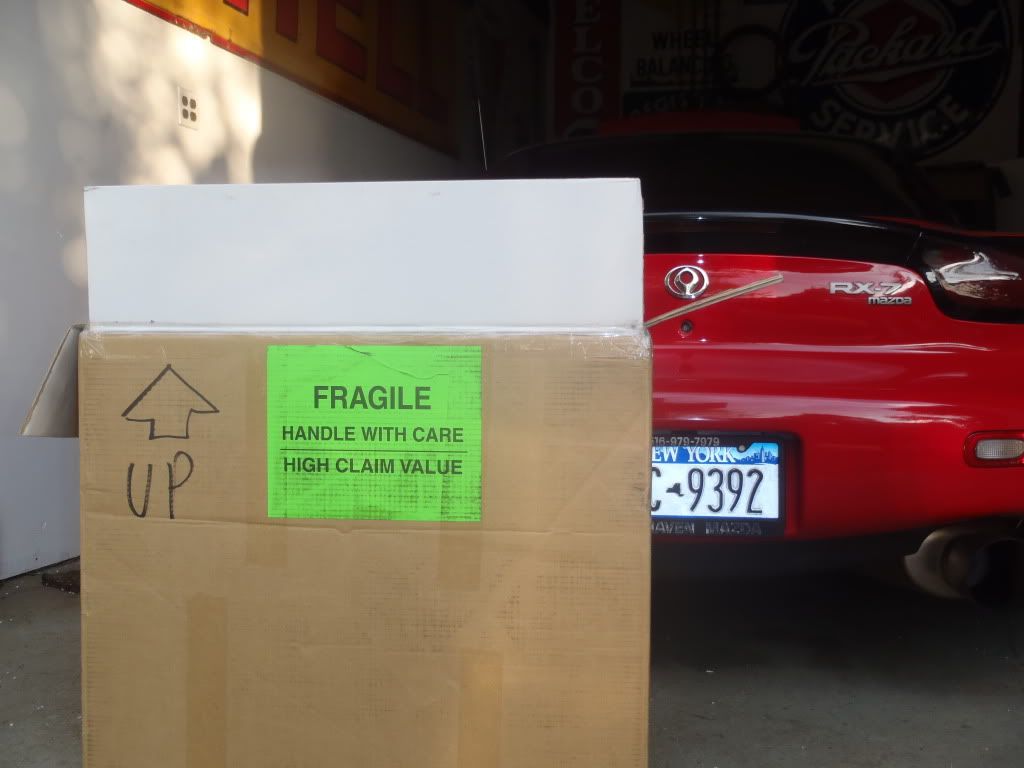
And one last pic, I love the sticker on this box. I think they are trying to imtimidate the postman.
John
I Figured i would post up some pics of my coilovers since this is a track build thread. They are Zeal Fuction Xs The spring rates are 13kg/13kg with x coil type R springs. Have pillow ball upper mounts. And aluminum shock bodies. I purchased these from Miata_mx5 . Thank you Ganesh
Here is a rubber isolater I made so the clamp does not scratch the shock body
And installed
I used new brake line retainer clips as well the part number below
And one last pic, I love the sticker on this box. I think they are trying to imtimidate the postman
.John


Joined: Mar 2001
Posts: 30,814
Likes: 655
From: FL-->NJ/NYC again!
^^or let potential thieves know this is a great target 
I put about 500 miles on my FD this past weekend, and set my Zeals to '2' (mine are 6 way) for the weekend. The ride was bearable, and a helluva lot better than my track settings of 6/5
My spring rates are a little tamer at 12kg F/ 10kg R but on the atrocious roads up here it still makes for a less-than-comfortable ride when on full stiff.
John, the BNRs will be ready soon and headed your way, so no worries bud
 .
. 
Thread Starter
Joined: Feb 2008
Posts: 2,979
Likes: 9
From: Long Island NY 11746
UPDATE
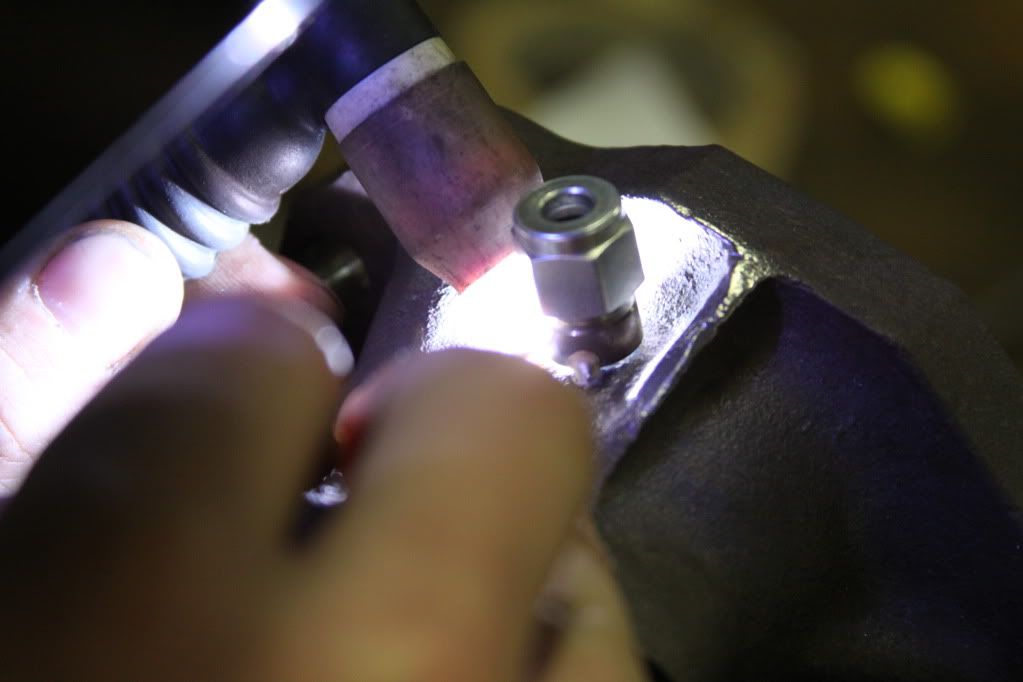
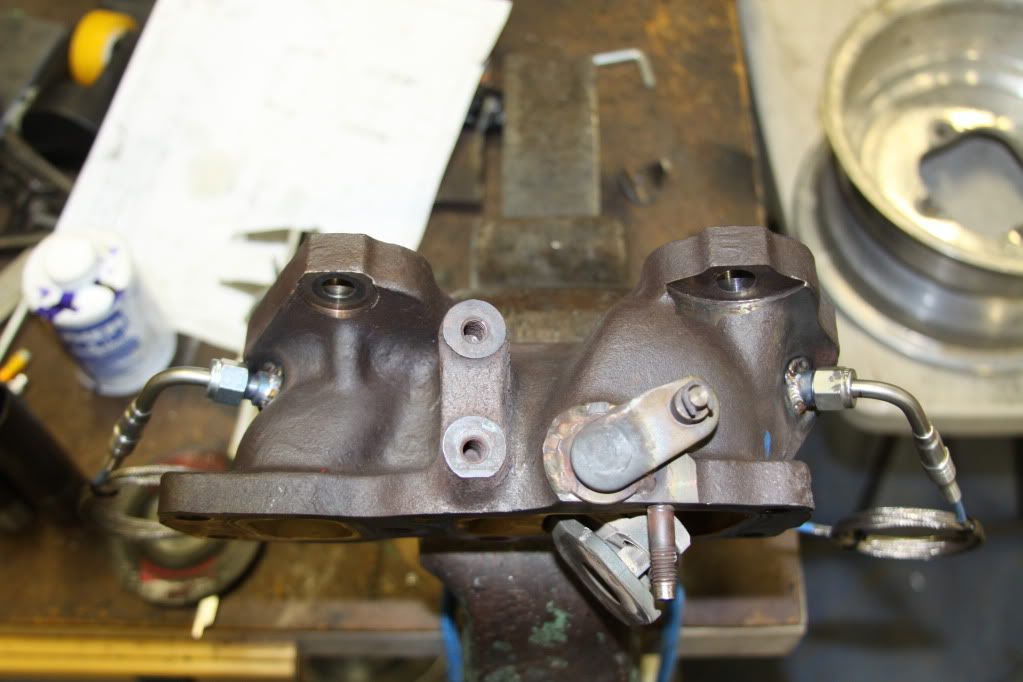
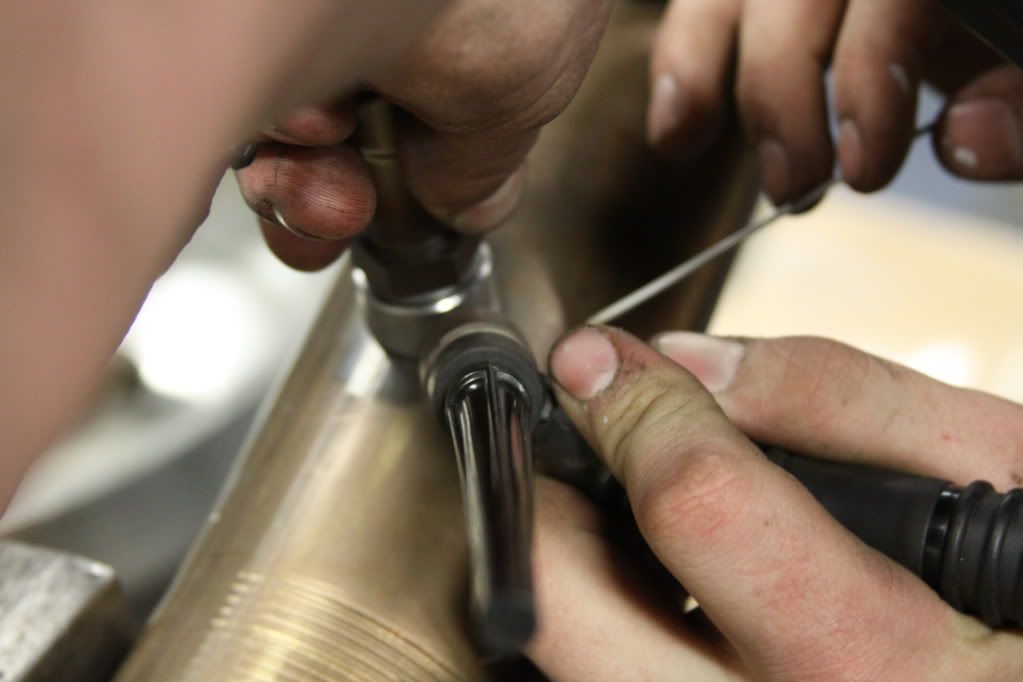
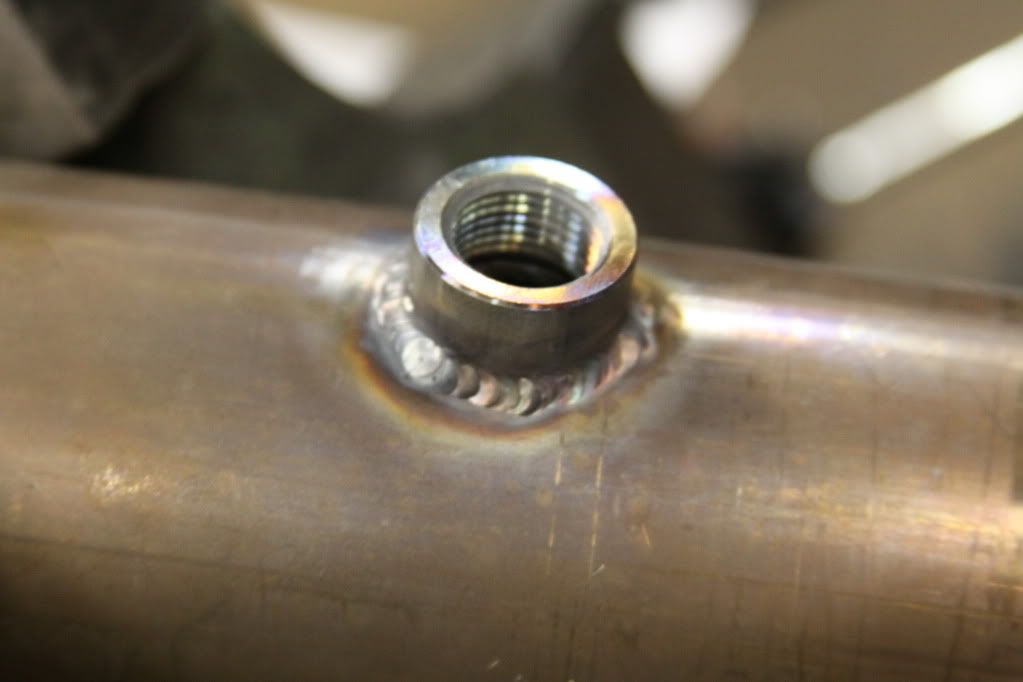
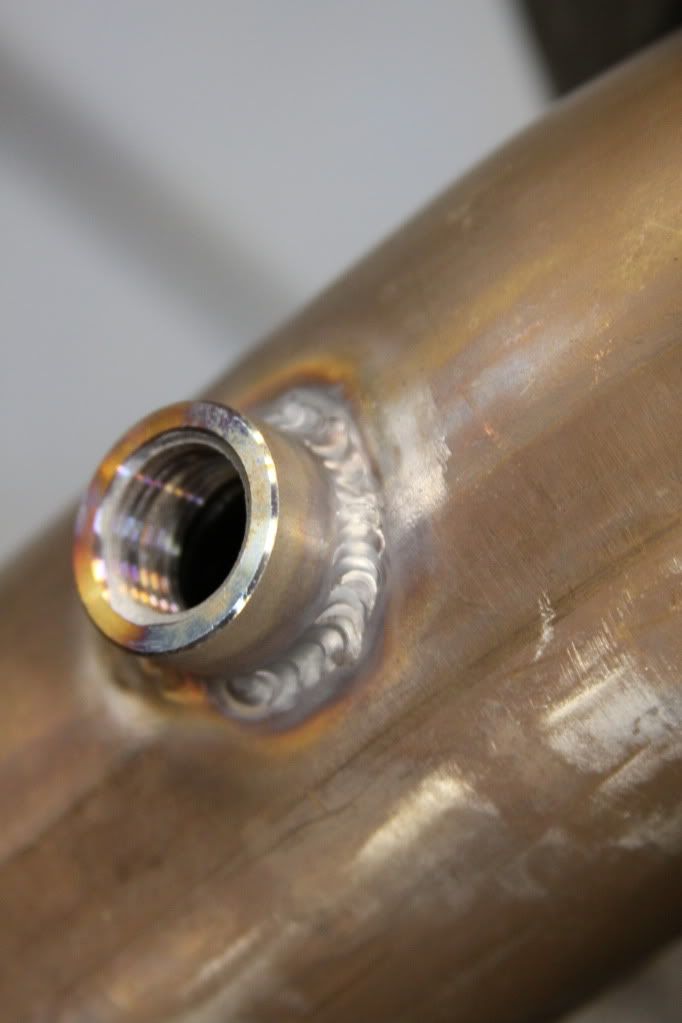
Last night I had my friend Matt (tig418) weld the EGT bungs to the manifold and also welded the wideband bung to the down pipe. Here are some progress pics.
All cleaned up ready for welding
Action Shot
Finished product
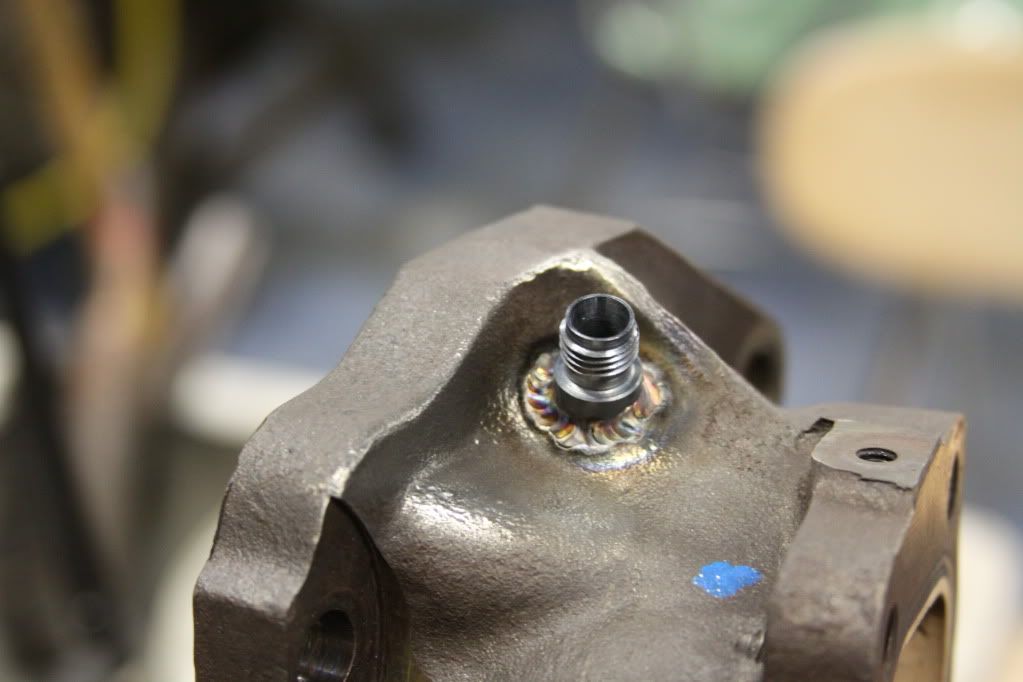
Here is a pic with the probes temporaly installed.
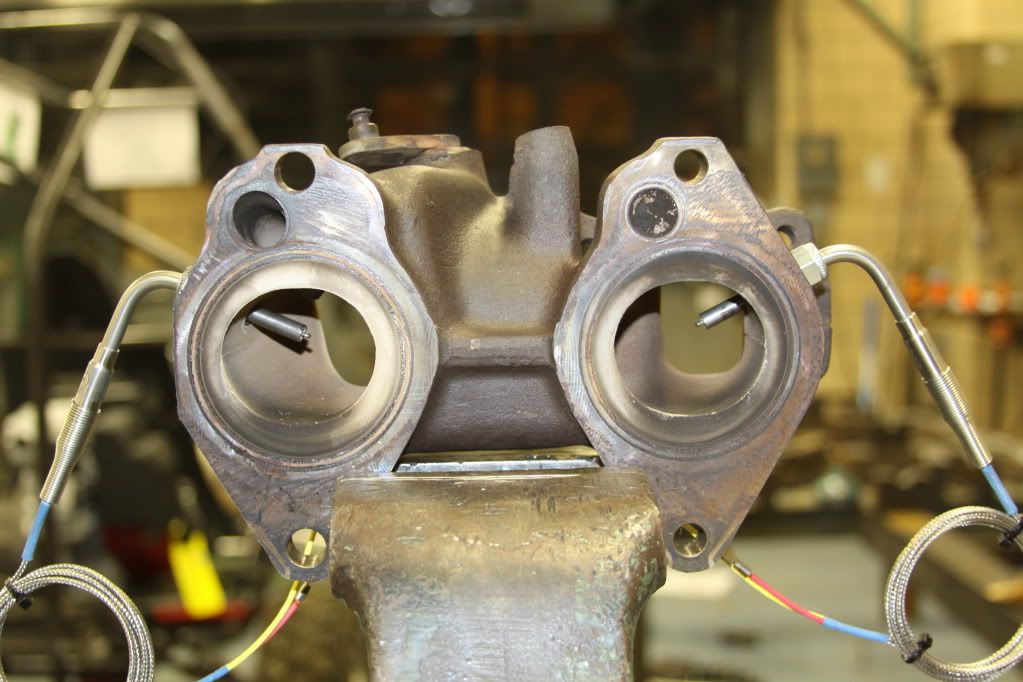
Another
aaaaaand another
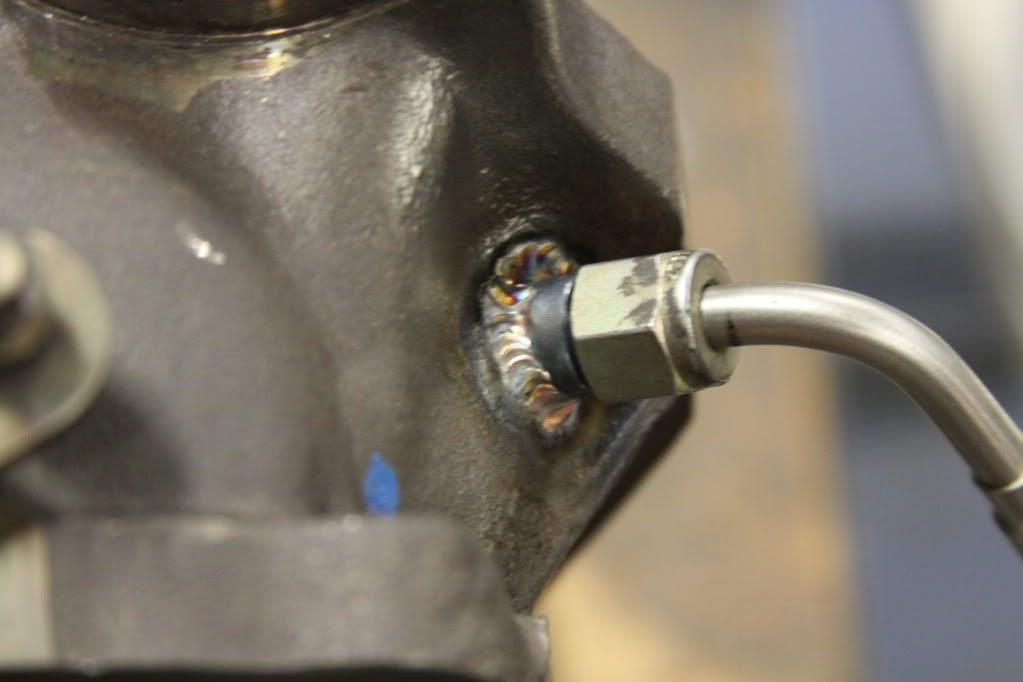
Here is a pic of the setup right before I drilled the hole for the wideband sensor. This made it very easy.
Welding the bung on
More in a few mins
John
Last night I had my friend Matt (tig418) weld the EGT bungs to the manifold and also welded the wideband bung to the down pipe. Here are some progress pics.
All cleaned up ready for welding
Action Shot
Finished product
Here is a pic with the probes temporaly installed.
Another
aaaaaand another
Here is a pic of the setup right before I drilled the hole for the wideband sensor. This made it very easy.
Welding the bung on
More in a few mins
John
Thread Starter
Joined: Feb 2008
Posts: 2,979
Likes: 9
From: Long Island NY 11746
Continued.....
BRAKES!!
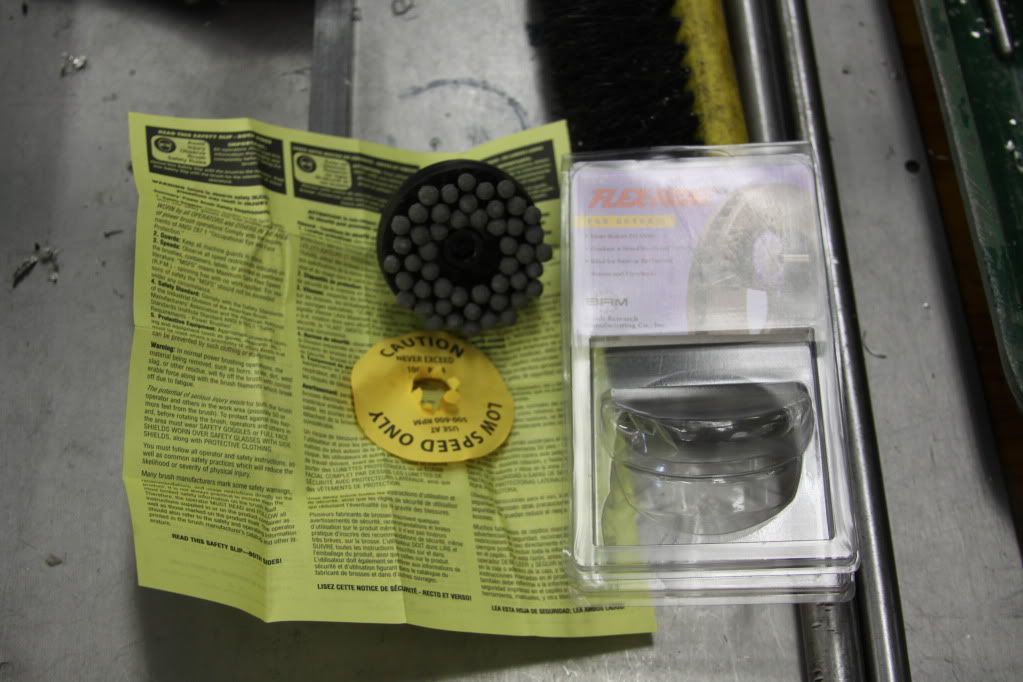
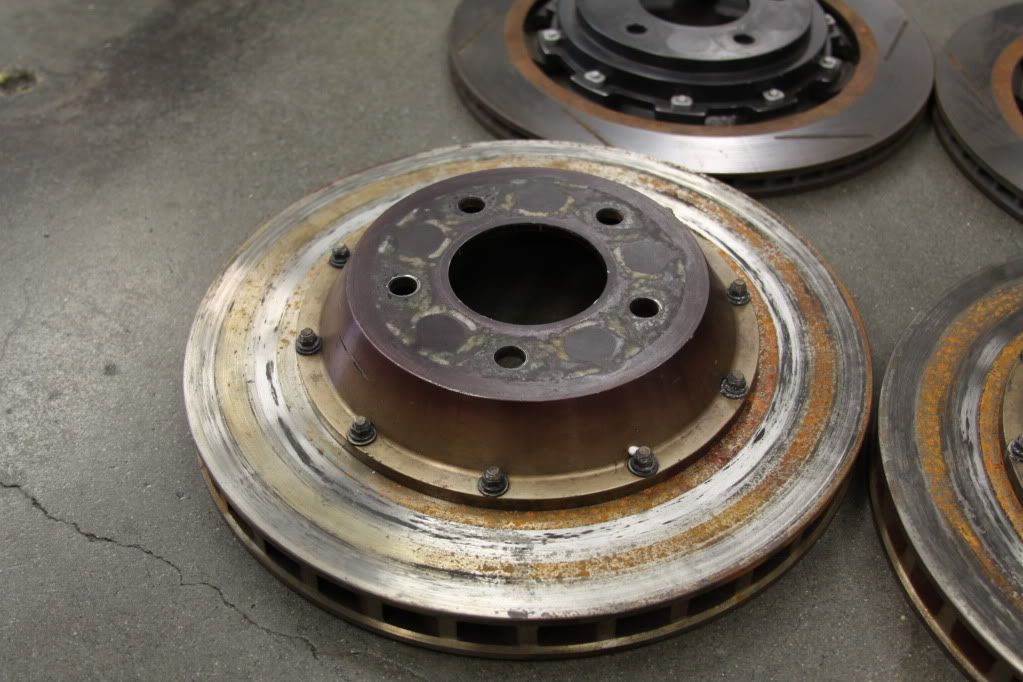
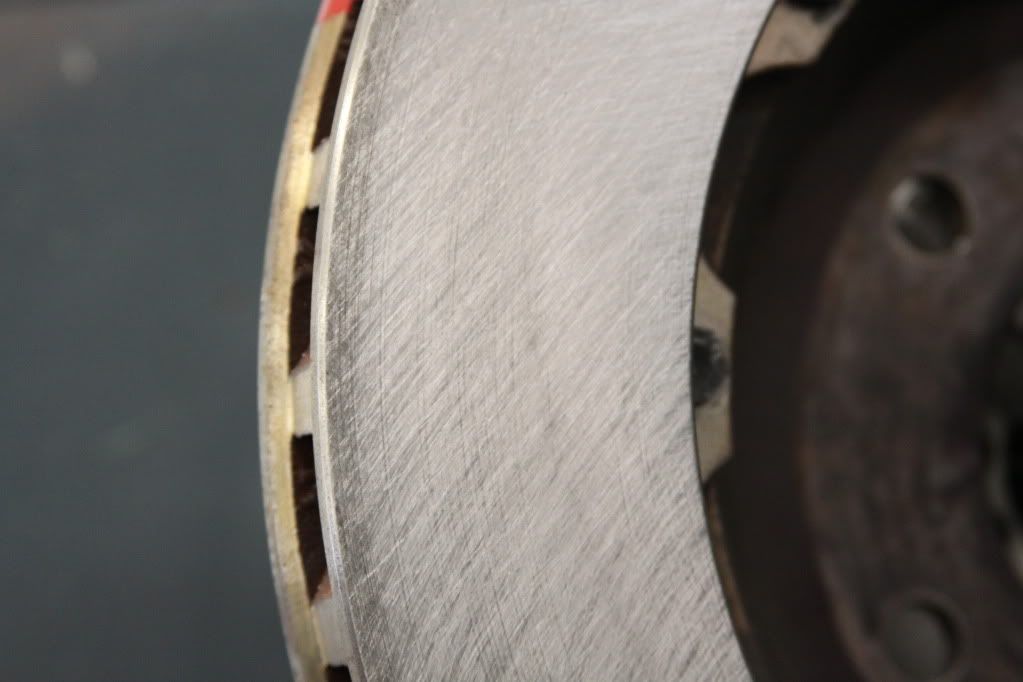
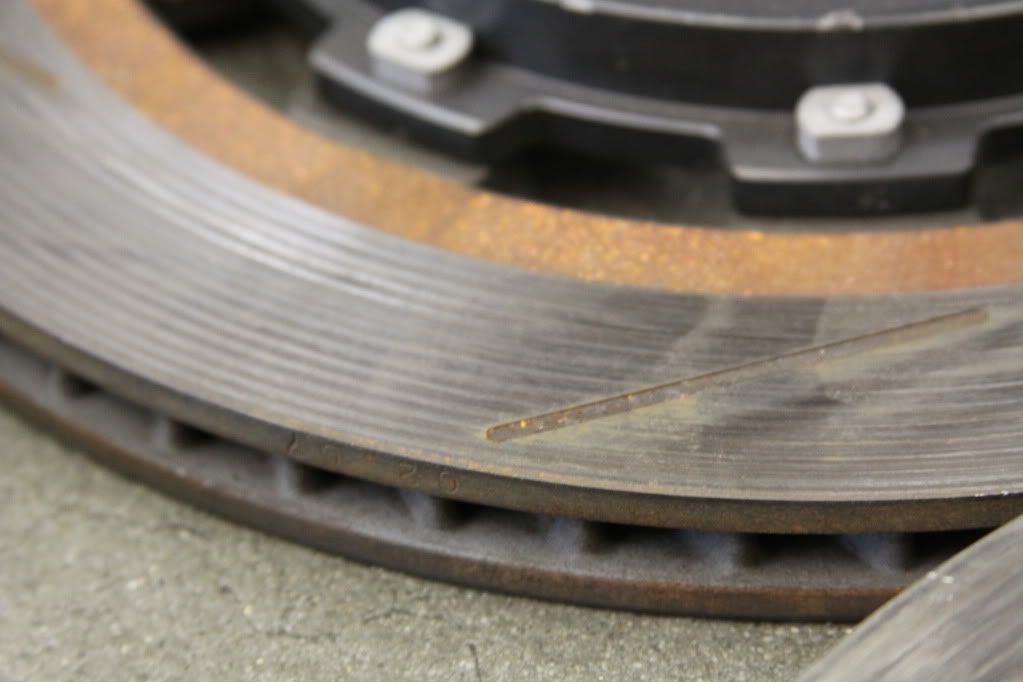
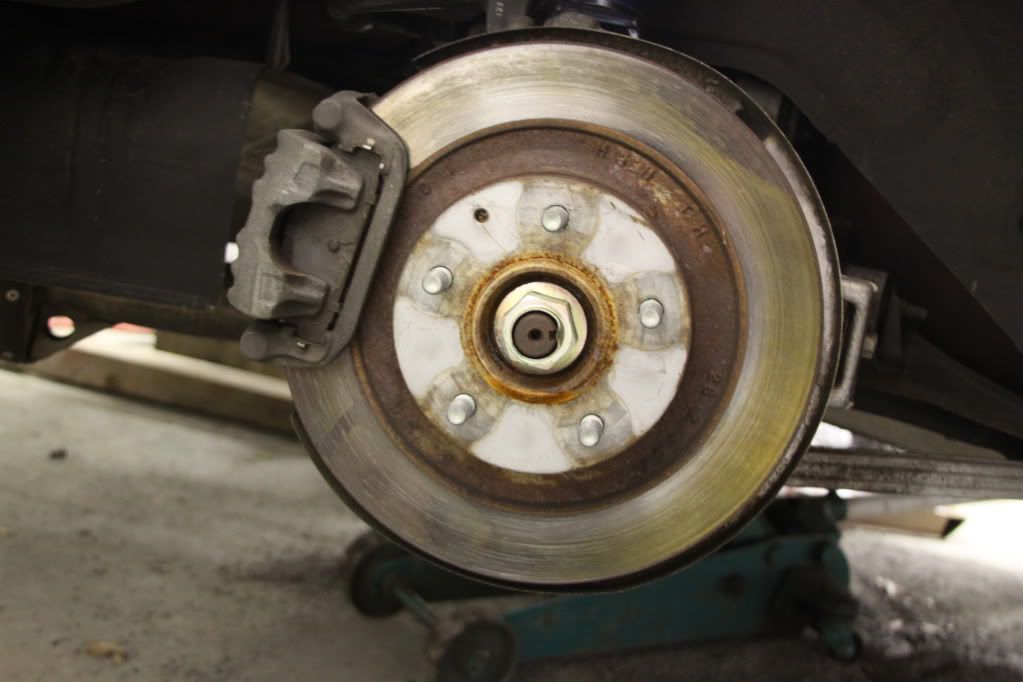
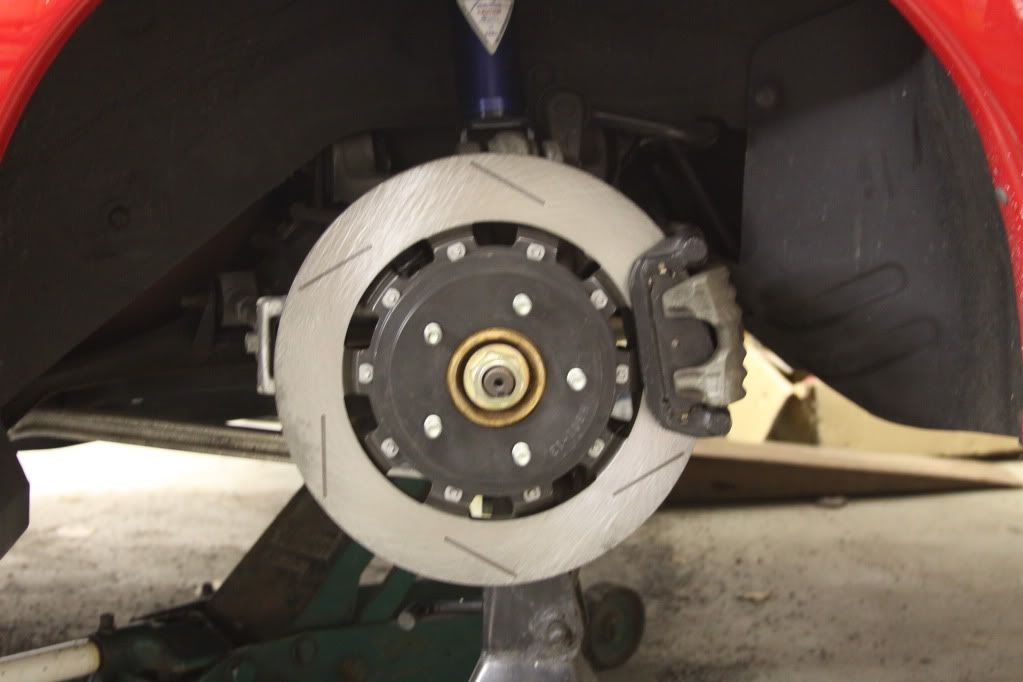
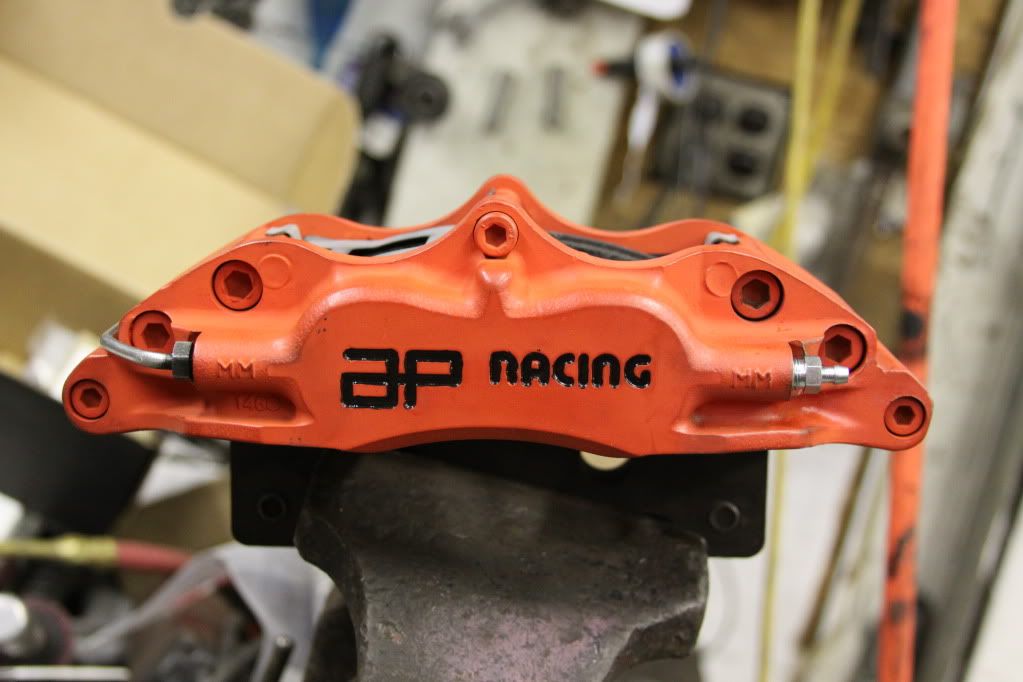
I had purchased a M2/AP racing front BBK from Fritz Flynn. They arrived exactly as described. But I wanted to clean up the rotors a bit as they were covered in rust. I was not sure how to go about cleaning the rust off of the rotors when a few days ago I was looking in a tool catalog at work and there was a brake rotor finish hone. Seemed like a good product. So I ordered it. Here is a pic of the product
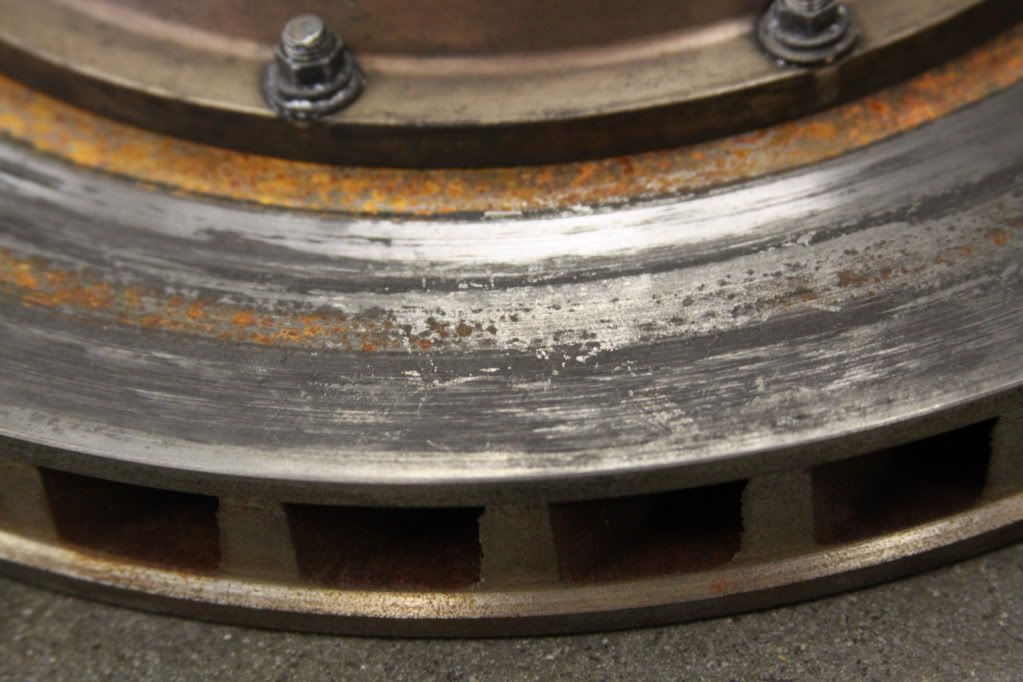
I took some before and after shots and I am Extremely happy with the way the rotors turned out.
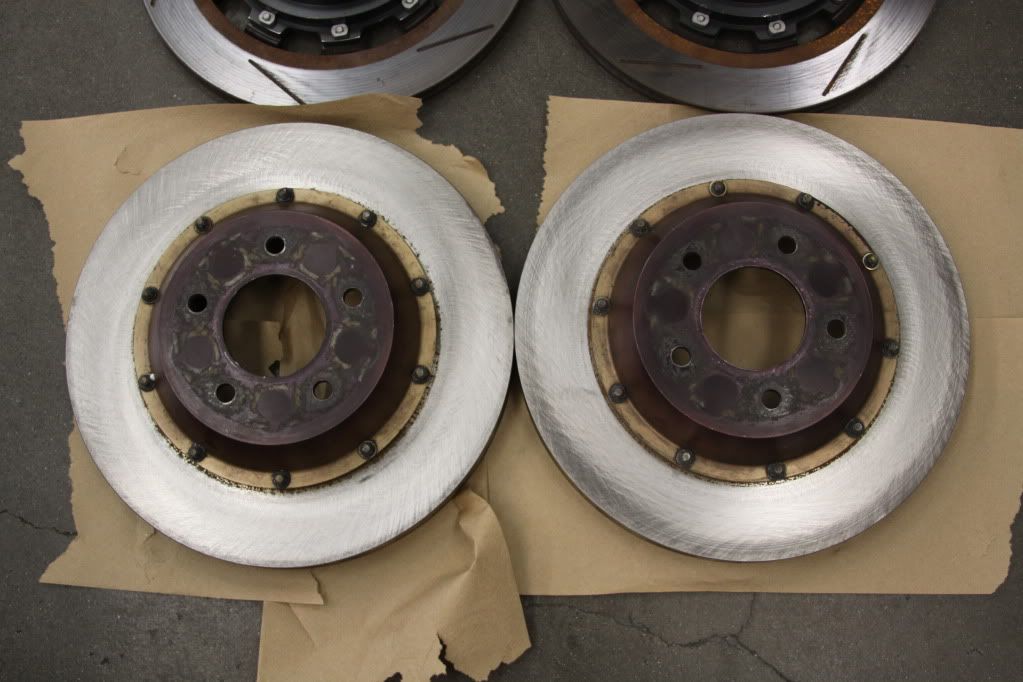
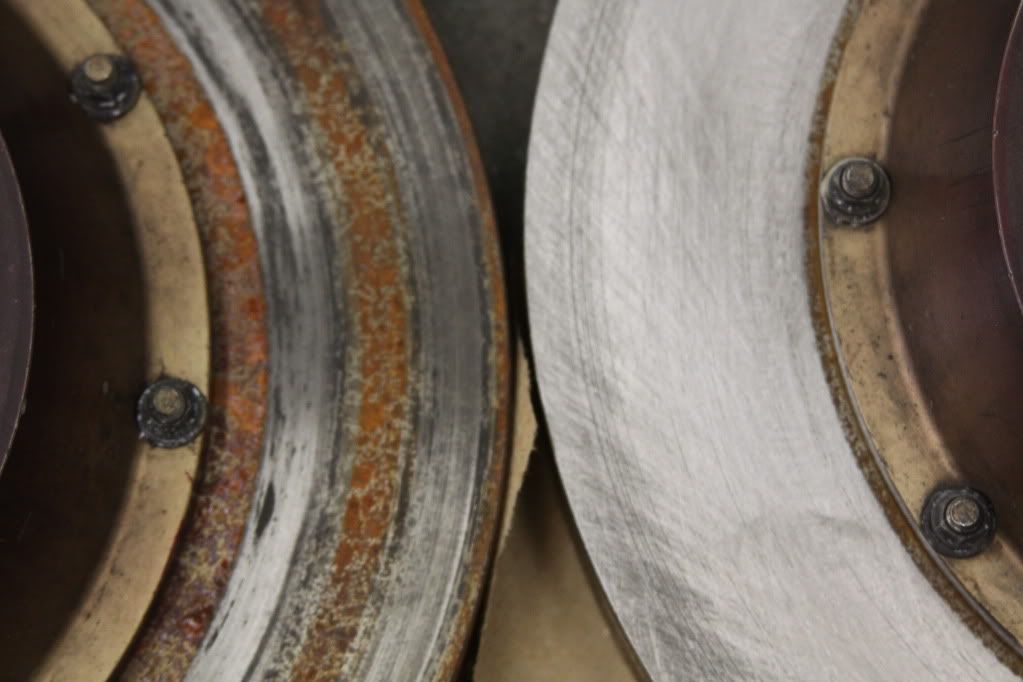
Pictured is also a Racing Brake rear BBK I purchased that from allrotor93 again everything is as described. I did the same thing to those rotors as well
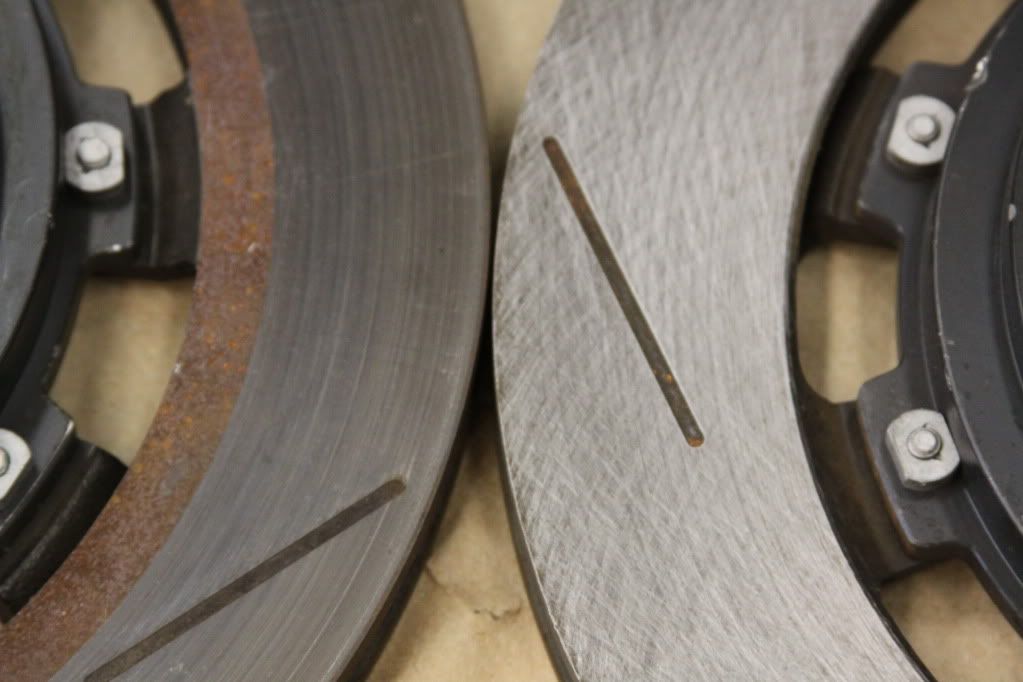
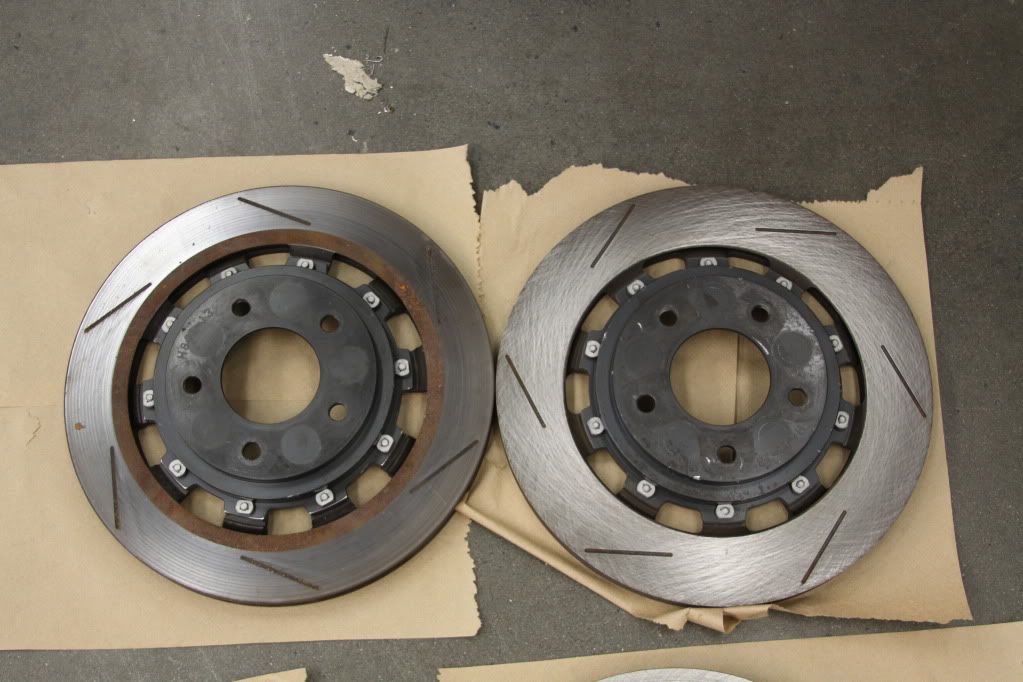
And here is a PIC with all of the rotors completed. Again, I am very happy with the results.
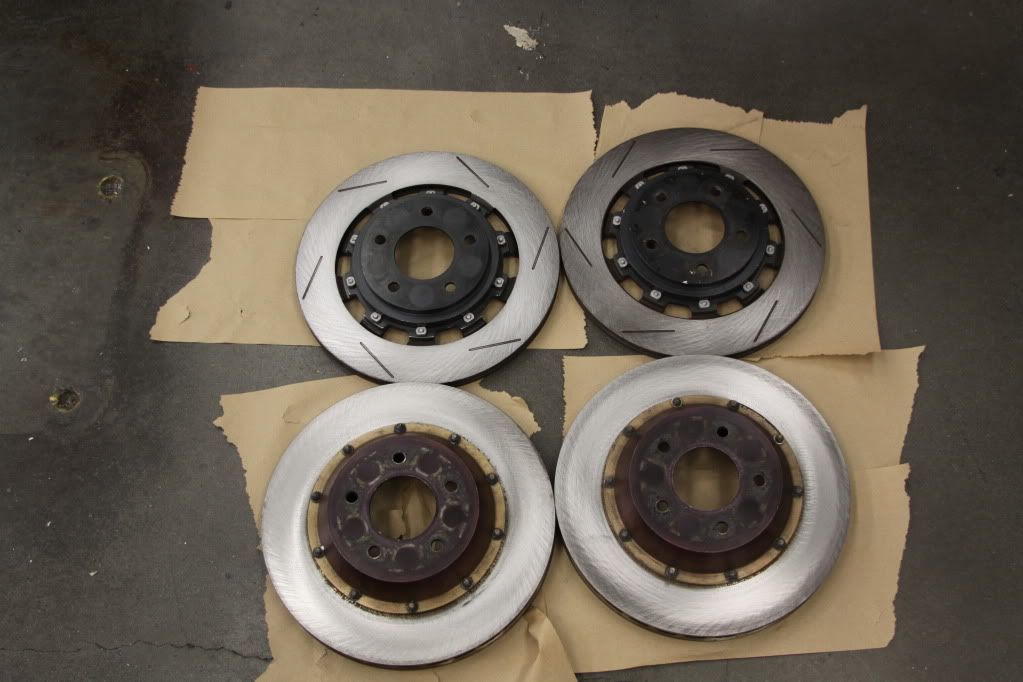
Let me know what you think. To clean up all 4 rotors front and back took about 30 mins. Very easy to do. You do need a lathe or something to spin the rotor though.
John
BRAKES!!
I had purchased a M2/AP racing front BBK from Fritz Flynn. They arrived exactly as described. But I wanted to clean up the rotors a bit as they were covered in rust. I was not sure how to go about cleaning the rust off of the rotors when a few days ago I was looking in a tool catalog at work and there was a brake rotor finish hone. Seemed like a good product. So I ordered it. Here is a pic of the product
I took some before and after shots and I am Extremely happy with the way the rotors turned out.
Pictured is also a Racing Brake rear BBK I purchased that from allrotor93 again everything is as described. I did the same thing to those rotors as well
And here is a PIC with all of the rotors completed. Again, I am very happy with the results.
Let me know what you think. To clean up all 4 rotors front and back took about 30 mins. Very easy to do. You do need a lathe or something to spin the rotor though.
John

Thread Starter
Joined: Feb 2008
Posts: 2,979
Likes: 9
From: Long Island NY 11746


Wangan Nasty
Joined: Apr 2006
Posts: 1,779
Likes: 3
From: Irvine, Southern California
Any serious DE Junkie or track guy should have Flex-Hone for their brake disks. A lot of various friction materials available on the market are not compatible with one another (I.E: Trying to bed X brand Race pads on disks that have Y brand race pads). A Flex-Hone will help clean the disks off so fresh pads can be re-bedded should you find brake pads that you like better than the ones you had before or frequently switch from soft street to race pads.
Thread Starter
Joined: Feb 2008
Posts: 2,979
Likes: 9
From: Long Island NY 11746
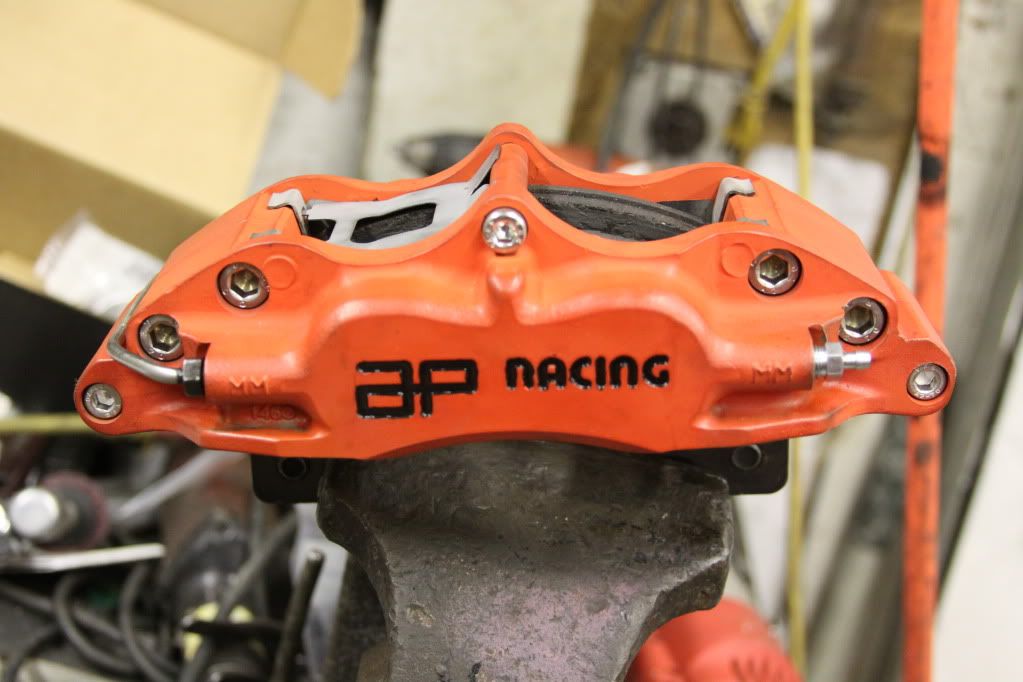
Brakes Pt. 2
This week I painted my front calipers. I am not sure if I like the color or the finish. It is VHT flat red. Looks much more like orange. I will probaly refinish them after deals gap.
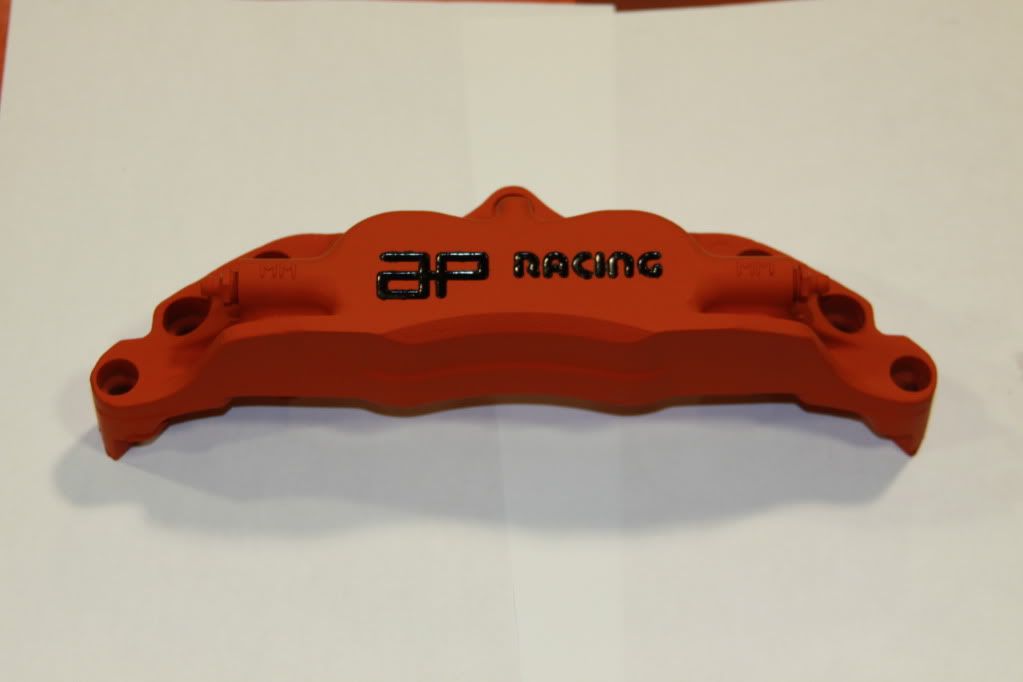
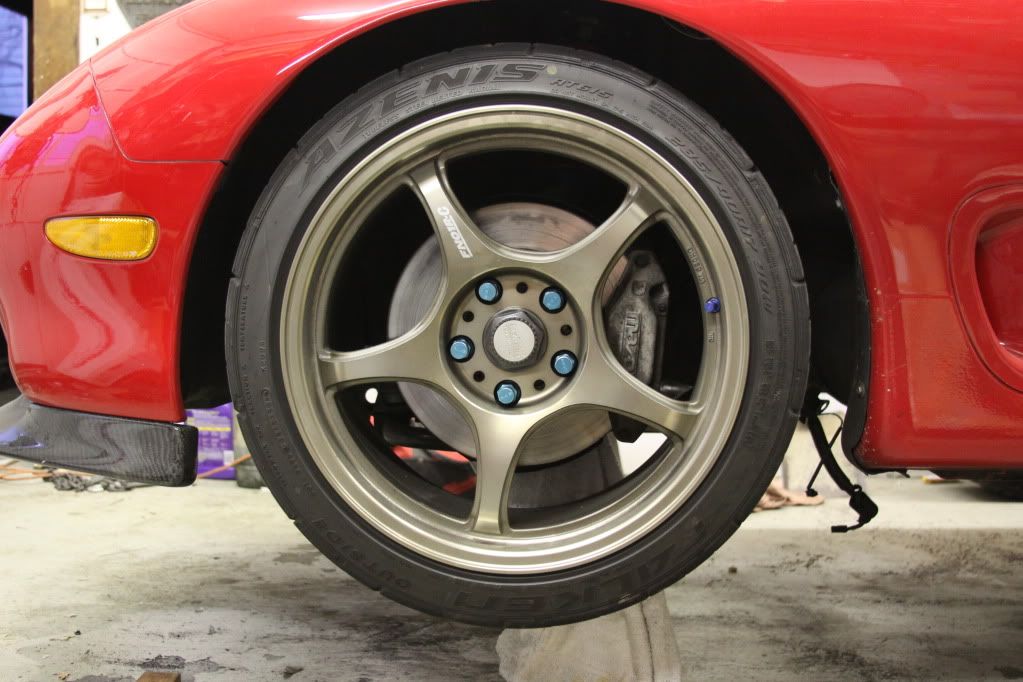
After painting both calipers I installed them.
BEFORE
AFTER
I also installed the rear BBK as well.
BEFORE
AFTER
Just need some BNR's
John
This week I painted my front calipers. I am not sure if I like the color or the finish. It is VHT flat red. Looks much more like orange. I will probaly refinish them after deals gap.
After painting both calipers I installed them.
BEFORE
AFTER
I also installed the rear BBK as well.
BEFORE
AFTER
Just need some BNR's
John
Thread Starter
Joined: Feb 2008
Posts: 2,979
Likes: 9
From: Long Island NY 11746
I had some parts arrive Thursday and Friday. Big thanks to Rich, Dan, and to Bryan at BNR.
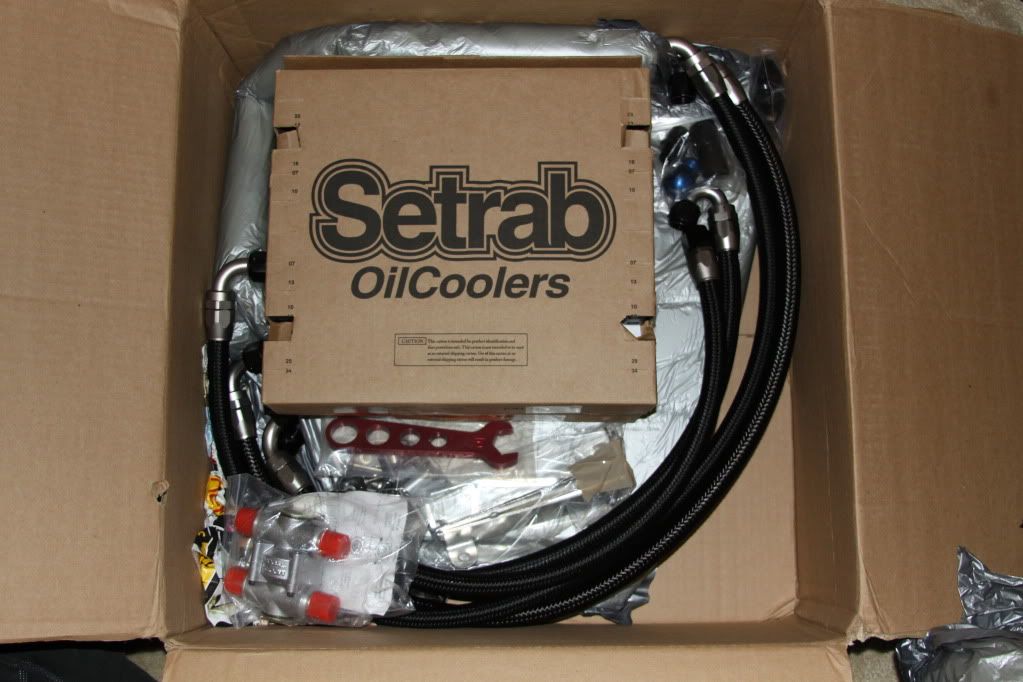
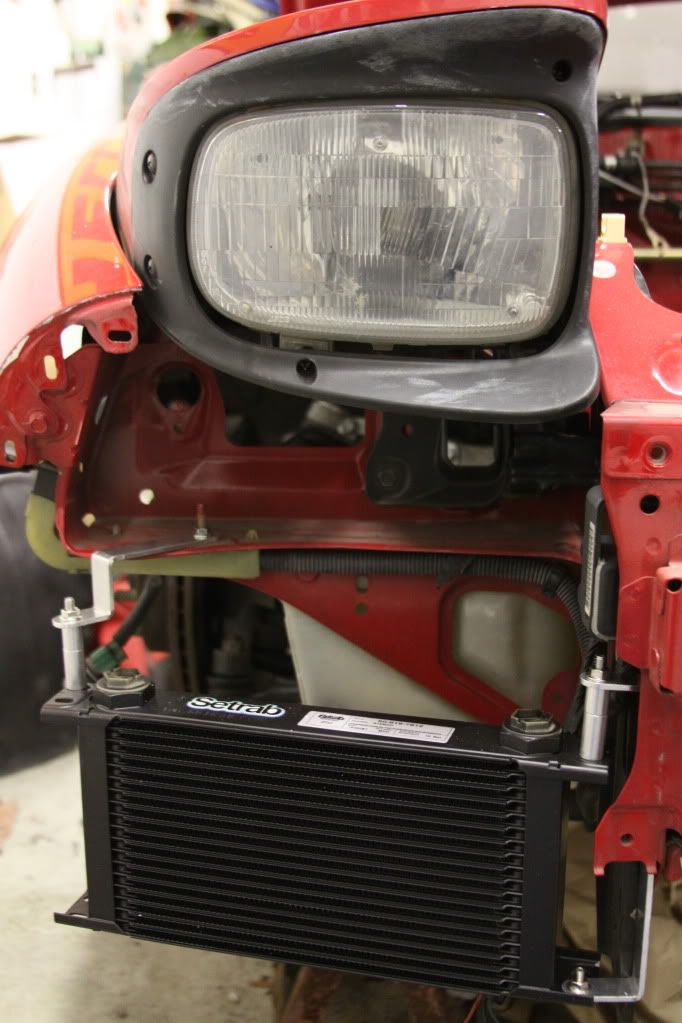
On Thursday the Sakebomb Dual oil coolers arrived. Thanks again Dan. They are 19 row and have the nylon braided race lines. Excellent packaging and fast shipping.
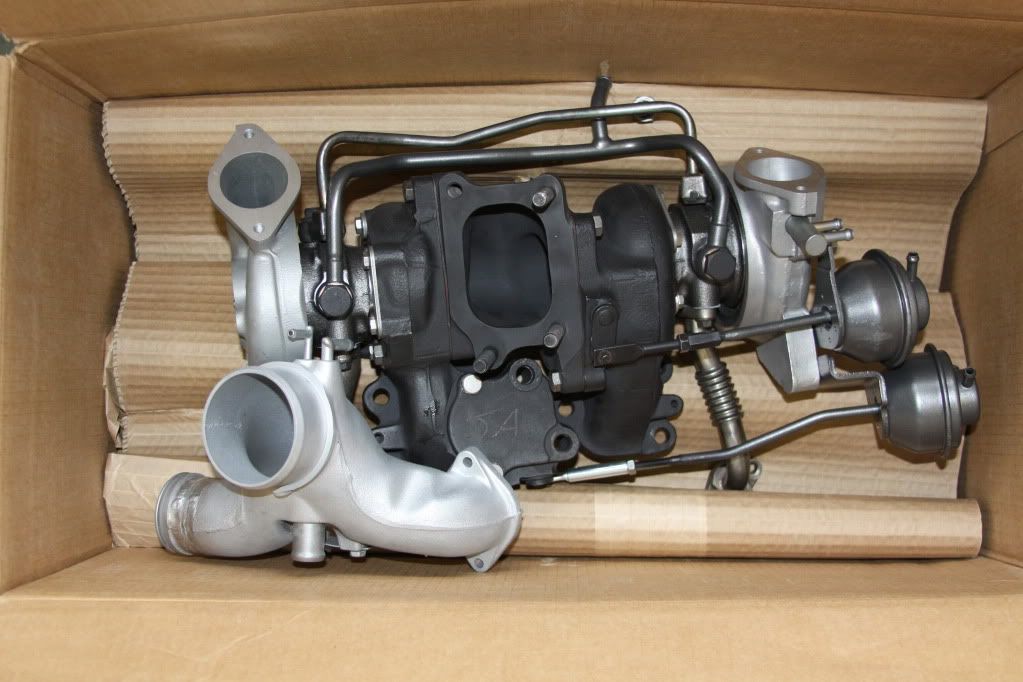
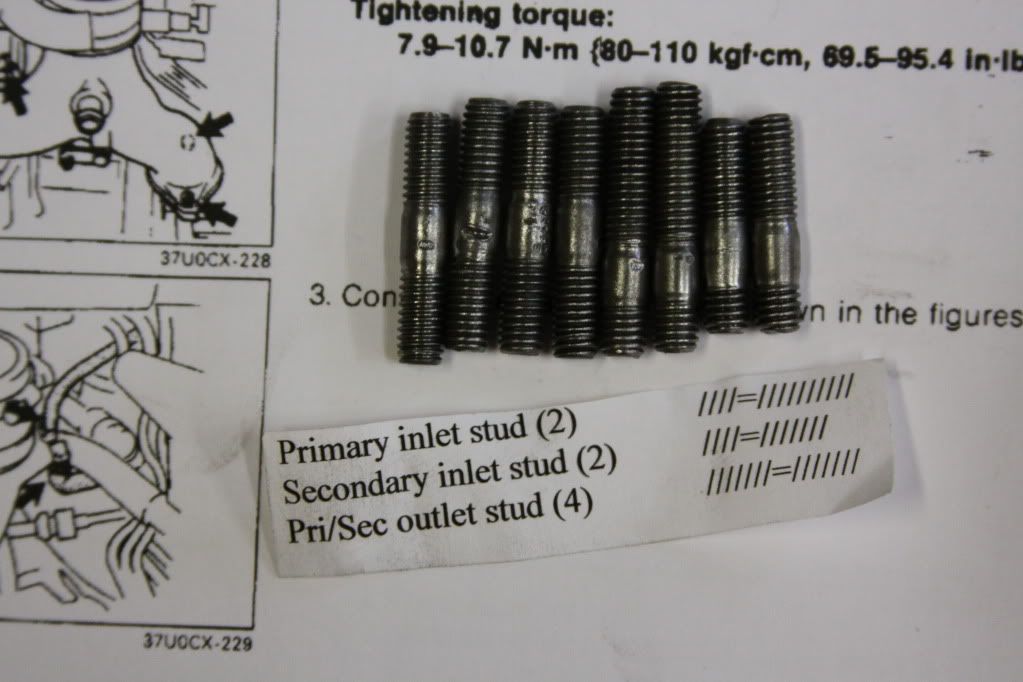
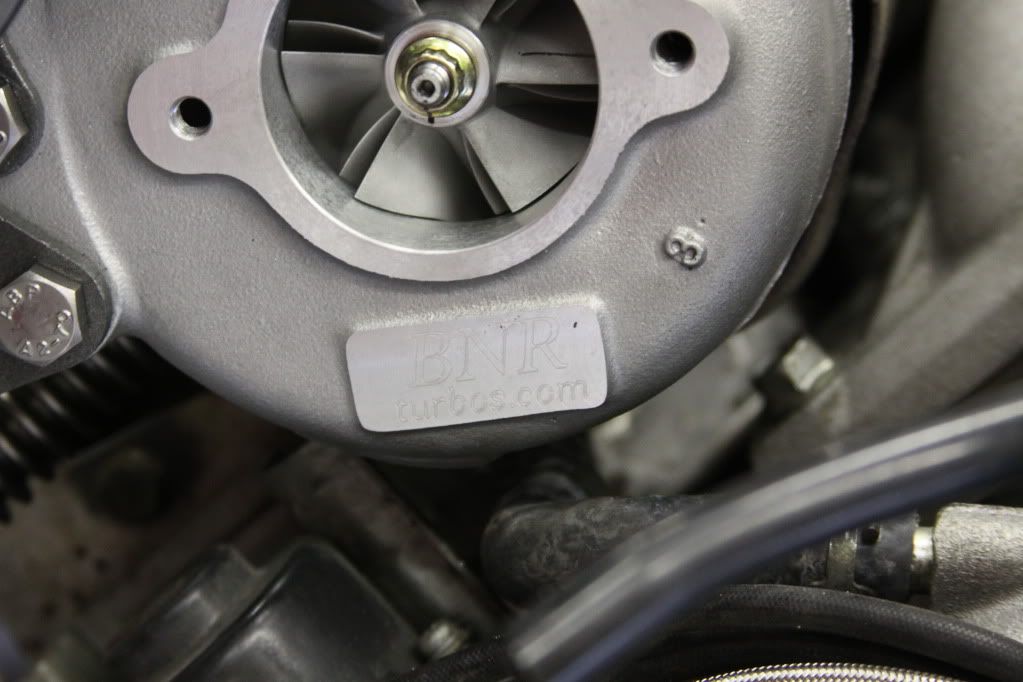
Friday was a monumental day. my BNR turbos arrived. Thank you Rich and Bryan. Bryan was able to finish these for me on Wednesday and ship them 2 day air to me so I could have them for Friday. I really appreciate it . These were packaged well and even had a diagram so the installer would know which studs go where on the turbos.
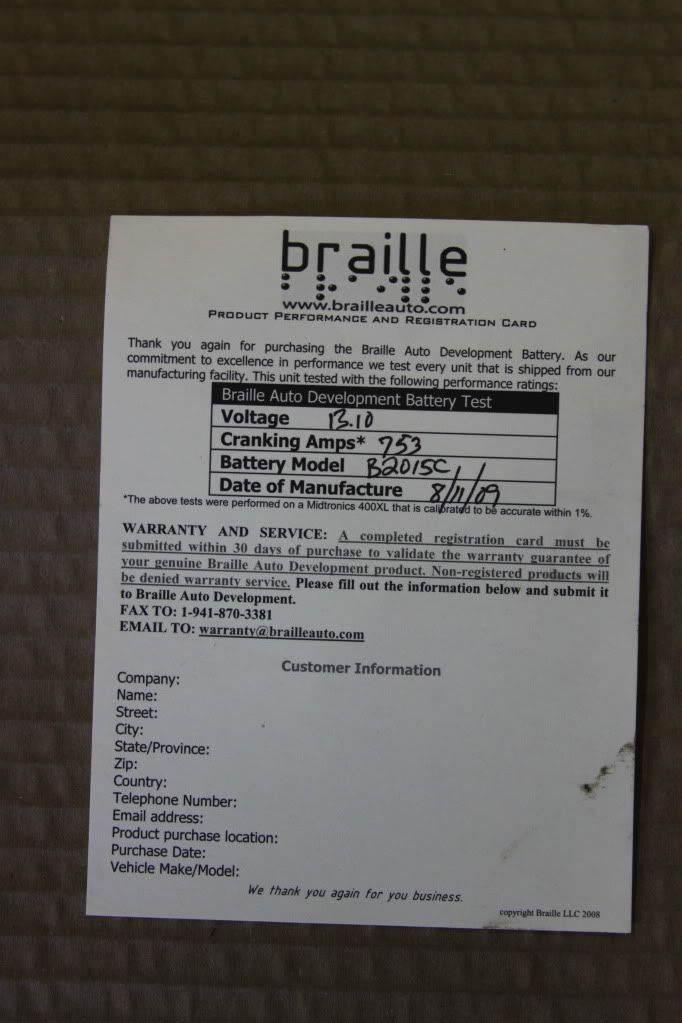
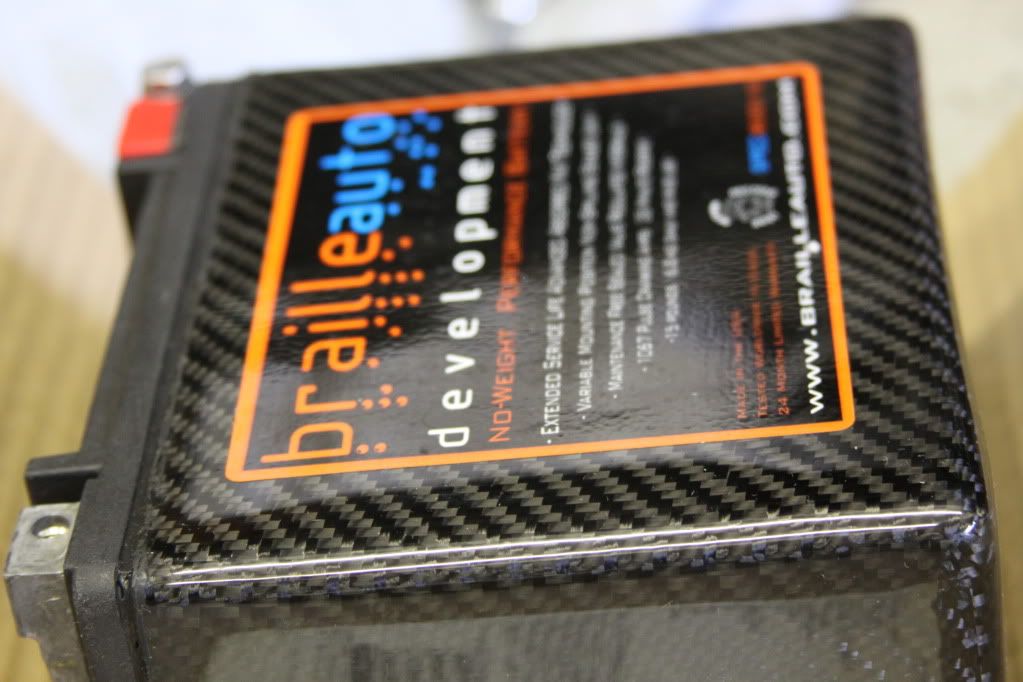
I also recieved my Braille Battery it is the carbon fiber version. I think it looks cool...... I like carbon. Compared to the odysey PC-680 this one blows it out of the water.

What is nice is the battery is shipped with a slip showing the performance. I do wish it showed what temp the test was performed at. I would guess room temp.
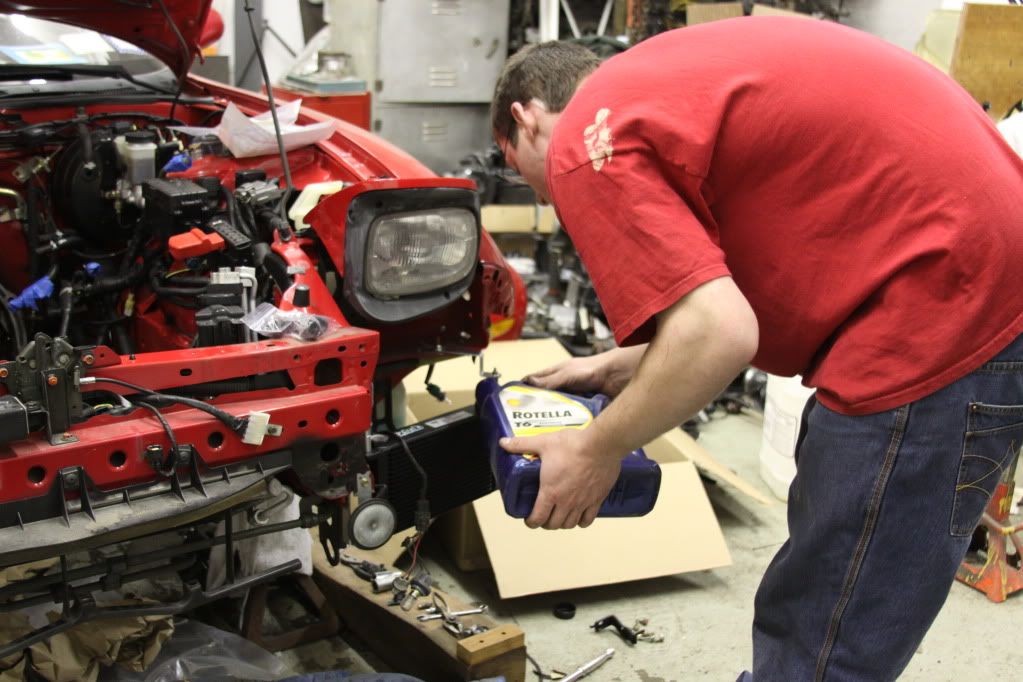
I also received a resonated midpipe i didn't take a pic though. I also received my tweak-it racing airpump delete pulley and also an RE-Speed oil filter pedistill.
John
On Thursday the Sakebomb Dual oil coolers arrived. Thanks again Dan
Friday was a monumental day. my BNR turbos arrived. Thank you Rich and Bryan. Bryan was able to finish these for me on Wednesday and ship them 2 day air to me so I could have them for Friday. I really appreciate it
. These were packaged well and even had a diagram so the installer would know which studs go where on the turbos.I also recieved my Braille Battery it is the carbon fiber version. I think it looks cool
...... I like carbon. Compared to the odysey PC-680 this one blows it out of the water.What is nice is the battery is shipped with a slip showing the performance. I do wish it showed what temp the test was performed at. I would guess room temp.
I also received a resonated midpipe i didn't take a pic though. I also received my tweak-it racing airpump delete pulley and also an RE-Speed oil filter pedistill.
John
Thread Starter
Joined: Feb 2008
Posts: 2,979
Likes: 9
From: Long Island NY 11746
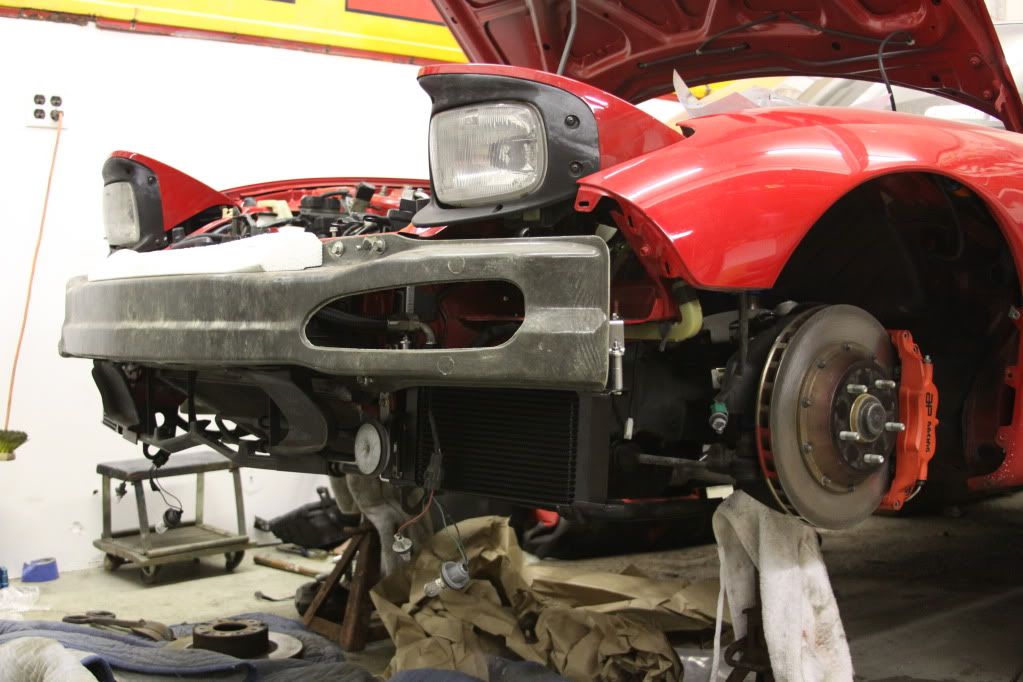
Today I had t take the GRE exam so I had a half day off of work. I started off by installing the BNR turbos
I also installed the Y pipe and the vacuum lines as well as the tweakit racing pully but for some reasin i didnt take a pic.
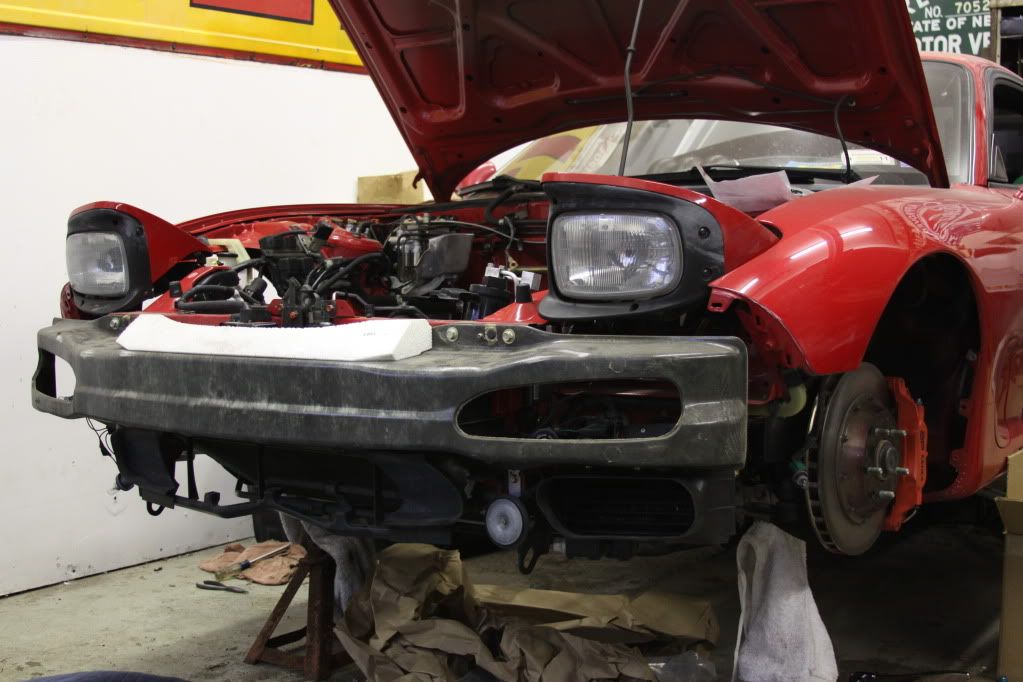
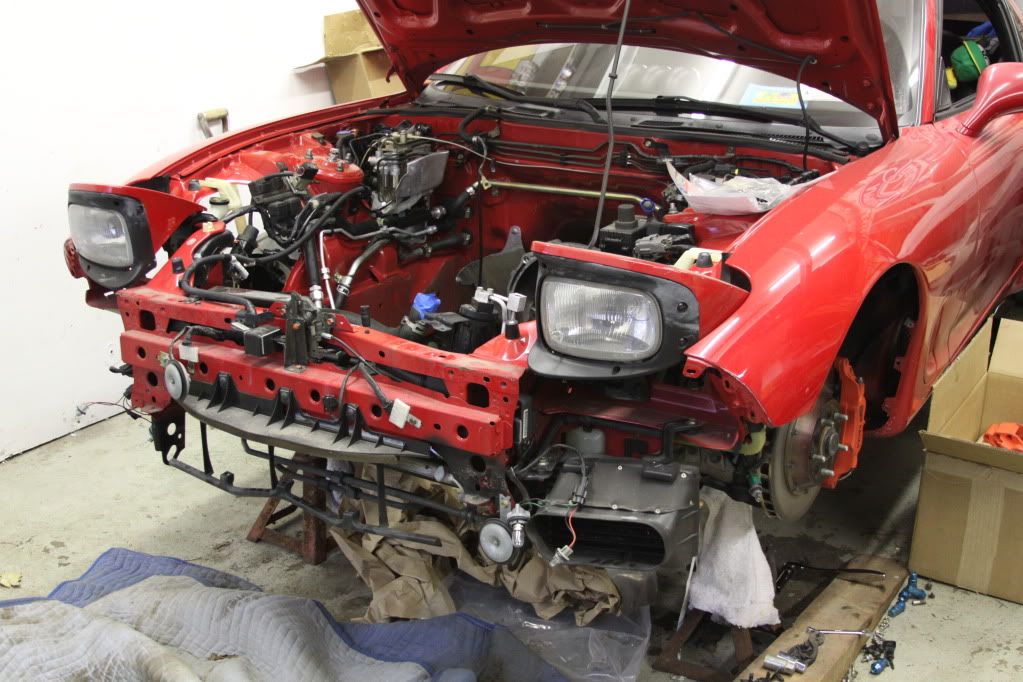
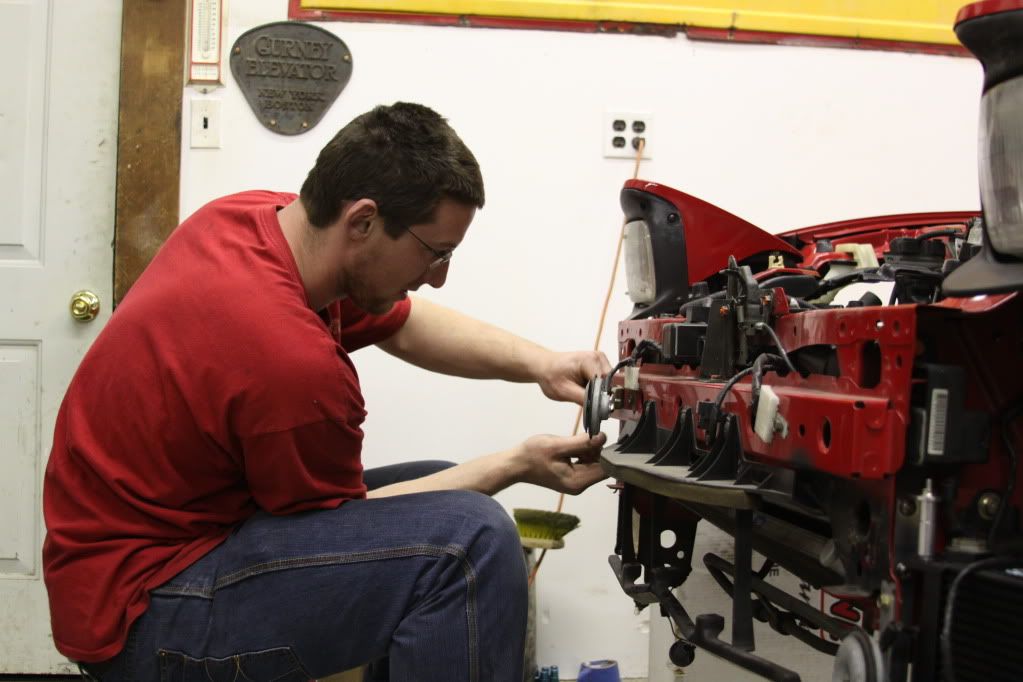
After I installed the BNR's I went ahead and started tackling the task of installing the sakebomb dual oil coolers. I was really nervous about taking off the front bumper but found out it is really easy. I was pleasantly suprised. I do not know why it takes some people so long to remove it .
.
The pics are fairly self explanatory

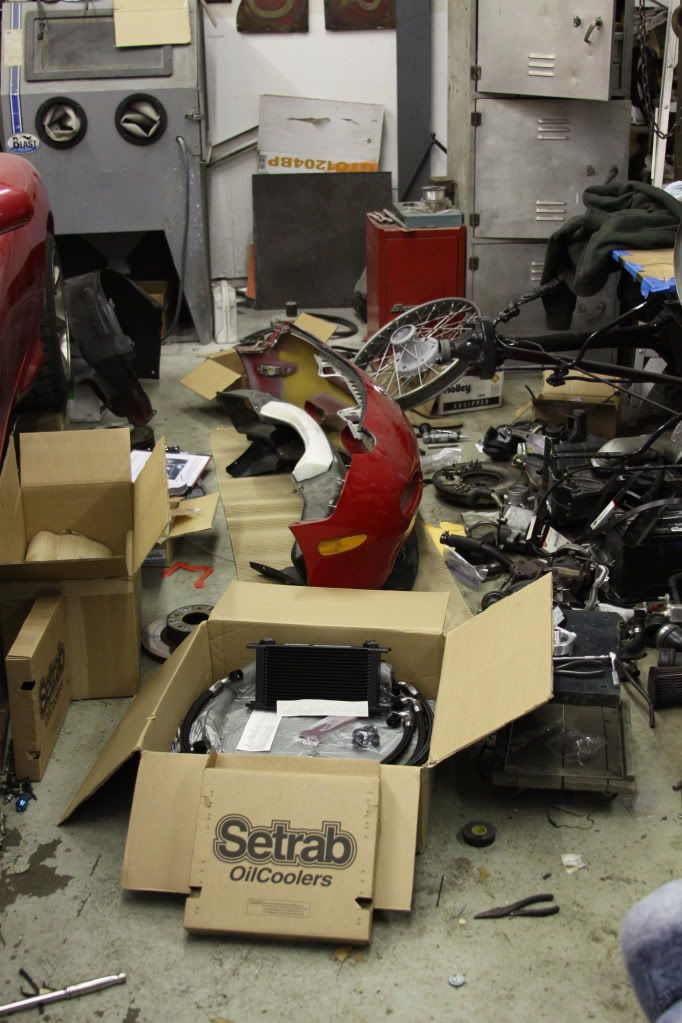
LOL I have a big mess of parts. I have a question for the wheel fitment gurus... What do I need to make that 33x3.5 Wire wheel fit my fd? Will I need spacers? What size tire should I run with out it rubbing?
Here I am installing the oil cooler brackets. My girlfriend took the pic.
Dan, Is there something wrong with this .
.
More progress in a few mins.
John
I also installed the Y pipe and the vacuum lines as well as the tweakit racing pully but for some reasin i didnt take a pic.
After I installed the BNR's I went ahead and started tackling the task of installing the sakebomb dual oil coolers. I was really nervous about taking off the front bumper but found out it is really easy. I was pleasantly suprised. I do not know why it takes some people so long to remove it
. The pics are fairly self explanatory
LOL I have a big mess of parts. I have a question for the wheel fitment gurus... What do I need to make that 33x3.5 Wire wheel fit my fd? Will I need spacers? What size tire should I run with out it rubbing
? Here I am installing the oil cooler brackets. My girlfriend took the pic.
Dan, Is there something wrong with this
.More progress in a few mins.
John
Thread Starter
Joined: Feb 2008
Posts: 2,979
Likes: 9
From: Long Island NY 11746
And some more progress
I had also decided to change the bolts in my calipes to stainless because i think it looks better.
Before:
After:
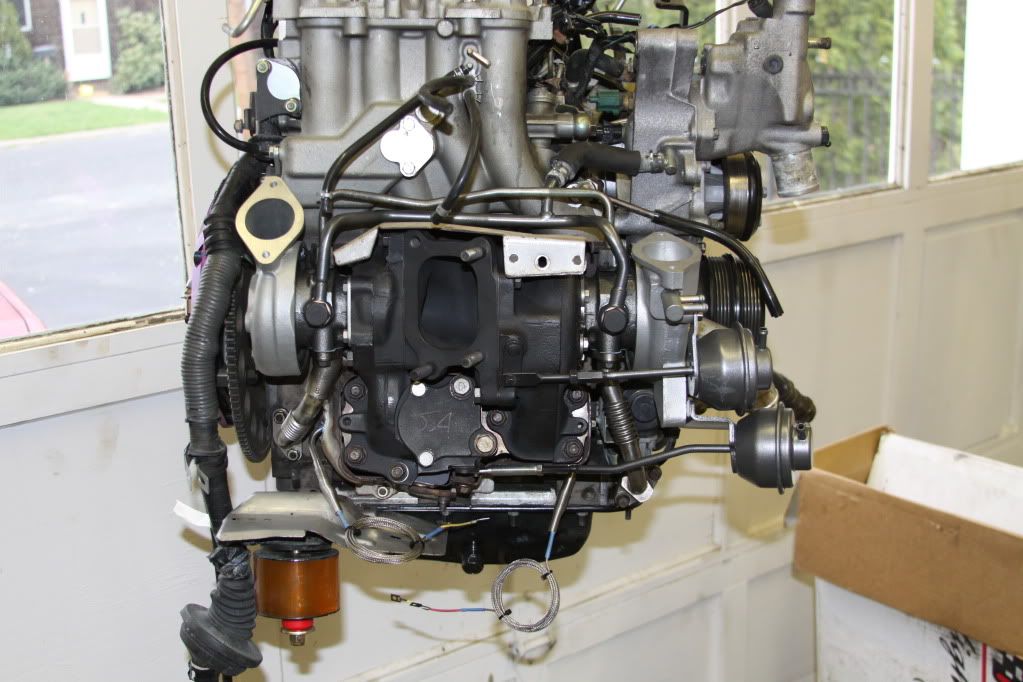
Here is the motor ready to go in. I hope to have it running tomorrow so I can check for leaks then reinstall the bumper. After that; finish my gauge install and install the midpipe. I should be driving it towards the end of the week after I can fabricate my intercooler piping and get it welded up. Gotta get some miles on it before deals gap.

John
I had also decided to change the bolts in my calipes to stainless because i think it looks better.
Before:
After:
Here is the motor ready to go in. I hope to have it running tomorrow so I can check for leaks then reinstall the bumper. After that; finish my gauge install and install the midpipe. I should be driving it towards the end of the week after I can fabricate my intercooler piping and get it welded up. Gotta get some miles on it before deals gap.
John
