
Homemade Nikki washer


Trending Topics
I'm not really that weird Sam, I'm just trying to out weird Stu, which is a real challenge.
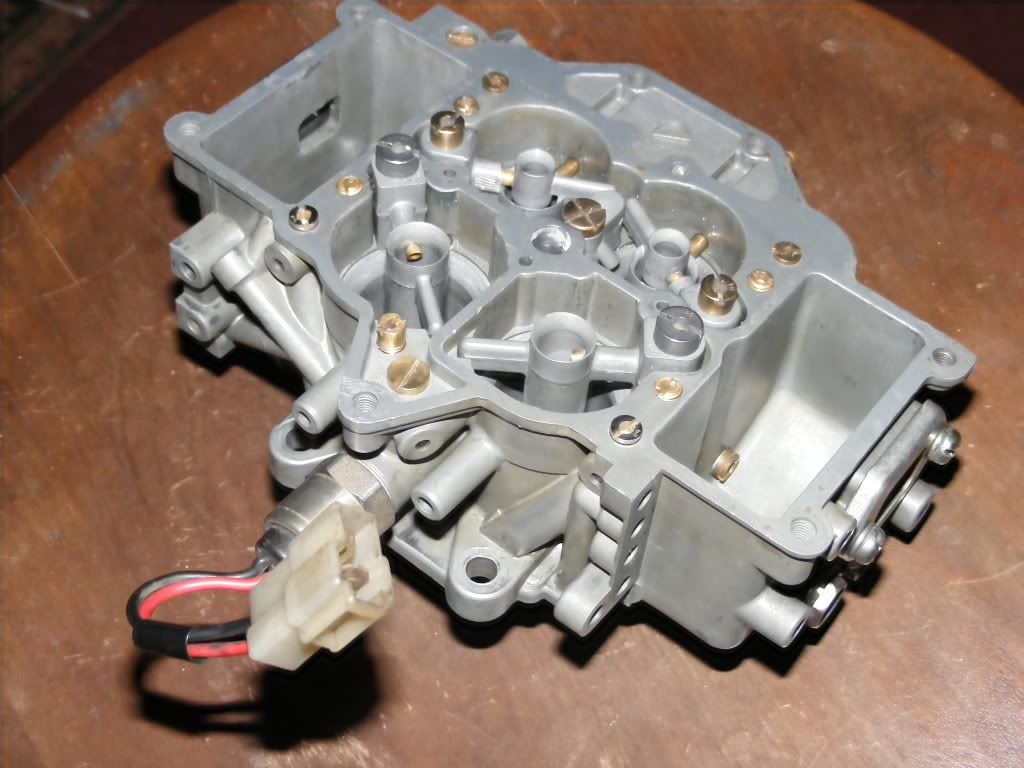
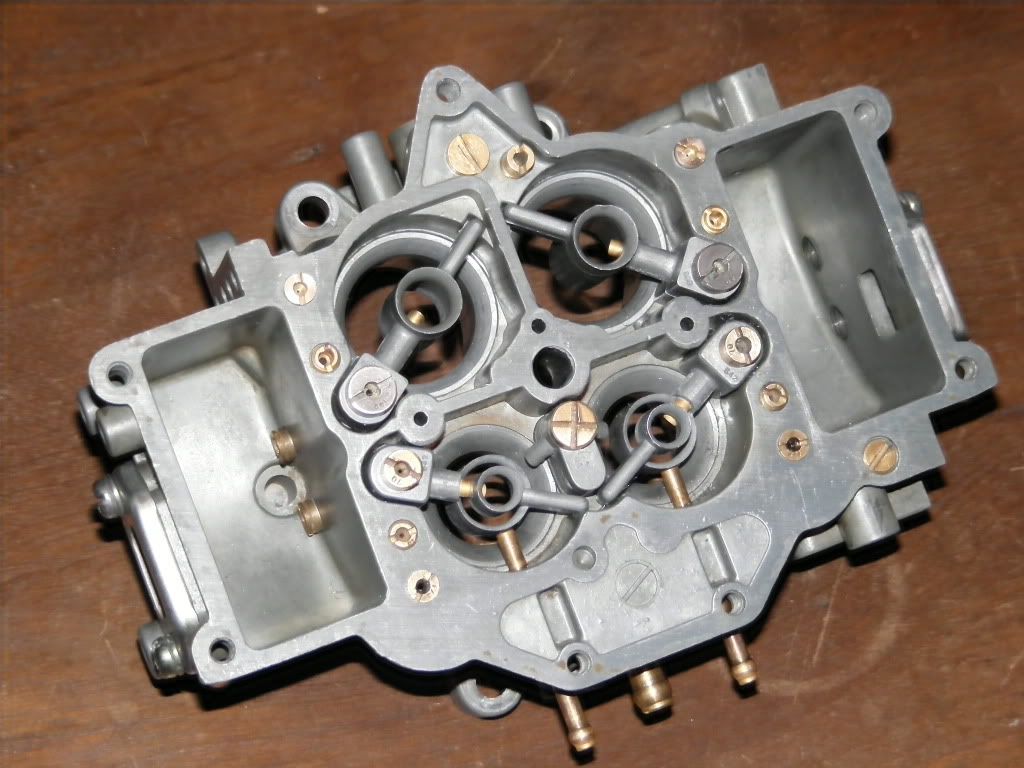
Dave the cleaner is a powerful water based solvent with lots of primary amines in it, does a great job of removing varnish from the carb parts. I'm having a problem with my progression circuits, I guess I didn't clean them out well enough when I rebuilt the Nikki last summer. They are tiny little orifices entering right at the throttle plate and when they clog up you have essentially no fuel delivery from around 1000 rpm to 2000 rpm, a real pain in traffic.
So this time I decided to do it right, Crit mentioned this parts cleaning kit you can get at Autozone. Only problem was the Nikki base piece is too tall to fit in the 1 gallon paint can they give you (which has a parts basket inside) so I poked around the shed and came up with my parts washer, swish swish.
I haven't seen what it's doing to the progression circuits yet, but the way it makes the carb surfaces shine looks like it's doing a great job of dissolving that hard to clean surface varnish.
Here's the current state of affairs, as the carb body parts soak:


And another shot of the parts washer:

Dave the cleaner is a powerful water based solvent with lots of primary amines in it, does a great job of removing varnish from the carb parts. I'm having a problem with my progression circuits, I guess I didn't clean them out well enough when I rebuilt the Nikki last summer. They are tiny little orifices entering right at the throttle plate and when they clog up you have essentially no fuel delivery from around 1000 rpm to 2000 rpm, a real pain in traffic.
So this time I decided to do it right, Crit mentioned this parts cleaning kit you can get at Autozone. Only problem was the Nikki base piece is too tall to fit in the 1 gallon paint can they give you (which has a parts basket inside) so I poked around the shed and came up with my parts washer, swish swish.
I haven't seen what it's doing to the progression circuits yet, but the way it makes the carb surfaces shine looks like it's doing a great job of dissolving that hard to clean surface varnish.
Here's the current state of affairs, as the carb body parts soak:
And another shot of the parts washer:

Rotary Enthusiast
iTrader: (4)
Joined: Jan 2003
Posts: 766
Likes: 0
From: Bryan, TX
We have total randomness....
I checked out where that parts washer came from, it turns out to be a bottle carrier for carrying 2 liter reagent bottles containing hazardous chemicals like sulfuric acid and stuff. The flutes are used to position the bottle in the center, protecting it from any impact. But it works great as a washing machine too.
I checked out where that parts washer came from, it turns out to be a bottle carrier for carrying 2 liter reagent bottles containing hazardous chemicals like sulfuric acid and stuff. The flutes are used to position the bottle in the center, protecting it from any impact. But it works great as a washing machine too.
Last edited by ray green; Dec 5, 2008 at 04:09 PM.
Looking real good Ray, on a (someway) related note, I see you've plugged the shutter valve off, have you considered simply removing it and plugging the holes on the intake? I've done so on all my 12a's with no ill effects, less clutter around the intake too!
I saw that gallon of cleaner last time I was at Tractor Supply company, I'll have to pick it up and give it a shot.
I saw that gallon of cleaner last time I was at Tractor Supply company, I'll have to pick it up and give it a shot.

I have one of those sonicator baths Kent but the bucket only holds about a liter so it would be good for the small parts only (I have another in my laboratory that I use all the time for my experiments). Good suggestion, I'll pull it out of the shed and put it to work.
Everything is sparkly clean now and last night I put together all the innards. Today the peripherals then I'll pop it back in the car and see what happens. About half the time when I do this I still have the problem I started with, so I'm hoping for better luck this time.
Photos in a bit.
Oh thanks for the suggestion 82transam about the shutter valve, I'll think about it.
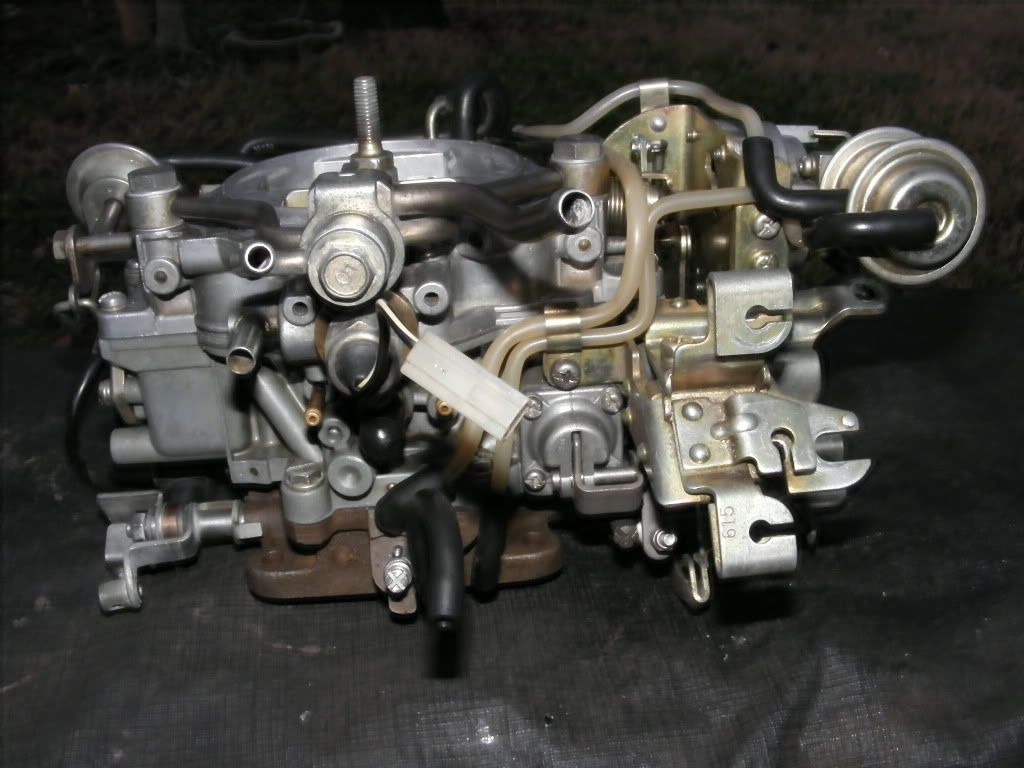
The Nikki's all together and ready to go back in but not enough light tonight for the pics, here's some quick pics of the progress:
That Berryman's works pretty good. I've also got the Branson Sonicator out and filled it with Berryman's, according to Kent's instructions. I'll give it a try tomorrow and do a video of it's virgin run when there's enough light.
There's a batch of those "bottle holders" (read parts washers) like the one I have on ebay, 6 units similar to the one in my photo but bigger (holds 4 liter bottles, probably about 3 gallons solvent; mine holds 2.5 liter bottles and about 1 gallon solvent). These have a top and they are brand new. Might be a good deal for a shop or group buy, at about $90 they'd be less than $20 each:
http://cgi.ebay.com/ws/eBayISAPI.dll...m=350134186876
Thanks 82, but don't get the wrong idea. Everything else I own is dirty. But yeah the Berryman's does a good job.
Here's Ken's sonication version of the Berryman's treatment. Looks like it has promise.
Here's a sample piece going in:

And here's after about 10 minutes of sonicating:

Here's Ken's sonication version of the Berryman's treatment. Looks like it has promise.
Here's a sample piece going in:
And here's after about 10 minutes of sonicating:
I soaked the main carb body with the progression circuits in Berryman's over night, with periodic swishing. The other parts soaked for an hour or so. Then I washed out the Berryman's using hot dish deterent in the kitchen sink (still trying to convince the wife that was good for the sink).
While it was soaking in the hot dish detergent I used a plastic pipette (another lab tool) to flush out all the ports while the unit was under water. That works real well because you can put a lot of hot detergent fluid pressure on the port and visually check to be sure it's flowing nicely. Here's a pic of the pipette:

Then I did a final rinse with hot tap water, followed by a good blow out with compressed air and gave all the parts a light spray with WD40 before assembling.
While it was soaking in the hot dish detergent I used a plastic pipette (another lab tool) to flush out all the ports while the unit was under water. That works real well because you can put a lot of hot detergent fluid pressure on the port and visually check to be sure it's flowing nicely. Here's a pic of the pipette:
Then I did a final rinse with hot tap water, followed by a good blow out with compressed air and gave all the parts a light spray with WD40 before assembling.

Thread
Thread Starter
Forum
Replies
Last Post
Jeff20B
1st Generation Specific (1979-1985)
73
Sep 16, 2018 07:16 PM
toplessFC3Sman
2nd Generation Specific (1986-1992)
6
Mar 20, 2018 01:54 PM