When you click on links to various merchants on this site and make a purchase, this can result in this site earning a commission. Affiliate programs and affiliations include, but are not limited to, the eBay Partner Network.
Heres an update on my rx7! I hope i dont upset anyone here:S but the rotary is soon to leave I picked up a motor from Montreal.... 1JZ GTE vvti! ive been wanting to do this swap for a year now and its finally slowly piecing together. Theirs a couple good threads on swapping them in the fc. Im going to try to make this one just as good. Ill be doing the swap myself. Ill be trying to focus on the budgeting and all the hard situations that you may run in to by doing this in your garage. Stay tuned my dudes! heres some pics!
Heres the wish list on the motor
Top end :
Bc springs/Ti retainers
Bc 1mm oversized intake valves
Bc keepers
Tomei Cam shafts
Tome Head gasket
Thats about it for internals, i also plan on port and polishing the head. This is going to be an extremely slow build because I'm currently in school.
The car is in very good condition, considering its been around Canada for almost 30 years. The pervious owners rust proofed the car and must not have driven in the winter.
The car was picked up for $400, the motor was picked up for $1300. These numbers look like small figures after going through the "to do list" haha.
Starting to pull the motor apart. Wasn't sure on what the mileage was on it, so i decided to take a look. My goal is to make around 6-700whp. This might be changed down the road. Ive never really built or driven a car with high boost and a lot of lag. I want something thats going to be fun to drive but also give super cars a run for their money So that could be changed but as for internals go i will be building for about 900hp. For those of you who are not familiar with the jz and think this is crazy, this is an average build for the jz this might be more of a jz thread then a rx7 thread atm, just because I'm more focused on getting the motor together then touching the car itself.
I doubt you will need 600-700HP to give a supercar a run for its money...500 would surely be enough in a 2800lb car. The key is getting power to the ground...I would get the motor to the 500HP level(with room for more if needed) and then focus more time on the rear differential and suspension. I try to build to the minimum power level needed to reach my goal, it tends to give you a more streetable car than a max HP build(also puts less stress on the drivetrain, which adds to reliability)
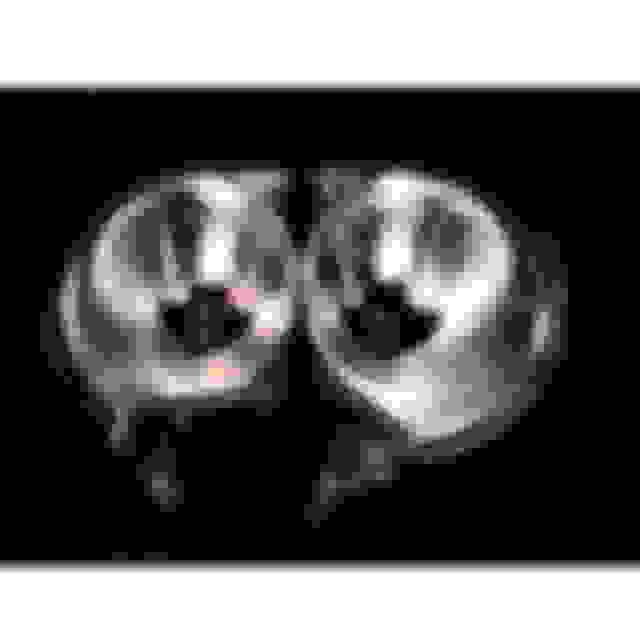
Here is a port and polish on my 1jz head. This is only 1 of the 5 intake ports. Took me awhile to do one but im very satisfied with the results. Here are the grits i used, if anyone is interested; 100, 320, 400, 600, 1000, 1500, 2000. It takes a lot of time and patience. You have to be very careful around your valve seats. If the metal chuck of your dremel hits, you will most definitely damage it enough for some machine work$$$
This is just a stage 1 port. I removed most of the cast imperfections and made the divider smaller and also added a fine edge on it. I've also done a few other things to the head that i will post when everything is done together. I've gathered some nice toys for the motor .
Just FYI, polishing the intake runners is harmful to power production. It reduces turbulence, turbulence in the intake runner keeps the fuel suspended in the air as opposed to puddling on the floor of the runner. In the actual combustion chamber itself as well as the exhaust port, its different since the fuel has already burned away. The rule of thumb is polish the chambers and the exhaust port but leave the intake ports semi rough from porting.
I had a feeling you'd say something about that. So heres my opinion. Yes you're somewhat correct but the only big loss would be on a carb'd motor. Having a smoothed polished finish reduces heat transfer and increases air flow by a surprising amount. Now i know you're probably saying "your fuel won't properly mix without turbulance". The intake manifold itself is rough, their will still be plenty on turbulence, but polishing will increase velocity. On a carb'd or NA motor this wouldn't be necessary, but on a motor with high boost, gains will definitely show.
Take a look a this video, he describes it very well. I appreciate the input though!
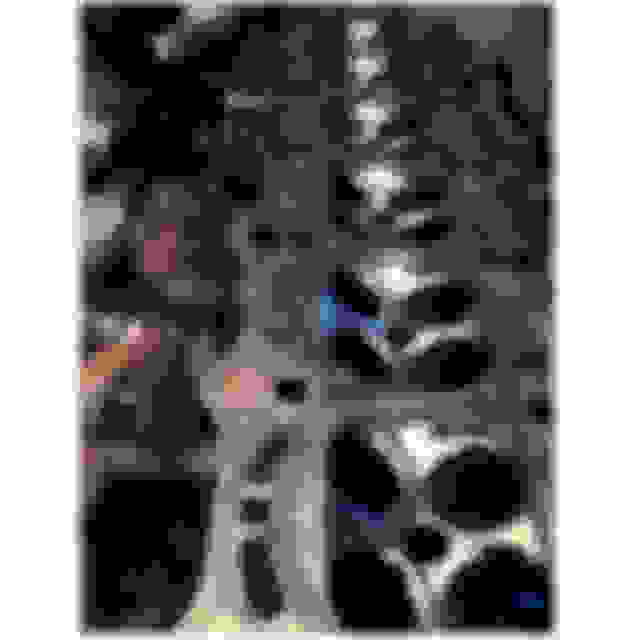
Heres some more work on the head, I polished the bowls on the head to help reduce hot spots and pre detonation, and also polished one of the valve covers. I also made a carbon spark plug cover (i got into making carbon parts about a year ago. More accessory then function.) you'll be seeing a lot more custom carbon pieces for the rx7 in the near future.
I do have to say nice work on everything, though the jury is still out on intake port polishing. I understand your point about carbs...but aftermarket injectors that flow a ton of fuel have poor spray patterns in general and act like a carb with poor atomization at idle and low RPM...they drip more than spray...and in those RPM bands you arent likely to be boosting so you need all the turbulence you can get. I guess it will be okay as long as you dont reduce air velocity too much though with things like an unnecesarily huge throttle body and crazy intake manifold porting. I laugh every time I see a 80mm throttle body on a NA Honda engine(or on a boosted one for that matter). What size TB will you be running?
I will most likely just run the stock throttle body, i believe its 70mm, i could be incorrect. I also already put a few hours into polishing it, their is no going back now haha. I agree the velocity is very important on both intake and exhaust side. I won't be opening the exhaust side any bigger, but i do have 1.6 oversized intake valves on the way. I also agree the polishing does have its cons, But the new valves also have a swirl finish in the stem and back side of the face, which supposedly helps the air and fuel mix.
Decided to clean the head, keep in mind that this is somewhat of a budget build and every cent that can be saved will be saved! After doing some searches i found that Cascade is a good cleaner for aluminum cylinder heads. I filled a large container with warm water, and poured the cascade into the head. Waited for about 20 min, and began to scrub with a soft tooth brush. Only took about 5 minutes to get rid of about 80% of the caked on oil. It also got most of the carbon build up in the exhaust ports. This is a great/cheap method and a good parts cleaning solution for aluminum parts. If you really wanted to, you could probably throw a 4 cylinder in the dishwasher and achieve the same result. Theirs still a bit of oil left in the hard to reach places, but every time i drain and refill it seems to slowly break it down. Here are some pics of the process
Hmm, interesting indeed, will keep the cascade trick in mind...currently I use simple green...but I wouldnt use that stuff on cam journals. Cascade is a neat trick.
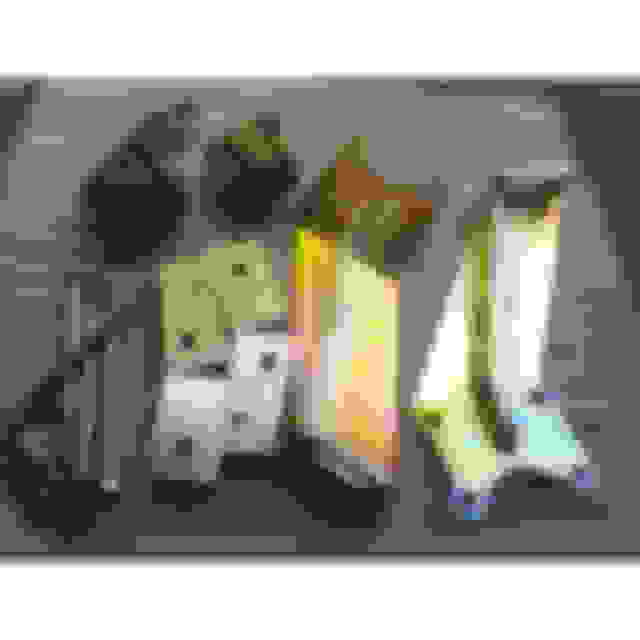
So ive been hearing a lot of rumors about how the vvti wont fit with most swap kits due to the different mounting points on the passenger side (usdm). But i realized that it actually has the mount points for the NON vvti as well. So i decided to just try it out and if all went bad, i would just fab one up for the left side. I got my mount kit from Xcessive manufacturing. I know of two others who make this swap. Small time guy with a company called futurefab, and the more expensive kit from Tech2Motorsports. I decided to go with xcessive because of the deal i snagged. Otherwise i would have considered Futurefab. Ive got the engine brackets, motor mounts, and frame spacers. Spacers will be needed to space the sub frame, to drop the motor another inch for hood clearance. The mounts are made with 80A bushings and are available in 65A. Heres a look at the kit (All parts will have to be bought separately).
So the first thing you're going to want to do is get the spacers on the subframe, here is a step by step on how to do this (This process is much easier if you remove the front sway bar and the steering rack). Start by removing the nuts on the 4 bolts that attach the frame to the subframe, they are located under the subframe. Keep in mind that these are the only things holding the subframe up , considering you've dropped the power steering... so make sure you have something under the subframe to catch or hold it while you unbolt it. Now cut the tact welds on the 4 bolts (check below for pics). The bolts will have to be banged out, i used a small sludge hammer. Once the bolts are out you will replace them with the ones from the swap kit. You won't be able to use the OEM ones again because they are too short. Note that there are dowel pins located with the back two subframe bolts. Two of the spacers from the kit have the holes with the seats to properly fit and accommodate with this modification. Take a look at the picture below to see how the spacers are placed. Lightly tap the spacer onto the dowel pin, while ensuring that the hole on the spacer is lined up with the hole on the subframe. Now place the dowel pin from the swap kit, in the top of the spacer. If you don't have a jack you'll need a friend to help you out!
So the best way i found to do this was to mount one bracket on the motor and one side on the mount. Put all the bolts/nuts in half way to allow play. Its pretty tricky to get it in and looks like it won't work at first. MAKE SURE YOU HAVE A REAR SUMP OIL PAN!!! if you don't and your on this step you've already realized your pan won't clear the subframe or the steering rack. Only the rear sump will work, don't bother trying the front sump either. This is one crucial thing you need to do when picking out you're 1jz/2jz. Here is a look at the 1jz sitting as far back as possible on the excessive mounts. No cutting was needed on the fire wall. Keep in mind theirs no transmission hooked up. Ive test fit the motor with out the spacers. Now I'm just waiting to get a hand of the hoist that i used, to test the fitment with the spacers. Heres a pick of the brackets on the motor and a pic of the MOTOR IN WITHOUT SPACERS
so the excessive mounts worked with the VVTI? ive never even heard that was an issue LOL. also curious about how low it sits without the spacers? im not planning to space my subframe and im still in the air between the futurefab mounts and the excessive
Yea I've read it about 3 times when i was first looking into the build, kind of had me worried haha. It won't clear the hood for sure. Ill find out soon how it is with the spacers, but apparently ill still have to cut the hood bracing. Cant really review the future fab mounts, but the xcessive worked out great!
What? You didnt measure height before you started? Its really probably not any taller than my Ford 2.3t, but the extra length+ slope of the hood exaggerates the issue.
P.S. how far above the valve cover does the intake manifold sit out of curiosity?
yea im not really worried about making the hood fit around the 2JZ. i rather have the engine sit as low as possible while keeping the subframe where it is
The test fit was a success! The hood closes with room to spare! The only issue i have is the heater core inlet and outlet, as seen in the pictures below. Ill have to just re route them somewhere else through the firewall. That is about as far back as the motor goes on the mounts. The xcessive swap kit fits so perfectly they really did an awesome job keeping the motor low enough to the clear the hood and just high enough for the crank case and oil pan to clear the subframe. I don't think you'll be able to fit the 2jz without the spacers. Theirs just not much play with the subframe the hood. Maybe 1/2" up but nothing really down. Not saying its not possible but it will be a challenge and you have to have some good fab skills to make those mounts. 2jz would be awesome though Their seems to still be tons of space left over in front of the bay, by the looks of it the inter cooler, radiator and electric fans should fit with ease, but we'll find that out later on. The car has been some what reassembled because I'm storing it for the school season I also threw some paint on the motor! I've got some picture of the hood clearance as well.
Looks to me as if the engine will fit without the subframe spacers...if you are willing to trim some hood bracing(I would rather trim the bracing than space the subframe myself)
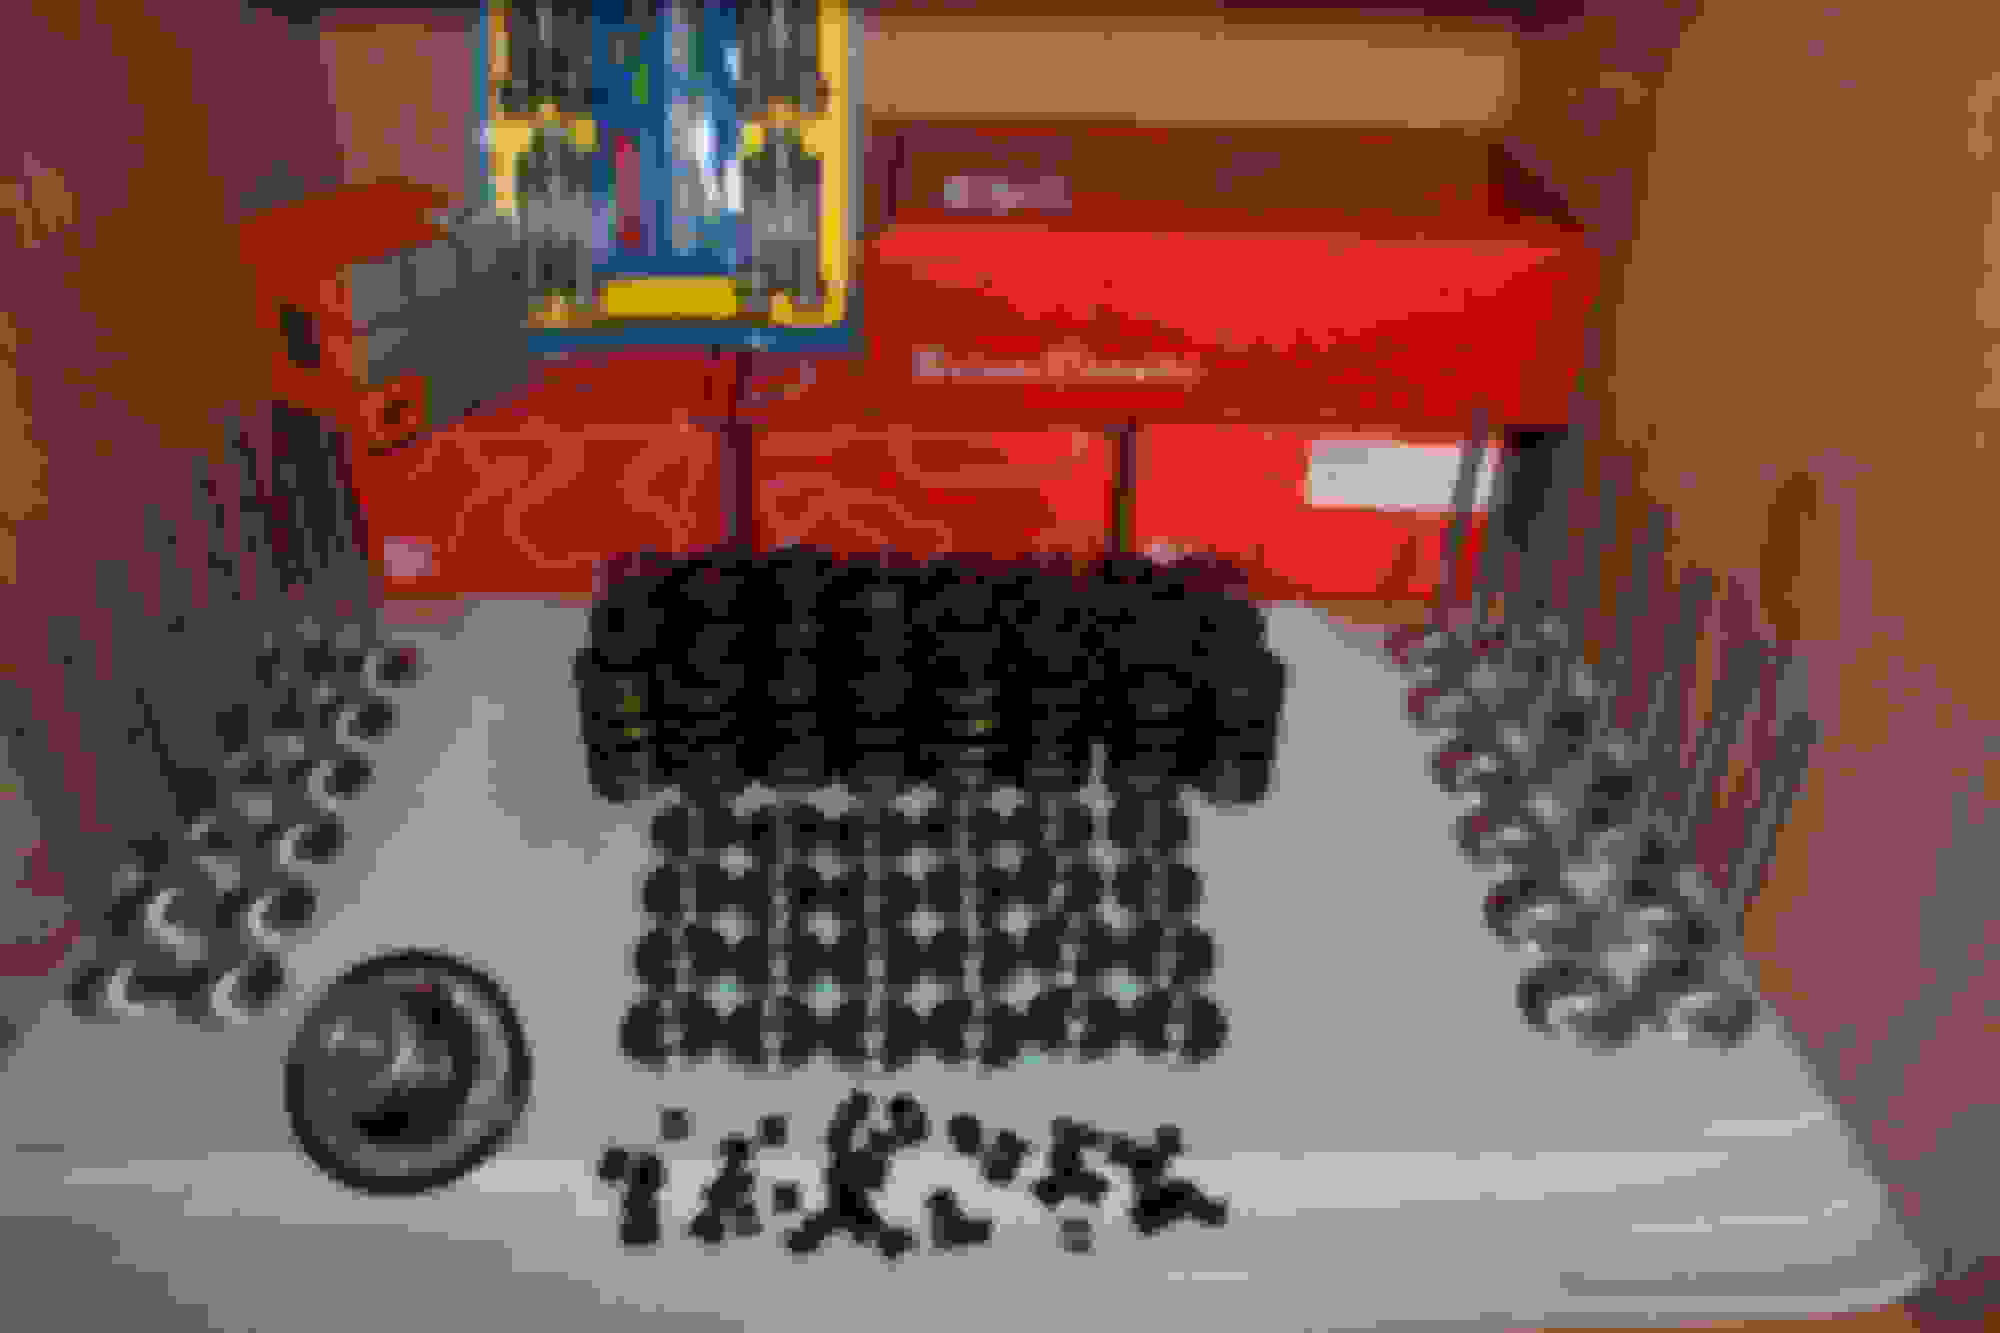
So i gathered some parts for the head. I got the BC 1.6mm oversized intake valves, BC keepers and BC springs. I also acquired front 5 bolt hubs, i still need to go back to my friends 88 parts car to remove the rears. I removed the bearings and studs because i will be replacing them.
Hey, I've seen your build on instagram a few times and posted. Anyways, I've ran across a few problems since my JZ has been in. I didn't do a full clean up of my engine bay as you did; I left my harness and a few other things in there because I wanted a quick swap that will take 5 months max with work. My RX7 body harness is in the way of all the JZ hoses -- fuel lines, vacuum lines, etc. I can't figure out where to route it? I still need it for things like the pop-ups, lights, and other electrical features, I assume.
i can't help you to much because I'm far from that point. but i was thinking of running it through the driver side fender. A lot of people do this with the body harness just to clean up the bay. Sorry for the lack of info, but i hope the swap turns out nice!
Here is an update on the head of the 1JZ. I slowly gathered all the Brian Crower parts that will be used in the head, and most likely in the whole engine. Ive gathered the valve springs, keepers, 1.6mm oversized intake valves, and standerd size exhaust valves. This is only about half of the parts that i will need to finish the head. I still need to get the Tomei cam shafts, TI Ferrea retainers, OEM shimless buckets, Ferrea valve guides. I also still need to deck the head and get the valves seats cut to match the valves.
Hey, I've seen your build on instagram a few times and posted. Anyways, I've ran across a few problems since my JZ has been in. I didn't do a full clean up of my engine bay as you did; I left my harness and a few other things in there because I wanted a quick swap that will take 5 months max with work. My RX7 body harness is in the way of all the JZ hoses -- fuel lines, vacuum lines, etc. I can't figure out where to route it? I still need it for things like the pop-ups, lights, and other electrical features, I assume.
Thanks for any help you can offer!
this is what you will want to do. i will also be completing this to make room for my JZ. remember to take your time and label everything. good luck. http://www.norotors.com/index.php?topic=2874.0
Small update on the car, been awhile since i ordered anything. Finally got my hands on titanium retainers, also got arp connecting rod bolts. waiting on my intake and exhaust GSC valve guides and GSC valve stem seals. Then i would just need to get my hands on ARP head studs, tomei connecting rods, and shimless buckets. This would complete the head, and move me onto the block.
 08-19-15, 10:22 PM


 So that could be changed but as for internals go i will be building for about 900hp. For those of you who are not familiar with the jz and think this is crazy, this is an average build for the jz
  this might be more of a jz thread then a rx7 thread atm, just because I'm more focused on getting the motor together then touching the car itself.


 The only issue i have is the heater core inlet and outlet, as seen in the pictures below. Ill have to just re route them somewhere else through the firewall. That is about as far back as the motor goes on the mounts. The xcessive swap kit fits so perfectly they really did an awesome job keeping the motor low enough to the clear the hood and just high enough for the crank case and oil pan to clear the subframe. I don't think you'll be able to fit the 2jz without the spacers. Theirs just not much play with the subframe the hood. Maybe 1/2" up but nothing really down. Not saying its not possible but it will be a challenge and you have to have some good fab skills to make those mounts. 2jz would be awesome though