How to build a Rotary Engine Stand adapter from scrap
 02-14-09, 12:21 AM
#1
Banned. I got OWNED!!!
Thread Starter

Join Date: Jun 2008
Location: usa
Posts: 329
Likes: 0
Received 0 Likes
on
0 Posts
How to build a Rotary Engine Stand adapter from scrap
And from scratch. I needed a new one. The one that I had originally built was, well weak. I built it out of 1/8" angle that I picked up @ the home depot. It flexed and I just wasn't comfortable using it, so I decided to build another one seeing as I have to rebuild an engine or two in the near future and decided that I would be using it enough to justify the 2 hours or so that I would need to build it, so.... here goes. All of this material was scrap that I had laying around.
First, I wanted to build a head that would slide into the engine stand, not bolt to the head supplied with the stand. The reason for doing this is I personally need to be able to finish assembling my engine with it bolted from the rear. The reason, my four LSX coils are mounted to exactely where the adapters need to be mounted to the front plate for assembly. By making a piece that slides in, I don't have to constantly adjust different heads. I can leave one set for the rear mount, and have this one for the front iron mount..... so away we go.
First is to take a few measurements. The block is 12" long so we want the bolts to be roughly 6" from the center for some decent balancing. The height of the front iron is roughly 10.5".

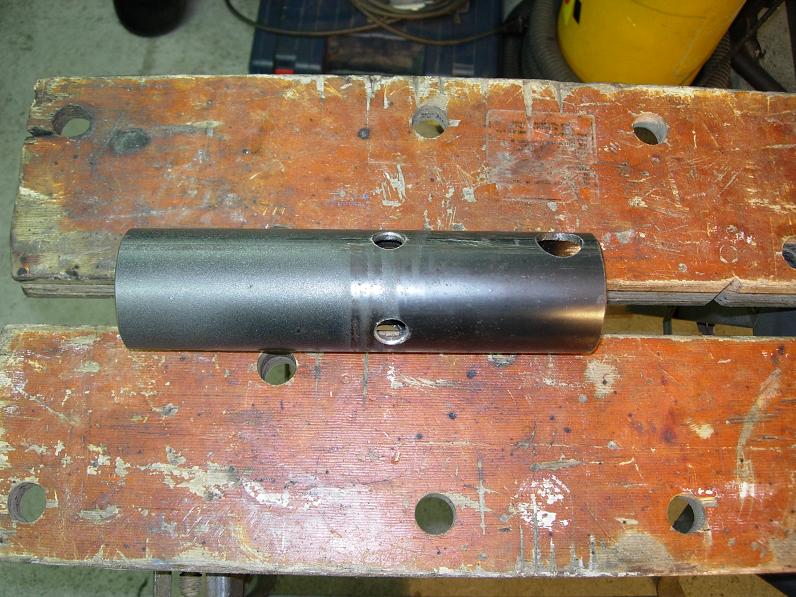
Second is to take a piece of 2.375" OD pipe and drill a few holes, two for the bar to spin it and four for the stops @ 90* from the first 4. I realize most people don't have 2.375" pipe just kicking around, but I do, so it's still scrap
Next, find some scrap angle. From measuing and running a few calcs we're going to need to step the front iron 5.1875" from the center of rotation. The center of the bolt holes is ~.875" in from the outermost edge of the front iron. We had this lying around from the front bumper of a Defender 90 that the PO made fit on, it wasn't a D90 bumper and this abortion of an extention is what made it fit. So, we need 5.1875" * 2 + 10.5" and it's in there....

This is the piece that we need.

So I cut out those three pieces from that piece of 3/16" x 2" angle. Now, because the pipe is 2.375" in diameter, when the 2 2" pieces are put adge to edge, there is going to be a huge gap, some trimming will be required to make a snug fit
This is what we're left with, the main pieces that we'll need to build this bad ride.

First, I wanted to build a head that would slide into the engine stand, not bolt to the head supplied with the stand. The reason for doing this is I personally need to be able to finish assembling my engine with it bolted from the rear. The reason, my four LSX coils are mounted to exactely where the adapters need to be mounted to the front plate for assembly. By making a piece that slides in, I don't have to constantly adjust different heads. I can leave one set for the rear mount, and have this one for the front iron mount..... so away we go.
First is to take a few measurements. The block is 12" long so we want the bolts to be roughly 6" from the center for some decent balancing. The height of the front iron is roughly 10.5".
Second is to take a piece of 2.375" OD pipe and drill a few holes, two for the bar to spin it and four for the stops @ 90* from the first 4. I realize most people don't have 2.375" pipe just kicking around, but I do, so it's still scrap
Next, find some scrap angle. From measuing and running a few calcs we're going to need to step the front iron 5.1875" from the center of rotation. The center of the bolt holes is ~.875" in from the outermost edge of the front iron. We had this lying around from the front bumper of a Defender 90 that the PO made fit on, it wasn't a D90 bumper and this abortion of an extention is what made it fit. So, we need 5.1875" * 2 + 10.5" and it's in there....
This is the piece that we need.
So I cut out those three pieces from that piece of 3/16" x 2" angle. Now, because the pipe is 2.375" in diameter, when the 2 2" pieces are put adge to edge, there is going to be a huge gap, some trimming will be required to make a snug fit
This is what we're left with, the main pieces that we'll need to build this bad ride.
 02-14-09, 12:34 AM
#2
Banned. I got OWNED!!!
Thread Starter
Join Date: Jun 2008
Location: usa
Posts: 329
Likes: 0
Received 0 Likes
on
0 Posts
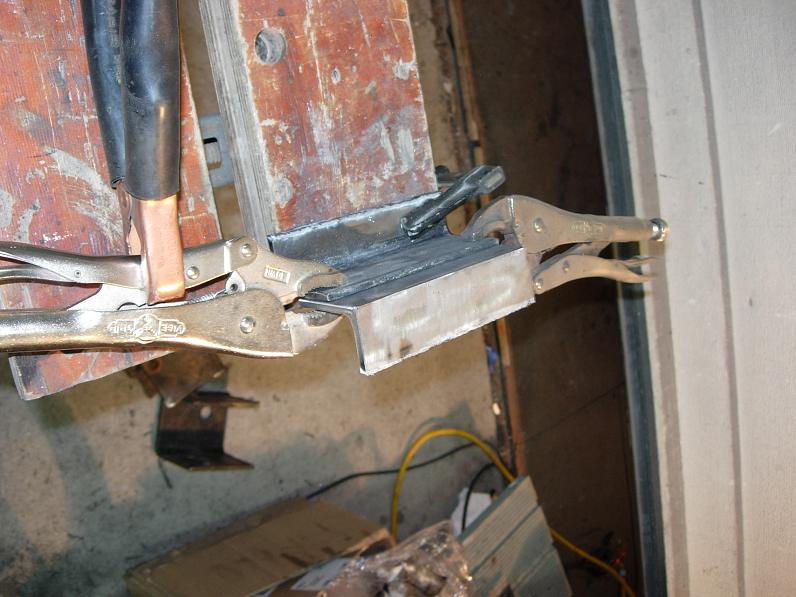
The 2 2" x 1.something x 5.1875" pieces are welded together so that they can fit snuggly around the pipe. I would reccomend putting a tack weld on the two pieces to make sure that they fit properly. If not, you may need to gap it slightly, trim the pipe, or grind a little off on edge to make it fit nicely. You'll also need to grind a little off the pipe itself as it is most likely cut @ a right angle and the inside of the angle has a slight arch to it preventing the pipe from bottoming out.

Next, send that just welded still scorching hot piece home on the pipe. Mine was snug enough that I didn't even need a tack weld to keep it in place for a fit check. Obviously the best way to do this is to put it in the stand and make sure everything is as it should be. Levels are great tools....
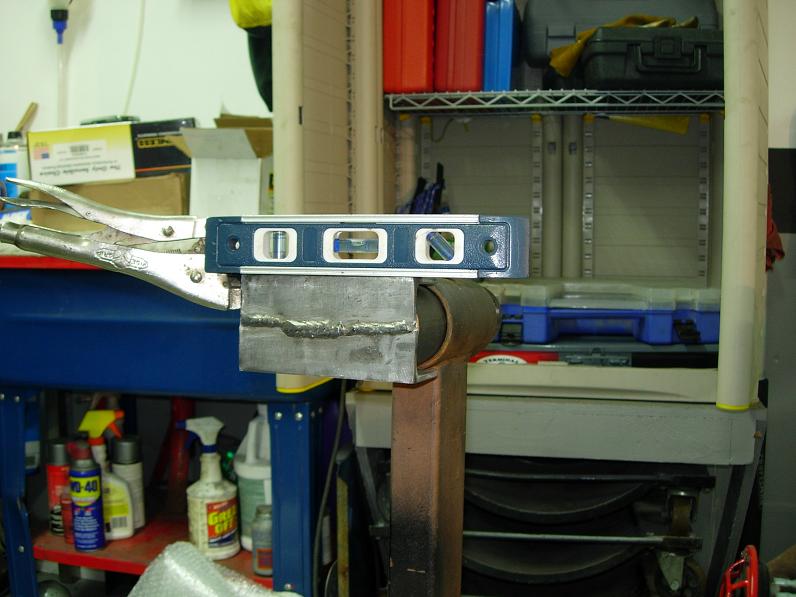
Next, weld everything solid. Put a few tacks around and make sure everything stays square. When using scrap it's important to make sure you grind everything off that isn't metal. I missed a few spots of gray powdercoating or galvinizing that effected the weld slightly. & REALLY pissed me off to boot.
Next the piece that bolts to the front iron needs to be extended slightly. Of to scrap pile. I didn't have any 3/16's plate kicking around, but I did have a big piece of 1/4" that we were using to make that non-D90 bumper fit properly on the D90. There was no reason to use a huge piece of this so I tapered it slightly.

Planning ahead and knowing where you need a flat plane to weld onto is key especially when using different sized pieces of bar stock. A little though yeilded this

Next, send that just welded still scorching hot piece home on the pipe. Mine was snug enough that I didn't even need a tack weld to keep it in place for a fit check. Obviously the best way to do this is to put it in the stand and make sure everything is as it should be. Levels are great tools....
Next, weld everything solid. Put a few tacks around and make sure everything stays square. When using scrap it's important to make sure you grind everything off that isn't metal. I missed a few spots of gray powdercoating or galvinizing that effected the weld slightly. & REALLY pissed me off to boot.
Next the piece that bolts to the front iron needs to be extended slightly. Of to scrap pile. I didn't have any 3/16's plate kicking around, but I did have a big piece of 1/4" that we were using to make that non-D90 bumper fit properly on the D90. There was no reason to use a huge piece of this so I tapered it slightly.
Planning ahead and knowing where you need a flat plane to weld onto is key especially when using different sized pieces of bar stock. A little though yeilded this
02-14-09, 12:44 AM
#3
Banned. I got OWNED!!!
Thread Starter
Join Date: Jun 2008
Location: usa
Posts: 329
Likes: 0
Received 0 Likes
on
0 Posts
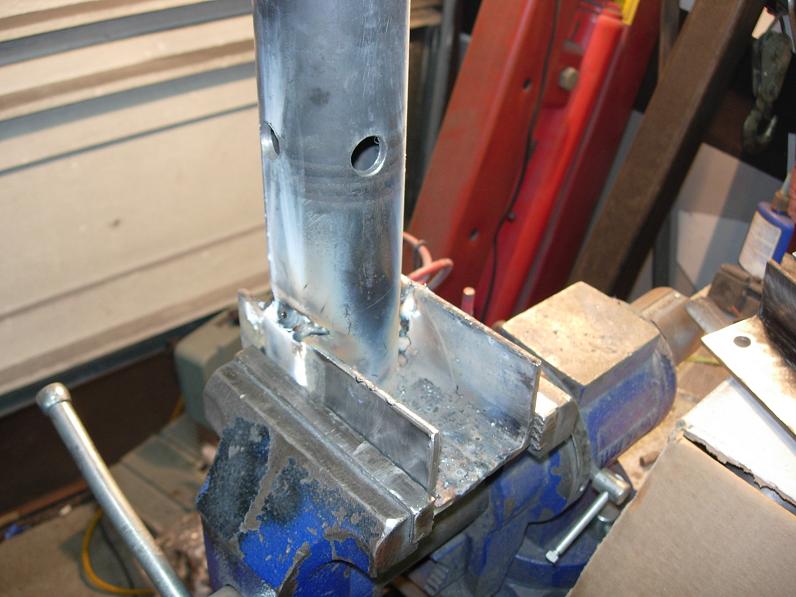
Time for a few gussets. Knowing where my 1/8" POS likes to flex, I decided to add some stregth to it. Those two pieces that I cut off the 2" angle to bring it down to meet the pipe will work perfect for keeping that now 2"x5"x10.5" angle that bolts to the front iron square, and I had a little piece of 3" x 3" x 3" by 1/4" angle left over from when I built my bending brake (something else that's really cool and easy to build - just a quick aside, I spent ~$30 on an aluminum 18" long POS bender that I ended up breaking and then kicking it. So I went down to Metals SuperMarket and got 7' of 3x3x1/4" angle steel and built a 36" bender for $27... go figure.) Regardless, here are the 3 gussets - The large one will go between the back of the same plate and the two angles welded together before they meet the pipe
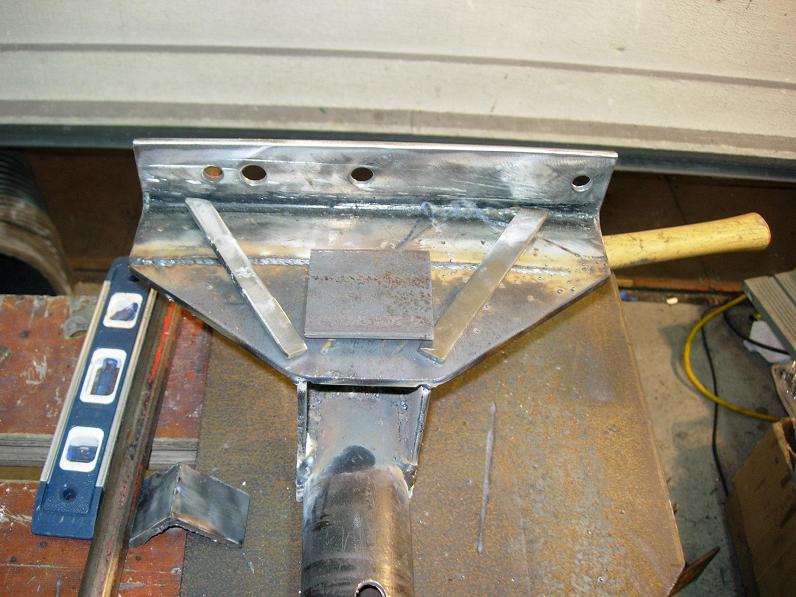
Here is where I ran out of welding gas..... on Friday the 13th, I ran out of gas on the last 1/4" of weld bead that I had to lay..... I couldn't believe it, I'm never this lucky. I welded the top first, left to right, then the bottom last, left to right. Look at all the crap in the very last spot, bottom right - no more gas. I counted my blessings, powdercoated it and called it a night. I'll get the finished pics with the sucker in action in the morning.

Here is where I ran out of welding gas..... on Friday the 13th, I ran out of gas on the last 1/4" of weld bead that I had to lay..... I couldn't believe it, I'm never this lucky. I welded the top first, left to right, then the bottom last, left to right. Look at all the crap in the very last spot, bottom right - no more gas. I counted my blessings, powdercoated it and called it a night. I'll get the finished pics with the sucker in action in the morning.
 02-15-09, 08:53 PM
#6
Banned. I got OWNED!!!
Thread Starter
Join Date: Jun 2008
Location: usa
Posts: 329
Likes: 0
Received 0 Likes
on
0 Posts
Sure as hell does, what are those things? $60 for the nice 1/2" steel one? I know MT sells thiers for ~$90
Not the heat that caused the spatter, it was the contaminents this time. Generally though, spatter is caused by too much speed, or so I have found.
Thanks Scott. I gotta take a few pics of the thing in action. Tomorrow night I have to assemble a coreless keg to portmatch some intake manis... I'll grab a pic of it then. Works REALLY well.


Trending Topics
 Thanks Adam. Which one are you going with?
 01-29-12, 09:50 AM
#13
Full Member
iTrader: (4)

Join Date: Jun 2011
Location: golden valley, az
Posts: 102
Likes: 0
Received 0 Likes
on
0 Posts
Being lazy i have one made from 2" angle 1/4 thick and bolted together and then bolts to a standard engine stand, no welding and quick, tried to load picturesAttachment 454738
Attachment 454739
Attachment 454740
Attachment 454739
Attachment 454740
Last edited by reo; 07-11-12 at 08:56 AM.
01-29-12, 10:54 AM
#15
engine stand
Being lazy i have one made from 2" angle 1/4 thick and bolted together and then bolts to a standard engine stand, no welding and quick, tried to load picturesAttachment 454738
Attachment 454739
Attachment 454740
Attachment 454739
Attachment 454740
