1986 Mazda RX-7 Sport
 12-02-16, 12:41 PM
#101
An actual disc brake Caliper tool kit works far more efficiently than the 'caliper cube' as I call it.
With the press kit, you're guaranteed smooth and even pressure whilst the piston is turned into the Caliper, and it can save some scraped knuckles.
The Caliper cube works, but is irritating, in my opinion.
With the press kit, you're guaranteed smooth and even pressure whilst the piston is turned into the Caliper, and it can save some scraped knuckles.
The Caliper cube works, but is irritating, in my opinion.
Pull caliper off the hub, remove pads, remove rotor.
Bolt caliper back to hub without rotor or pads. use a 6 inch extension on the cube and use your ratchet, apply gentle pressure and start winding the piston back in. It should wind back. If it is stubborn, crack the bleeder loose and attach a hose to the bleeder valve. Now the caliper will wind back with little to no effort. Tighten bleeder valve immediately when the piston is wound back to flush with the caliper. Likely no air got in, but give that corner a quick bleed when you are done to make sure.
Also, leave the slots in the piston an 12 and 6 o'clock when you wind back the piston. There is a nub on the back of the pad that fits into the piston. If the piston slots are not straight up and down the pad will not sit on the piston correctly.
 12-02-16, 12:49 PM
#102
Red Pill Dealer
iTrader: (10)

I always just used a big screwdriver or the square shank of a smaller one.
12-02-16, 12:53 PM
#103
Here is how it works. I believe this is in most cars that have rear disks that use the rear caliper as the parking brake. Cars that use a small drum inside the hat of the rotor for a parking brake do not have screw adjustment pistons in the rear calipers.
12-03-16, 09:37 PM
#105
Red Pill Dealer
iTrader: (10)
Well there you go. LOF had the best info. I guess American cars have the rear screw in piston, it's just that I've never worked on one. My father has an '89 'vette that has the little drum inside the disc setup.
I noticed I didn't really complete the last sentence in my last post. I use a really big screw driver or the shank of a smaller one to fit the cross and screw it in. Really, anything that fits in there and works will do the trick. The little cube thingy looks nice, just never saw one before.
I noticed I didn't really complete the last sentence in my last post. I use a really big screw driver or the shank of a smaller one to fit the cross and screw it in. Really, anything that fits in there and works will do the trick. The little cube thingy looks nice, just never saw one before.
12-03-16, 09:51 PM
#106
LegacyCore
Thread Starter
Thanks for all the info guys, I had no doubt about how to do the brakes on my car. I just like using proper tools to do the job easier, and figured I'd add that step in my update. Regardless, I was so busy working on the body of the FC today I didn't have a chance to work on the rear breaks hahaha.
12-03-16, 10:32 PM
#107
LegacyCore
Thread Starter
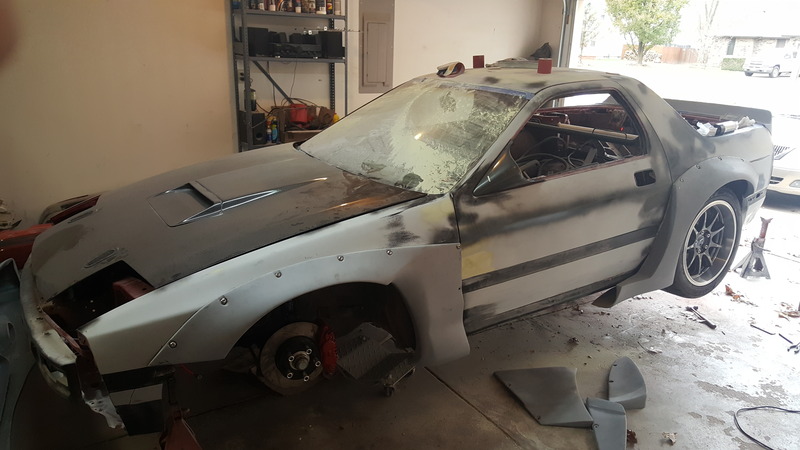
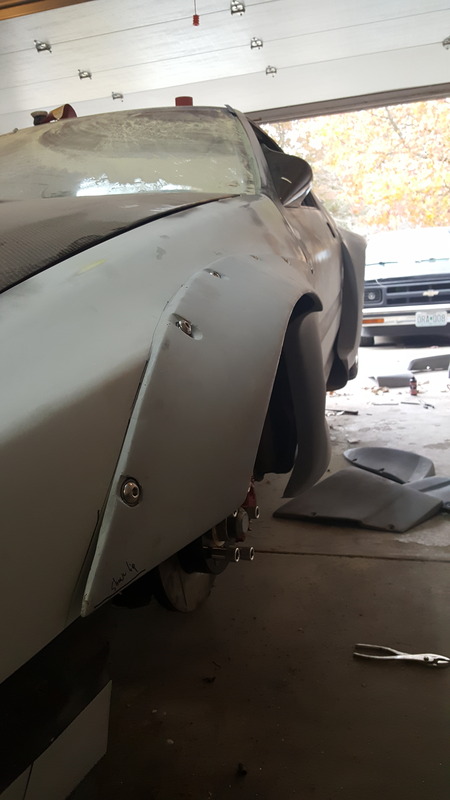
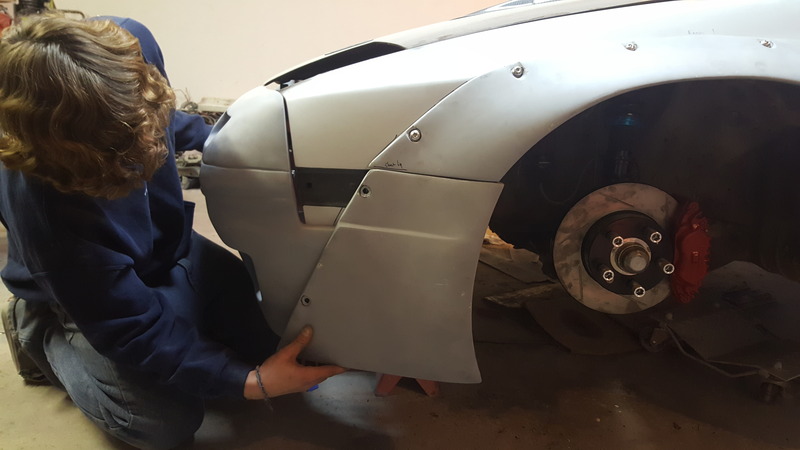
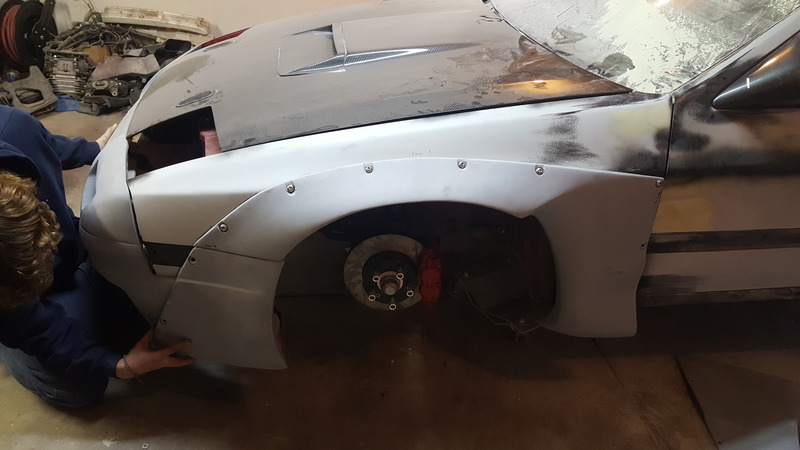
So I made everybody a promise that I would post up some updates of the body work done today. And while a good amount of it was done today, it was not as much as I was hoping for. Drilling out all of the holes and installing the rivnuts took a lot longer than expected. So all we were able to do today was install the fenders flares. Still lots of work needs to be put into making the flares fit perfect, and that much more work in the rest of th kit. But it's closer and you get an idea of how the kit will work. So on with the pics!
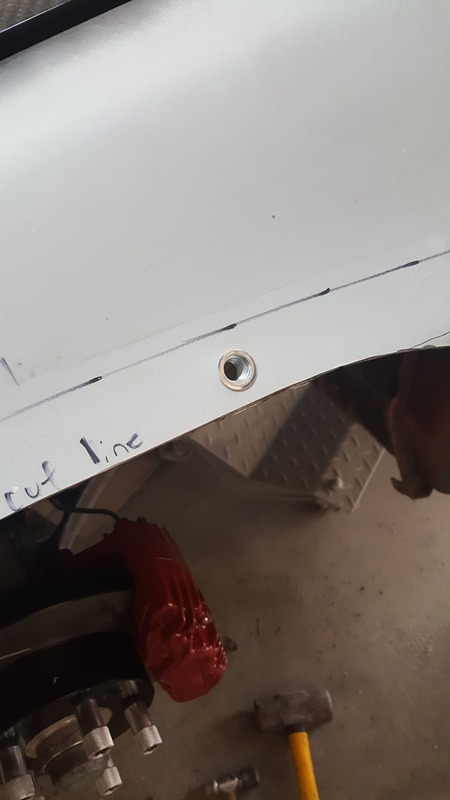
A pic of the first rivnut installed, these things are kind of a PITA to install but are going to make things so much easier to install the kit.
A couple of shots of the car with both front and rear flares installed:
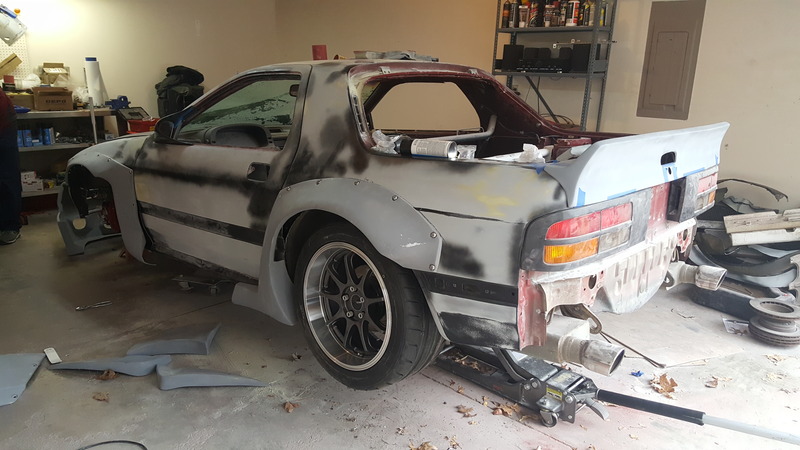
These last few pictures are just mocking up the front bumper and the trim between the bumper and the front flare:
So that pretty much it for now, it will be another week or two before I'll have a chance to get anymore work done on it. Thanks for checking out and all the compliments. Stay tuned!
A pic of the first rivnut installed, these things are kind of a PITA to install but are going to make things so much easier to install the kit.

A couple of shots of the car with both front and rear flares installed:


These last few pictures are just mocking up the front bumper and the trim between the bumper and the front flare:


So that pretty much it for now, it will be another week or two before I'll have a chance to get anymore work done on it. Thanks for checking out and all the compliments. Stay tuned!


 12-07-16, 11:04 AM
#114
LegacyCore
Thread Starter
I thought the same way at first, but after getting a few pics from the manufacture of the kit on his FC (unpainted) I was sold. It should be in paint by this spring, would be sooner but as it is now I have time one day a week to work on it. So it's just a slow process for me.
02-01-17, 10:36 PM
#115
LegacyCore
Thread Starter
Hey everybody, I've started a build thread on my 1986 Mazda RX7 Sport Edition dubbed RBFC since it's getting a Rocket Bunny kit installed on it as I type this up. If you're interested in following the build process which has been going on for over two years now. Then lick on the URL below and give the page a like! Thanks 
https://www.facebook.com/RocketBunnyFC/
I will probably not be posting much anymore if at all in this thread again, it's just easier to use FB for everything. Thanks for understanding!
https://www.facebook.com/RocketBunnyFC/
I will probably not be posting much anymore if at all in this thread again, it's just easier to use FB for everything. Thanks for understanding!

Thread
Thread Starter
Forum
Replies
Last Post