Widebody Twincharged R2
 12-26-16, 12:26 PM
#1
Widebody Twincharged R2
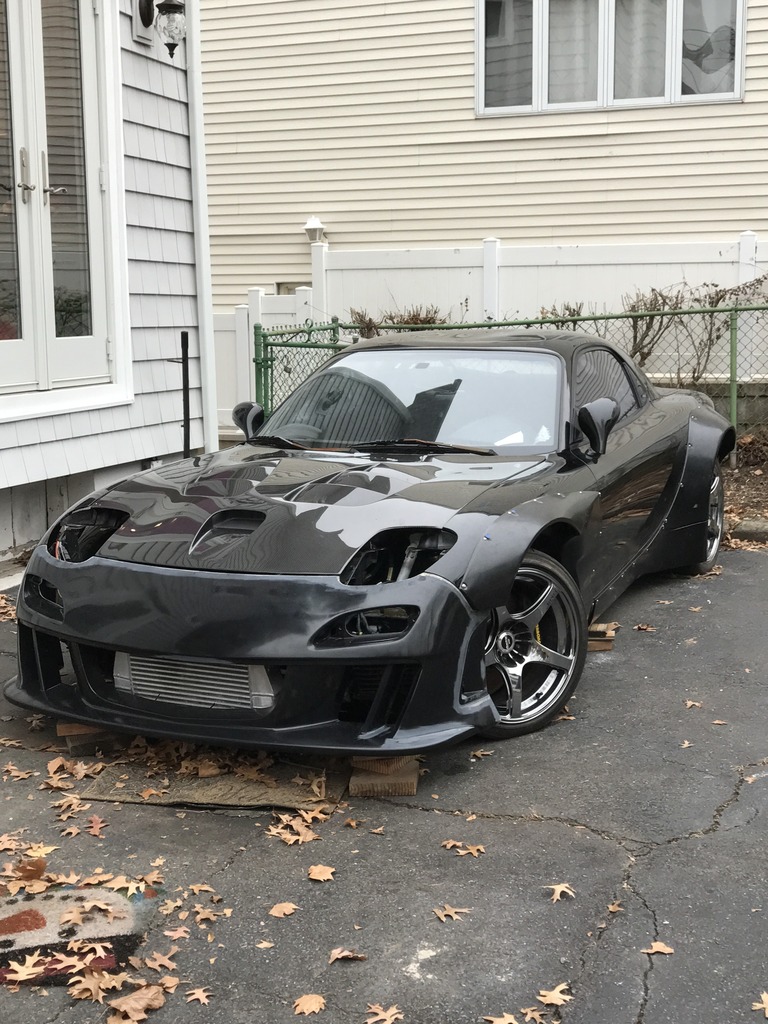
Hi all, a long time build that has been dormant for a few years. Almost ready to send off to paint. Switching ECUs to the AEM Infinity 508, so have to re-wire a few things before tuning.
Car has a Borg Warner S366 turbo and Eaton M45 supercharger, and meth injection.
Front bumper is Knightsports V7. Bodykit is Rocket Bunny. Rear wing will be Feed V2.
Car has a Borg Warner S366 turbo and Eaton M45 supercharger, and meth injection.
Front bumper is Knightsports V7. Bodykit is Rocket Bunny. Rear wing will be Feed V2.
Last edited by GoodfellaFD3S; 12-27-16 at 08:38 PM.
 12-27-16, 09:51 PM
#6
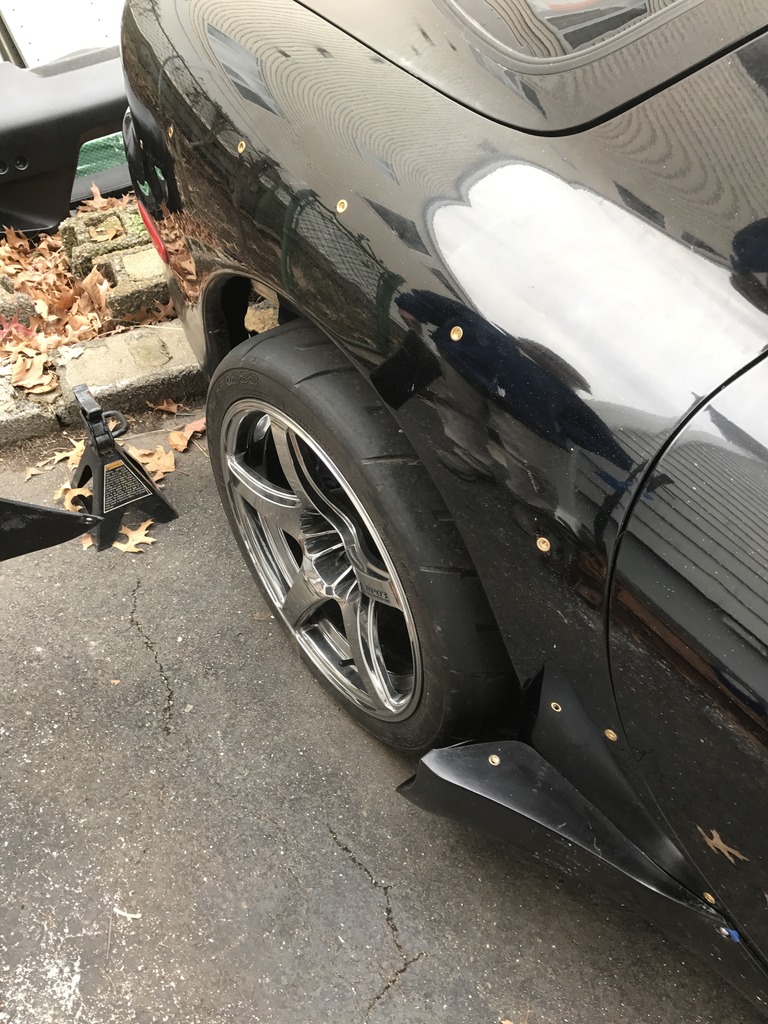
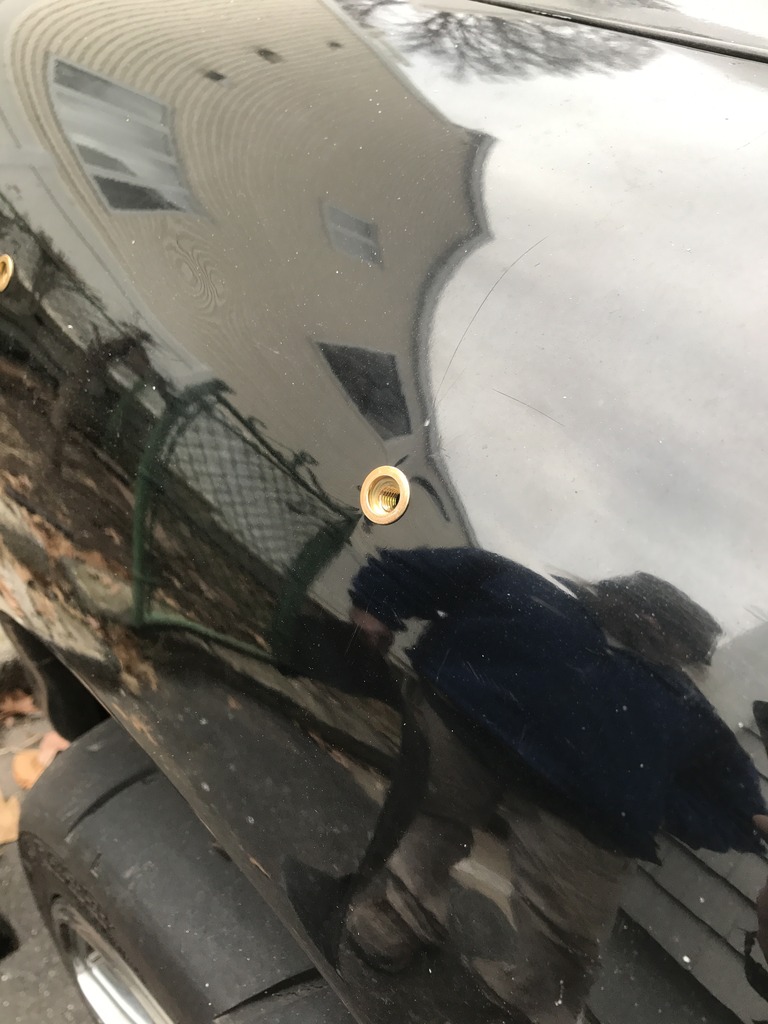
For anyone curious about the body kit mounting. Stainless m6 hardware with rivnuts. Fitment is amazing.
Knightsport bumper fits awesome as well. Not quite sure yet about how to merge the gender flare with the bumper as the rocket bunny flares are meant to go with the rocket bunny bumper. I've seen a stock bumper with the flares and they just left it as is. Doesn't look too bad but was thinking about trying to make it more gradual. Probably just add some fiberglass to the bumper to make it flow into the flare.
Even the VIS hood fits well. I must have lucked out.
12-28-16, 12:42 AM
#7
Yeah you are pretty screwed on the front fender flares add-on piece because the front bumper you chose has the side exhaust vent for the oil cooler in the front of the wheel arch right where the lower front fender flare add-on piece would go.
You could cover the vent and do a wheel arch add-on that mimics the Boss FD version.
Also, the front bumper is problematic as the wheels have to turn and still no room for over 25" tire height really.
So, the wheels tires stay the same width as what fits with stock body (18x11 295s) and the offset up front gets outrageous and then the wheels aren't so much turning as flapping about from the inner lip so they hit the wheel arch front/back.
If you cut up the unibody around the headlight mount you can fit taller (wider) tires and get the offset back to almost decent, but you still have 5" of outer wheel barrel flopping back and forth instead of 3" so you need front and rear fender gap/clearance on the front wheel arch.
Well, you will see once you get front wheels to fill out the front arches- either way the front bumper will have to be cut-up around the front wheel arch.
Trending Topics
12-28-16, 07:40 AM
#8
The front actually doesn't look too bad as is. The curvature of the bumper gives enough coverage. As long as the wheels clear the coolant overflow, they won't hit anything else.
The rear is more of an issue because of how the rear of the side skirt curves back around the wheel. I've read about one build where they adjusted the trailing arm back a bit. But no one ever really posts the details other than that.
I'll probably have the Bodyshop cut it and reshape it a bit to provide the clearance.
I know you don't like the huge widebody/wheel fitment haha. And I think you have found the best wheel fitment for a stock body car (functional for track use). But don't worry, I won't be stancing or stretching anything. I'll be using proper spacers to get the wheel to sit right for now. But eventually I'd like a square set up so I can rotate everything around. Which mean some sort of spacer will be required regardless in the rear. 315 tires at all four corners will be fine. I don't think it would look weird from behind if the wheel was spaced out a bit to make the tire edge almost line up with the fender edge.
12-28-16, 12:17 PM
#9
Wasn't meaning to sound like a crabby-patty about the widebody.
You have need of big rear tires for traction and I like that you have added wide front fenders as well to preserve the balance of the car instead of the old style of Pettit rear flares only on the FD.
I was just trying to give you a heads up on the headaches that pop-up with wide front fenders on the FD; which can be overcome.
Once you get the wheels that will fill out the fenders you will see what I mean about the extra 2" of outer wheel barrel hitting the front bumper where it is part of the wheel arch when you turn the wheels.
This is why the Rocket Bunny kits have the gap front and rear on the wheel well (so a longer, oval arch shape instead of circle).
12-28-16, 12:20 PM
#10


That gap front and rear on the front wheel arch- you will need that to turn the wheels. In the rear you have it because the fender is Rocket Bunny.
In the front you will need to make that gap because you are not using the Rocket Bunny front bumper.
12-28-16, 01:41 PM
#12
It goes turbo to supercharger to intercooler to throttle body to plenum.
There is also a wastegate on the main pipe to the throttle body. As soon as the pressure is less in the plenum than the other side of the throttle body it opens wide. A regular blow off valve couldn't vent enough air and when the throttle shuts, the supercharger would get backed up so bad the belt would slip.
There is also a wastegate on the main pipe to the throttle body. As soon as the pressure is less in the plenum than the other side of the throttle body it opens wide. A regular blow off valve couldn't vent enough air and when the throttle shuts, the supercharger would get backed up so bad the belt would slip.
12-28-16, 02:43 PM
#13
The supercharger also has a clutch. So it can turn off at idle.
I also built another charge pipe that basically bypasses the supercharger. This way the turbo can go straight into the intercooler so we can do testing with and without the supercharger.
This was all made prior to the EFR turbos being available. So we'll have to compare the twincharged S366 to the comparable EFR to determine if it's any more responsive than the newer turbos with the same top end.
12-29-16, 09:07 PM
#14
Close up on how it attached. Can't believe some people actually use sheet metal screws.
A couple more pics before it goes off to paint:
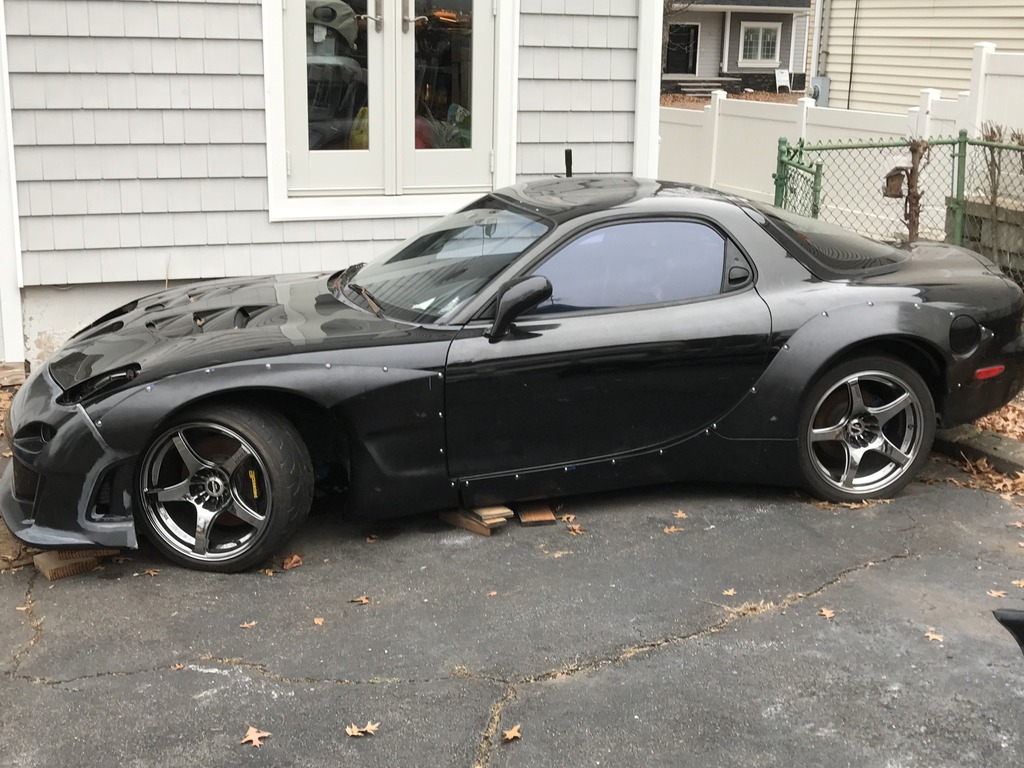
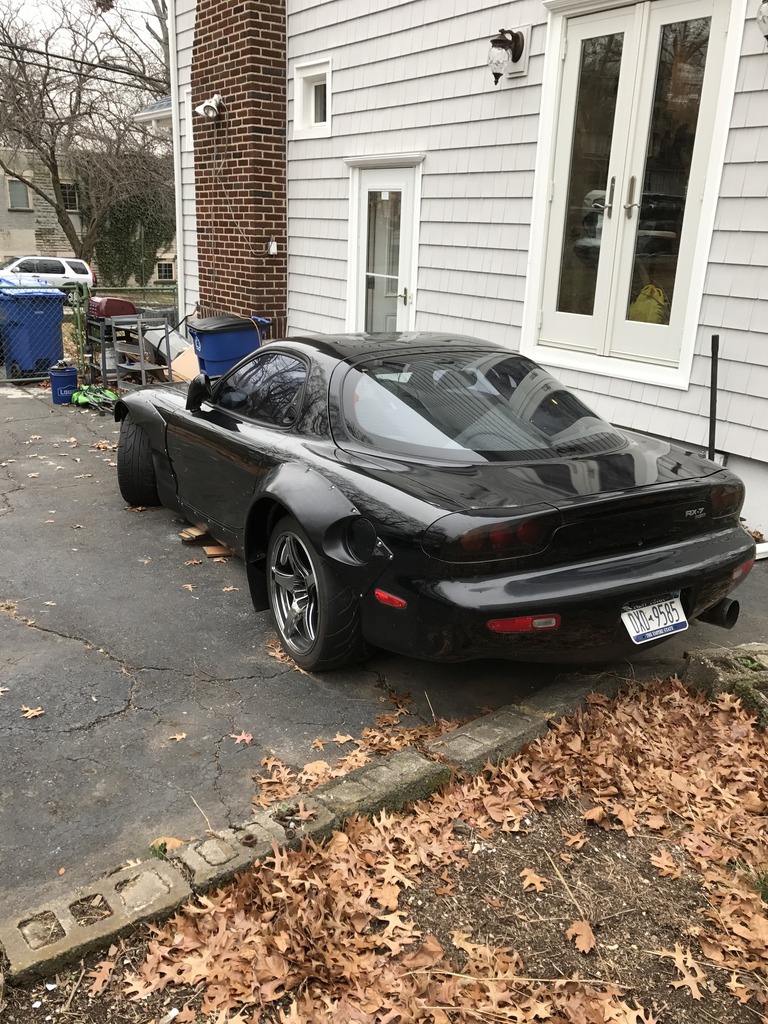
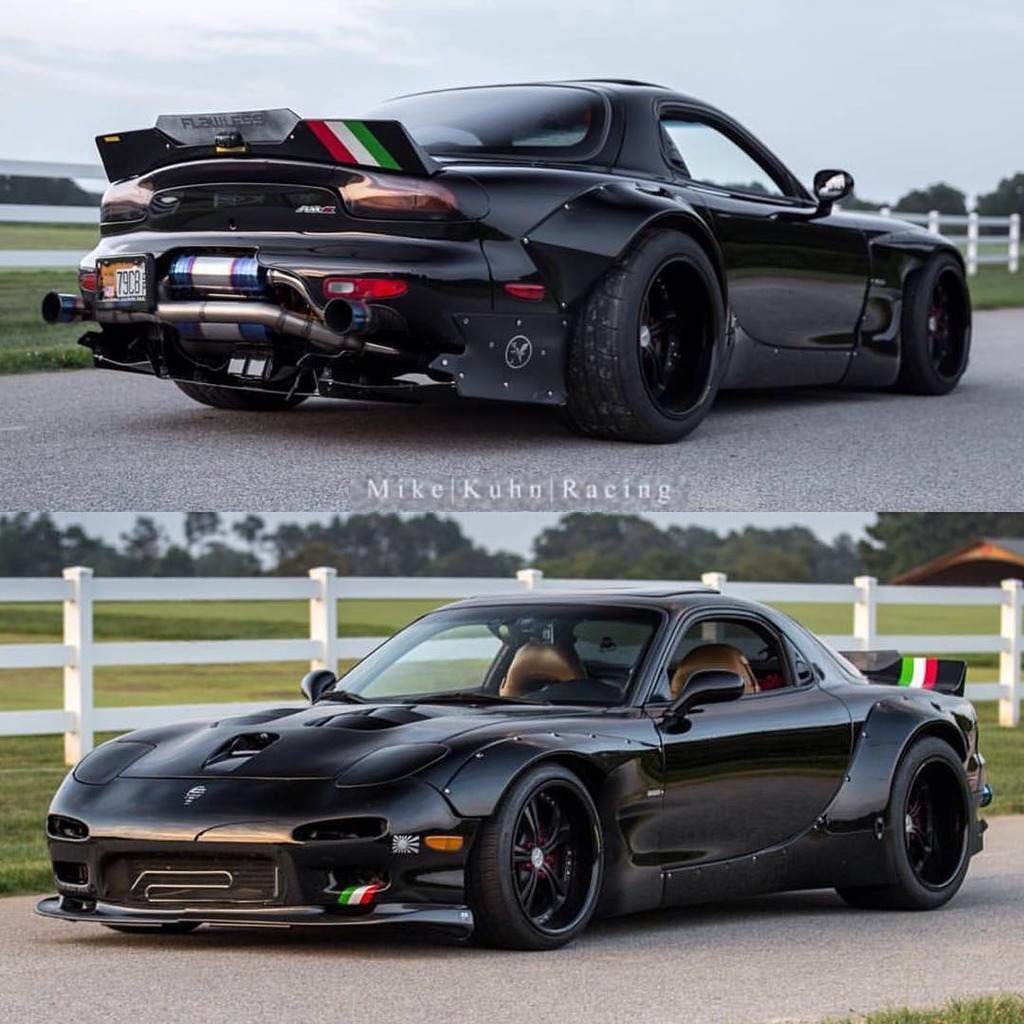
And a bit of what inspired the look, found it online, pretty sick exhaust. You can see it actually looks ok without the rocket bunny front bumper to merge with the flares. Probably only works on a black car though, as the detail can hid in the shadows.
I need to mount the rear diffuser and headlights still. Then off to paint. Also need to find a place that can anodize or powdercoat all the SS fasteners and washers black.


A couple more pics before it goes off to paint:


And a bit of what inspired the look, found it online, pretty sick exhaust. You can see it actually looks ok without the rocket bunny front bumper to merge with the flares. Probably only works on a black car though, as the detail can hid in the shadows.

I need to mount the rear diffuser and headlights still. Then off to paint. Also need to find a place that can anodize or powdercoat all the SS fasteners and washers black.
12-29-16, 09:54 PM
#15
Wow!
This is why the the rotary community is the best!
I remember when i mentioned doing this on IWSTI and nasioc and everyone was so narrow minded about it, they were like it cant be done its not worth it....
I swear out of all the communities I have been part of the Rotary community is the most innovative of all. I love the fact that as a community we are consistently trying new things and not afraid of trying new things.
 12-30-16, 05:01 PM
#17
Loading...
iTrader: (3)
Join Date: May 2006
Location: PA
Posts: 78
Likes: 0
Received 0 Likes
on
0 Posts
Looking good! I've got 18x13 -22 rears and 18x10 -14 on the fronts of my Rocket Bunny car, but I did have to trim a good bit to get the fronts to fit like BlueTII mentioned above.
12-30-16, 06:13 PM
#20
Originally Posted by TurbosaurusRX
Looking good! I've got 18x13 -22 rears and 18x10 -14 on the fronts of my Rocket Bunny car, but I did have to trim a good bit to get the fronts to fit like BlueTII mentioned above.
The following users liked this post:
y0ungjoker (01-07-22)