JerryLH3's RX-7 Turbo II Restoration

 06-02-10, 10:05 AM
#27
Awesome project! too bad I'm no longer in Tampa or I'd lend a hand.
One day (when a new car worth buying comes out) my TII will get the love and attention she deserves, until then she'll have to settle for reliability mods and performance upgrades that can be completed within the scope of 1 weekend
One day (when a new car worth buying comes out) my TII will get the love and attention she deserves, until then she'll have to settle for reliability mods and performance upgrades that can be completed within the scope of 1 weekend
06-22-10, 04:14 PM
#28
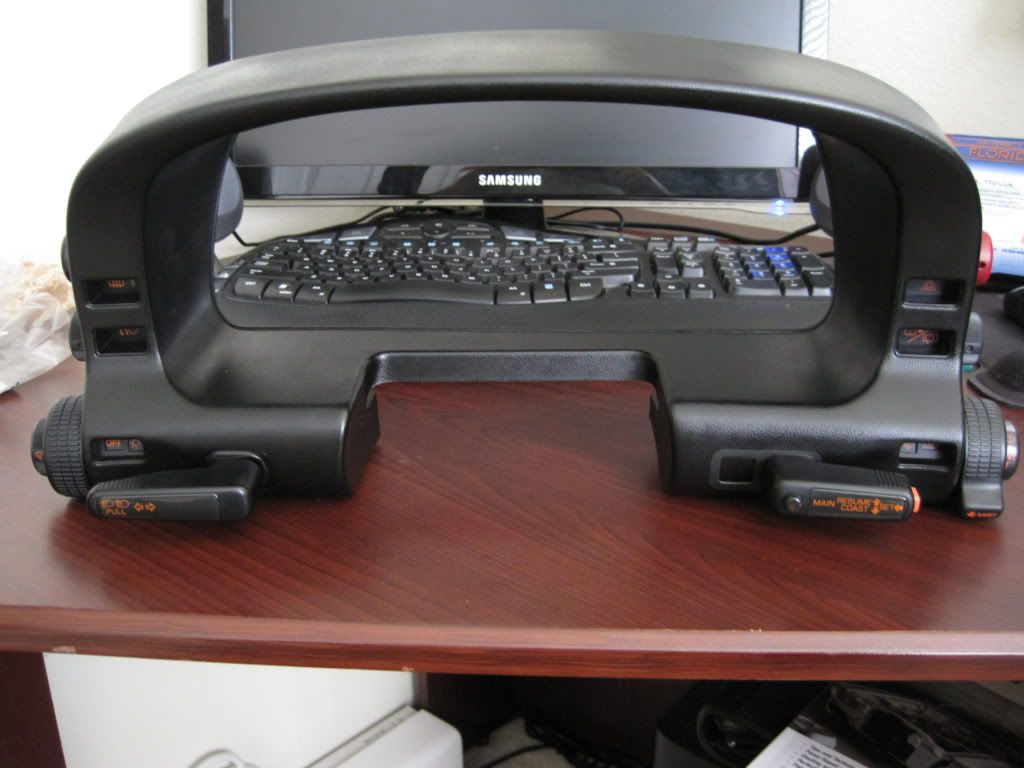
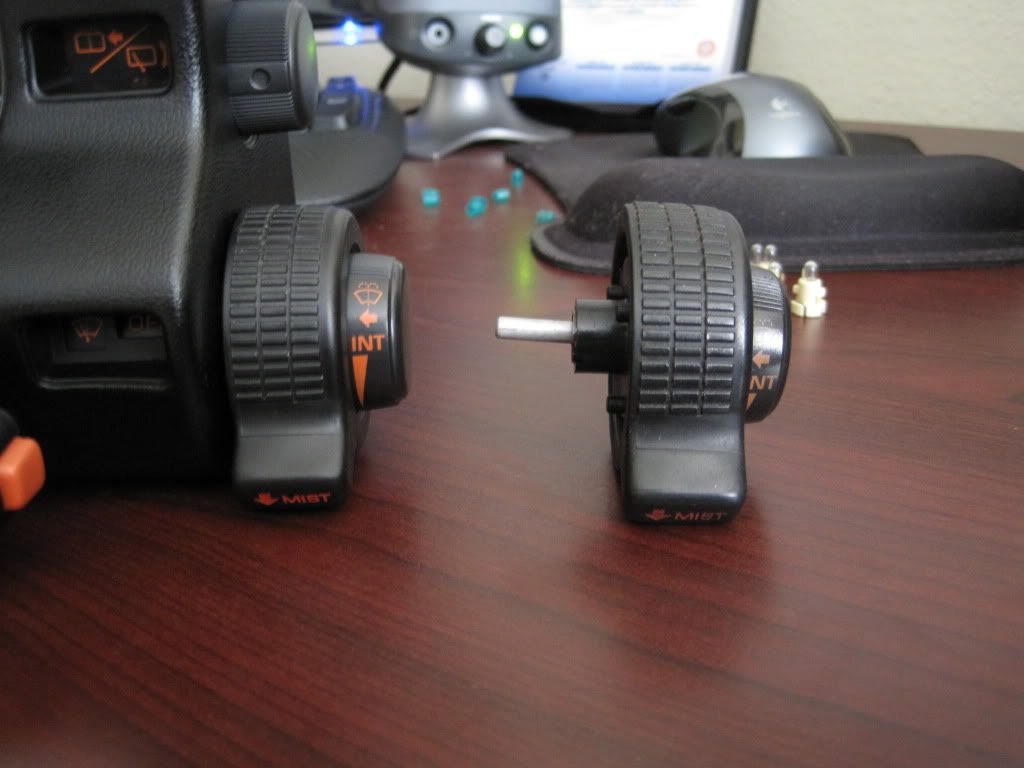
It's pretty hot outside today, so after my girlfriend and I did yard work this morning, then cleaned up and went to breakfast, I wasn't about to do anything that required me to stay in the garage today. So, I worked on finishing up the instrument surround and reinstalling the switches into the cluster.
One of the locating tabs was broken, so I went to work on that first:
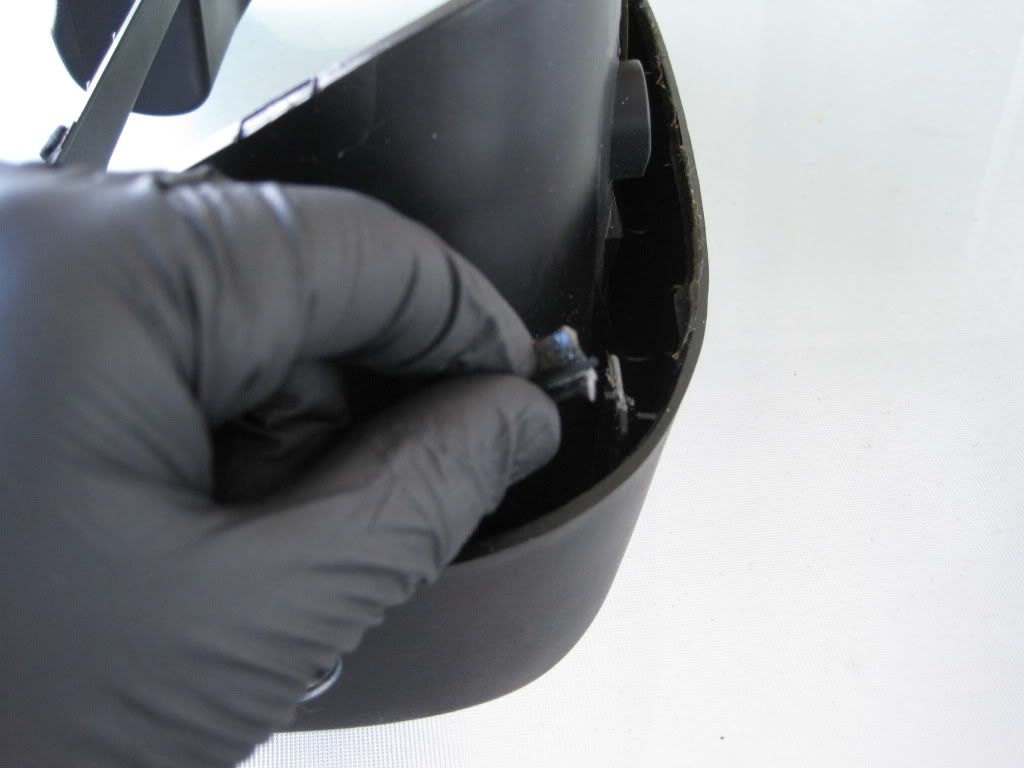
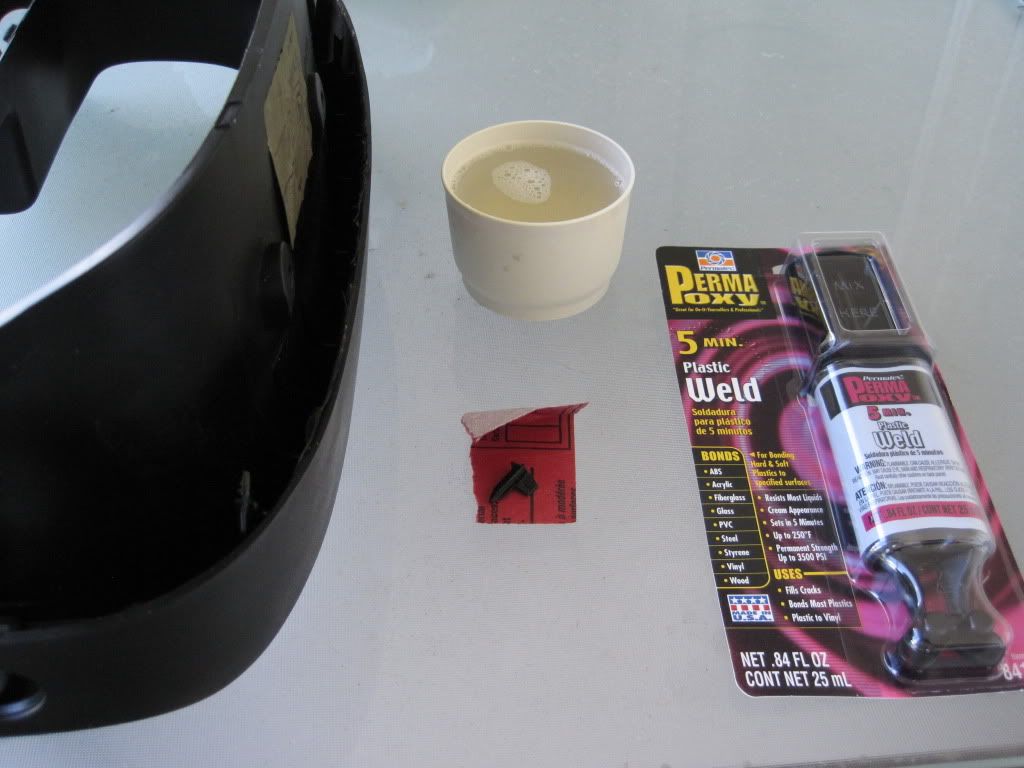
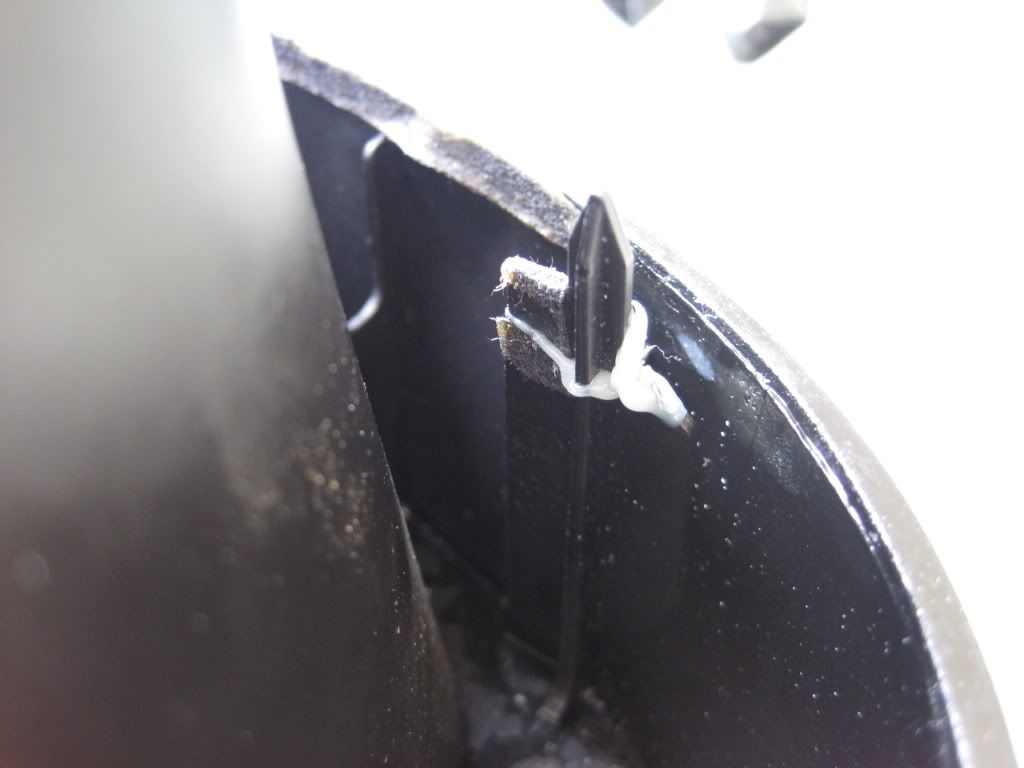
A little epoxy and it will work. There's another broken off piece that I must have lost, so this will have to do.
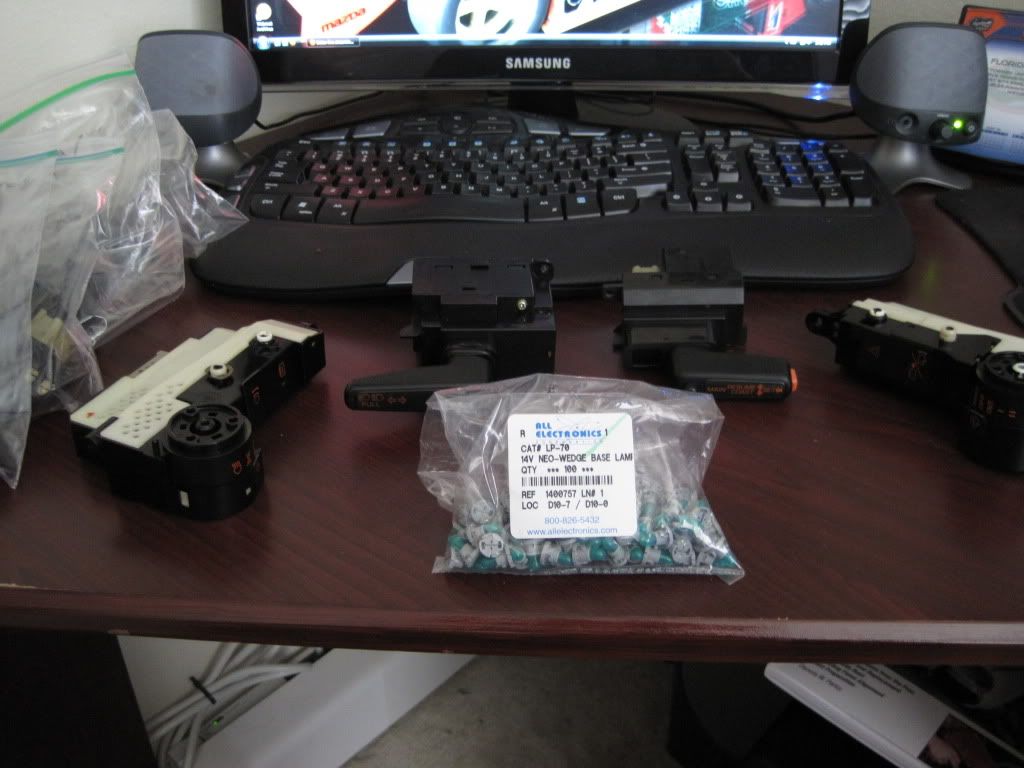
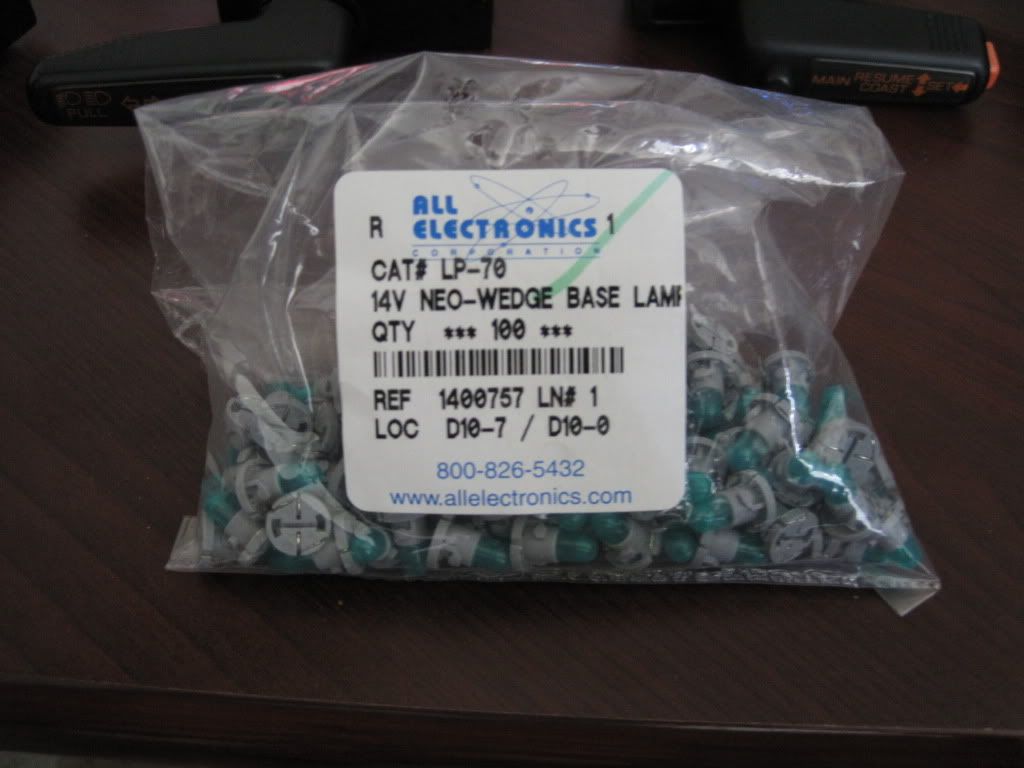
After we went to the Mazda dealer to order some parts and then lunch, the epoxy was set up enough I could work on it without fear. The bag is 100 Neo Wedge 14V lamps for the headlight, turn signal, wiper and cruise control switches and the warning light cluster. I got them from allelectronics.com and after I saw it was a $7.00 S&H fee regardless of how many bulbs I ordered, I went ahead and ordered 100 of them to get the bulk discount. To replace all lights of this type in an FC requires 19, so I've got plenty if anyone needs them. The green silicone cover is easily removed to expose a regular tiny incandescent bulb.
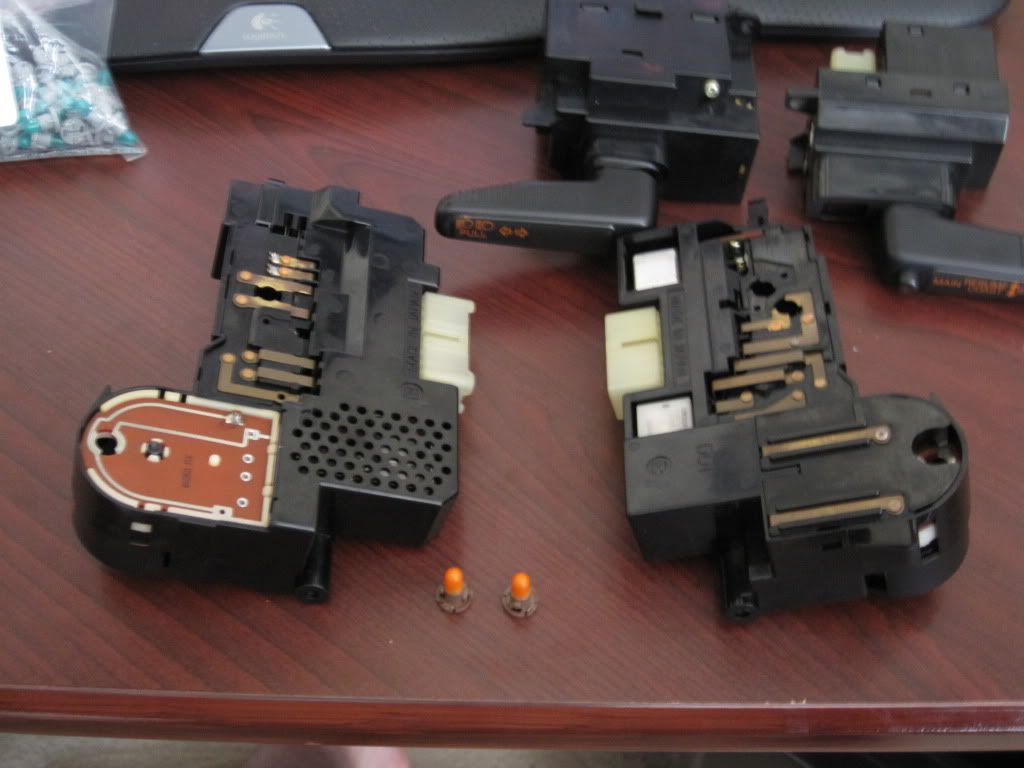
Removal of the old bulbs is straightforward enough, just a simple twist lock that requires a small flathead screwdriver. The lower bulb on the headlight and wiper switches has an amber cover that should be transferred to the new bulbs.
When reinstalling the switches, extreme care should be taken. The mounting posts on my surround already had tiny cracks and I definitely made them bigger and even broke a couple of the posts. Luckily, everything is still secure and none of the switches flop around at all.

I installed some new ***** and it's now ready to be reinstalled in the car (whenever that day may arrive).
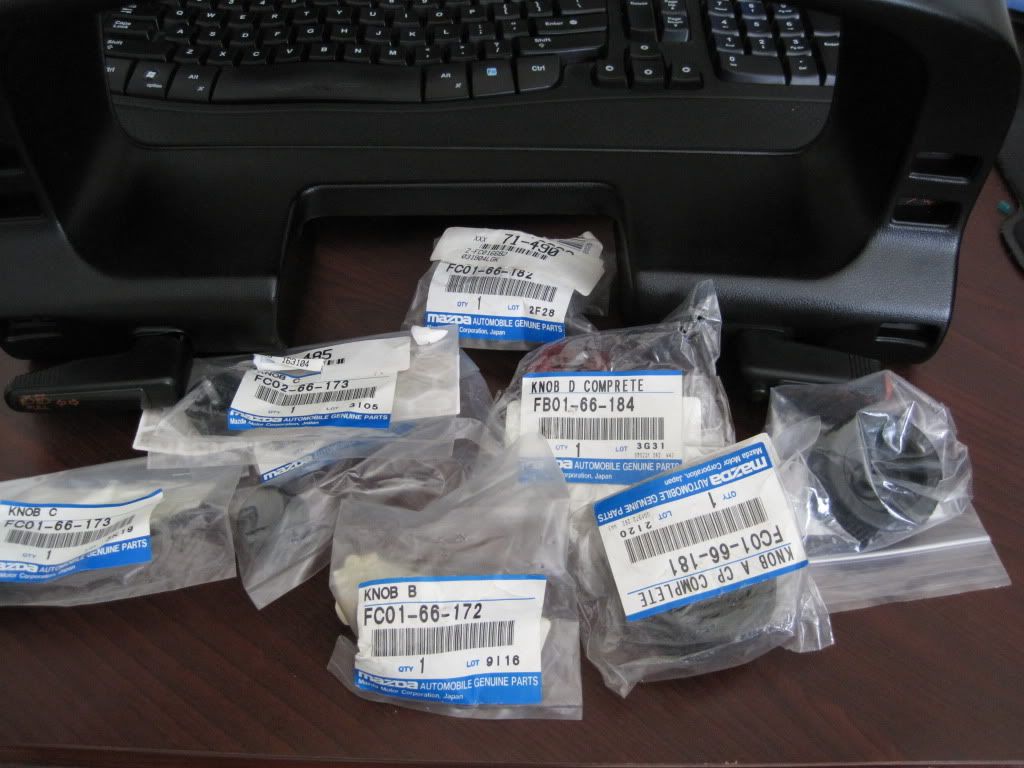
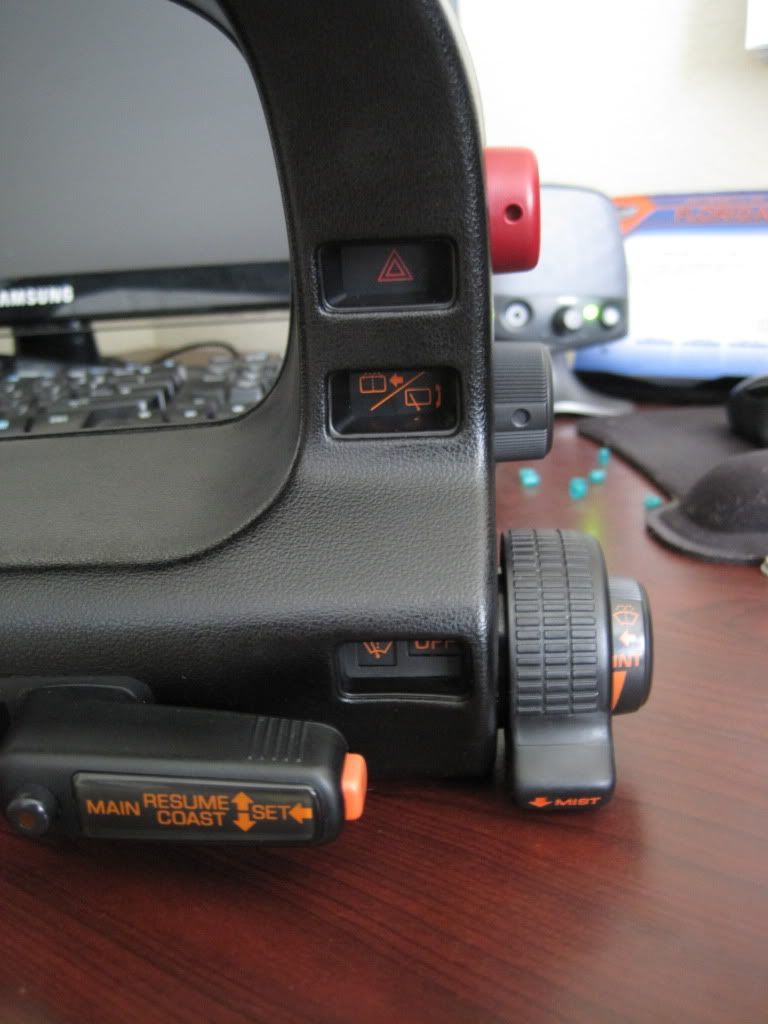

Here's a comparison of a twenty year old **** and a brand new one. The old one may have had "patina", but I'll take the new one. I'm not out to win the all original concours d'elegance.
One of the locating tabs was broken, so I went to work on that first:
A little epoxy and it will work. There's another broken off piece that I must have lost, so this will have to do.
After we went to the Mazda dealer to order some parts and then lunch, the epoxy was set up enough I could work on it without fear. The bag is 100 Neo Wedge 14V lamps for the headlight, turn signal, wiper and cruise control switches and the warning light cluster. I got them from allelectronics.com and after I saw it was a $7.00 S&H fee regardless of how many bulbs I ordered, I went ahead and ordered 100 of them to get the bulk discount. To replace all lights of this type in an FC requires 19, so I've got plenty if anyone needs them. The green silicone cover is easily removed to expose a regular tiny incandescent bulb.
Removal of the old bulbs is straightforward enough, just a simple twist lock that requires a small flathead screwdriver. The lower bulb on the headlight and wiper switches has an amber cover that should be transferred to the new bulbs.
When reinstalling the switches, extreme care should be taken. The mounting posts on my surround already had tiny cracks and I definitely made them bigger and even broke a couple of the posts. Luckily, everything is still secure and none of the switches flop around at all.
I installed some new ***** and it's now ready to be reinstalled in the car (whenever that day may arrive).
Here's a comparison of a twenty year old **** and a brand new one. The old one may have had "patina", but I'll take the new one. I'm not out to win the all original concours d'elegance.
The following users liked this post:
B.slick (11-07-21)
 06-22-10, 06:10 PM
#31
The FC insturment cluster surround where all those switches mount is a complete PoS.
I have had so many break on me it got to the point where i would not ever use cruiser control because when i went to gingerly turn the CC puter on the CC switch would just disappear into the dash.
I finally just filled the whole thing in with JB weld....MASSIVE amounts of it.
I have had so many break on me it got to the point where i would not ever use cruiser control because when i went to gingerly turn the CC puter on the CC switch would just disappear into the dash.
I finally just filled the whole thing in with JB weld....MASSIVE amounts of it.
06-22-10, 06:22 PM
#32
The FC insturment cluster surround where all those switches mount is a complete PoS.
I have had so many break on me it got to the point where i would not ever use cruiser control because when i went to gingerly turn the CC puter on the CC switch would just disappear into the dash.
I finally just filled the whole thing in with JB weld....MASSIVE amounts of it.
I have had so many break on me it got to the point where i would not ever use cruiser control because when i went to gingerly turn the CC puter on the CC switch would just disappear into the dash.
I finally just filled the whole thing in with JB weld....MASSIVE amounts of it.
06-23-10, 10:15 AM
#37
Rotary Enthusiast
Wow. I thought I was a stickler for details... When I saw that you replaced the little piece for the trip odometer-reset I was impressed! Above and beyond is all I've got to say. Great job.
06-23-10, 02:56 PM
#41
I think that's a compliment. If so, thanks!
Yes, a dashboard and some other various trim pieces that I had my friend pick up for me. He's coming down next week so I'll finally get them. Thanks again for holding them until he made a trip to Raleigh.
I think if they had made the plastic posts thicker, it may have helped, but I don't know.
Yeah, still in the game, even after having my last one stolen. Good to see you're still in it too, although you've now taken a slightly different path.
Thanks for all the compliments guys. It should look pretty darn good once I'm done. I need to get off my butt and do some body work, but the motivation is hard to get when it's 95+ outside, thus the smaller tasks right now. I may just wait for September to come and then do all the bodywork and paint by Christmas so that it's still done before the baby arrives.
06-26-10, 06:09 PM
#43
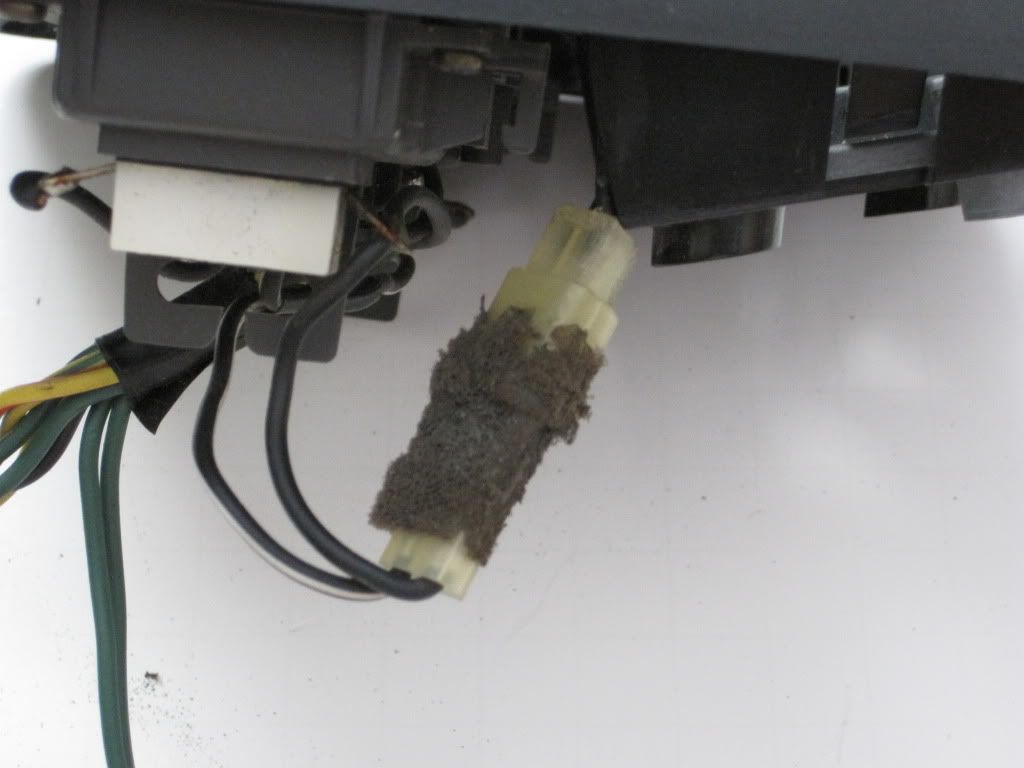
I got a little more work done the past couple days. I took two overhead consoles, one from my car and a donor, and disassembled, cleaned and put together one that will go back in the car.
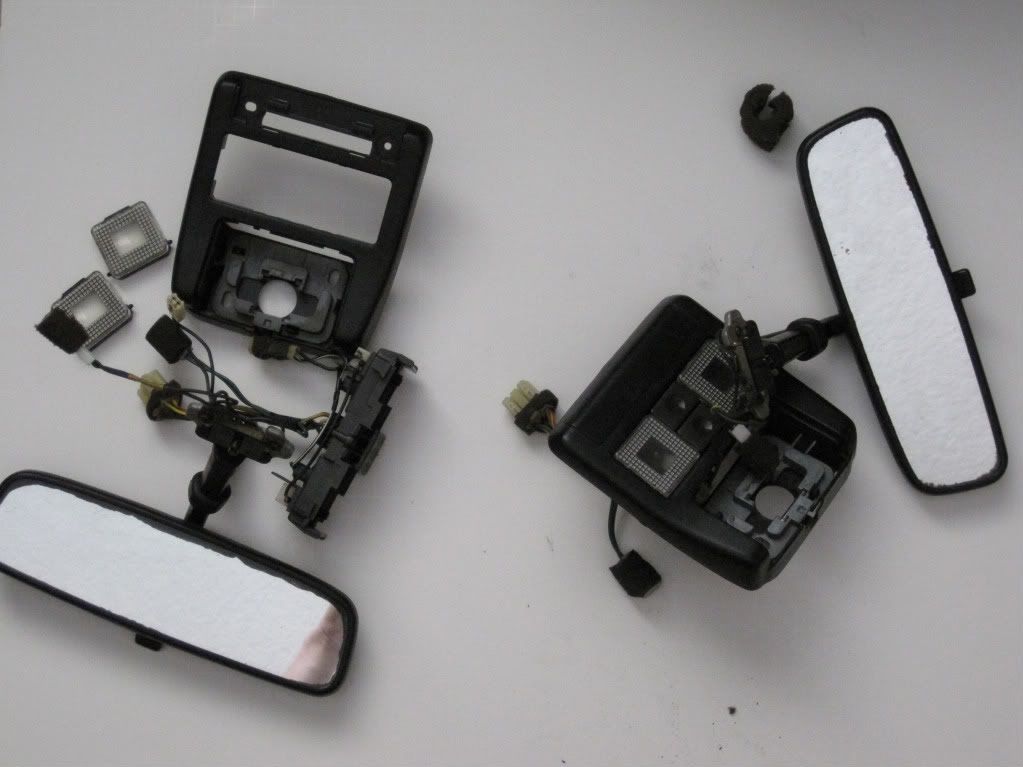
This plug was being a major pain. I eventually cut the plug off and reattached the plug from the other mirror that I was able to disconnect.
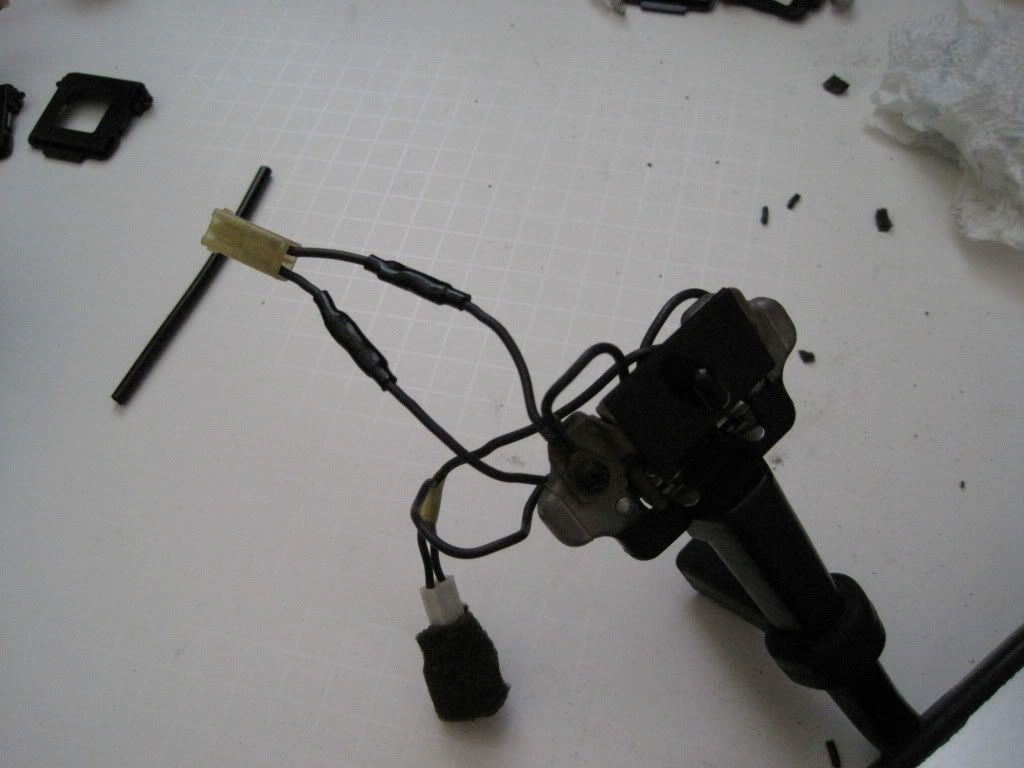
The initial problem with my mirror was the prongs that hold on the bulb for the dome light had fallen off. I figured it was easier and worth my time to just spend a few dollars on a new (used) one.

I gave the lenses the usual plastic treatment of sanding and polishing to remove some of the yellowing. Once reinstalled the assembly will be finished off with a new dome light lens.

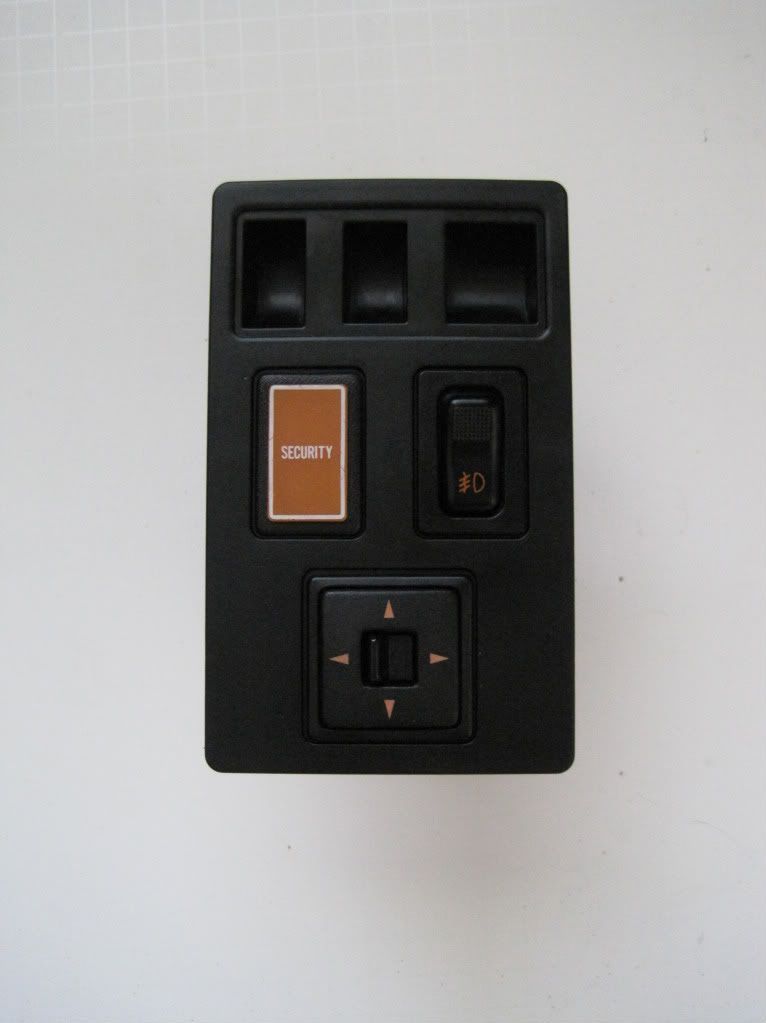
I also took some time to remove all the switches in the center console, give the trim piece a good cleaning and then reinstalled all of the switches.
This plug was being a major pain. I eventually cut the plug off and reattached the plug from the other mirror that I was able to disconnect.
The initial problem with my mirror was the prongs that hold on the bulb for the dome light had fallen off. I figured it was easier and worth my time to just spend a few dollars on a new (used) one.
I gave the lenses the usual plastic treatment of sanding and polishing to remove some of the yellowing. Once reinstalled the assembly will be finished off with a new dome light lens.
I also took some time to remove all the switches in the center console, give the trim piece a good cleaning and then reinstalled all of the switches.
06-27-10, 09:21 AM
#46
I'm toying around with an idea that might work for reinforcing the mounting posts for the cluster switches. There is a local hobby store that sells various diameters of brass tubing. I'm thinking of trying to cut short pieces of the tubing and sliding it over the posts, perhaps using an adhesive as well. Copper tubing typically has thicker walls than the brass variety, so brass might be a better choice. This should work well if the posts are simply cracked. If there is a chunk of the post missing, then you could still use the tubing and fill it up with epoxy and drill a new hole for the mounting screw. Whaddayathink???
 07-01-10, 12:45 AM
#48
Full Member
iTrader: (3)
Join Date: Jun 2010
Location: North-East Ohio
Posts: 147
Likes: 0
Received 0 Likes
on
0 Posts
Seeing how you carefully removed and restored your fog lights remind me of how I brutally ripped my starched once off the mounts when I could have done the same, lesson learned