REVIEW: My Order from Ground Control
 02-05-14, 02:54 PM
#1
REVIEW: My Order from Ground Control
Wanted to post about my recent purchase from Ground Control so you'll know what to take into consideration should you buy from them.
I decided on the weld-on coilover kit for the front, and camber plates.
I placed the order on 1/24 and days passed as I awaited the shipping email that the order invoice said would be sent upon shipping with tracking info. No email ever came, but thankfully the parts did on 2/3. At this point I was a bit disappointed but not disgusted.
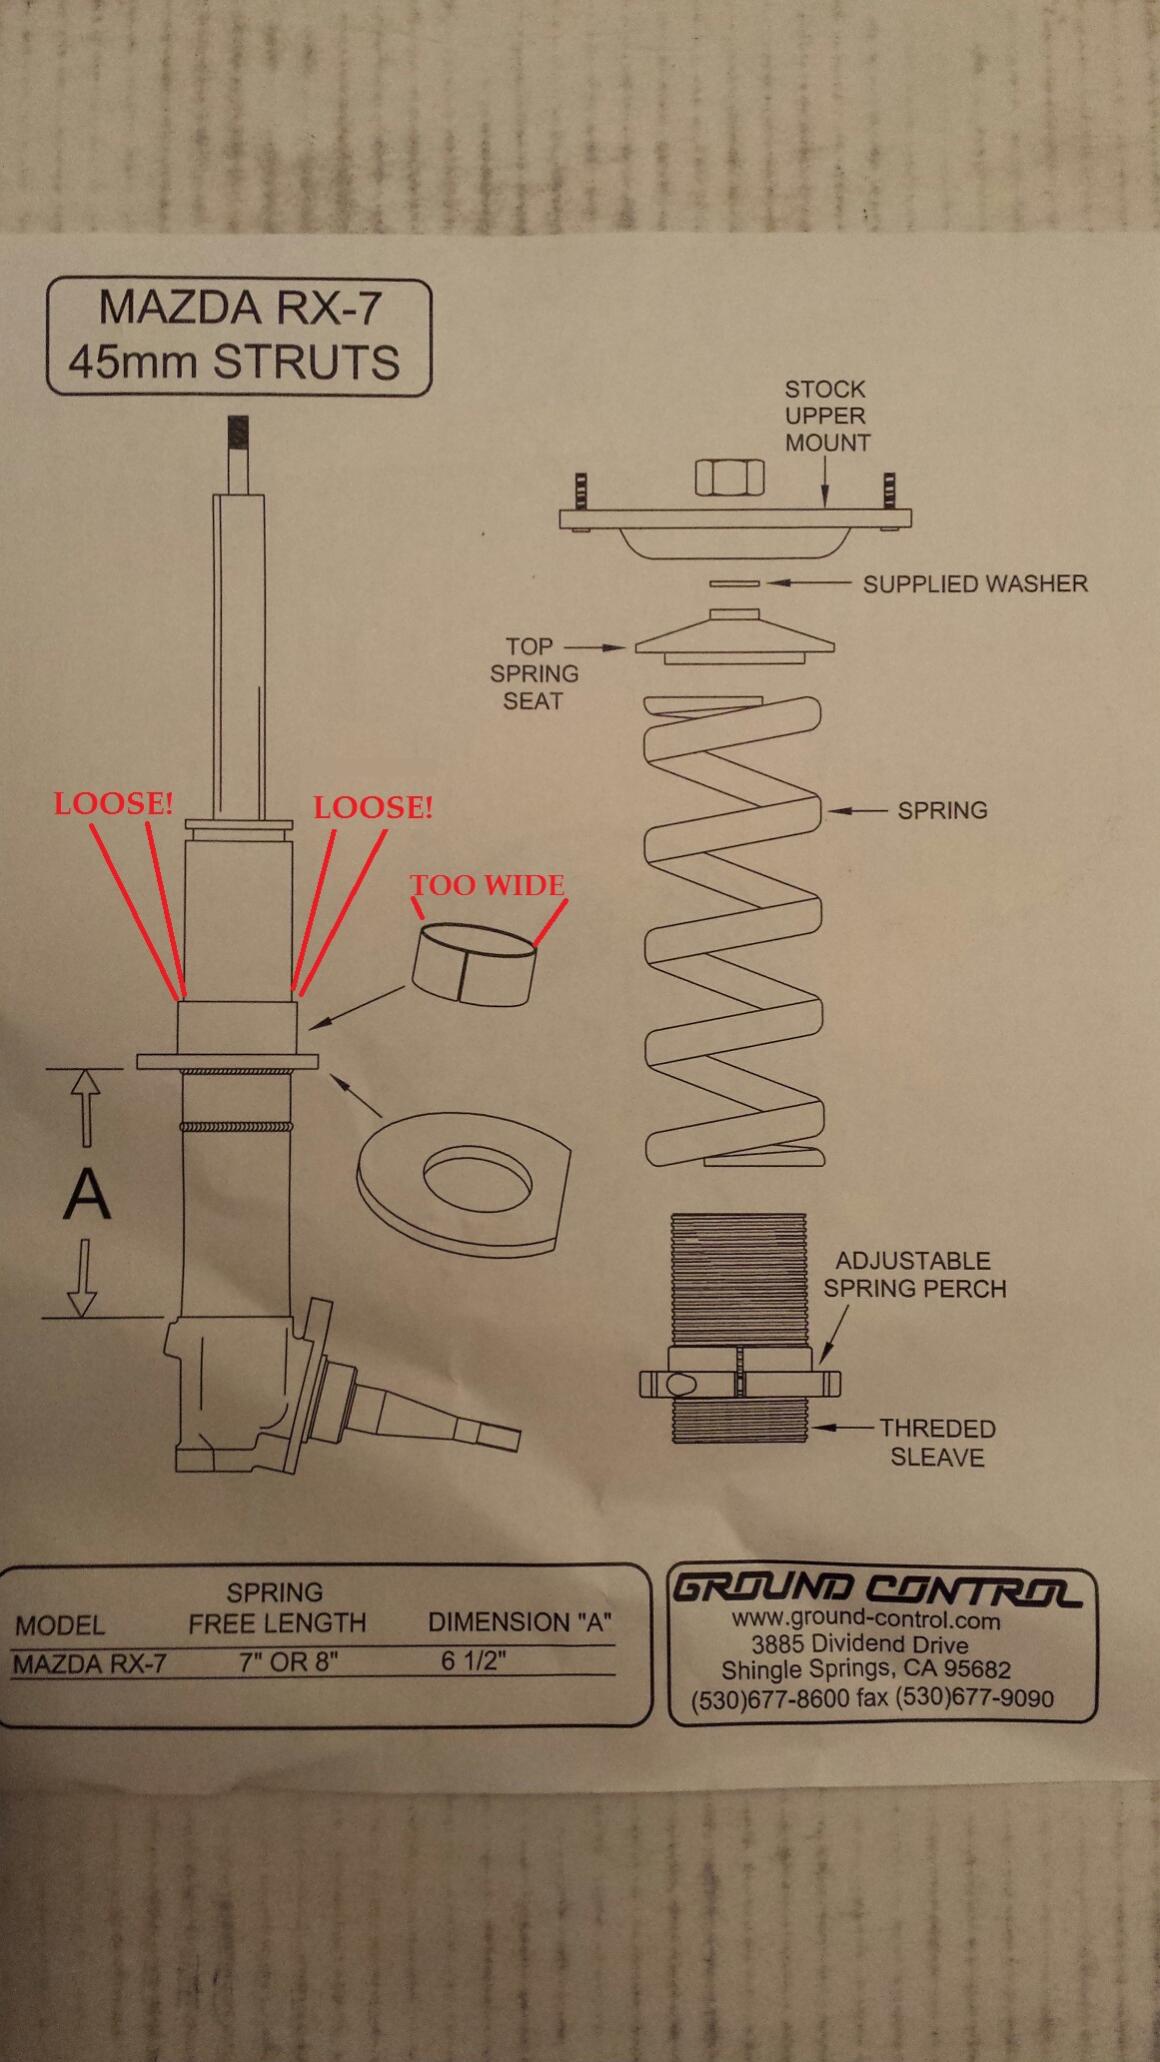
I opened the package and found my parts in good shape, shiny and unmolested. I realized that there was astonishingly little in the way of instructions included. In fact only 1 simple diagram for the coilover install was included (see below), and nothing telling me how to orient or install the camber plates, zilch. The "Tech-Talk" and "FAQ" section of their site is equally void of relevant product information...sigh.
On further inspection I realized that no strut spacers for the plates were included. I may or may not need them, but without documentation how am I to know this?
Upon mocking up the coilover stationary spring perch and perch sleeve (the steel sleeve that gets welded to the stationary perch and strut tube, not the threaded aluminum spring height adjusting sleeve) I was confused by the amount of slop /free-play between the new weld-on spring perch/sleeve assembly and the OEM strut tube that it's to be welded to. I was expecting a snug fit, not a loose 2mm gap.
Also, no information was included indicating what spring-rate Eibach's were sent in the coilover kit. I selected "street/show" for a softer ride but expected the rate to be noted on the invoice, nope.
At his point I'm disgusted with Ground Control for not having better customer communication, documentation and product tolerances. The email I sent Mark yesterday morning has yet to be replied to. I'll undoubtedly need to call there again and voice these concerns to him directly.
I don't want this to came across as bashing, just a heads-up. Hopefully this is just 1 bad experience vs many positive. I spoke w/Mark on the phone before my initial order and he seemed pleasant and helpful... I'm sure a phone call will get my confusion resolved and I can update this post with good news.
I decided on the weld-on coilover kit for the front, and camber plates.
I placed the order on 1/24 and days passed as I awaited the shipping email that the order invoice said would be sent upon shipping with tracking info. No email ever came, but thankfully the parts did on 2/3. At this point I was a bit disappointed but not disgusted.
I opened the package and found my parts in good shape, shiny and unmolested. I realized that there was astonishingly little in the way of instructions included. In fact only 1 simple diagram for the coilover install was included (see below), and nothing telling me how to orient or install the camber plates, zilch. The "Tech-Talk" and "FAQ" section of their site is equally void of relevant product information...sigh.
On further inspection I realized that no strut spacers for the plates were included. I may or may not need them, but without documentation how am I to know this?
Upon mocking up the coilover stationary spring perch and perch sleeve (the steel sleeve that gets welded to the stationary perch and strut tube, not the threaded aluminum spring height adjusting sleeve) I was confused by the amount of slop /free-play between the new weld-on spring perch/sleeve assembly and the OEM strut tube that it's to be welded to. I was expecting a snug fit, not a loose 2mm gap.
Also, no information was included indicating what spring-rate Eibach's were sent in the coilover kit. I selected "street/show" for a softer ride but expected the rate to be noted on the invoice, nope.
At his point I'm disgusted with Ground Control for not having better customer communication, documentation and product tolerances. The email I sent Mark yesterday morning has yet to be replied to. I'll undoubtedly need to call there again and voice these concerns to him directly.
I don't want this to came across as bashing, just a heads-up. Hopefully this is just 1 bad experience vs many positive. I spoke w/Mark on the phone before my initial order and he seemed pleasant and helpful... I'm sure a phone call will get my confusion resolved and I can update this post with good news.
 02-05-14, 08:02 PM
#3
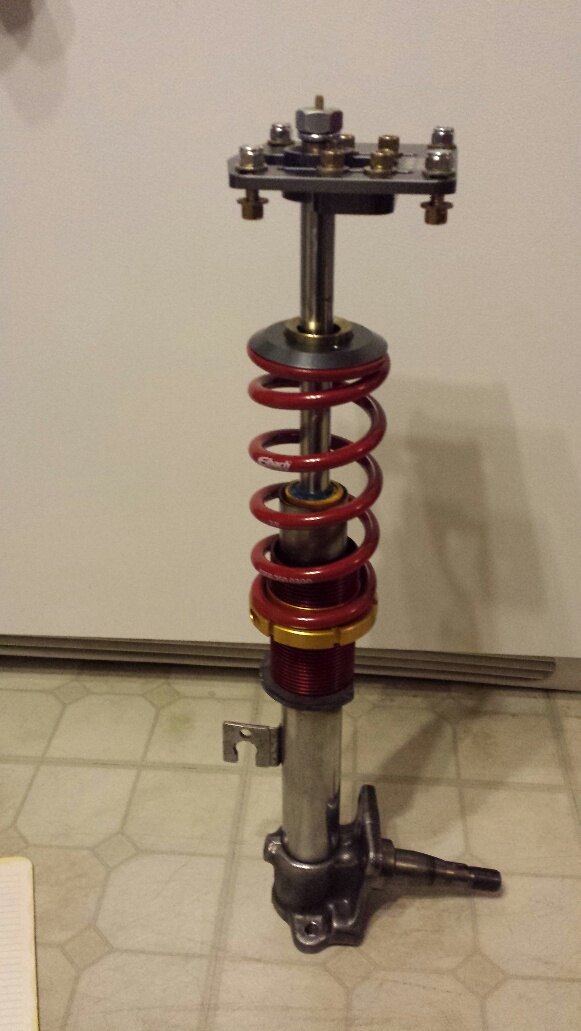
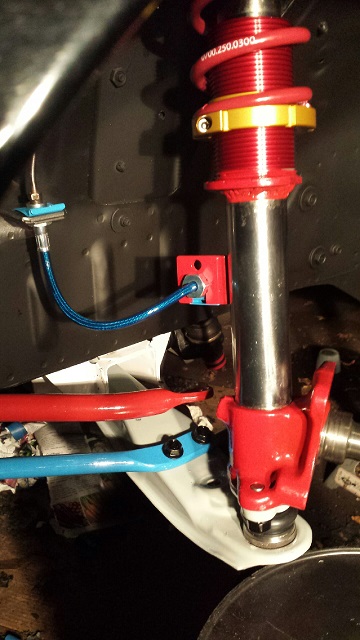
Okay, my guy got the welding portion of the coilover job done earlier today. The looseness/slop I was worried about wasn't an issue for him as it's now firmly welded to the strut tube and the threaded sleeve sits squarely. So here it is mocked up, but the strut extension is pushing it "apart" leaving the spring just kinda sitting there with the hat on it... is everything held in place once it's on the car or what? I'm used to seeing "tight" strut assemblies with the plate, hat, spring etc all fitting snugly and looking more like this: 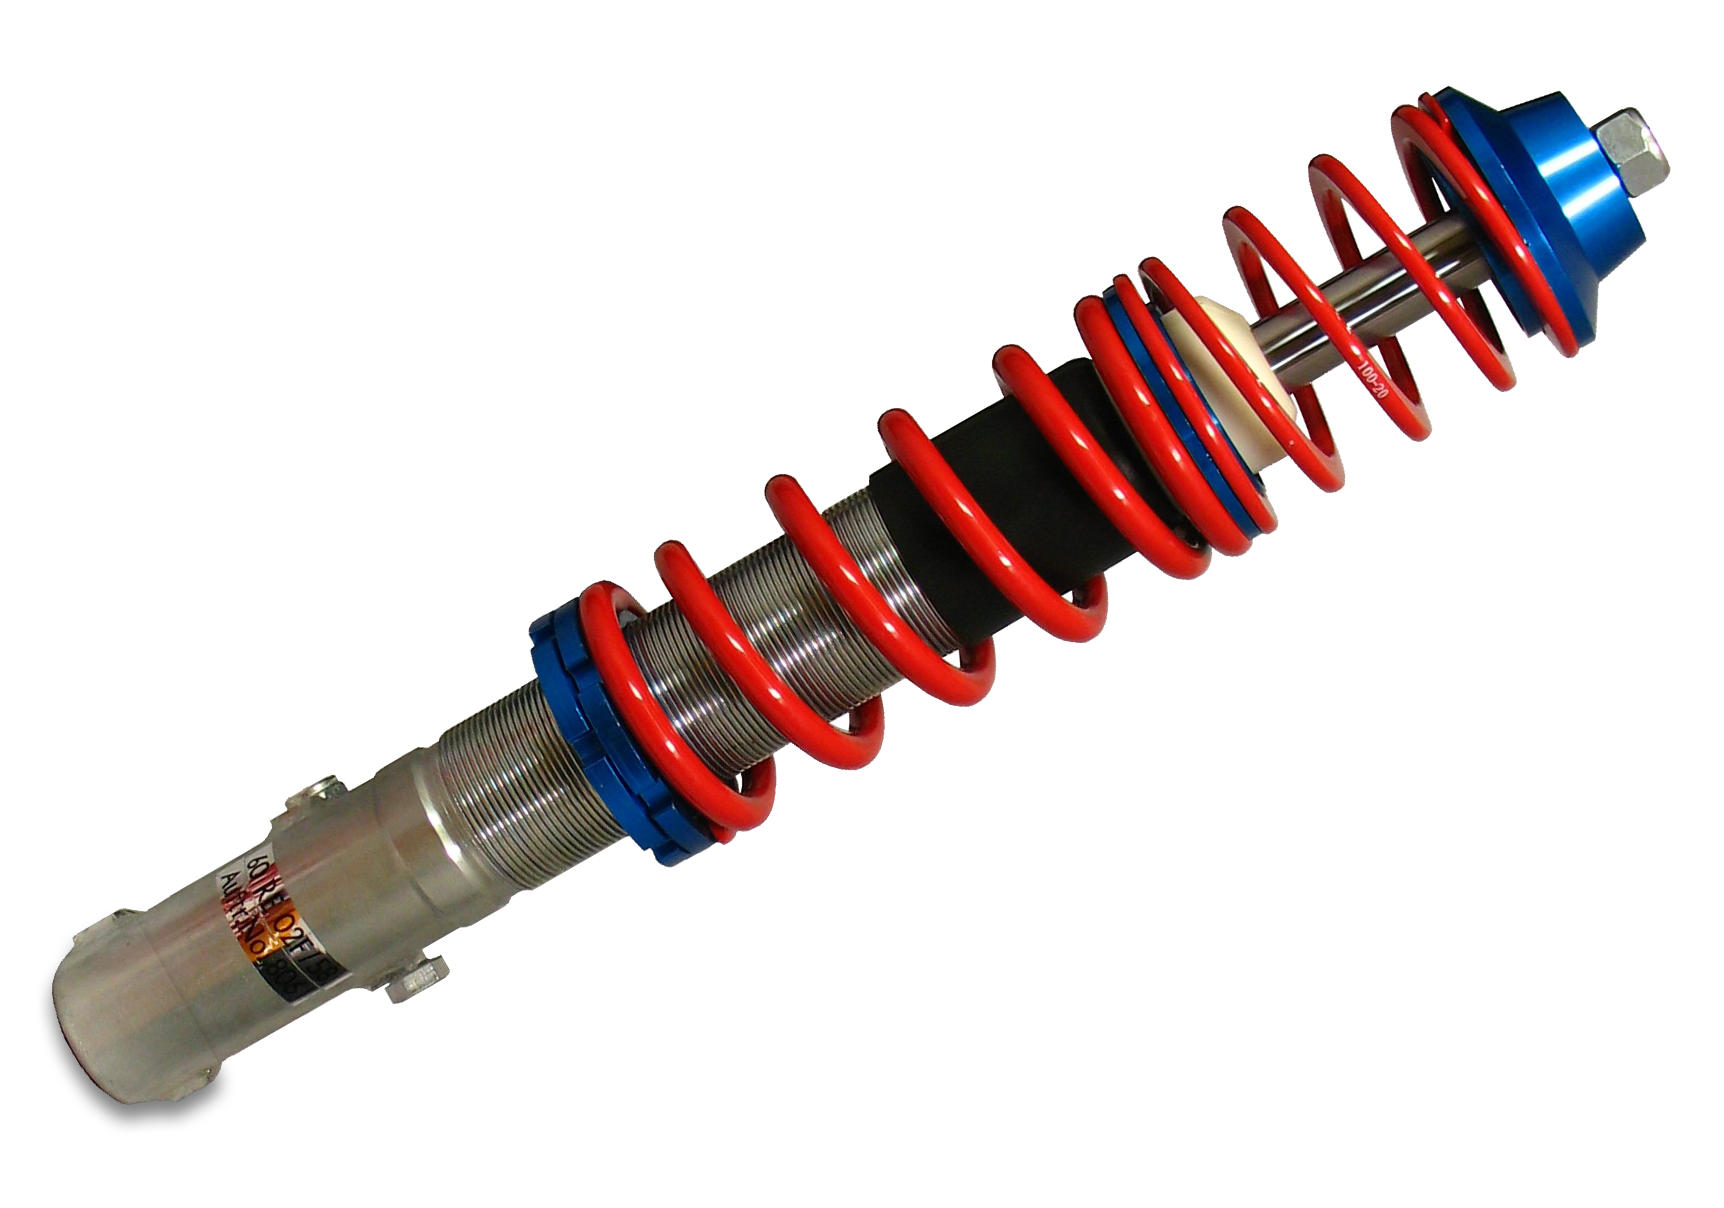
Instead of this:
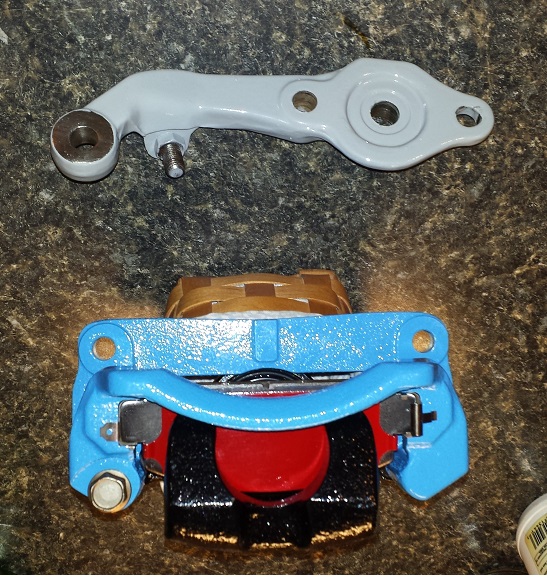
As for the camber plates, I called GC to see about instructions for the camber plates and no, they don't come with any. This being the case I have 2 primary questions:
1) Do they mount from the top or from underneath and
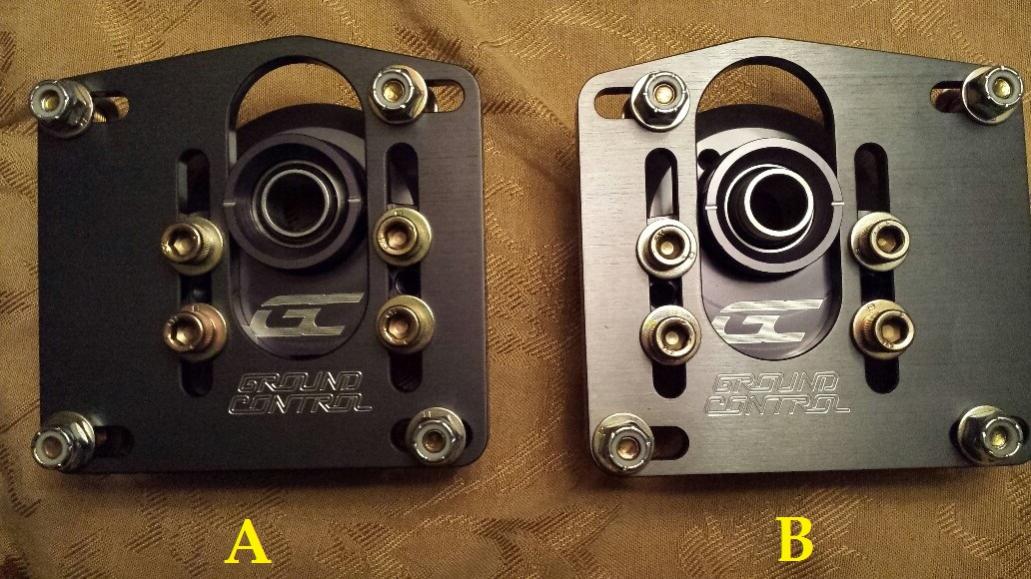
2) Which one of these is for the driver's side, A or B:
 , but getting there...
Instead of this:
As for the camber plates, I called GC to see about instructions for the camber plates and no, they don't come with any. This being the case I have 2 primary questions:
1) Do they mount from the top or from underneath and
2) Which one of these is for the driver's side, A or B:
, but getting there...
 I guess I'll be happy they still at least actually sell what they sell.. (I'm looking at you ReSpeed
  )
02-06-14, 12:26 AM
)
02-06-14, 12:26 AM
#5
You are installing the camber/caster plates to increase the camber/caster over the stock installation. Look at the plates and how they install and obviously A goes on the drivers side and B goes on the passenger side.
The picture you show of your assembly looks right. They will all come together when installed on the car.
Installing on top or below the strut tower is not so clear. You can do either. If you really lower the car a lot, mounting them on the bottom will result in very little suspension travel before the shocks bottom out. This is especially true if the springs are on the soft side (say 325 lb/in or less). If you mount them on the top, you can gain about a 1/4" of suspension travel. If you mount them on top with spacers you can get as much travel as you want until you hit the bottom of the hood. At some point you have to get creative with the spacers to avoid some interferences. If you try it you will see what I mean. I originally mounted them on the underside of my ITA car, but to get more travel mounted them on top with spacers. I was able to get about 1" more travel. Both above and below worked. Mustanghammer has some nice pictures of how he raised the top of the strut towers in the 1st gen build section. Racing beat used to sell shock tower "extenders" and I think Mariah Motorsports might still do that. Just some options.
You will probably have to notch the hole in the top of the strut tower to allow for max caster and still have some adjustability of the camber. See the attached picture.
You are almost there. Good luck.
GC's instructions are not really that bad. You just have to start putting it together to realize that they are fine. Can't say anything about their customer service. I have had good luck the few times I have dealt with them.
Carl
02-06-14, 06:50 AM
#6
Great Carl thanks for the input. Yeah I see what you mean now in figuring out which is which... Since I want to maximize caster I'd need to use A on the driver's side.
Thanks for the pics of both the assembly and plate. Good to know the strut/coilover assembly will come together when loaded. I see what you mean about notching the tower too for the camber adjust bolts. I'll checkout what Mustanghammer did too, thanks again!
Thanks for the pics of both the assembly and plate. Good to know the strut/coilover assembly will come together when loaded. I see what you mean about notching the tower too for the camber adjust bolts. I'll checkout what Mustanghammer did too, thanks again!
Trending Topics
02-06-14, 03:57 PM
#8
I should note that in the picture of the top of the strut tower, I had slotted the holes to allow camber/caster adjustment before I had camber plates. With the c/c plates you should not slot them. You will probably need to notch out the hole though.
Carl
Carl
02-10-14, 02:16 PM
#10
Moderator
iTrader: (3)
Join Date: Mar 2001
Location: https://www2.mazda.com/en/100th/
Posts: 30,802
Received 2,577 Likes
on
1,831 Posts
02-10-14, 07:10 PM
#11
I would recommend putting them under the factory strut tower not on top. They need the strength of the strut tower top. I had a set of these on an IT car for 10+ years and even with them mounted under the strut tower they eventually bent and one of them cracked.
If you are having issues with the struts bottoming out you have the car too low, don't have enough spring rate and/or need to stay on the race track or out of pot holes.
You will have to trim the center hole on the bottom and the fire wall side to make room for the bearing mount. Note that the Ground Control camber plates are off set as well as slotted to provide caster. You can also get caster by adjusting the tension rod.
02-13-14, 02:45 PM
#12
FB=OS Giken LSD
iTrader: (20)
Join Date: Apr 2001
Location: Wilmington, DE
Posts: 2,279
Likes: 0
Received 0 Likes
on
0 Posts
Not to get too far off topic, but I have this same kit and have been wanting to play with alignments. What are you guys using? I found some interesting do-it-yourself stuff but would like to know what others have had success with.
02-13-14, 04:34 PM
#14
Moderator
iTrader: (3)
Join Date: Mar 2001
Location: https://www2.mazda.com/en/100th/
Posts: 30,802
Received 2,577 Likes
on
1,831 Posts
we also have a longacre camber gauge for the camber, although i have a level app on my phone which works just as well. or you can use the tyre pirometer, and it'll have you max out the caber plate and want more, most likely.
caster is really hard to measure without the machine, you might just try max caster and minimum caster, and see what you like.
for ride height, best geometry without a spacer under the strut, is with the inner control arm bolt something like 5/8" above the ball joint center, not the easiest thing to measure...
02-18-14, 12:33 PM
#16
I would recommend putting them under the factory strut tower not on top. They need the strength of the strut tower top. I had a set of these on an IT car for 10+ years and even with them mounted under the strut tower they eventually bent and one of them cracked.
If you are having issues with the struts bottoming out you have the car too low, don't have enough spring rate and/or need to stay on the race track or out of pot holes.
You will have to trim the center hole on the bottom and the fire wall side to make room for the bearing mount. Note that the Ground Control camber plates are off set as well as slotted to provide caster. You can also get caster by adjusting the tension rod.
If you are having issues with the struts bottoming out you have the car too low, don't have enough spring rate and/or need to stay on the race track or out of pot holes.
You will have to trim the center hole on the bottom and the fire wall side to make room for the bearing mount. Note that the Ground Control camber plates are off set as well as slotted to provide caster. You can also get caster by adjusting the tension rod.
About the tension rod... I was wondering about that but thought it might cause wear in the control arm pivot/bushing
...Since part of my issue is with "wonder steering" and caster helps the car straighten itself out, I want as much caster as I can safely get.
How much caster from the tension rod have you gained and how much is too much before control arm geometry is compromised??? The FSM outlines tension rod install to factory spec but doesn't cover caster adjustment or tolerances.
02-18-14, 12:54 PM
#17
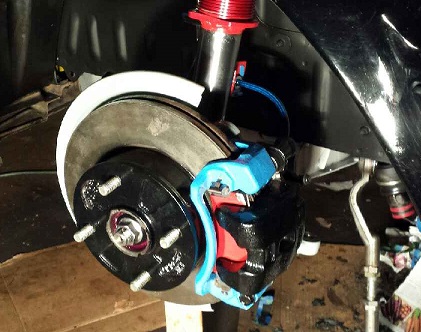
Brakes: Rebuilt the caliper and powder coated it black gloss with the bracket "Ford" blue.
Strut Tube Assembly: the spindle, brake hose retention bracket and coilover sleeve perch in "wagon" red gloss. Polished the stripped strut tube to a good shine and will hit w/clear powder.
Hub: Cleaned out, and repacked bearings, coated hub in black gloss to go with the Enkei Apache IIs wheels.
Finally the dust shroud behind the rotor is refinished in machine gray.
Control arm and tension rod to be done in machine gray. New ES black poly bushings on standby to replace the old rubber.
Stock sway bar can't fit in oven to cure, so will likely just paint that and forget coating it.
Tie rods and steering linkage were redone last year, so will just grease zerks, wipe clean and leave be for now.
I'll post a pic at some point in this thread once the clear is done and it's mock-assembled.
02-19-14, 10:52 AM
#18
Full Member
iTrader: (6)

Join Date: May 2012
Location: pennsylvania
Posts: 249
Likes: 0
Received 0 Likes
on
0 Posts
Not to hijack the thread but you guys may help.I have the RE speed camber plates. Tokico blues and the ground control coil overs.
1. I can't get the tokicos to fit in the bearing of the camber plates. I assume I need to machine down the shaft?
Next there is a large gap between the bottom of the camber plates and the top hat. It hits the bolts that are in the bottom of the plate. Do I make a spacer for that or let the top hat rest on the bolt heads?
3 if I were to out needle bearings in to out the load on the plate and not the bearing do I need to make spacer or what. And would it be worth it to do that. Right now it's on the factory top plates.
07-14-14, 01:51 PM
#19
Update
Okay so it's been a few months but have made some progress:
Front wheel wells de-gunked and repainted flat black. Crossmember sandblasted and painted white. Front engine mount (part that bolts to front cover) stripped and polished. Engine mounts ("feet") painted red.
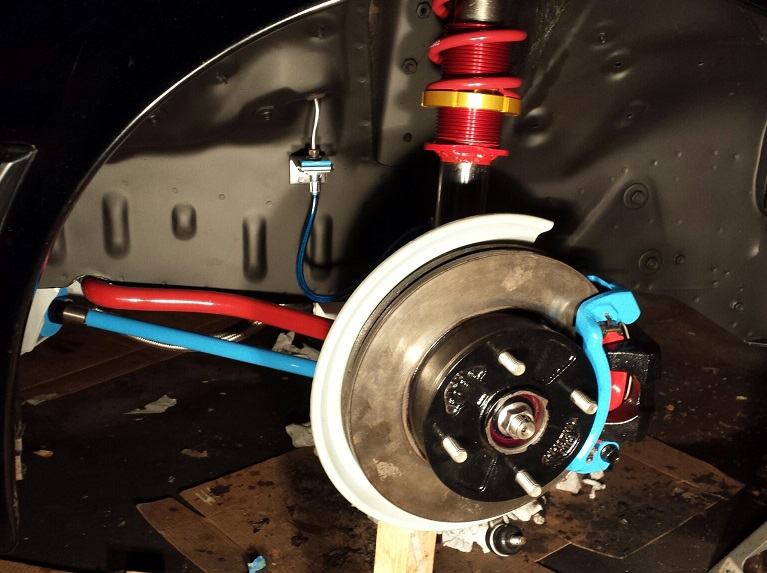
The entire front suspension has been removed and wire brushed/powdercoated and or polished. All bushes replaced with lithium lubed ES poly units (black). Pressed out and replaced (and tacked) new ball joints drilled and tapped for zerks. Inner control arms and sway bar bushes also drilled and fit with zerks. Bolt heads and nuts powdercoated black and new blue pvc coated stainless brake lines installed. Brake calipers disassembled and rebuilt. Of course they were coated too (seen here with gray coated knuckle arm):
The GC coilover and camber plate setup seem to be just fine so far on the install. I had to notch the strut tower to allow full adjustment of the camber plate but this was expected and went smoothly. A hack saw, vice grips and a curved metal file made it painless. Sorry no pic of that yet..
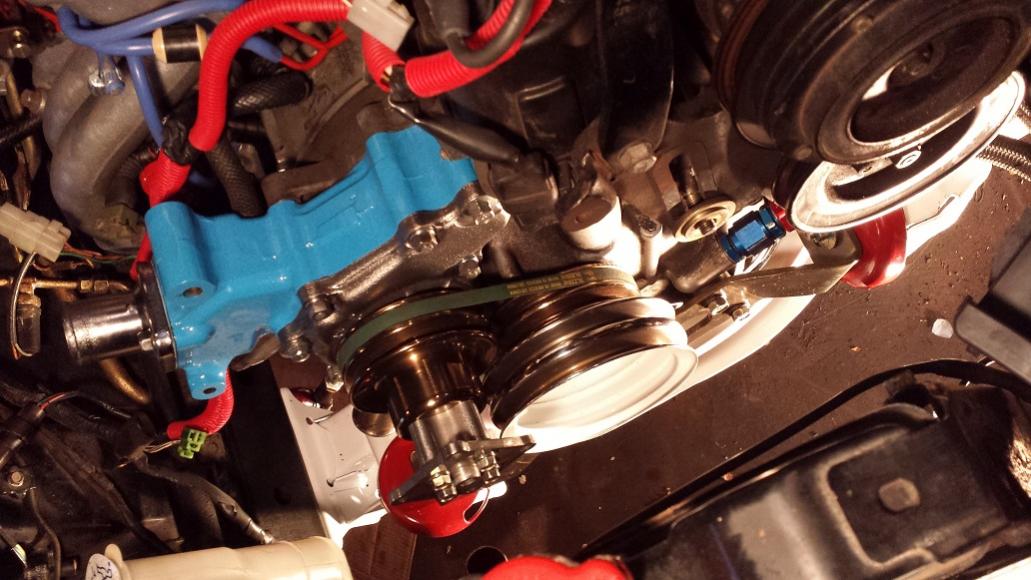
While cleaning, polishing and powder coating suspension parts I discovered a water pump leak, so replaced that and cleaned up some pulleys while stuff was off:
Hopefully tonight I can get the dust shield, brake caliper and hub back on. Then it's off to the passenger side. Have done it all myself except for sandblasting the crossmember and tacking in the ball joints... gotta get a stick welder and that 12 SCFM compressor I've been eyeing .
.
Tired of wrenchin' and ready to get her on the road before fall!
Front wheel wells de-gunked and repainted flat black. Crossmember sandblasted and painted white. Front engine mount (part that bolts to front cover) stripped and polished. Engine mounts ("feet") painted red.
The entire front suspension has been removed and wire brushed/powdercoated and or polished. All bushes replaced with lithium lubed ES poly units (black). Pressed out and replaced (and tacked) new ball joints drilled and tapped for zerks. Inner control arms and sway bar bushes also drilled and fit with zerks. Bolt heads and nuts powdercoated black and new blue pvc coated stainless brake lines installed. Brake calipers disassembled and rebuilt. Of course they were coated too (seen here with gray coated knuckle arm):
The GC coilover and camber plate setup seem to be just fine so far on the install. I had to notch the strut tower to allow full adjustment of the camber plate but this was expected and went smoothly. A hack saw, vice grips and a curved metal file made it painless. Sorry no pic of that yet..
While cleaning, polishing and powder coating suspension parts I discovered a water pump leak, so replaced that and cleaned up some pulleys while stuff was off:
Hopefully tonight I can get the dust shield, brake caliper and hub back on. Then it's off to the passenger side. Have done it all myself except for sandblasting the crossmember and tacking in the ball joints... gotta get a stick welder and that 12 SCFM compressor I've been eyeing
.Tired of wrenchin' and ready to get her on the road before fall!
07-15-14, 04:29 PM
#21
Hey 'Tus, glad to see you're back

Grease zerks... just small brass fittings like you normally find on tie-rod ends to easily lube joints. You gotta do some work on the poly bushings to allow the grease to get into the joint tho.
A little more progress last night:
Seeing as how this has moved from a GC review to more of a build thread, mods feel free to relocate this to the build section.
08-27-14, 11:11 AM
#22
Done
Back on the road and the upgrades have paid off. The GC parts work great and the sloppy steering has been replaced by buttery-smooth goodness. 
All the oil-cooler-leak-ruined OEM bushings have been replaced with poly and so far no squeaks. The extra grease fittings will help remedy this should it occur.
Highly recommend a front suspension rebuild if your steering sucks. I still have yet to adjust sector shaft preload, so after things break in I MIGHT give that a try too.
This upgrade nicely compliments the steering linkage work I did last year. Not much to fiddle with now except nailing down the tension rod bushing preload torque... that got a little sketchy and needs some follow-up (As detailed HERE)

Thread
Thread Starter
Forum
Replies
Last Post