
Pics of my "Sleepy" headlight conversion

Thread Starter
Belligerent Security
Joined: Jul 2003
Posts: 70
Likes: 0
From: Pulling you over
Pics of my "Sleepy" headlight conversion
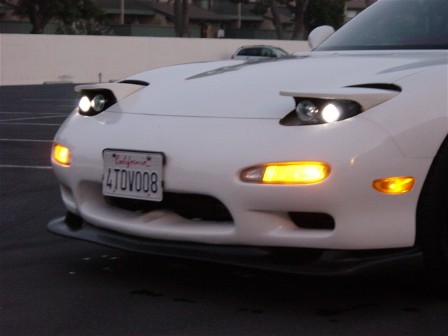
I finally got around to taking pics of Wael's headlight kit installed on my car.
The Hella HID's are very nice and surprisingly have a great wide beam and a VERY sharp cutoff. This surprised me because it is technically a foglight. These lights go for around $600+, so they are not cheap.
The high beams are just a PIAA foglight. I wired them up so when they are activated, the HID low beams stay on as well. The way Wael had them installed, the PIAA's are only connected via one bolt. I am going to take them out soon and fab up a bracket to hold both sides. Being I live in So Cal I hardly ever need to use my high beams, so I am not very concerned even if they had them. I am not sure on the price but I assume they are around $200.
Wael used the bracket for the Hella lights that it came with. It is just mounted at the bottom of the stock cradle and he had to cut a little on both sides of the cradle to allow enough room for the lights side by side. Also, he cut the top of the cradle to allow for easy adjustment. I mounted the boxes for the Hellas on the metal piece that is right on top of the oil coolers.
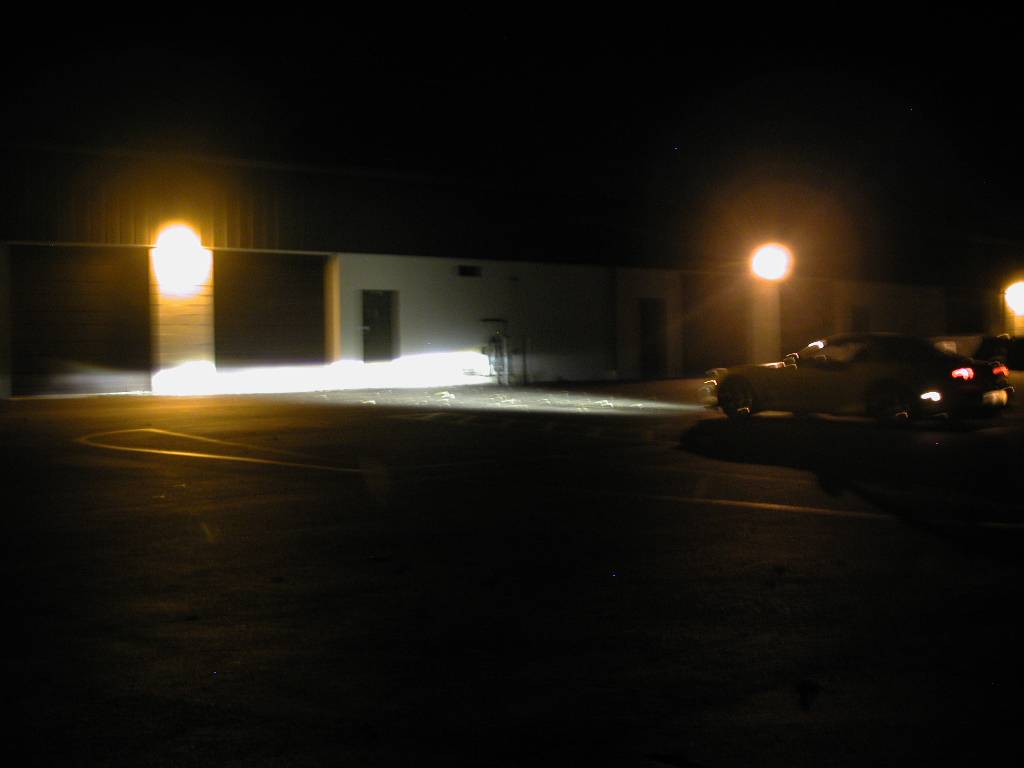
I am still tinkering with the adjustment of my low beams but I am pretty much done with it. I will post some pics of the beam pattern when I get a chance to take pics with no ambient light around. Its hard to find that in So Cal.
Here is 2 links for the Hella's
http://www.hellausa.com/optilux/productpages/DEX.html
http://www.rallylights.com/Optilux/optilux_DEX_HID.asp
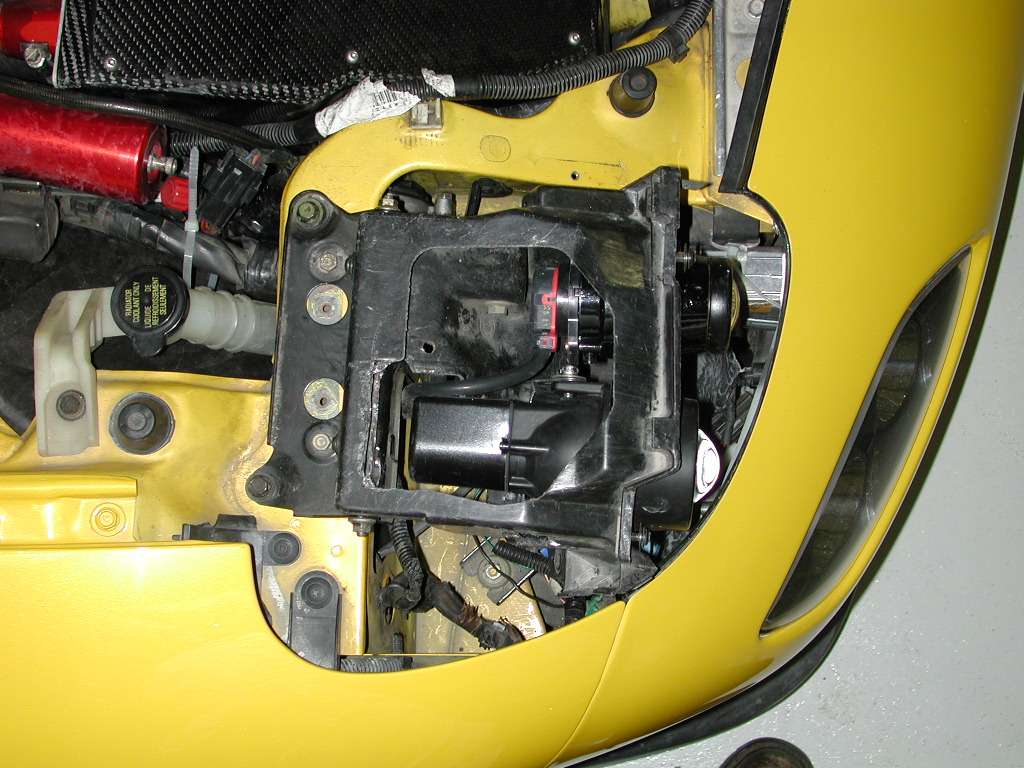
*edit* I forgot to mention the motor. I did not get a chance to open it up and see how Wael modified it. If I get a chance I will do this.
Also... special thanks goes out to Fritz Flynn that sold the lights to me. Thanks man
The Hella HID's are very nice and surprisingly have a great wide beam and a VERY sharp cutoff. This surprised me because it is technically a foglight. These lights go for around $600+, so they are not cheap.
The high beams are just a PIAA foglight. I wired them up so when they are activated, the HID low beams stay on as well. The way Wael had them installed, the PIAA's are only connected via one bolt. I am going to take them out soon and fab up a bracket to hold both sides. Being I live in So Cal I hardly ever need to use my high beams, so I am not very concerned even if they had them. I am not sure on the price but I assume they are around $200.
Wael used the bracket for the Hella lights that it came with. It is just mounted at the bottom of the stock cradle and he had to cut a little on both sides of the cradle to allow enough room for the lights side by side. Also, he cut the top of the cradle to allow for easy adjustment. I mounted the boxes for the Hellas on the metal piece that is right on top of the oil coolers.
I am still tinkering with the adjustment of my low beams but I am pretty much done with it. I will post some pics of the beam pattern when I get a chance to take pics with no ambient light around. Its hard to find that in So Cal.
Here is 2 links for the Hella's
http://www.hellausa.com/optilux/productpages/DEX.html
http://www.rallylights.com/Optilux/optilux_DEX_HID.asp
*edit* I forgot to mention the motor. I did not get a chance to open it up and see how Wael modified it. If I get a chance I will do this.
Also... special thanks goes out to Fritz Flynn that sold the lights to me. Thanks man
Last edited by Fumanchu; Mar 19, 2004 at 08:59 PM.
Rotor DEMON !
Joined: Nov 2002
Posts: 1,074
Likes: 0
From: alberta canada/soon to be cape coral FL:D
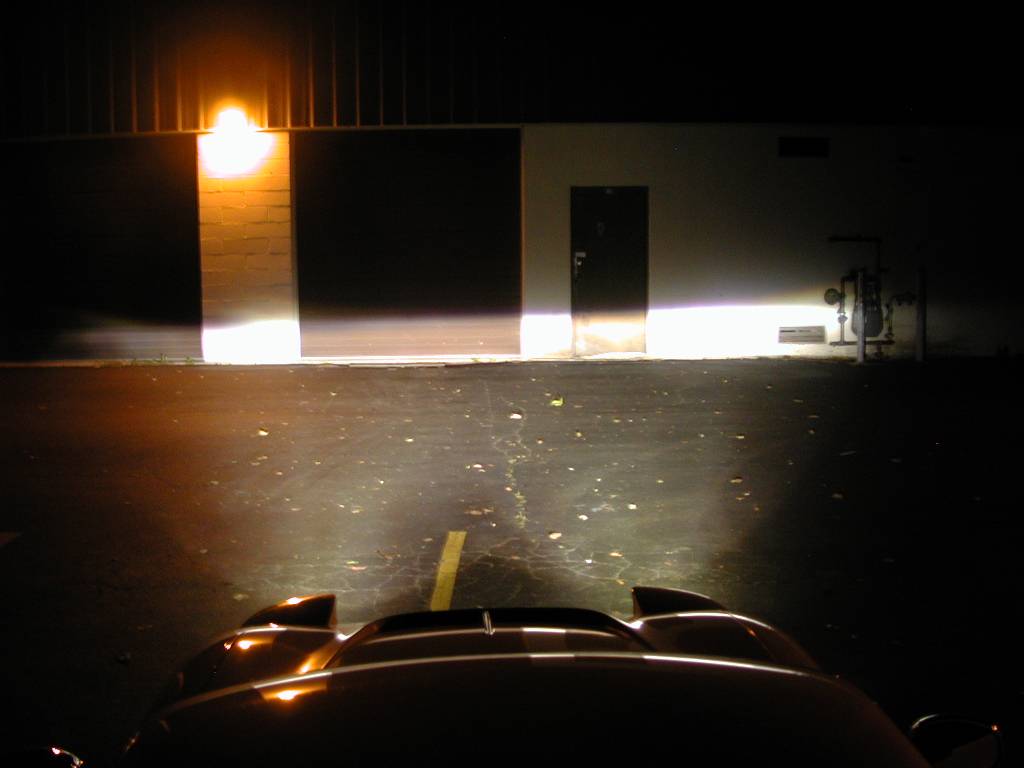
get some nigth shots when you can  . love to see how the foglights work. was thinking about using them just didn't know how well they would work. look great tho. nice job
joel
. love to see how the foglights work. was thinking about using them just didn't know how well they would work. look great tho. nice job joel
Last edited by bigmack000; Mar 19, 2004 at 09:00 PM.
Thread Starter
Belligerent Security
Joined: Jul 2003
Posts: 70
Likes: 0
From: Pulling you over
Originally posted by bigmack000
get some nigth shots when you can. love to see how the foglights work. was thinking about using them just didn't know how well they would work. look great tho. nice job
joel
get some nigth shots when you can
. love to see how the foglights work. was thinking about using them just didn't know how well they would work. look great tho. nice job joel
Pics of the high beam? Or just the low beams? The reason I ask is because the high's have not been aimed yet and I need to fab up a better bracket for them before I can do so.
I will take pics of the low beams when I can find a place with no ambient light.
Trending Topics
Rotor DEMON !
Joined: Nov 2002
Posts: 1,074
Likes: 0
From: alberta canada/soon to be cape coral FL:D
Originally posted by Fumanchu
Pics of the high beam? Or just the low beams? The reason I ask is because the high's have not been aimed yet and I need to fab up a better bracket for them before I can do so.
I will take pics of the low beams when I can find a place with no ambient light.
Pics of the high beam? Or just the low beams? The reason I ask is because the high's have not been aimed yet and I need to fab up a better bracket for them before I can do so.
I will take pics of the low beams when I can find a place with no ambient light.
oh yeah how long did this take you to do. ruff time est?
joel
Thread Starter
Belligerent Security
Joined: Jul 2003
Posts: 70
Likes: 0
From: Pulling you over
Well, Wael is the one that made it. He said it took him around a weekends time to finish it. Seems about right when looking at what he had to do.
Just for me to take out the old assemblies, put the new ones in, and wire them up took me around 3 hours or so. This is because I had to remove my intake and battery to get at the bolts on the side.
Just for me to take out the old assemblies, put the new ones in, and wire them up took me around 3 hours or so. This is because I had to remove my intake and battery to get at the bolts on the side.


Thread Starter
Belligerent Security
Joined: Jul 2003
Posts: 70
Likes: 0
From: Pulling you over
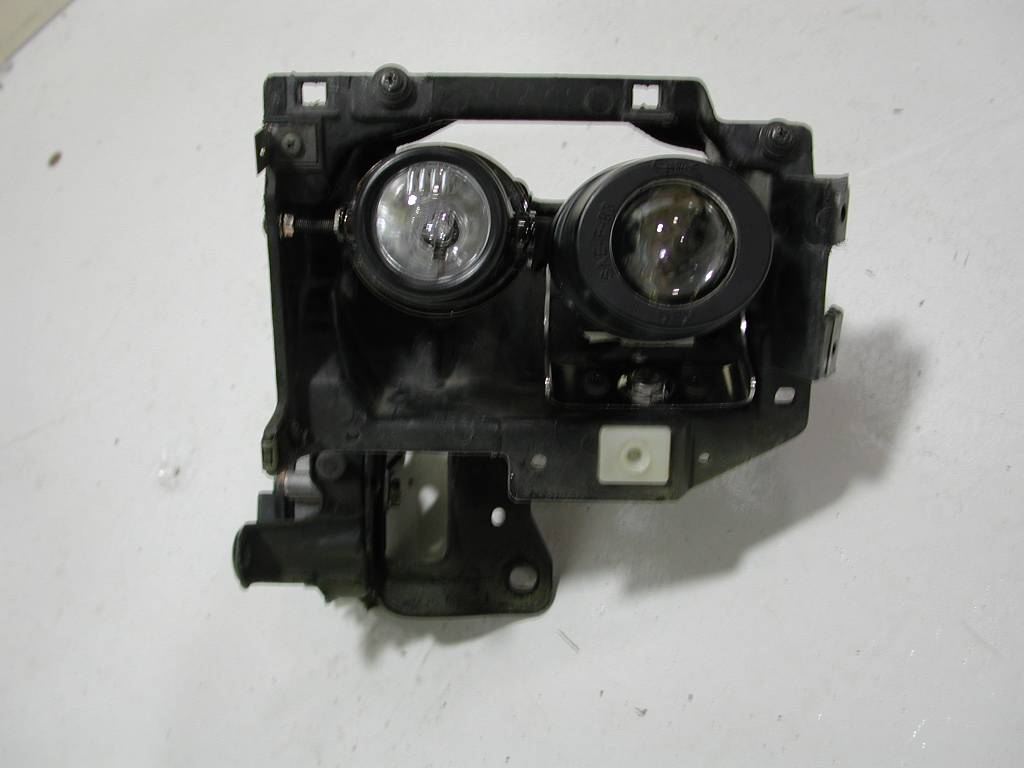
There is no bezel. I don't think it needs one. If you look at the pictures, the opening is WAY smaller than the knightsports kit. The covers are parallel to the ground pretty much.
I figured no one wants pictures of me installing the kit. It was the same thing as putting stock headlamps in and out.
Here are some pics that Wael provided ealier...


I figured no one wants pictures of me installing the kit. It was the same thing as putting stock headlamps in and out.
Here are some pics that Wael provided ealier...


It looks very simple to do. but how did you get the sleepy look? and what type lights did you used, I think I can do this also, got a friend thats very good with fiberglass so he can make a bezel for look purposed, but at the same time it can provide some cool air to the intake!


Originally posted by CSMCanuck
Where can I get them and for how much?
Where can I get them and for how much?
Originally posted by SpeedKing
You can't get them anywhere. They were a one-off custom deal. Keep tabs on forum sponsor Rotary Extreme. They've got a low profile headlight kit in the works.
You can't get them anywhere. They were a one-off custom deal. Keep tabs on forum sponsor Rotary Extreme. They've got a low profile headlight kit in the works.