
RS/RZ brakes install notes and pics (warning... many big pics)


RS/RZ brakes install notes and pics (warning... many big pics)
Ok, it took a while (long while) but I finally got the RS/RZ calipers from the group buy and got them installed. I didn't do
a good job this time of taking pics during each step but I do have some pics and notes for ya.
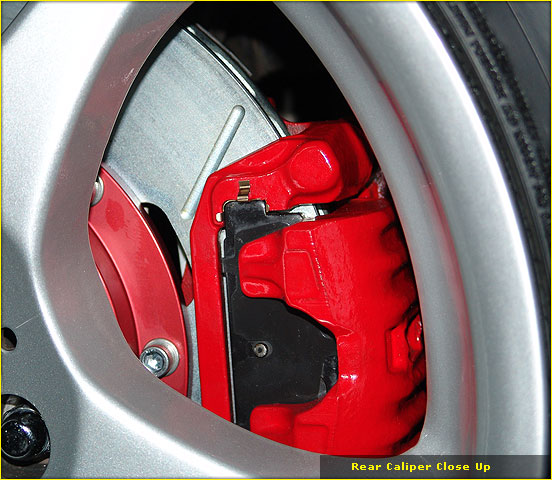
Here is what they look like on the car:
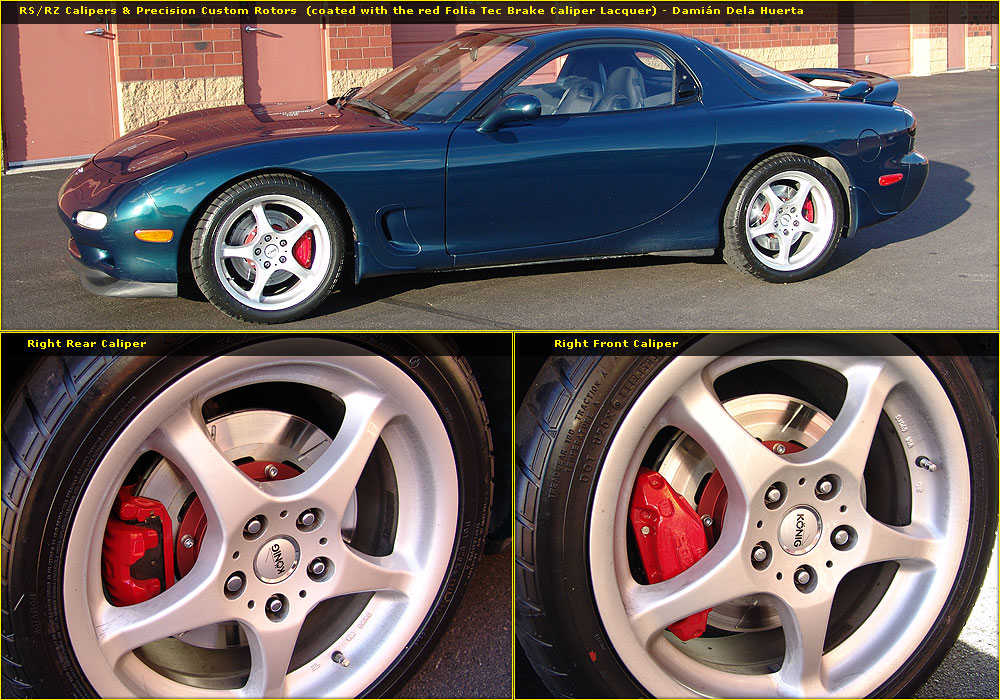
I'll put more pics in the posts below.
Install notes:
Pre-install
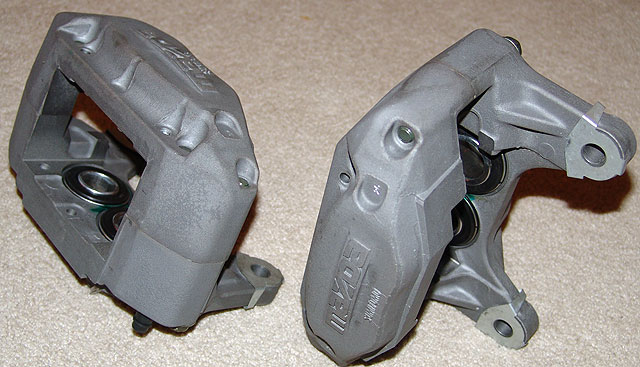
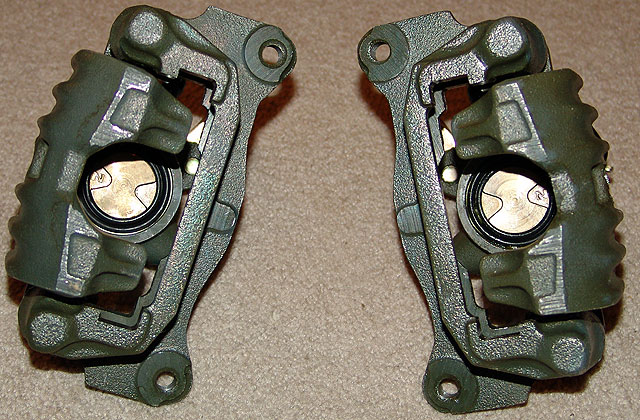
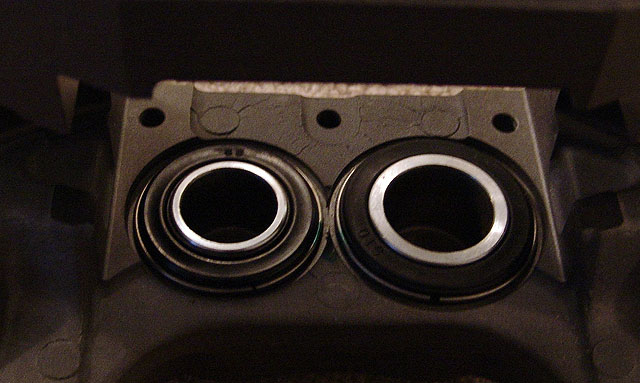
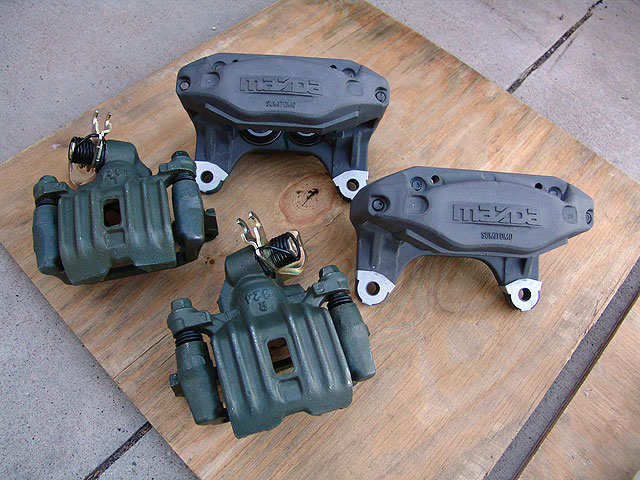
- coat/paint calipers as per directions of coating (be sure not to coat parts that should not be coated like rubber grommets, nipple holes, brake line threads, et)
- make sure have a torque wrench and other standard tools
- have some new copper crush washers for the rears
- possibly buy the new rear banjo bolts (read below)
- a rubber mallet will help
- might need impact screw driver (philips head, read below)
- get a high quality brake flare nut wrench
Install
- I suggest to use the same pattern as the bleeding procedure since you basically have to 'bleed' the caliper once you get it on and all hooked up, so start with the RR, then RL, then RF, then LF, the LR.
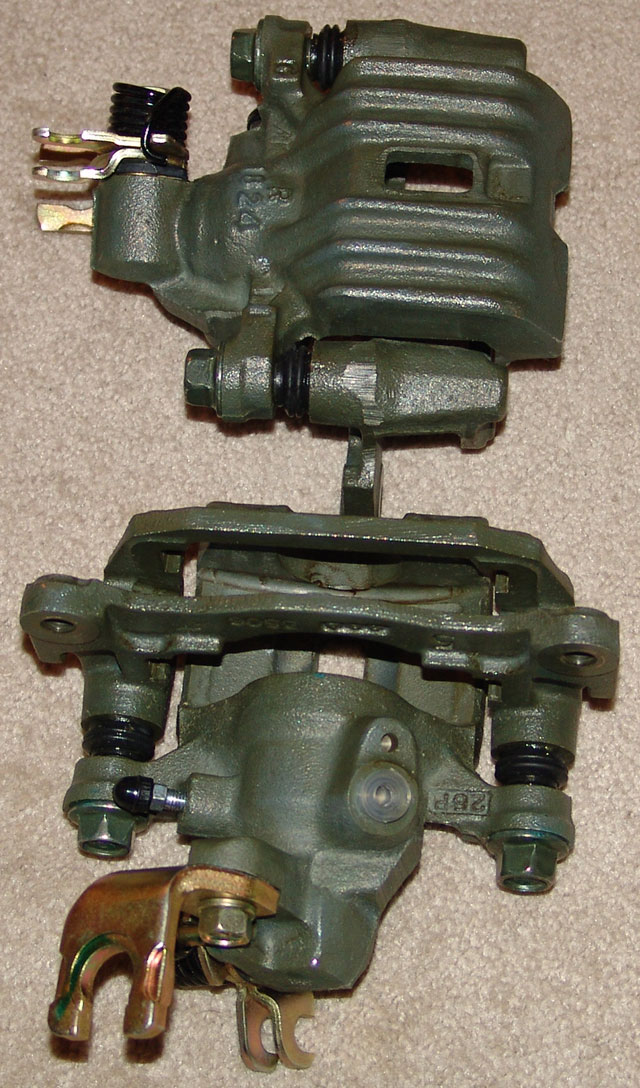
Rears
- use the standard procedure to take the old caliper off, only two bolts hold it on, so just disconnect the hand brake line, brake line, and two main bolts, be sure to have something to plug the brake line with once you disconnect it because it will keep dripping out, i used a silicone hose cut in half and shoved it into the end of the brake line
- take the old rotor off, may need to 'rubber mallet' it off
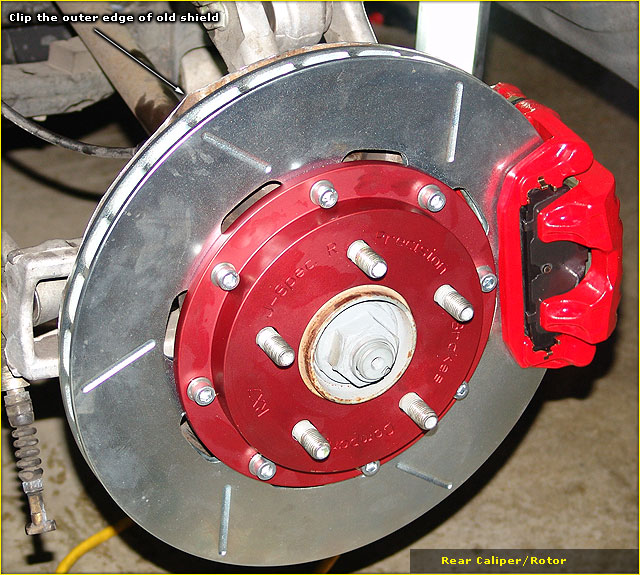
- after caliper and rotor is off (and brake line plugged and to the side), clip the rim on the shield so that it does not hit the new, bigger, rotor, i had to rebend it after clipping so there was no rubbing on the new rotor. (or put new shields on if you got em, or take these off, but you have to do more work to do either of those)
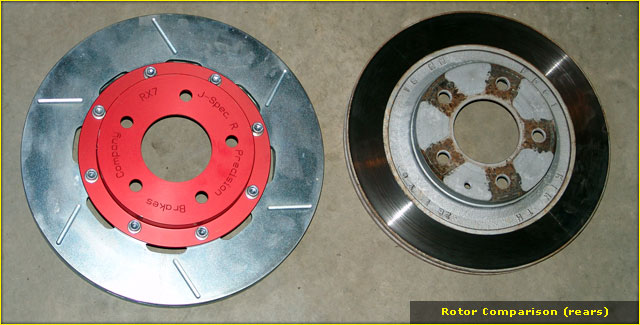
- now put the new rotor on, MAKE SURE its the proper side rotor, the internal veins should be pulling air from the inside rotor and pushing it out of the rotor as it spins in the forward direction, check it twice as it can look right but on the double check you may see otherwise :-)
- now put the new caliper in place and bolt down
- then put in the pads
- then attach the hand brake line
- OPTIONAL - replace stock bleed nipple with speedbleeders ( http://www.speedbleeder.com/ ), I did this as I liked using them on both my cars.
- finally, reconnect the brake line, this is where I made a mistake of over-torquing the banjo bolt and twisted it into a spiral (uggg), SO START OUT EASY AND USE A TORQUE WRENCH!!! use NEW copper crush washers and I suggest buying the new, updated version of the banjo bolt, its seems like a better design. part number: B001-43-694A you will need one for each side in the rear (fronts use flare fitting, not needed there)
- now everything should be ready so its time to bleed
- bleed the caliper as you normally would, make the sure the reservoir stays filled
- now do the other rear caliper the same way
Fronts
- basically same as rear but for some minor changes
- use the standard procedure to take the old caliper off, only two bolts hold it on, so just disconnect brake line, and two main bolts, be sure to have something to plug the brake line with once you disconnect it because it will keep dripping out, i used a small rubber plug and shoved it into the end of flare in the hard brake line
- I DID NOT have to get the new hard lines, I just used the old ones and did not have to bend them, there is a trick to getting them on that i will explain below
- the rotors may have some screws holding them to the hub, they can be a 'biaatch' to get out without stripping them so this is where you may need the impact screw driver to get them out, I had to drill one out, no need to keep them since the new rotor hats don't use them
- after caliper and rotor is off (and brake line plugged and to the side), clip the rim on the shield so that it does not hit the new, bigger, rotor, i had to rebend it after clipping so there was no rubbing on the new rotor. (or put new shields on if you got em, or take these off, but you have to do more work to do either of those)
- now put the new rotor on, MAKE SURE its the proper side rotor, the internal veins should be pulling air from the inside rotor and pushing it out of the rotor as it spins in the forward direction, check it twice as it can look right but on the double check you may see otherwise :-)
- now put the new caliper in place and bolt down, BUT DO NOT BOLT THE HARD LINE BRACKET ON THE CALIPER YET, leave it off to the side, also don't tighten down the top bolt
-now tighten the bottom bolt enough so that the caliper does not move but is in its proper place, - then remove the top bolt, it was just in to make sure the caliper is in its proper place
- remove the top bolt
- now put the hard line in the new caliper and tighten the flare nut, BE CAREFUL, they can strip easy, in order to get the hard line to match up you have to put its bracket in place, but kinda loose, against the caliper, it should be so that it IS NOT distorting the hard line but the bracket will not match up to the caliper hole exactly....yet :-)
- now use the top bolt as a mini 'pry-bar' and put it through the hard line bracket, at an angle, so that you can get the end of it in the caliper hole, then use it to pry the bracket hole to match the caliper hole to thread the bolt in, this SHOULD NOT take a lot of force, i was able to do it using just my hand and thread the bolt with my fingers, so if you need to use a lot of force to try to get the holes to match then something is not right
- after you get the top bolt threaded then torque the bolts down and make sure the flare nut is tight
- then put in the pads
- now everything should be ready so its time to bleed
- bleed the caliper as you normally would, make the sure the reservoir stays filled
- now do the other front caliper the same way
Post_install
- make sure the pedal is firm
- make sure nothing is rubbing incorrectly
- be sure to bed the pads in
- check brake fluid level
Thats about it!!!
More pics below.....
a good job this time of taking pics during each step but I do have some pics and notes for ya.
Here is what they look like on the car:
I'll put more pics in the posts below.
Install notes:
Pre-install
- coat/paint calipers as per directions of coating (be sure not to coat parts that should not be coated like rubber grommets, nipple holes, brake line threads, et)
- make sure have a torque wrench and other standard tools
- have some new copper crush washers for the rears
- possibly buy the new rear banjo bolts (read below)
- a rubber mallet will help
- might need impact screw driver (philips head, read below)
- get a high quality brake flare nut wrench
Install
- I suggest to use the same pattern as the bleeding procedure since you basically have to 'bleed' the caliper once you get it on and all hooked up, so start with the RR, then RL, then RF, then LF, the LR.
Rears
- use the standard procedure to take the old caliper off, only two bolts hold it on, so just disconnect the hand brake line, brake line, and two main bolts, be sure to have something to plug the brake line with once you disconnect it because it will keep dripping out, i used a silicone hose cut in half and shoved it into the end of the brake line
- take the old rotor off, may need to 'rubber mallet' it off
- after caliper and rotor is off (and brake line plugged and to the side), clip the rim on the shield so that it does not hit the new, bigger, rotor, i had to rebend it after clipping so there was no rubbing on the new rotor. (or put new shields on if you got em, or take these off, but you have to do more work to do either of those)
- now put the new rotor on, MAKE SURE its the proper side rotor, the internal veins should be pulling air from the inside rotor and pushing it out of the rotor as it spins in the forward direction, check it twice as it can look right but on the double check you may see otherwise :-)
- now put the new caliper in place and bolt down
- then put in the pads
- then attach the hand brake line
- OPTIONAL - replace stock bleed nipple with speedbleeders ( http://www.speedbleeder.com/ ), I did this as I liked using them on both my cars.
- finally, reconnect the brake line, this is where I made a mistake of over-torquing the banjo bolt and twisted it into a spiral (uggg), SO START OUT EASY AND USE A TORQUE WRENCH!!! use NEW copper crush washers and I suggest buying the new, updated version of the banjo bolt, its seems like a better design. part number: B001-43-694A you will need one for each side in the rear (fronts use flare fitting, not needed there)
- now everything should be ready so its time to bleed
- bleed the caliper as you normally would, make the sure the reservoir stays filled
- now do the other rear caliper the same way
Fronts
- basically same as rear but for some minor changes
- use the standard procedure to take the old caliper off, only two bolts hold it on, so just disconnect brake line, and two main bolts, be sure to have something to plug the brake line with once you disconnect it because it will keep dripping out, i used a small rubber plug and shoved it into the end of flare in the hard brake line
- I DID NOT have to get the new hard lines, I just used the old ones and did not have to bend them, there is a trick to getting them on that i will explain below
- the rotors may have some screws holding them to the hub, they can be a 'biaatch' to get out without stripping them so this is where you may need the impact screw driver to get them out, I had to drill one out, no need to keep them since the new rotor hats don't use them
- after caliper and rotor is off (and brake line plugged and to the side), clip the rim on the shield so that it does not hit the new, bigger, rotor, i had to rebend it after clipping so there was no rubbing on the new rotor. (or put new shields on if you got em, or take these off, but you have to do more work to do either of those)
- now put the new rotor on, MAKE SURE its the proper side rotor, the internal veins should be pulling air from the inside rotor and pushing it out of the rotor as it spins in the forward direction, check it twice as it can look right but on the double check you may see otherwise :-)
- now put the new caliper in place and bolt down, BUT DO NOT BOLT THE HARD LINE BRACKET ON THE CALIPER YET, leave it off to the side, also don't tighten down the top bolt
-now tighten the bottom bolt enough so that the caliper does not move but is in its proper place, - then remove the top bolt, it was just in to make sure the caliper is in its proper place
- remove the top bolt
- now put the hard line in the new caliper and tighten the flare nut, BE CAREFUL, they can strip easy, in order to get the hard line to match up you have to put its bracket in place, but kinda loose, against the caliper, it should be so that it IS NOT distorting the hard line but the bracket will not match up to the caliper hole exactly....yet :-)
- now use the top bolt as a mini 'pry-bar' and put it through the hard line bracket, at an angle, so that you can get the end of it in the caliper hole, then use it to pry the bracket hole to match the caliper hole to thread the bolt in, this SHOULD NOT take a lot of force, i was able to do it using just my hand and thread the bolt with my fingers, so if you need to use a lot of force to try to get the holes to match then something is not right
- after you get the top bolt threaded then torque the bolts down and make sure the flare nut is tight
- then put in the pads
- now everything should be ready so its time to bleed
- bleed the caliper as you normally would, make the sure the reservoir stays filled
- now do the other front caliper the same way
Post_install
- make sure the pedal is firm
- make sure nothing is rubbing incorrectly
- be sure to bed the pads in
- check brake fluid level
Thats about it!!!
More pics below.....

Trending Topics
Originally posted by turbojeff
Do the stock 16" wheels fit w/those brakes?
Looks great man! Great write up too!
Do the stock 16" wheels fit w/those brakes?
Looks great man! Great write up too!
Thanks Jeff
They do not fit with the stock 16" rims. Those are 17" I have on and they fill the space very well :-)
Joined: May 2003
Posts: 2,096
Likes: 1
From: Dove le cose sono fatte il vecchio moda il senso
As always, great work and write-up.
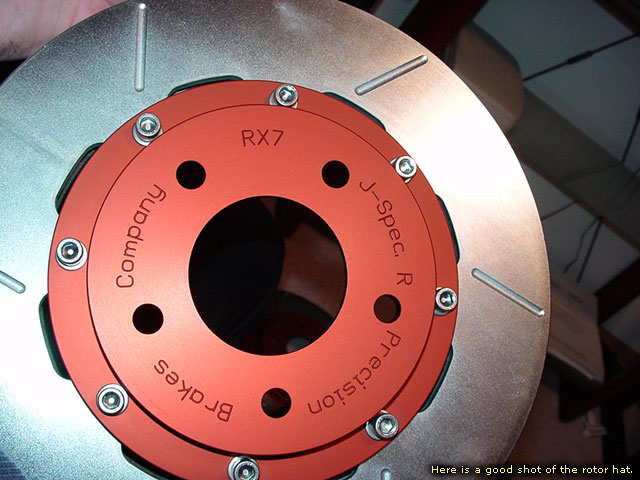
Now for that special touch,....buff off the red paint on the "MAZDA" insignia on the front rotors.
Now for that special touch,....buff off the red paint on the "MAZDA" insignia on the front rotors.
hey guys, ill post one them once i use them a bit.... i havnt done anything but bed the pads in.
i already had ss line installed so i didnt talk about that install.
i already had ss line installed so i didnt talk about that install.
Originally posted by areXseven
As always, great work and write-up.
Now for that special touch,....buff off the red paint on the "MAZDA" insignia on the front rotors.
As always, great work and write-up.
Now for that special touch,....buff off the red paint on the "MAZDA" insignia on the front rotors.
 .
.


Tim, did you read my write up? (u goof)
i explain that I did not have to really bend mine but there is a trick to get the hard line bracket to fit right. it does 'pull' on the hard line but not enough to really bend it out of shape.
do you need more info than what i wrote above on gettin it in to fit?
i explain that I did not have to really bend mine but there is a trick to get the hard line bracket to fit right. it does 'pull' on the hard line but not enough to really bend it out of shape.
do you need more info than what i wrote above on gettin it in to fit?
opps, I got a chubby from looking at the pics, I didn't read Sort of like the magazines I read...........RX-7 Magazine from Japan, can't read it just look at the pictures.
Tim
Sort of like the magazines I read...........RX-7 Magazine from Japan, can't read it just look at the pictures.Tim
Originally posted by WVRx7
Great write up and pics. Top notch.
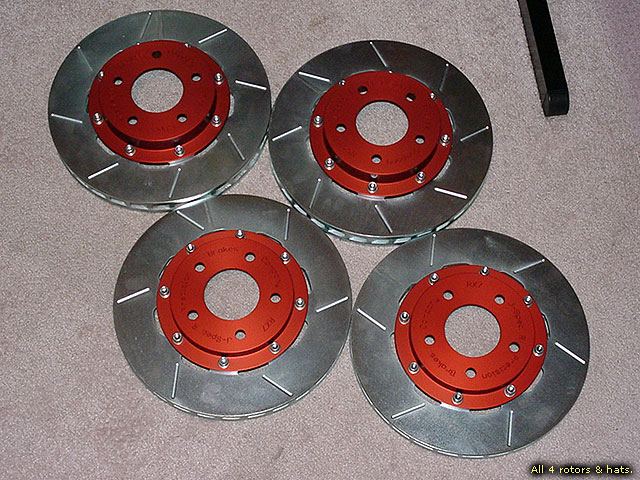
Question: Can you get those rotors without the silly "grooves"?
Question: Did someone say they have a set for the rear for sale?
Great write up and pics. Top notch.
Question: Can you get those rotors without the silly "grooves"?
Question: Did someone say they have a set for the rear for sale?
Silly grooves Bill? They are better than cross-drilled rotors that are going to see the track. I wish I had bought the rears when the group buy was going on as well. You going to MADS or VIR this weekend?
Tim
Tim
Hey Bill, on your web site in the VIR 2002 lap times section...is that Jose of rx7boricua fame from our days of yesteryear on the AOL chat room? Moved to Florida from PA and then moved back?
Tim
Tim