
Product Review: RaceFab FC Dual Caliper Kit


Product Review: RaceFab FC Dual Caliper Kit
This is long overdue...
Ive had this setup on my car for a few months now but due to work and some personal issues, I did not have time to write a review on it. Ive done a decent amount of street driving and have been to a couple events. I have had ZERO issues with this setup. Completely solid and reliable. However, I have had a lot of issues with leaky calipers and getting air out of the lines, but that has nothing to do with hardware included in this kit.
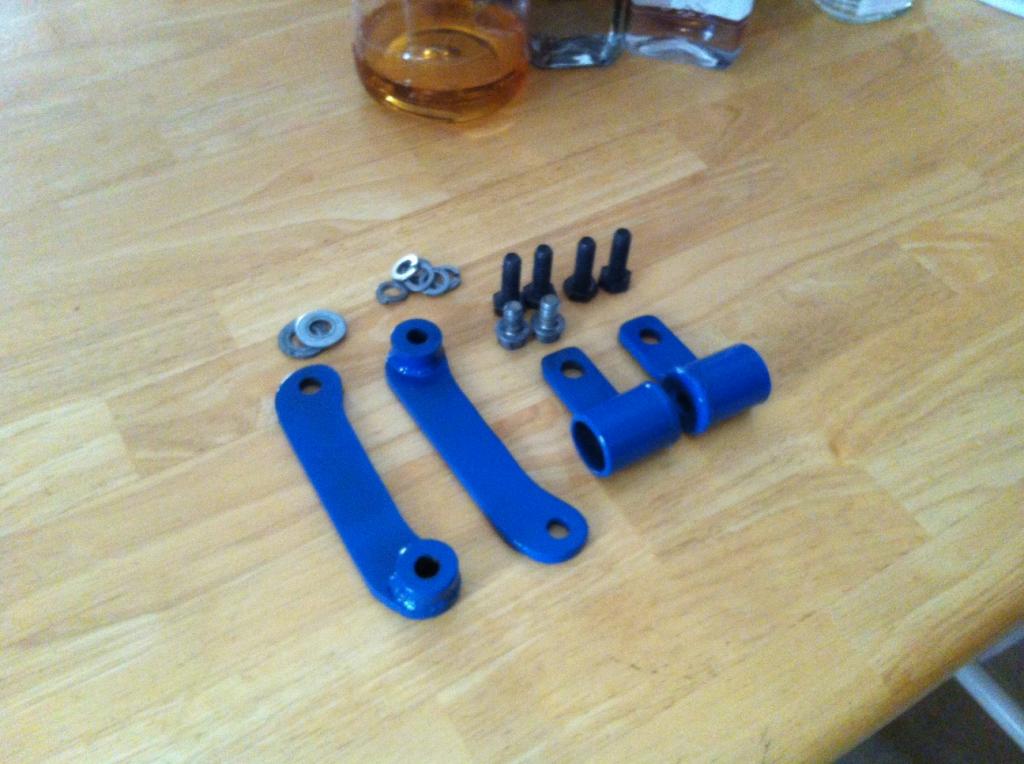
The kit consists of all the brackets and hardware you will need to bolt an additional FC caliper onto a stock sized rotor. A true bolt on kit. You will need to provide all the plumbing and hydraulic parts yourself though.
Install was stupid easy. This is my starting point

Take the stock caliper off, then lock the rotor in place so you can get the screws out. They were seized on there, so I ended up just drilling them out in the end.

Once thats done you can take caliper bracket off and slide the rotor off. Should look like this:

Ive had this setup on my car for a few months now but due to work and some personal issues, I did not have time to write a review on it. Ive done a decent amount of street driving and have been to a couple events. I have had ZERO issues with this setup. Completely solid and reliable. However, I have had a lot of issues with leaky calipers and getting air out of the lines, but that has nothing to do with hardware included in this kit.
The kit consists of all the brackets and hardware you will need to bolt an additional FC caliper onto a stock sized rotor. A true bolt on kit. You will need to provide all the plumbing and hydraulic parts yourself though.
Install was stupid easy. This is my starting point
Take the stock caliper off, then lock the rotor in place so you can get the screws out. They were seized on there, so I ended up just drilling them out in the end.
Once thats done you can take caliper bracket off and slide the rotor off. Should look like this:
Once thats done, its time to take the dust shield off. You couple probably trim it to fit with the calipers on there but I just got rid of it altogther
Should look like this

So at this point you need to put the rotor back on, but I left it off in these pictures so its easier to see how it goes together.
Bolt the stock bracket back on. Re-use the stock bolt on the bottom.

Use the longer bolt provided in the kit to bolt one end of the "bridge" piece on. The end with the spacer on it goes to the new caliper side.

Next, loosely bolt the additional caliper bracket onto the bridge part using the supplied hardware.

The you can flip the bracket out of the way and bolt on the bottom adapter

Another view. Note the spacer.

Then you can swing the bracket down and bolt it all back together

Now just tighten everything down install the calipers on the brackets

Finished product:


Should look like this
So at this point you need to put the rotor back on, but I left it off in these pictures so its easier to see how it goes together.
Bolt the stock bracket back on. Re-use the stock bolt on the bottom.
Use the longer bolt provided in the kit to bolt one end of the "bridge" piece on. The end with the spacer on it goes to the new caliper side.
Next, loosely bolt the additional caliper bracket onto the bridge part using the supplied hardware.
The you can flip the bracket out of the way and bolt on the bottom adapter
Another view. Note the spacer.
Then you can swing the bracket down and bolt it all back together
Now just tighten everything down install the calipers on the brackets
Finished product:
Other notes/things I liked:
-Everything came powdercoated.
-The welds looked good
-I had no issues whatsoever with fitment. Didnt have to bend or manipulate anything to make anything fit
-All the hardware was the appropriate strength/grade.
-The price is really cheap
I think this was the first kit he made and he may have made some changes since i put this on. I would definitely recommend it if you were planning on using a hydro ebrake.

Facebook:
https://www.facebook.com/Racefabrication?fref=ts
Website:
RaceFab - HOME
or you could PM him on here. His s/n is rotorracing
https://www.facebook.com/Racefabrication?fref=ts
Website:
RaceFab - HOME
or you could PM him on here. His s/n is rotorracing
Like I said earlier, you have to come up with all the plumbing yourself. The kit is just for the mounting brackets, hardware, spacers and washers.
Here's what I provided, starting from front to back:
I didn't like the idea of the fluid reservoir being in the cabin or obvious reasons and I also wanted the extra clearance for my elbow when pulling the handle. If the reservoir was on the brake itself, my driving position would have been too cramped for my liking. So I got a Wilwood remote reservoir kit from Summit for like $39. Mounted it on the inside of the passenger fender
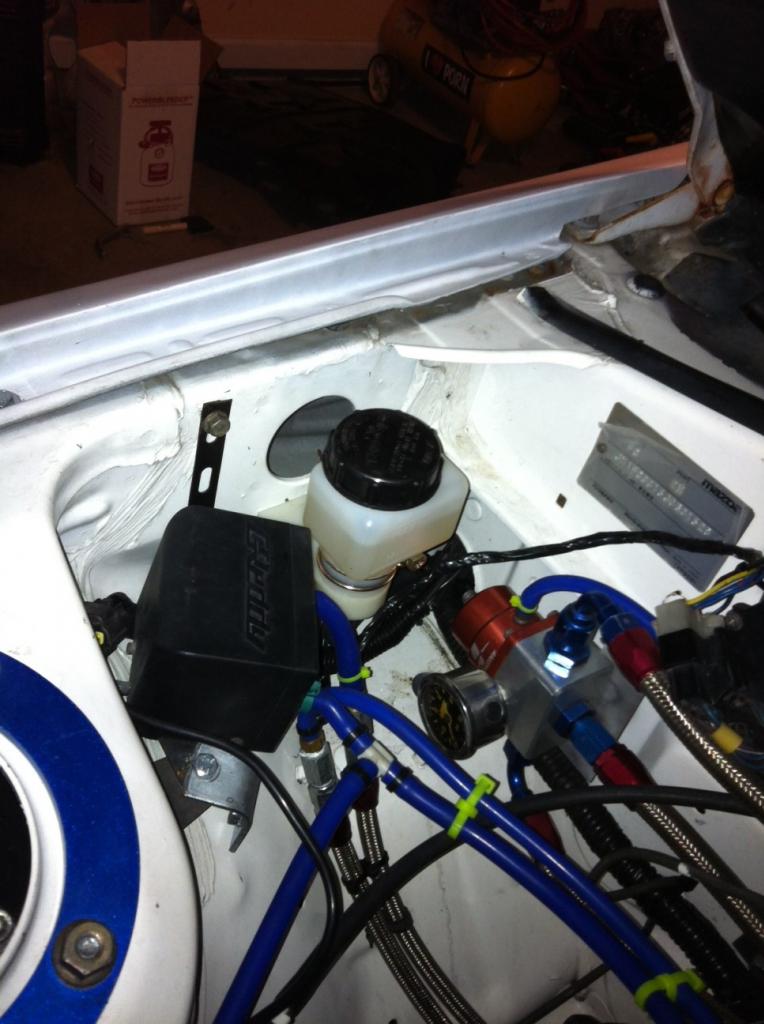
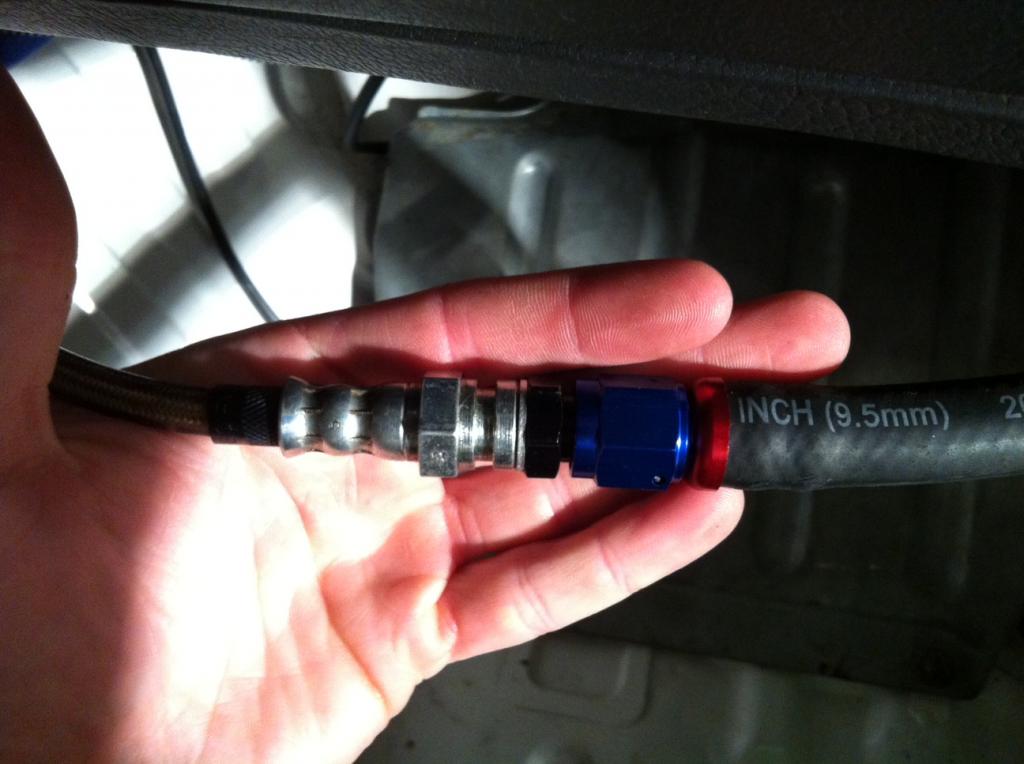
I got an AN to brake line adapter fitting(~$6 from Summit) to go from the wilwood kit's soft line to my hard lines that had made at a local brake shop.
From there it went into my Isis handbrake(~$90 from Enjuku). You could see here how it could be an issue if the reservoir was there. Yes, I know the cylinder is "upside down". No, I didnt have problems bleeding it. I flipped it like that to avoid smashing my elbow on the fittings
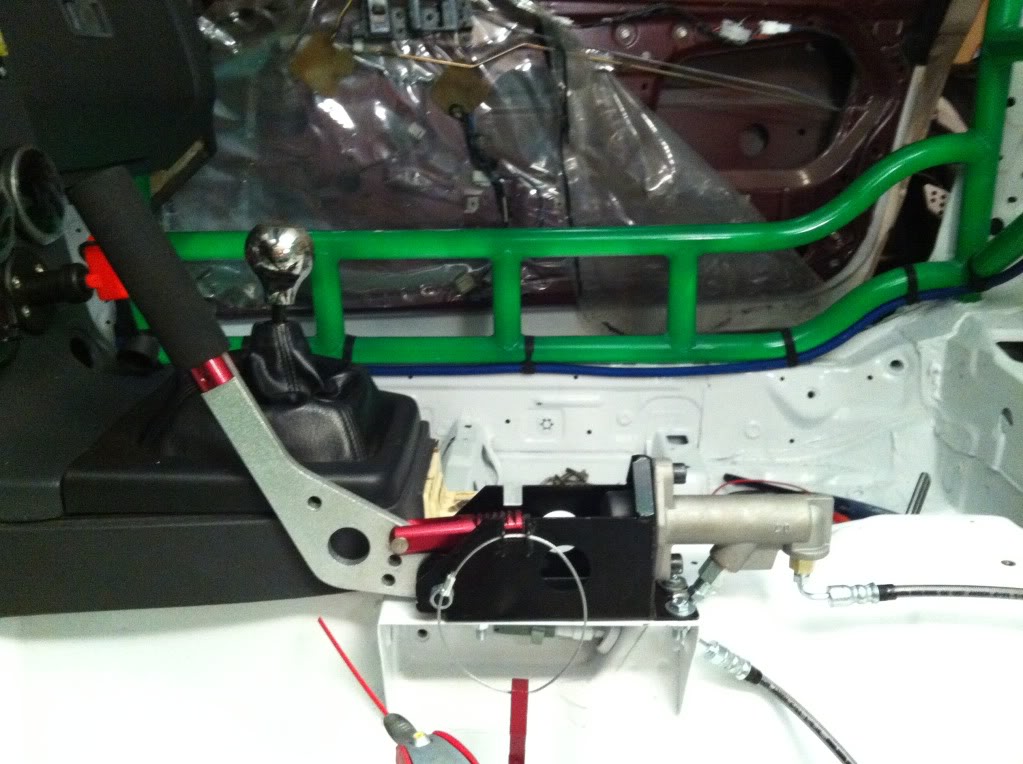
From there, it went into my custom brake lines and tee fitting I had made. Cost me about $110 to for this
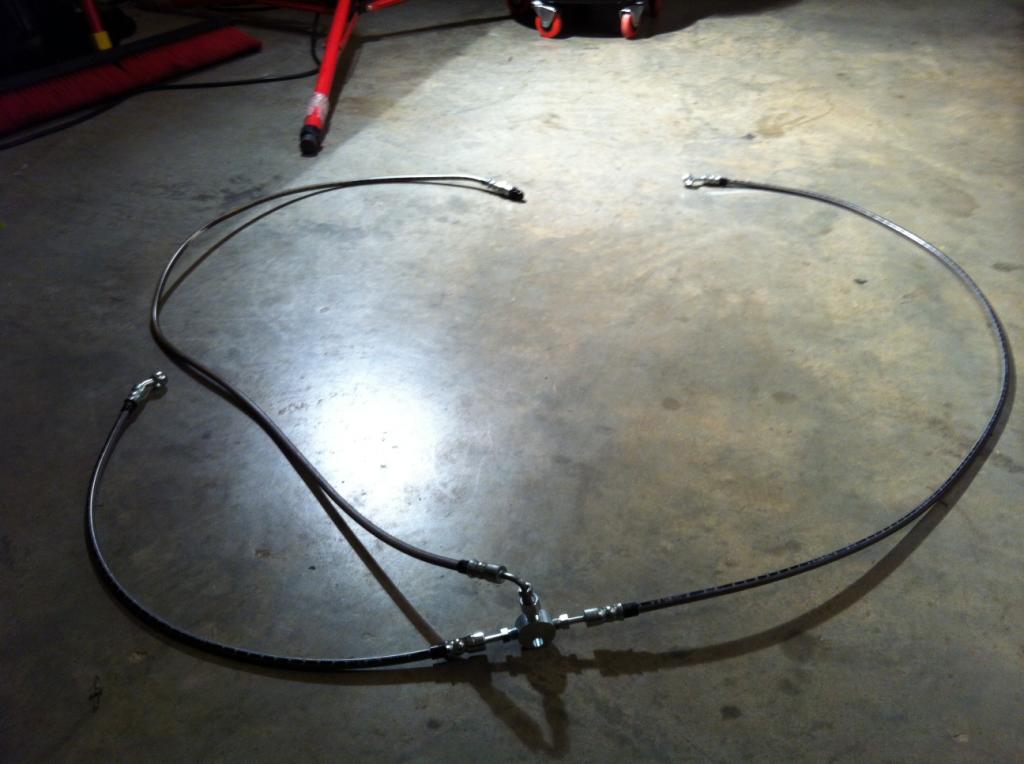
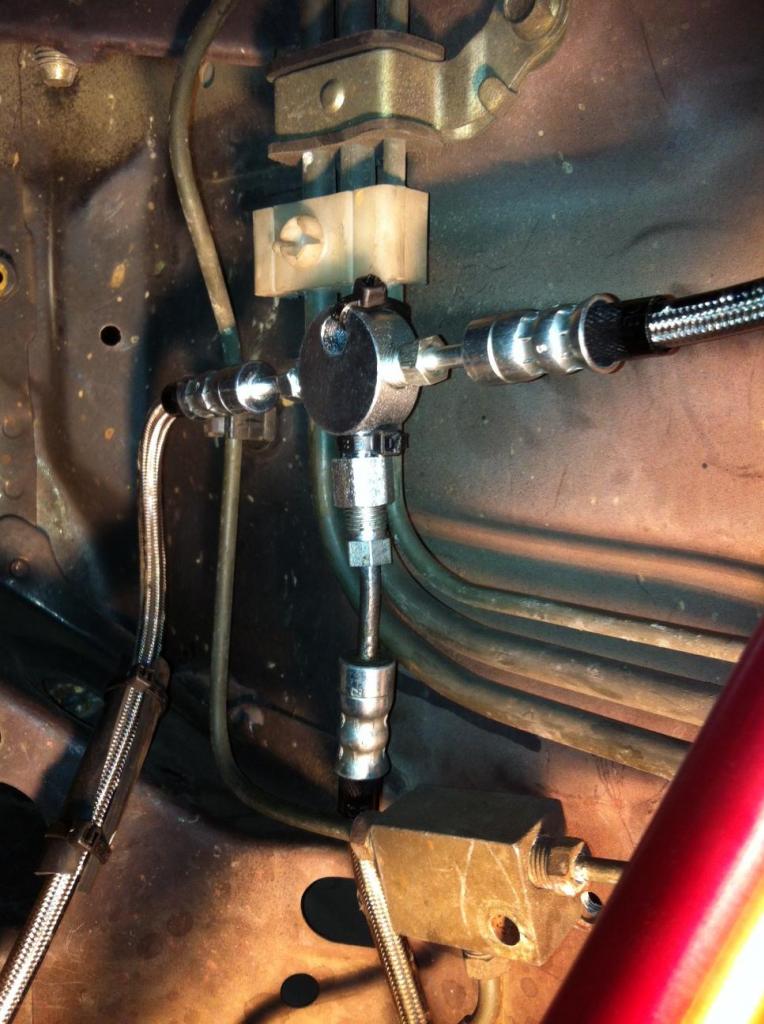
Ran the lines and mounted the tee fitting next to the stock tee fitting. Then just hooked them up to the brakes like normal from here

Here's what I provided, starting from front to back:
I didn't like the idea of the fluid reservoir being in the cabin or obvious reasons and I also wanted the extra clearance for my elbow when pulling the handle. If the reservoir was on the brake itself, my driving position would have been too cramped for my liking. So I got a Wilwood remote reservoir kit from Summit for like $39. Mounted it on the inside of the passenger fender

I got an AN to brake line adapter fitting(~$6 from Summit) to go from the wilwood kit's soft line to my hard lines that had made at a local brake shop.

From there it went into my Isis handbrake(~$90 from Enjuku). You could see here how it could be an issue if the reservoir was there. Yes, I know the cylinder is "upside down". No, I didnt have problems bleeding it. I flipped it like that to avoid smashing my elbow on the fittings

From there, it went into my custom brake lines and tee fitting I had made. Cost me about $110 to for this

Ran the lines and mounted the tee fitting next to the stock tee fitting. Then just hooked them up to the brakes like normal from here

Trending Topics

Honestly, the stock FC handbrake is pretty damn good. Id just leave it if i could do it again.
This mount setup is solid. But if you are refering to the handbrake "feel" I'm not satisfied with it yet. But that has nothing to do with this kit. It all comes down to the hydraulics you use in the system. I wouldnt recommend the Isis handbrake. The handle is too short to get good leverage and the overall build quality is OK. Not bad, just ok. I would rather go go with a ASD handbrake but this isnt broken so Im not gonna fix it, would rather spend the money on tires. I also had lots of problems bleeding brand new calipers. I dont know if its because they are mounted upside down on the brackets or I just suck at bleeding brakes(but i doubt it, done it 1000 times before). It doesnt quite "lock" like i want it to. Theres like 1/2 sec of drag before it locks. But once the tires and pads get hot, it locks a lot harder. But im sure that has a lot to do with air still in my lines. Also, the pads you use will have a huge impact on the feel of it too.

Thread
Thread Starter
Forum
Replies
Last Post
djritz
3rd Generation Specific (1993-2002)
2
Aug 25, 2015 02:46 PM
Frisky Arab
2nd Generation Specific (1986-1992)
13
Aug 18, 2015 05:30 PM