
1993 rx-7 r1

1993 rx-7 r1
Hey everyone, been looking on and off for an FD for the past few years and finally found one with cloth seats and no sunroof unmolested. I'm not new to rotaries, own an 04 RX-8, and built a custom scale twin rotor nitro engine (~1/4 scale). Since I was in middle school I loved the FD. Hopefully this is an acceptable first thread to start.
Anyway on to the car...'93 R1
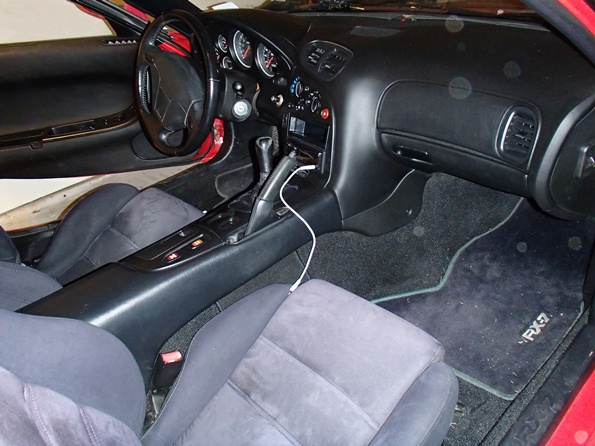
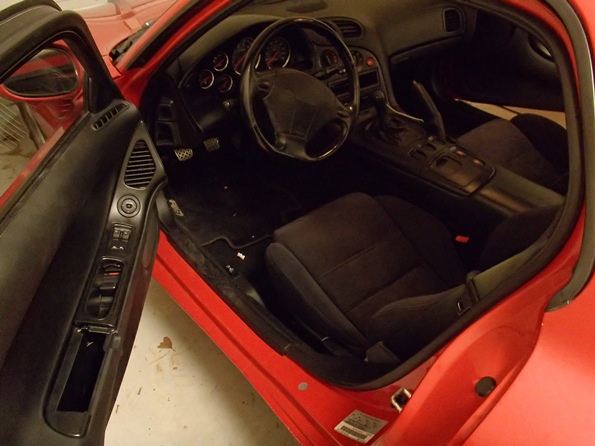
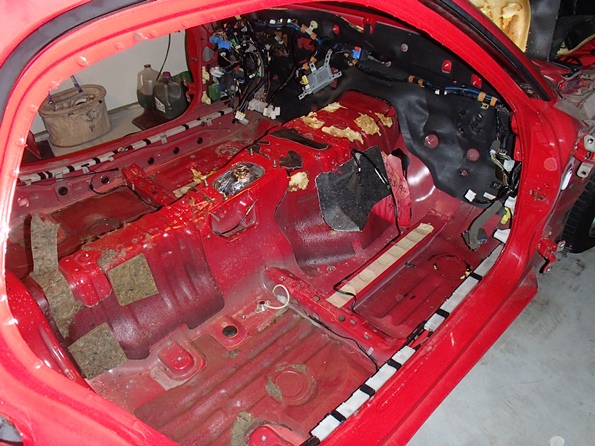
Interior:
Original Condition: Center console scratches/wear, foggy lens over tach, slight odd smell, cracked/warped defroster, broken driver door map bocket lid, and cracked plastic under the 'leather' rear trans tunnel (elbow area just aft of the ash tray).
Plans: Keep original, custom Speedhut Gauges, and Possibly Recaro seats (seats far down road)
Pics:
Exterior:
Original Condition: Horrible roof, spoiler, mirror and trunk paint fade (salmon/pink), few dents and dings, missing headlight cover (included primed replacement in sale), faded plastics.
Plans: Complete repaint (engine bay, jams, wells, etc), 99+ lip/spoiler/bumper/lights, original (very unlikely)/reproduction MS hood, wheels (99+ stock or other - bronze?). All the stock components will be held onto a restored at the same time.
Pics:
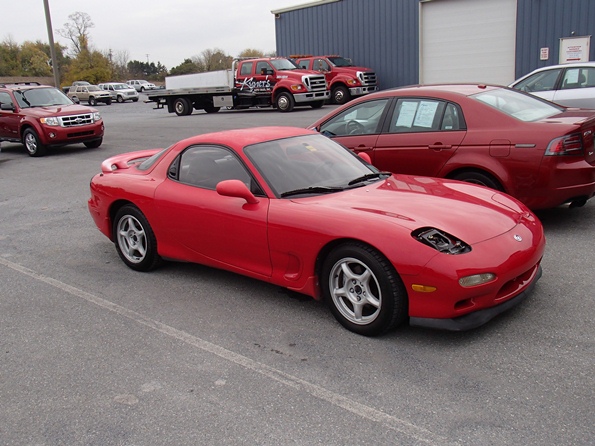
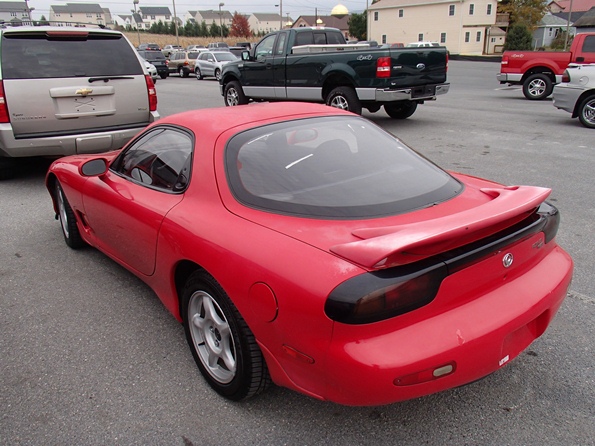
Pics make the paint look much better than it truly is.
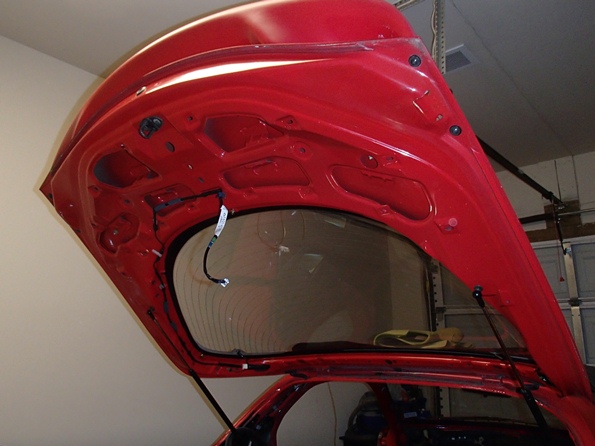
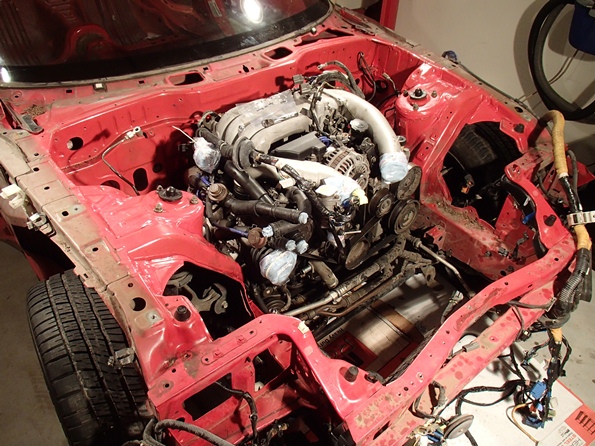
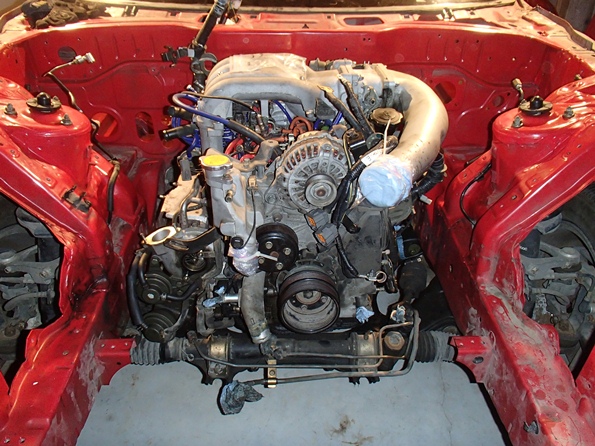
I dont have engine pics at this time but its not in bad condition. Appeared to have some type of battery malfunction that did some damage to surrounding aluminum/plastic components. It appeared to have been occasionally shorted on the hood while driving. The pos terminal is exposed and directly above it there is etching in the hood.
on to progress so far...
Anyway on to the car...'93 R1
Interior:
Original Condition: Center console scratches/wear, foggy lens over tach, slight odd smell, cracked/warped defroster, broken driver door map bocket lid, and cracked plastic under the 'leather' rear trans tunnel (elbow area just aft of the ash tray).
Plans: Keep original, custom Speedhut Gauges, and Possibly Recaro seats (seats far down road)
Pics:
Exterior:
Original Condition: Horrible roof, spoiler, mirror and trunk paint fade (salmon/pink), few dents and dings, missing headlight cover (included primed replacement in sale), faded plastics.
Plans: Complete repaint (engine bay, jams, wells, etc), 99+ lip/spoiler/bumper/lights, original (very unlikely)/reproduction MS hood, wheels (99+ stock or other - bronze?). All the stock components will be held onto a restored at the same time.
Pics:
Pics make the paint look much better than it truly is.
I dont have engine pics at this time but its not in bad condition. Appeared to have some type of battery malfunction that did some damage to surrounding aluminum/plastic components. It appeared to have been occasionally shorted on the hood while driving. The pos terminal is exposed and directly above it there is etching in the hood.
on to progress so far...
I drove it for three days, what a blast. The transmission is a little notchy and I see a trans rebuild in the near future. But no hesitation, misfire, etc. it pulled strong. Didn't waste and time I began digging in.
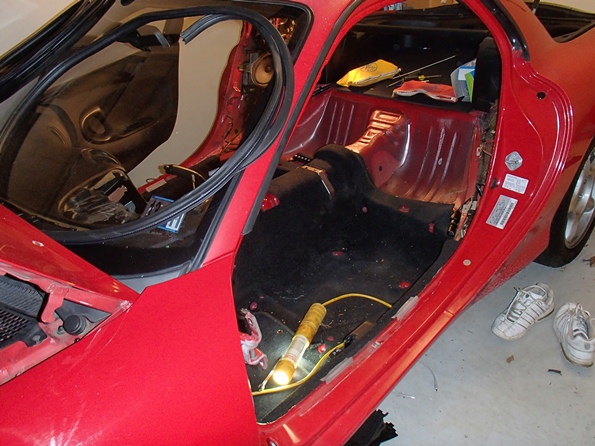
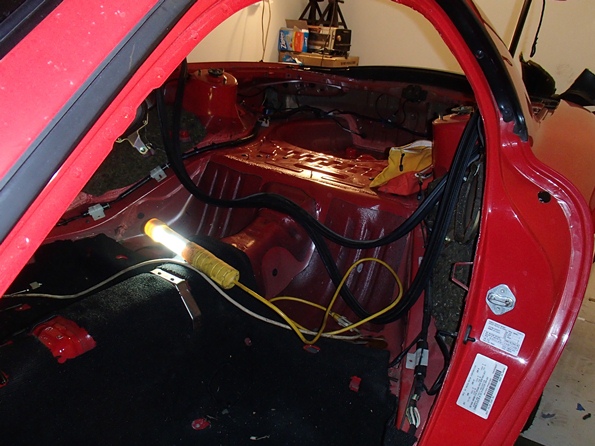
I have the interior almost completely gutted. If you are looking for any specific pictures let me know while everything is out.
I have been photographing each and every step, and keeping a daily log of part by part removal and hours. Figured it would be a cool log to have to look back on and track my hours in the car. Plus it will be an invaluable aid in reassembling the car.
Interior Disassembly:
End of Day One:

End of Day Two:
Found this guy under my rear storage. Might have been adding to the odd smell. I guess it was a mouse or chipmunk, but the resident was no where to be found.
End of Day Three:
End of Day Four:
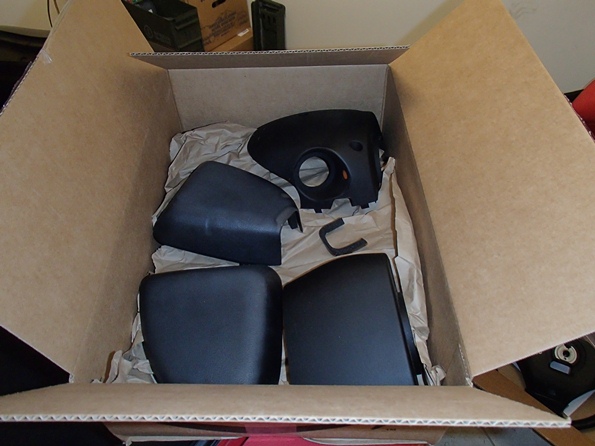
Been keeping all the interior wrapped and boxed for safety while bagging and tagging all the screws, nuts, clips, etc...
more...
I have the interior almost completely gutted. If you are looking for any specific pictures let me know while everything is out.
I have been photographing each and every step, and keeping a daily log of part by part removal and hours. Figured it would be a cool log to have to look back on and track my hours in the car. Plus it will be an invaluable aid in reassembling the car.
Interior Disassembly:
End of Day One:
End of Day Two:
Found this guy under my rear storage. Might have been adding to the odd smell. I guess it was a mouse or chipmunk, but the resident was no where to be found.
End of Day Three:
End of Day Four:
Been keeping all the interior wrapped and boxed for safety while bagging and tagging all the screws, nuts, clips, etc...
more...
End of Day Five:
Been noticing a few places with the speckled rust pattern. As of right now it appears to just be surface. I guess taking a wire wheel/media blaster prior to paint would fix this? Its not prevalent by any means, just a few random interior sections.

Thats all I got to this point. Just a few hours each night. Next major projects will be to removed the AC/heater cores, interior wiring and foam/insulation.
Any tips or warnings on future work would be appreciated! Also has any one else ever seen that speckled rust pattern on the interior of their car body? It surprised me for how rust free the exterior is. Also stuck on removing the two spoiler nuts. The bolt is just spinning when I try and remove the nut.
Been noticing a few places with the speckled rust pattern. As of right now it appears to just be surface. I guess taking a wire wheel/media blaster prior to paint would fix this? Its not prevalent by any means, just a few random interior sections.
Thats all I got to this point. Just a few hours each night. Next major projects will be to removed the AC/heater cores, interior wiring and foam/insulation.
Any tips or warnings on future work would be appreciated! Also has any one else ever seen that speckled rust pattern on the interior of their car body? It surprised me for how rust free the exterior is. Also stuck on removing the two spoiler nuts. The bolt is just spinning when I try and remove the nut.
^ actually I looked at it again, and it appears to just something else. It looks like rust but can be wiped off with a rag?!? A rag and some citrus cleaner should do the job. I want to get a bore scope and check down deeper into the chassis to see if there is more or another nest hiding.
More updates:
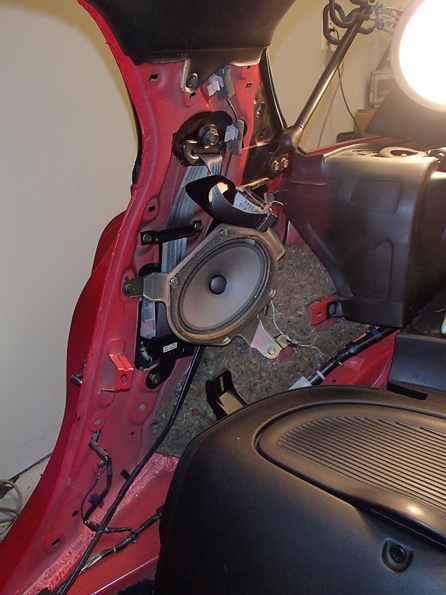
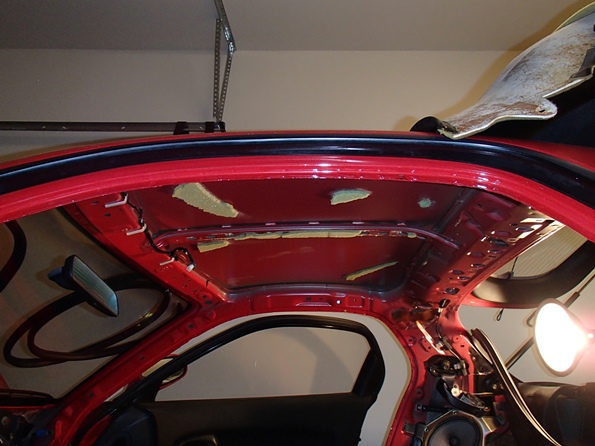
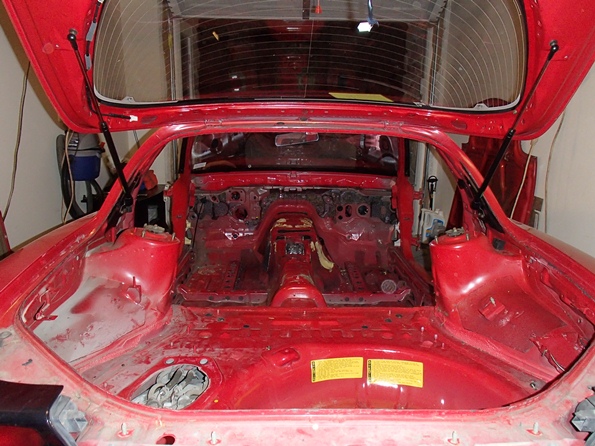
Carpet, AC, Heater and Blower Cores removed:
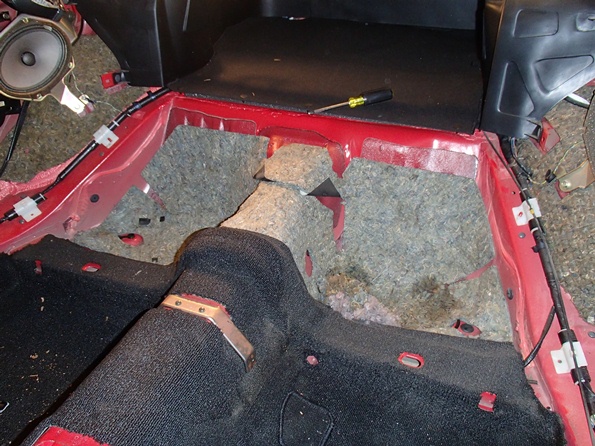
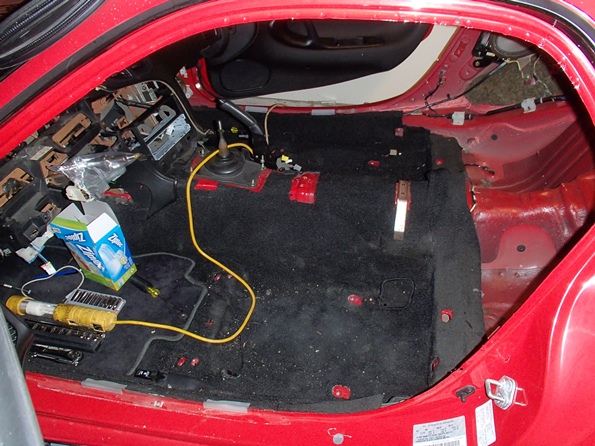
Finished gutting the entire interior:
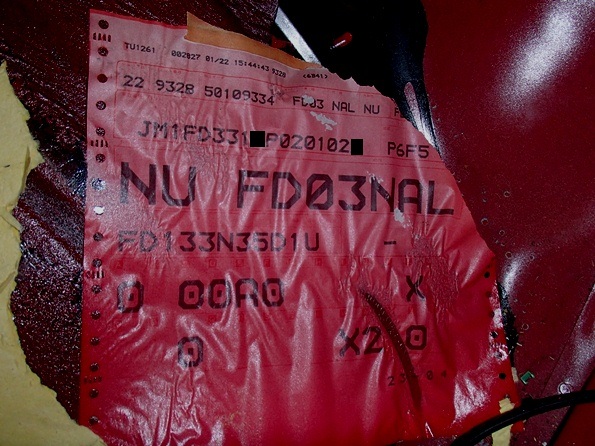
I found this under the capet and stuck to the tar on the trans tunnel. Does anyone have an additional information on what each section means or what it is used for?
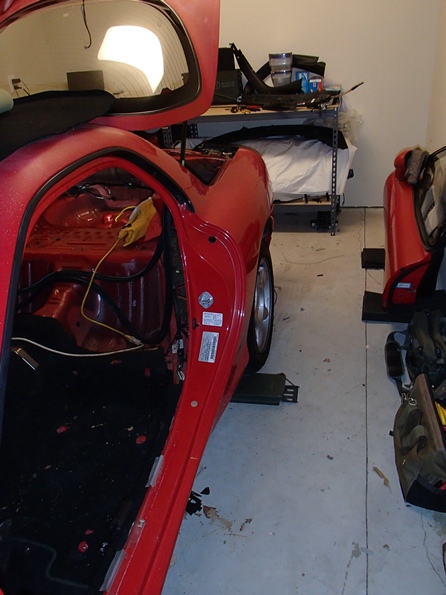
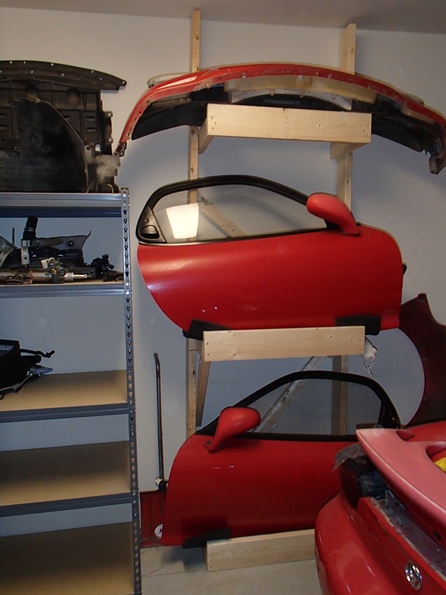
I needed to make more space and organize the parts. Made a simple door and bumper rack, not the prettiest but it gets the job done.
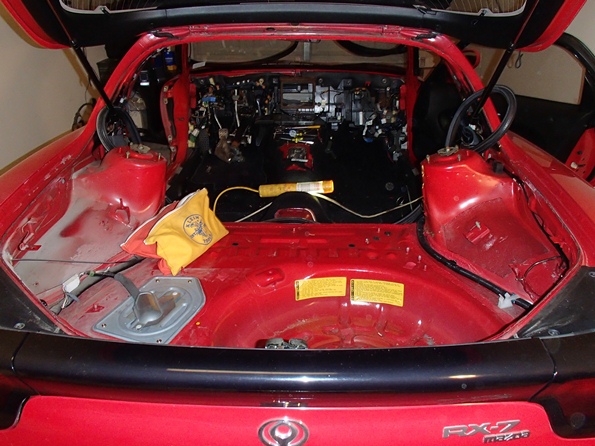
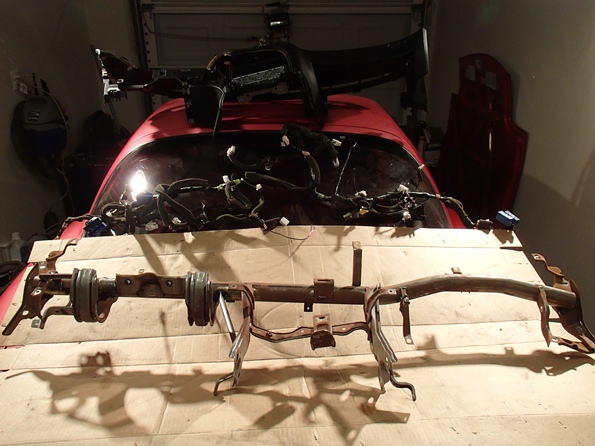
As it currently stands. Looking forward to pulling the engine, dropping the sub-frames and getting it on a rotisserie.
More updates:
Carpet, AC, Heater and Blower Cores removed:
Finished gutting the entire interior:
I found this under the capet and stuck to the tar on the trans tunnel. Does anyone have an additional information on what each section means or what it is used for?
I needed to make more space and organize the parts. Made a simple door and bumper rack, not the prettiest but it gets the job done.
As it currently stands. Looking forward to pulling the engine, dropping the sub-frames and getting it on a rotisserie.


Trending Topics
Few more updates. Nothing too interesting yet just more tear down.
Disassembled the driver & pass doors, removed the rear hatch glass, and removed the rear hatch itself. My wall o' parts is complete.

Removed the entire exhaust system, air pump, ac comp, power steering pump, Y pipe, oil coolers, and oil lines. Thats as far as I will take in down in the car. Most of this will not be returning to the car.
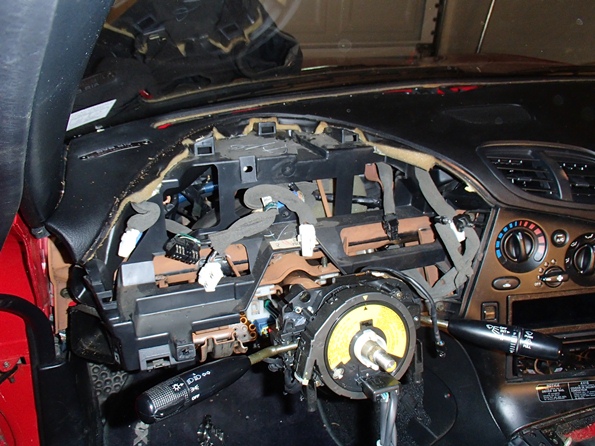
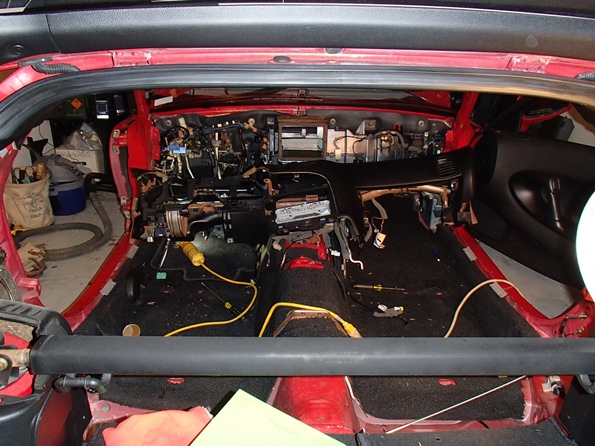
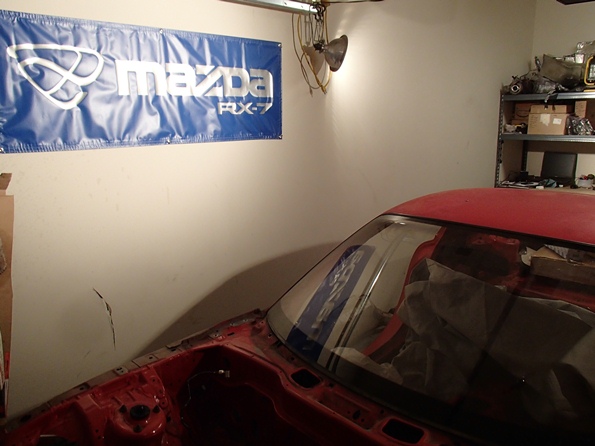
Change of pace and disassembled the entire dash. Wanted to get it disassembled so I could get the cover out of my garage before it got damaged. I basically have an FD interior in my bedroom, plus glass.
Disassembled the driver & pass doors, removed the rear hatch glass, and removed the rear hatch itself. My wall o' parts is complete.
Removed the entire exhaust system, air pump, ac comp, power steering pump, Y pipe, oil coolers, and oil lines. Thats as far as I will take in down in the car. Most of this will not be returning to the car.
Change of pace and disassembled the entire dash. Wanted to get it disassembled so I could get the cover out of my garage before it got damaged. I basically have an FD interior in my bedroom, plus glass.
Help?
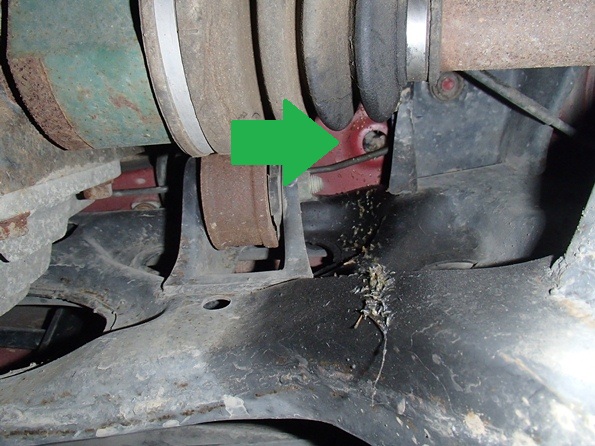
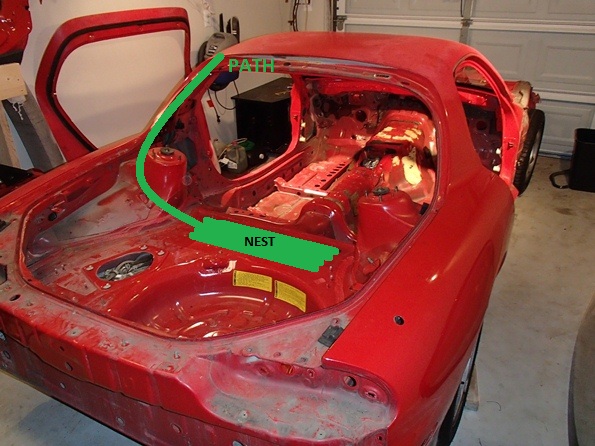
I knew I would find more rodent damage/nests in the car at some point or another. When I was under the car removing the exhaust I noticed this, feces/urine from the intruder which led me to his entry point:
Its directly under the trunk floor, between the rear strut towers. I cannot find any other way of getting to this area other than the two small ports on the bottom of the car. I can see its packed full of junk and who knows what else.
Planning my attack, dont want to cut or drill through the spot welds:
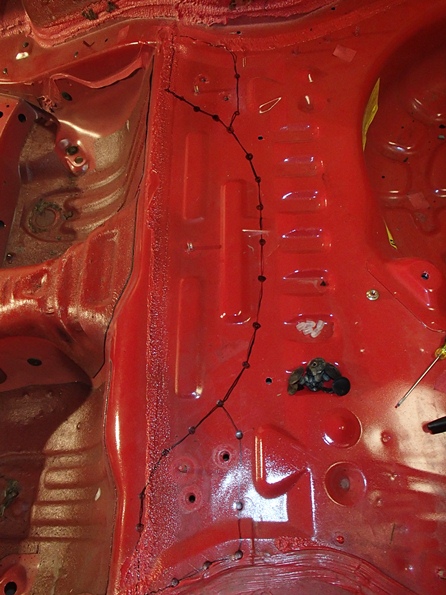
Mapped out his road system from its urine trail. Tip, If you ever plan to sneak around and dont want to get caught. Dont leave a trail of urine behind.
I know some of you will say leave it alone, but I cant. The OCD side of me is going crazy right now. I am rebuilding this car to sales floor condition and this I cant leave behind. For my own quality of work and health reasons.
Help request:
Does anyone know how to get into this chassis tunnel/tube to clean it out and repair the inevitable rust/urine damage?
All I can think of right now is to drill/cut through the trunk floor. It doesn't seem structural as I can flex it with my index finger. I'm going to hold off until its on a rotisserie so I can better search for an entry point. However, any help or guidance would really be appreciated.
Thanks
-B
Its directly under the trunk floor, between the rear strut towers. I cannot find any other way of getting to this area other than the two small ports on the bottom of the car. I can see its packed full of junk and who knows what else.
Planning my attack, dont want to cut or drill through the spot welds:
Mapped out his road system from its urine trail. Tip, If you ever plan to sneak around and dont want to get caught. Dont leave a trail of urine behind.
I know some of you will say leave it alone, but I cant. The OCD side of me is going crazy right now. I am rebuilding this car to sales floor condition and this I cant leave behind. For my own quality of work and health reasons.
Help request:
Does anyone know how to get into this chassis tunnel/tube to clean it out and repair the inevitable rust/urine damage?
All I can think of right now is to drill/cut through the trunk floor. It doesn't seem structural as I can flex it with my index finger. I'm going to hold off until its on a rotisserie so I can better search for an entry point. However, any help or guidance would really be appreciated.
Thanks
-B


Been a while since an update. Most of my work is nothing new to 7 club so I figured I would hold off on posting. I am still planning my rodent assault, but found out his dining room was nestled right next to each oil injector. Nice collection of seed shells all over my engine block.
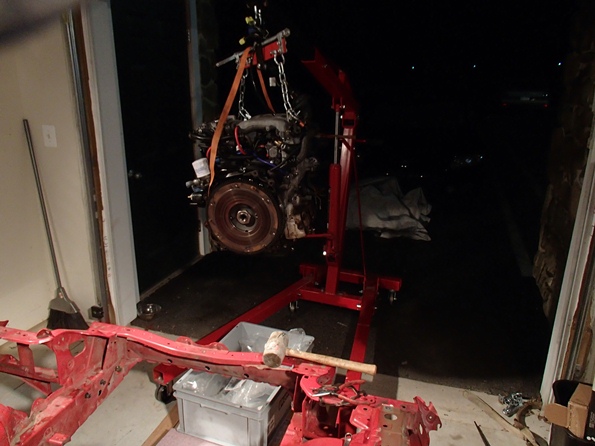
Engine out. I didn't have the car lifted so space was a minimum. There way not much working room under the car, and I got pissed trying to see & figure out disengaging the clutch. I just decided to unbolt the pressure plate. Almost always work by myself, so if I can avoid lifting the car while under it I try to avoid it (reduce risk of it falling on me)
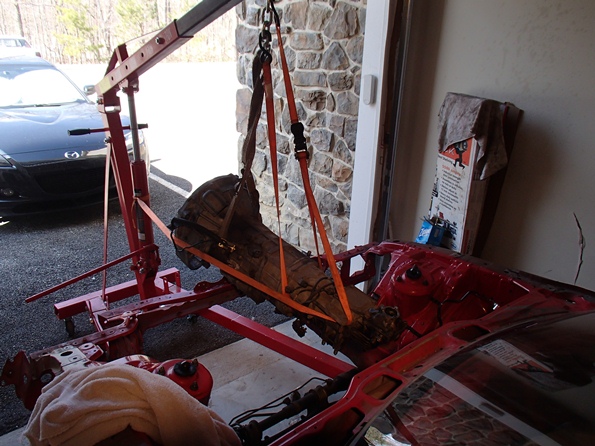
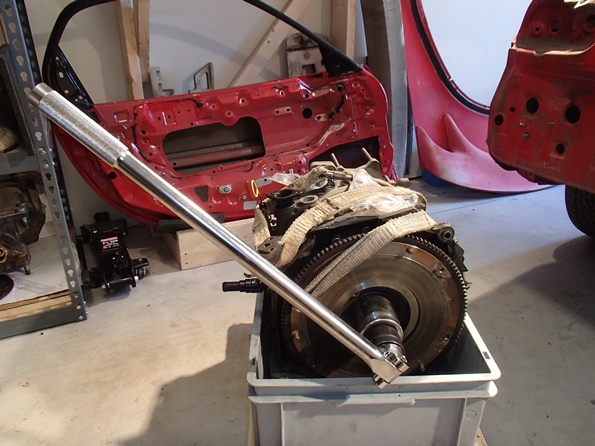
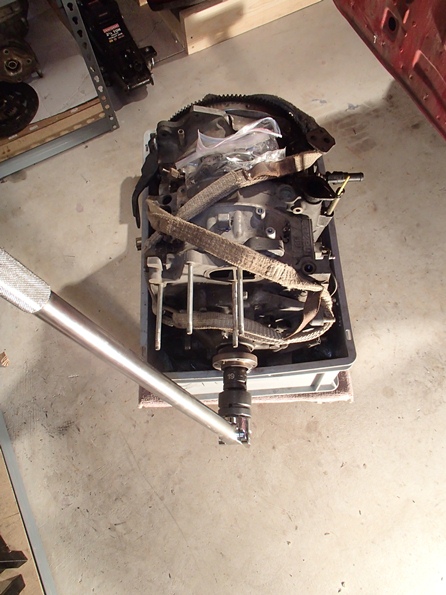
Next was the transmission. Wow! Are the PPF nuts a PITA to remove, I was waiting for my shoulder to blow out. The trans will be rebuilt, just about every gear had a grind (other than 5th). Not matter how slow, fast, light pressure, etc I tried...it would grind. Buying a second trans might be a better idea, but its something I want to give a try. If i succeed or fail I will learn about the trans.
Engine disassembly. Got myself ready for war with the fly wheel nut, but it barley put up a fight. I instantly knew something was about to go wrong. And then came the front nut...cost me a breaker, adapter, and ratchet. 1" breaker with 3/4" 19mm socket did the trick, oh and plenty of heat!
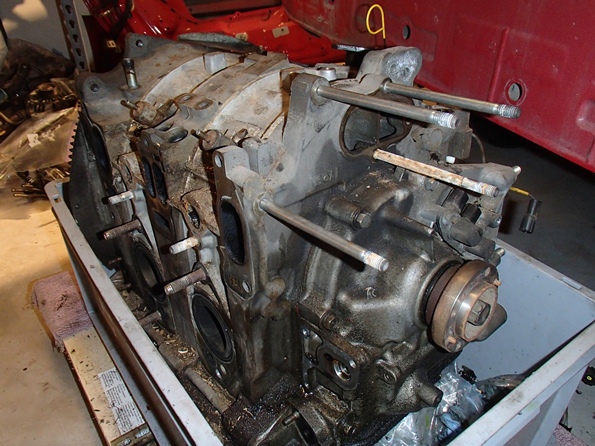
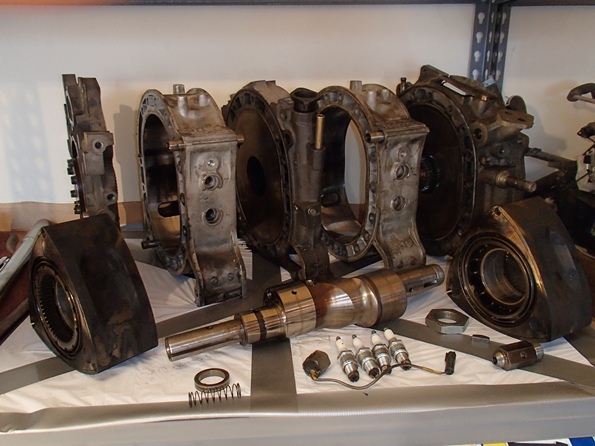
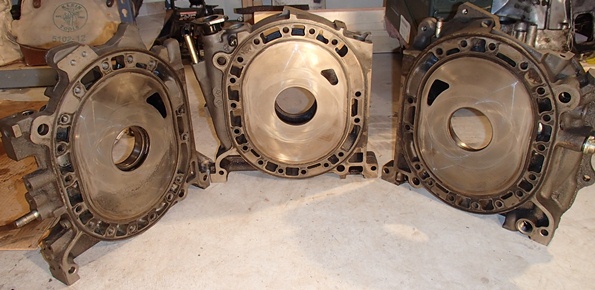
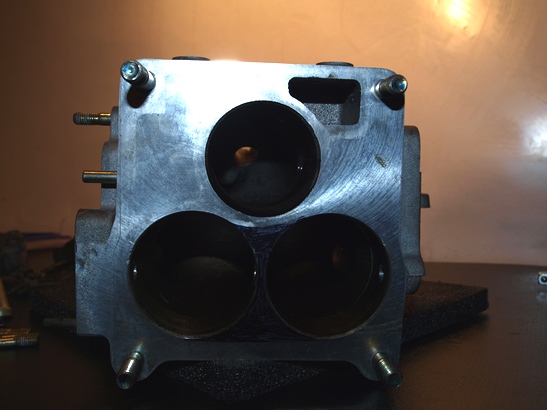
Engine condition. Both rotor housings have chrome flaking around the rear edge, and one has carbon stains (apex floating?) above the exhaust port. I think the flaking is still below or at the 2mm limit, but will probably get replacements. Why rebuild the engine with components that are just about reject-able. No cracking around the plug holes. The irons appear to be in decent shape, no over heated discoloration. I still need to do all the inspections measurements to see whats good. I still have a lot to learn on inspecting the engine parts, more info on what components are good will come later on.
Decoration:
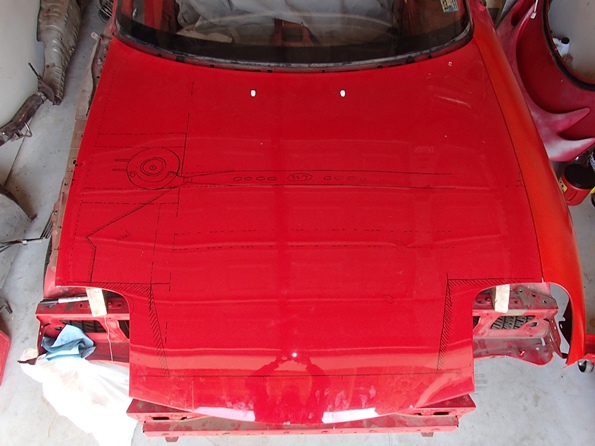
Little side project. Might stray from my initial 100% stock plan. I refuse to cut or drill (anything irreversible) to the car or original parts. So I am thinking of using the stock hood to make a mold for my own custom hood. I want to try and duct the intercooler and ?radiator? out the hood. Laying out the location of the opening in the hood. The vent will have influences from the mazdaspeed hood.
Also, about two weeks away from ordering a complete 99+ front end! Looking to order from Corksport, best price+shipping I could find. Once it arrives I can really start planning out my ducting. Got a lot of ideas for the brakes, oil cooler-side vent, radiator, intercooler, etc...but no bumper is making it hard to plan out. Just hit 105 hours into the car so far, no rush.
Engine out. I didn't have the car lifted so space was a minimum. There way not much working room under the car, and I got pissed trying to see & figure out disengaging the clutch. I just decided to unbolt the pressure plate. Almost always work by myself, so if I can avoid lifting the car while under it I try to avoid it (reduce risk of it falling on me)
Next was the transmission. Wow! Are the PPF nuts a PITA to remove, I was waiting for my shoulder to blow out. The trans will be rebuilt, just about every gear had a grind (other than 5th). Not matter how slow, fast, light pressure, etc I tried...it would grind. Buying a second trans might be a better idea, but its something I want to give a try. If i succeed or fail I will learn about the trans.
Engine disassembly. Got myself ready for war with the fly wheel nut, but it barley put up a fight. I instantly knew something was about to go wrong. And then came the front nut...cost me a breaker, adapter, and ratchet. 1" breaker with 3/4" 19mm socket did the trick, oh and plenty of heat!
Engine condition. Both rotor housings have chrome flaking around the rear edge, and one has carbon stains (apex floating?) above the exhaust port. I think the flaking is still below or at the 2mm limit, but will probably get replacements. Why rebuild the engine with components that are just about reject-able. No cracking around the plug holes. The irons appear to be in decent shape, no over heated discoloration. I still need to do all the inspections measurements to see whats good. I still have a lot to learn on inspecting the engine parts, more info on what components are good will come later on.
Decoration:
Little side project. Might stray from my initial 100% stock plan. I refuse to cut or drill (anything irreversible) to the car or original parts. So I am thinking of using the stock hood to make a mold for my own custom hood. I want to try and duct the intercooler and ?radiator? out the hood. Laying out the location of the opening in the hood. The vent will have influences from the mazdaspeed hood.
Also, about two weeks away from ordering a complete 99+ front end! Looking to order from Corksport, best price+shipping I could find. Once it arrives I can really start planning out my ducting. Got a lot of ideas for the brakes, oil cooler-side vent, radiator, intercooler, etc...but no bumper is making it hard to plan out. Just hit 105 hours into the car so far, no rush.


Little more progress. A picture is worth a thousand words, so here you go:
4 Day Rotor Bath (Zep De-greaser):
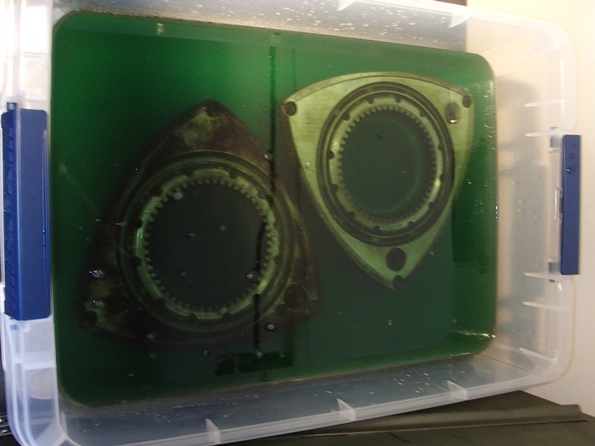
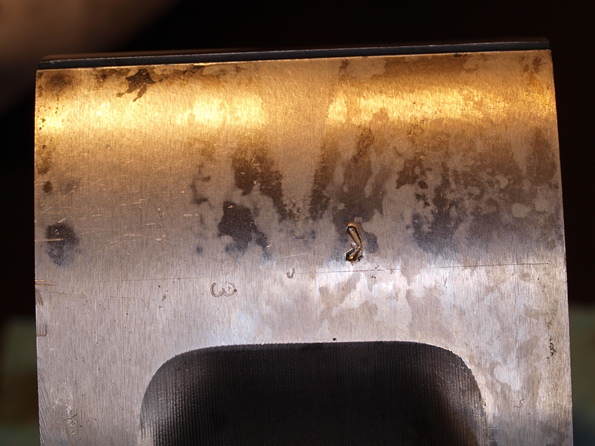
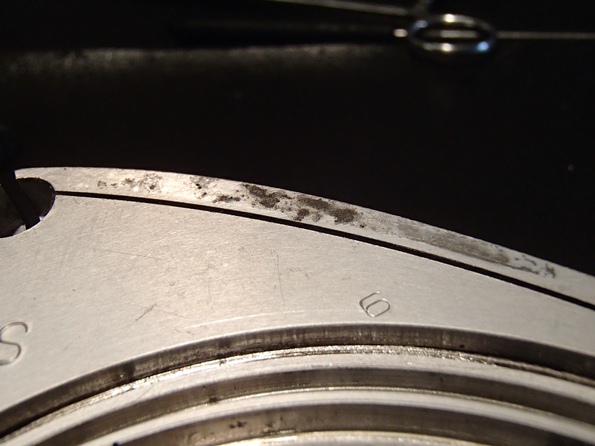
Side Rust & Face Mark:
-Surface grind / clearance rotor to remove the surface rust, it is only outside of the side seals?
-Is the indent some kind of identification mark? I cant see it being an impact since the rotor housings are undamaged?

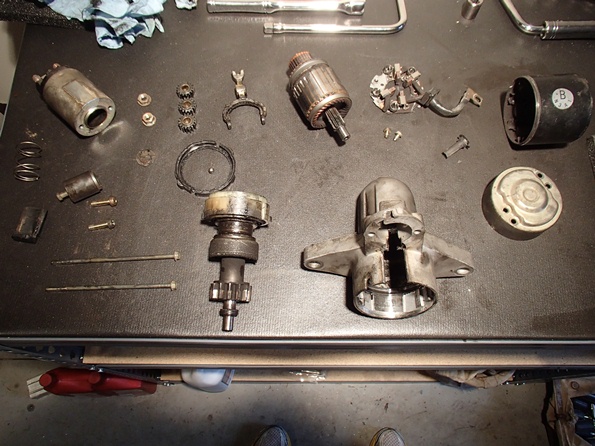
Starter Rebuild:

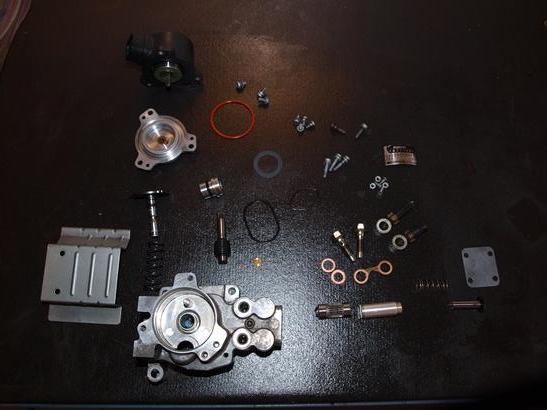
OMP/MOP Rebuild & Inspection:
Alternator Rebuilt:

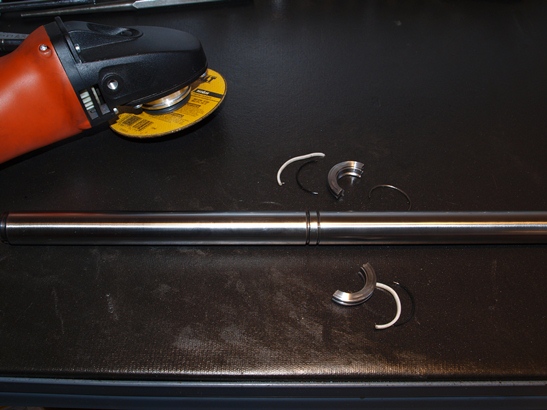
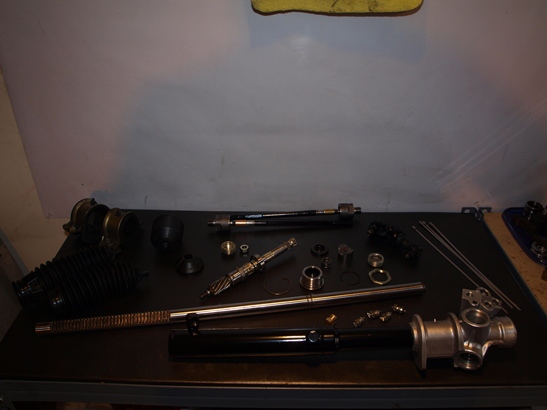
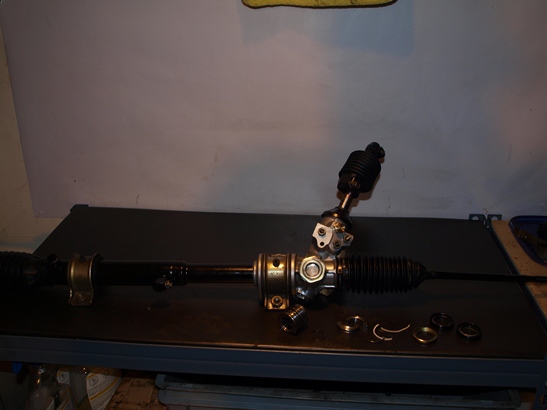
Steering Rack Clean, De-power (Seal, Valve & Piston Removal - non loop line) & Rebuild:
...
4 Day Rotor Bath (Zep De-greaser):

Side Rust & Face Mark:
-Surface grind / clearance rotor to remove the surface rust, it is only outside of the side seals?
-Is the indent some kind of identification mark? I cant see it being an impact since the rotor housings are undamaged?


Starter Rebuild:


OMP/MOP Rebuild & Inspection:


Alternator Rebuilt:

Steering Rack Clean, De-power (Seal, Valve & Piston Removal - non loop line) & Rebuild:


...
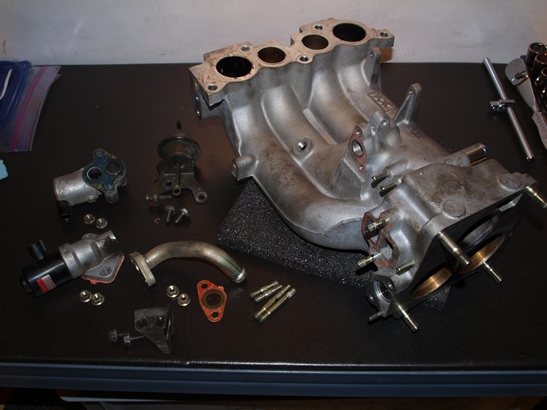
Throttle Body Disassembled:
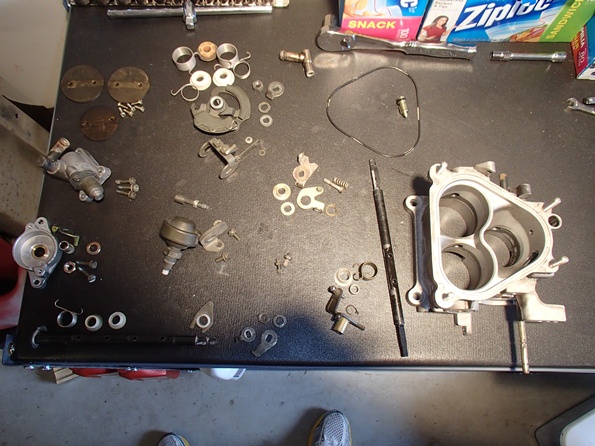
Has anyone removed the bridge between the two throttle plates on the UIM (black colored area - not accurately drawn). It does not meet flush with the back of the throttle body (small cutout in throttle body), possibly help slightly with response as polishing does?
UIM Disassembled:
Any help on my rotor and UIM modification questions would be greatly appreciated. Hope your enjoying so far. Again I now have around 8GB of FD disassembly photos, if you need help locating something.

Has anyone removed the bridge between the two throttle plates on the UIM (black colored area - not accurately drawn). It does not meet flush with the back of the throttle body (small cutout in throttle body), possibly help slightly with response as polishing does?

UIM Disassembled:

Any help on my rotor and UIM modification questions would be greatly appreciated. Hope your enjoying so far. Again I now have around 8GB of FD disassembly photos, if you need help locating something.

Thanks guys, I am loving the work so far. Other than degreasing, I hate that part...along with all the pictures I have a few hundred labeled ziplock bags plus notes. Its helps to organize them by date, bag smaller sub assmeblies in one large main assembly bag, and then grouping the entire system of assemblies into one box.
Plus, you know your an FD owner when you got two seats and the front/rear glass next to your bed, dash on your dresser, and disassembled tail light on your coffee table.
The shop manuals are also a great help for referencing things I have naver worked on before.
Getting ready to order a trans rebuild kit, that will be my next major overhaul. I also finally saved up enough $'s for my 99 front end this Friday!

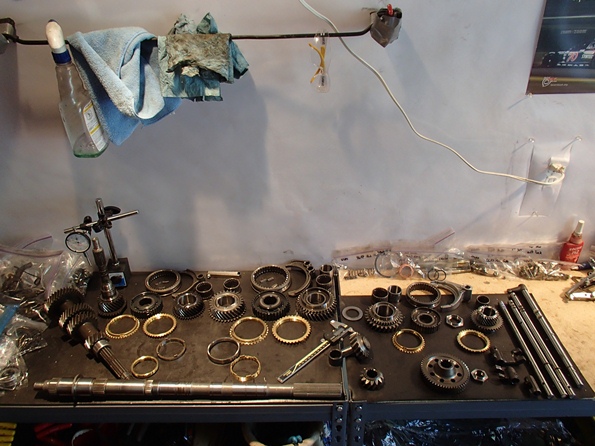
Nothing too great, as I am 50% through my trans rebuild when I forgot to order replacement snap rings & two shims/spacers that got damaged pulling the bearings. The best part was spending 5 hours trying to pull the input shaft bearing, but it finally gave way. Following the service manuals inspection guidelines most of my transmission was in good shape, other than the 5th/Rev shift fork and clutch ring (both replaced). Also while I'm in there I'm replacing all bearings & synchros. Ordered most of my parts through Ray at Malloy Mazda, great guy.
Staring my trans components inspection:
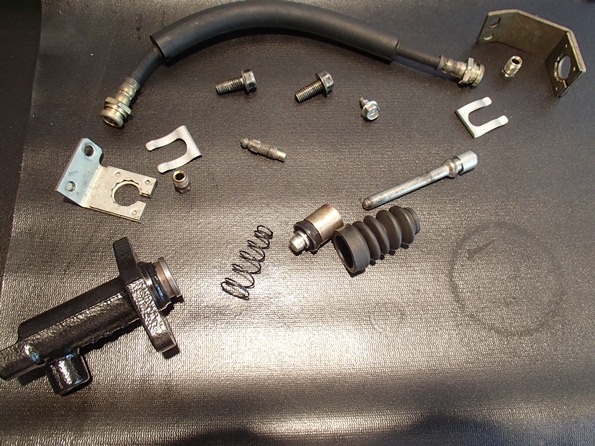
Clutch release fork:
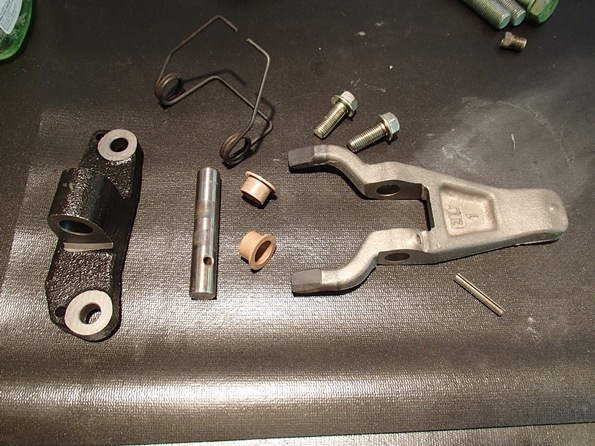
Slave Cylinder:
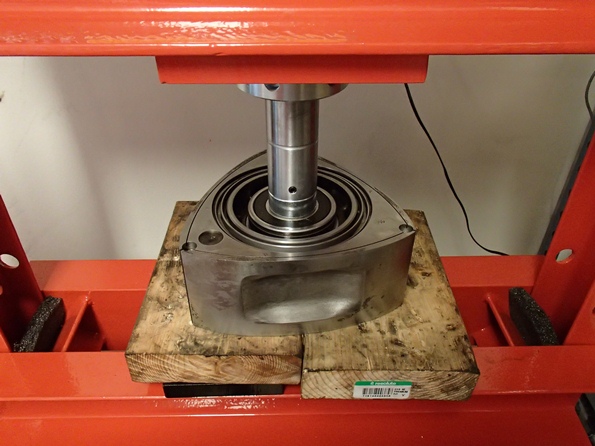
Pressing out rotor bearing, significant amount of bare copper showing around the entire bearing. Sounded like a gun shot when it finally released (~6 tons), & good use of an old trans bearing:
==========
Stumped by what I have seen with my rotors? I'll admit that I'm new to rebuilding a 13B, and am looking for some help! Is it common to have one rotor with textured ("lines"), and the other to have smooth faces? I have never seen a rotor like this before:
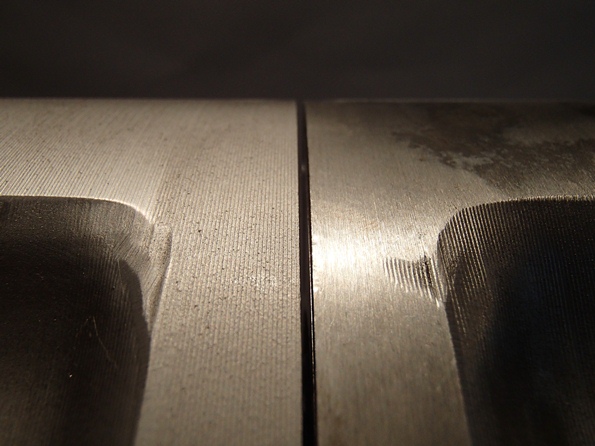
Are the indentations on my rotor faces used as identification marks? I doubt they are damage since the rotor housing is damage free. I would think they would lead to hot spots on the rotor face?
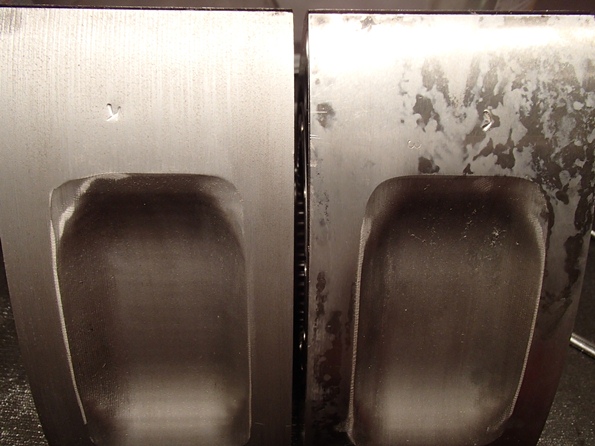
Again, more corrosion outside the side seals. Does this pose any hazards to the side housings?
Staring my trans components inspection:

Clutch release fork:

Slave Cylinder:

Pressing out rotor bearing, significant amount of bare copper showing around the entire bearing. Sounded like a gun shot when it finally released (~6 tons), & good use of an old trans bearing:

==========
Stumped by what I have seen with my rotors? I'll admit that I'm new to rebuilding a 13B, and am looking for some help! Is it common to have one rotor with textured ("lines"), and the other to have smooth faces? I have never seen a rotor like this before:

Are the indentations on my rotor faces used as identification marks? I doubt they are damage since the rotor housing is damage free. I would think they would lead to hot spots on the rotor face?

Again, more corrosion outside the side seals. Does this pose any hazards to the side housings?

