AFGMOTO1978 Build Thread

 09-26-12, 11:24 PM
#27
12/29/06
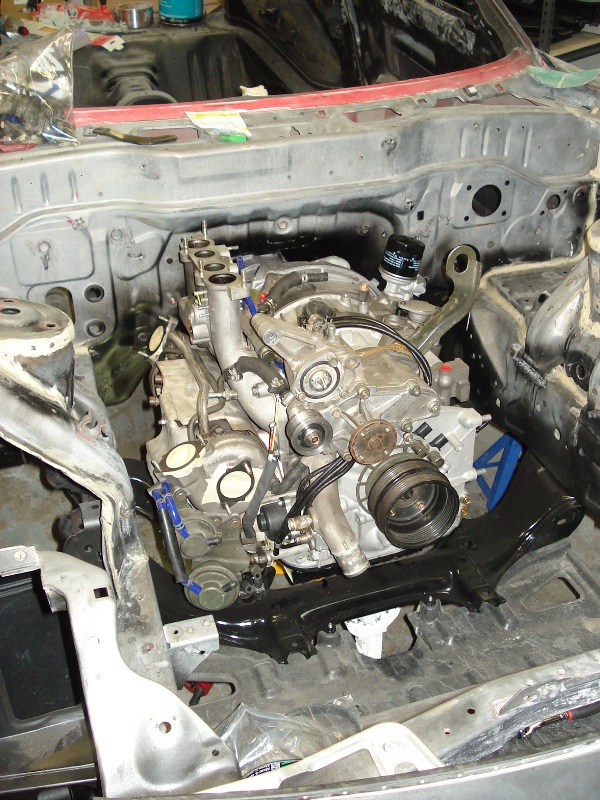
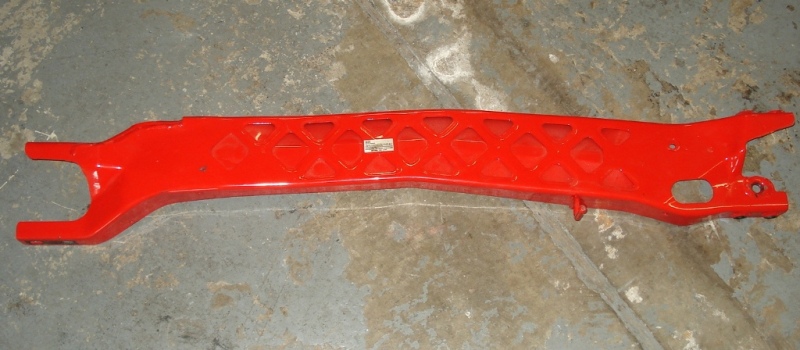
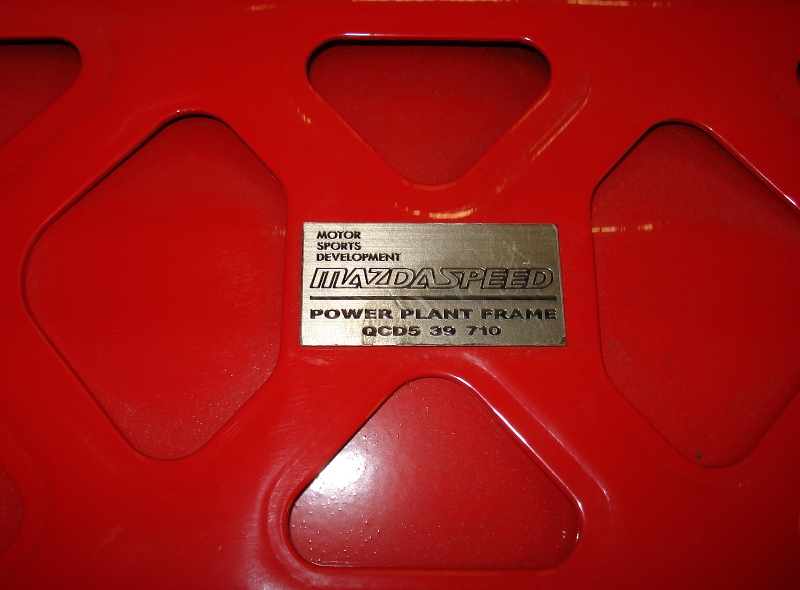
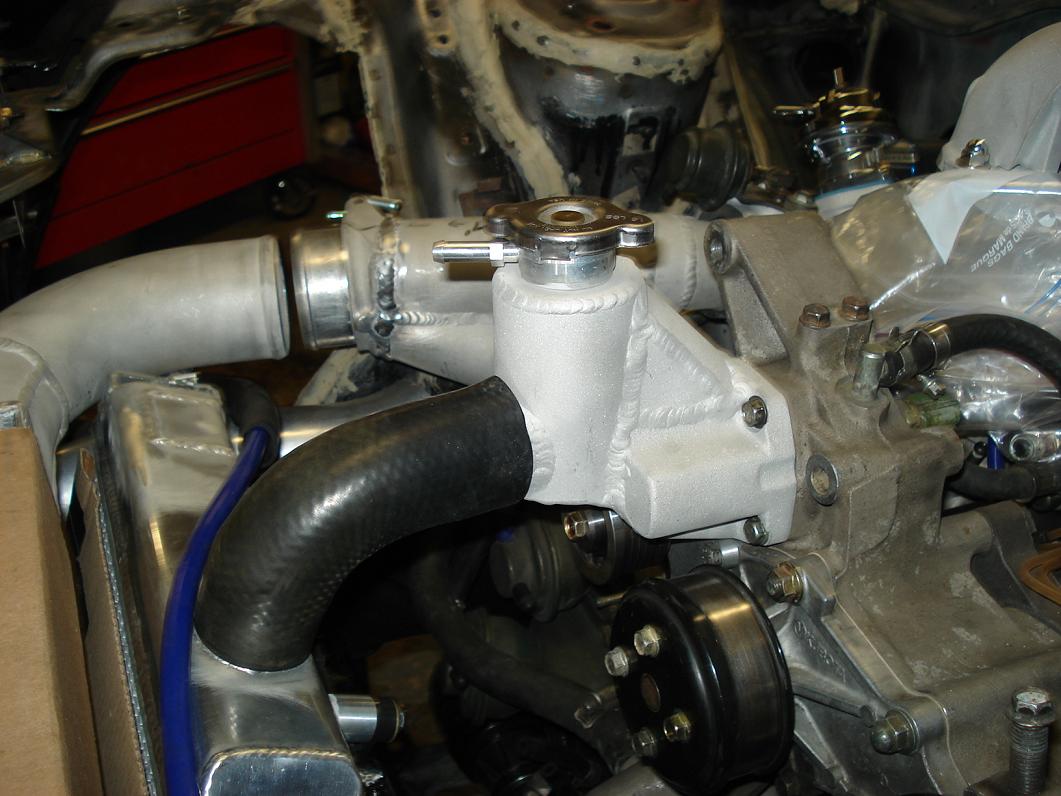
Alright, got the motor, tranny and my Mazdaspeed power plant frame in and ready for all my custom fab work. I got a Koyo Rad and a Greddy RS Recirc BOV for the secondary turbo for bypass duties Thursday. I got this stuff at Speed Concepts off of TV Highway; they can get just about anything you want aftermarket-wise.
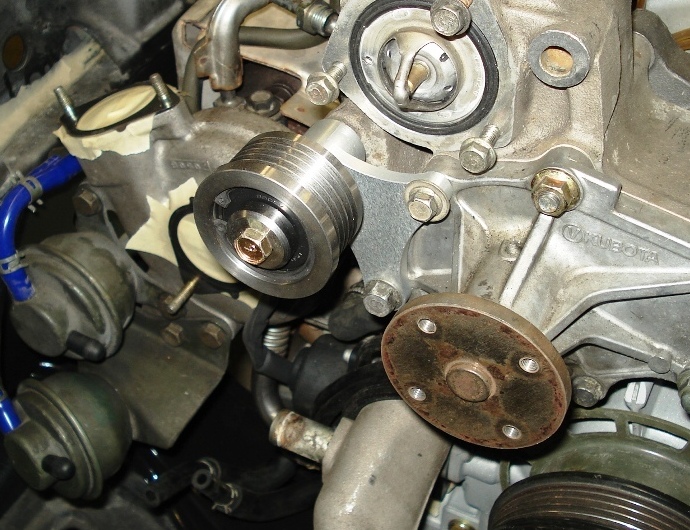
I have the Pineapple Idler Wheel kit installed for the air pump relocation, this idler wheel prevents the water pump wheel from skipping when the air pump is removed.
I will be reusing my Spearco bar & plate IC I already have for the twins and will upgrade to a larger unit when I go single next year.
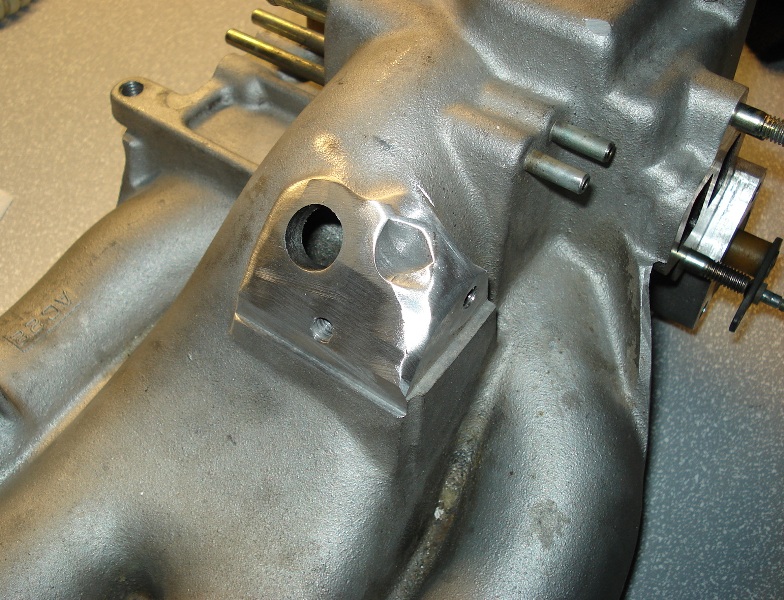
I'm also in the process of mod'n the UIM by relocating the brake booster vacuum plug from the rear secondary port location to the -20deg idle control valve mounting location. Granted both front and rear rotors will be affected now, but it will be equally affected, which in theory should aid in getting a closer AFR ratio between the front & rear.
If some of you were wondering the reasoning; Mazda put it there because of it's proximity to a RHD brake booster. That's all great for RHD, but it’s a stupid location for a LHD setup with that long *** air line across the firewall. This setup should clean that up nicely, which will make room for my new strut tower bar I will be making too.
Alright, got the motor, tranny and my Mazdaspeed power plant frame in and ready for all my custom fab work. I got a Koyo Rad and a Greddy RS Recirc BOV for the secondary turbo for bypass duties Thursday. I got this stuff at Speed Concepts off of TV Highway; they can get just about anything you want aftermarket-wise.
I have the Pineapple Idler Wheel kit installed for the air pump relocation, this idler wheel prevents the water pump wheel from skipping when the air pump is removed.
I will be reusing my Spearco bar & plate IC I already have for the twins and will upgrade to a larger unit when I go single next year.
I'm also in the process of mod'n the UIM by relocating the brake booster vacuum plug from the rear secondary port location to the -20deg idle control valve mounting location. Granted both front and rear rotors will be affected now, but it will be equally affected, which in theory should aid in getting a closer AFR ratio between the front & rear.
If some of you were wondering the reasoning; Mazda put it there because of it's proximity to a RHD brake booster. That's all great for RHD, but it’s a stupid location for a LHD setup with that long *** air line across the firewall. This setup should clean that up nicely, which will make room for my new strut tower bar I will be making too.
09-26-12, 11:32 PM
#29
1/4/07
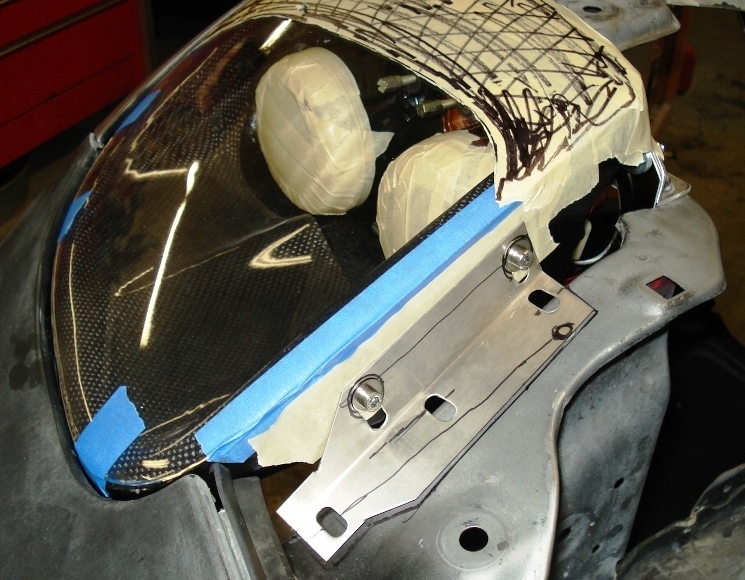
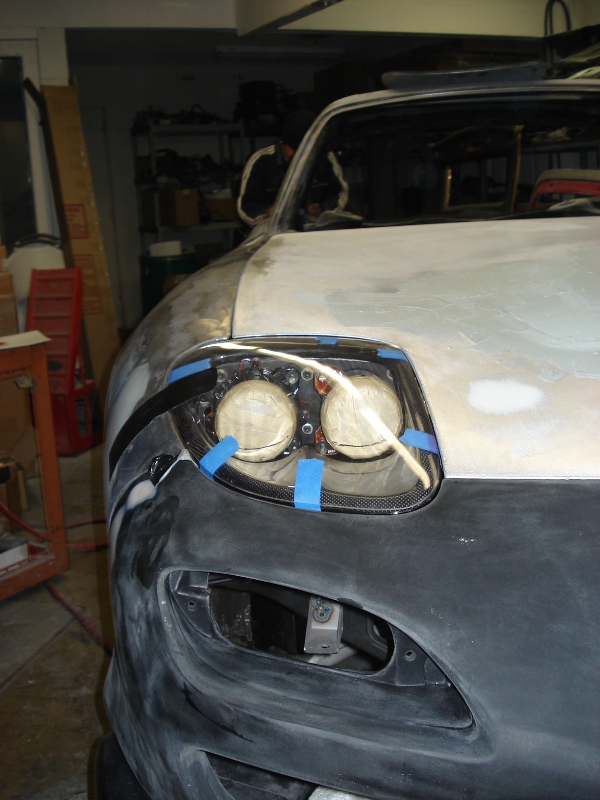
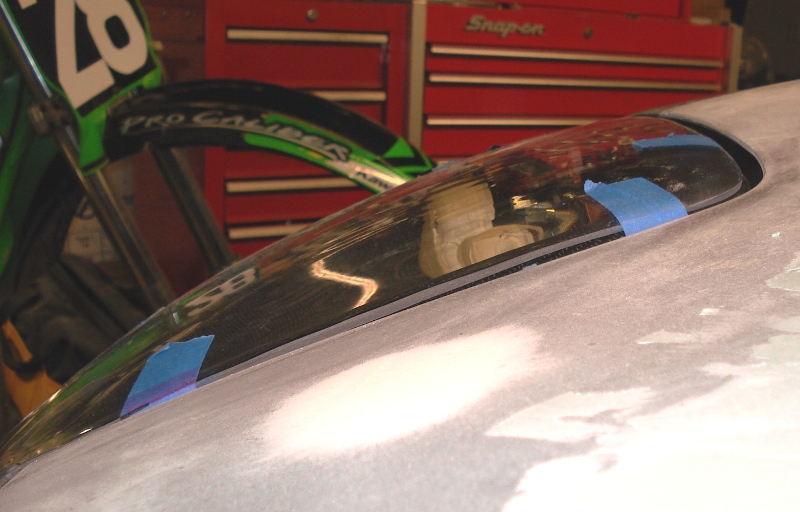
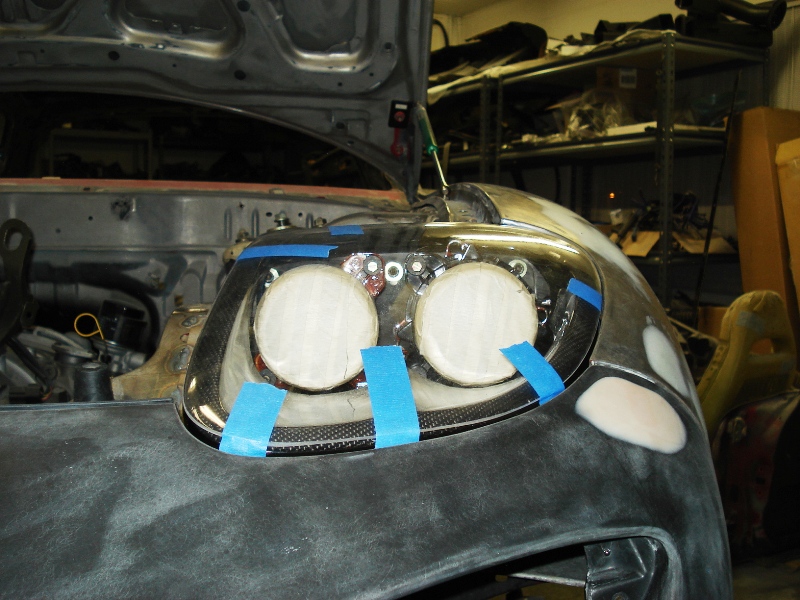
Got the stainless head light plates done and the Hella light mounting holes are just off (1/16”), doh! Anyways I was at least able to start proper mockup. Overall fit up is pretty good, but I need to remake the headlight plates, cut off the unused ear on the high beam lamps to clear the housing, make some custom support plates to properly support the front of the covers for high speeds, remake the existing cover support brackets. Basically everything except the housing and lens! Put some tape on the lens to get an idea of how much I would want painted black.

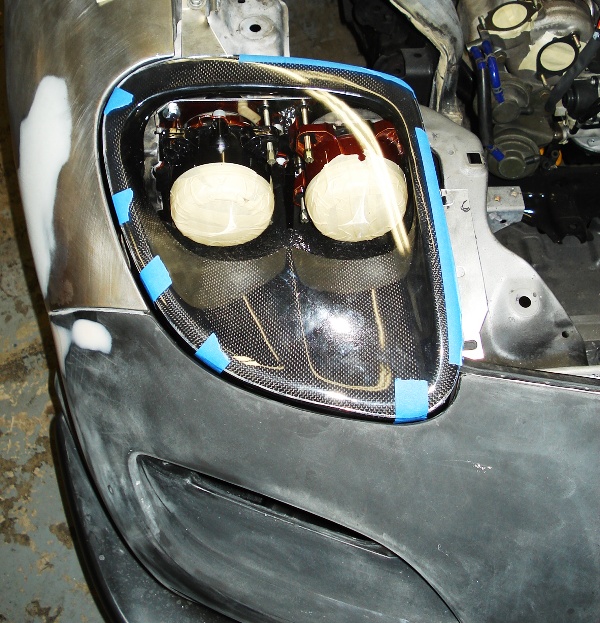
Got the stainless head light plates done and the Hella light mounting holes are just off (1/16”), doh! Anyways I was at least able to start proper mockup. Overall fit up is pretty good, but I need to remake the headlight plates, cut off the unused ear on the high beam lamps to clear the housing, make some custom support plates to properly support the front of the covers for high speeds, remake the existing cover support brackets. Basically everything except the housing and lens! Put some tape on the lens to get an idea of how much I would want painted black.
09-26-12, 11:35 PM
#30
1/19/07
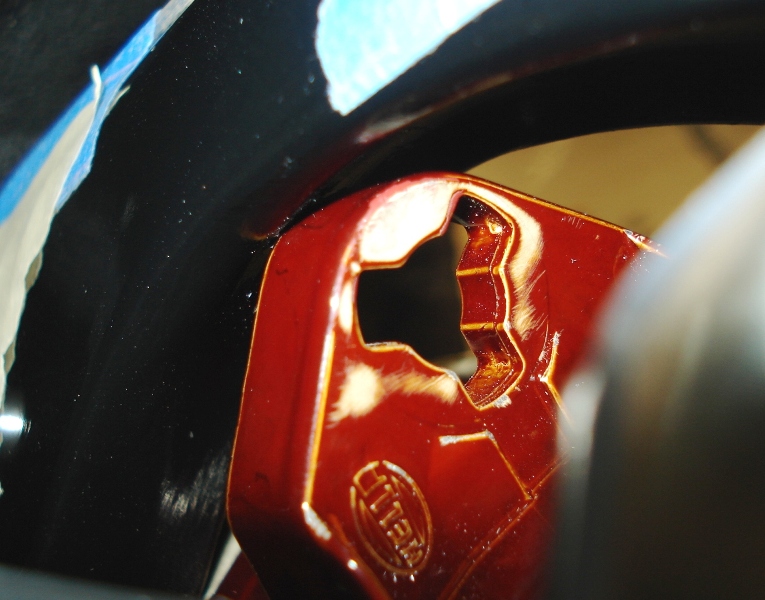
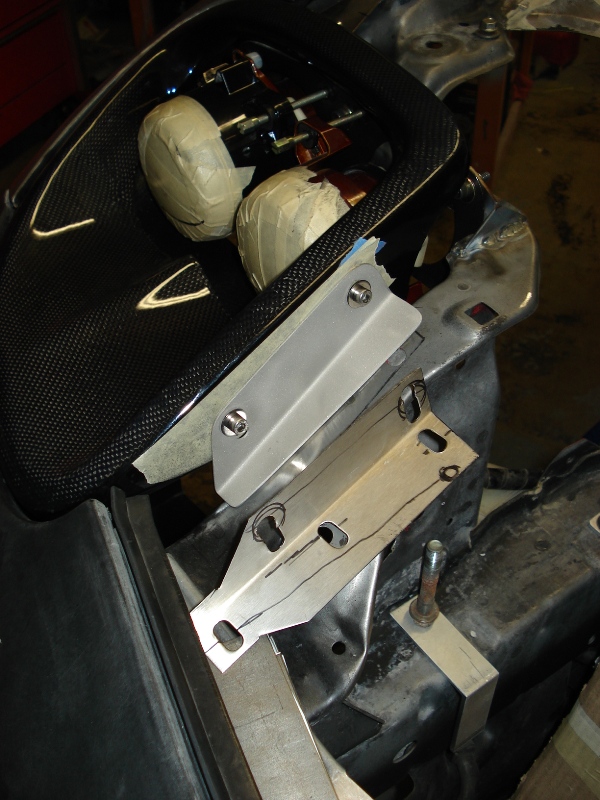
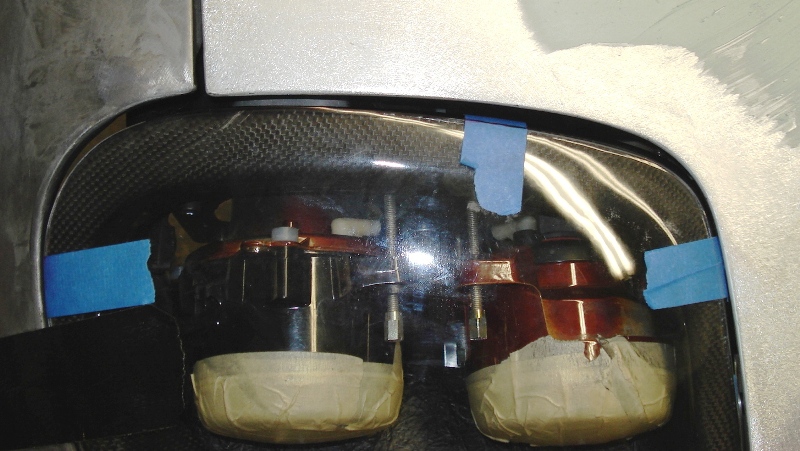
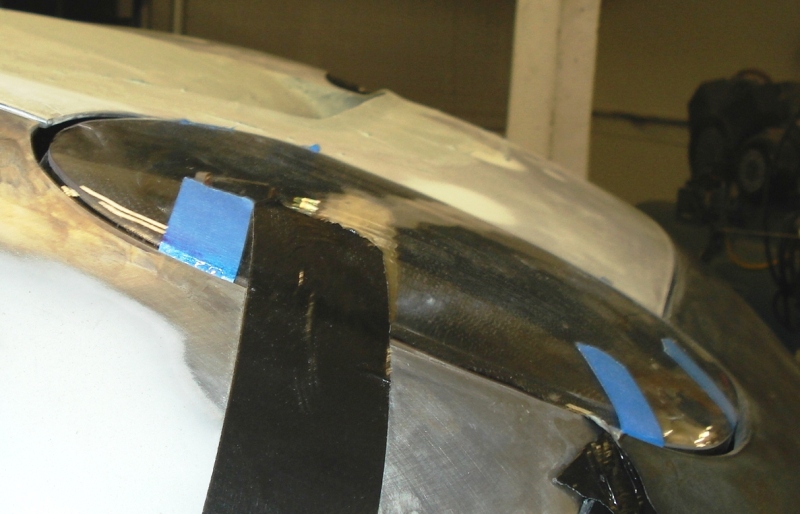
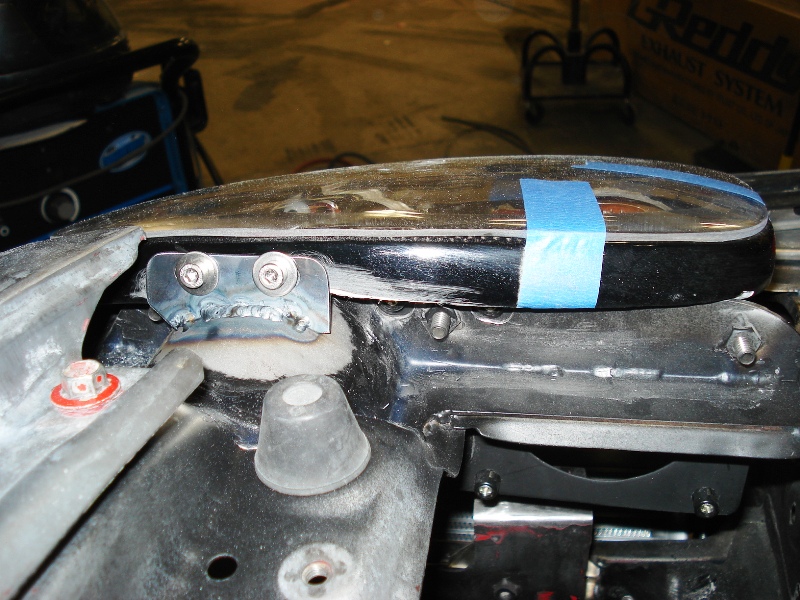
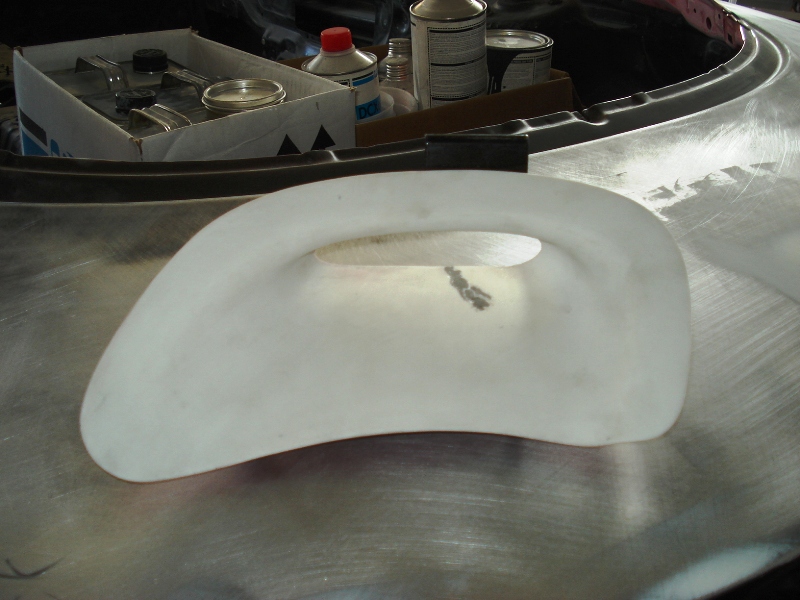
after getting the sleek headlight kit all properly fitted up with the new headlight bracket I made, the bulbs are finally in full view (the marker lines show how much of the lens was blocked with original setup). However, I didn't like how little material was left on the remained headlight structure so I've been redesigning and fabricating a welded structure that I should be finished fabricating today and have it welded on the chassis tomorrow.
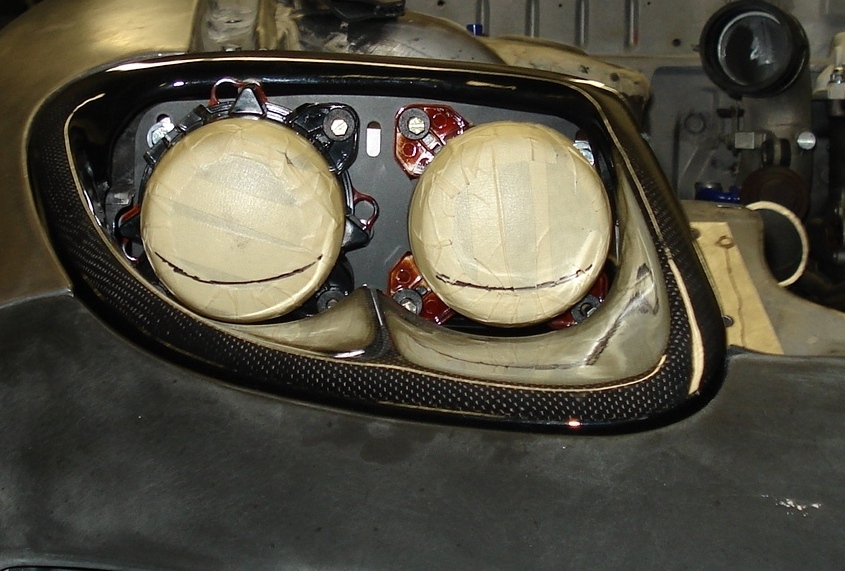


after getting the sleek headlight kit all properly fitted up with the new headlight bracket I made, the bulbs are finally in full view (the marker lines show how much of the lens was blocked with original setup). However, I didn't like how little material was left on the remained headlight structure so I've been redesigning and fabricating a welded structure that I should be finished fabricating today and have it welded on the chassis tomorrow.
09-26-12, 11:39 PM
#31
1/22/07
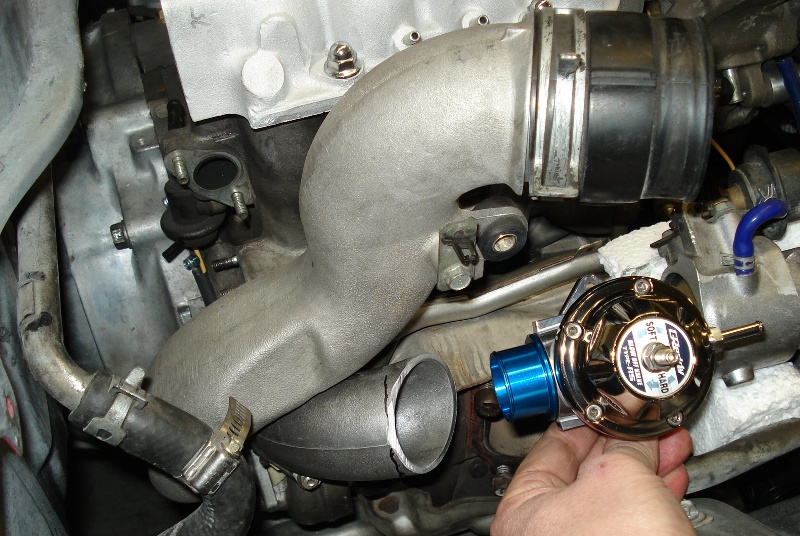
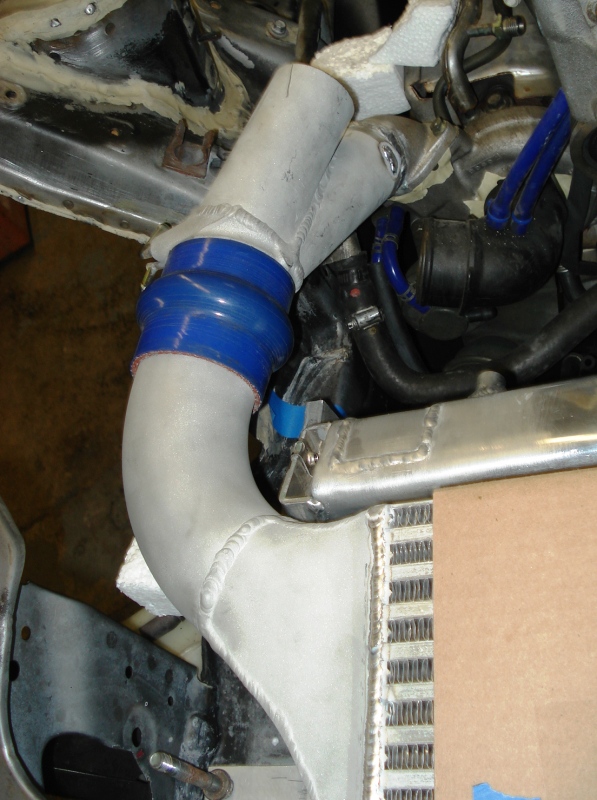
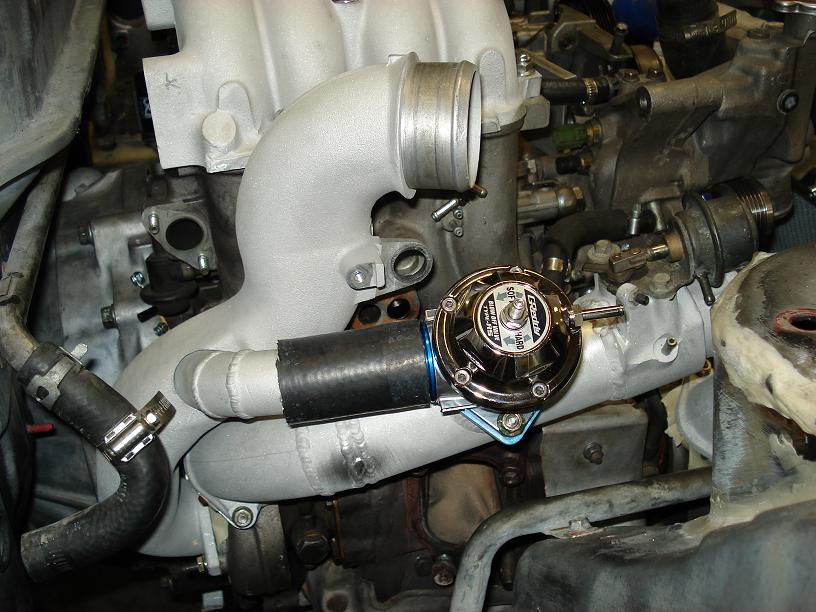
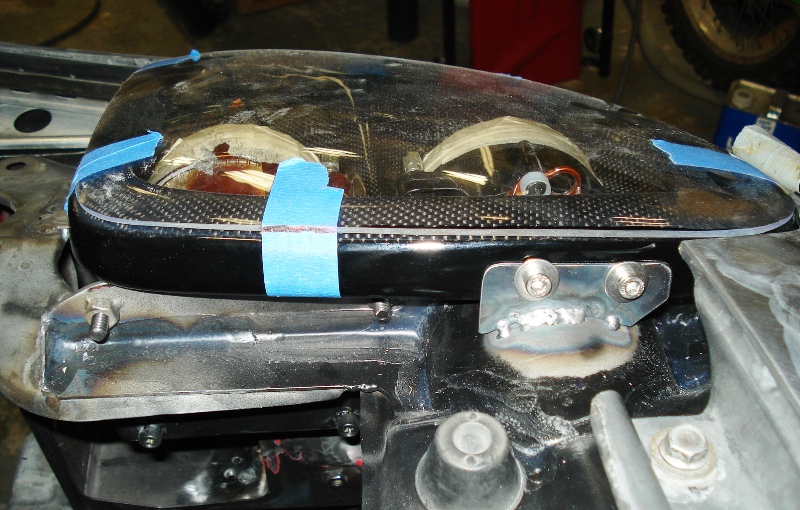
Got the new headlight frame all welded in and it turned out pretty good, nice and solid. I still need to add a gusset to support the bottom of the headlight panel, but other than that, I’m there. Also started playing around with the turbo ducting and how I’m going to join the two turbos, the picture will give you an idea of the direction I’m going. Also I plan on having the bypass valve (Greddy BOV) on the secondary plum back in to the intake serpentine tube.
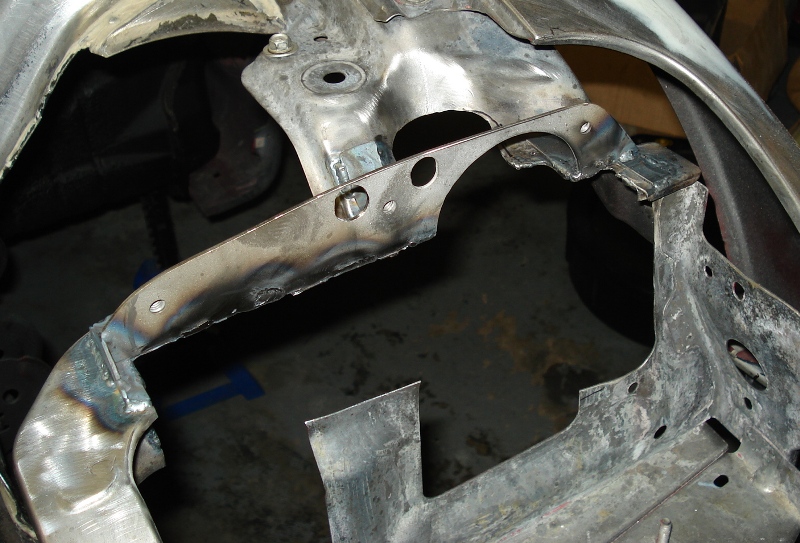
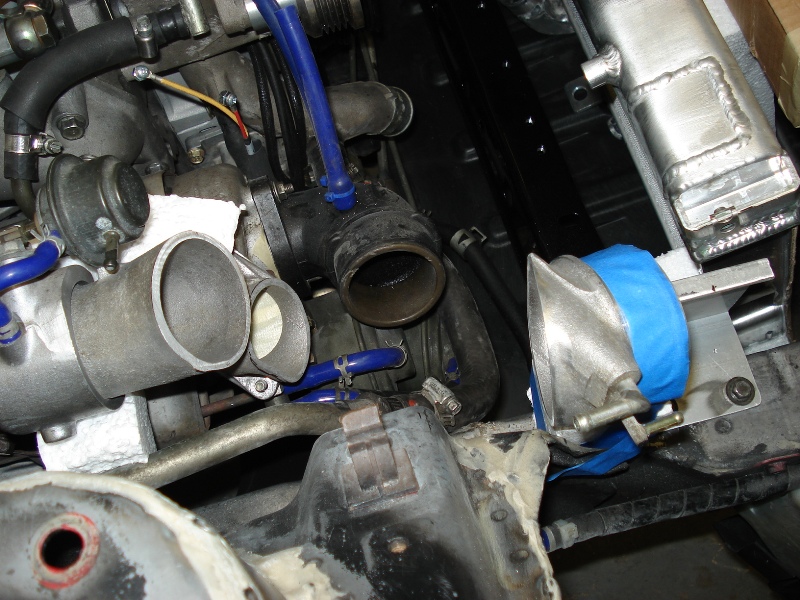
Got the new headlight frame all welded in and it turned out pretty good, nice and solid. I still need to add a gusset to support the bottom of the headlight panel, but other than that, I’m there. Also started playing around with the turbo ducting and how I’m going to join the two turbos, the picture will give you an idea of the direction I’m going. Also I plan on having the bypass valve (Greddy BOV) on the secondary plum back in to the intake serpentine tube.
 09-27-12, 10:40 PM
#33
1/27/07
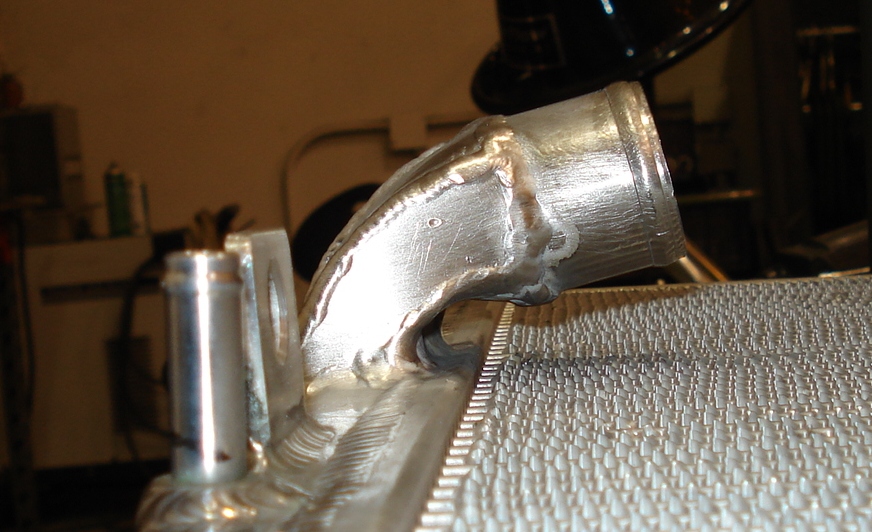
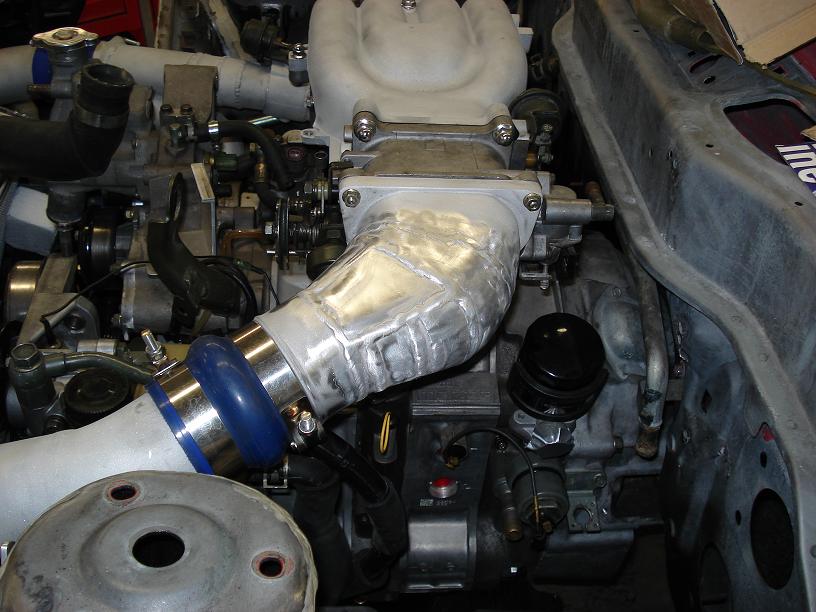
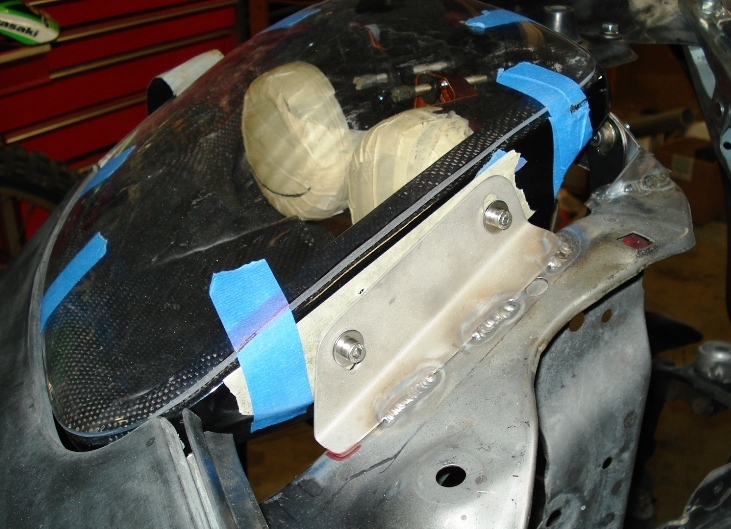
Alright, got the headlight shroud mounting plates done, looks nicer than what came with the kit. Also, I finally got my IC core and proceeded making the end tank for the turbo side and welded it on once I welded and smoothed out the internal seams.

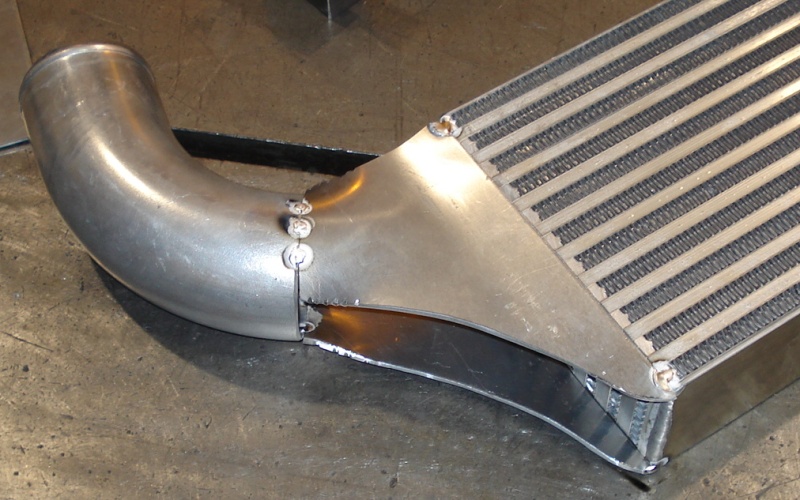
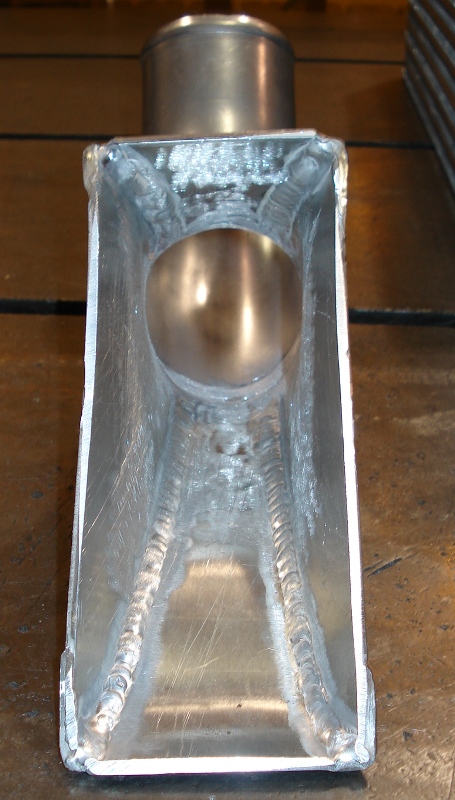
Tomorrow I will modify my Greddy elbow to the configuration I want it to be (wish I could get the HKS elbow (Still do) that comes with their v-mount kit, but oh well). I also started fab'n up the twin turbo connection tubes. Hope to get that done tomorrow too.
[img][/img]
Alright, got the headlight shroud mounting plates done, looks nicer than what came with the kit. Also, I finally got my IC core and proceeded making the end tank for the turbo side and welded it on once I welded and smoothed out the internal seams.
Tomorrow I will modify my Greddy elbow to the configuration I want it to be (wish I could get the HKS elbow (Still do) that comes with their v-mount kit, but oh well). I also started fab'n up the twin turbo connection tubes. Hope to get that done tomorrow too.
[img][/img]
09-27-12, 10:42 PM
#34
1/29/07
Got most of the routing for the twin turbos done, just need to cut a section for the secondary tubing. Currently have it all tack'd up to confirm everything lines up. I also have the intake side IC endtank started, but need to wait for some 3" tubing to finish the routing before I finish it. I started on modifying the greddy elbow too, but didn't like the direction I was going....need to put more thought into that. Man, I tired.
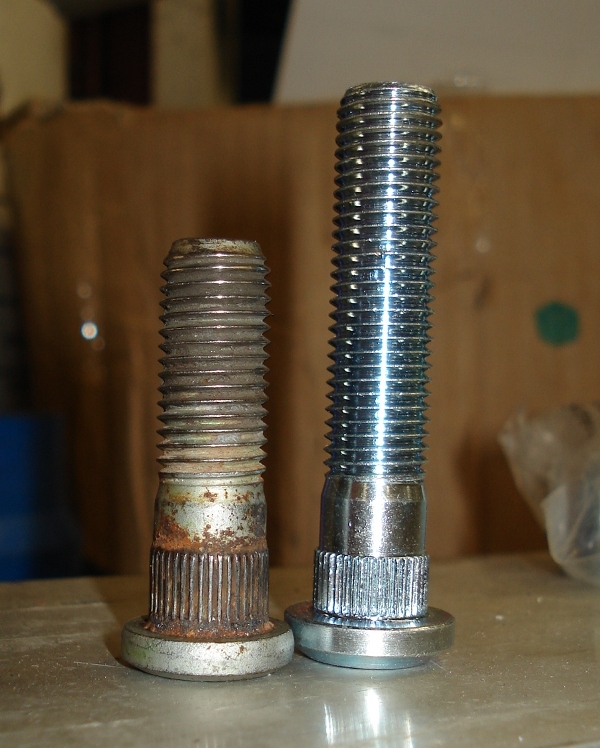
Oh, I also got some Mackin industries 20mm longer than stock wheel studs.
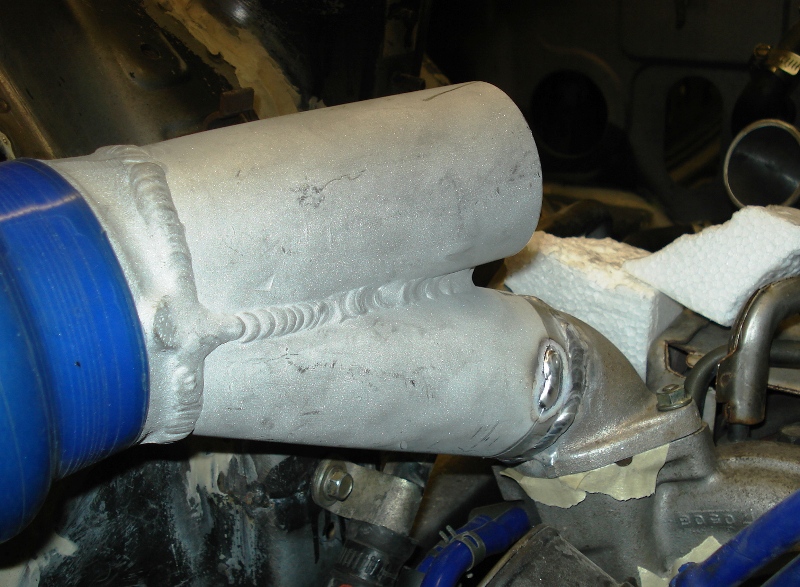

Got most of the routing for the twin turbos done, just need to cut a section for the secondary tubing. Currently have it all tack'd up to confirm everything lines up. I also have the intake side IC endtank started, but need to wait for some 3" tubing to finish the routing before I finish it. I started on modifying the greddy elbow too, but didn't like the direction I was going....need to put more thought into that. Man, I tired.
Oh, I also got some Mackin industries 20mm longer than stock wheel studs.
09-27-12, 10:46 PM
#35
2/4/07
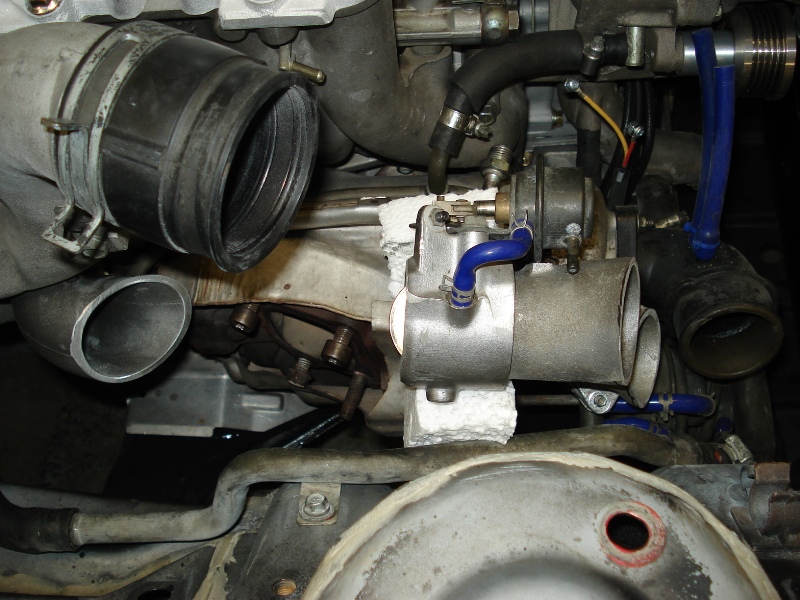
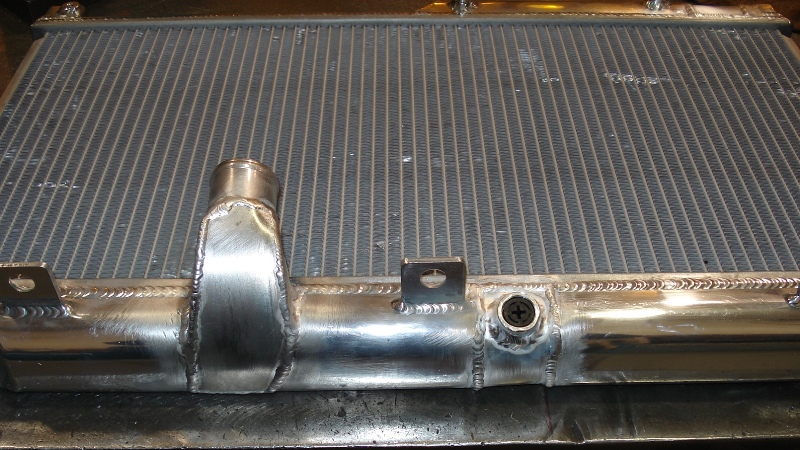
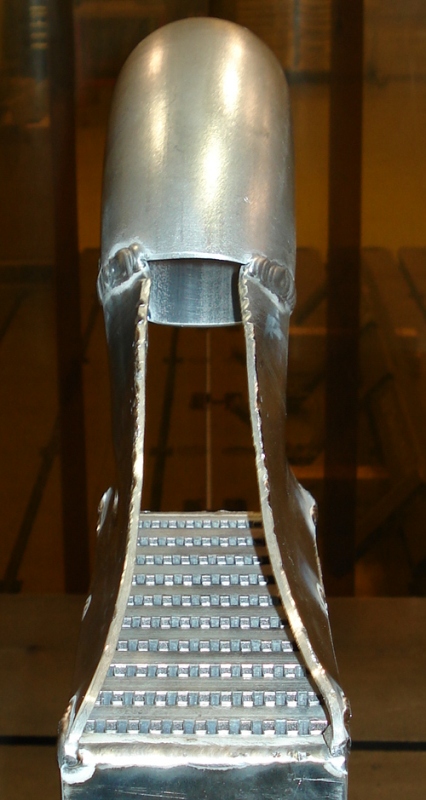
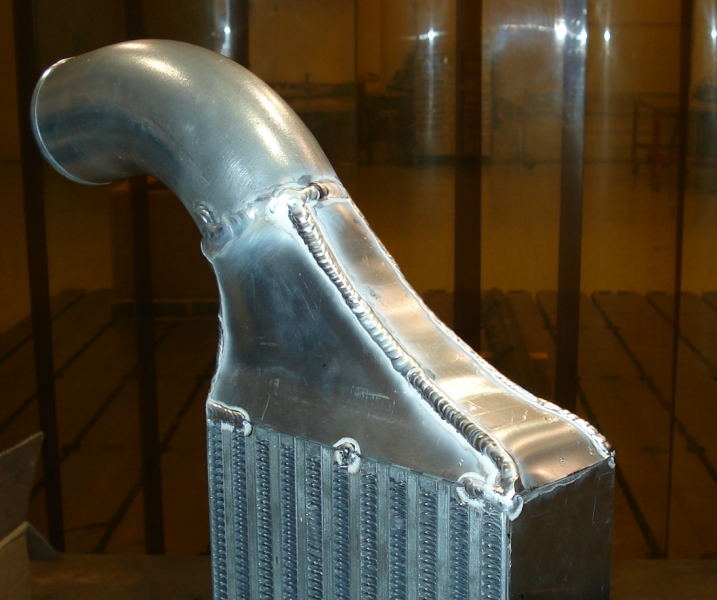
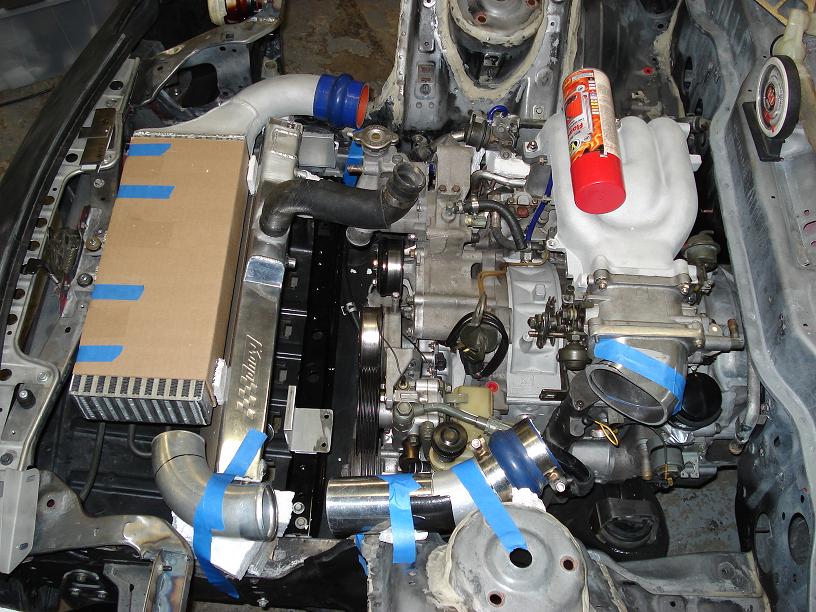
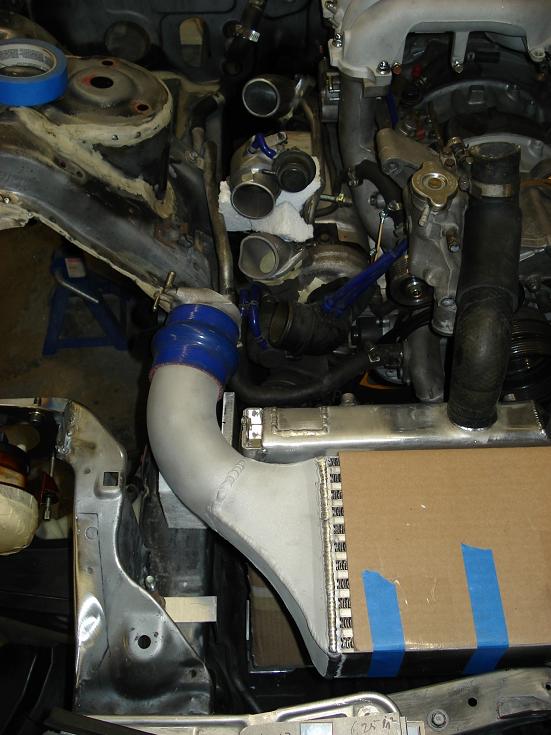
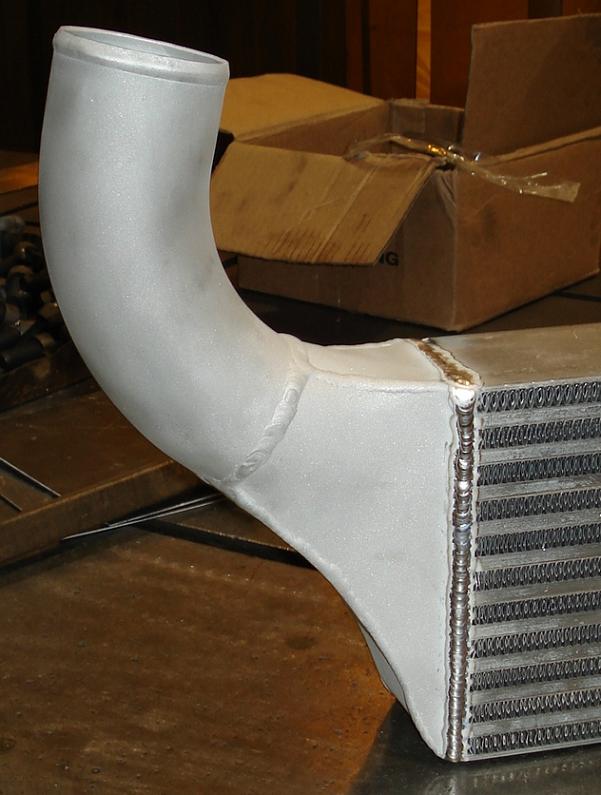
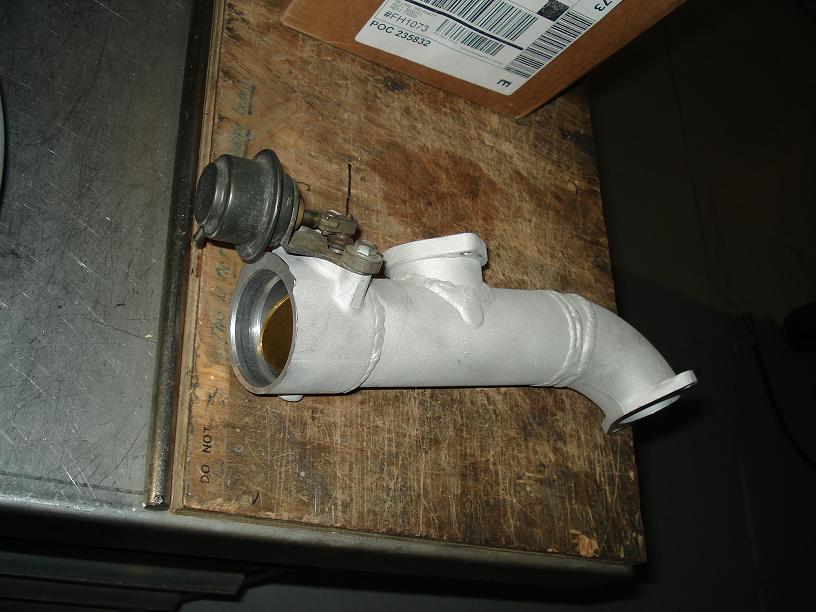
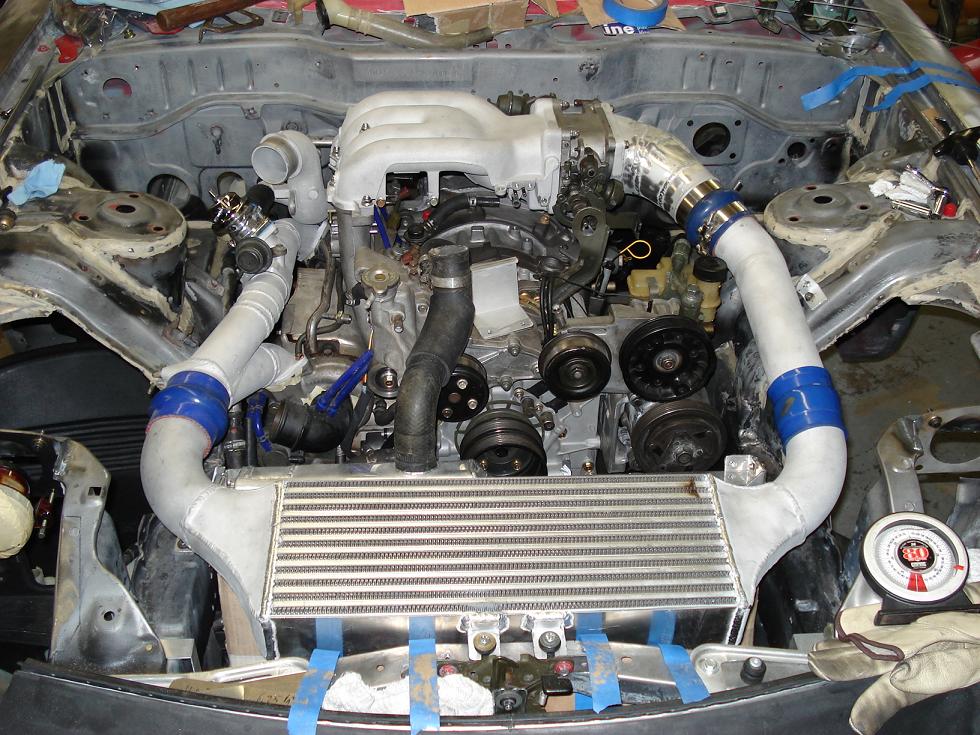
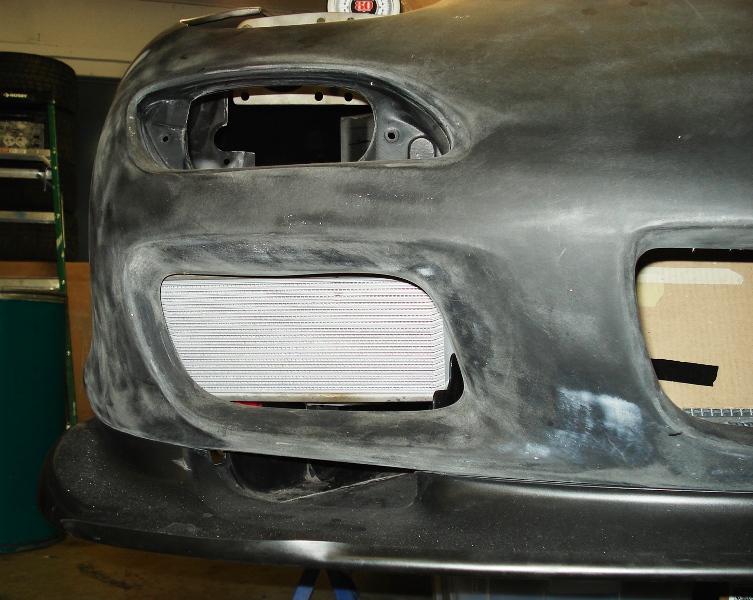
Alright, got the IC and ducting done. The Secondary turbo BOV is in, just need to finish welding in the recirc tubing. The throttle body end tank is a bit frankensteinish, but it will work great. Trying to decide if I want to weld on the Tial BOV on the throttle body end tank or at the cold side end tank of the IC.
I need to get the rad fan I want and I should have all the mounting done by end of week. I still need to do the oil cooler mounting, waiting for some fittings before I go further on that. Making progress.
I'm also trying to decide if I want to mod the hood so it's vented. A lot of work, but it would be functional and bad *** at the same time.......

[img][/img]
Alright, got the IC and ducting done. The Secondary turbo BOV is in, just need to finish welding in the recirc tubing. The throttle body end tank is a bit frankensteinish, but it will work great. Trying to decide if I want to weld on the Tial BOV on the throttle body end tank or at the cold side end tank of the IC.
I need to get the rad fan I want and I should have all the mounting done by end of week. I still need to do the oil cooler mounting, waiting for some fittings before I go further on that. Making progress.
I'm also trying to decide if I want to mod the hood so it's vented. A lot of work, but it would be functional and bad *** at the same time.......
[img][/img]
The following users liked this post:
Nakd n Fearless (08-15-19)
09-27-12, 10:51 PM
#36
2/12/07
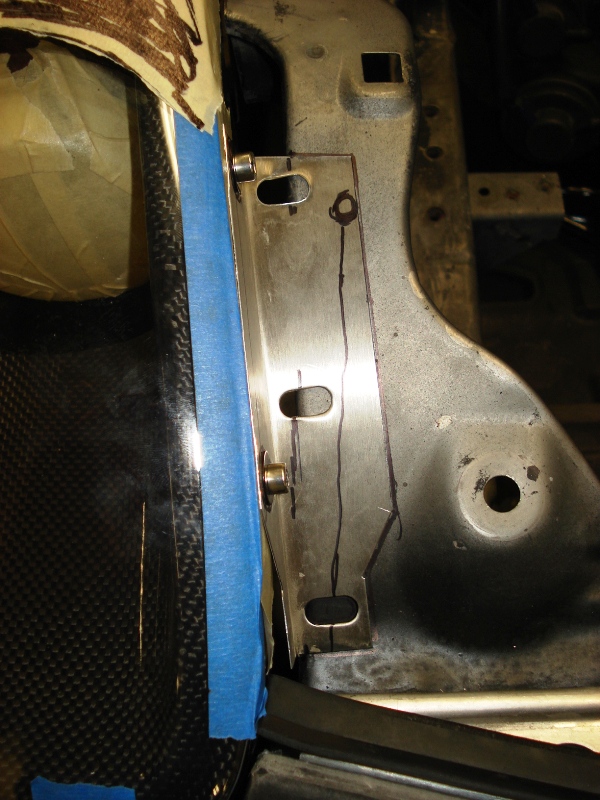
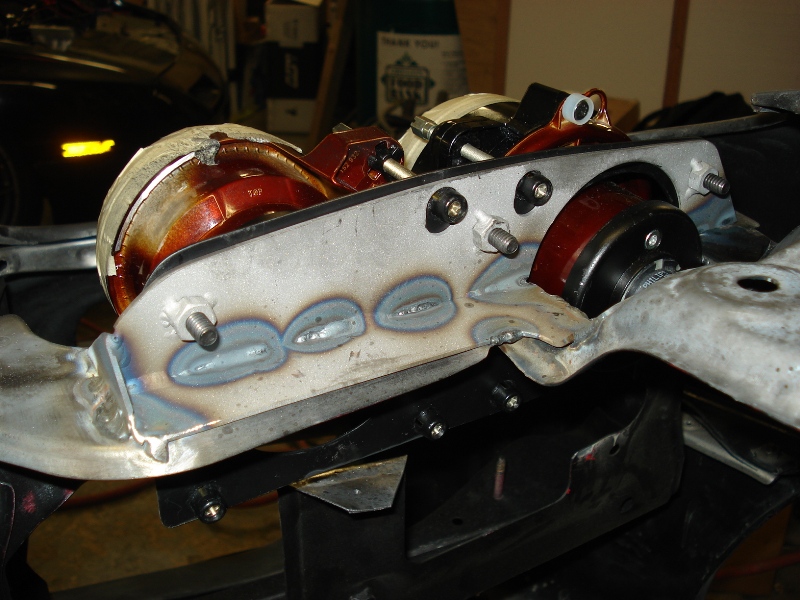
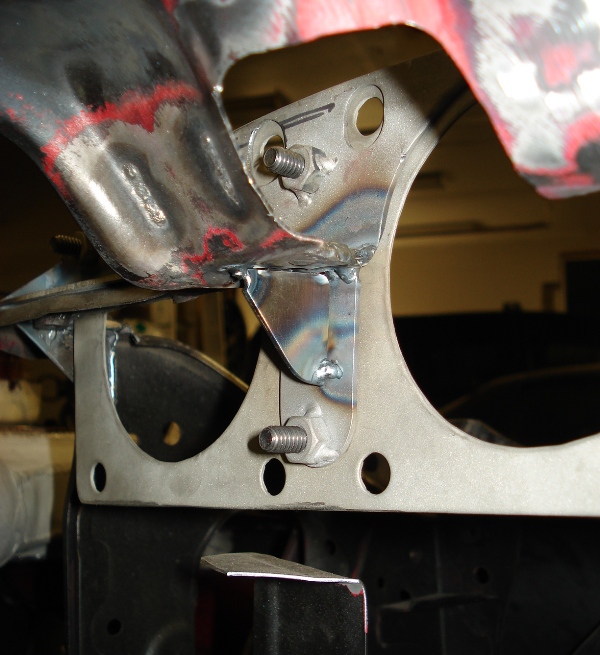
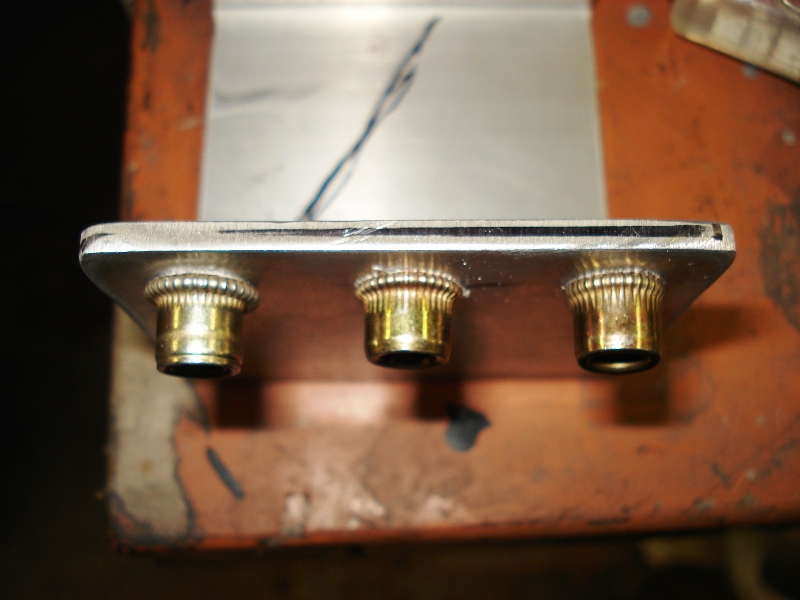
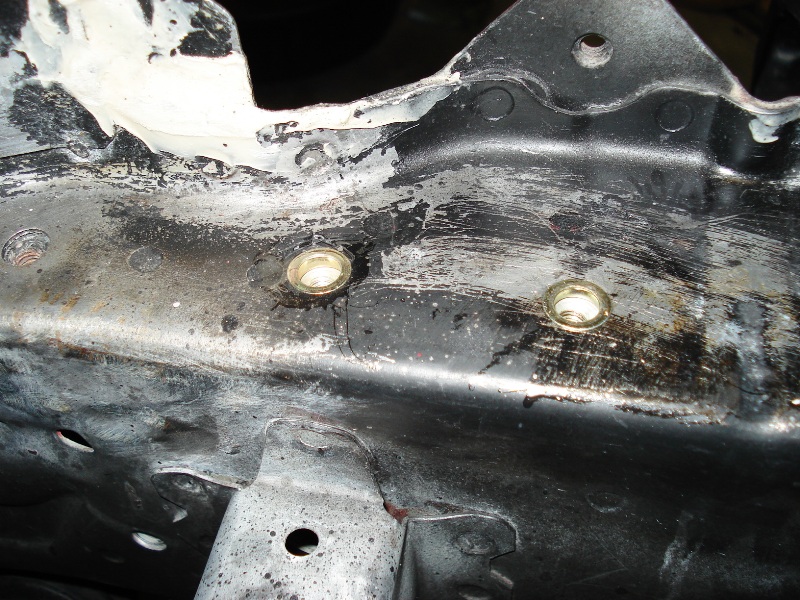
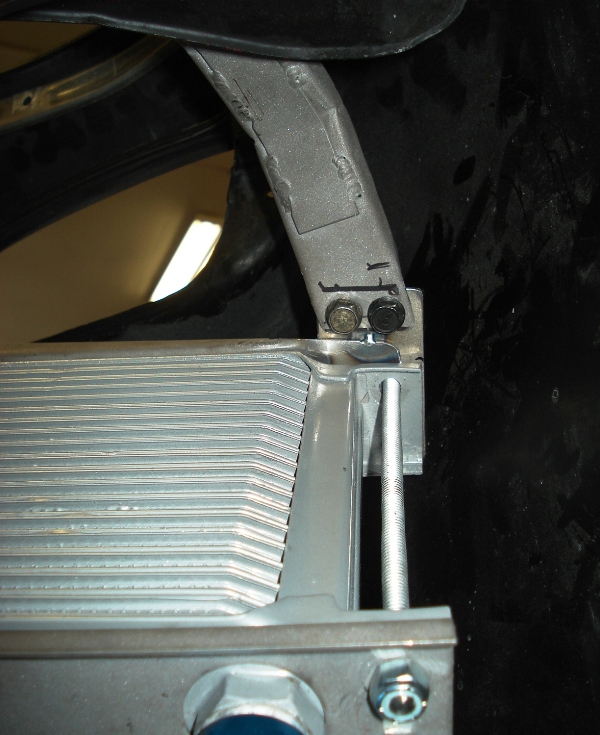
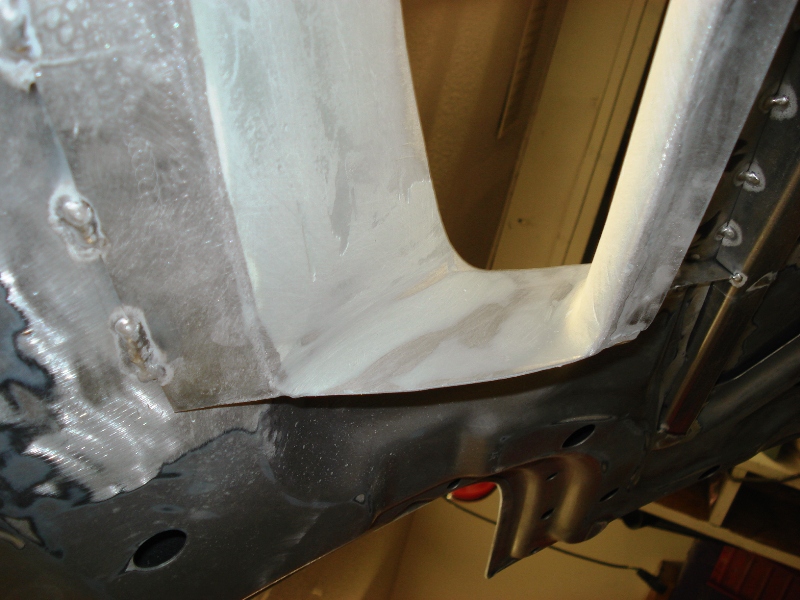
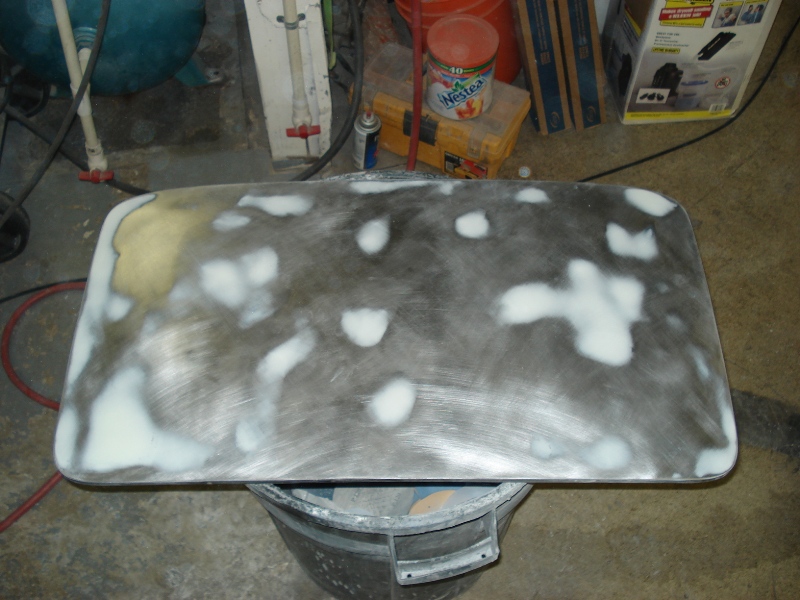
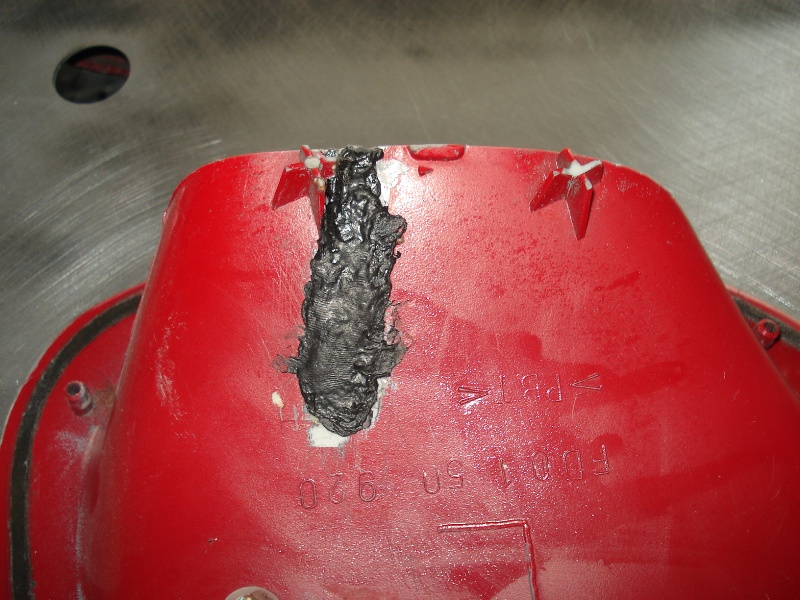
Okay, so I fab’d up a mount for the Radiator and I didn’t like how it turned out so I’m redoing it. However, I was able to put rivnuts on the driver side frame rail for the rad mount. FYI, if you ever use these things be sure to do a mockup on another piece with the same thickness to get the crimping settings right. These things are prone to spinning if not installed properly. On that note I added epoxy to the mix to further reduce that risk. If you look at the mockup panel I did you can see three different degrees of crimping, the center on is what you want to look for.
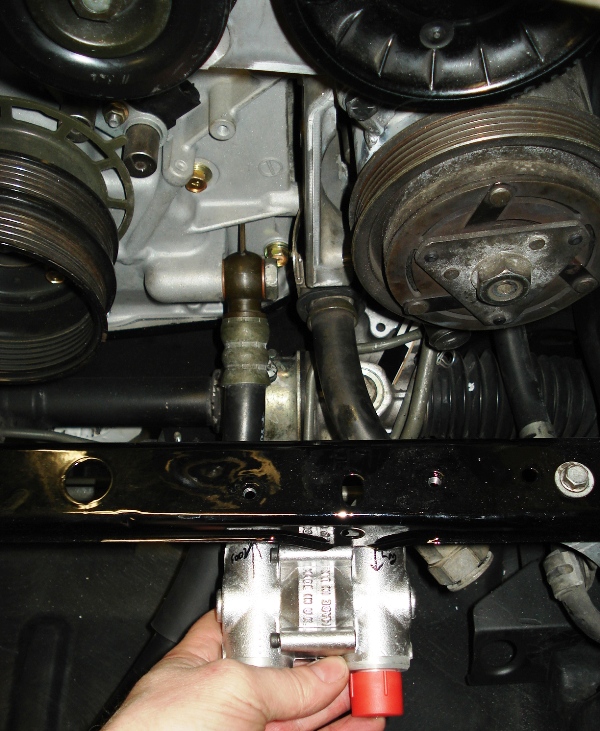
I also started playing around with the mounting location of the Mocal oil thermostat. I was hoping to utilize the stock inlet/outlet lines, but it’s not looking like that will work. I have to go buy more fitting for the twin oil cooler setup.
Tack’d the headlight support tabs too, welding upside down isn’t easy.
2/13/07
Got most of my oil line fittings so I went ahead and started playing around with the setup. Wish I had gone with Setrab oil coolers back then, would have save me a lot of trouble

Okay, so I fab’d up a mount for the Radiator and I didn’t like how it turned out so I’m redoing it. However, I was able to put rivnuts on the driver side frame rail for the rad mount. FYI, if you ever use these things be sure to do a mockup on another piece with the same thickness to get the crimping settings right. These things are prone to spinning if not installed properly. On that note I added epoxy to the mix to further reduce that risk. If you look at the mockup panel I did you can see three different degrees of crimping, the center on is what you want to look for.
I also started playing around with the mounting location of the Mocal oil thermostat. I was hoping to utilize the stock inlet/outlet lines, but it’s not looking like that will work. I have to go buy more fitting for the twin oil cooler setup.
Tack’d the headlight support tabs too, welding upside down isn’t easy.
2/13/07
Got most of my oil line fittings so I went ahead and started playing around with the setup. Wish I had gone with Setrab oil coolers back then, would have save me a lot of trouble
09-27-12, 11:03 PM
#37
2/25/07
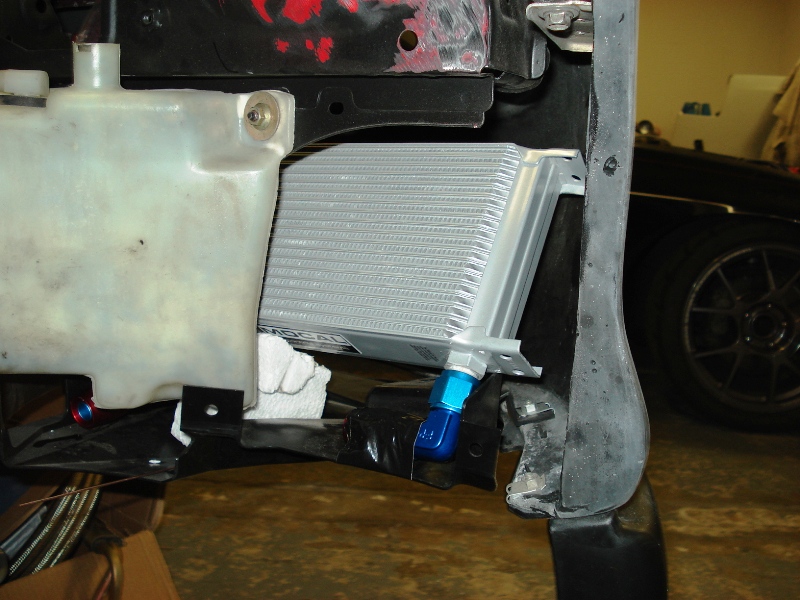
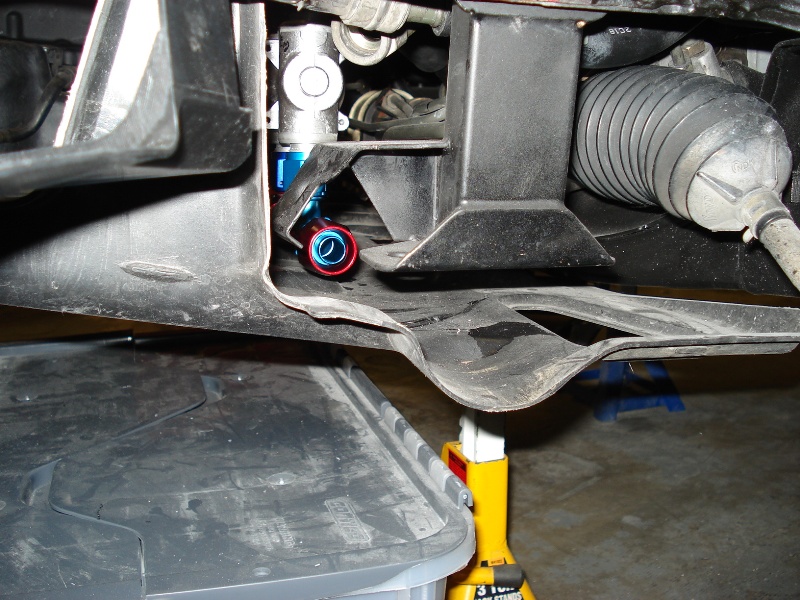
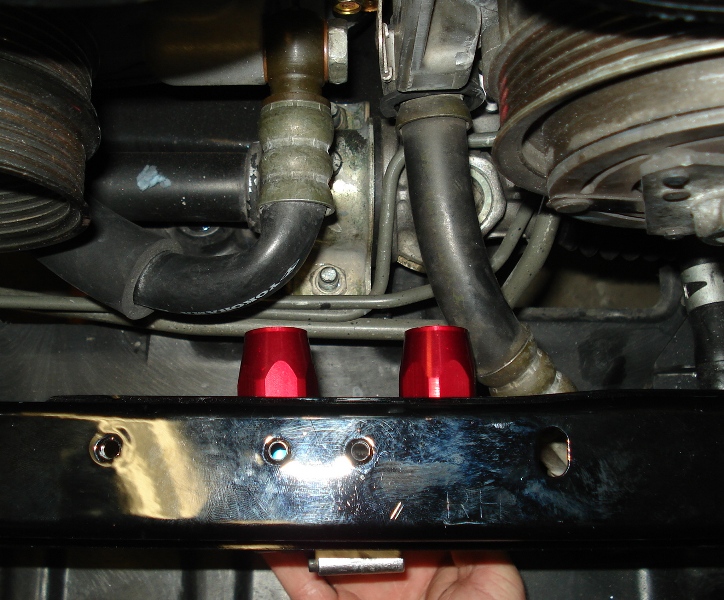
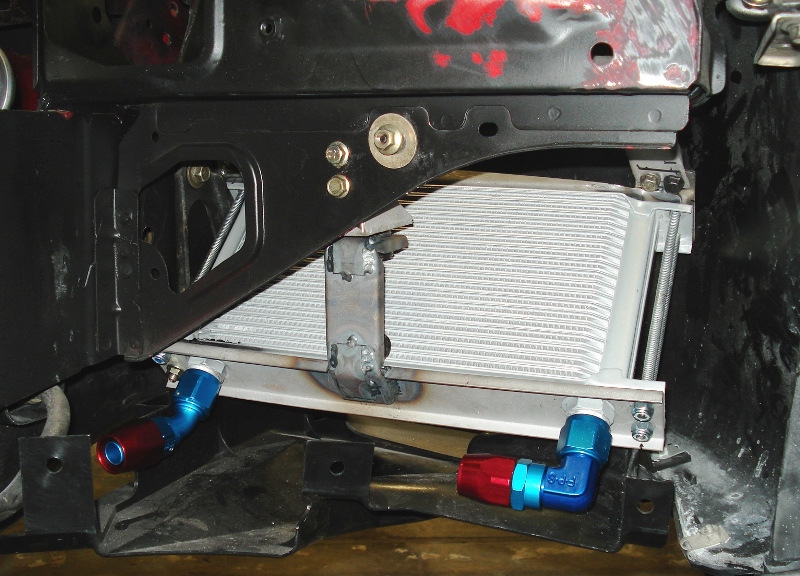
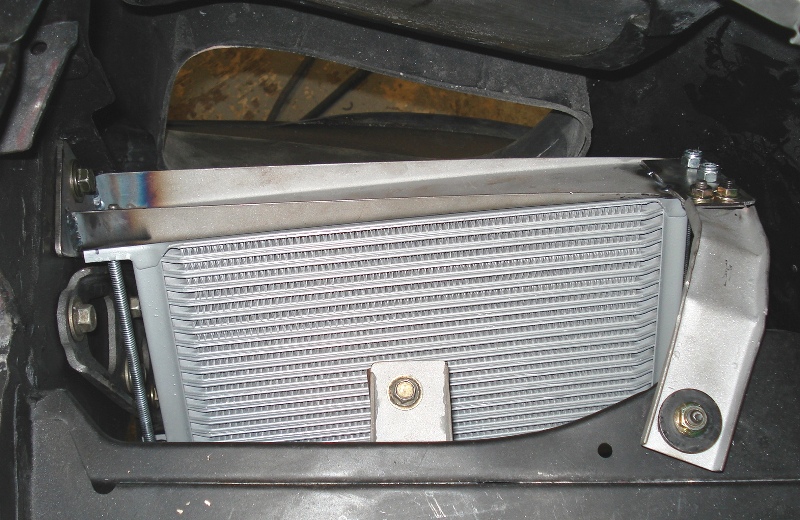
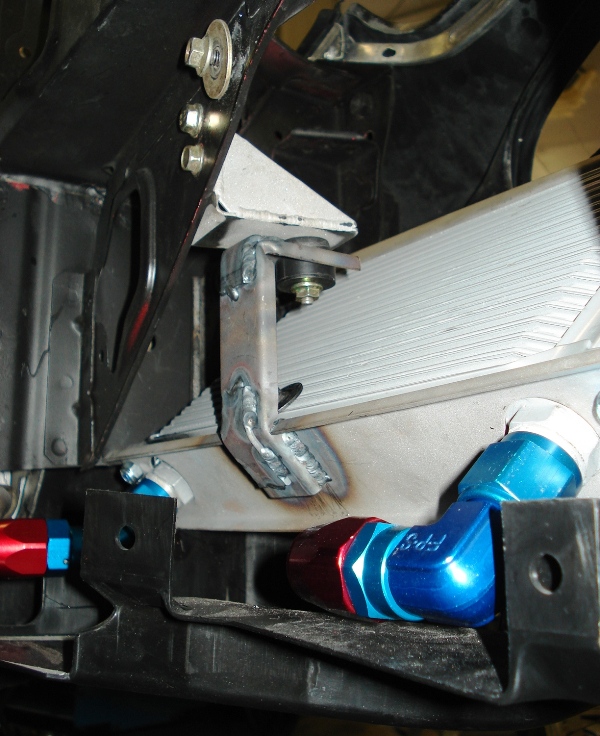
Today I got the water outlet tank done. I also have most of the oil cooler mounting pieces made, just need to weld everything together.
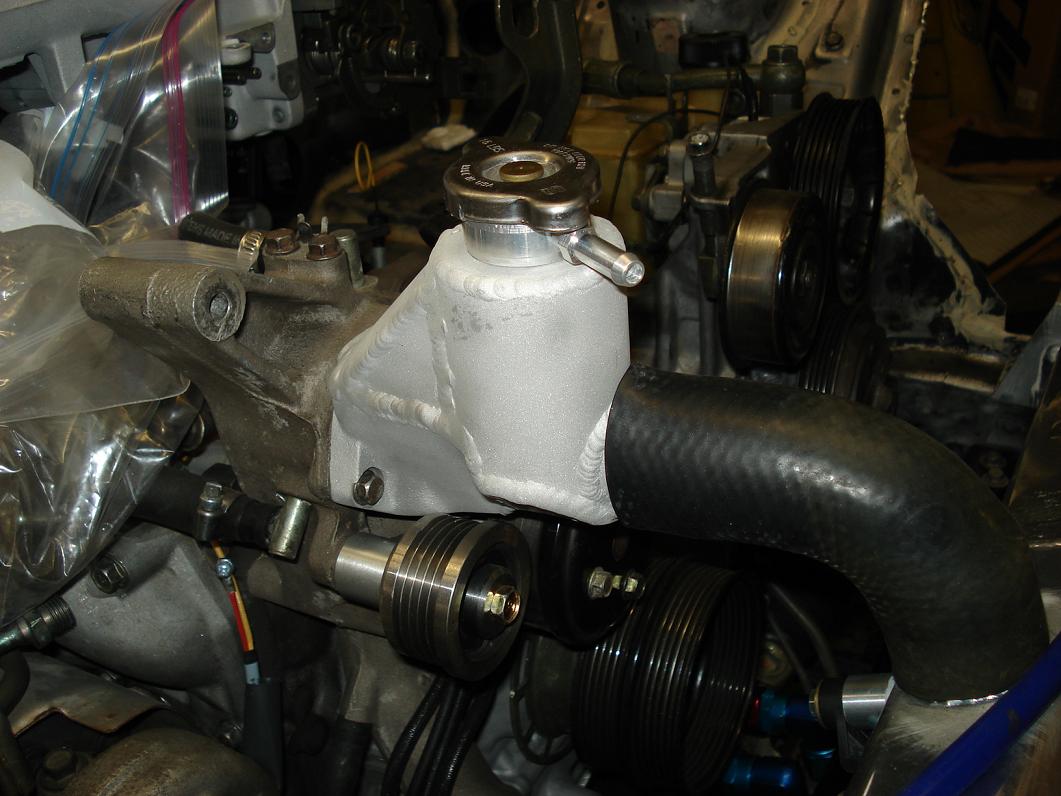
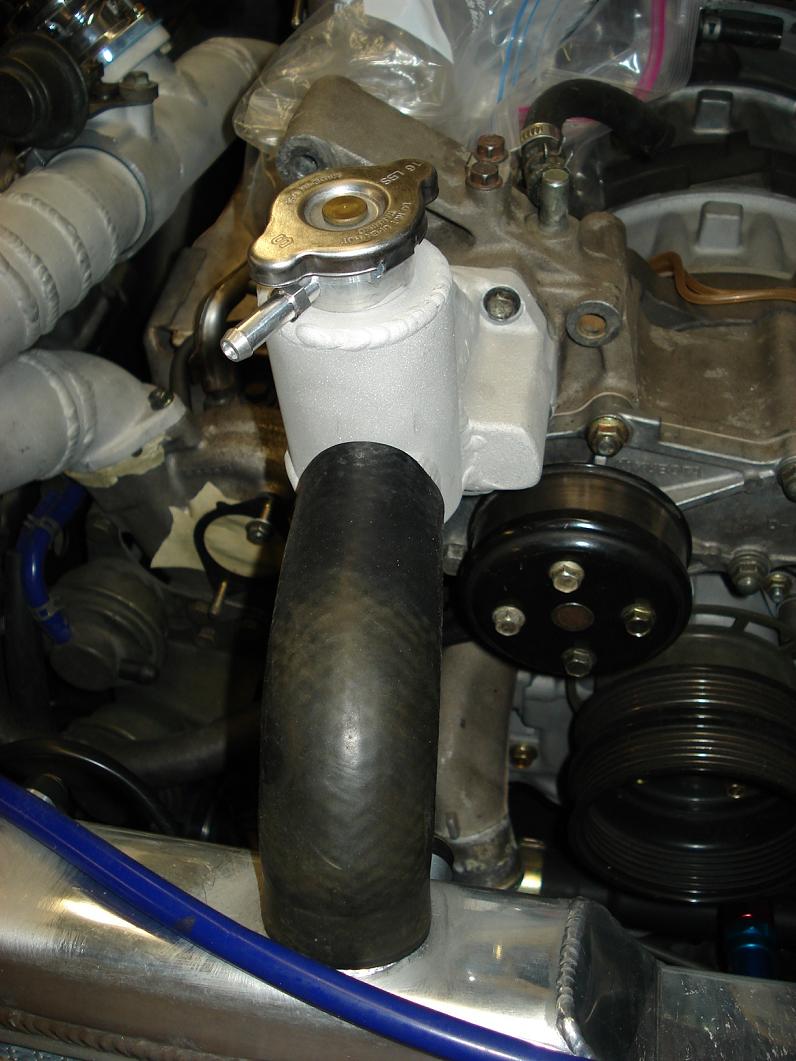
3/5/07
Finished the oil cooler mounting, need to get the oil thermostat tied in and then the hood vented. Should have gone with Setrab oil cooler from the beginning, would have saved me a lot of hassle.
[img][/img]
Today I got the water outlet tank done. I also have most of the oil cooler mounting pieces made, just need to weld everything together.
3/5/07
Finished the oil cooler mounting, need to get the oil thermostat tied in and then the hood vented. Should have gone with Setrab oil cooler from the beginning, would have saved me a lot of hassle.
[img][/img]
09-27-12, 11:08 PM
#38
3/19/07
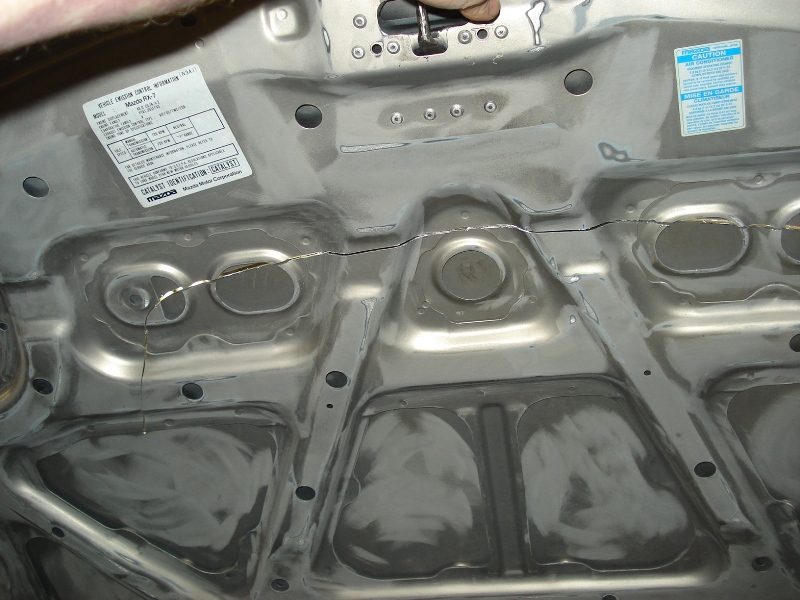
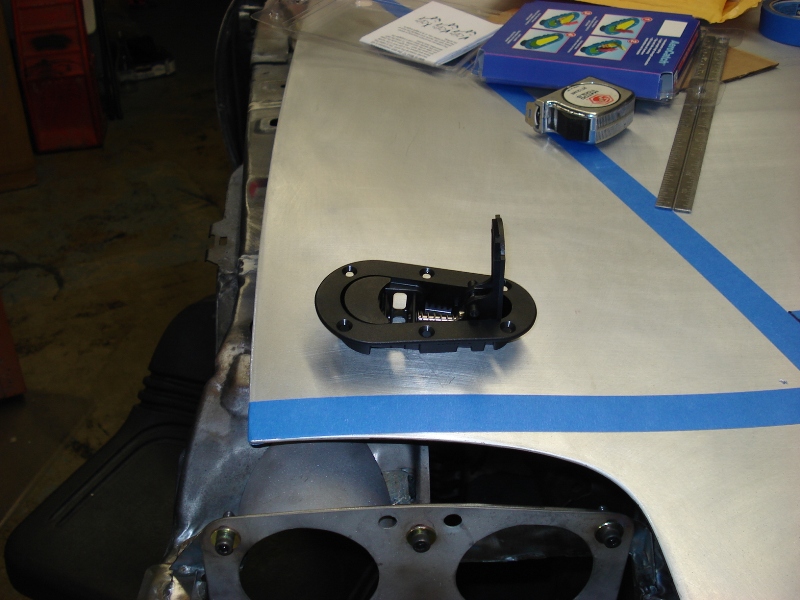
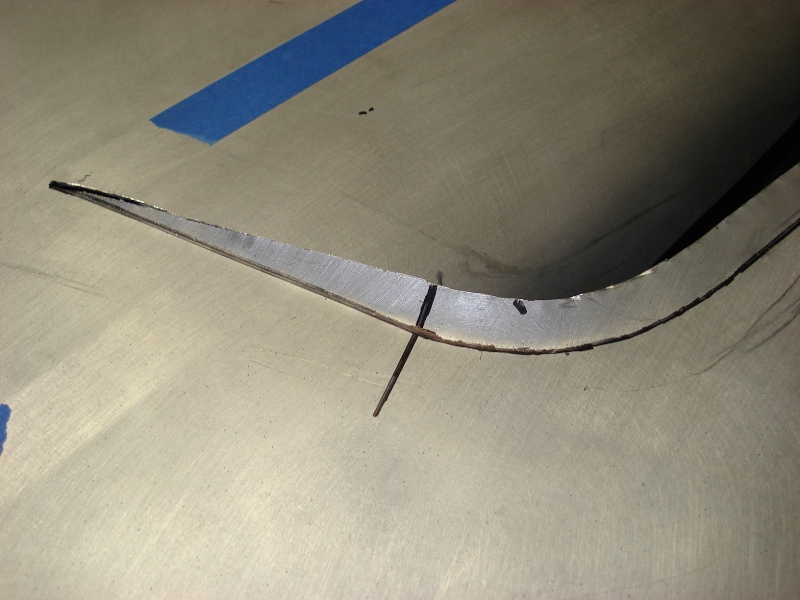
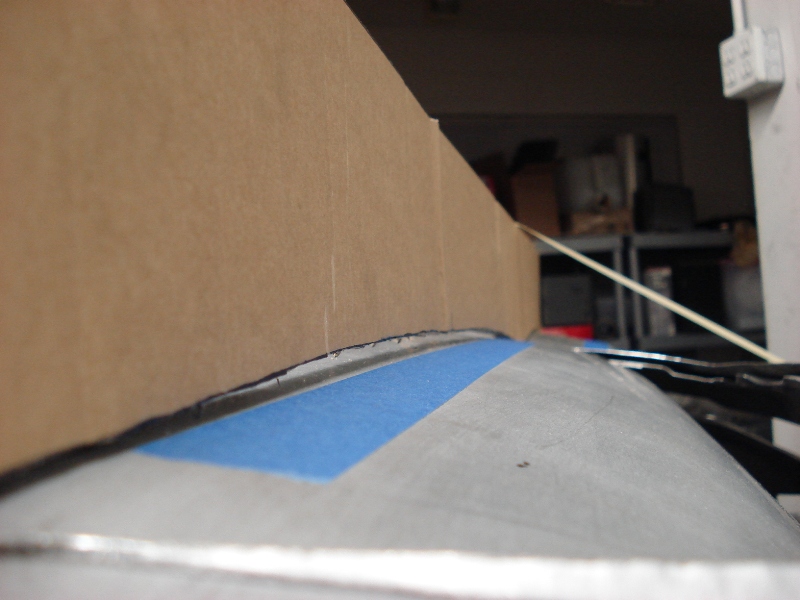
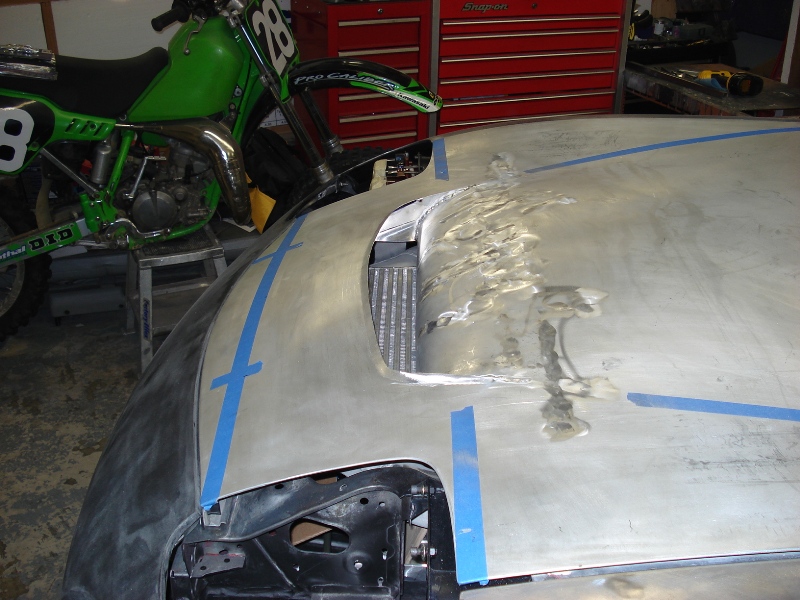
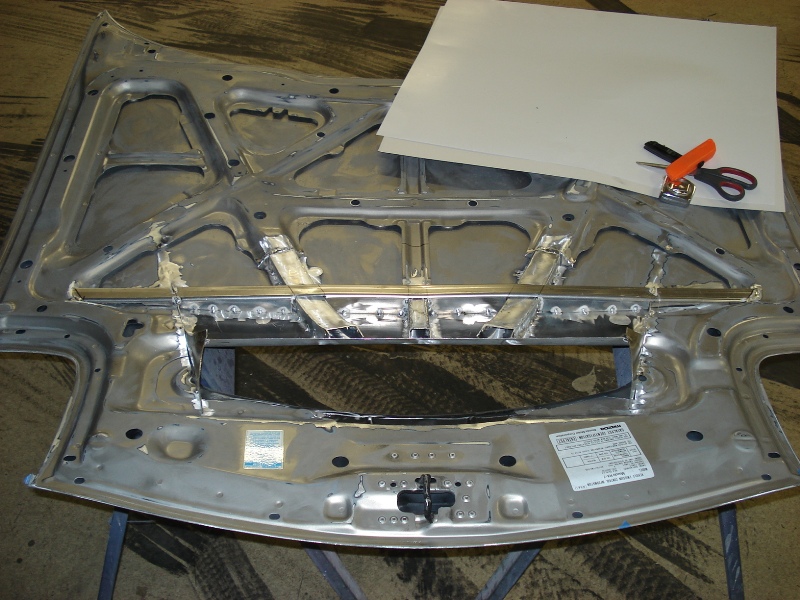
I was able to start on the modification of my hood. Need to cut out the support structure, form the lip and then weld on a new support structure. I also got a hood pin assembly and will be putting that in too.
3/26/07
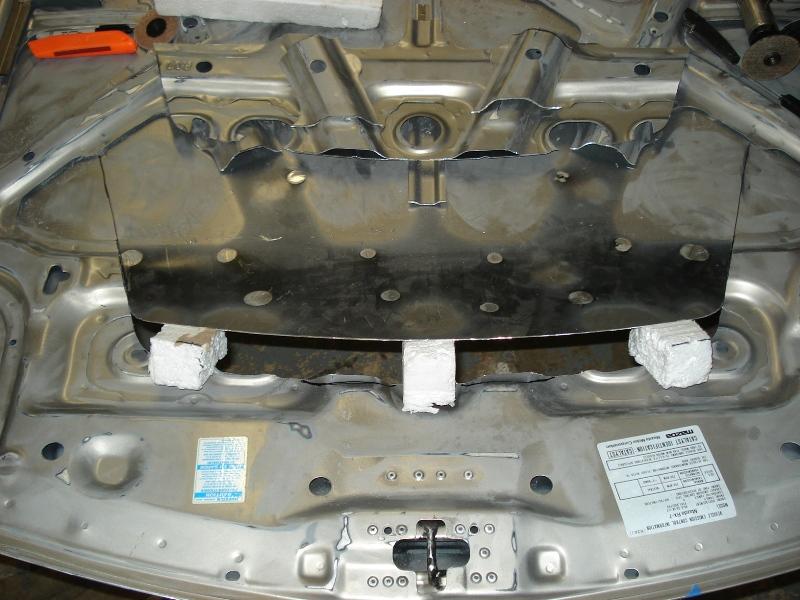
Support structure off and planning on how I will make the new support structure.
3/27/07
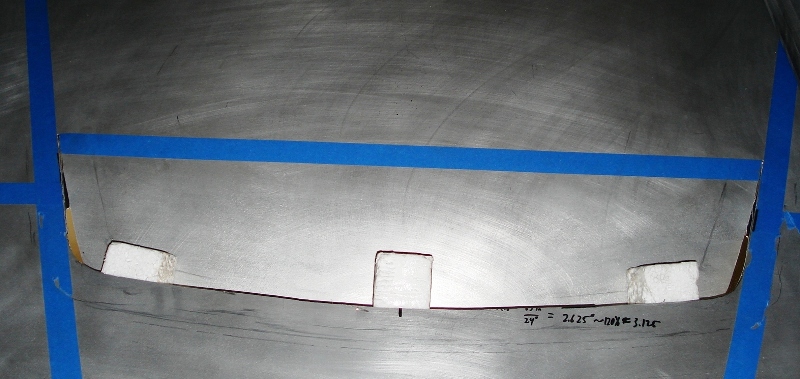
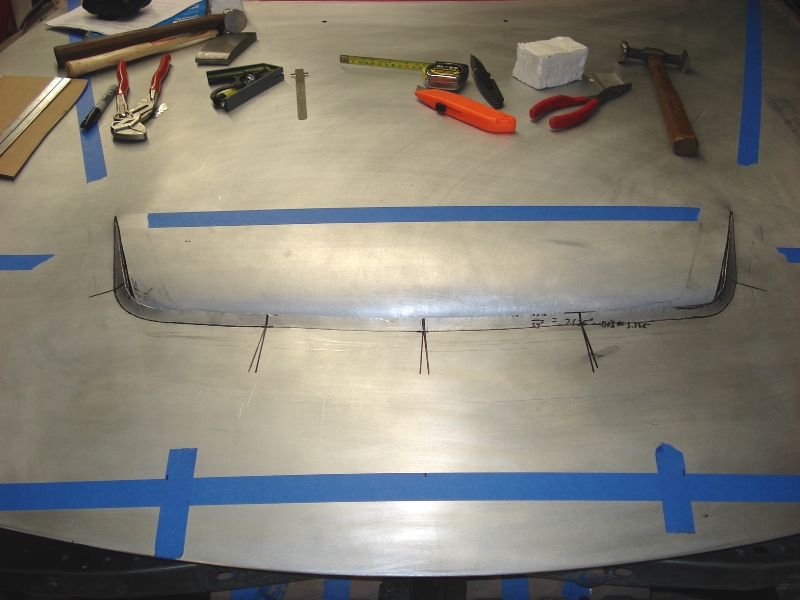
Started the process of forming the front lip and made a template of the curvature I need to follow for the support structure. Will be making a support frame before I finish the top surface. Need to remove the exposed support frame under the new lip now.
I was able to start on the modification of my hood. Need to cut out the support structure, form the lip and then weld on a new support structure. I also got a hood pin assembly and will be putting that in too.
3/26/07
Support structure off and planning on how I will make the new support structure.
3/27/07
Started the process of forming the front lip and made a template of the curvature I need to follow for the support structure. Will be making a support frame before I finish the top surface. Need to remove the exposed support frame under the new lip now.
09-27-12, 11:17 PM
#40
4/2/07
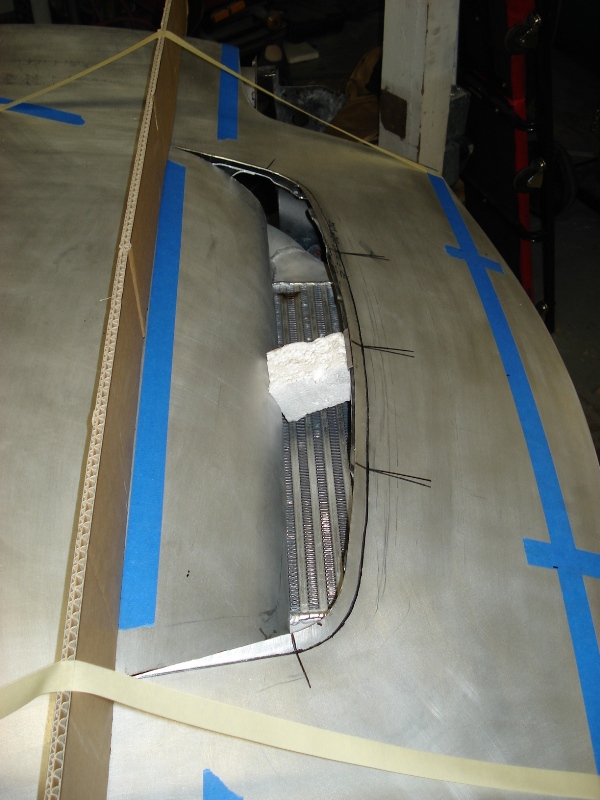
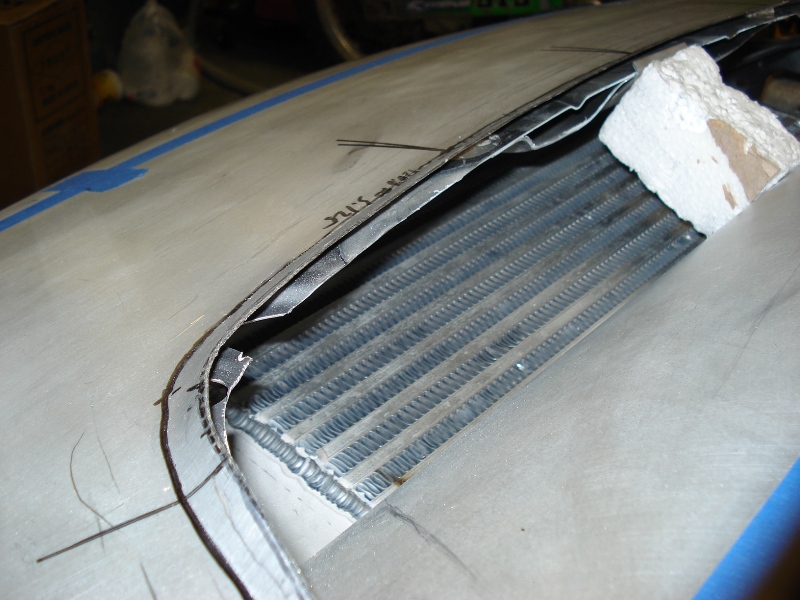
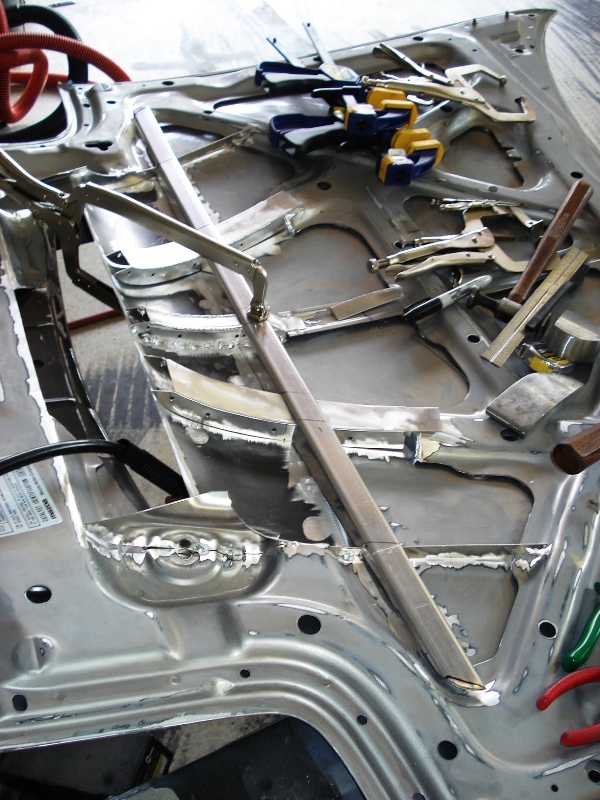
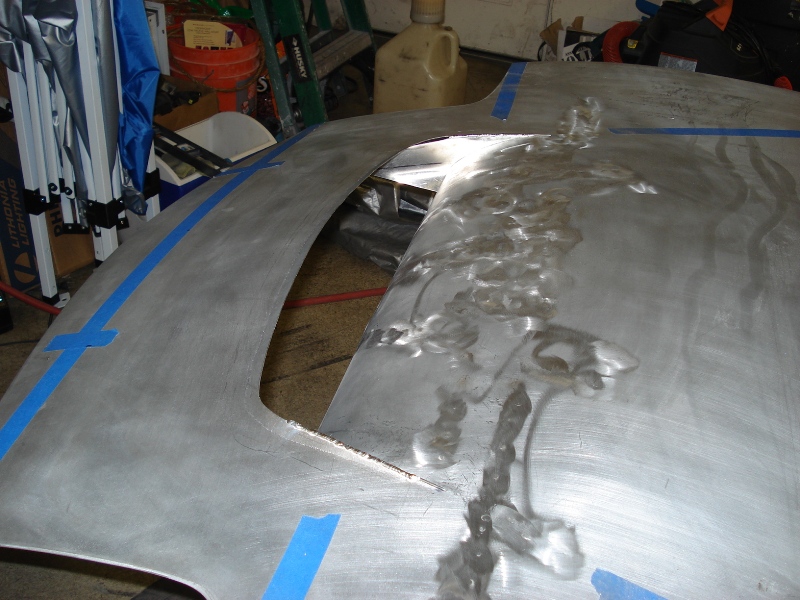
Alright the frame for the hood is mostly done, just need to make closeout panels and a few other things to finish it. Turning out pretty good, not perfect, but that's to be expected without a jig. This hood will need a lot of filler to cover over the shrinkage/forming experienced from the welding. If you plan on doing something like this....DON"T....buy yourself a hood and save yourself the work and frustration. But damn it turned out awesome!
Bobbo Koski also helped me for a short time putting in the side skirts this weekend.
4/3/07
First layer of etching primer, this will be sanded off to find the remaining low/high spots.
Hood needs one more piece welded on, the aesthetic welds grinded and bondo laid up on the A surface and it's done.
09-27-12, 11:25 PM
#42
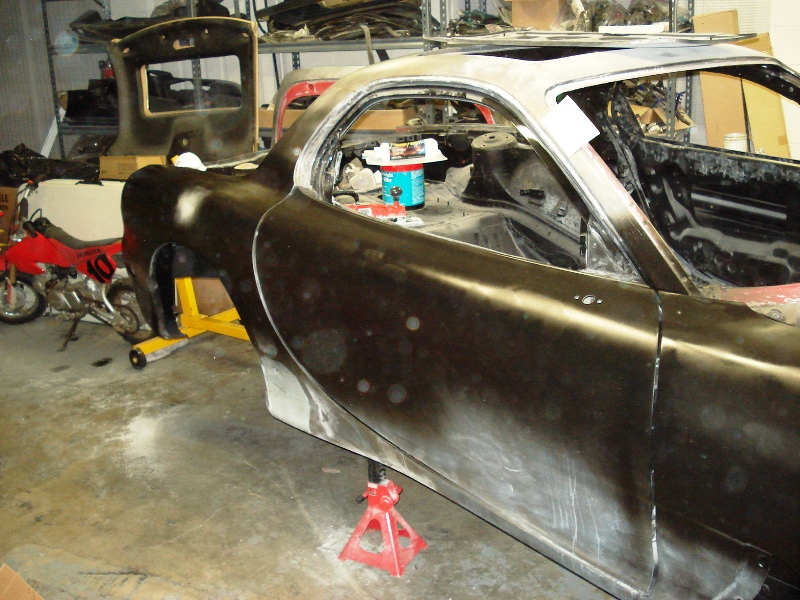
4/12/07
Alright in process of finishing body work and fitting up things. I had to trim the bumper in order to have the body lines lineup. Fitting up the sleek light housings such that the lens are flush with the bodywork and the gaping somewhat even is proving a royal pain. The lens I have aren't exactly correctly shaped and will be needed some shaving to look symetrical.
The hood has it's second coat of 3MPFBF glazing on and should be done sanding by this weekend. With some help I should be done with bodywork by either the end of this weekend or mid next week. And then Paint! LOL


 10-01-12, 06:30 PM
#48
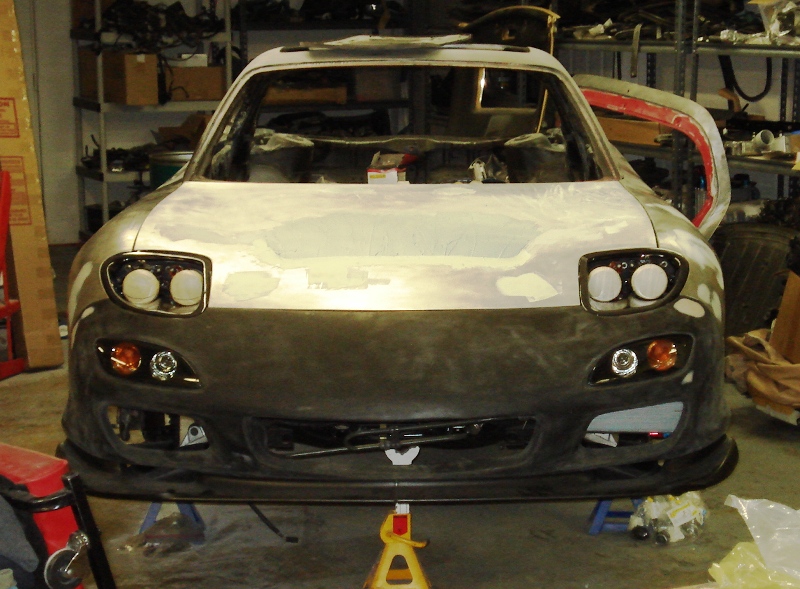
4/16/07
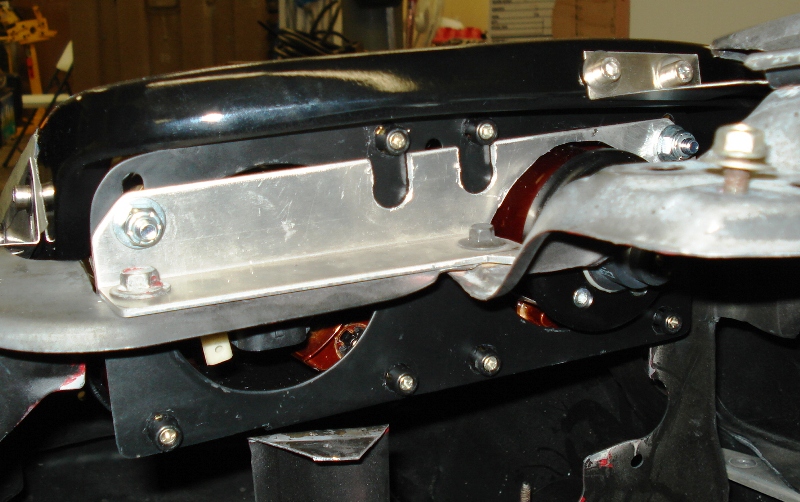
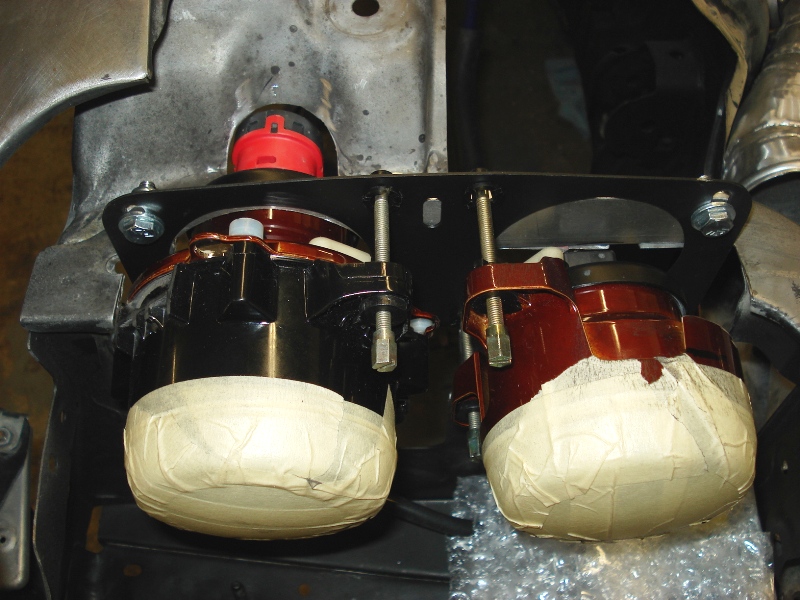
Got the headlight housings and lens to lineup with the rest of the bodywork. I had to cut into the driver side headlight housing to even get it to drop flush with the bodywork. Somewhat my fault for not compensating for a non symmetrical chassis/bodywork layout, but still it shouldn't be this hard. I have one more tab to weld on the chassis for the headlights and then it's bodywork from then on until paint.

"I've never heard anyone complain about the RE sleek headlight fitment... Was it really that bad?? Or was it your custom brackets and projectors that caused the problems? " - Ungradedd
Well the saying goes "Ignorance is bliss" and this is a good example. Knowing what I know from my test engineering background the mounting structure wouldn't last that long or provide a stable footing for the lights. However, I did make it harder on myself by making my own setup, so my difficulty was both my doing and the poor design of the RE units mounting.
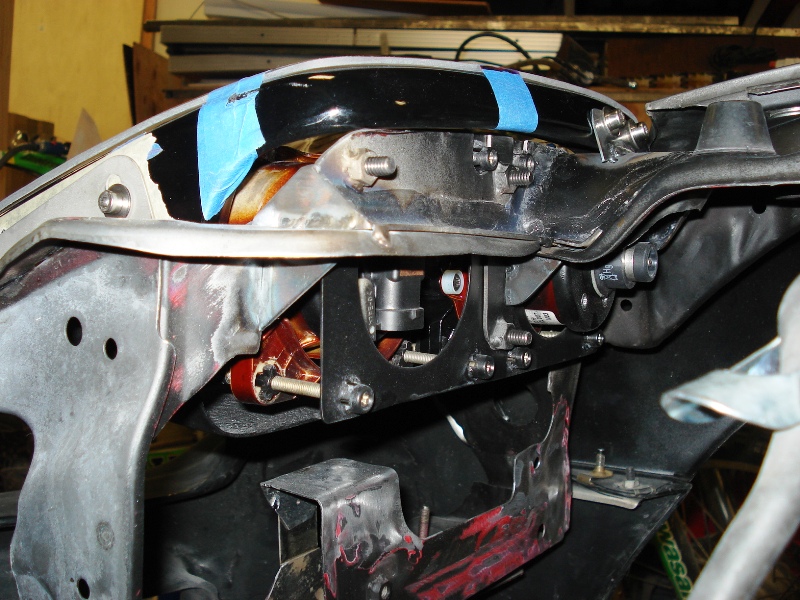
Note, what you don't see in this setup is the additional support I added to the outer most corner of the bezel. When at speed the cover would flex downward.I did this mod later in the build.
Got the headlight housings and lens to lineup with the rest of the bodywork. I had to cut into the driver side headlight housing to even get it to drop flush with the bodywork. Somewhat my fault for not compensating for a non symmetrical chassis/bodywork layout, but still it shouldn't be this hard. I have one more tab to weld on the chassis for the headlights and then it's bodywork from then on until paint.
"I've never heard anyone complain about the RE sleek headlight fitment... Was it really that bad?? Or was it your custom brackets and projectors that caused the problems? " - Ungradedd
Well the saying goes "Ignorance is bliss" and this is a good example. Knowing what I know from my test engineering background the mounting structure wouldn't last that long or provide a stable footing for the lights. However, I did make it harder on myself by making my own setup, so my difficulty was both my doing and the poor design of the RE units mounting.
Note, what you don't see in this setup is the additional support I added to the outer most corner of the bezel. When at speed the cover would flex downward.I did this mod later in the build.
10-01-12, 06:34 PM
#49
4/16/07
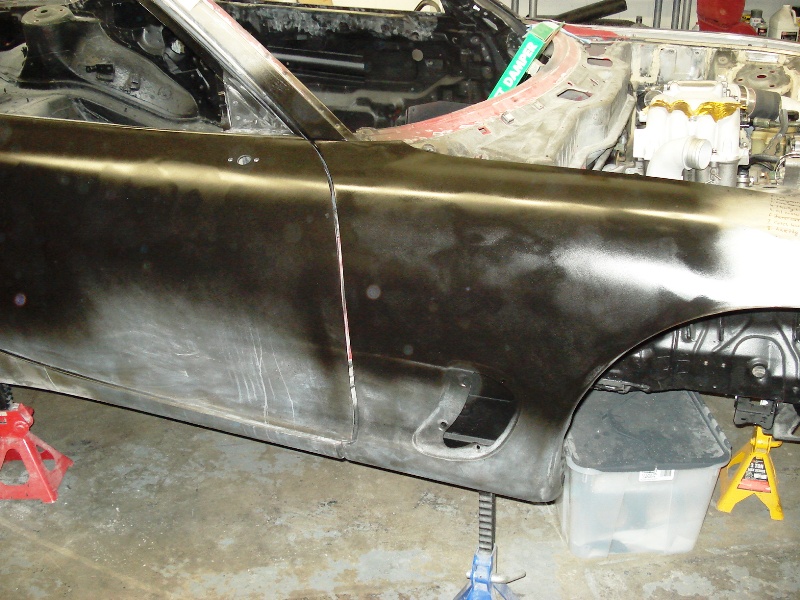
Well I think I'm done with bodywork. With the assistance of Bobby, I was able to get it done this weekend. The painter will be giving it a once over to see if I need to fix a few areas. If all is well, it's going to be painted this week.
4/19/07
The paint/body shop I was going to use said it still needs a lot of work. When I get back in town, I going to see what their talking about. Basically, my bodywork is still too wavy. I'm getting a second professional opinion to verify and if it's true it means I still have a lot of work to do. Complete skim coat and sand with a long block. Basically another 100 hours worth of work. Plus the painter seems gun shy, he basically does panel repair not full cars and doesn't have the time to do a project like that.
10-01-12, 06:43 PM
#50
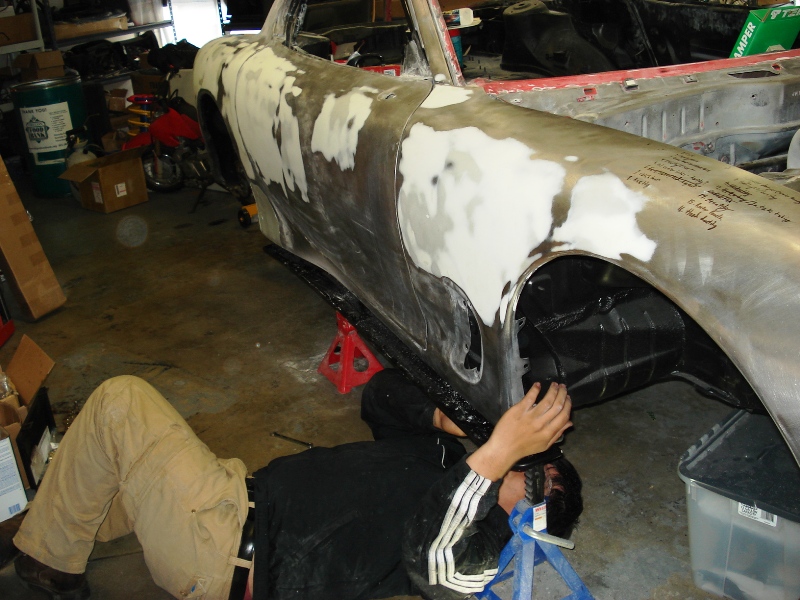
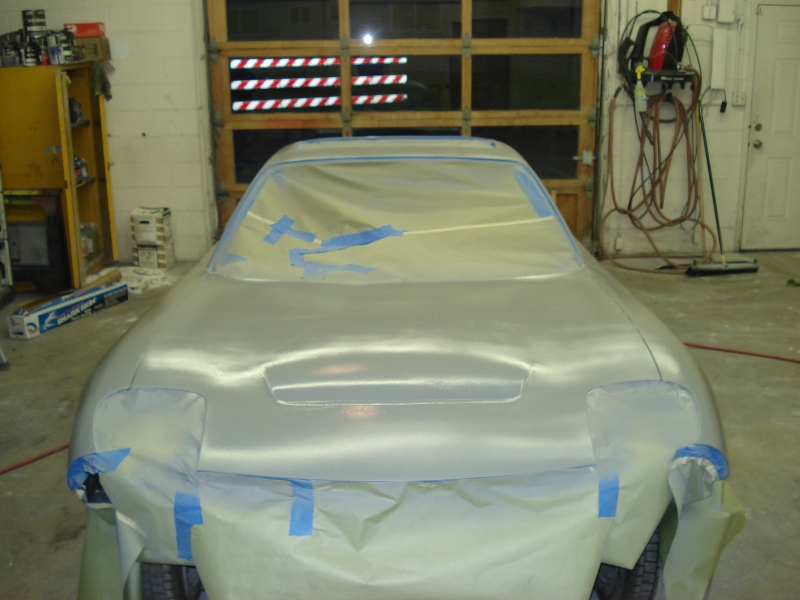
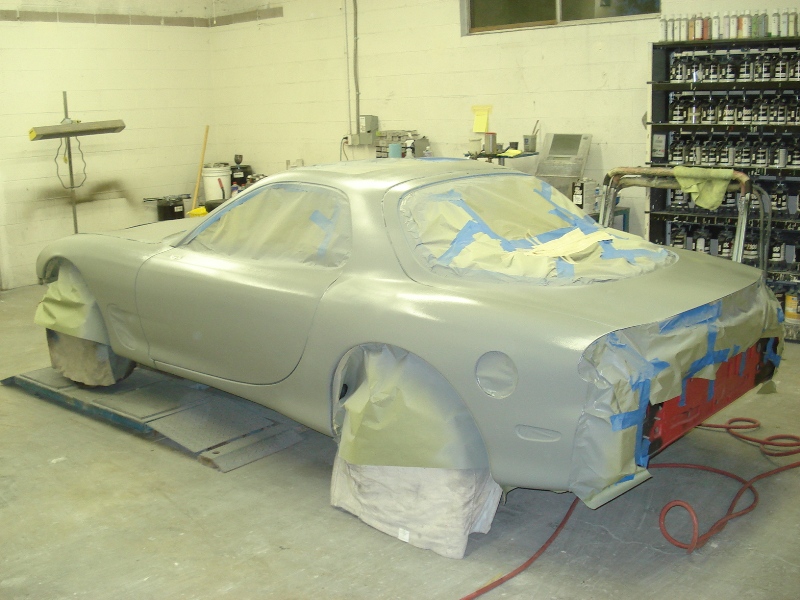
4/30/07
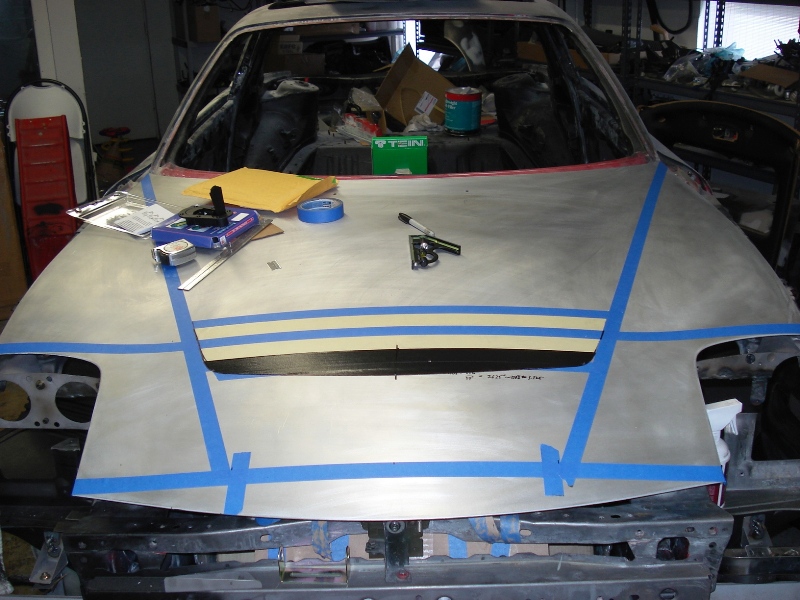
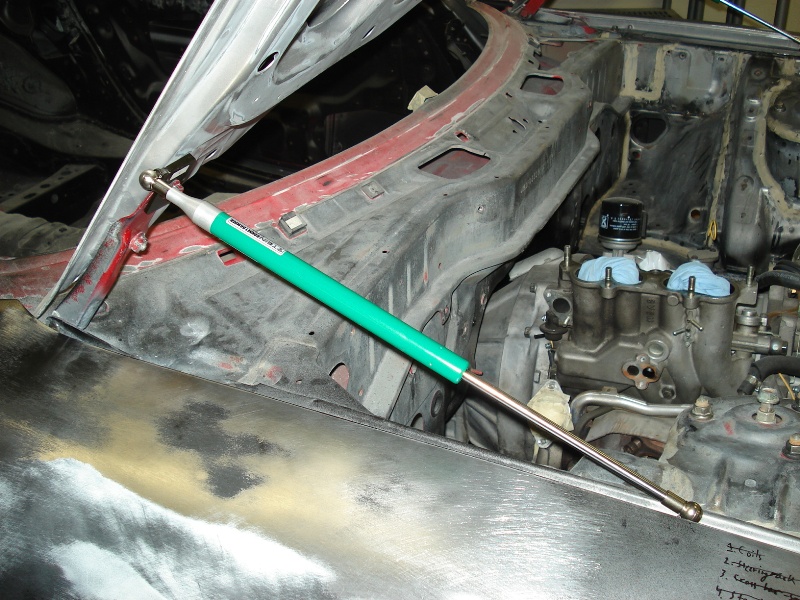
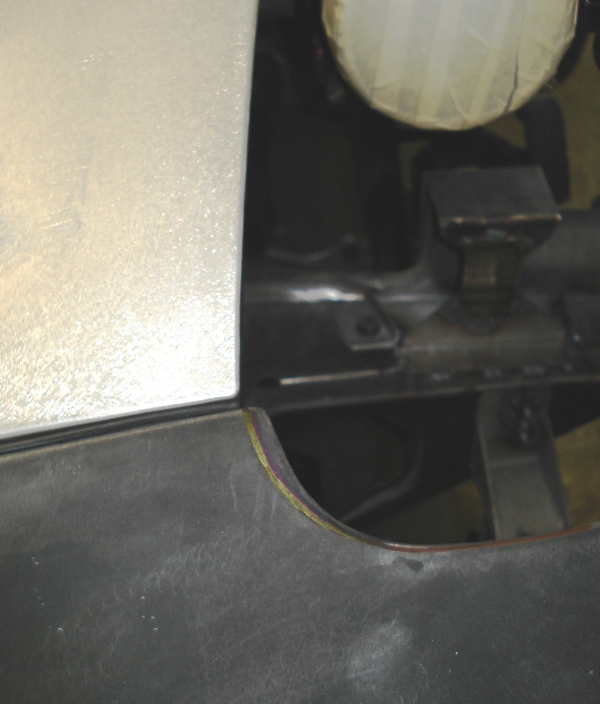
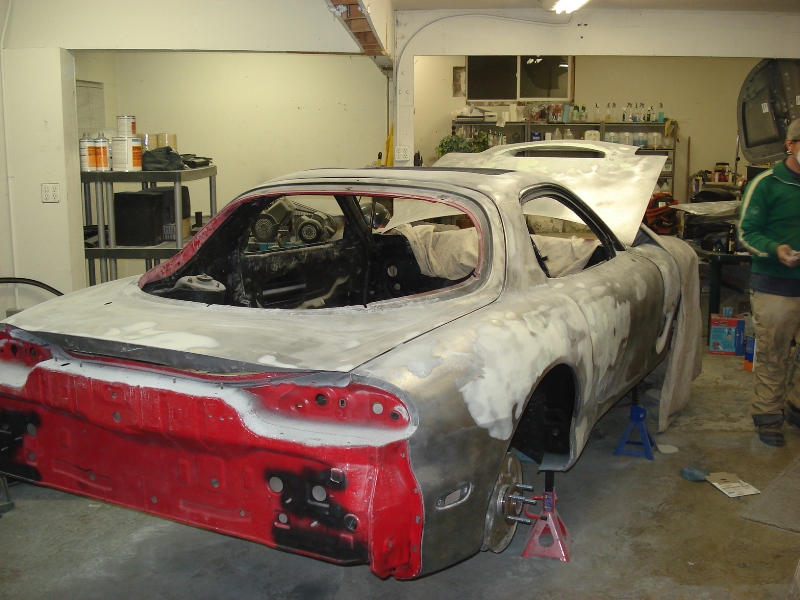
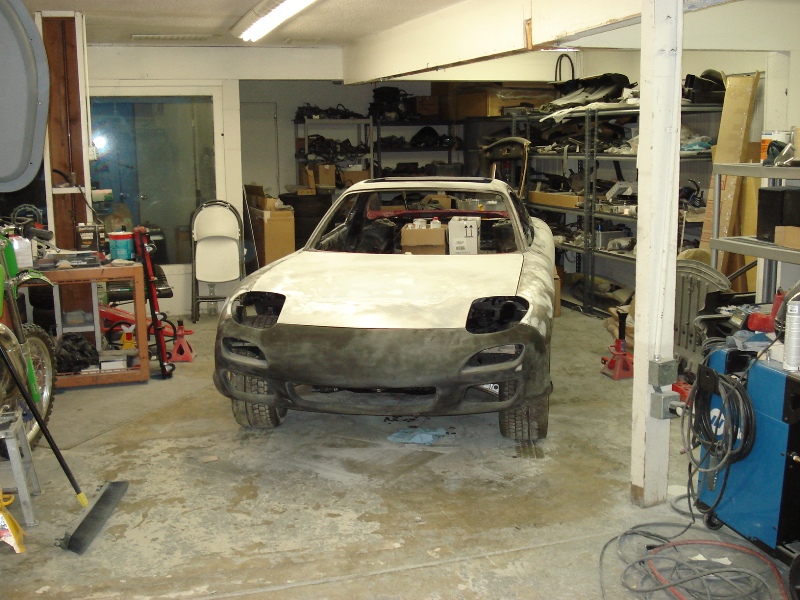
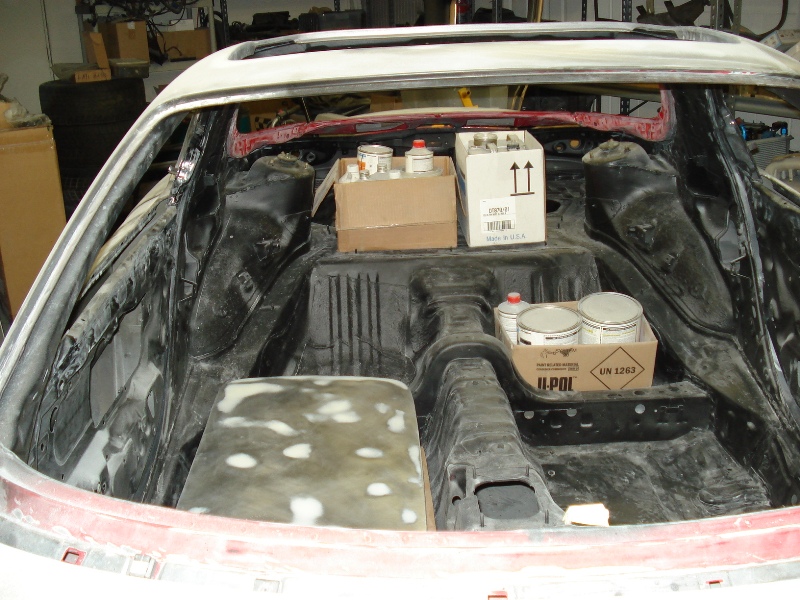
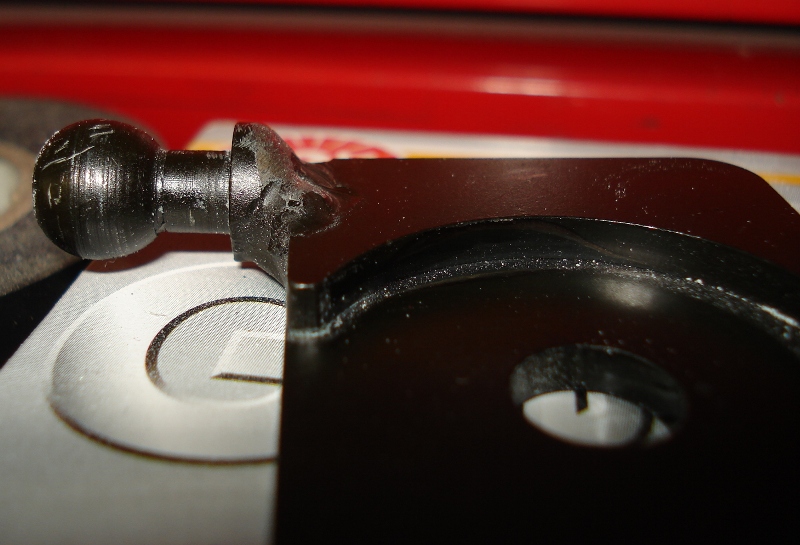
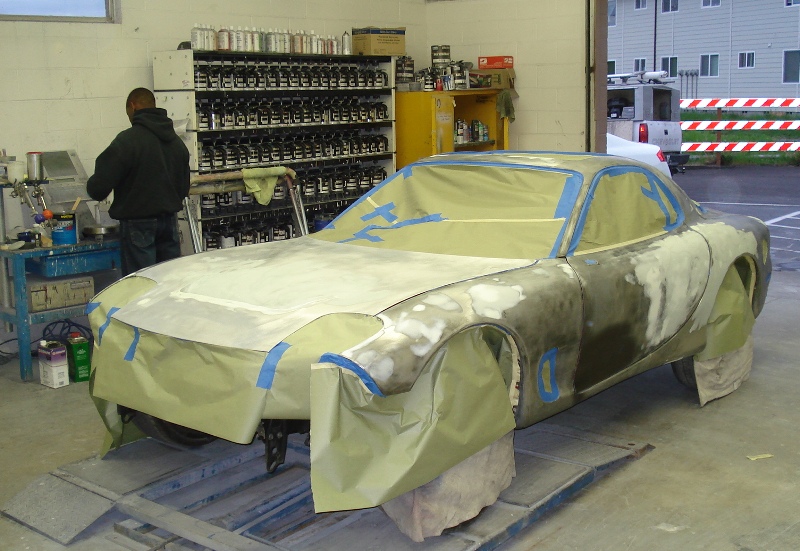
Alright, did some touch up on some of the ~wavey~ sections and got the car all taped up for the spray on "Mud". Also fixed one of my fender vents with the nifty plastic welder I got. Well worth the money buying that kit. Also, for those who have hood struts, you might want to grind off the excess material on the hood mounted pivot tab. It won't sit properly otherwise.
Harbor Freight has them: Plastic Welder & Welding Kit
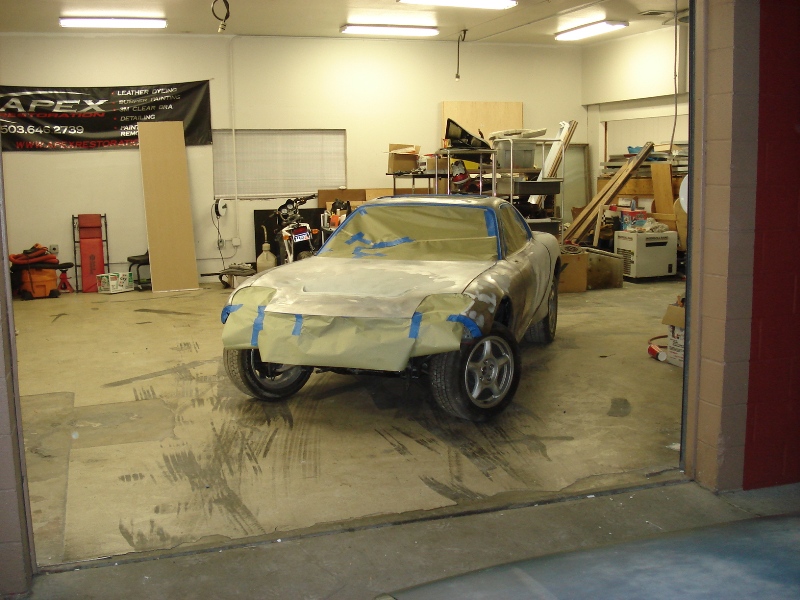
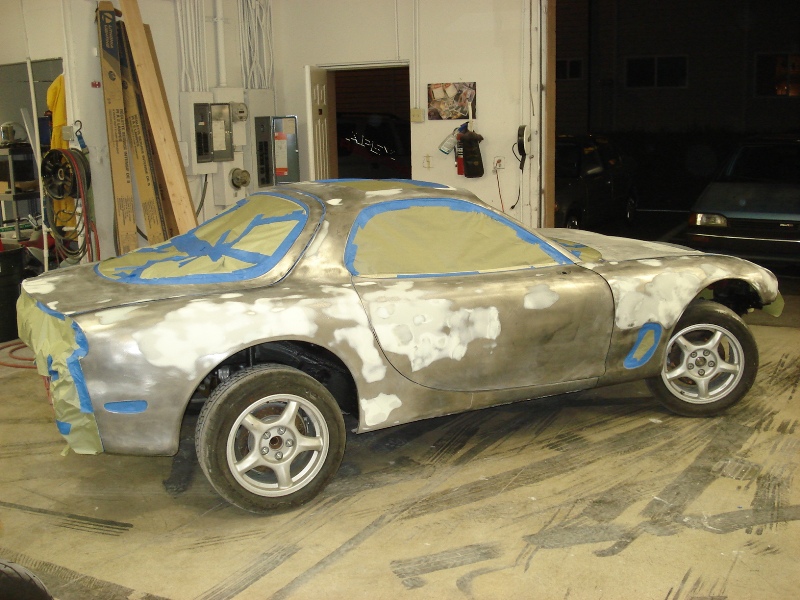
5/1/07
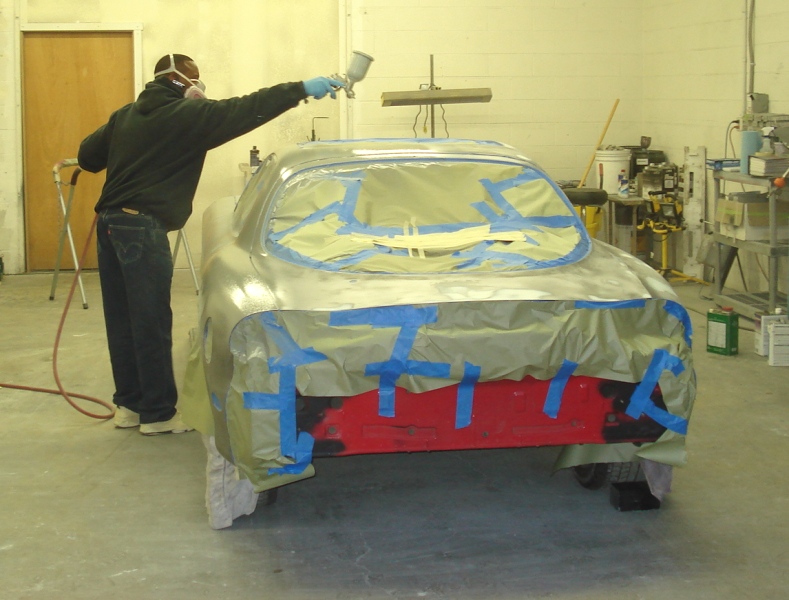
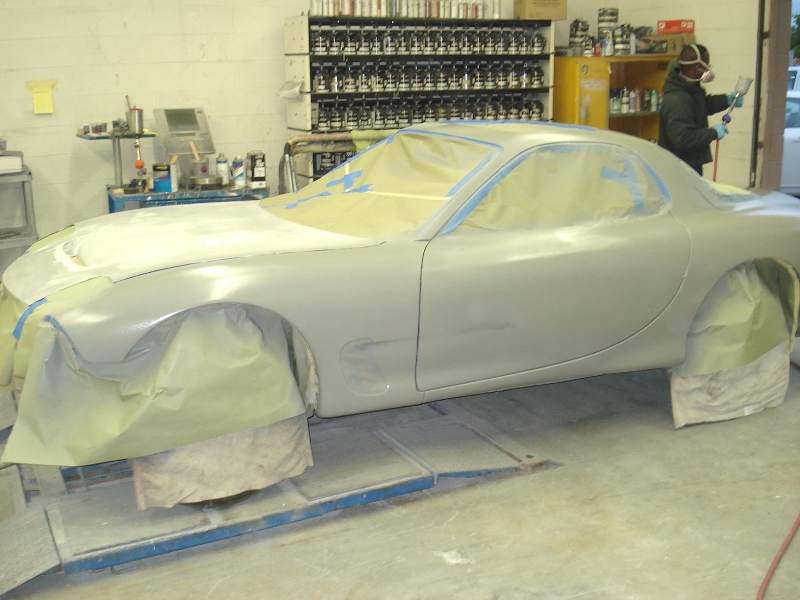
Alright, Leo helped me put on the spray-on body filler, 3mm thick! After looking at the options I'm going to try and see if I can rent are booth and have Leo paint it. (Looking back on it I wish I had painted my own car)
[img][/img]
Alright, did some touch up on some of the ~wavey~ sections and got the car all taped up for the spray on "Mud". Also fixed one of my fender vents with the nifty plastic welder I got. Well worth the money buying that kit. Also, for those who have hood struts, you might want to grind off the excess material on the hood mounted pivot tab. It won't sit properly otherwise.
Harbor Freight has them: Plastic Welder & Welding Kit
5/1/07
Alright, Leo helped me put on the spray-on body filler, 3mm thick! After looking at the options I'm going to try and see if I can rent are booth and have Leo paint it. (Looking back on it I wish I had painted my own car)
[img][/img]